Anglia105E
-
Posts
3,487 -
Joined
-
Last visited
Content Type
Profiles
Forums
Events
Gallery
Everything posted by Anglia105E
-
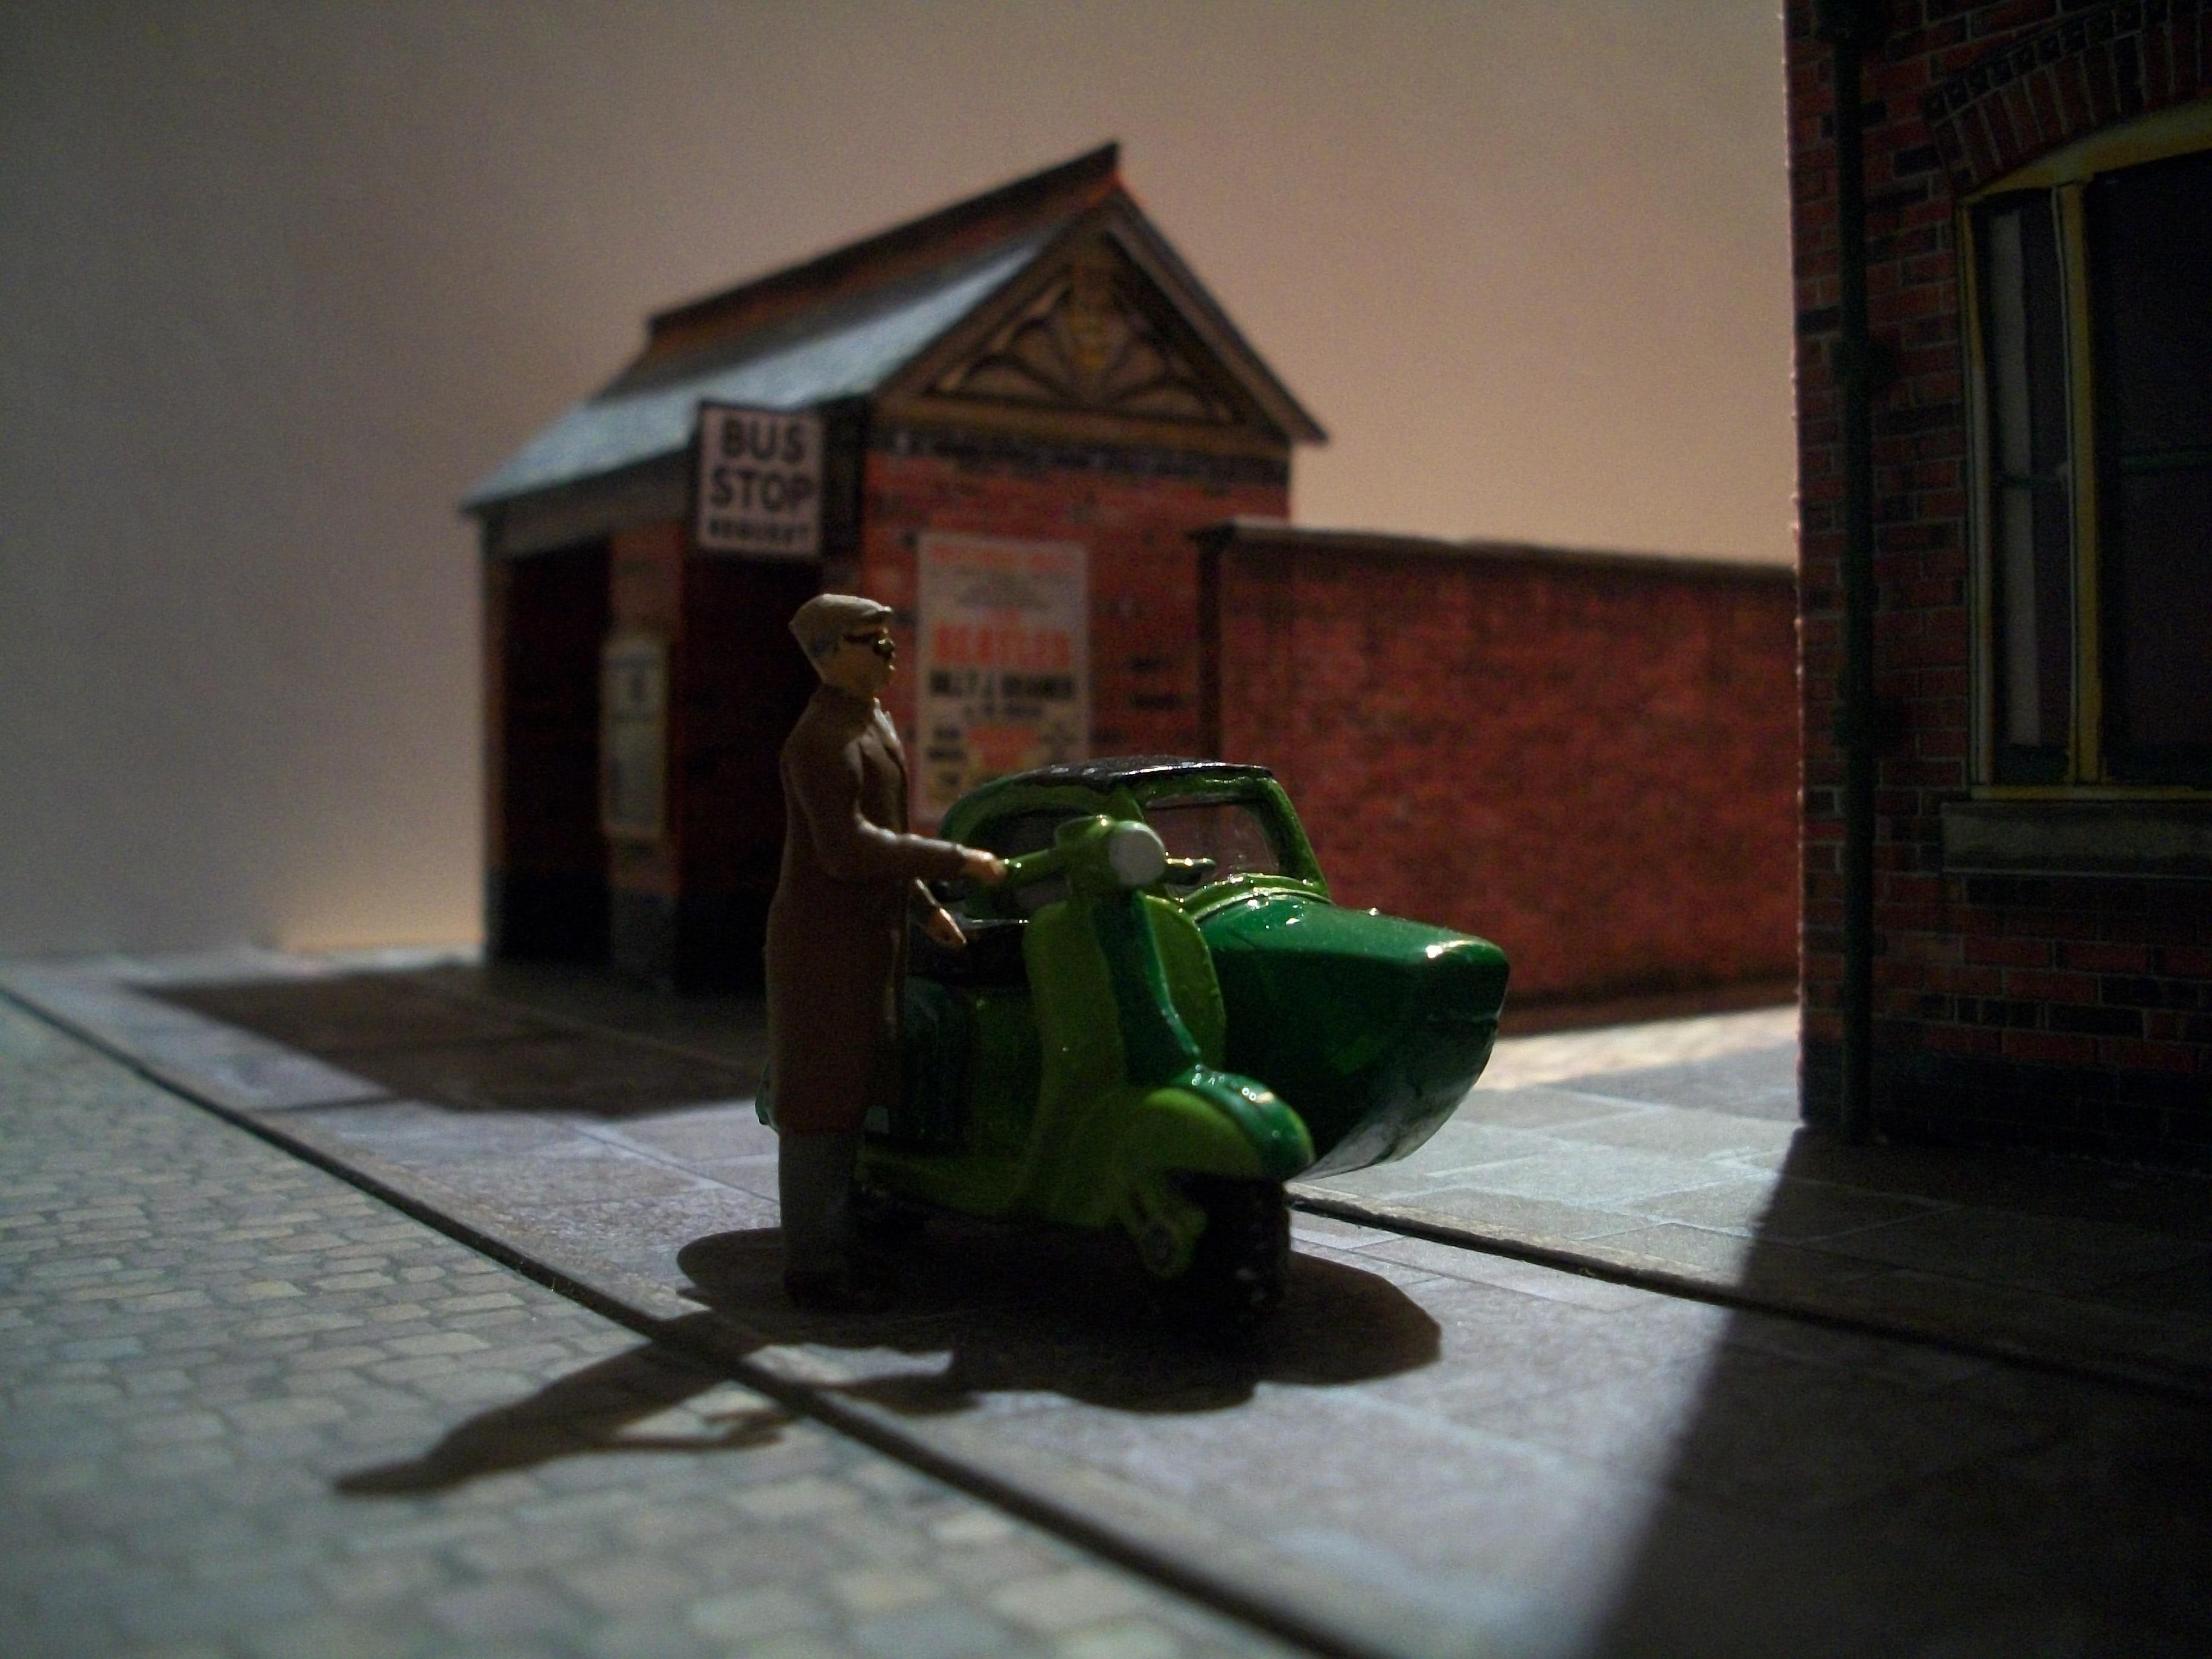
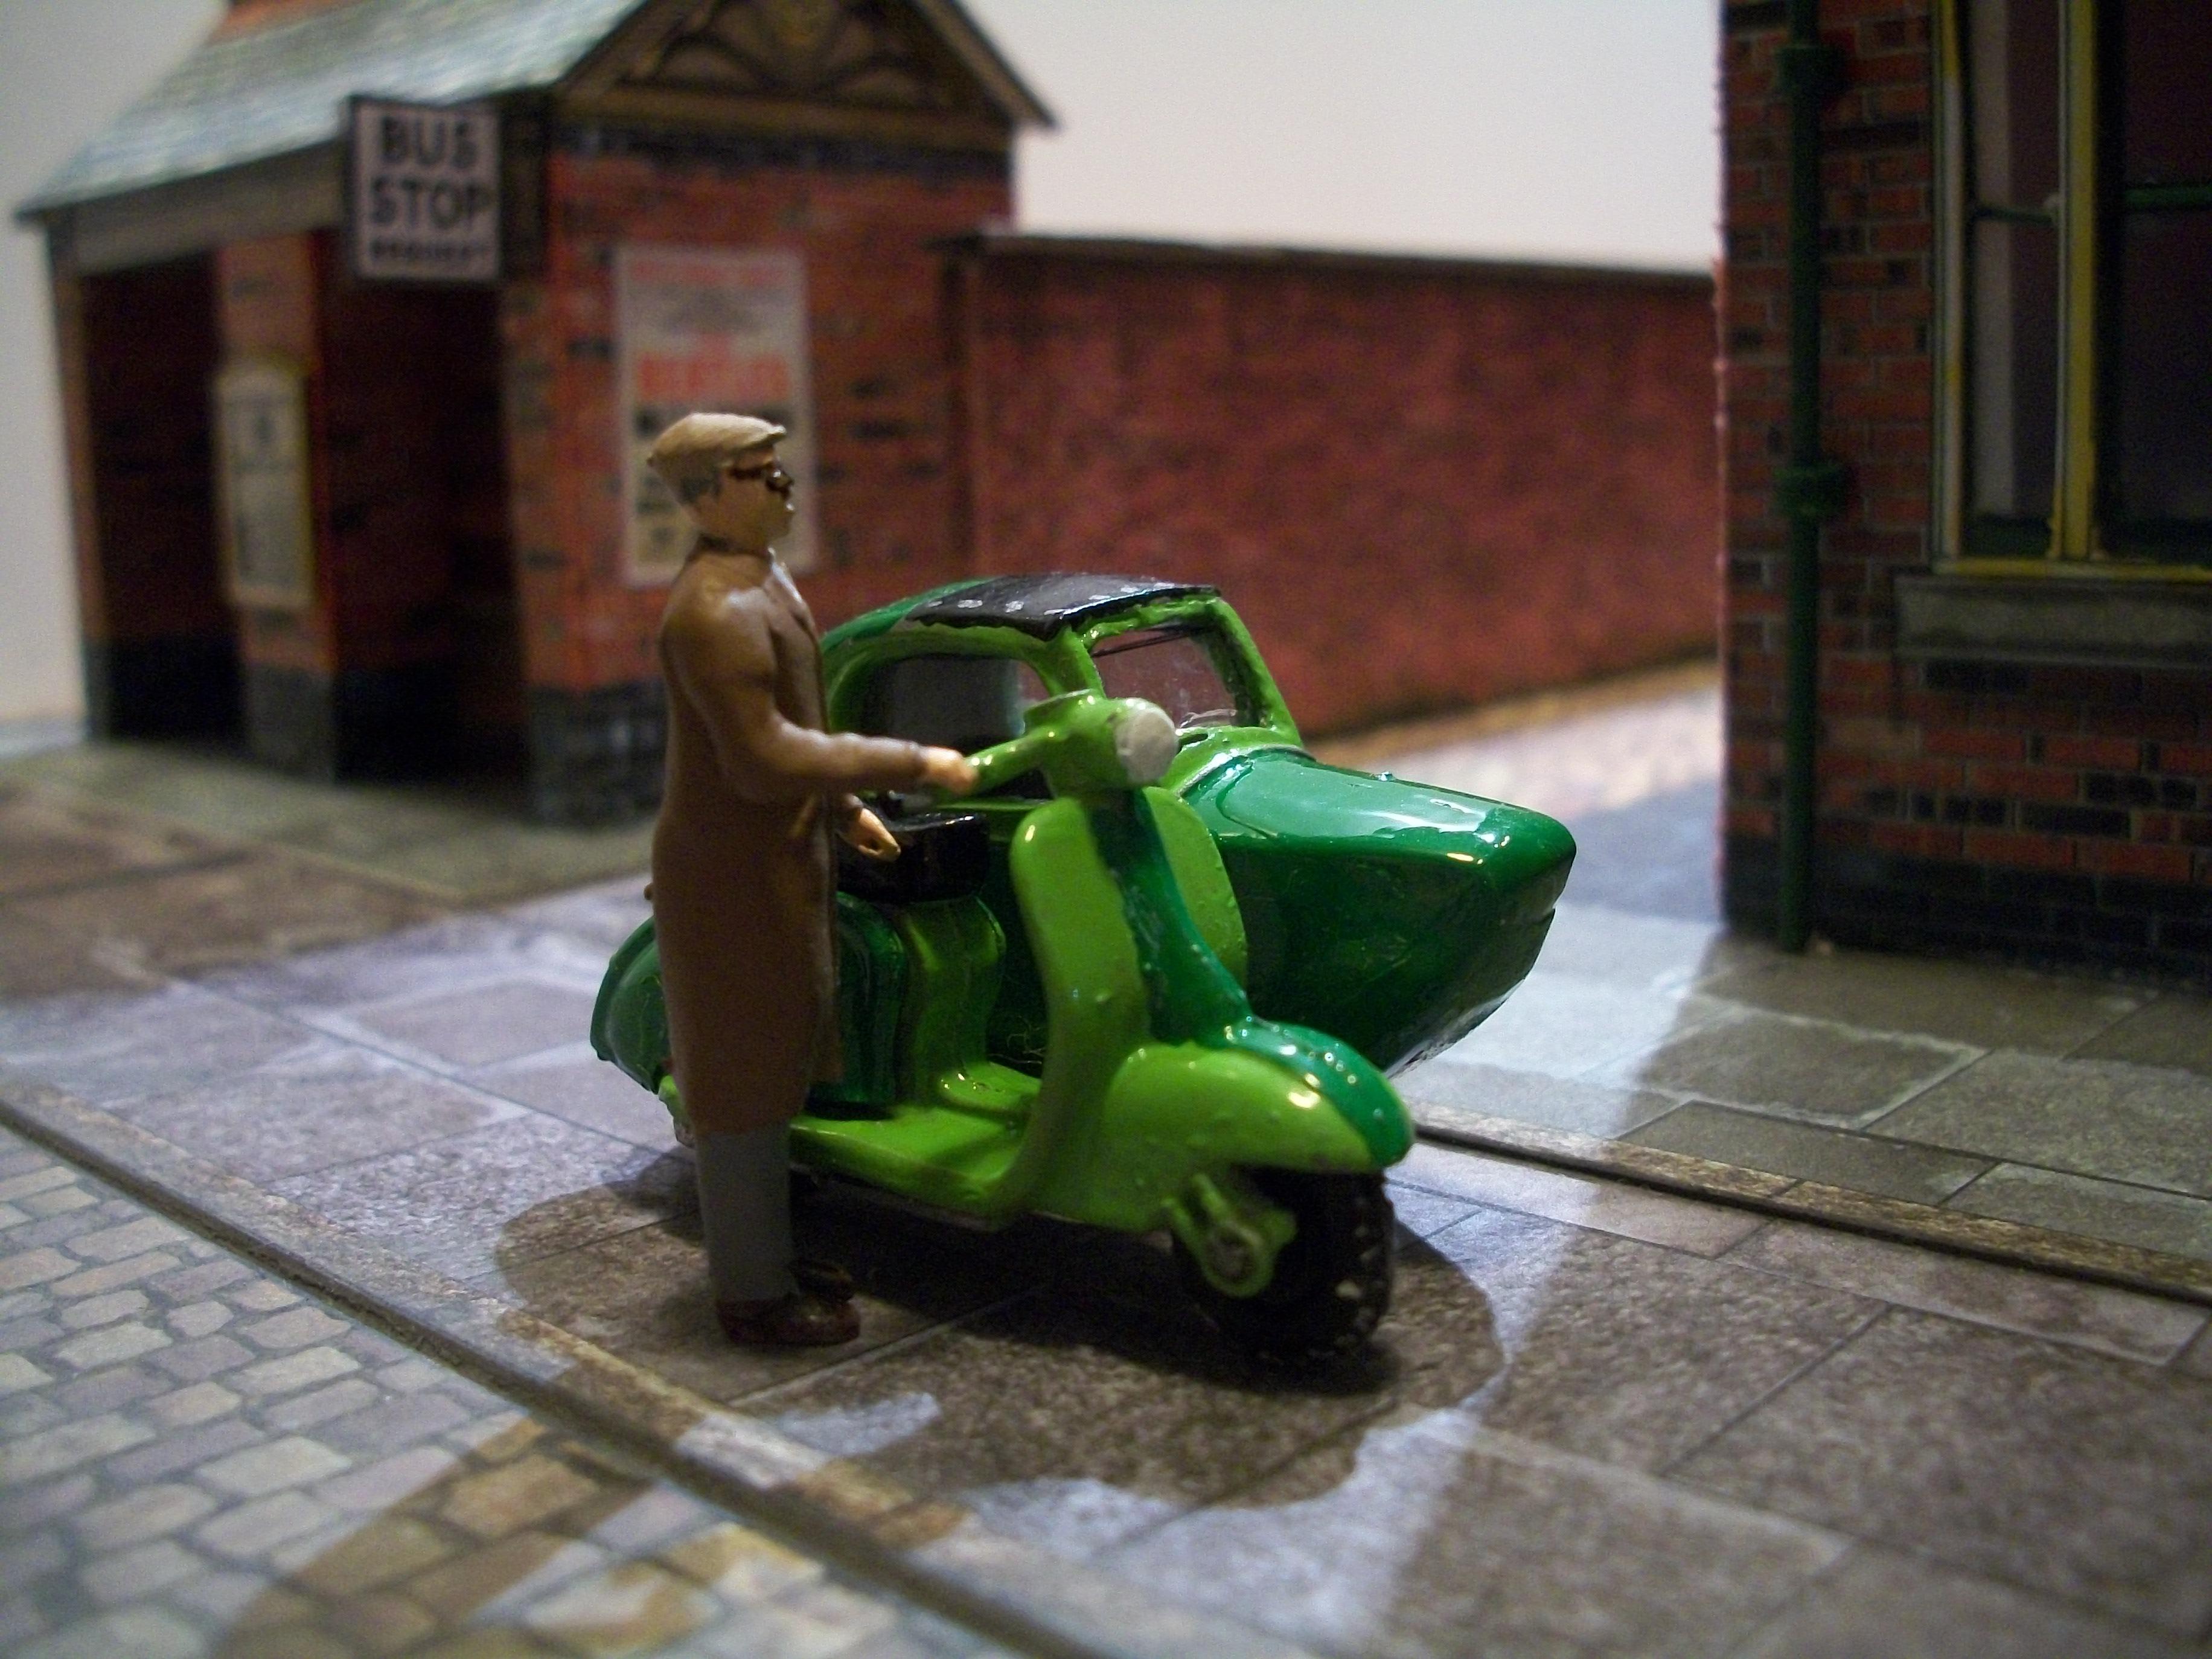
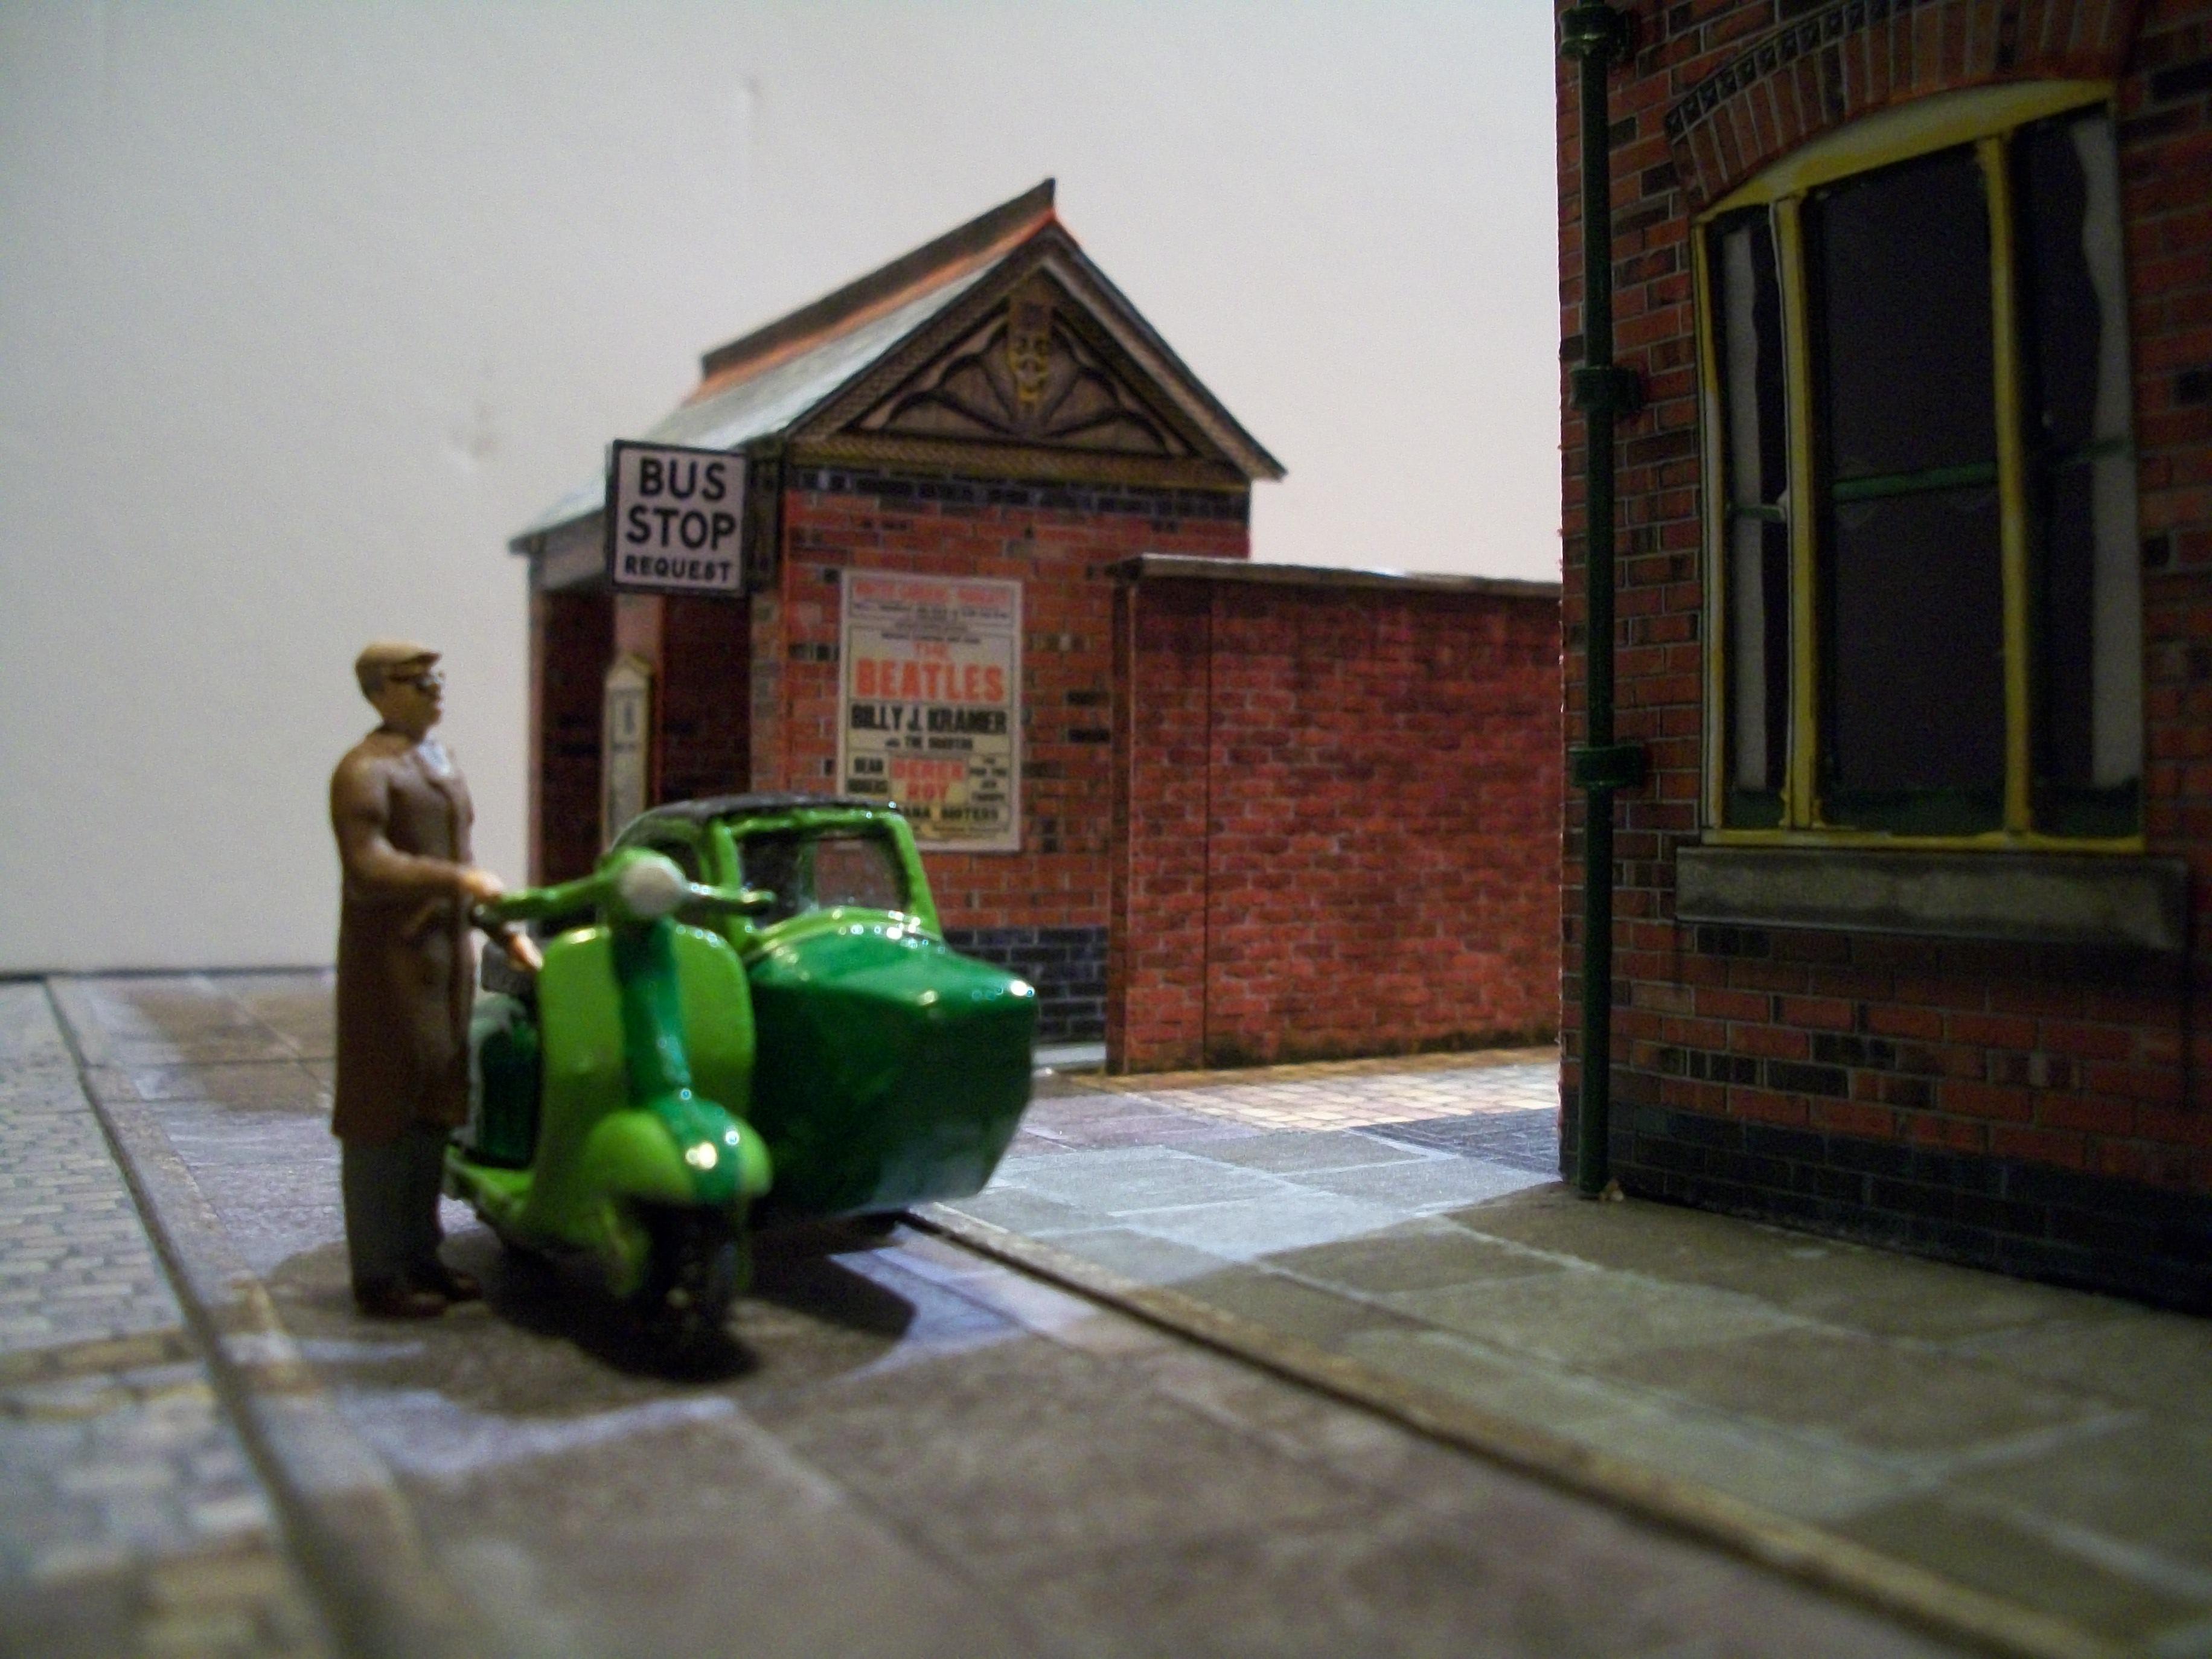
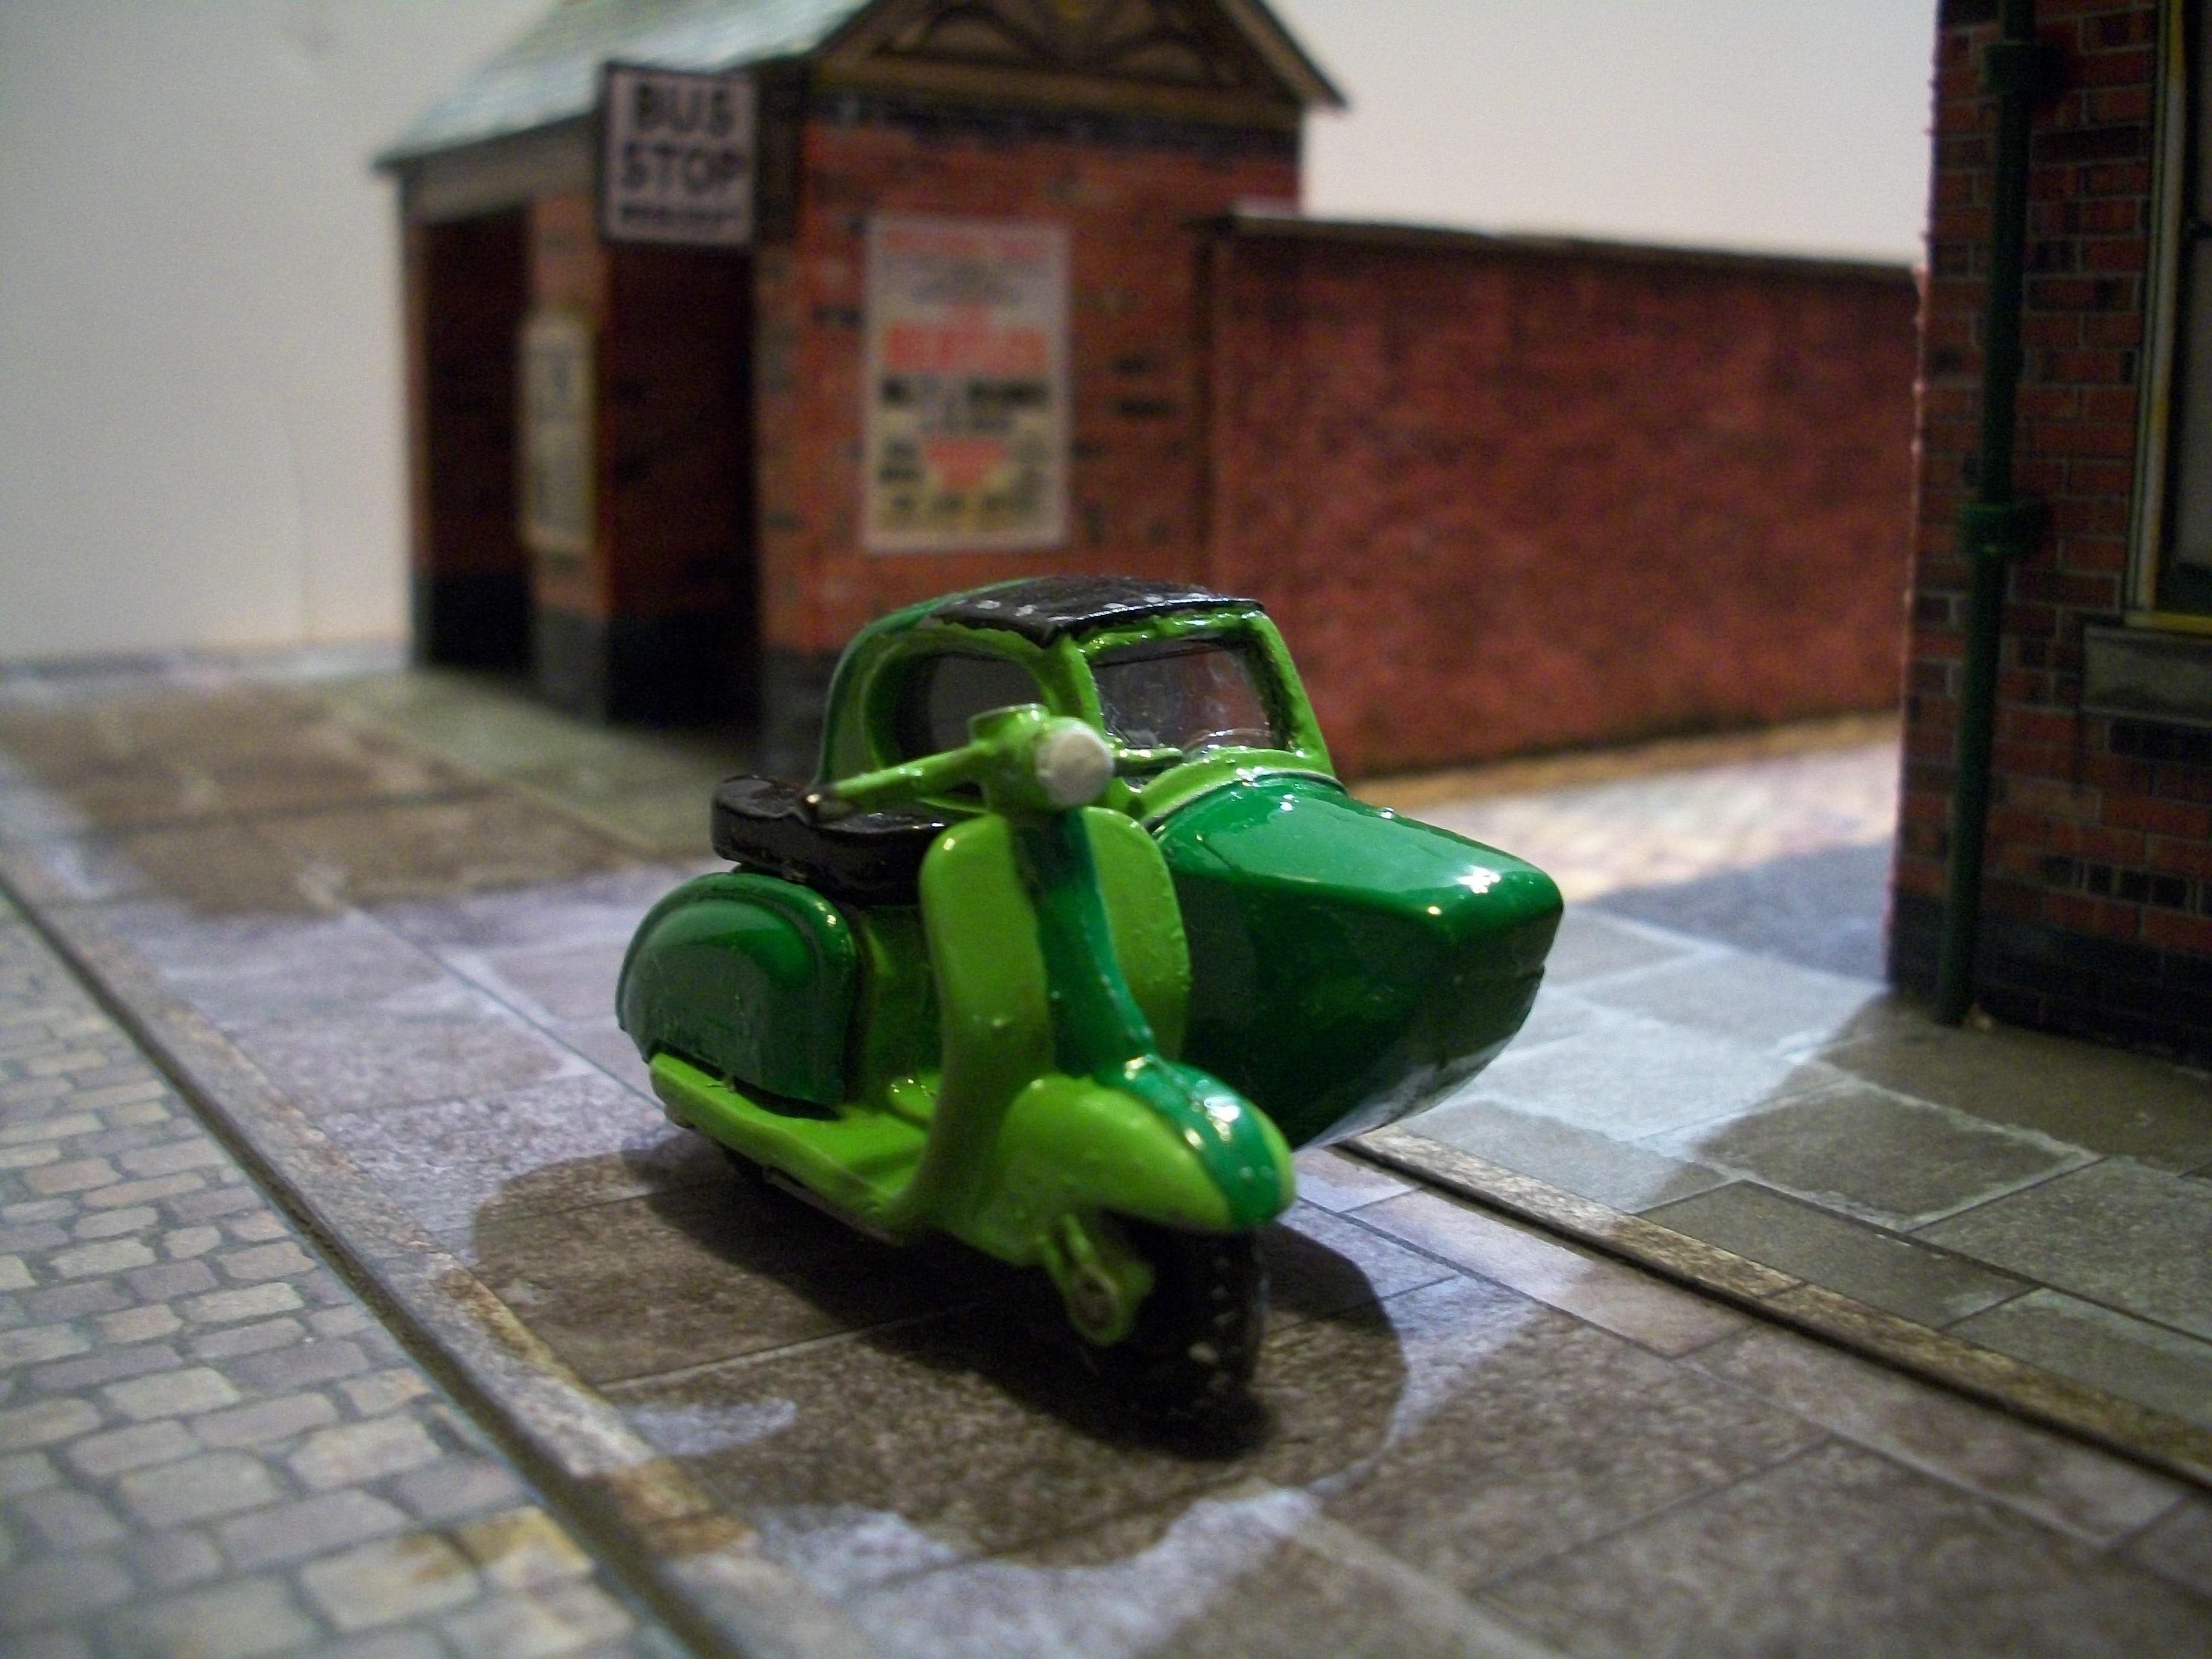
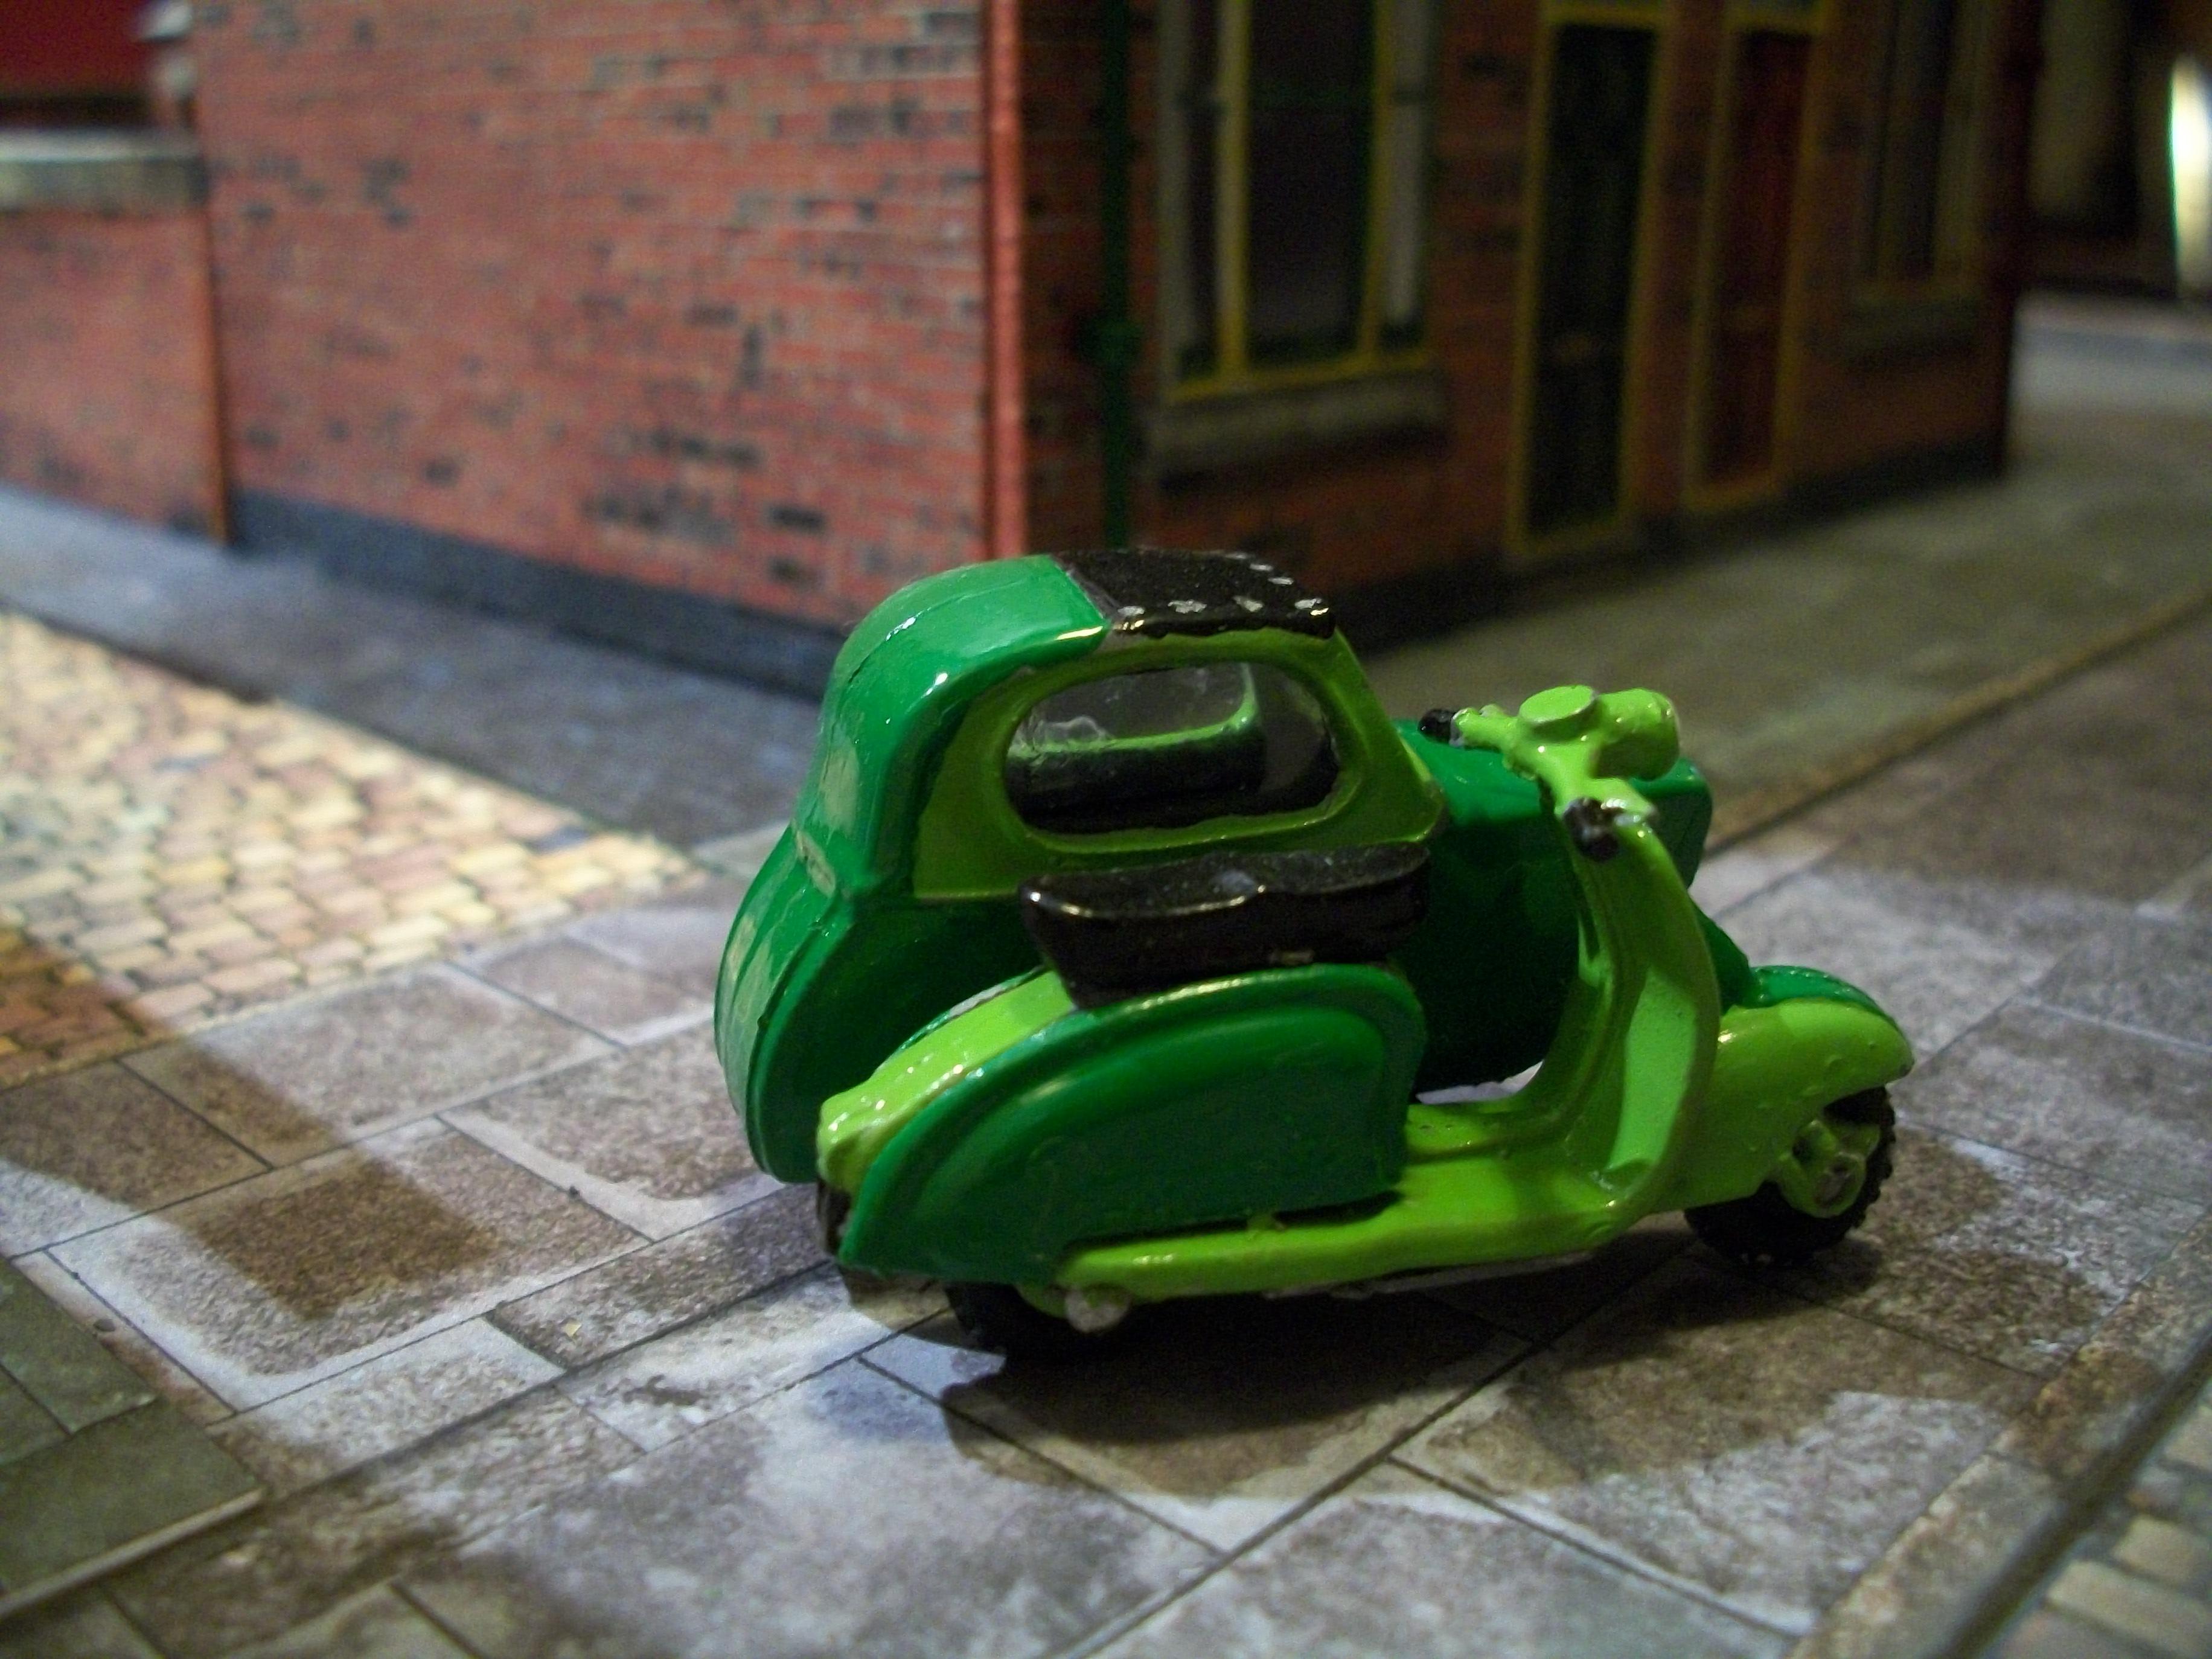
During the past week I have been assembling and painting a 1:43 scale Lambretta motor scooter and Swallow sidecar combination from a white metal kit, that is a lead and tin alloy. The paint finish is brushed on Humbrol enamel, using Emerald Green and Lime Green. As an addition that is not included in the kit, I have fitted three pieces of acetate window glass. The kit only comprises 14 pieces in total, as compared with the 1:24 scale Tamiya Vespa motor scooter, which comprised only 8 pieces. Quite a fiddly and tricky kit to build, but the result is better than I had expected to be honest. David

-
I believe a lot of Jaguar Mk V's were exported to USA and Canada, and the design developed later into the MK VII ( there doesn't seem to have been a MK VI, well maybe two ) David
-
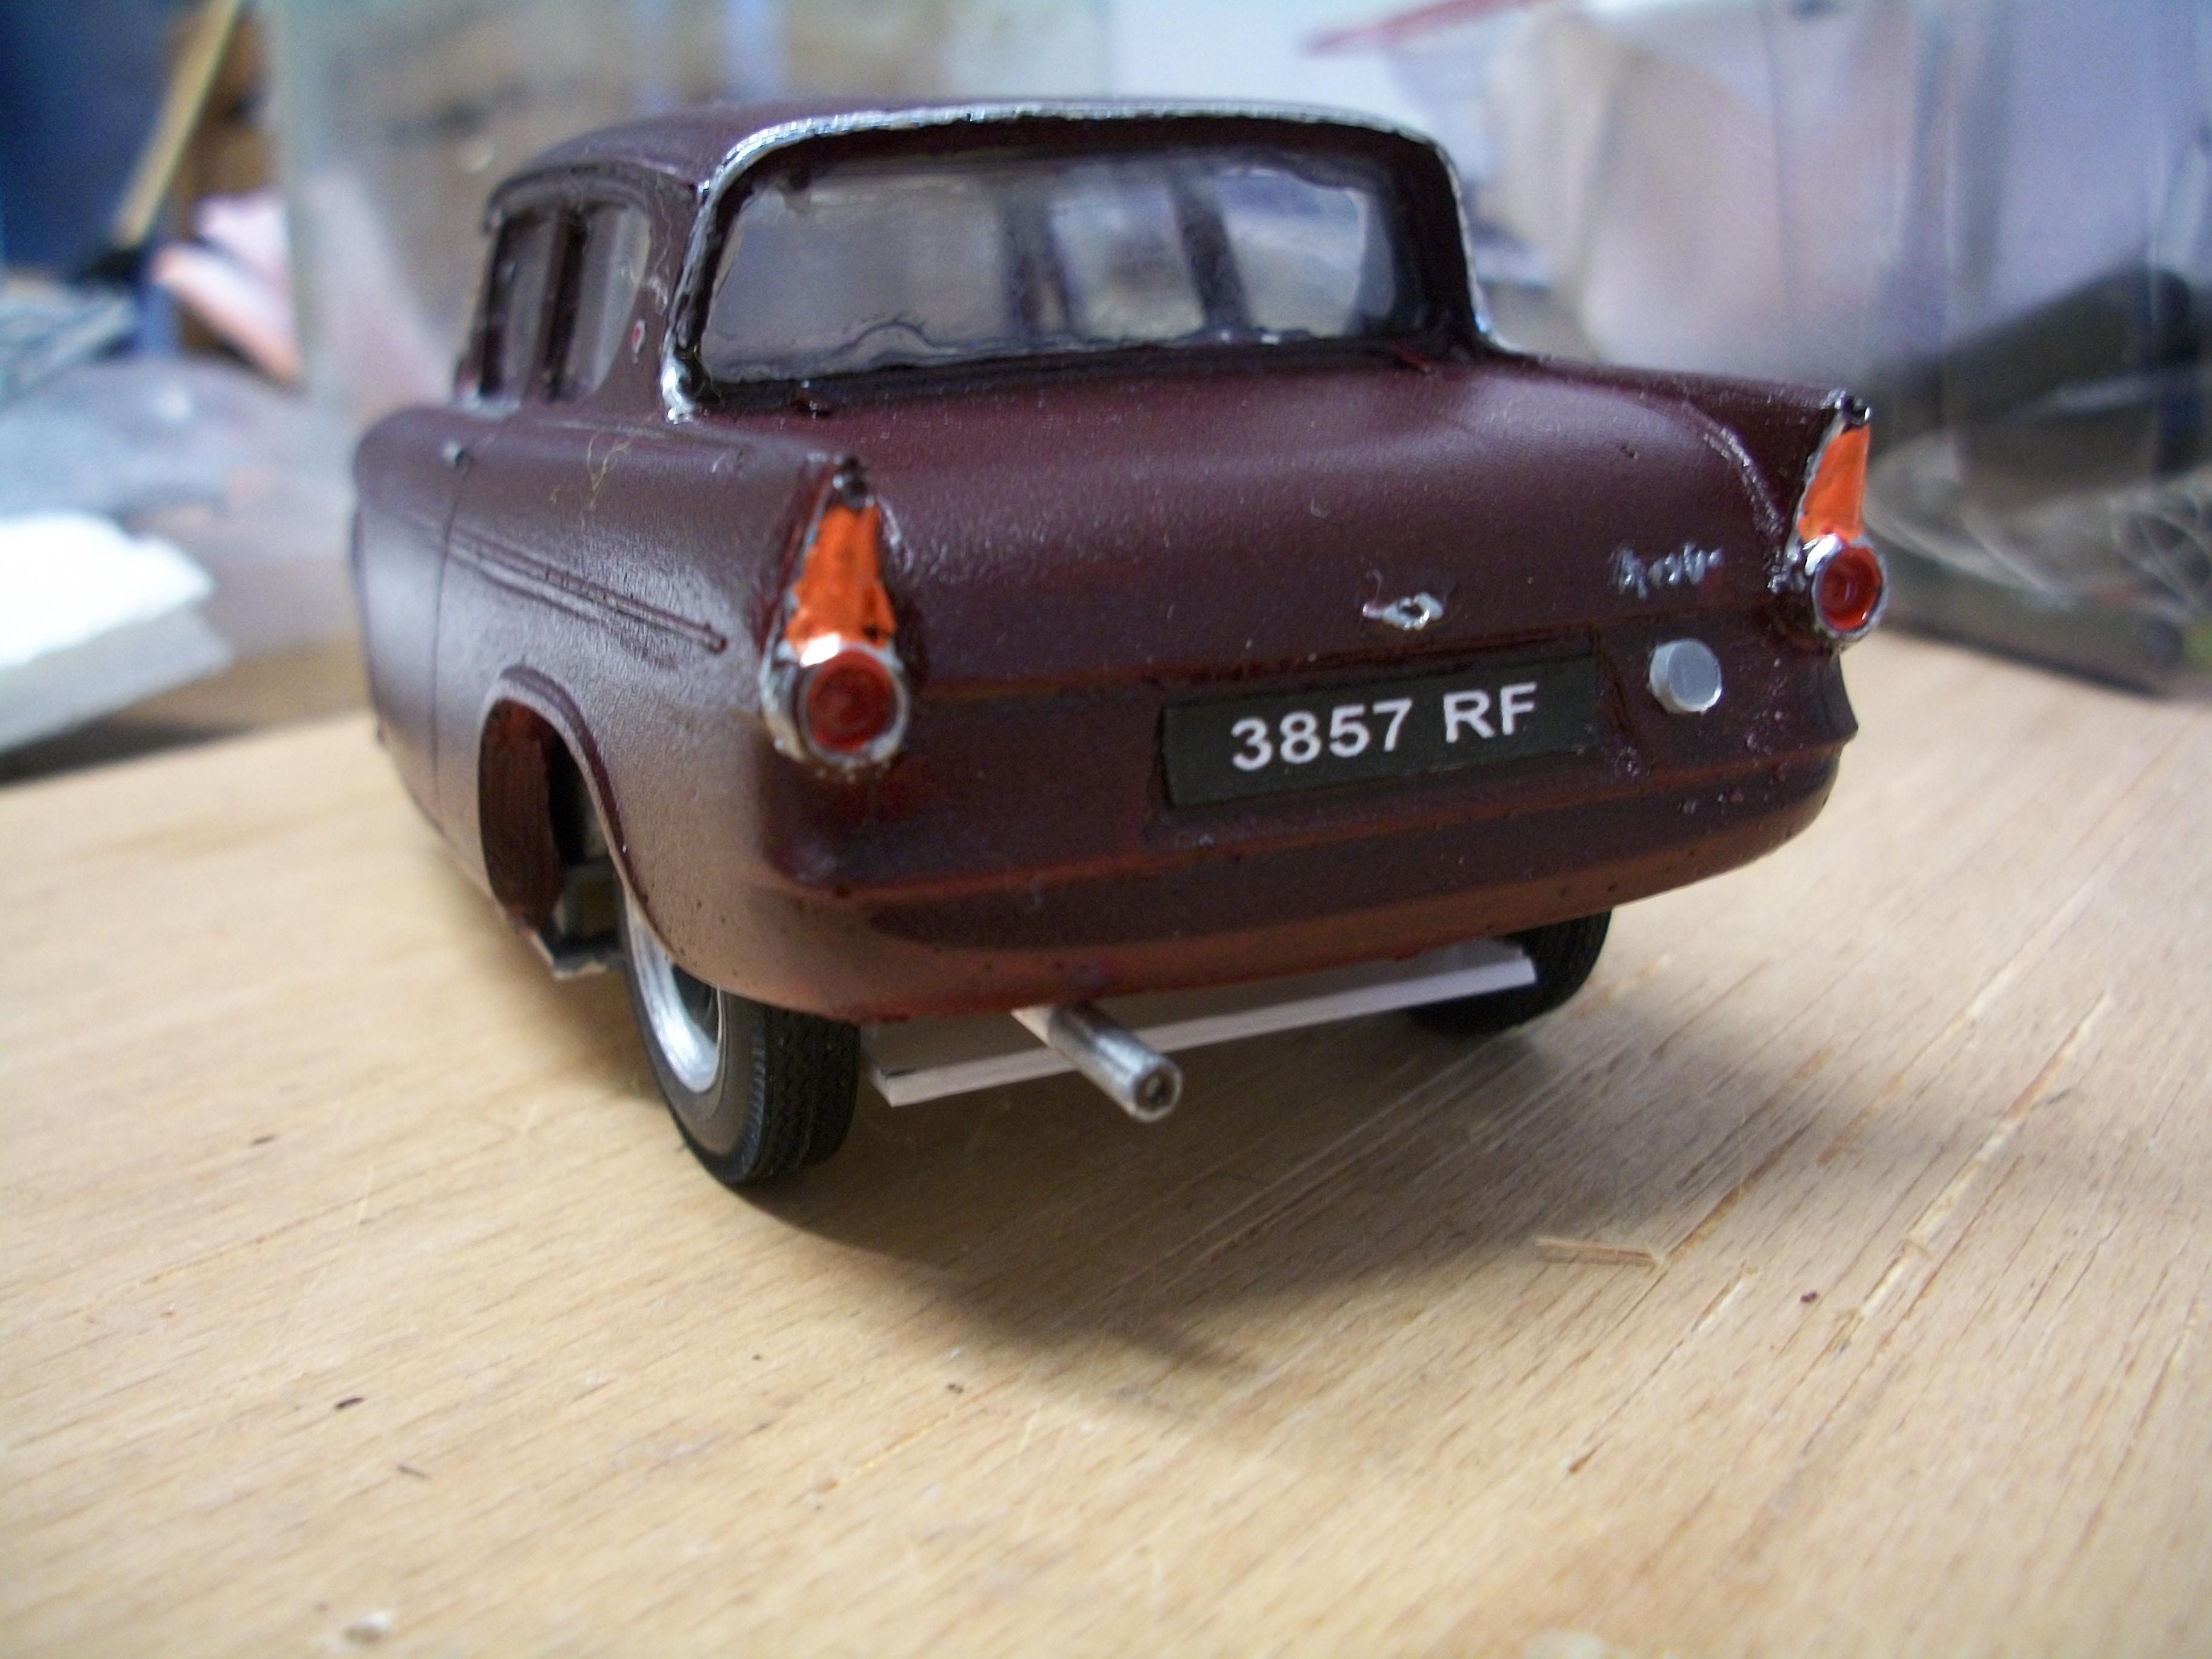
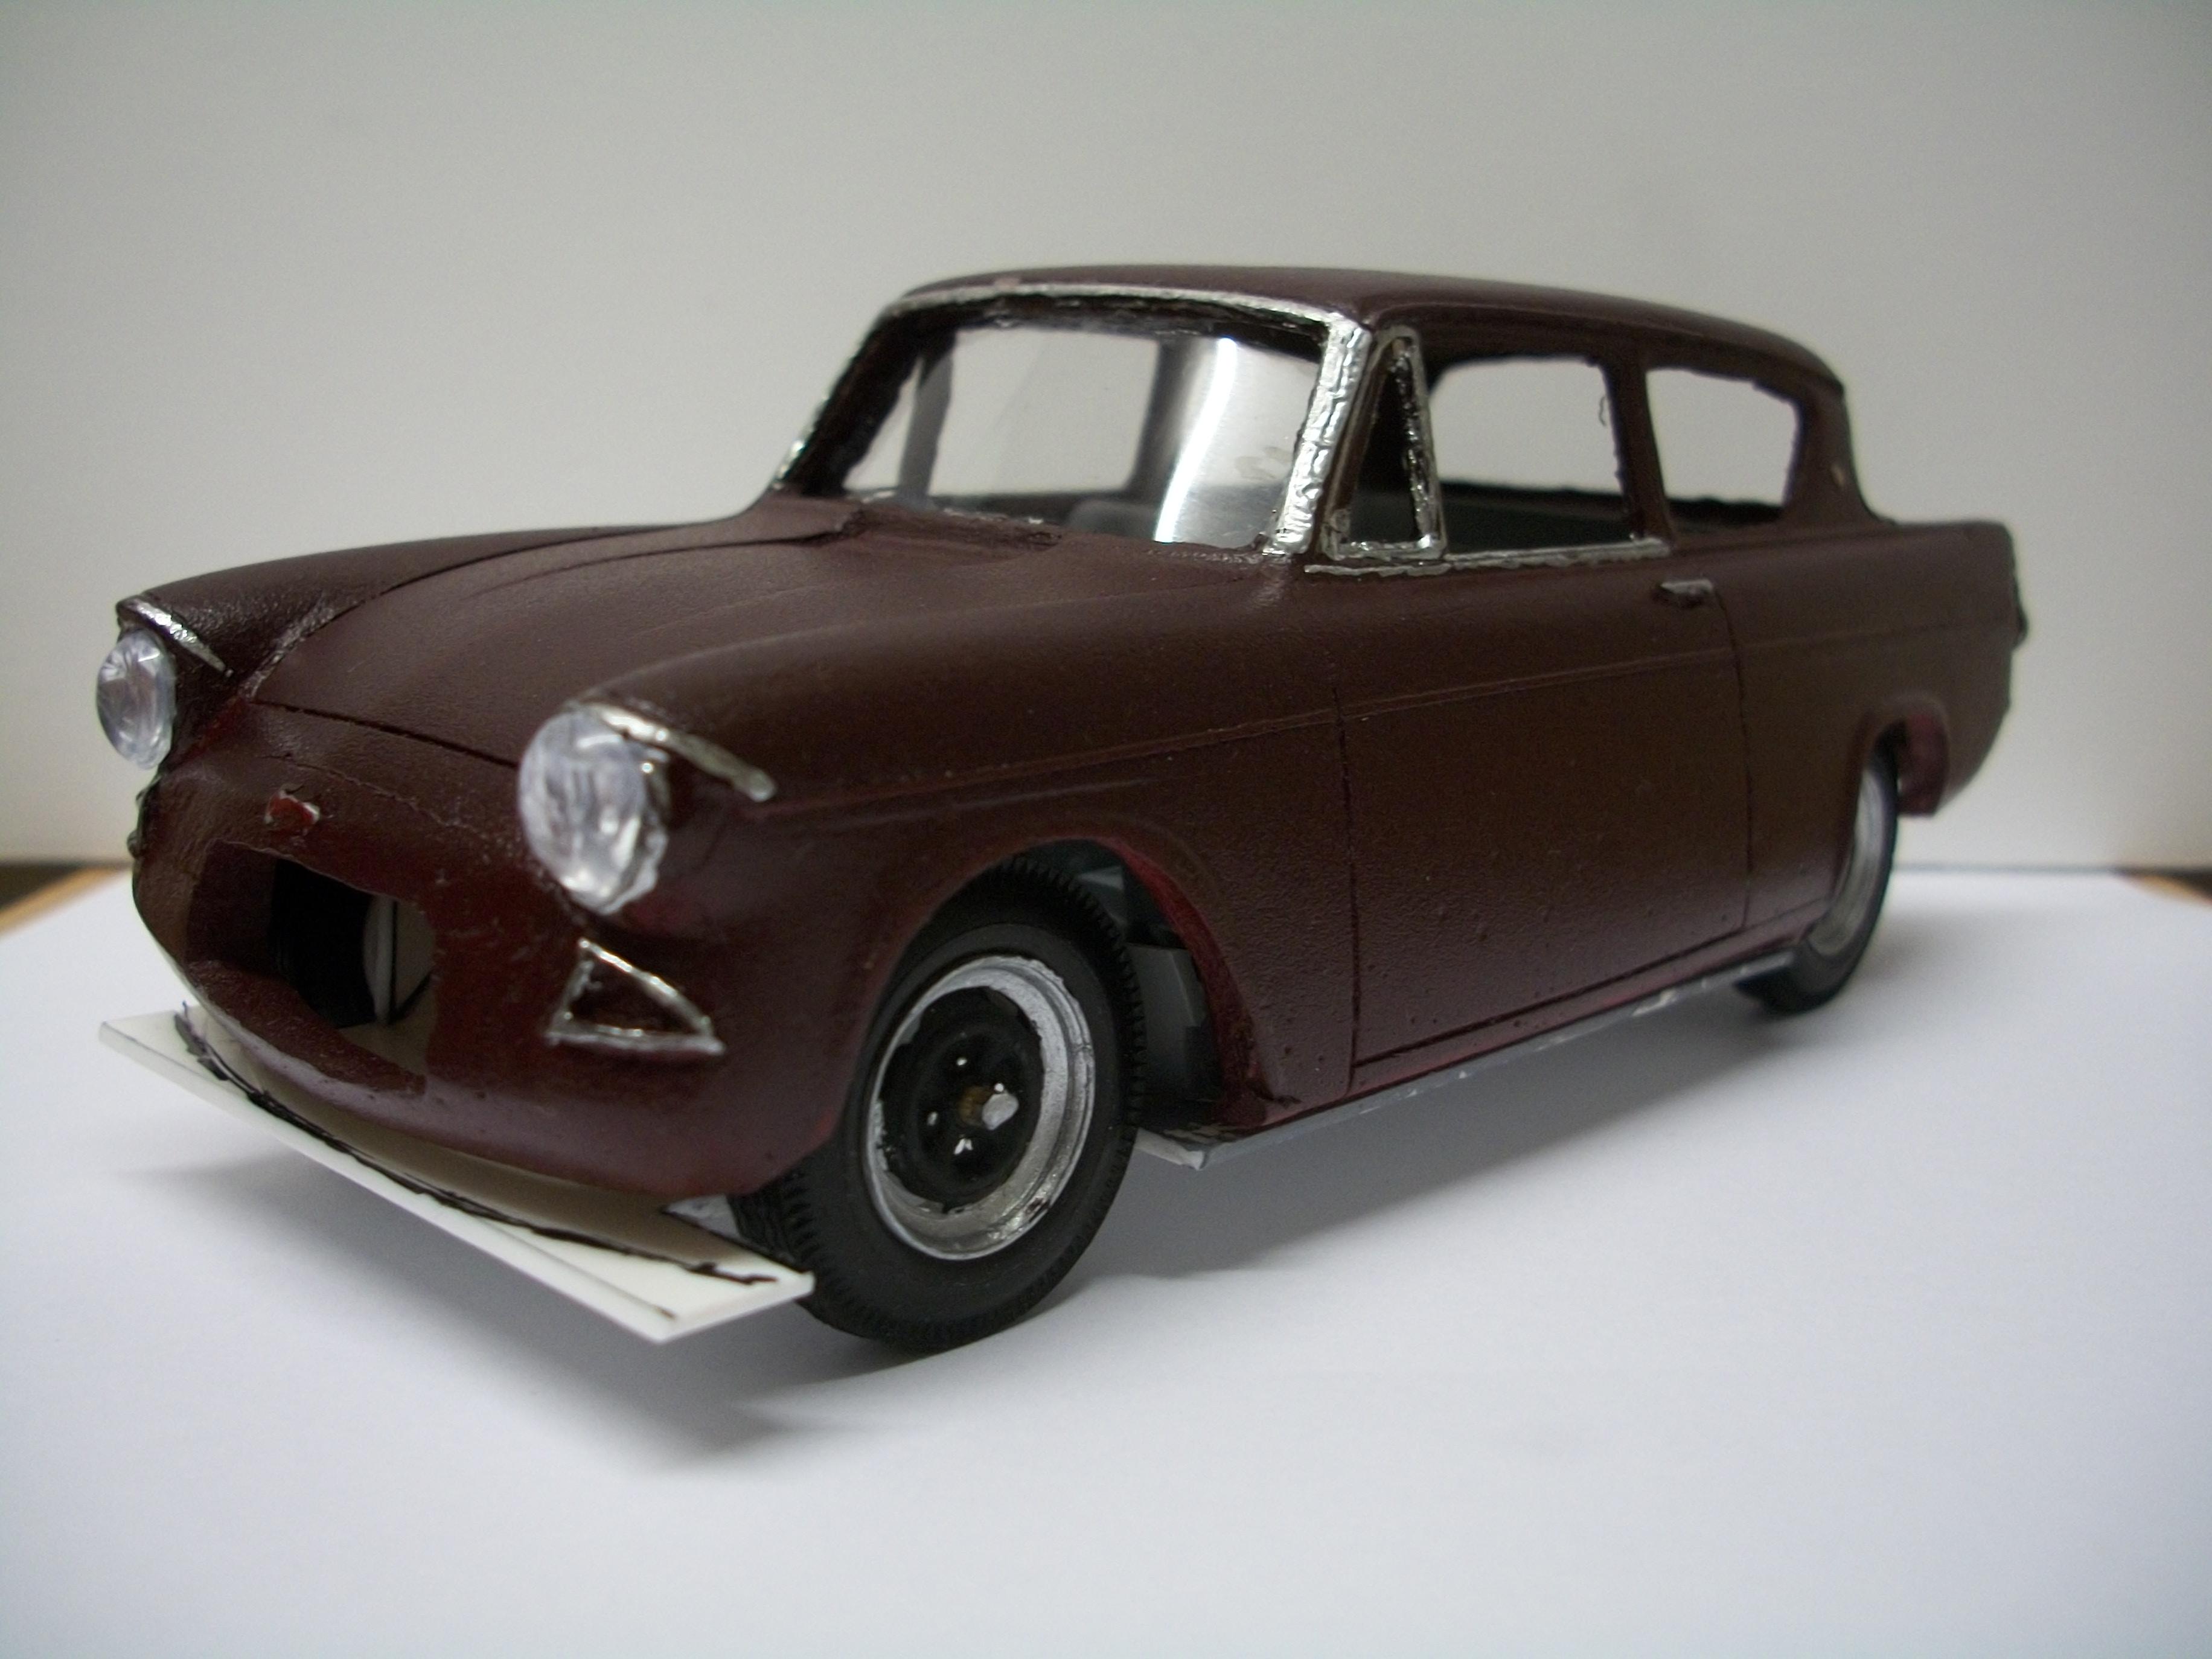
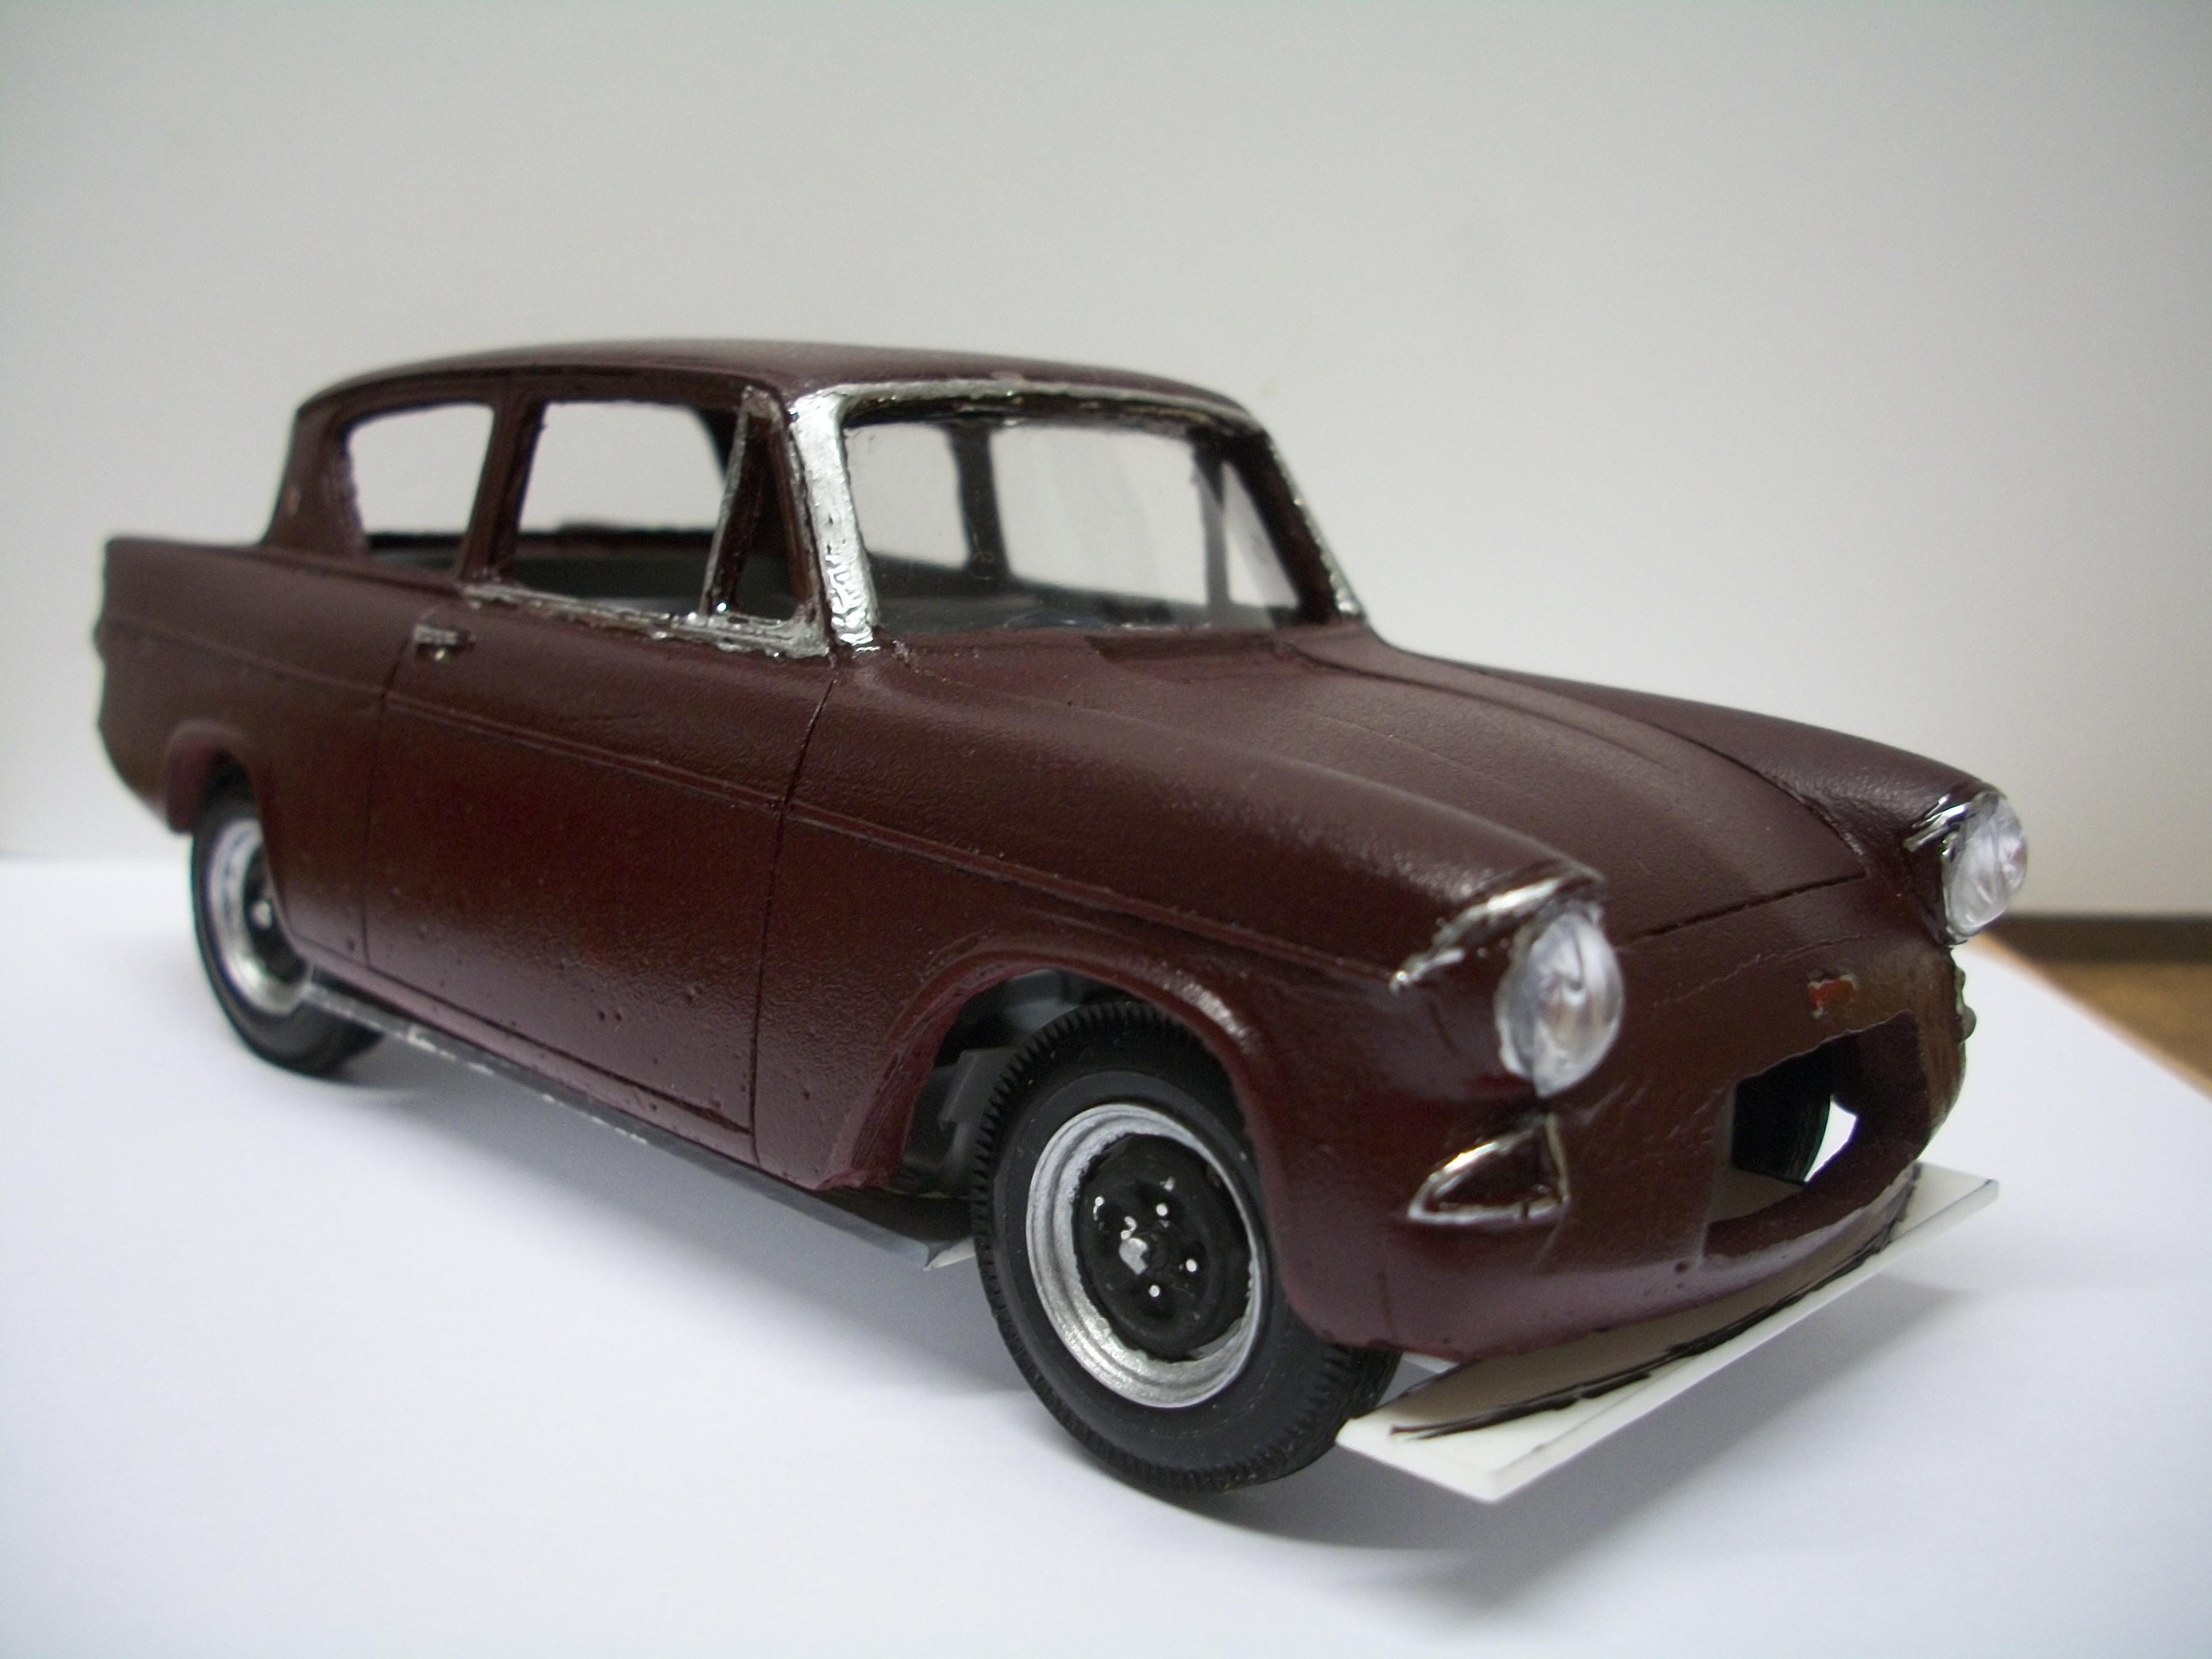
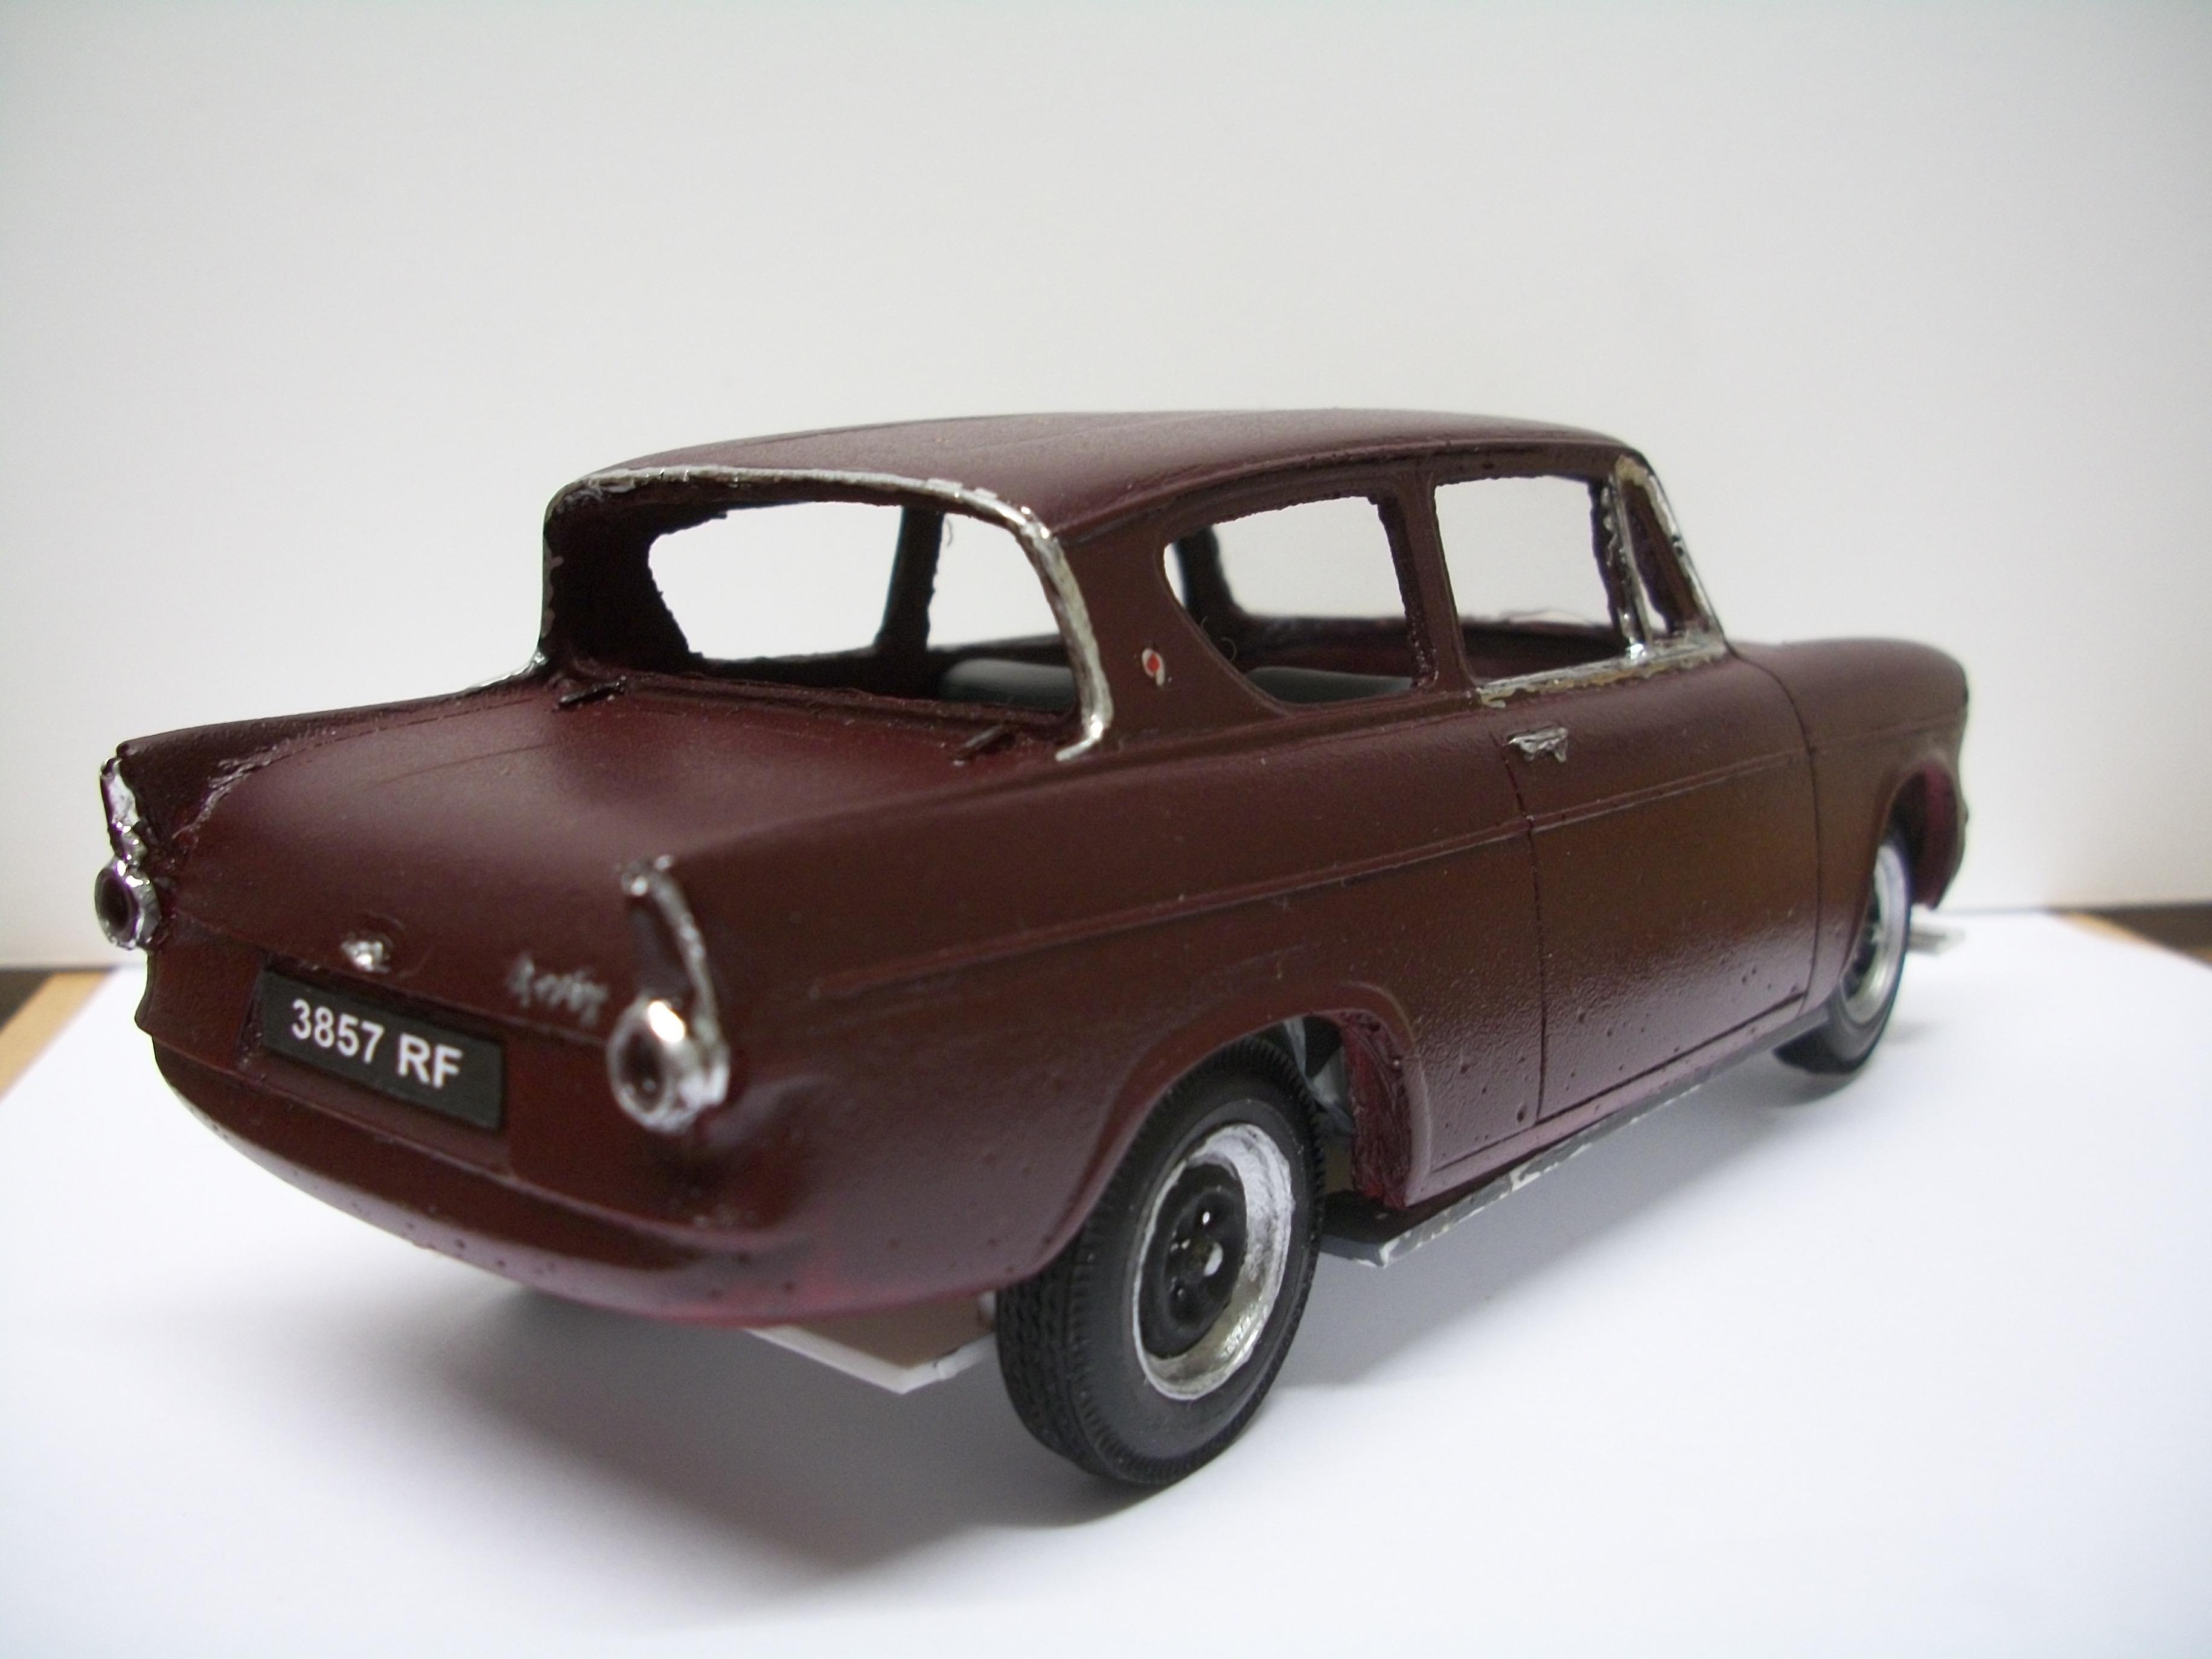
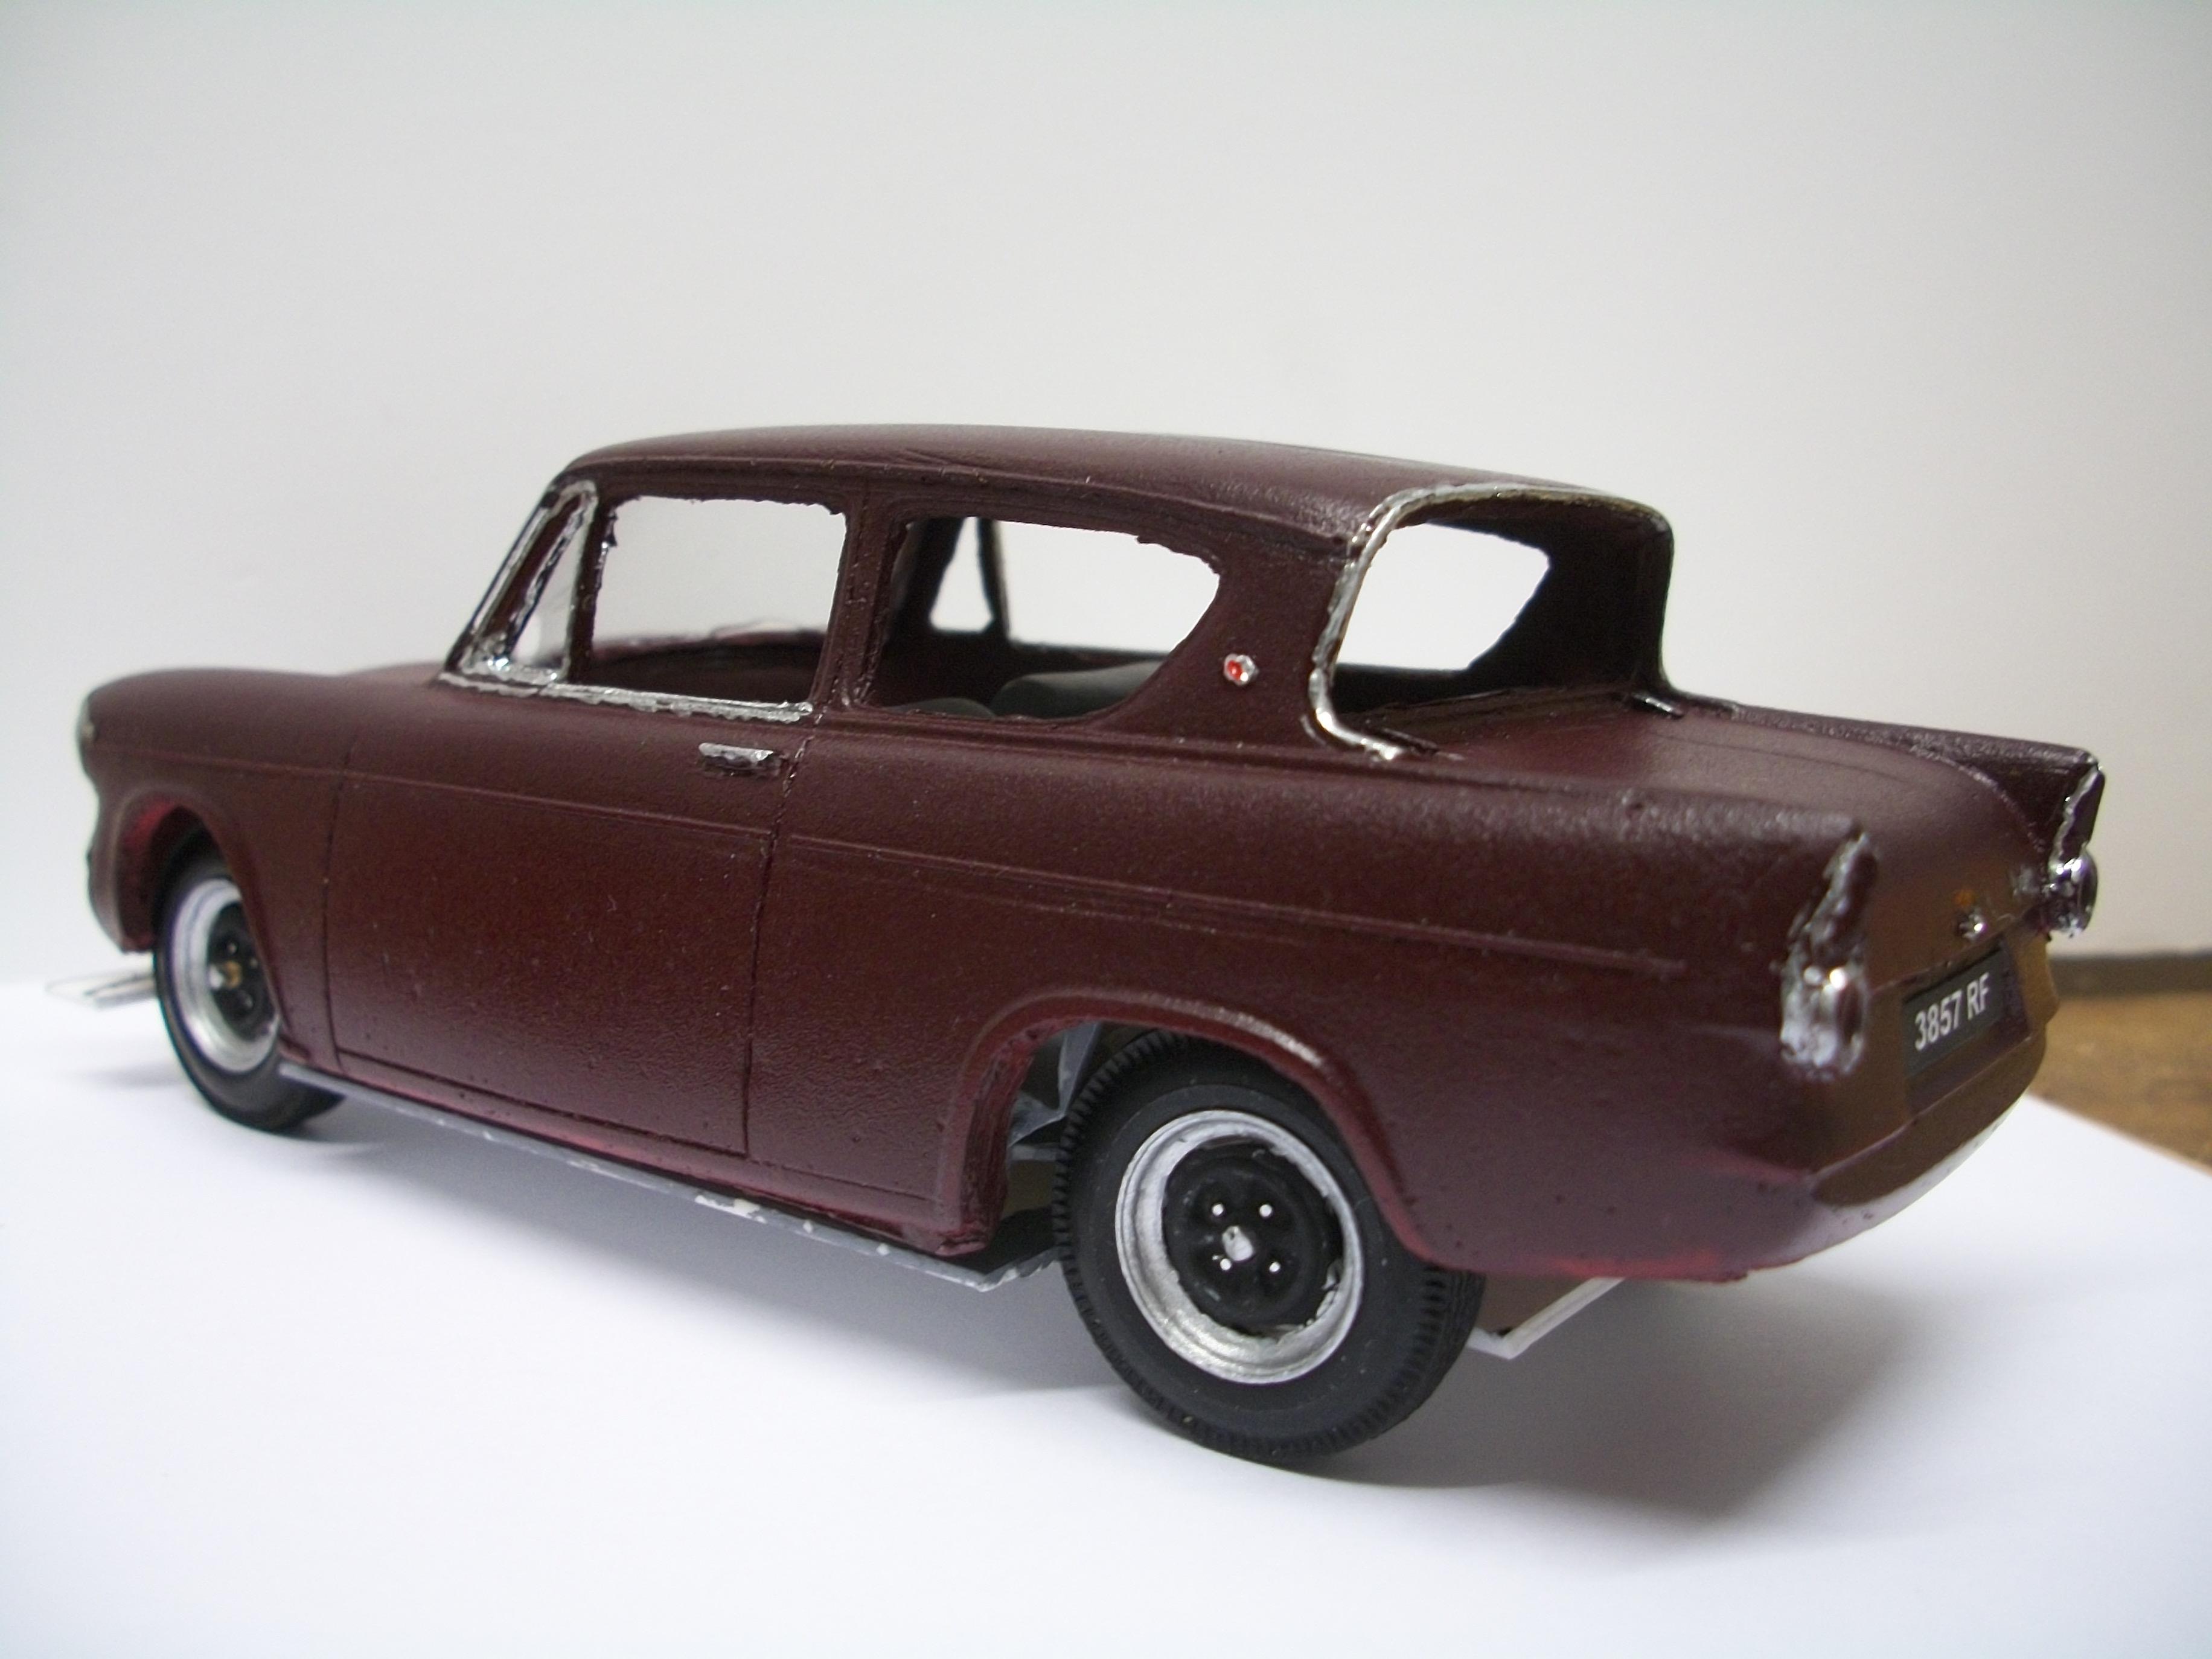
The rear window glass has been fitted correctly, and there is no visible gap at the top edge now. Still not sure about the rear end of this car...... and although the stance appears to be correct from both sides, it does seem to be rather high when viewed from the rear. The build has been problematic throughout, and I am not entirely comfortable with what is nearly the end result....... bit of head scratching going on here...... David
-
Having looked at this JADA 1:24 Ford Anglia sometime last week, Gary...... I very nearly ordered one! Might have been the price that stopped me..... I seem to remember it being a bit high? David
-
Thanks, Randy...... it is certainly a nice looking model motor car, and the main reason that it appears to be larger than 1:43 scale is the close-up photography, which when combined with a realistic diorama setting provides a convincing illusion of size and scale. David
-
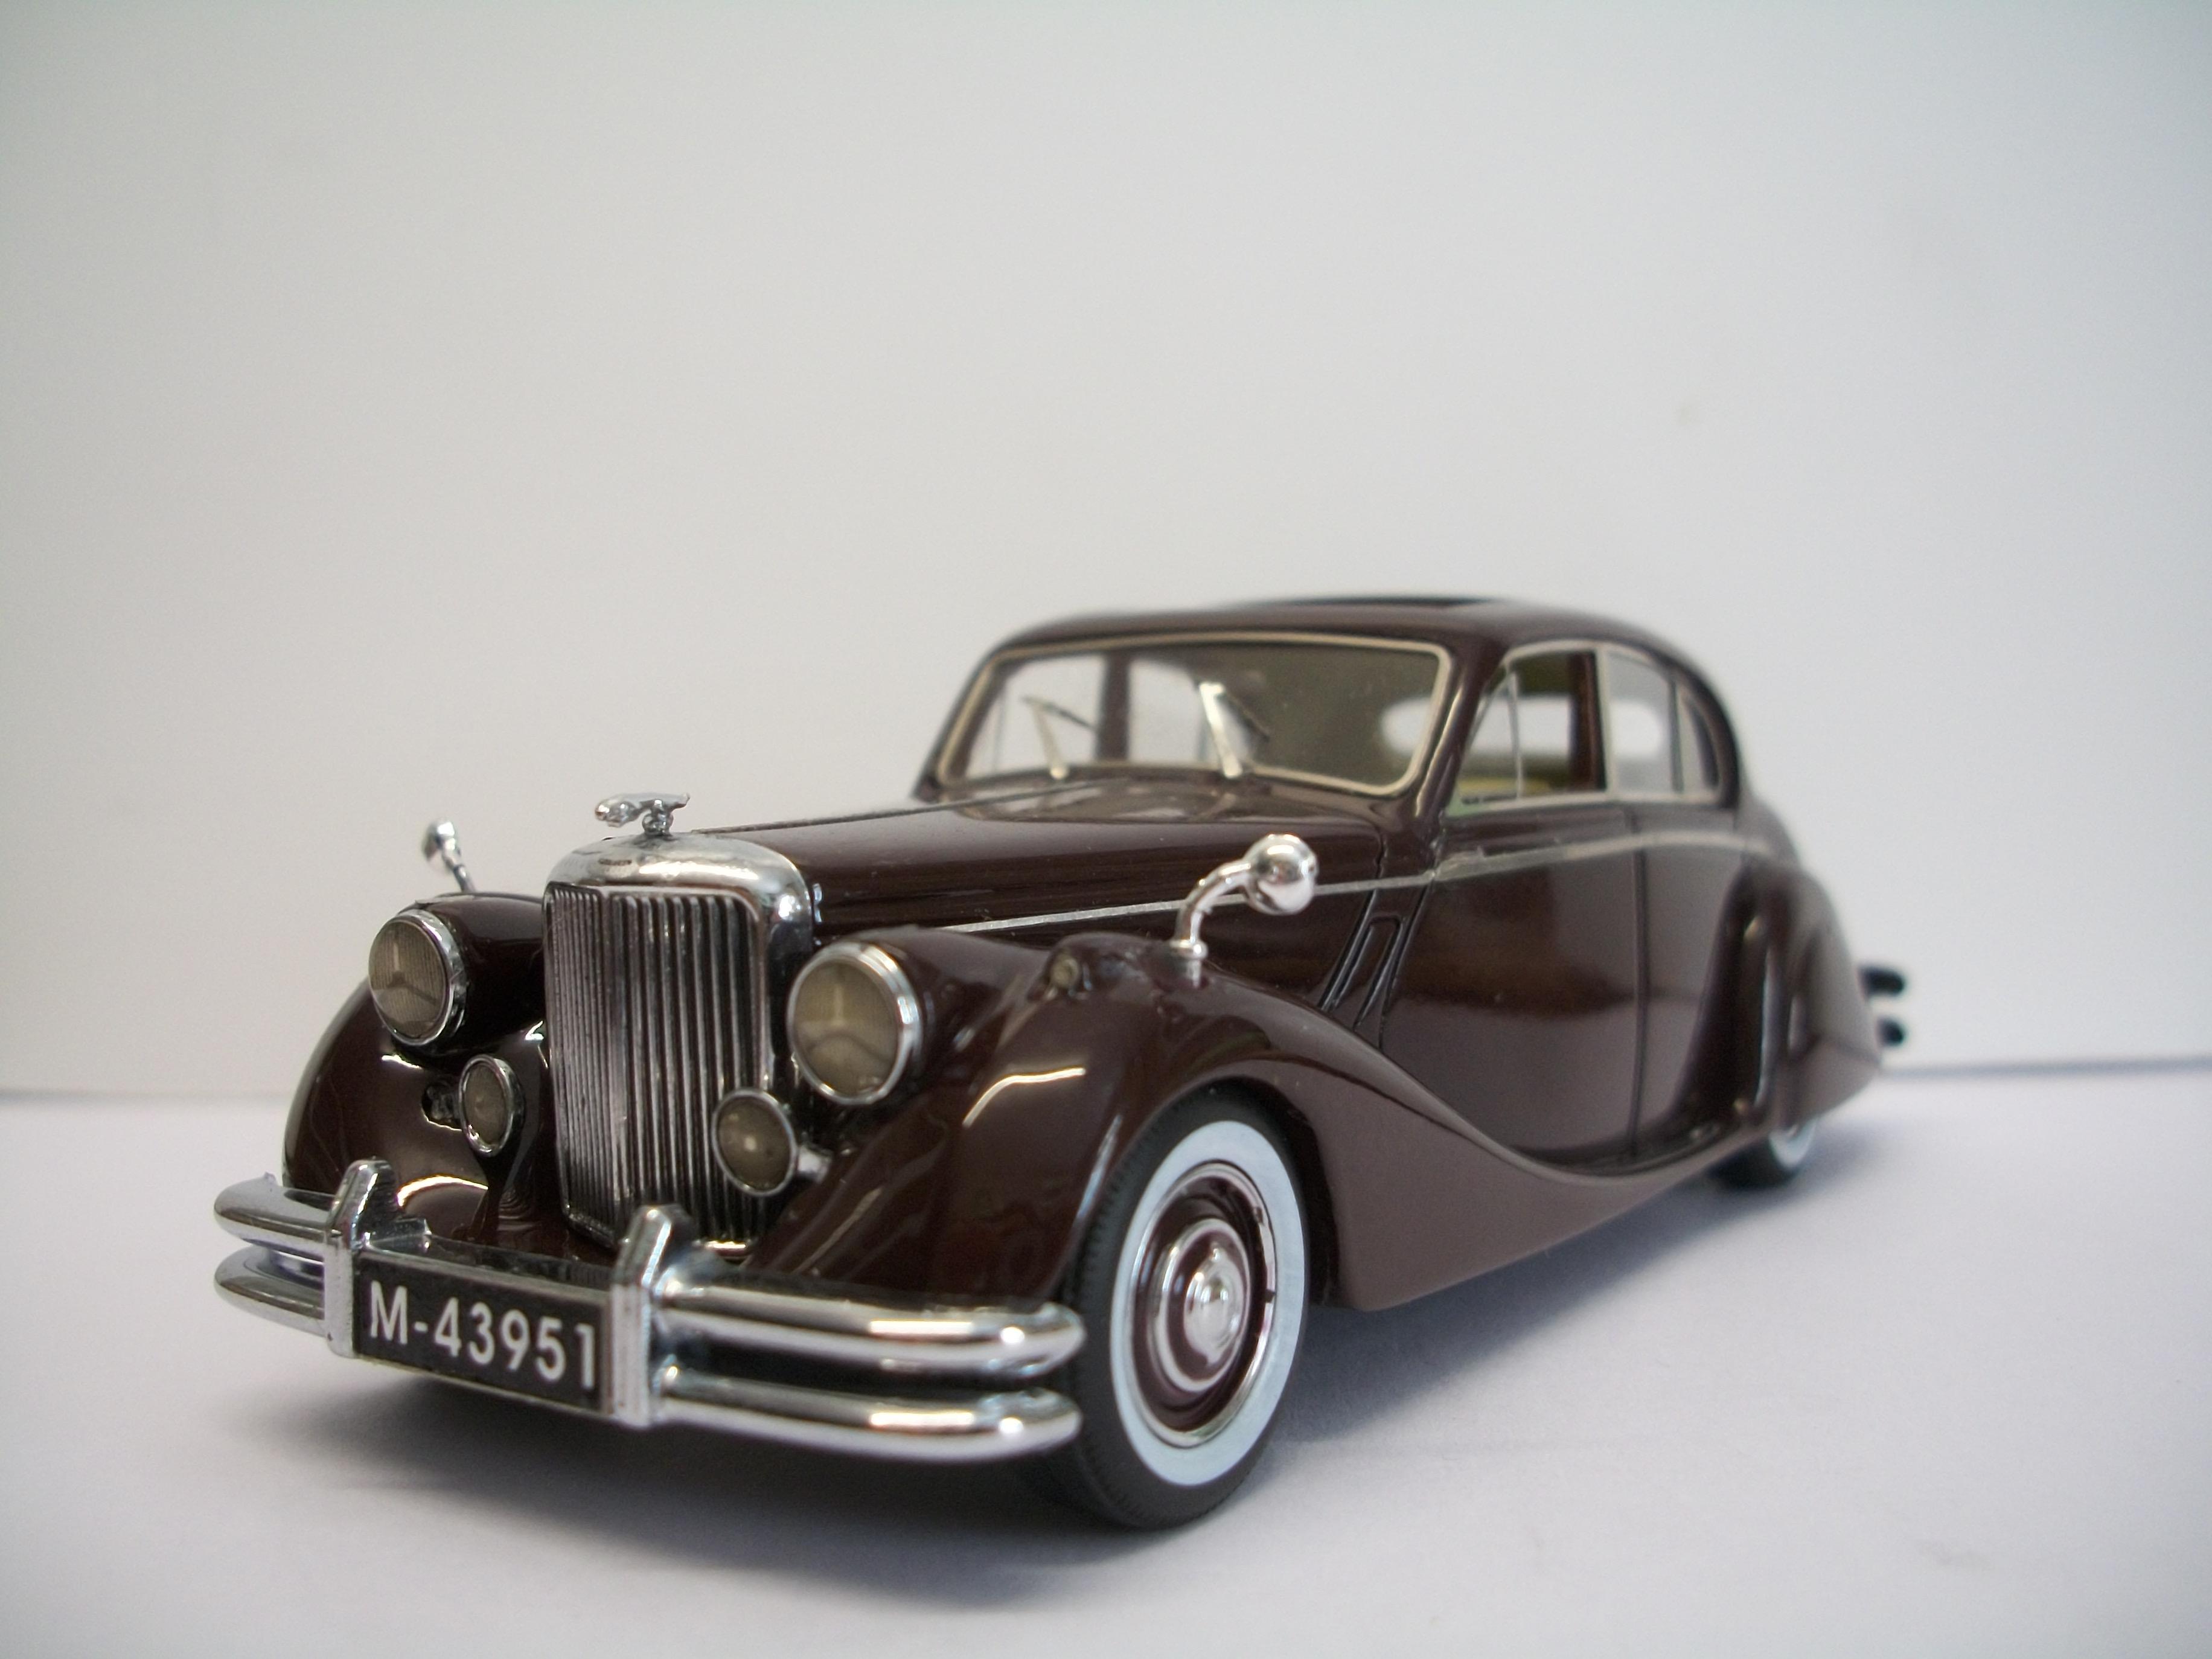
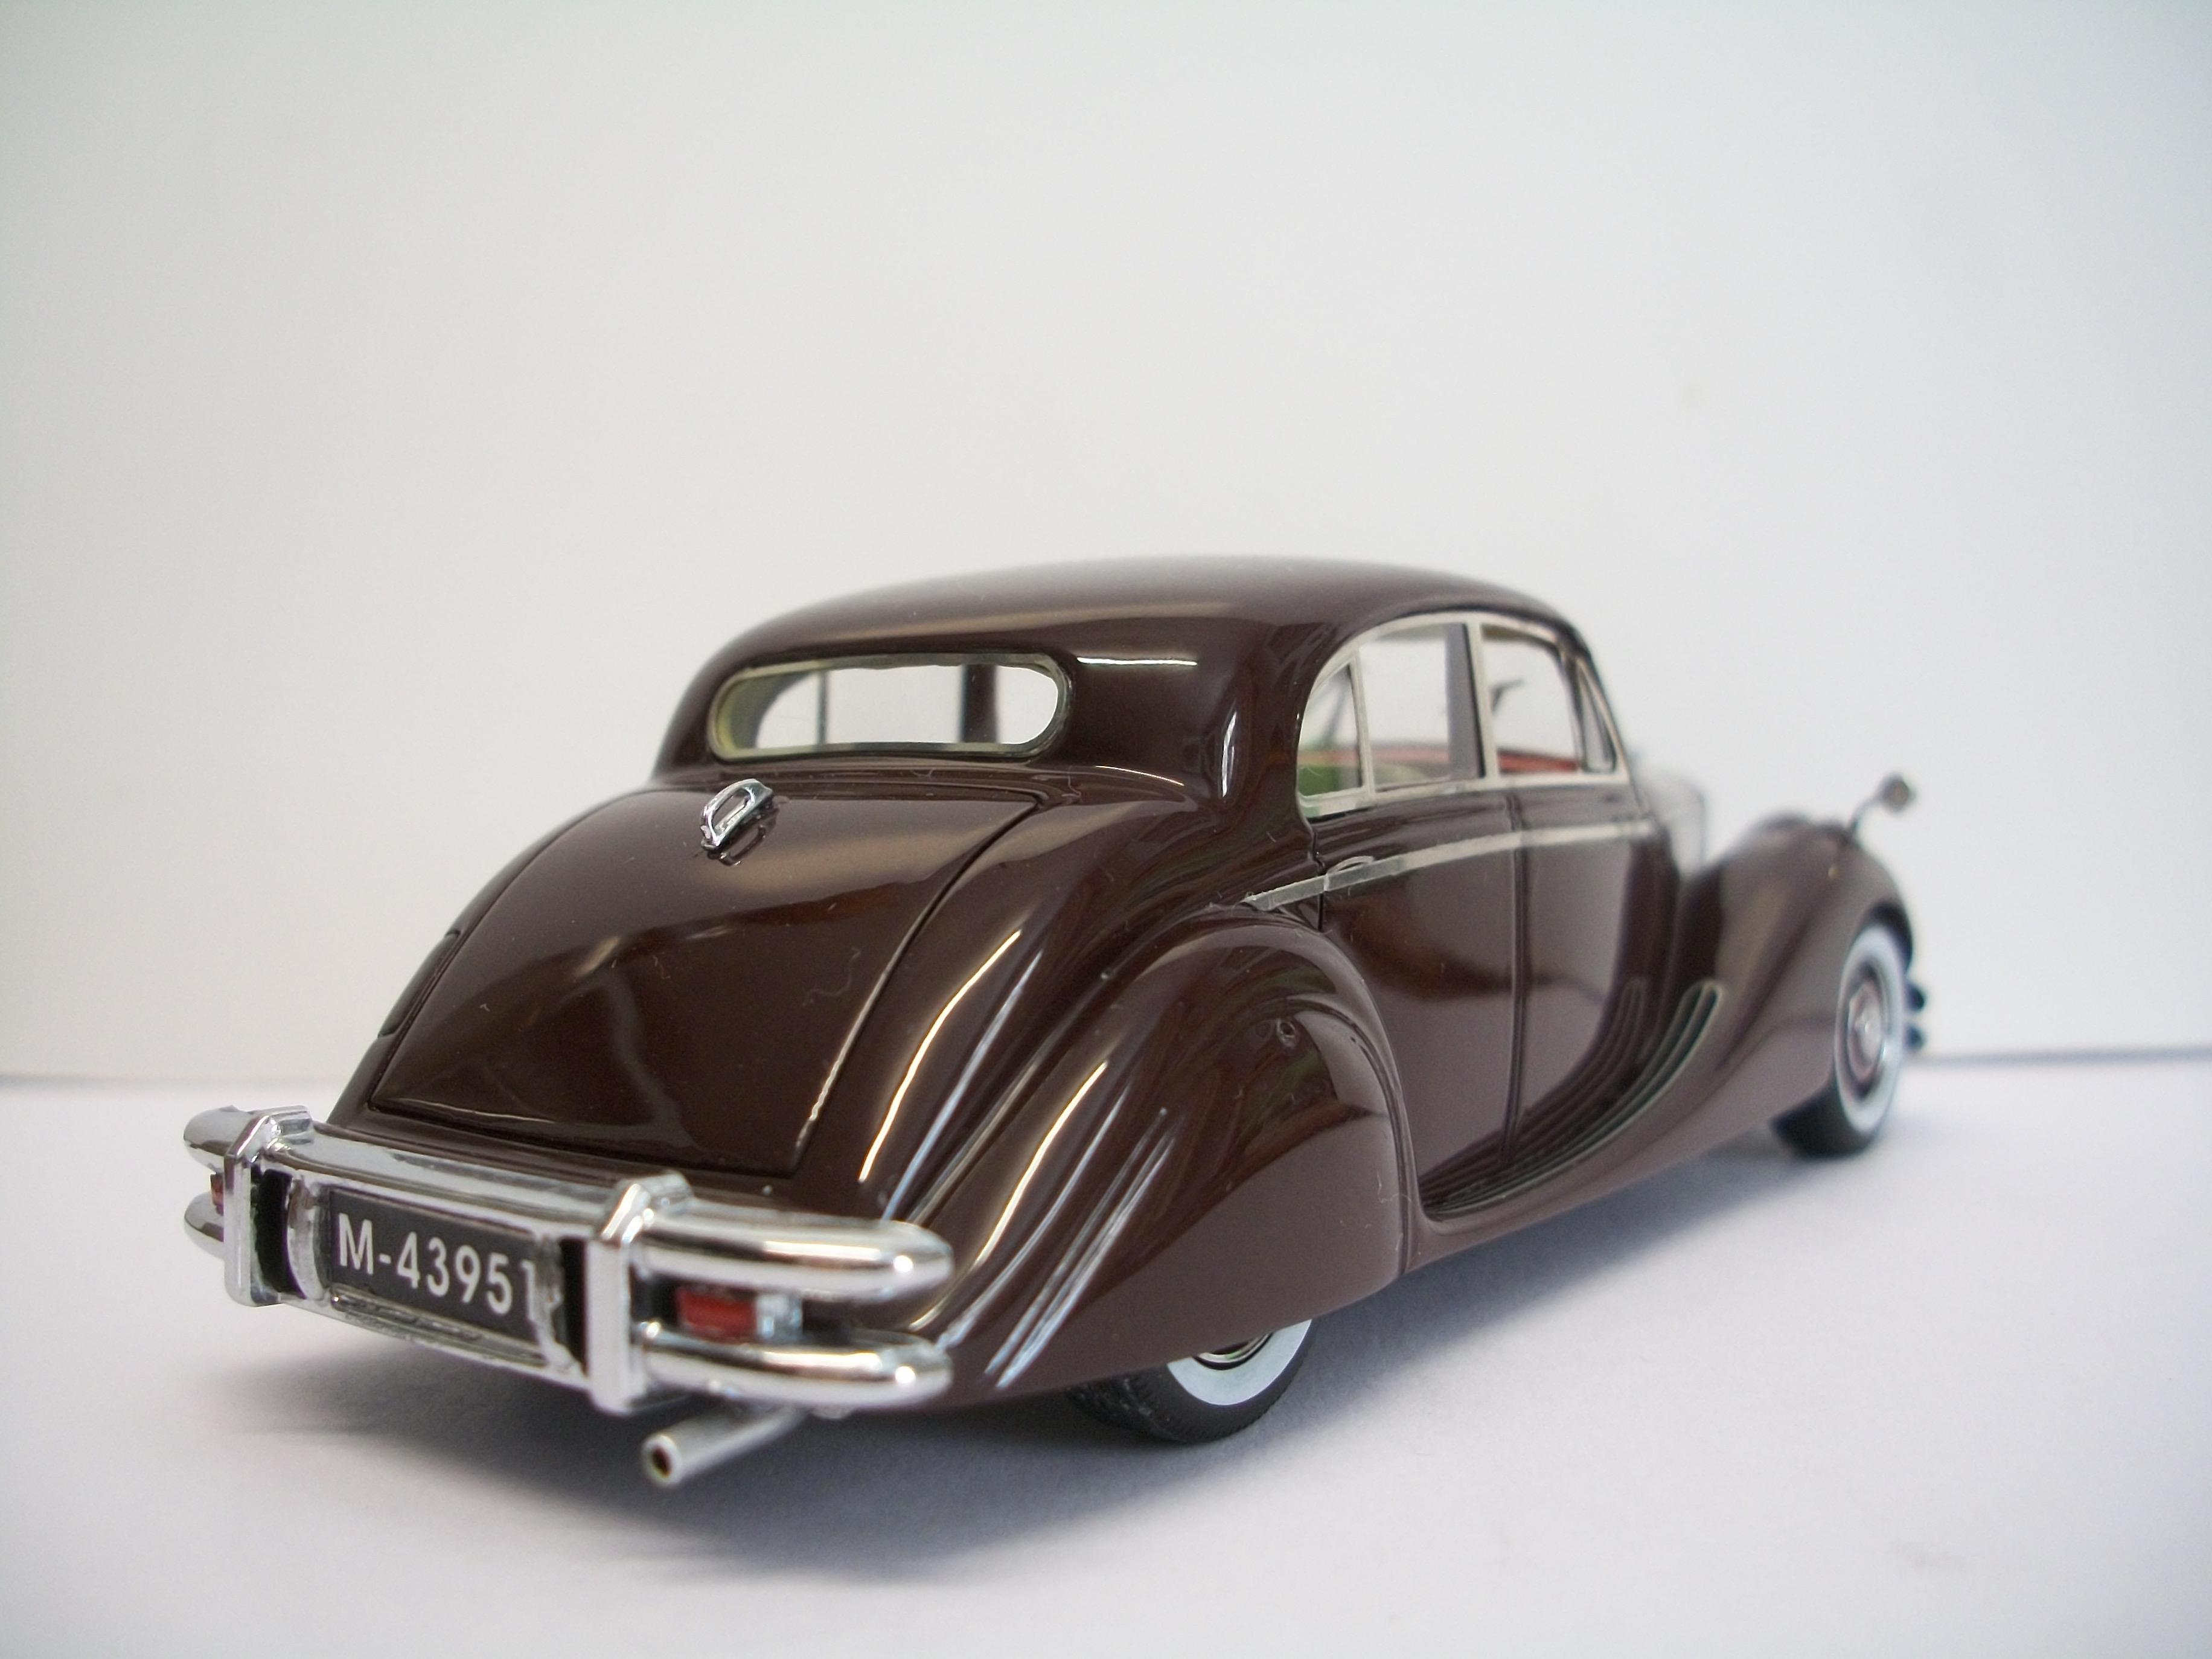
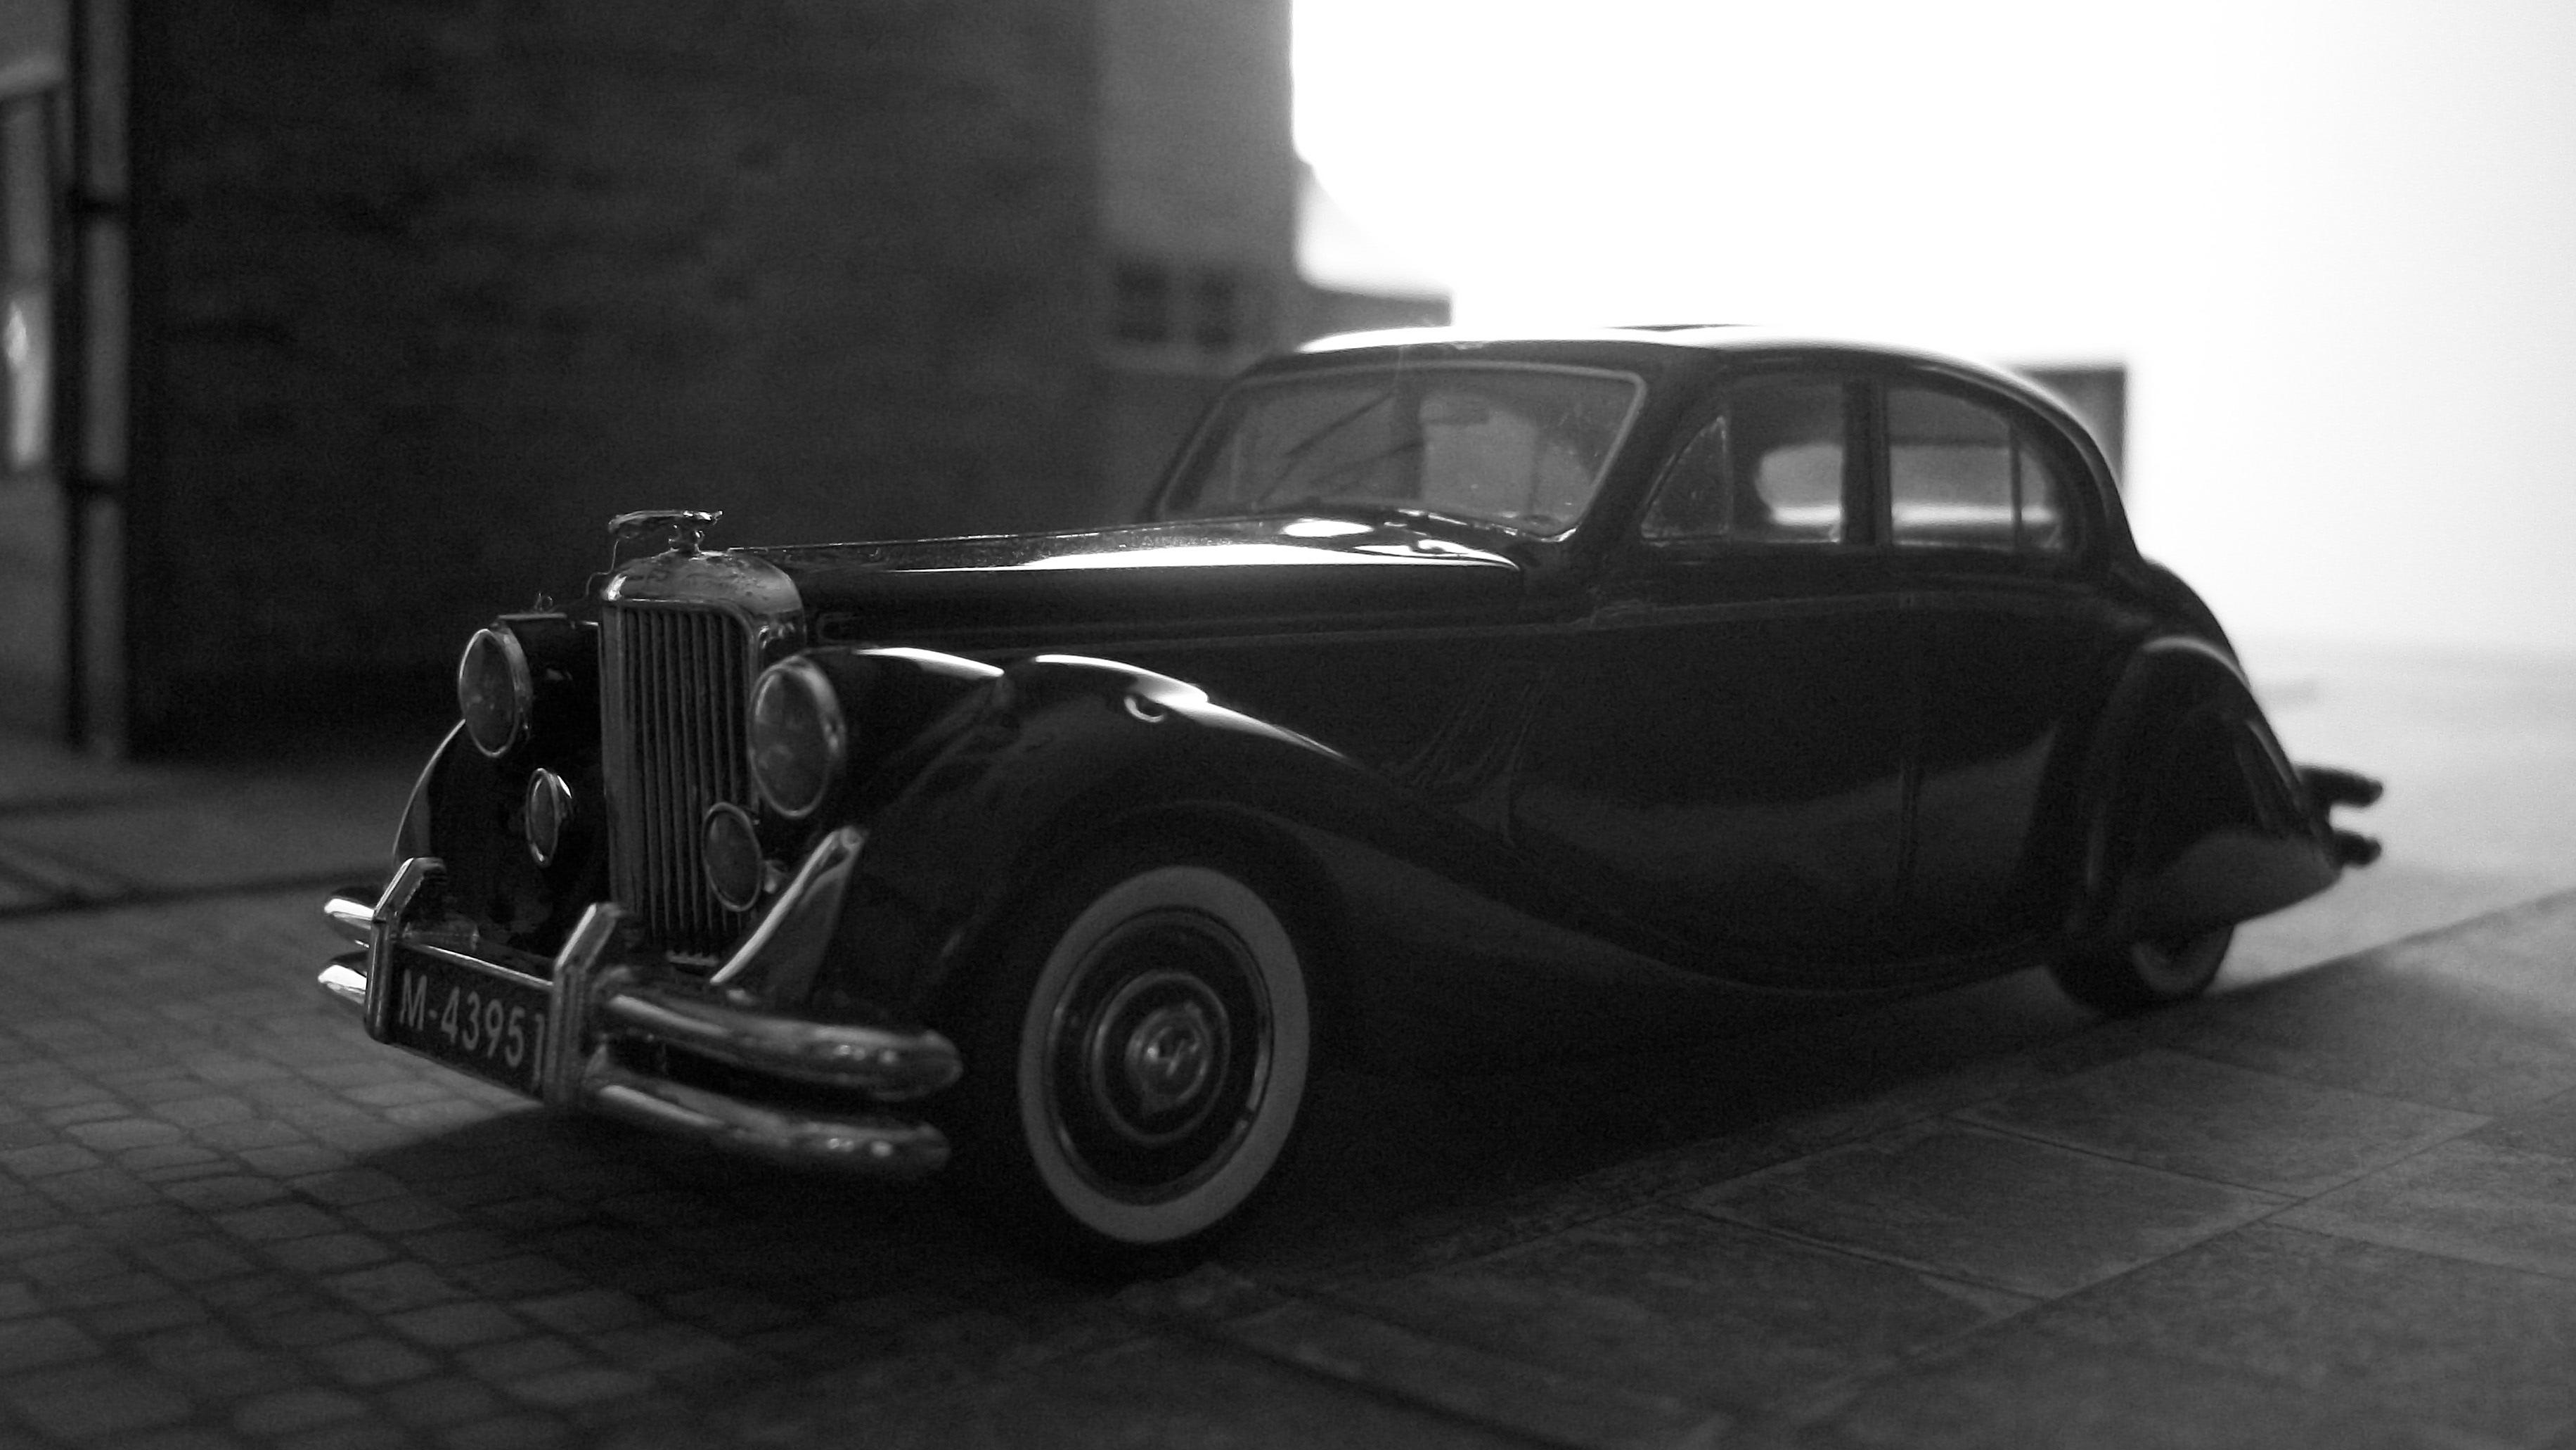
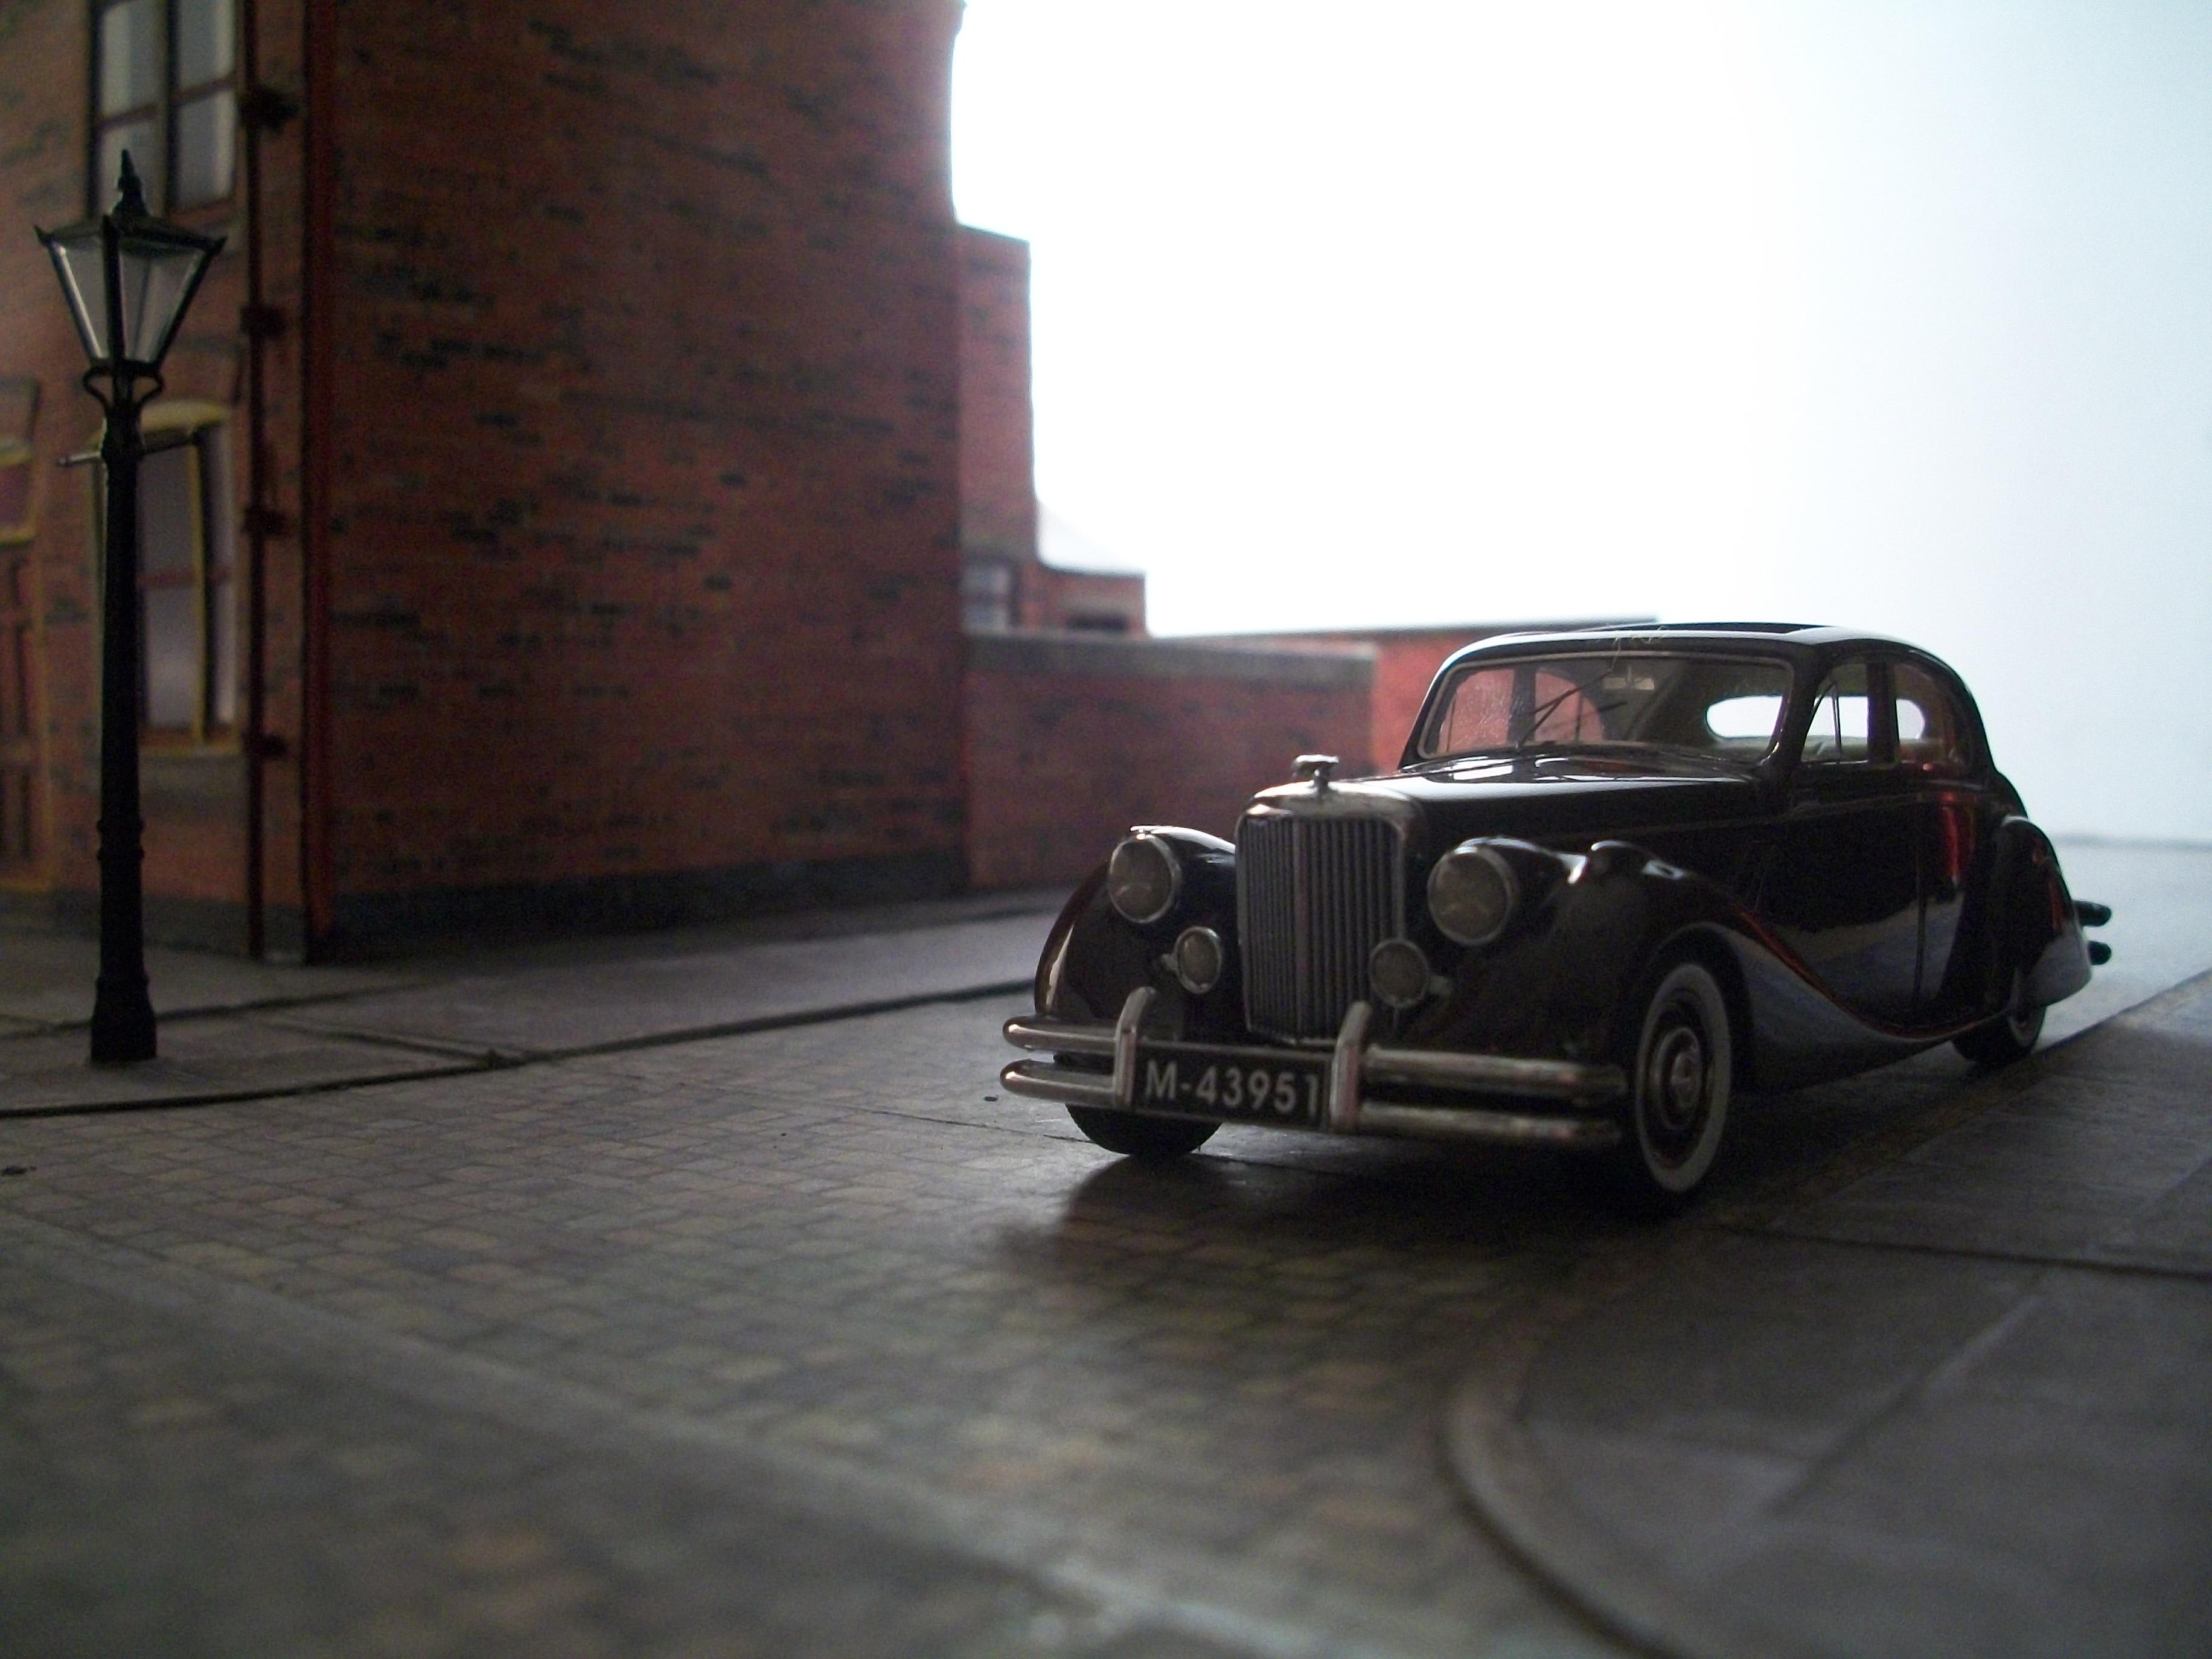
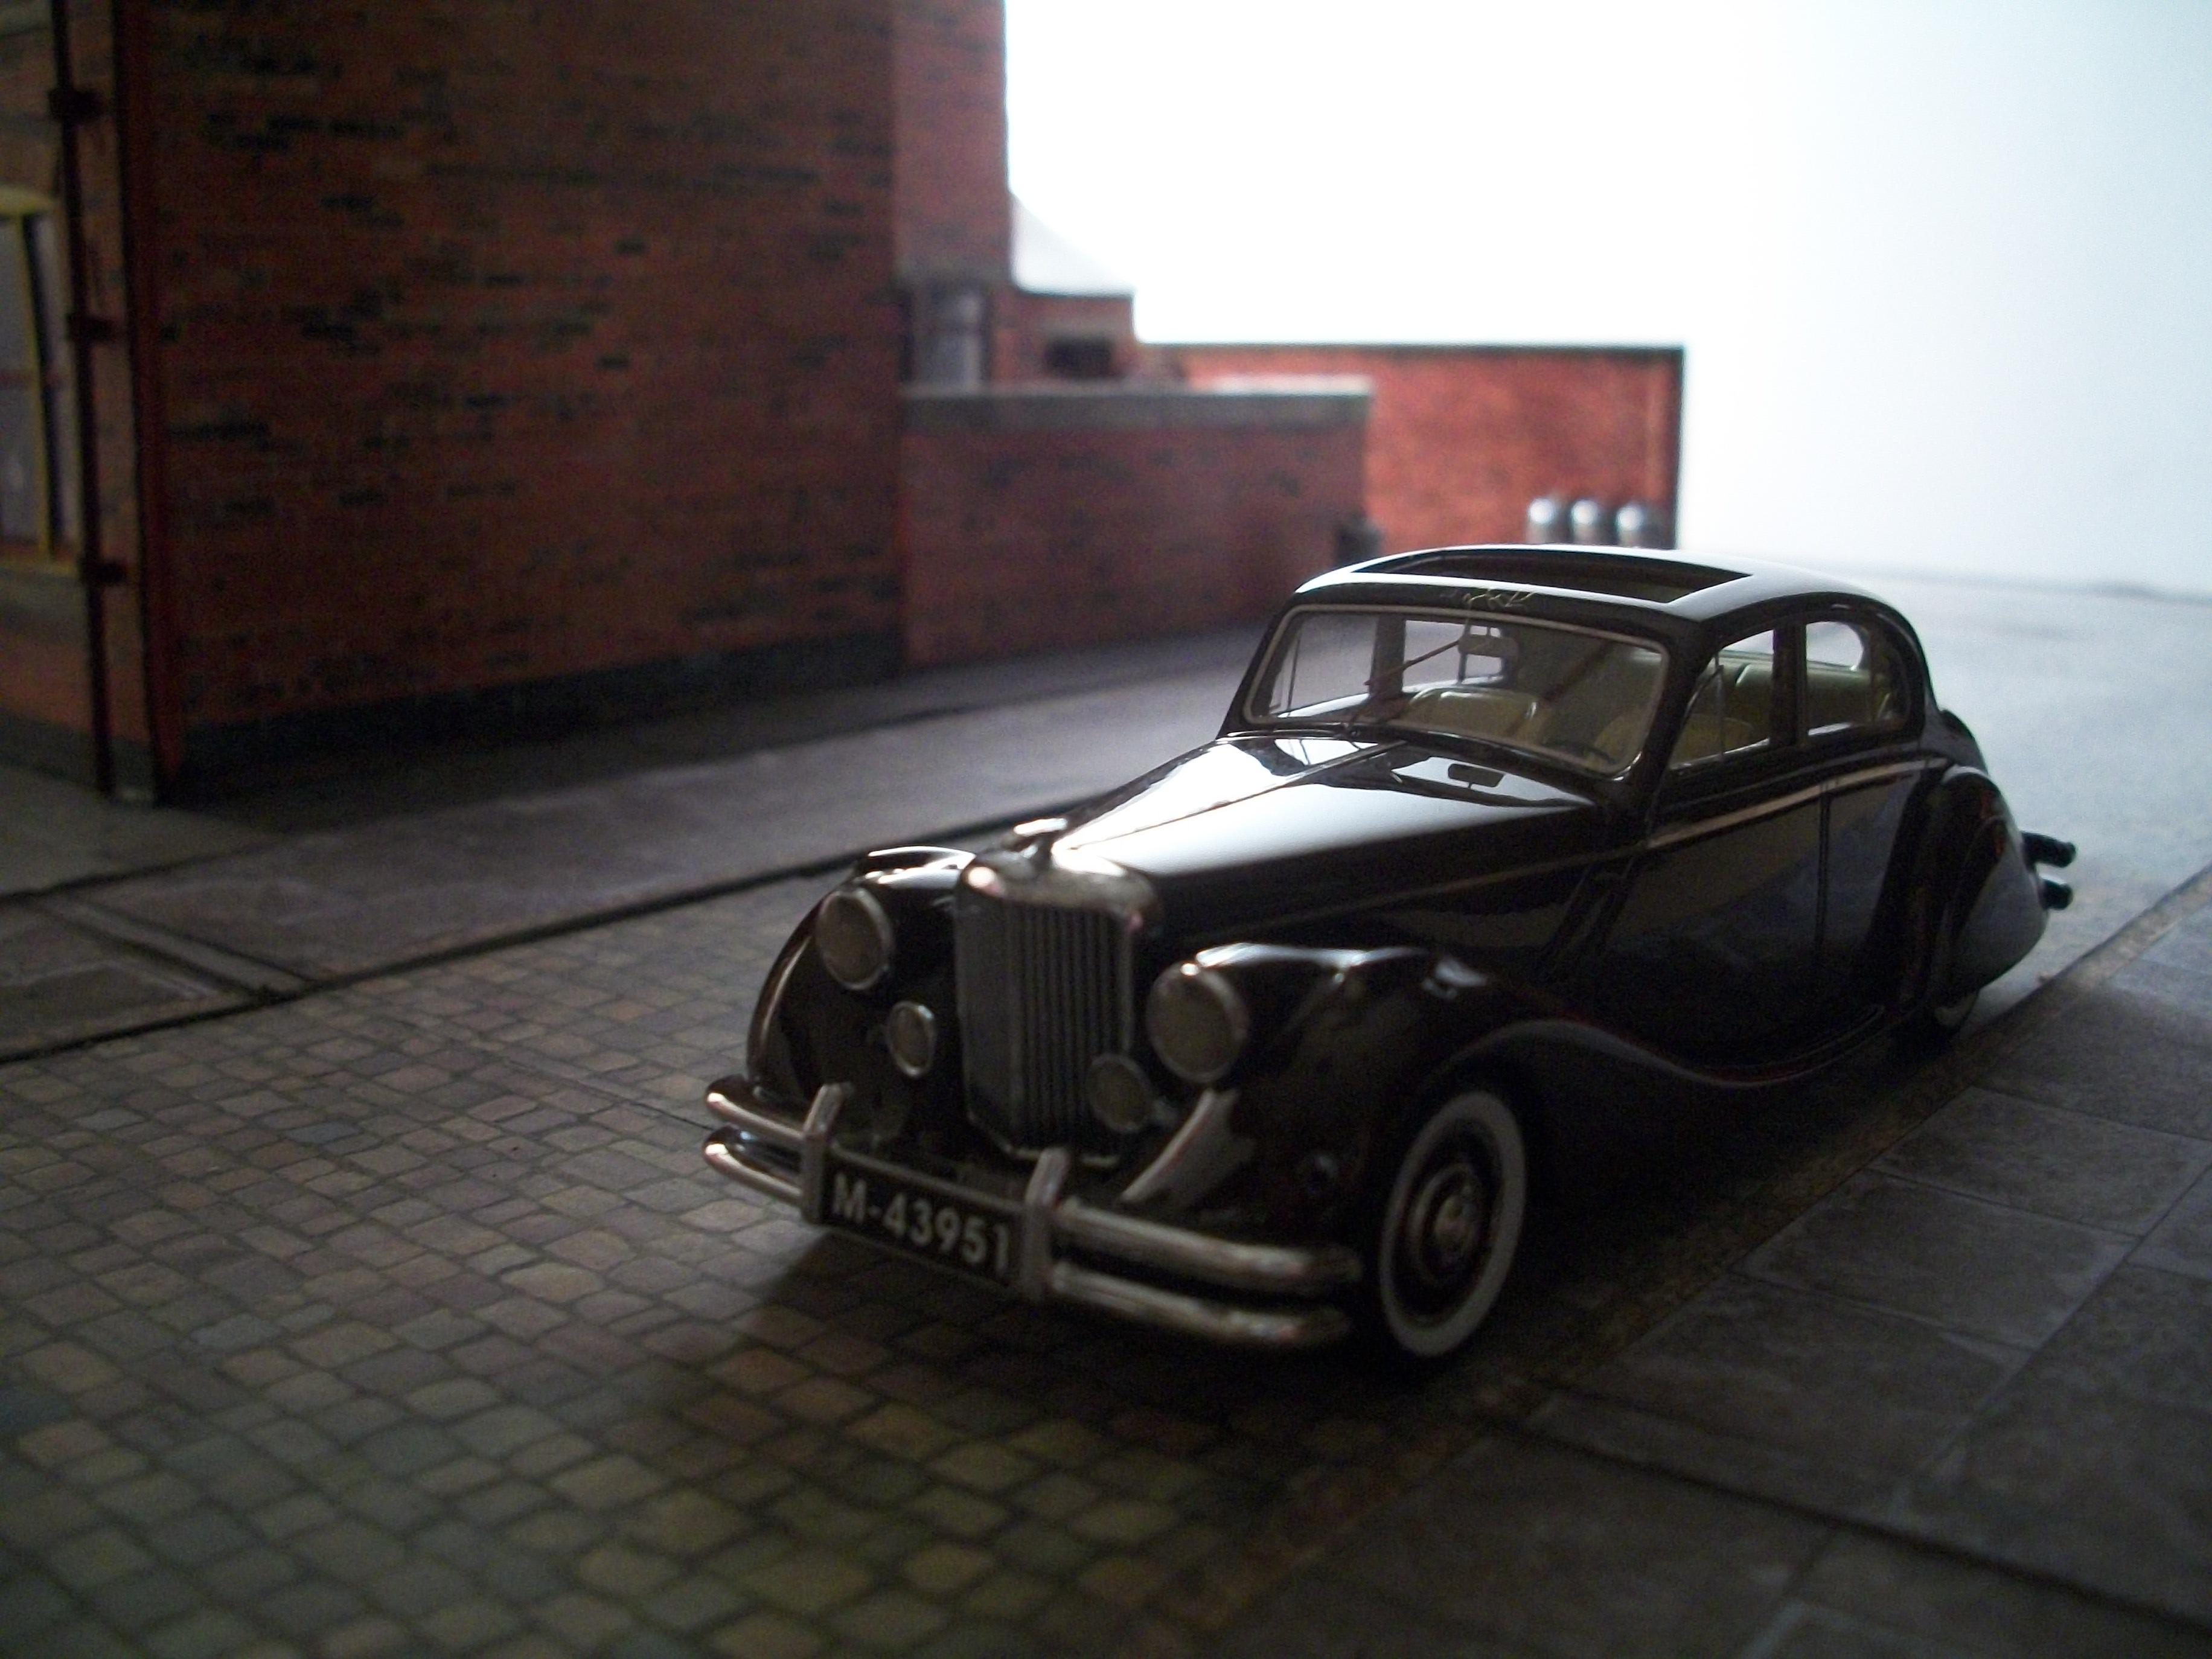
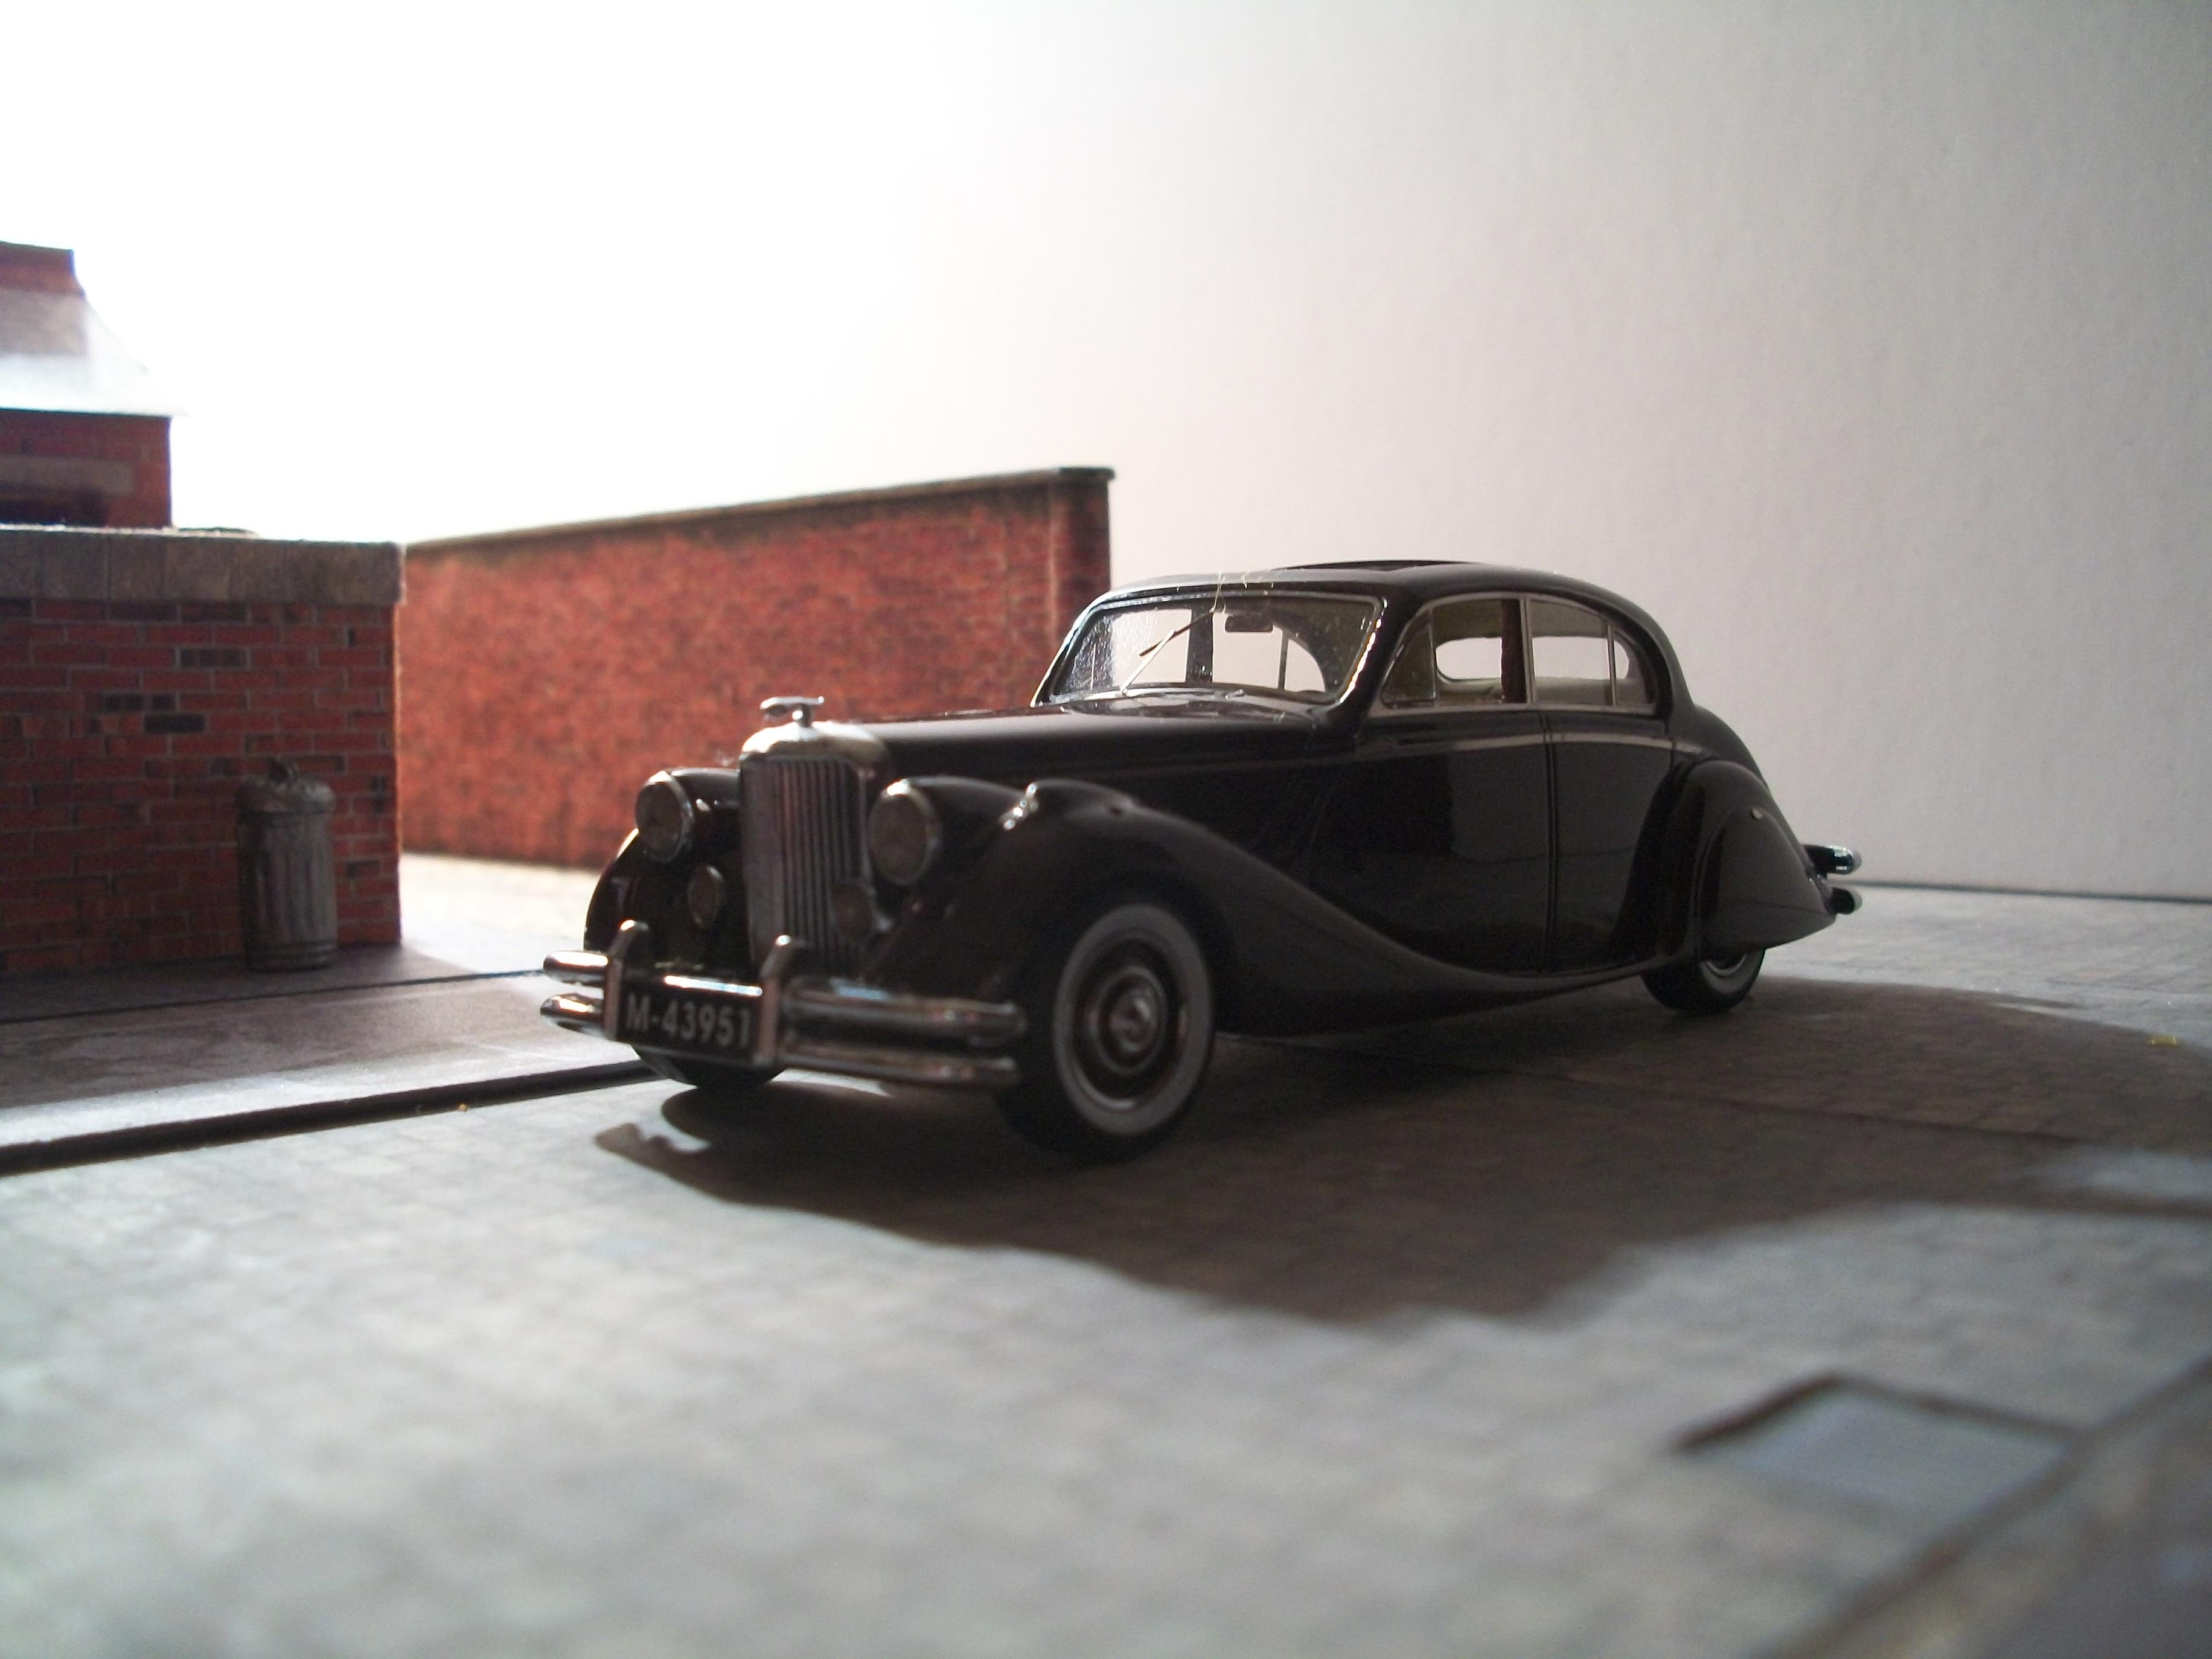
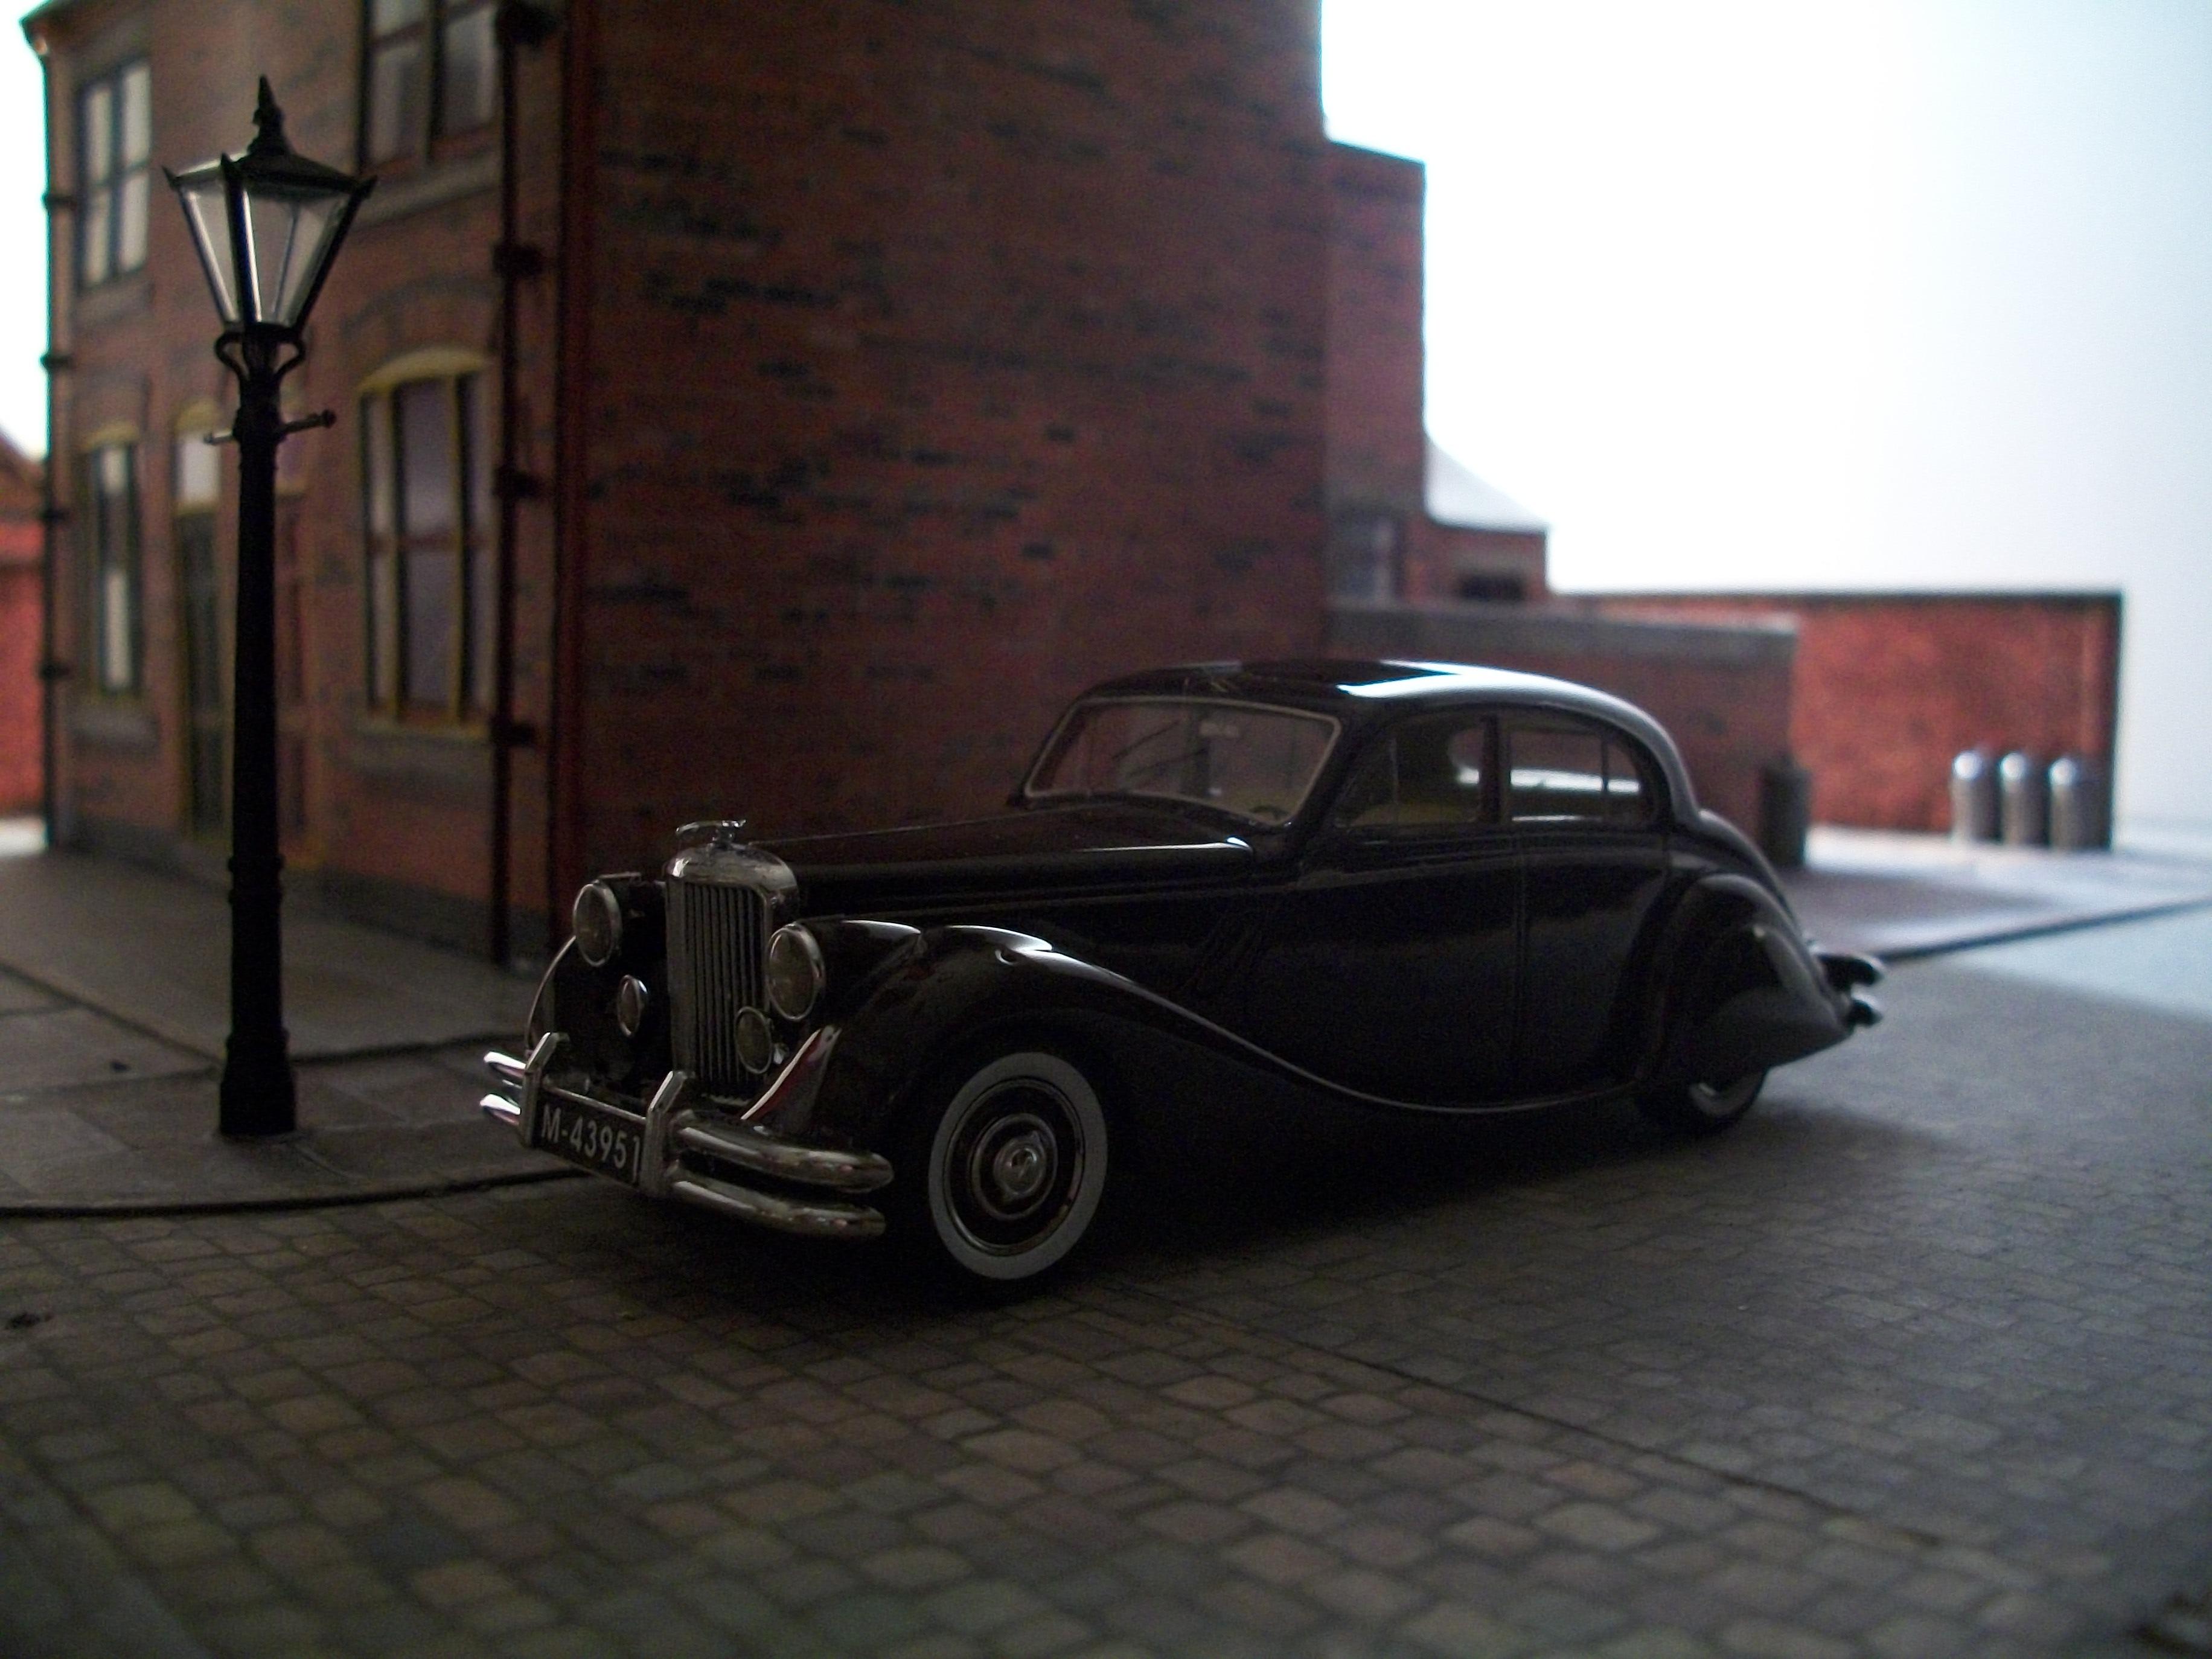
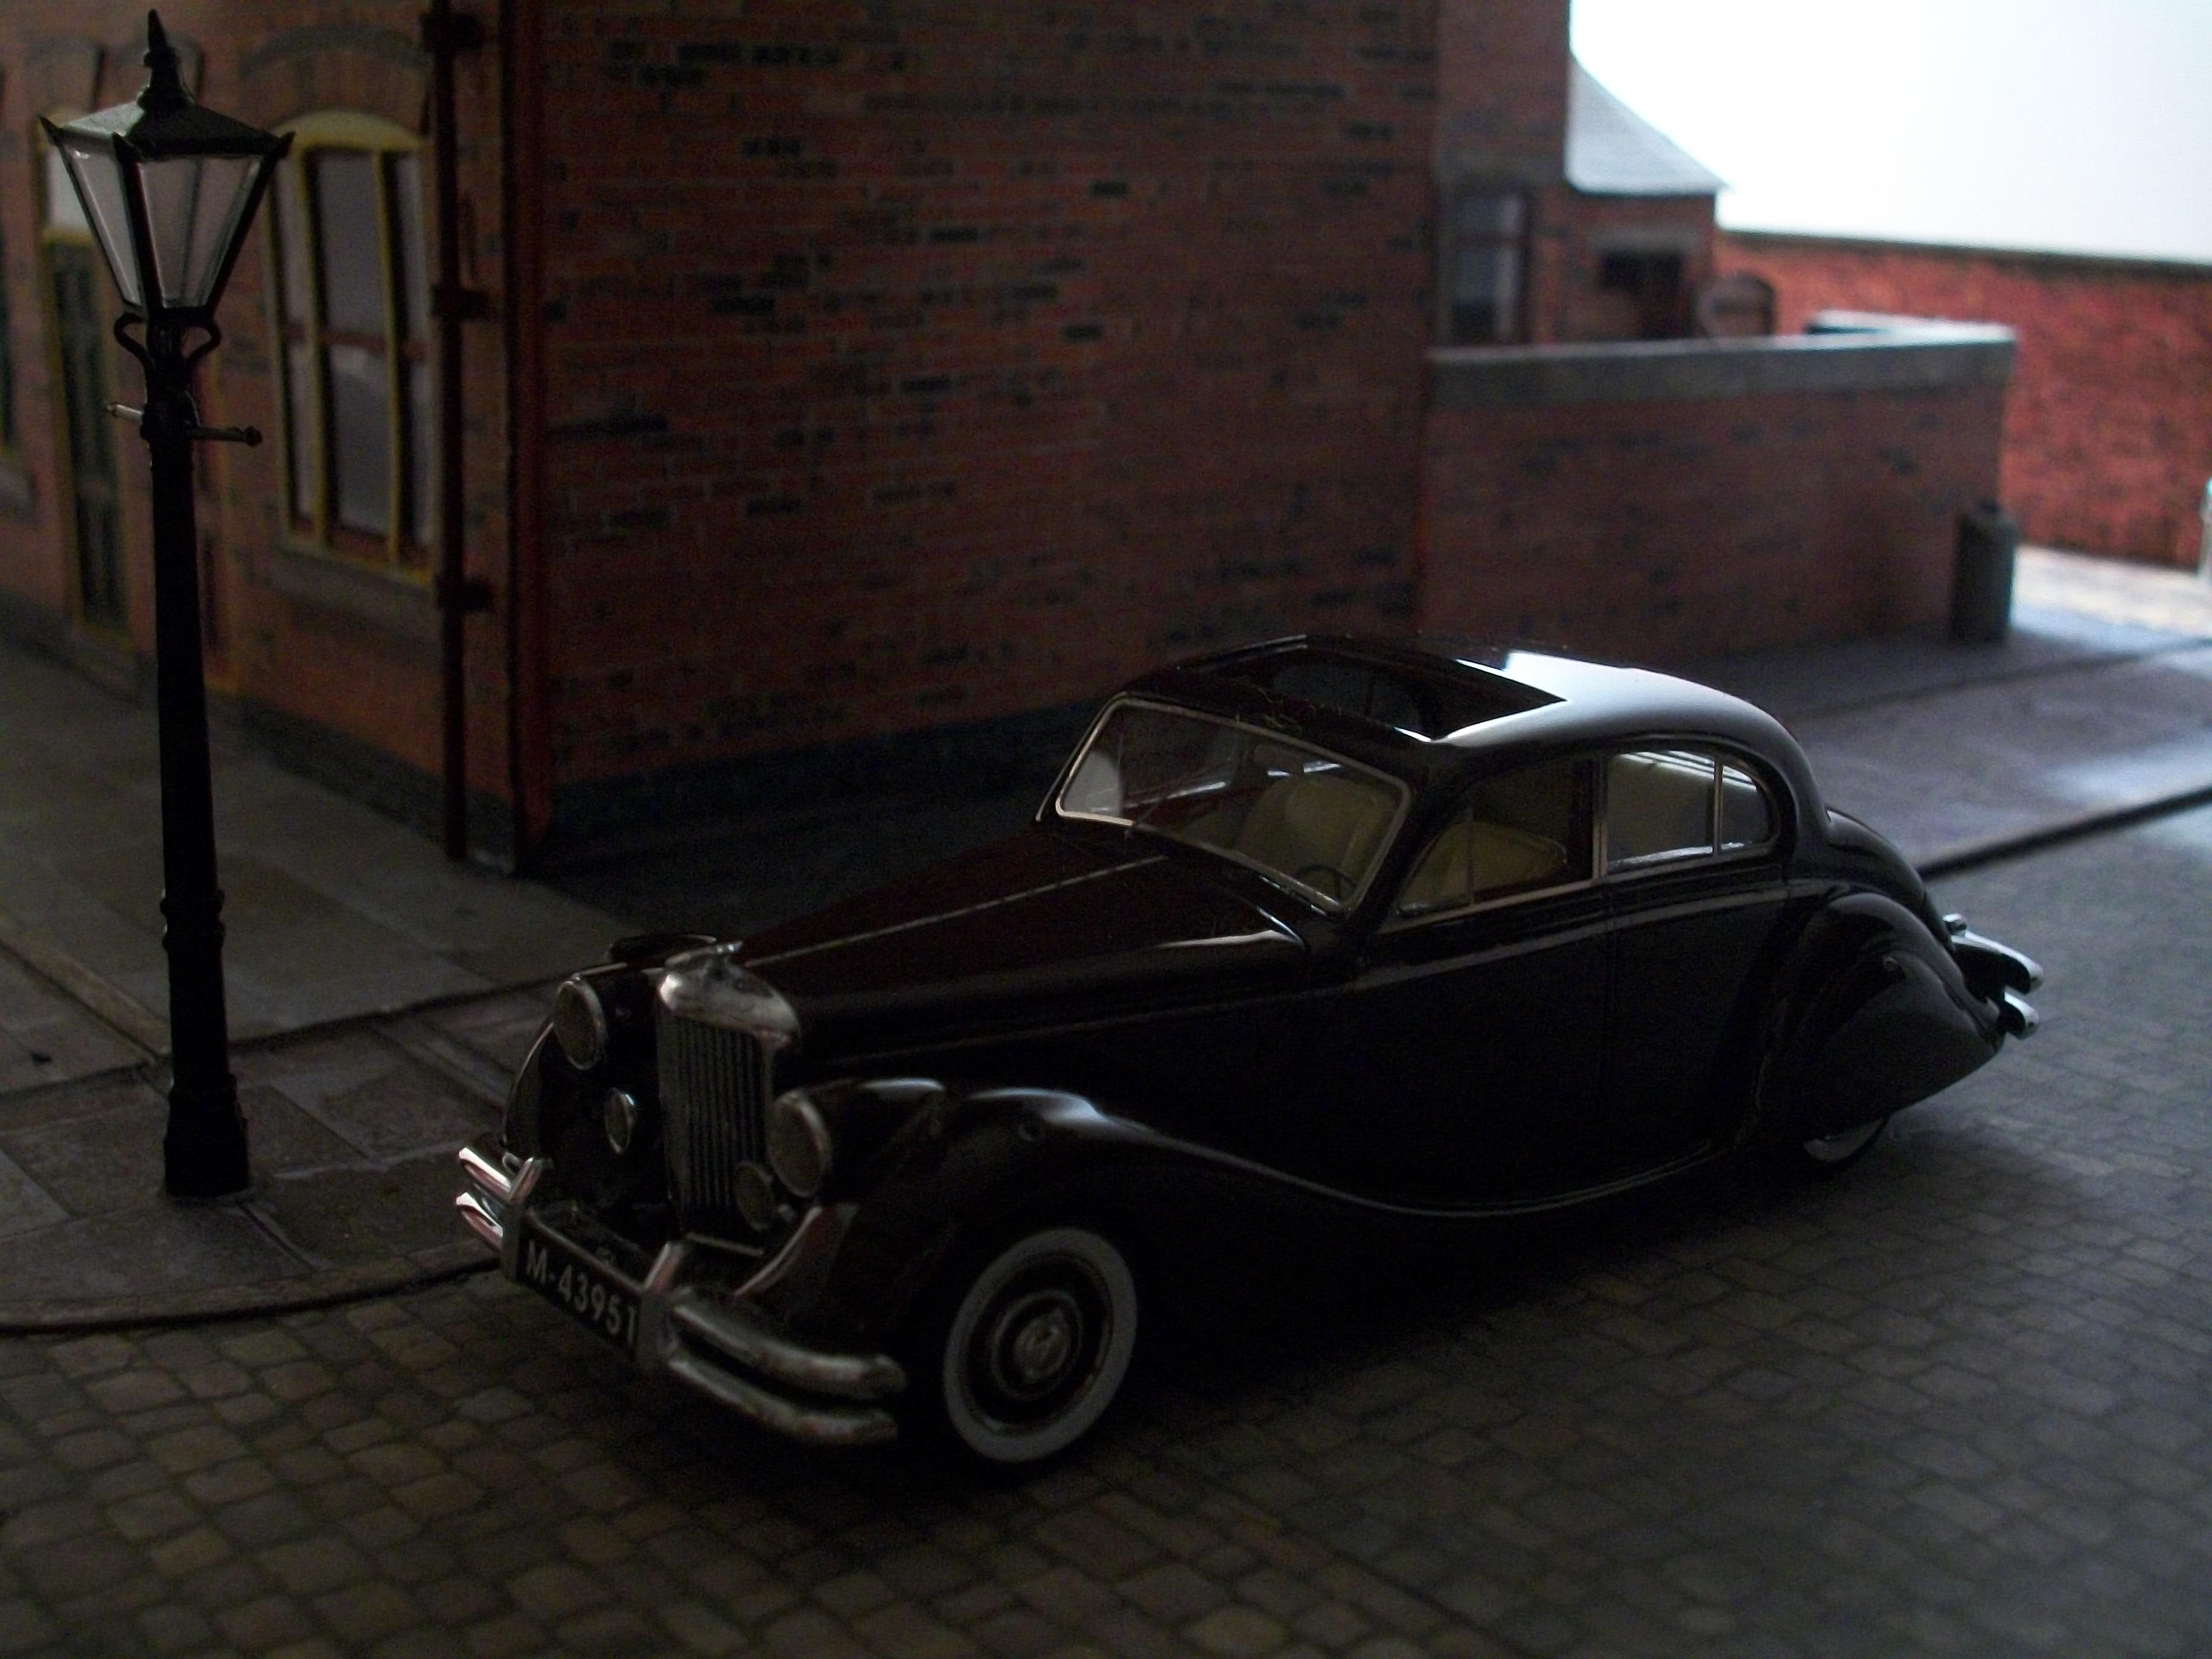
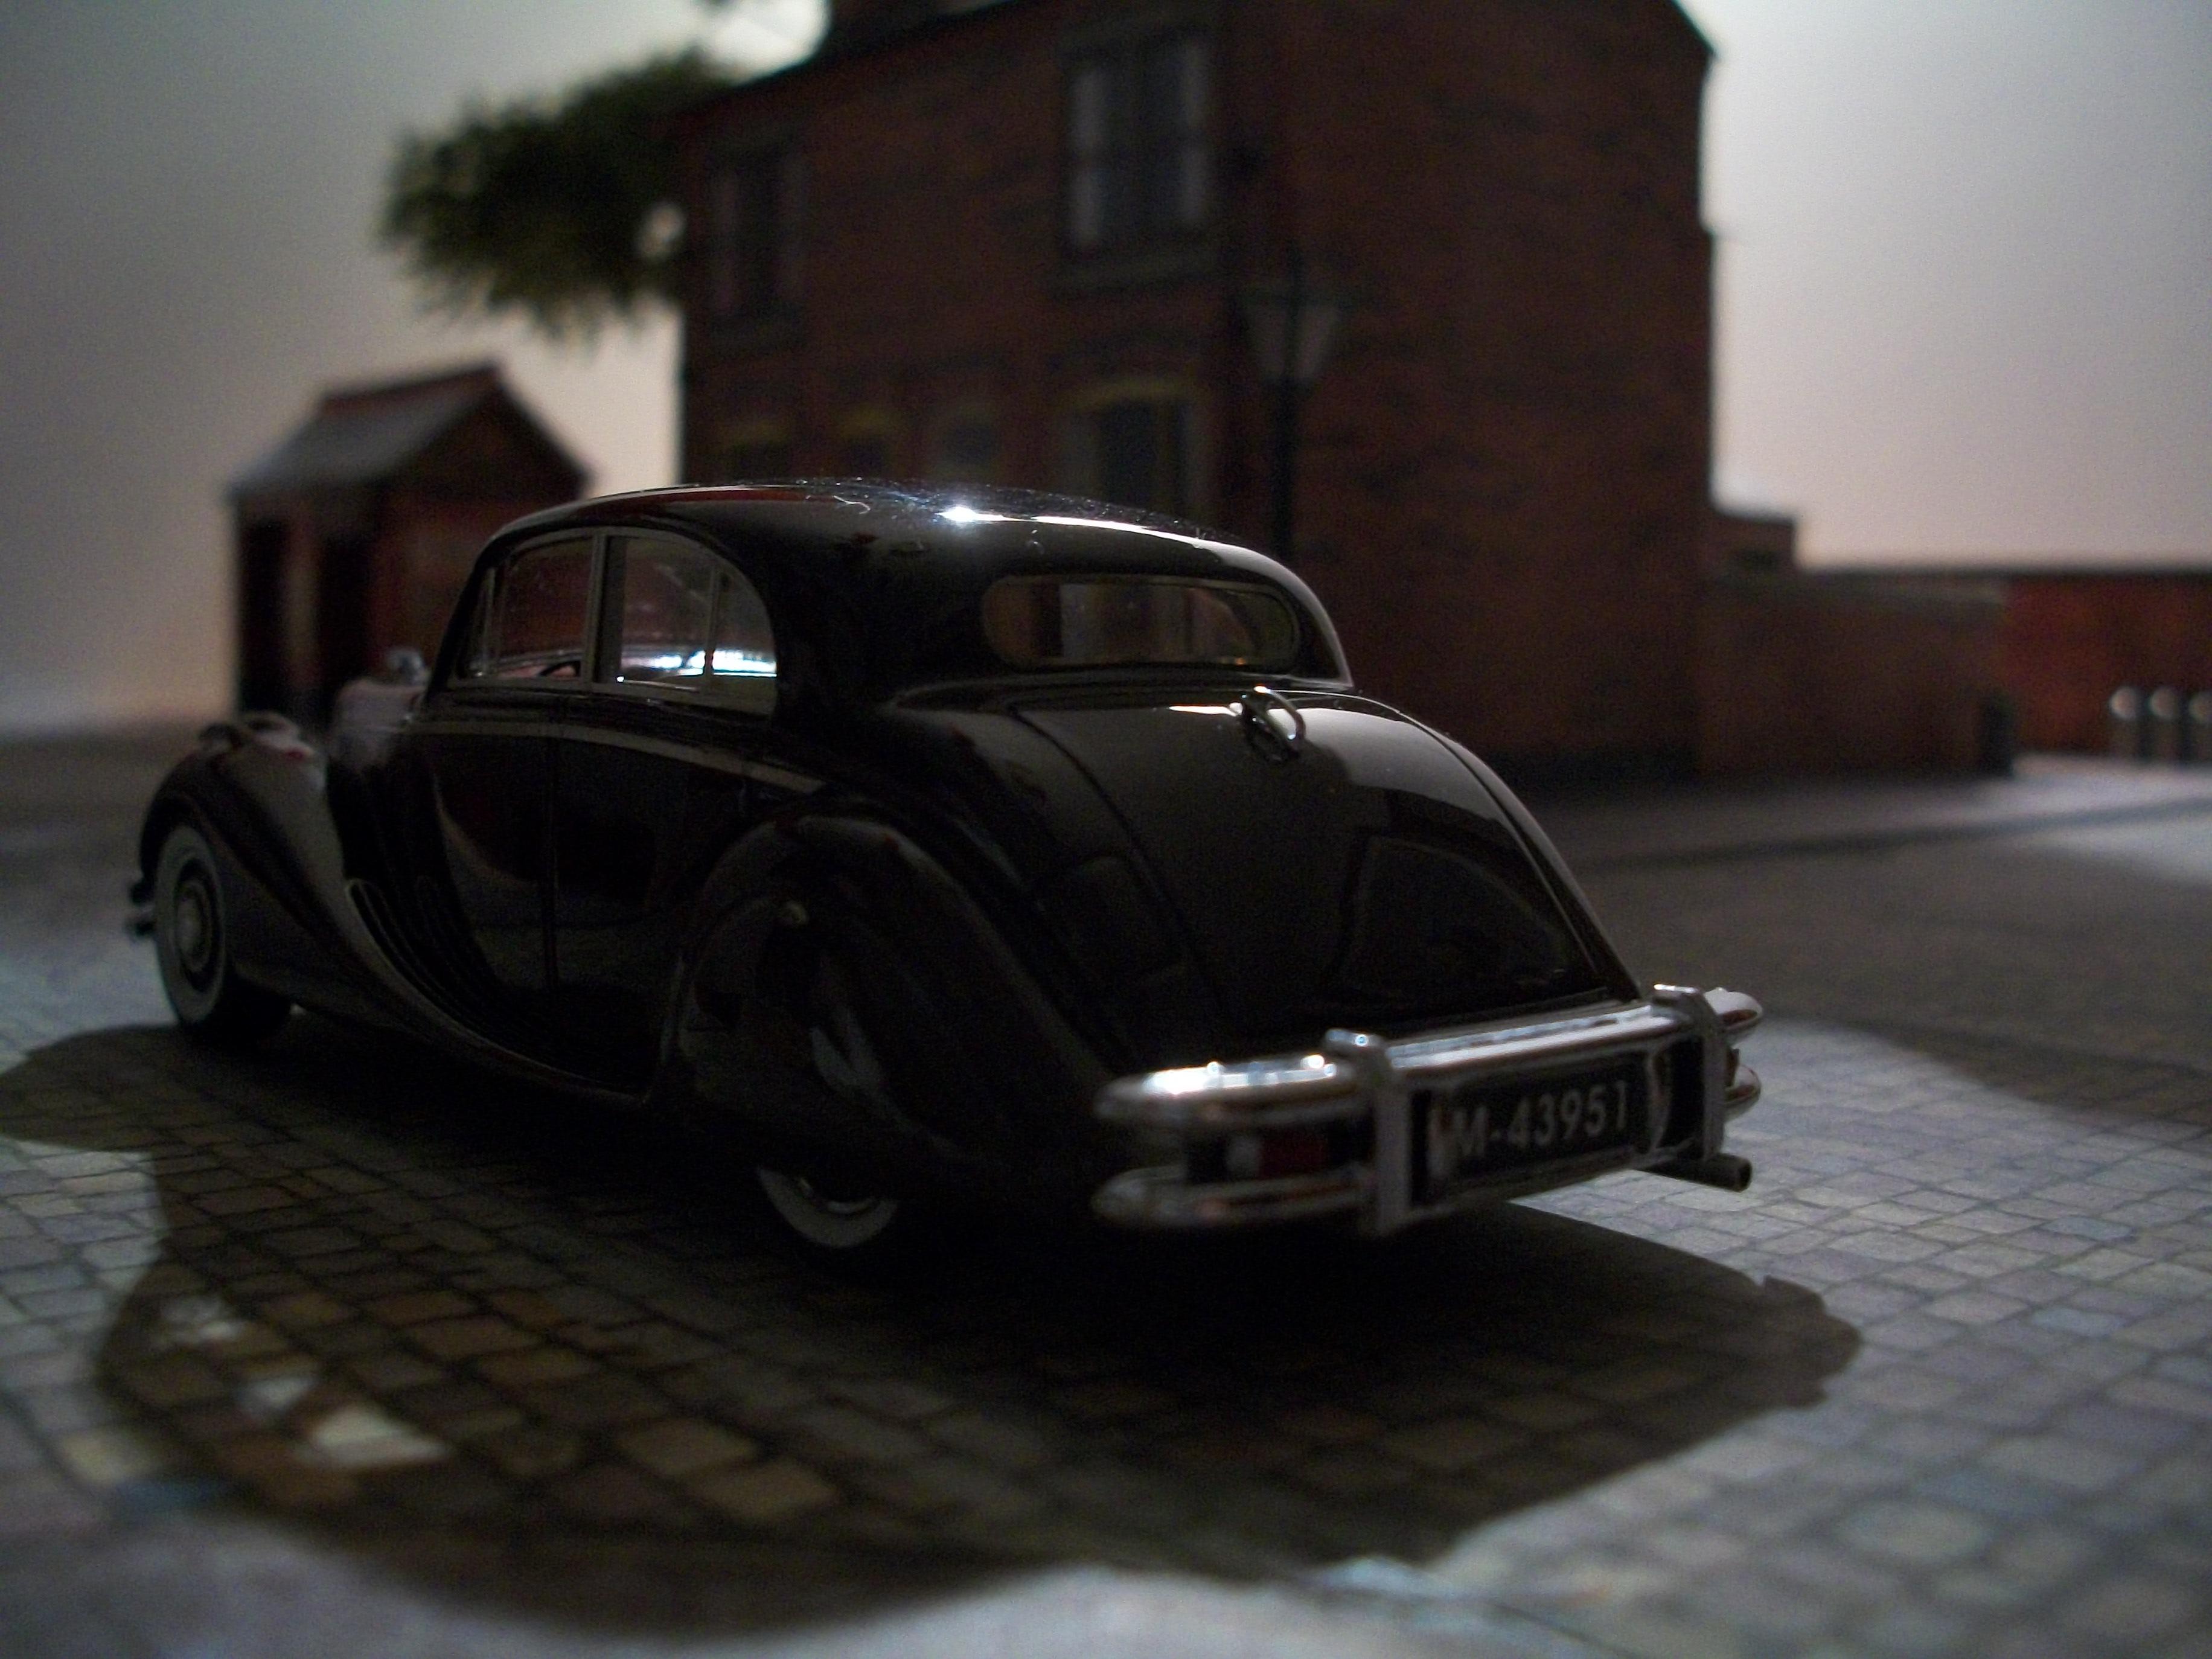
Oh, I forgot to include these photos in my previous post, Eric..... showing the Jaguar MK V now that it has been fully restored. One the wheels had come off in the box, the radiator grille mascot was missing, the windscreen wipers were missing and the front bumper was bent upwards slightly. All issues resolved now. David
-
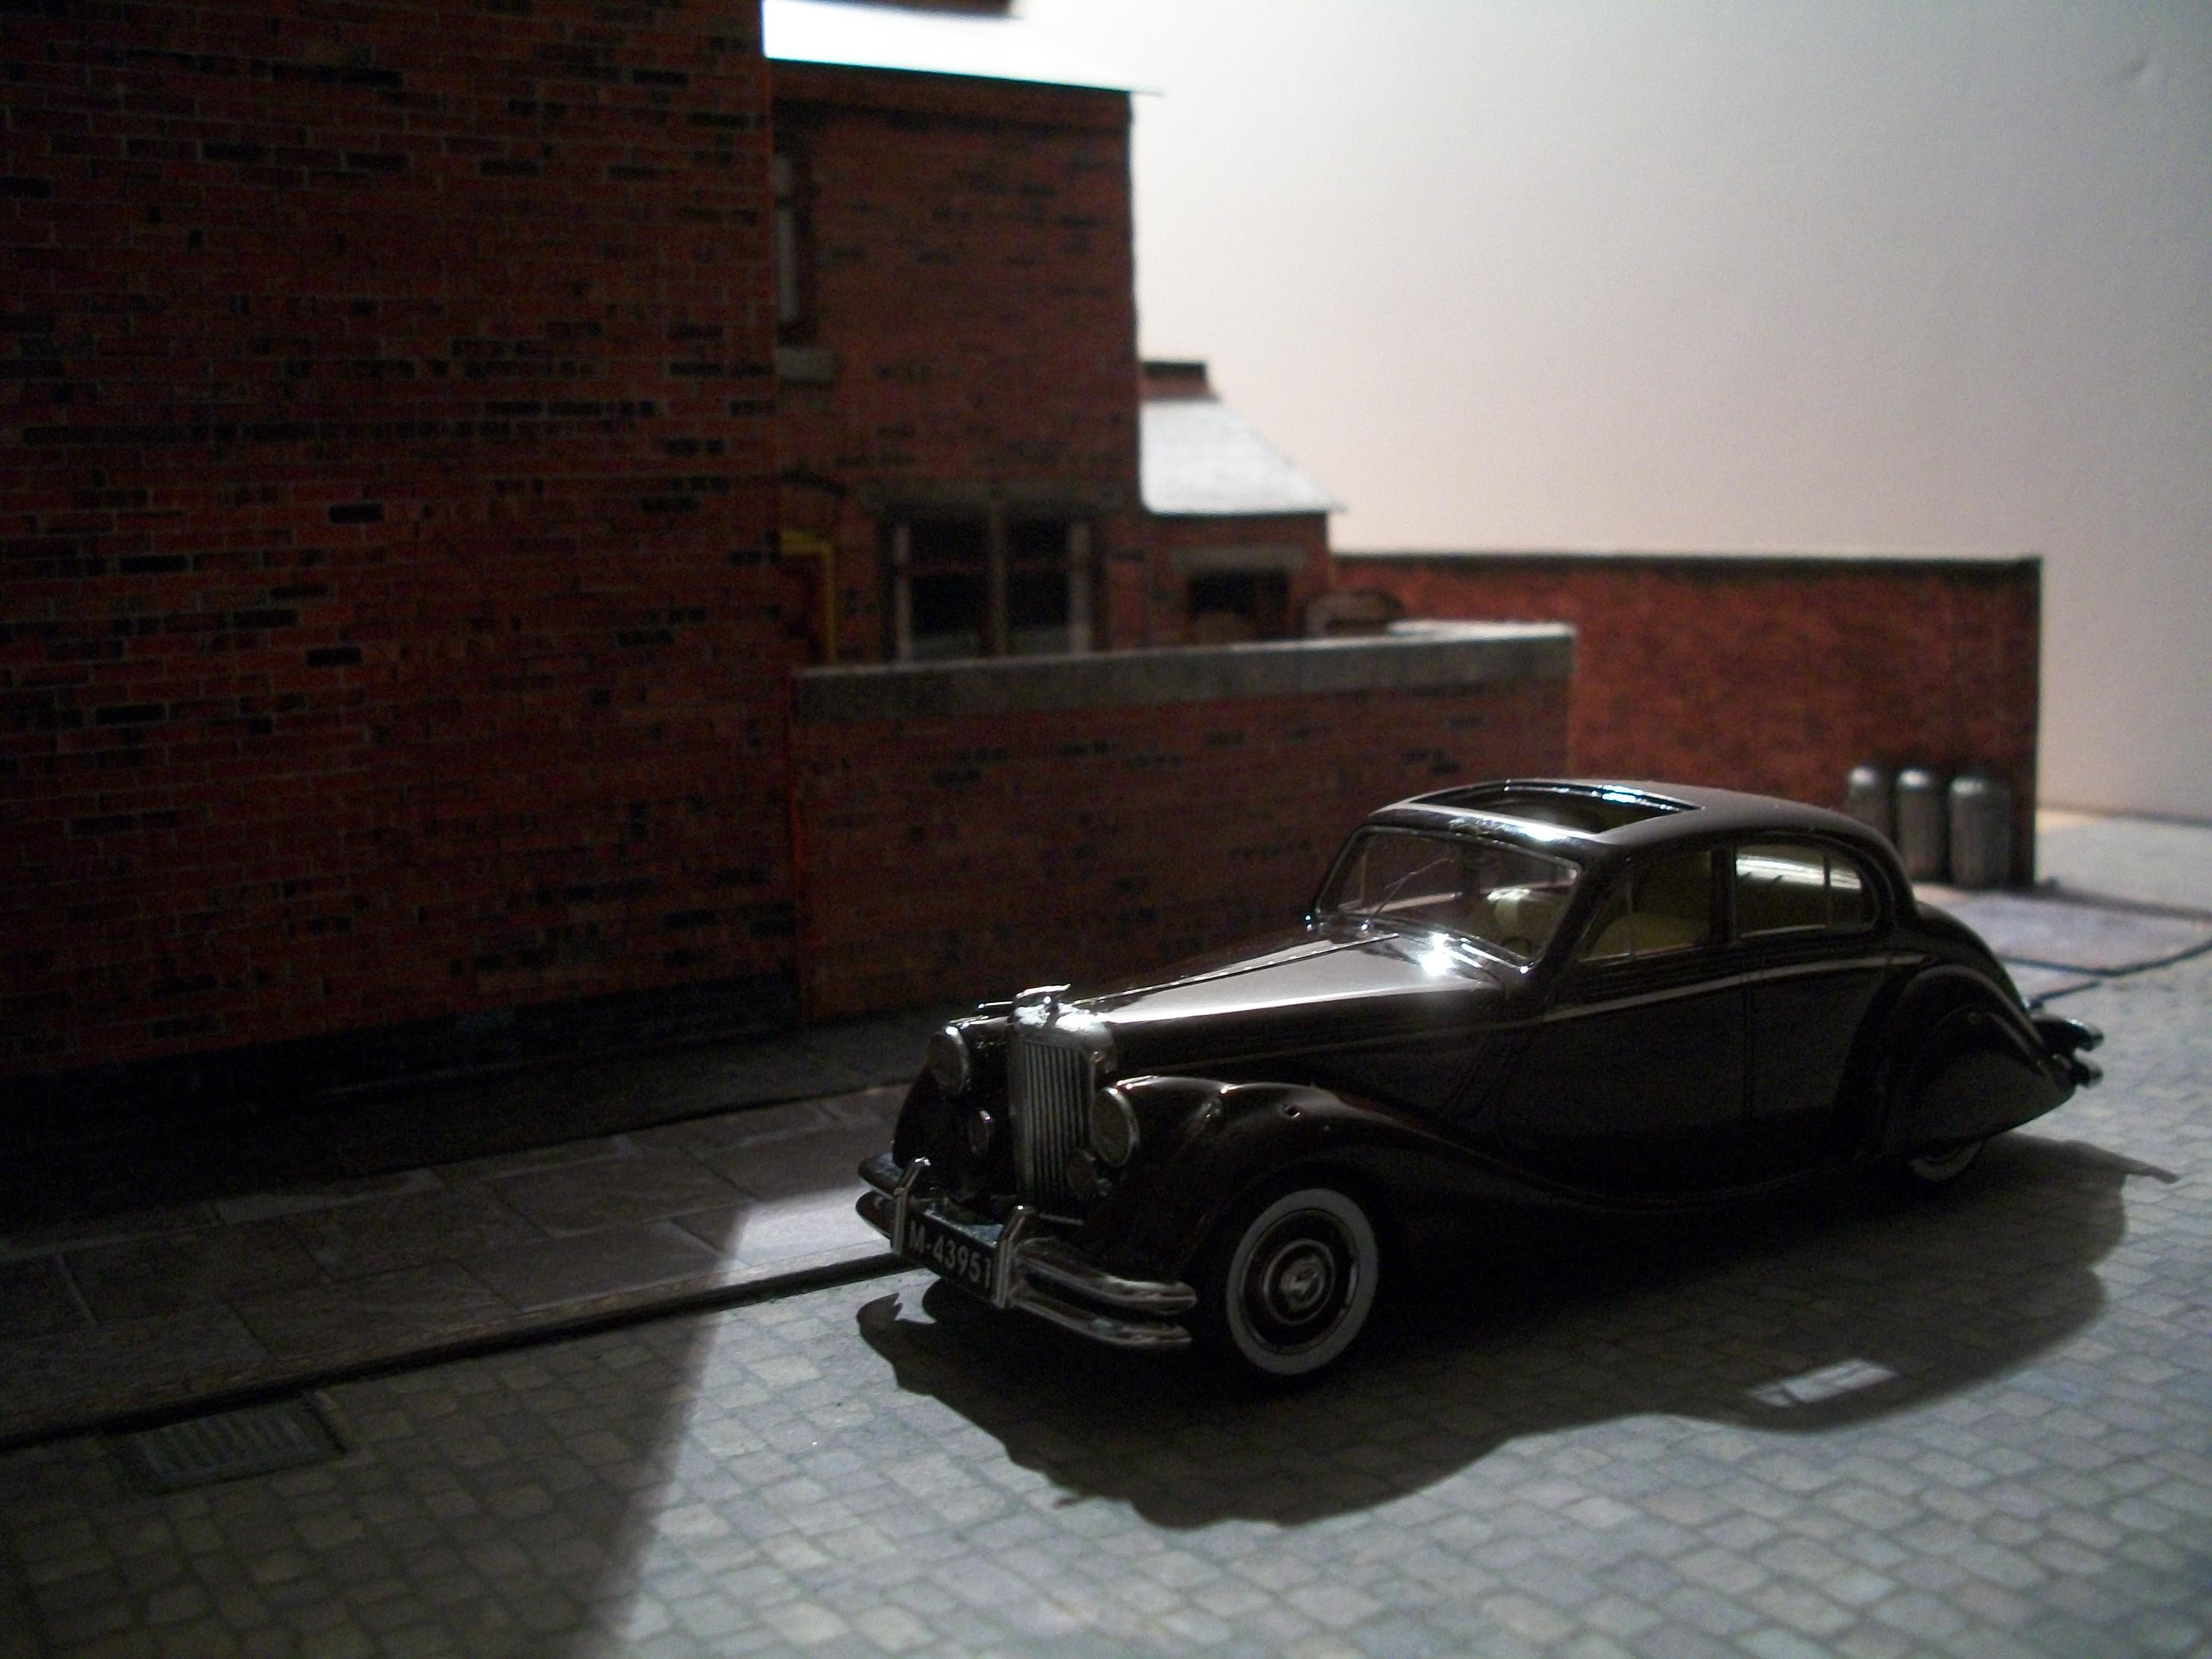
Thank you, Eric...... and I think the Jaguar MK V compares well alongside the Rolls-Royce Silver Dawn and Silver Wraith of the same time period. This part of the latest 1:43 scale diorama is what I am calling Diorama 3, and the next one to be constructed will be known as Diorama 4, which will be the Hooper & Co factory at Western Avenue, Park Royal, Acton, London...... the idea is that both Diorama 3 and Diorama 4 will merge together as one larger setting for next year's exhibition during June of 2020. Diorama 2 was the 1:43 scale version of the Hooper & Co, St James's St showroom building, and Diorama 1 was the 1:24 scale Hooper showroom building. David
-
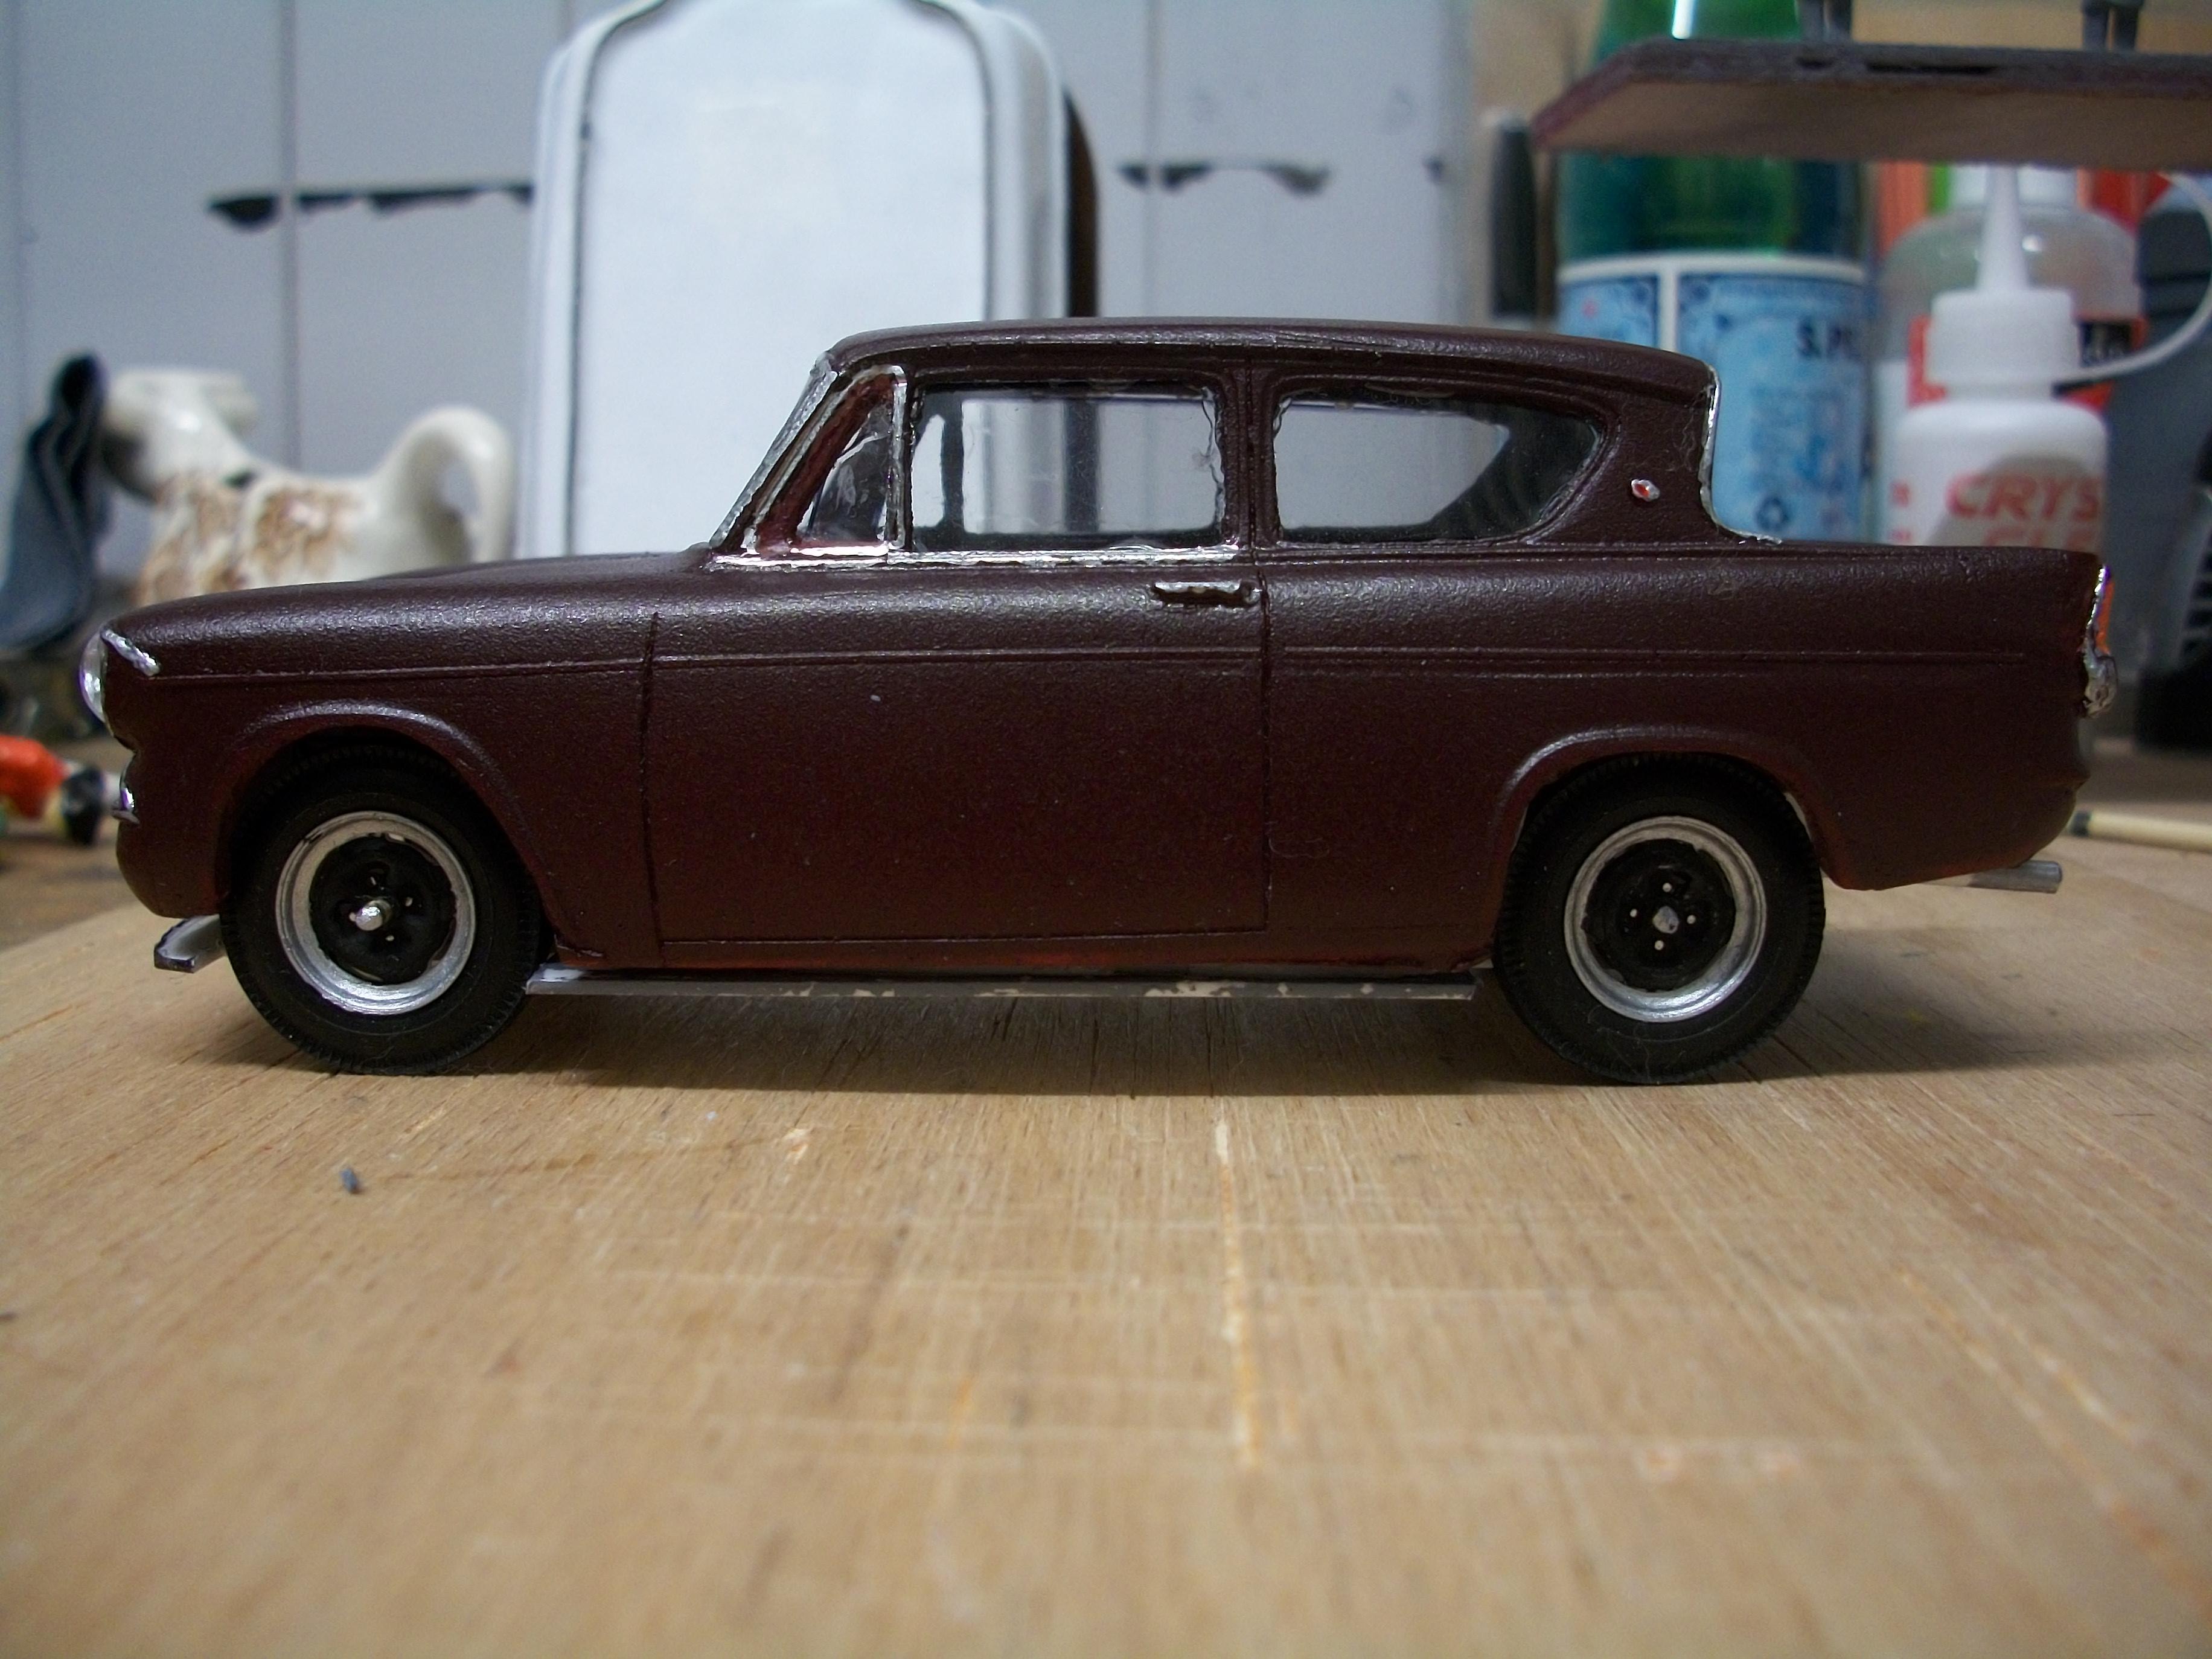
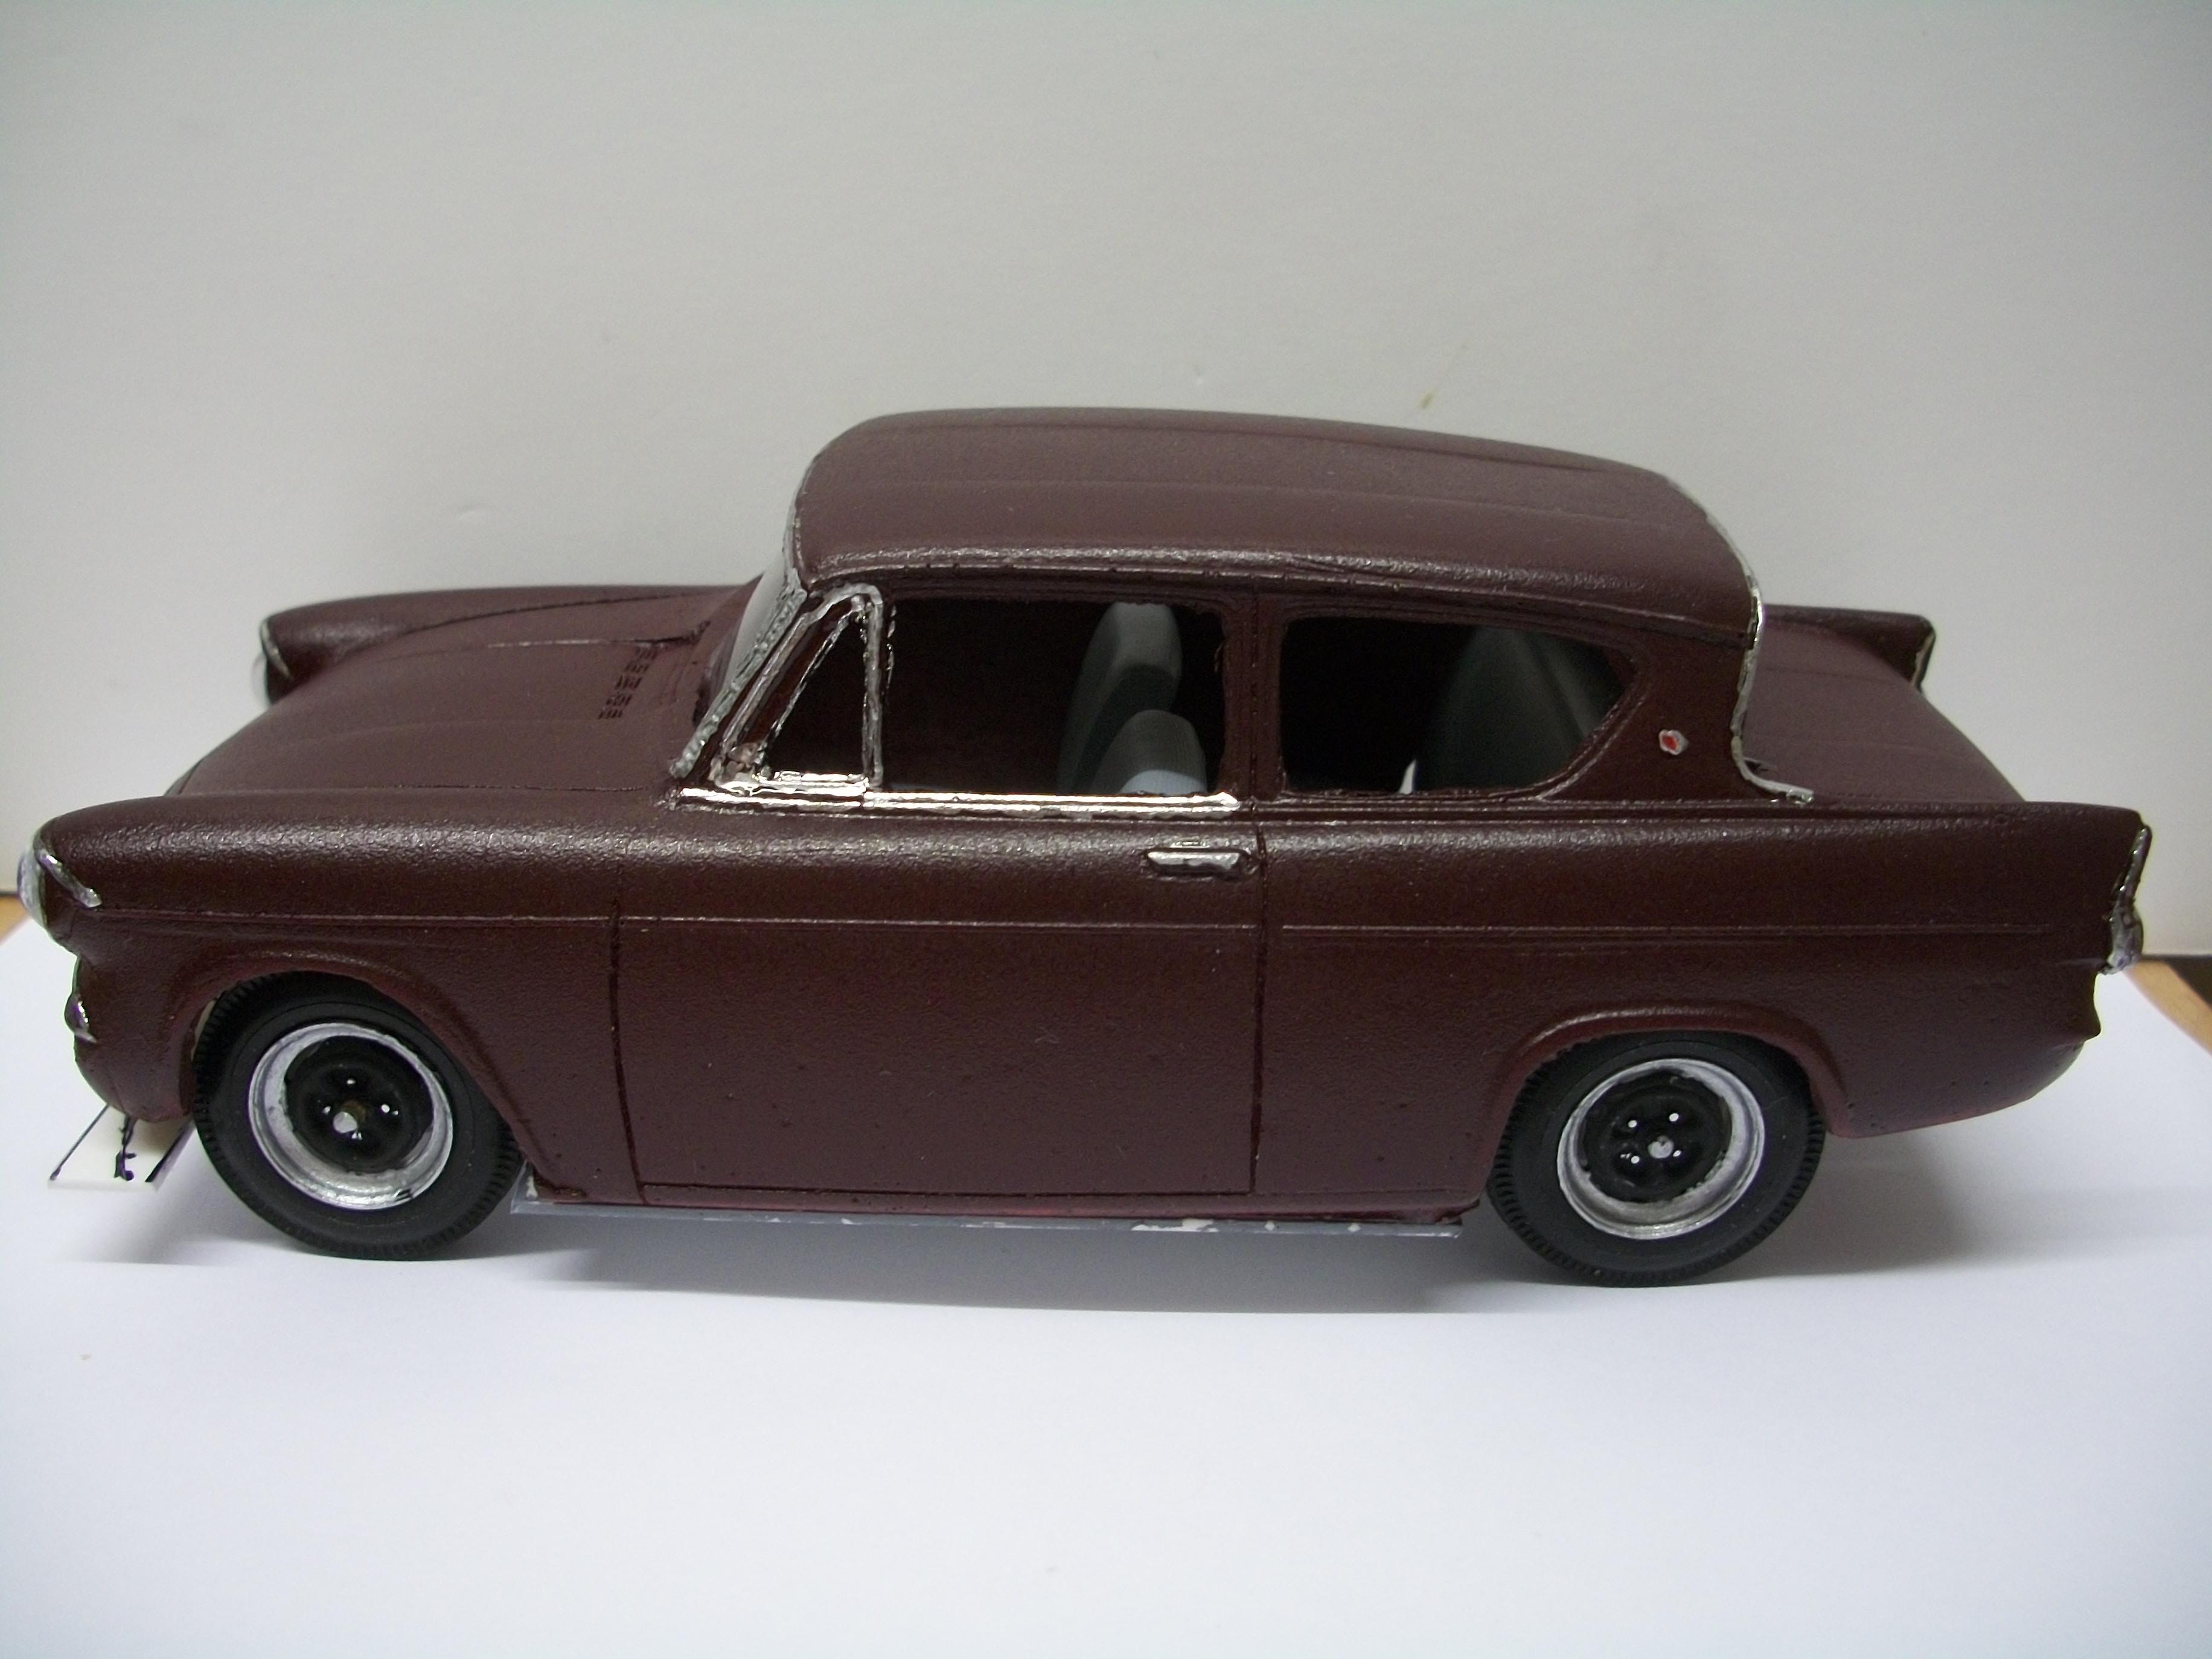
Further work this weekend on the Anglia 105E, which saw the dashboard fitted, also the exhaust tailpipe and fuel filler cap, as well as some work on the front sidelights and road tax disc. The back end of the car seems to be too high off the ground, and both the front and rear track of the wheels might not be quite wide enough. David
-
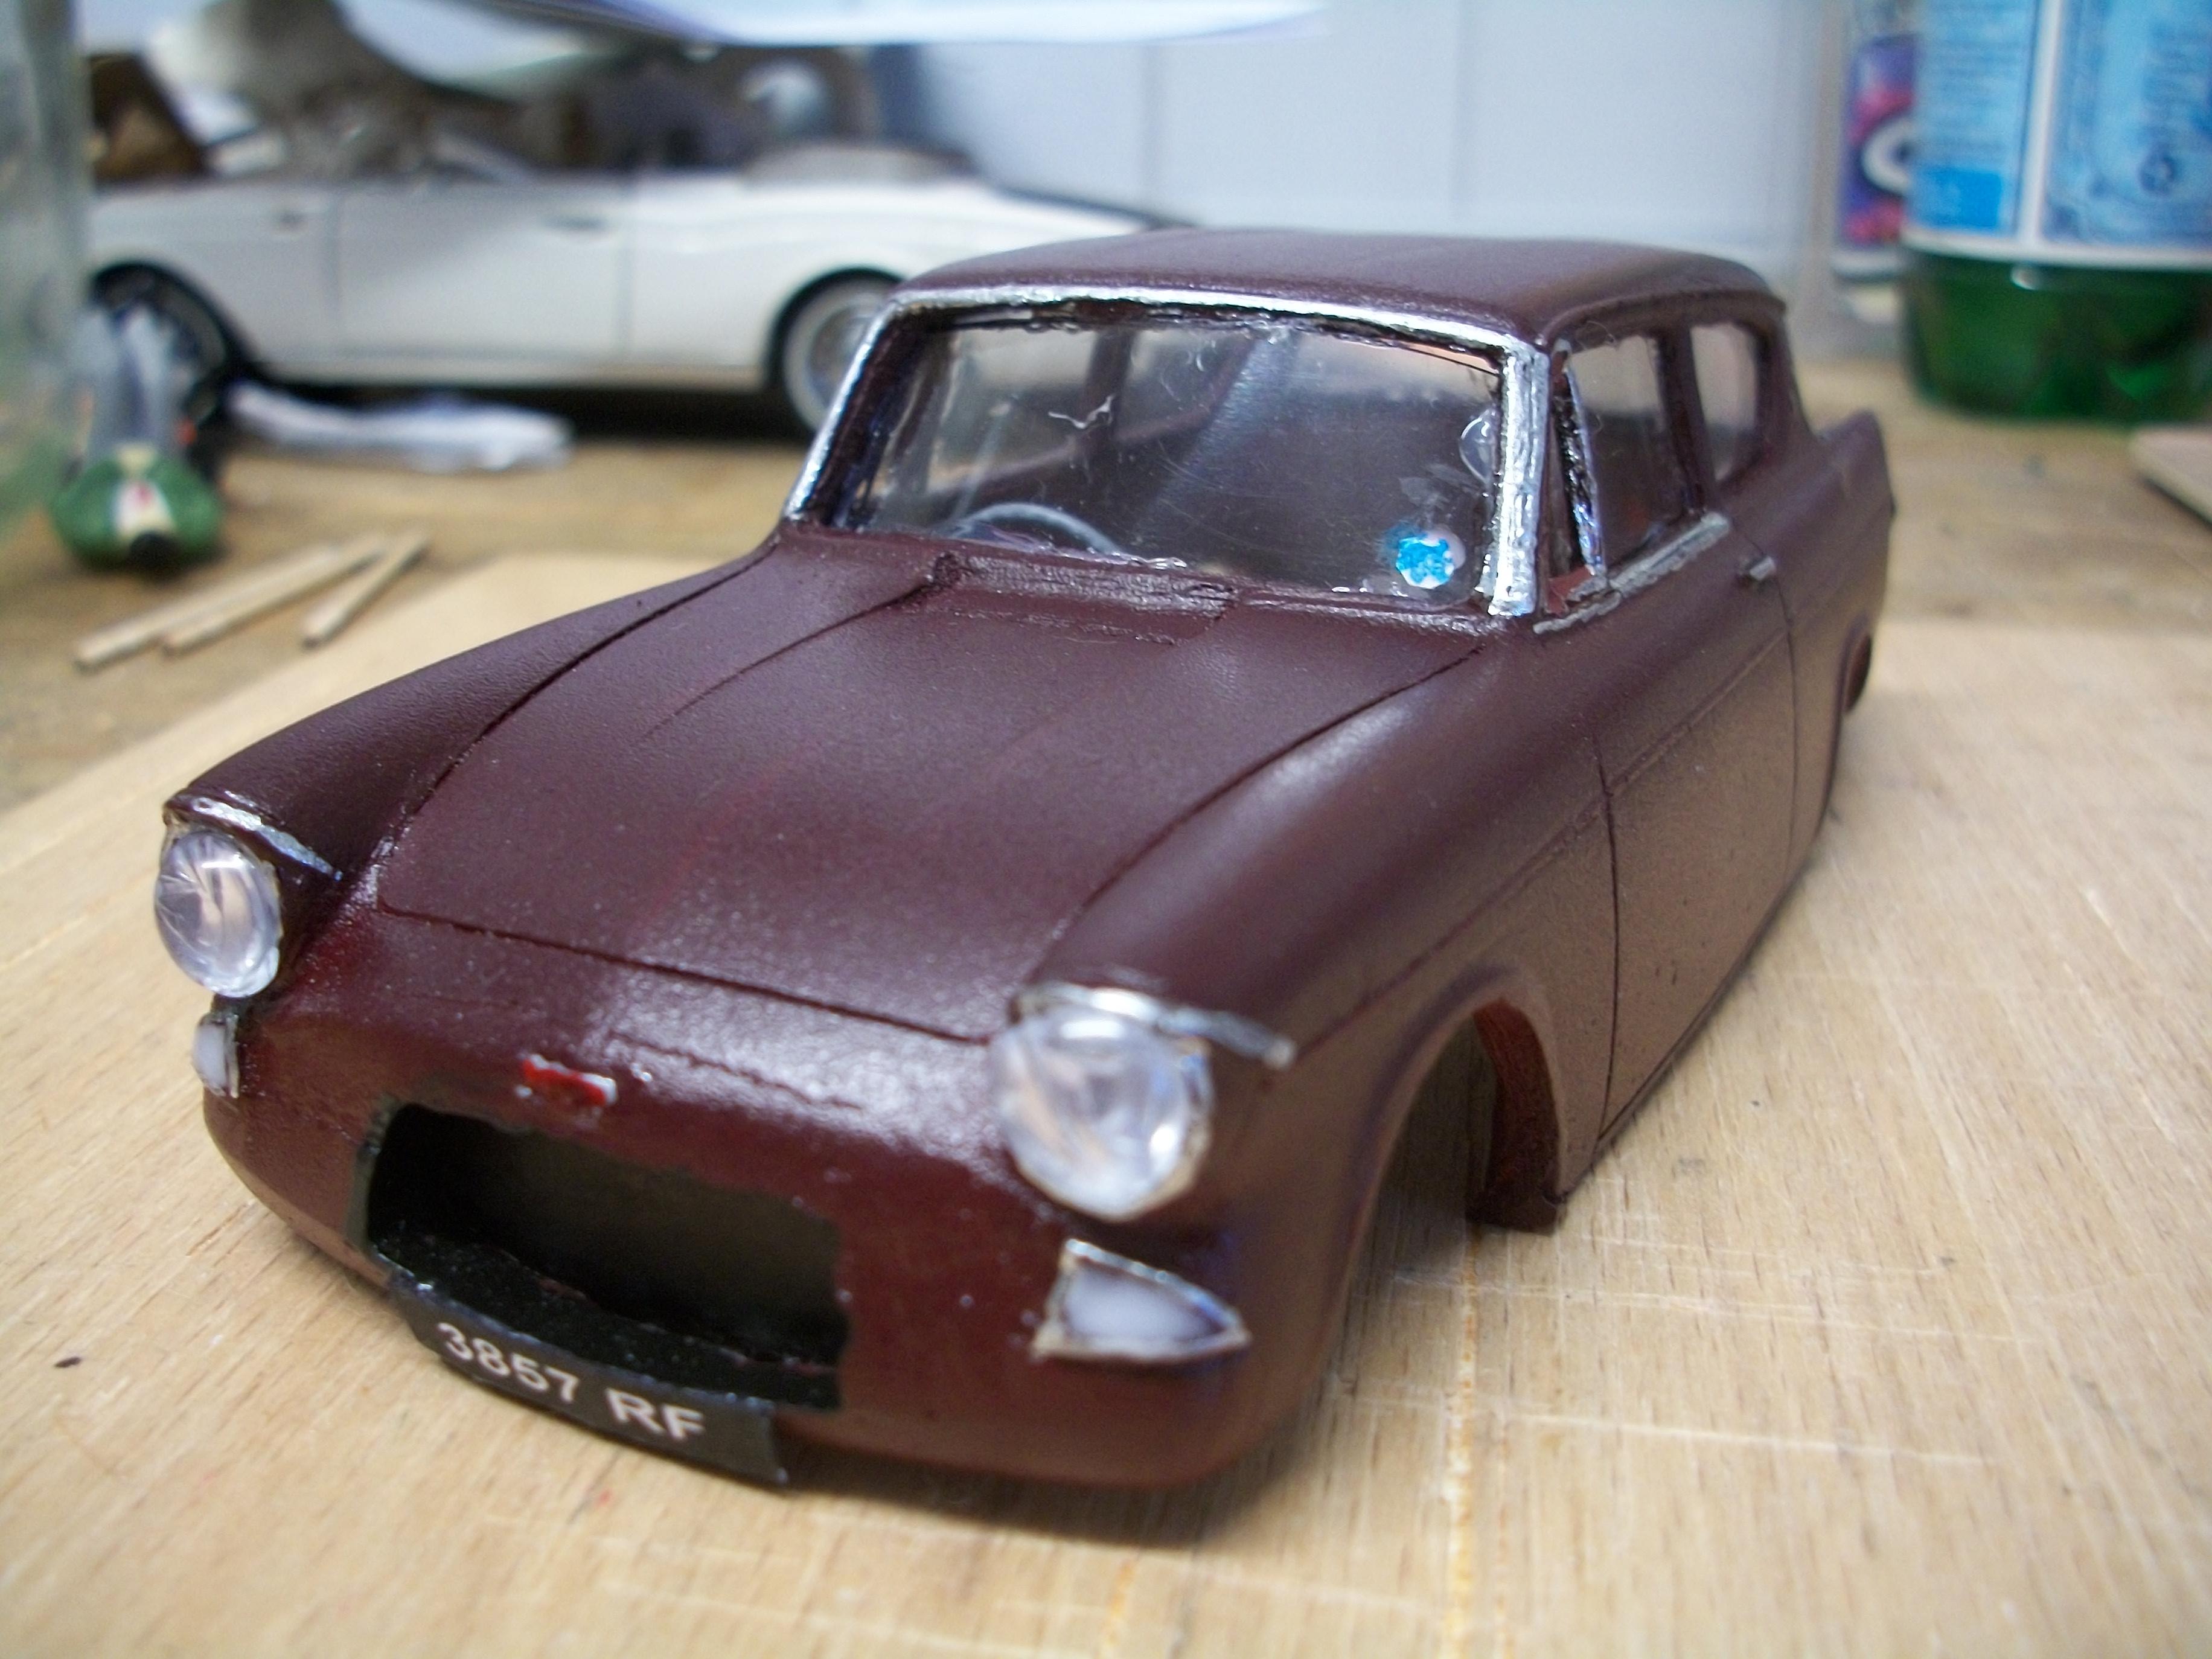
Thanks, Guy...... and what a surprising coincidence...... not only was your first car an Anglia 105E but it was also Imperial Maroon ! The car in your photo looks in reasonable shape, and apart from the paintwork on the nearside front wing the body is pretty good. It has an original tax disc also, I notice. Here are a couple more photos of the build, which is nearing completion. The dashboard is ready to be fitted, complete with steering wheel and speedometer. The front air intake which would normally be hidden by the chrome grille, is now painted satin black and the front registration plate is in place. Behind the air intake there is now a black backing panel that represents where the cooling radiator would have been. Windscreen glass, side windows and rear window are all fitted. David
-
Picked up this nice 1:43 diecast model car from Ebay, which is a 1950 Jaguar MK V by Neo in brown. The car is LHD with US registration plates I think, also white wall tyres and an open sun roof. This is a very realistic looking model, so ideal for my photography, and it is quite rare to find. David
-
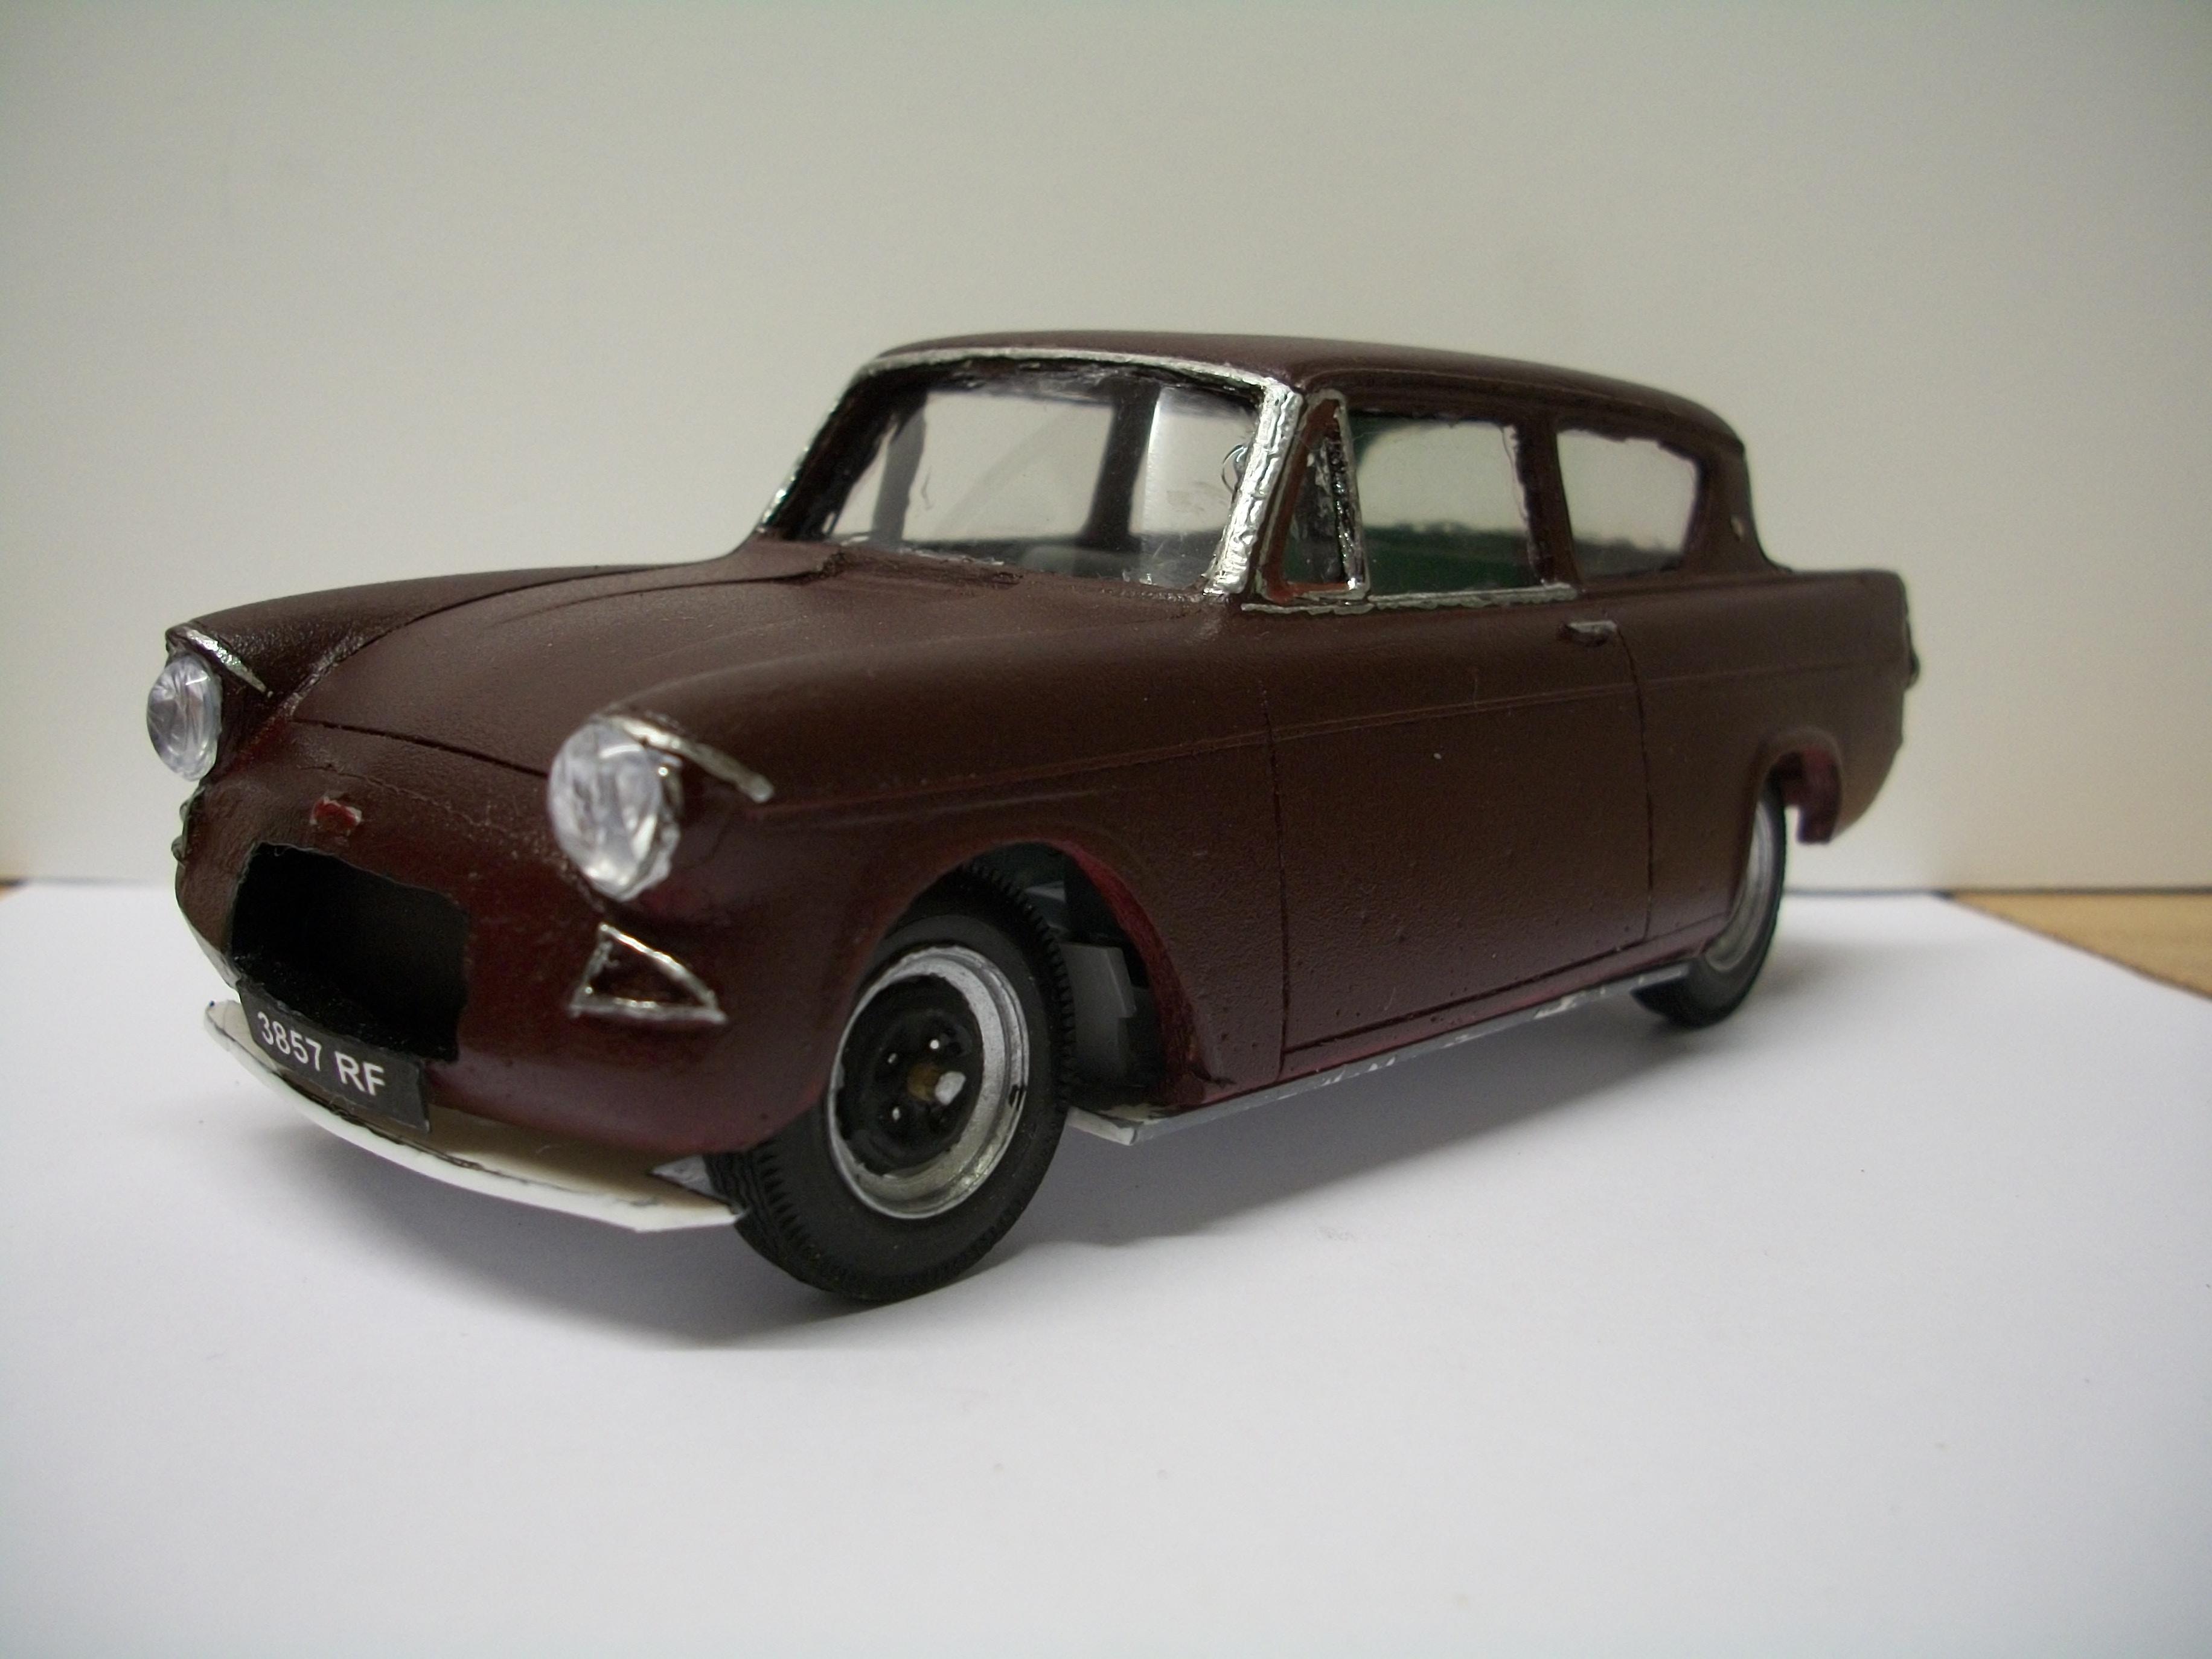
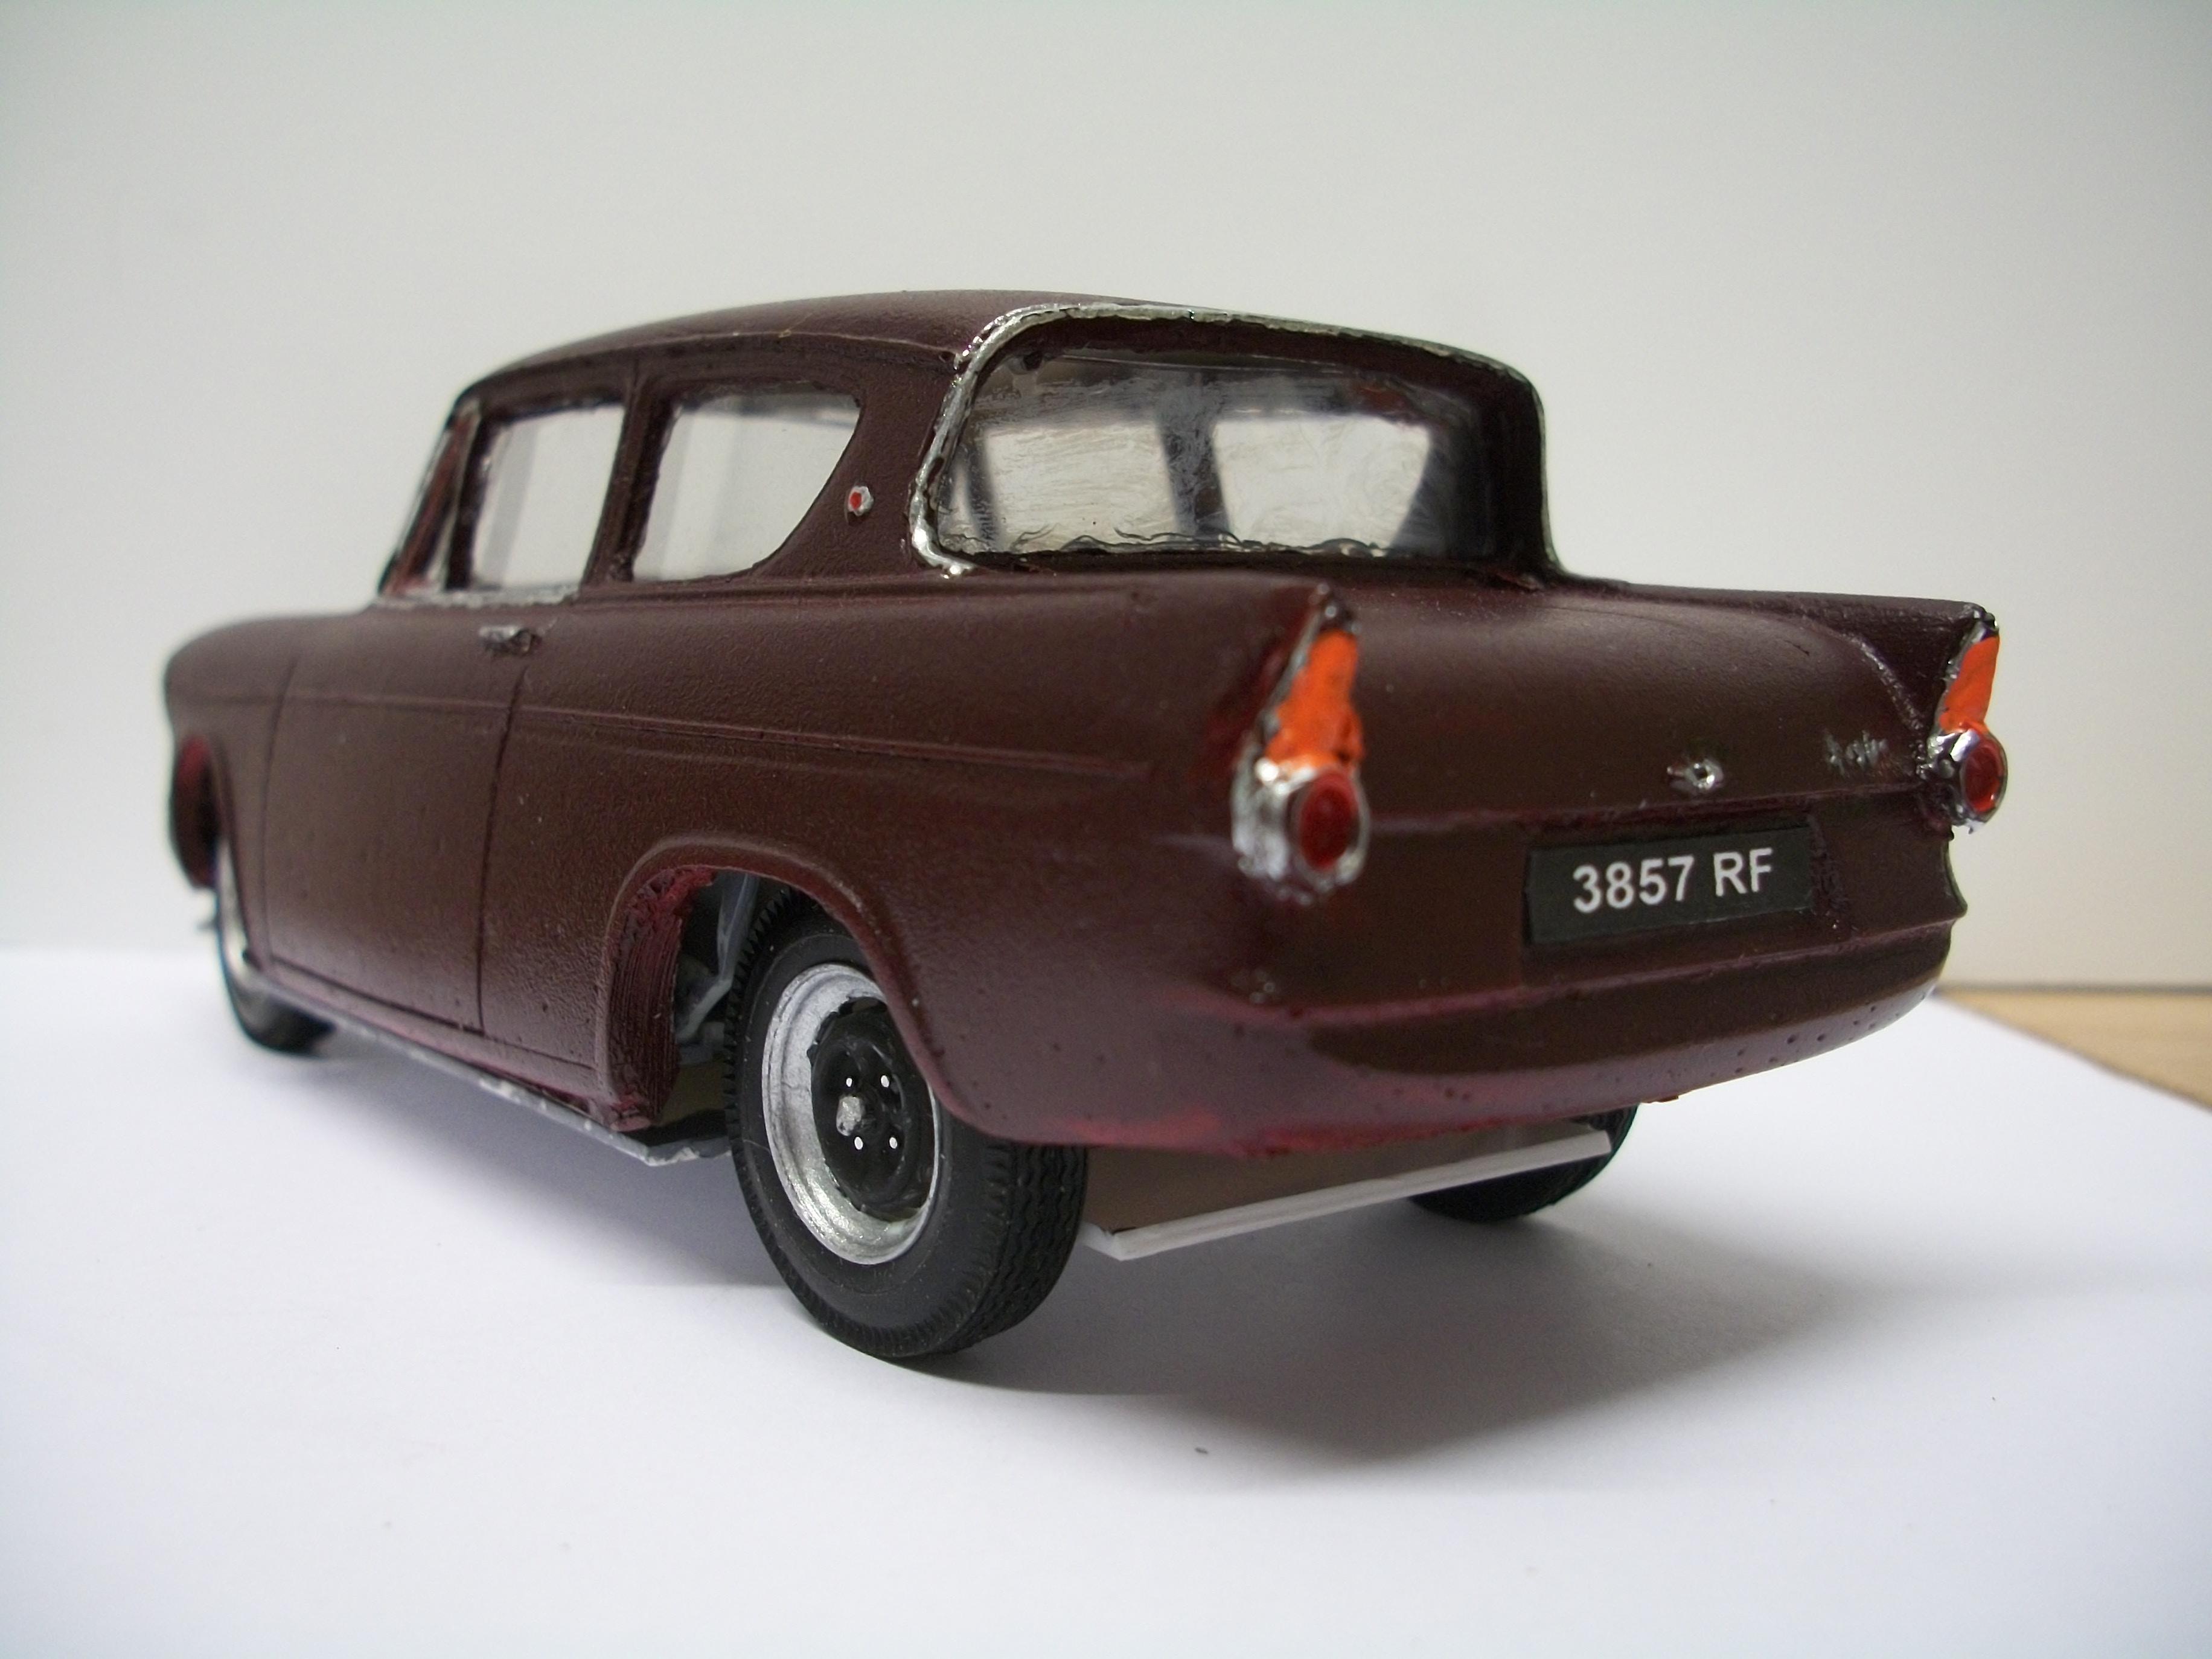
Nice tidy joins between the doors and the body...... very smooth lines for this car. David
-
Thanks a lot, Eric..... this is my second scratch built model car, with the first being the Morris Minor Traveller which I gave to my cousin, as it was a replica of his late father's car. It was nice to build a model car by fabricating the parts, rather than following the instructions that come with a boxed kit. David
-
Here is the latest addition to the 1:43 collection of scale model cars, photographed in a diorama setting. This is a 1950 Jaguar MK V diecast by NEO and it is a left-hand drive version with sun roof and white wall tyres, finished in brown paintwork. I had a feeling that this car would photograph well, and I was not disappointed. The MK V was the first post war Jaguar to be produced, from 1948 to 1951. David
-
Wow, 130 bhp !......... that's a bit more than the 39 bhp for the standard 997 cc engine David
-
Thank you, Shay....... your comment is much appreciated. David
-
Thanks, Dann........ hoping to complete the build this weekend, but the quality of this model is not good enough to go into the ' Under Glass ' section, because I believe this is not my best work. There are many issues that I can see with my critical eye, and there are all sorts of areas where I could have done much better. This one is a sort of in between build while two other projects are evolving. The paint job on this car is certainly not good enough and I know this is no Rolls-Royce, but even so it is not up to my standard, as I see it. Having said all that, this is an entirely scratch built resin body kit and next to the Rolls-Royce Silver Cloud the Ford Anglia 105E is my all time favourite car. ( if it's good enough for Harry Potter...... it's good enough for me ! ) David
-
Absolutely wonderful, Clifford....... marvellous kit and clearly a challenging build. Even considering the large amount of money involved, this big scale model motor car has to be worth every penny / cent....... it is so real to look at, and that dark green colour is beautiful...... certainly appears to be black until you get close up. David
-
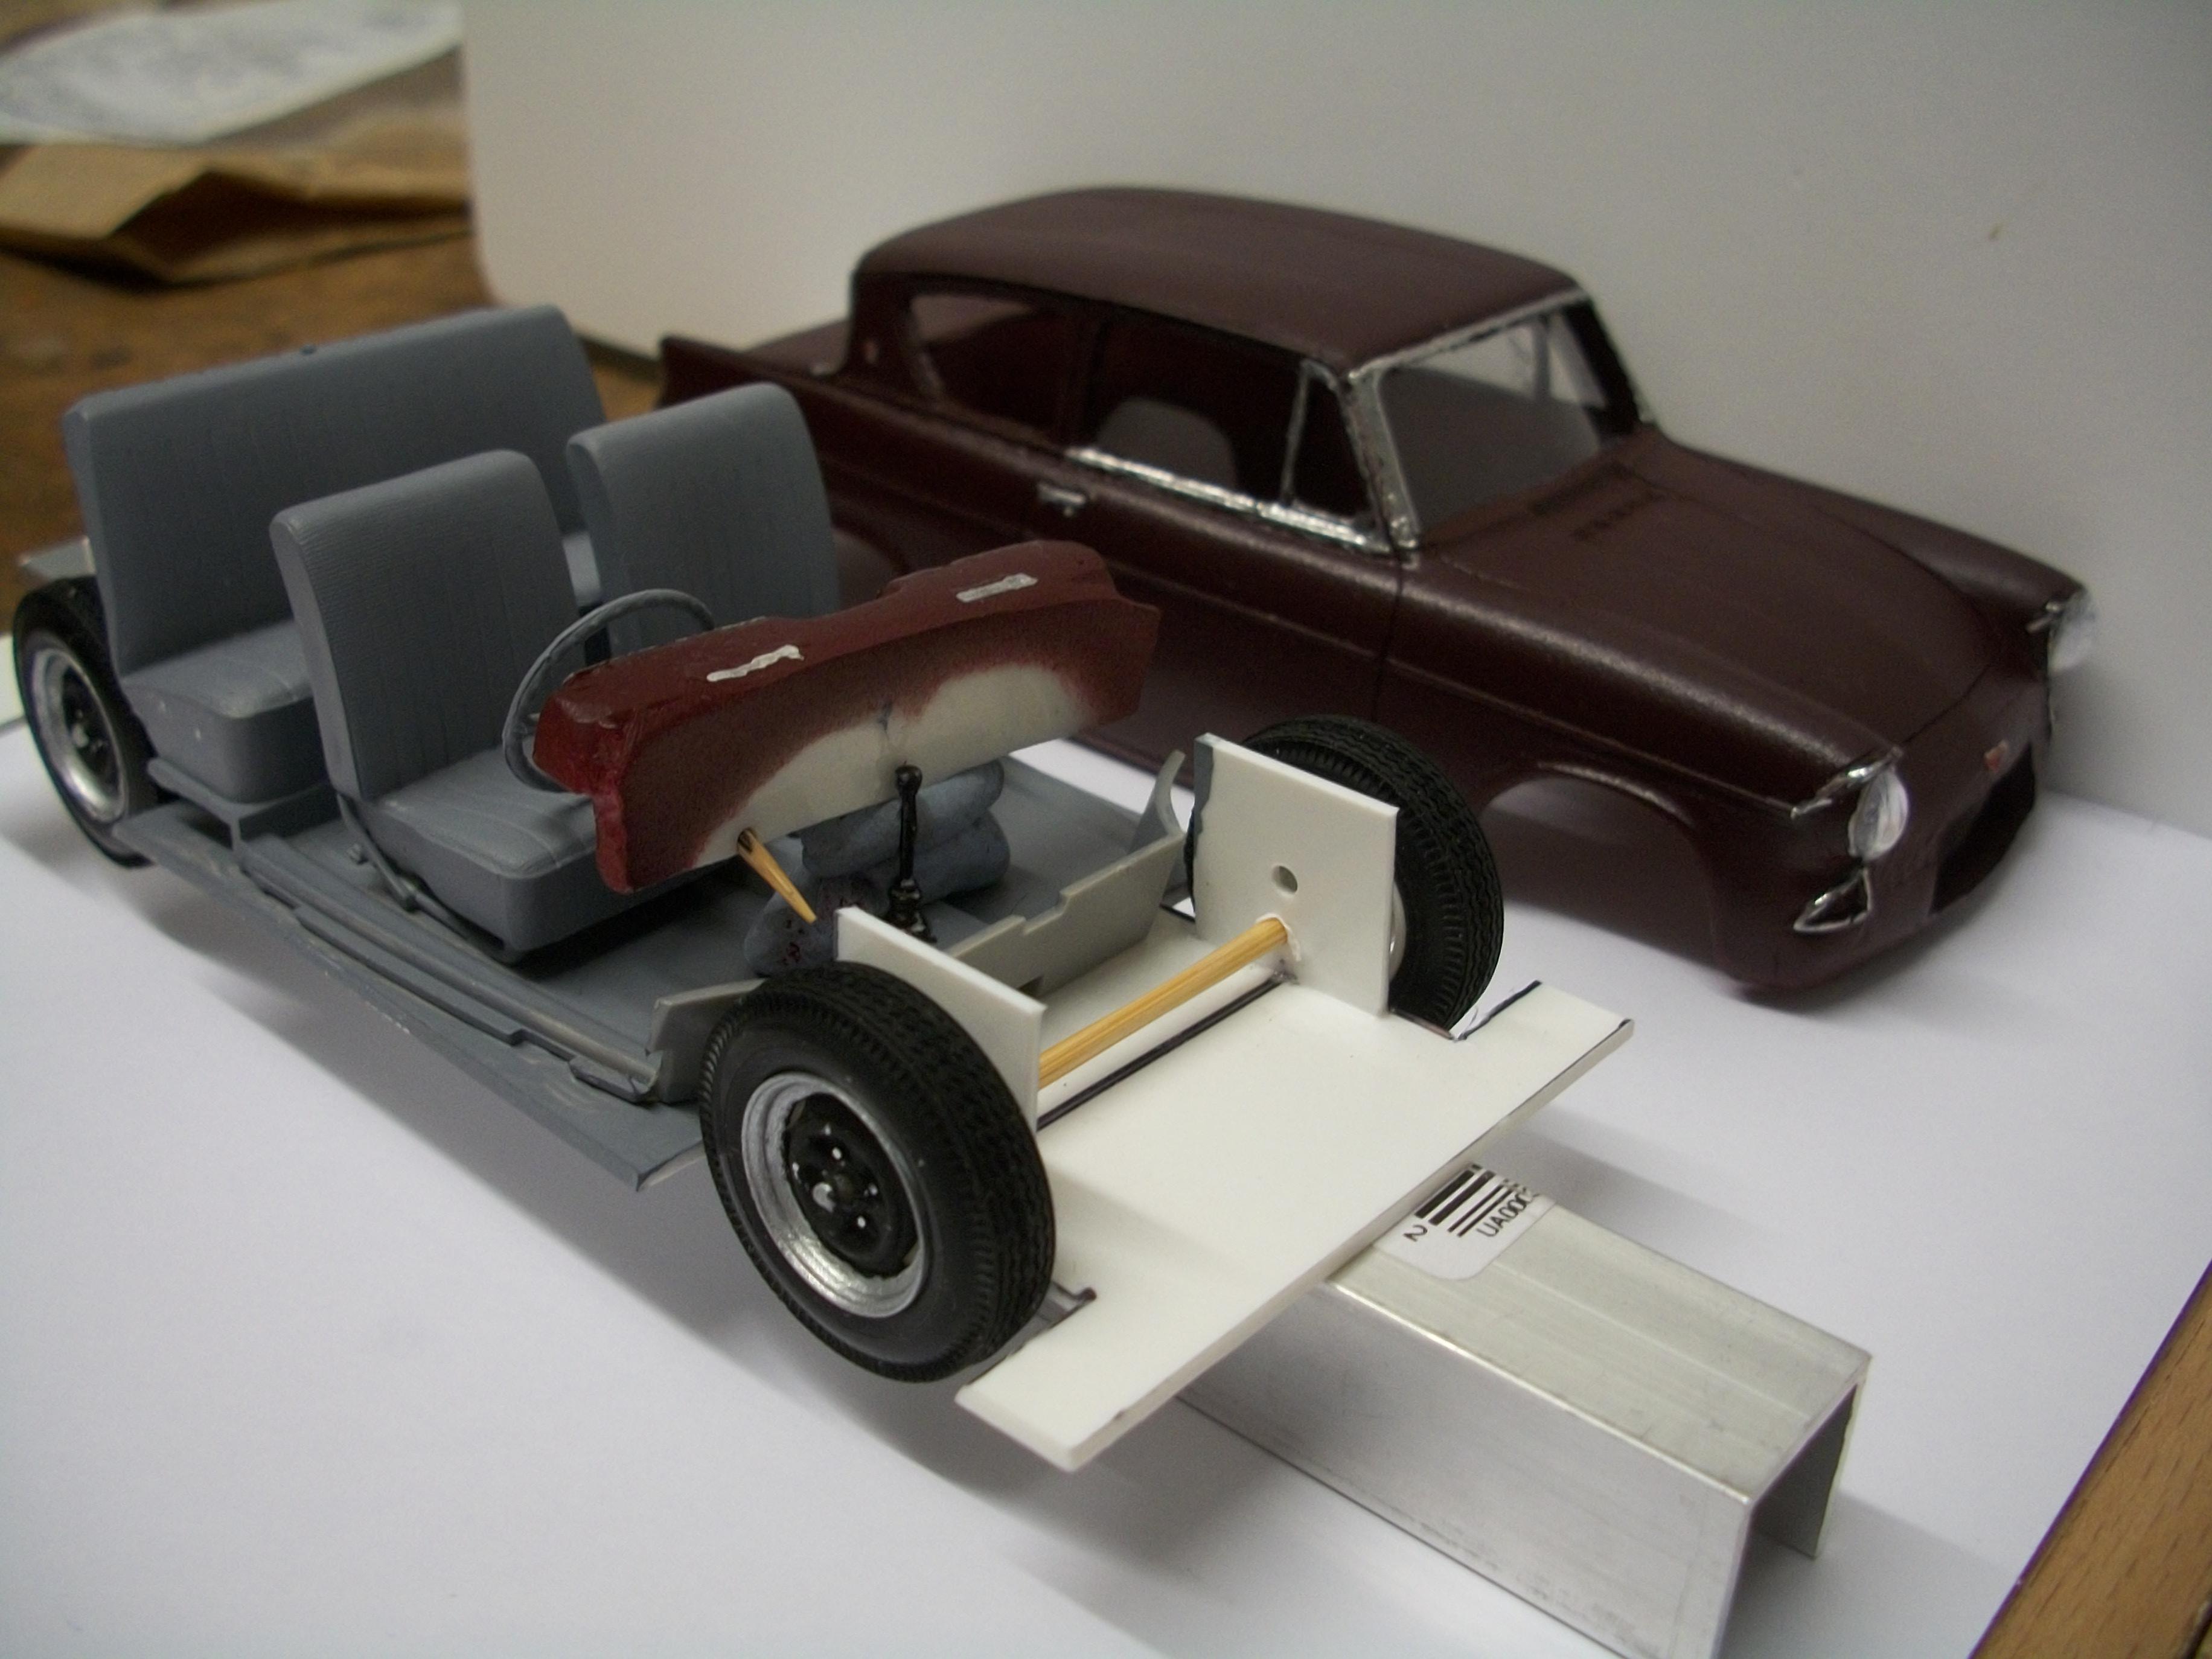
Managed to get the body aligned with the chassis, and as expected this was a tricky procedure. Removed the rear section of the chassis, and the front end of the chassis will be cut to follow the curve of the lower edge of the body shell. Dashboard assembly still needs to be fitted. This Ford Anglia 105E is almost entirely scratch built, with only the body being resin cast. David
-
Windscreen is fitted, and also the headlamps. The dashboard is test fitted onto some Blu-Tak, with both speedometer and steering wheel in place. Some liquid chrome pen work done but needs tidying. Currently thinking about the order in which the remaining tasks need to be completed..... particularly the window glass, body alignment and polishing. David
-
I am pleased to hear that you ended up feeling good about this build, Randy..... I would agree that Heller kits can be a bit quirky, but the completed model does look really nice. Funny that you should mention your possible future builds from Heller kits, because I too have the Delahaye 135 and the Bugatti T50 waiting in boxes, having built the Talbot Lago Record and also the Citroen Traction Avant. David
-

Porsche 959 Paris-Dakar - rode hard and hung up wet
Anglia105E replied to 89AKurt's topic in Model Cars
One of the finest Porsche builds that I have seen in a long time, Kurt..... clearly you have worked hard to get the detail right, and lots of thinking outside the box also. Your weathering techniques have pulled off the ' rally ' look and congratulations on your extensive research. David -
My Opera browser does have the Ad-Blocker enabled by default, Dave...... and it does seem to be blocking ads from MCM Forums. Usually, I do find ads very distracting when I am trying to focus on the content of a web page that I am reading. I will consider turning off the ad-blocker for MCM only...... David
-
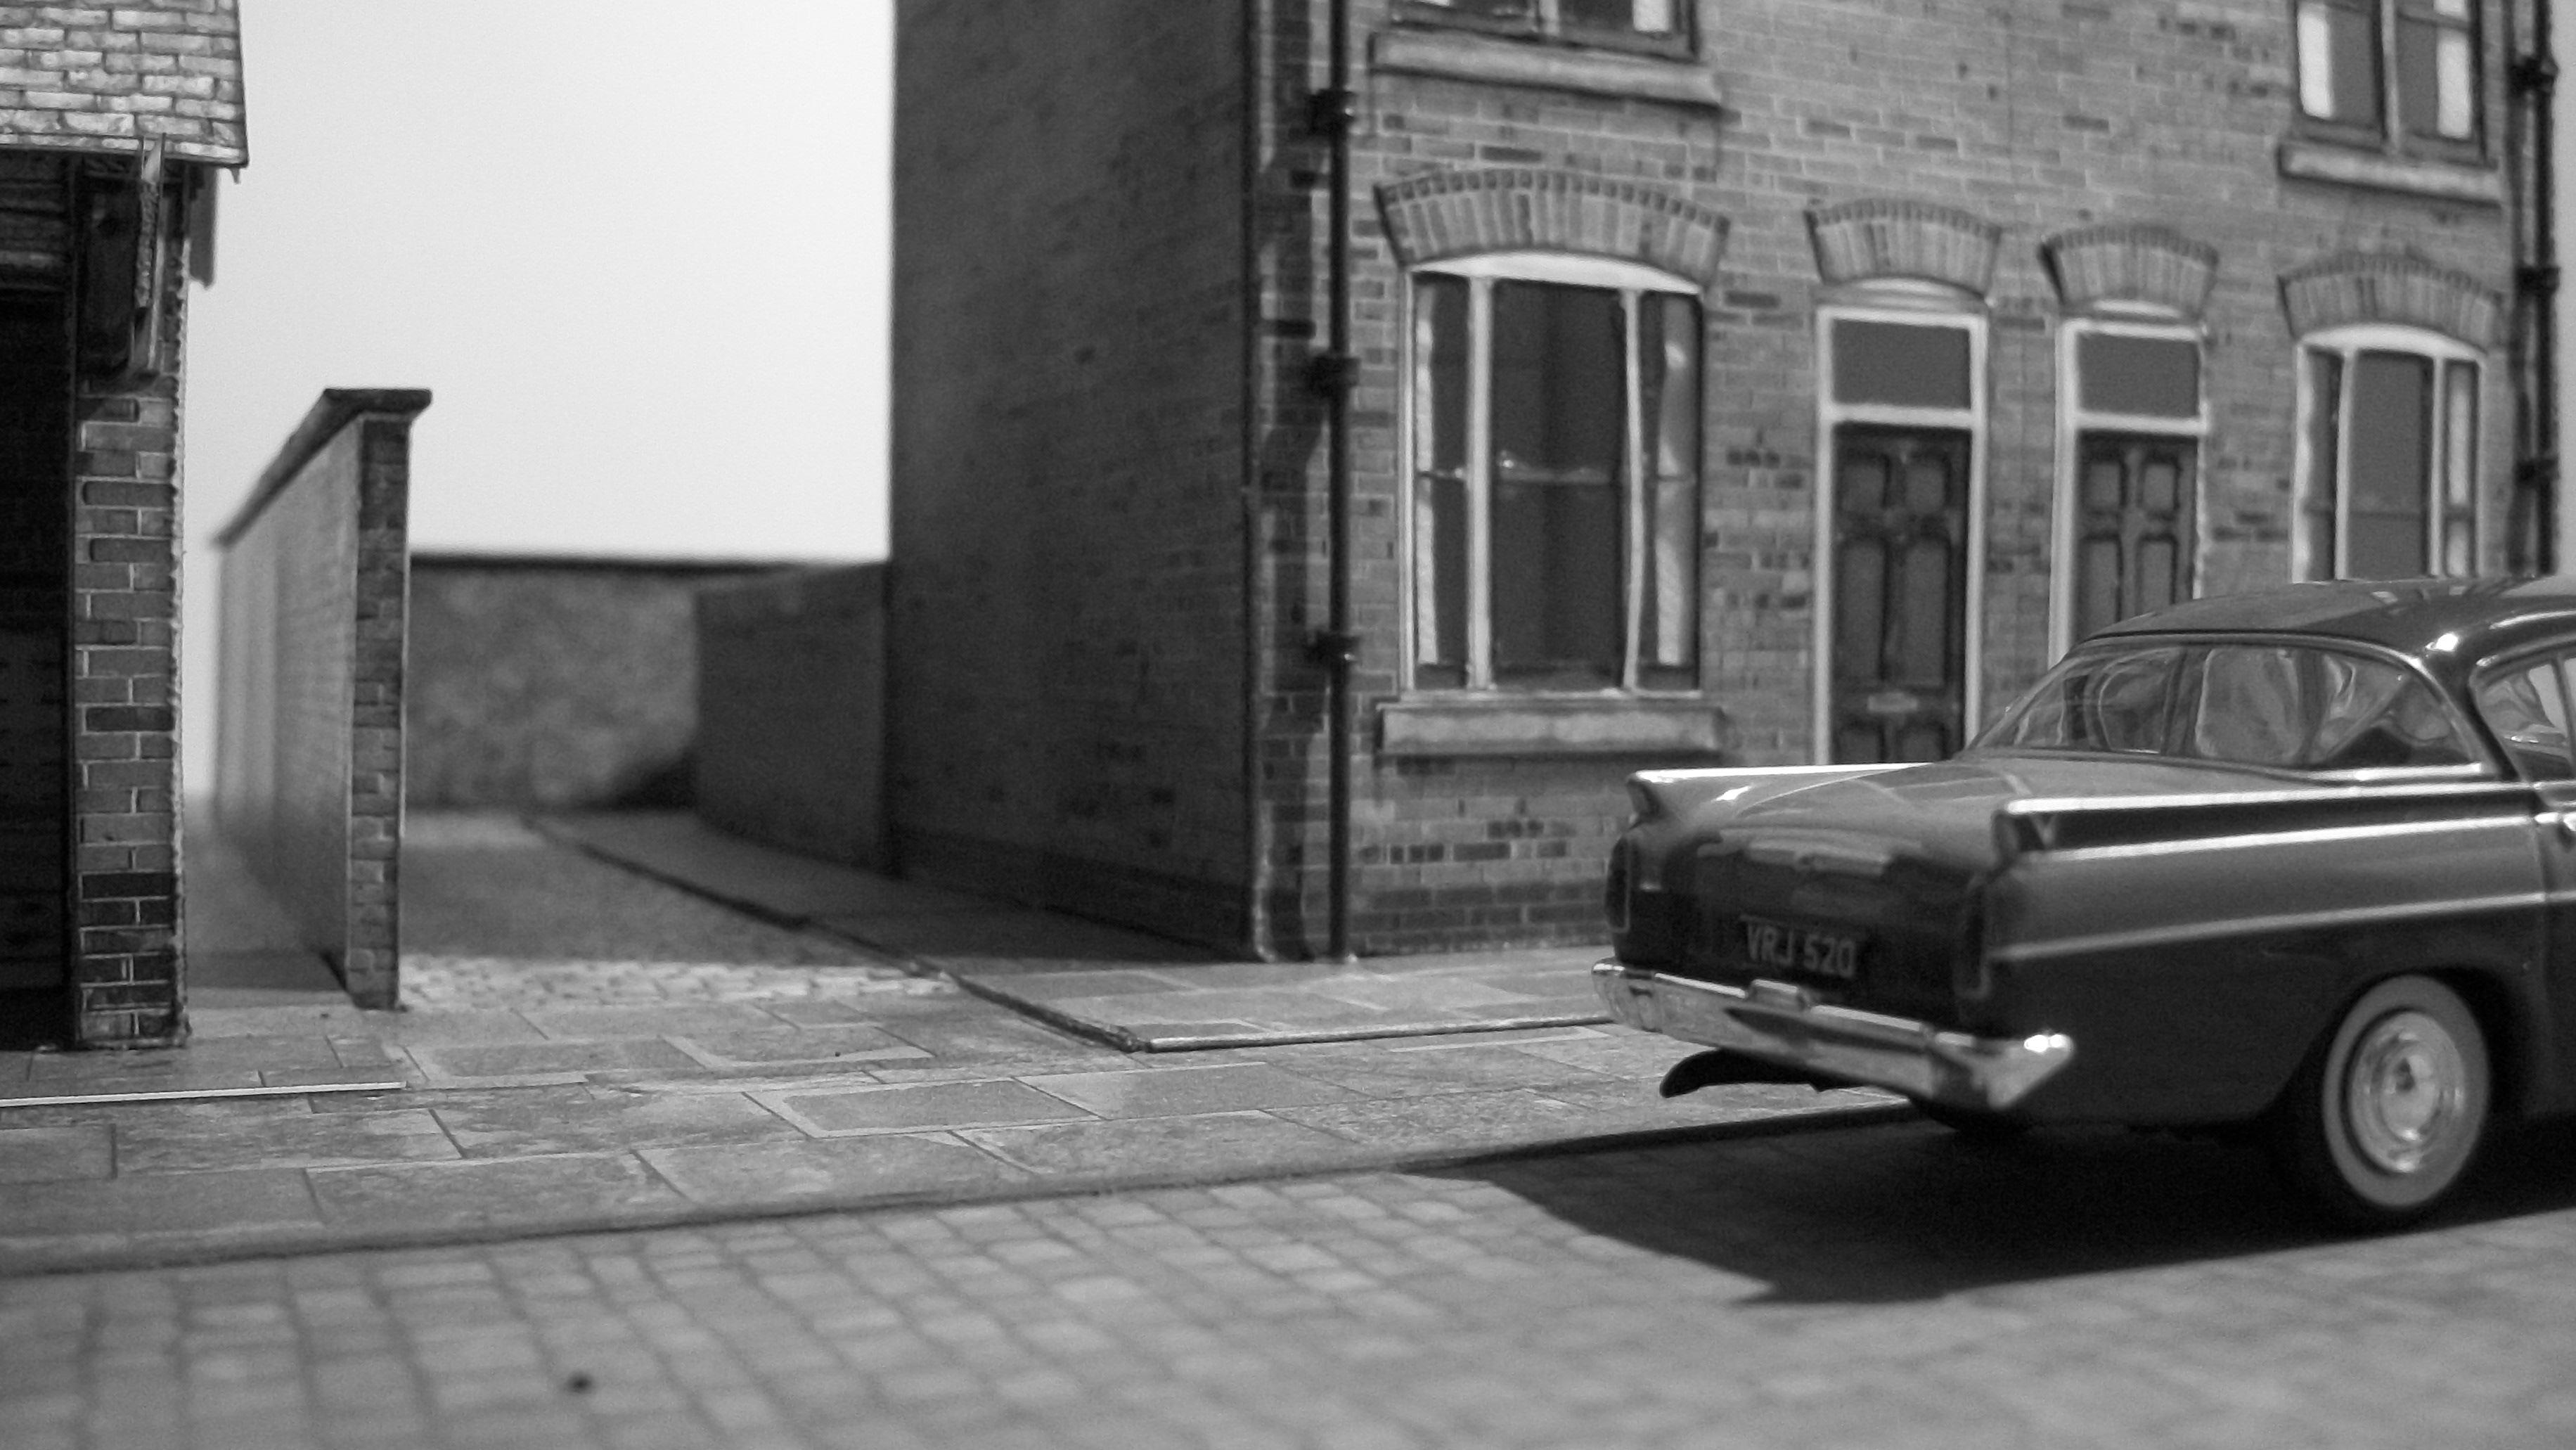
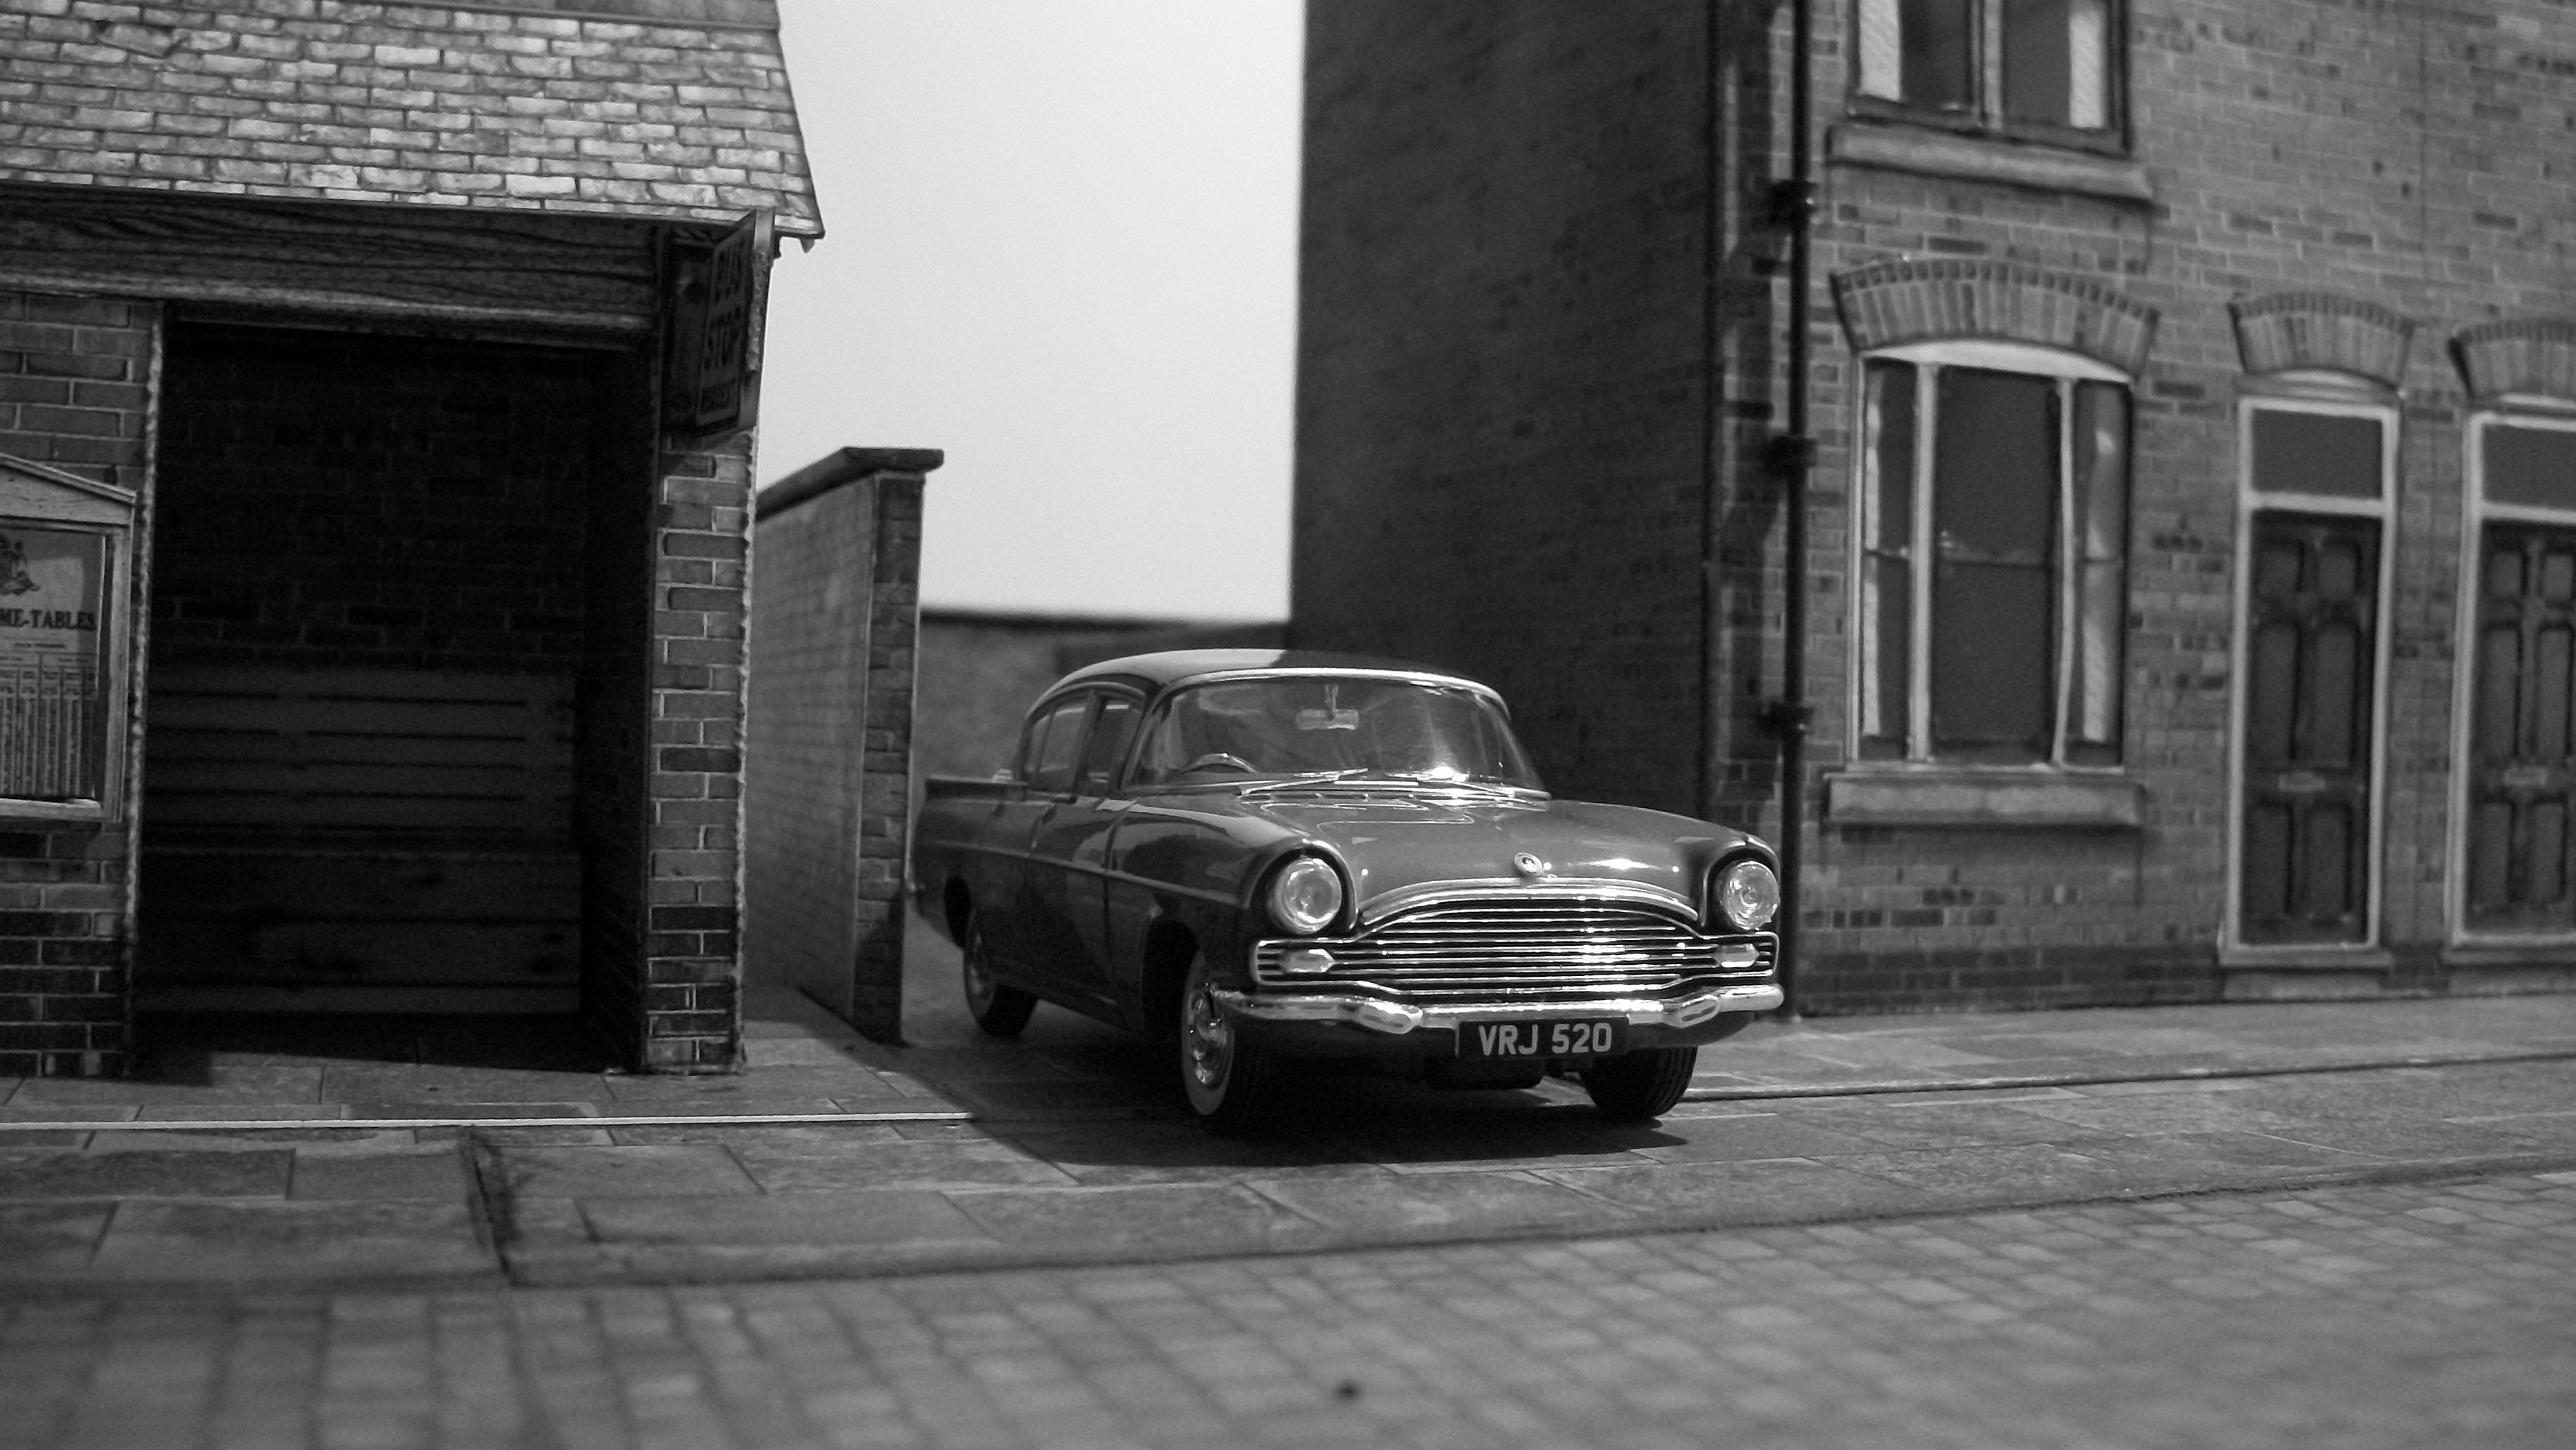
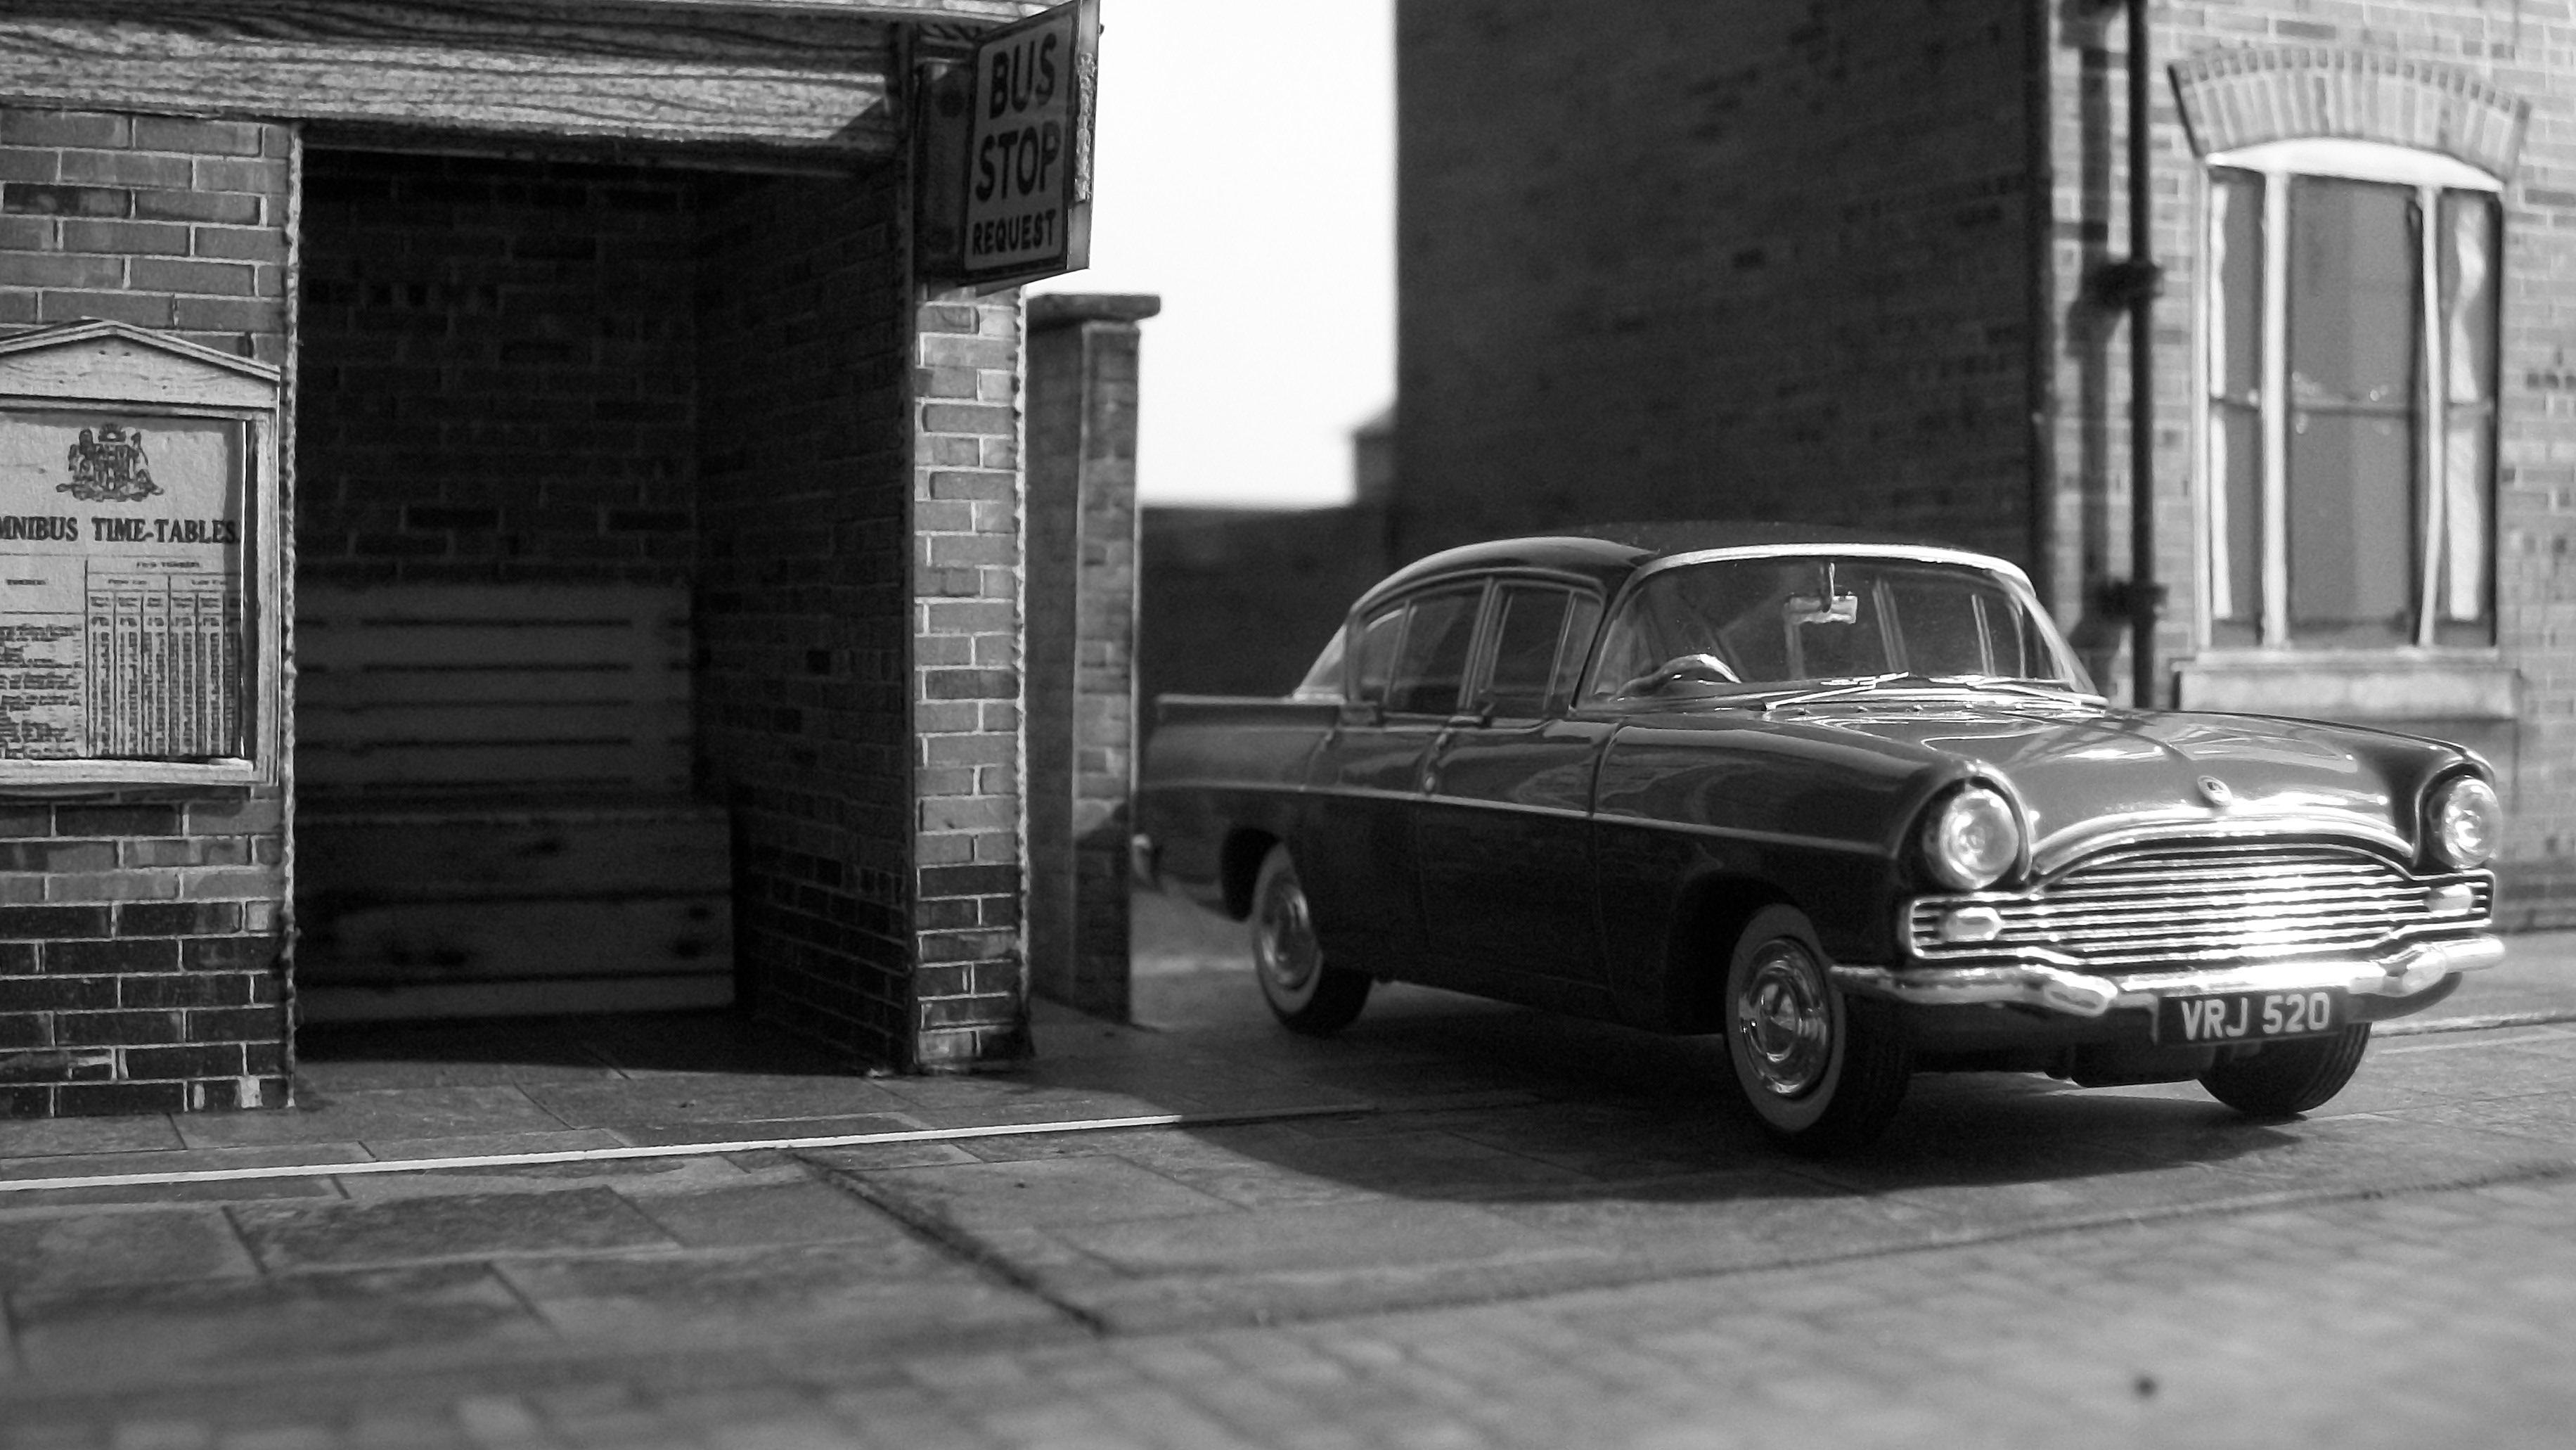
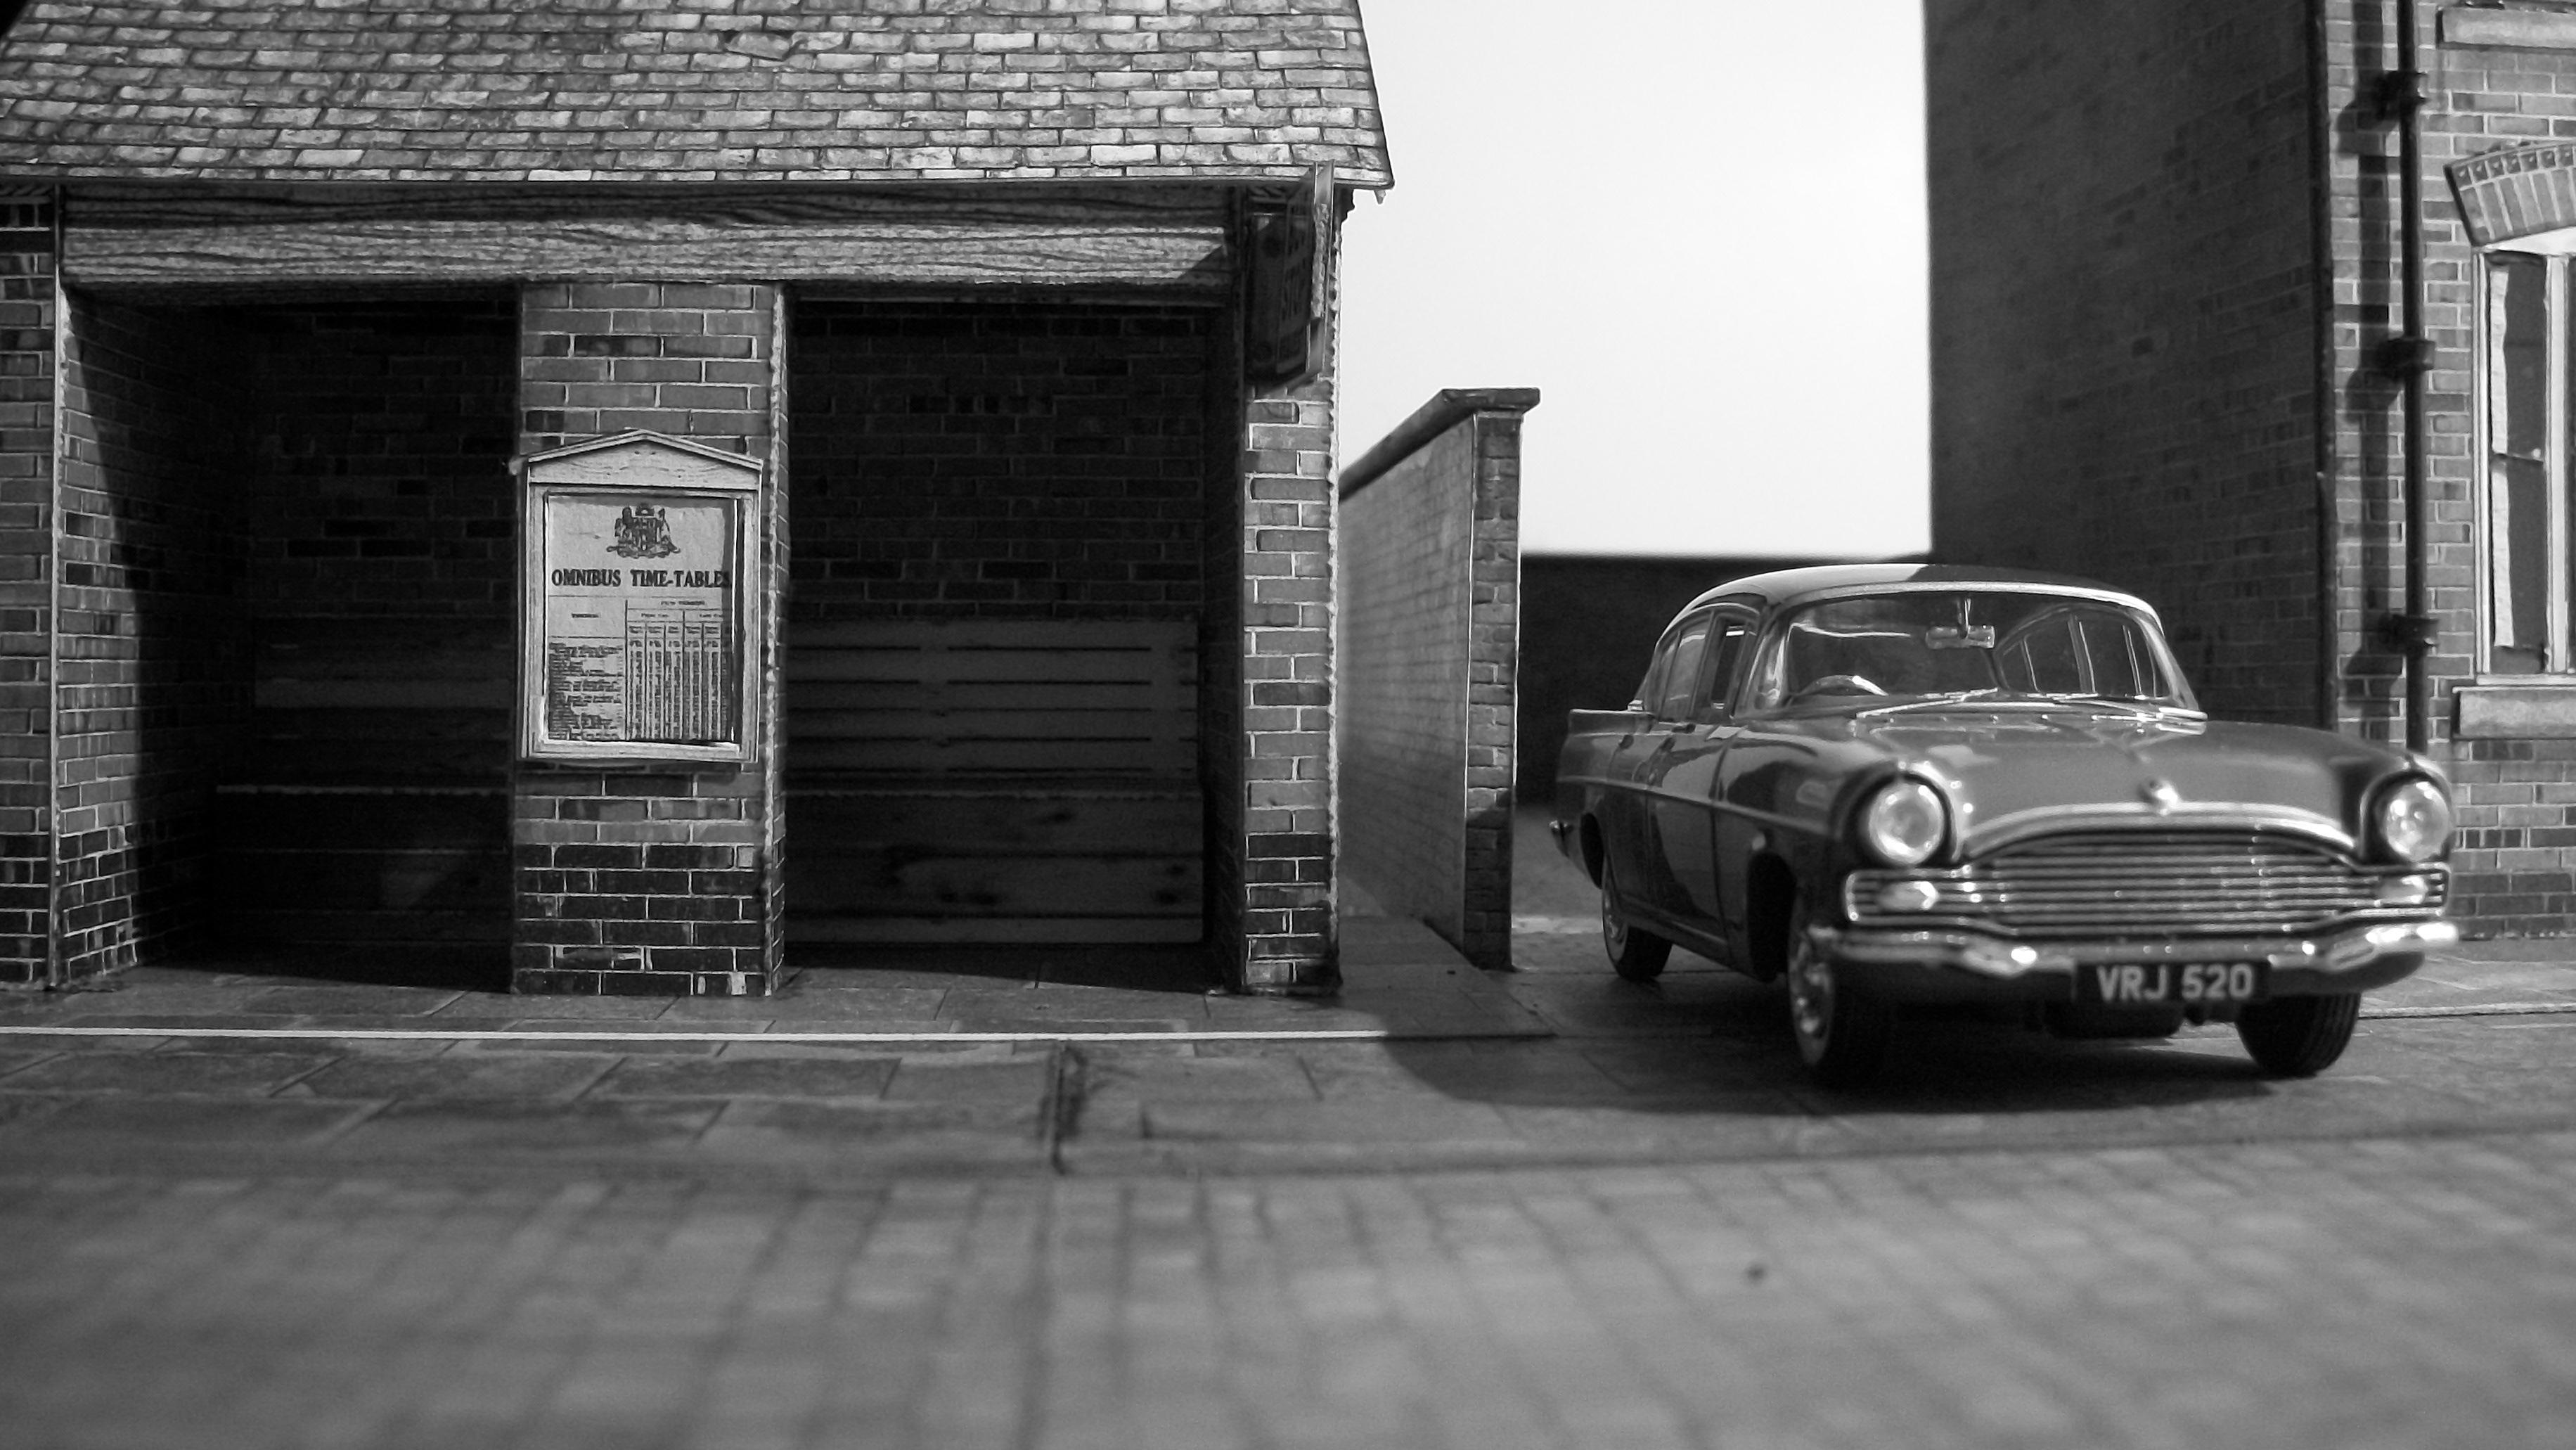
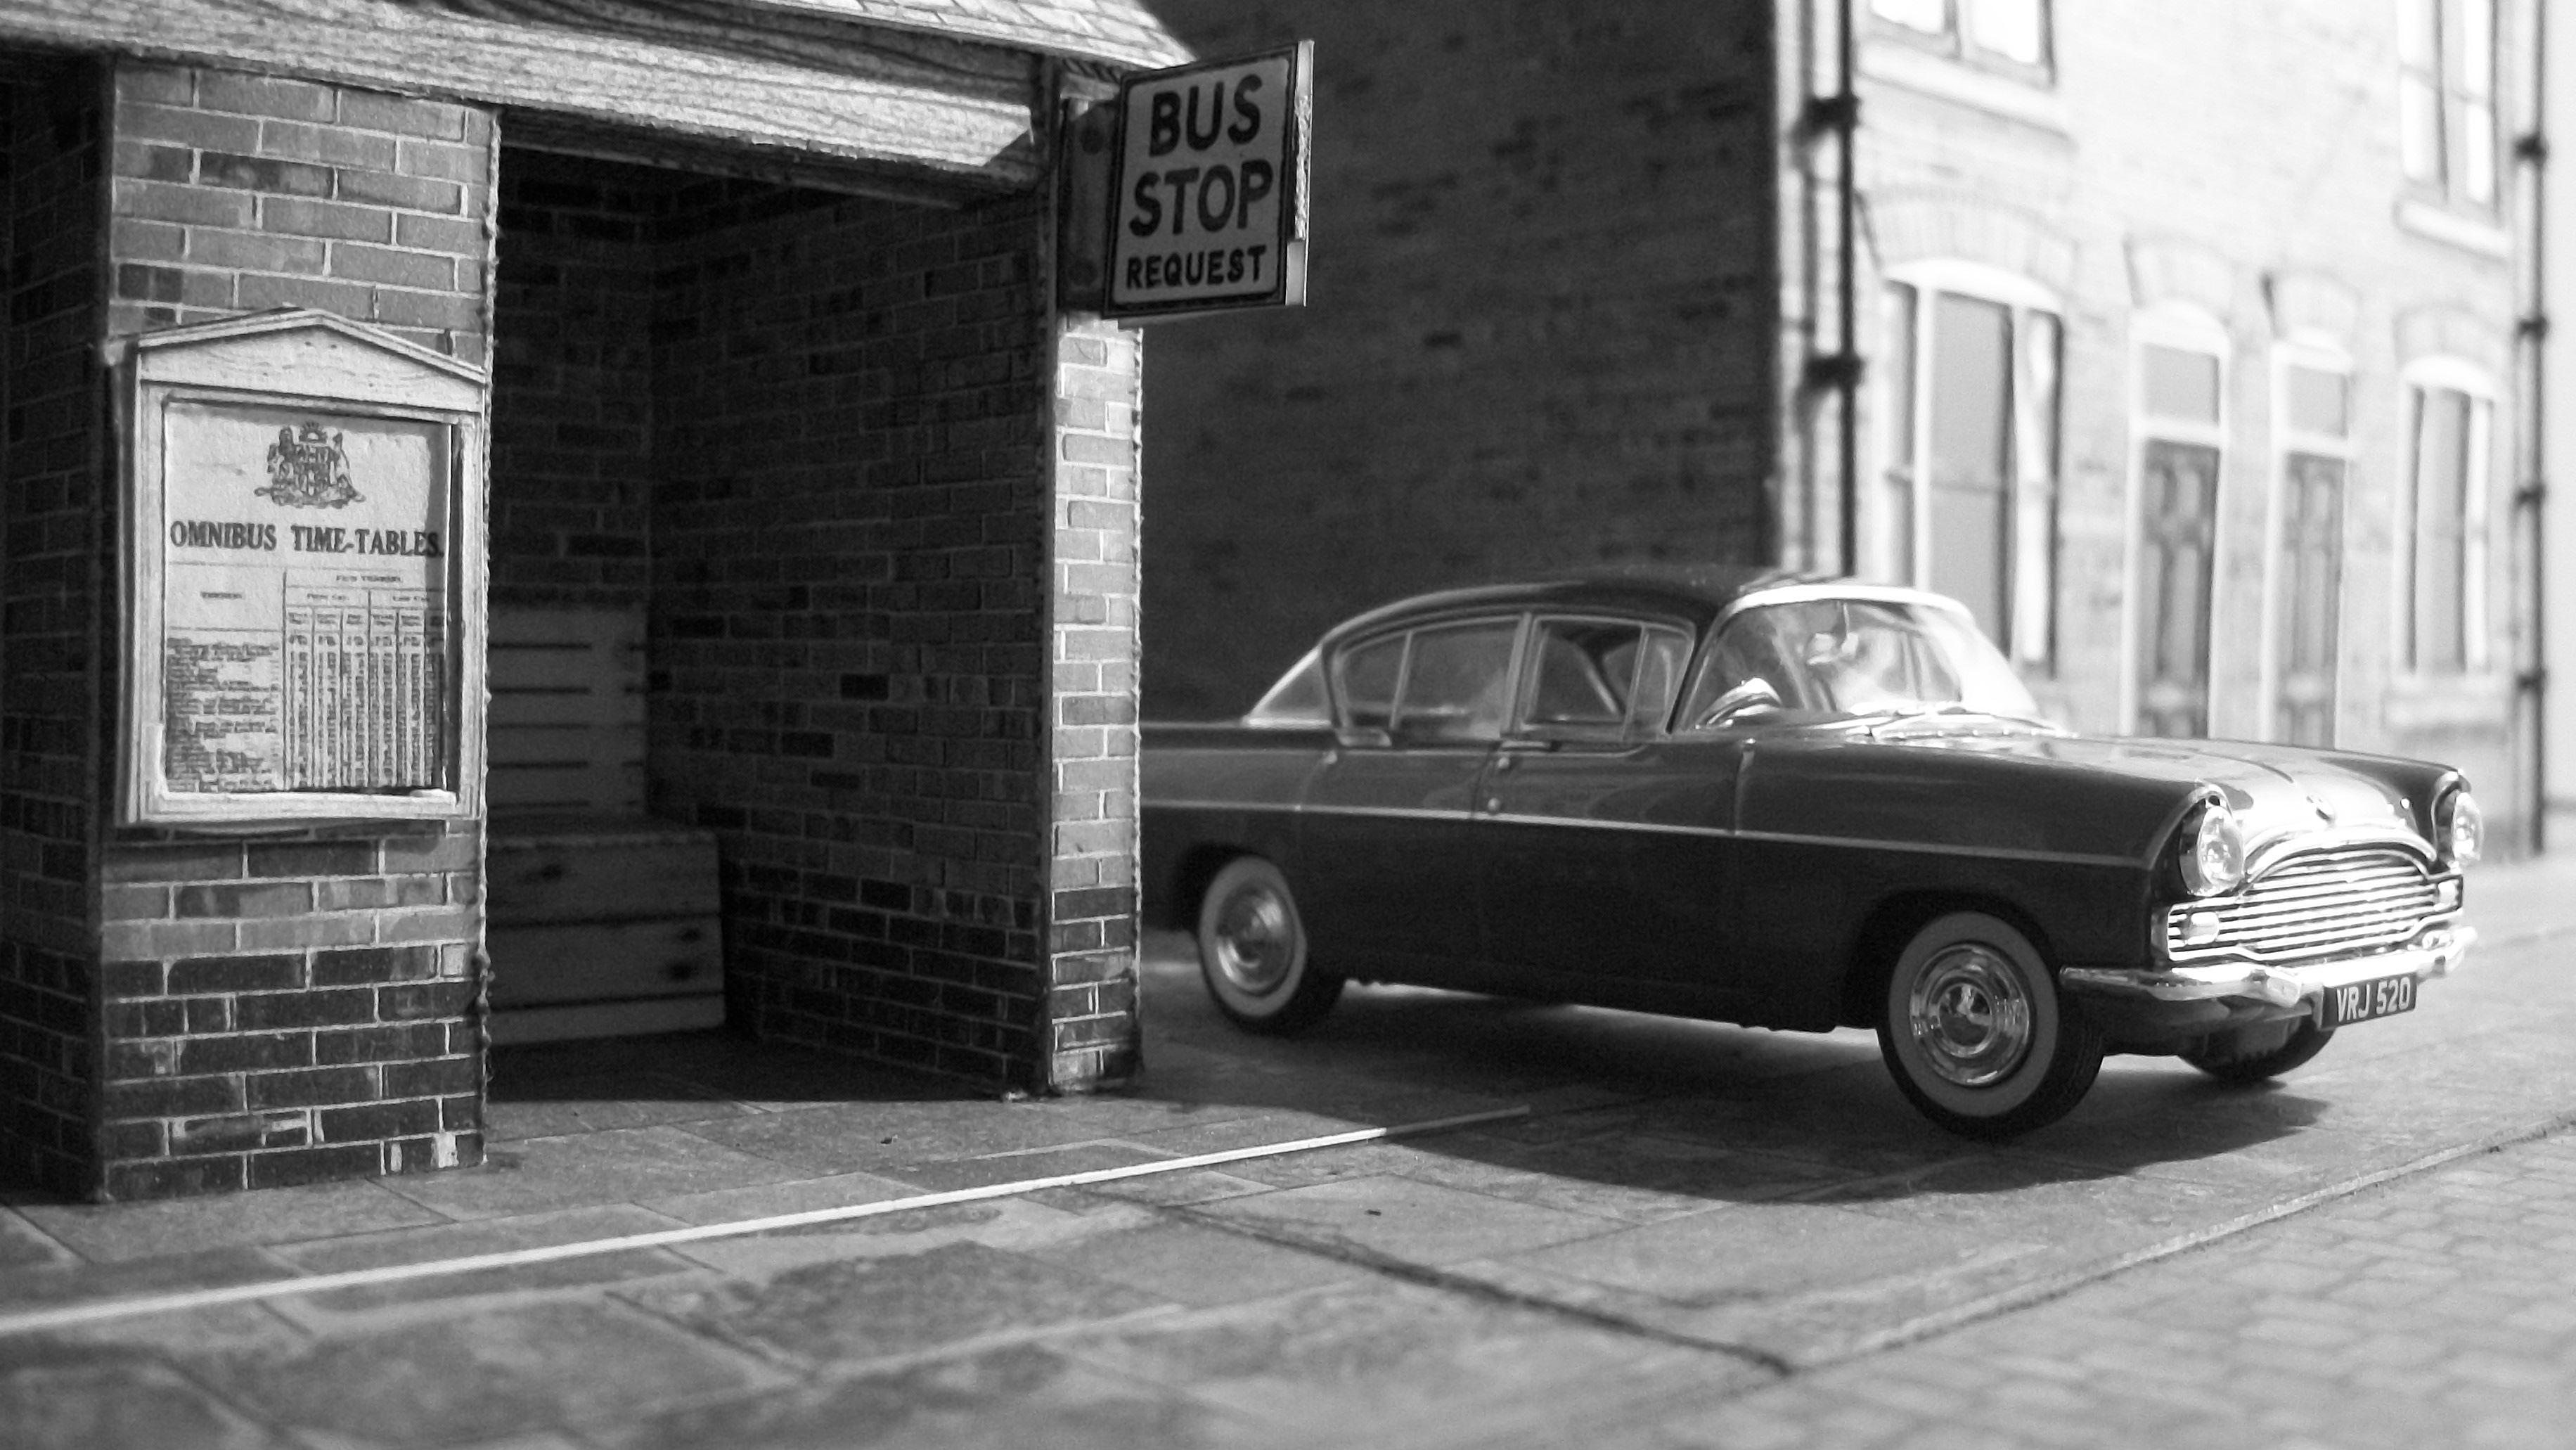
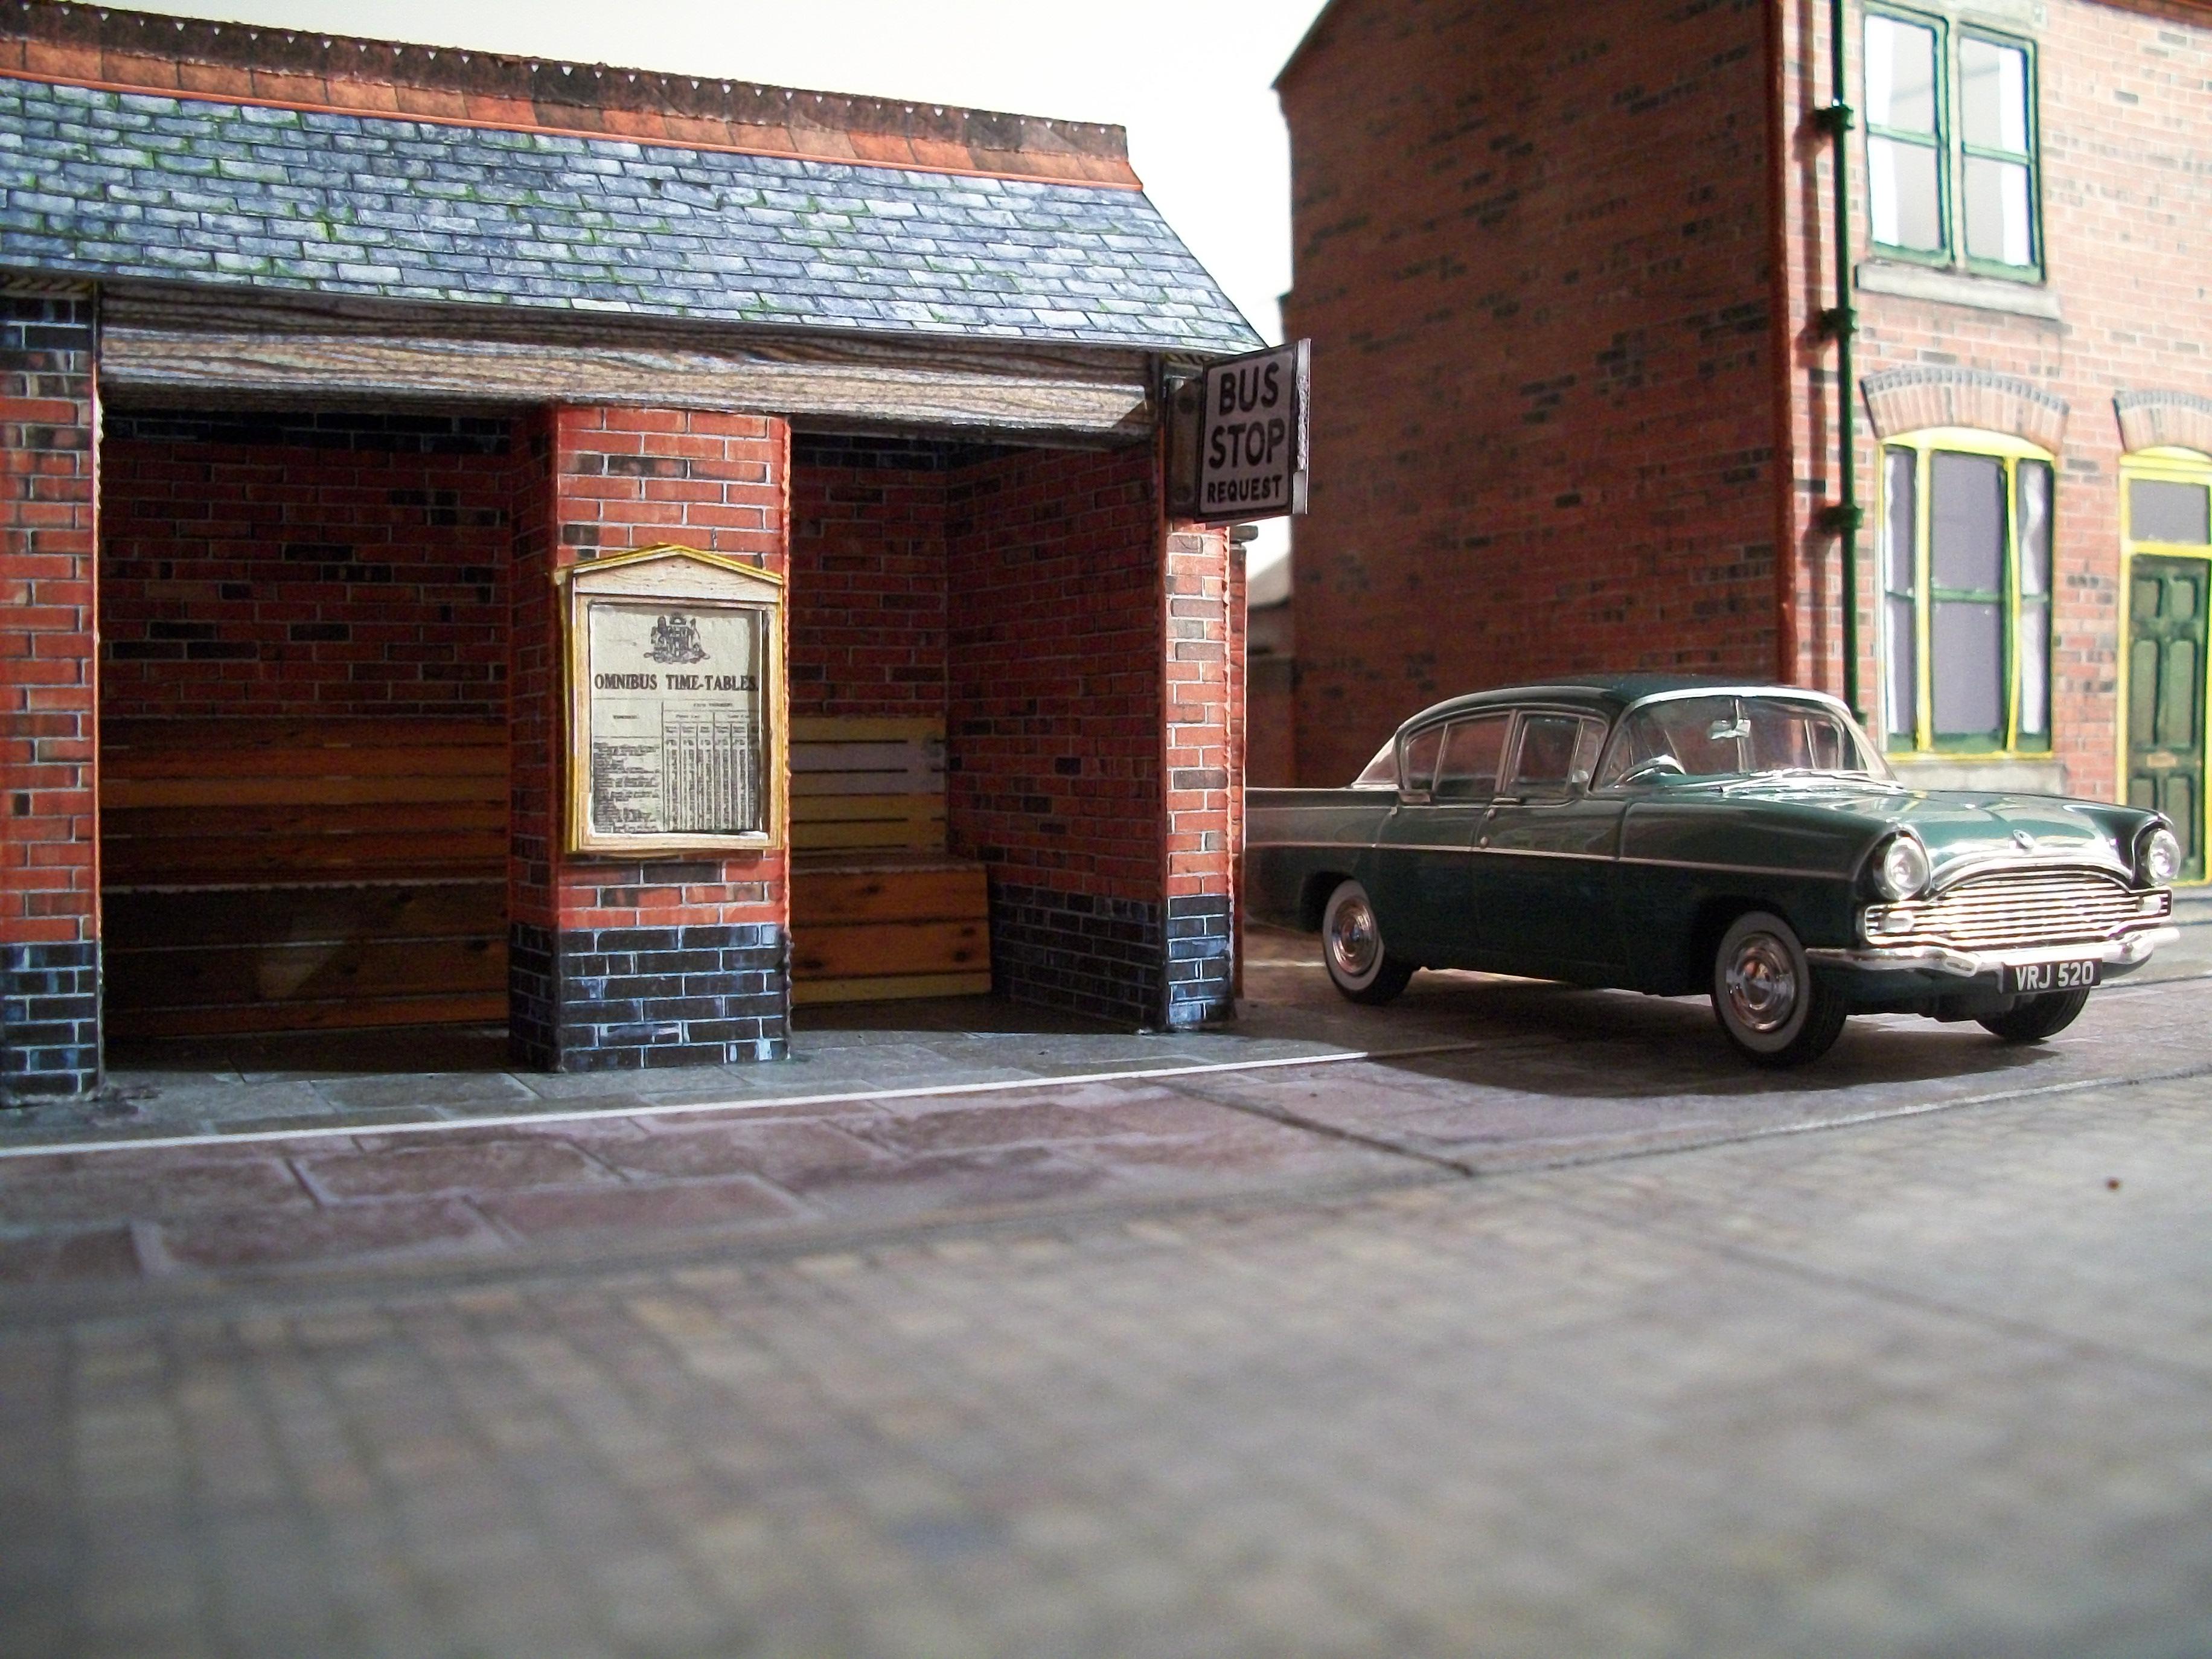
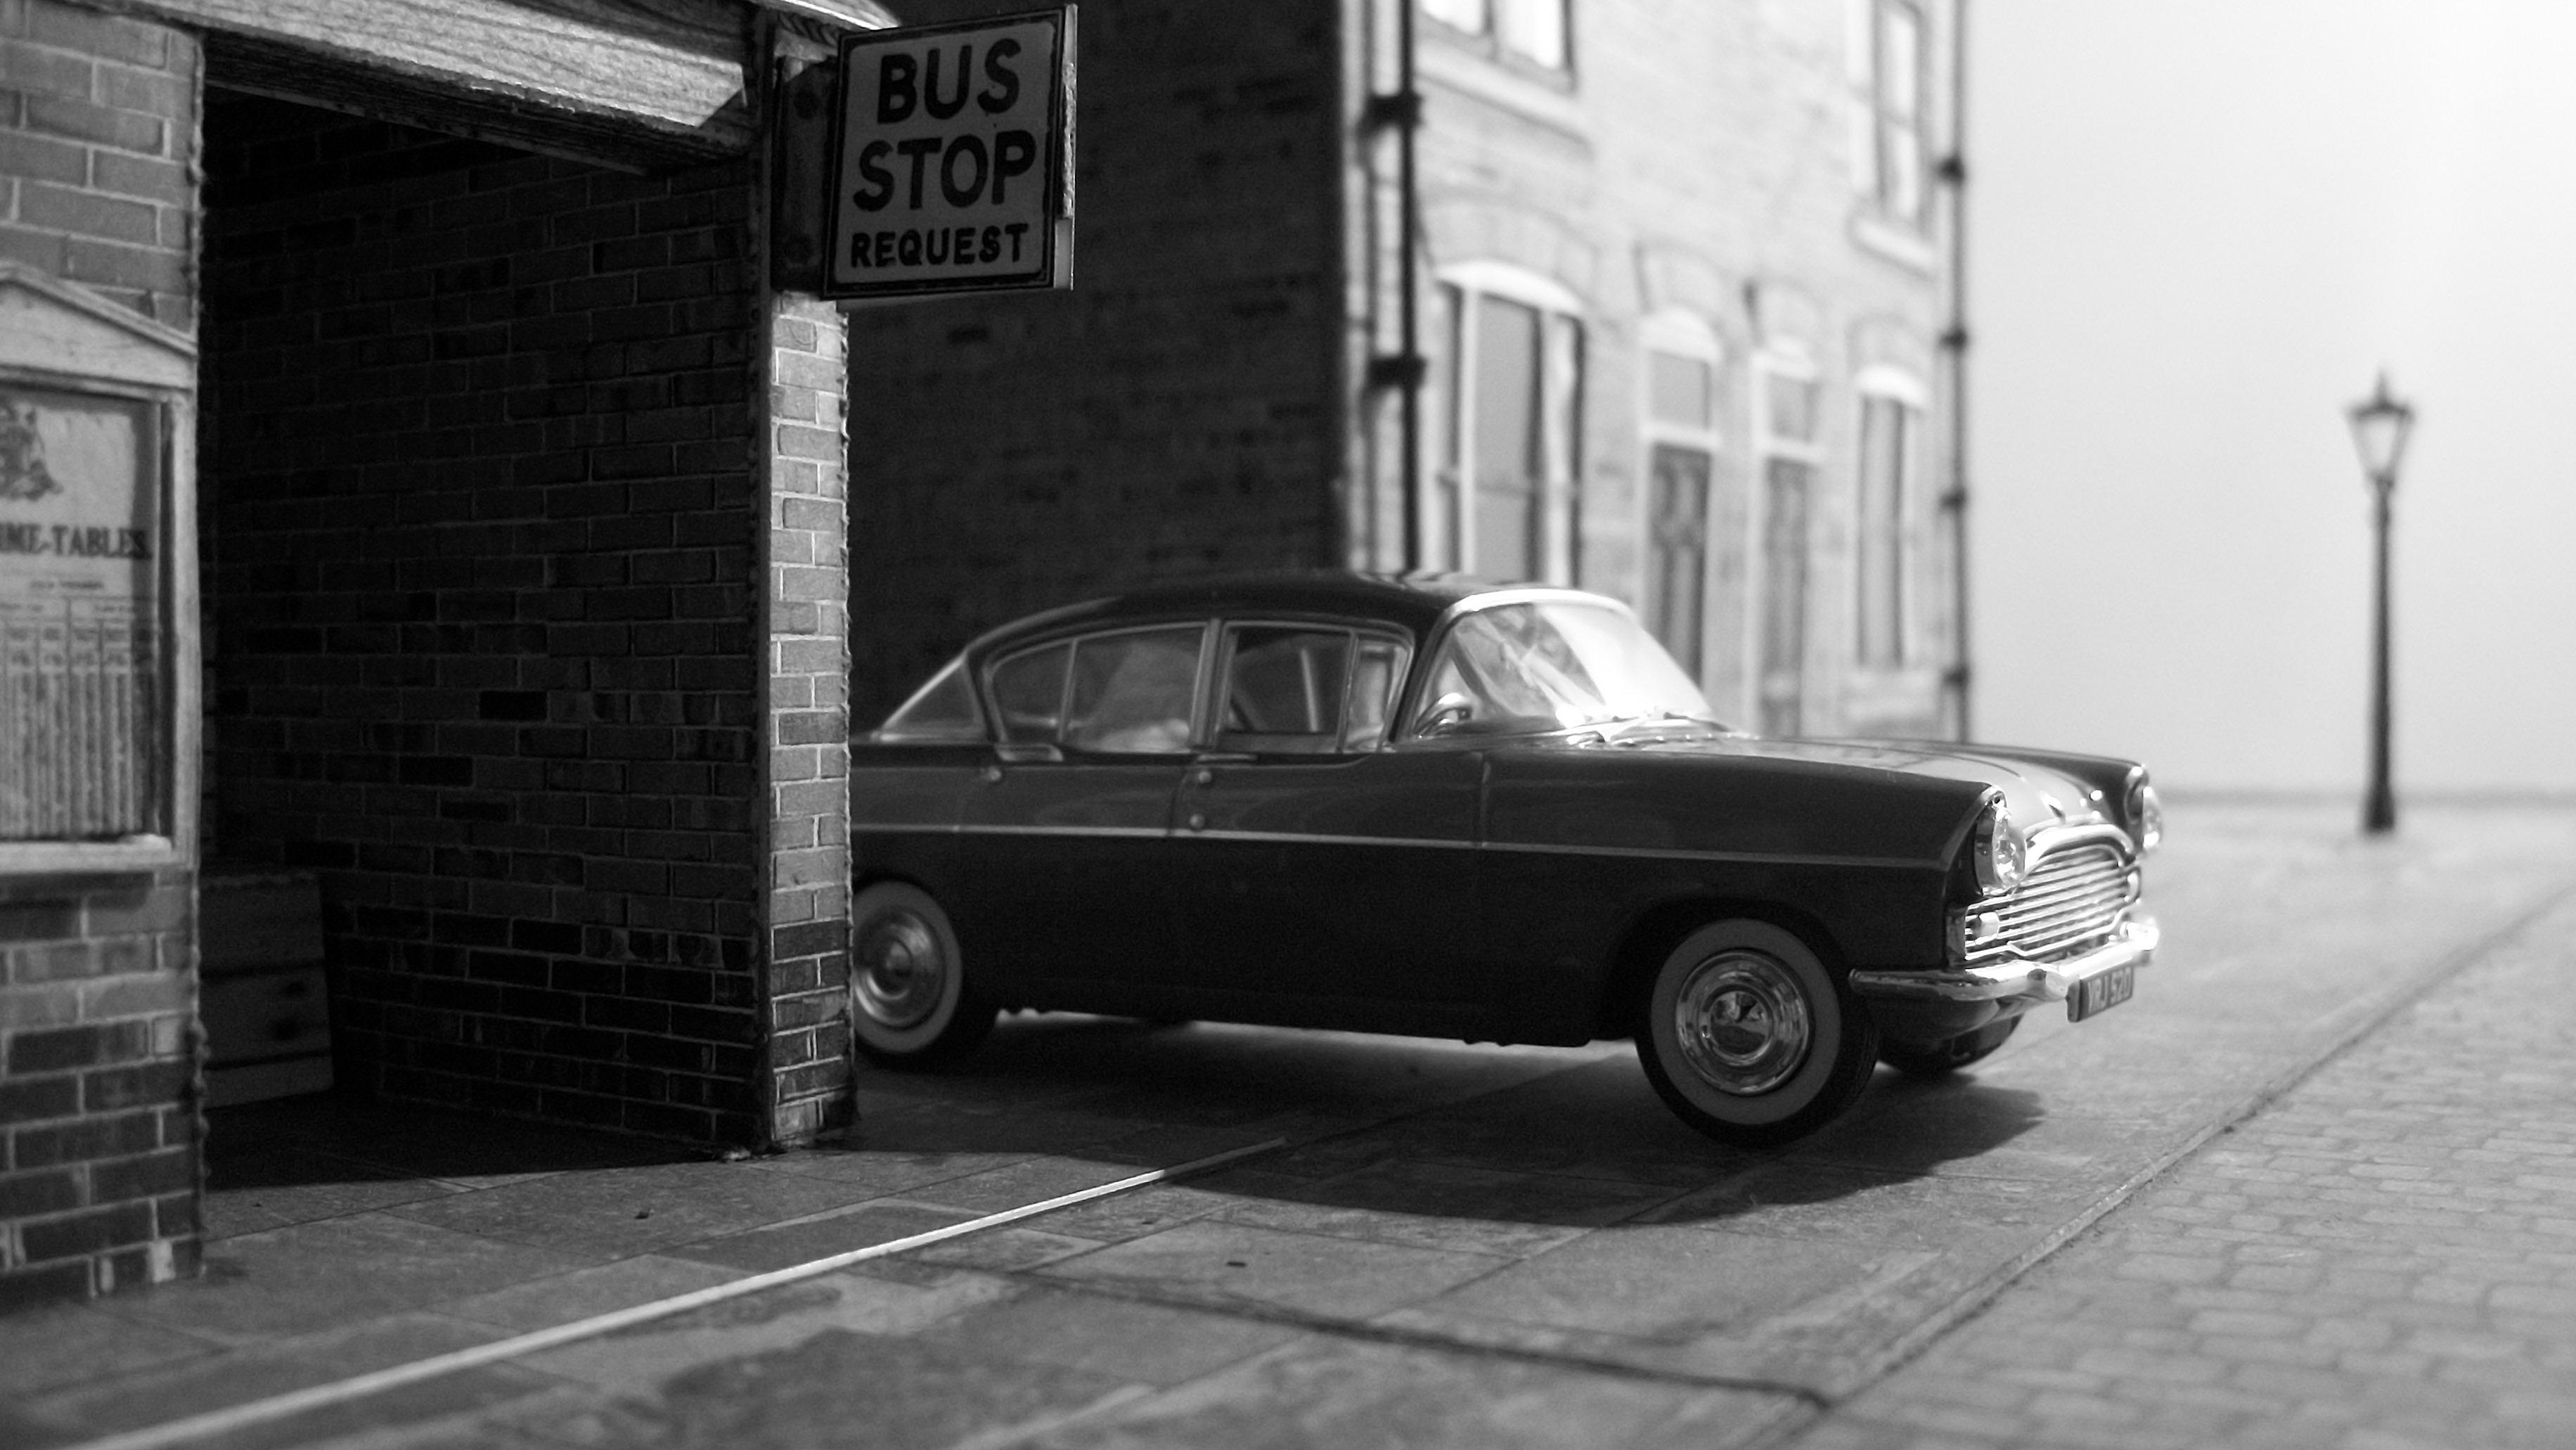
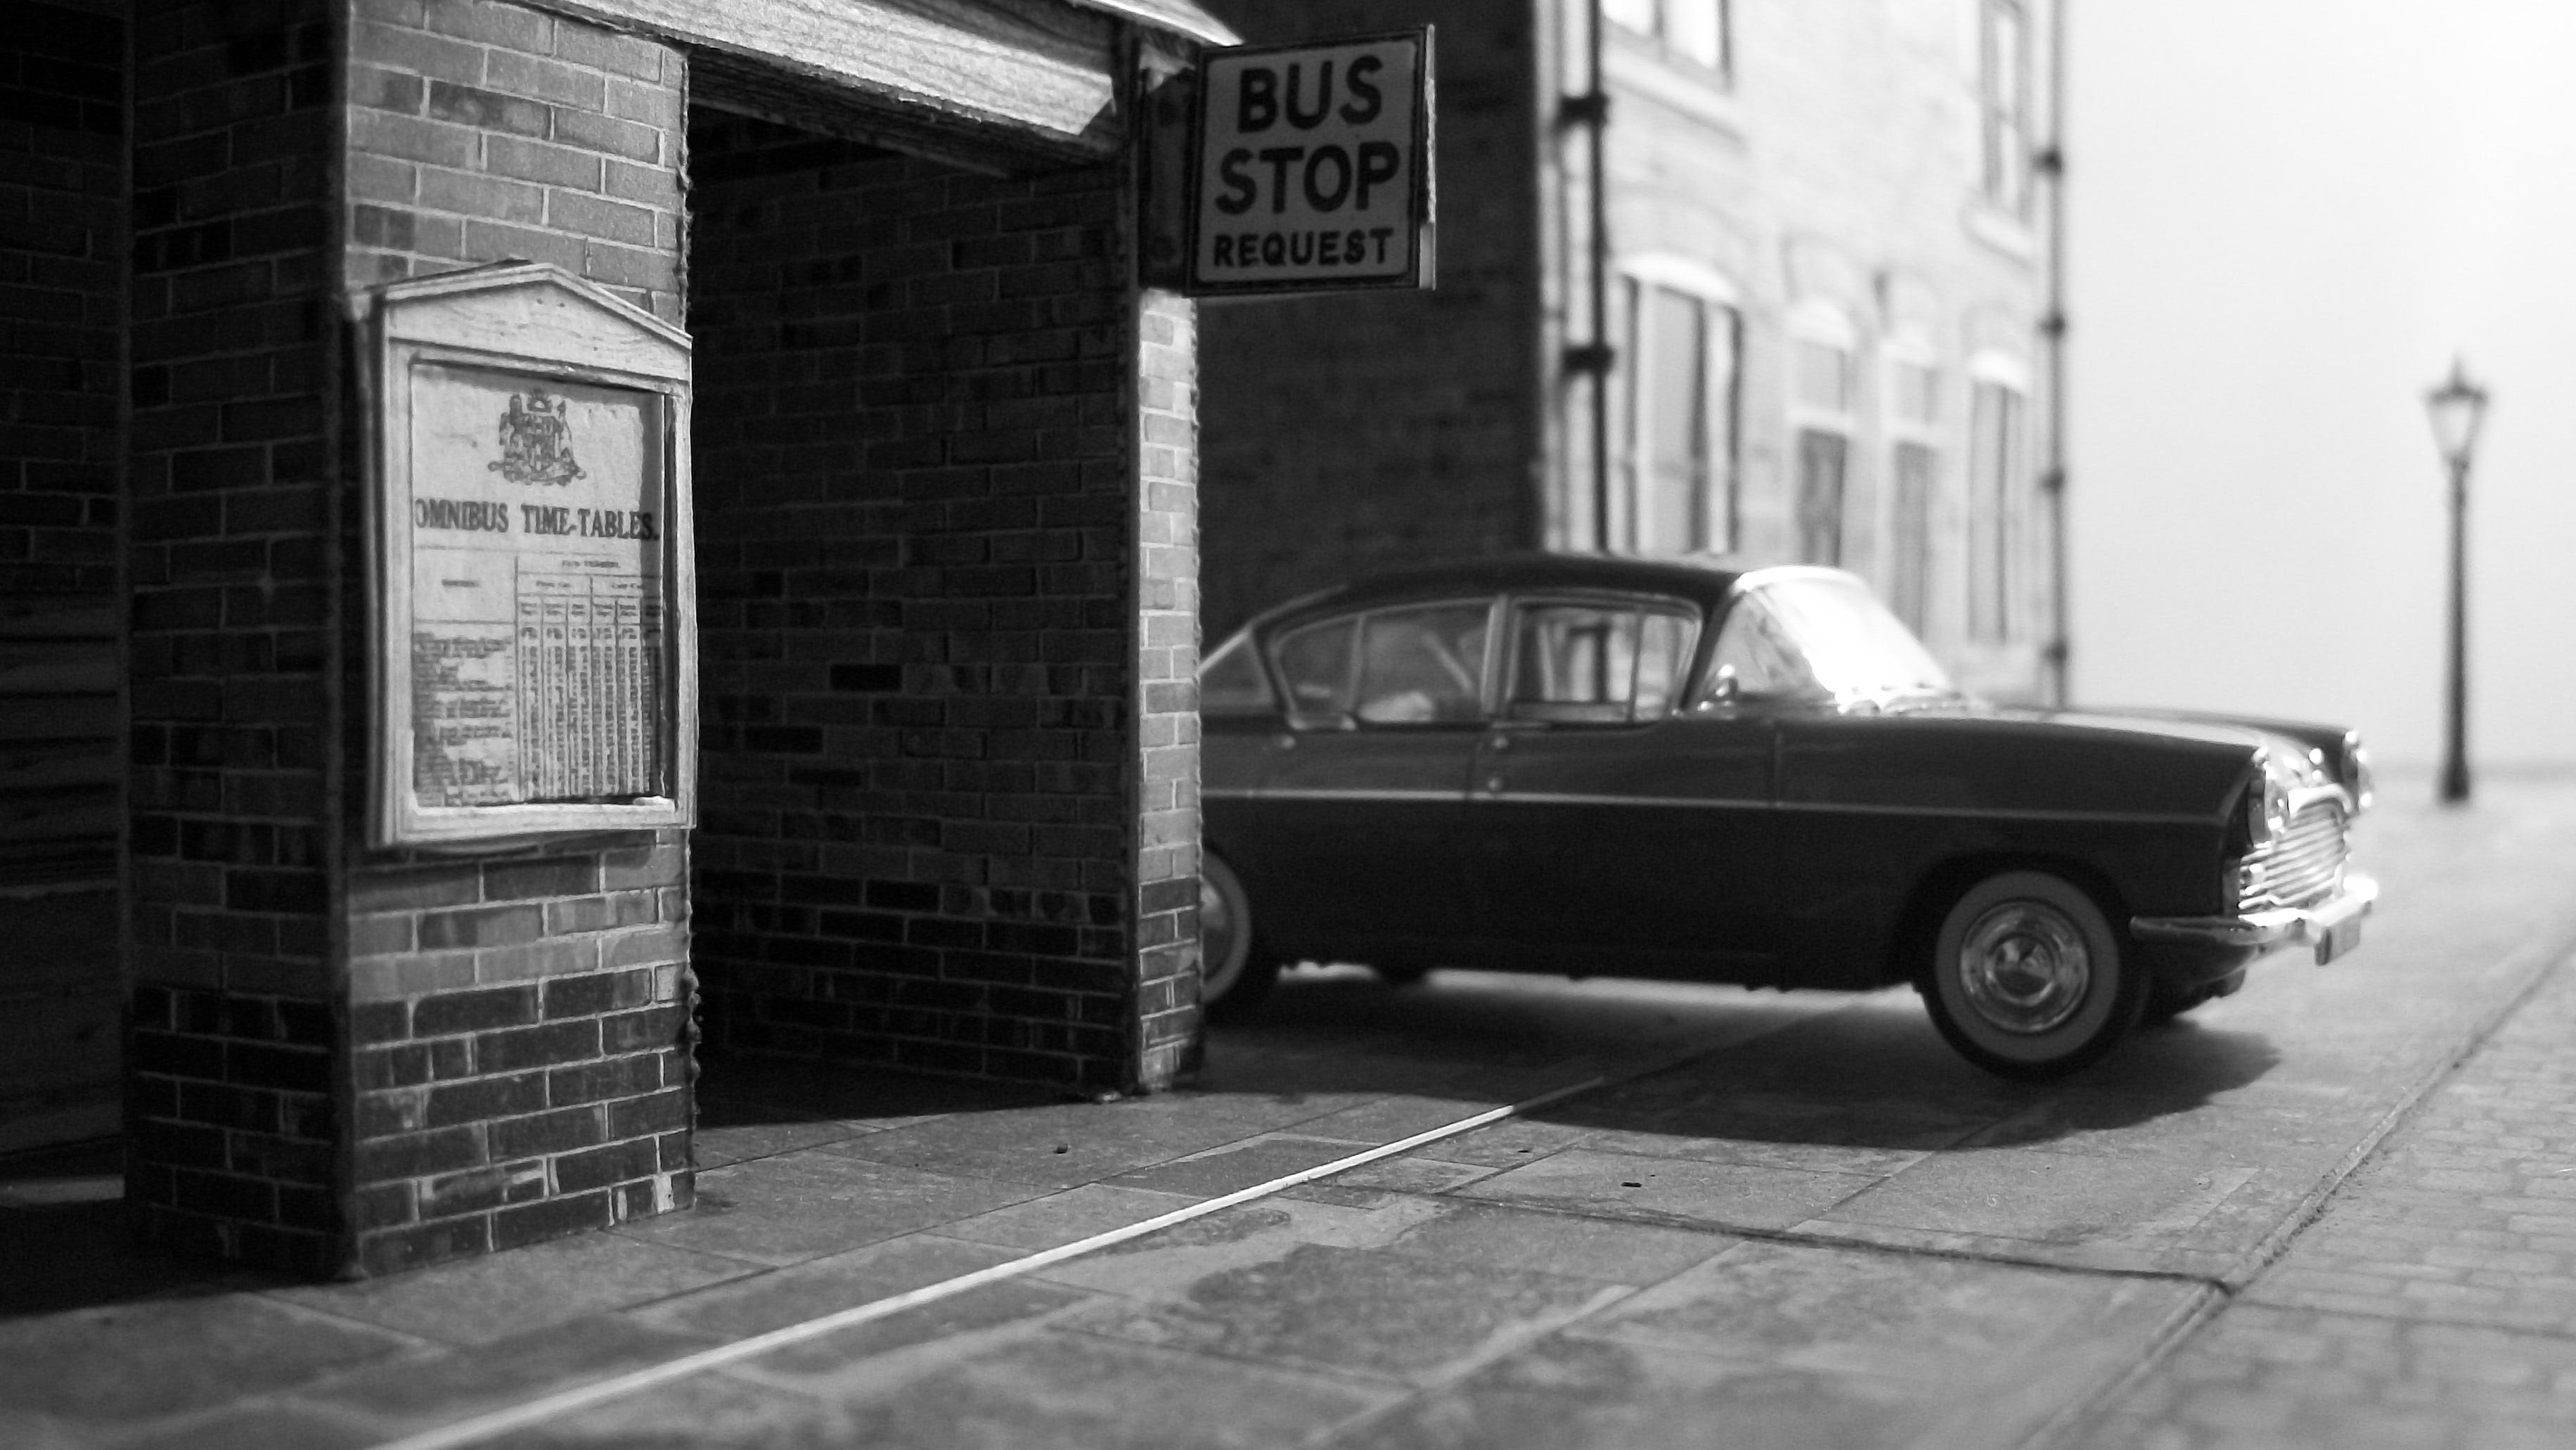
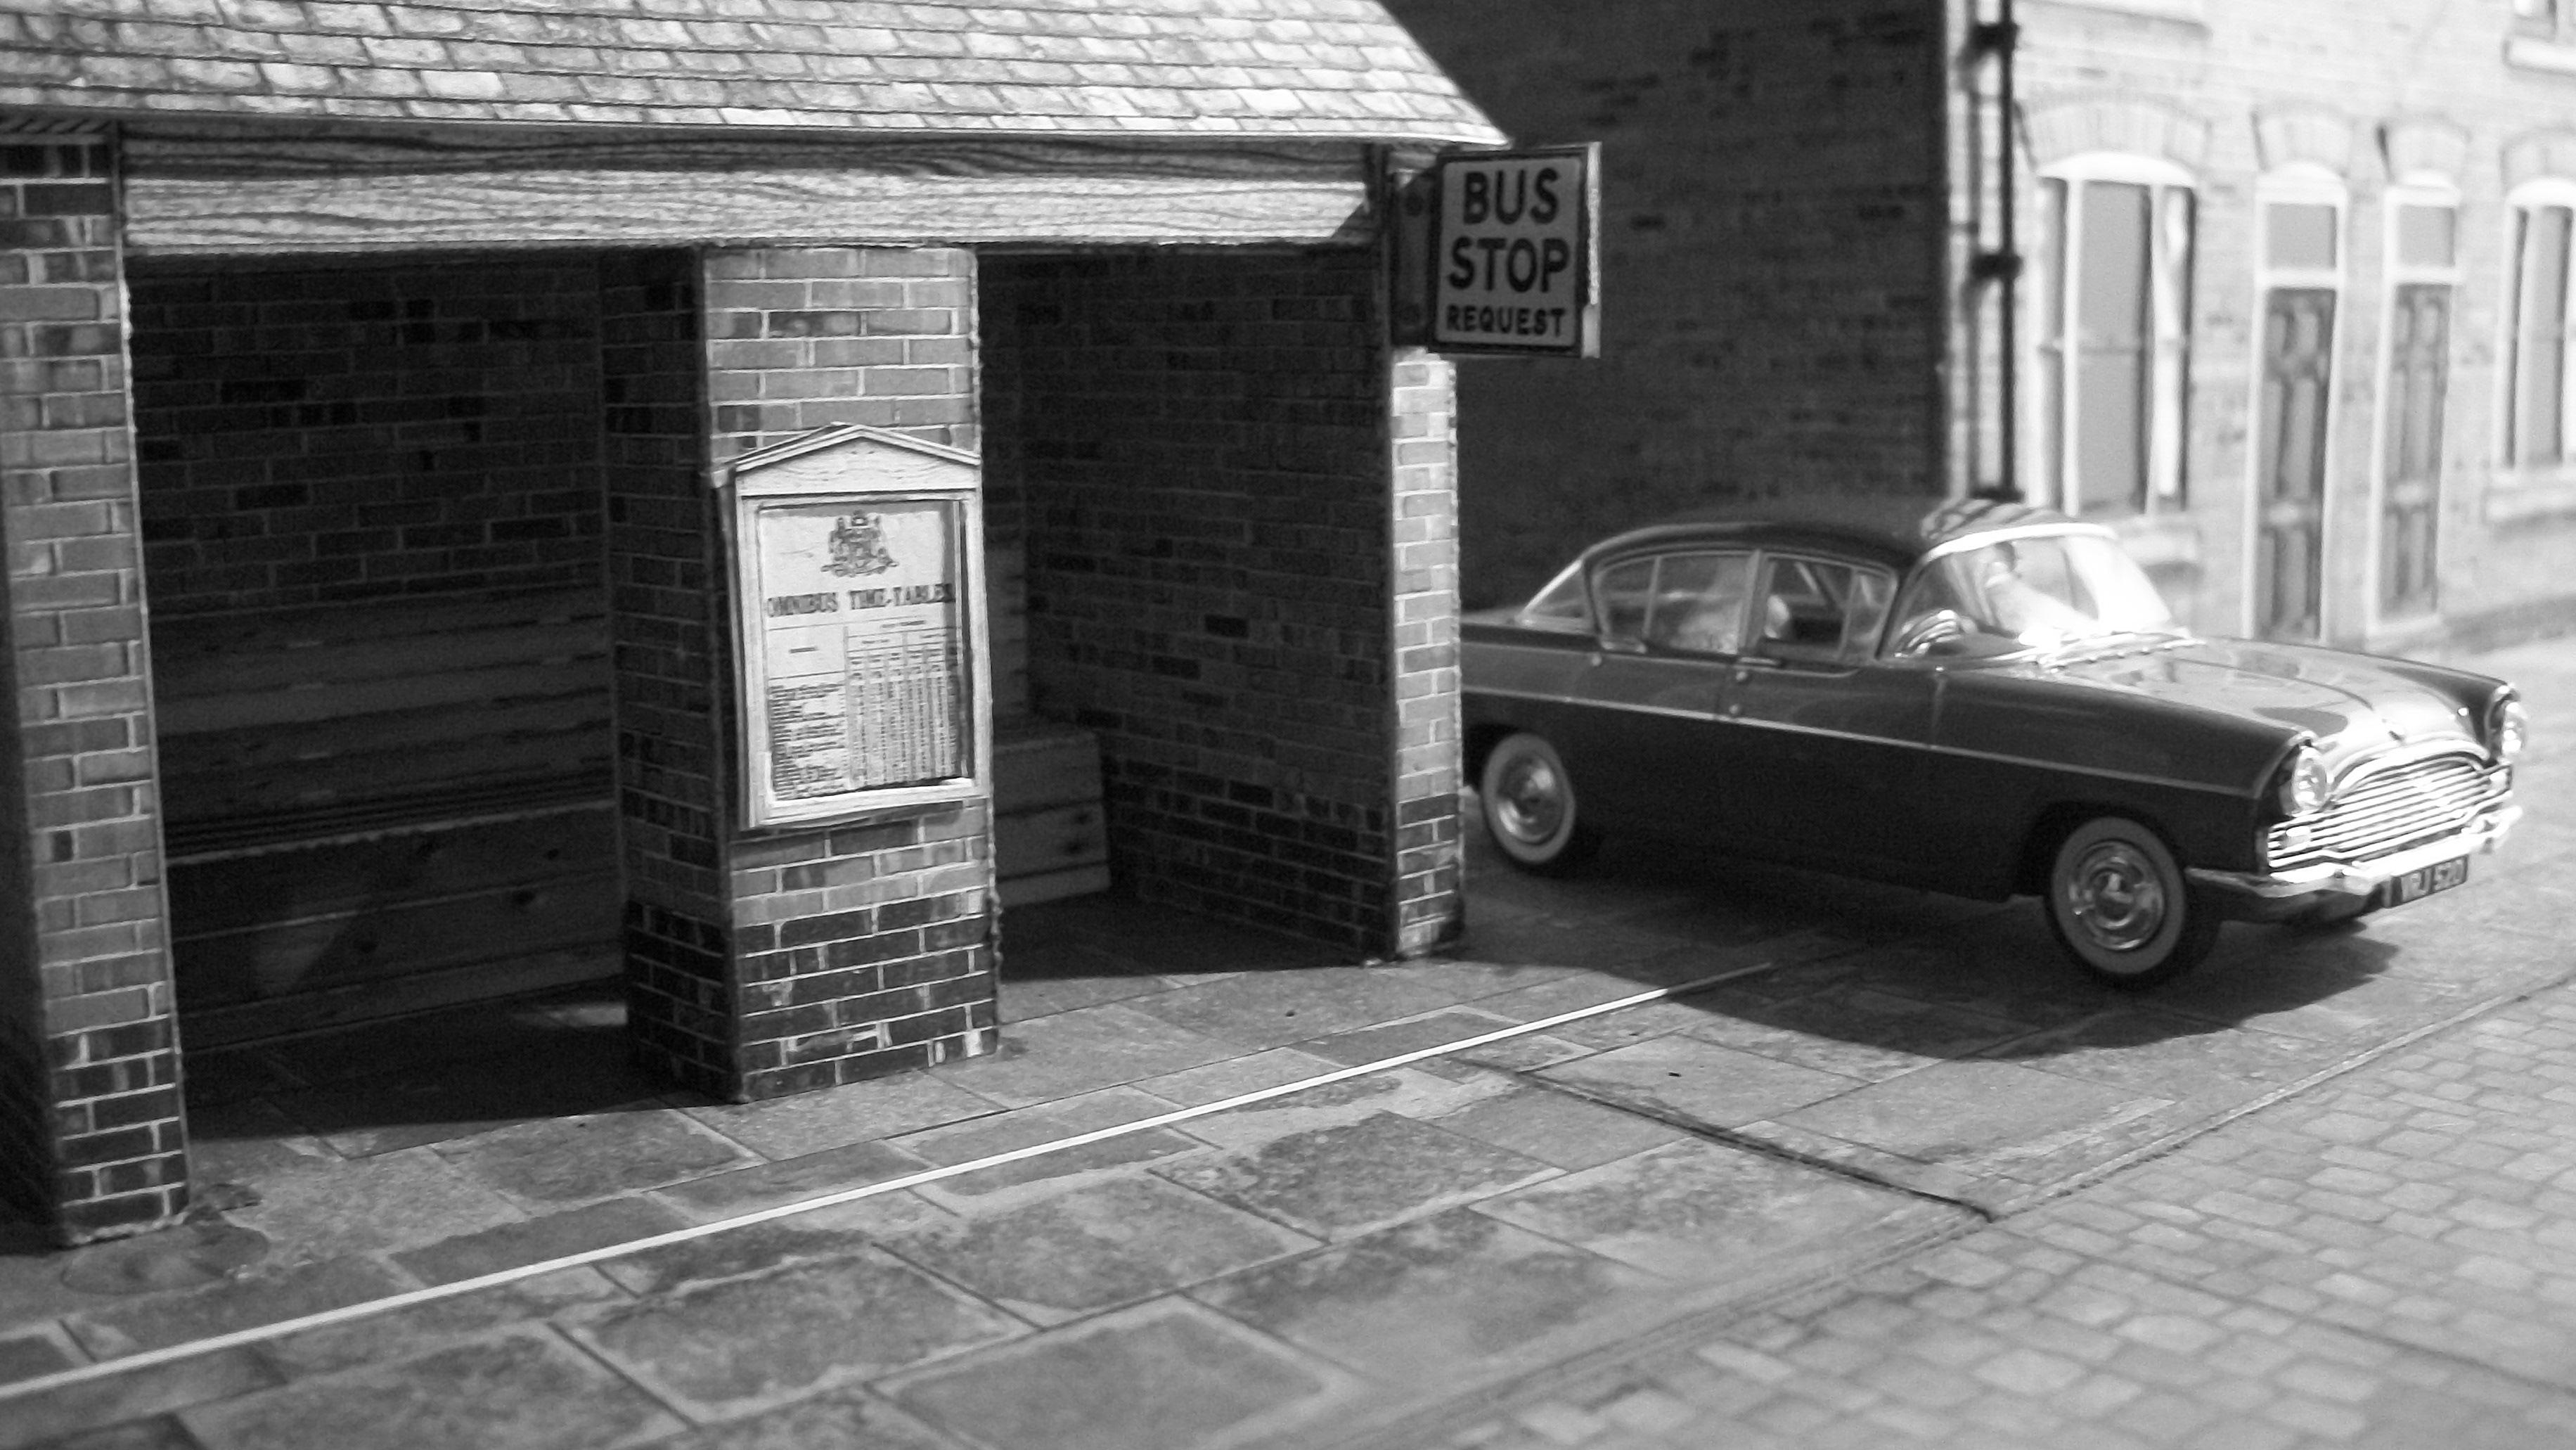
The following photographs feature the 1960 Vauxhall Cresta PA in two-tone green, which is Alpine Green and Glade Green. This is the 1:43 scale diorama and the car is parked between the terraced houses and the bus shelter. It is early morning during the early 1960's, shortly before the first bus is due, and around the time that the local milkman is about to begin his deliveries. Soon the newspaper delivery boy will be doing his rounds and the owner of the green Vauxhall will be driving off to work. David
-
Sorry, Gary...... I wasn't being critical, and I hope it didn't sound like I was. I am agreeing with you that the Pyro GT6 would need a fair amount of work to convert it into a Spitfire. ( my post was about two diecast models, for the topic ' What diecast did you get today? '...... not sure how I got onto 1:24 scale plastic ? ) Oops. David
-
Okay, thanks Lesley...... no problem. David