Anglia105E
-
Posts
3,487 -
Joined
-
Last visited
Content Type
Profiles
Forums
Events
Gallery
Everything posted by Anglia105E
-
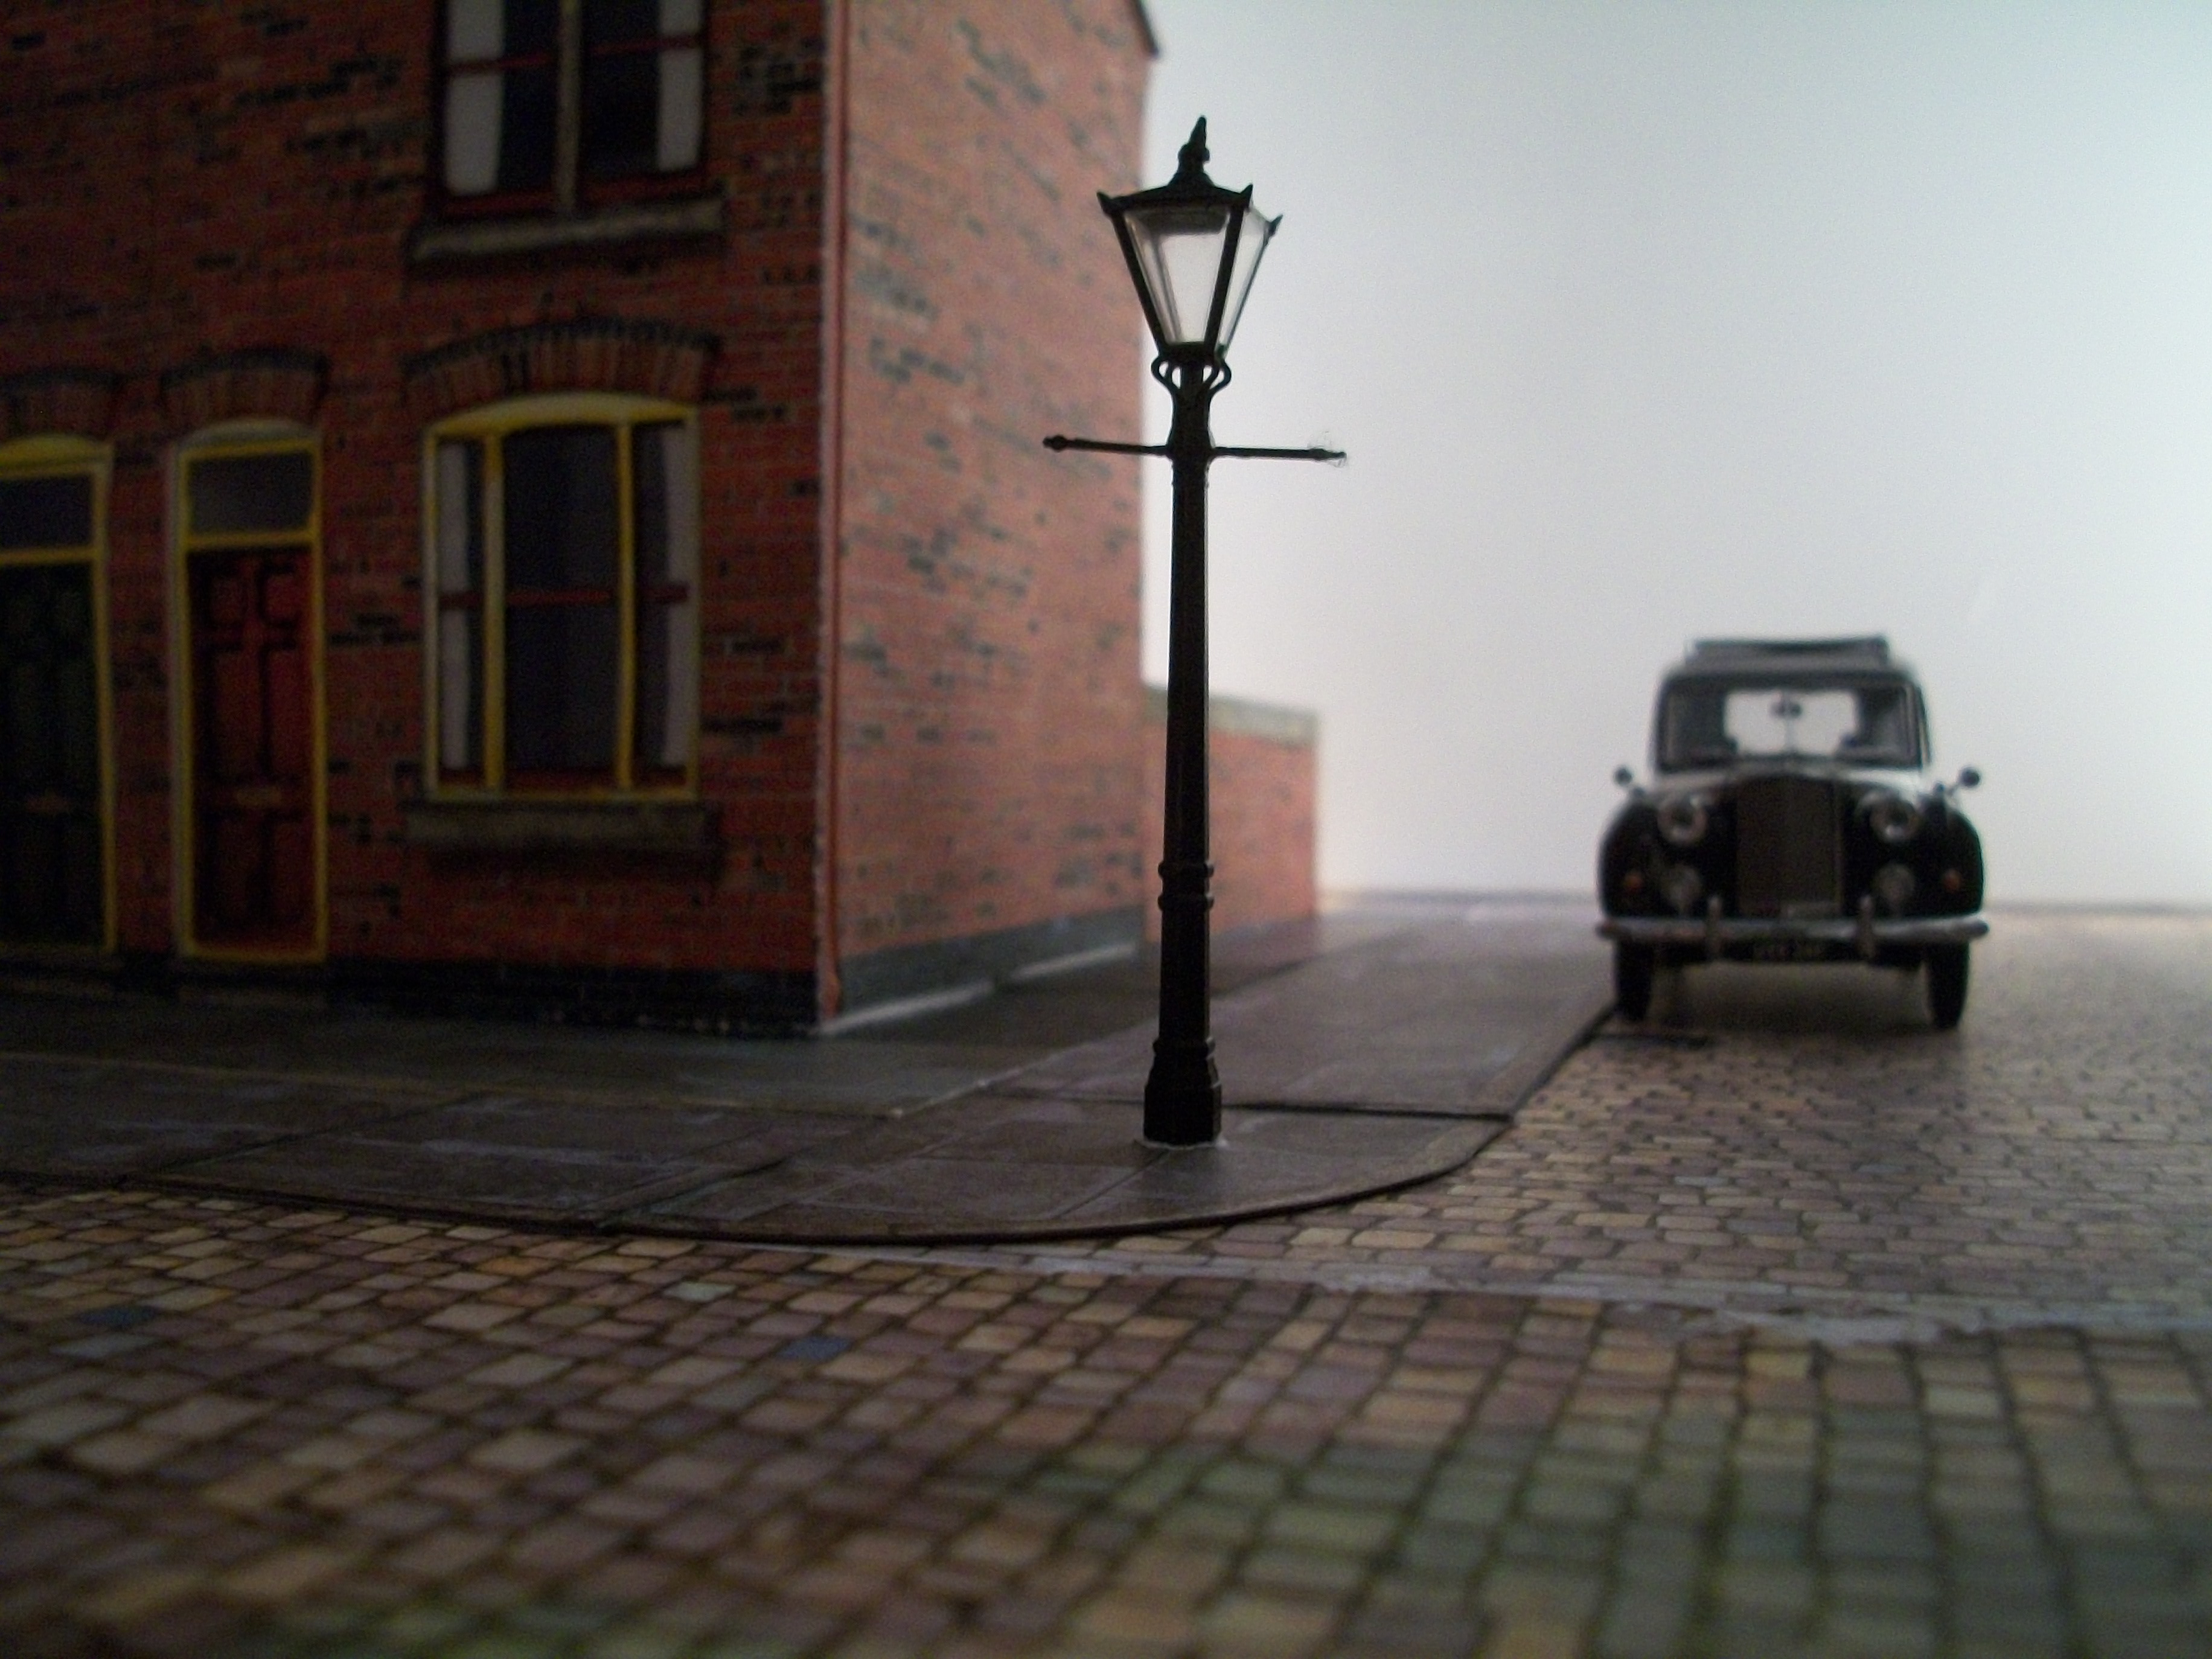
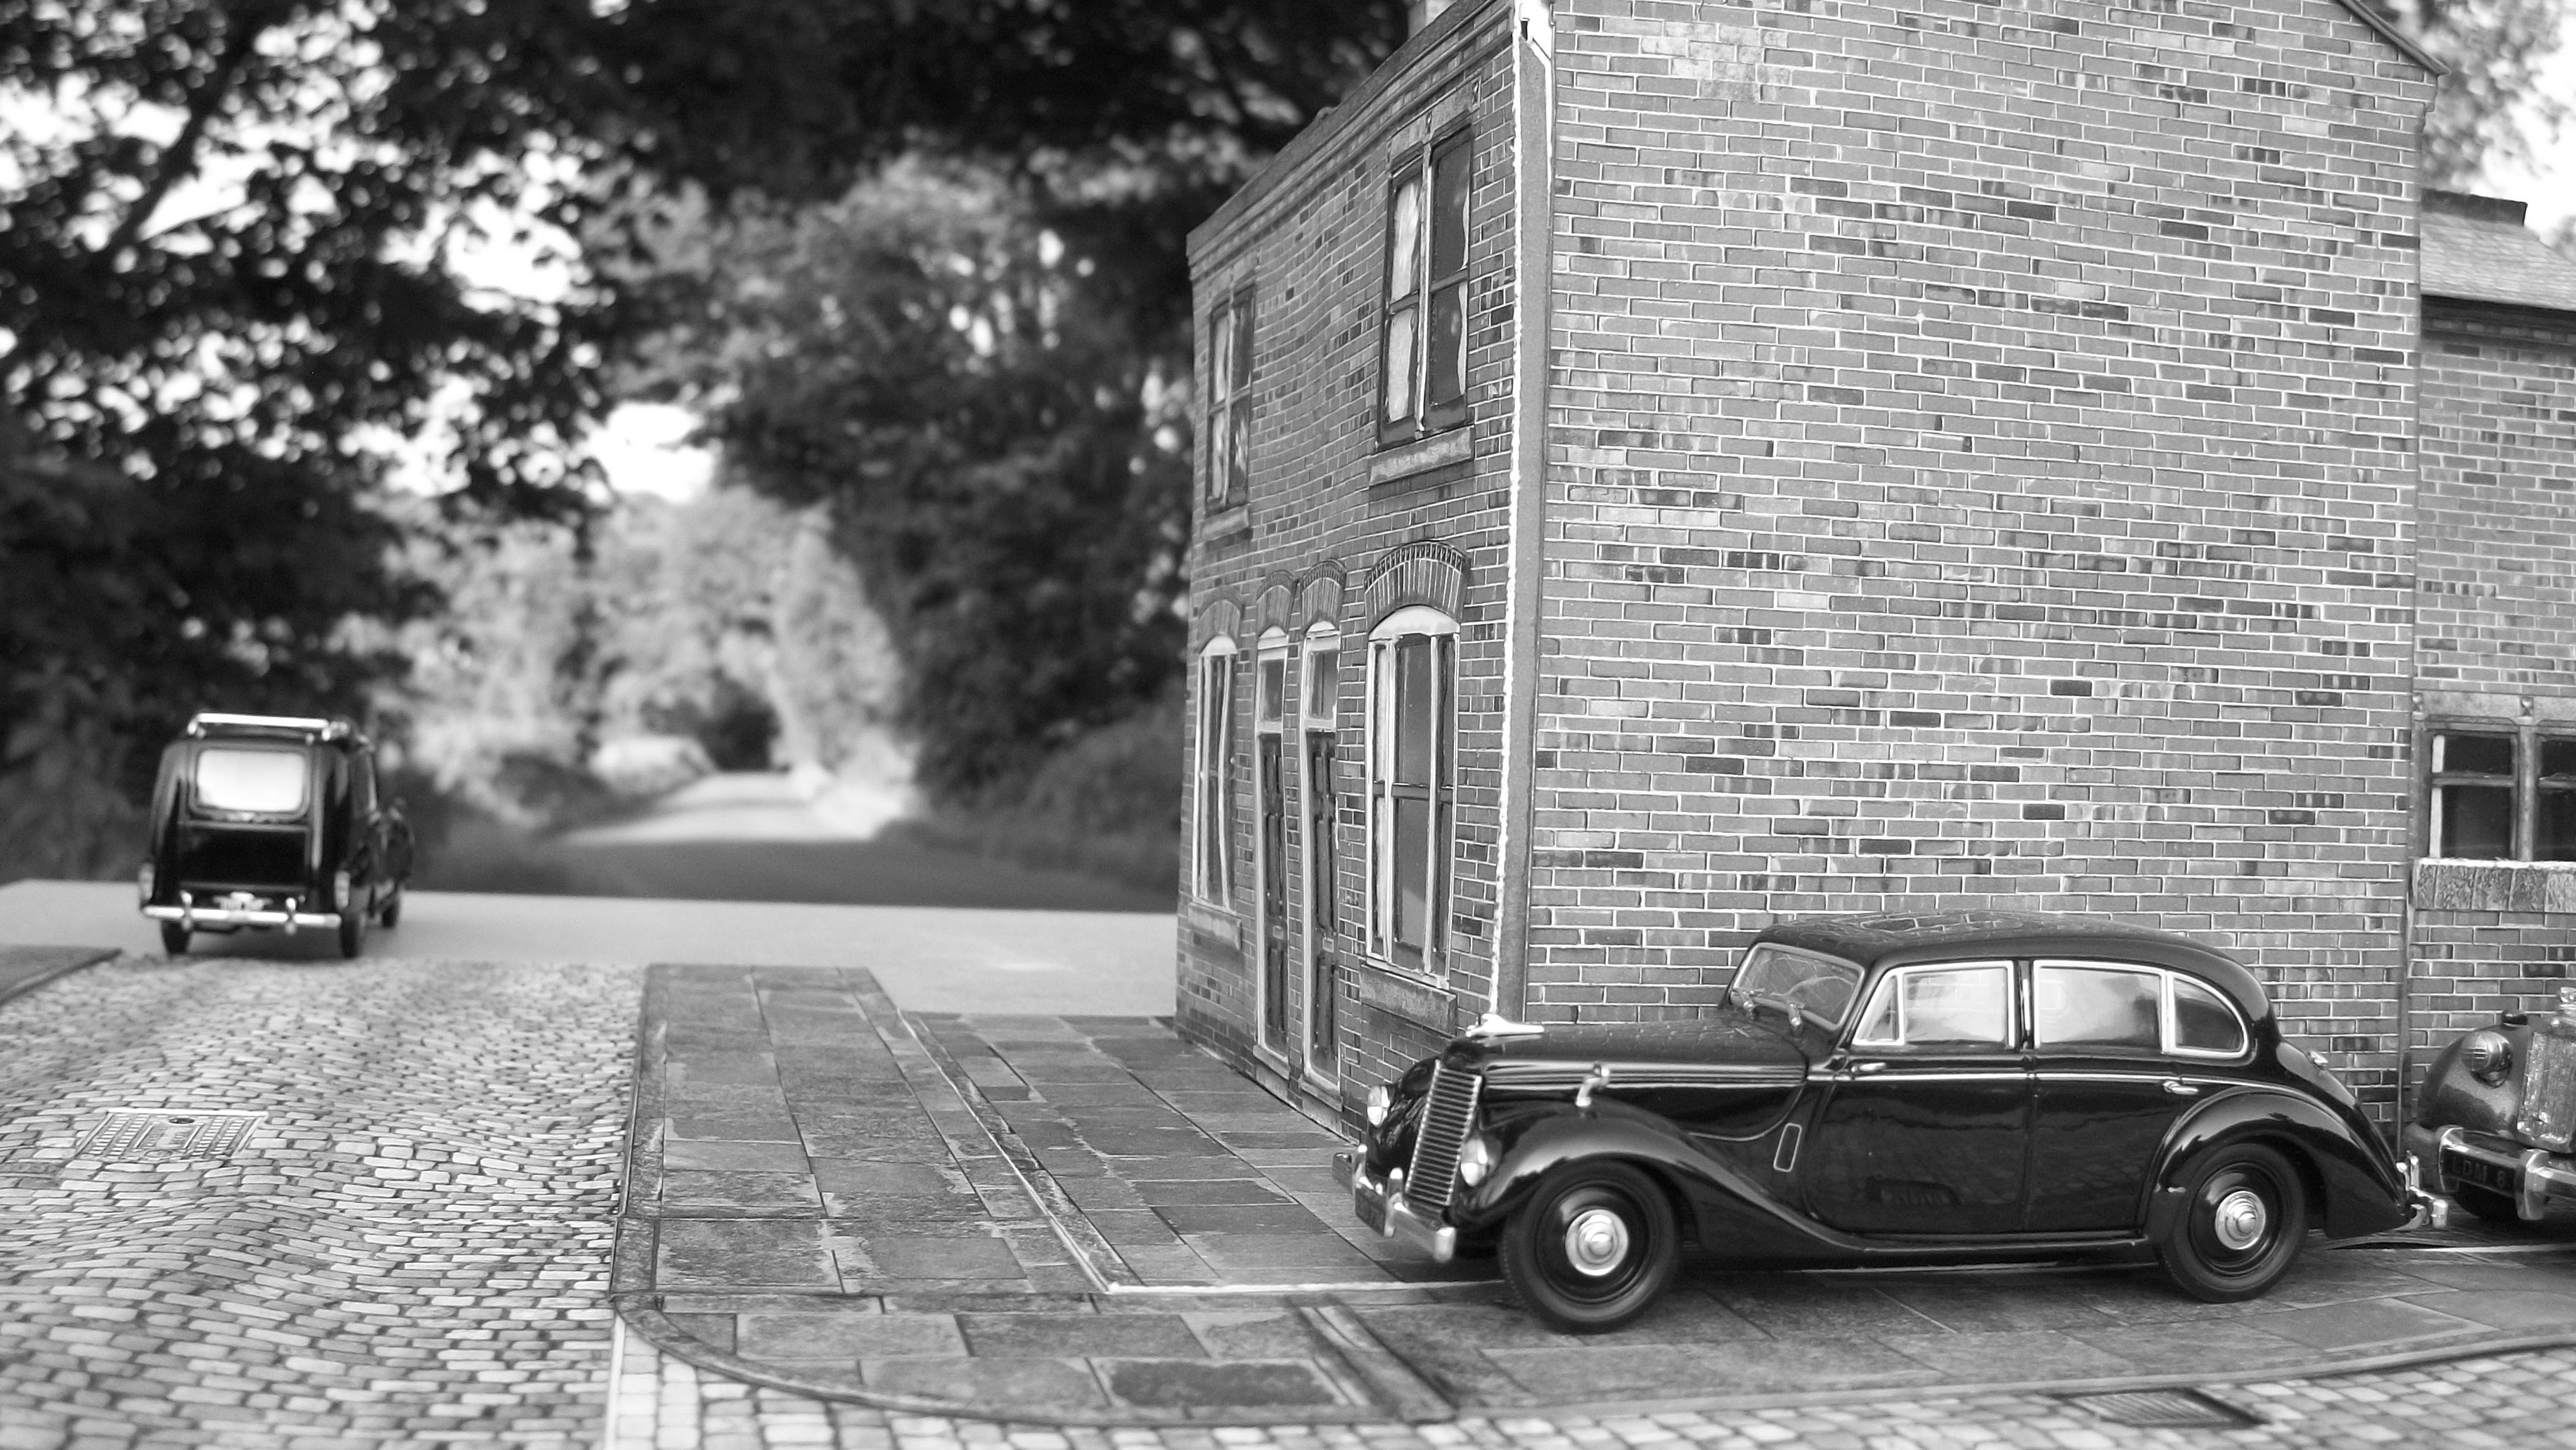
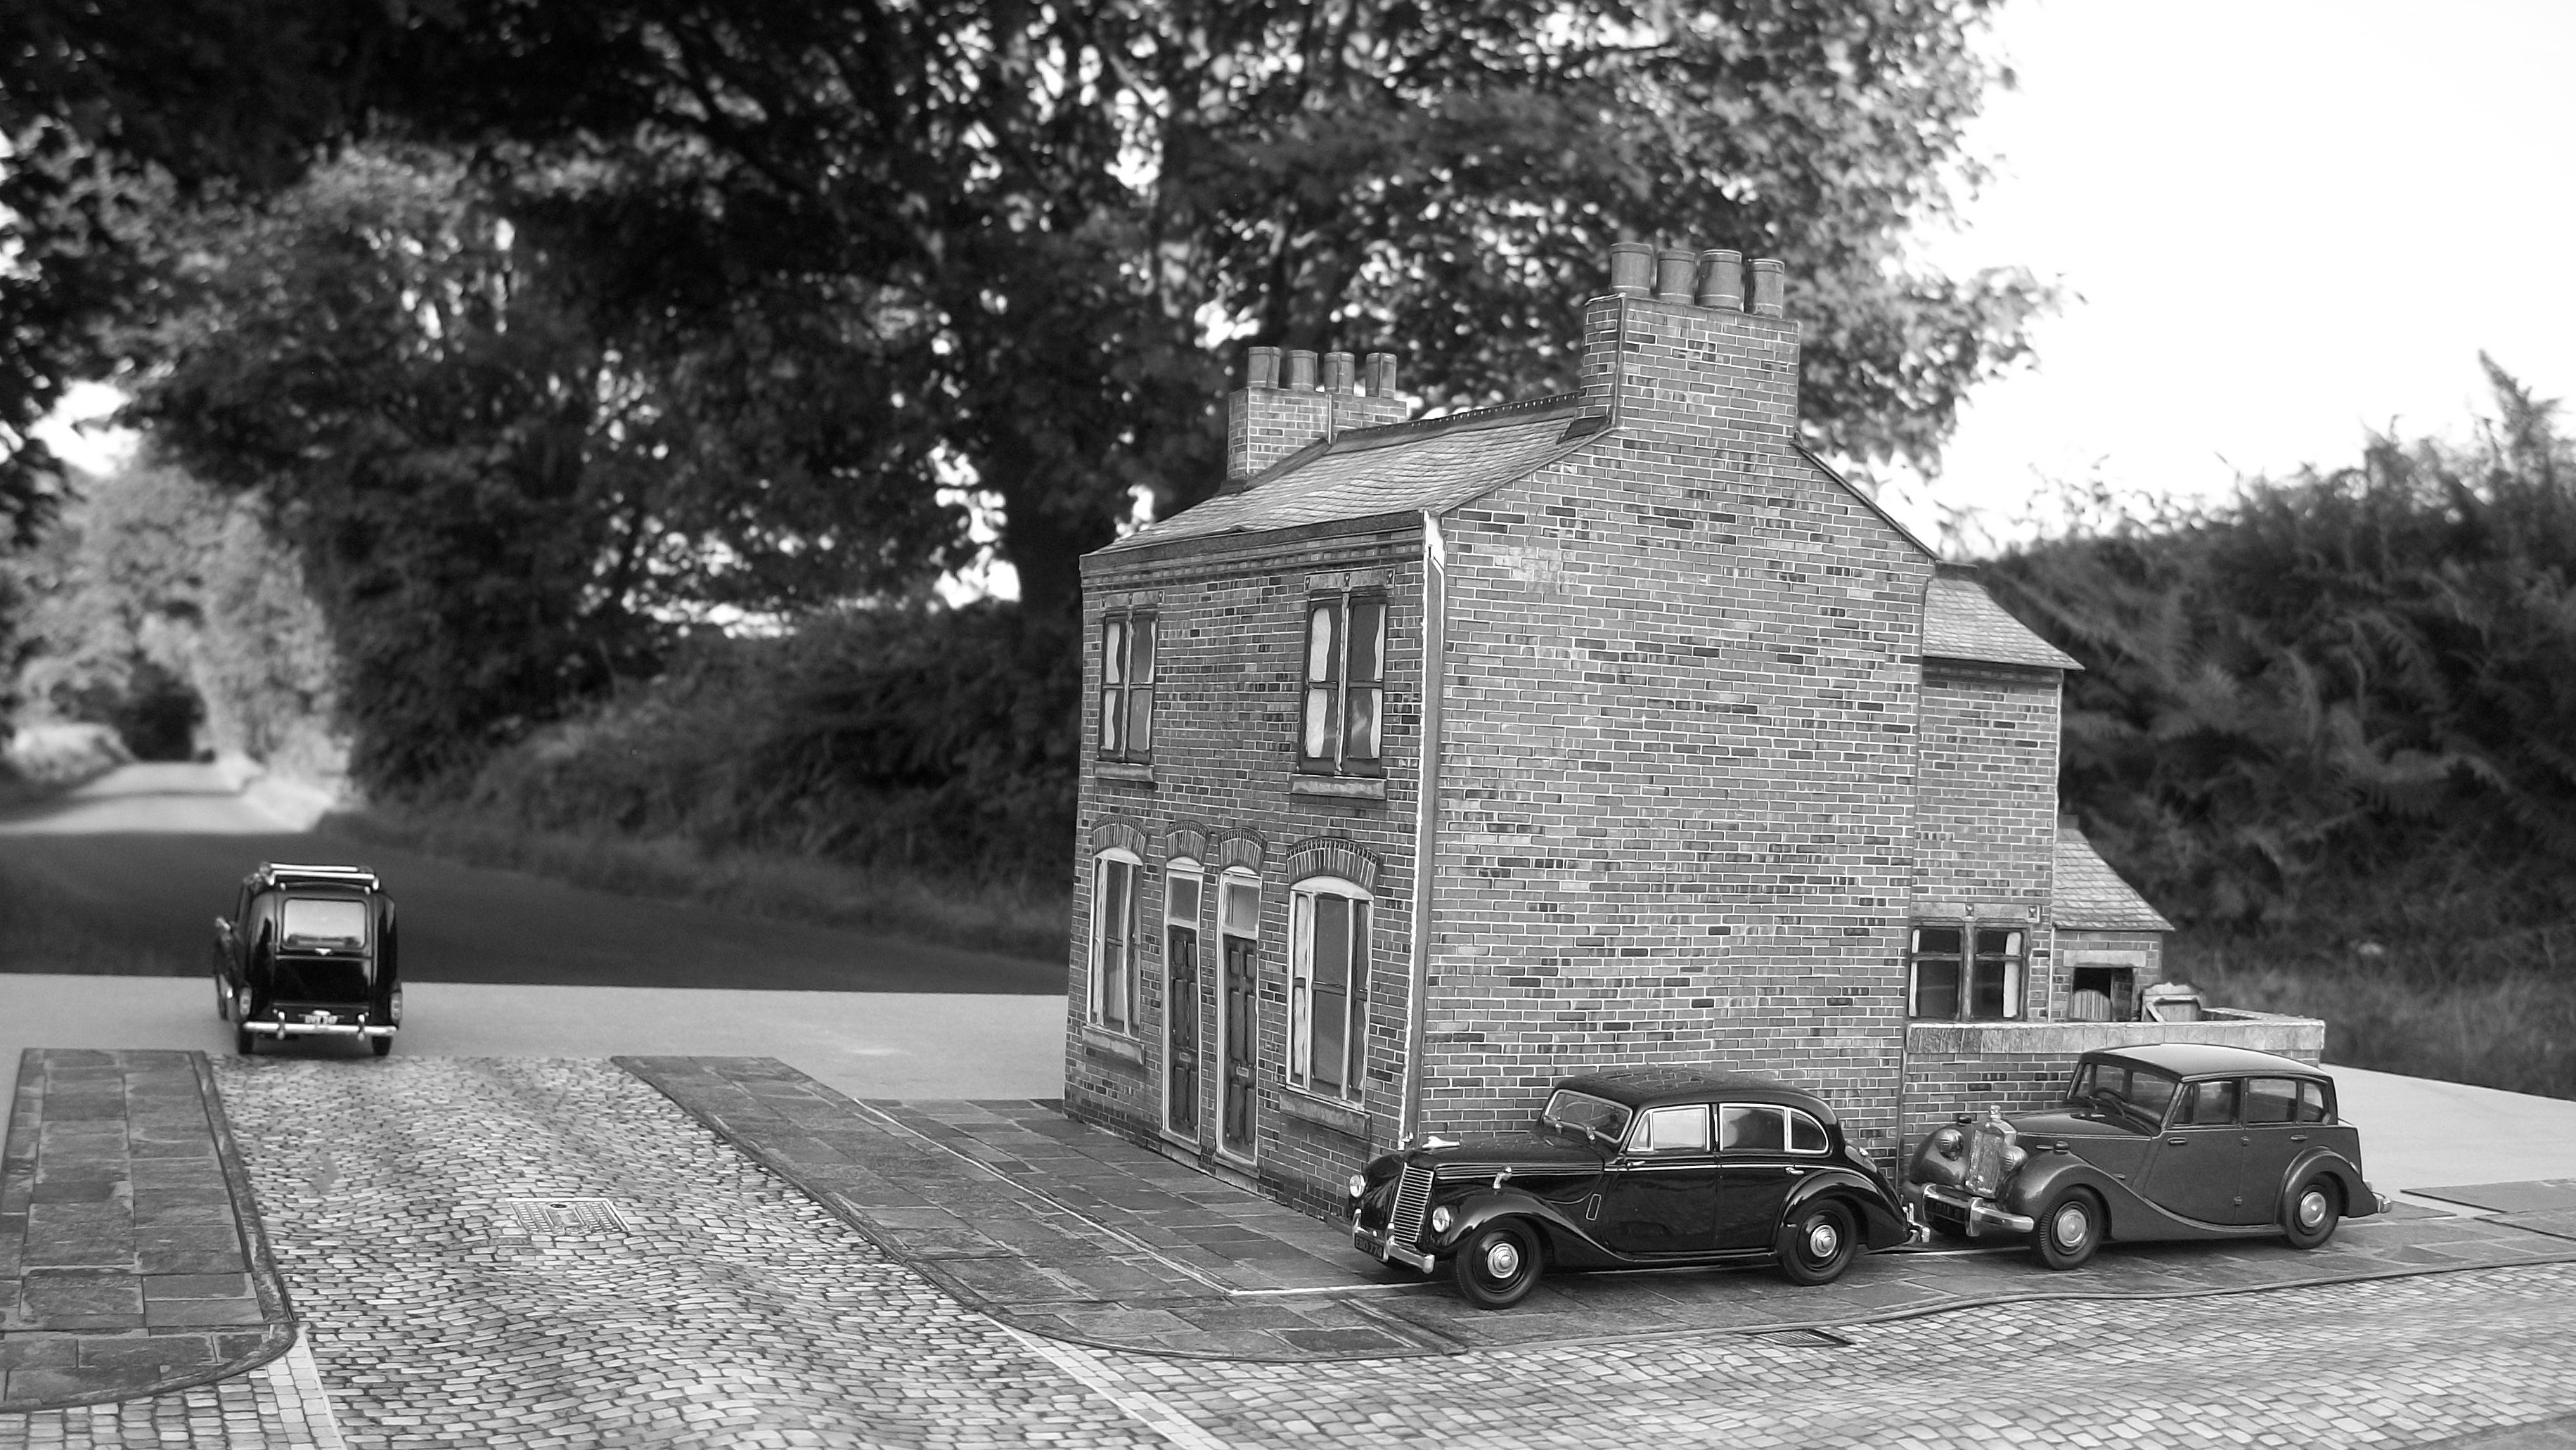
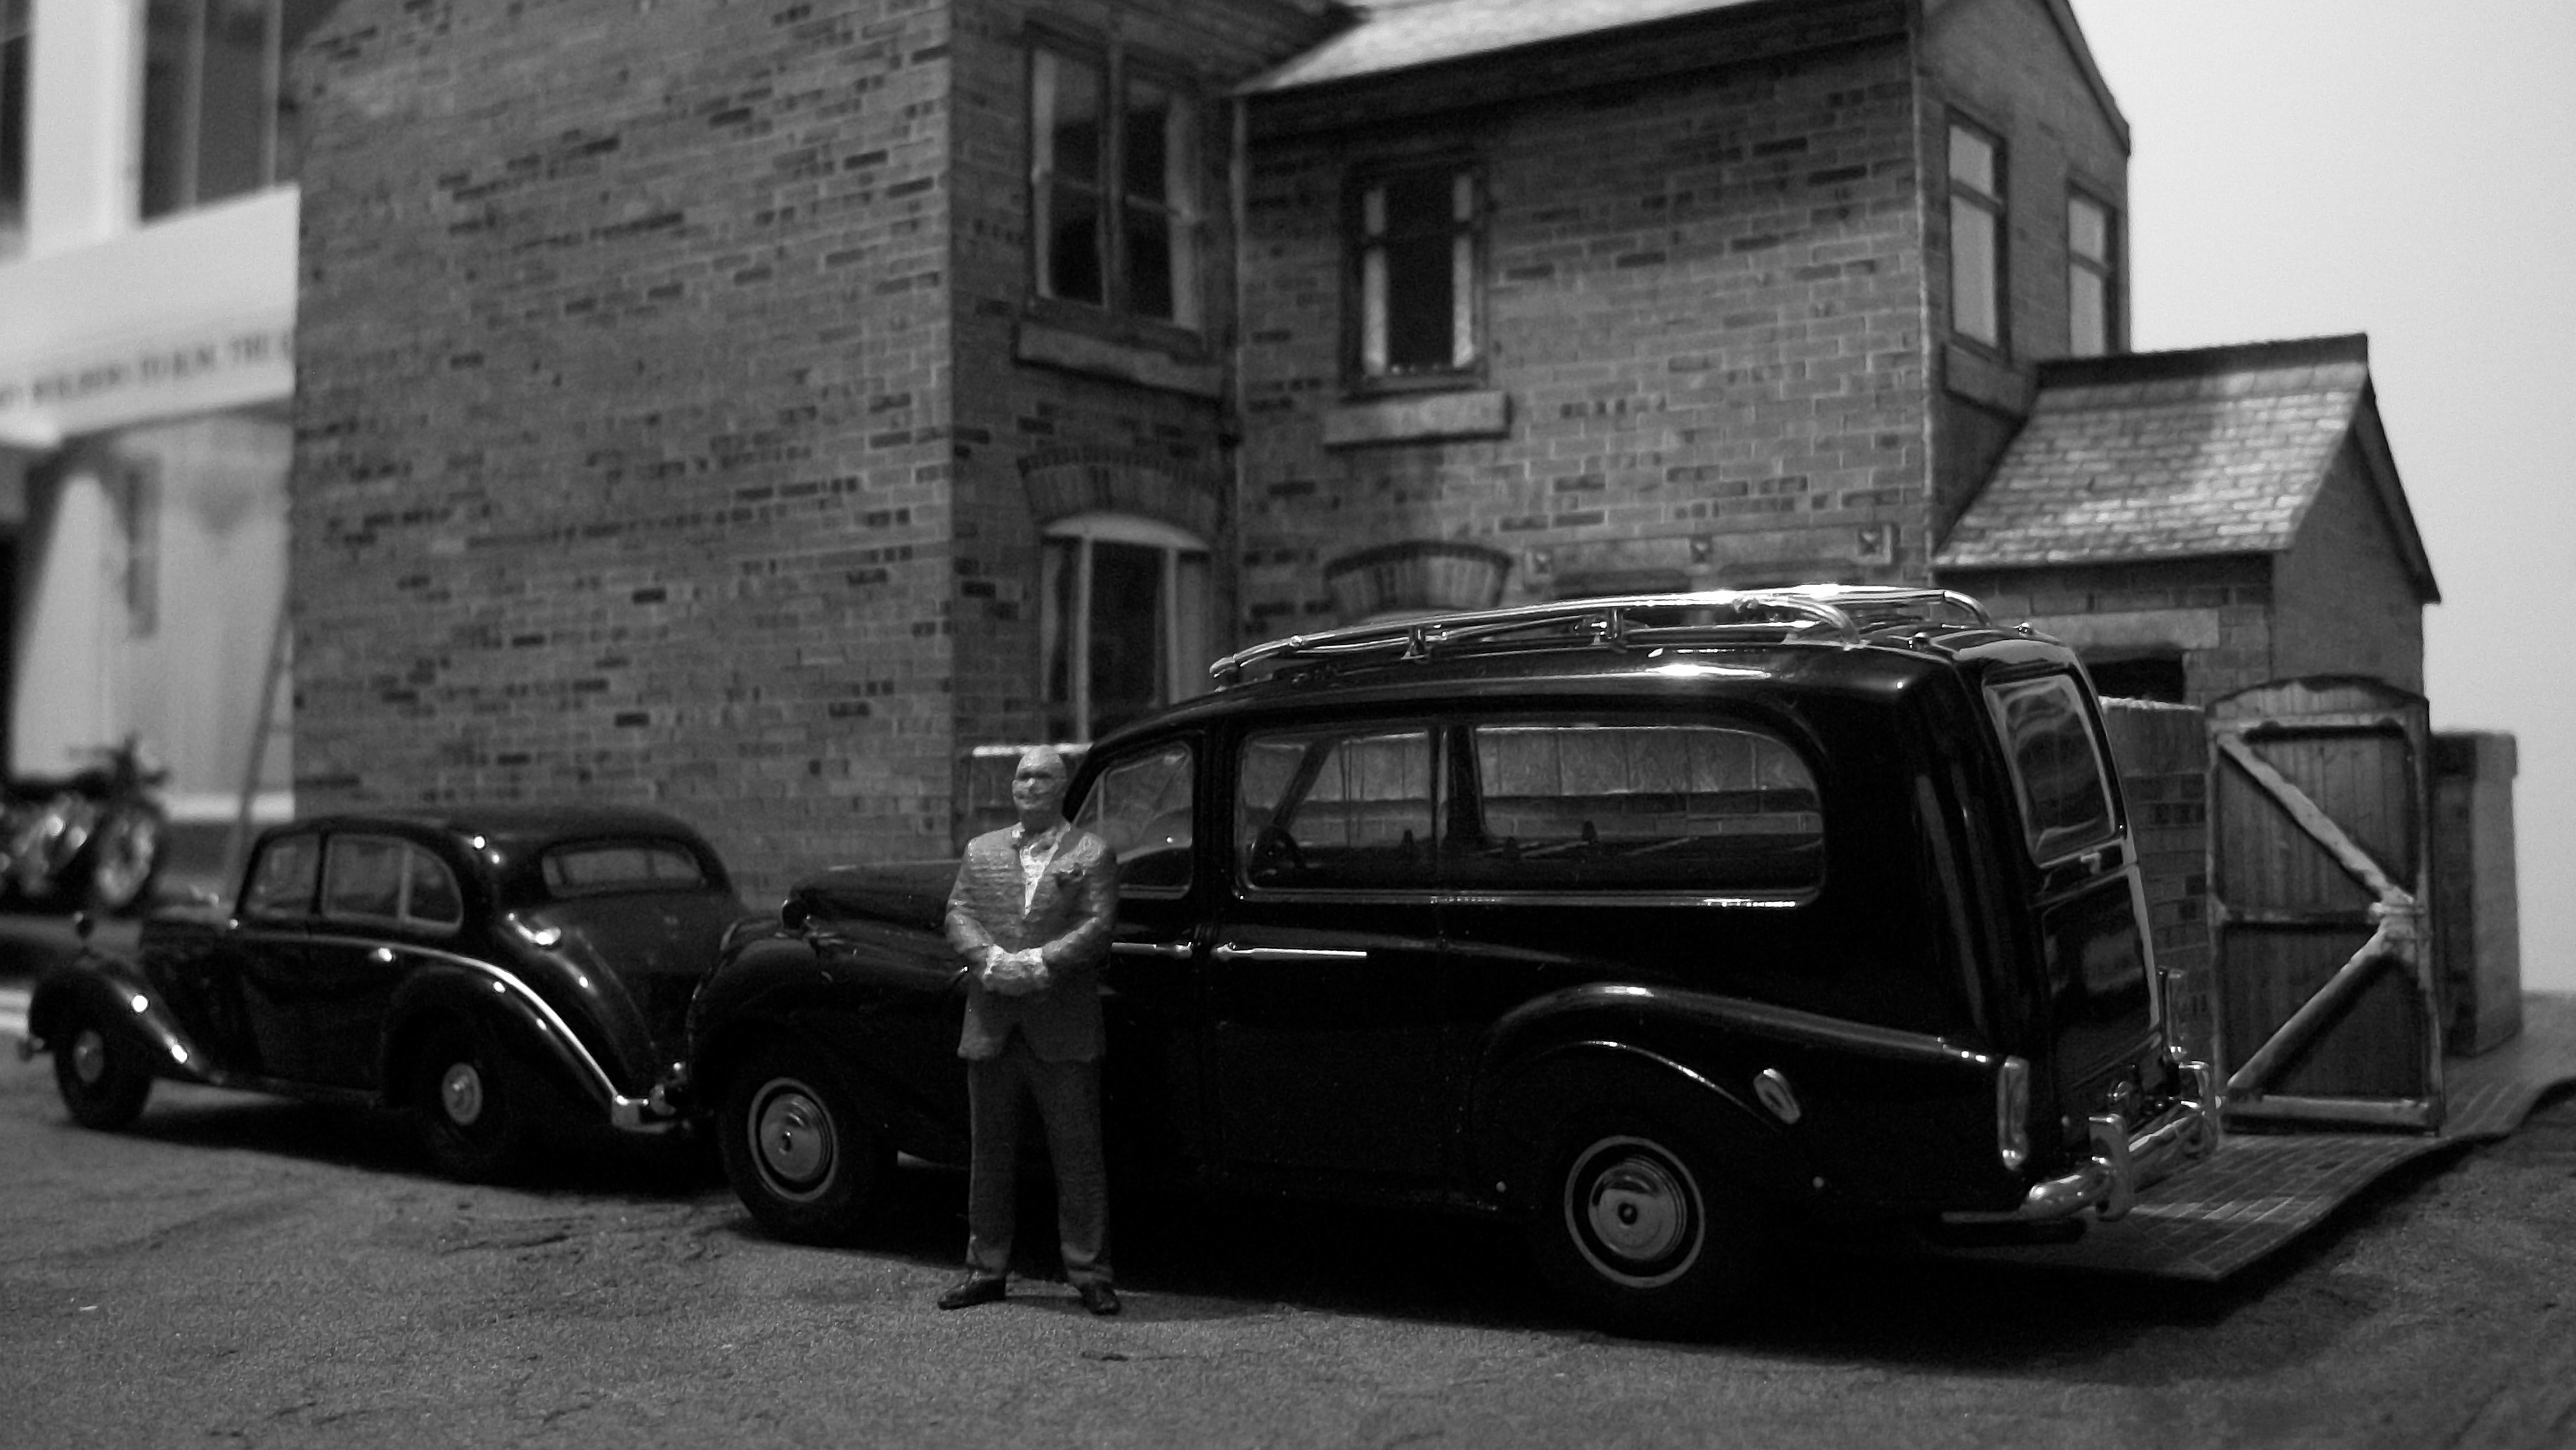
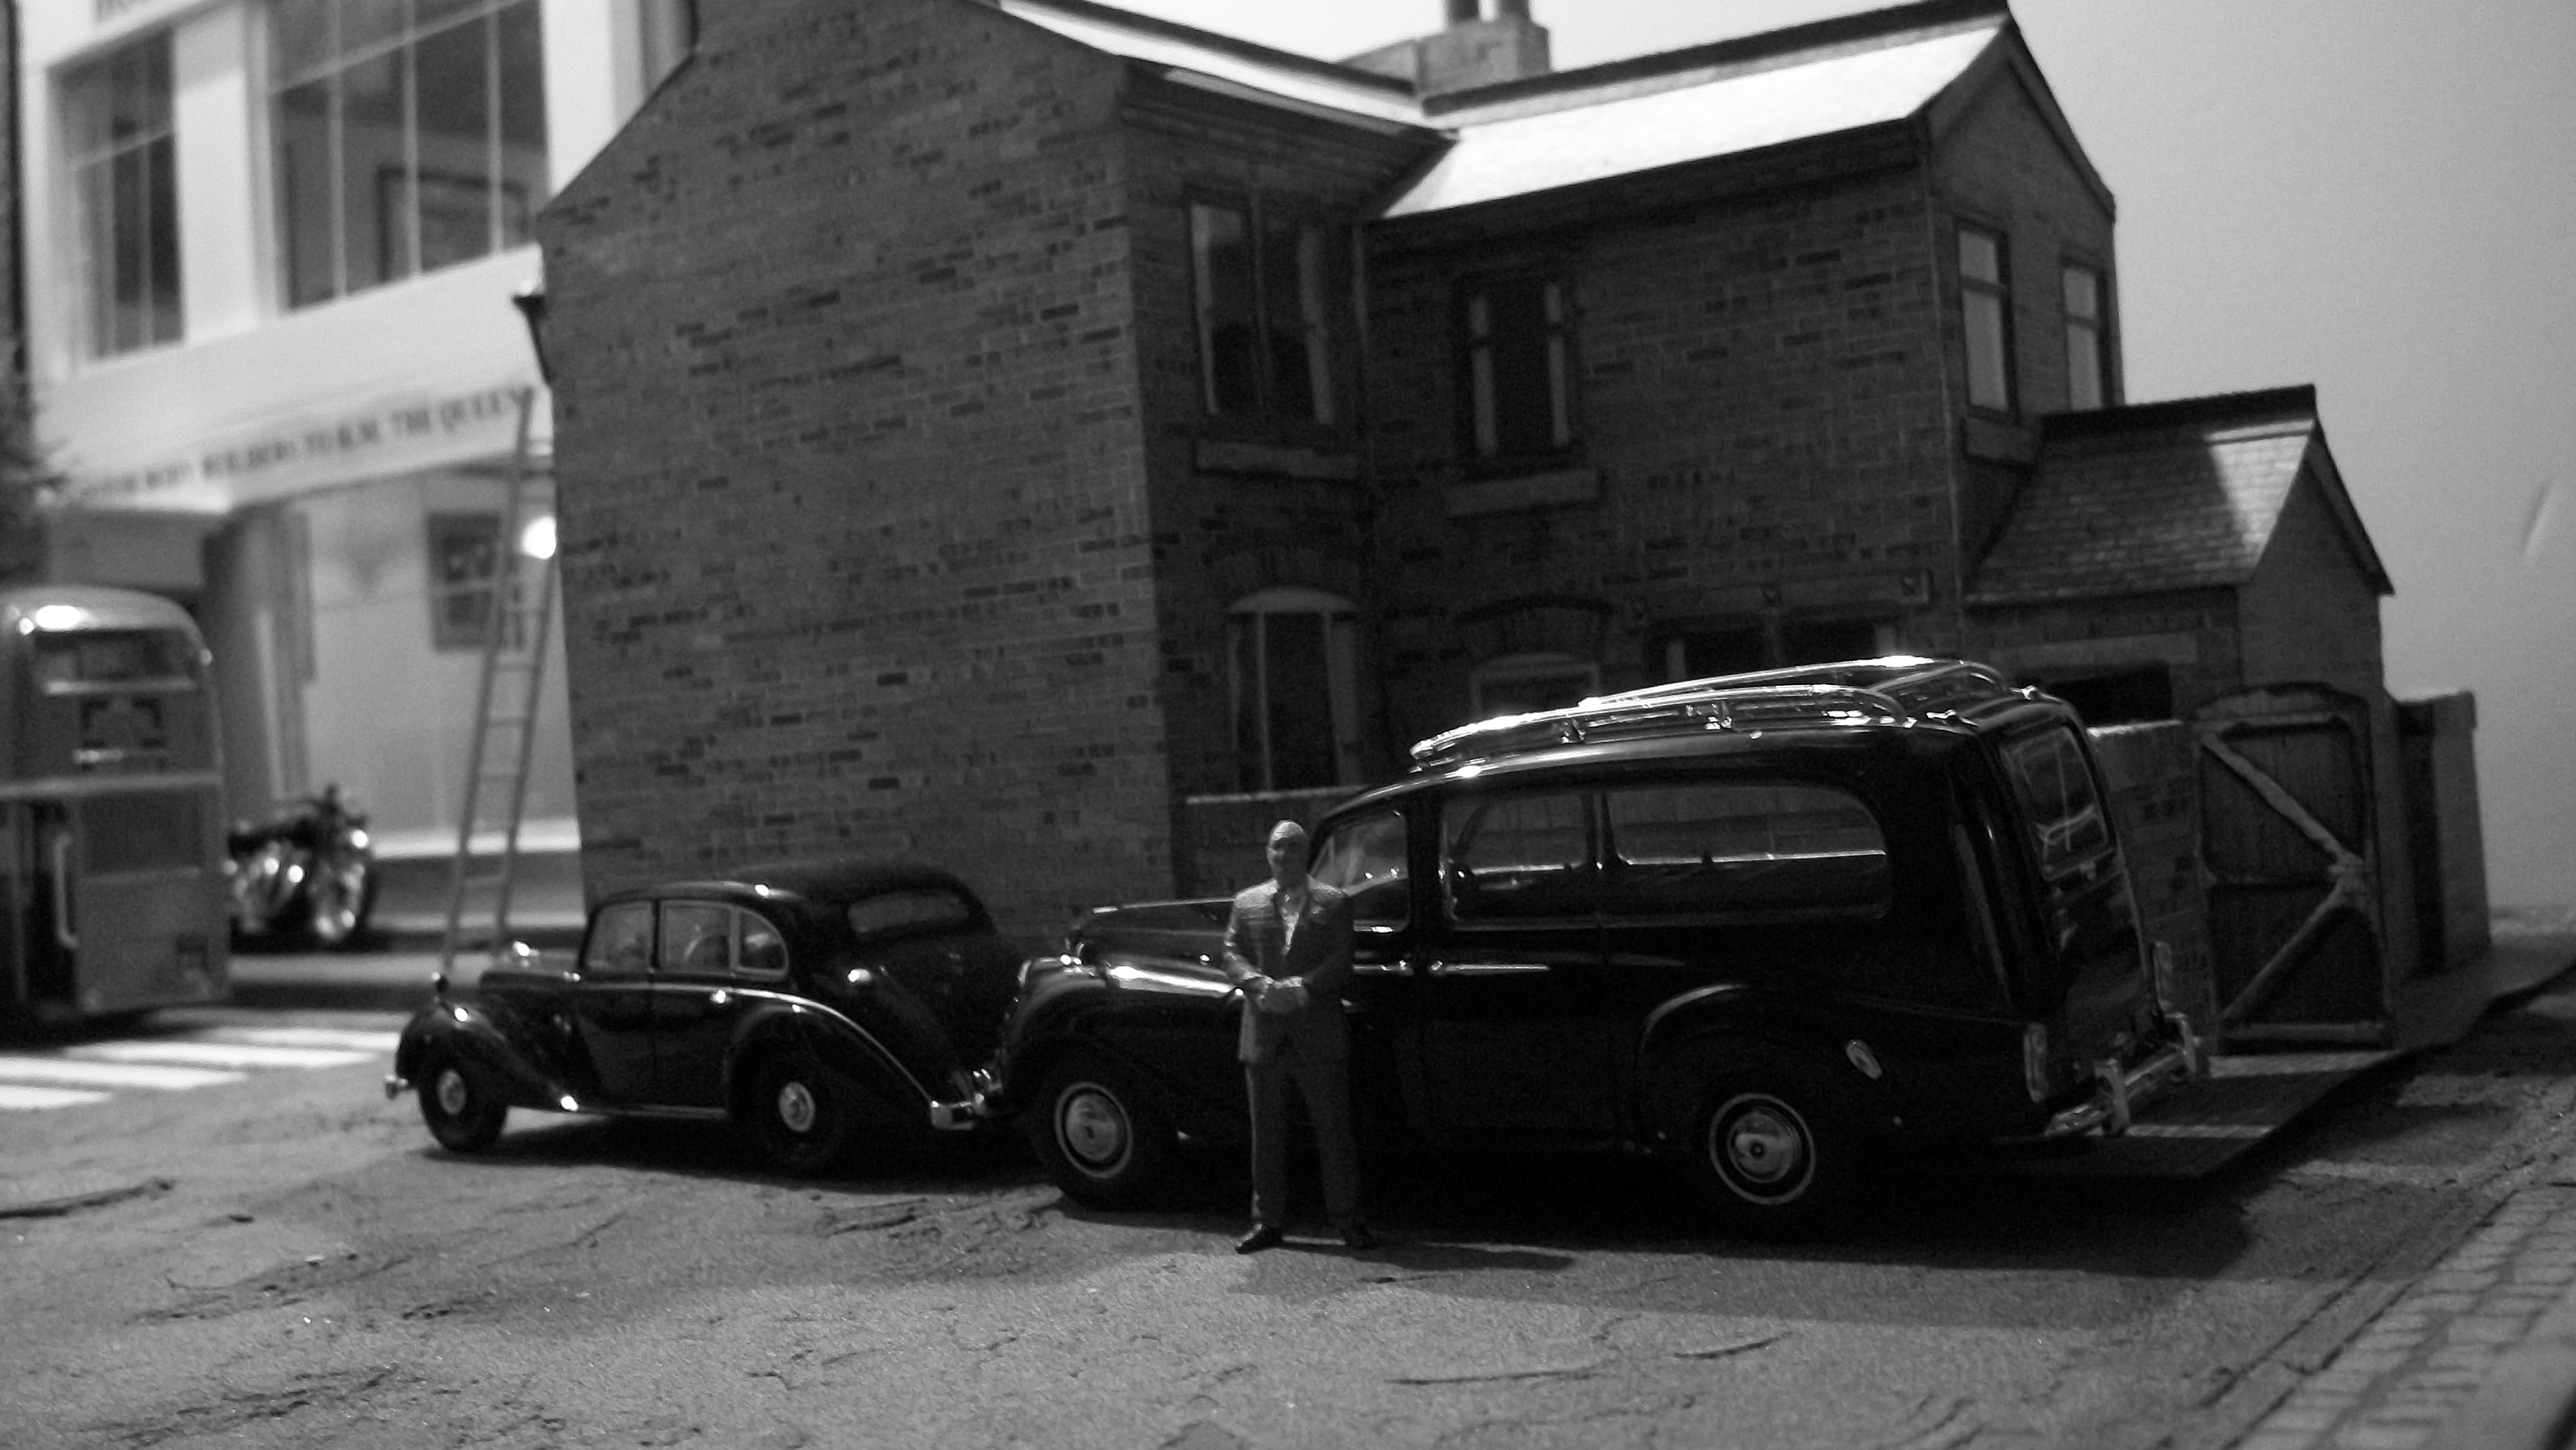
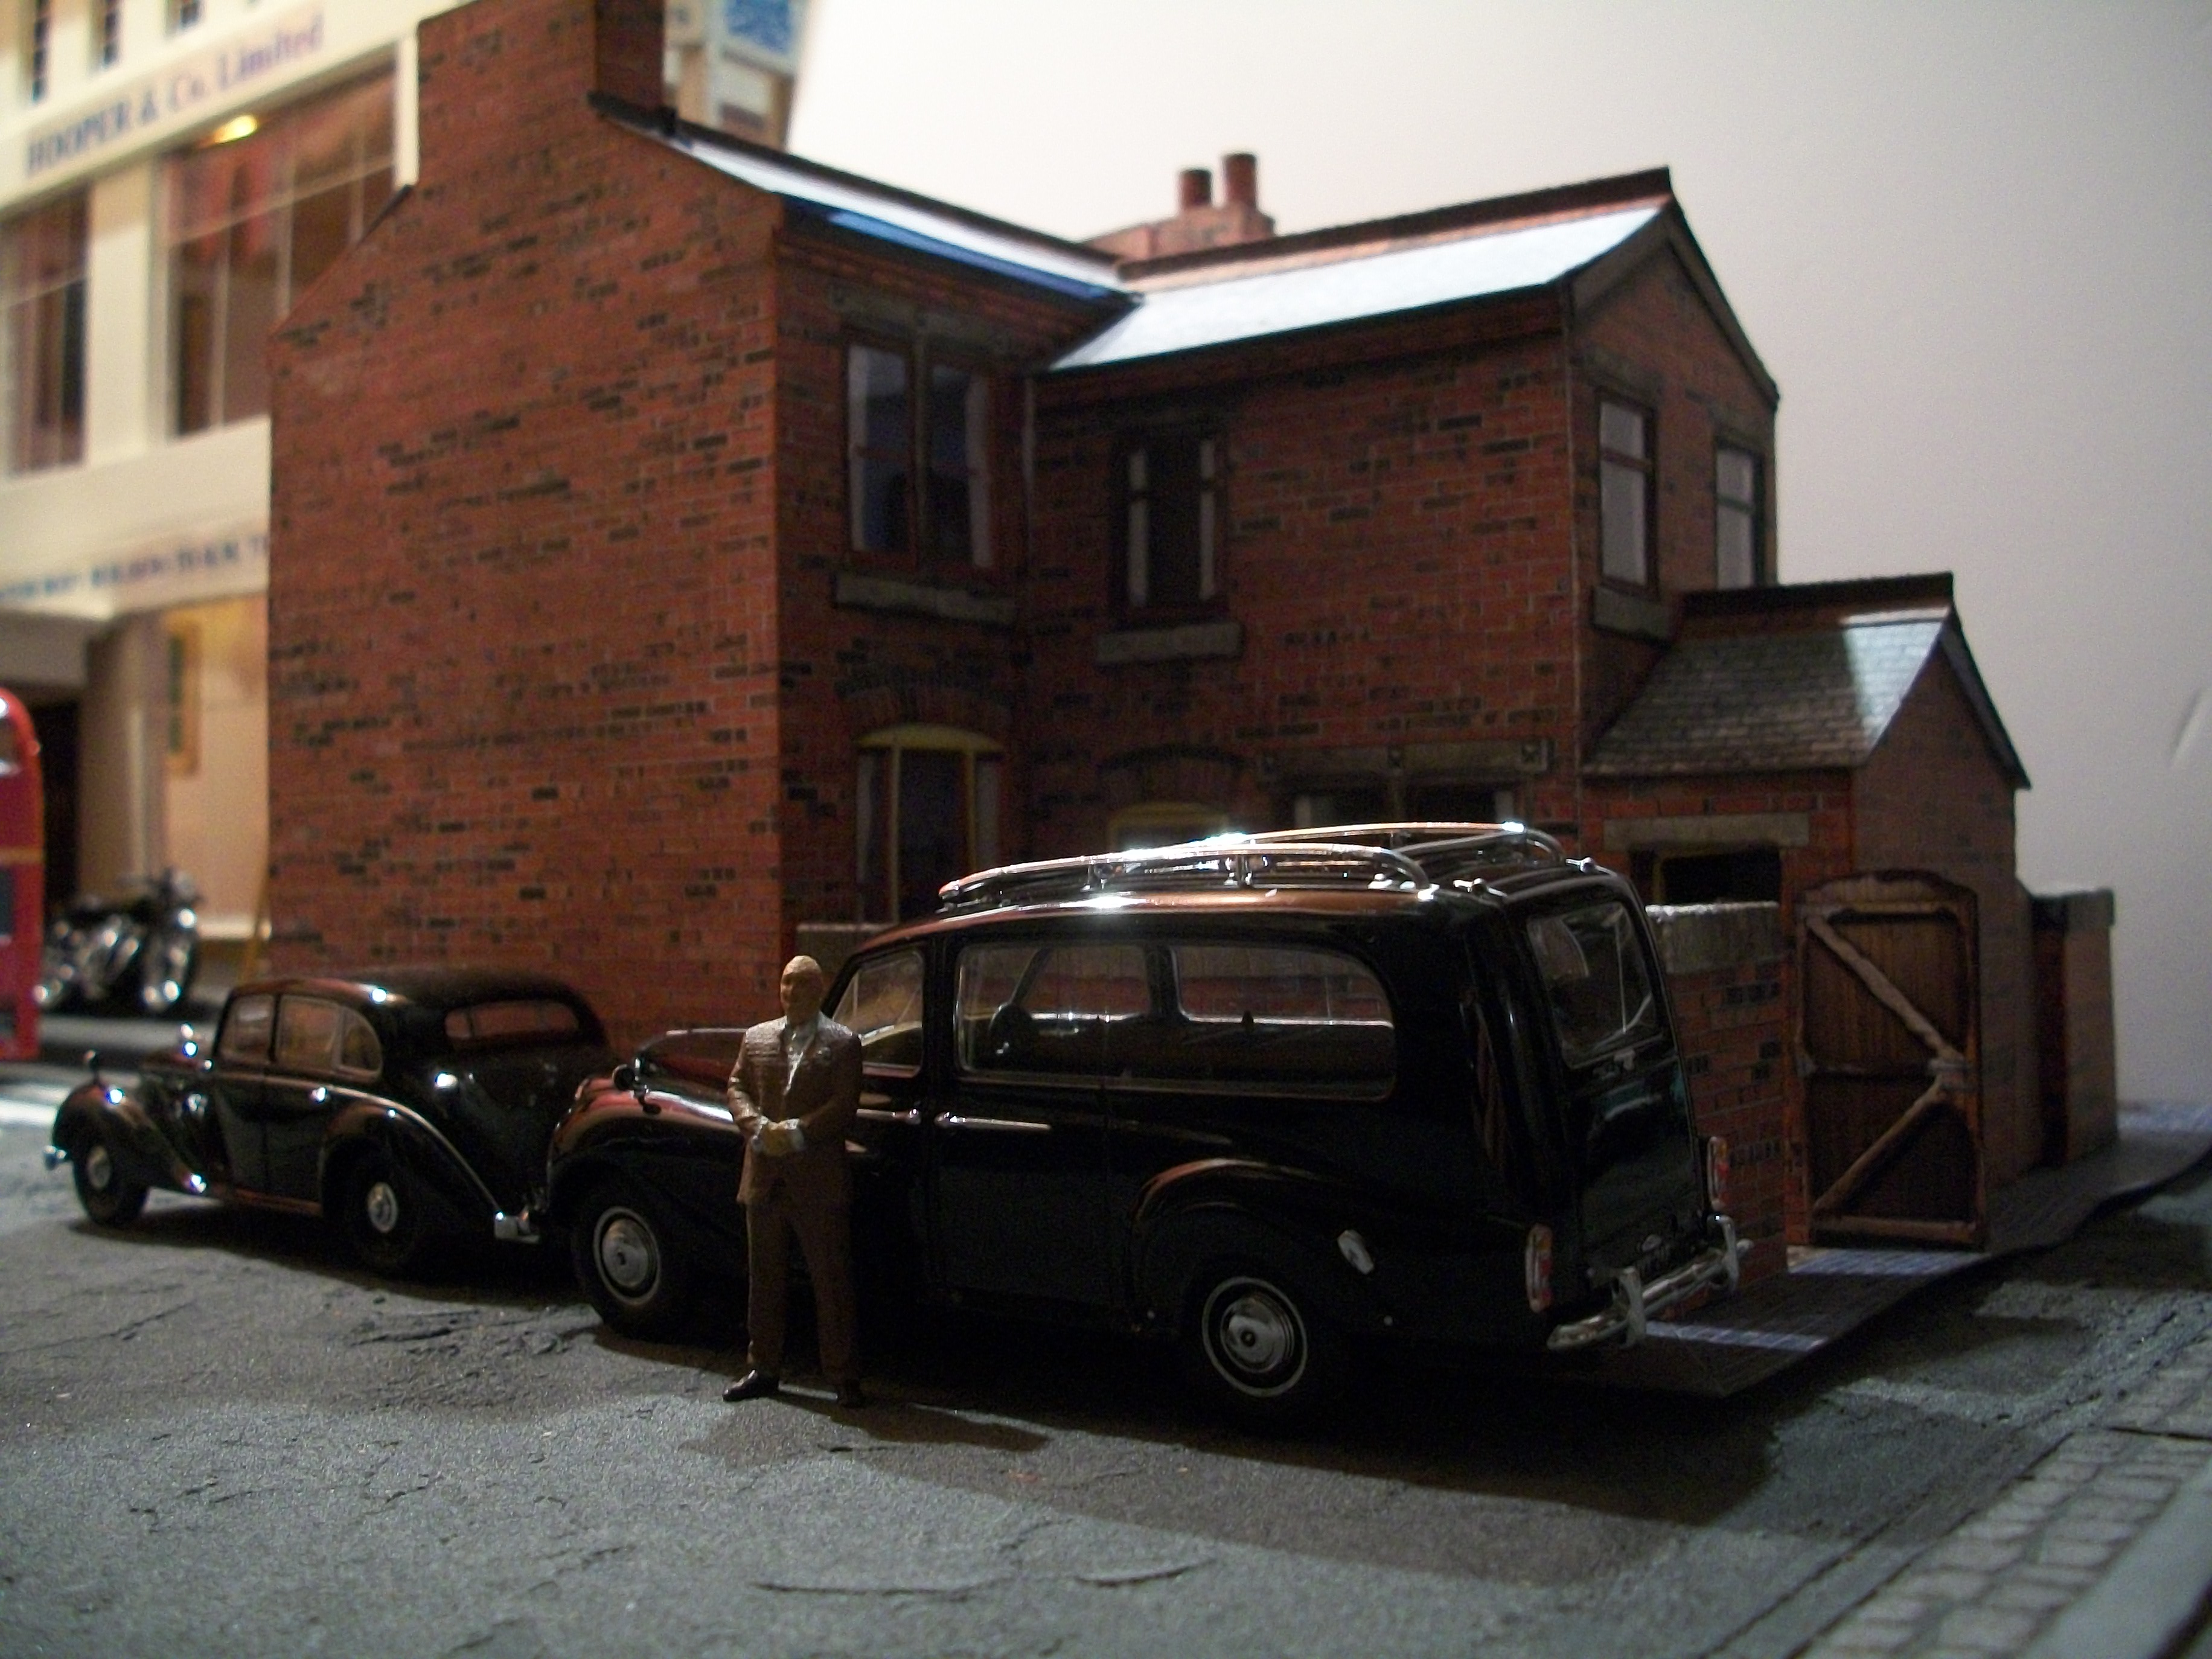
These following photos were taken indoors, using one 100 watt daylight bulb, showing the third diorama in 1:43 scale with the first of the street lamps added. The hearse is waiting outside the Victorian terraced houses early in the morning........... David

-
Michael..... is this a part diecast and part plastic kit? Certainly, I have one unbuilt in the original box, and I shall follow your build with interest. The metal body looks very accurate. David
-

Big but beautiful
Anglia105E replied to landman's topic in General Automotive Talk (Trucks and Cars)
Pat..... those guys must have a pretty decent 3D printer....... !!! David -
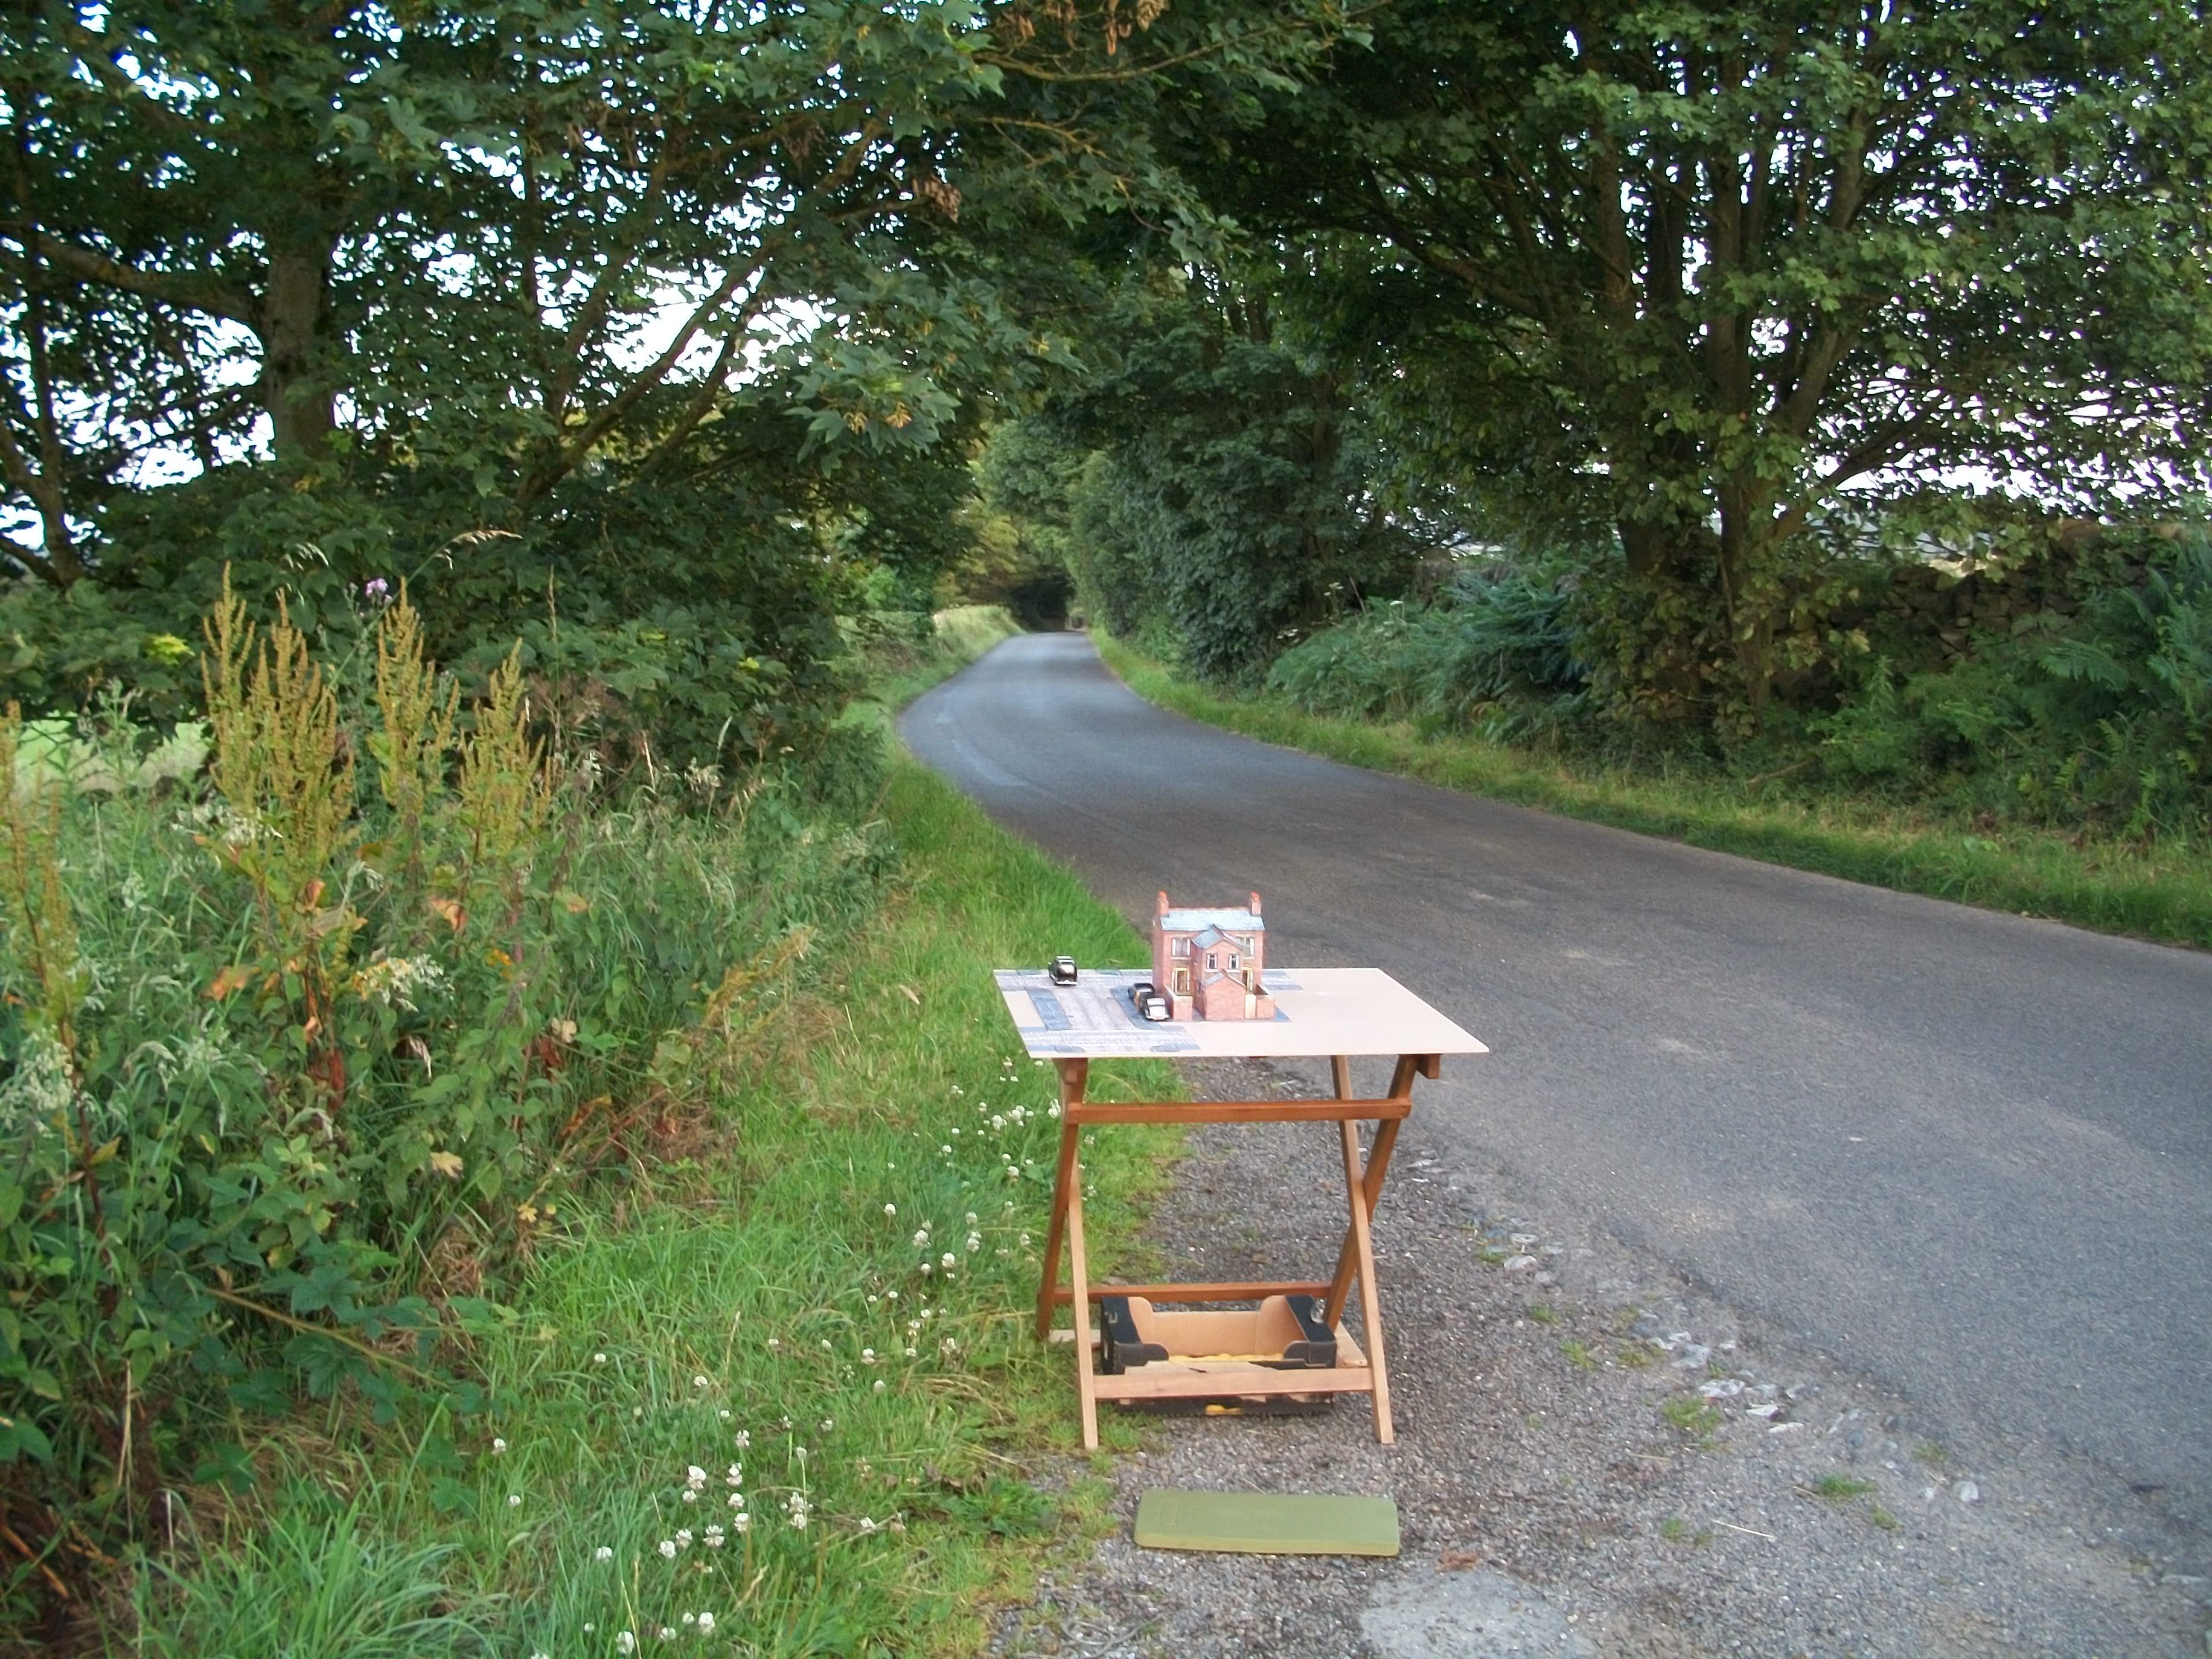
I am inspired by the work of Michael Paul Smith, who was the expert when it came to this photography technique..... so I am learning too, Pat. Yes, Gary..... the building is attached to the baseboard with double-sided tape, and it requires tipping on edge to get the diorama through the door of my house. David
-
I managed to get up at 4.15 am this morning and I arrived at the location for the dawn photo shoot at 5.05 am, just before sunrise. Rattled off 167 shots over a two hour period, some of which are in colour and some in B&W. I would say that three issues have been thrown up during this experimental photo shoot..... one is that the real road surface is light grey in colour, while my diorama road surface is more of a creamy beige sandstone colour. Secondly, the model road surface buckled quite severely, which is due to a lack of PVA glue being applied over the entire under surface of the roadways, so only along the edges. Lastly, there are many photos where either the foreground is slightly out of focus or the background is out of focus, which does not help achieve the seamless joining of the diorama baseboard with the real background setting. Of course, with a DSLR camera you can use the F6 setting to fix this issue, but my compact Kodak camera does not have ' F ' settings. Anyway, here are 12 photos from the batch of 167 photos taken. David
-
I really do like this build of yours, Randy...... the colour is simply wonderful and so pleasing to the eye, as you have found yourself. The '50's style of American Chevy's is exactly the genre that I would want to build if I was collecting American scale model cars, and this Monogram 1953 Chevy Bel Air would be my first choice without a doubt. The Danbury Mint and Franklin Mint model cars are part of my collection, but like you, I try to build from styrene kits where possible or in a situation where I cannot afford to purchase the diecast version. When you place the plastic version of the car immediately next to the diecast version, and you find that you cannot quite see the difference..... that is something to be proud of. My collection does focus on English motor cars of the 1920's, 1930's, 1940's and 1950's, so I keep reminding myself that I must not build even one American model car, simply because it would not fit my 1950's dioramas and I would want to expand the collection to include more of this fascinating genre. You must be extremely proud of the green Chevy..... keep looking at it..... David
-
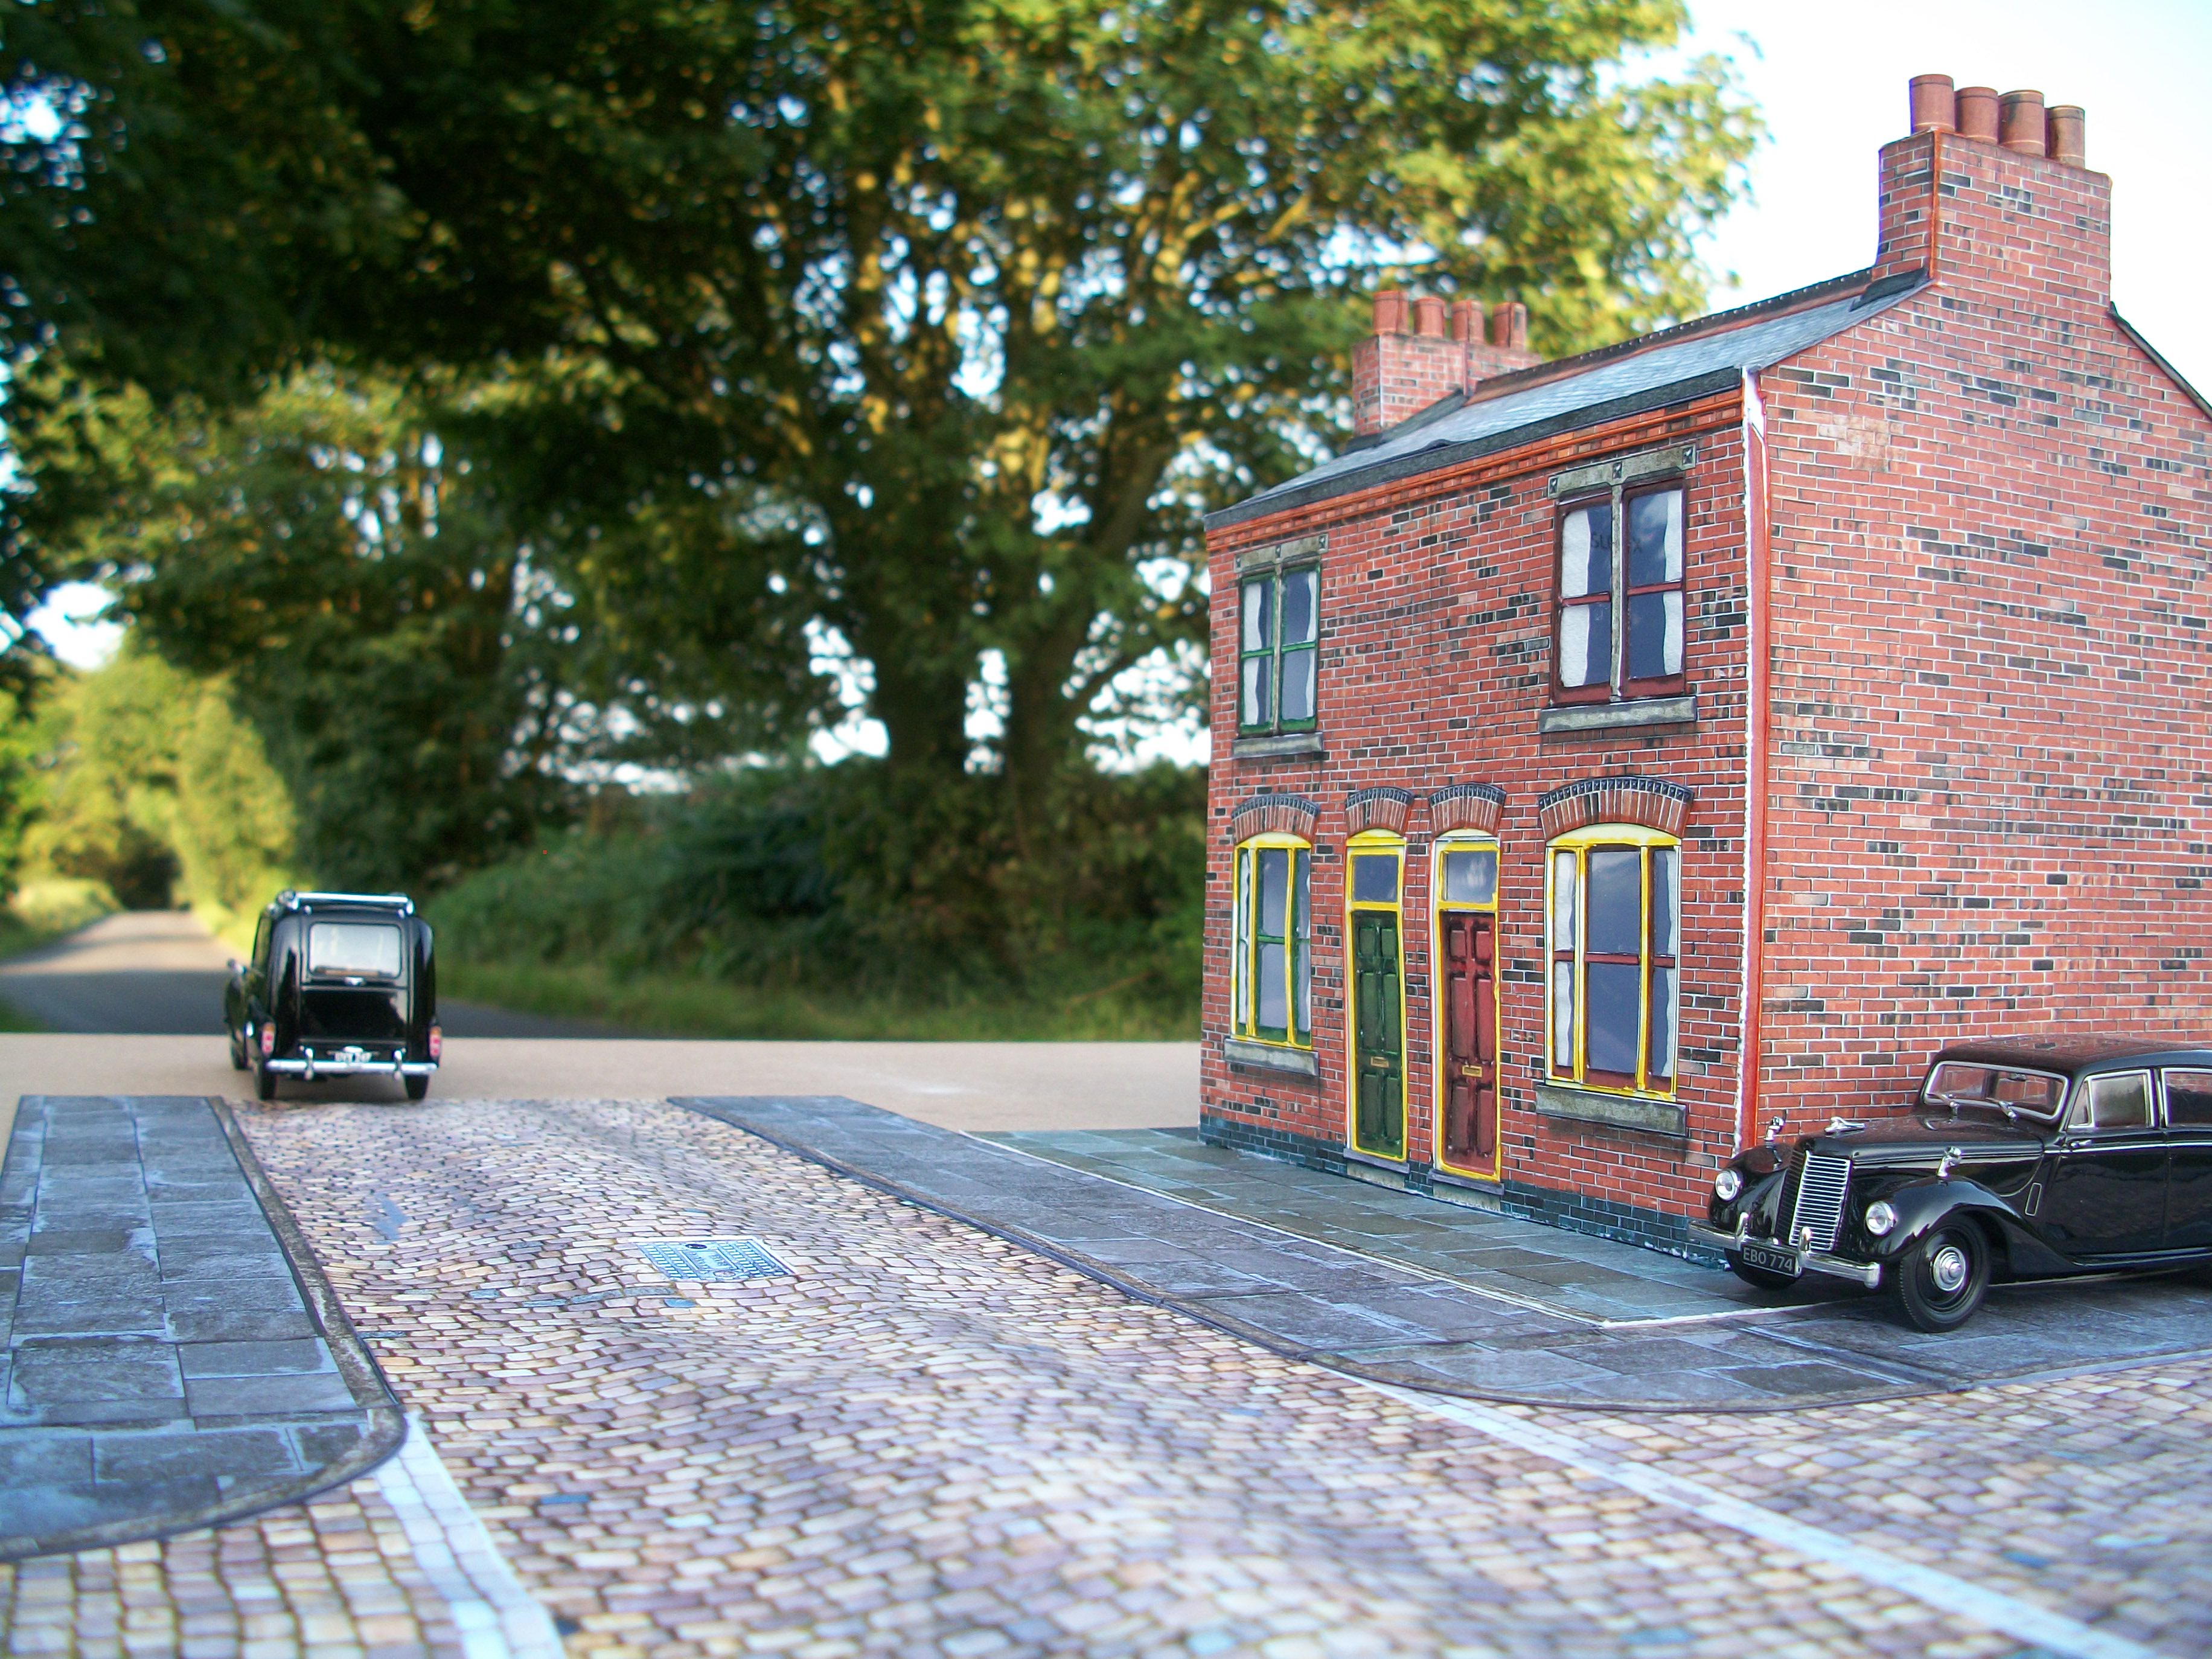
Thanks Gary..... the priority at this stage is to set up the far left corner of the baseboard, so that the end of the street in this diorama can be blended seamlessly with a real road in an outdoor setting, within the next few days. Of course, this will be tricky to set up initially, so some trial and error will be necessary. Following the outdoor forced perspective photography, there will be some indoor photography, when the diorama evolves into a terraced house street scene complete with telephone kiosk, post box, cars and figures, telegraph poles and wires..... and wherever my imagination leads me! The outdoor scene will include a funeral hearse that is either approaching the Victorian terraced houses, or leaving the houses by the road that recedes into the distance. These photos will be taken at dawn to catch the quality of light that only sunrise can provide..... assuming that I can get up early! David
-
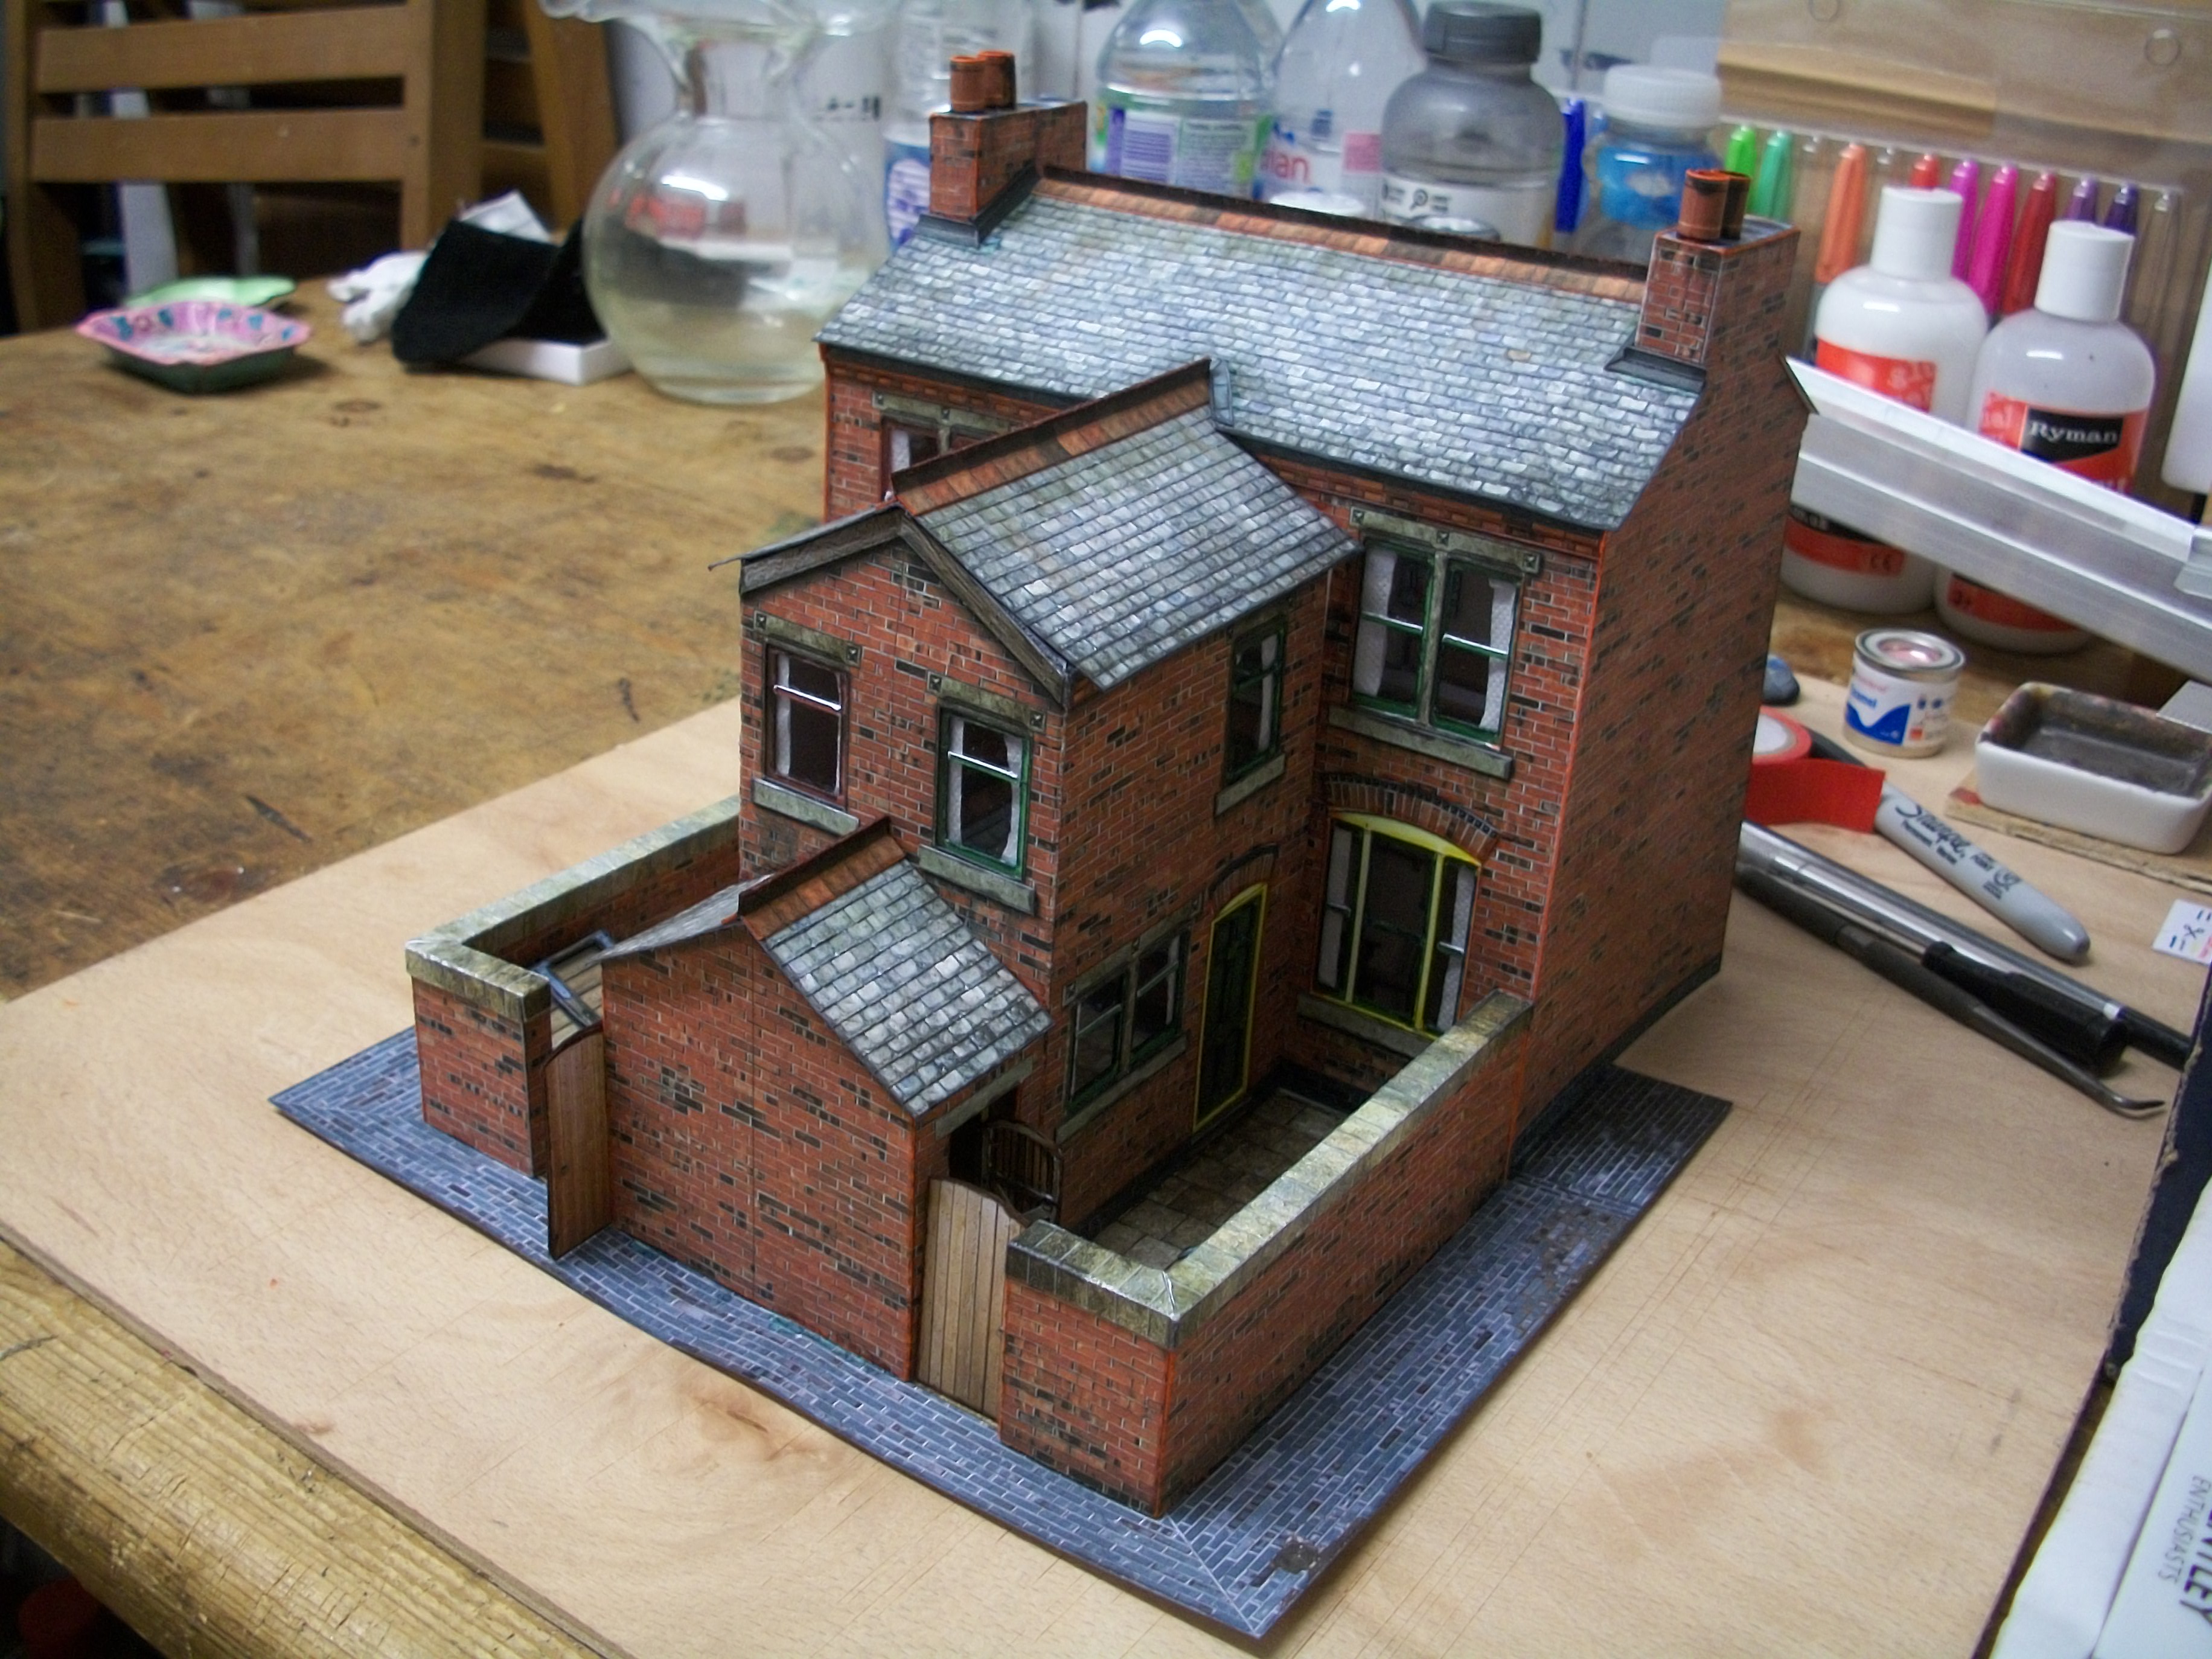
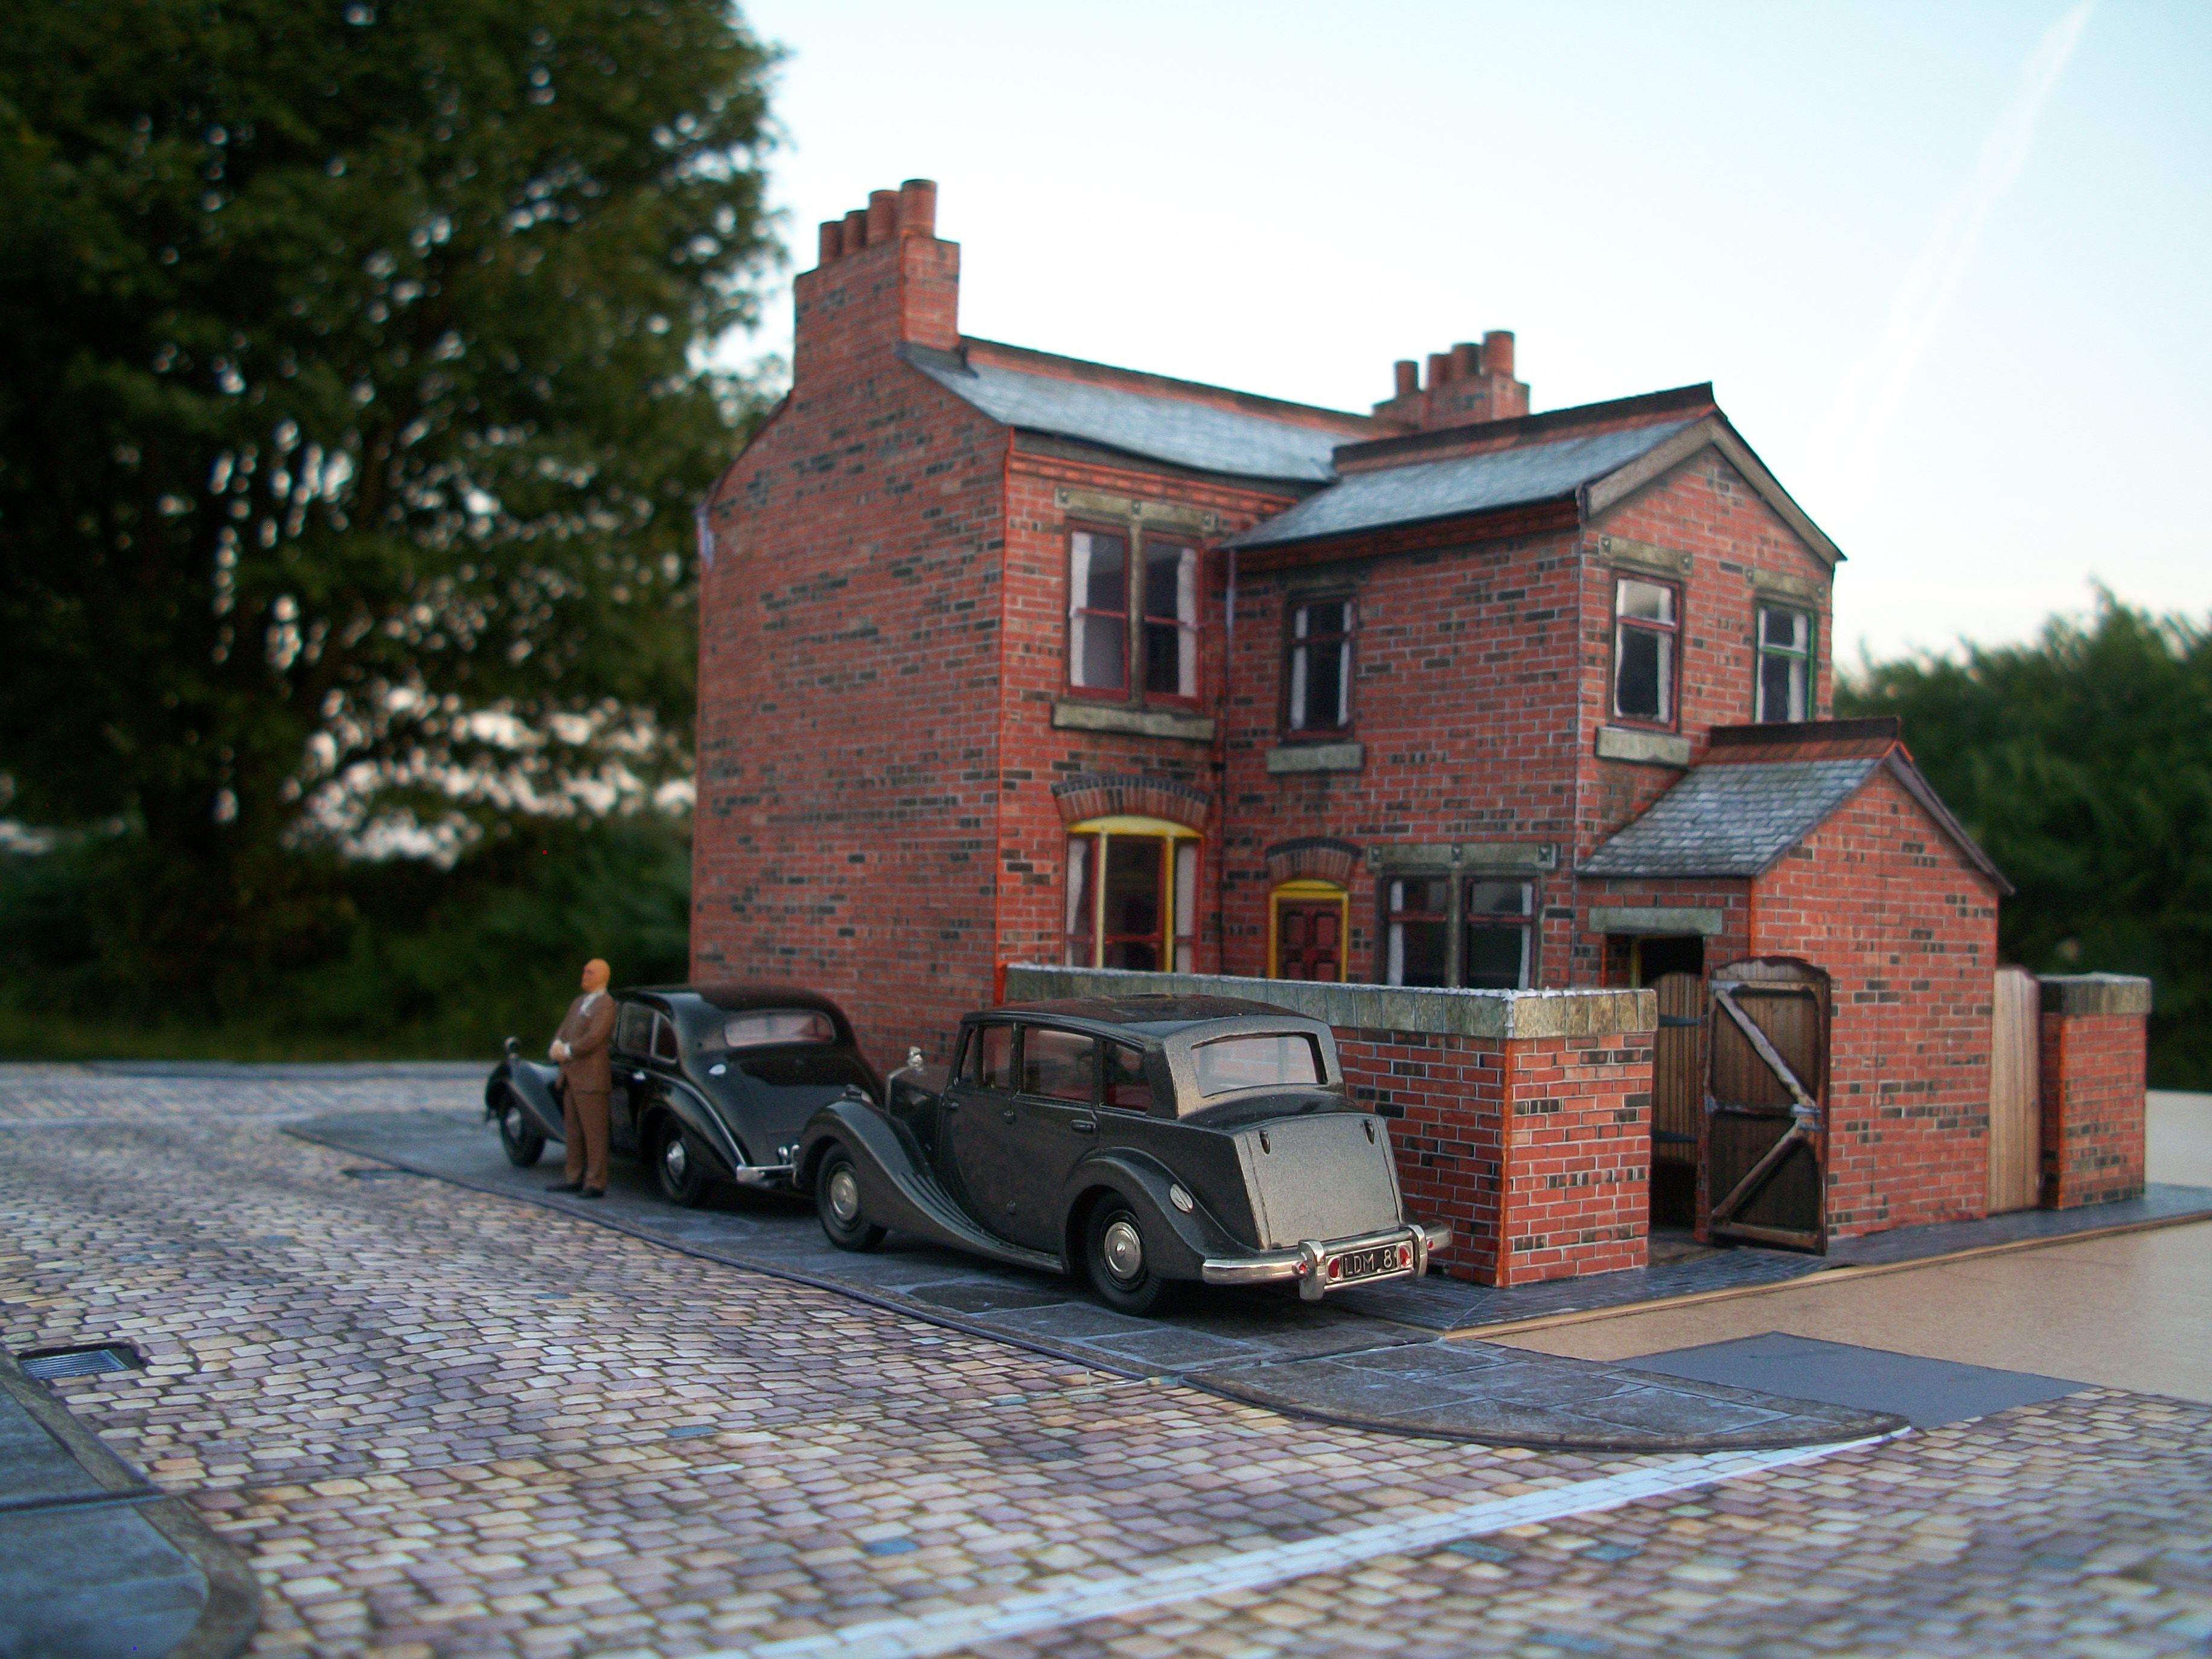
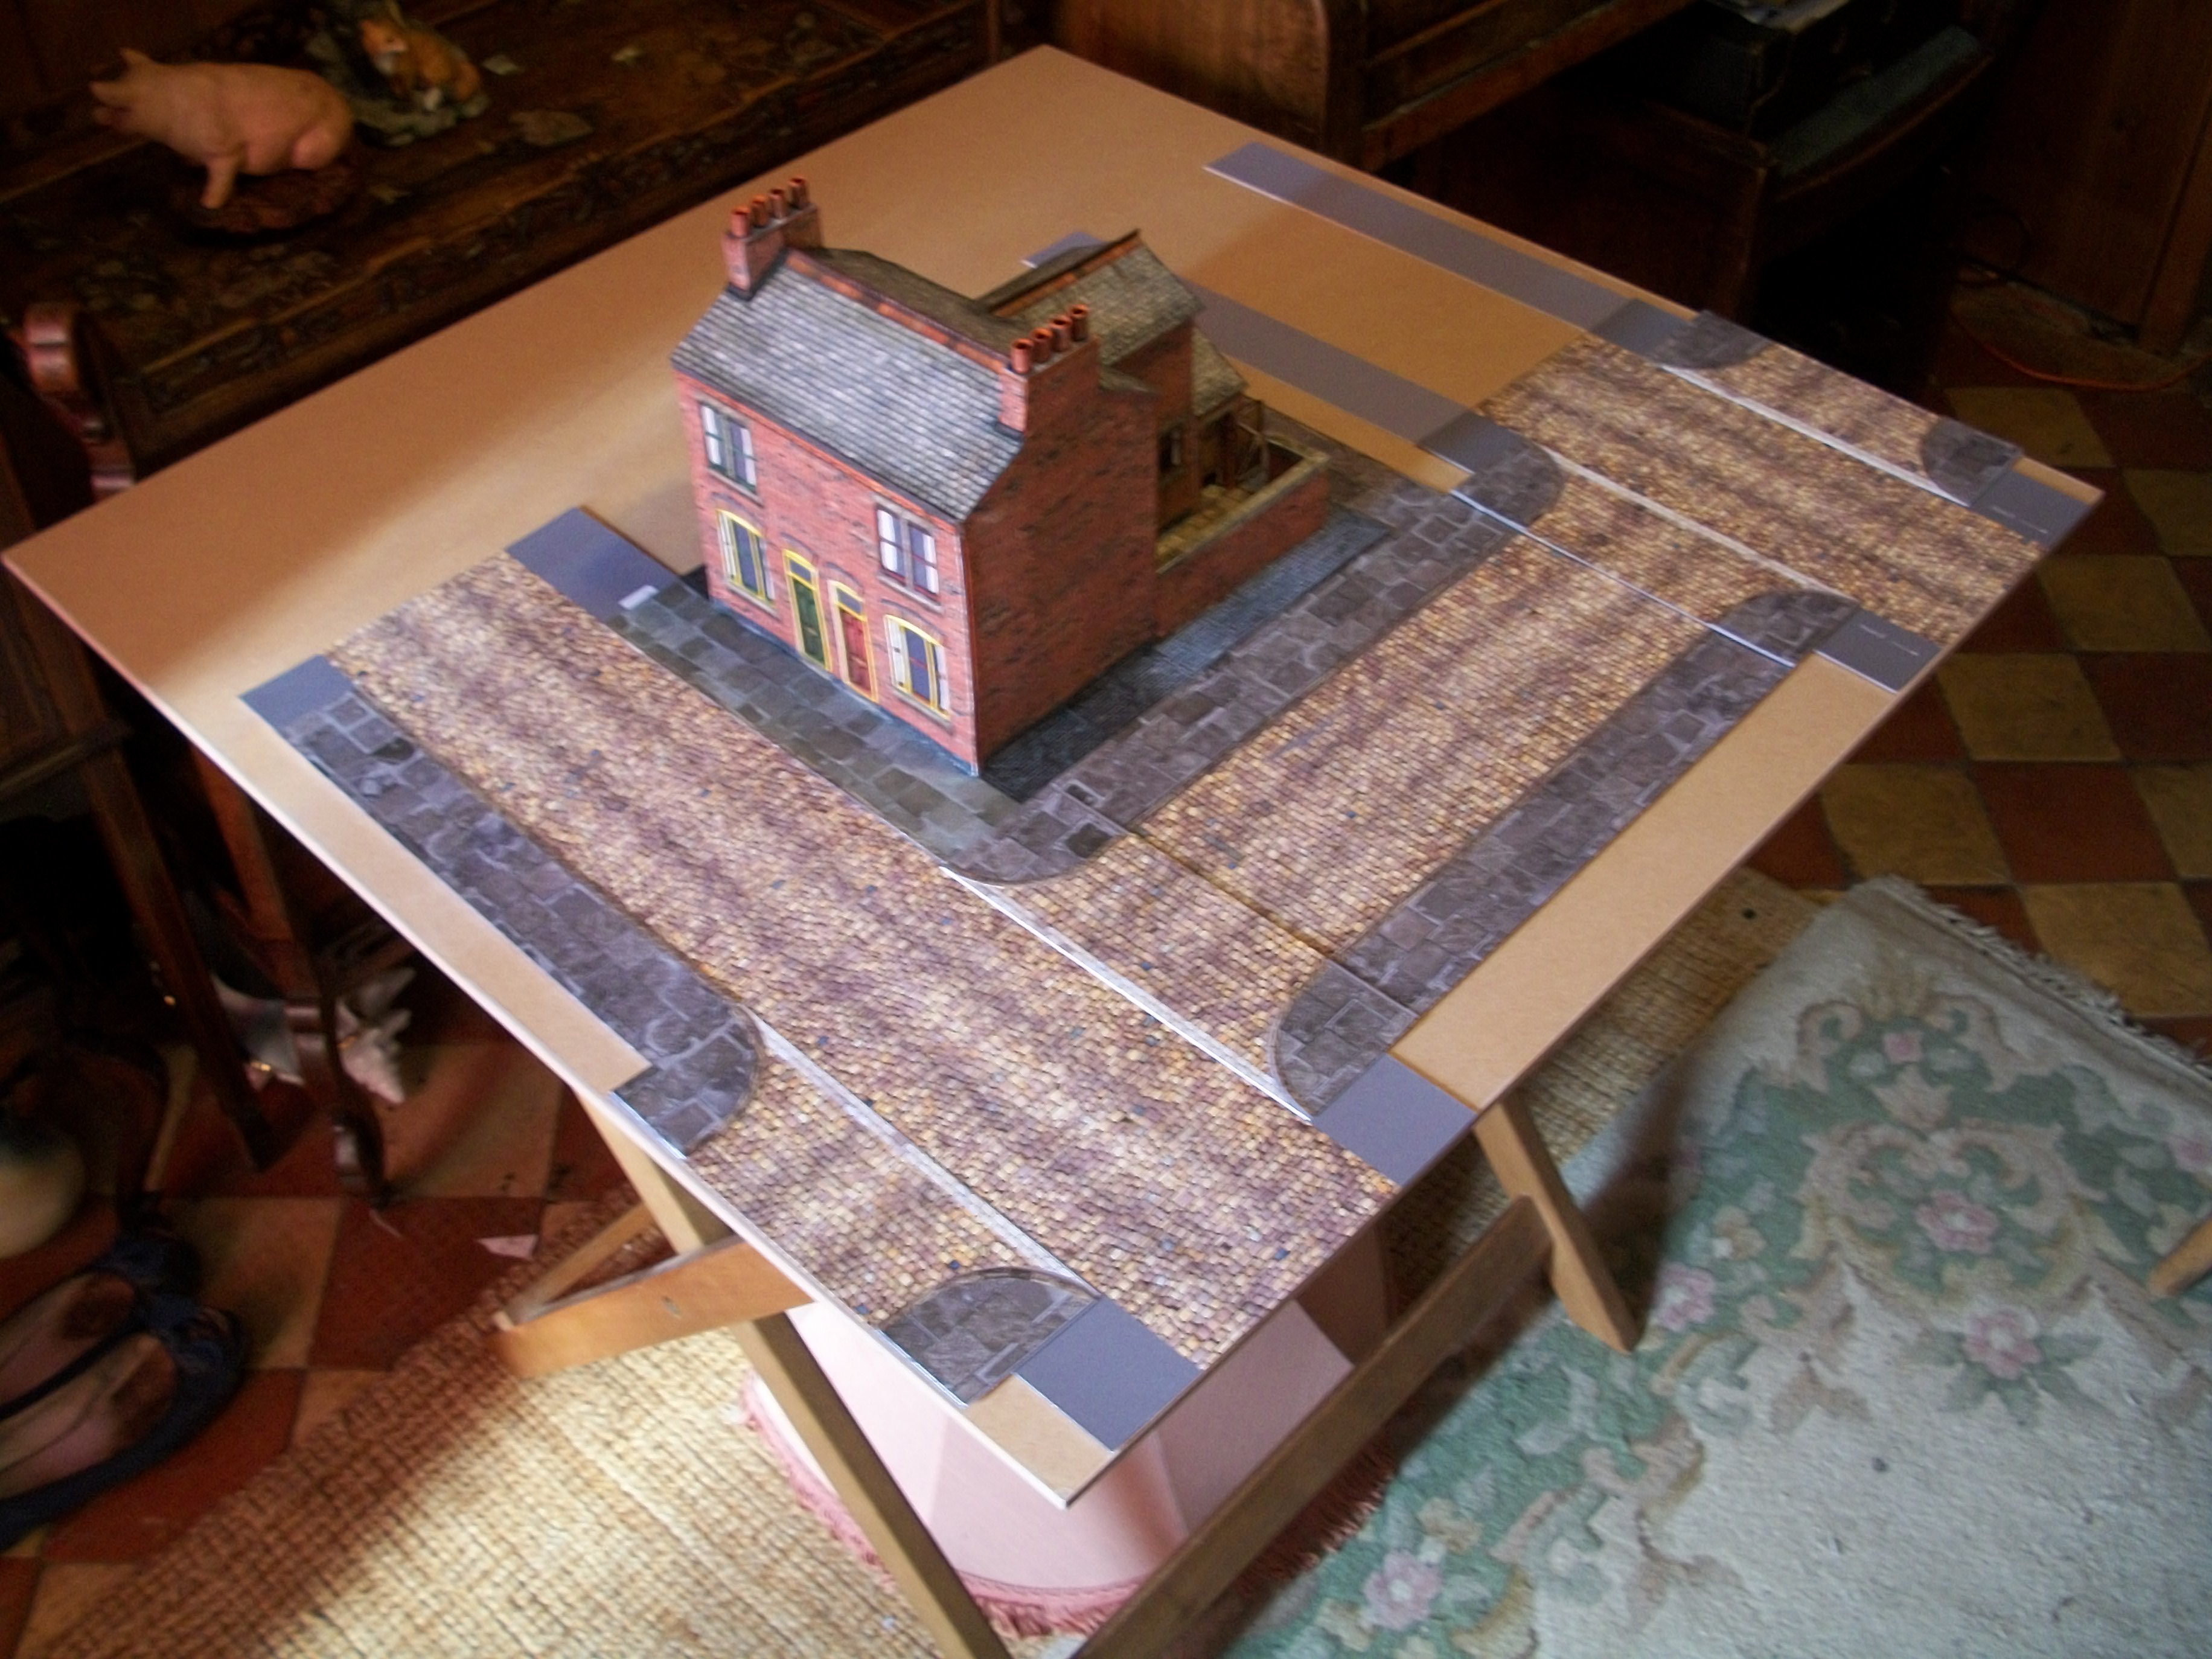
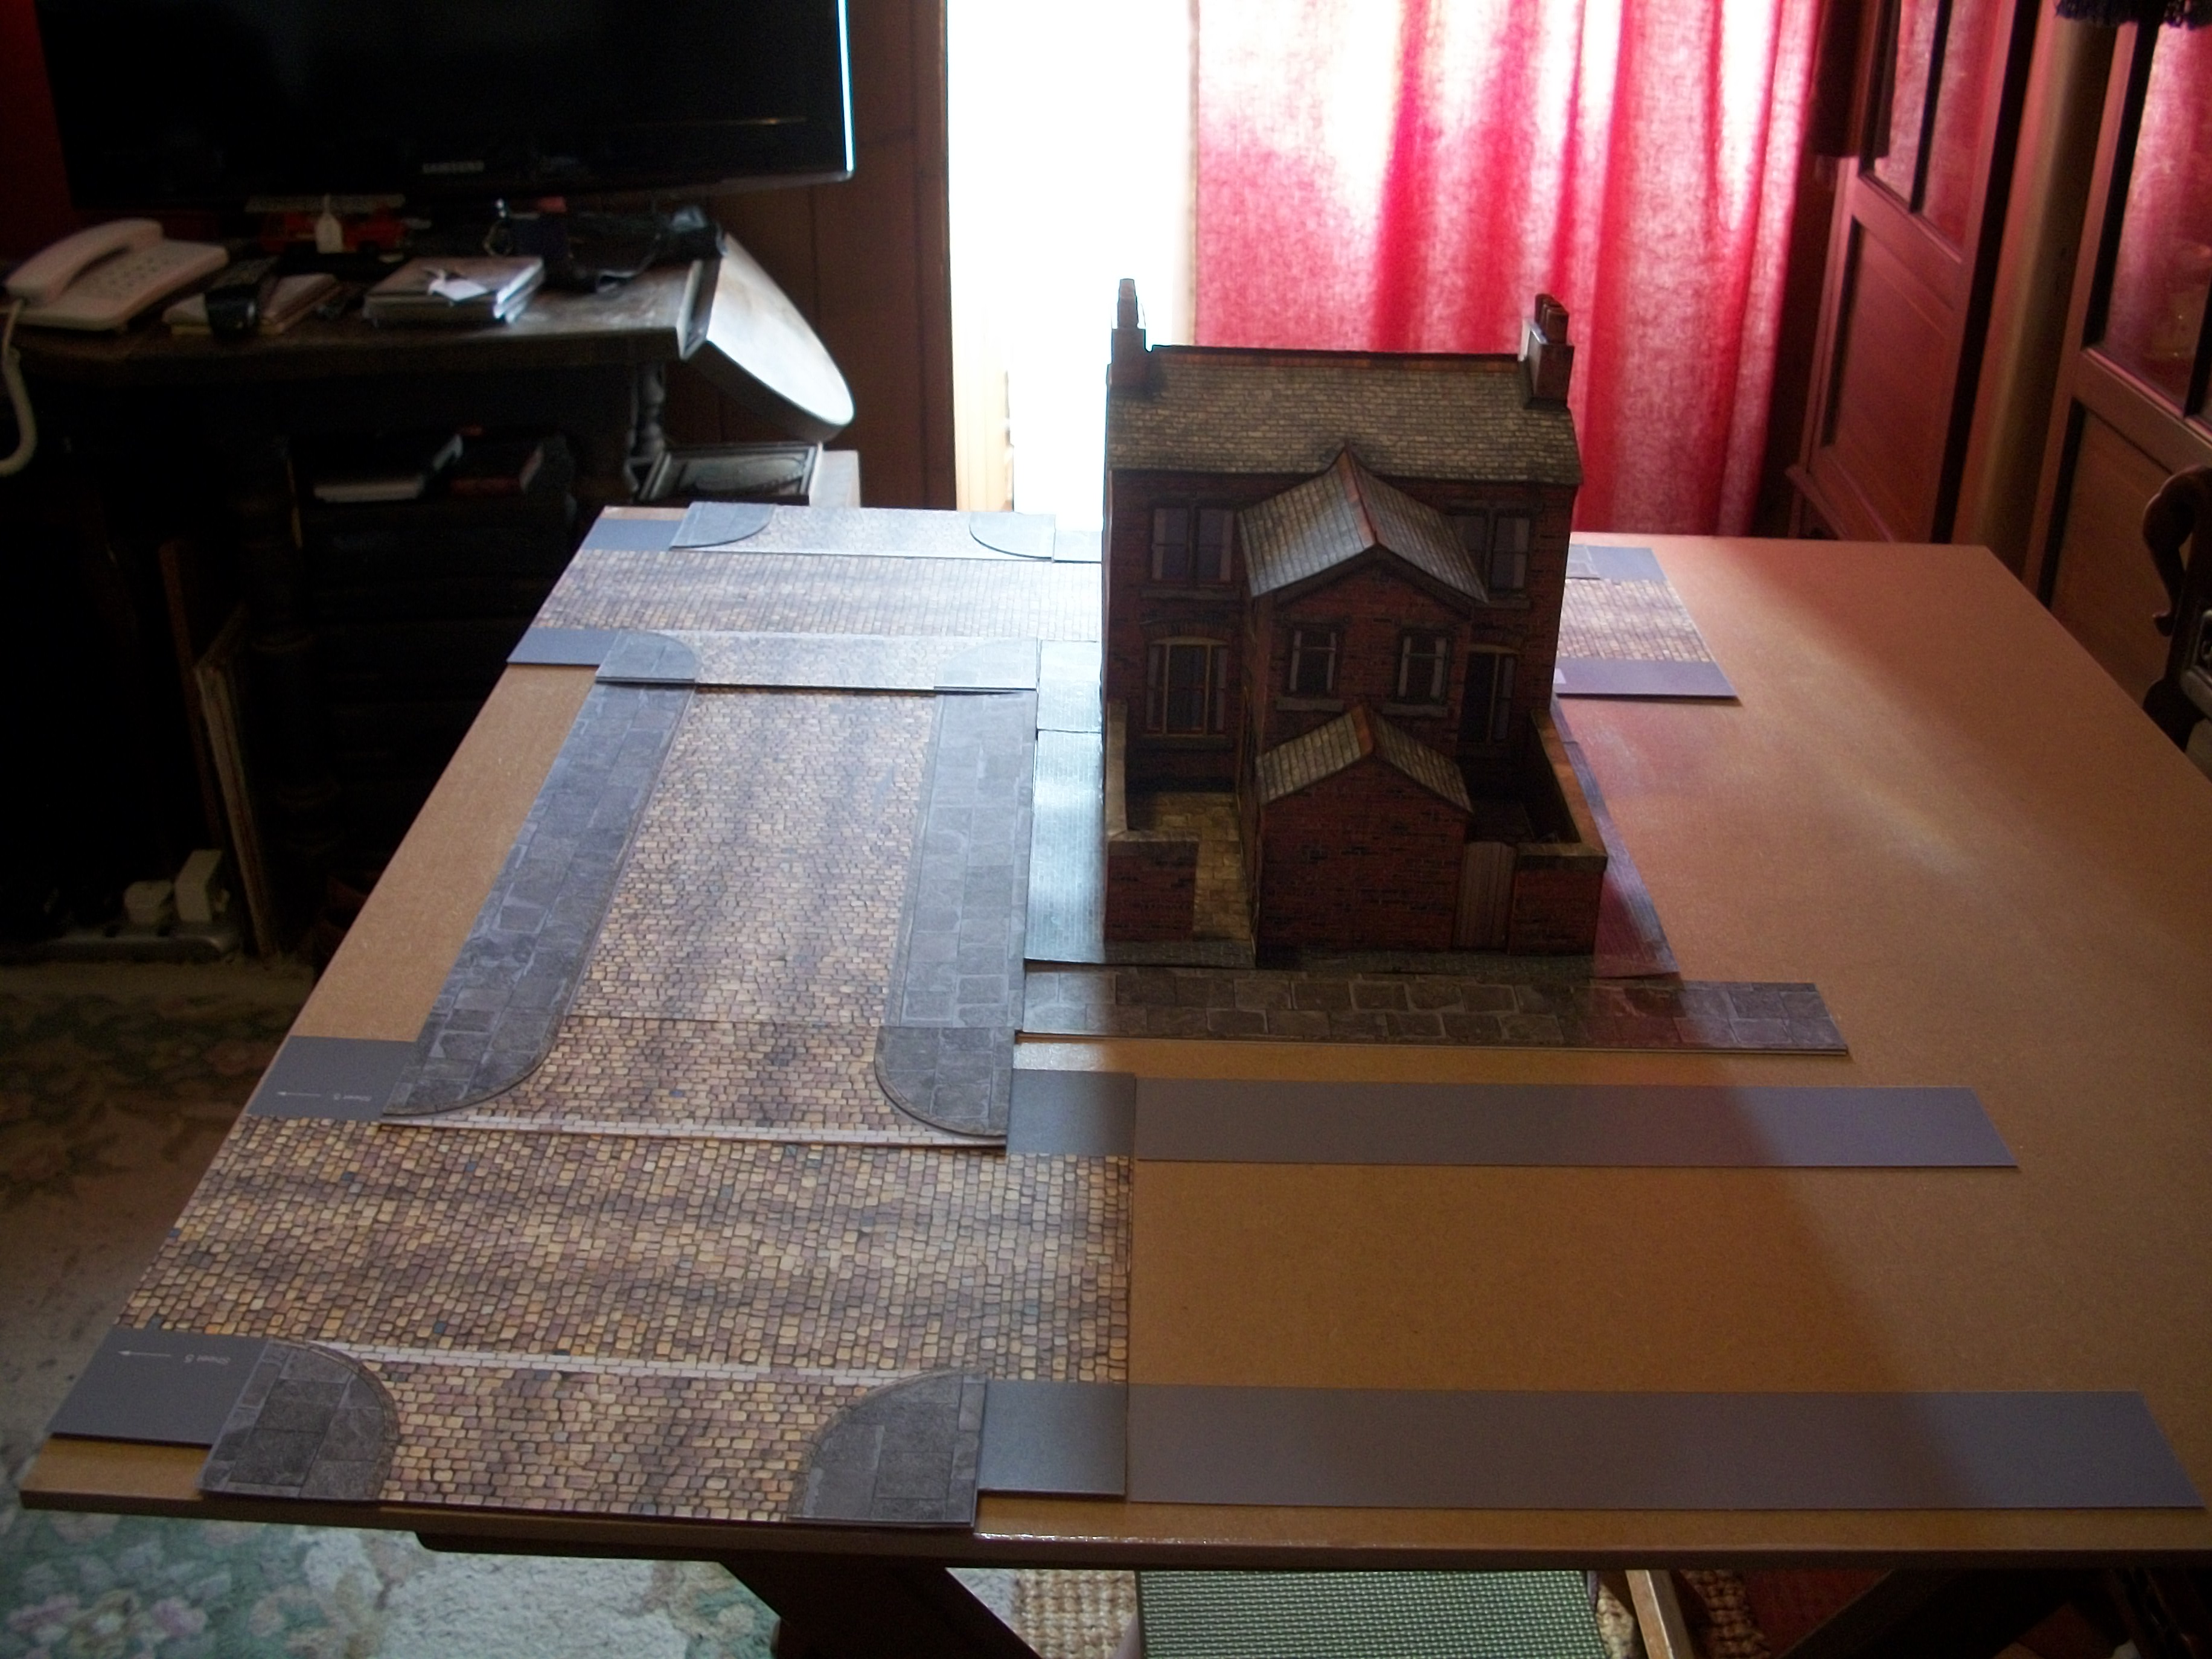
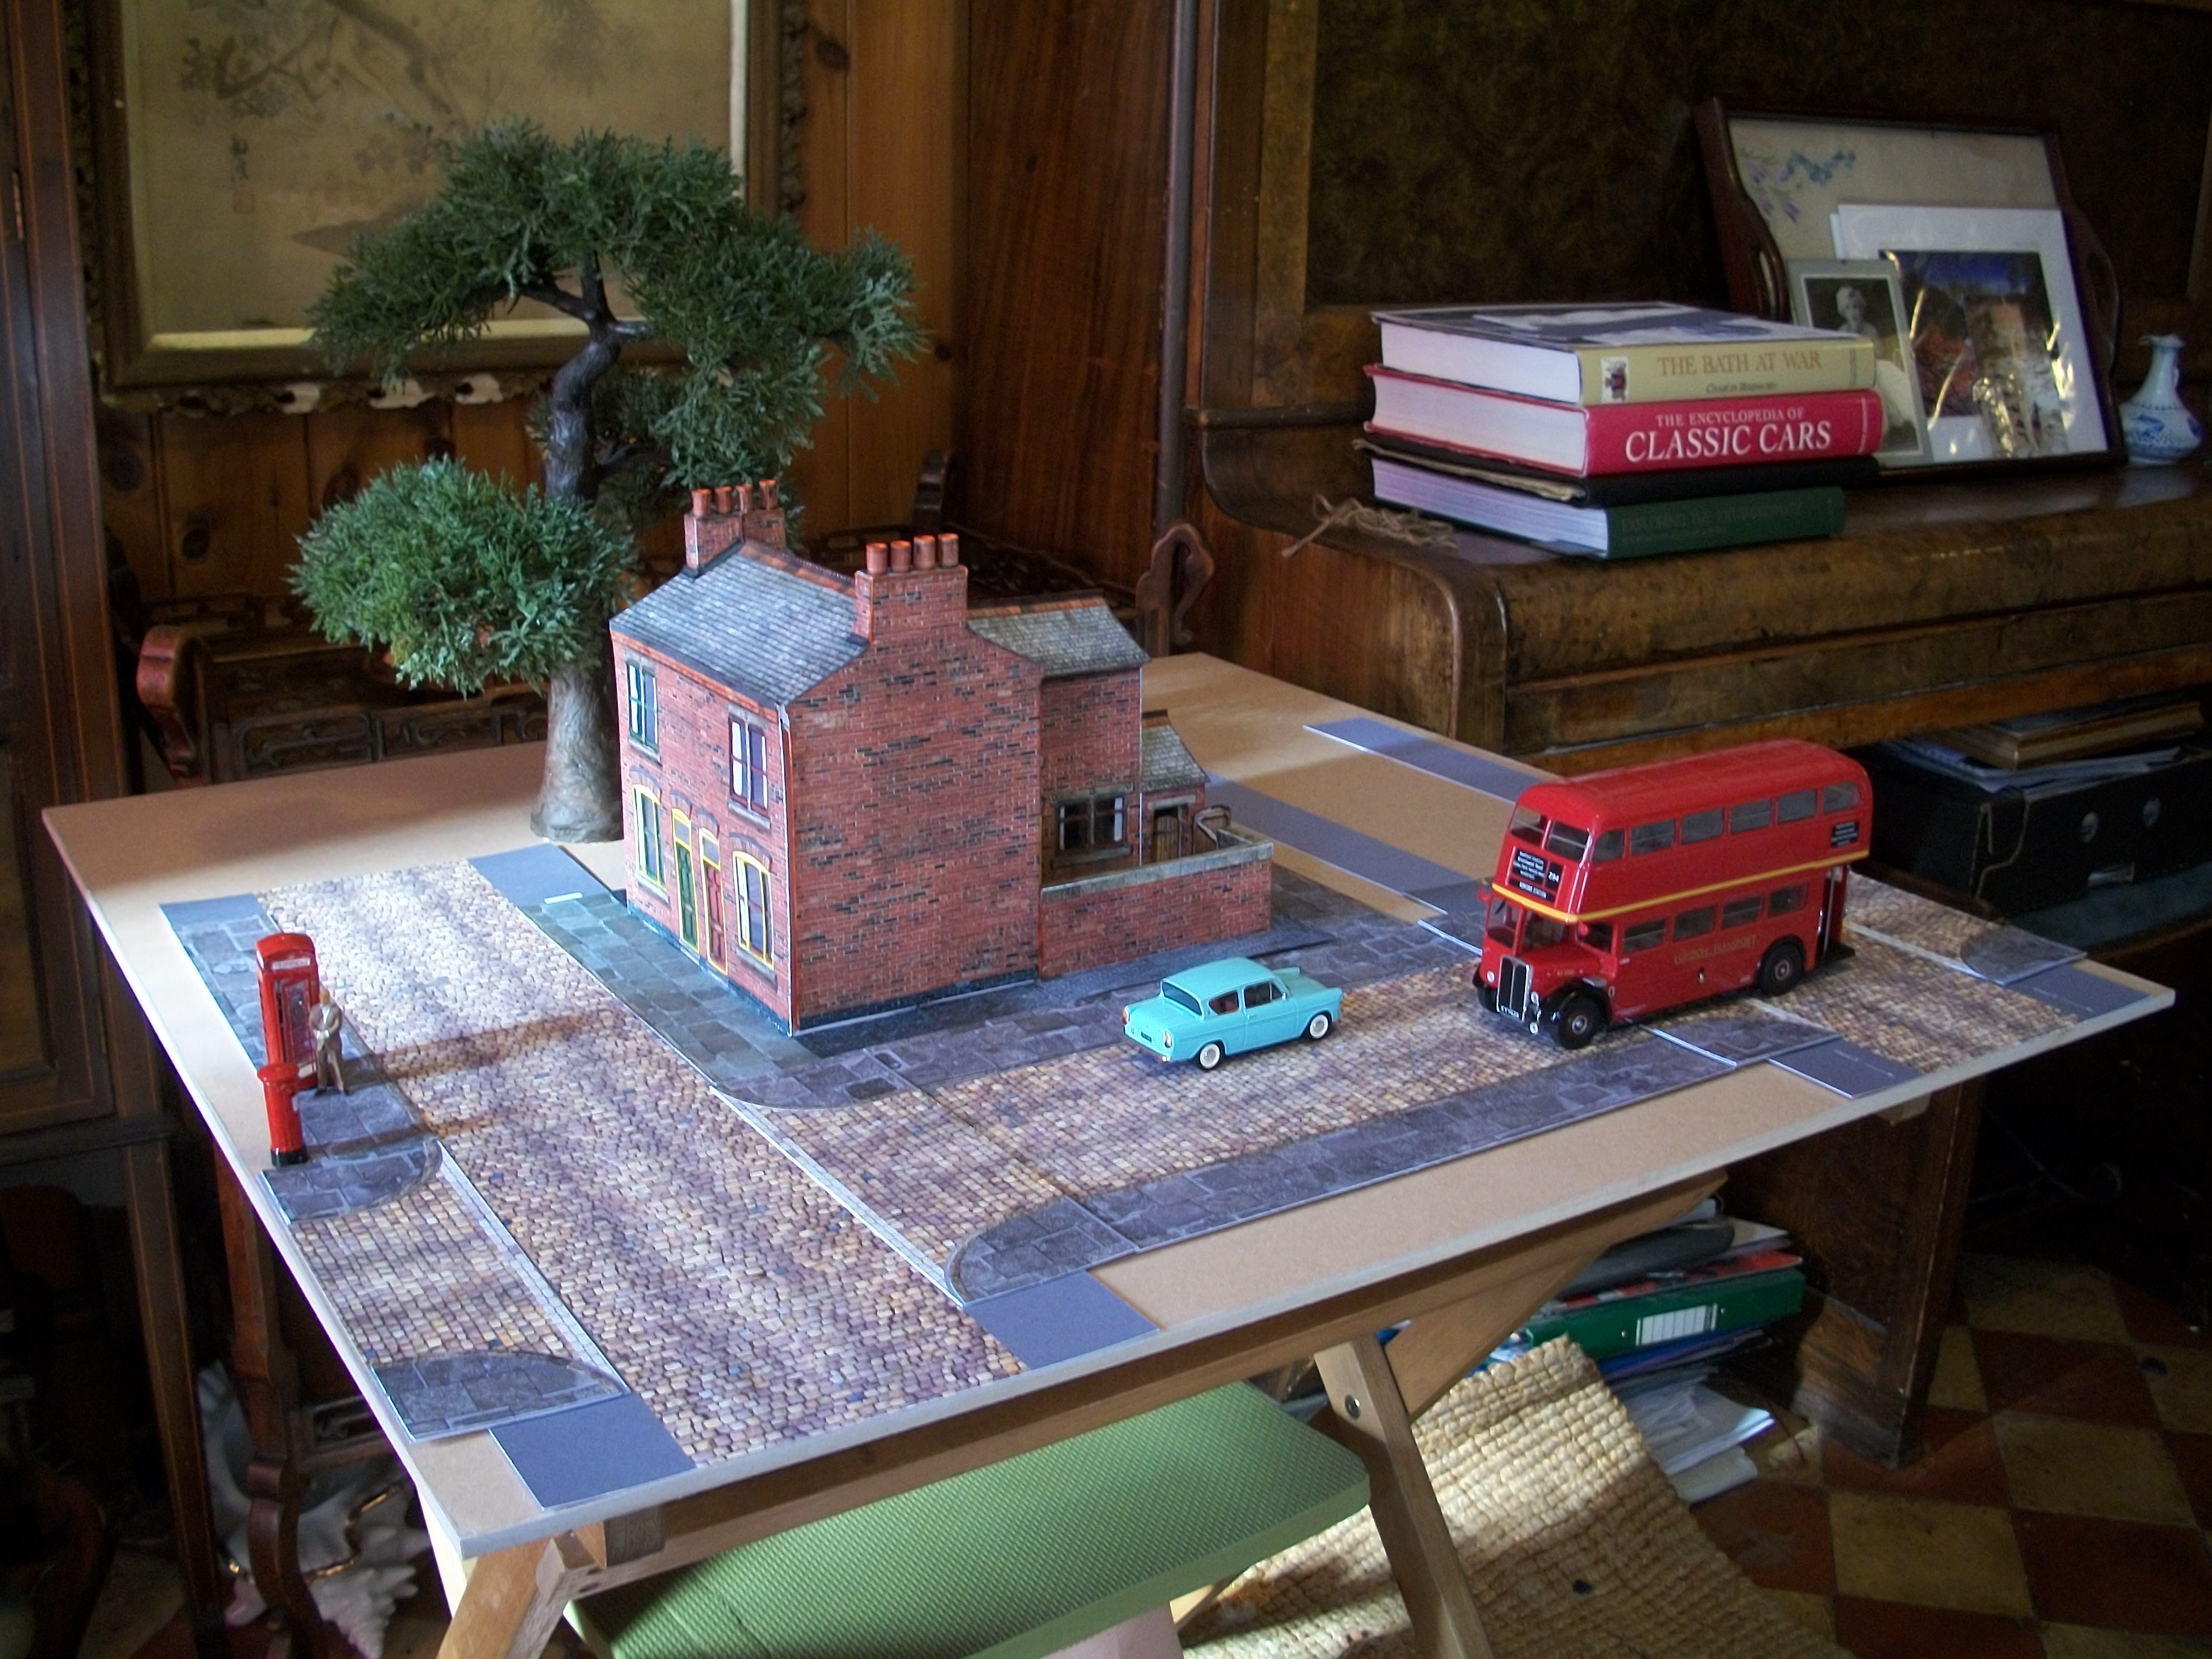
The assembly of the two Victorian terraced houses has been completed, and work has started on the layout of roadways and paving. These streets are made of high quality card and are being mounted on the MDF baseboard with PVA glue. There is still quite a lot of work to do yet on the diorama baseboard, but I can now see where this is going. Thinking carefully about the layout of these streets and the arrangement of the junctions is quite easy to get wrong! David
-
Off to the races - Porsche GT3 RSR Flying Lizard
Anglia105E replied to Gramps46's topic in Diecast Corner
Nice looking 1:24 Bburago Porsche you have there, Gary...... the wheels and tyres look particularly good. As you say, the price is around what you would expect to pay for a 1:24 styrene kit. David -
Many thanks, Gary and Pat....... David
-
Not at all a stupid question, Pat..... In architecture and city planning, a terrace or terrace house (UK) or townhouse (US)[1] is a form of medium-density housing that originated in Europe in the 16th century, whereby a row of attached dwellings share side walls. They are also known in some areas as row houses (especially in Baltimore, New York City, Philadelphia, and Washington, D.C.) Terrace Housing. ... Terraced houses are structurally built the same and both sides of each house shares walls with neighbours. Main advantage of a terraced house: It is generally cheaper than detached and semi-detached properties. The first and last of these houses is called an end terrace, and is often a different layout from the houses in the middle, sometimes called mid-terrace. My 1:43 scale model, or O-gauge if you like, is a pair of end terrace houses, so they are in effect both ' semi-detached ' houses. David
-
The latest addition to the 1:43 scale model car collection arrived today, and here are a few photos of this car alongside the Victorian terraced houses. This is an Oxford Diecast Austin Princess hearse, which does not contain a coffin or a driver. The black & white images seem to work better than the colour shots, I think. David
-
This 1:43 diecast should be arriving later today...... it's an Oxford Diecast Austin Princess Hearse in black. The real hearse was produced from 1947 but this one has a registration number plate that indicates it is 1968. David
-
Completed the assembly of the 1:43 scale Victorian Terraced Houses backs kit this weekend, and I am ready to start assembling the terraced houses fronts kit from Monday..... I have really enjoyed working with card and PVA glue, and I am very impressed with these kits. Need to prepare a baseboard for this third diorama, which will be 75 cm x 75 cm square to cover the surface of a 65 cm x 65 cm folding table. Photo shoots will be outdoors at a carefully selected location, and the real background has to be perfect for forced perspective photography, using natural daylight this time. David
-
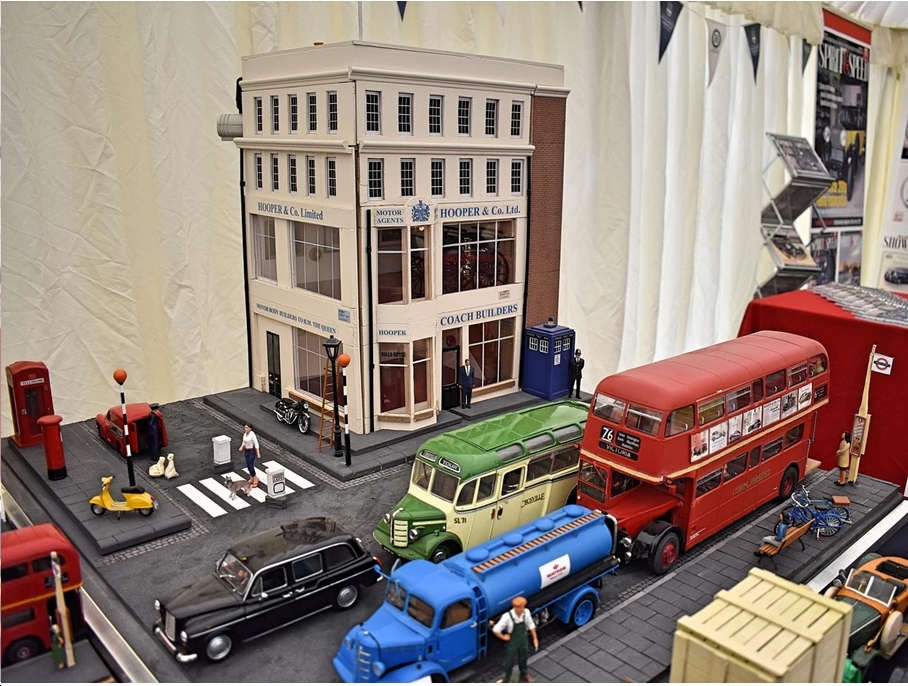
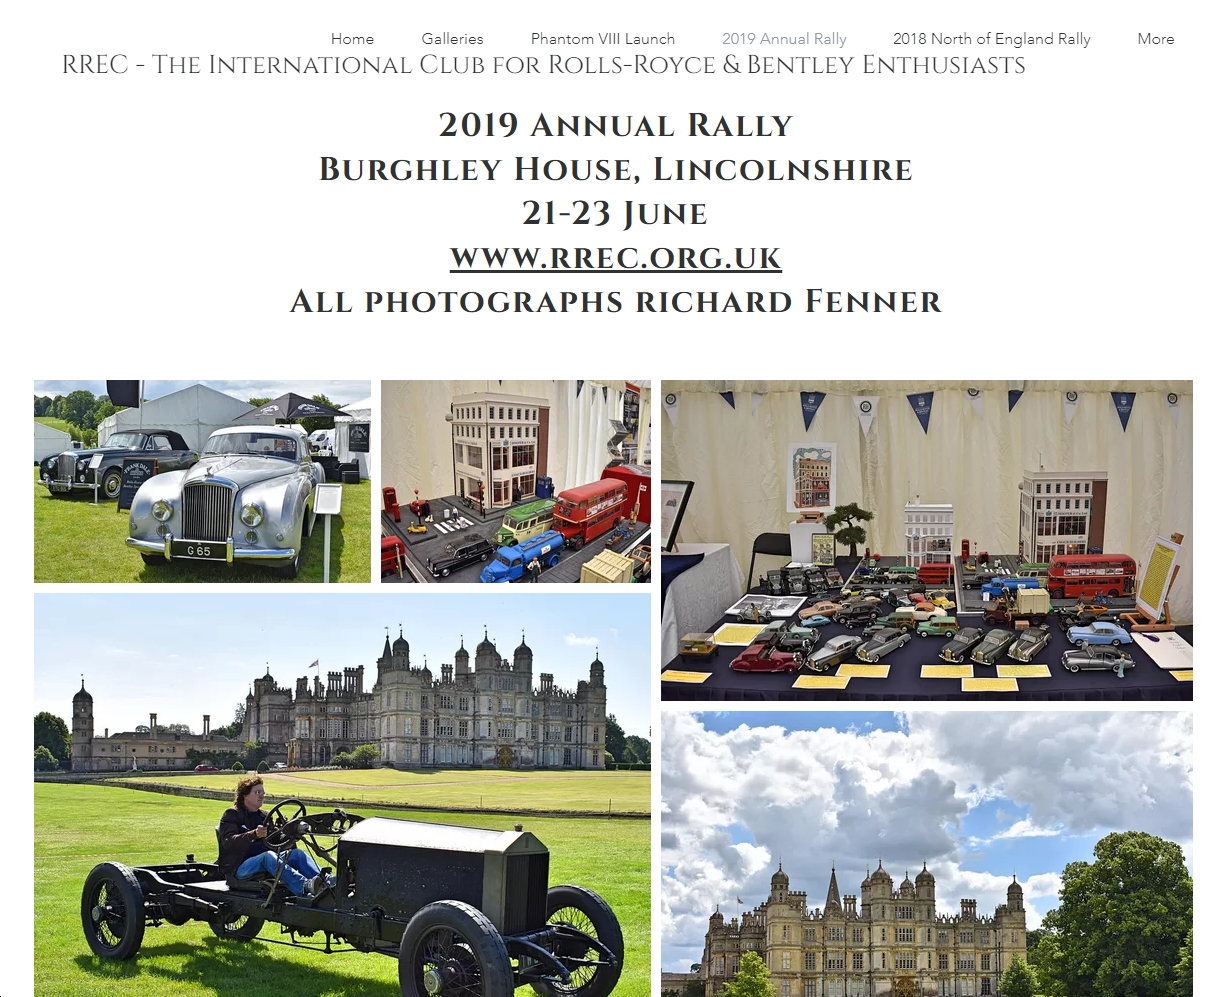
Many thanks, Eric...... and your compliments are much appreciated! Here are a couple of official photographs that appear at the top of the very first page of the RREC Annual Show report, and taken by a professional photographer. There are hundreds of photos in the review of the show, but somehow I managed to get onto the cover page with my dioramas display stand. David
-
That's another interesting figure you have there, Pat...... perhaps you could reduce the size of an image of a newspaper to 1:24 scale, print it out on standard paper and glue it to whatever he is holding? Failing that, you can get doll's house newspapers in 1:24 scale, very cheaply I believe. David
-
Hi Mark..... I thought you might find this gallery of 33 photos interesting, some of which relate to your previous build, along with some surprising images. Here is the link for you : https://newatlas.com/caterham-crawley-tour/46419/#gallery David
-
That is a print of an original painting by the famous war artist and photographer, Eric Ravilious...... mounted on foam board and displayed on a mini easel. David
-
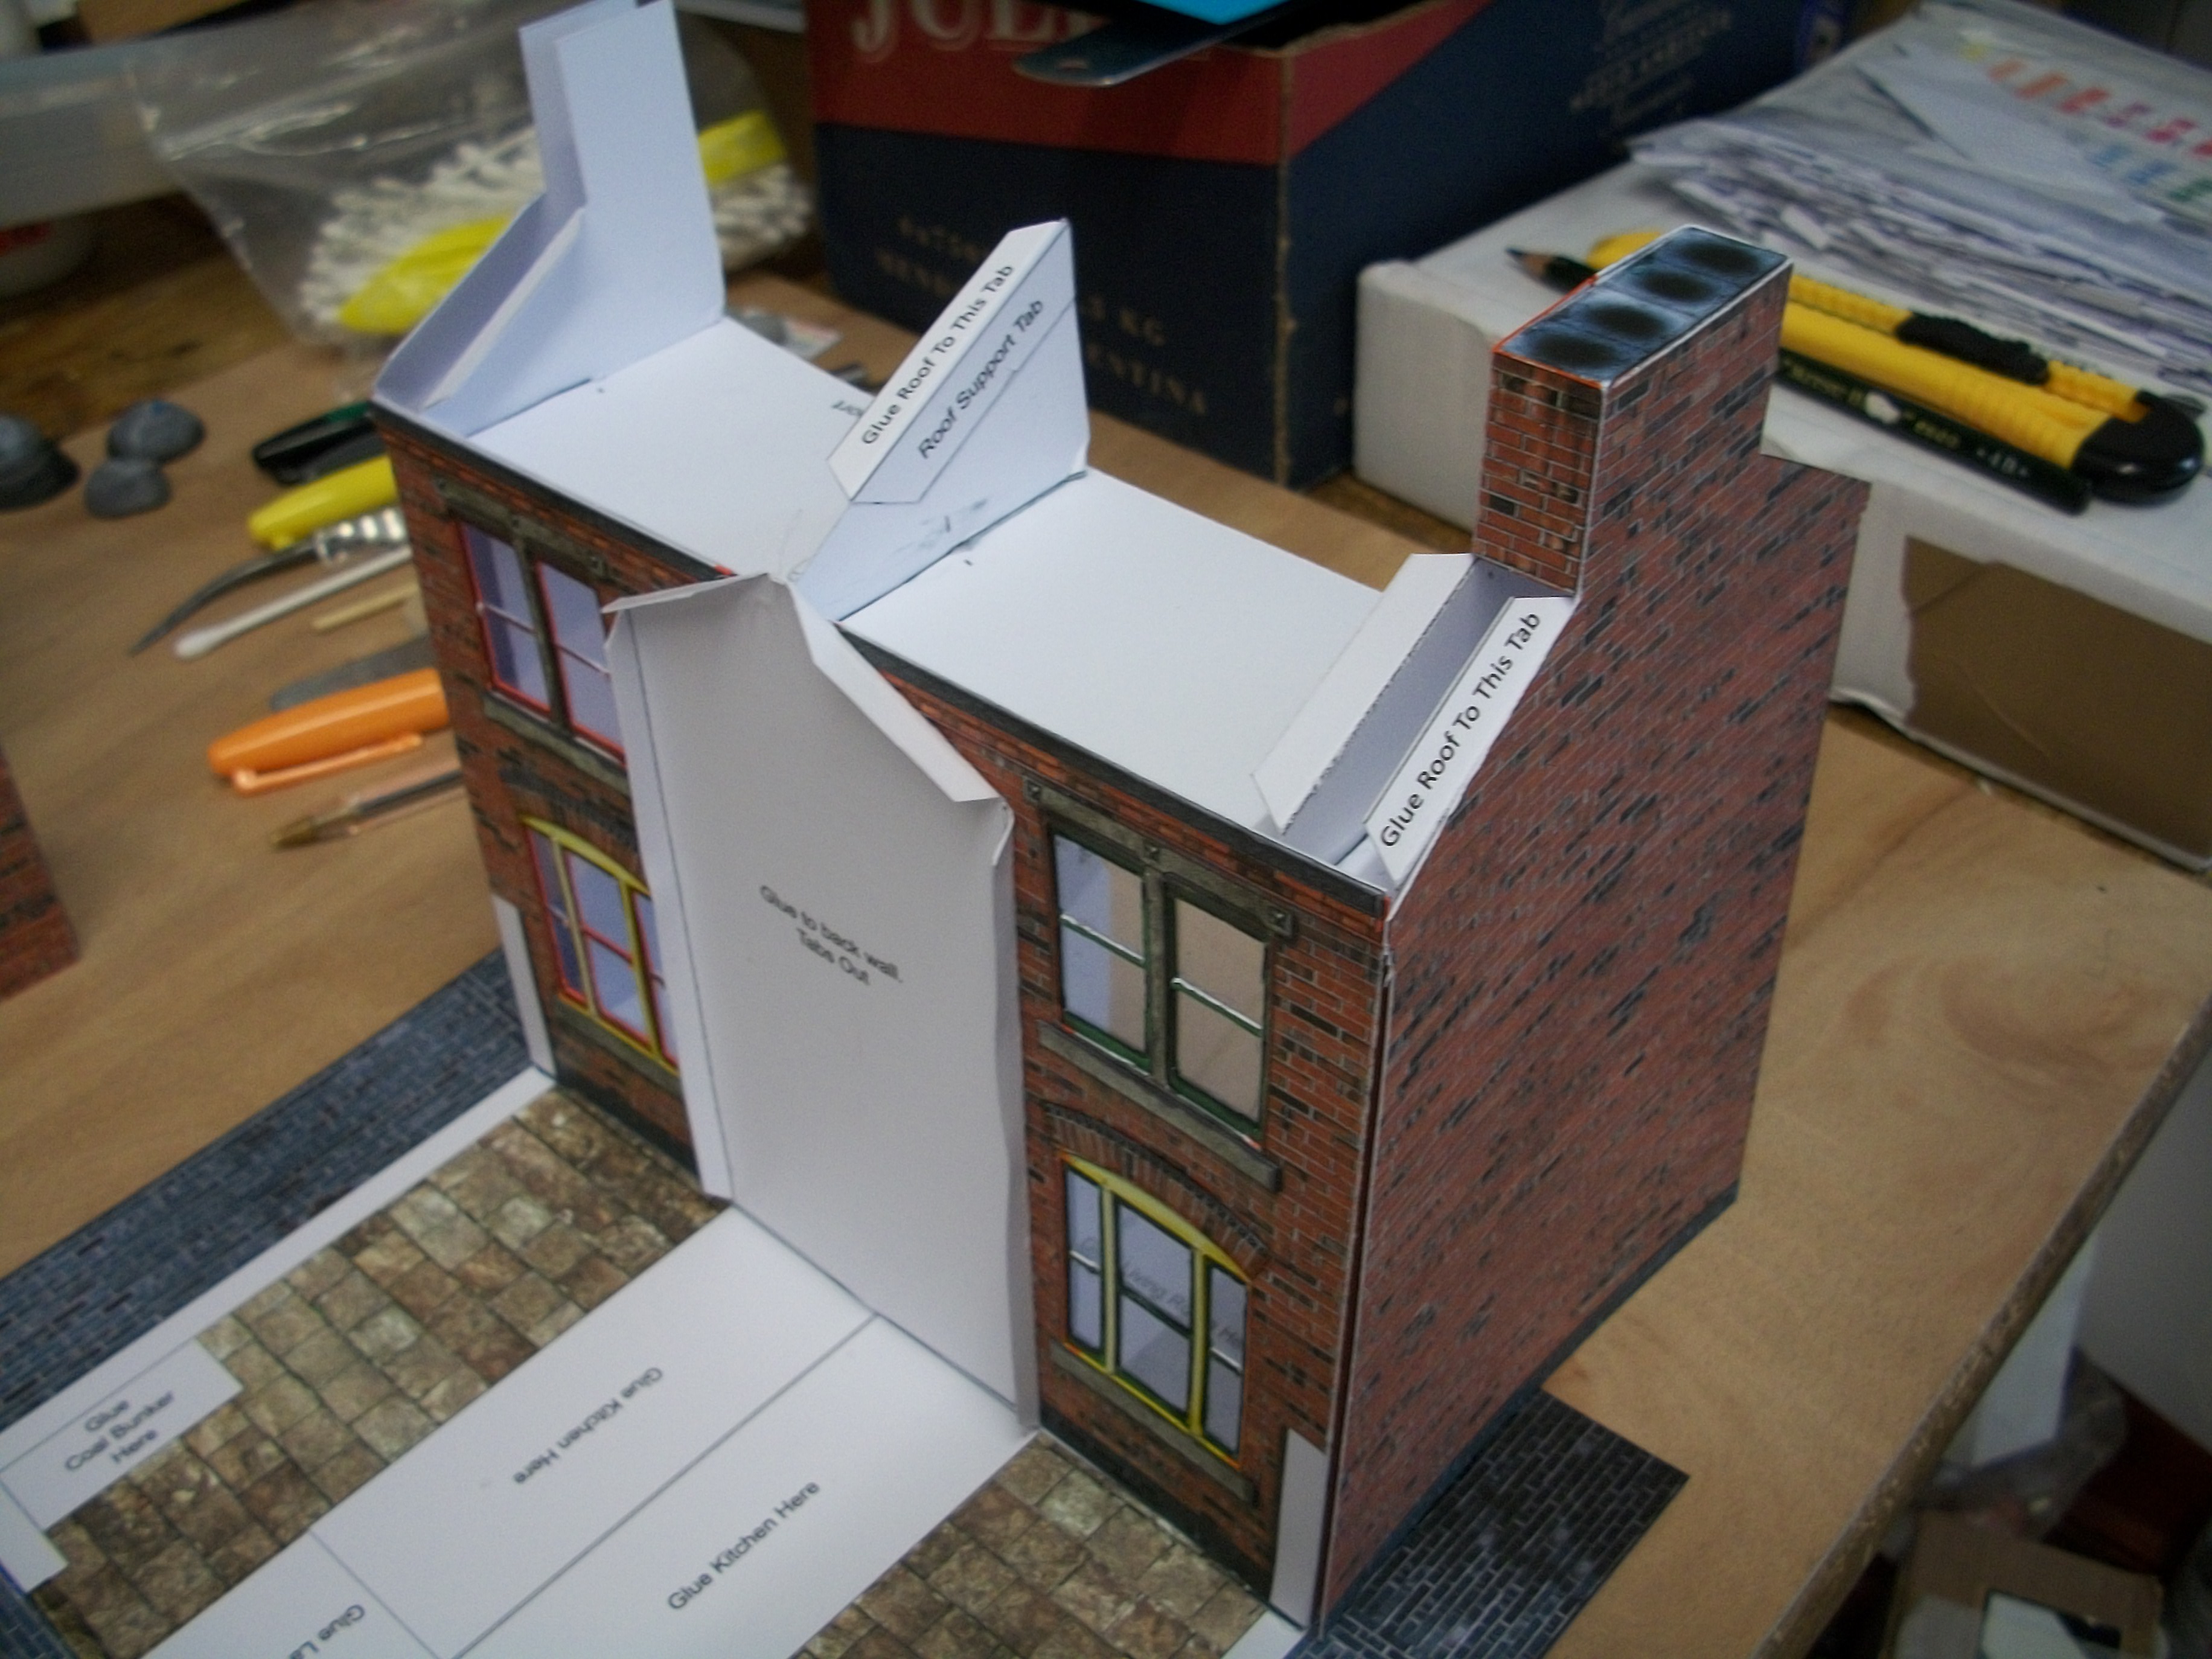
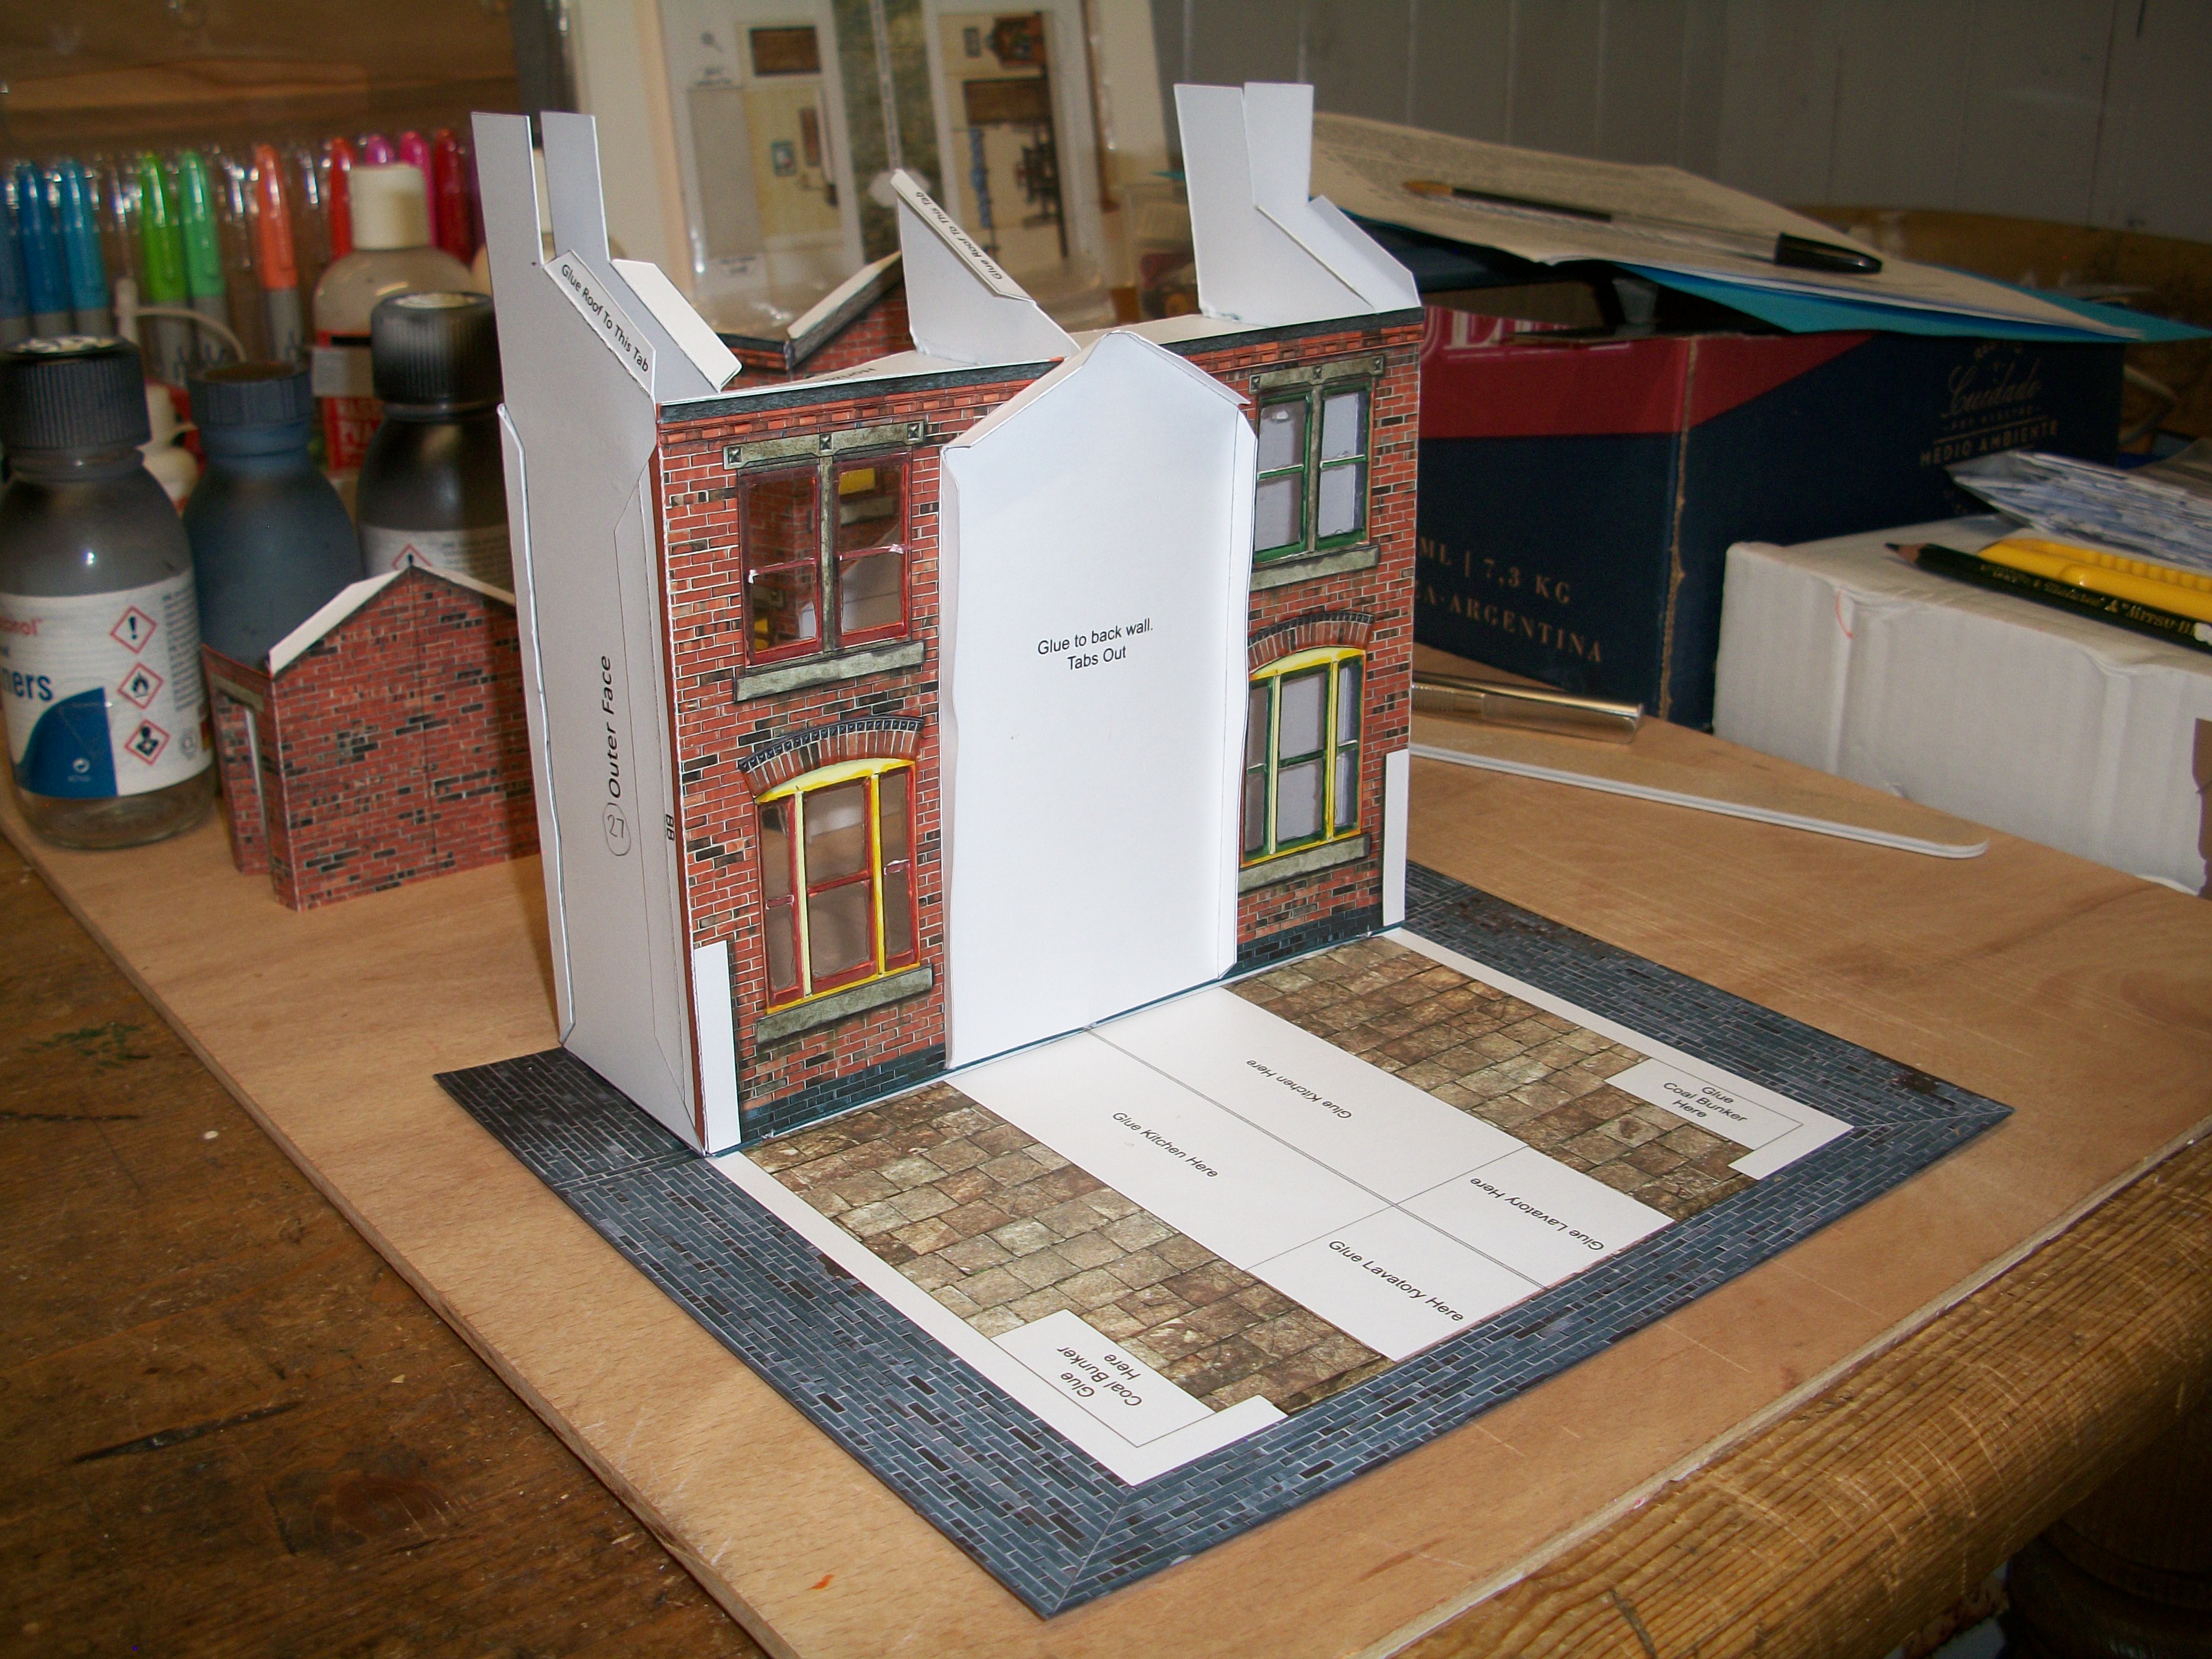
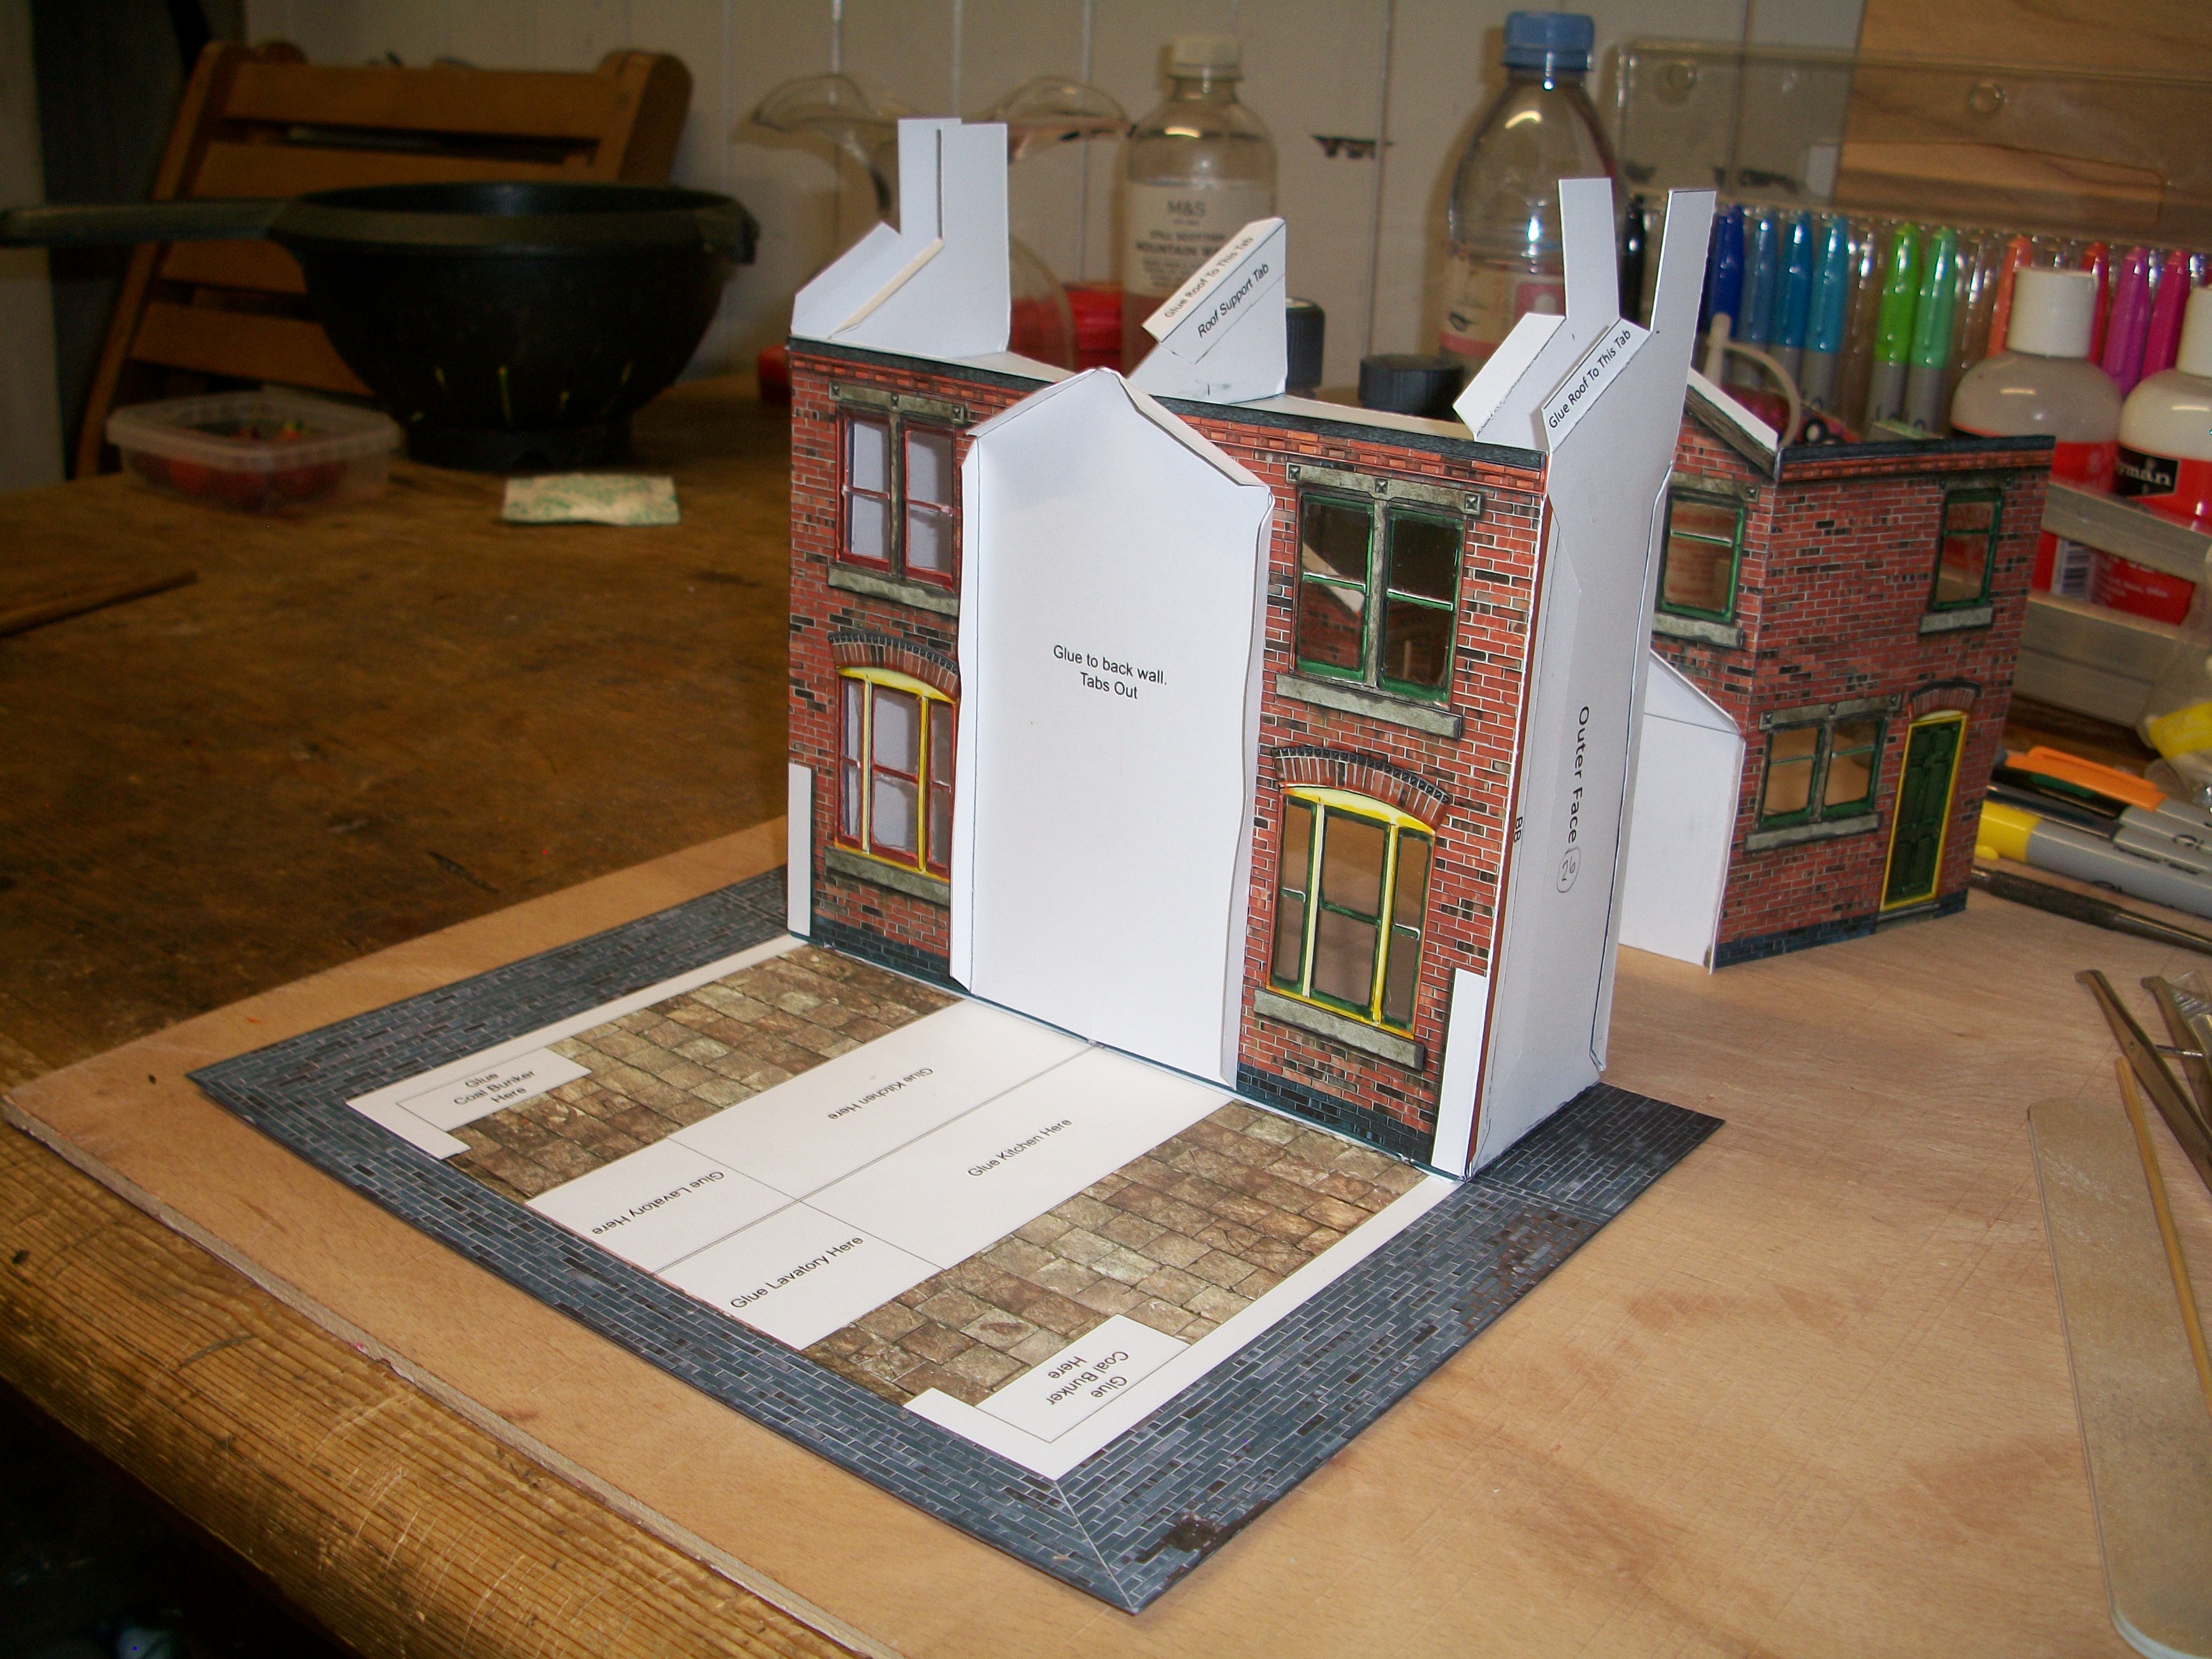
Thanks, Pat and Gary...... the card building kit is assembled using PVA glue, and I have then used Crystal Clear glue from Zero Paints for the clear acetate window glazing. When I saw the serious warp in the main wall, as seen from above, I was getting ready to use super glue for the correction but suddenly realised that hot glue would work better. The bend and the resulting gap was my fault due to poor alignment, but the hot glue has held it together nicely. Hoping that over time the PVA glue will not weaken because the instruction sheets do specify PVA. David
-
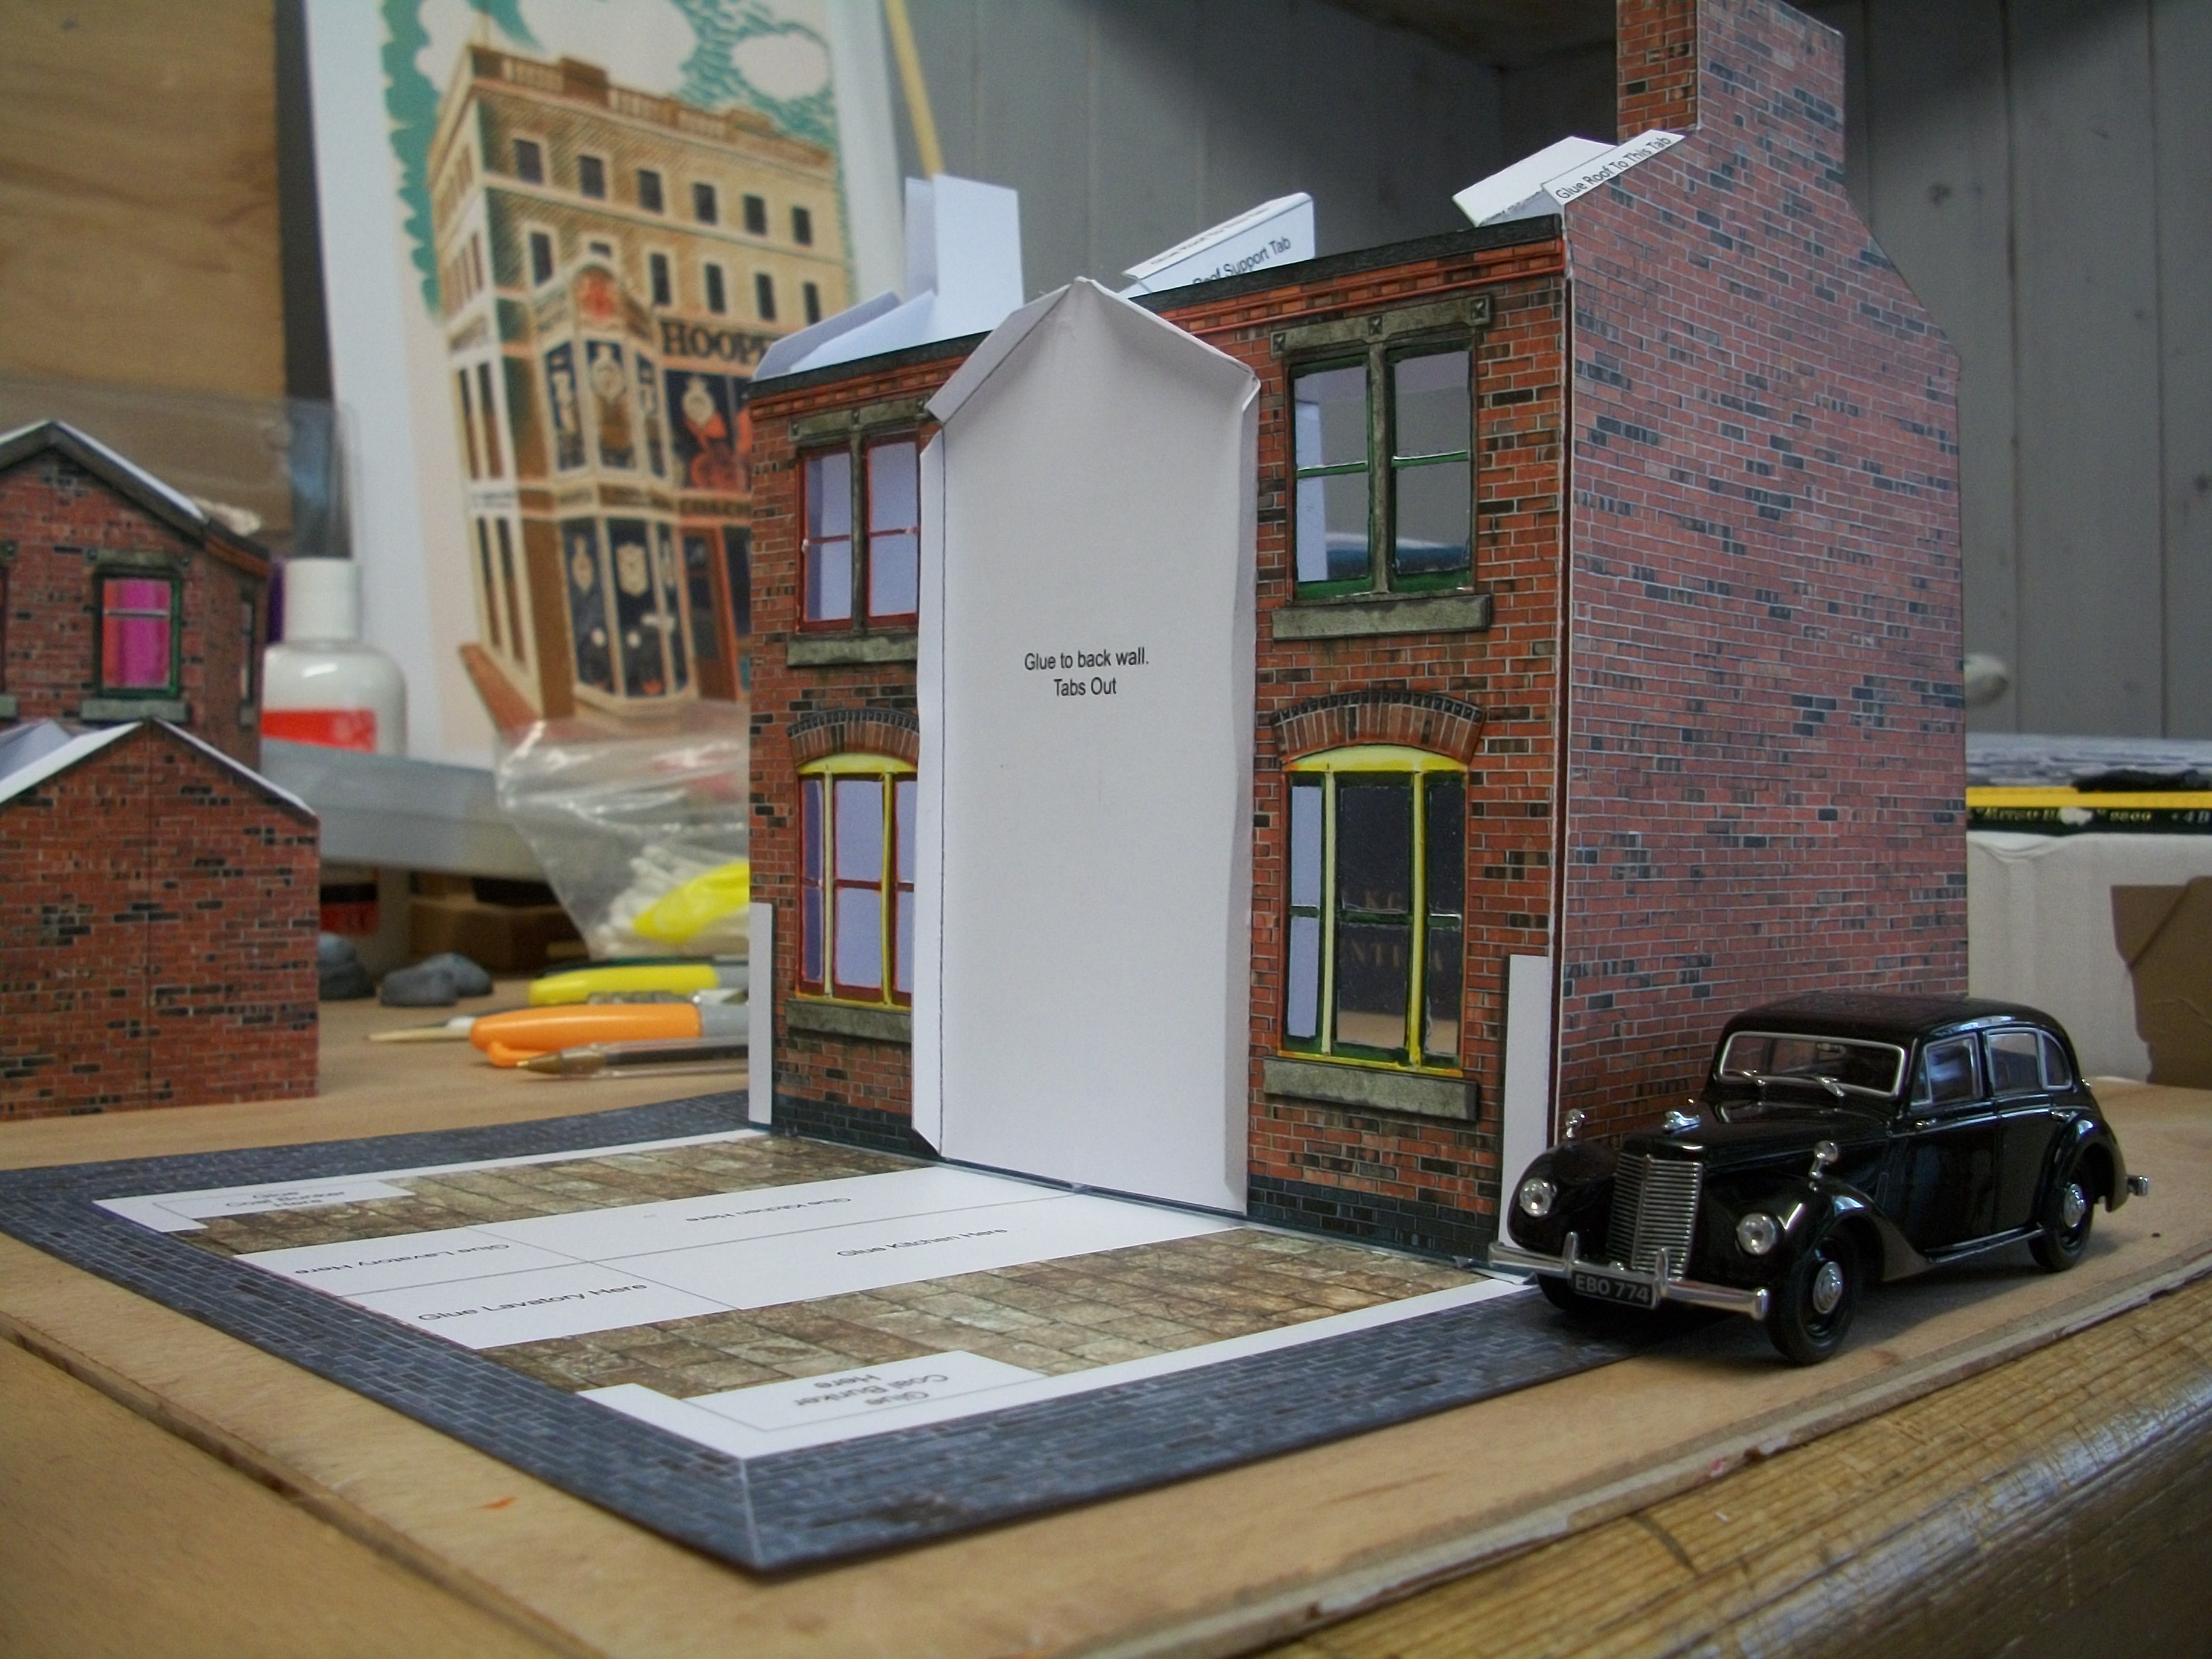
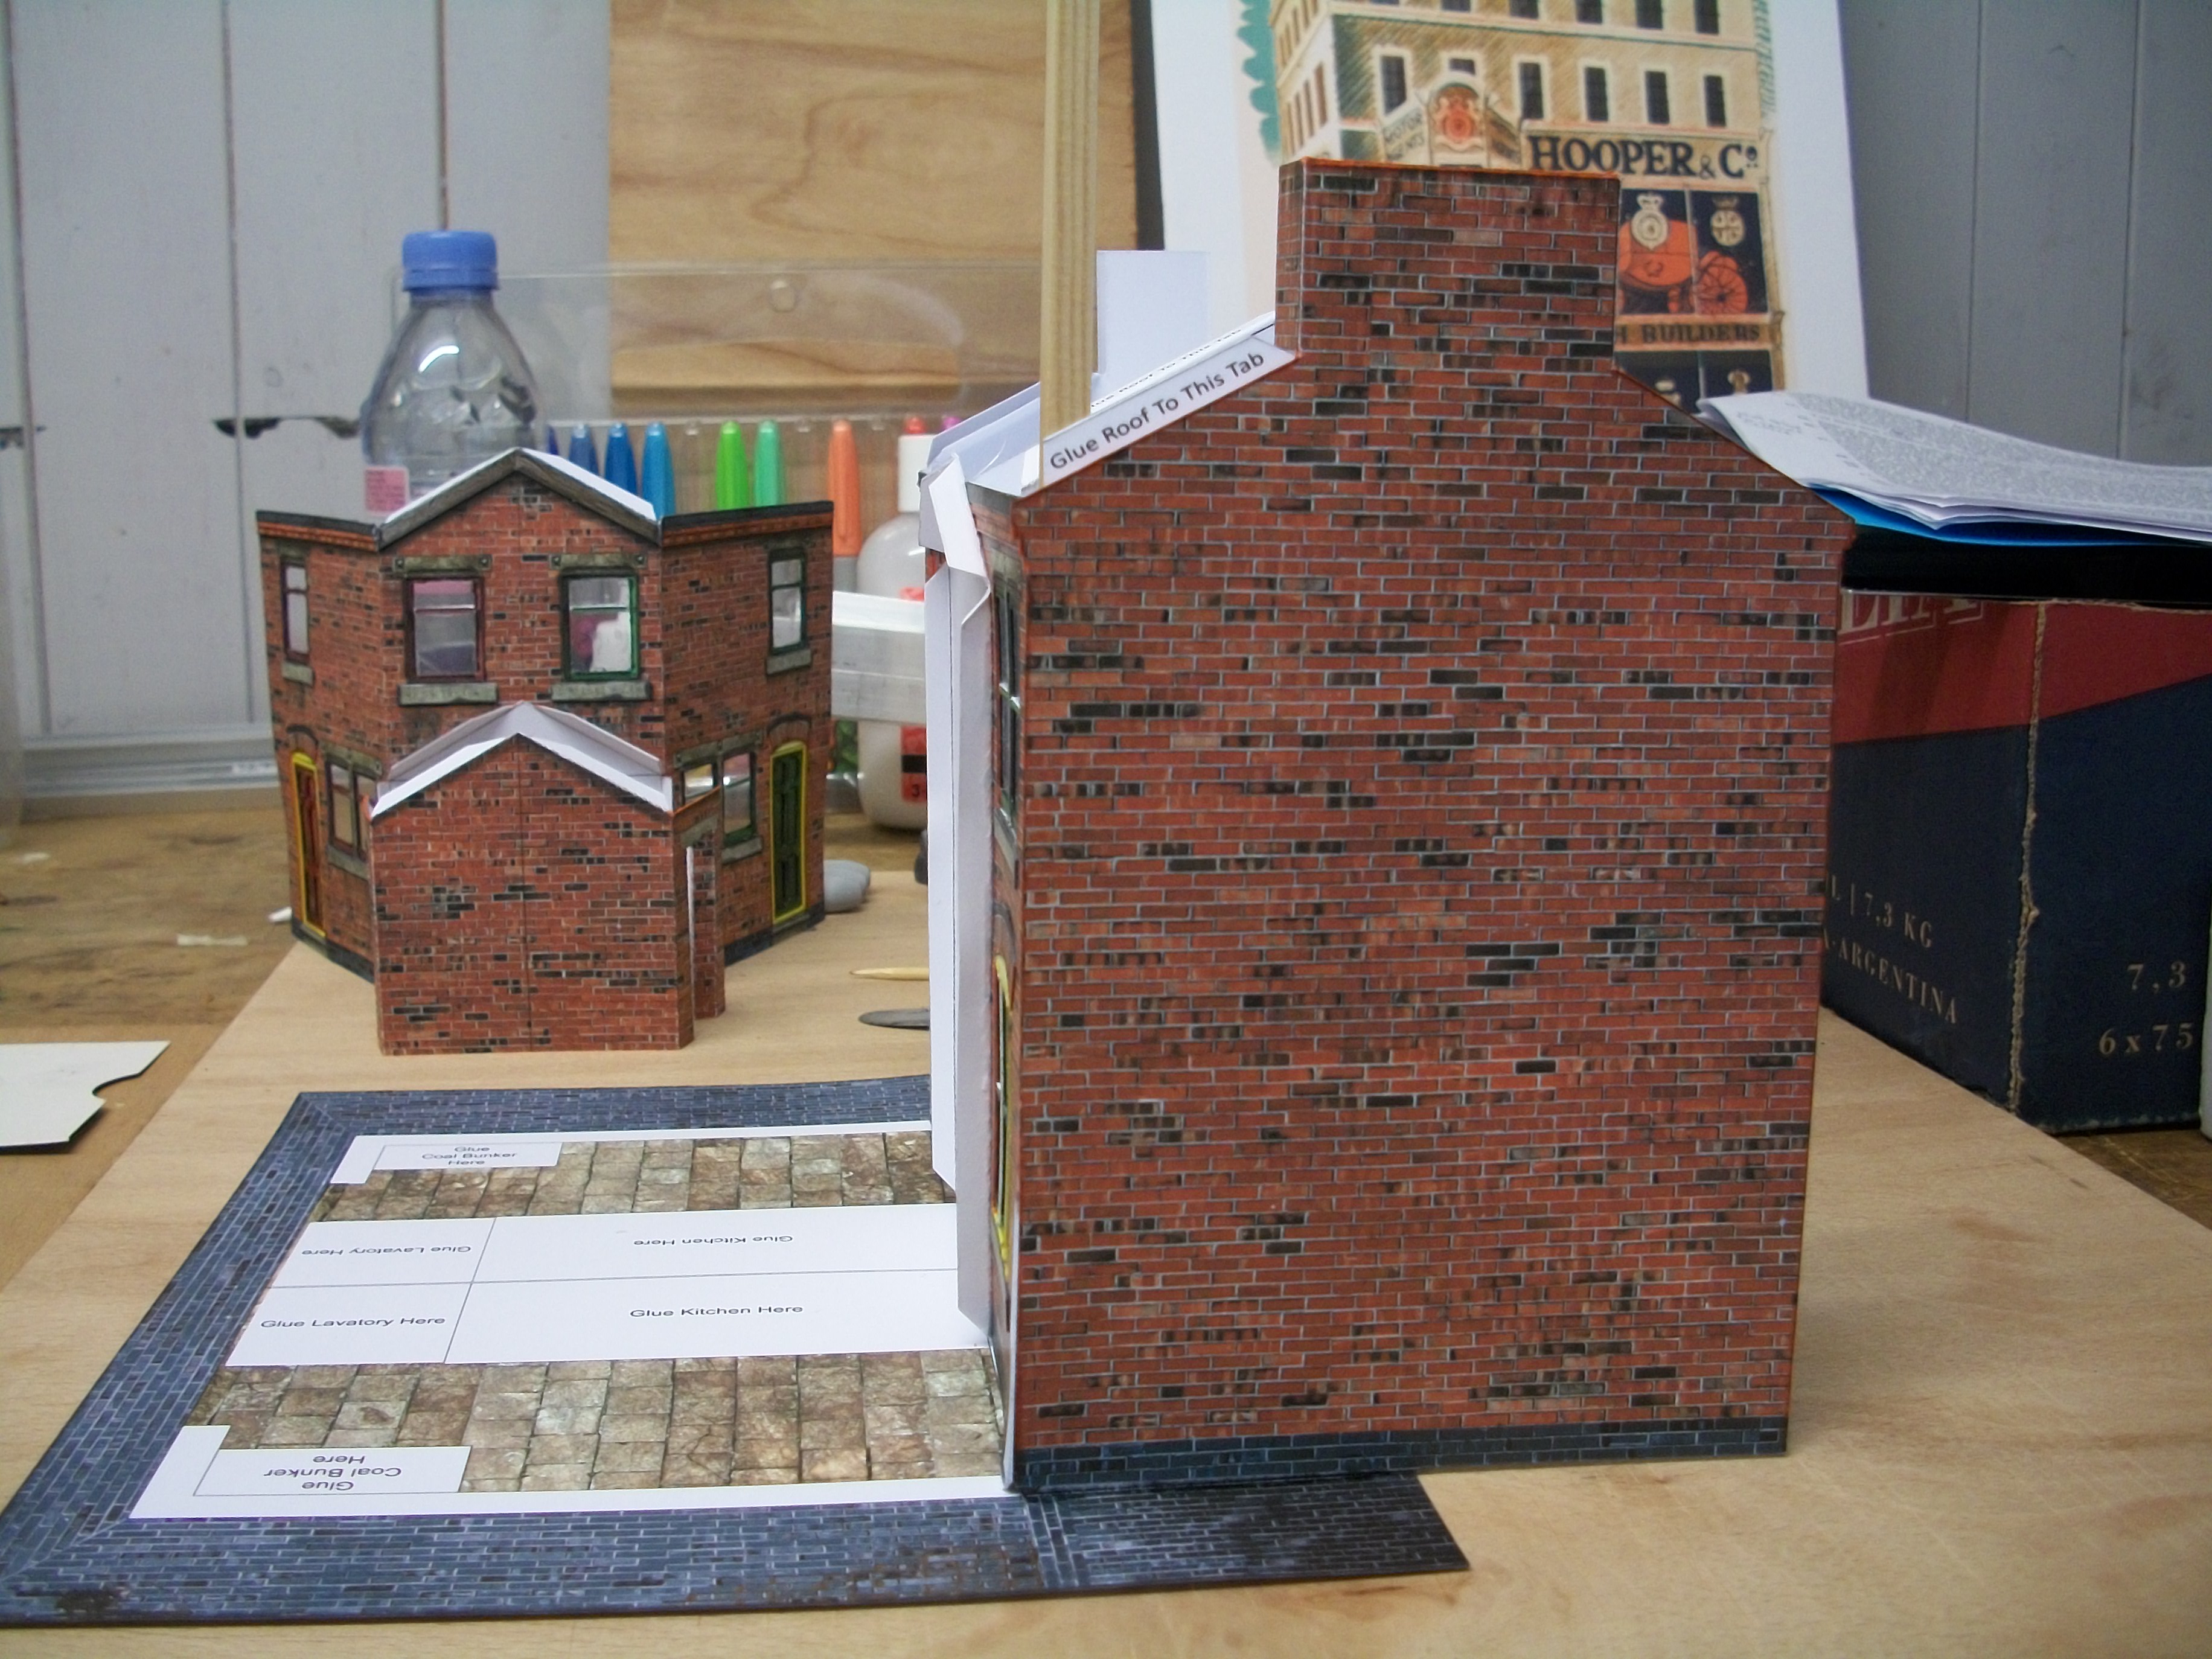
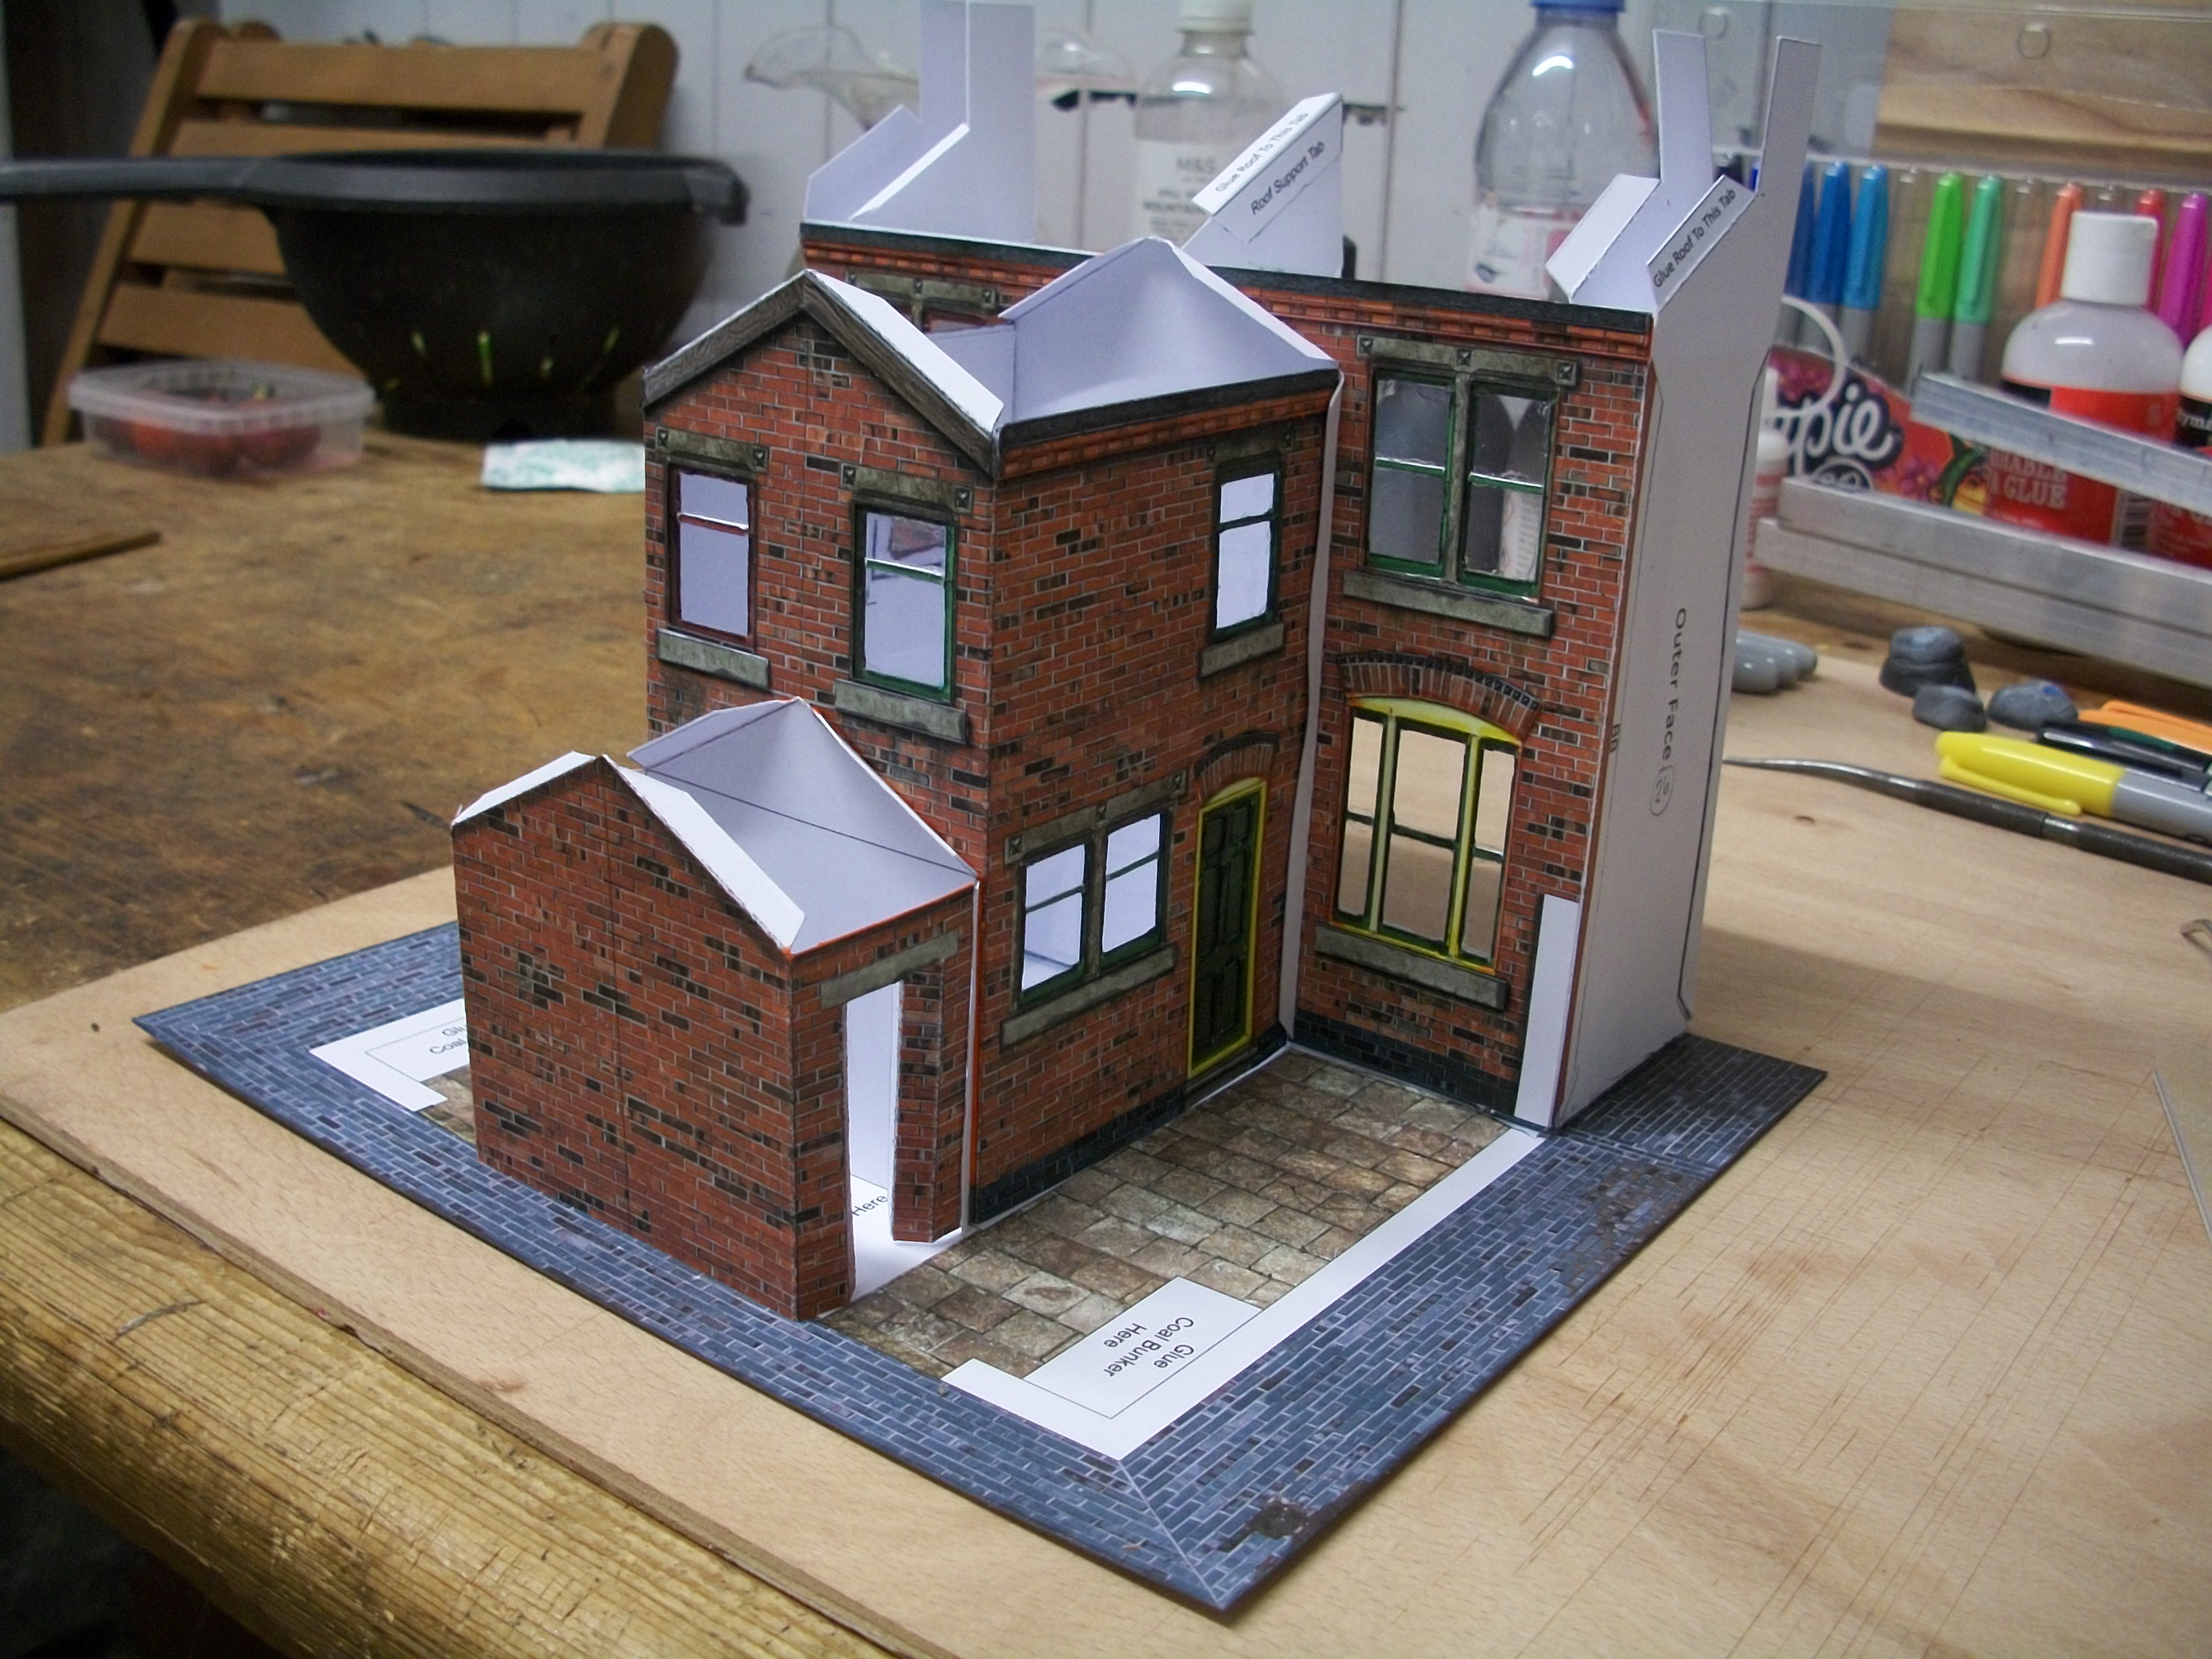
Some further progress made on the terraced houses over the weekend..... the side walls and chimney stacks are in place, and when I noticed a bend in the main wall of the building, in the centre, I was able to use the hot glue gun to strengthen the assembly. Working on the living rooms downstairs now, with the upstairs bedrooms following shortly afterwards. Surprisingly, there is still quite a lot of work to do on these terraced house backs, and then the terraced house fronts will be assembled as a second kit, before mating the two structures together. David
-
Hi Matt..... yes these building kits are in 1:43 scale and sold as O-gauge, so maybe they could be enlarged to 1:24 scale ? One of my model builder friends suggested it would be great if they printed these kits on styrene sheet, as well as on card. As well as the Victorian red brick terraced houses, Purple Bob's Hobbies do a factory facade, a public house, a shop, a bus shelter, railway station, tudor building, roads and pavements, a bridge and even a public toilet! Website is here https://purplebob.co.uk/ David
-
Yes, Pat.... the website is https://purplebob.co.uk/ and the Purple Bob's Hobbies company is based in Cornwall, England. David
-
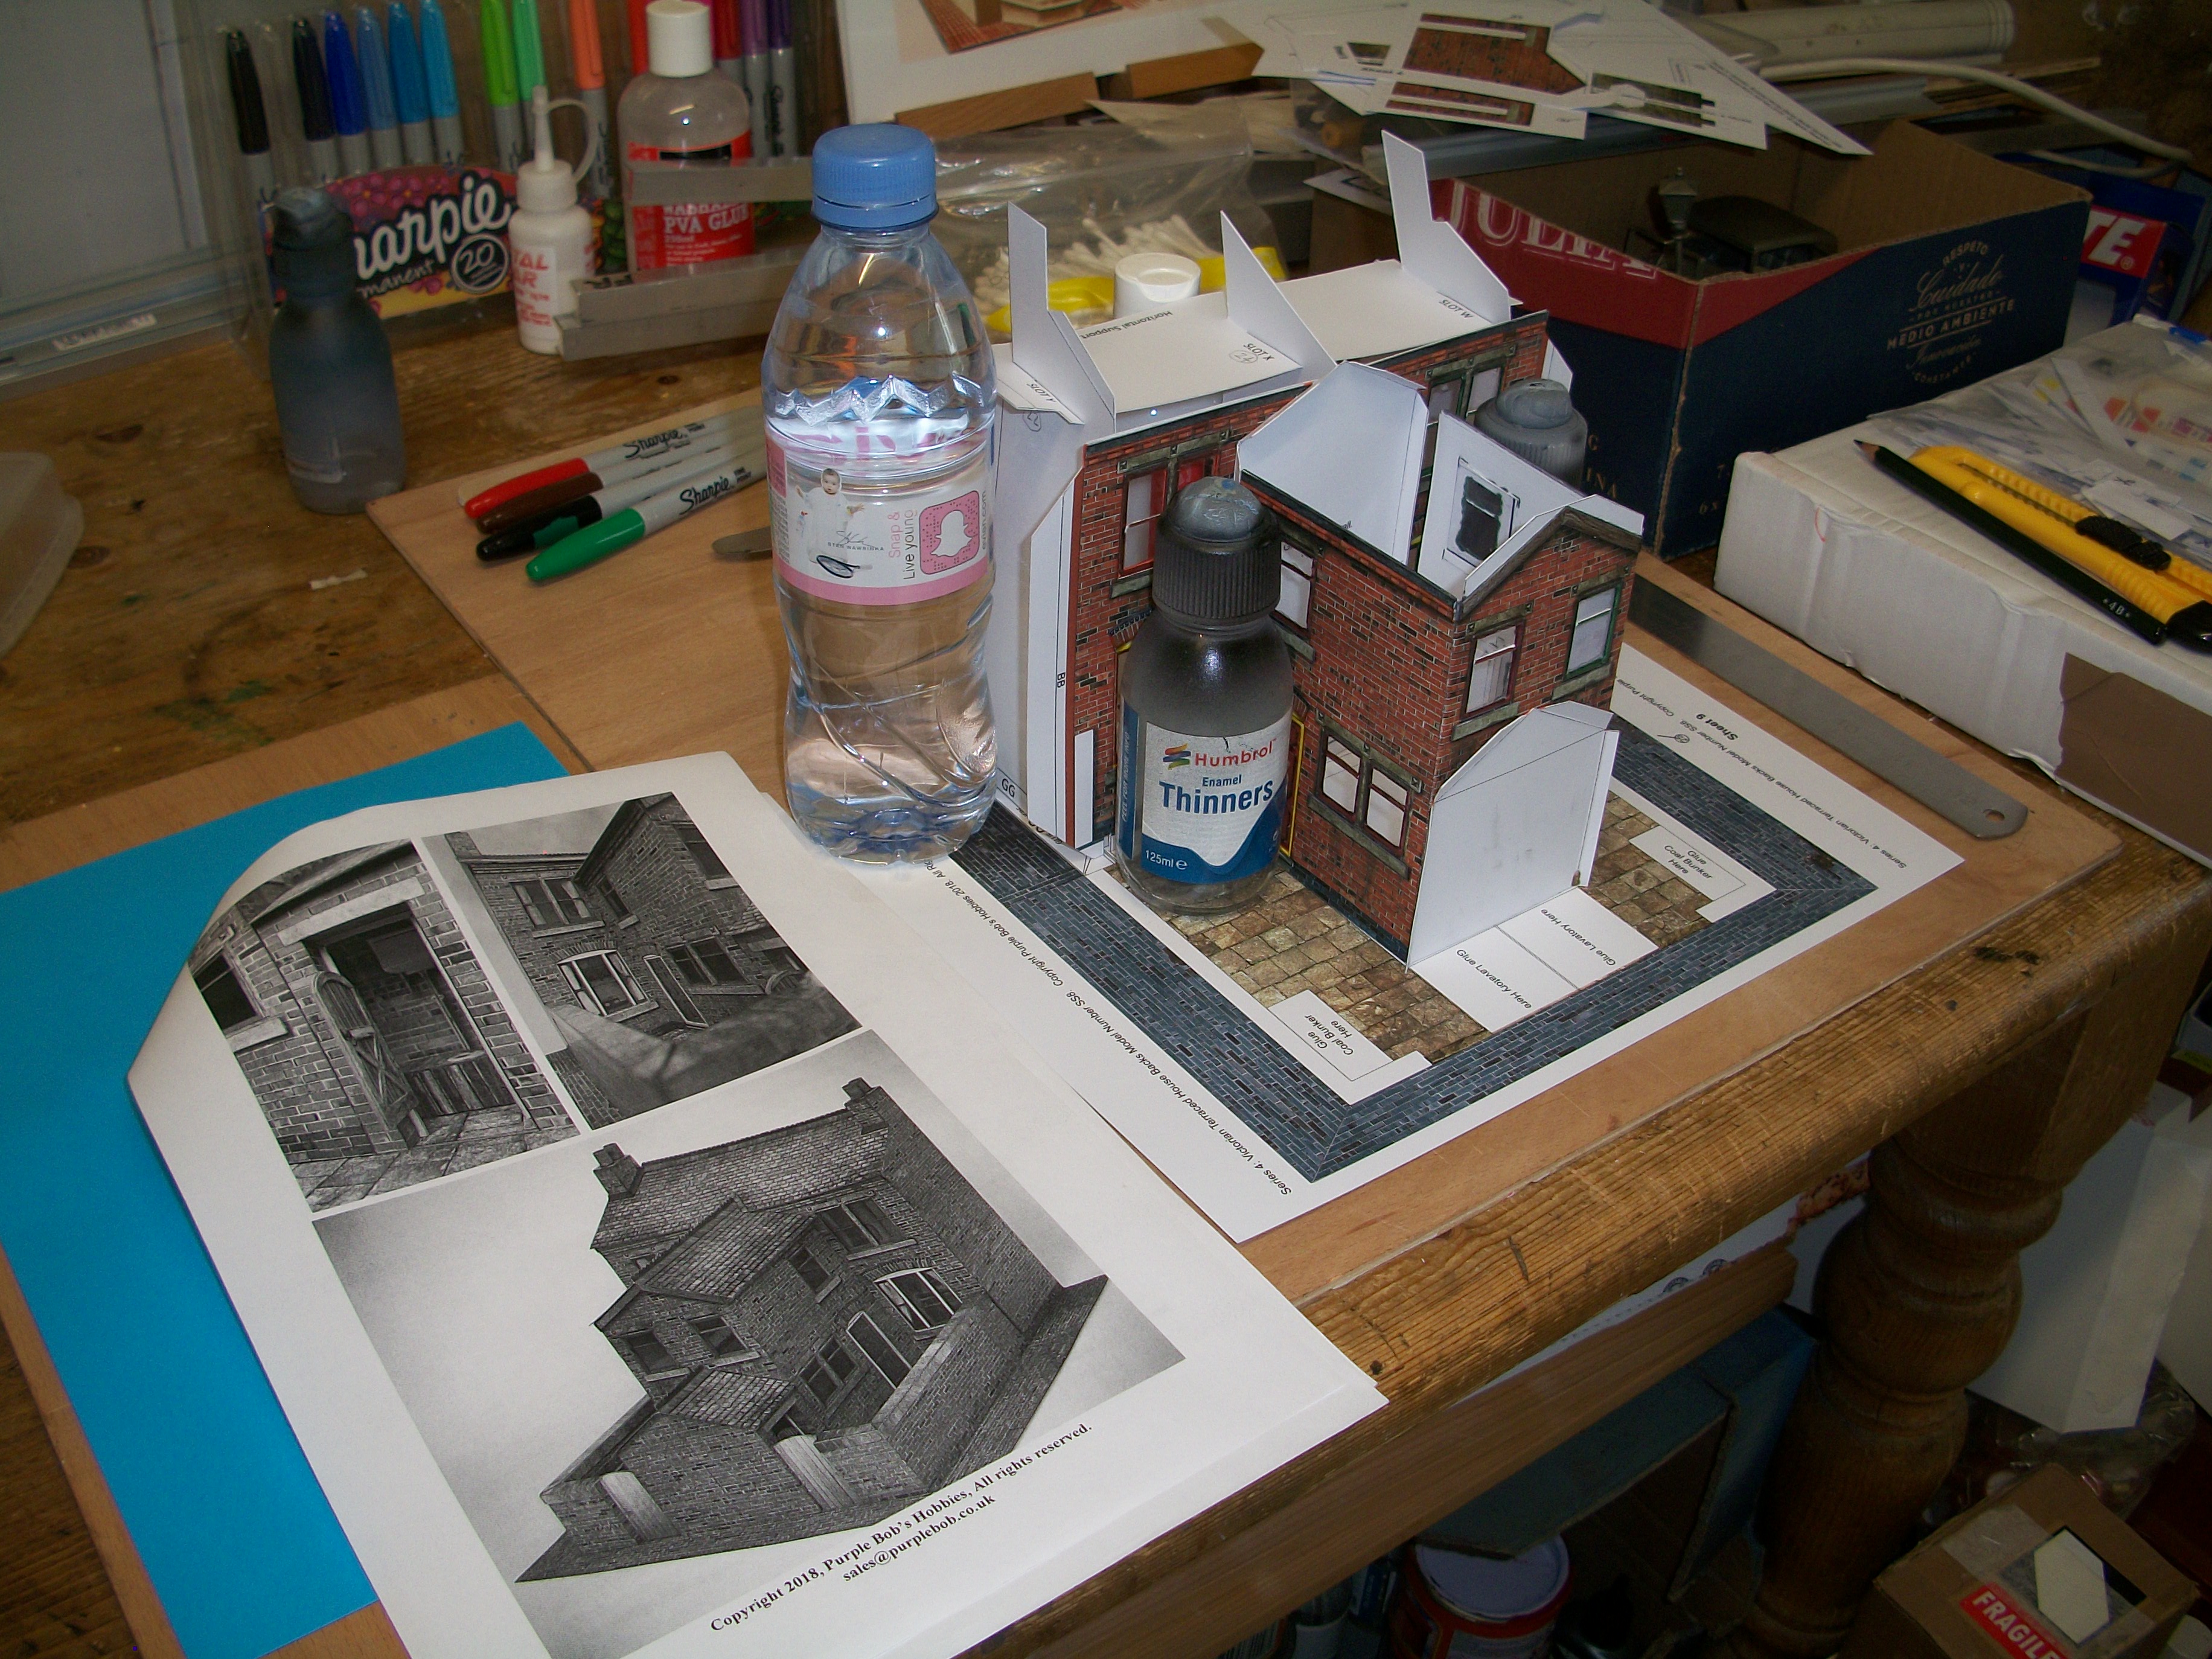
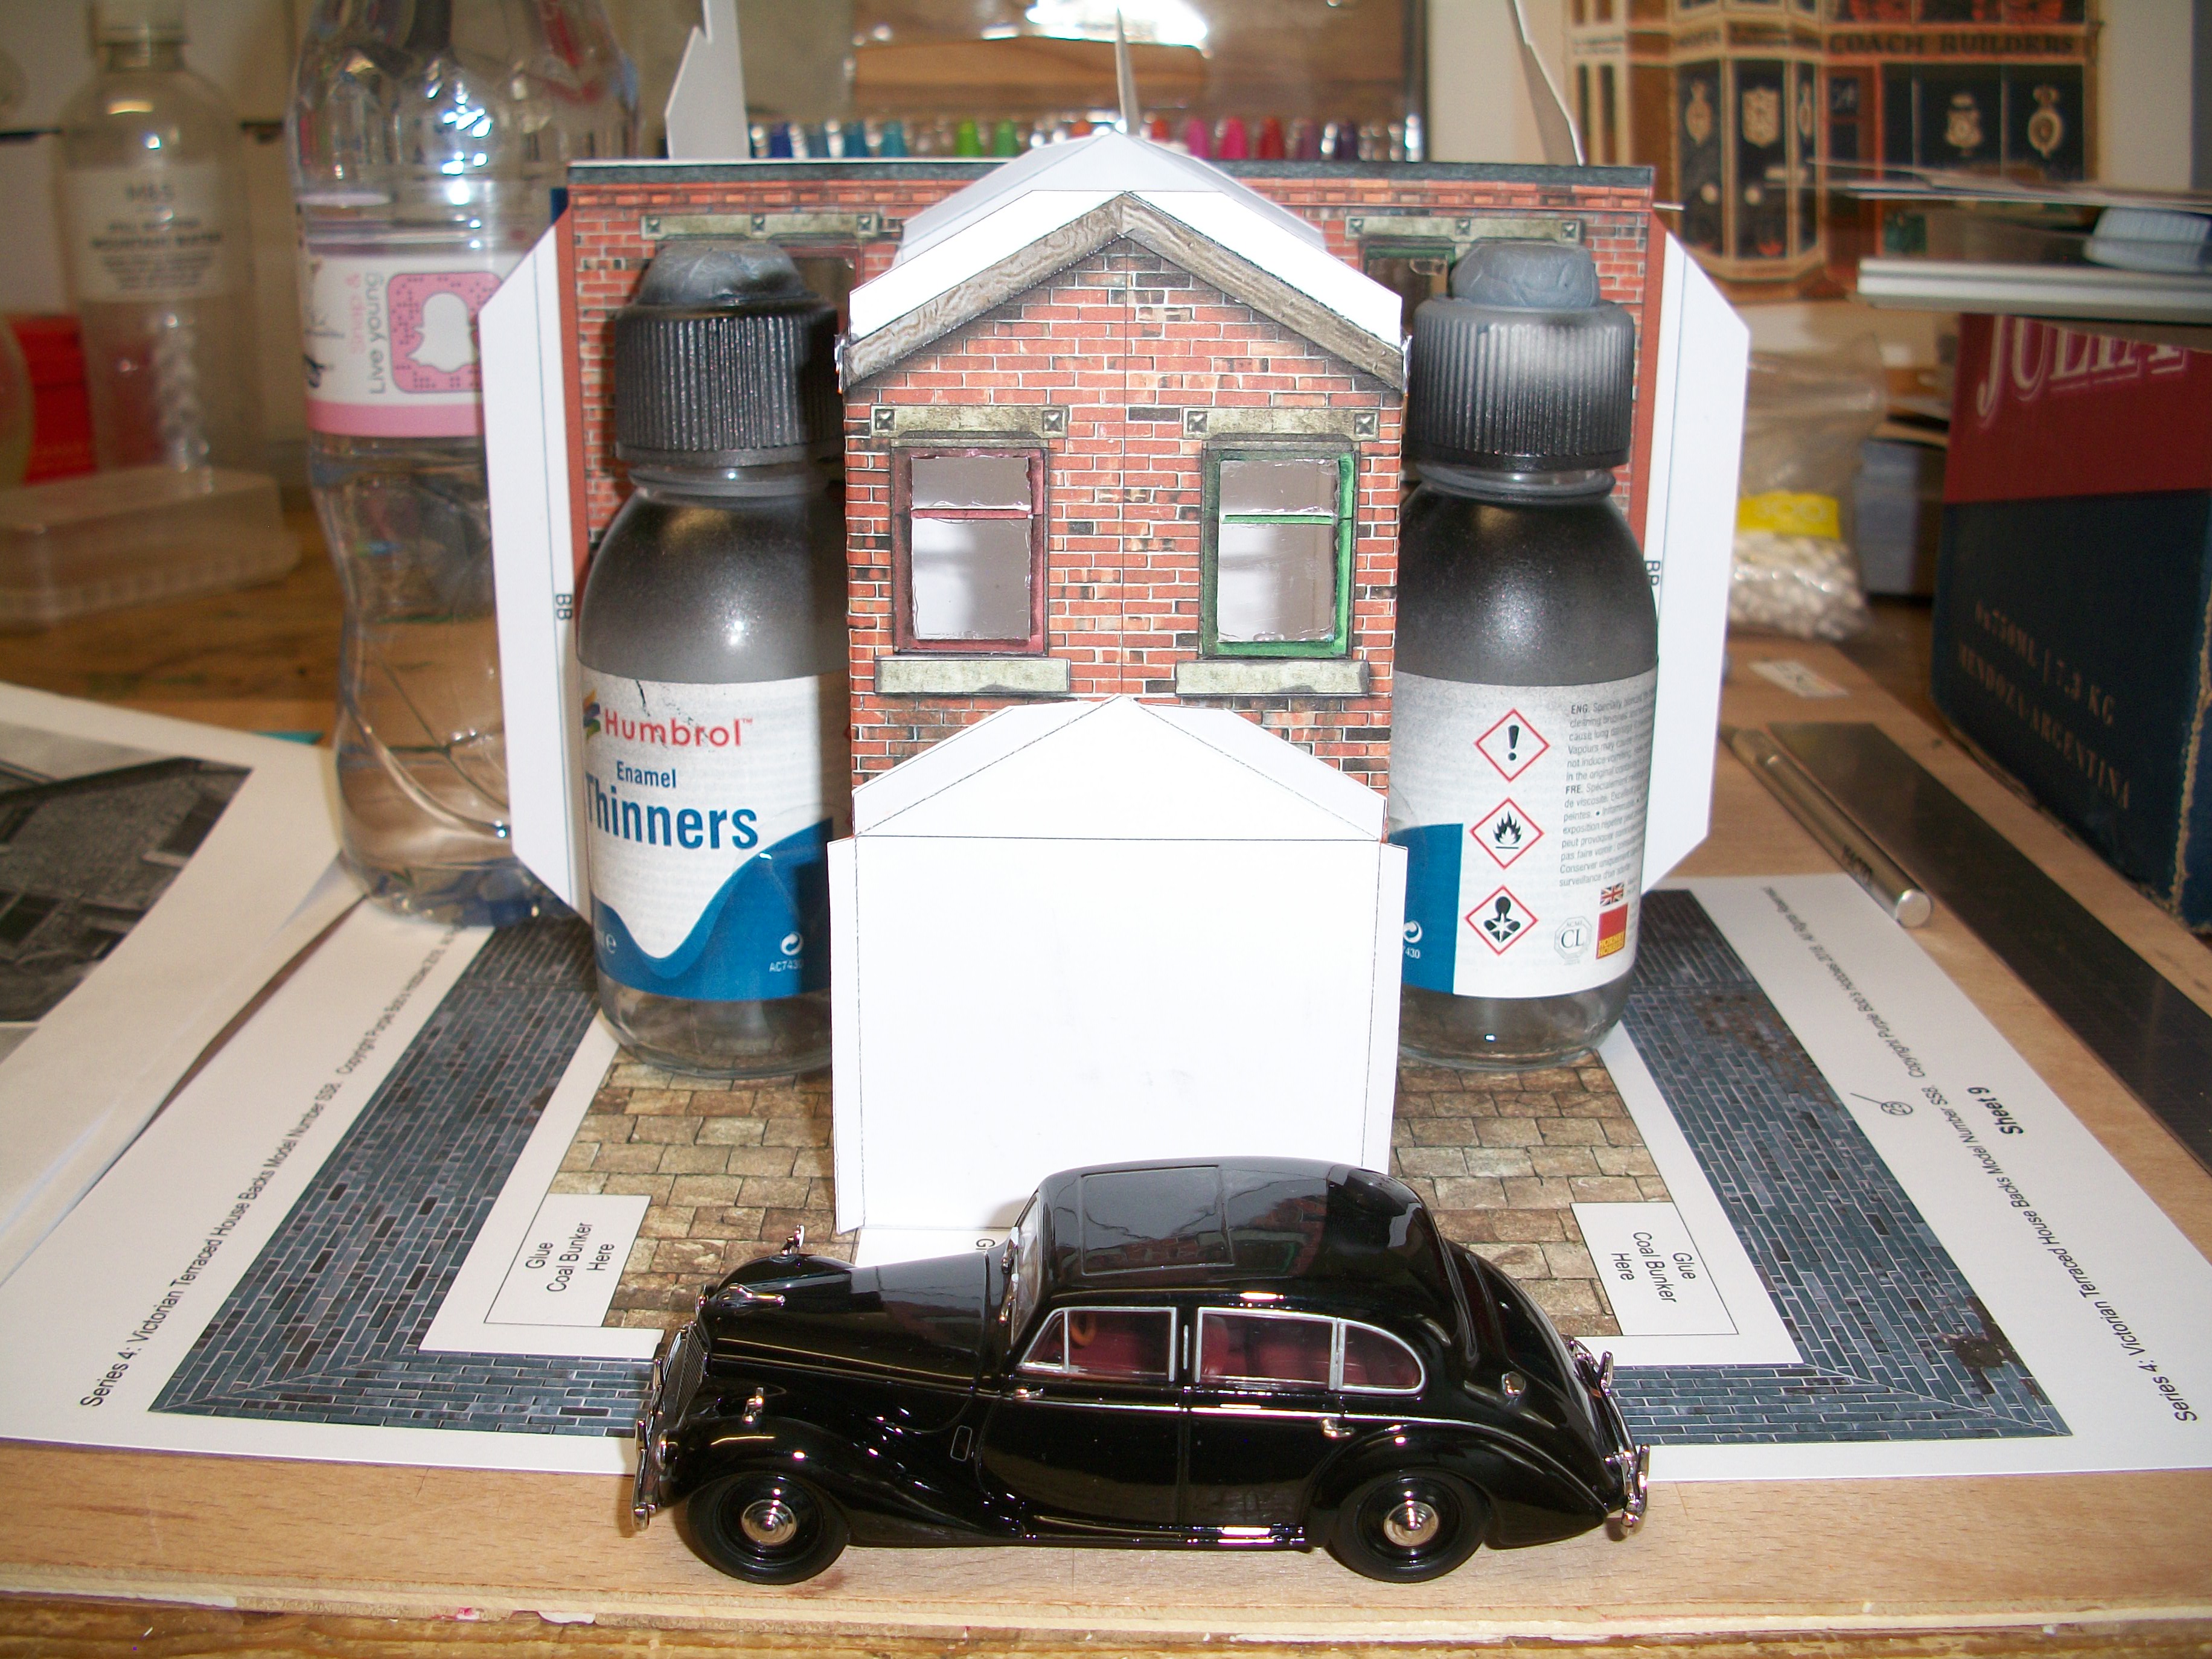
Here are a few photos to show the current progress with the building of the Victorian red brick terraced houses. This is an advanced kit and not recommended for the novice to card model construction. Some parts of this assembly are quite difficult and great care is required to cut out, score and assemble each individual component part. The overall strength of the buildings is improving as I add each module, and there are still rooms to add as open fronted boxes, also roof sections, side walls, yard walls, kitchen extensions and outdoor lavatories. The quality of these kits is excellent, and the complex instruction sheets are well written, running to eight A4 pages. Once this terraced house backs kit is completed, I will have to construct the terraced house fronts kit in order to create the entire building, which represents two houses in 1:43 scale. David
-
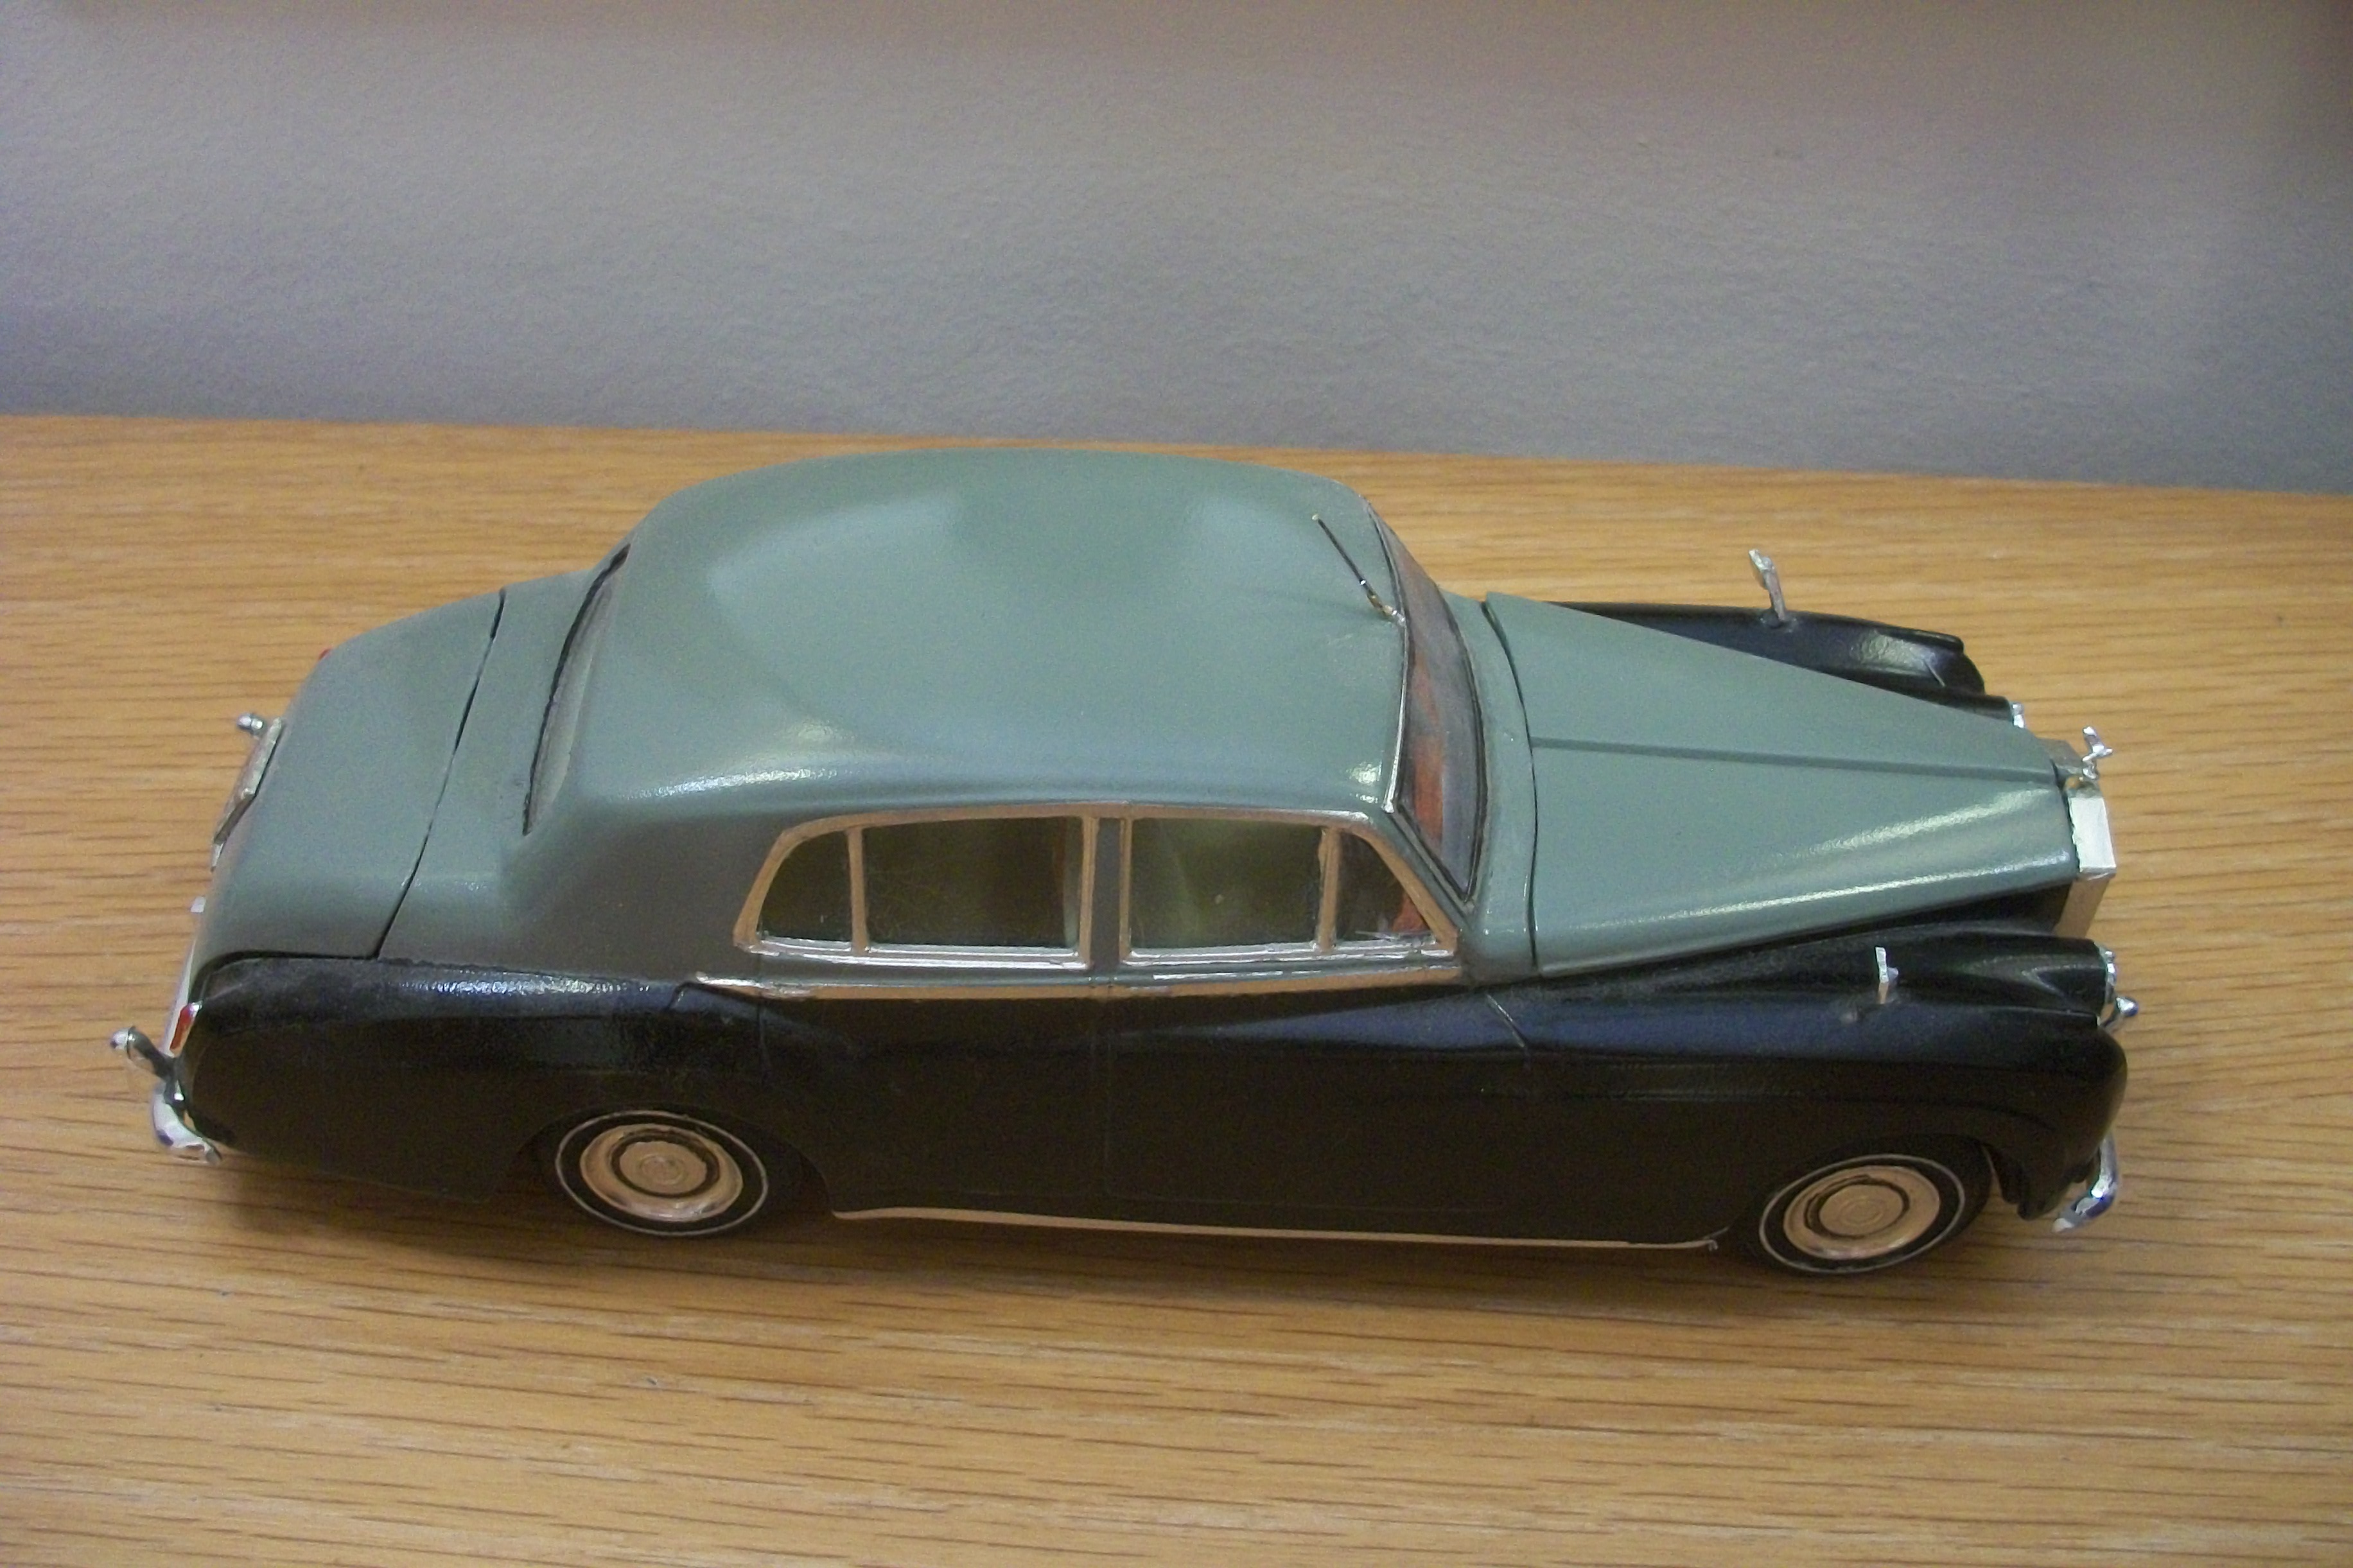
This is the first model car that I built only two years ago, after returning to the hobby 50 years after building car models as a teenager. It is the 1:24 scale Minicraft Rolls-Royce Silver Cloud with many modifications, and finished in airbrushed Sage Green over Velvet Green with BMF chrome. David
-
What do you drive?
Anglia105E replied to gasman's topic in General Automotive Talk (Trucks and Cars)
1994 Mitsubishi Pajero grey import 2.8TD SWB Auto with Overdrive and Super Select 4WD...... workhorse with hundreds of thousands of miles on the clock !


.jpg.ab6f278e64dc426502bc06908db87222.jpg)