absmiami
-
Posts
4,778 -
Joined
-
Last visited
Content Type
Profiles
Forums
Events
Gallery
Everything posted by absmiami
-
 Thanks for viewing ... and thanks for voting ...
 -
Gracias. And my compliments to your profile ID box Picture / thingy ...
-
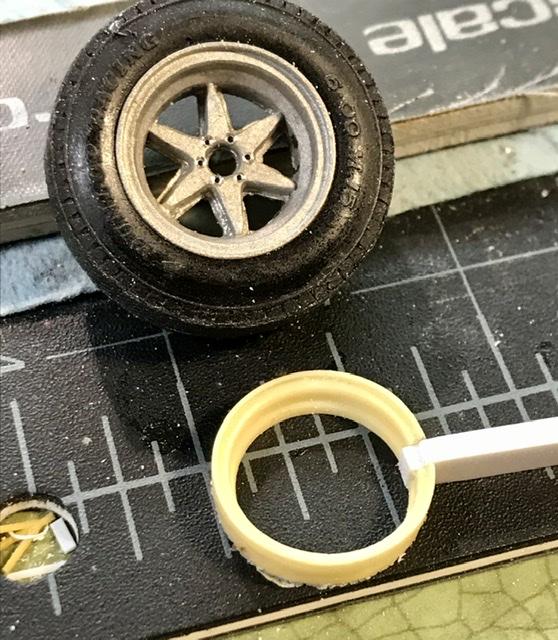
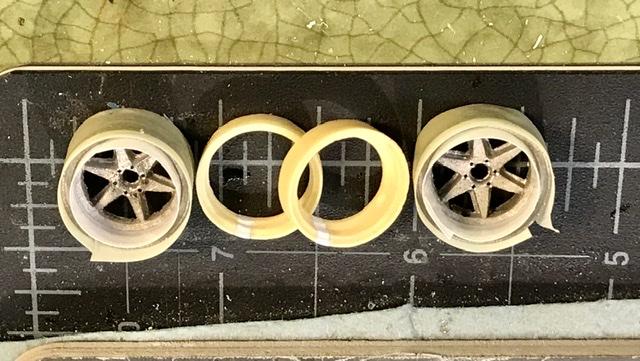
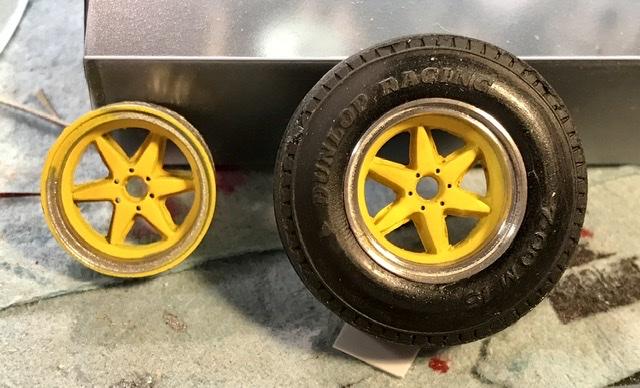
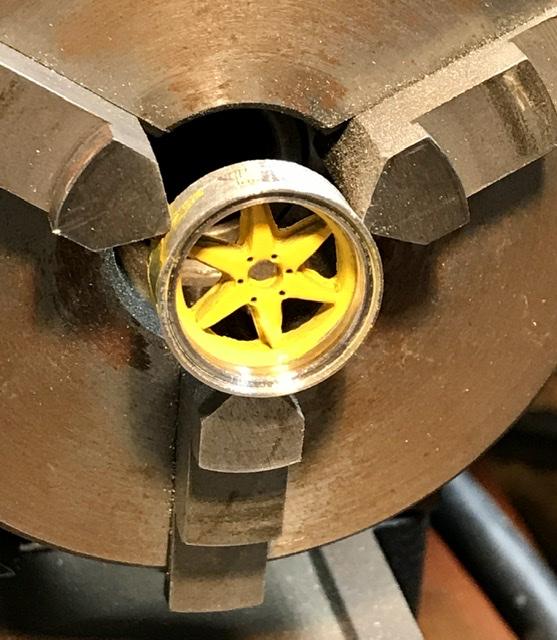
Wheels: kit white metal parts. The 32B ran the same wheels and tires as the 33. The tires are some old stash Perry’s Resin Dunlops rubber - very nice. Inner rims are enlarged to match the Dunlops - wheels and rims are painted with Tamiya yellow. Some paint over-run on the outer rims are removed with some small grinding bits and sanding sticks while the wheels are held in a 3 jaw Chuck on the Sherline. Then the wheels and rims got a coat of Alcad semi gloss .. the wheels were also drilled for wheel nuts ....

-
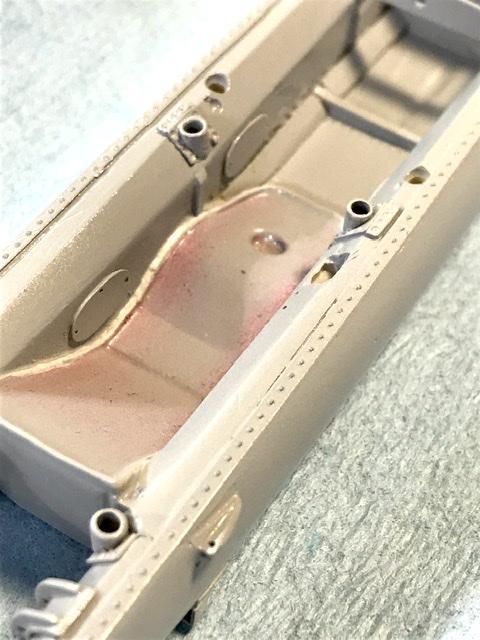
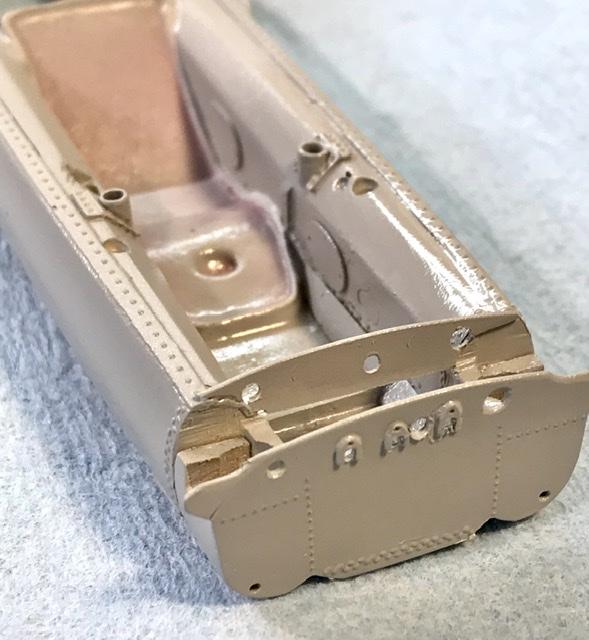
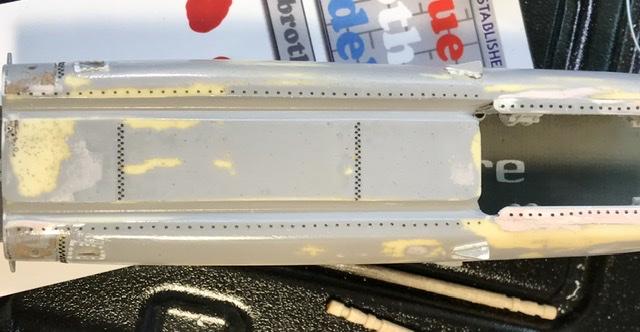
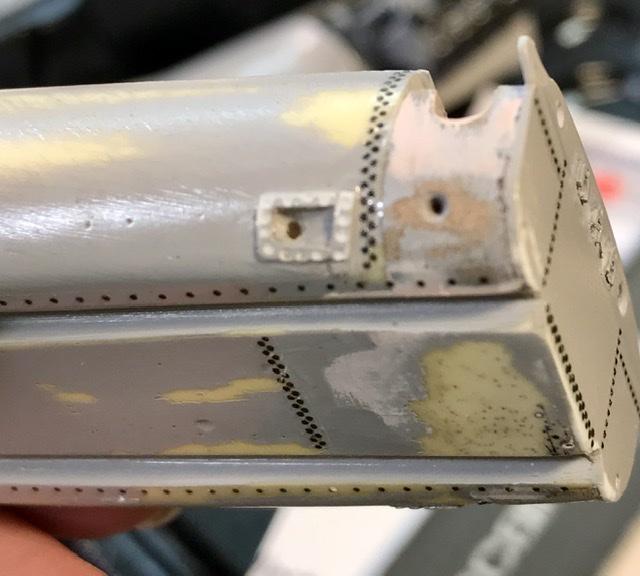
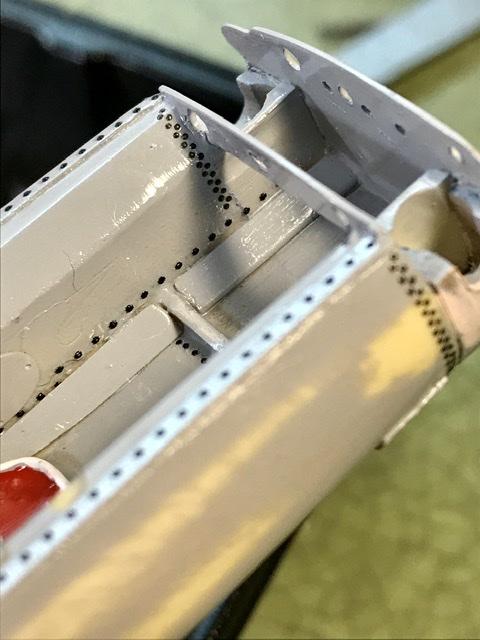
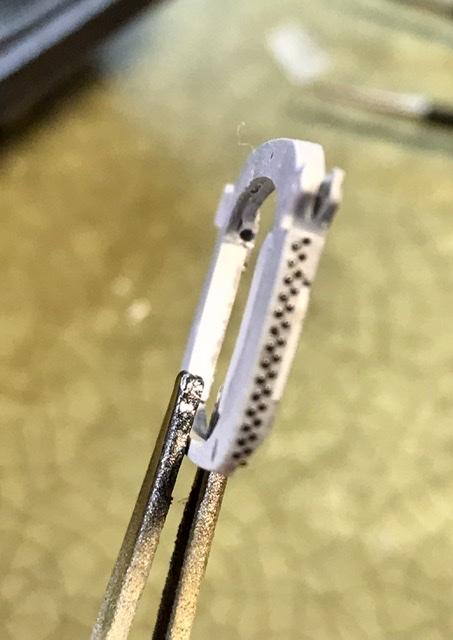
No matter what ... there are always repairs or corrections on the body work after the first primer coat. The second coat is on now. You can see that the rivets will stand out under the paint and the carrier film for the rivet decals just sort of goes away - it is not visible ...
-
Yup but you finished it so fast that you couldn’t take advantage of the xtra hour of building time today .... on to the Mangusta ?
-
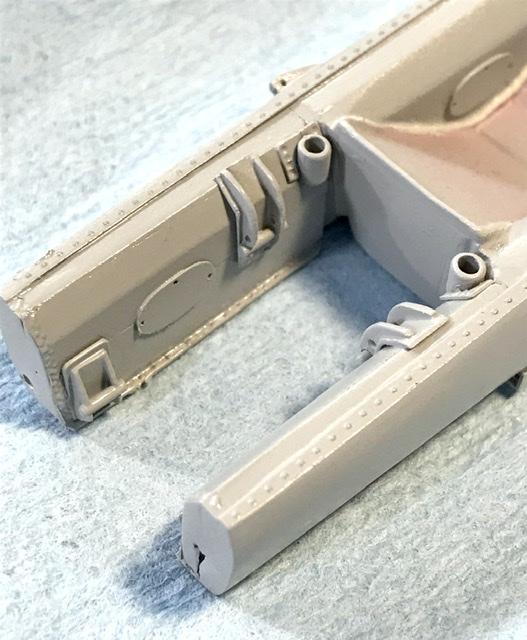
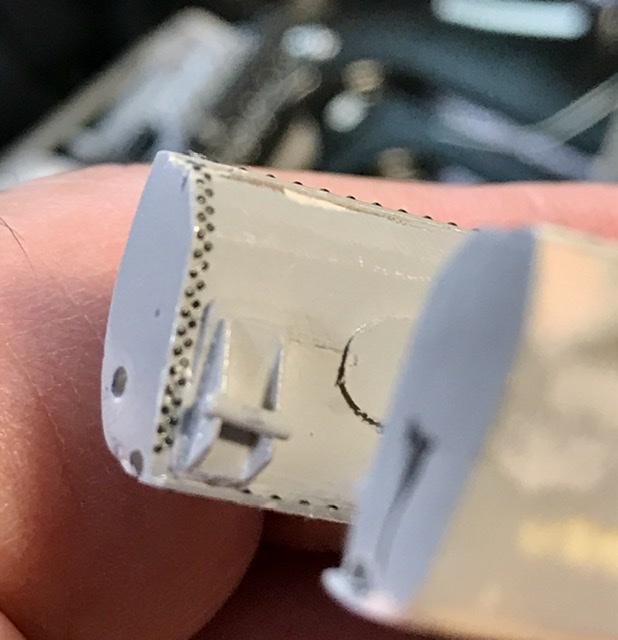
Rivet rivet rivet ...
-
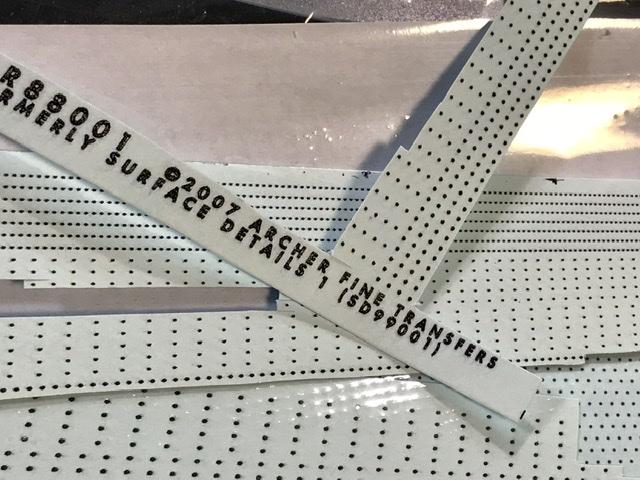
Time for some rivets ... using Archer and some alt pattern rivets from Micro Mark these work well. Try them. You’ll like them ...
-
1/32 scale Belly Tank Lakester
absmiami replied to styromaniac's topic in WIP: Other Racing: Road Racing, Land Speed Racers
Hmmm. Belly tanker ... -
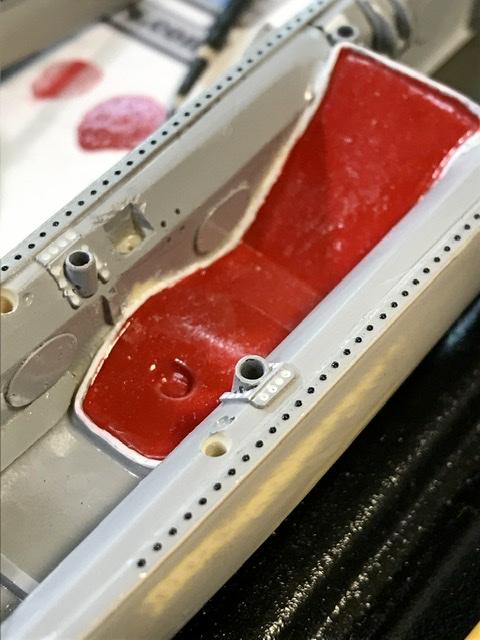
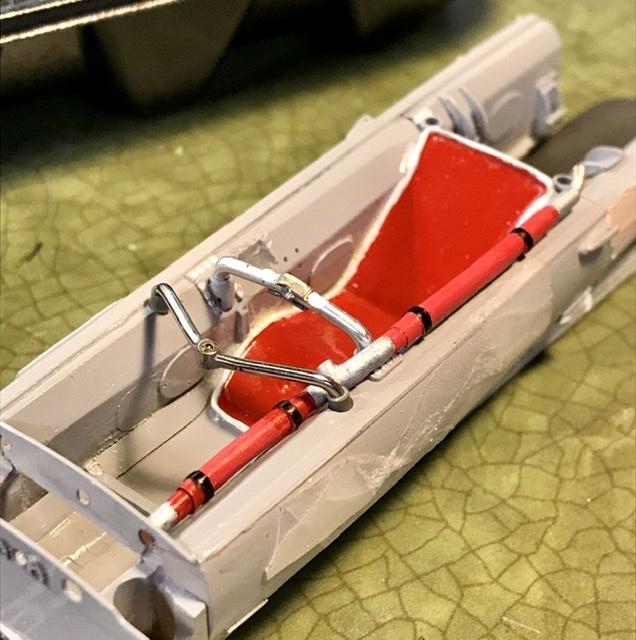
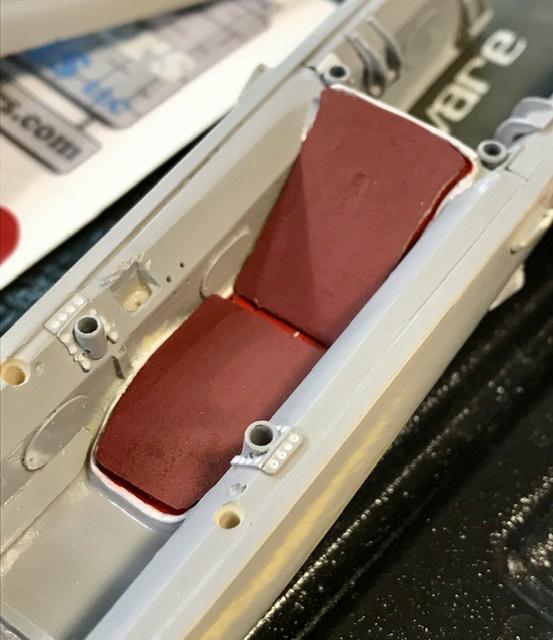
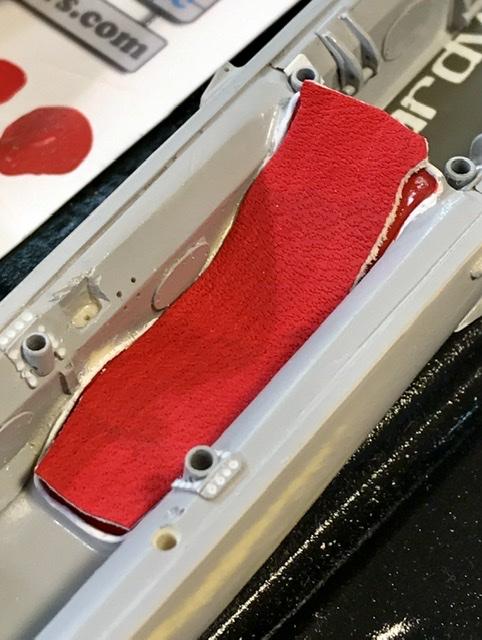
Seat covering ... team lotus used red leather. Figure painters have a great knack for painting a surface and making it look like leather. And I am not a figure painter. So I’m trying different things. Too shiny. Too dark. Etc. the fix I think will be the thin leather - think it’s calf skin not sure - coated with a red sharpie. Getting close but I’ll try a perm marker with a slightly darker shade of red ....
-
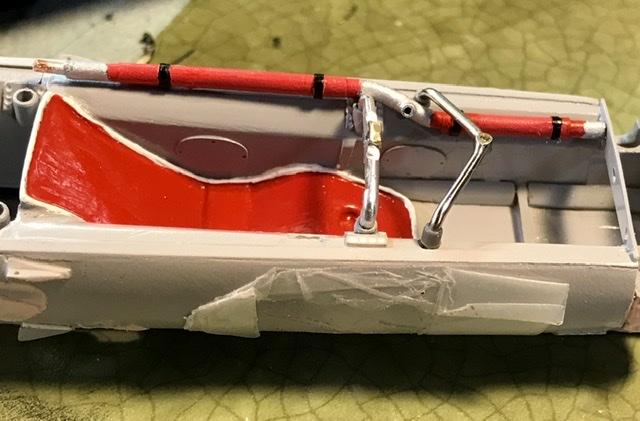
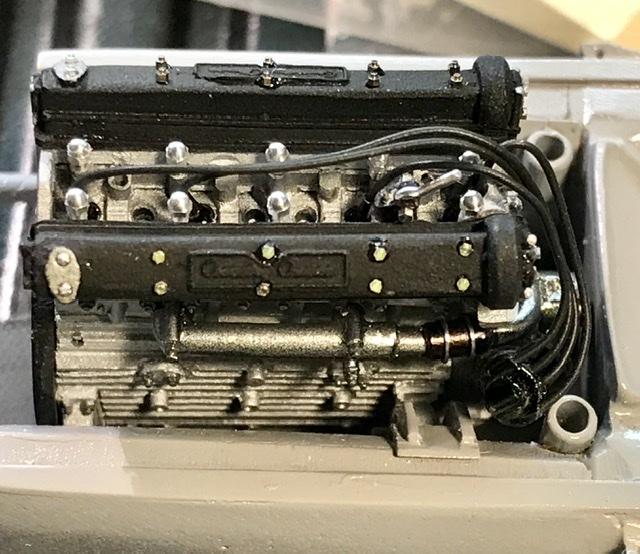
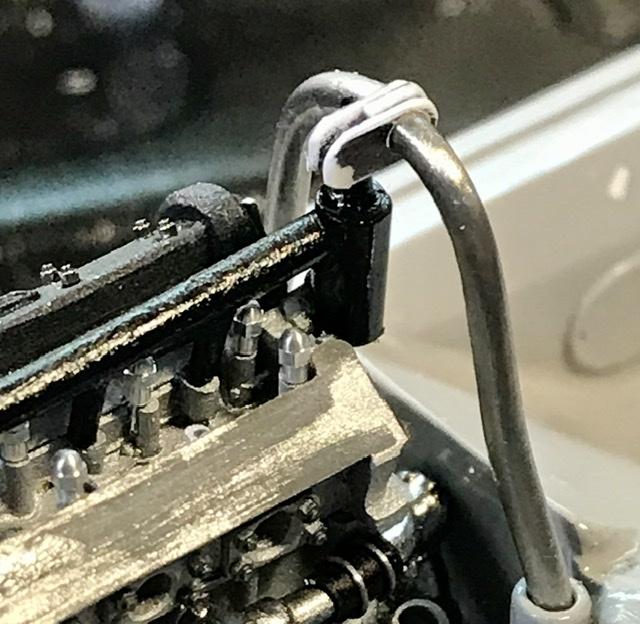
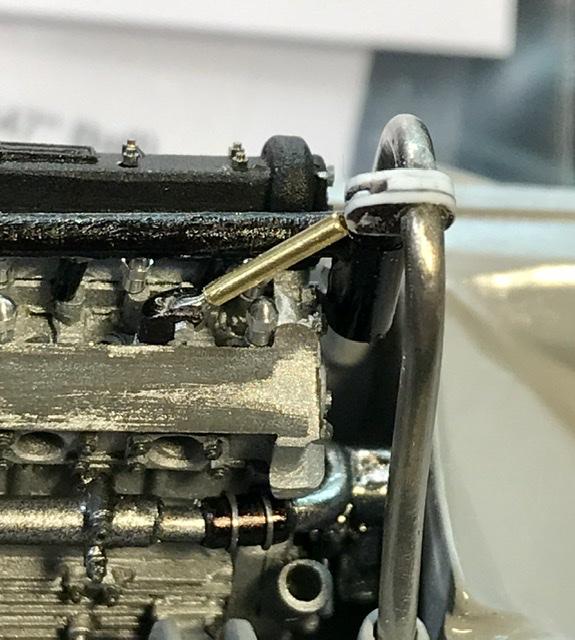
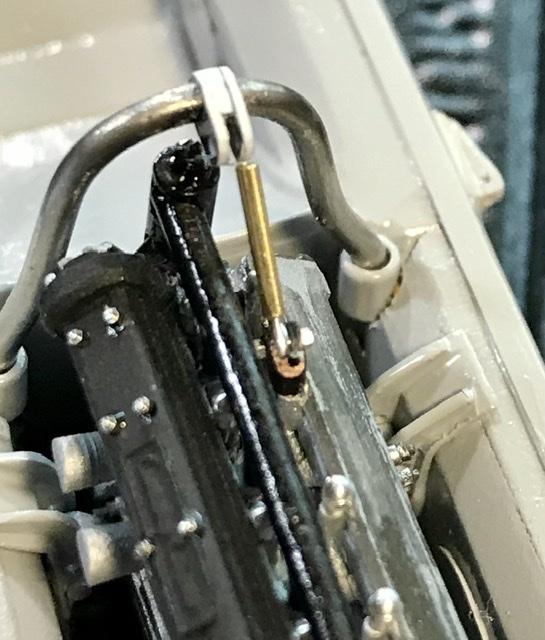
The pipe has some heat shielding - this was added with some tape. The shielding will be painted red and the exposed pipe is aluminum ... there is a short length of rubber pipe running past the roll bar and into the collector in front of the cyl head - there is just enough room there - things are going to get crowded in the engine bay ...
-
The aluminum wire bending jig is Randy D’s fault ... sold on amazon and/or eBay.
-
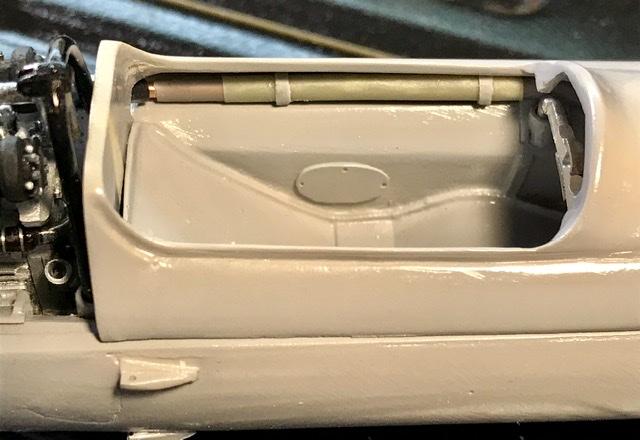
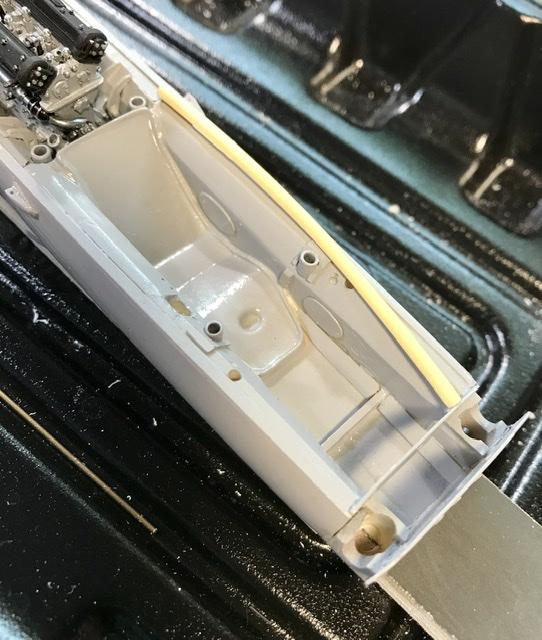
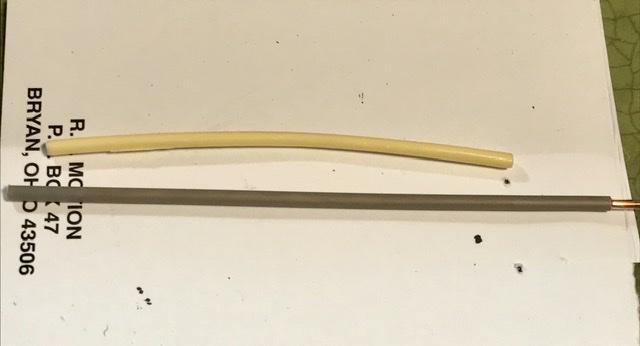
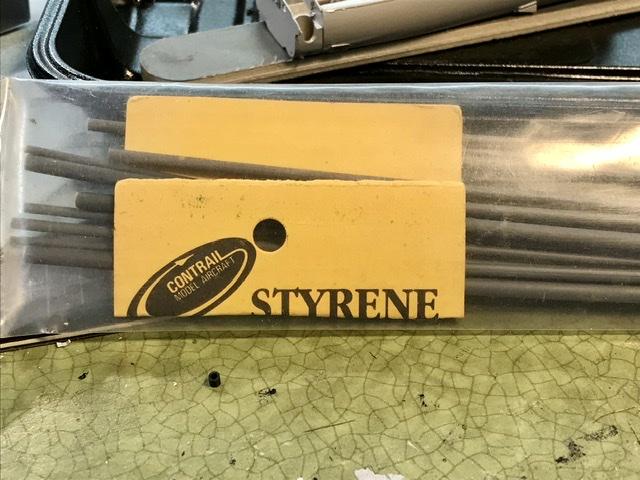
The water return pipe ... the run forward is different on the 32B because the sides of the monocoque are slimmer than the 33 ... so I can’t use the cast part. It’s replaced with a part that I’ll make with styrene tube with a copper insert - so I can bend it around the fuel filling pipe ... the styrene was sold by a model railroad outfit called contrail. These aren’t sold anymore. There is probably something similar but I haven’t found it
-
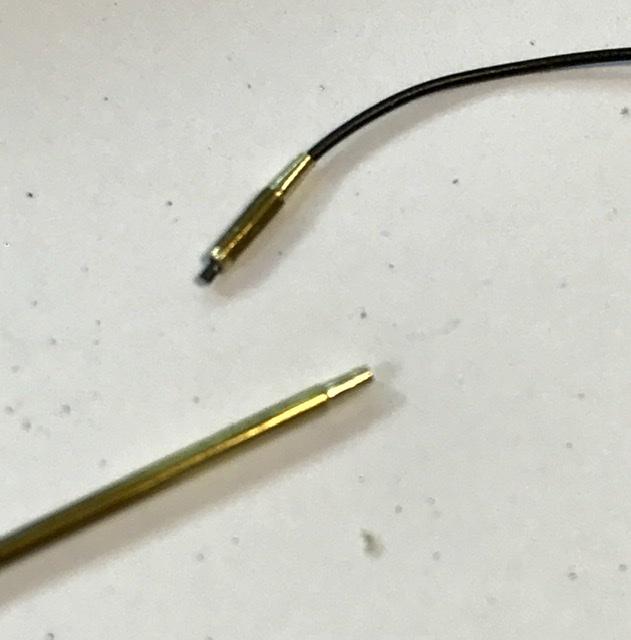
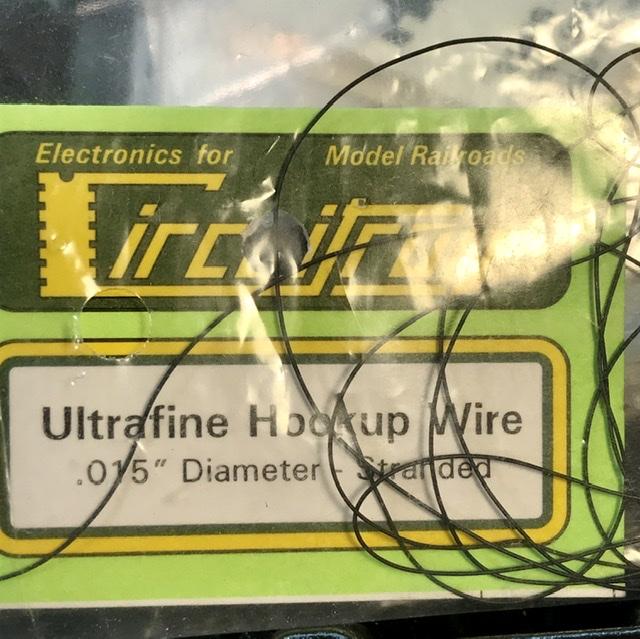
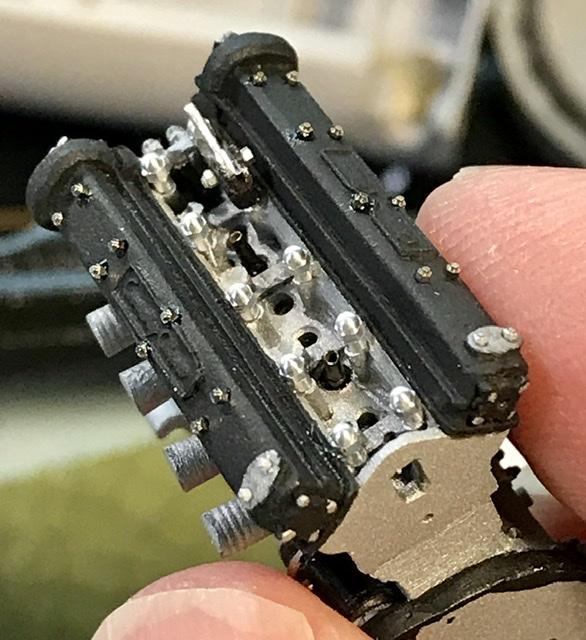
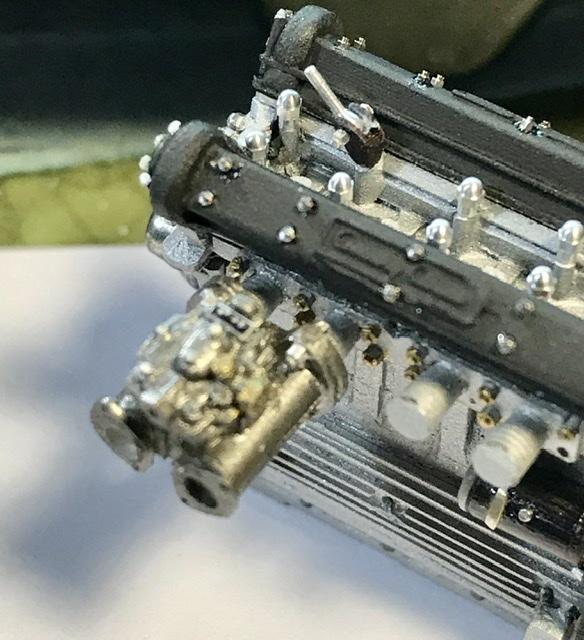
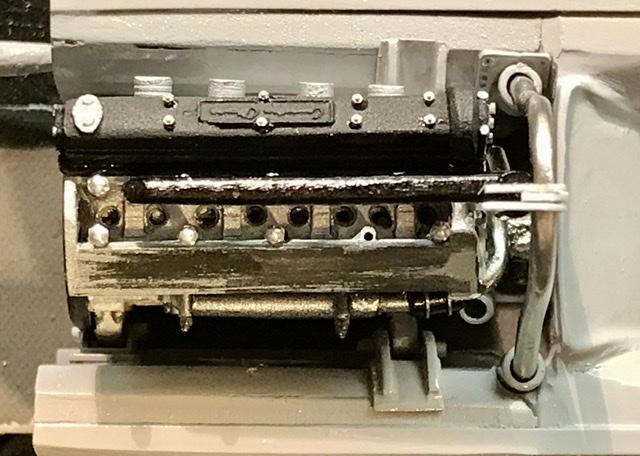
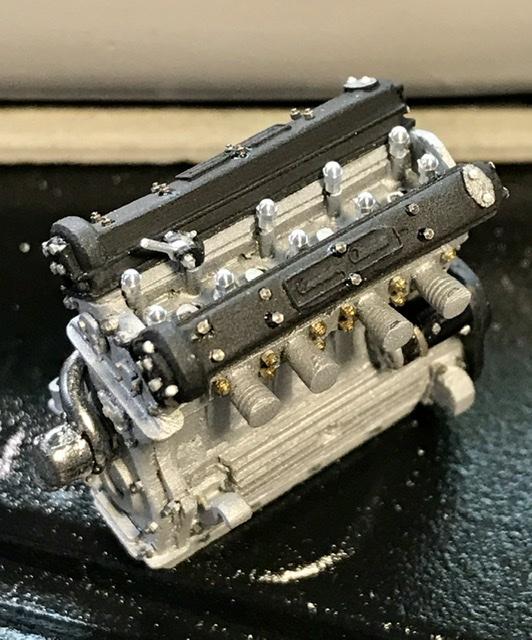
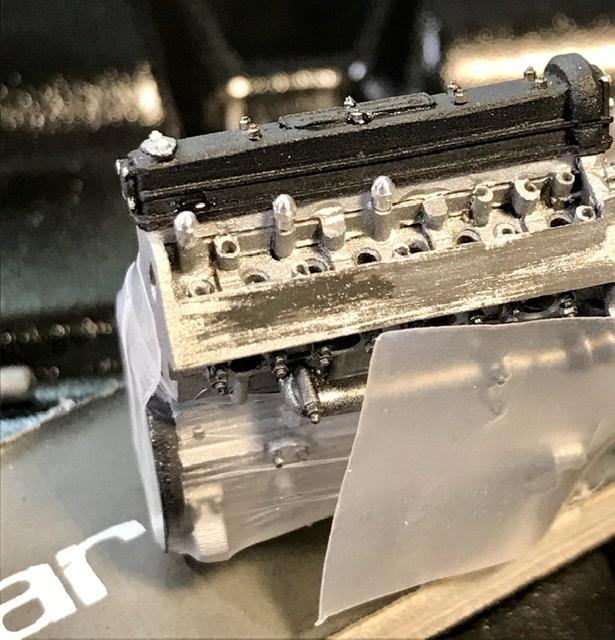
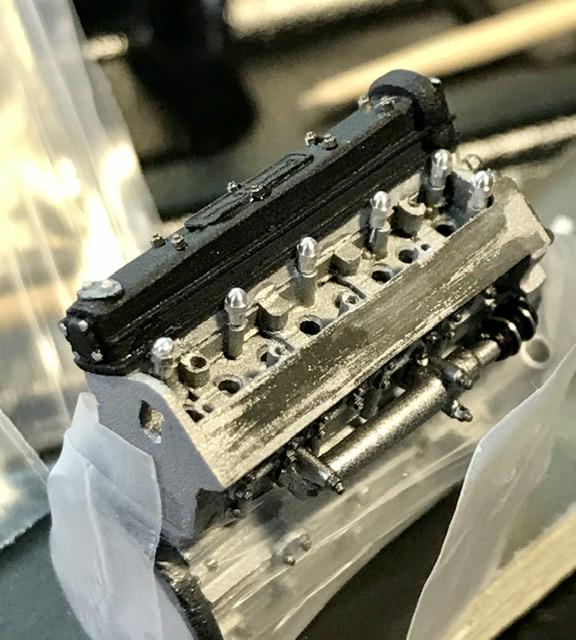
The 4 plug wires are cut from some railroad accessory pick up wire - I like the finish. Real flat and the .015 thickness ... the plug boots are made from .034 brass tube and finished with a black sharpie. And glued into the cyl head at an angle ...
-
Ferrari D50 MFH 1/12
absmiami replied to primabaleron's topic in Other Racing: Road Racing, Salt Flat Racers
Yup -
1/24 Lamborghini Centenario Roadster build by Scaled Lenses
absmiami replied to mvsl1022's topic in WIP: Model Cars
This is rather nice. Really precise finish and detail. What paints did you use for the seats and other leather surfaces ?? -
And some detailing on the Weber’s ....
-
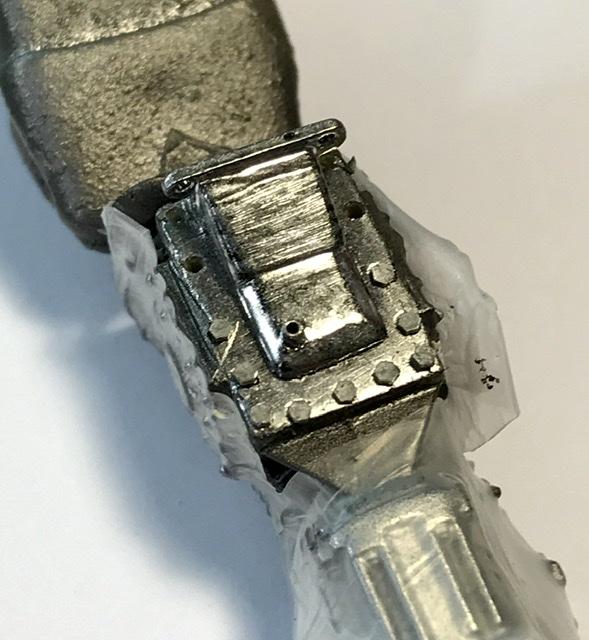
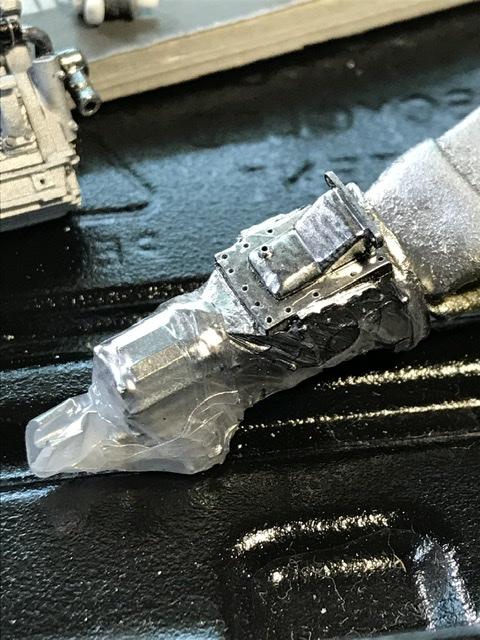
Master club bolts on the gearbox cover - .08 size - with some sharpie silver - looks a little too flat. - might finish these with a molotov ink pen ...
-
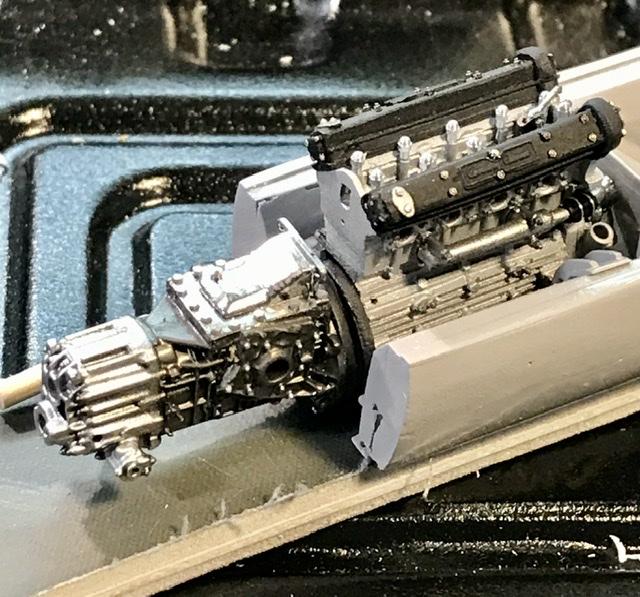
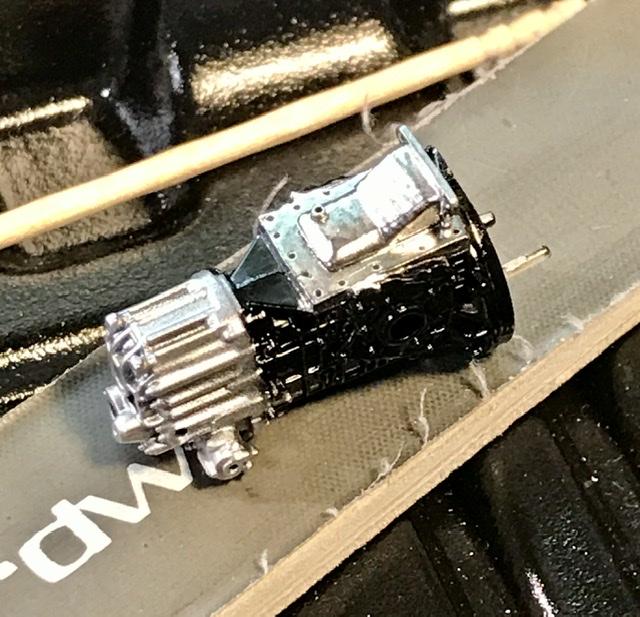
And it time to mask and paint the gear box. Using 3M parafilm and Alcad aluminum, polished steel, and magnesium is next ...
-
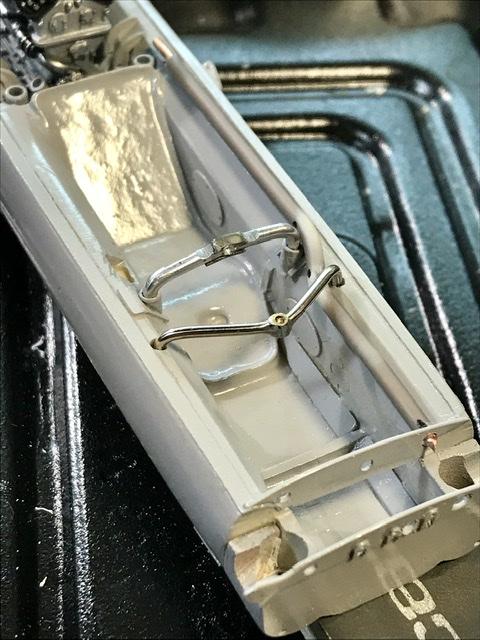
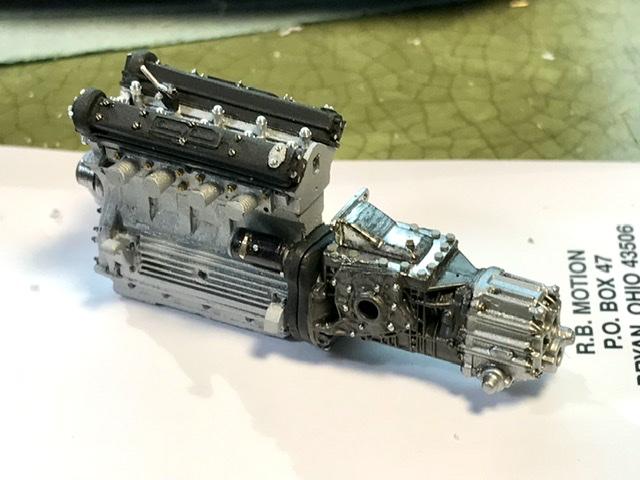
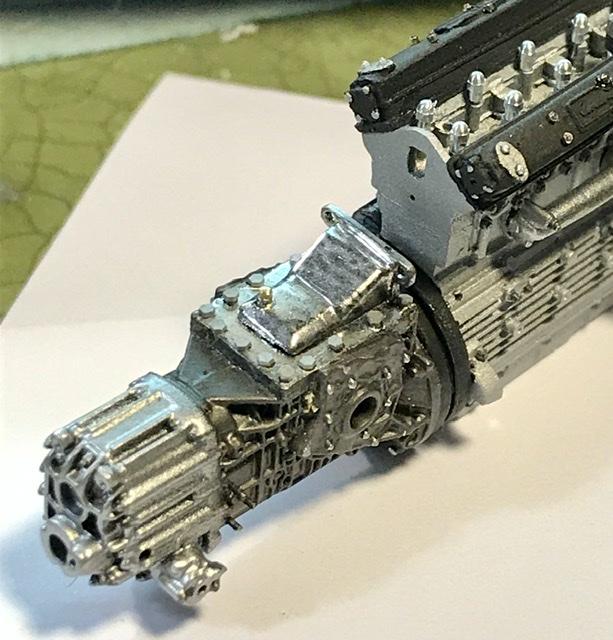
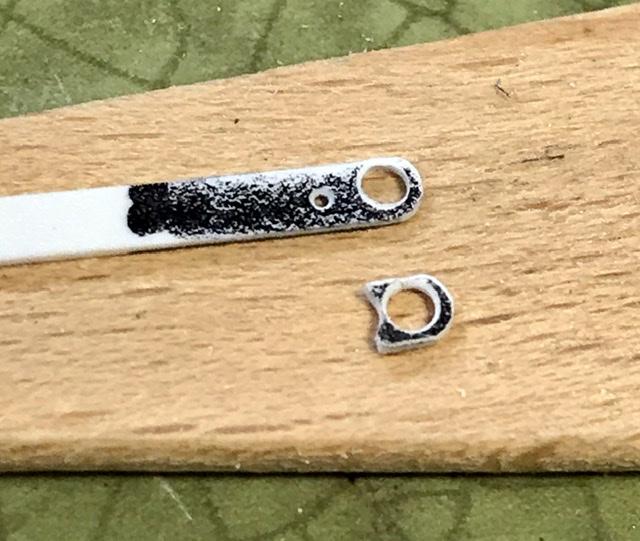
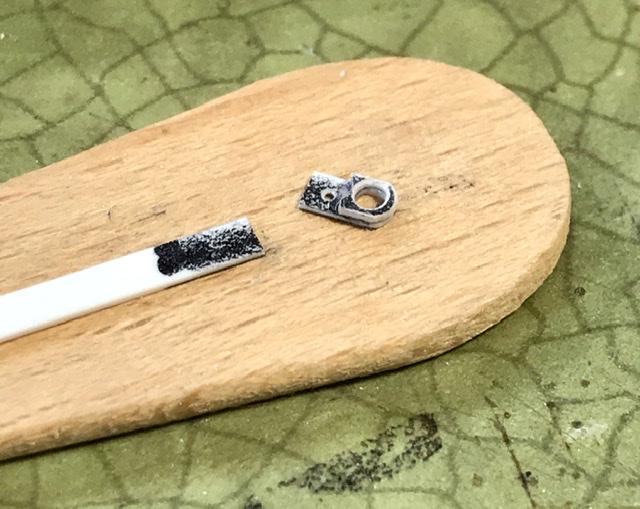
The roll bar is braced to the top of the engine - so I’m making the brackets on the cyl head and at the peak of the roll bar for this assembly. Using RB motion components here too - including some of those rod ends that dandy d is putting to great use on his hot rod Porsche ... rb makes these in three or four sizes. I’m using an intermediate size here. - think it .47 ...
-
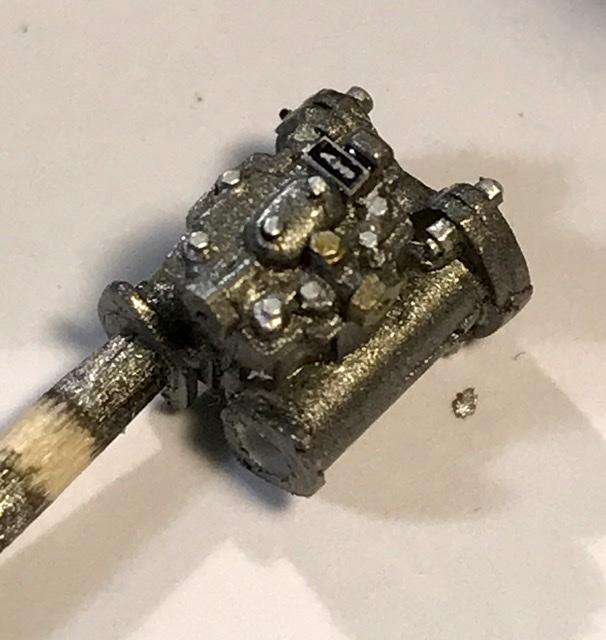
RB has some acorn nuts in his catalog [ does anyone under the age of thirty know what a catalog is ?] He probably is too busy filling pandemic orders to have time for custom work at this time - but a number of years ago he made me some custom acorns with a small sleeve. These are correct for the cylinder head nuts on the climax . Thank you mr Bentley ...
-
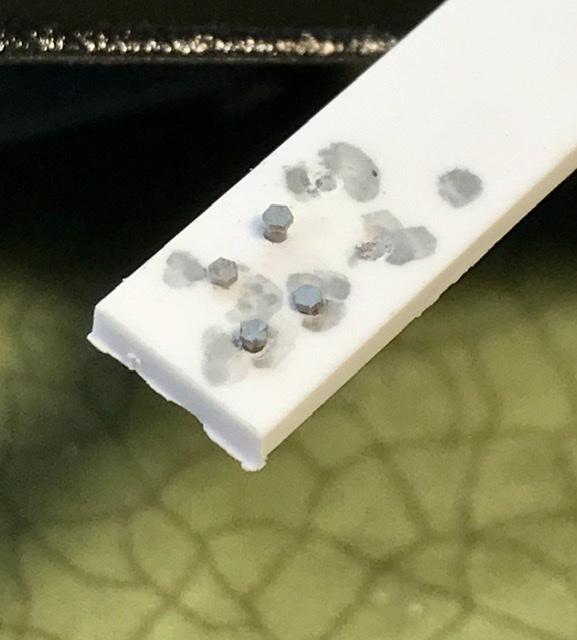
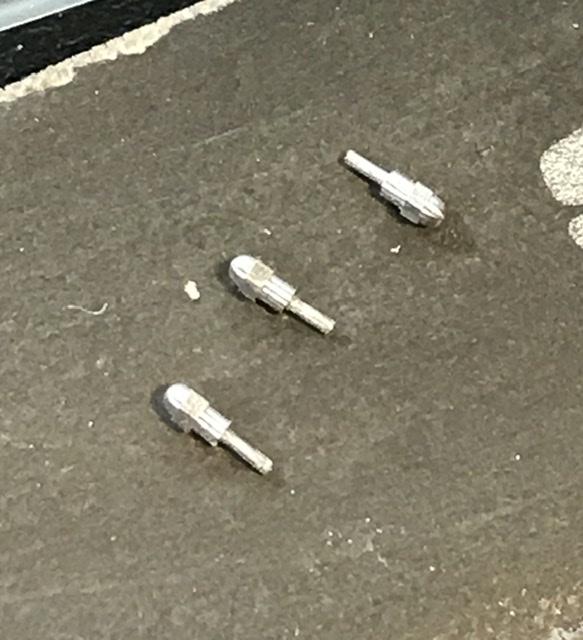
Using my last stock of 0.5 mm bolts. -will there be more ? I’ll try to find out .... also using RB motion hardware and resin 3D printed bolts - these are tiny and with very fine detailed. - I’ll paint them with a mix of floquil colors for a gun metal finish ...And some brass for contrast ...
-
Edit II. abs Miami ...
-
Edit : thanks for staring ... and Miami
-
Tamiya McLaren MP4/6 build
absmiami replied to Josie's topic in WIP: Other Racing: Road Racing, Land Speed Racers
Yup. ...