absmiami
-
Posts
4,779 -
Joined
-
Last visited
Content Type
Profiles
Forums
Events
Gallery
Everything posted by absmiami
-

Tamiya McLaren MP4/6 build
absmiami replied to Josie's topic in WIP: Other Racing: Road Racing, Land Speed Racers
Yup. ... -
Thank you for sharing. Made my day ...
-
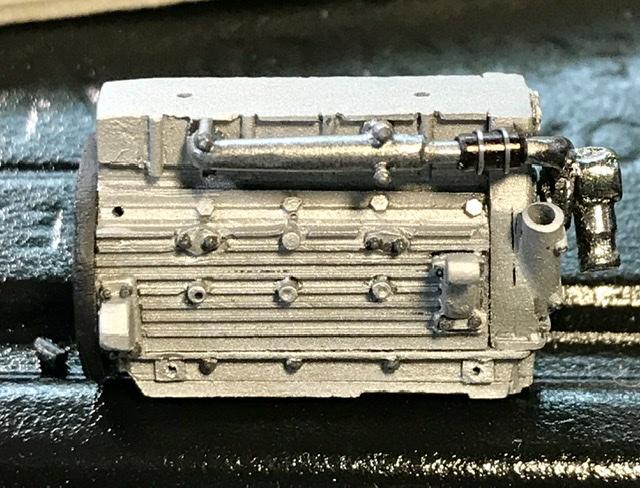
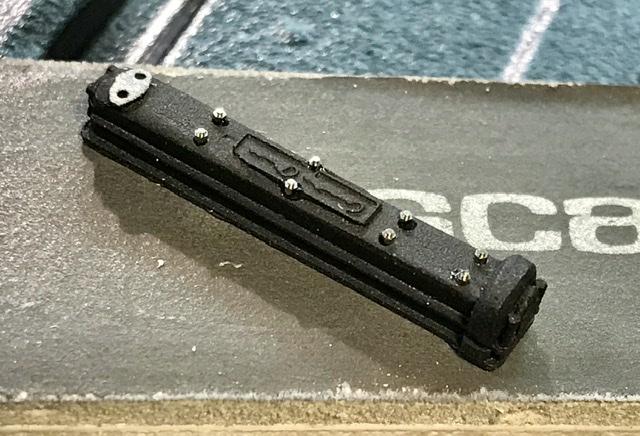
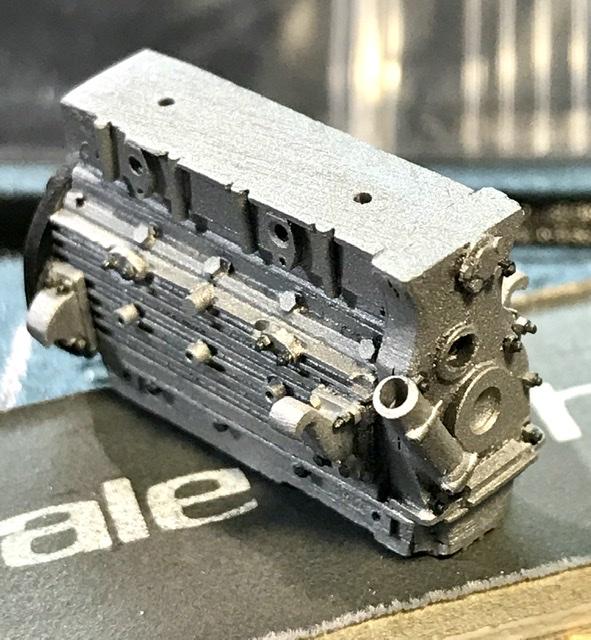
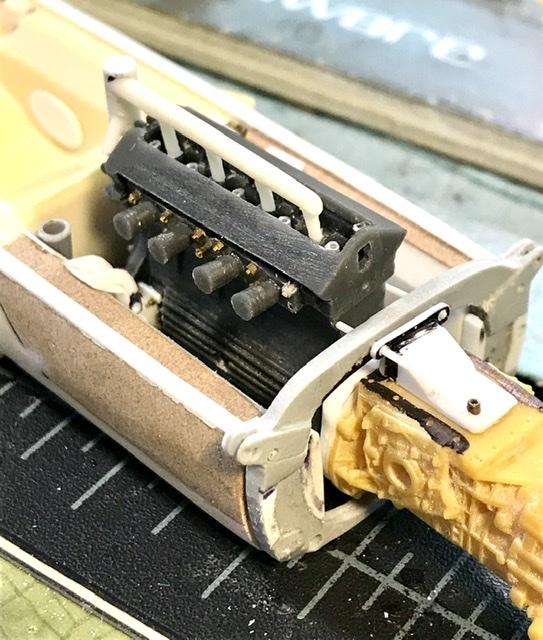
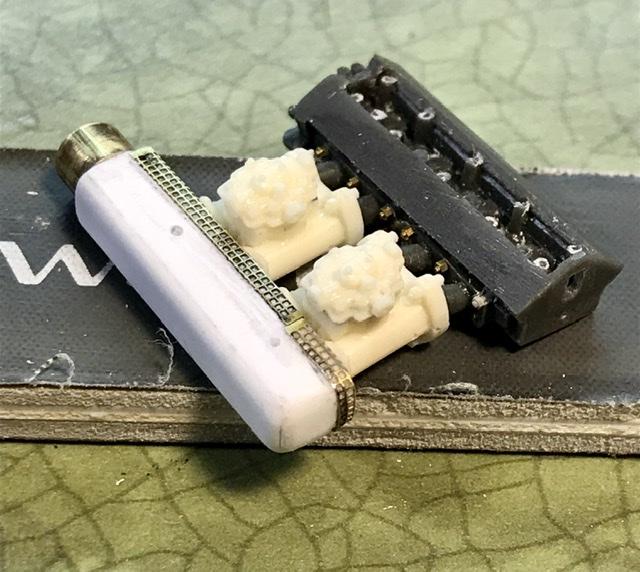
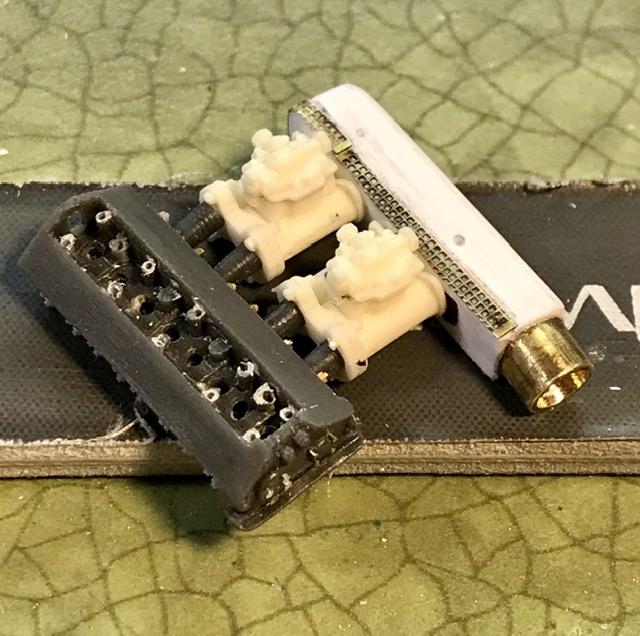
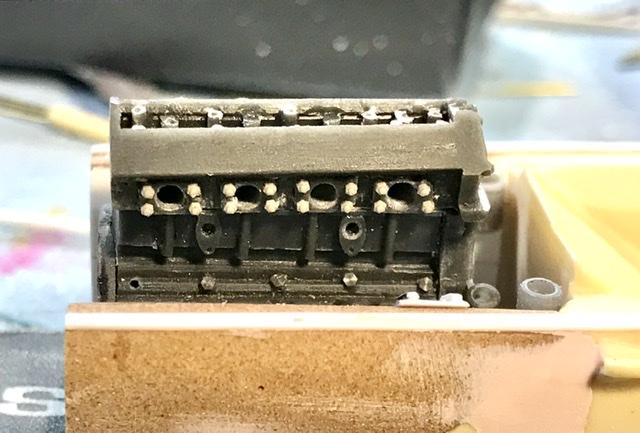
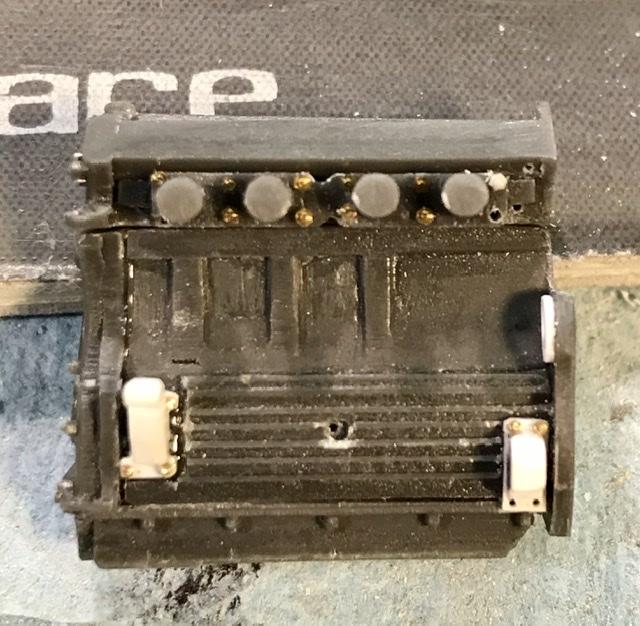
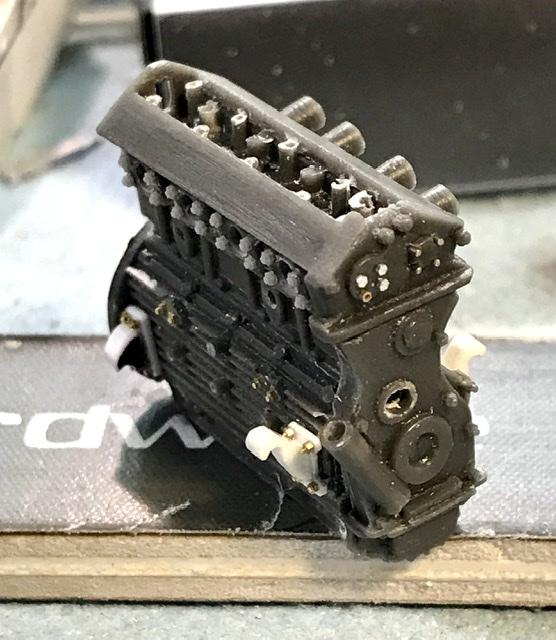
The paint finish on the block is Alcad semi-matte aluminum. Might be a little too dull - not sure - but I’ll paint the engine accessories with a brighter finish to contrast ... the valve covers are painted with hardware store flat black - again it’s impossible to know what exact shade is correct ...

-
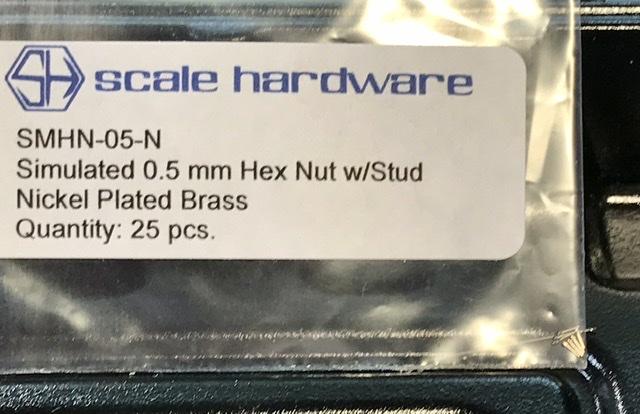
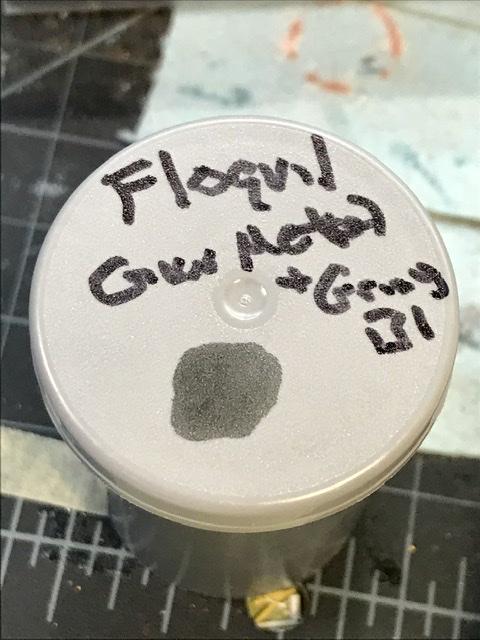
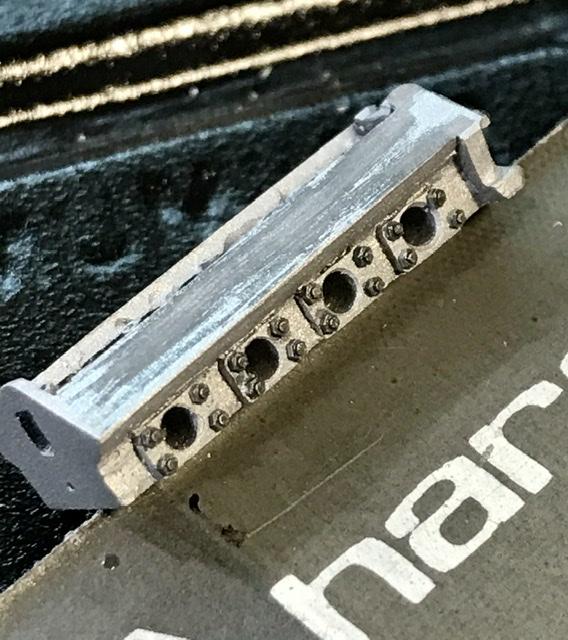
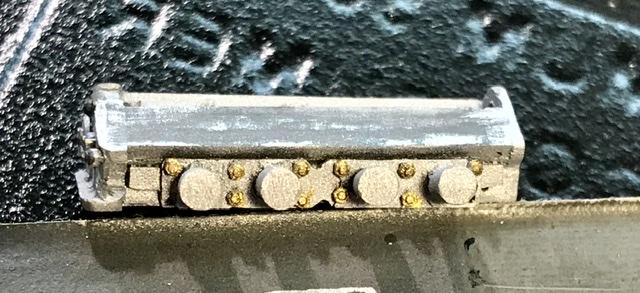
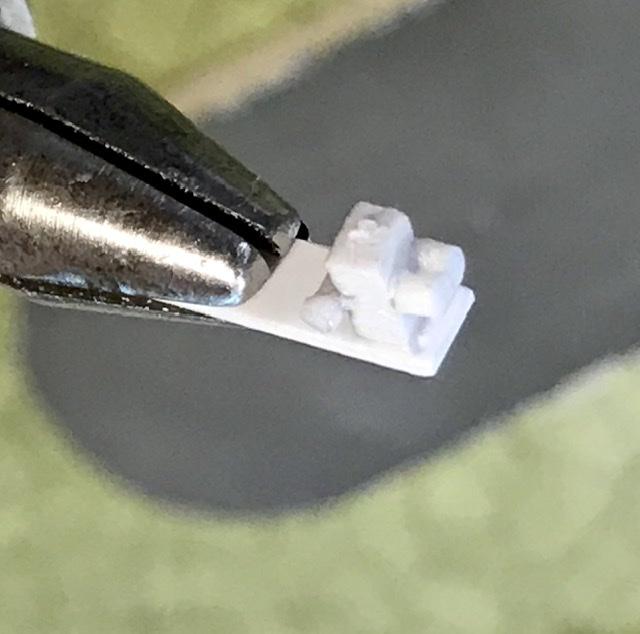
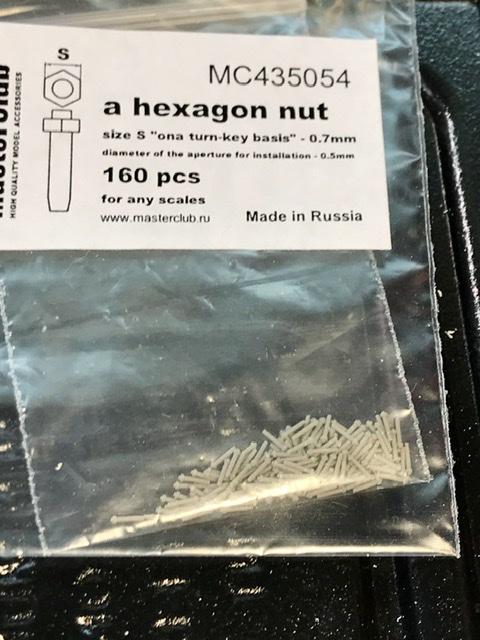
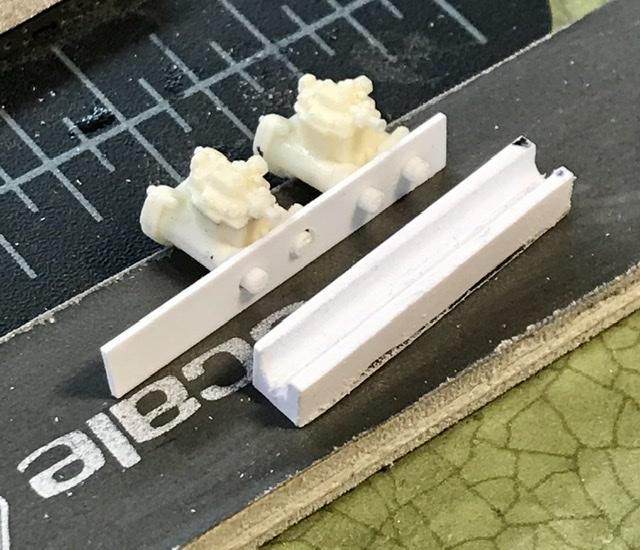
Using my last stock of 0.5 mm bolts. -will there be more ? I’ll try to find out .... also using RB motion hardware and resin 3D printed bolts - these are tiny and with very fine detailed. - I’ll paint them with a mix of floquil colors for a gun metal finish ...And some brass for contrast ...
-
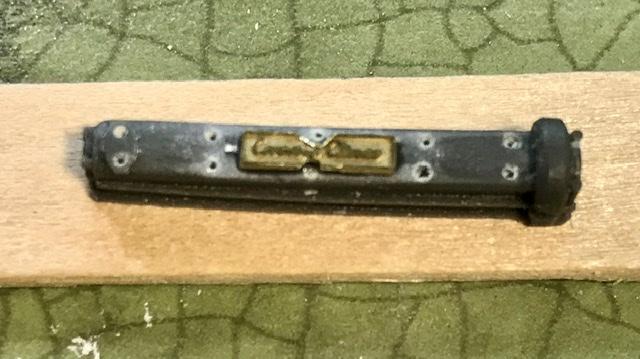
Valve covers and fuel pump... the valve covers are drilled and prepped for a bunch of bolts ... the fuel pump is made fro evergreen stock. - based on photos of a pump that I took on a different climax engine. - the restored car appears to use a slightly different pump - but it’s hard to know what the arrangement was for the Tasman season so I’m winging it ...
-
Not to mention Coconut Grove ...
-
Body Color ? I like them in gold ...
-
Gracias Now would you please dirty up your workbench some more ...??
-
The seams are very convincing what is you hand tool of choice to bend the pipes. And I assume that you anneal the metal first - have you found pliers that will bend the metal with only a limited amount of tool markings in the metal ? ? I’m about do do something like this on my Lotus ....
-
.007. ?? Holy cow. That’s scale ...
-
Yup this is cool ...
-
Looked again ... exhausts are 1/16 ?? are the pipes copper or brass and am I color blind ?
-
Yup questions - the exhausts are copper - right ? What are the dimensions ? Looks like .080? weld seams - made with nickel silver Wire ? and the fuel lines - nickel ? Dimensions - .012 ?? ??
-
Jaguar C type
absmiami replied to Miroslav Beran's topic in Other Racing: Road Racing, Salt Flat Racers
?? ??? keep going ... -
Bout ready to do some painting ...
-
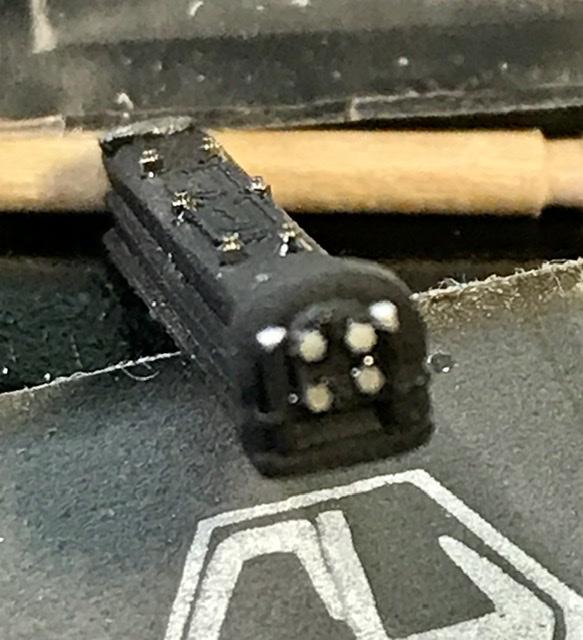
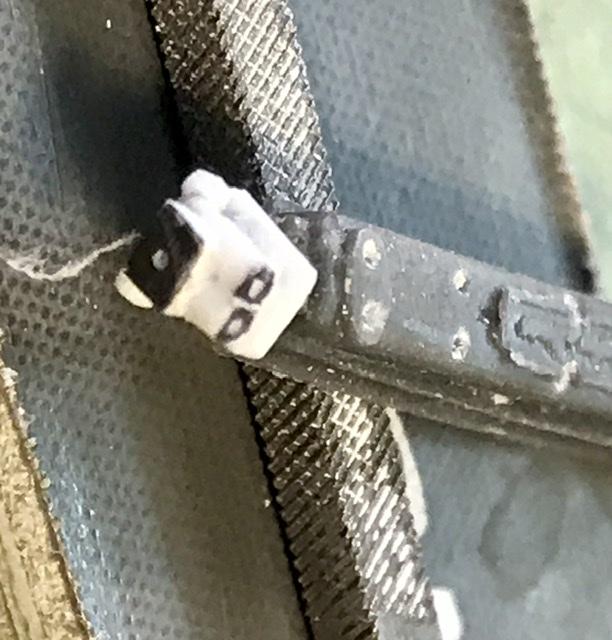
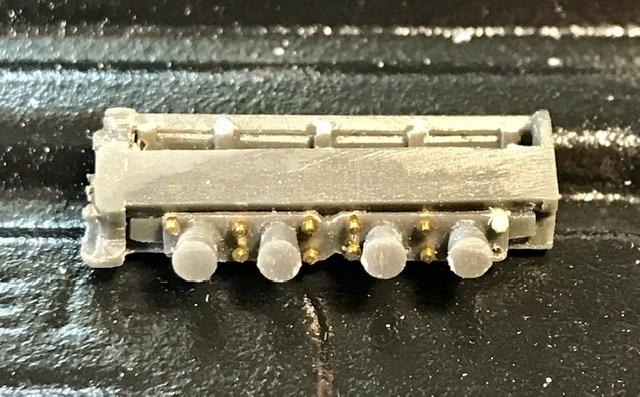
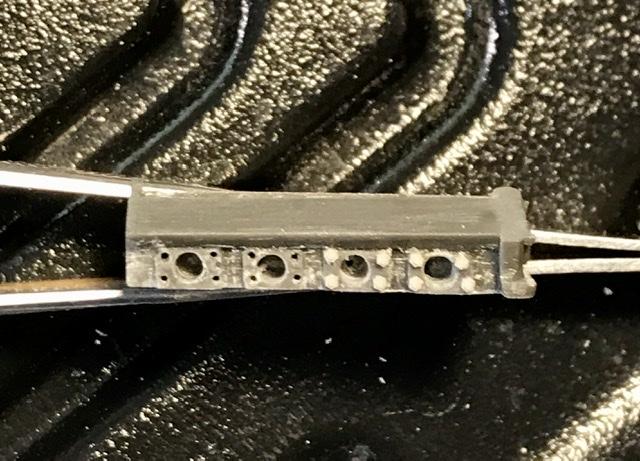
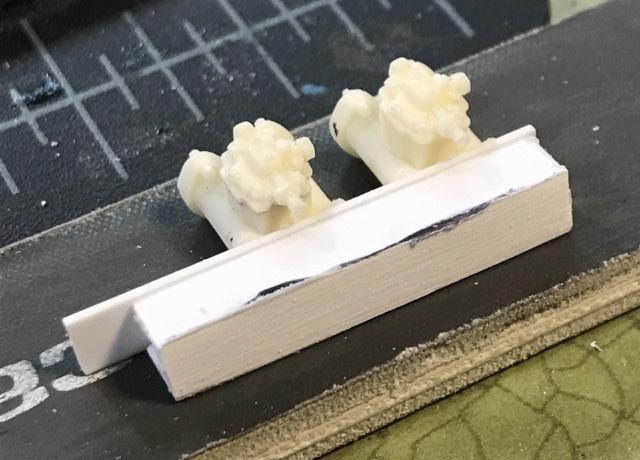
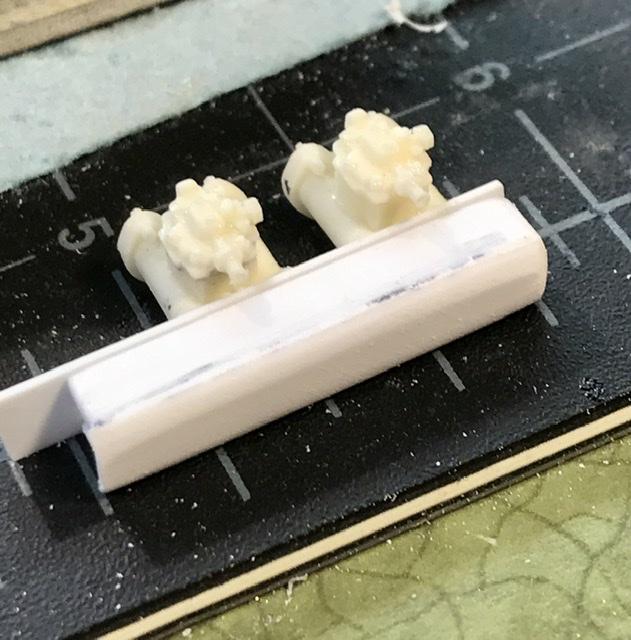
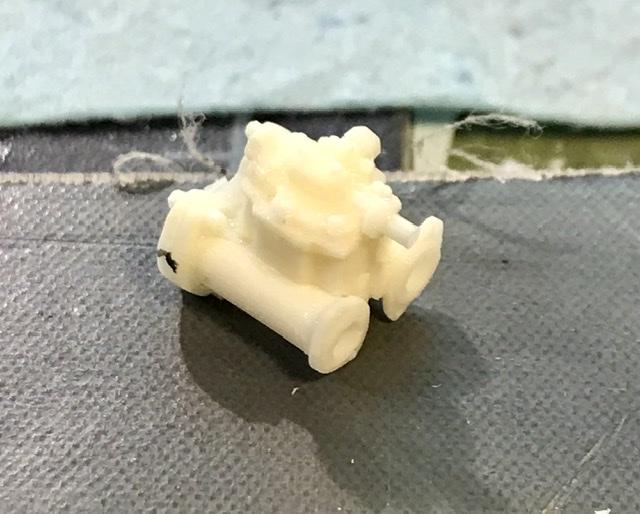
Before painting I’m adding dozens of bolts to the block and the cyl head. Doing this now so I can limit my handling of these parts once they are painted. Using .020 and .025 bolt heads and nuts from RB motion, Master Club - those are the plastic bolts on the exhaust manifold flanges. These are really very sharp castings. Some scale hardware bolts also used.
-
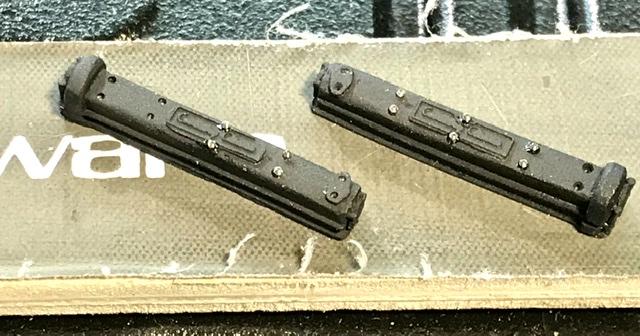
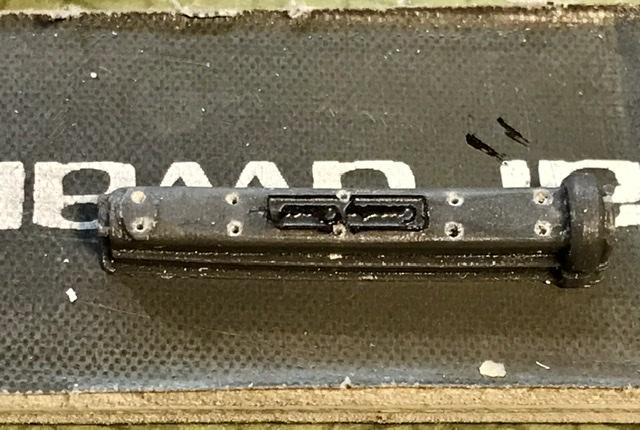
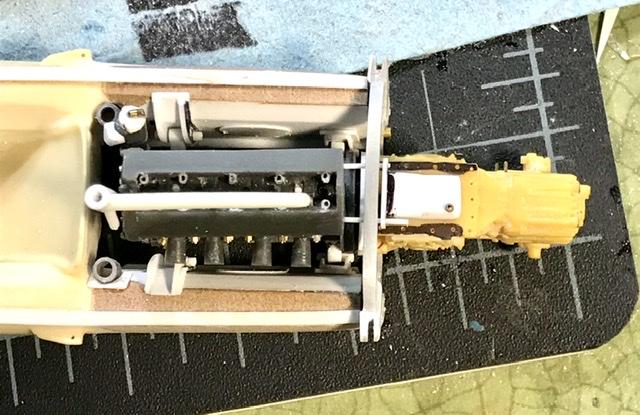
The air box is not used on the restored car. - and it’s a safe bet that the actual air box was binned at the end of the season - or when the 32B was sold to an Australian privateer at the end of the season. But there are a handful of photos available online - and the design was a pre-cursor of the air boxes used on the Ford DOHC Indy winner 6 months later.
-
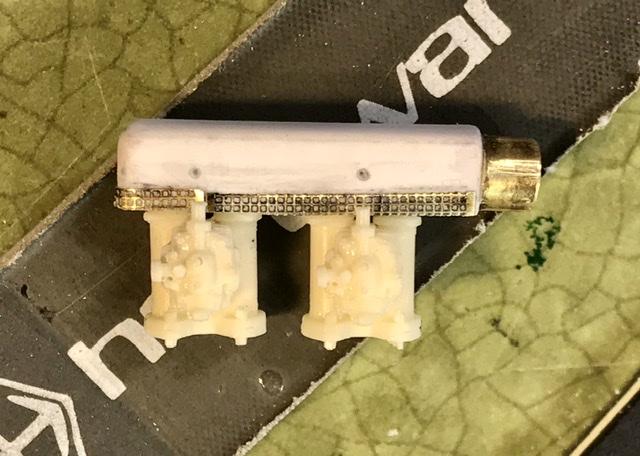
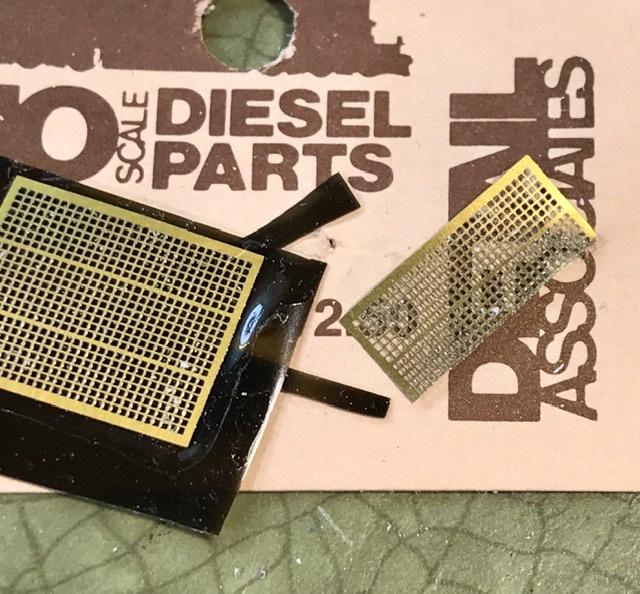
The carbs will be pegged into an air box that team Lotus used in the Tasman series ...
-
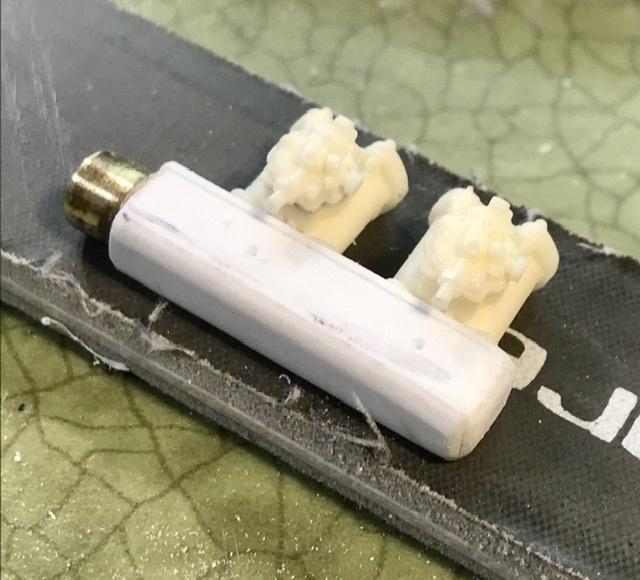
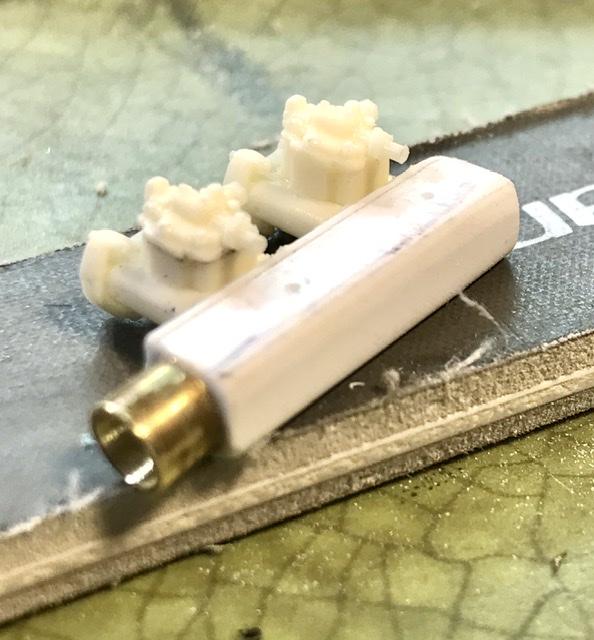
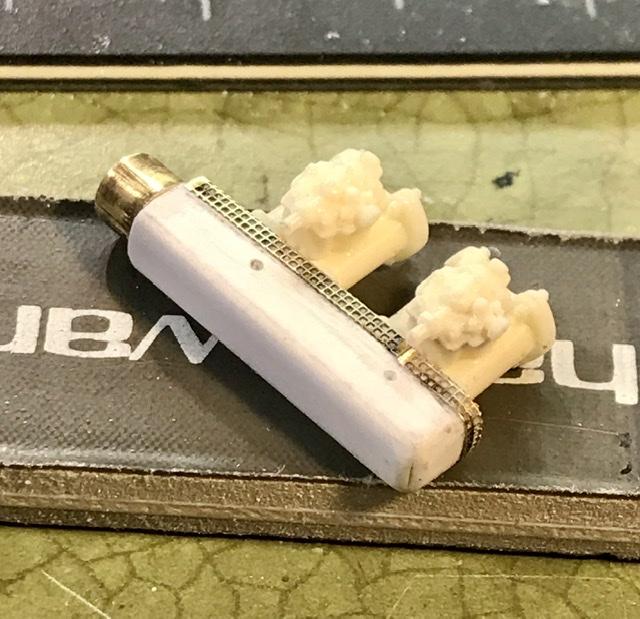
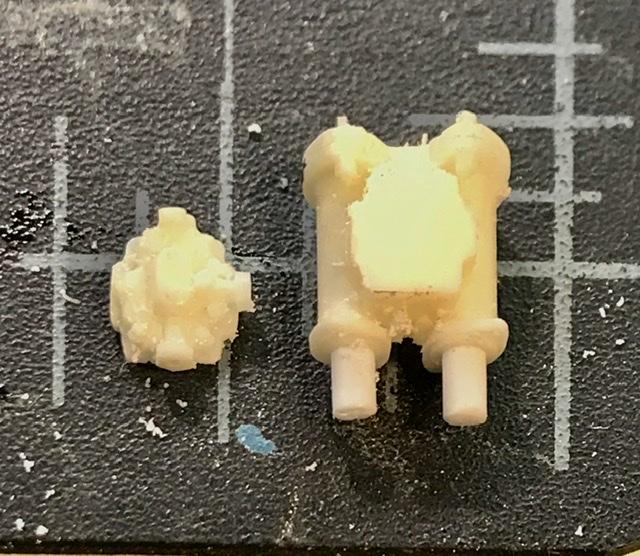
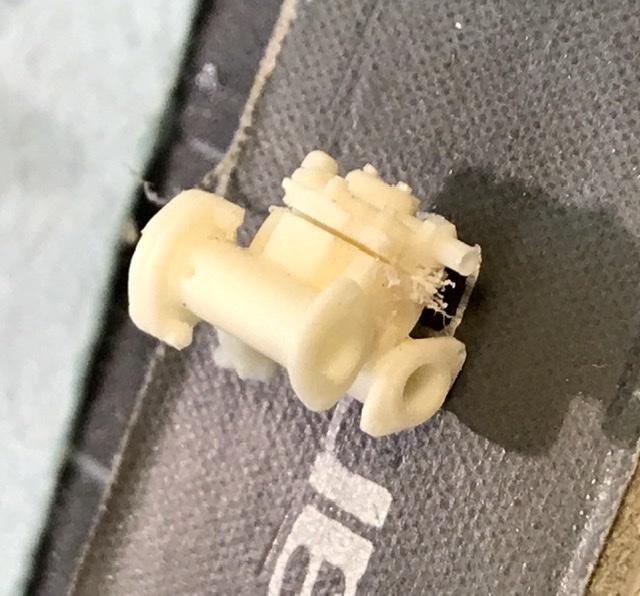
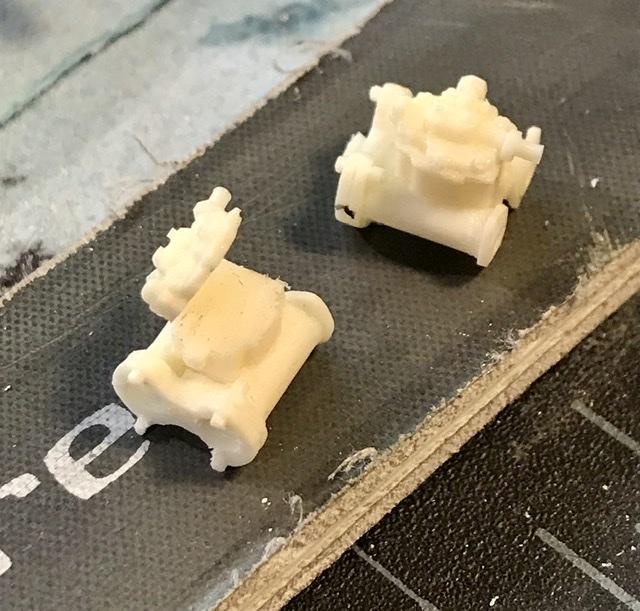
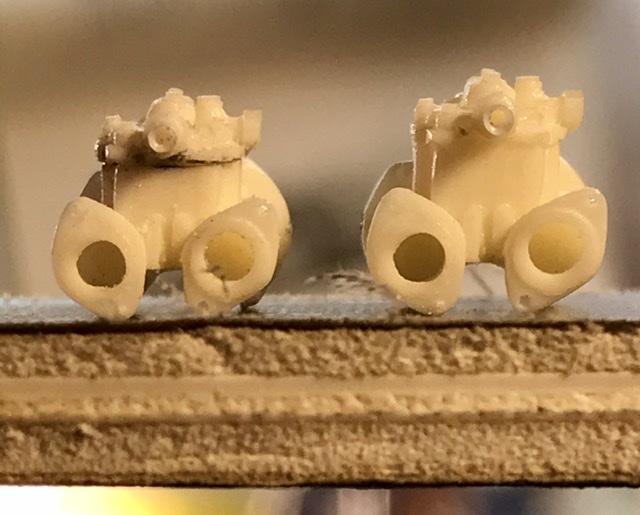
When I made the master - I made the body of the carb just a little too tall . So I’m performing a Weber lobotomy. I sawed the cap off - sanded away about .020 - and then epoxied the cap back on - and then the same on the second carb.
-
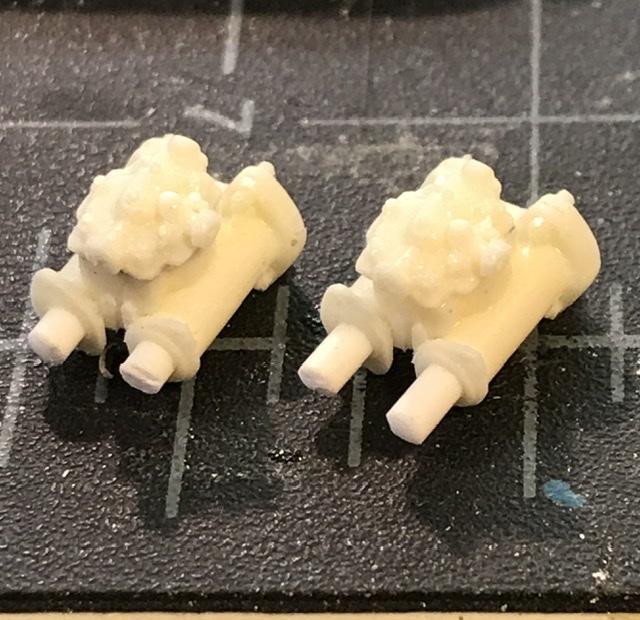
You are referring to the old Revell ? Kit ?? Don’t give up. It was very detailed and has great potential. And one of my favorite cars. more on the engine. - the 32B used side draft Webers - which was the general choice for the Climax FPF. I’m using some castings of a Weber that I made years ago.
-
Latest GSL posting just swam into my email box ... May 5-8 2022 and yes, it is the last and yes, Bugattifan , you’re invited too ...
-
Not to beat a dead horse ... ok. Why not the great salt lake contest will have a category for these creations ... so ....
-
Once again. Please Trailer this to the GSL21....
-
Rather nice. -is this a recent build ? ?
-
So if you’ve shelled out lots of cash for Tamiya’s 300 sl kit you know what I mean. While it is a very good kit T could have casted a stand alone starter to place into the base of the engine block. Not asking too much - how bout it, T. ?? There, rant over - I feel better now ...