Dragonhawk1066
-
Posts
3,930 -
Joined
-
Last visited
Content Type
Profiles
Forums
Events
Gallery
Everything posted by Dragonhawk1066
-

Revell 1971 Olds 442 W-30, 1/25 Scale. In Tamiya Black.
Dragonhawk1066 replied to Dragonhawk1066's topic in Model Cars
Thanks Jeremy! I have heard from a few builders that for them the flat or matte colors spray on smoother while still giving that nice gloss look after clear. I used the semi-gloss black only because my local hobby shop didn't have any gloss black when I needed it. It did lay down pretty smooth though, so there may be some truth to flats and semi-gloss' drying smoother. -
Revell 1971 Olds 442 W-30, 1/25 Scale. In Tamiya Black.
Dragonhawk1066 replied to Dragonhawk1066's topic in Model Cars
Thanks everyone, much appreciated! -
Revell 1971 Olds 442 W-30, 1/25 Scale. In Tamiya Black.
Dragonhawk1066 replied to Dragonhawk1066's topic in Model Cars
Thanks all, much appreciated! -
Nice looking Magnum!
-
Fujimi Enthusiast 1/24 Dino 246GTS Spyder
Dragonhawk1066 replied to Justin Porter's topic in Model Cars
That looks nice! I love the color! -
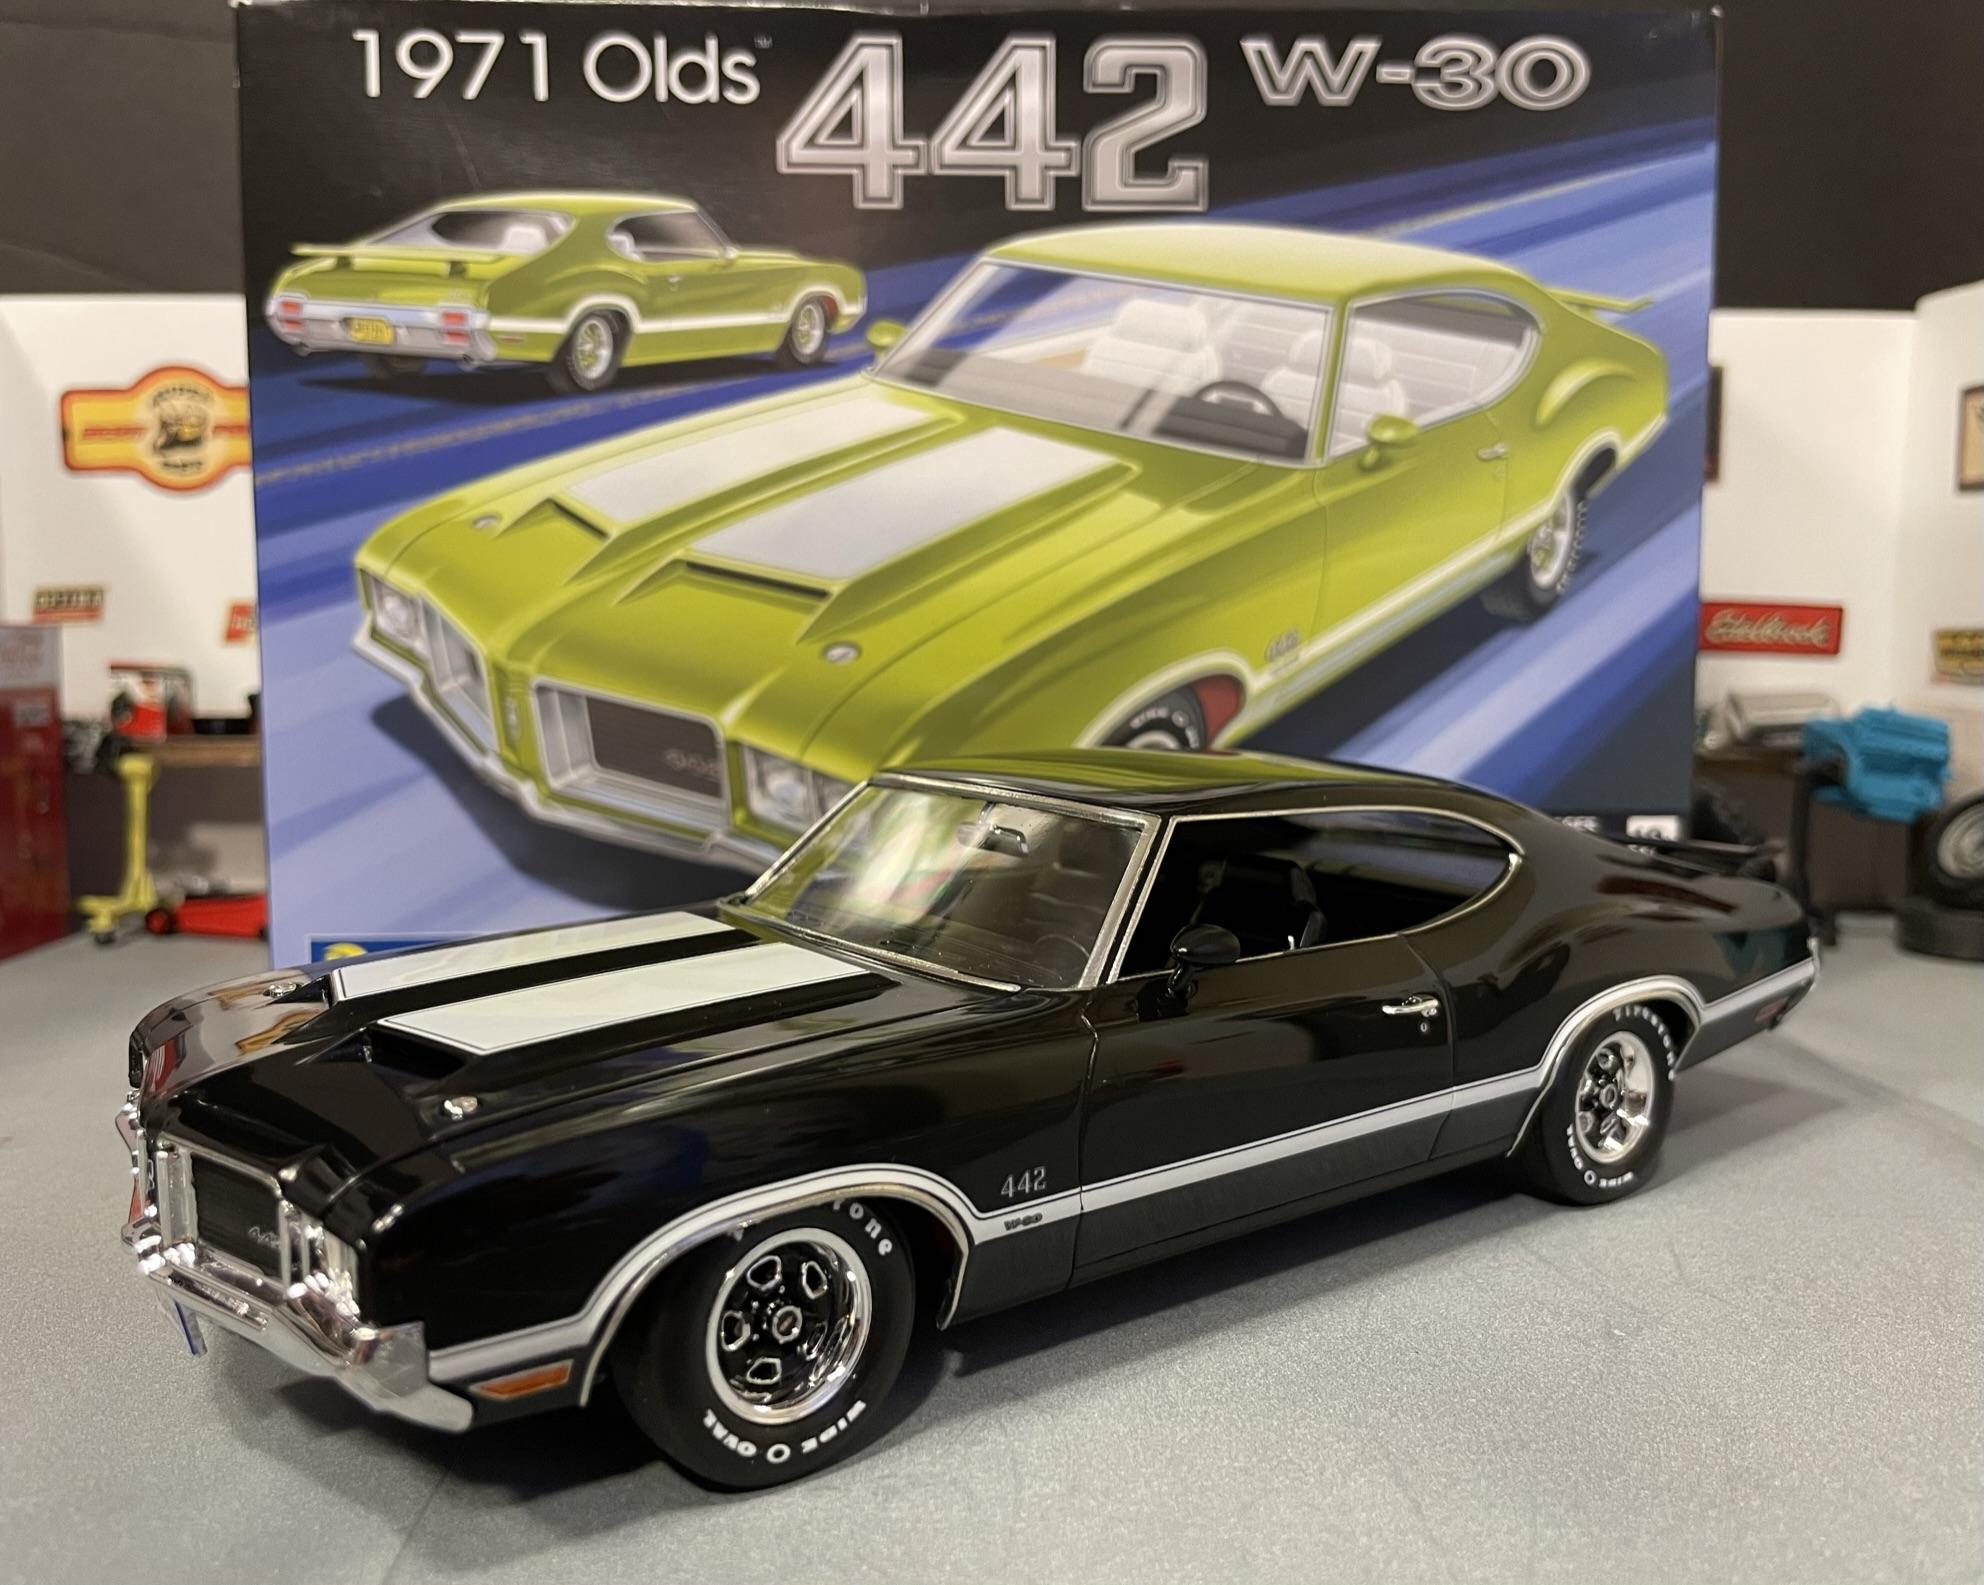
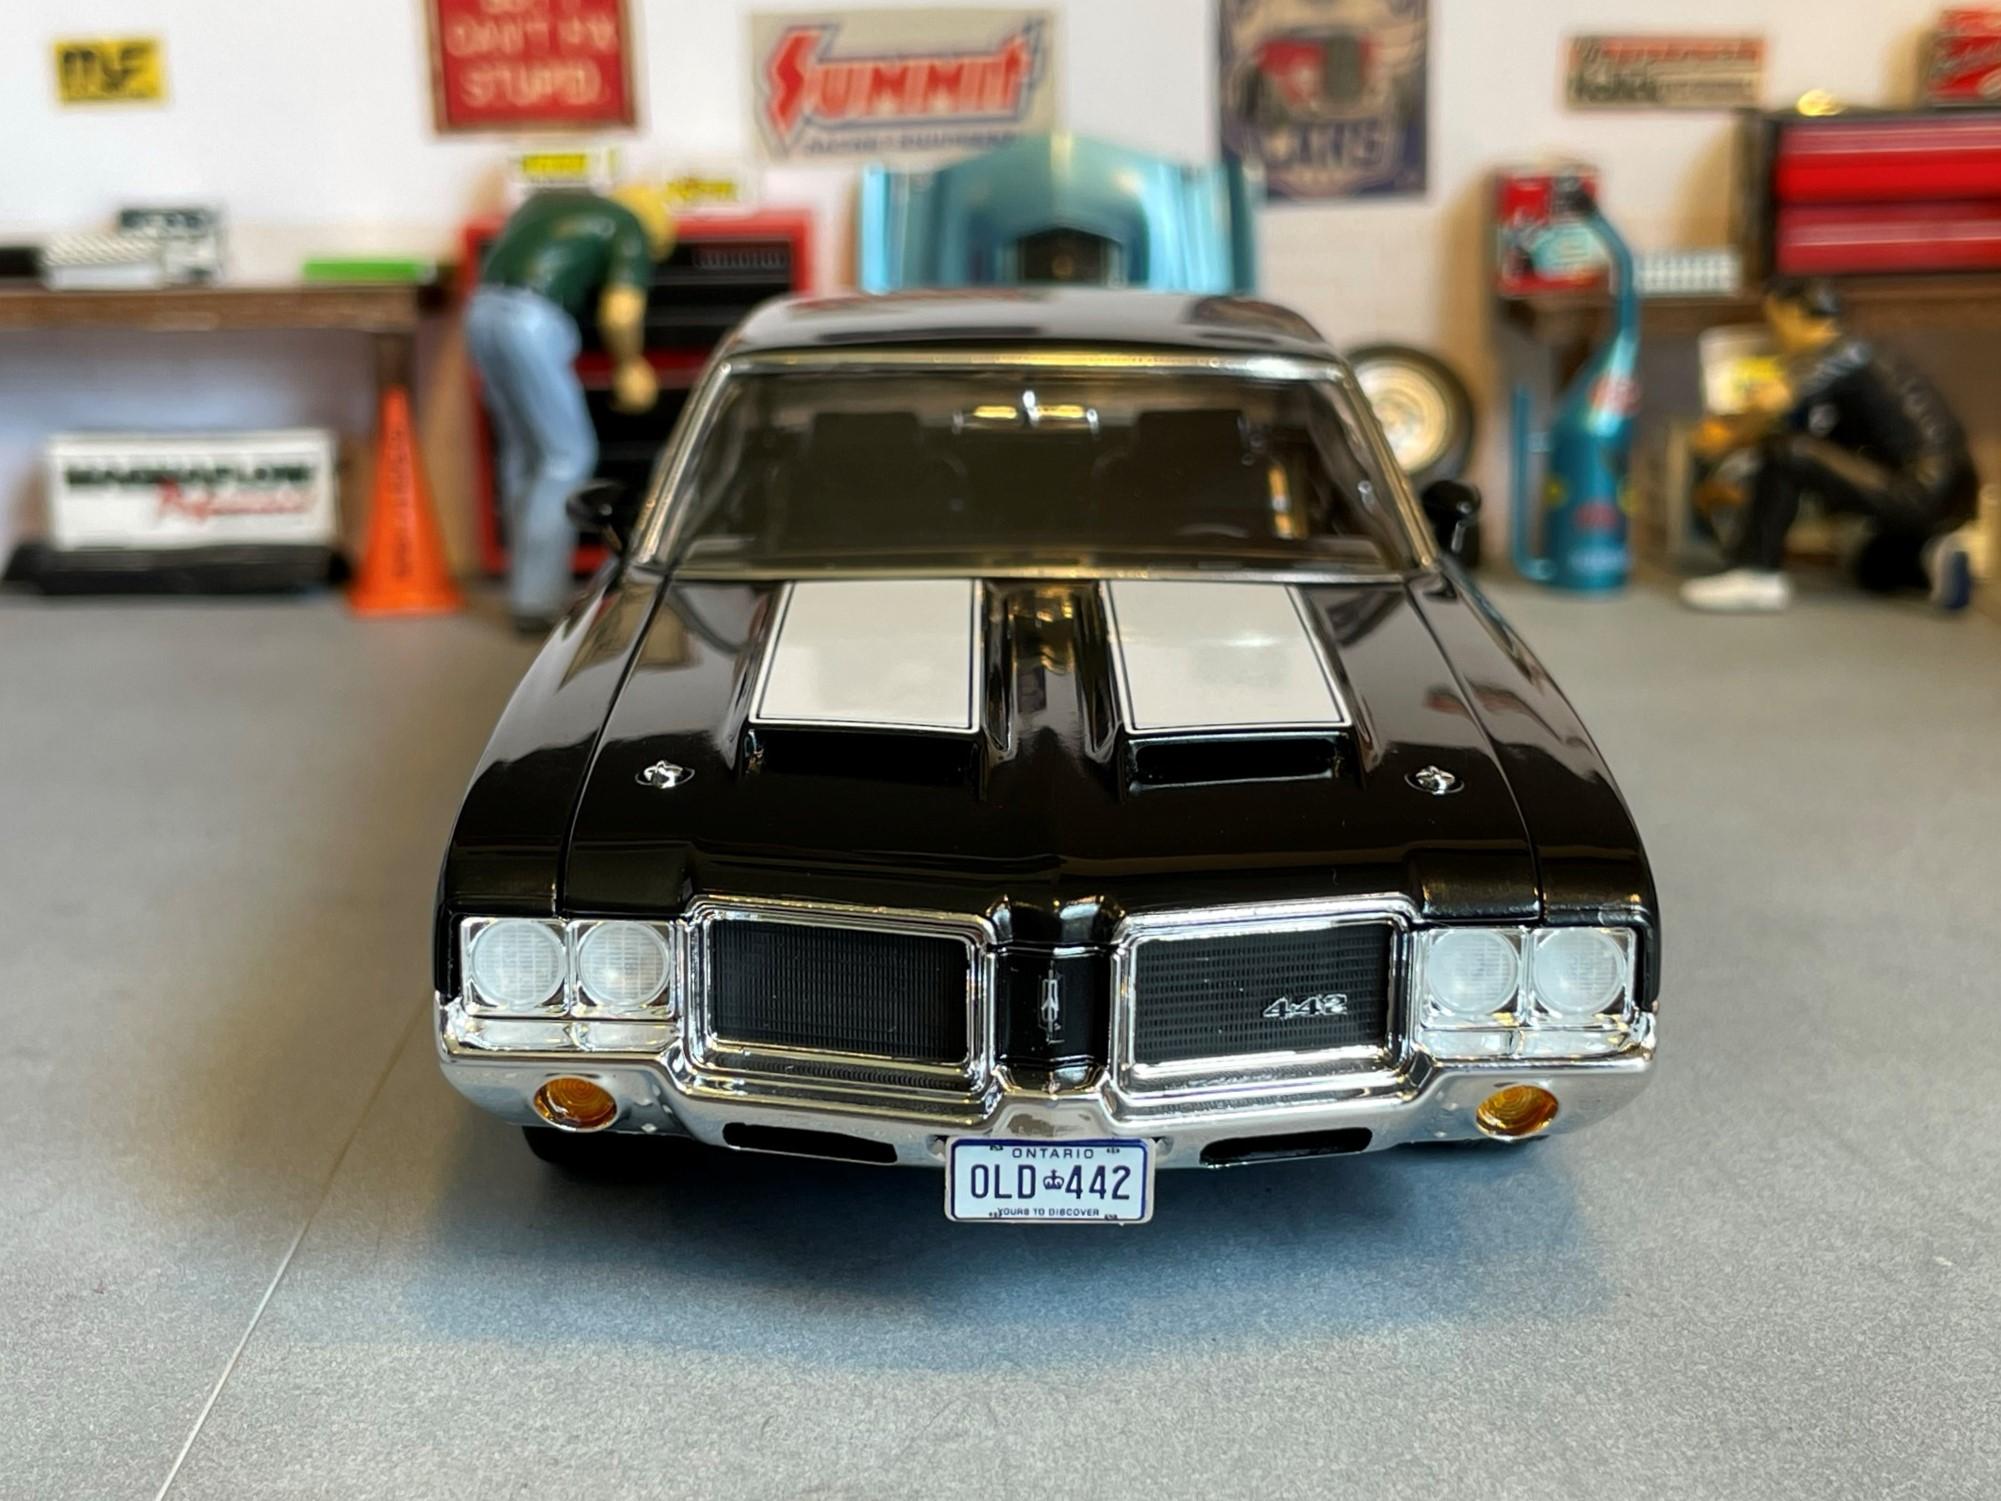
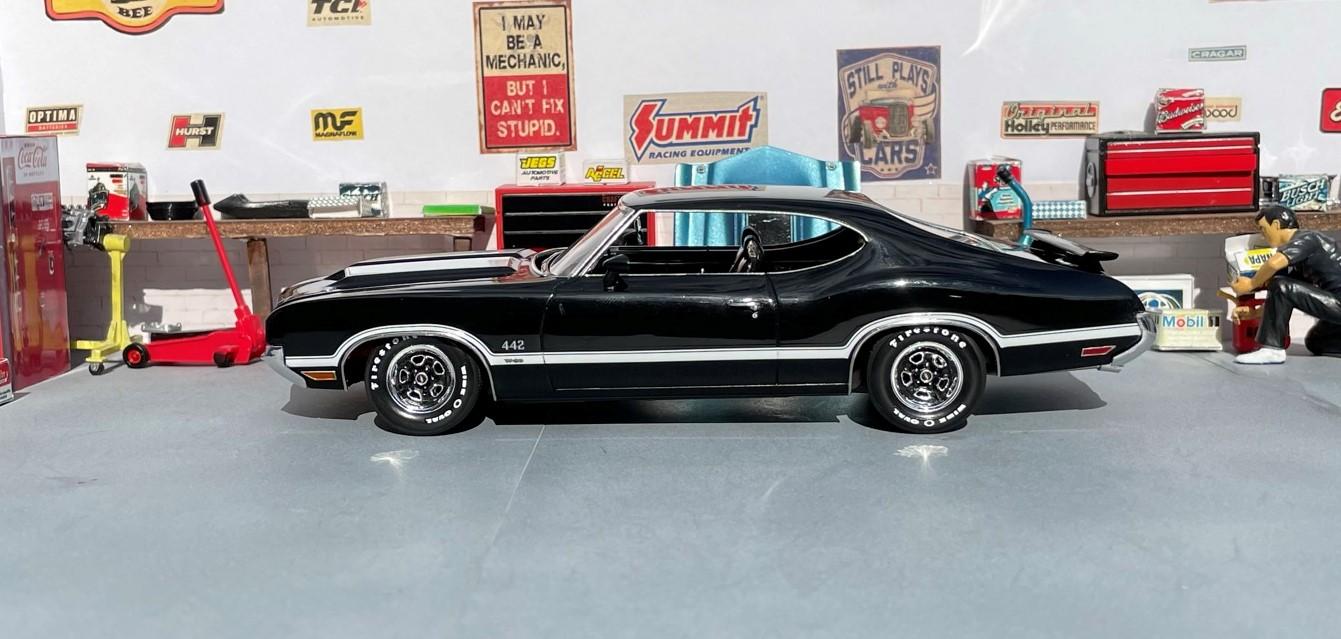
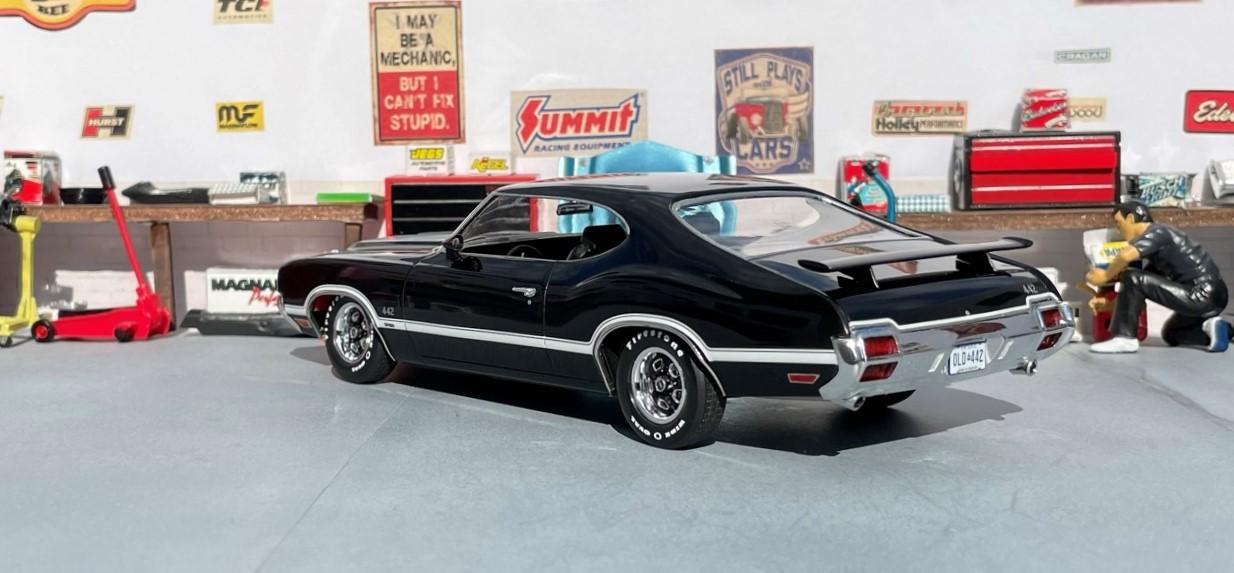
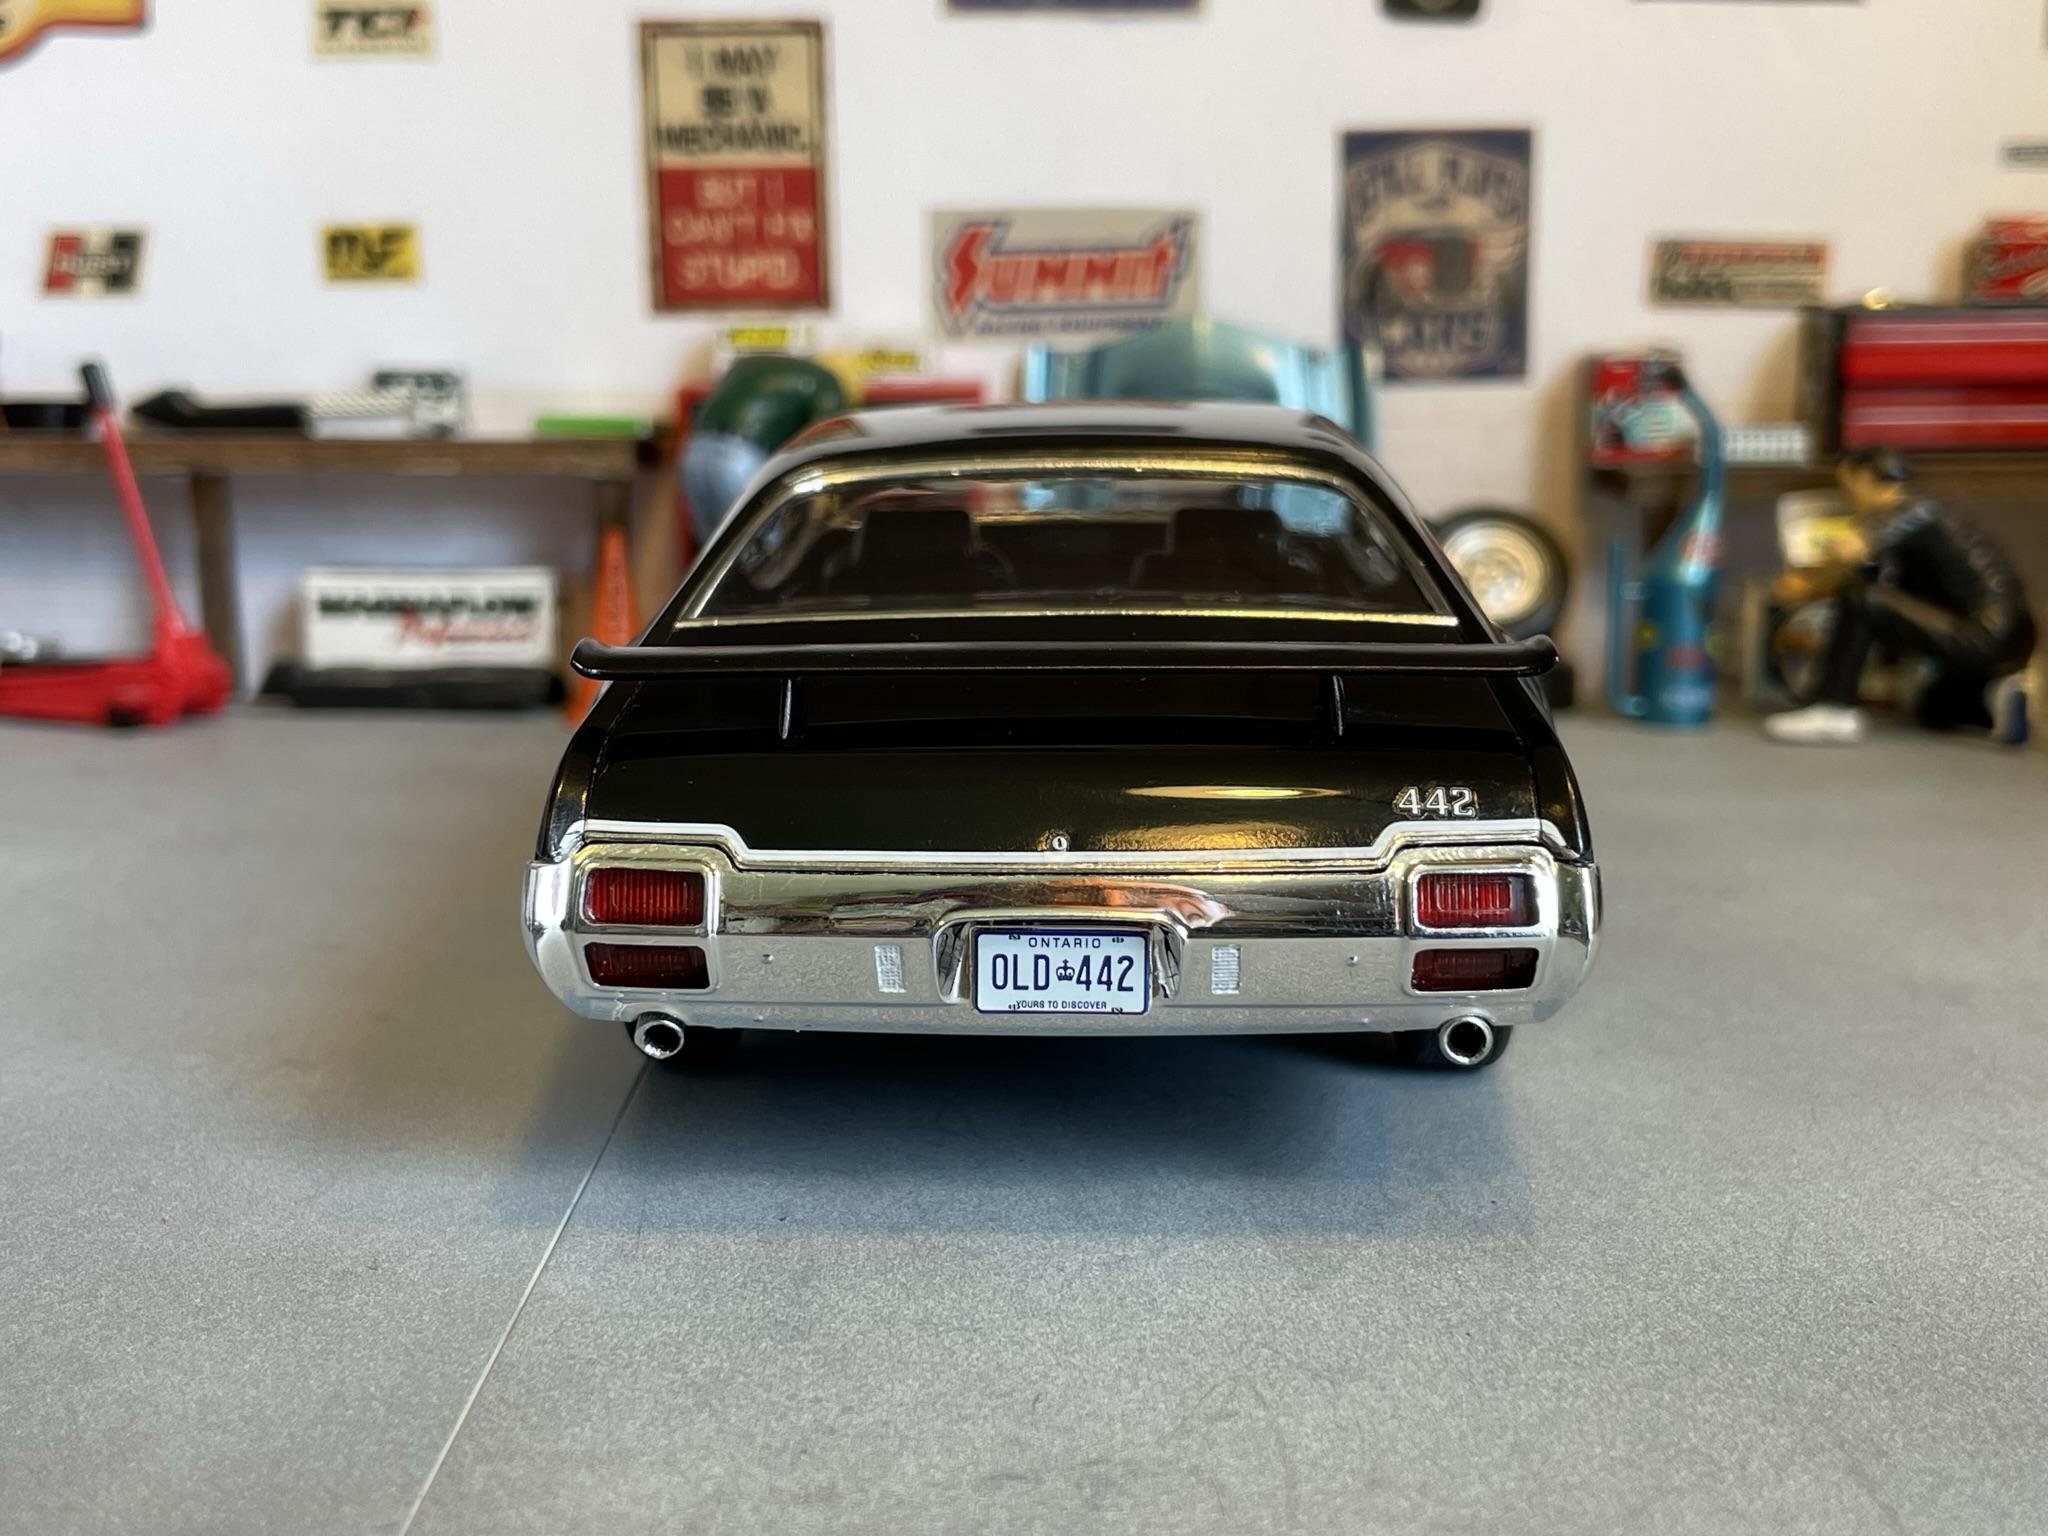
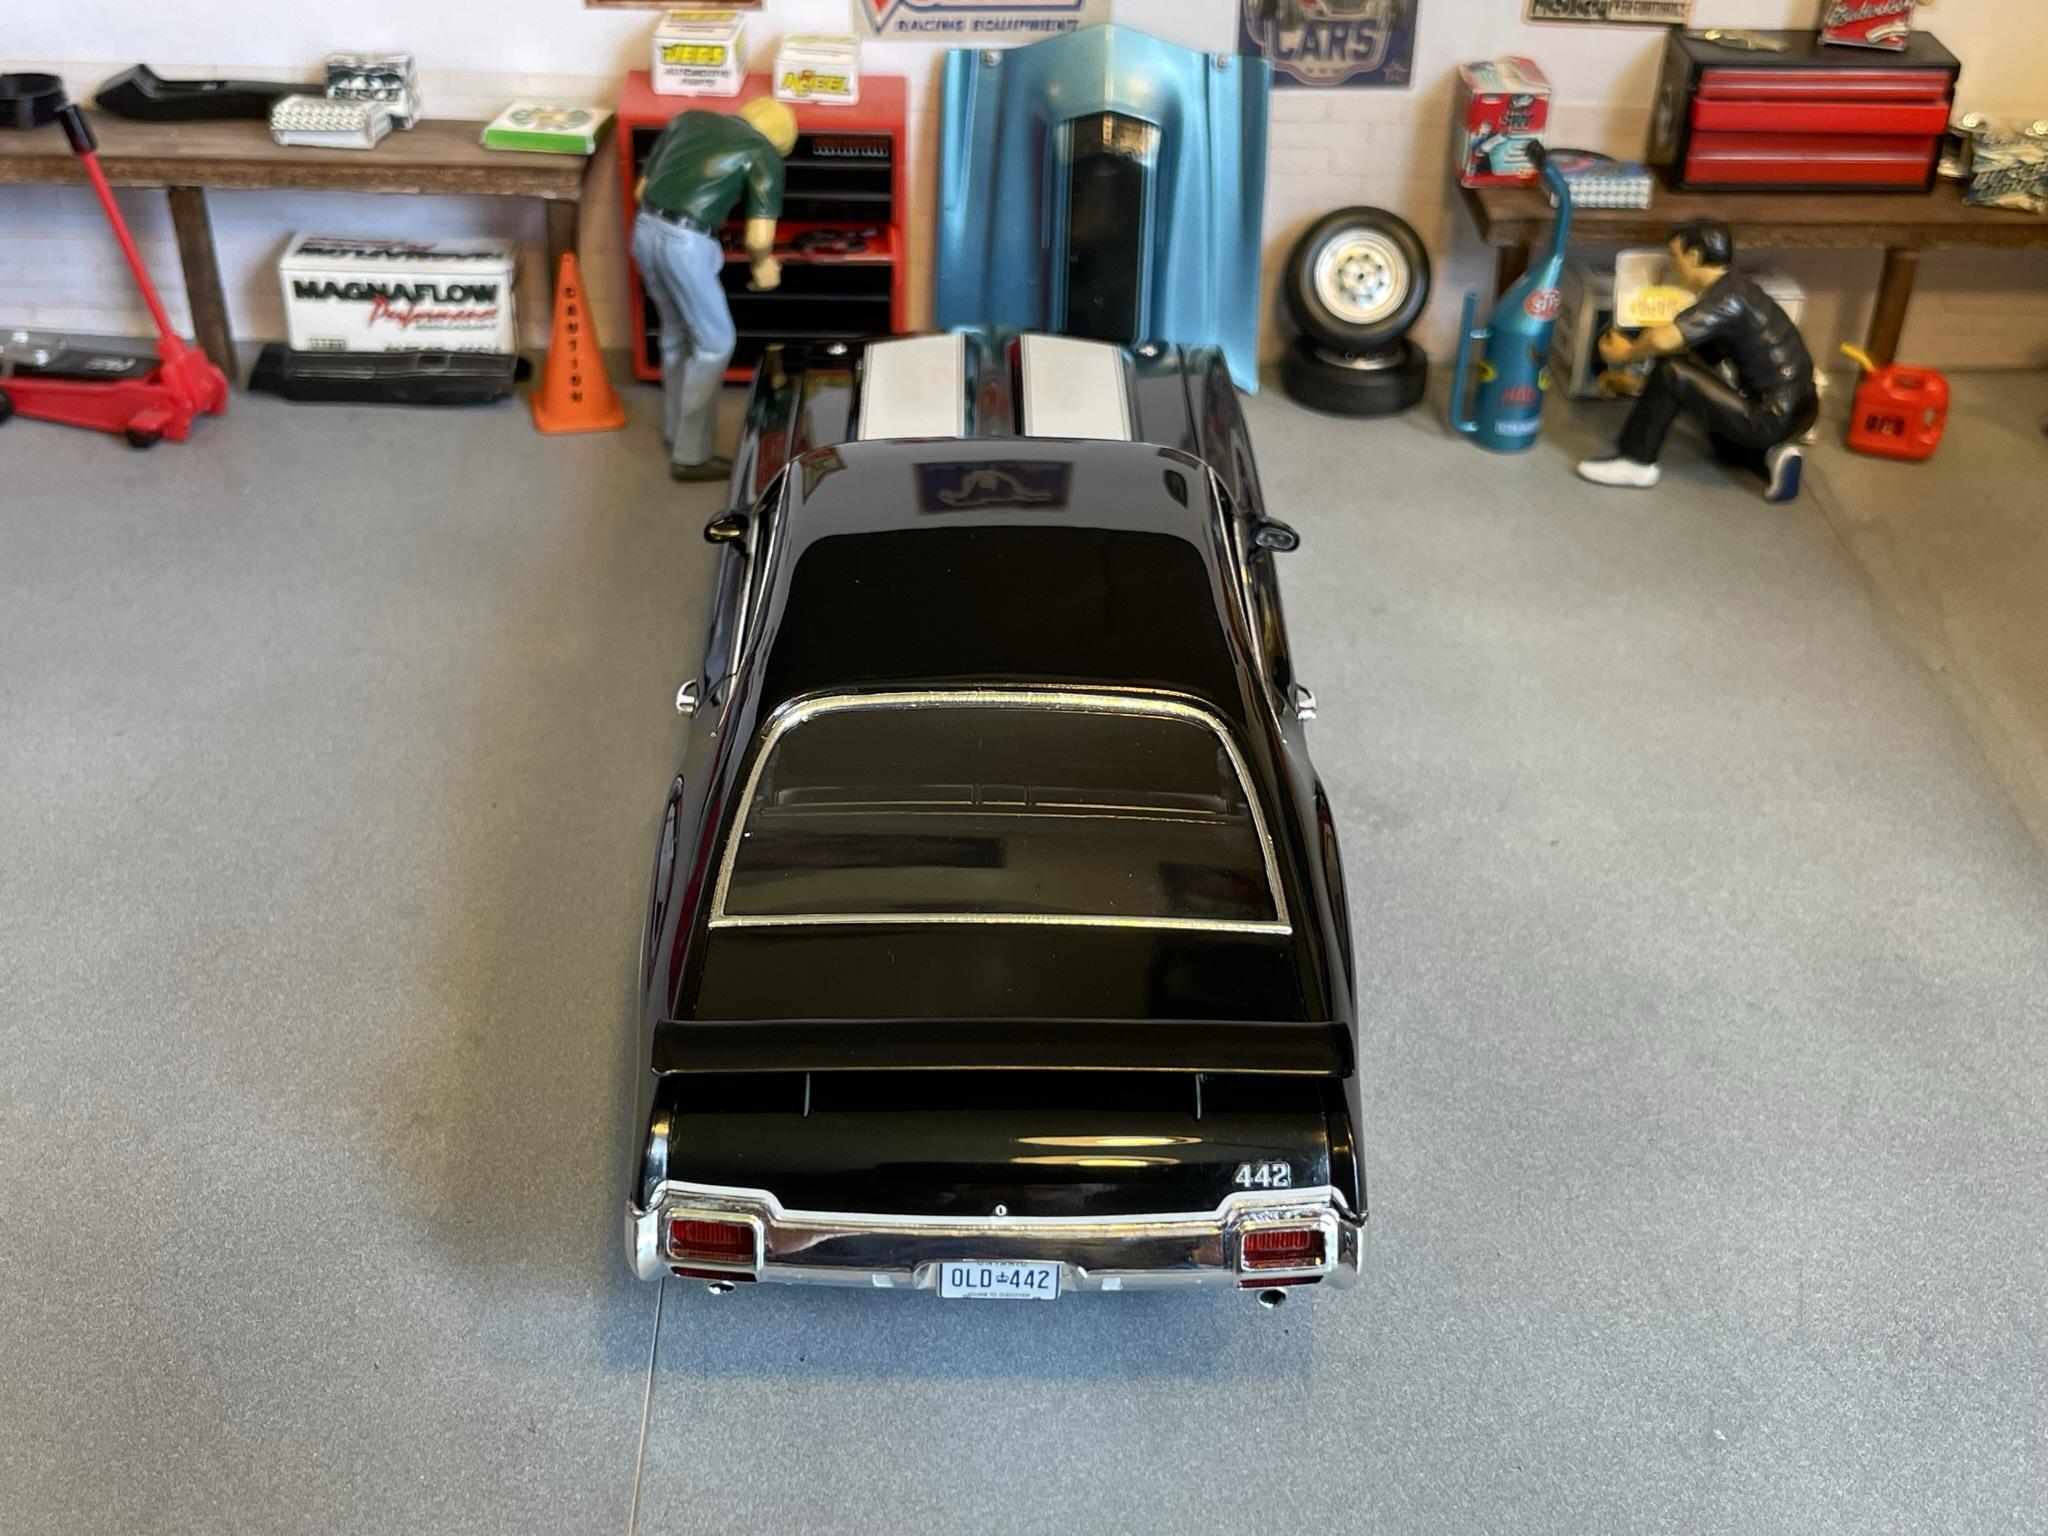
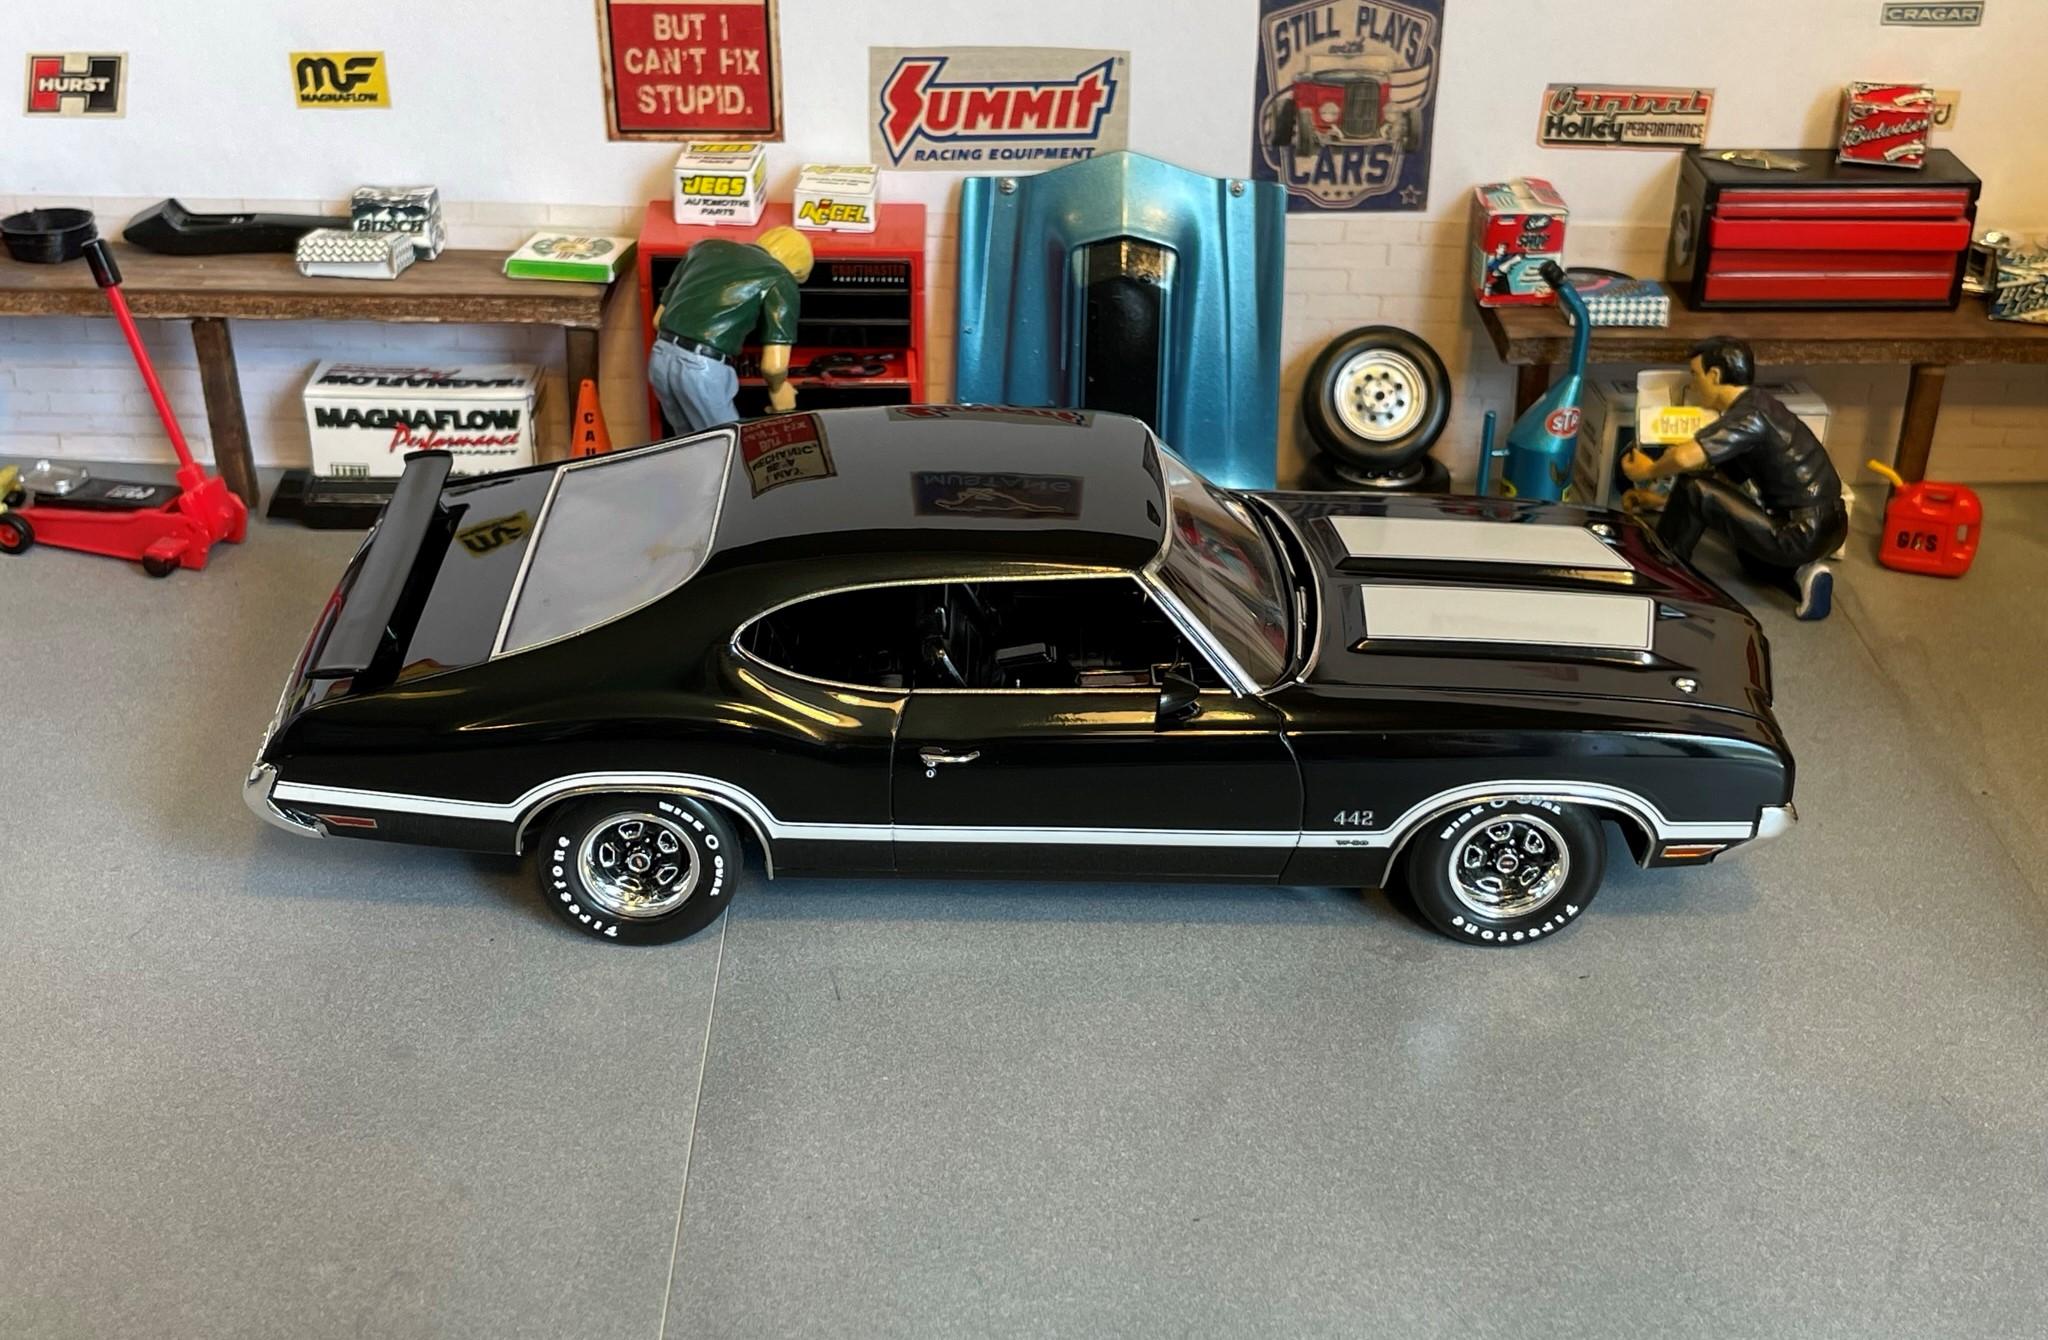
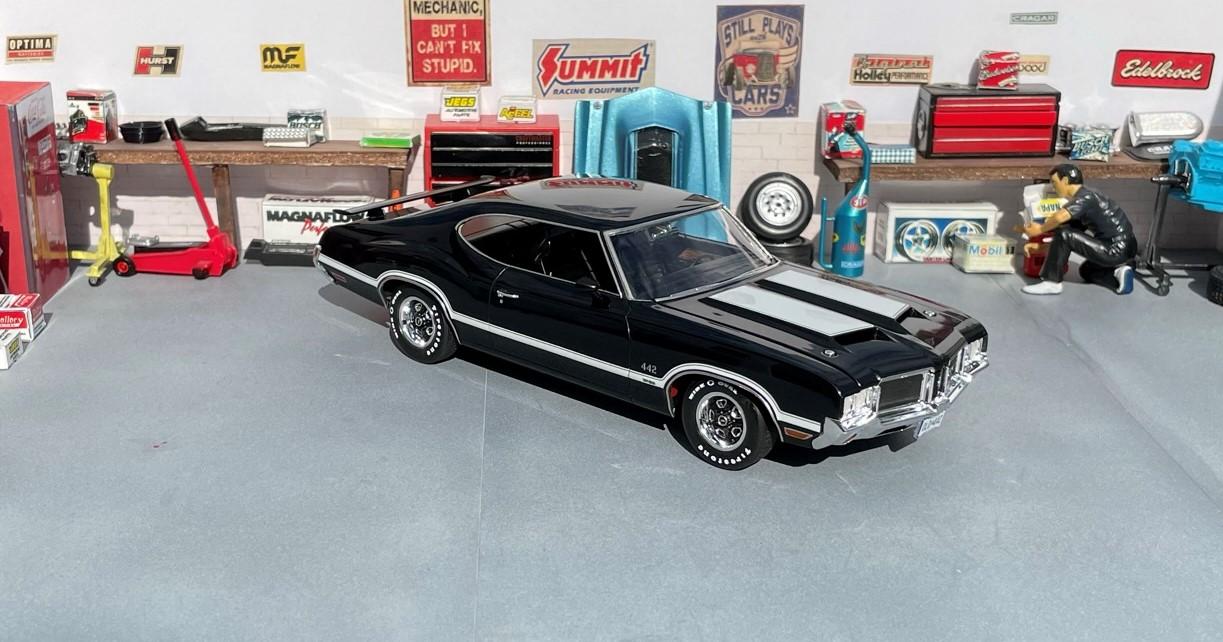
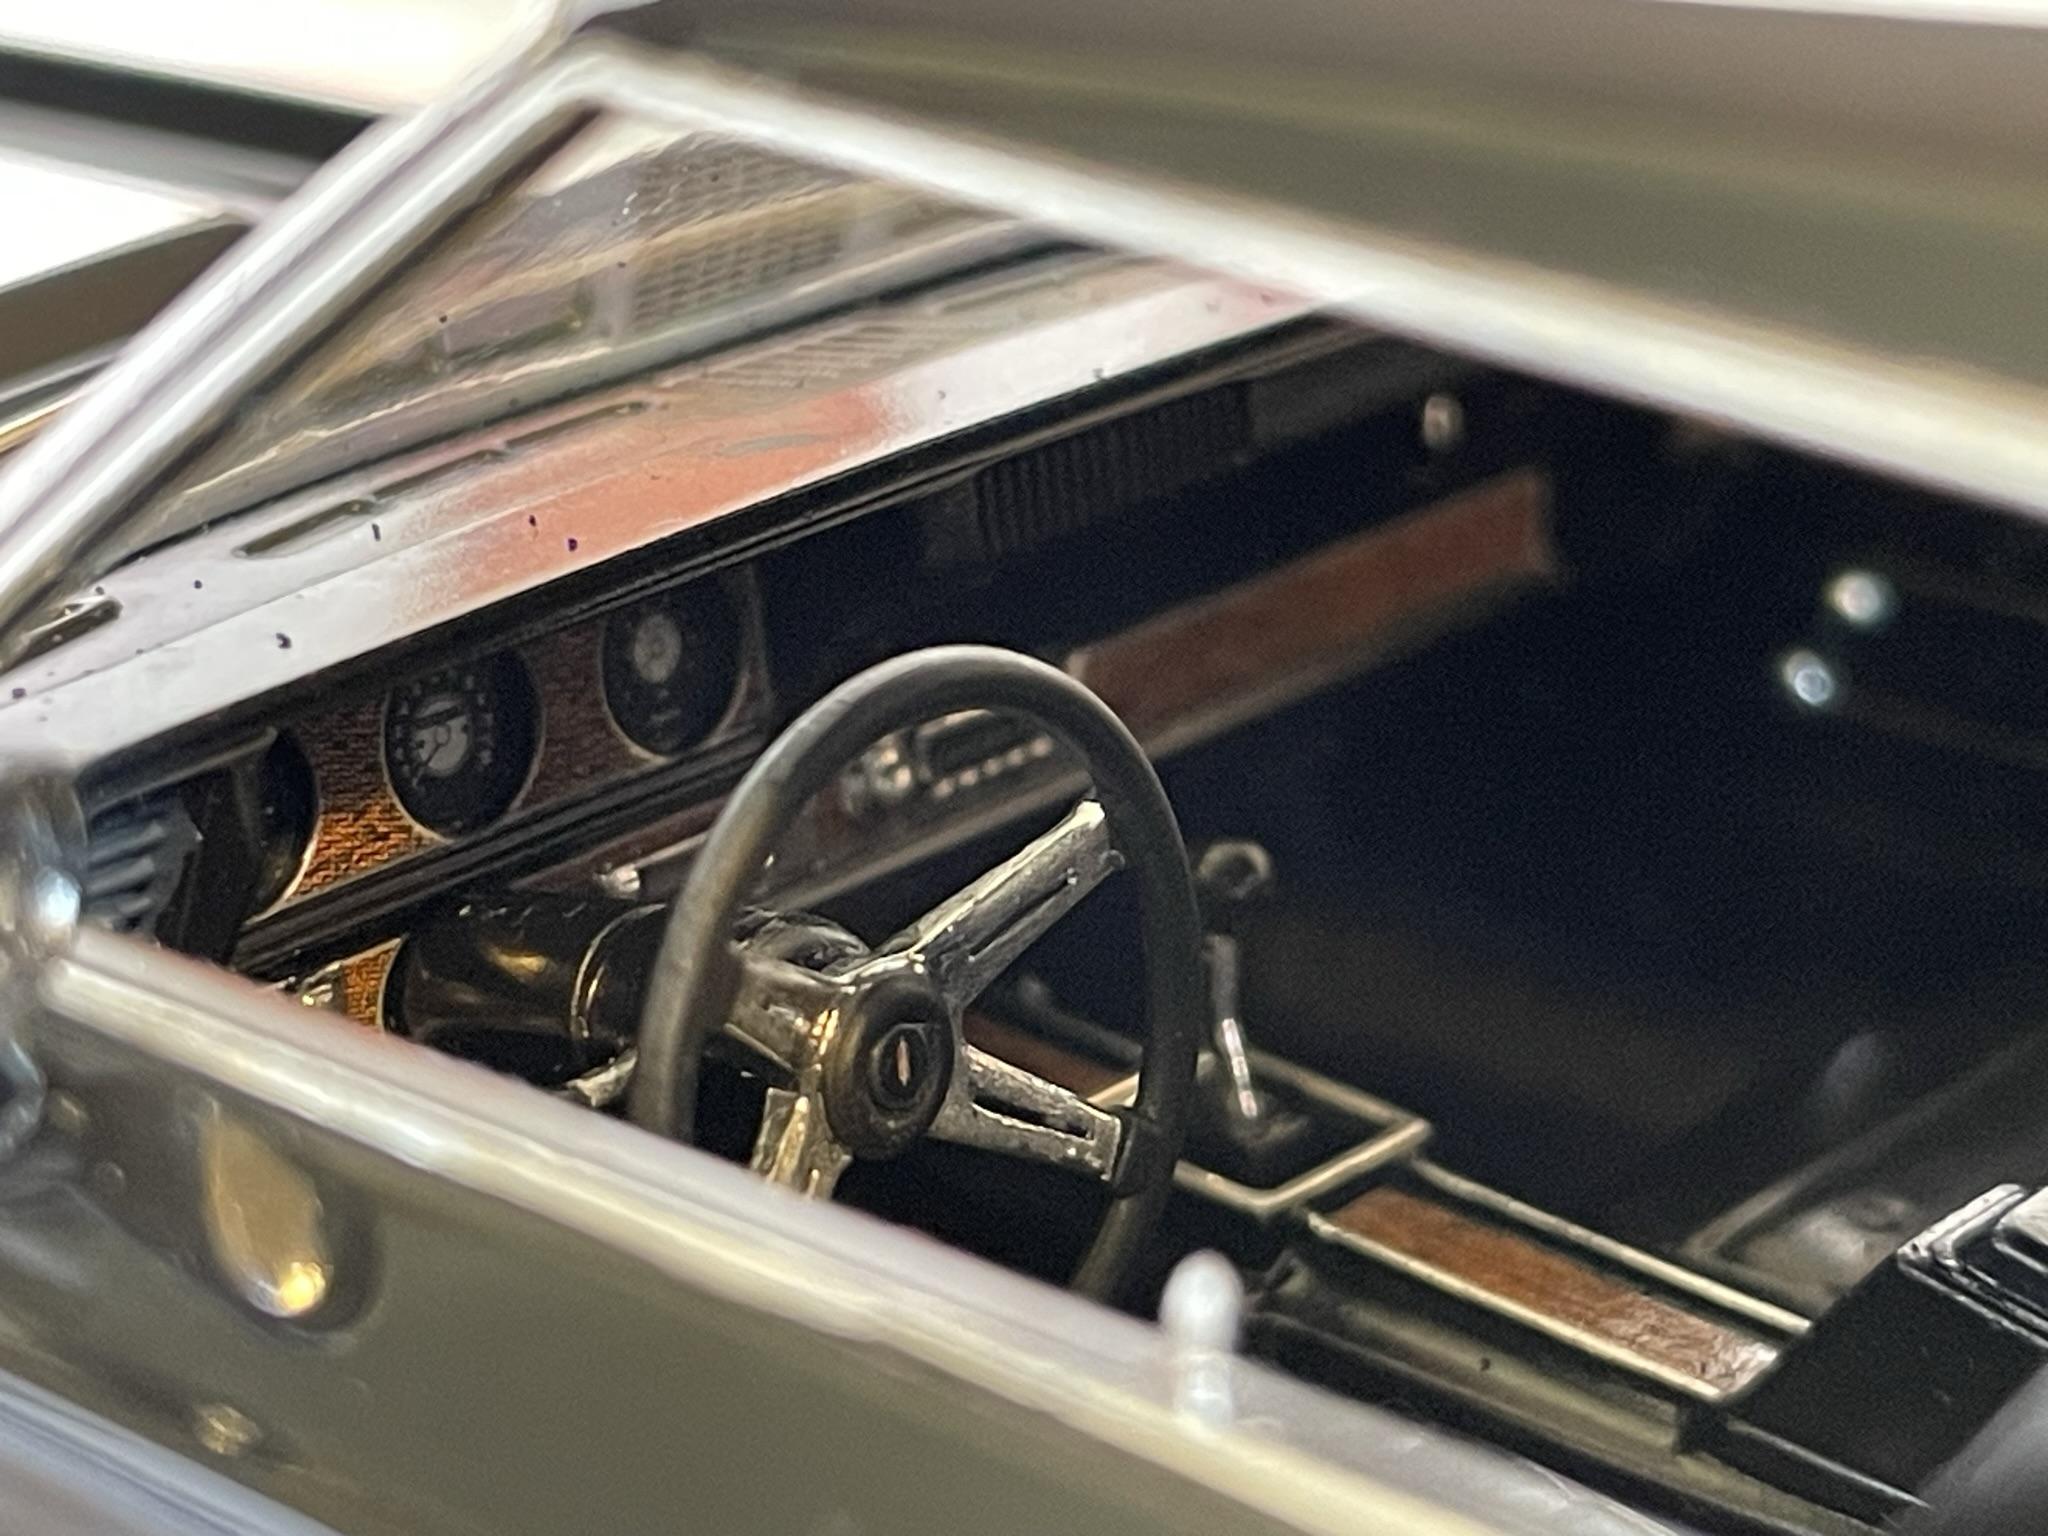
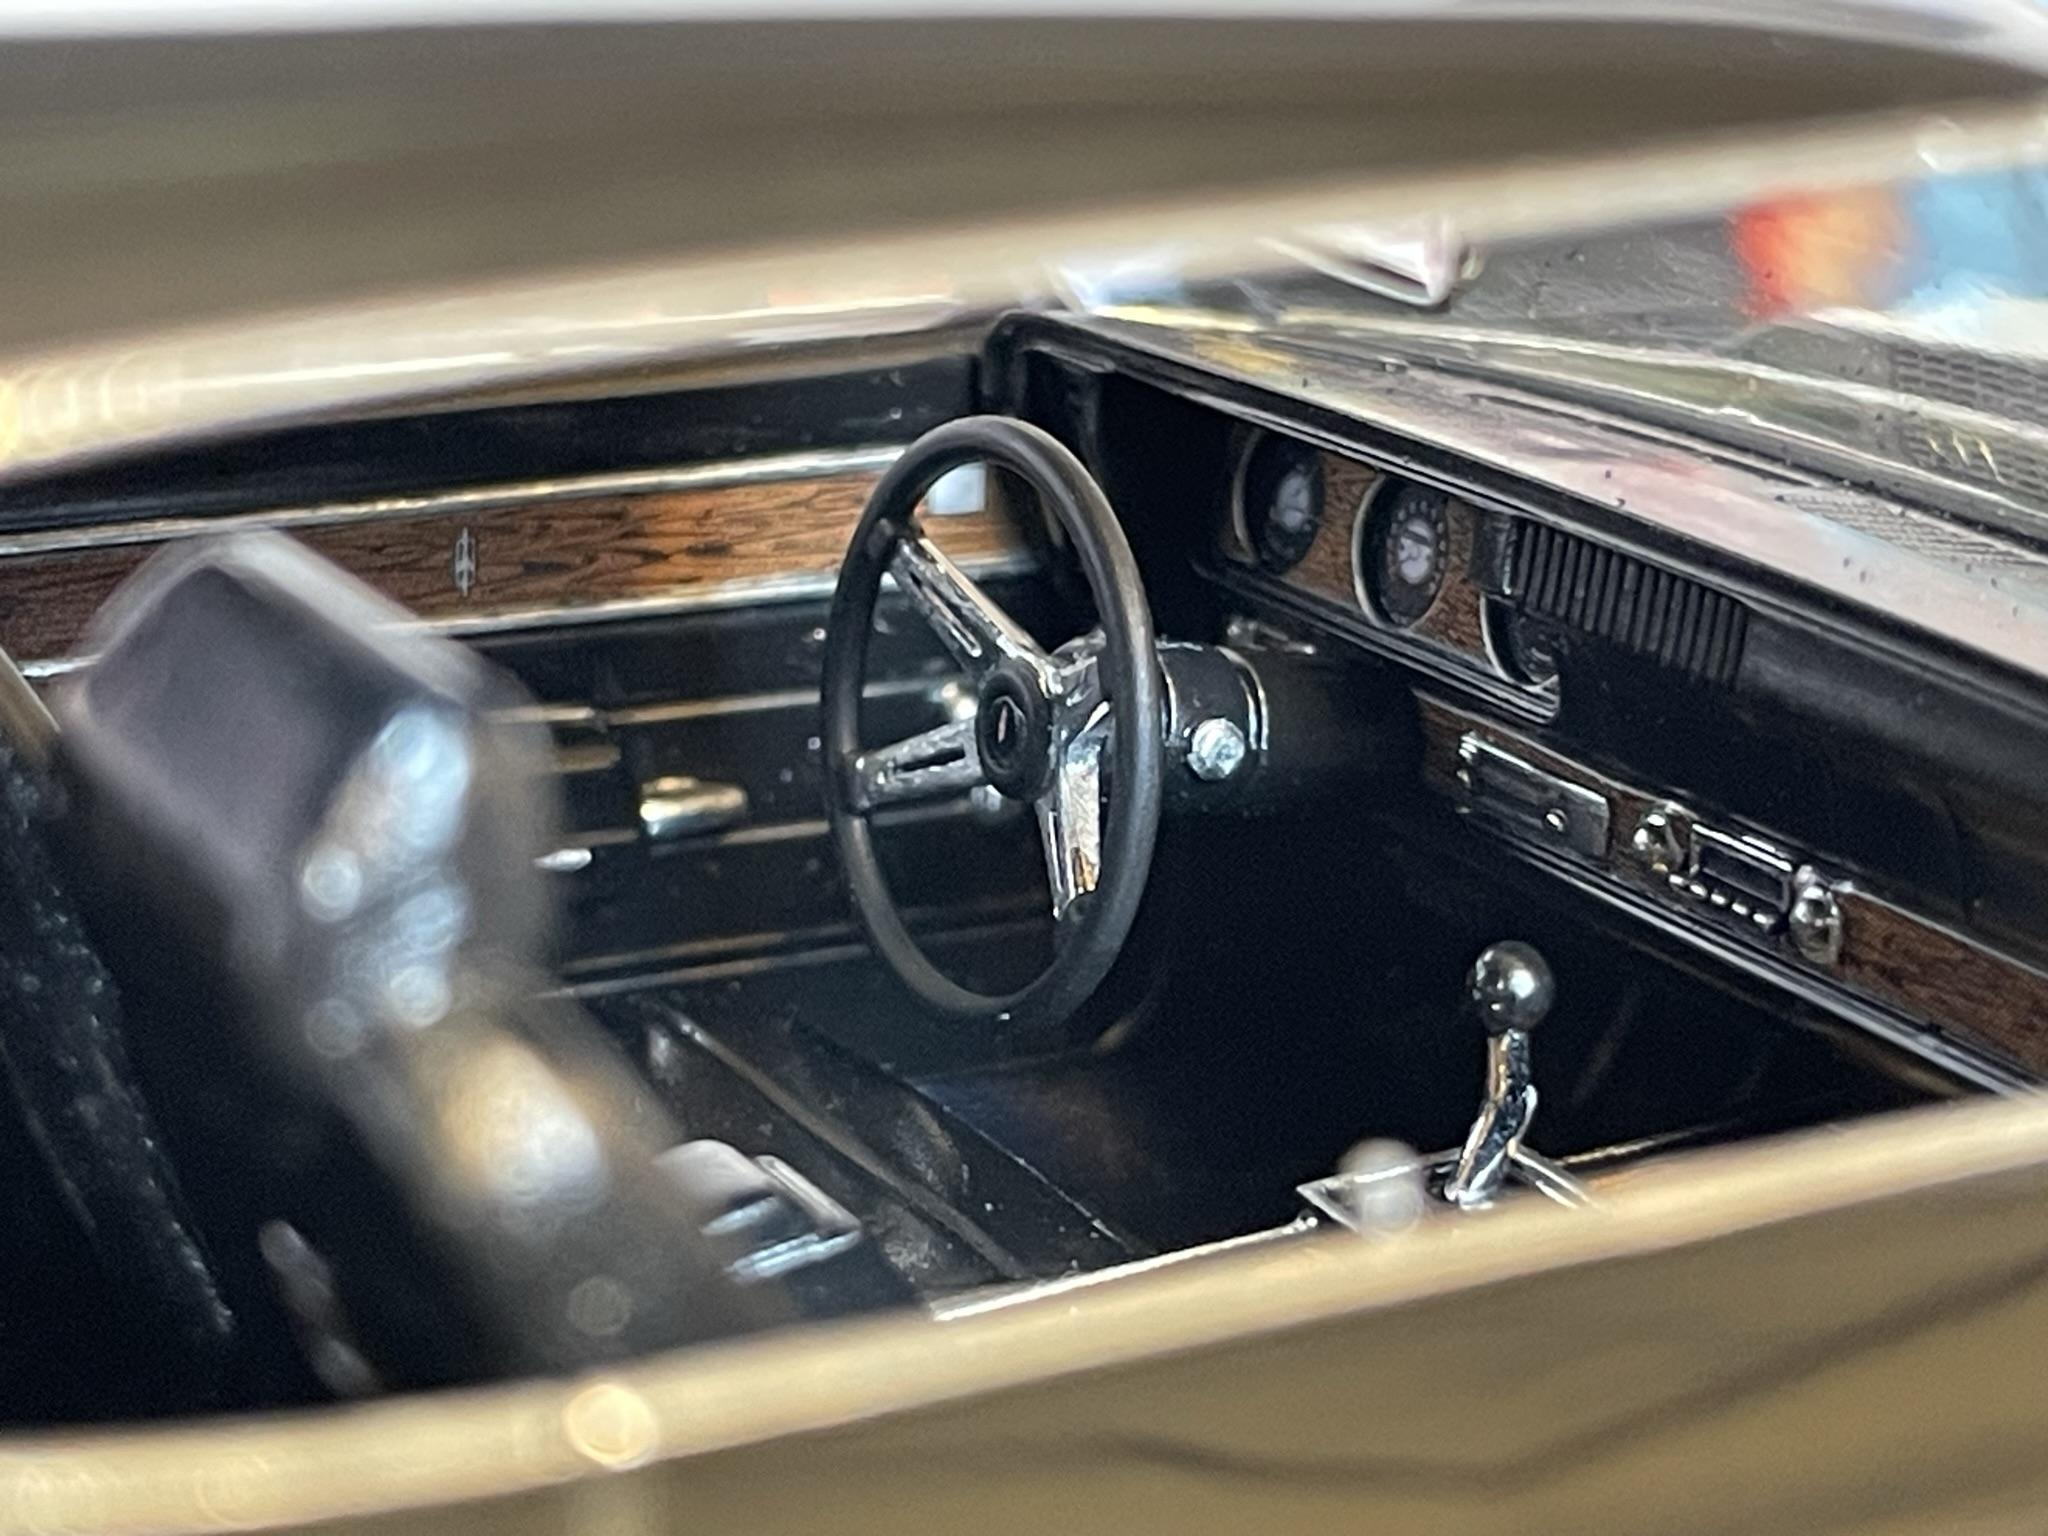
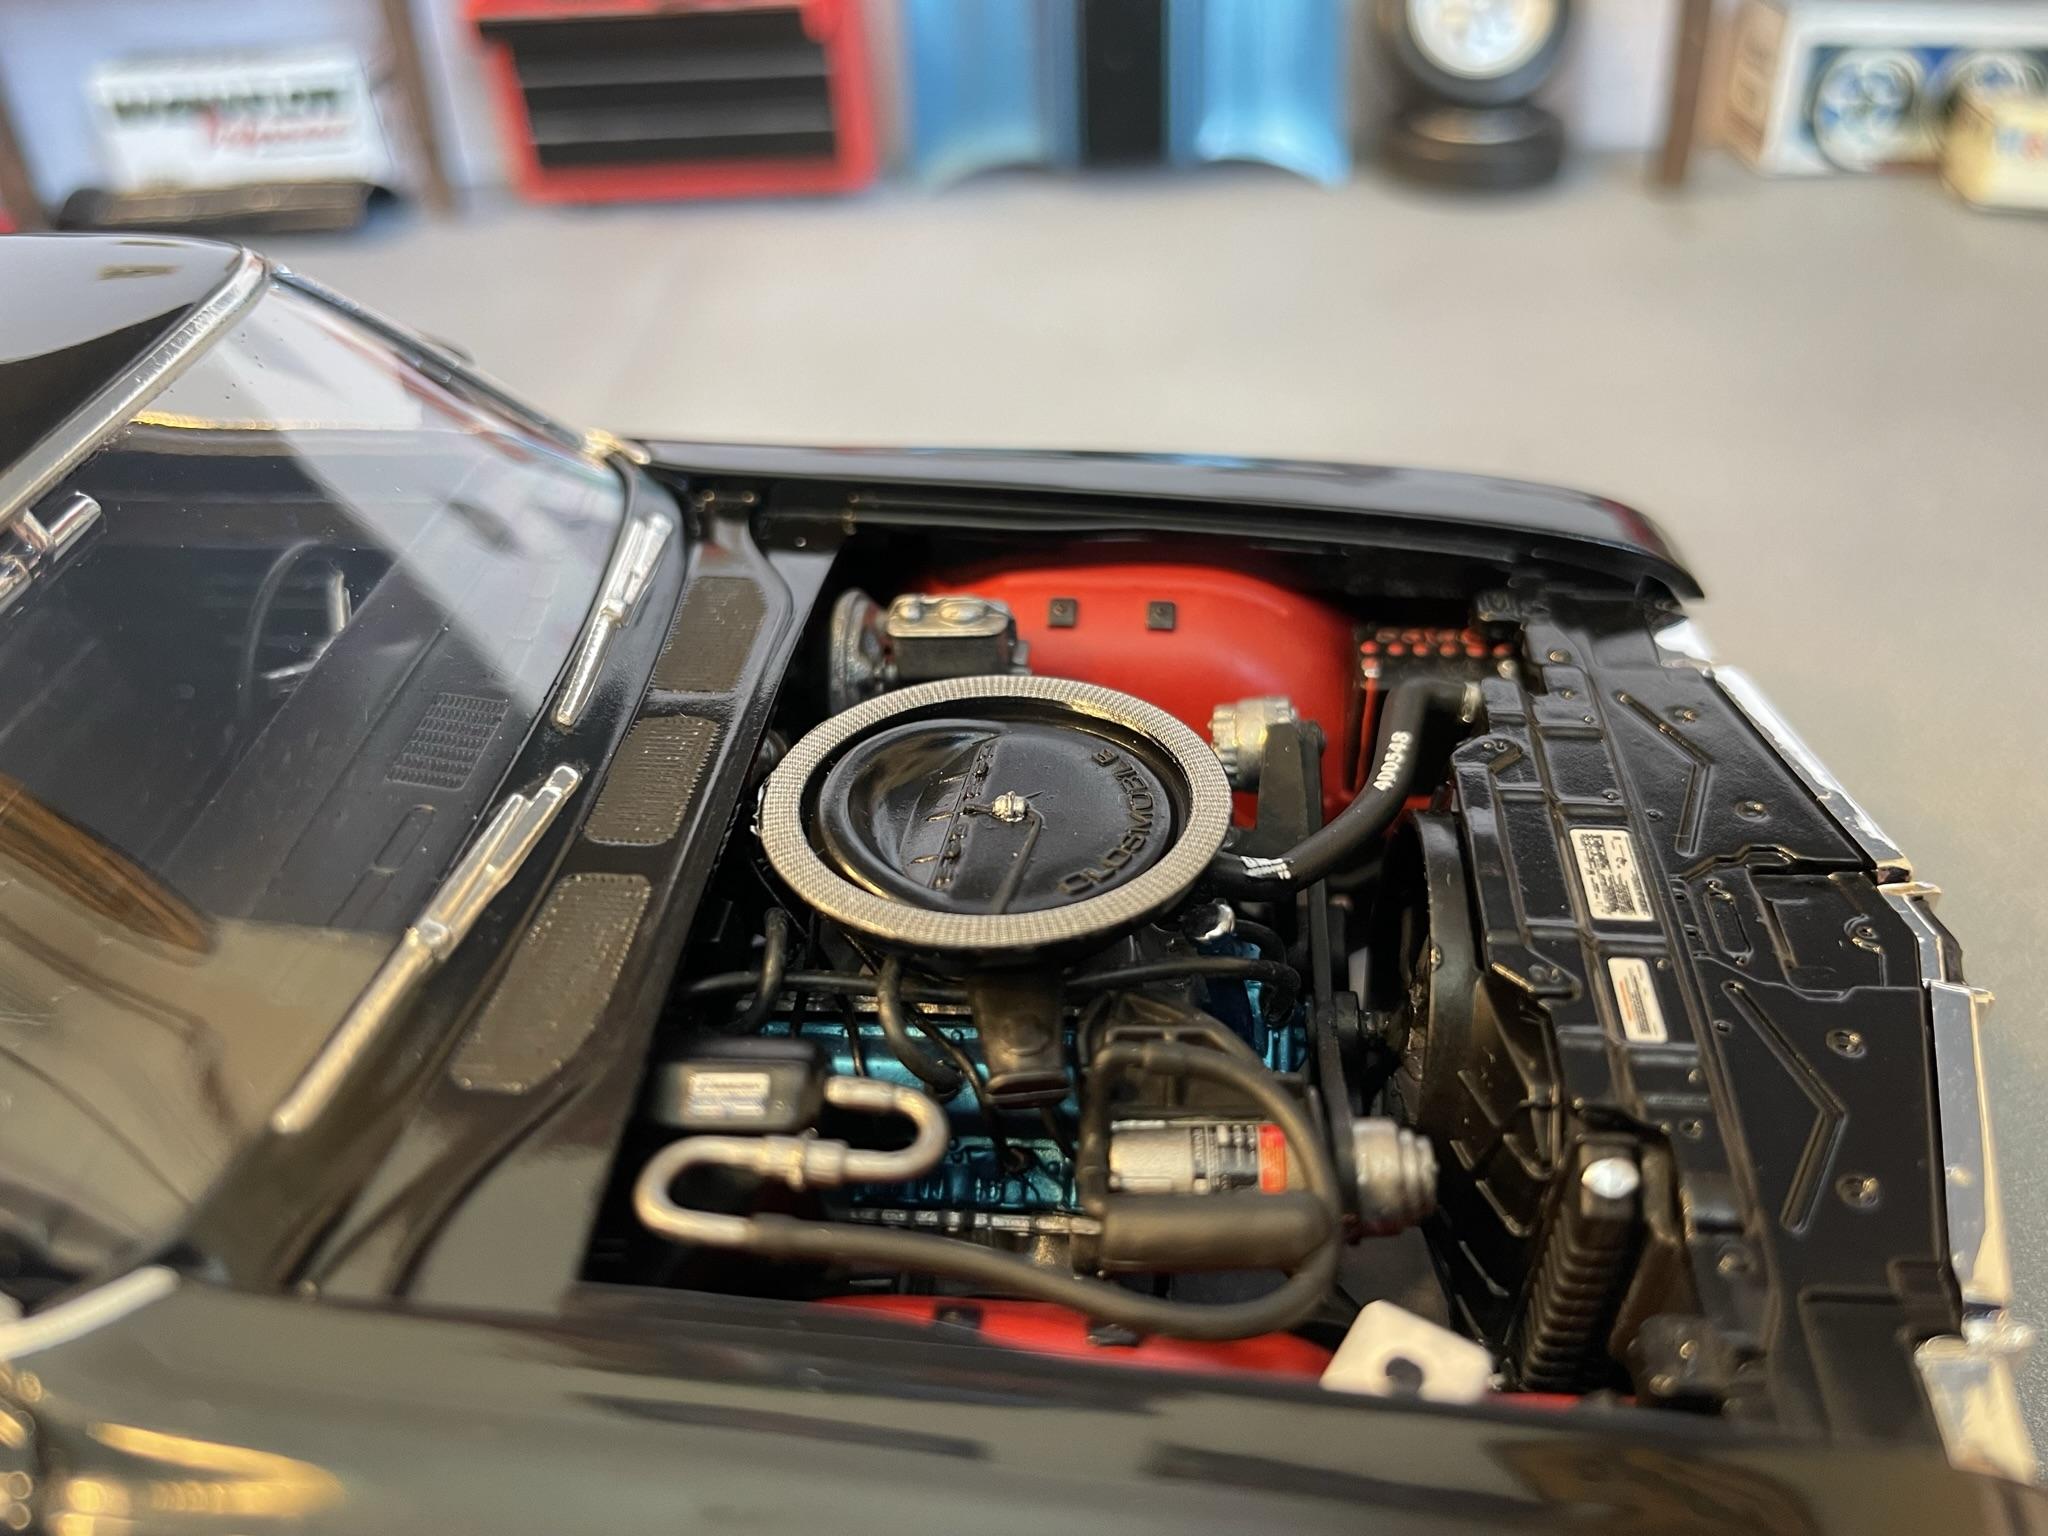
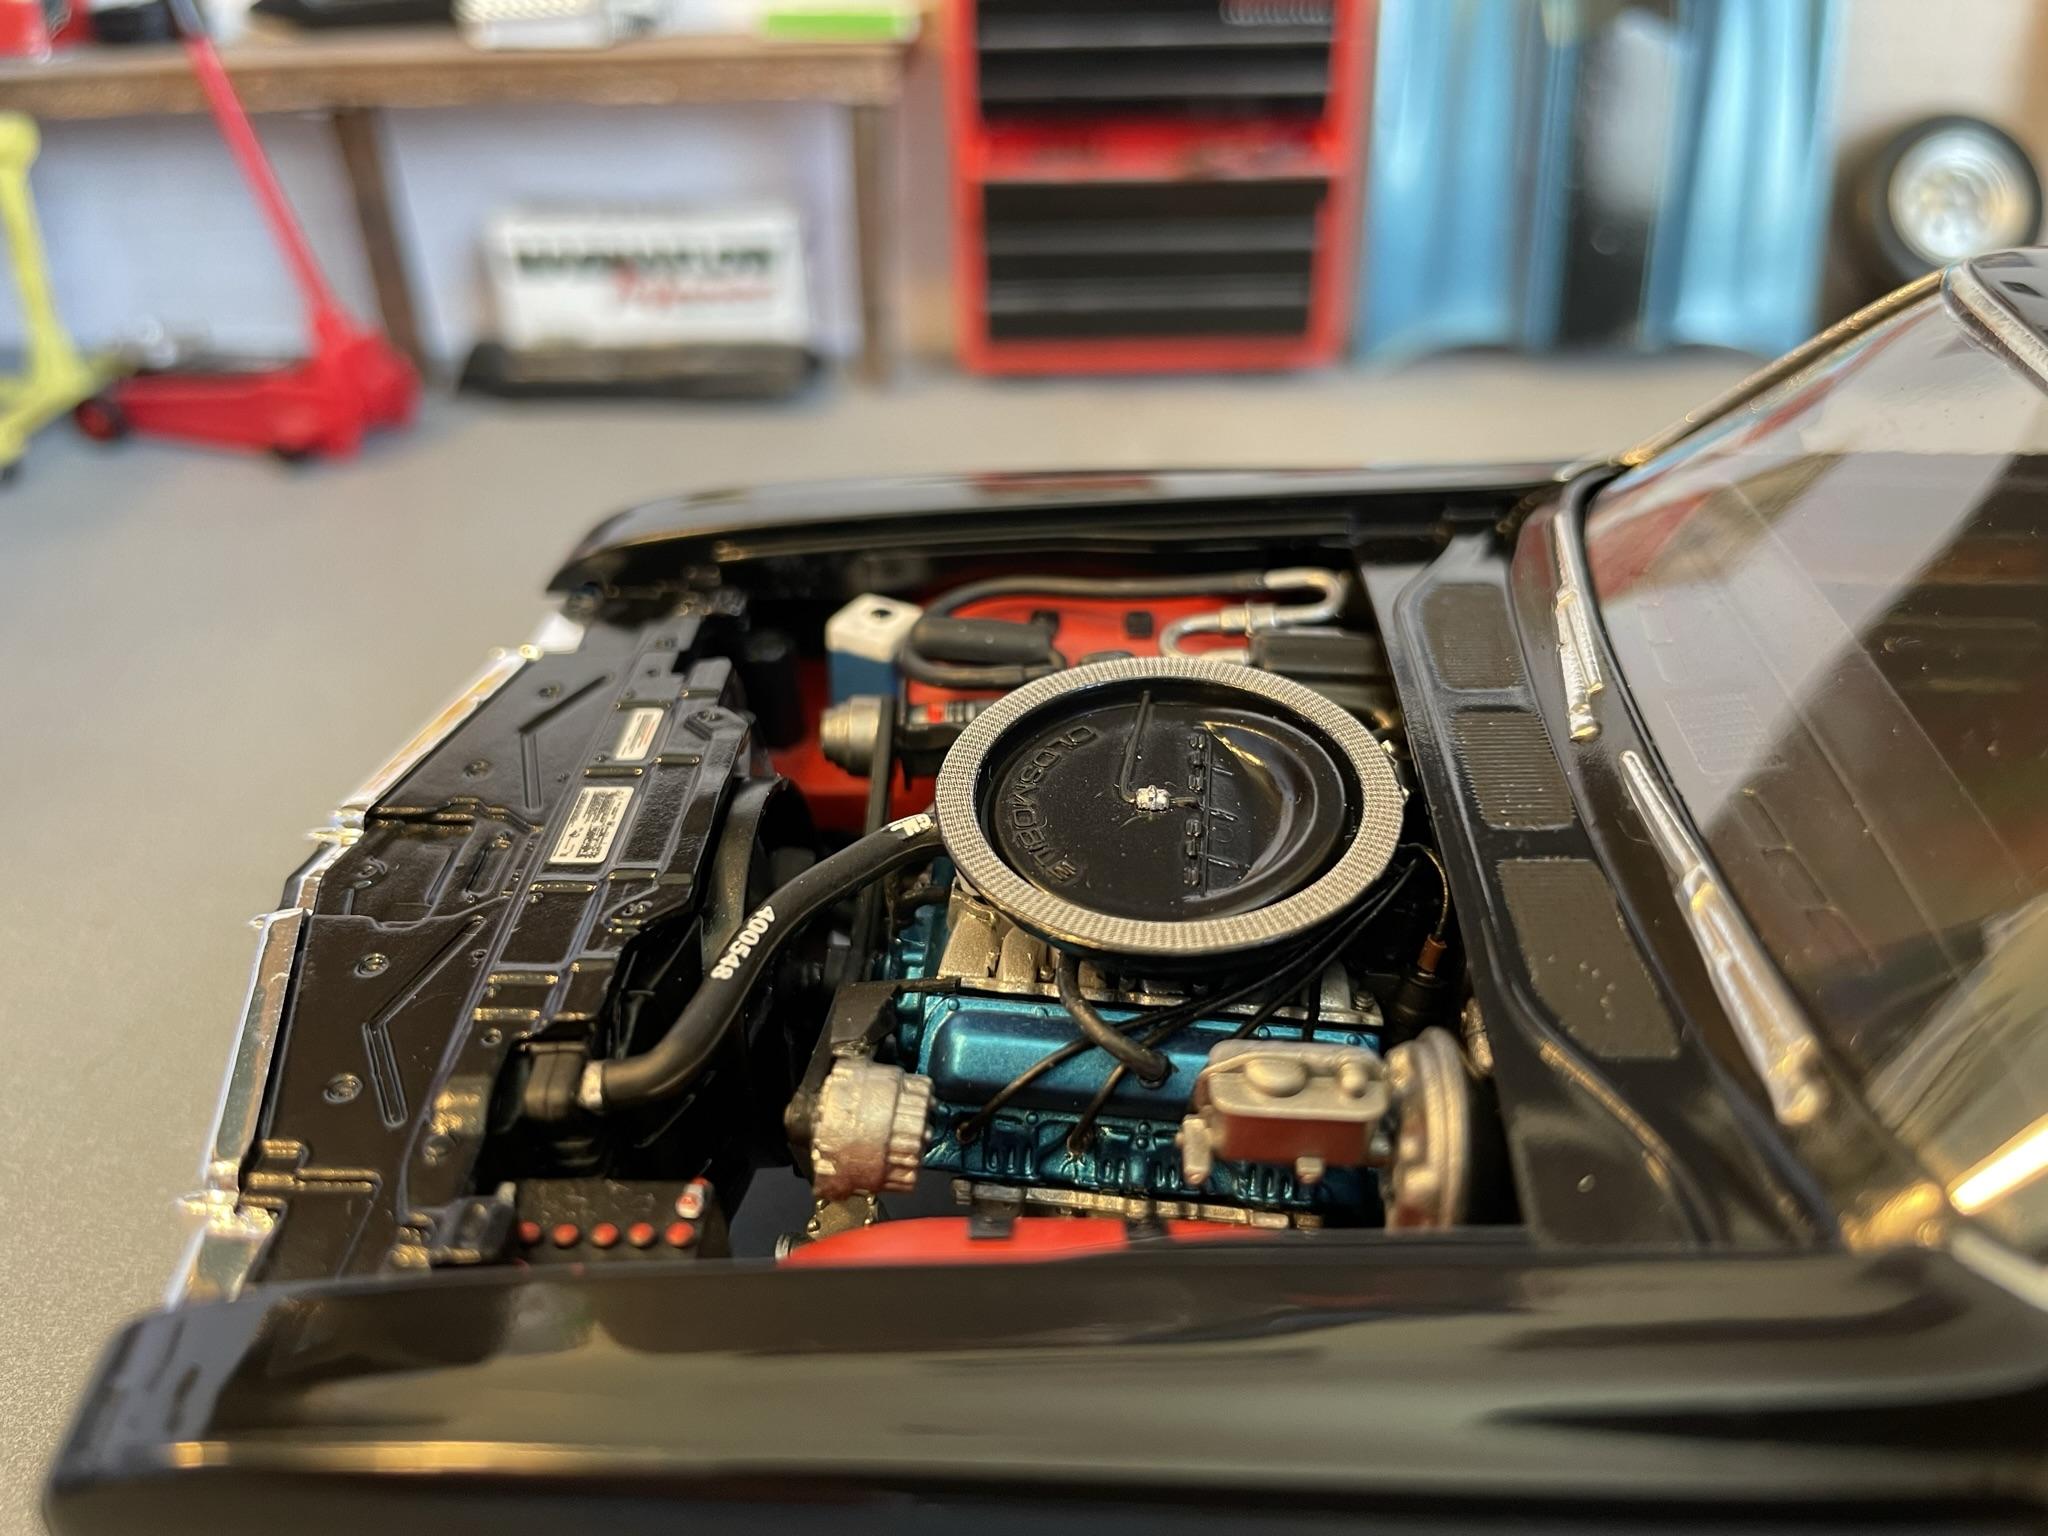
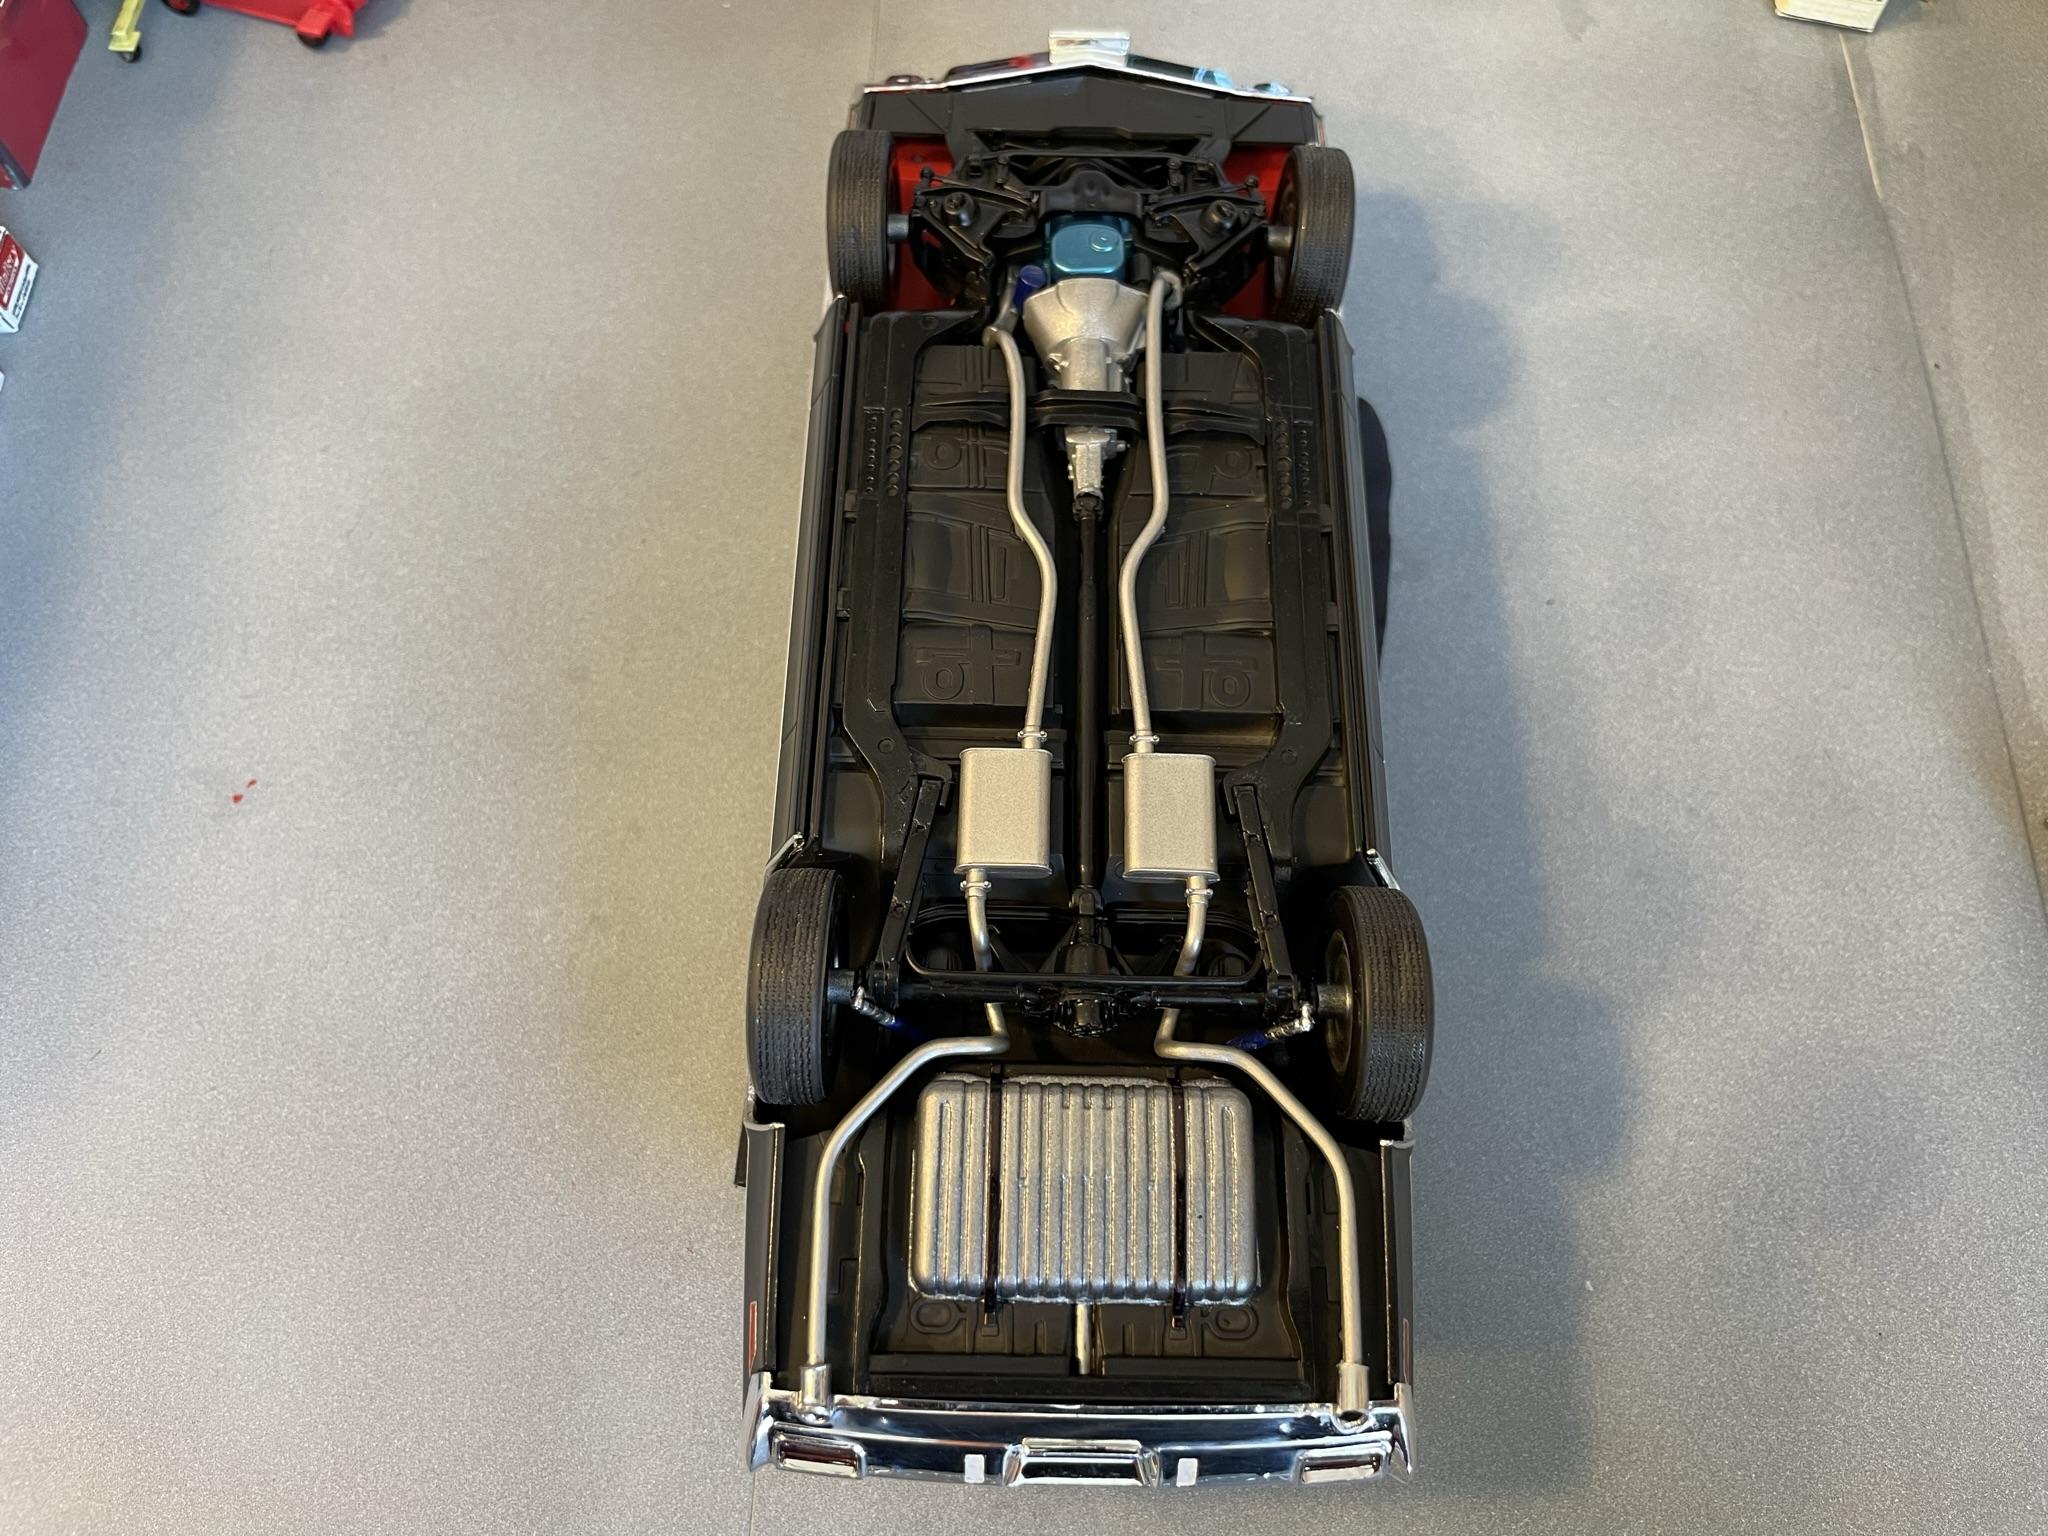
Here's my version of the Revell 1971 Olds 442 W-30. This one was done as a tribute to our Basset Hound Willow, who passed away on August 16th a few months shy of her 12th birthday. It's painted in Tamiya TS-29 Semi-Gloss Black with Tamiya TS-13 Gloss Clear. It was then wet-sanded, polished and waxed. I used Bare Metal Foil for the trim and side marker lights, with Tamiya Clear Orange and Clear Red. The interior was painted with a semi-gloss black craft paint, with black embossing powder added for the carpet area. The wood-grain is all kit decals, with Molotow Chrome brush painted on for the interior chrome. The engine is a custom mix of craft paints, and I added breather tubes, heater hoses, and spark plug wires for extra detail. This is an excellent kit with nice details and everything fit together very well, with the only exception being the rear end assembly needs some work to get the wheels/tires to fit correctly in the rear fenderwells. Due to the circumstances, this one became much more special to me than I ever could have imagined. Thanks for looking!!

- 43 replies
-
- 16
-

-
Fantastic!!
-
Outstanding!!
-
Beautiful color and paint job! Very nicely done!!
-
That looks absolutely amazing and could easily be mistaken for the real thing, especially with the gas station diorama background!!
-
Revell 1968 (1971) Corvette for my Aunt and Uncle
Dragonhawk1066 replied to ewetwo's topic in Model Cars
Well done! -
Nice looking Chevelle! Well done!
-
Looks great, nice color choice!
-
Looks great!
-
Looks excellent, I'd say you hit the Lime Gold right on!
-
That's a great looking Charger! Great paint, vinyl top, and details all around!
-
Very nice!
-
Looks great!
-
Nice work!
-
AMT 1971 Plymouth Duster 340 in Go Mango Orange.
Dragonhawk1066 replied to Dragonhawk1066's topic in Model Cars
Thanks Chris! Thanks Anthony! Thank you Keith! Thanks Mike! -
AMT 1971 Plymouth Duster 340 in Go Mango Orange.
Dragonhawk1066 replied to Dragonhawk1066's topic in Model Cars
Thanks! I kind of go back and forth with craft paints and spray cans. It was summer and the Go Mango was the exact shade I was after. Thanks guys! -
Excellent looking Z!!
-
That's a very nice looking Mustang!
-
Well done!
-
You did it justice, it looks fantastic!!