Dragonhawk1066
-
Posts
3,932 -
Joined
-
Last visited
Content Type
Profiles
Forums
Events
Gallery
Everything posted by Dragonhawk1066
-
Nicely done!!
-
Pretty nice work!
-
WOW!! That's amazing ,and so realistic!!
-
I don't know, the color kind of grows on ya combined with the decals. Rub it up and get it a little dirty and it could be a neglected former show winner from it's heyday. I would love to have a couple of these kits myself, one as the actual car and one with a little imagination added.
-
Well done! And a great color for it! If memory serves, that's a really nice kit and hopefully is on Revell's re-release docket soon.
-
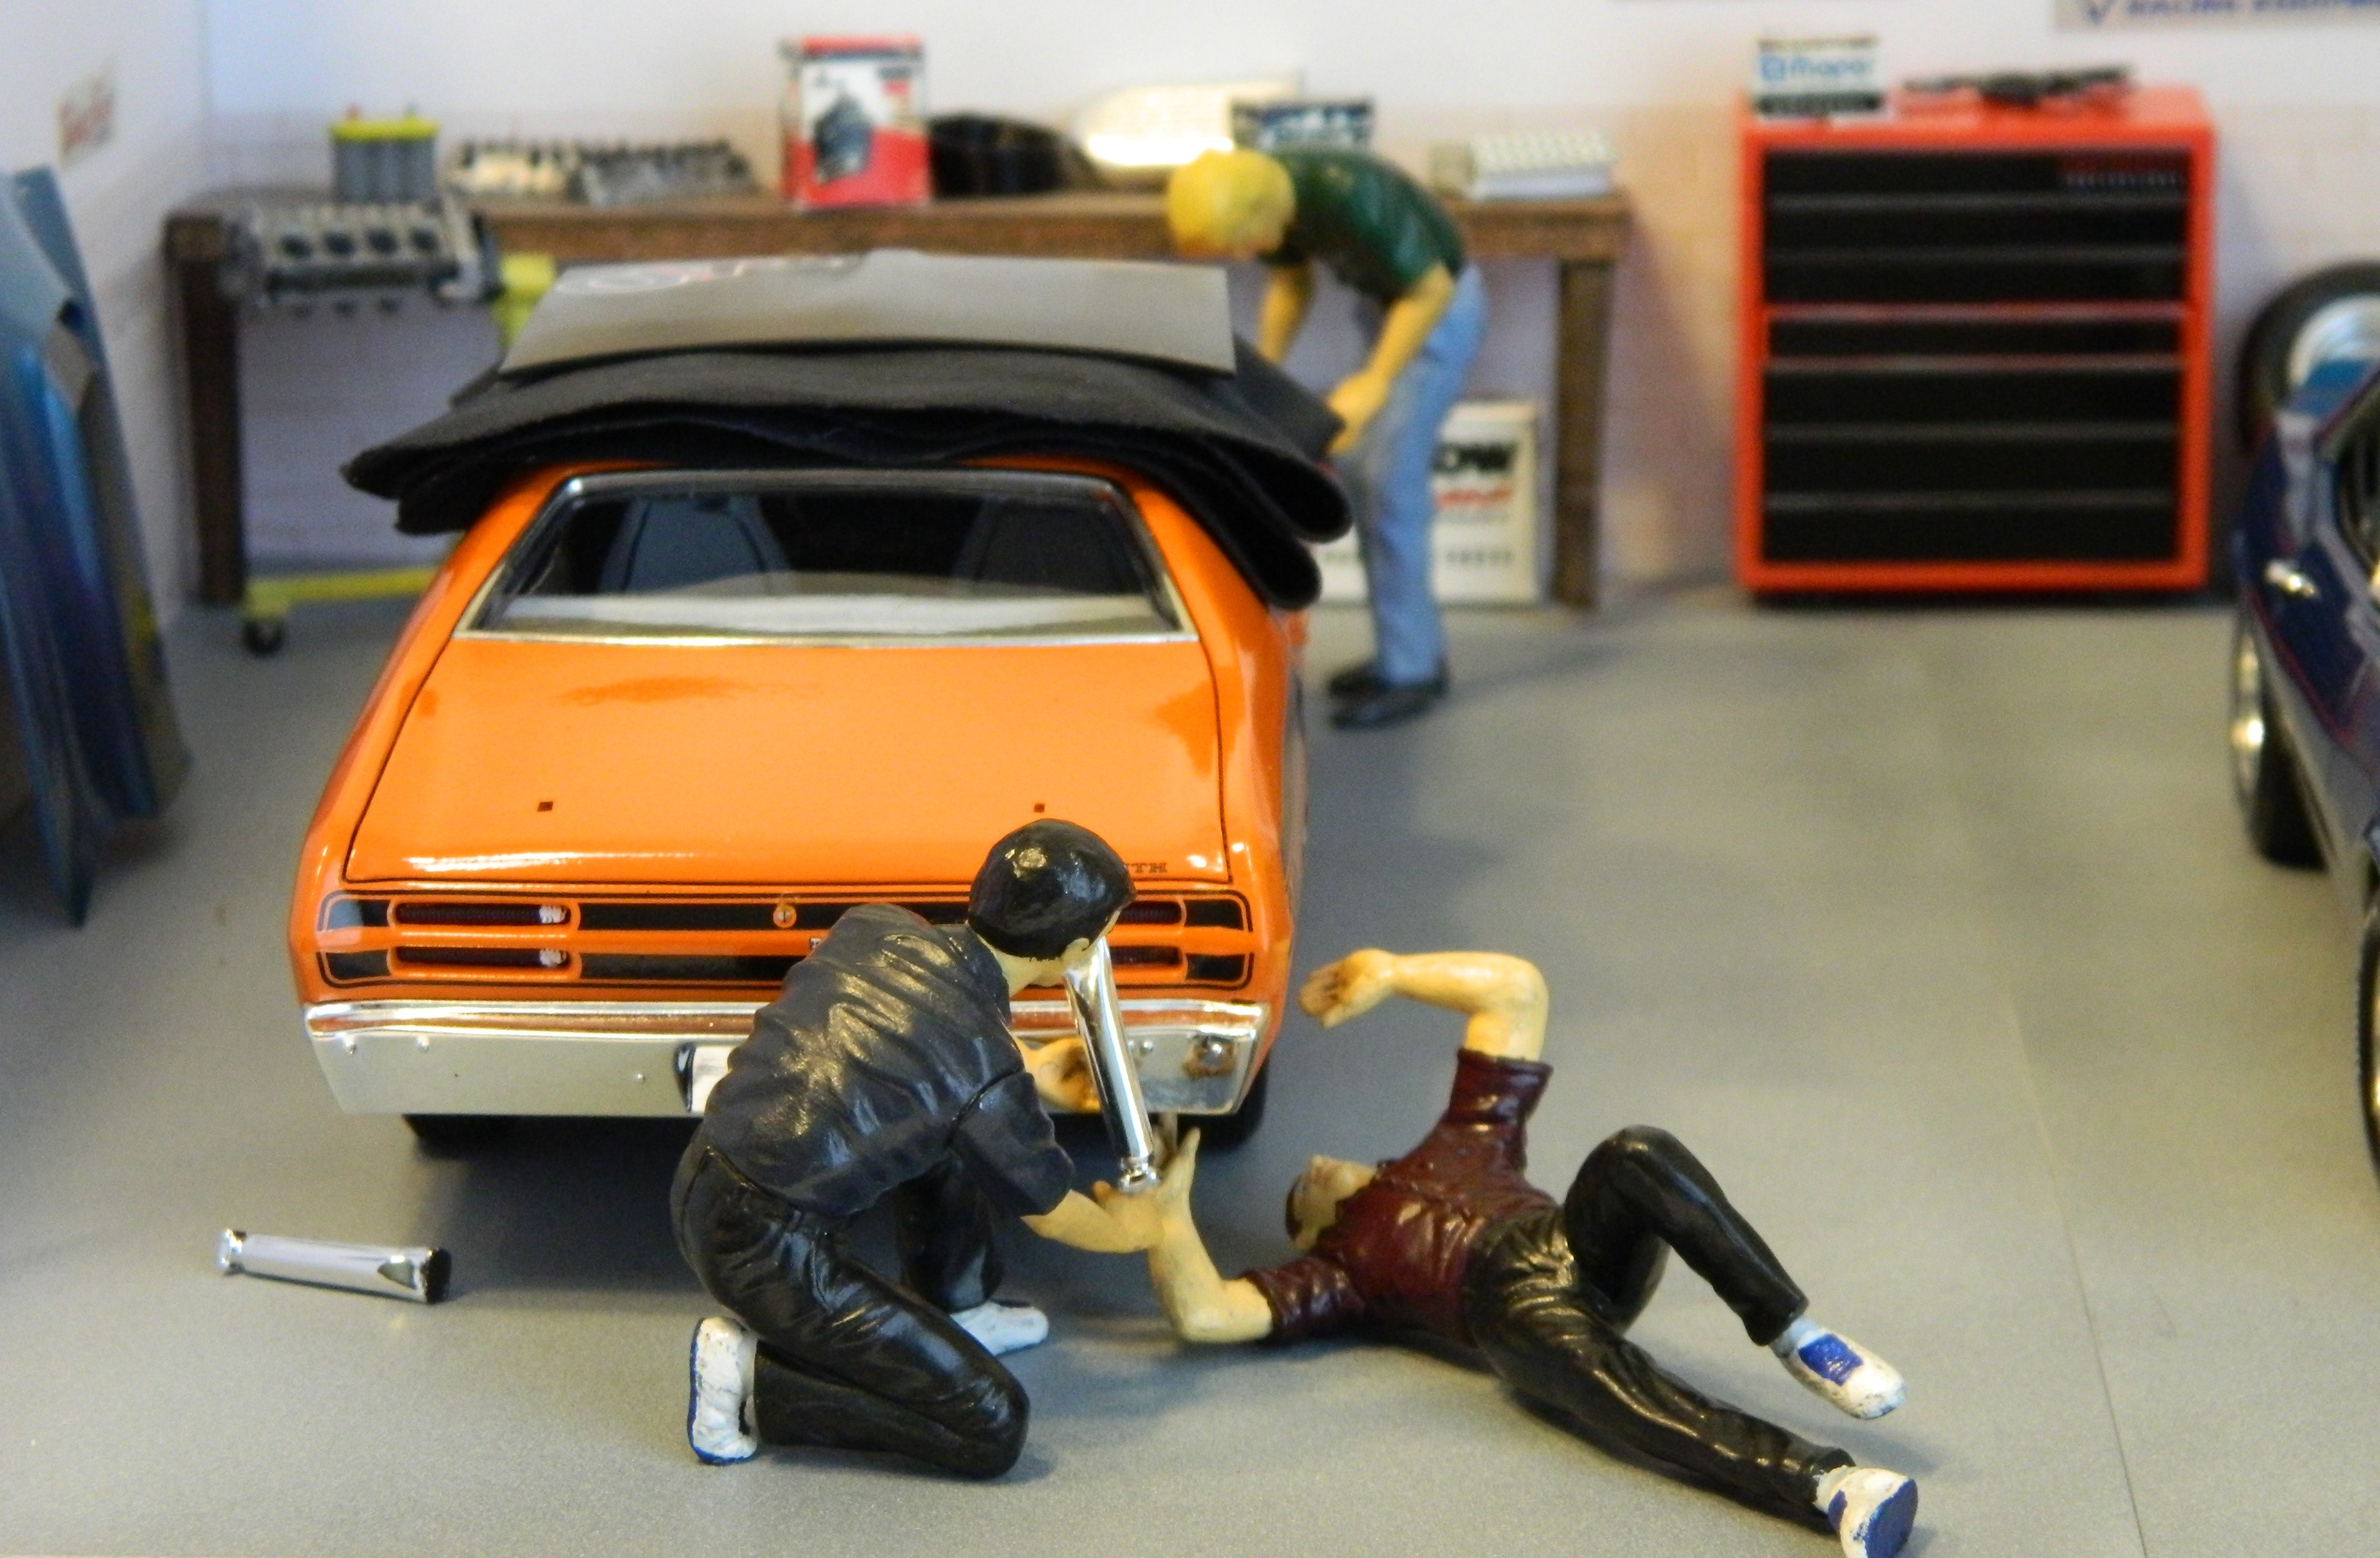
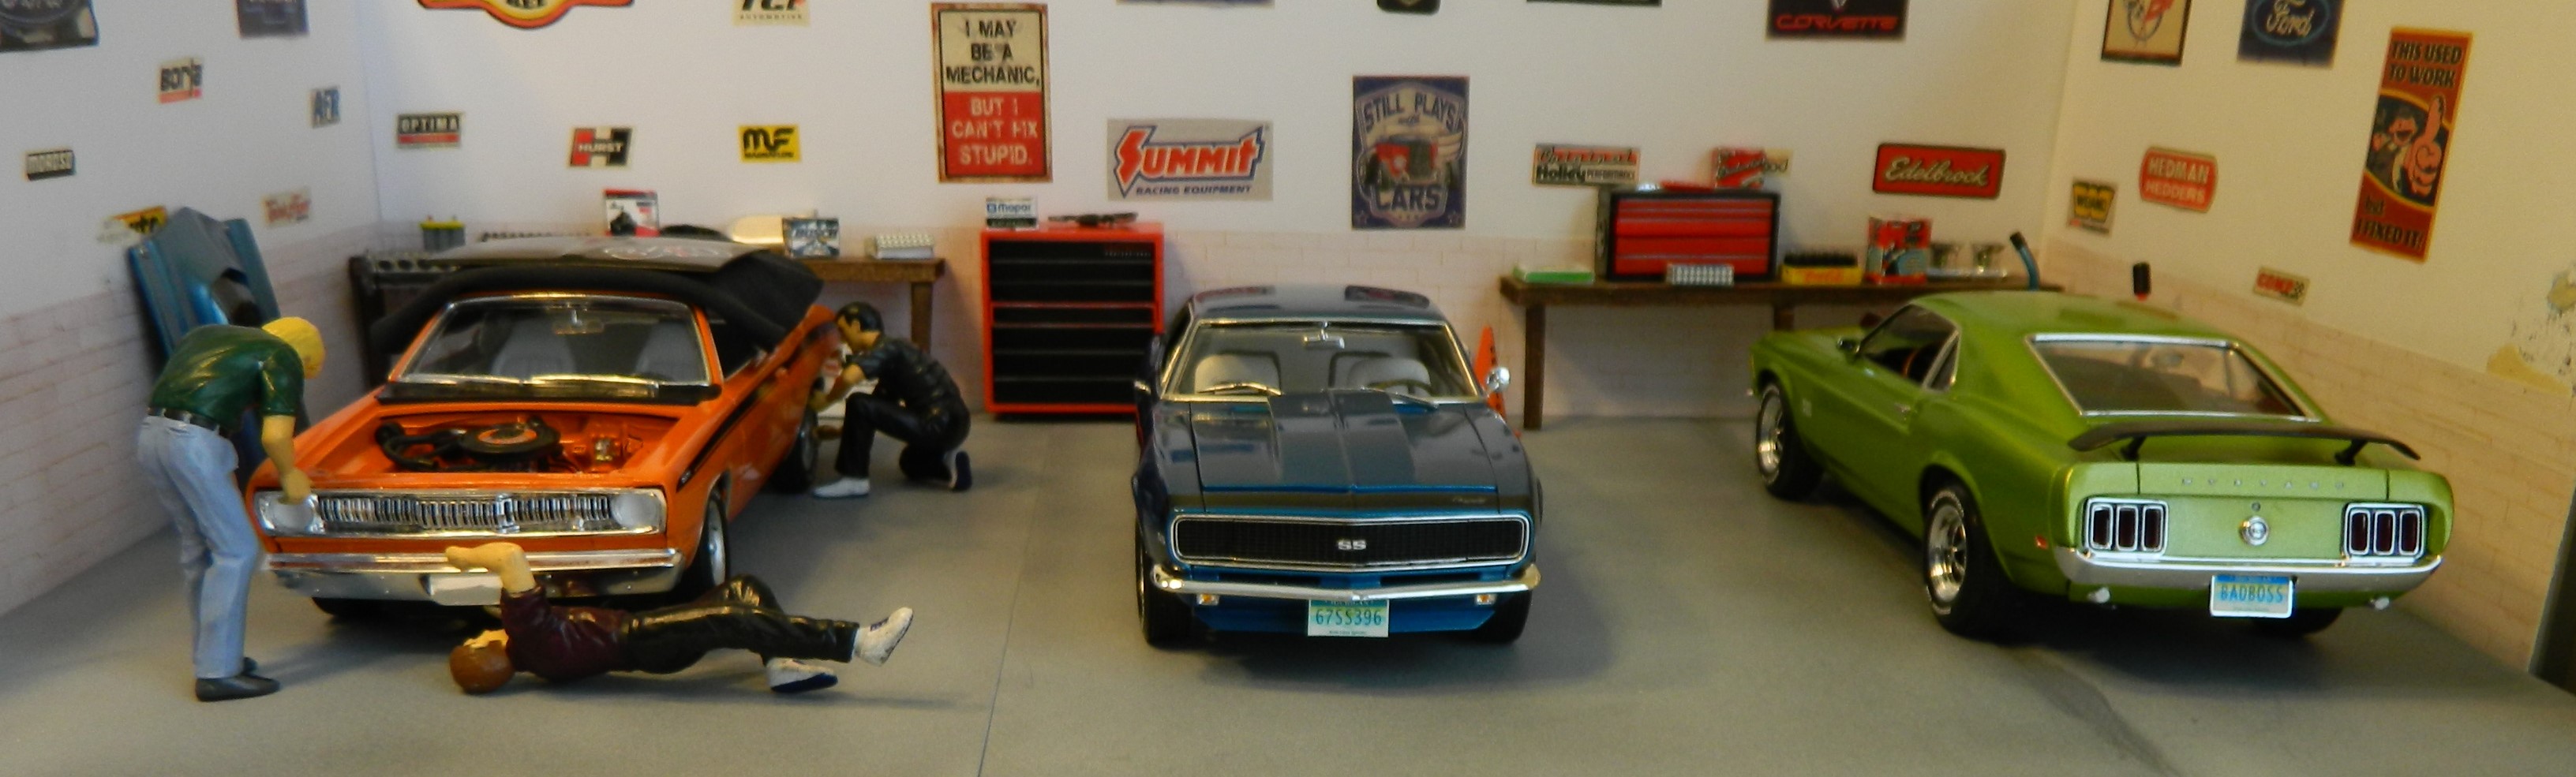
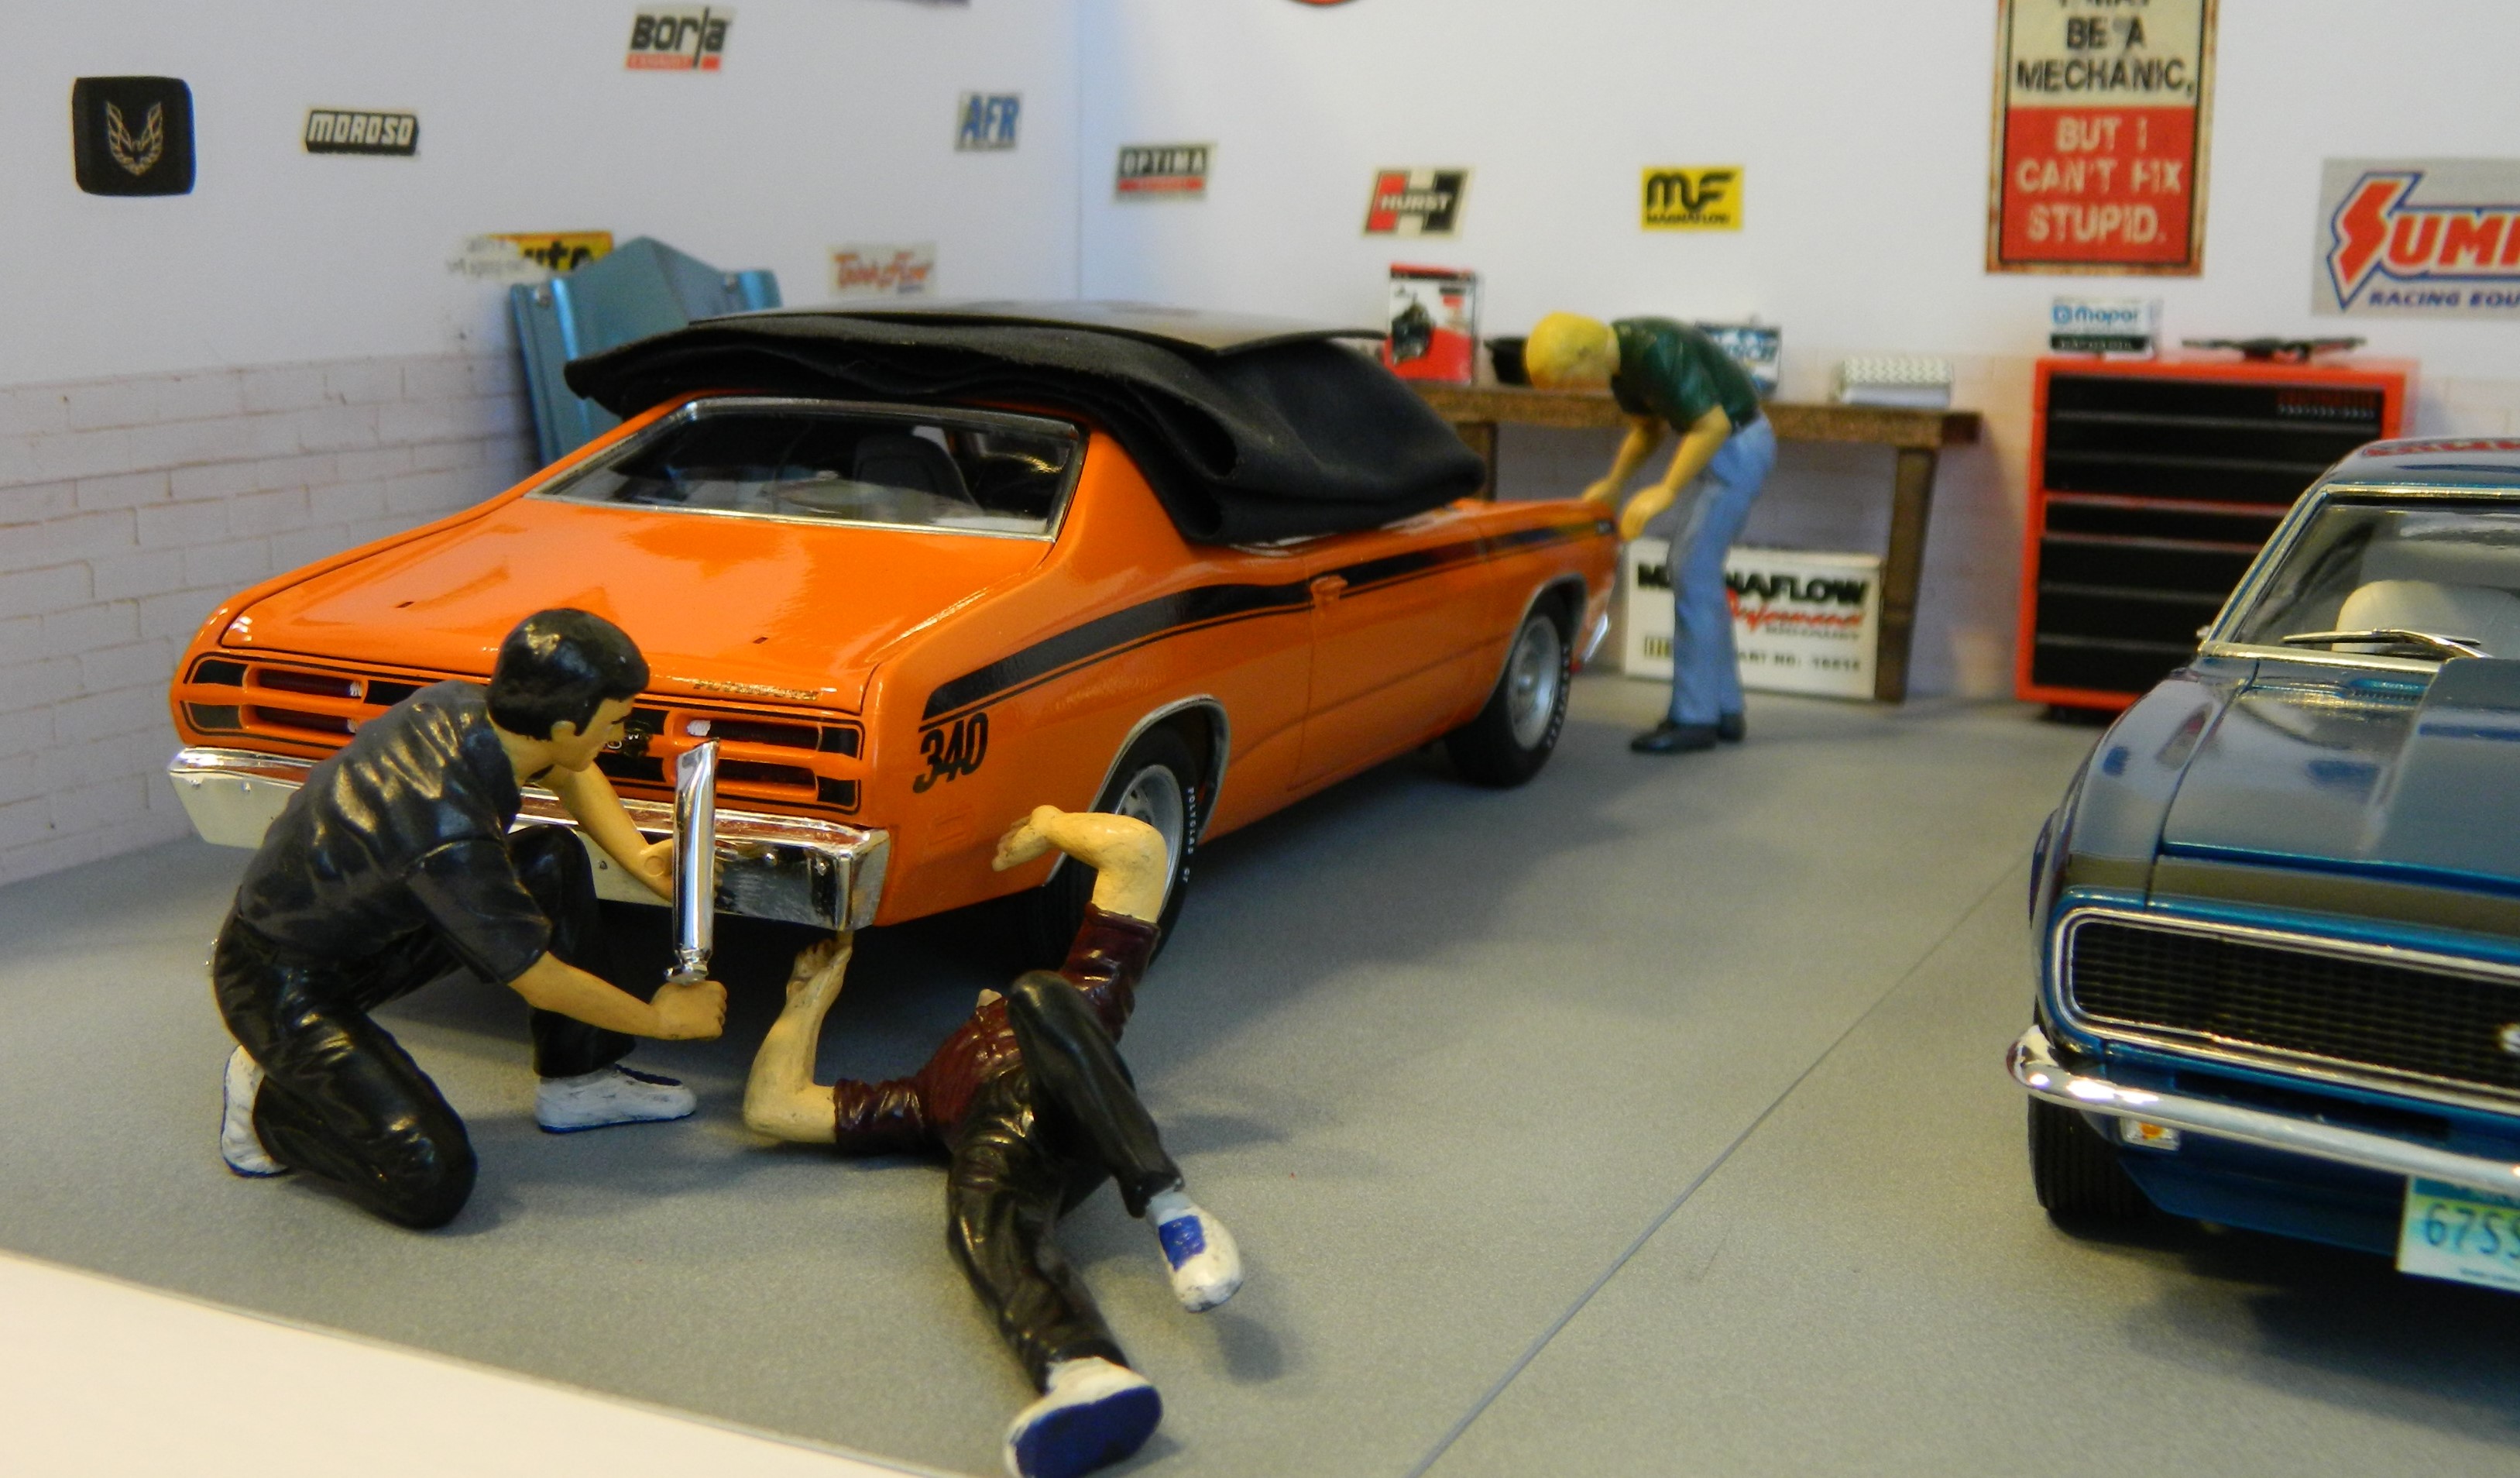
CM had been spending a lot of time on his '71 Plymouth Duster trying to get it finished for the local weekend car show and was worried he might not get everything done. So he called up his buddies Craig and Flash to give him a hand, and even though they're true to their Ford's and Chevy's, they were more than happy to help their buddy out with his Mopar. Although CM didn't really need to, he decided to bribe them with beer and pizza for their time and efforts. Flash stopped at the donut shop on the way over because beer and pizza just wasn't enough, and Craig brought some extra shop towels because he just isn't happy unless he's spilling something and making a mess.

-

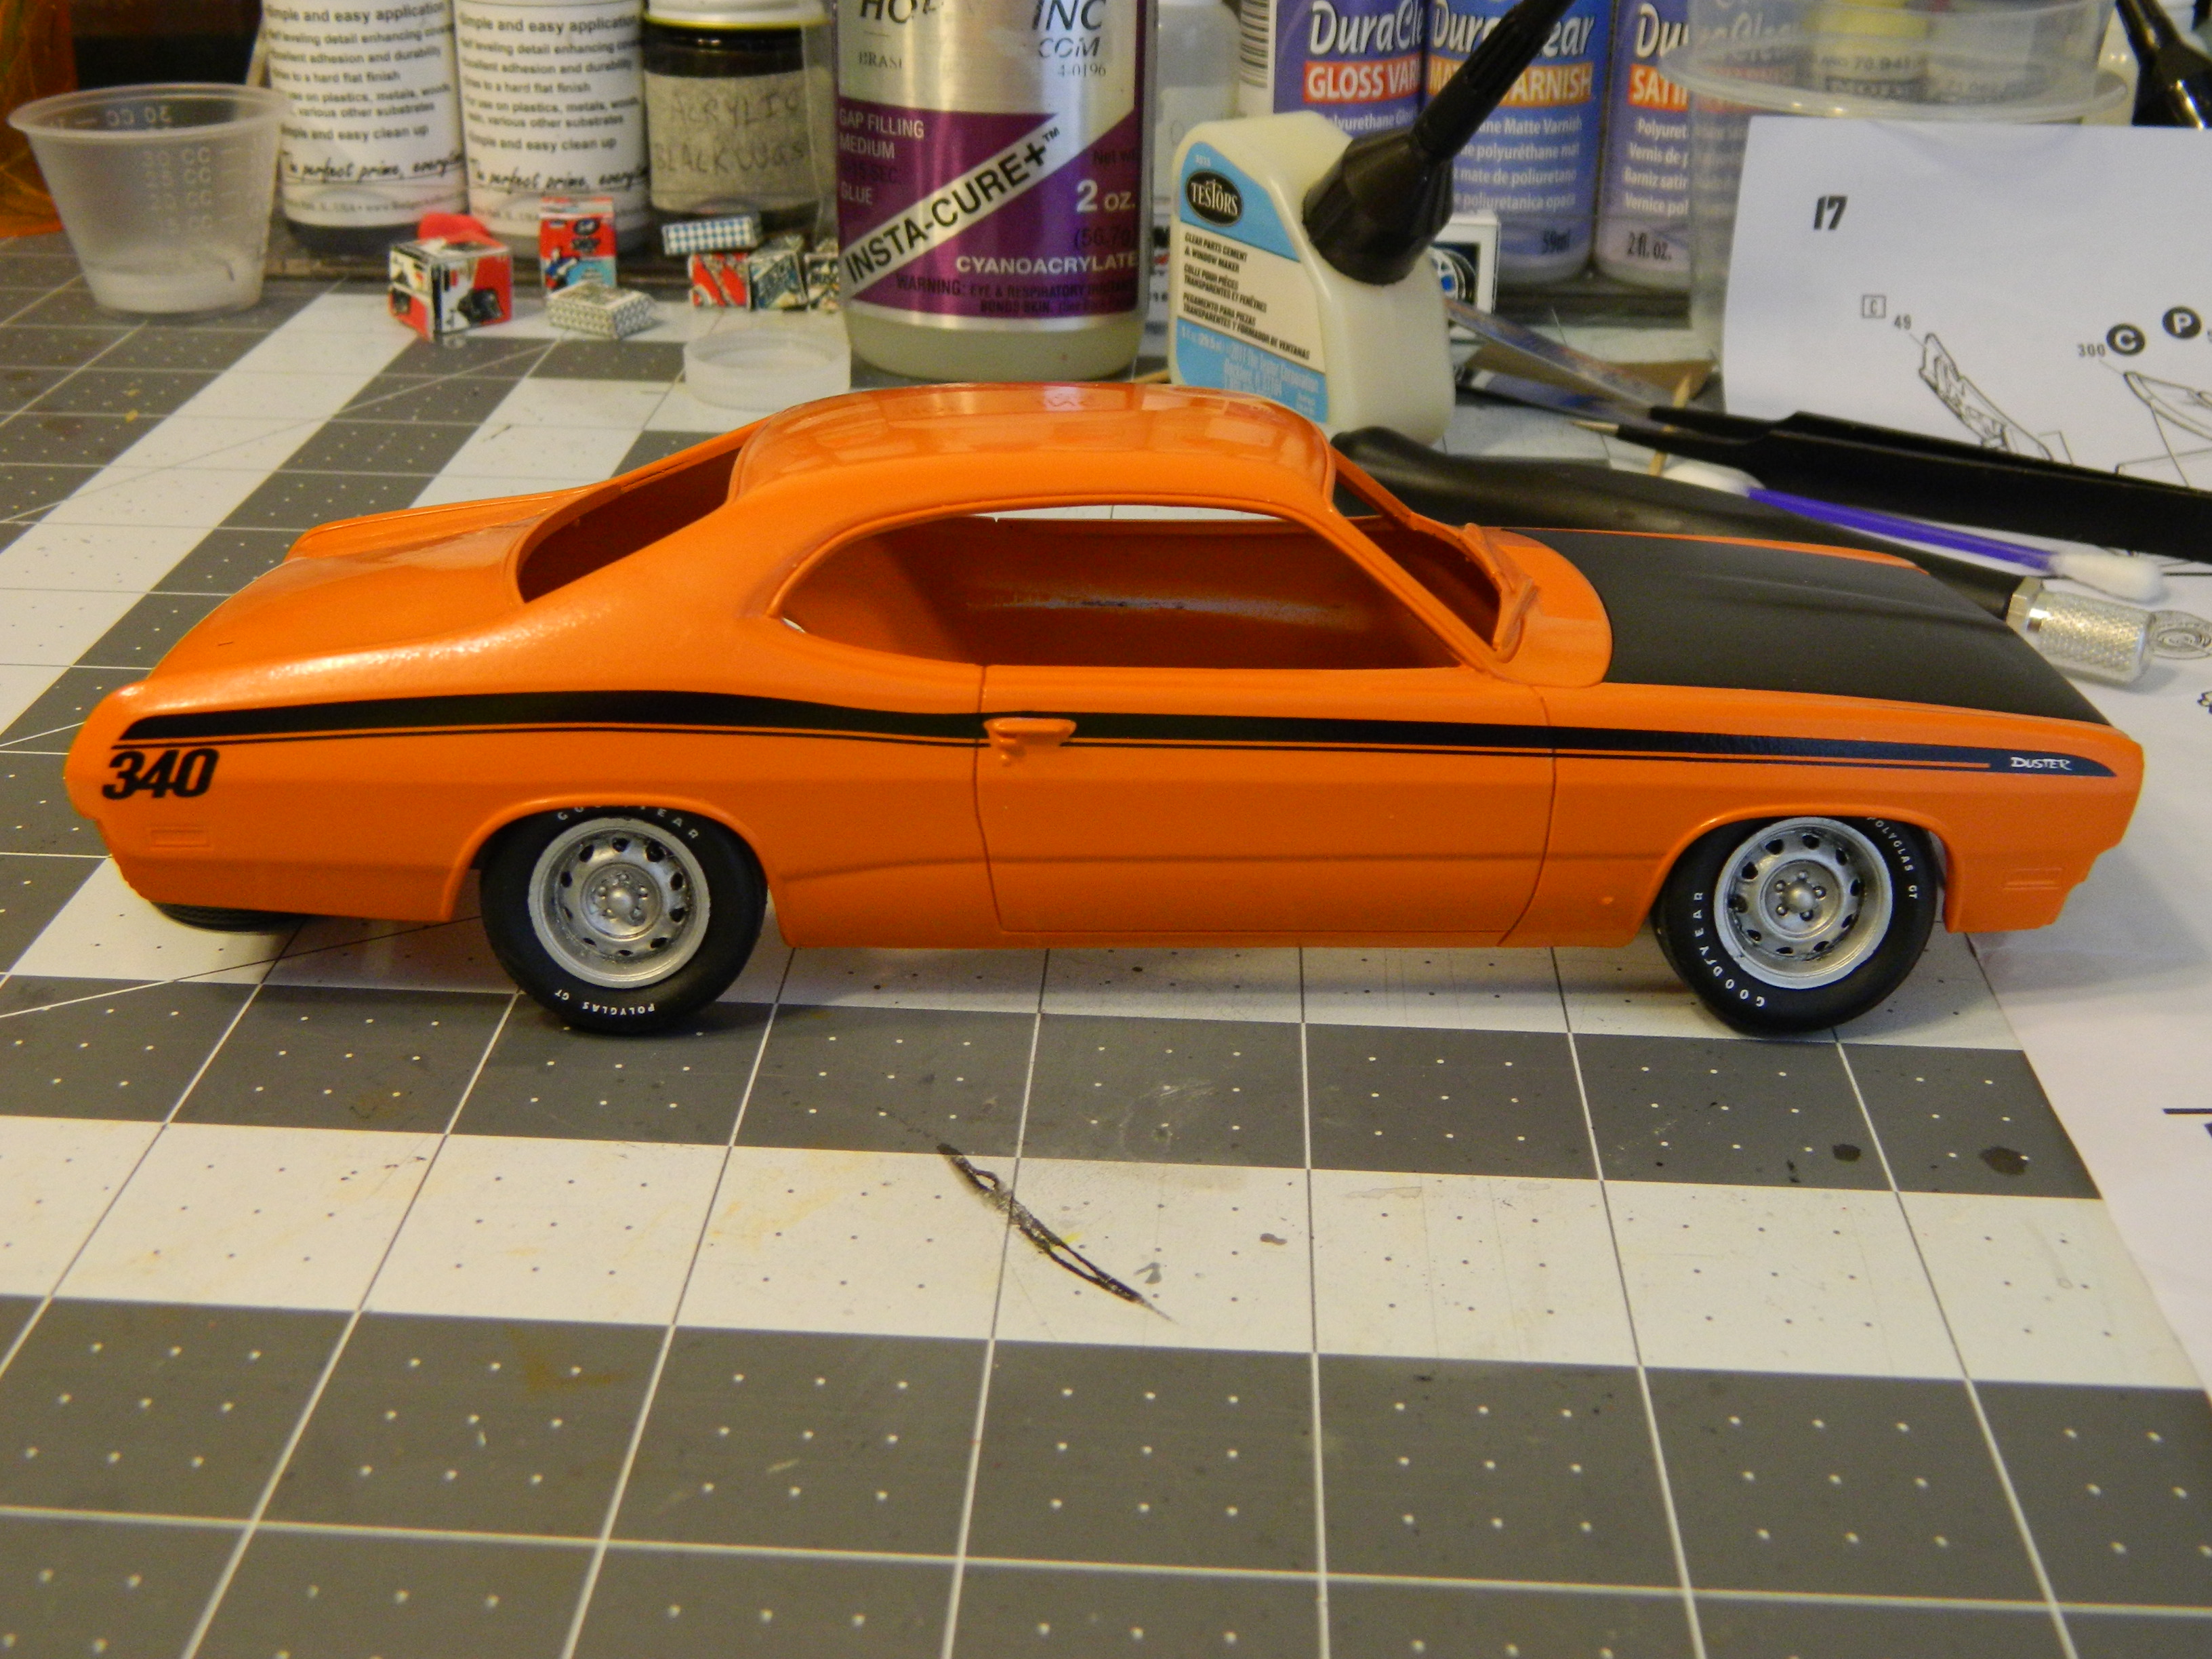
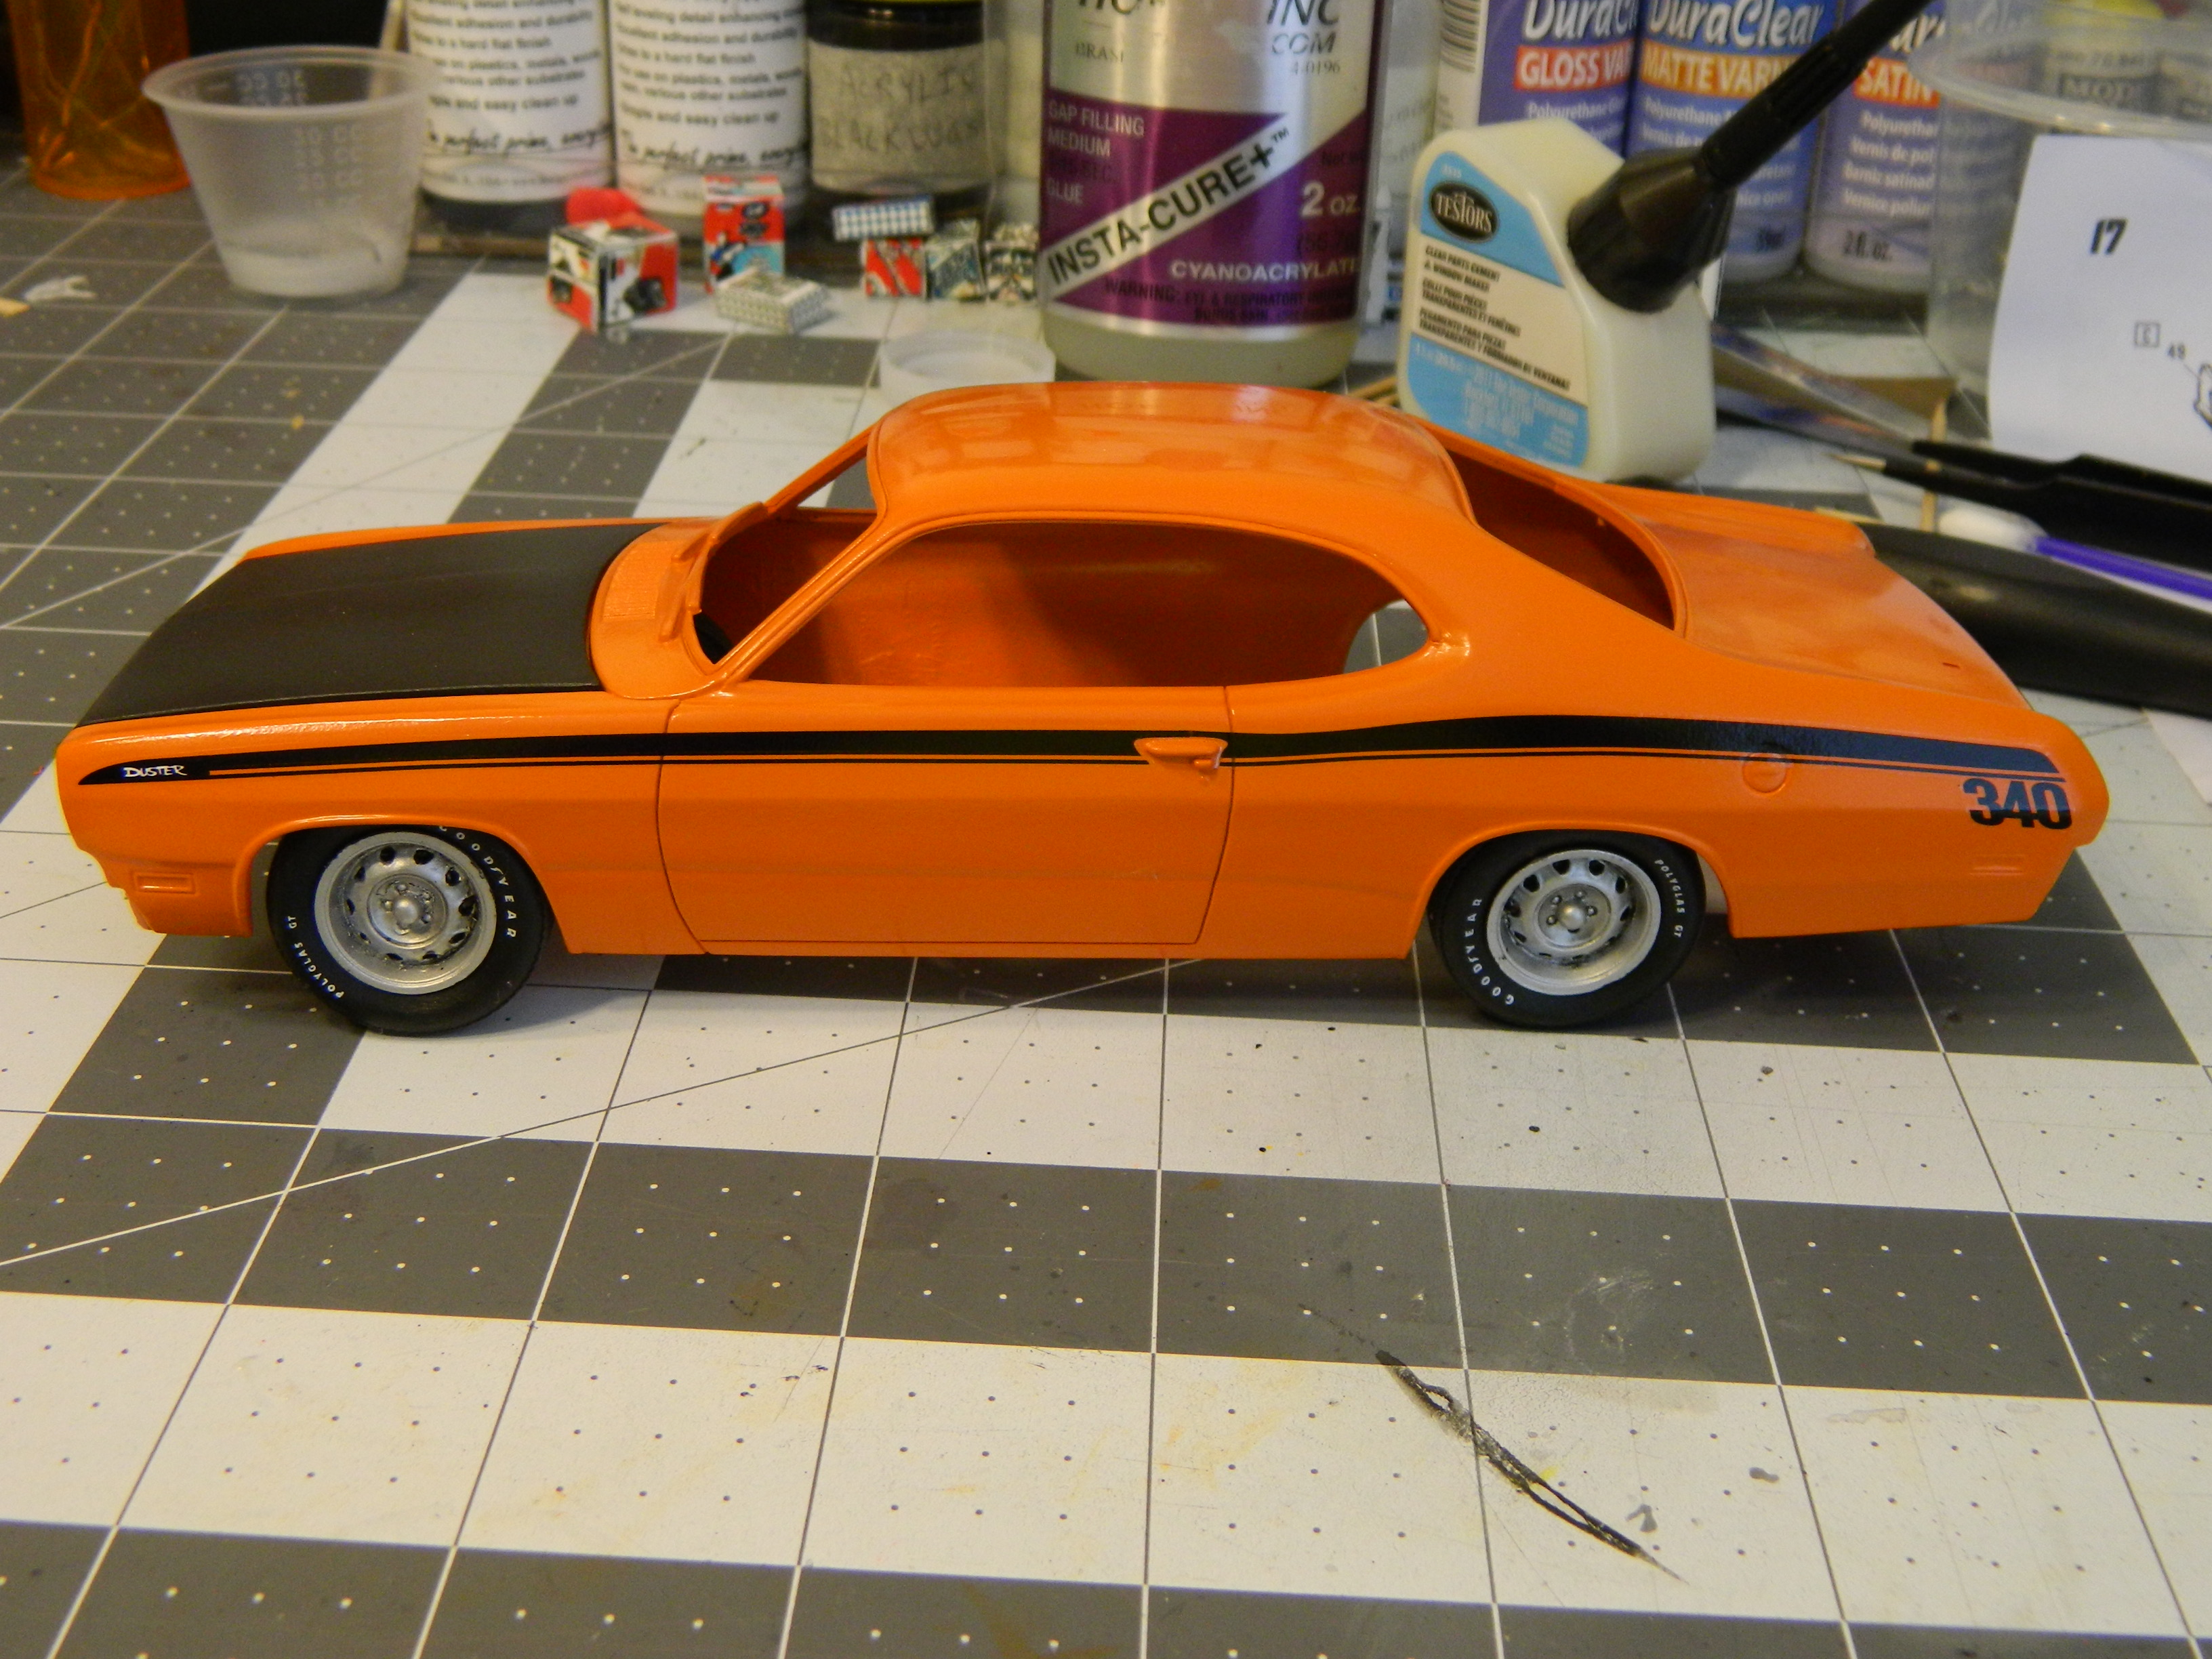
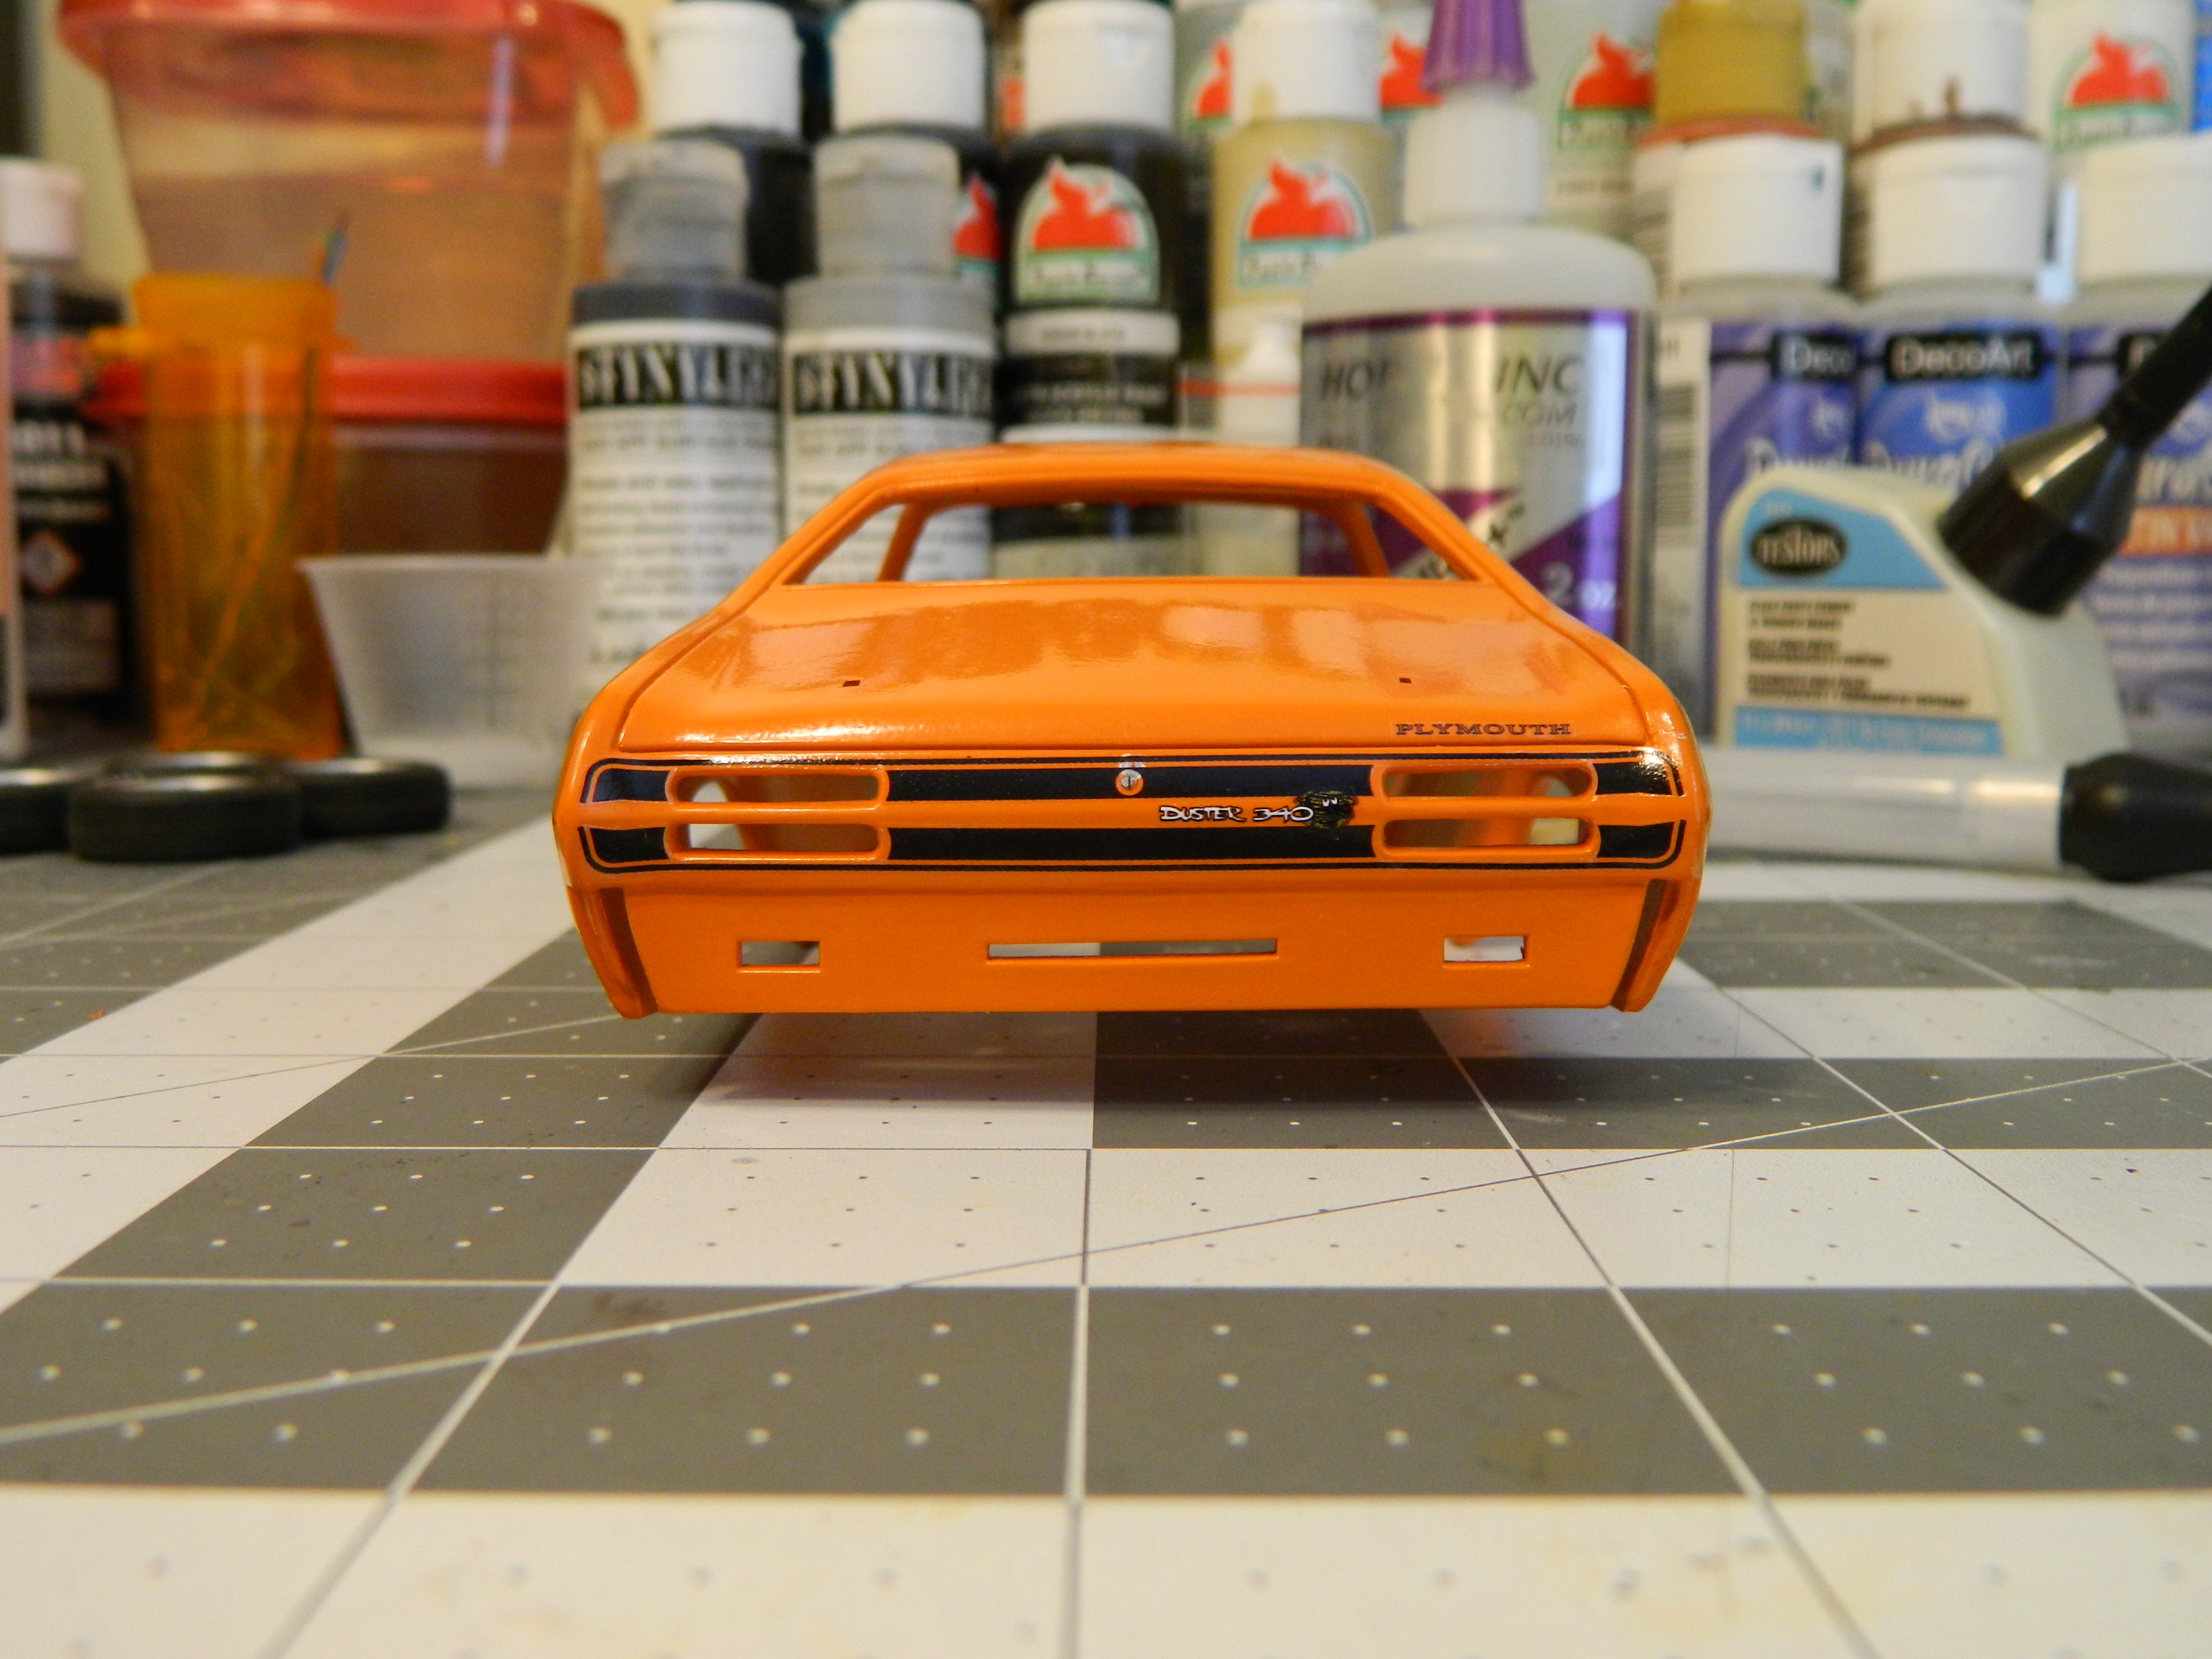
AMT 1971 Plymouth Duster 340. Go Mango Orange.
Dragonhawk1066 replied to Dragonhawk1066's topic in WIP: Model Cars
CM had been spending a lot of time on his '71 Plymouth Duster trying to get it finished for the local weekend car show and was worried he might not get everything done. So he called up his buddies Craig and Flash to give him a hand, and even though they're true to their Ford's and Chevy's, they were more than happy to help their buddy out with his Mopar. Although CM didn't really need to, he decided to bribe them with beer and pizza for their time and efforts. Flash stopped at the donut shop on the way over because beer and pizza just wasn't enough, and Craig brought some extra shop towels because he just isn't happy unless he's spilling something and making a mess.
-
Well done!!
-
Looks good! I love that generation Camaro in Pro Stock form.
-
Nice paint work!!
-
Sweet looking combo!! Really nice paint work, well done!!
-
AMT 1971 Plymouth Duster 340. Go Mango Orange.
Dragonhawk1066 replied to Dragonhawk1066's topic in WIP: Model Cars
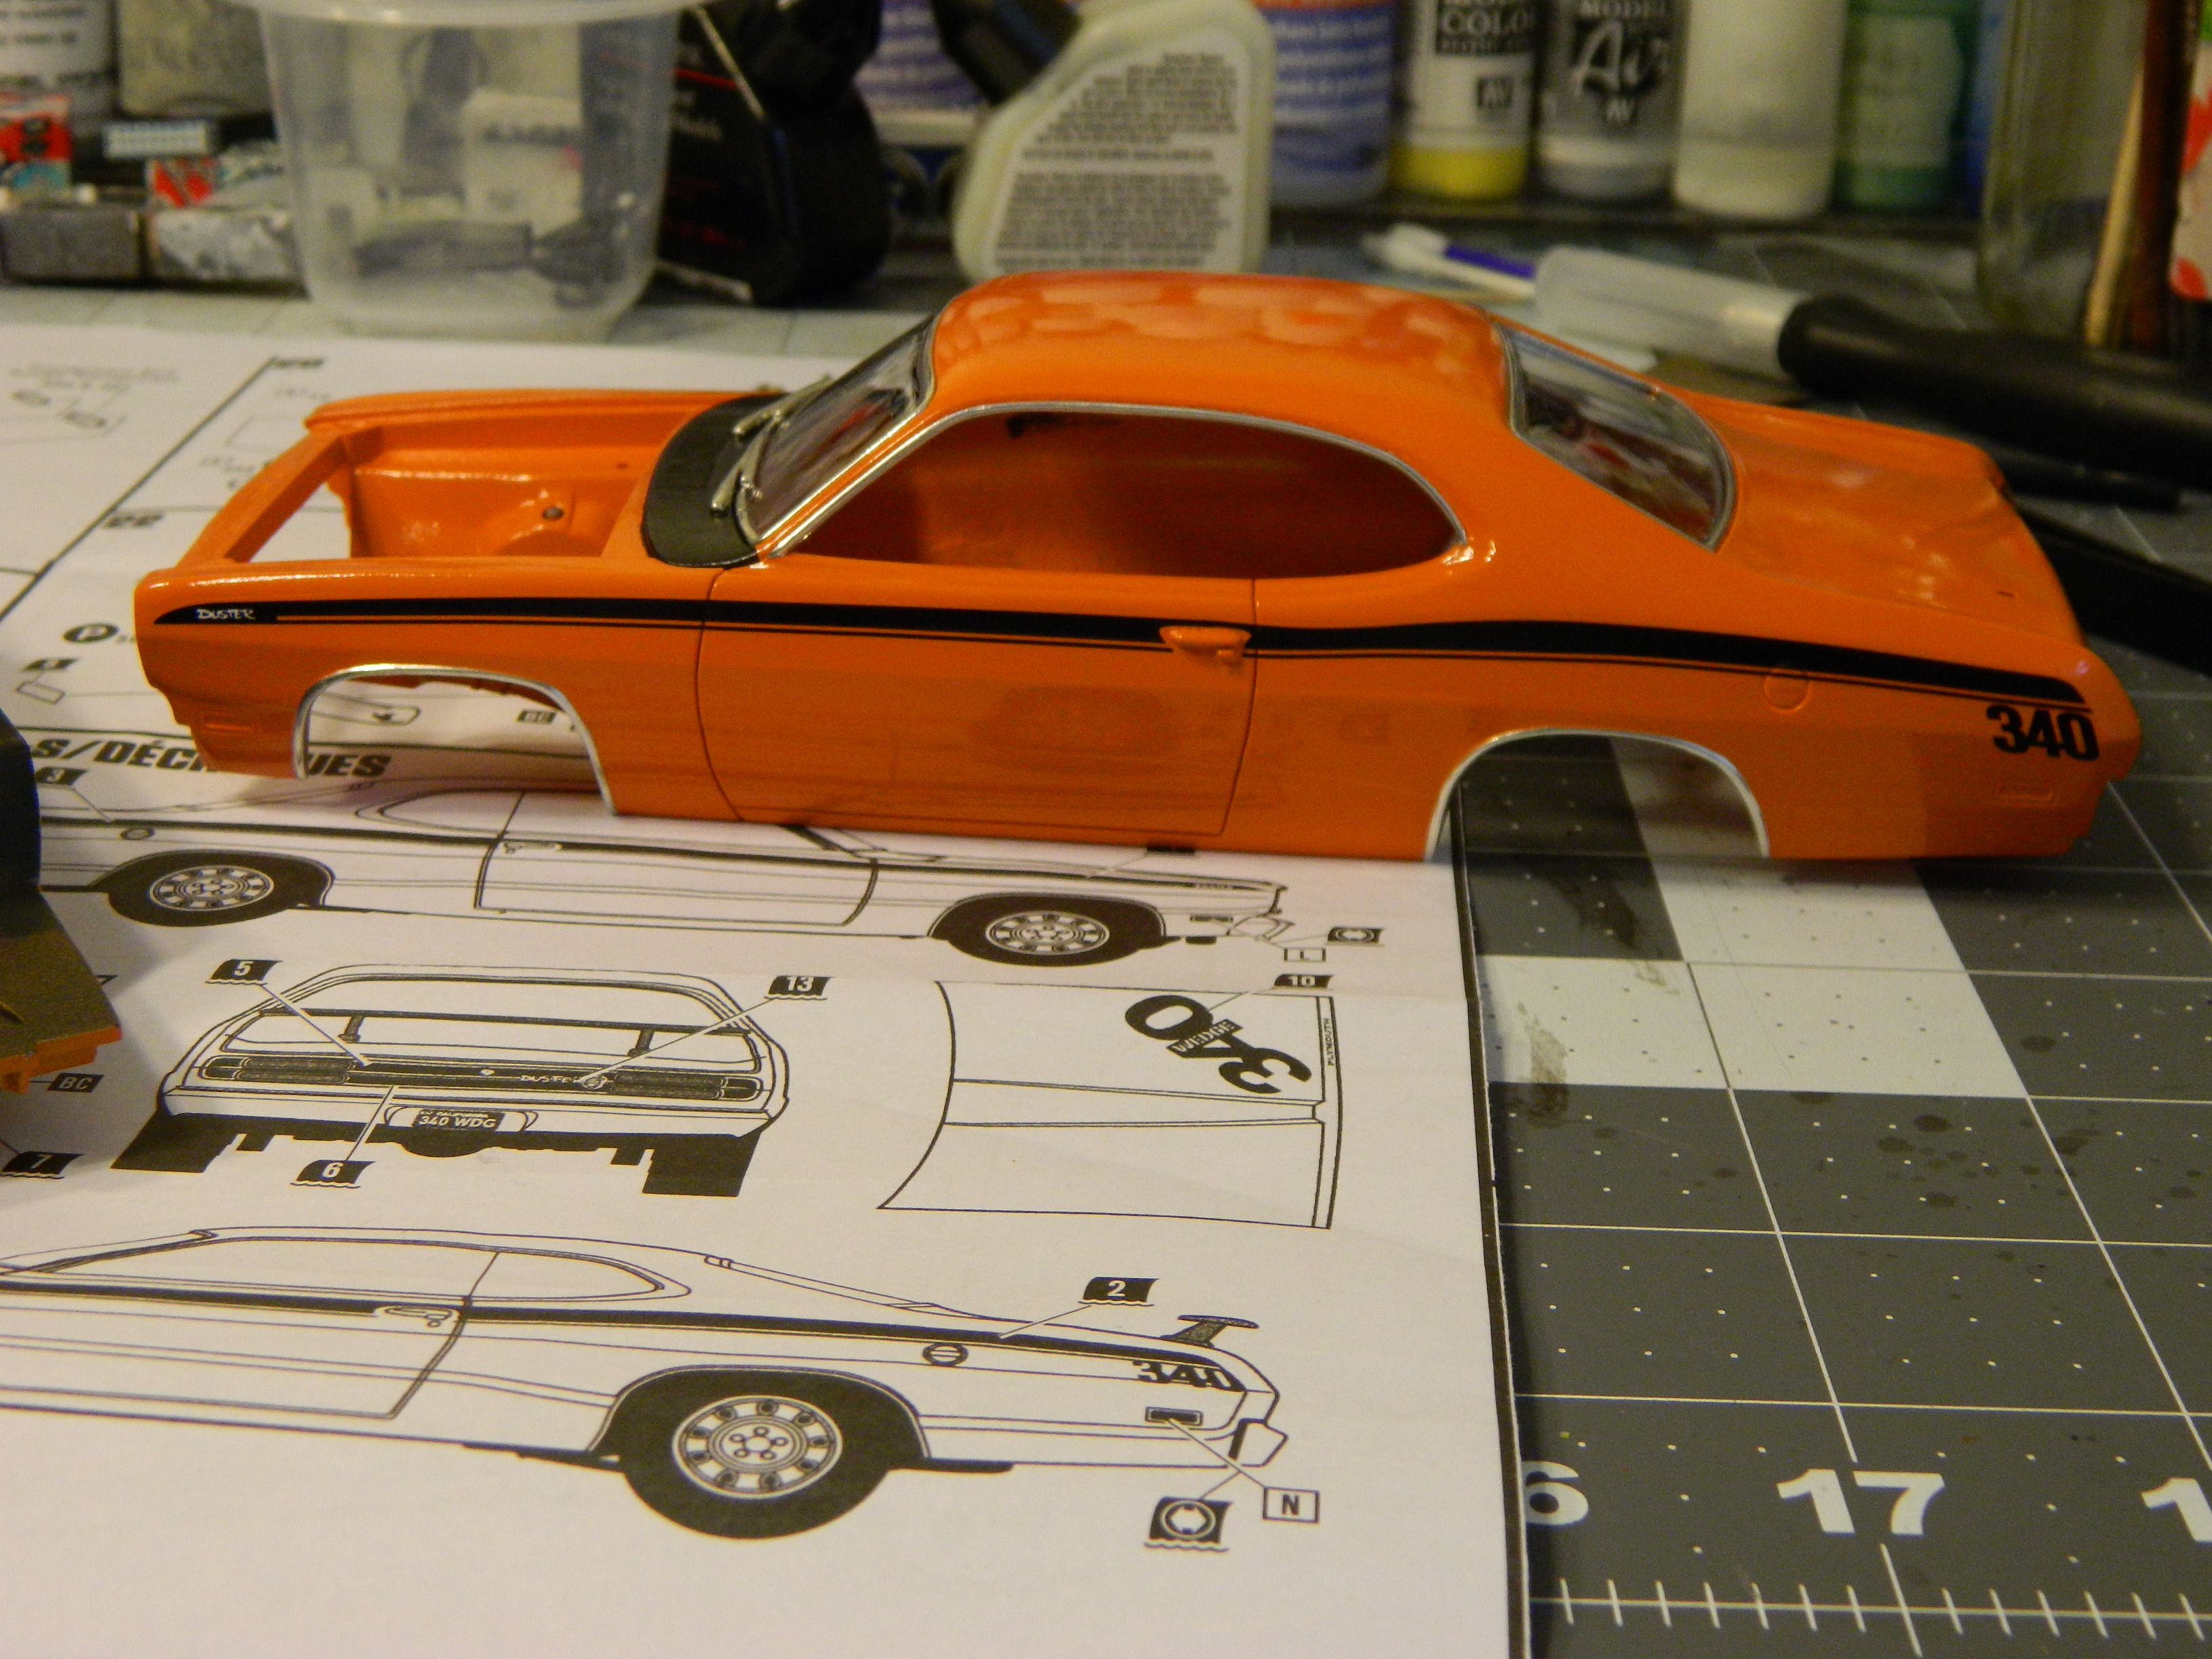
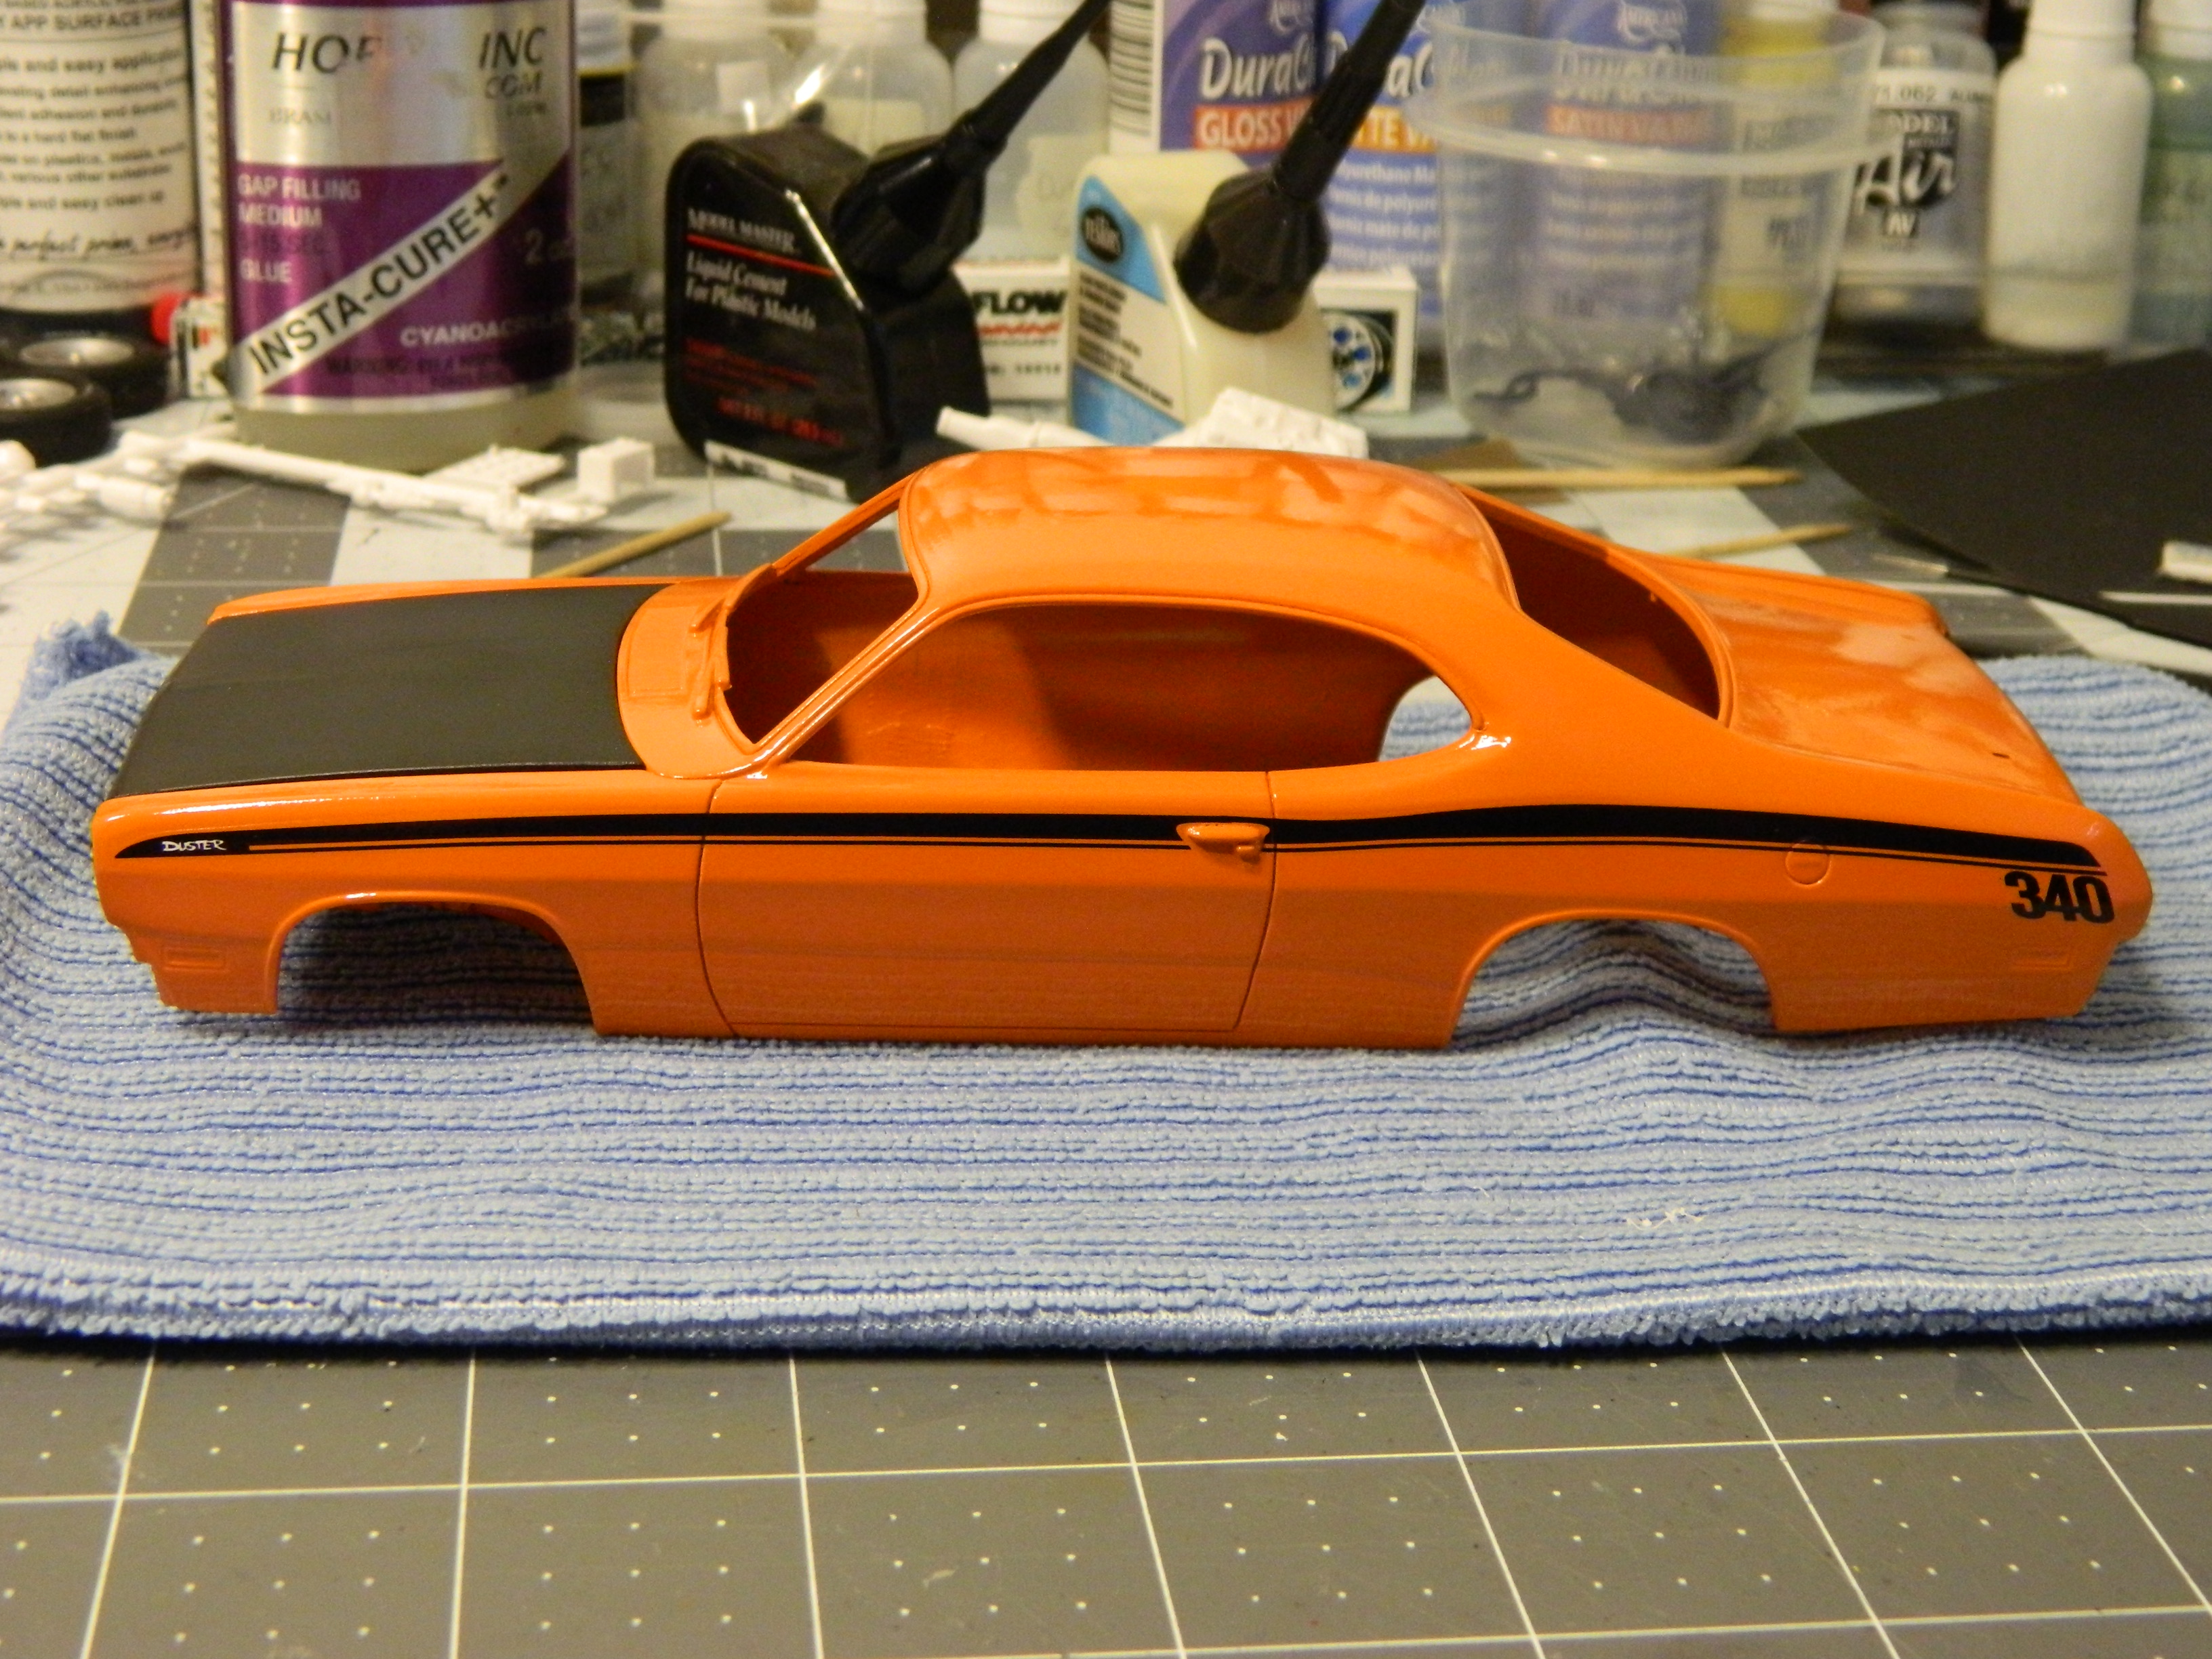
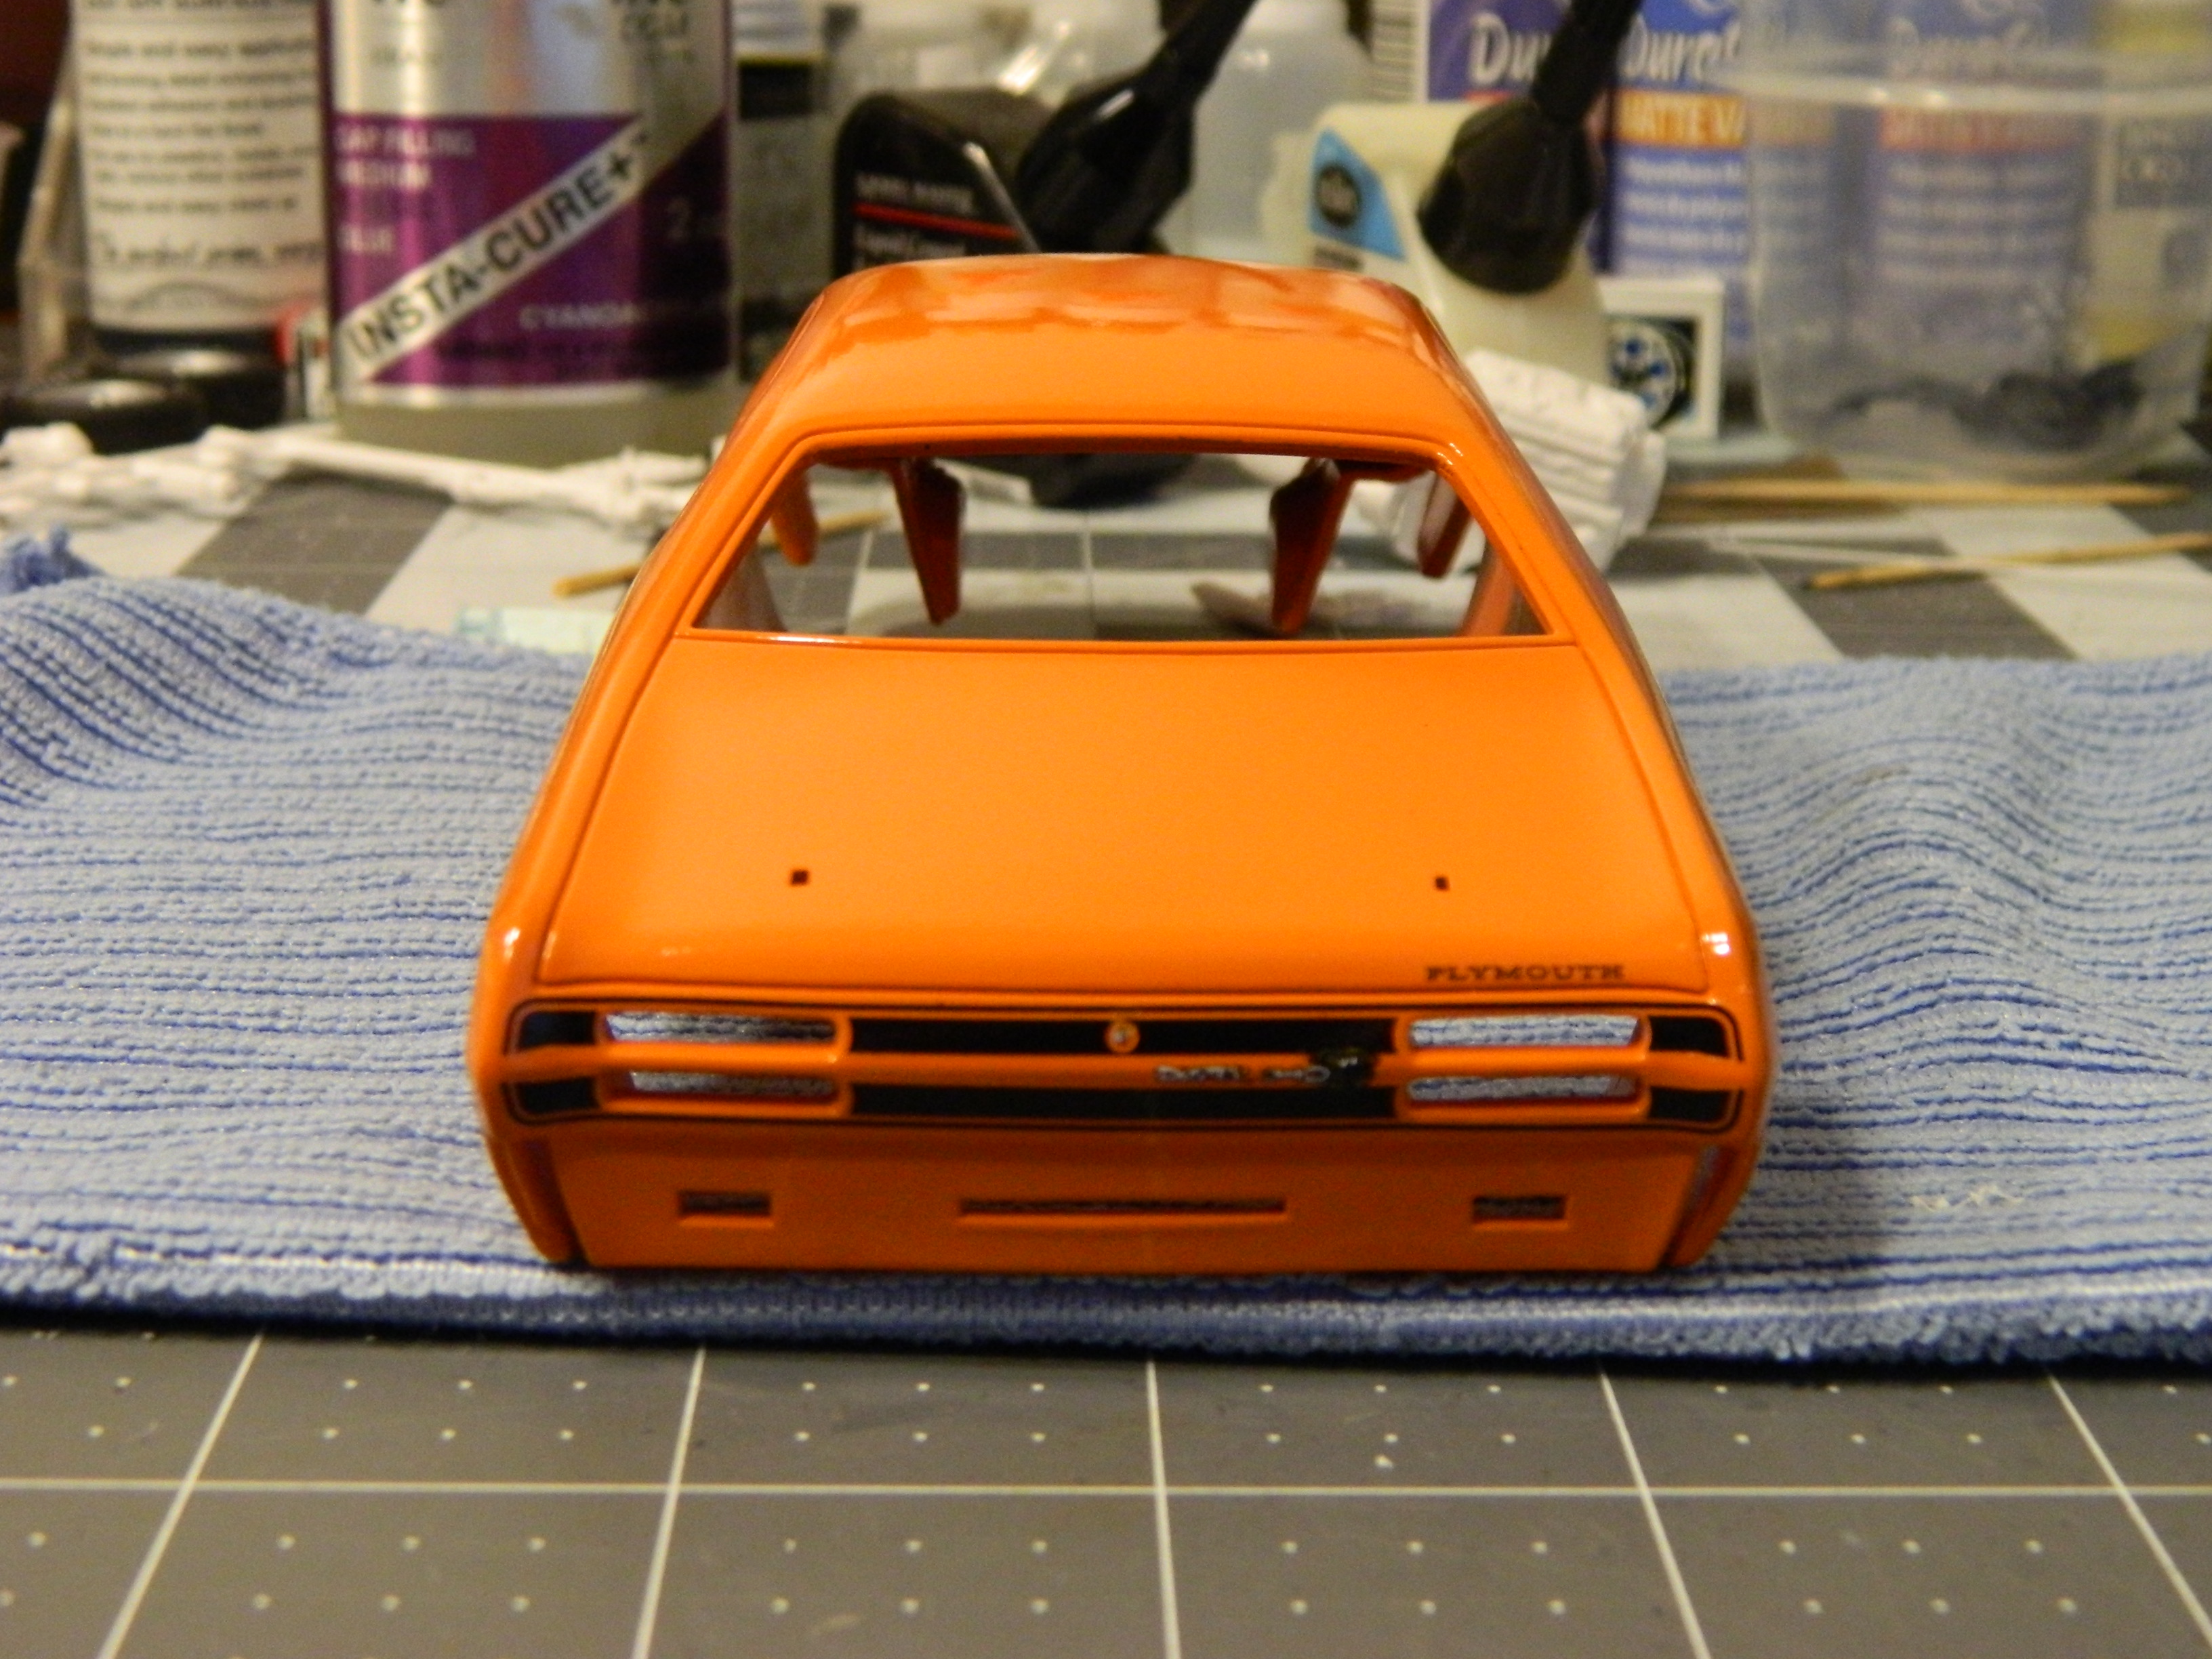
I tried to paint the black around the windows and on top of the doors and fenders, but the tape started pulling off the clear. I noticed it around the passenger side door right at the stripe decal as I was trying to get the tape aligned. I decided to carefully remove the rest of the tape and just paint the cowl area black to match the hood. I'm a little bummed, but I still like how it looks. I've had trouble with tape lifting the Model Master clear before, so maybe it's not such a bad thing it's no longer being manufactured. Since I wasn't painting around the trim, I went ahead and foiled the trim today too, and after that I installed the glass. Next up is polishing with Novus #2 and a coat of wax before final assembly. I also haven't heard from Round 2 yet about my missing part claim, so I think I might have to make a "wanted" post for the spoiler pedestal.
-
AMT 1971 Plymouth Duster 340. Go Mango Orange.
Dragonhawk1066 replied to Dragonhawk1066's topic in WIP: Model Cars
I got a nice little break in the weather yesterday and sprayed the clear on. I have to say it looks pretty darned good. I'll let it set for a couple of days before taping off to spray the black. Kind of makes me kick myself for being a little complacent on the '68 Chevelle I did before this one. I thought it looked good enough to not wet-sand the paint before clear when I really should have. Oh well, live and learn no more short cuts, but I'm very happy with it and very happy with this one so far.
-
AMT 1971 Plymouth Duster 340. Go Mango Orange.
Dragonhawk1066 replied to Dragonhawk1066's topic in WIP: Model Cars
Pretty cool reflection in the window, eh? LOL. I didn't really notice that when I first found the pic on Google, but it's a pretty cool effect. I've only seen a couple of Duster's with the 500's, and on one they're a little oversized, like maybe 16 or 17", but it's really a good look. -
What's the best 1/25 1966 Batmobile kit?
Dragonhawk1066 replied to crowe-t's topic in Car Kit News & Reviews
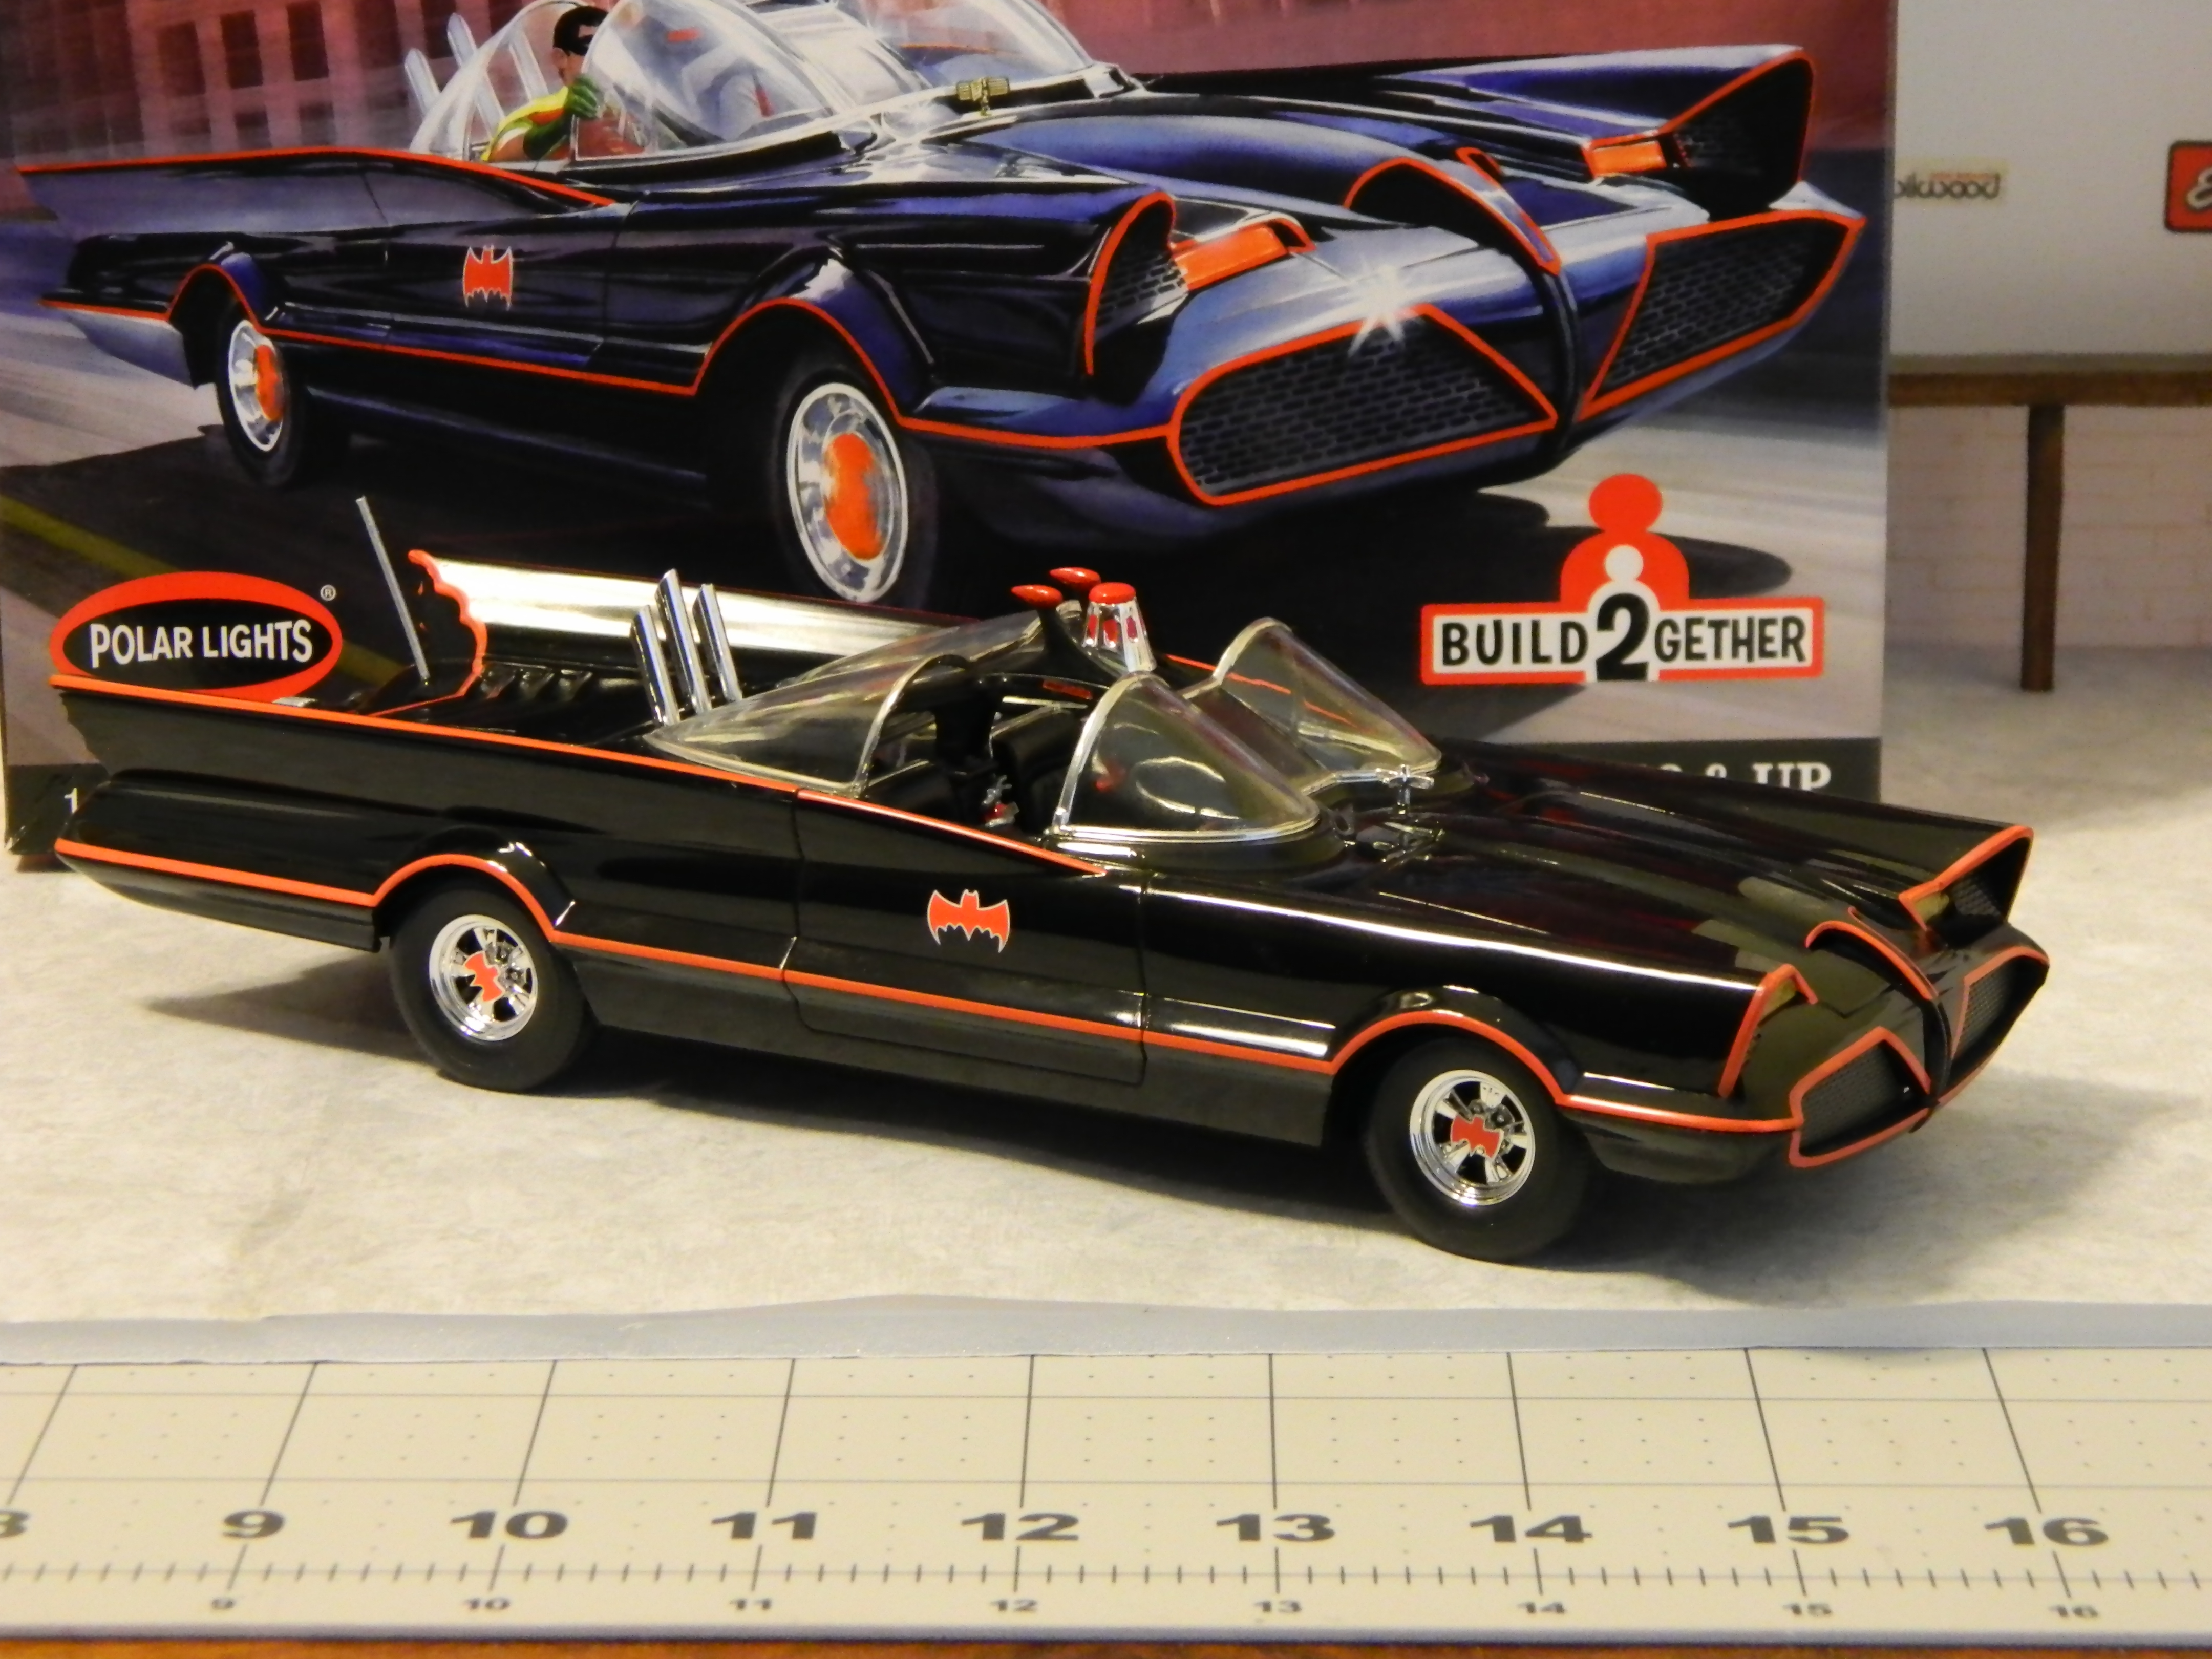
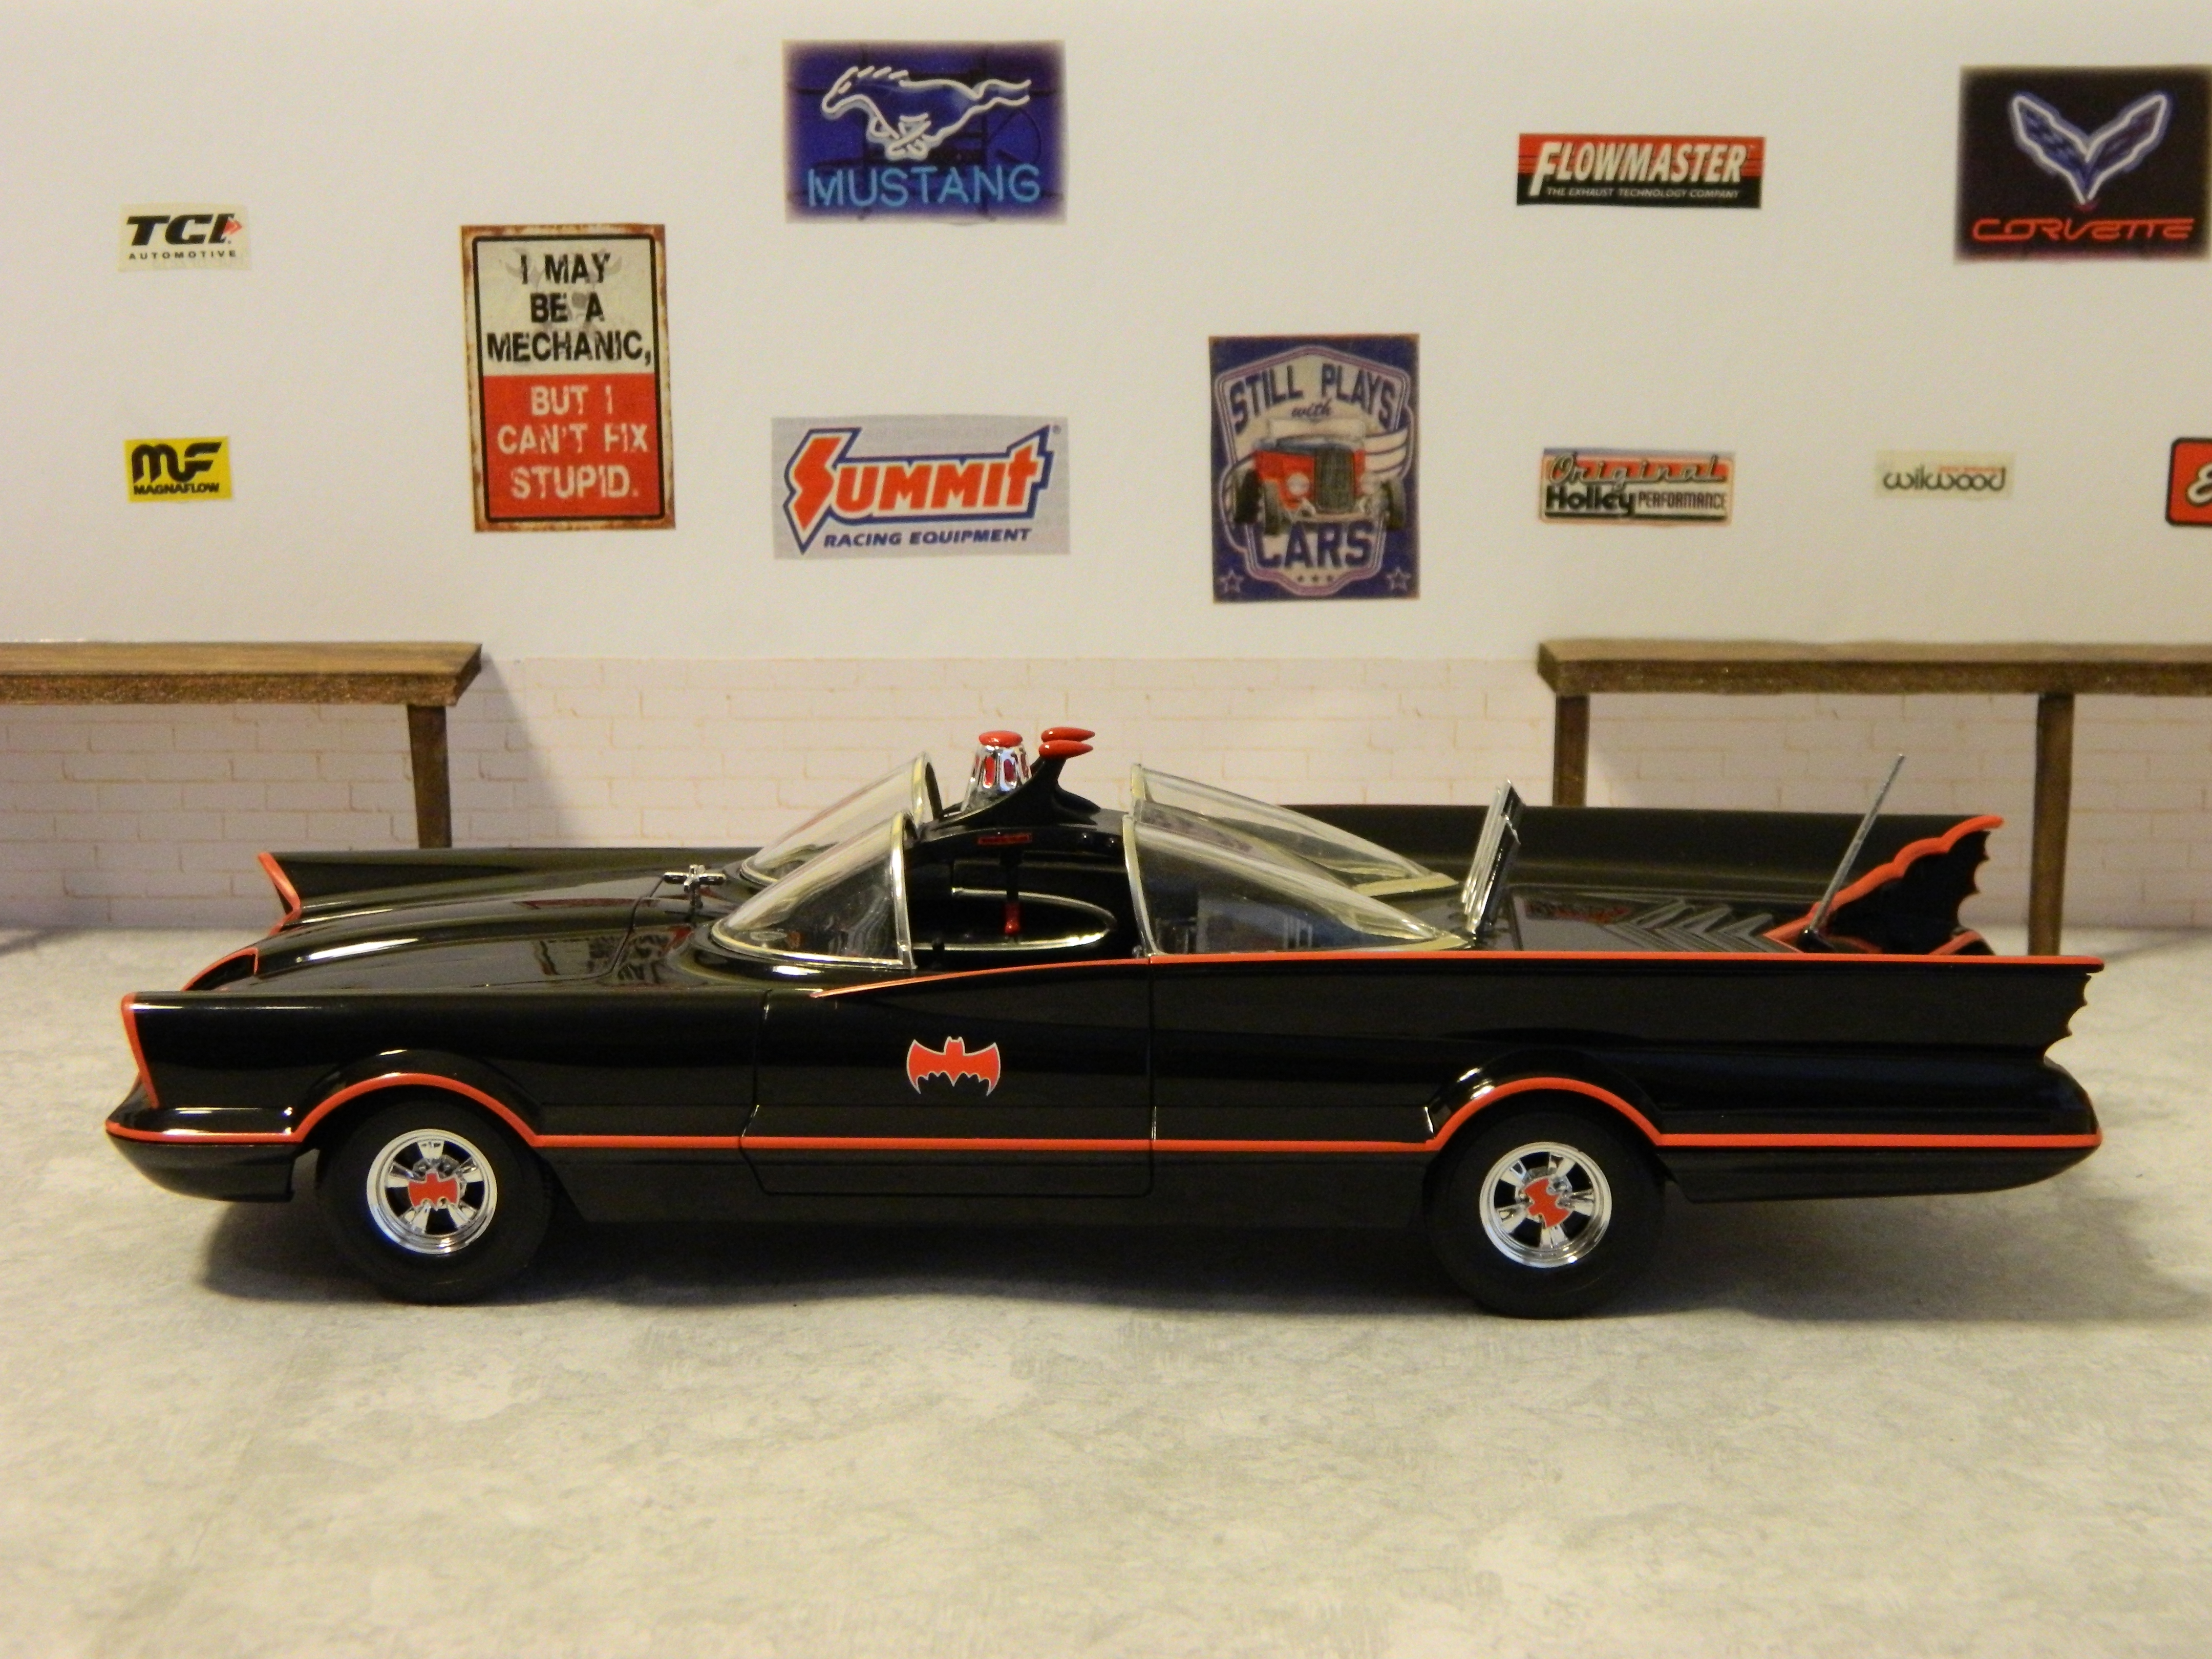
I got the Polar Lights Build 2gether dual kit a couple of years ago. It includes the pre-painted snap version and the glue version. I don't think it came with photoetch and unfortunately no figures☹️. I've only built the snap kit so far, but it's a really nice piece and looks great to me.
-
AMT 1971 Plymouth Duster 340. Go Mango Orange.
Dragonhawk1066 replied to Dragonhawk1066's topic in WIP: Model Cars
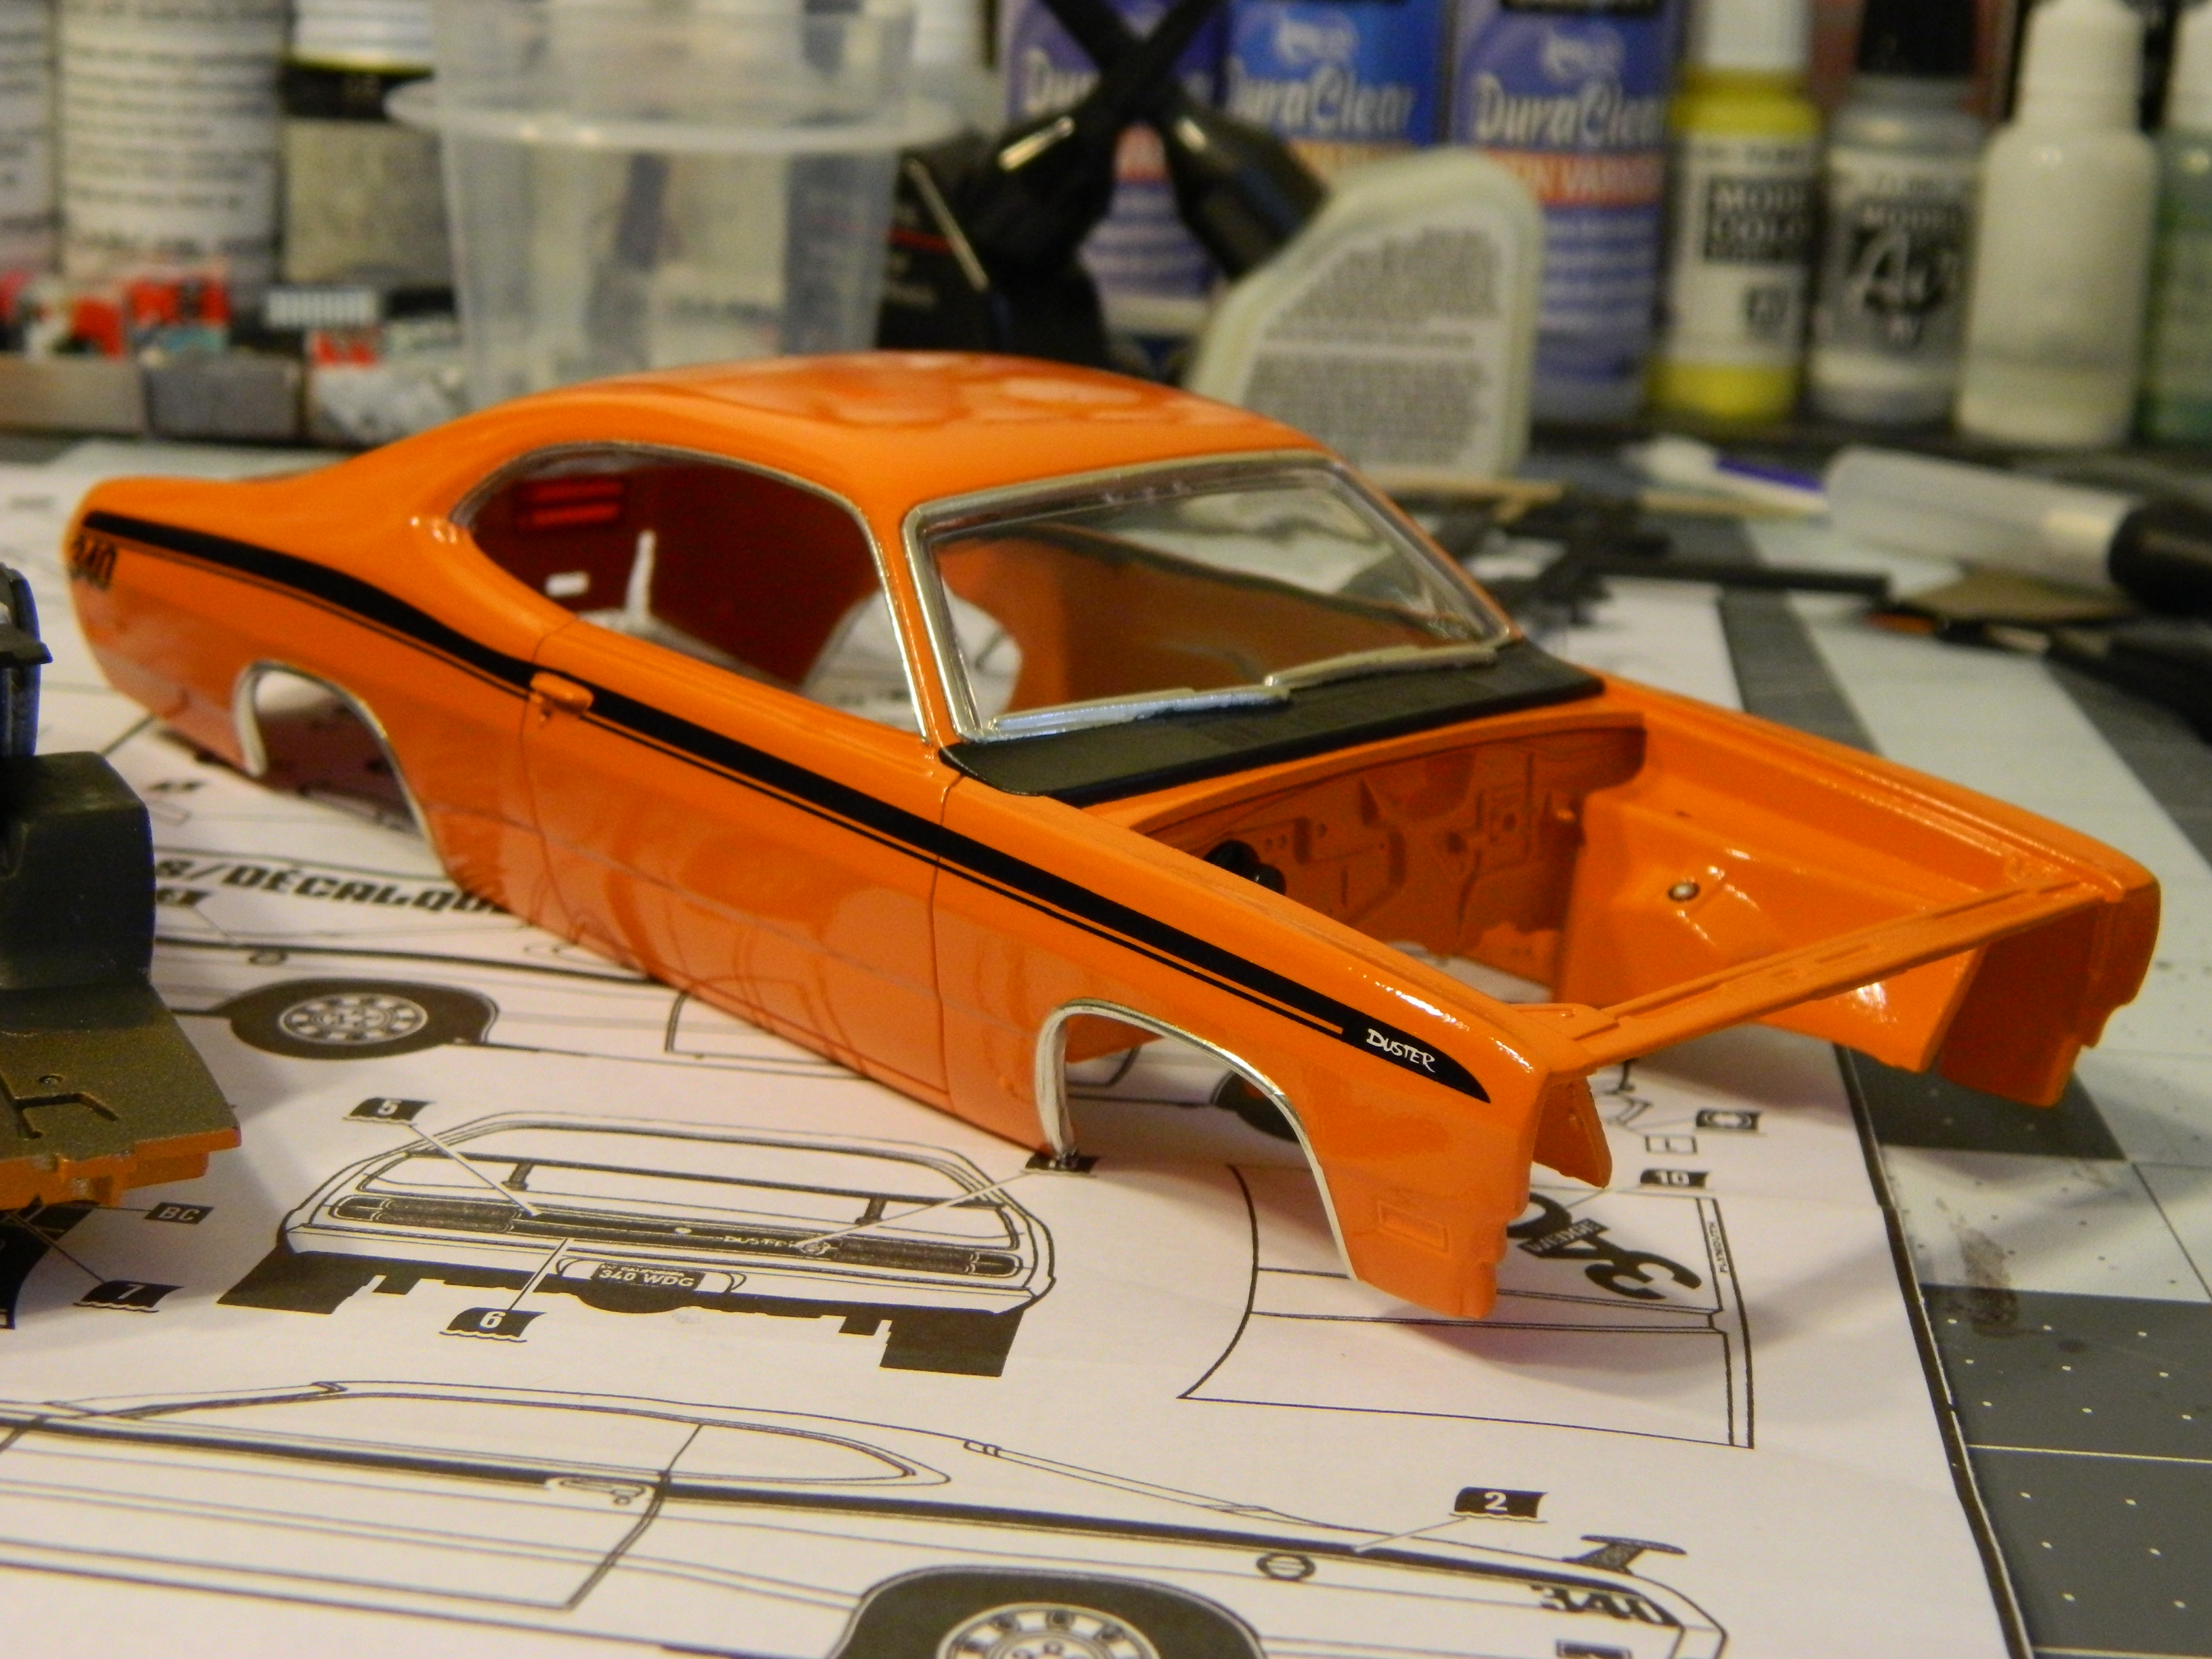
I went ahead and put the decals on this morning. Hopefully I can get the clear on tomorrow. A few days after that I'll tape off the areas for the cowl, around the door windows, and top of the fenders to be painted satin black, and then lay down some satin clear while it's still taped off.
-
AMT 1971 Plymouth Duster 340. Go Mango Orange.
Dragonhawk1066 replied to Dragonhawk1066's topic in WIP: Model Cars
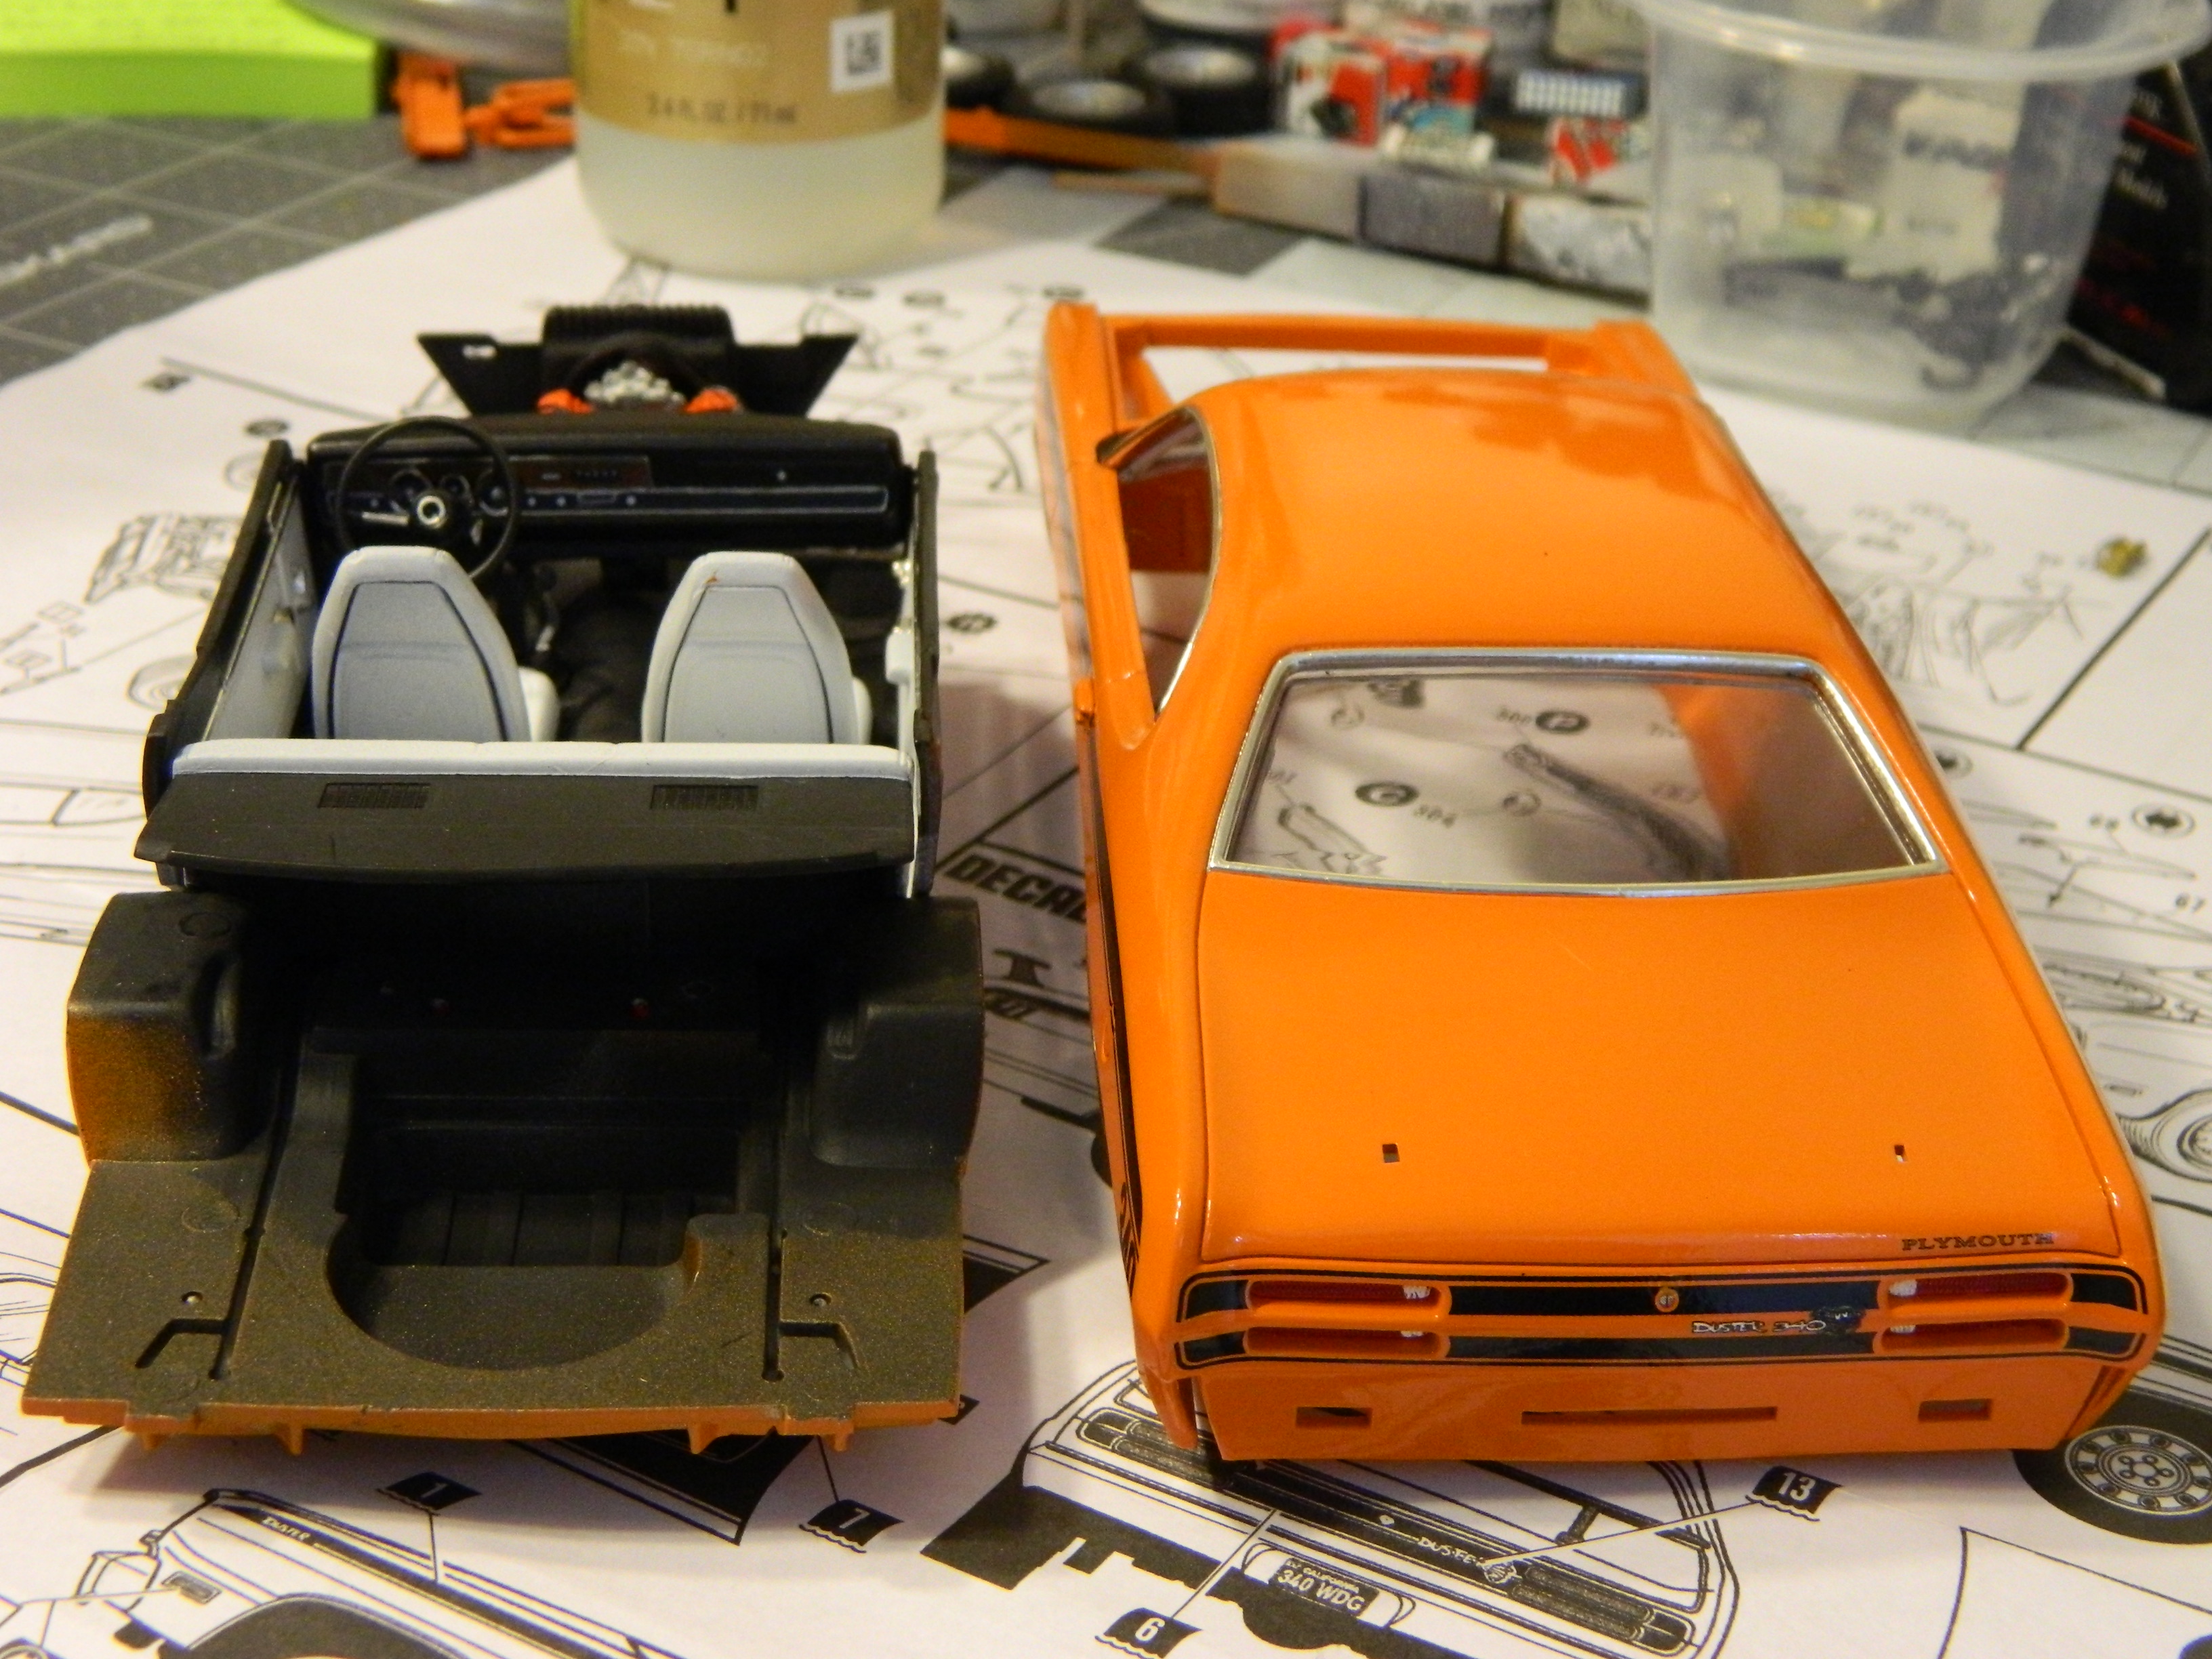
Thanks again for the tip, I removed the piece from the bottom of the windshield, then did a test fit and everything fits perfectly (hope I didn't jinx it for final assembly, lol), and I did see where there would have been a problem. I may have to do the same to the rear window (I didn't have that one in for test fit). -
Looks good! I agree with Eric and Lee, this could be your best yet.
-
Well done! I like the color choice! I bought two of these last October with the plan to do one as Dom's and one factory stock, but I think I'll be doing both as factory stock.
-
AMT 1971 Plymouth Duster 340. Go Mango Orange.
Dragonhawk1066 replied to Dragonhawk1066's topic in WIP: Model Cars
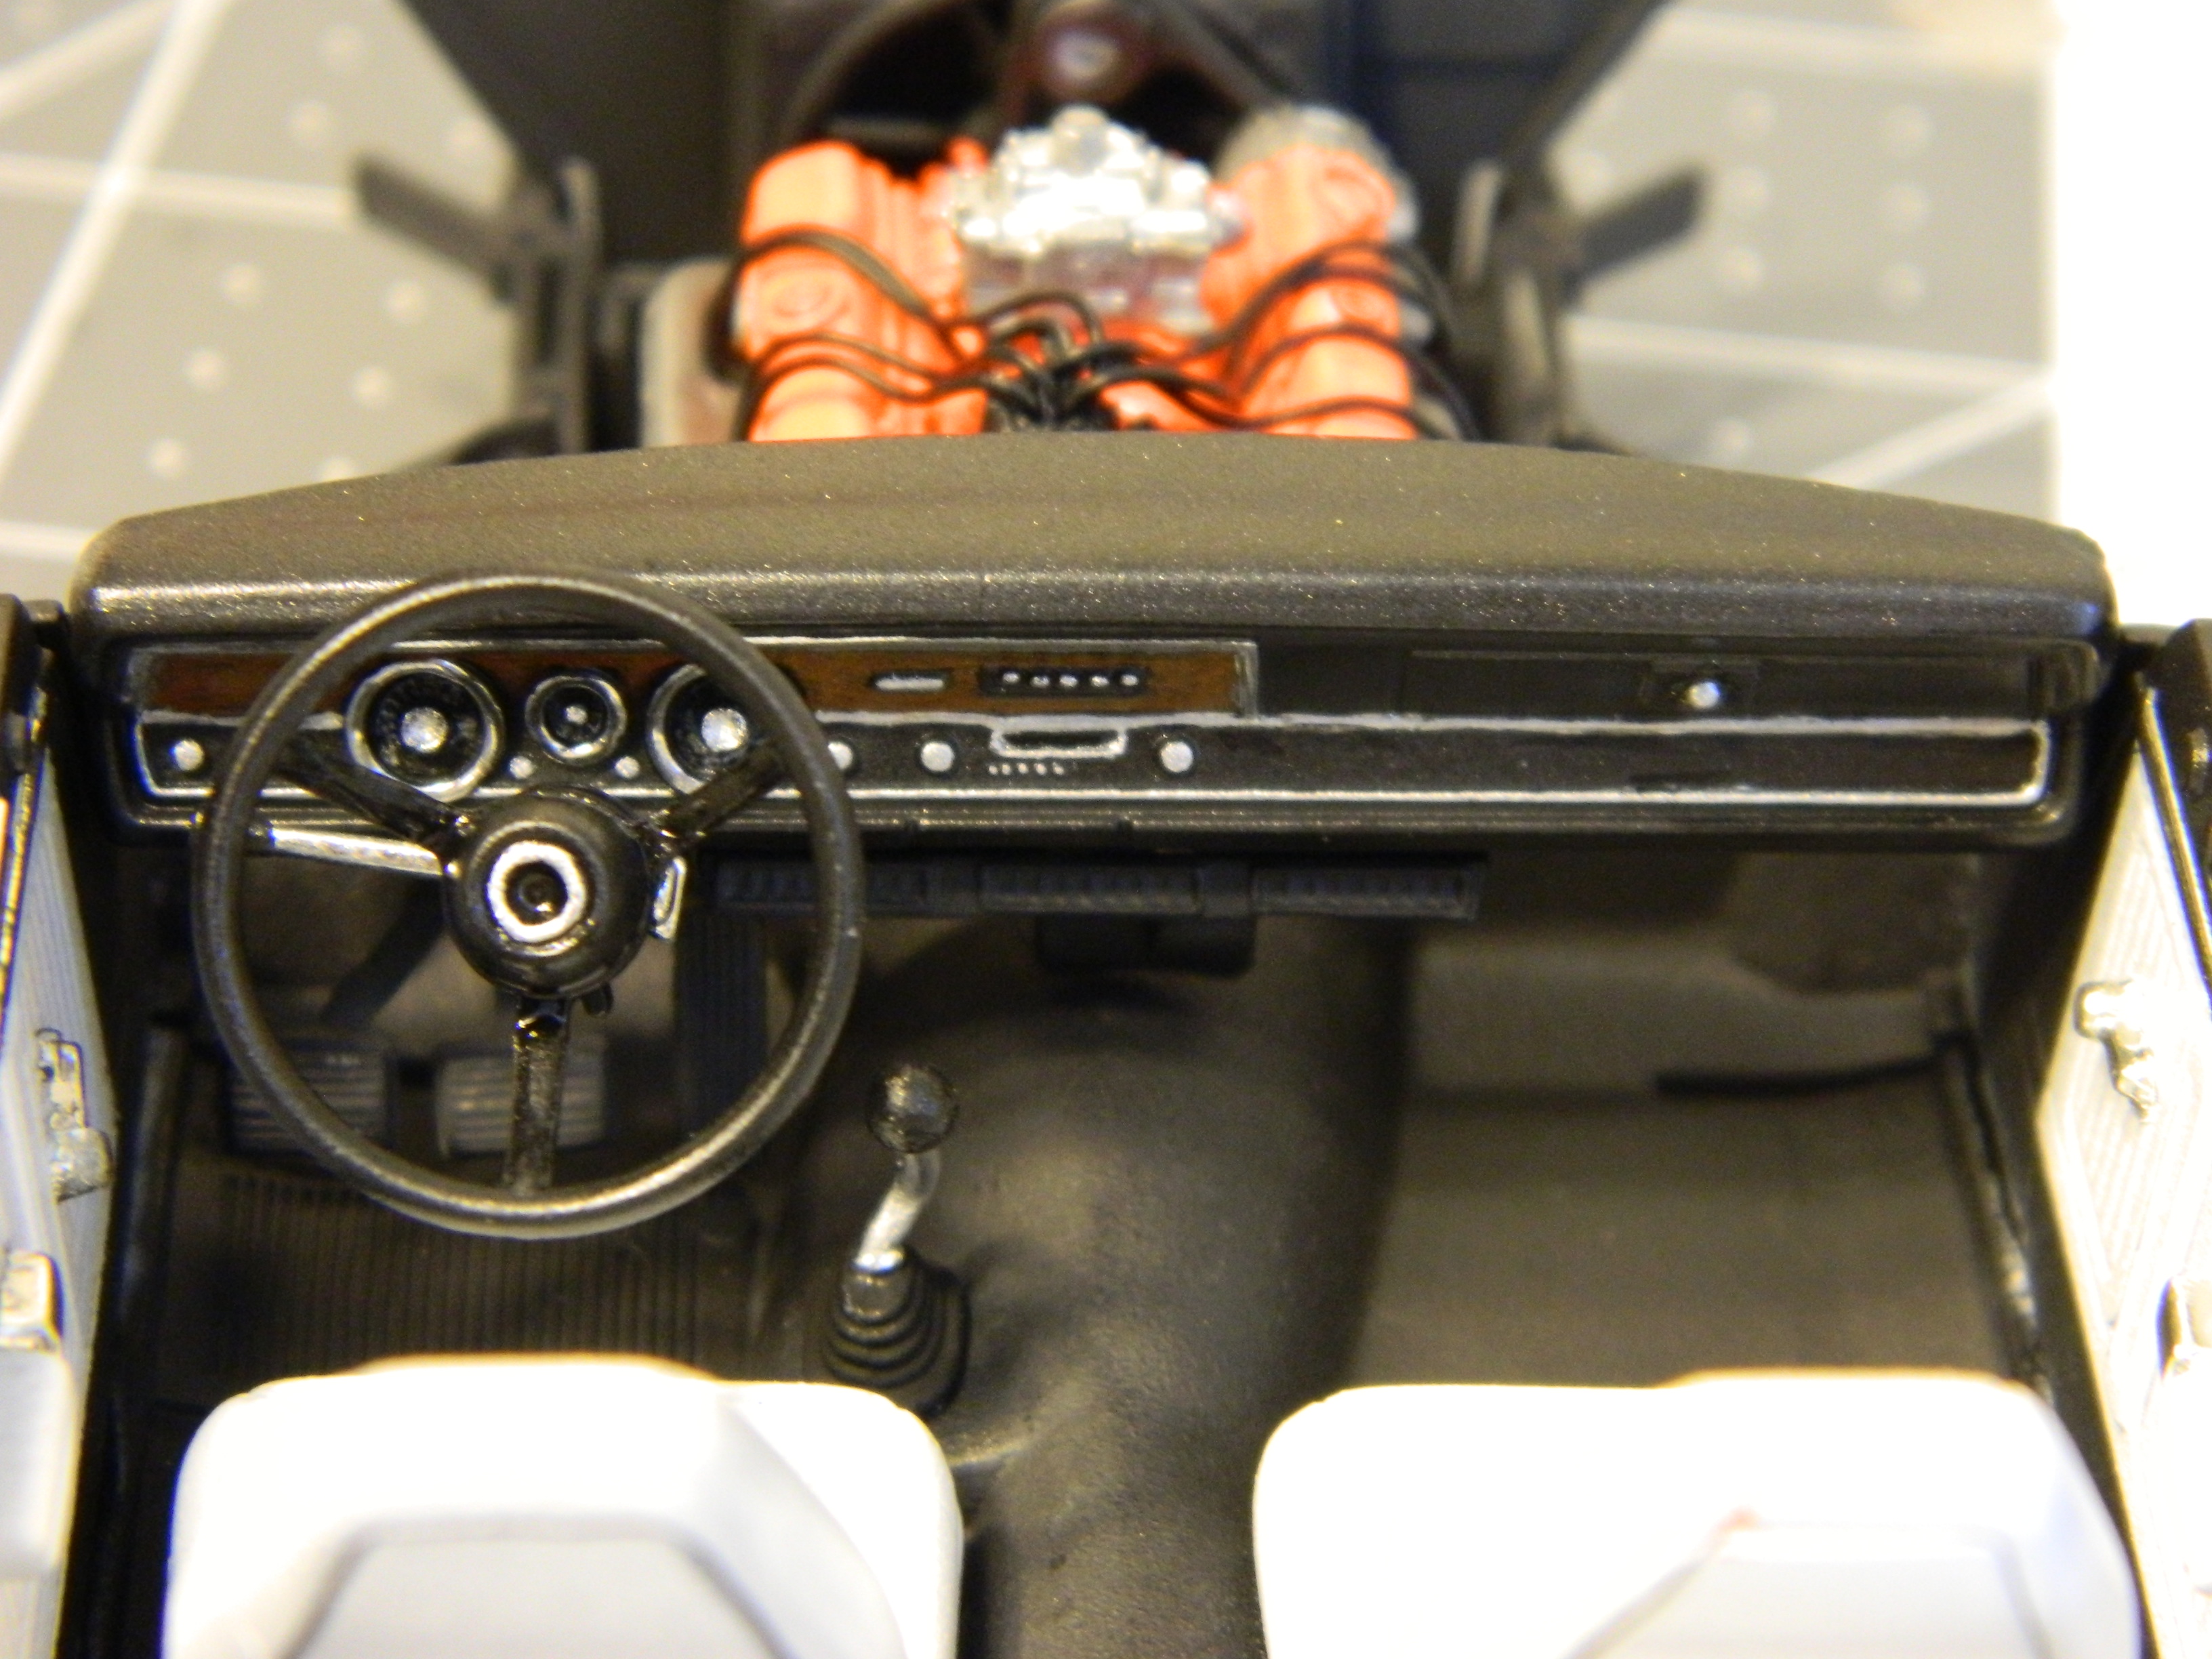
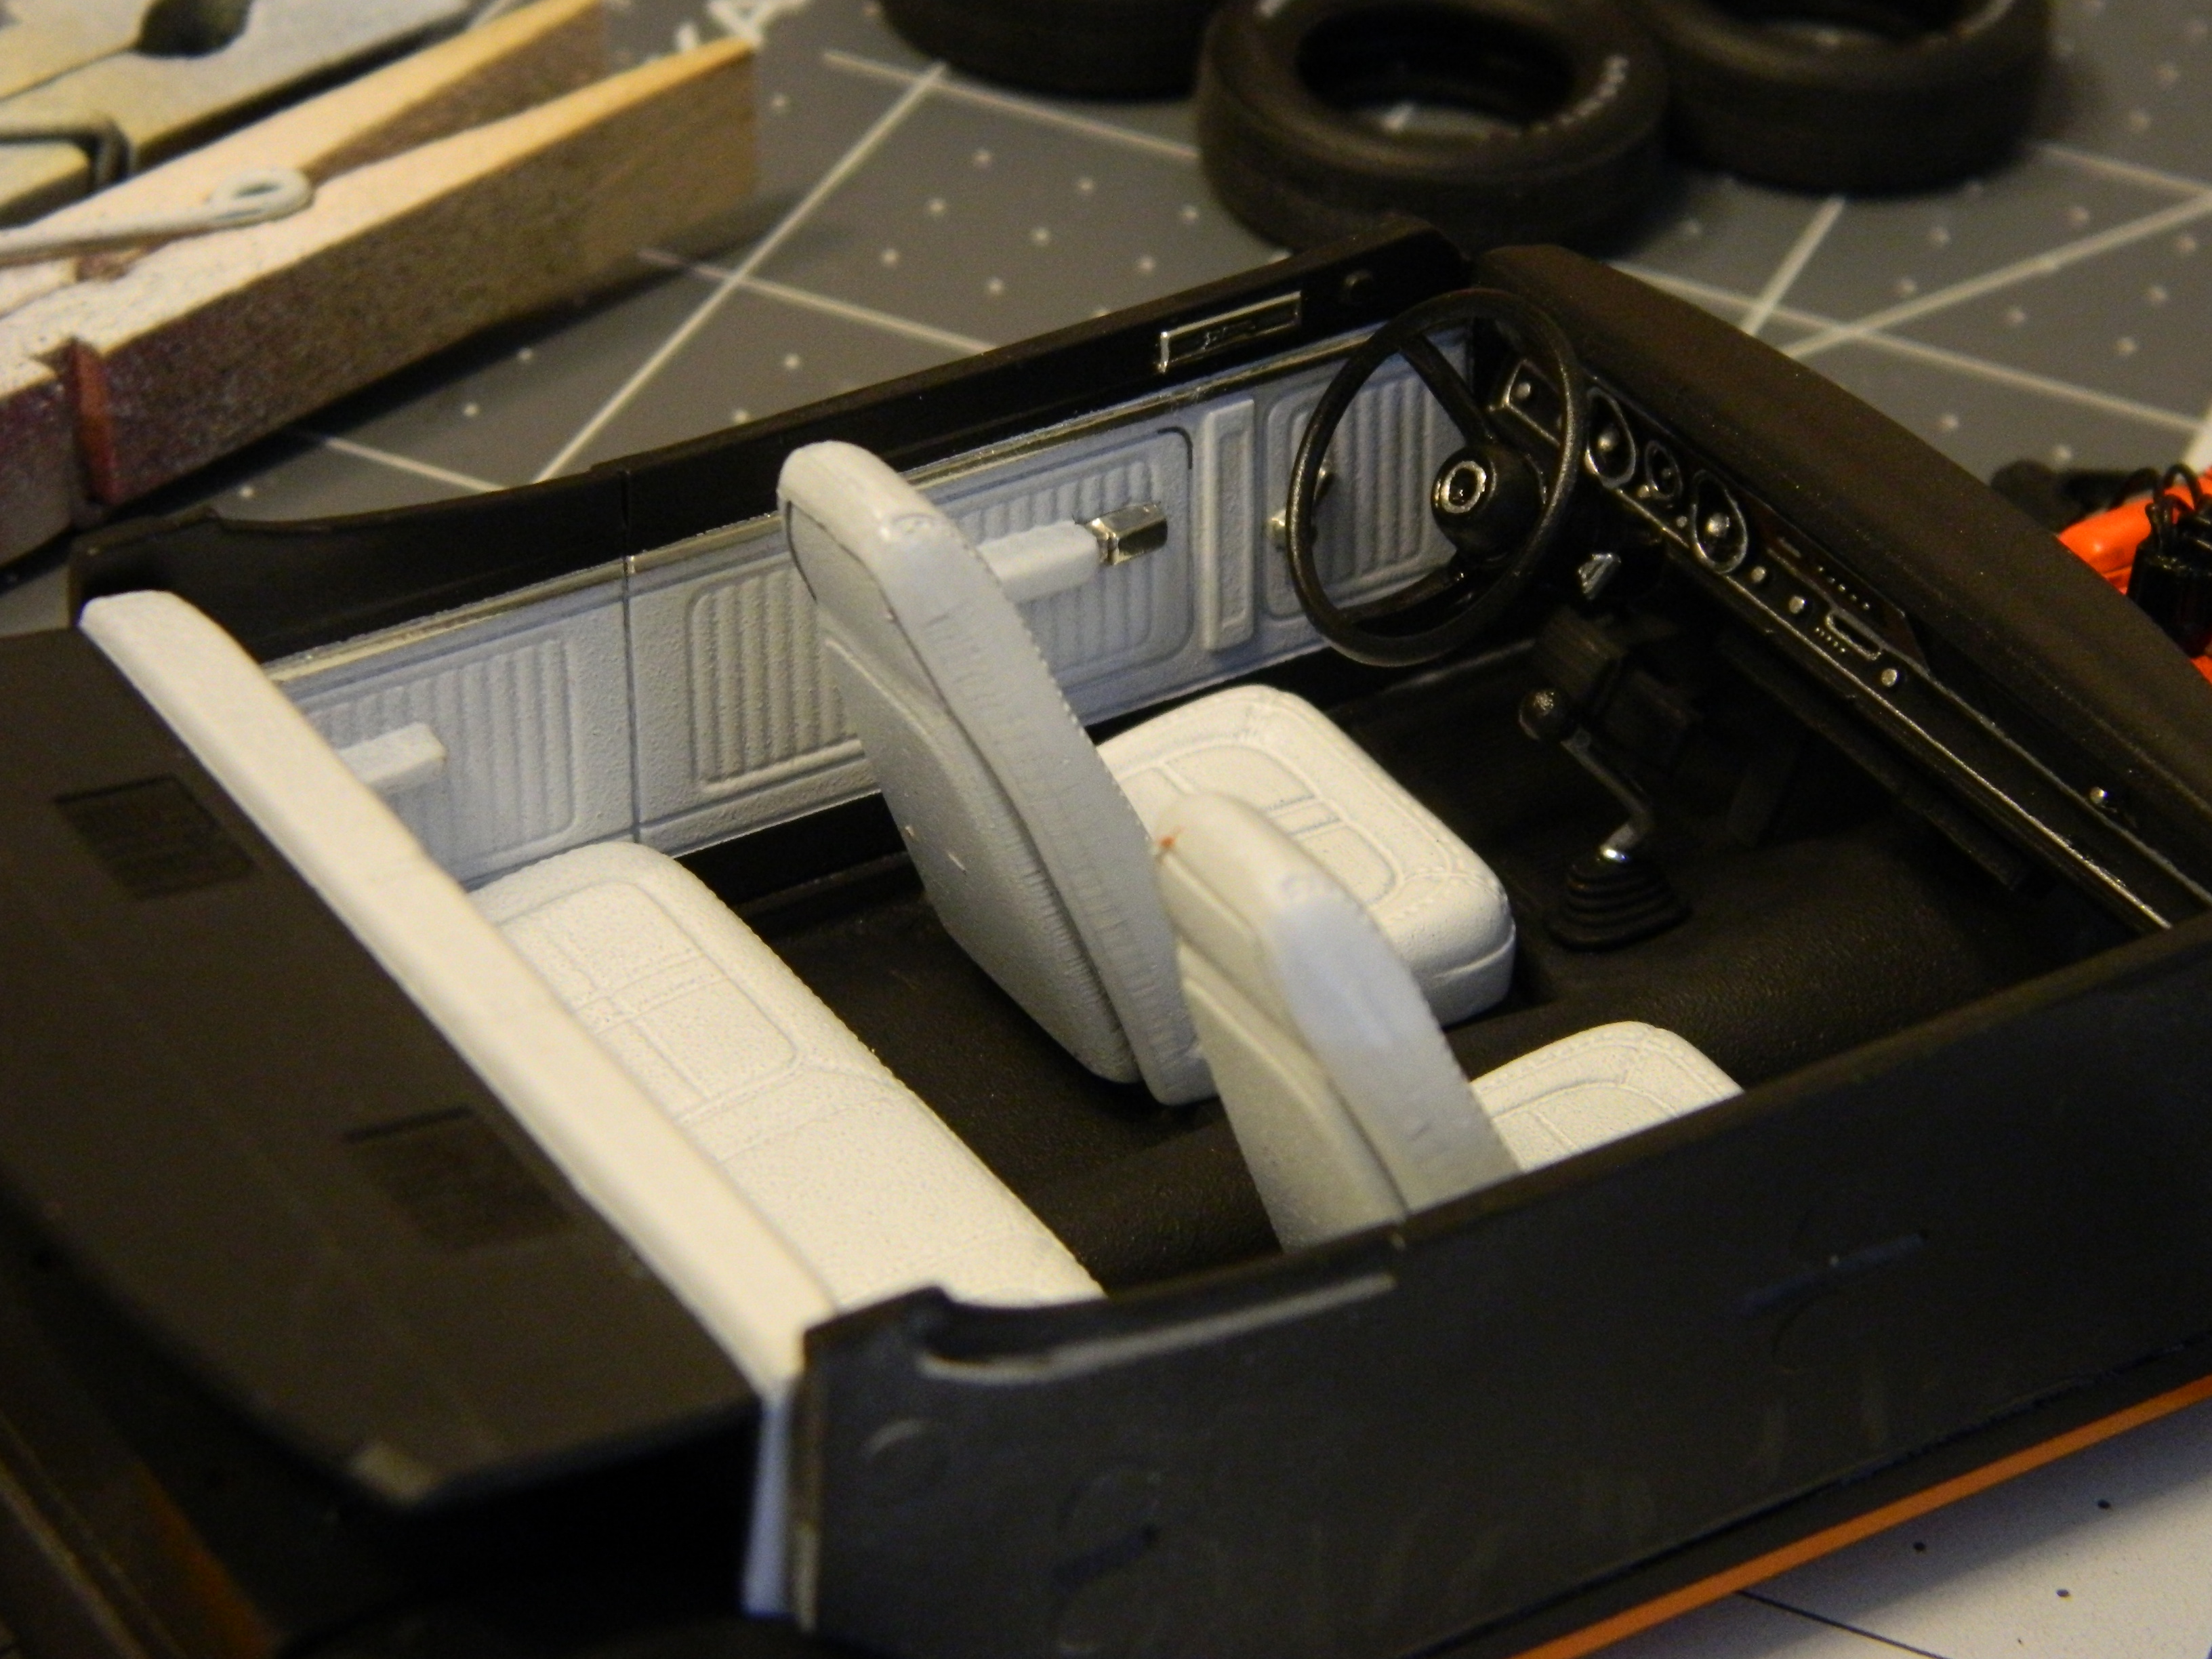
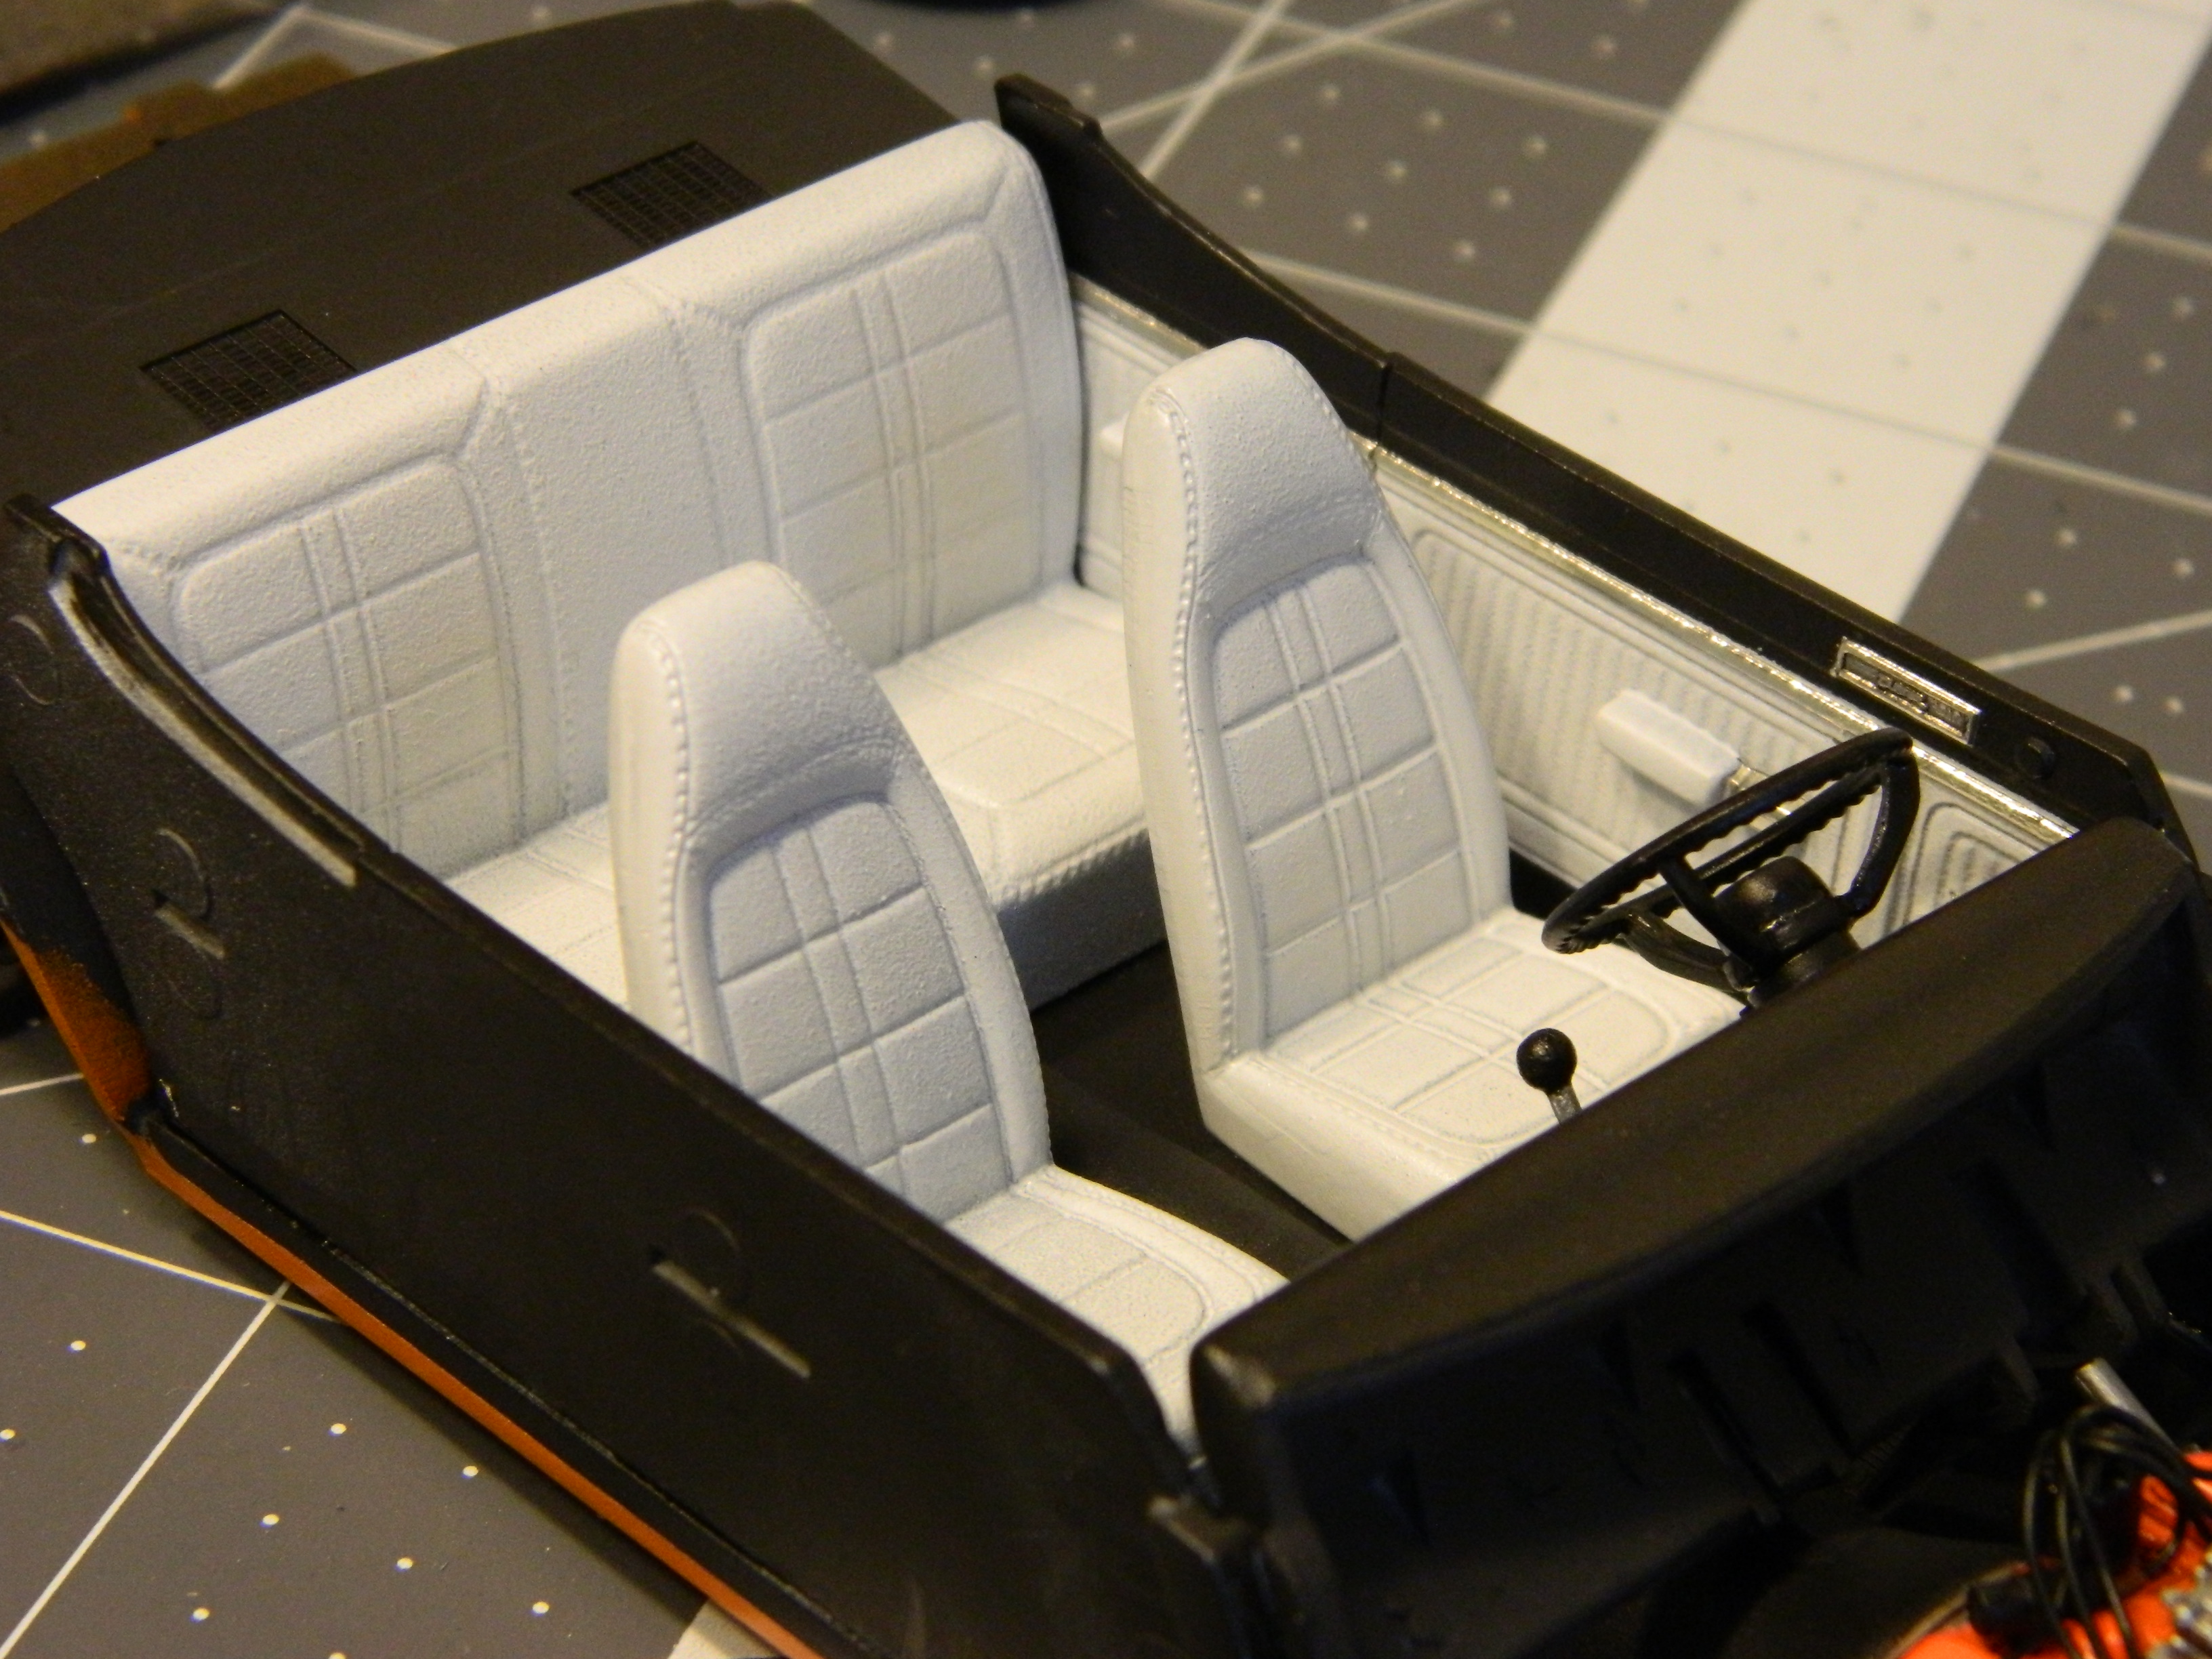
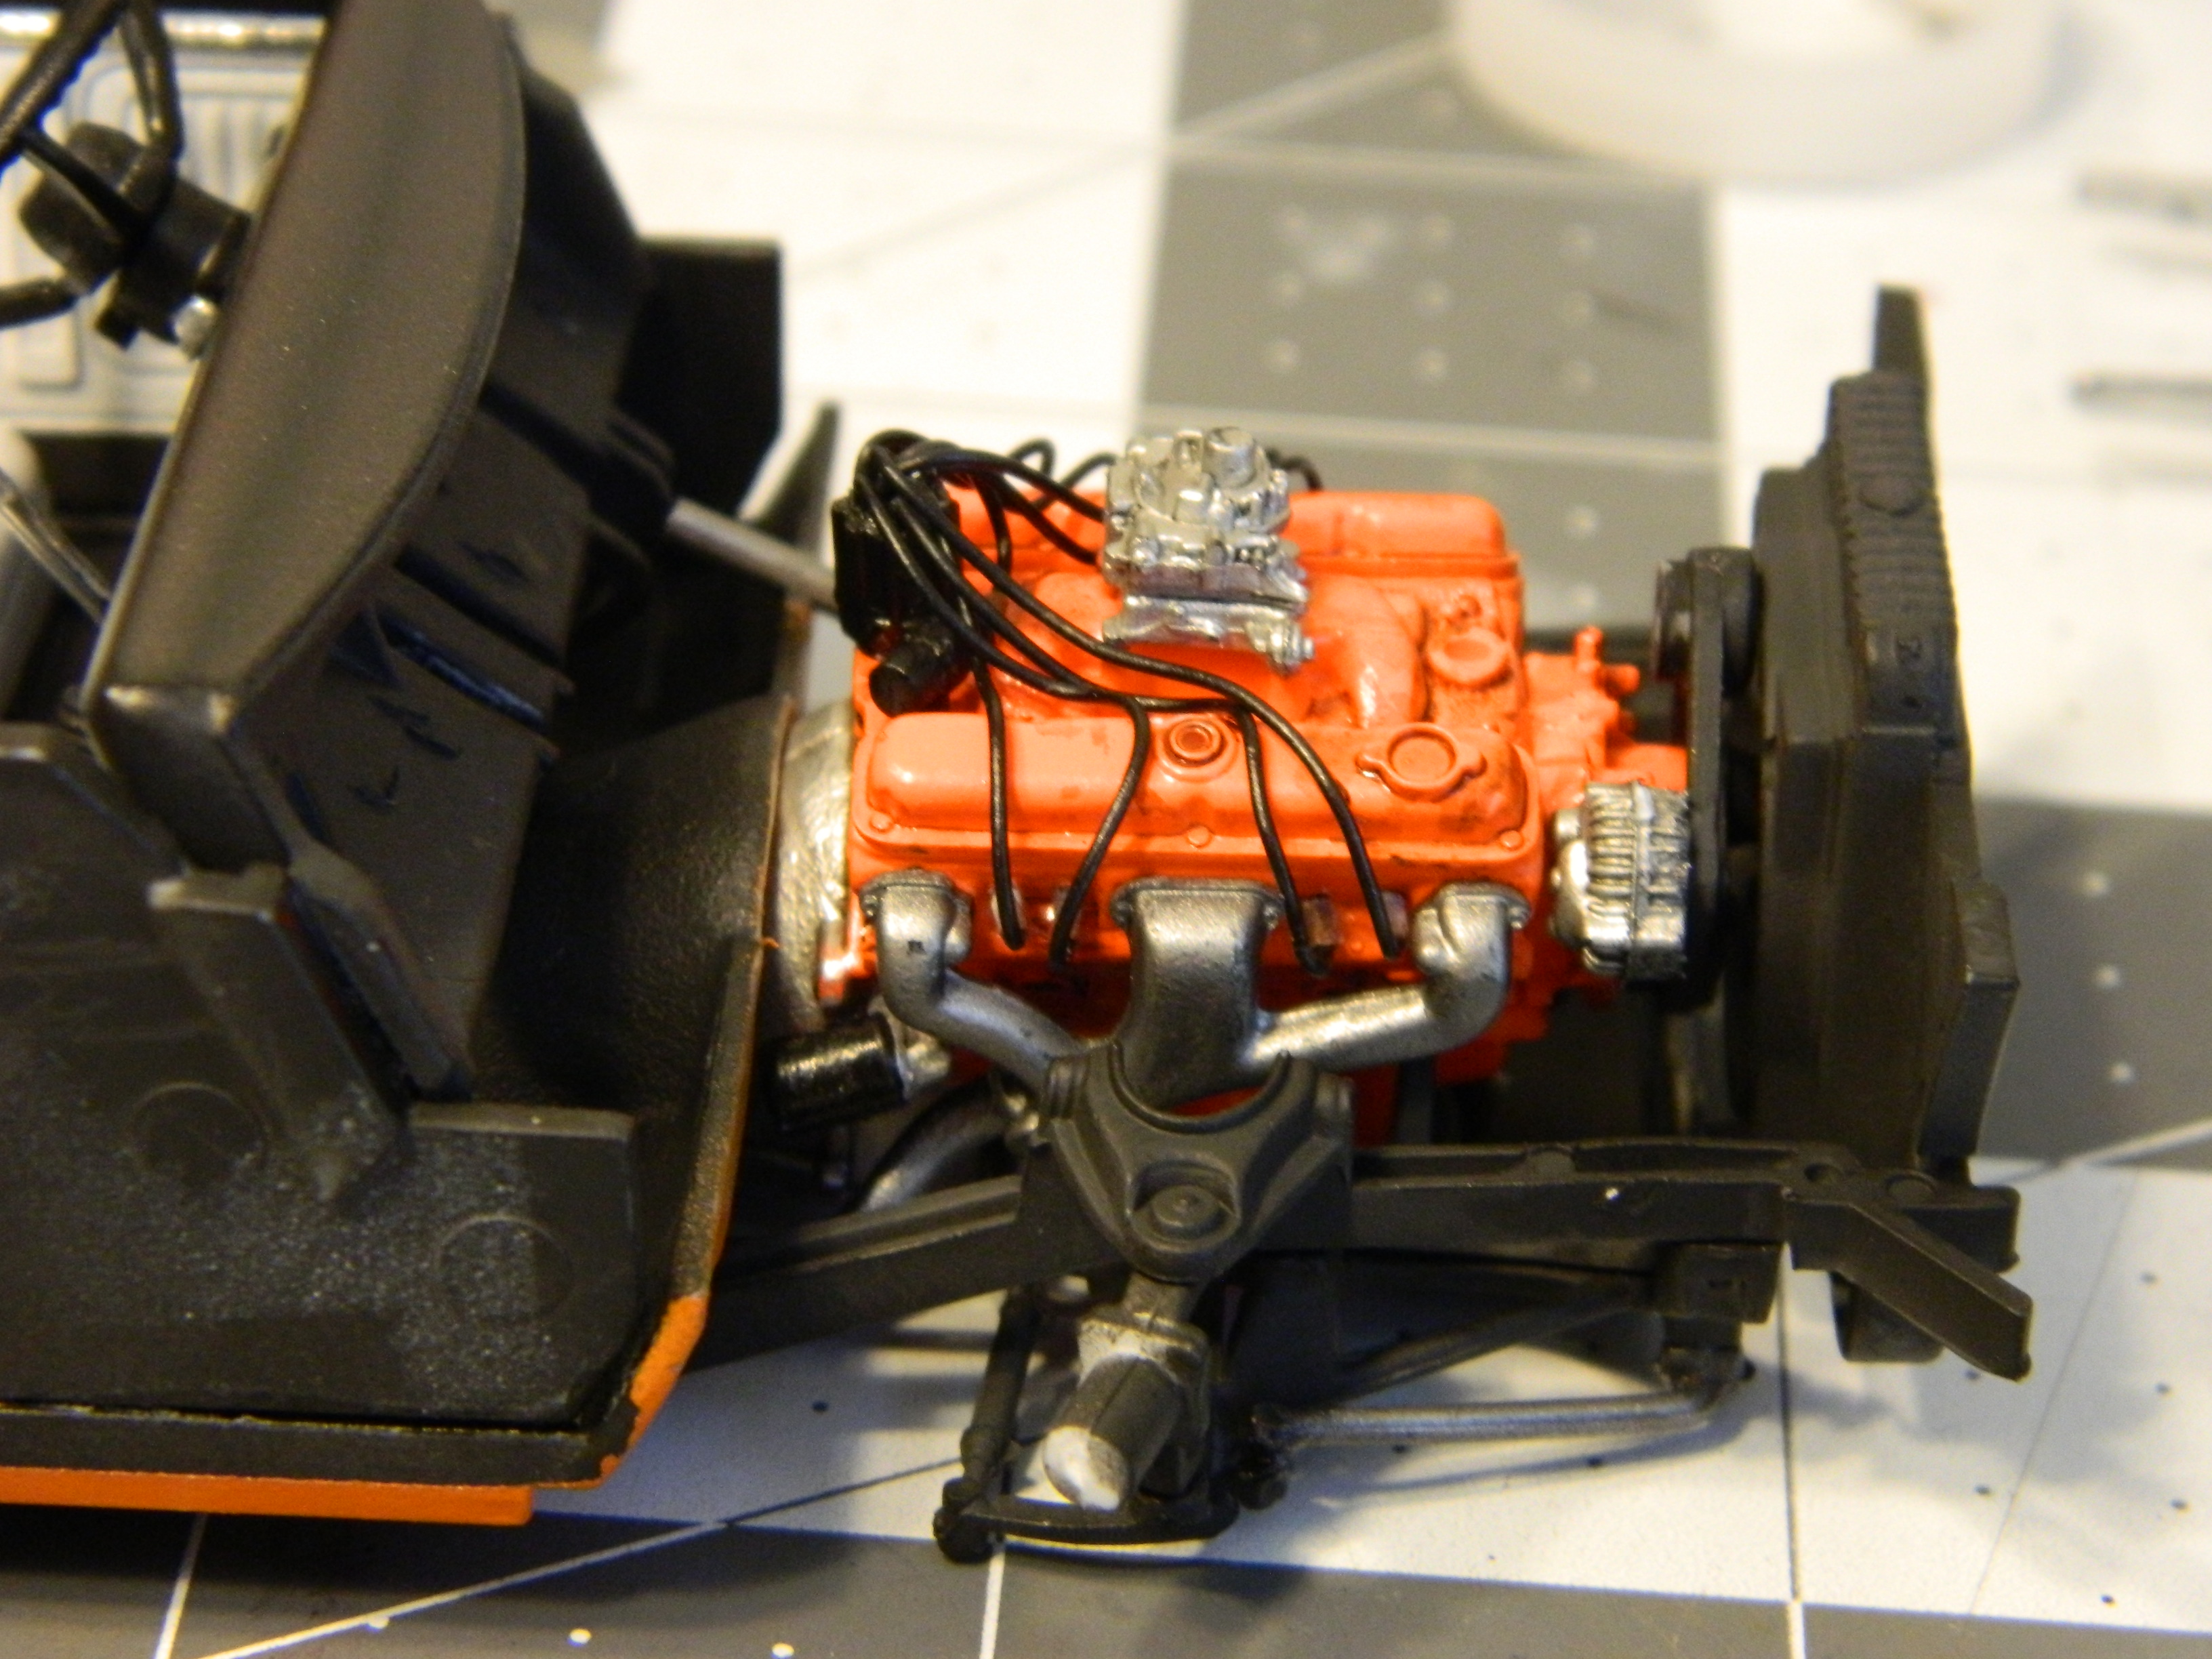
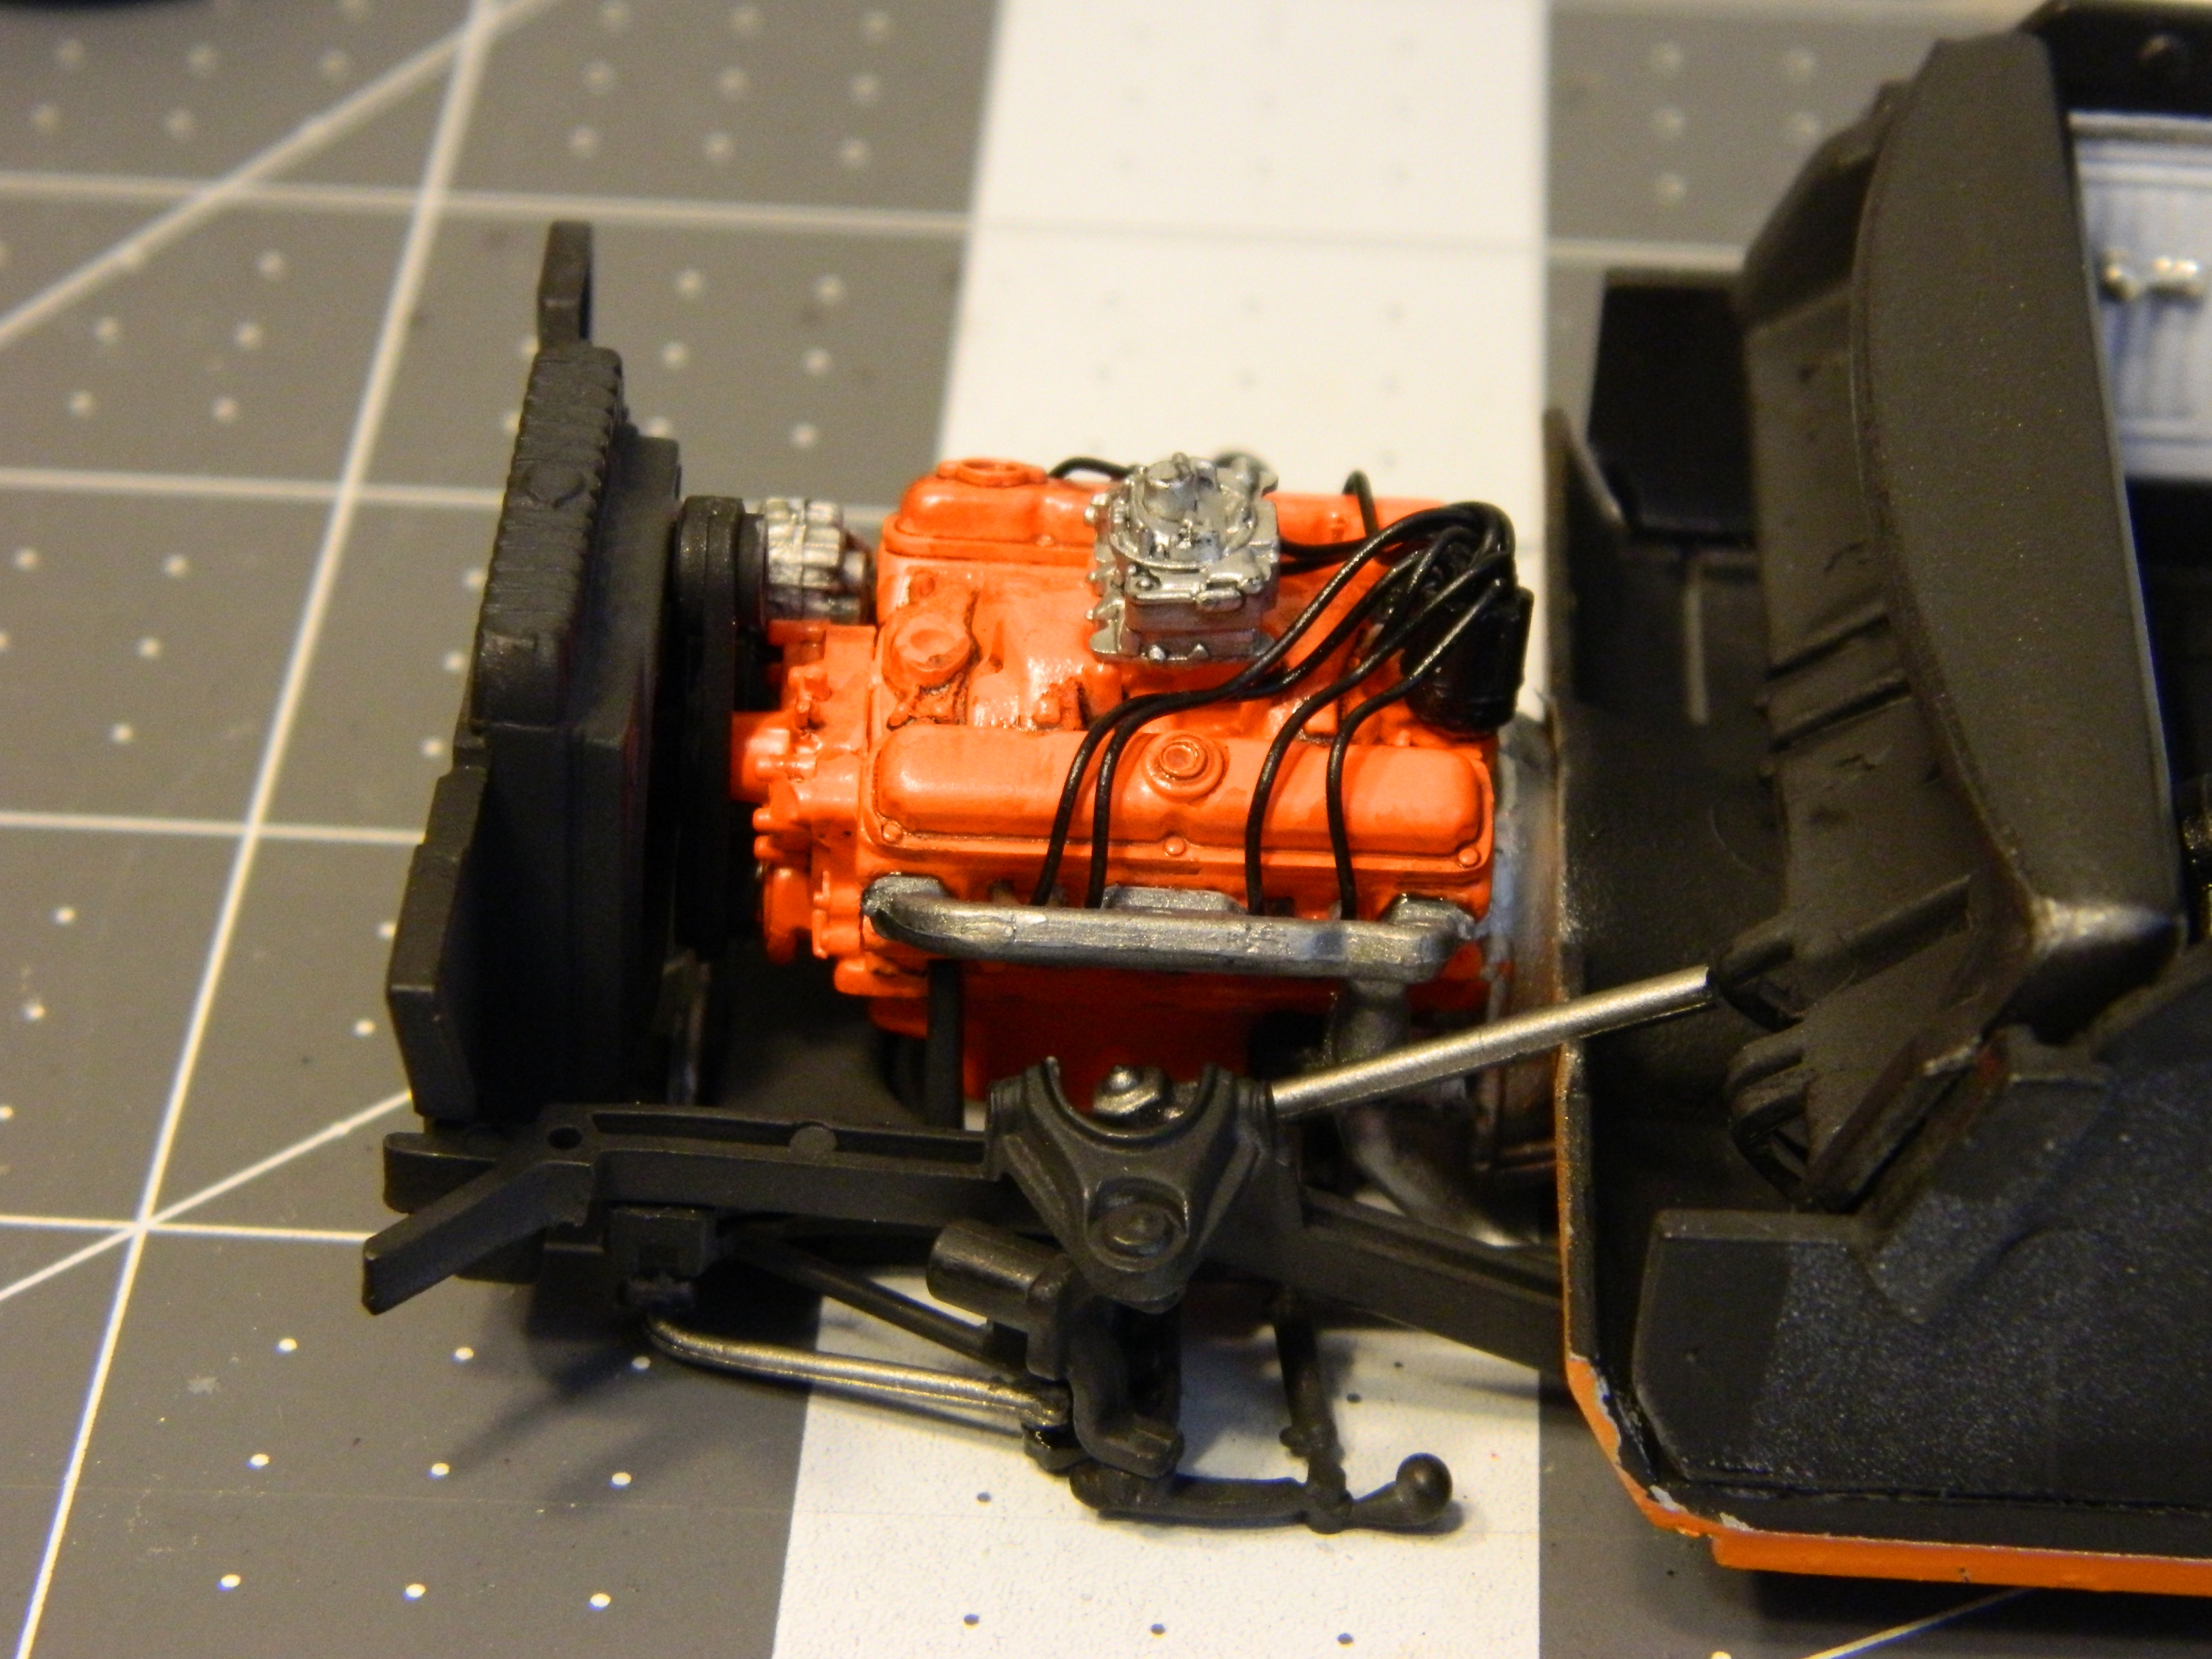
I got the interior buttoned up, the front and rear chassis done, exhaust on and engine installed. Now I just have to catch up on the body. I wet-sanded the Go Mango, and it's ready for clear, the black on top of the doors, cowl, and around the windows, decals, and foil but I have to figure out the best order in which to do it all. I'm thinking of doing the clear, wet-sanding it after a few days, then the black followed by satin clear on the black, then polishing the Go Mango with Novus #2 followed by wax, then the foil and decals last.
-
Sanford & Son Truck
Dragonhawk1066 replied to Nosferatu's topic in Model Trucks: Pickups, Vans, SUVs, Light Commercial
Nicely done! A great tribute to a great show!! -
Very cool customs!! Outstanding work on all of them, and very imaginative use of office equipment, lol!! Seriously though, the shape of the stapler for the cargo area really makes a ton of difference for the custom aspect of this build, well done!!
-
Very nice looking Shelby!!
-
3 large survivor models finally photographed
Dragonhawk1066 replied to traditional's topic in Model Cars
All three pieces are outstanding!! -
AMT 1971 Plymouth Duster 340. Go Mango Orange.
Dragonhawk1066 replied to Dragonhawk1066's topic in WIP: Model Cars
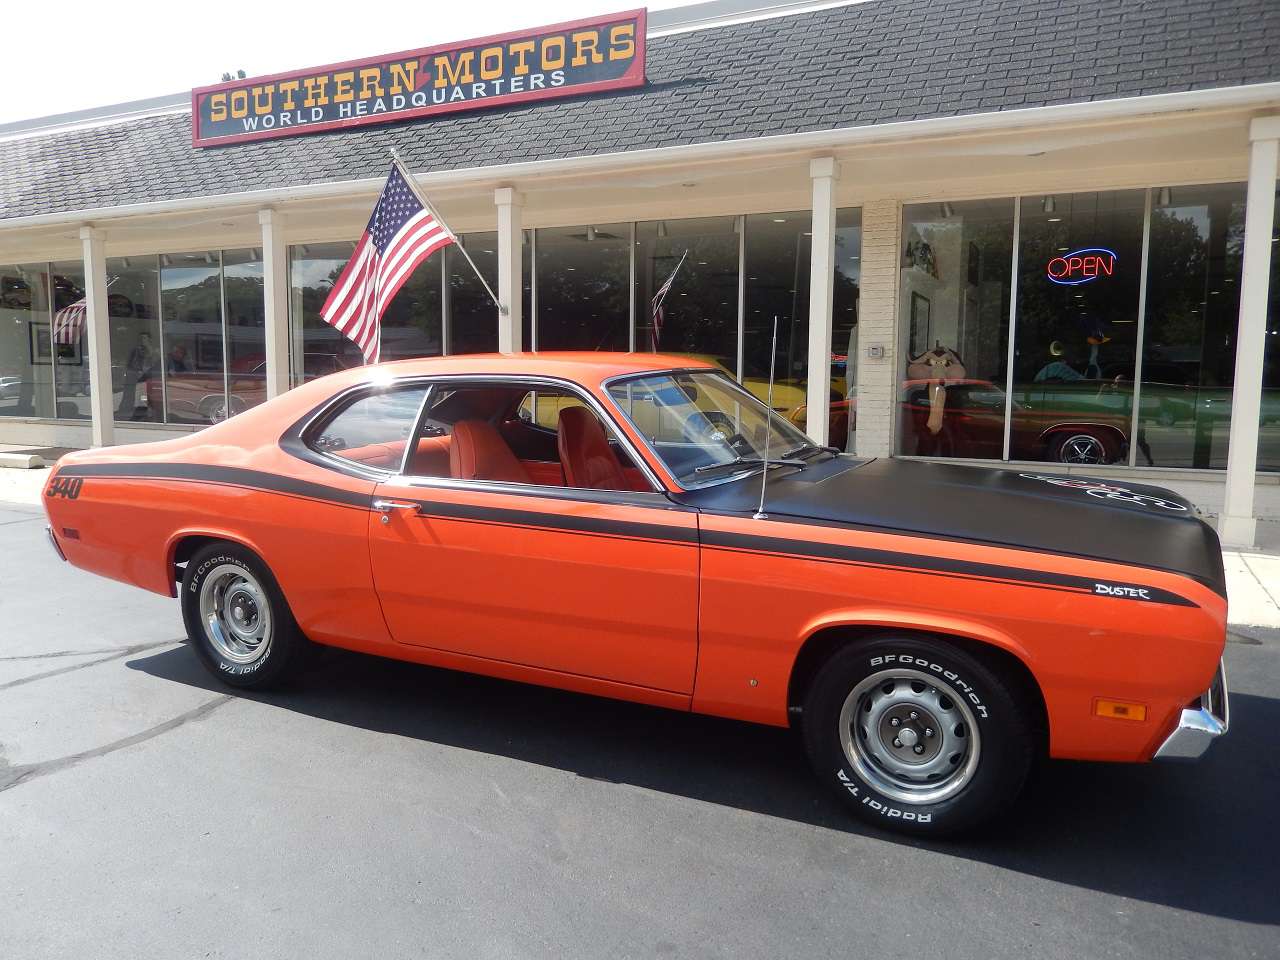
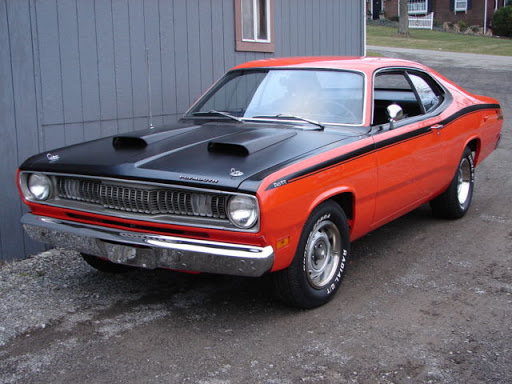
I forgot to post the pics of the look I'm after, except with a white and black interior, and the flat hood. The black around the side windows, especially along the roof and front pillars is going to be fun!

.JPG.f0af6a8cc5f262396c3f27c836a76c83.JPG)
.JPG.6c4627f885df9413cb56ee3a3dfccac4.JPG)


.JPG.46abd60964ba04c0235ad200c753ce70.JPG)