Pico
-
Posts
537 -
Joined
-
Last visited
Content Type
Profiles
Forums
Events
Gallery
Everything posted by Pico
-
Four of these bodies were built; here is some info from coachbuilt.com: https://www.coachbuild.com/forum/viewtopic.php?f=6&t=1786

-
Maybe, maybe not.
-
The nose is easy, it's the rear that's hard.
-
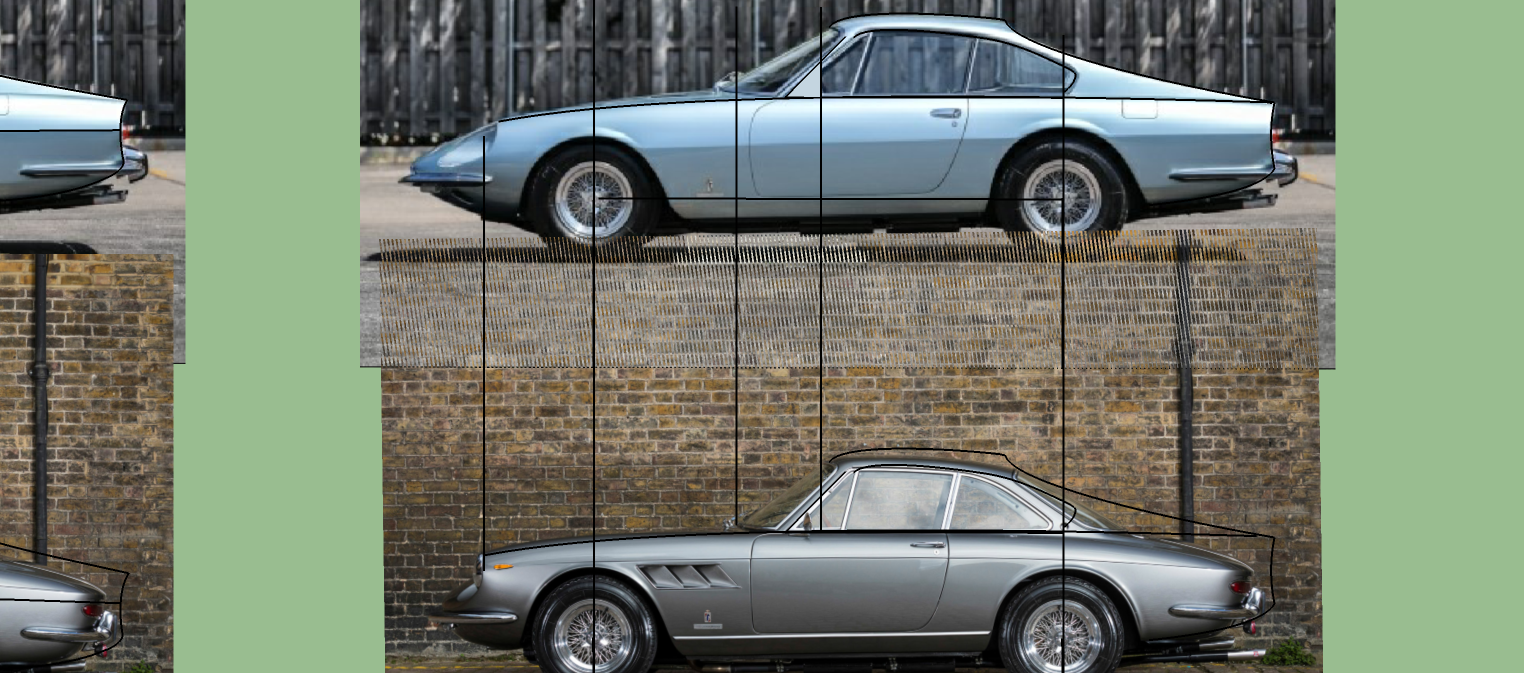
Check my drawing, which I've done in 1/24th to help visualize the model and dimension the parts I will replace. The roof and the rear of the model will be built of high density urethane.
-
Not close enough.
-
A comparison of the size of the two cars. I'll have to stretch the resin body, one way or another.
-
Early Ferrari Models 1949-1967
Pico replied to Gramps46's topic in General Automotive Talk (Trucks and Cars)
I have started a WIP thread about modifying an Airtrax 1967 Ferrari 330 GTC to the de Rethy 330 GTC Speciale.
-
On the workbench: Modifying an Airtrax Ferrari 330 GTC coupe to the magnificent Princess de Rethy 330 GTC Speciale.
-
For those interested in buying, here is a Facebook page for testing resin printers, it's very informative: https://www.facebook.com/groups/theslachannel/?ref=bookmarks
-
Early Ferrari Models 1949-1967
Pico replied to Gramps46's topic in General Automotive Talk (Trucks and Cars)
The 1//24th kit was made by Marcelllo Figliozzi several years ago and is very good. Don't know if it would be available, PM me for his email.
-
Early Ferrari Models 1949-1967
Pico replied to Gramps46's topic in General Automotive Talk (Trucks and Cars)
Are you interested in a model of that Maserati clone or a Maserati A6G? A Maserati A6G in 1/24 has been produced. I see no reason to make a model of the clone. -
Early Ferrari Models 1949-1967
Pico replied to Gramps46's topic in General Automotive Talk (Trucks and Cars)
Produced by Umi Modelwerks about 25 years ago, 1949 Ferrari 166MM. Ferrari's first le Mans winner.
-
I have emailed him, should show up here soon.
-
Leather seats - difficult to work when wrapping around corners. Wrinkles. Easier to work in 2 dimensions.
-
Airtrax makes a 1/24 Cortina.
-
Darn it , Bill, quit tempting me.
-
Early Ferrari Models 1949-1967
Pico replied to Gramps46's topic in General Automotive Talk (Trucks and Cars)
Work in progress in computer, 1951 Ferrari 340 America - 1951 MM winner, to be 3d printed.
-
Early Ferrari Models 1949-1967
Pico replied to Gramps46's topic in General Automotive Talk (Trucks and Cars)
Ferrari 340 Mexico, 1/24th scale by ABC.
-
Early Ferrari Models 1949-1967
Pico replied to Gramps46's topic in General Automotive Talk (Trucks and Cars)
Early Ferrari? This is almost as early as you can get.
-
Early Ferrari Models 1949-1967
Pico replied to Gramps46's topic in General Automotive Talk (Trucks and Cars)
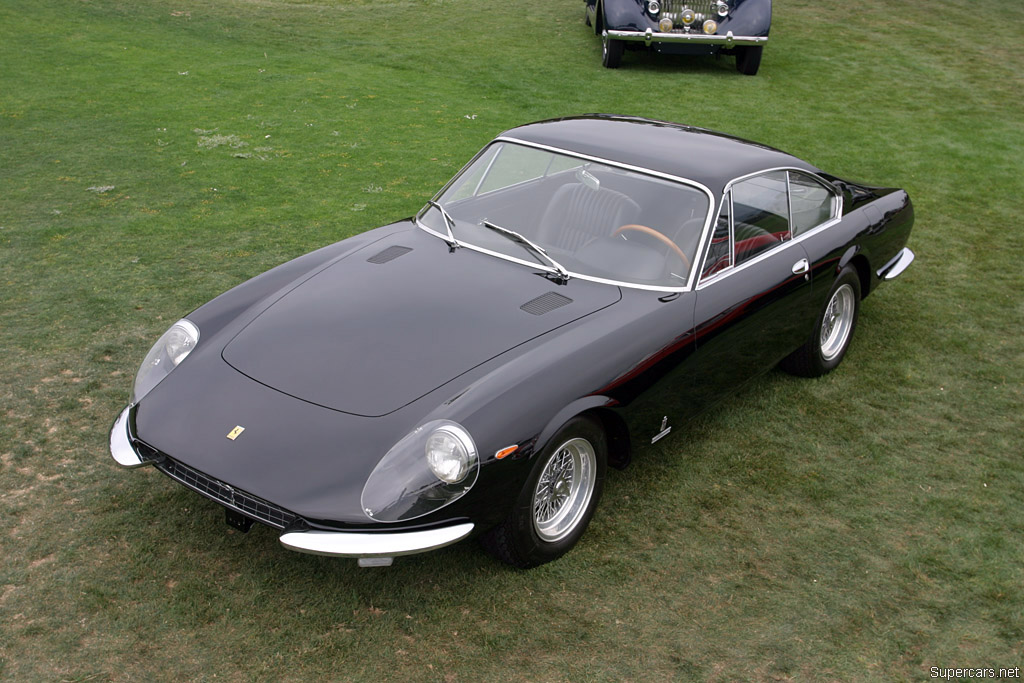
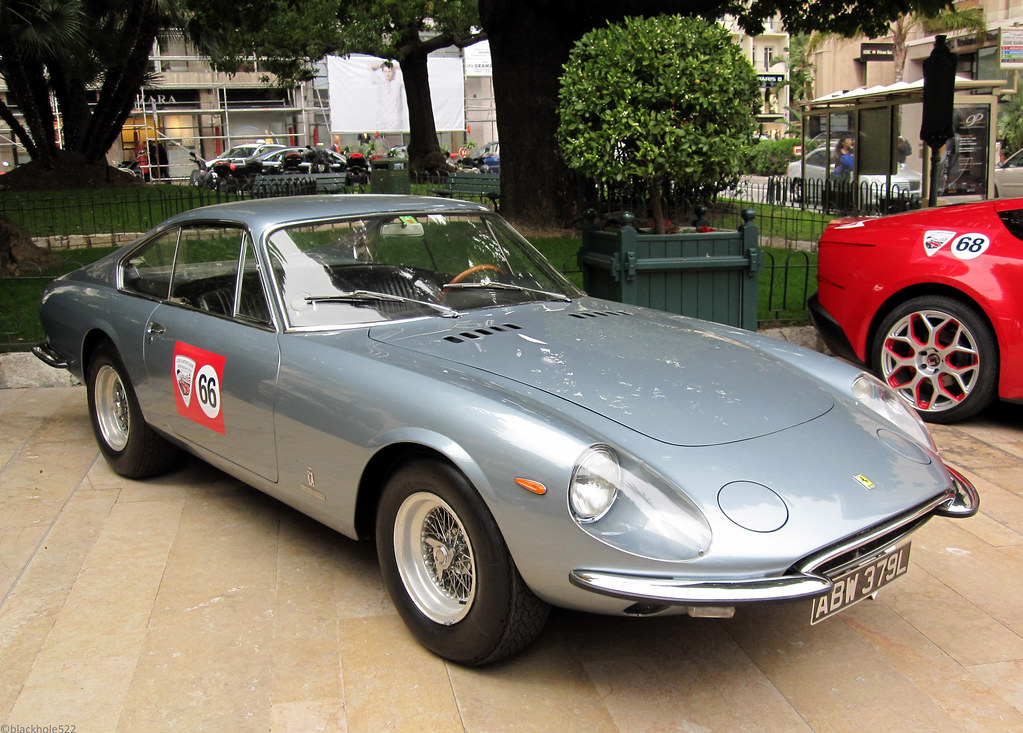
Here's a pic of the Airtrax Ferrari 330GTC. I've filled the pinholes and primered it. It's a beautiful car and a good kit. For the Airtrax price list, Mr. Obsessive posted it on another thread, easy to find using the search function.
-
Superb work!
-
Since we've been discussing scanning, here is an example of a full scale scan that has been output as a model. I can't tell the scale or if it was cut out by cnc or 3d printed but I thought it may interest some of you guys. BTW, that stl file can be downloaded and printed; anyone for a 1973 Ranchero model? I have tried to do this at concours by taking lots of photos but the bright reflections ruined the production of the mesh. The light has to be broad and subdued, as on a cloudy day. Link: https://grabcad.com/library/ford-ranchero-73-3d-scan-1
-
I couldn't do what I do without SU's plugins, especially Solid Inspector 2, the stl importers and exporters and Bezier Curve. I've been doing printed rims with predrilled holes for several years but it will be printed with spokes from now on. Modelmartin will be producing a Bug T50 Profile (fastback) body with correct wheels.
-
I had the rims and hubs printed, then hand strung them. They are not in my shop because it's necessary to have a jig to hold them and require a lot of patience to string. However with the advent of relatively low cost printers that will make high resolution parts, I am refining my design skills to design spoked wheels (it's not easy) that can be printed. I use Sketchup , Bilingham uses Fusion360, which is a better Cad program. But I'm pretty good at SU.
-
Which ones did you get from Shapeways? ACME member Bilingham has some there that have printed wire wheel spokes that are very good. The spokes are .015" in diameter.