Oldcarfan27
-
Posts
4,902 -
Joined
-
Last visited
Content Type
Profiles
Forums
Events
Gallery
Everything posted by Oldcarfan27
-

Pro street under carriage question
Oldcarfan27 replied to foxbat426's topic in Model Building Questions and Answers
Counter Point. Look at the many different ways car builders (real and scale) interpret how a chassis should look. • Some do it in primer with body color overspray, like the factory finished it. • Black chassis' represent undercoating to prevent rust. • Full painted chassis is an over-restored or custom look. • Brown is either muddy or on its way to be devoured by "tinmites" Decide what look you want to present and do it that way. Living through the 80s, I remember Pro Street Cars being professionally built and lots of money being put into them. No professional worth his salt would put undercoat on a chassis after doing all that fabrication and handiwork. Those cars were going to be shown off, not driven in salt laden, snowy climates. (Imagine driving a Pro Street car on a snowy road - talk about a thrill ride!) So a black undercoated chassis would look inappropriate for a show car. Point is, decide on the purpose for the car your building and paint it accordingly. -
I've been drivin' all night, my hand's wet on the wheel There's a voice in my head that drives my heel...
-
Bring Out Your Dead... Long Stalled Models
Oldcarfan27 replied to Tom Geiger's topic in WIP: Model Cars
That thing is EPIC! Where did you get all the cool stuff inside. Is it dollhouse furnishings? What did you use to attach the aluminum framework together? -
Bring Out Your Dead... Long Stalled Models
Oldcarfan27 replied to Tom Geiger's topic in WIP: Model Cars
Oh, behave. Yeah, baby!! -
If the plastic is as flexible as current issue, it should. The issue I'm not sure of is the original cream colored from 1981
-
As it has always been. I just wanted to show how simple it can be to correct the "boxy" look of the body to match the prototype.
-
What Kits Were Molded in Green?
Oldcarfan27 replied to Snake45's topic in General Automotive Talk (Trucks and Cars)
What about the Green Hornet kits? The Monogram hot rod and the Aurora tv show car. Monogram S10 Wave Rider Monogram 70 GTX -
Then again, I would've never thought I'd see the day when folks restore 70s Corollas and Pacers. But here we are.
-
I've seen them side by side at Pep Boys.
-
Does Rustoleum even make automotive touch up paint? I don't think so. Besides, other than primers and basic color palette, they don't have a very large variety to offer.
-
Yeah, especially with a great pair of shorts!

-
Oh really? But do YOU still look better than anything else on the road? LOL
-
Hey! How about doing that with Chevy pickups? Even more choices.
-
Great concept. Now do the 77 Monte Carlo or 76 Caprice and you have 30 years 87 Monte - 40 years 96 Impala - 50 years At least with Chevys, you have subject matter that goes that far.
-
Kurt, you know why this is "Classic"? Because it doesn't look like what's being driven on the road today and still looks great! I think people admire a person who keeps an old car on the road and drives it like it was intended. Keep it going, it IS a Classic!
-
Not sure if we're talking about the same formula of Testors paint. I'm talking about the old spray called Gloss Cote, and it kinda smells like rubbing alcohol when you spray it. First coat goes on smooth but a little thin. After that, any coats sprayed on top would lump up and never smooth out. It's as if it wasn't compatible with itself. And if you sprayed it on Testors regular silver, the silver would turn muddy grey and never get glossy no matter how many coats you put on it. Pretty sure gold reacted the same way. Maybe Testors improved that old formula, but that's the horror I remember with it and I've never used it since.
-
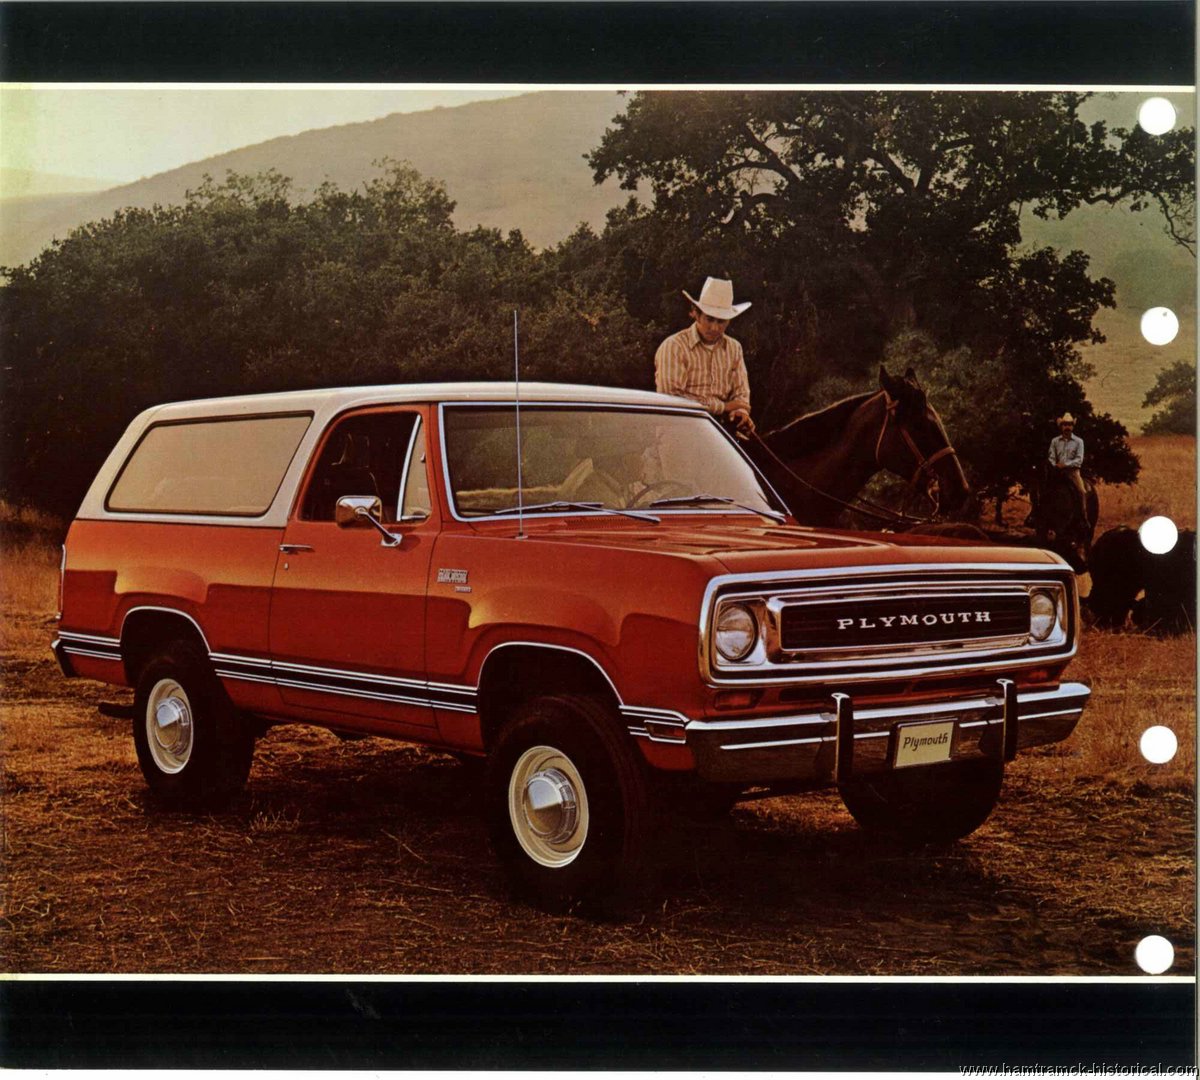
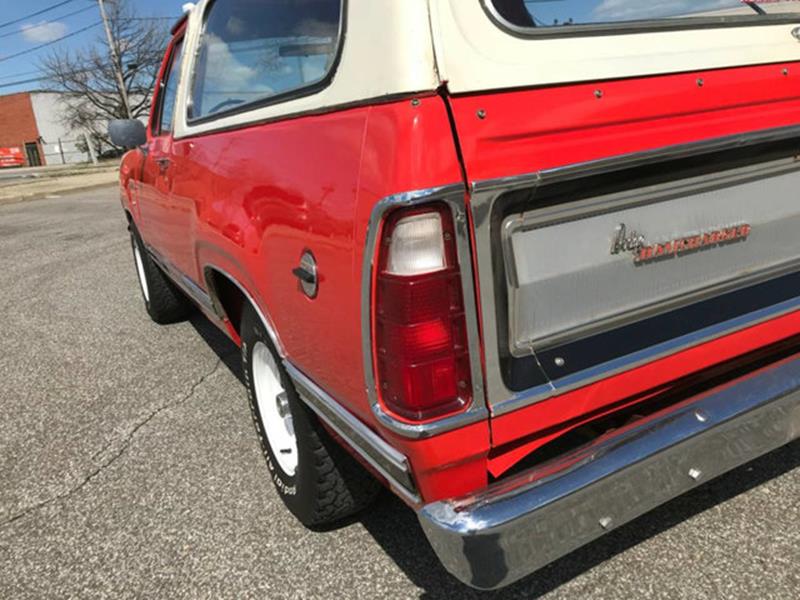
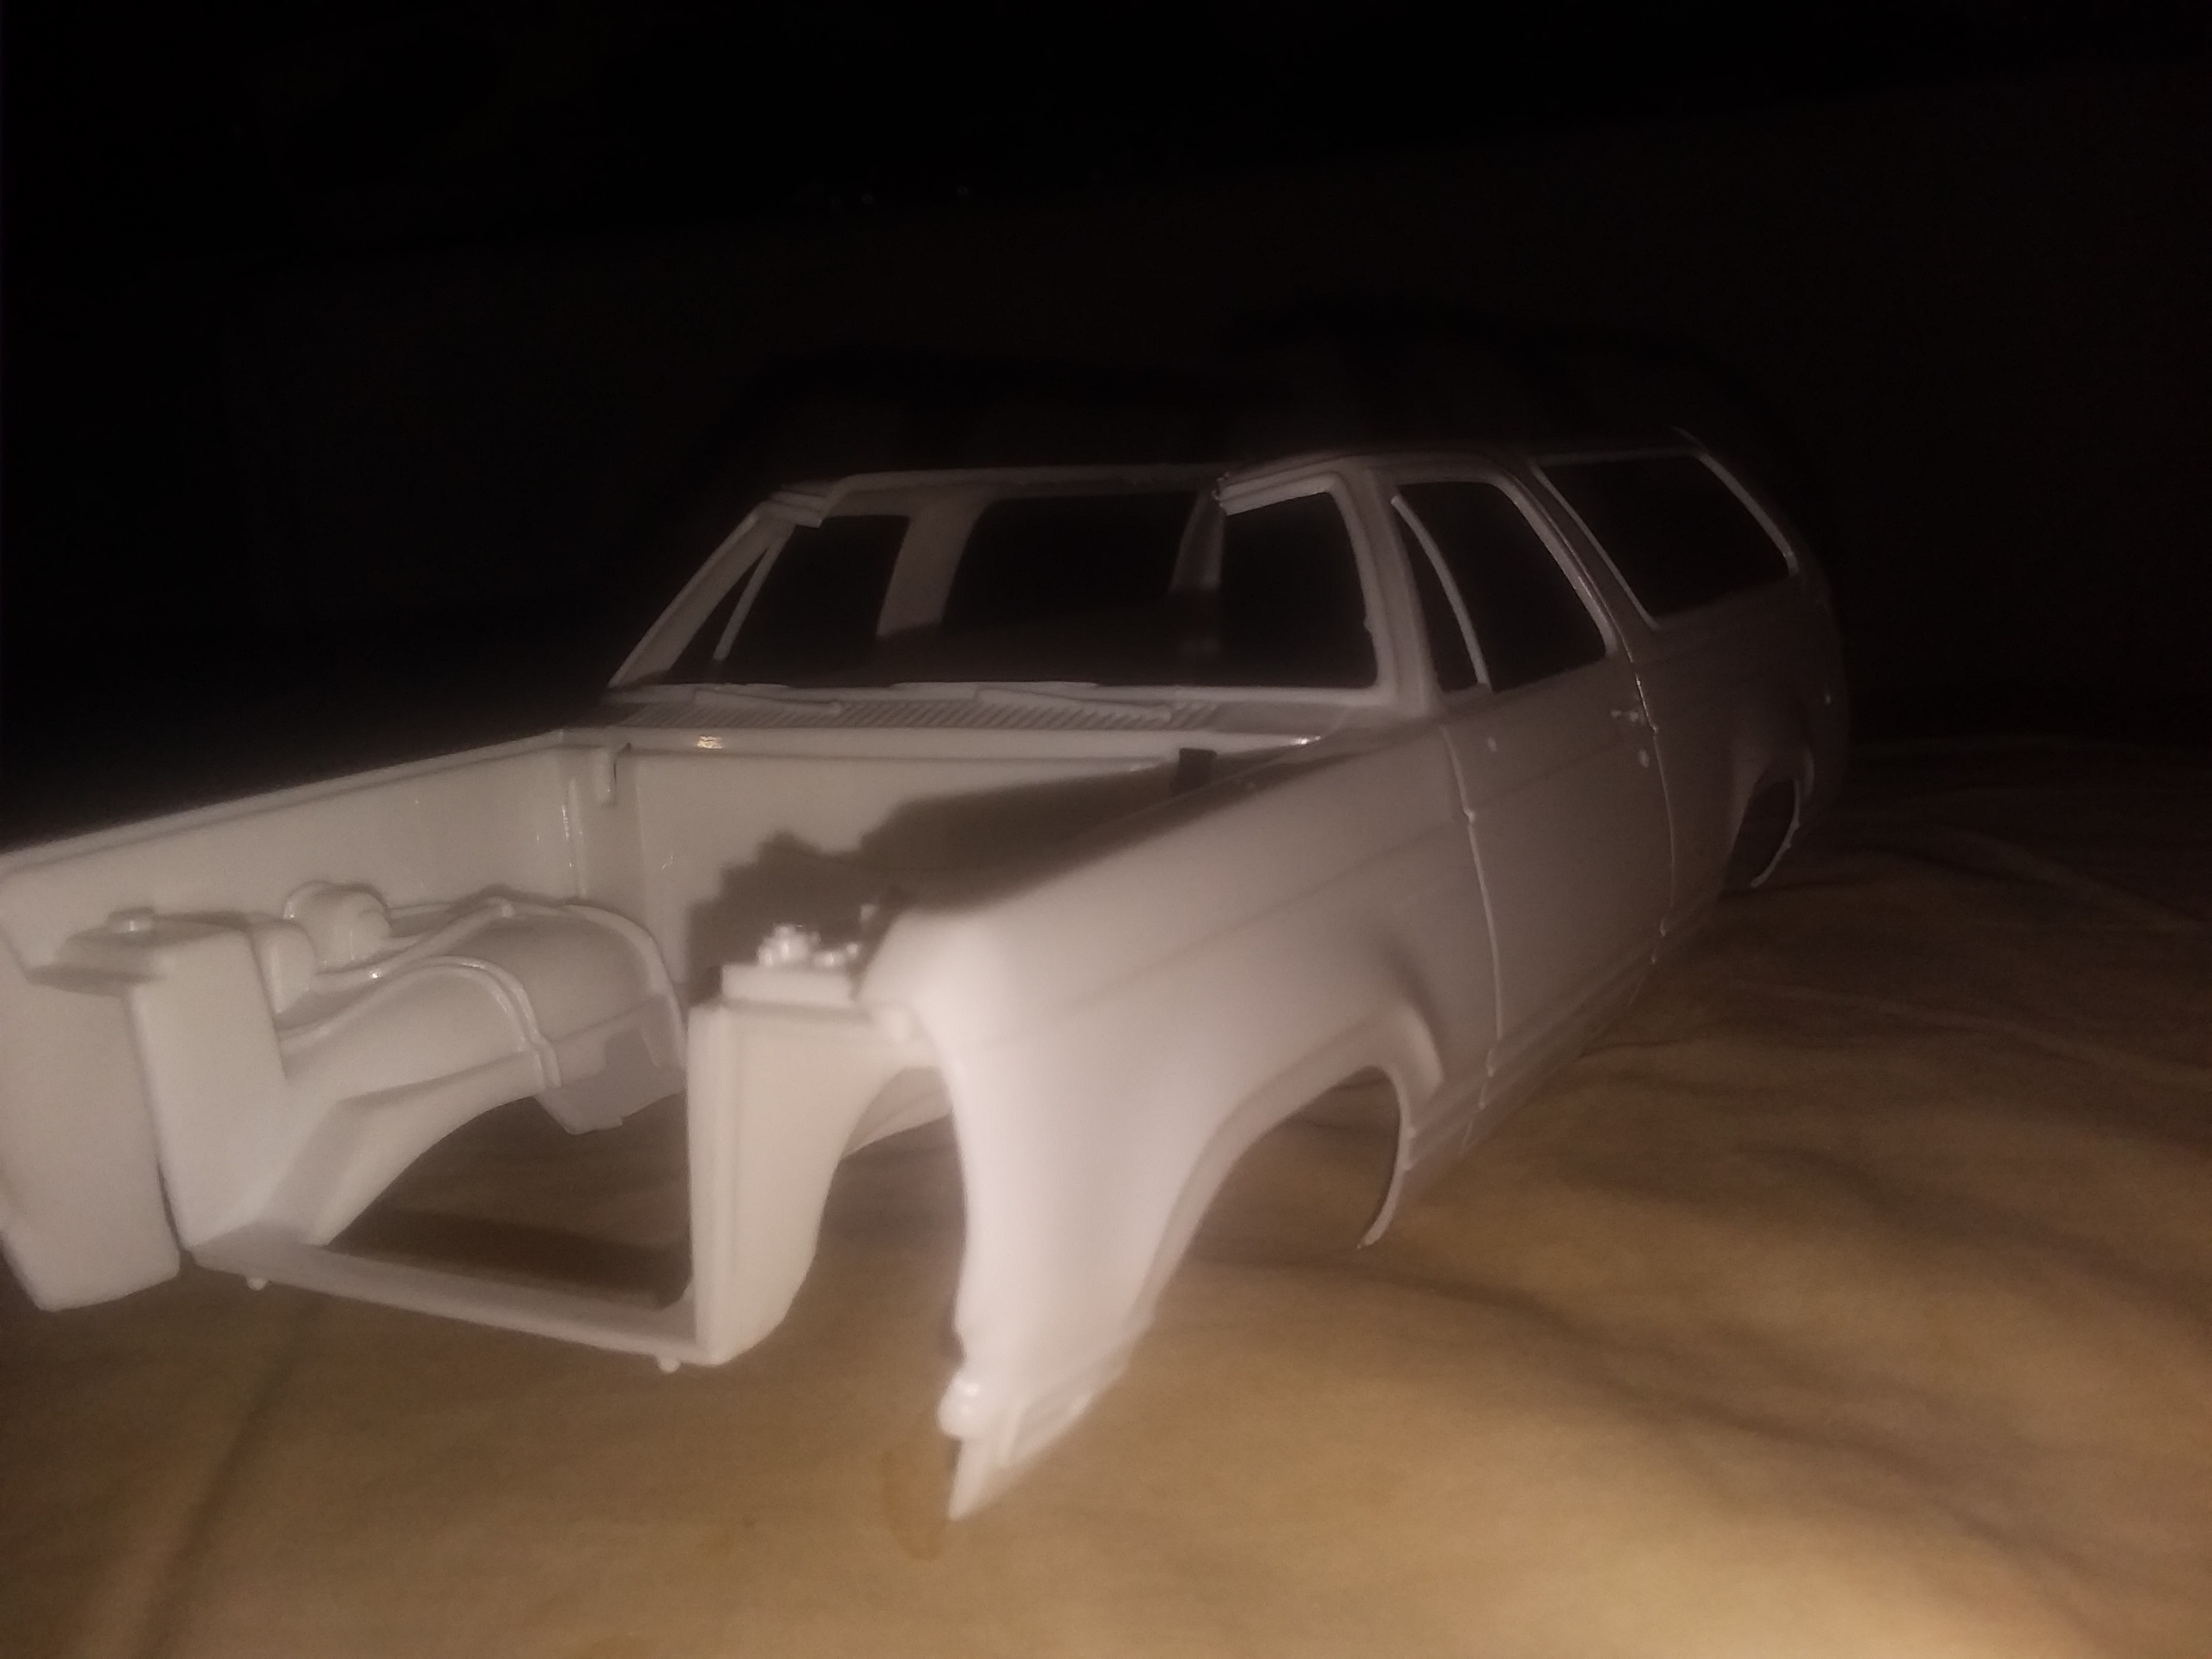
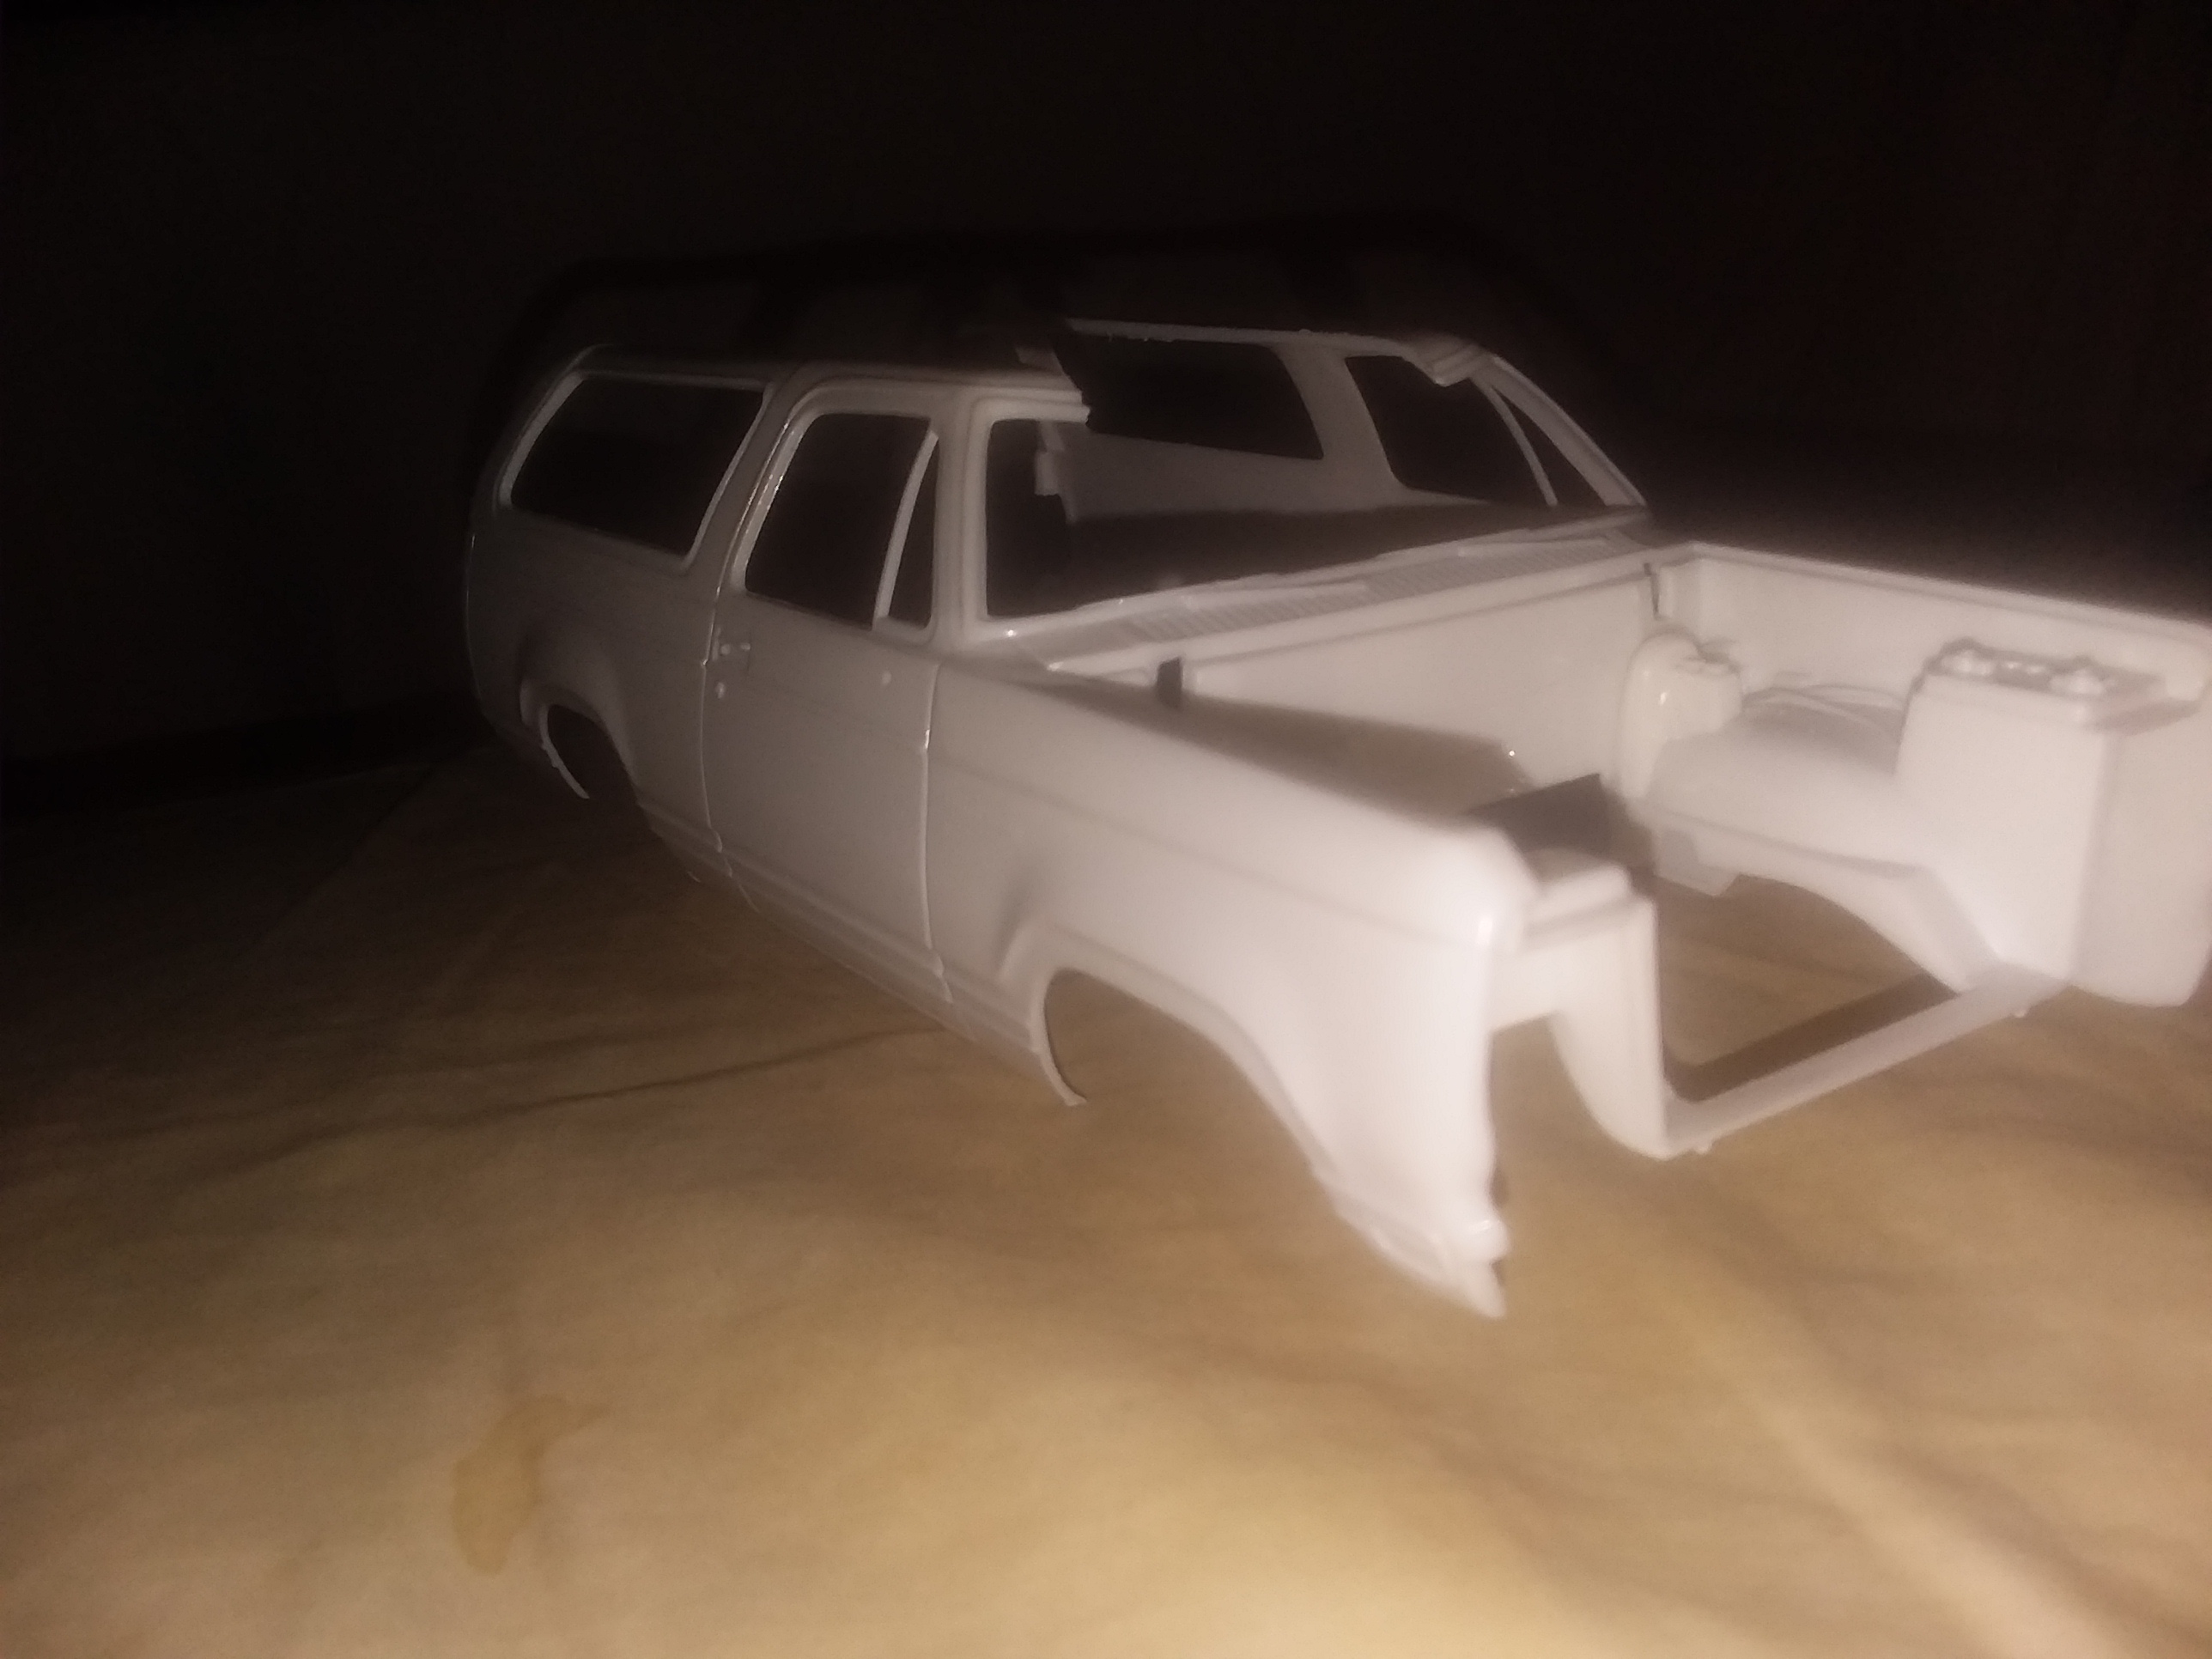
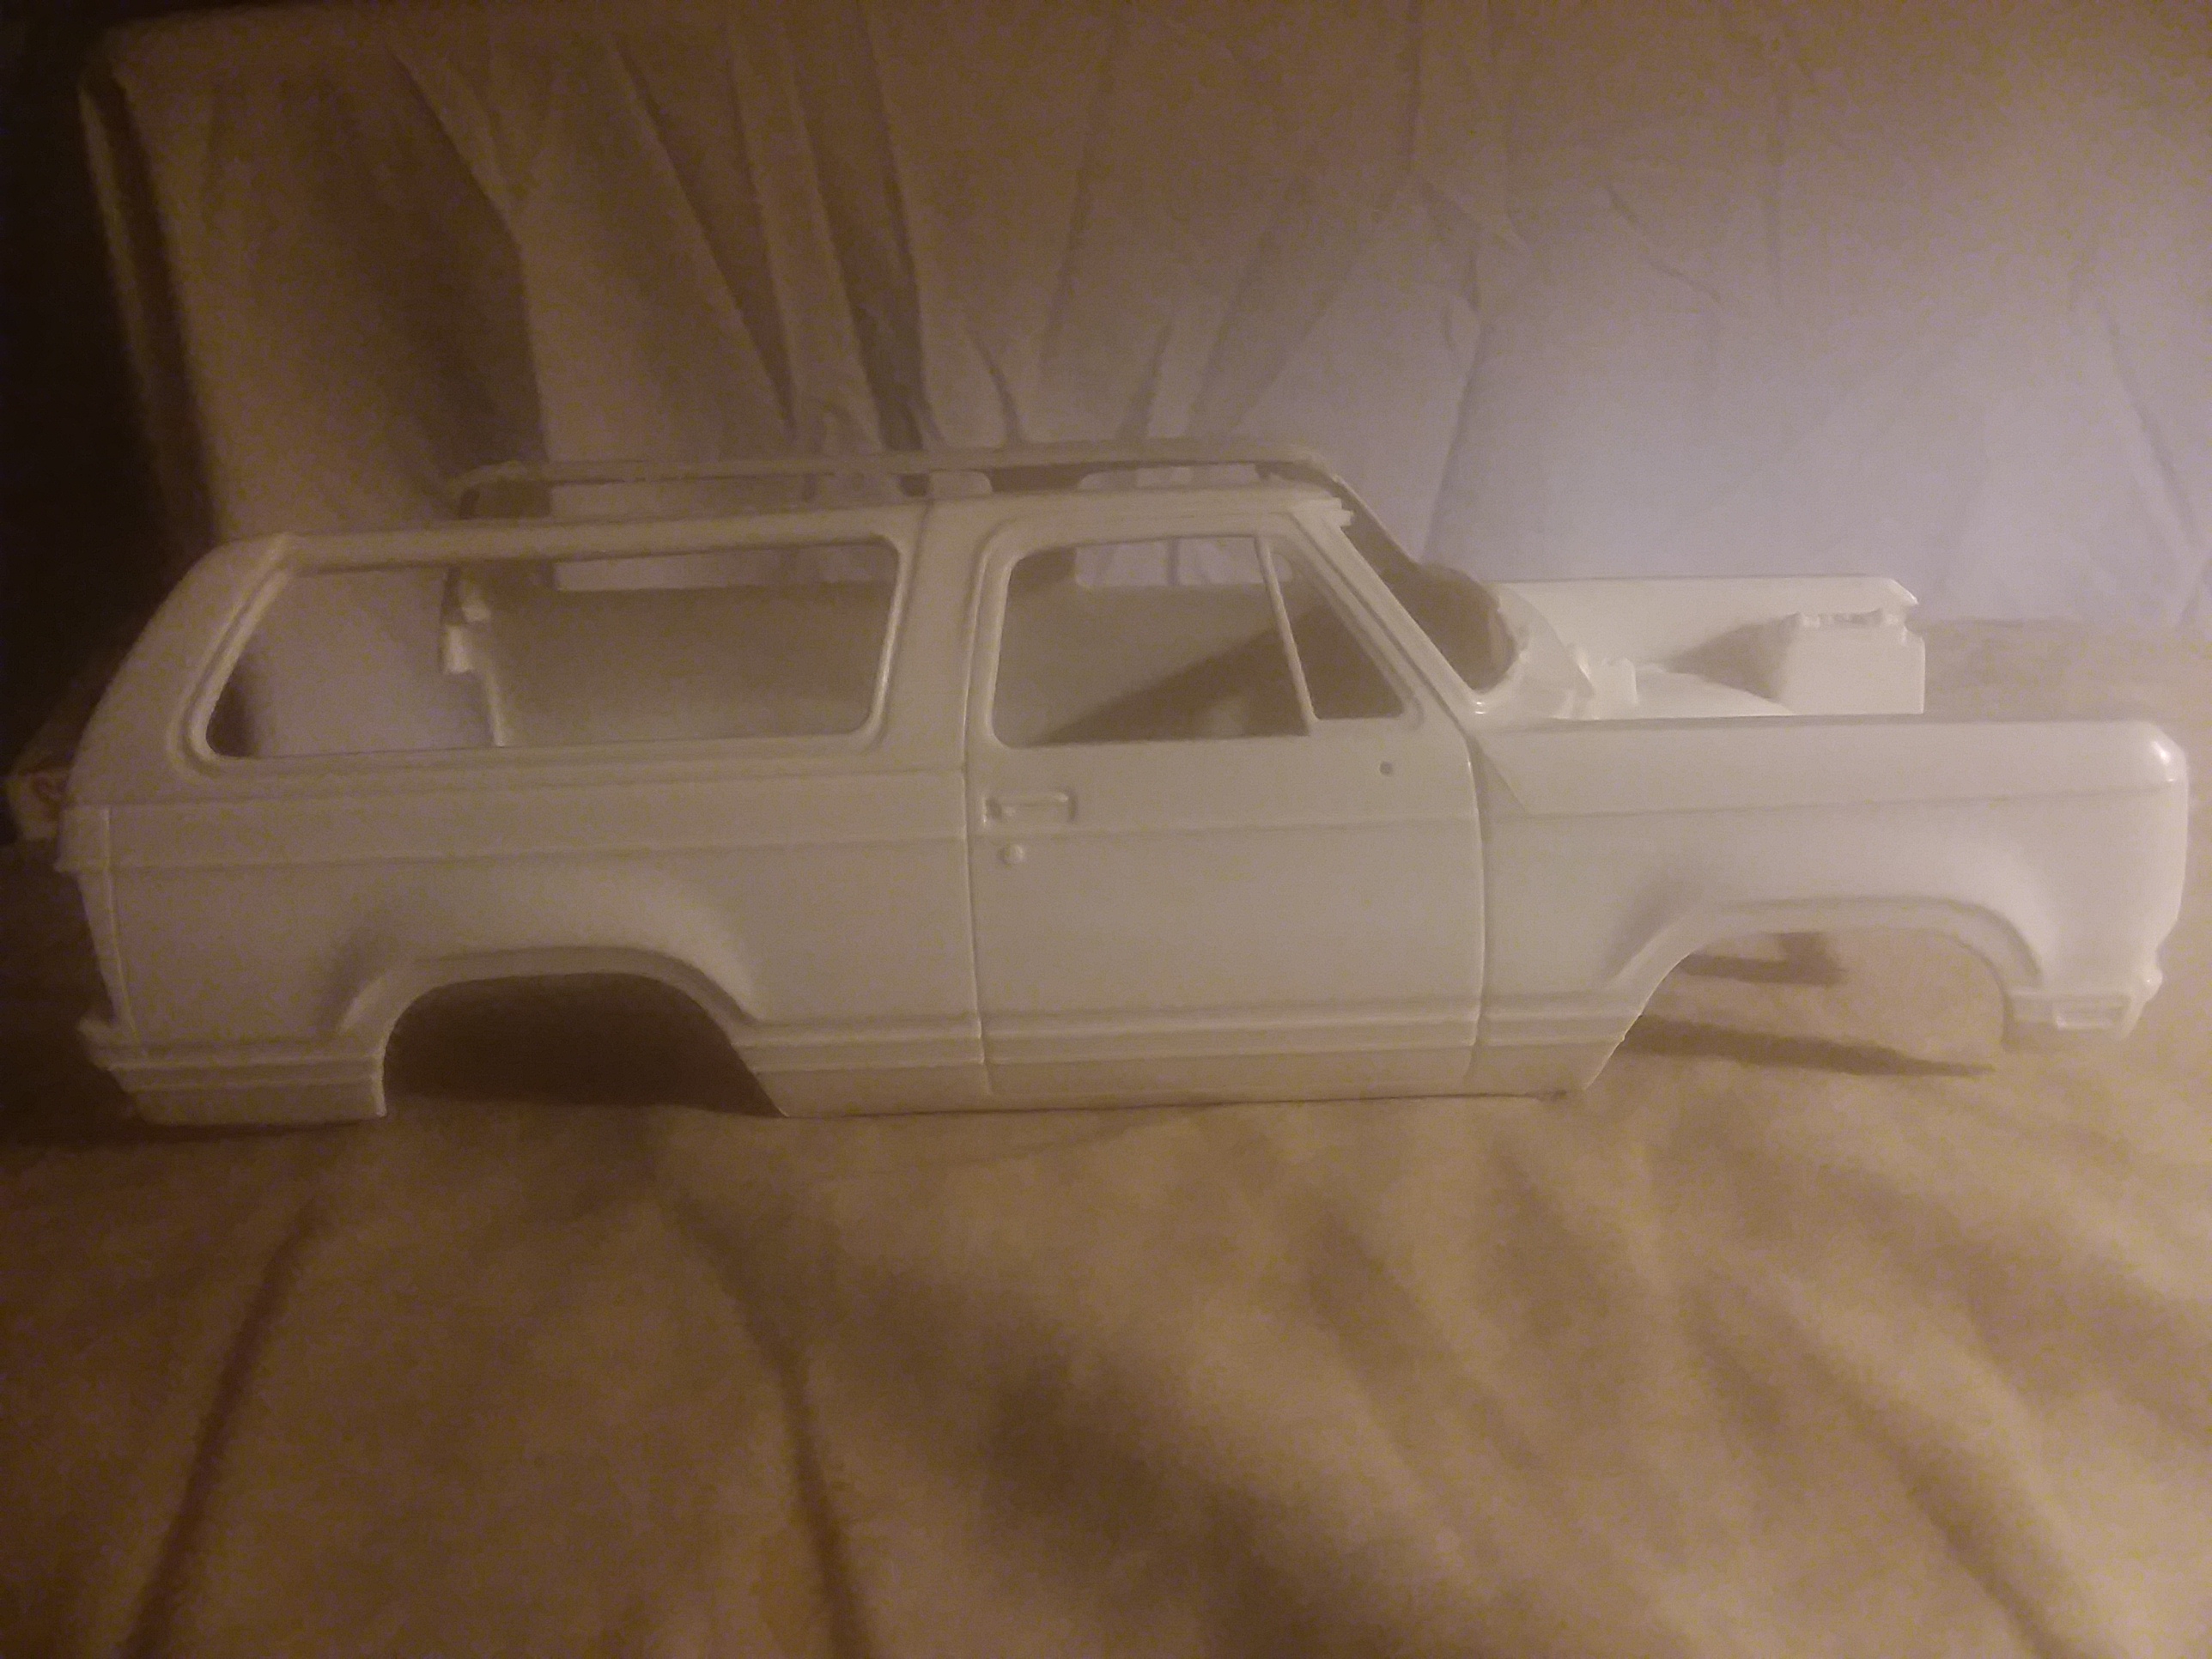
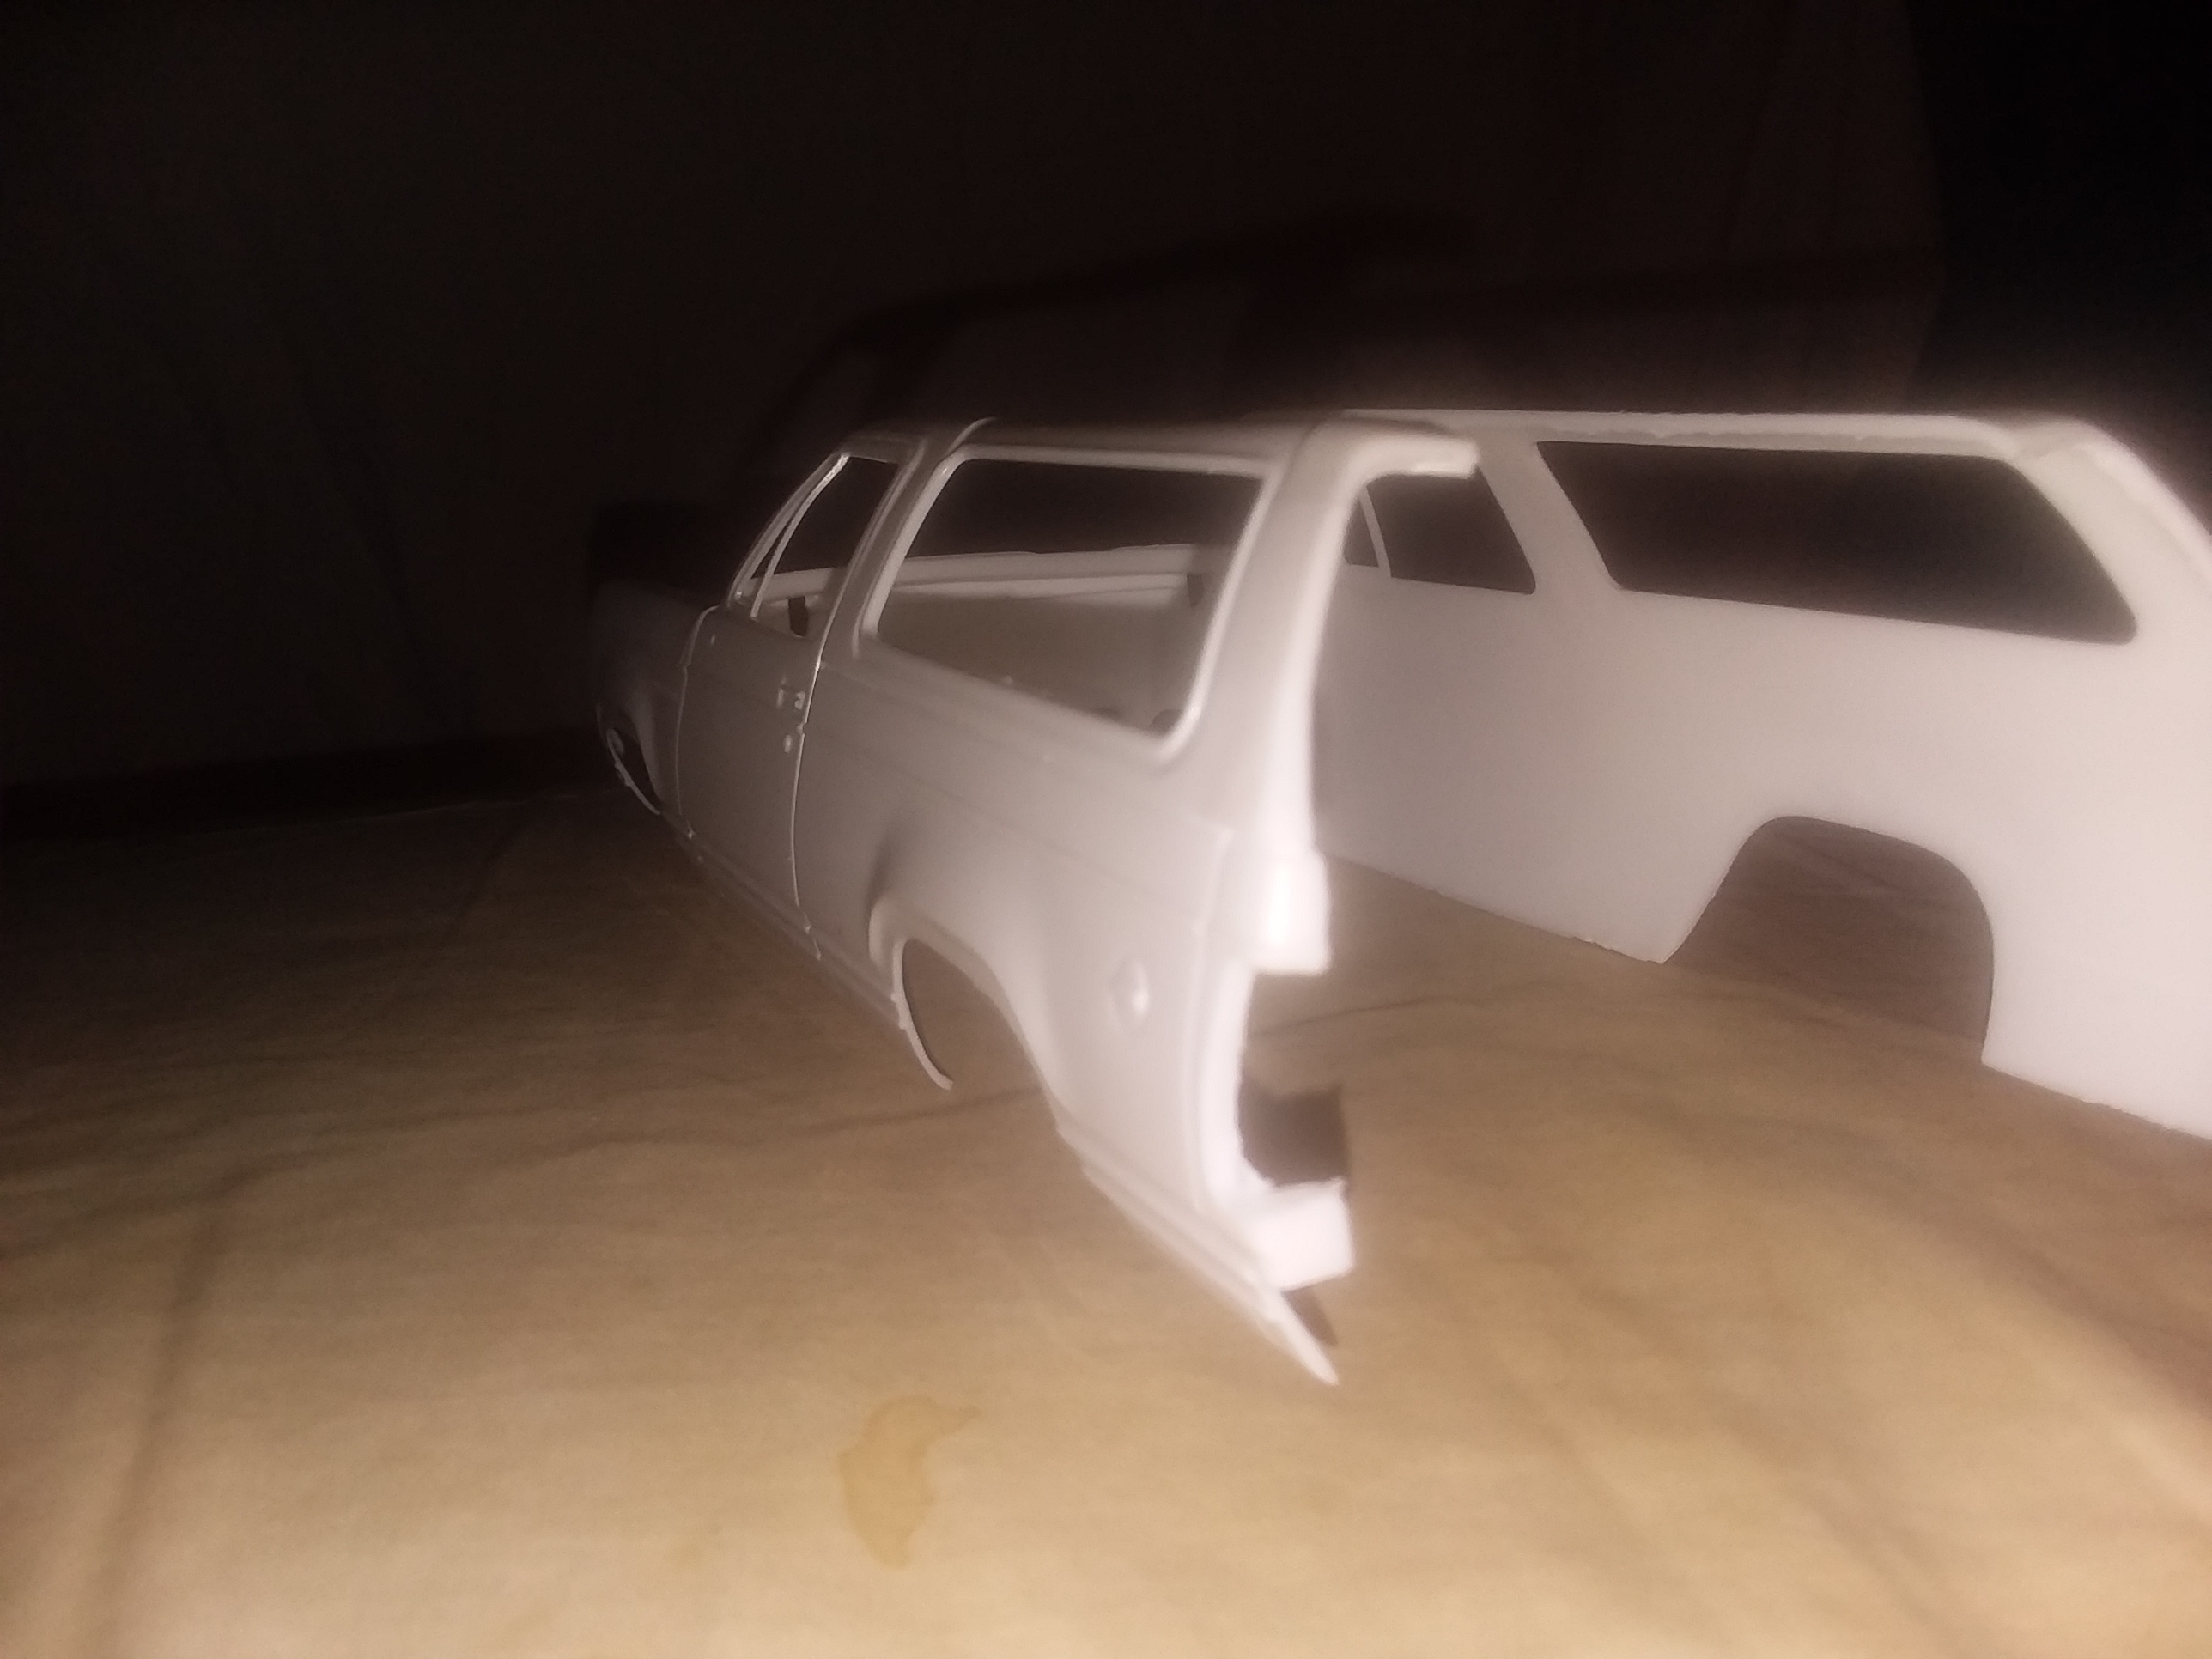
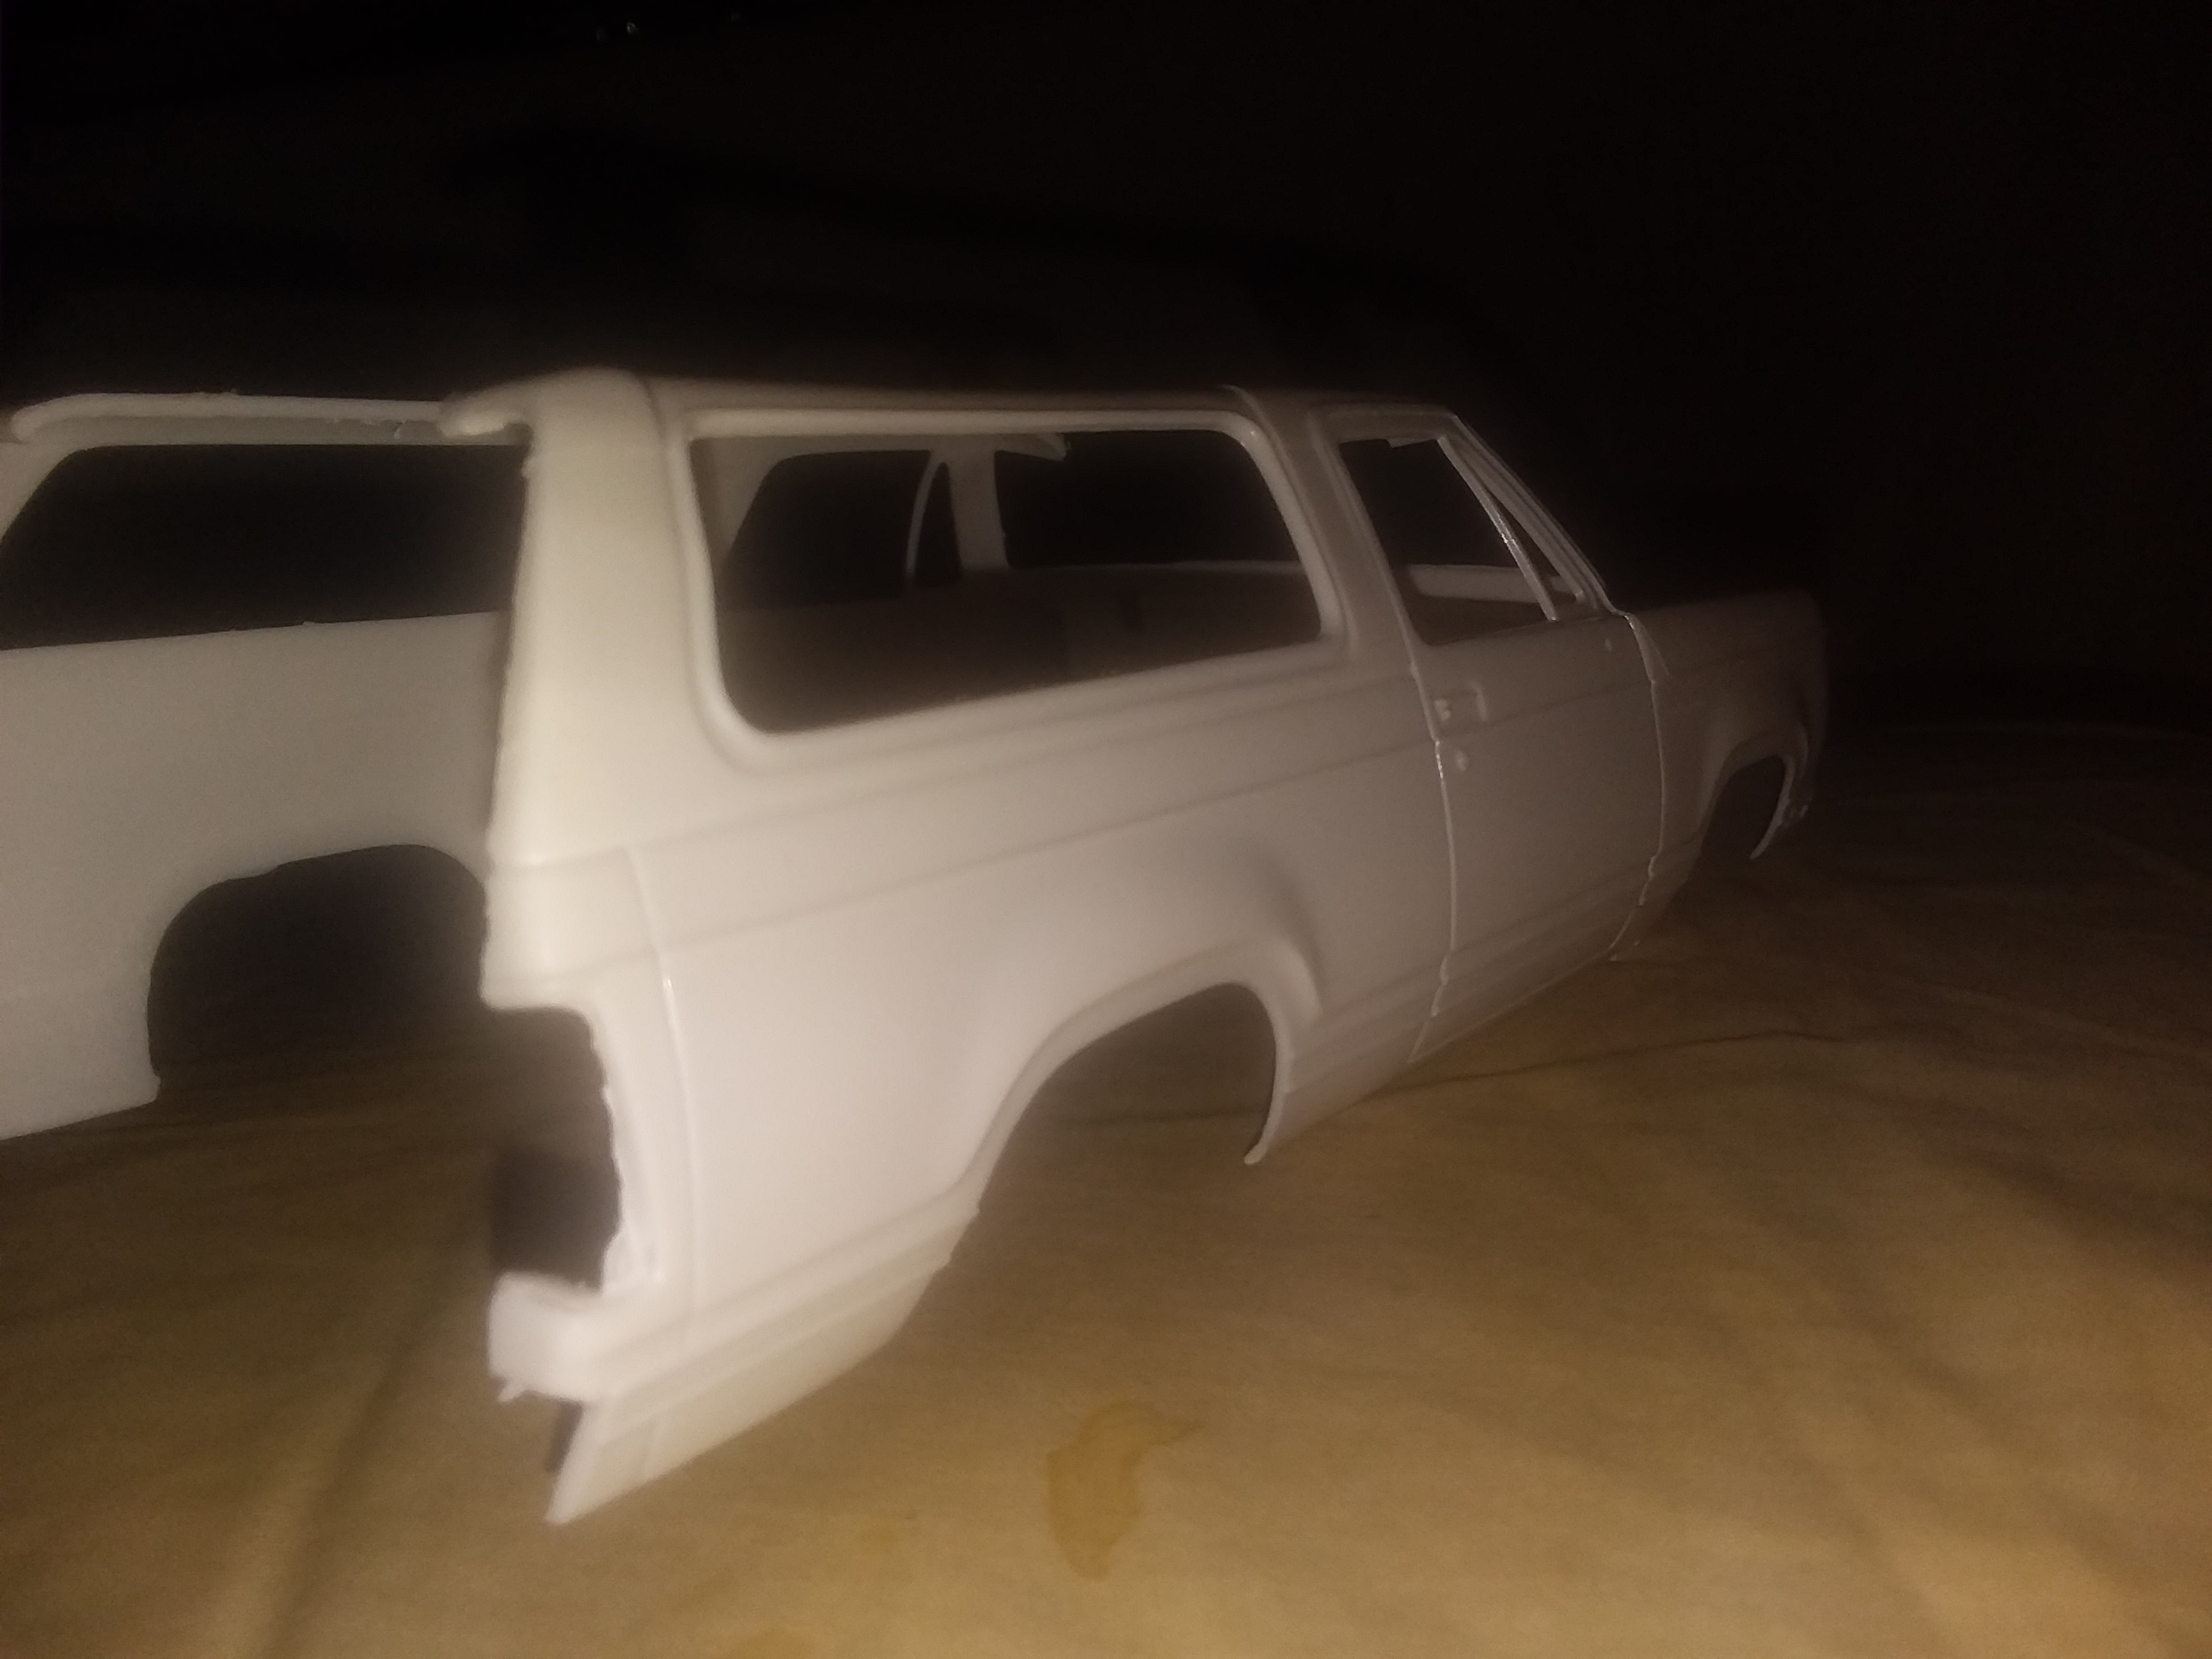
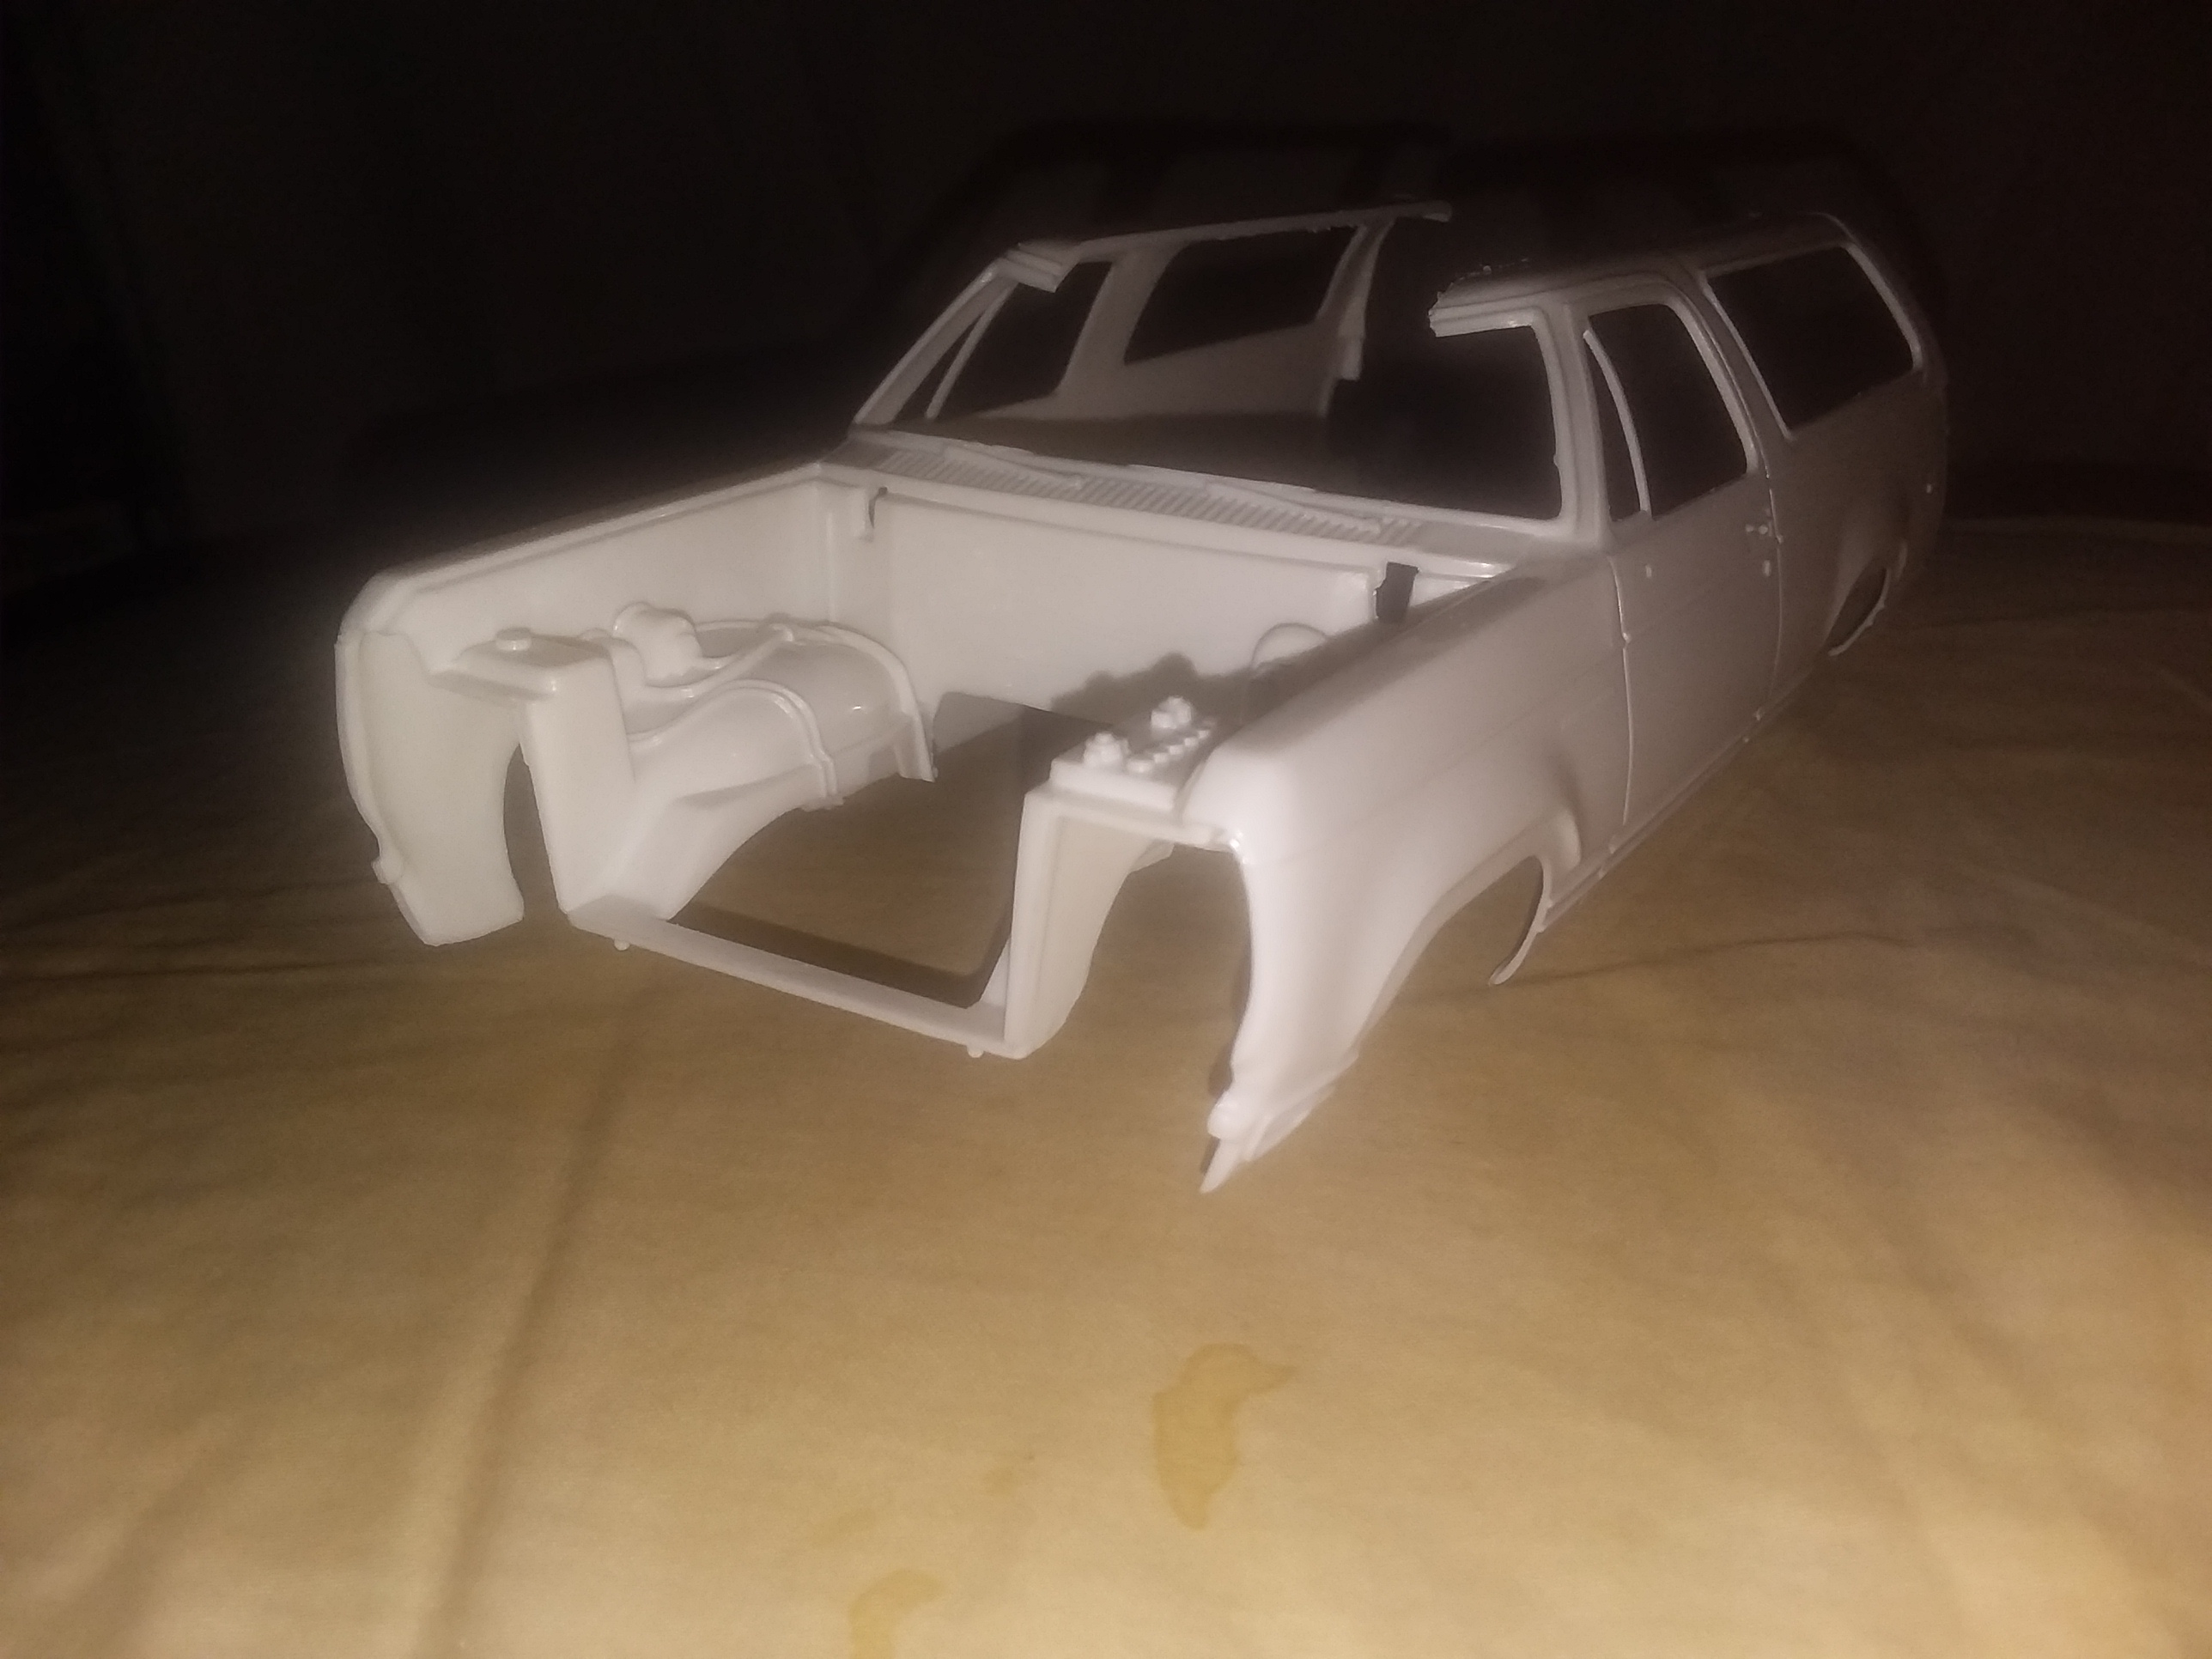
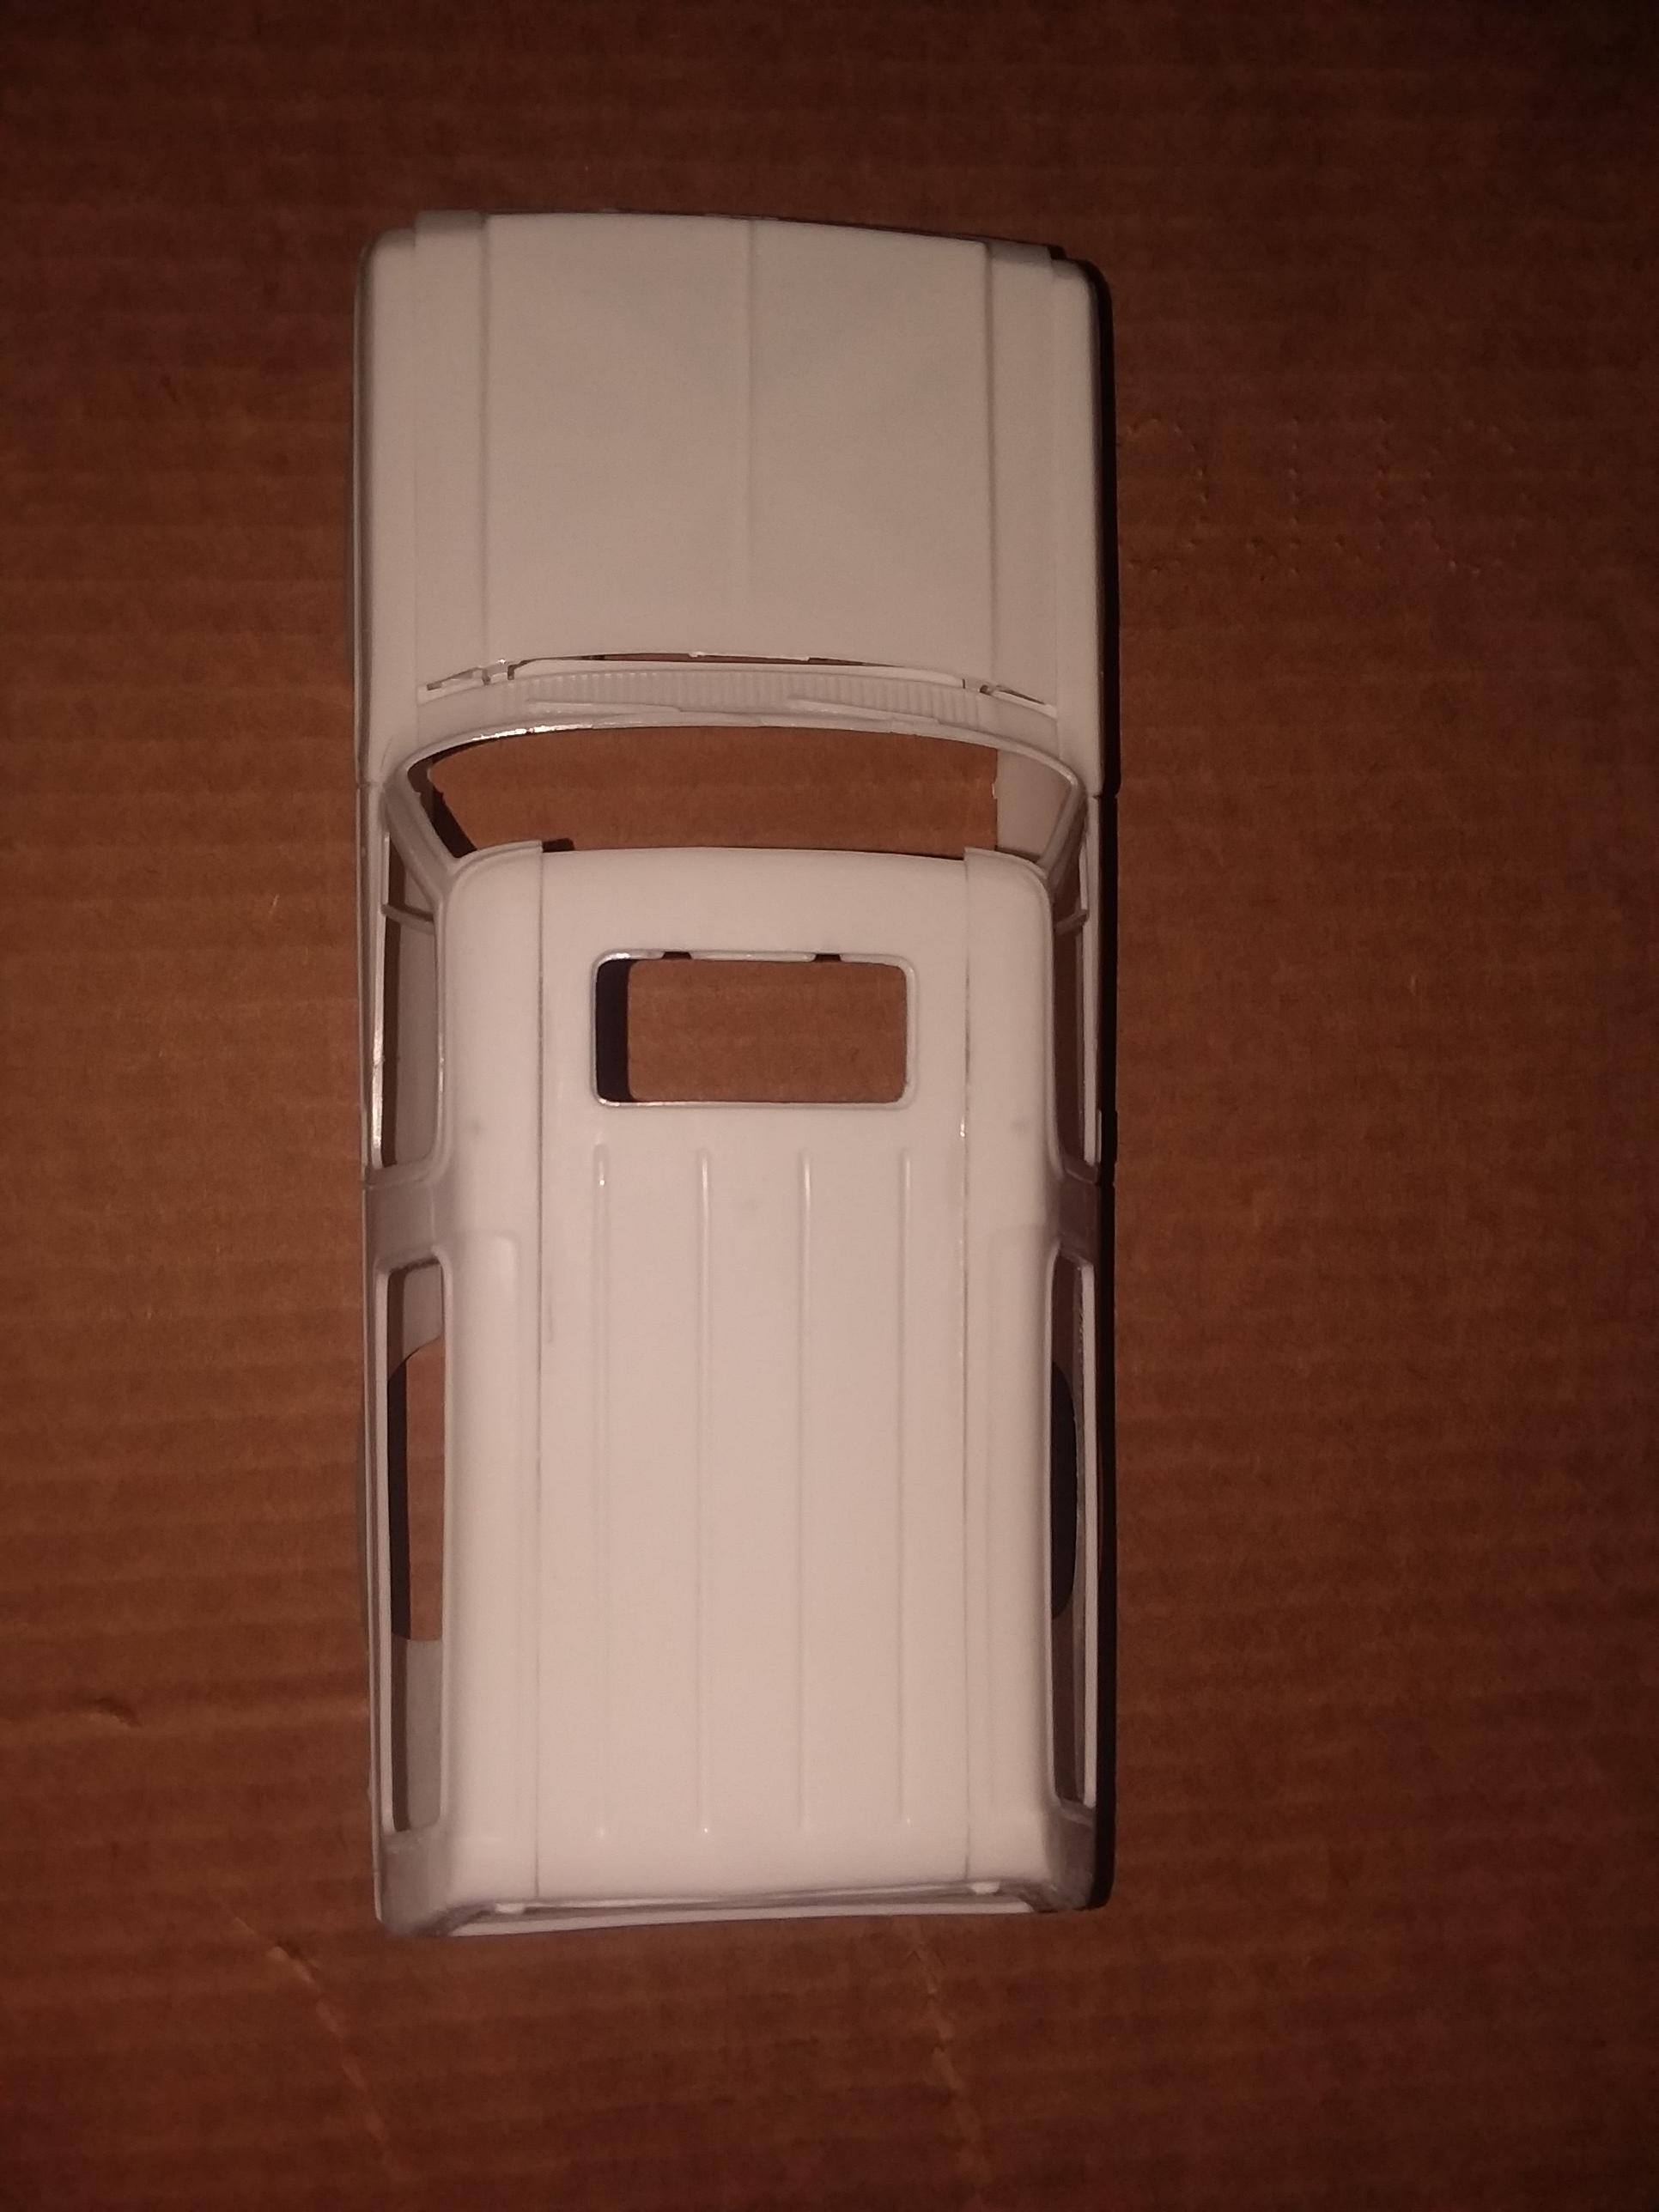
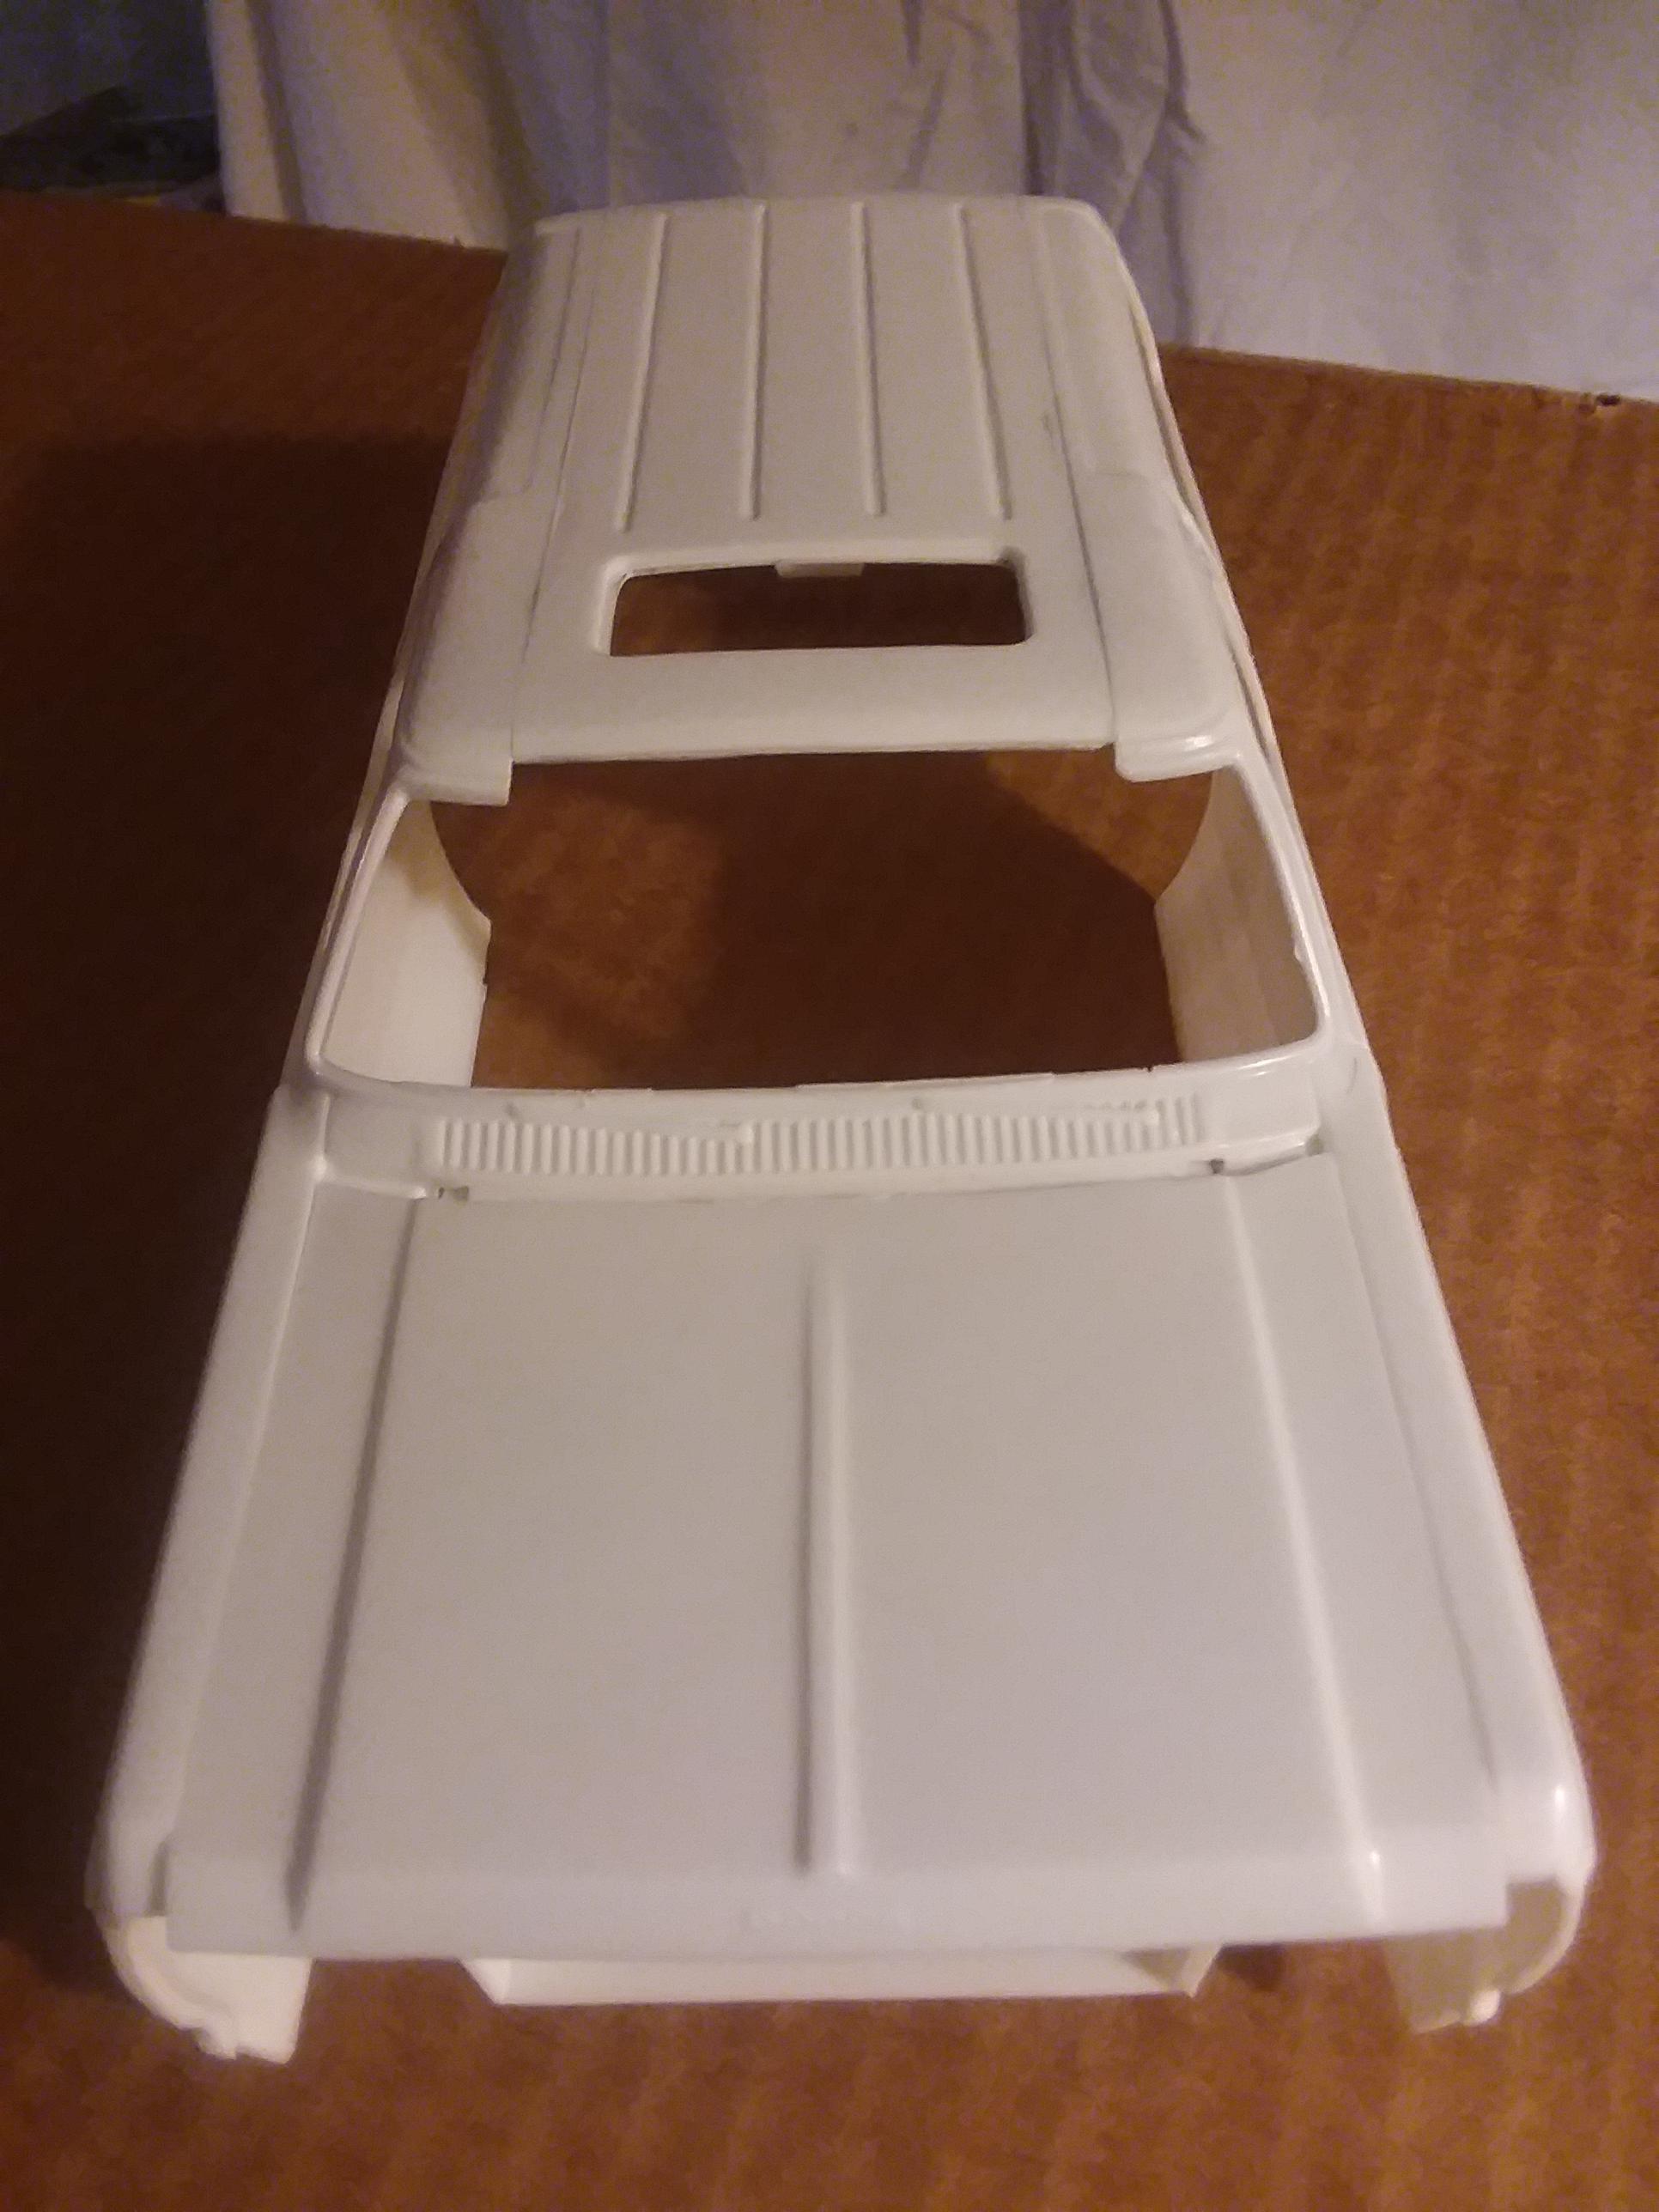
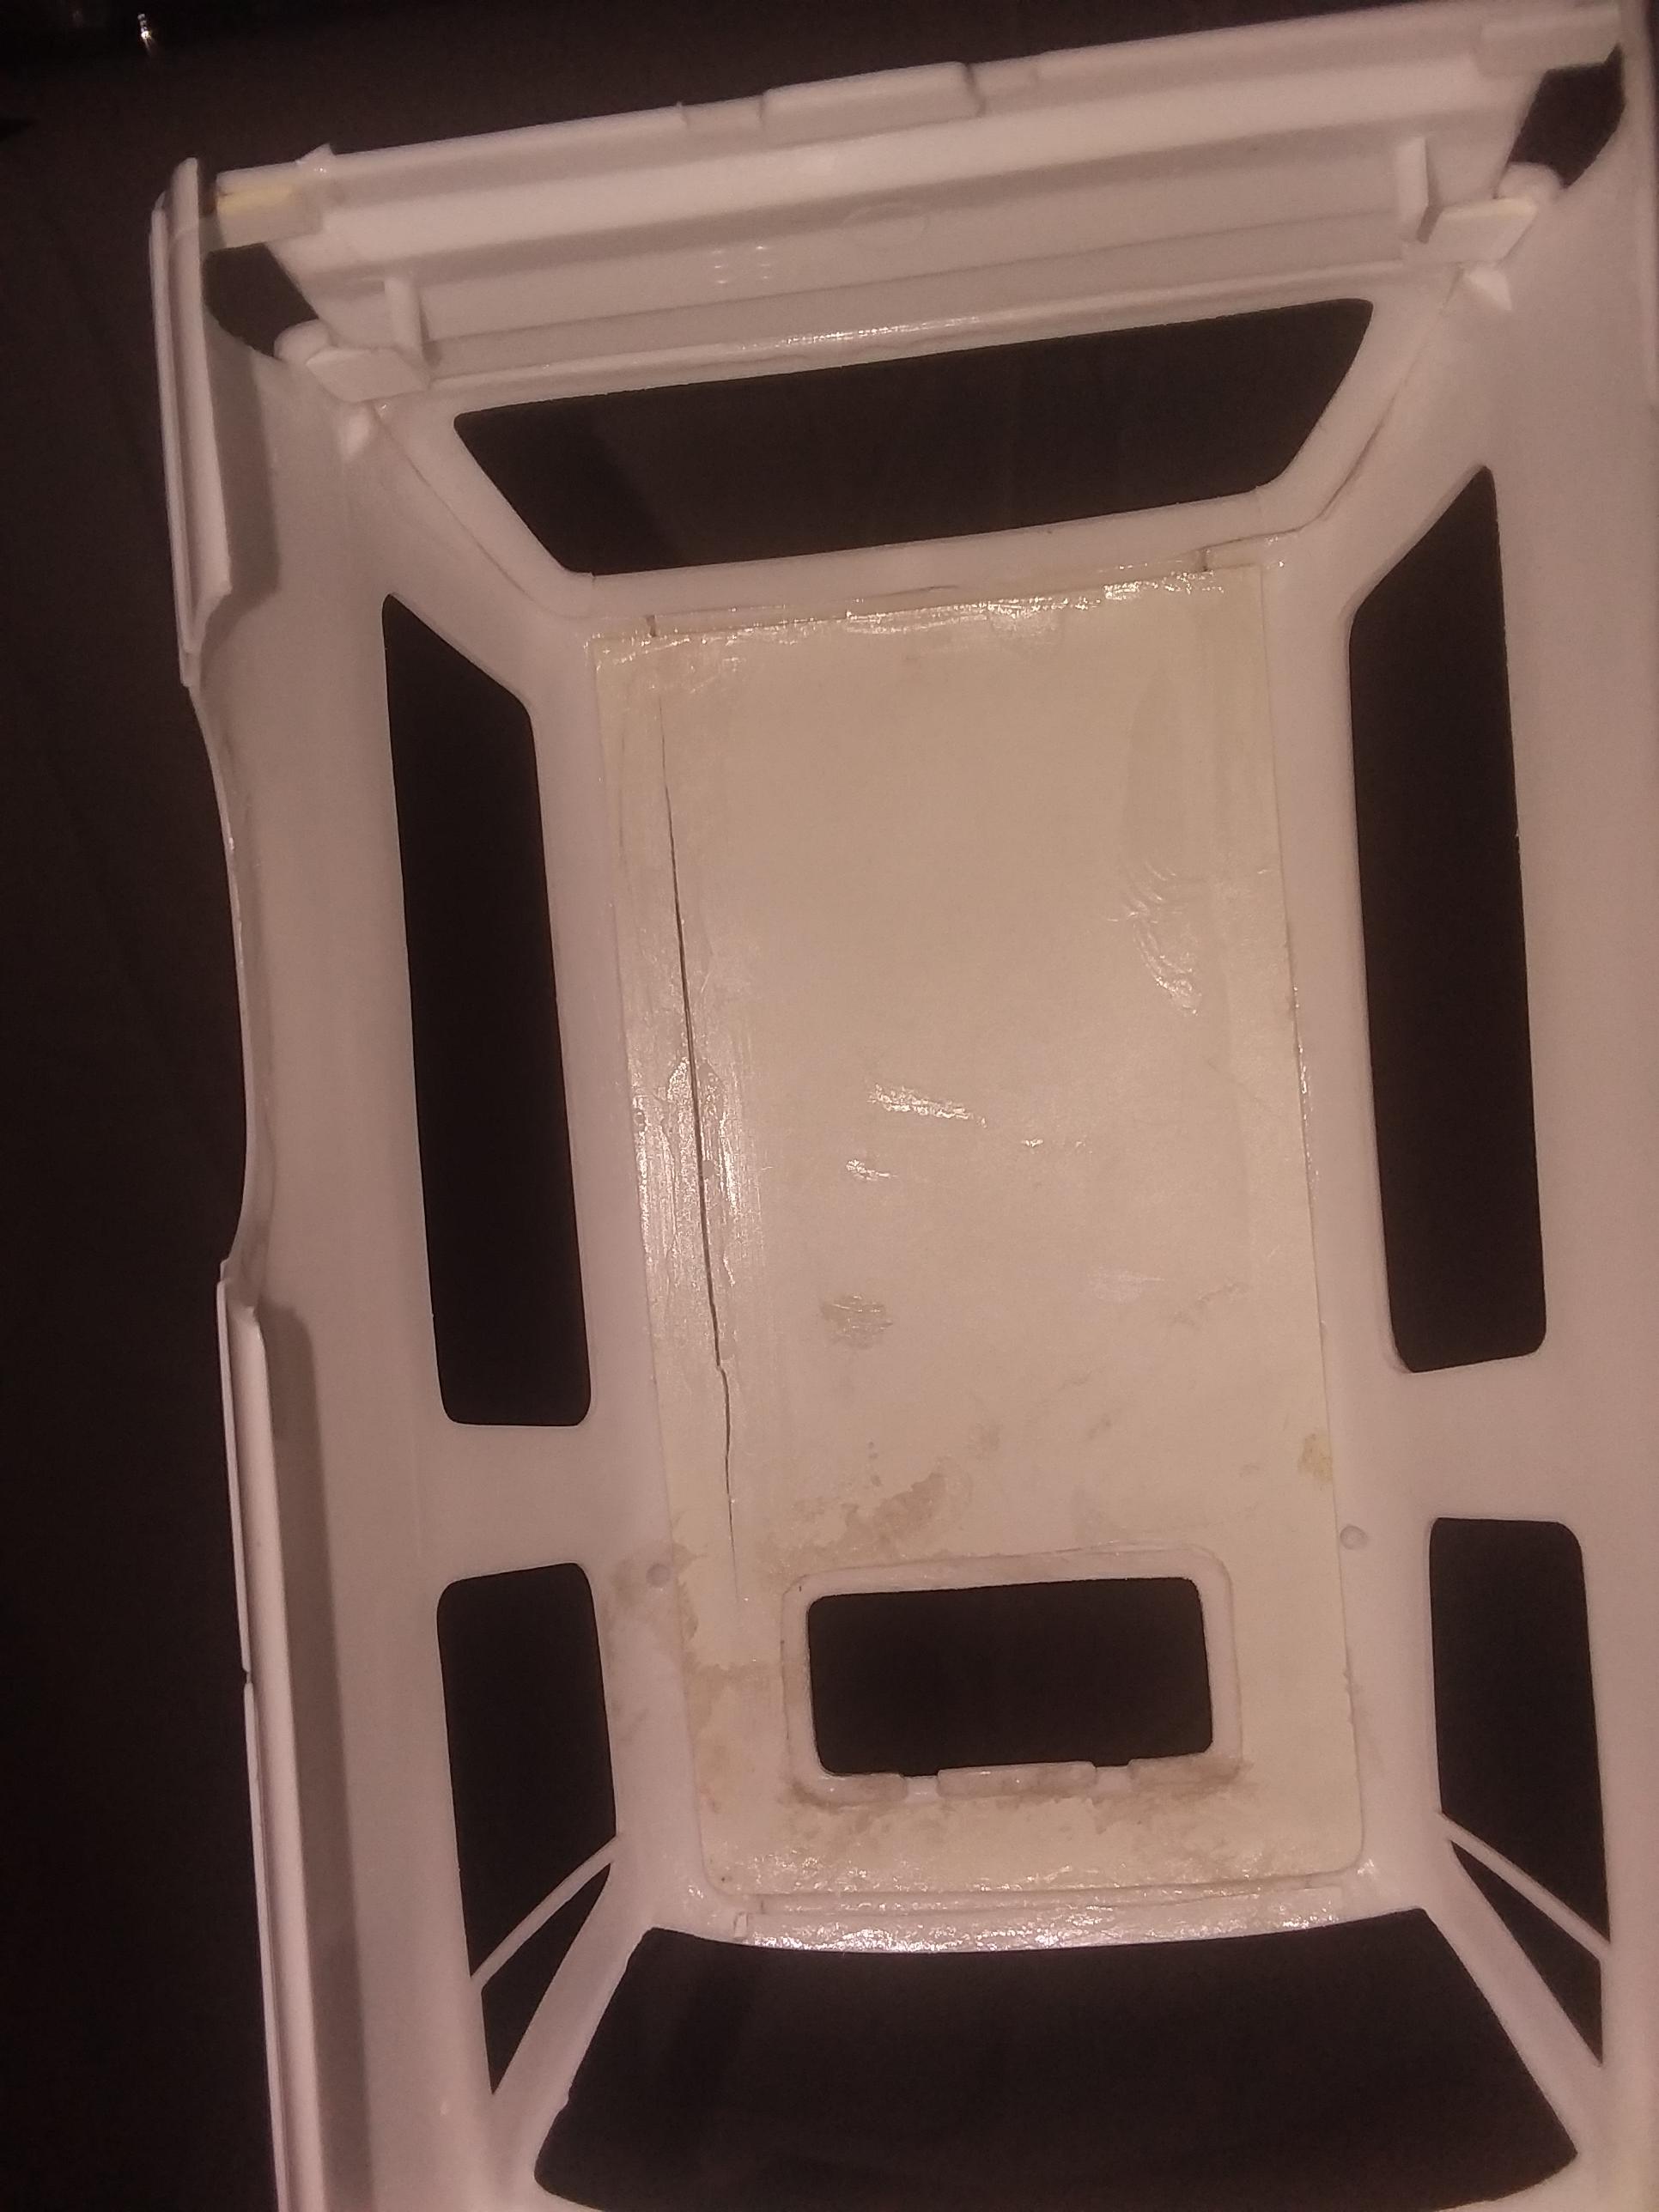
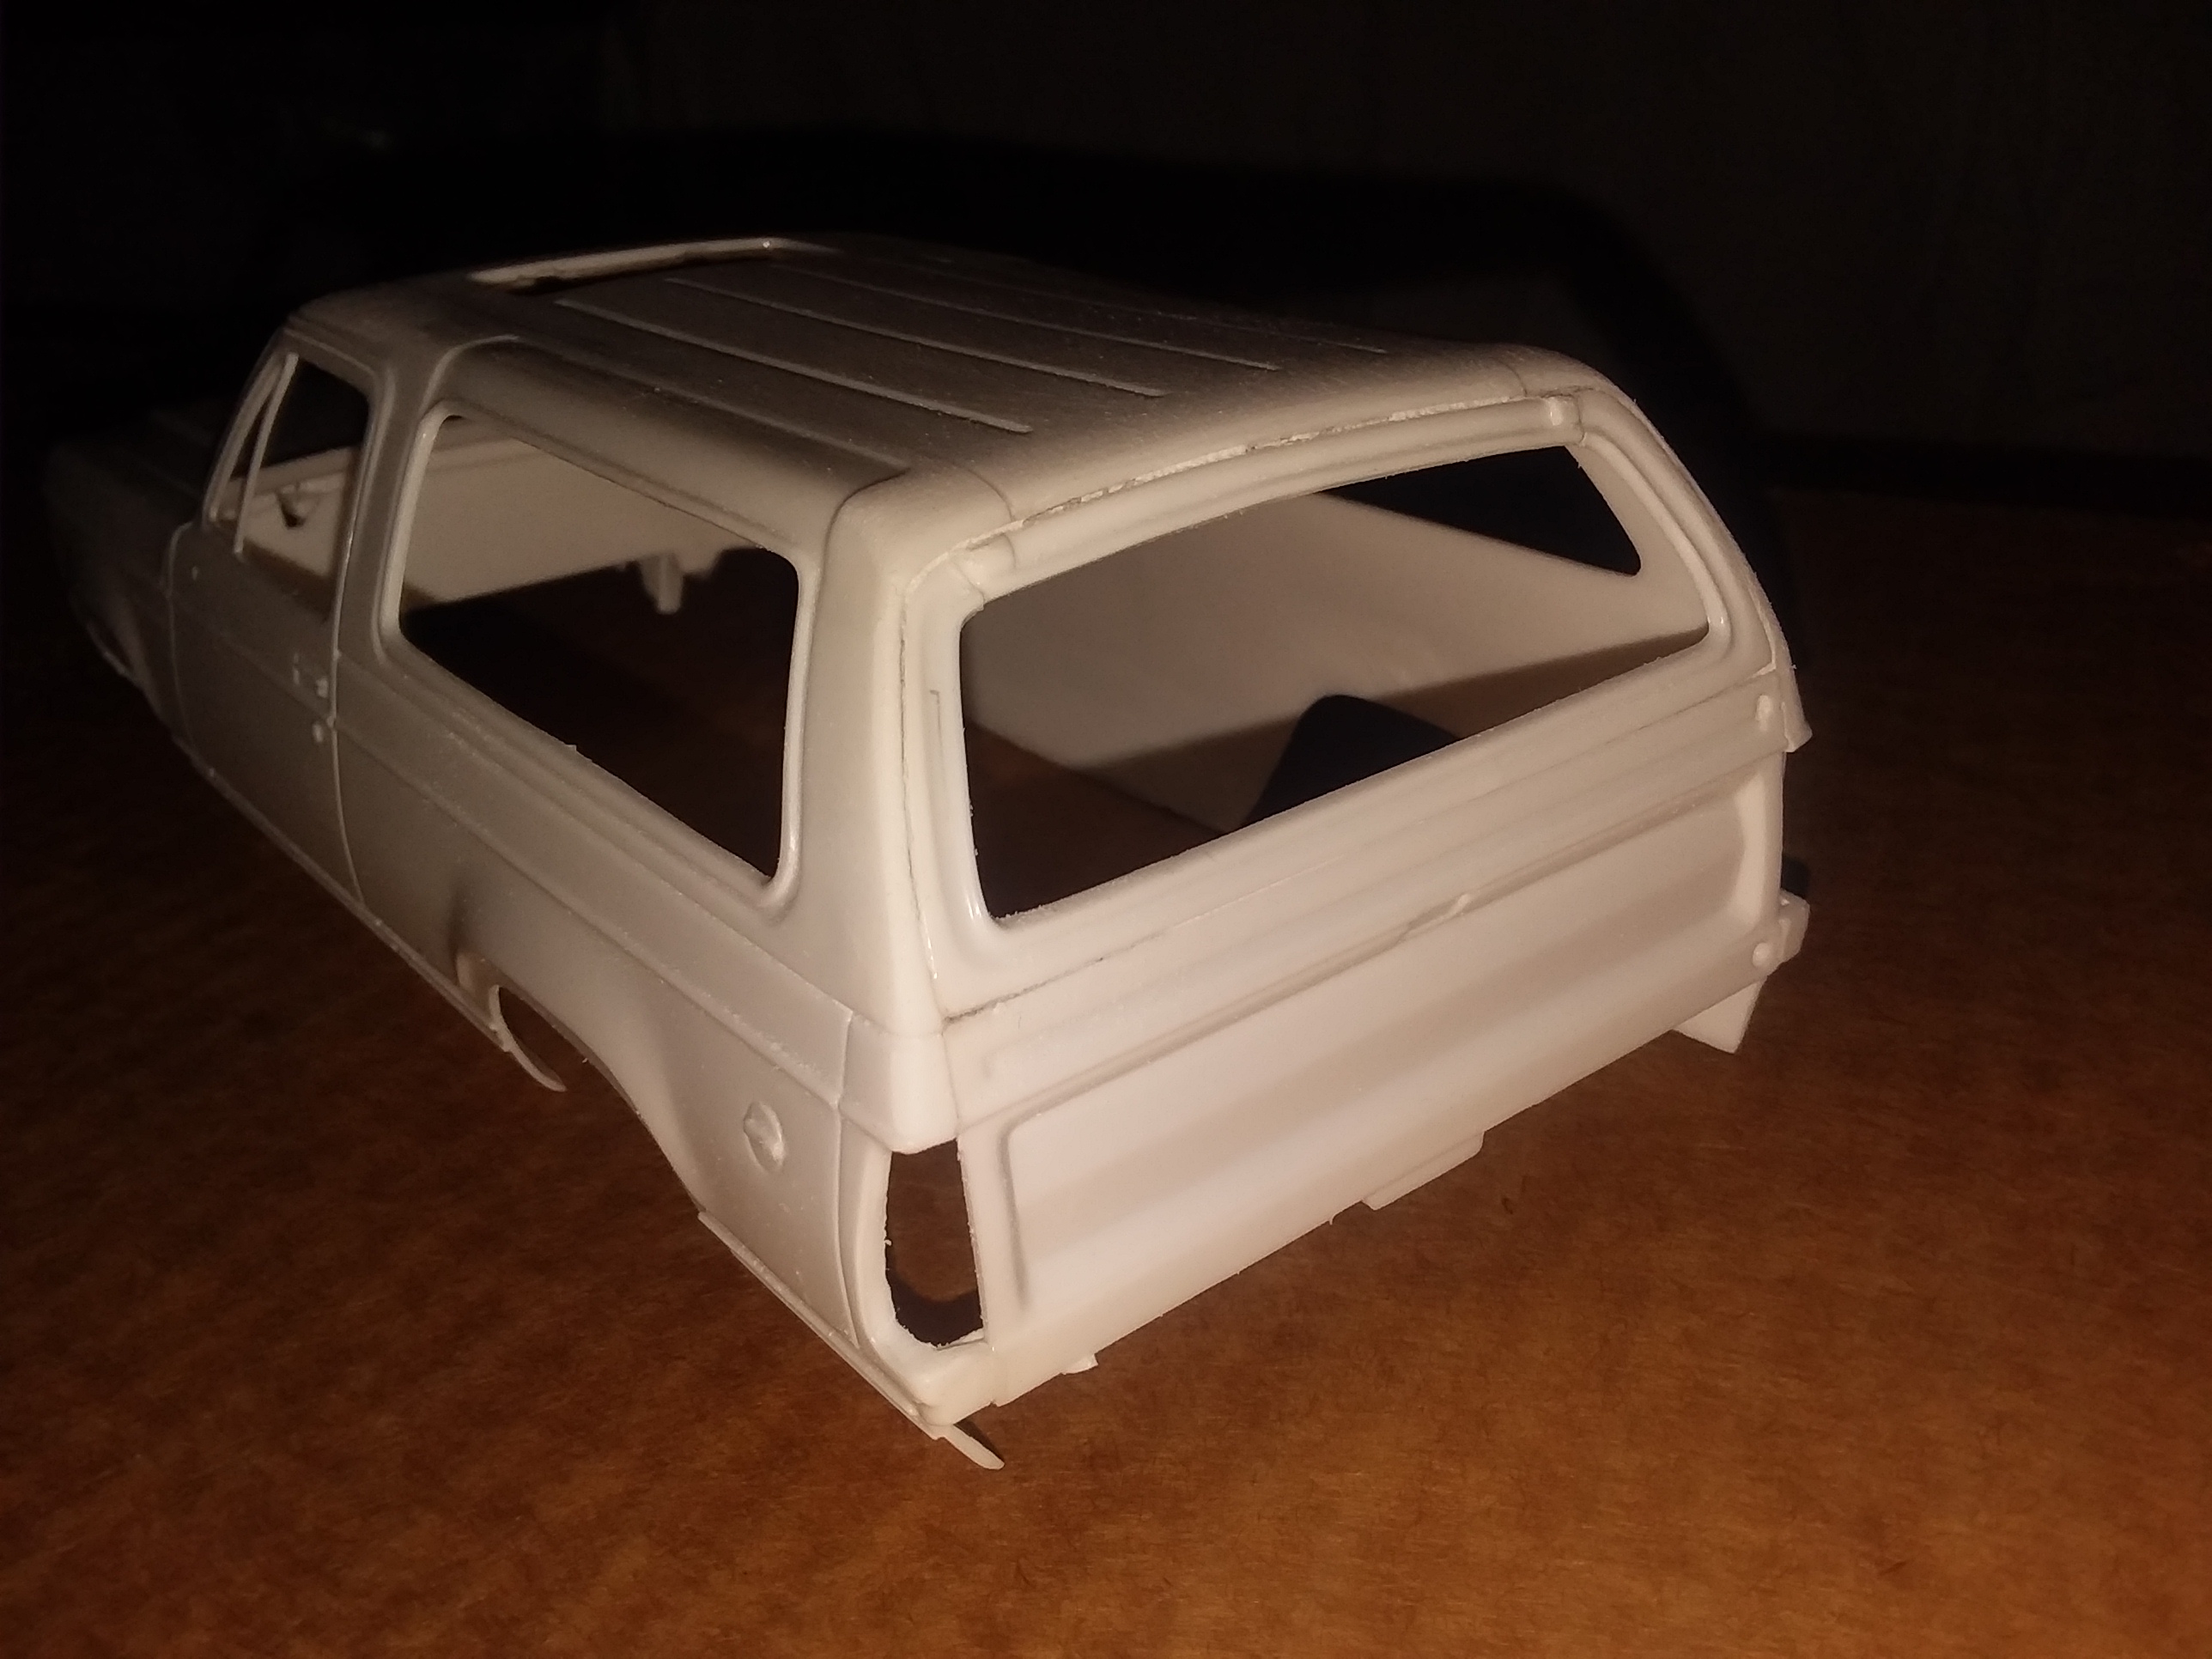
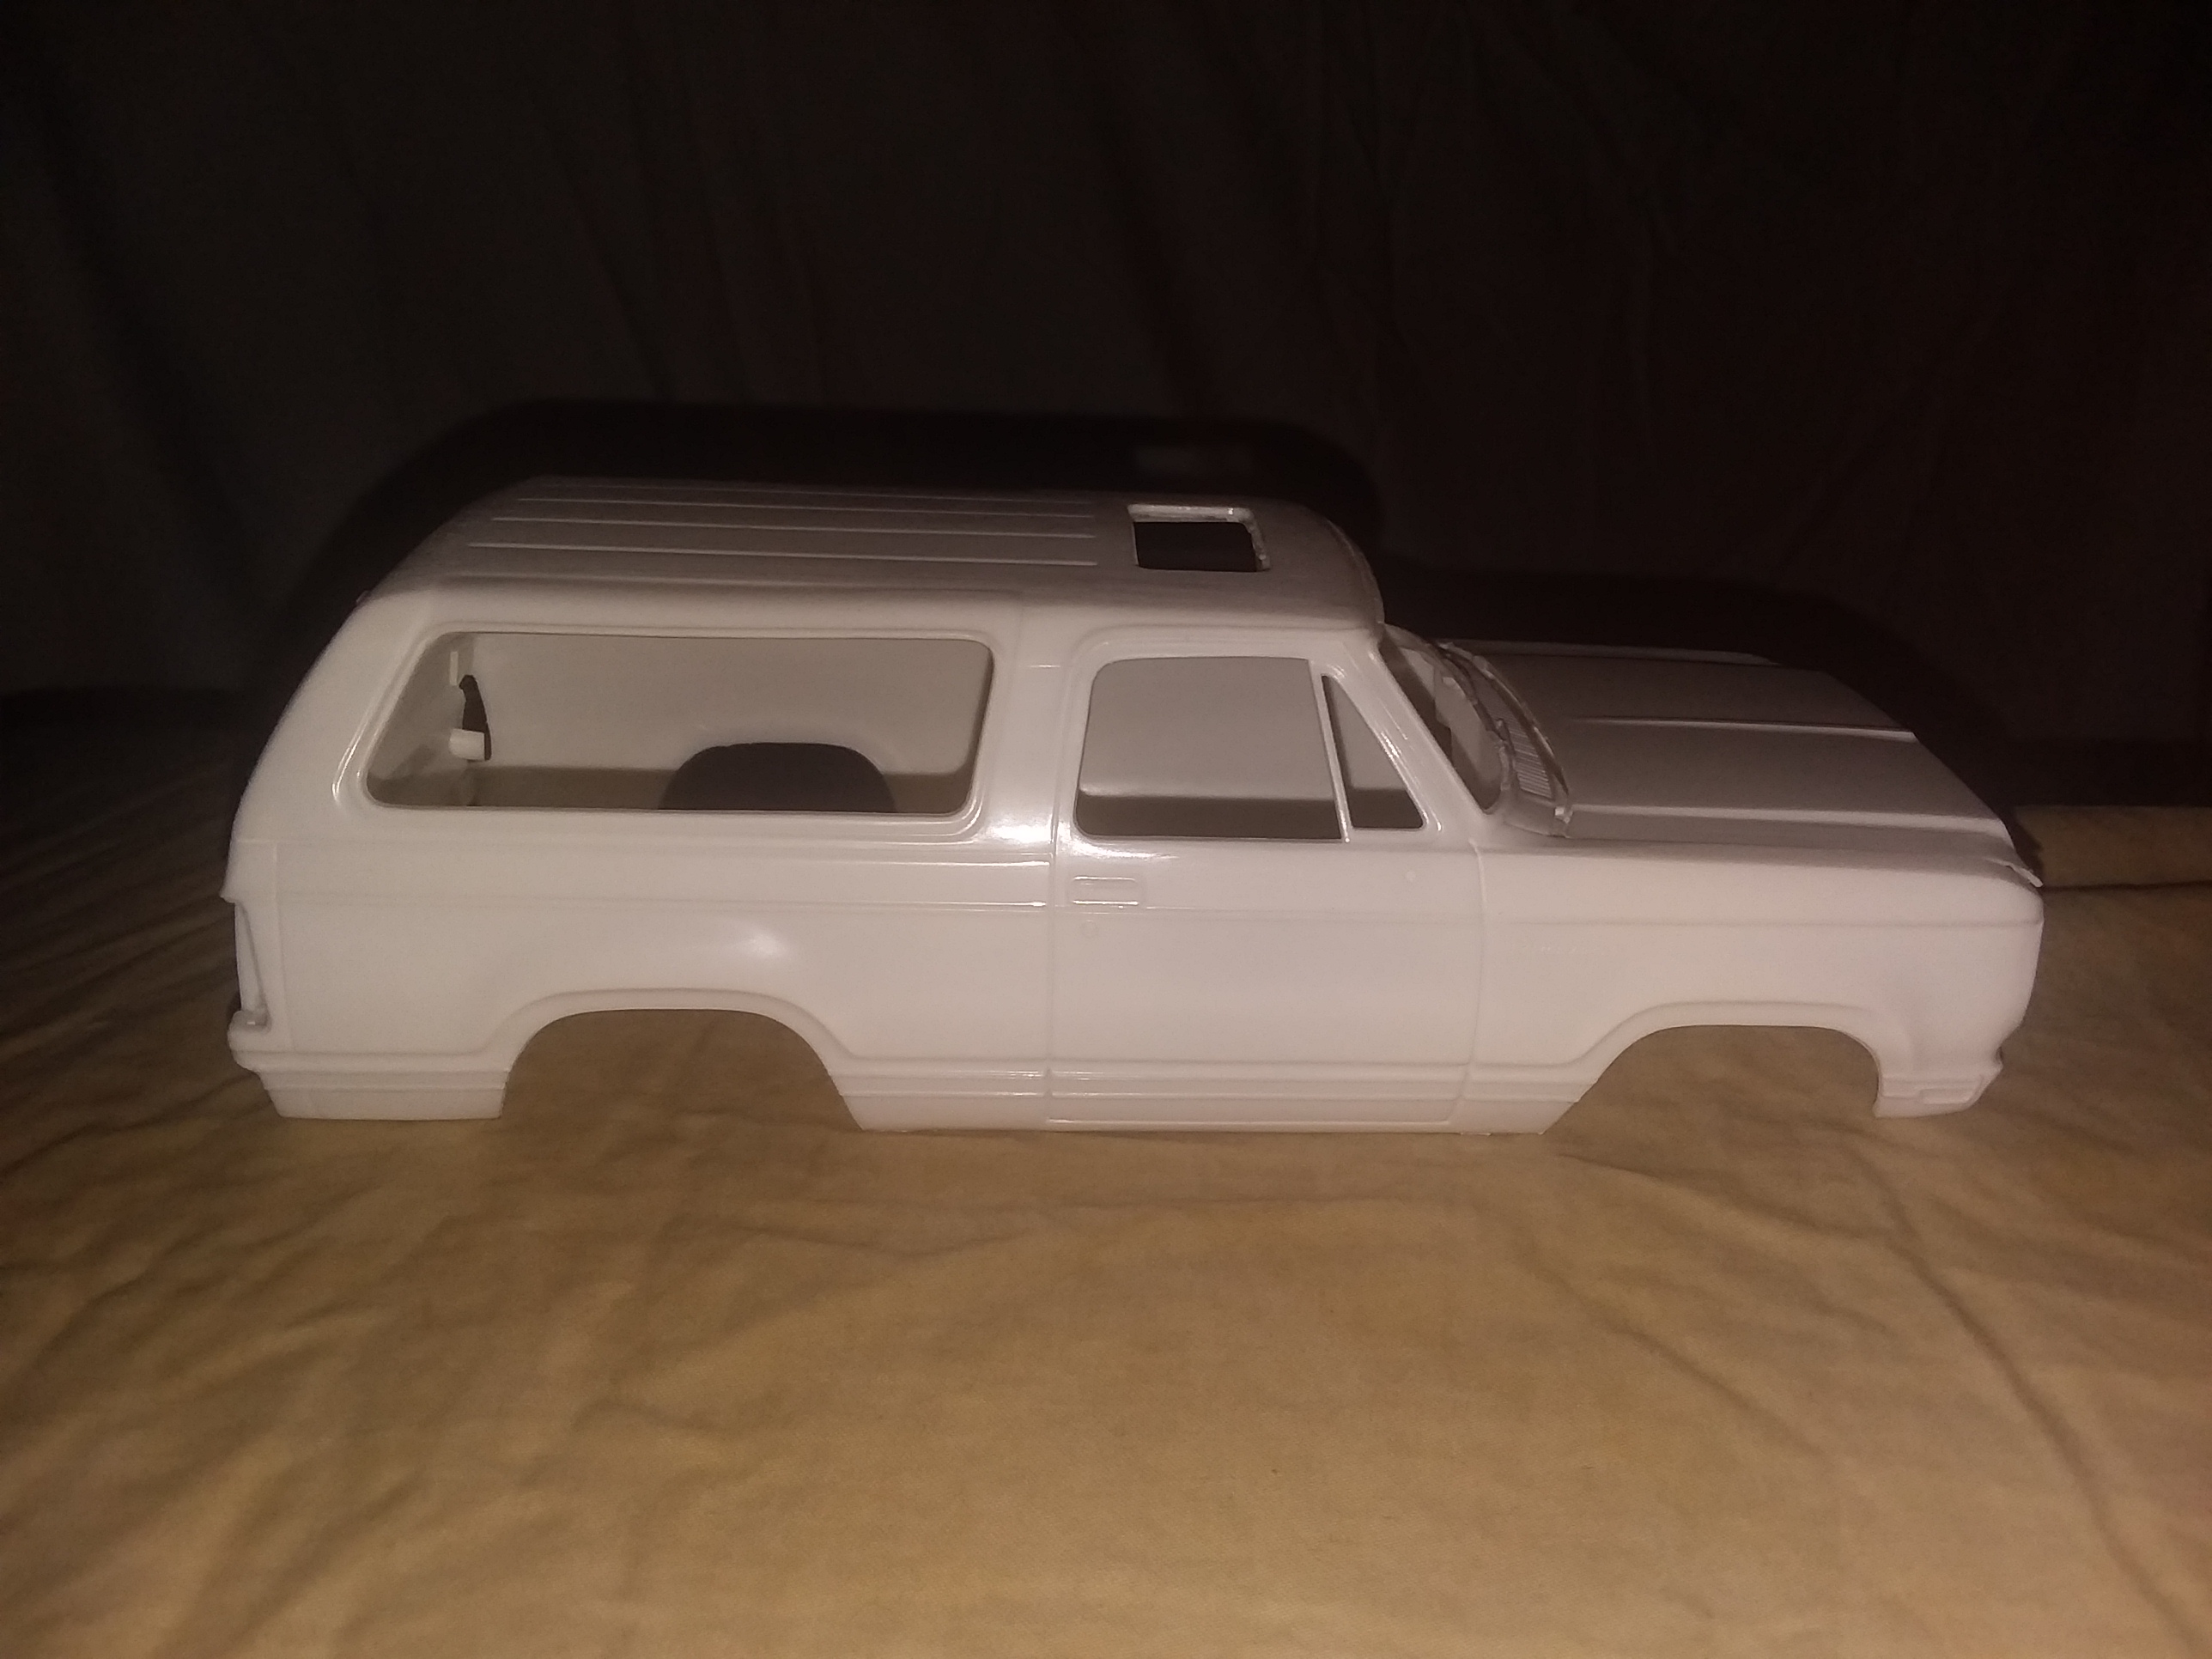
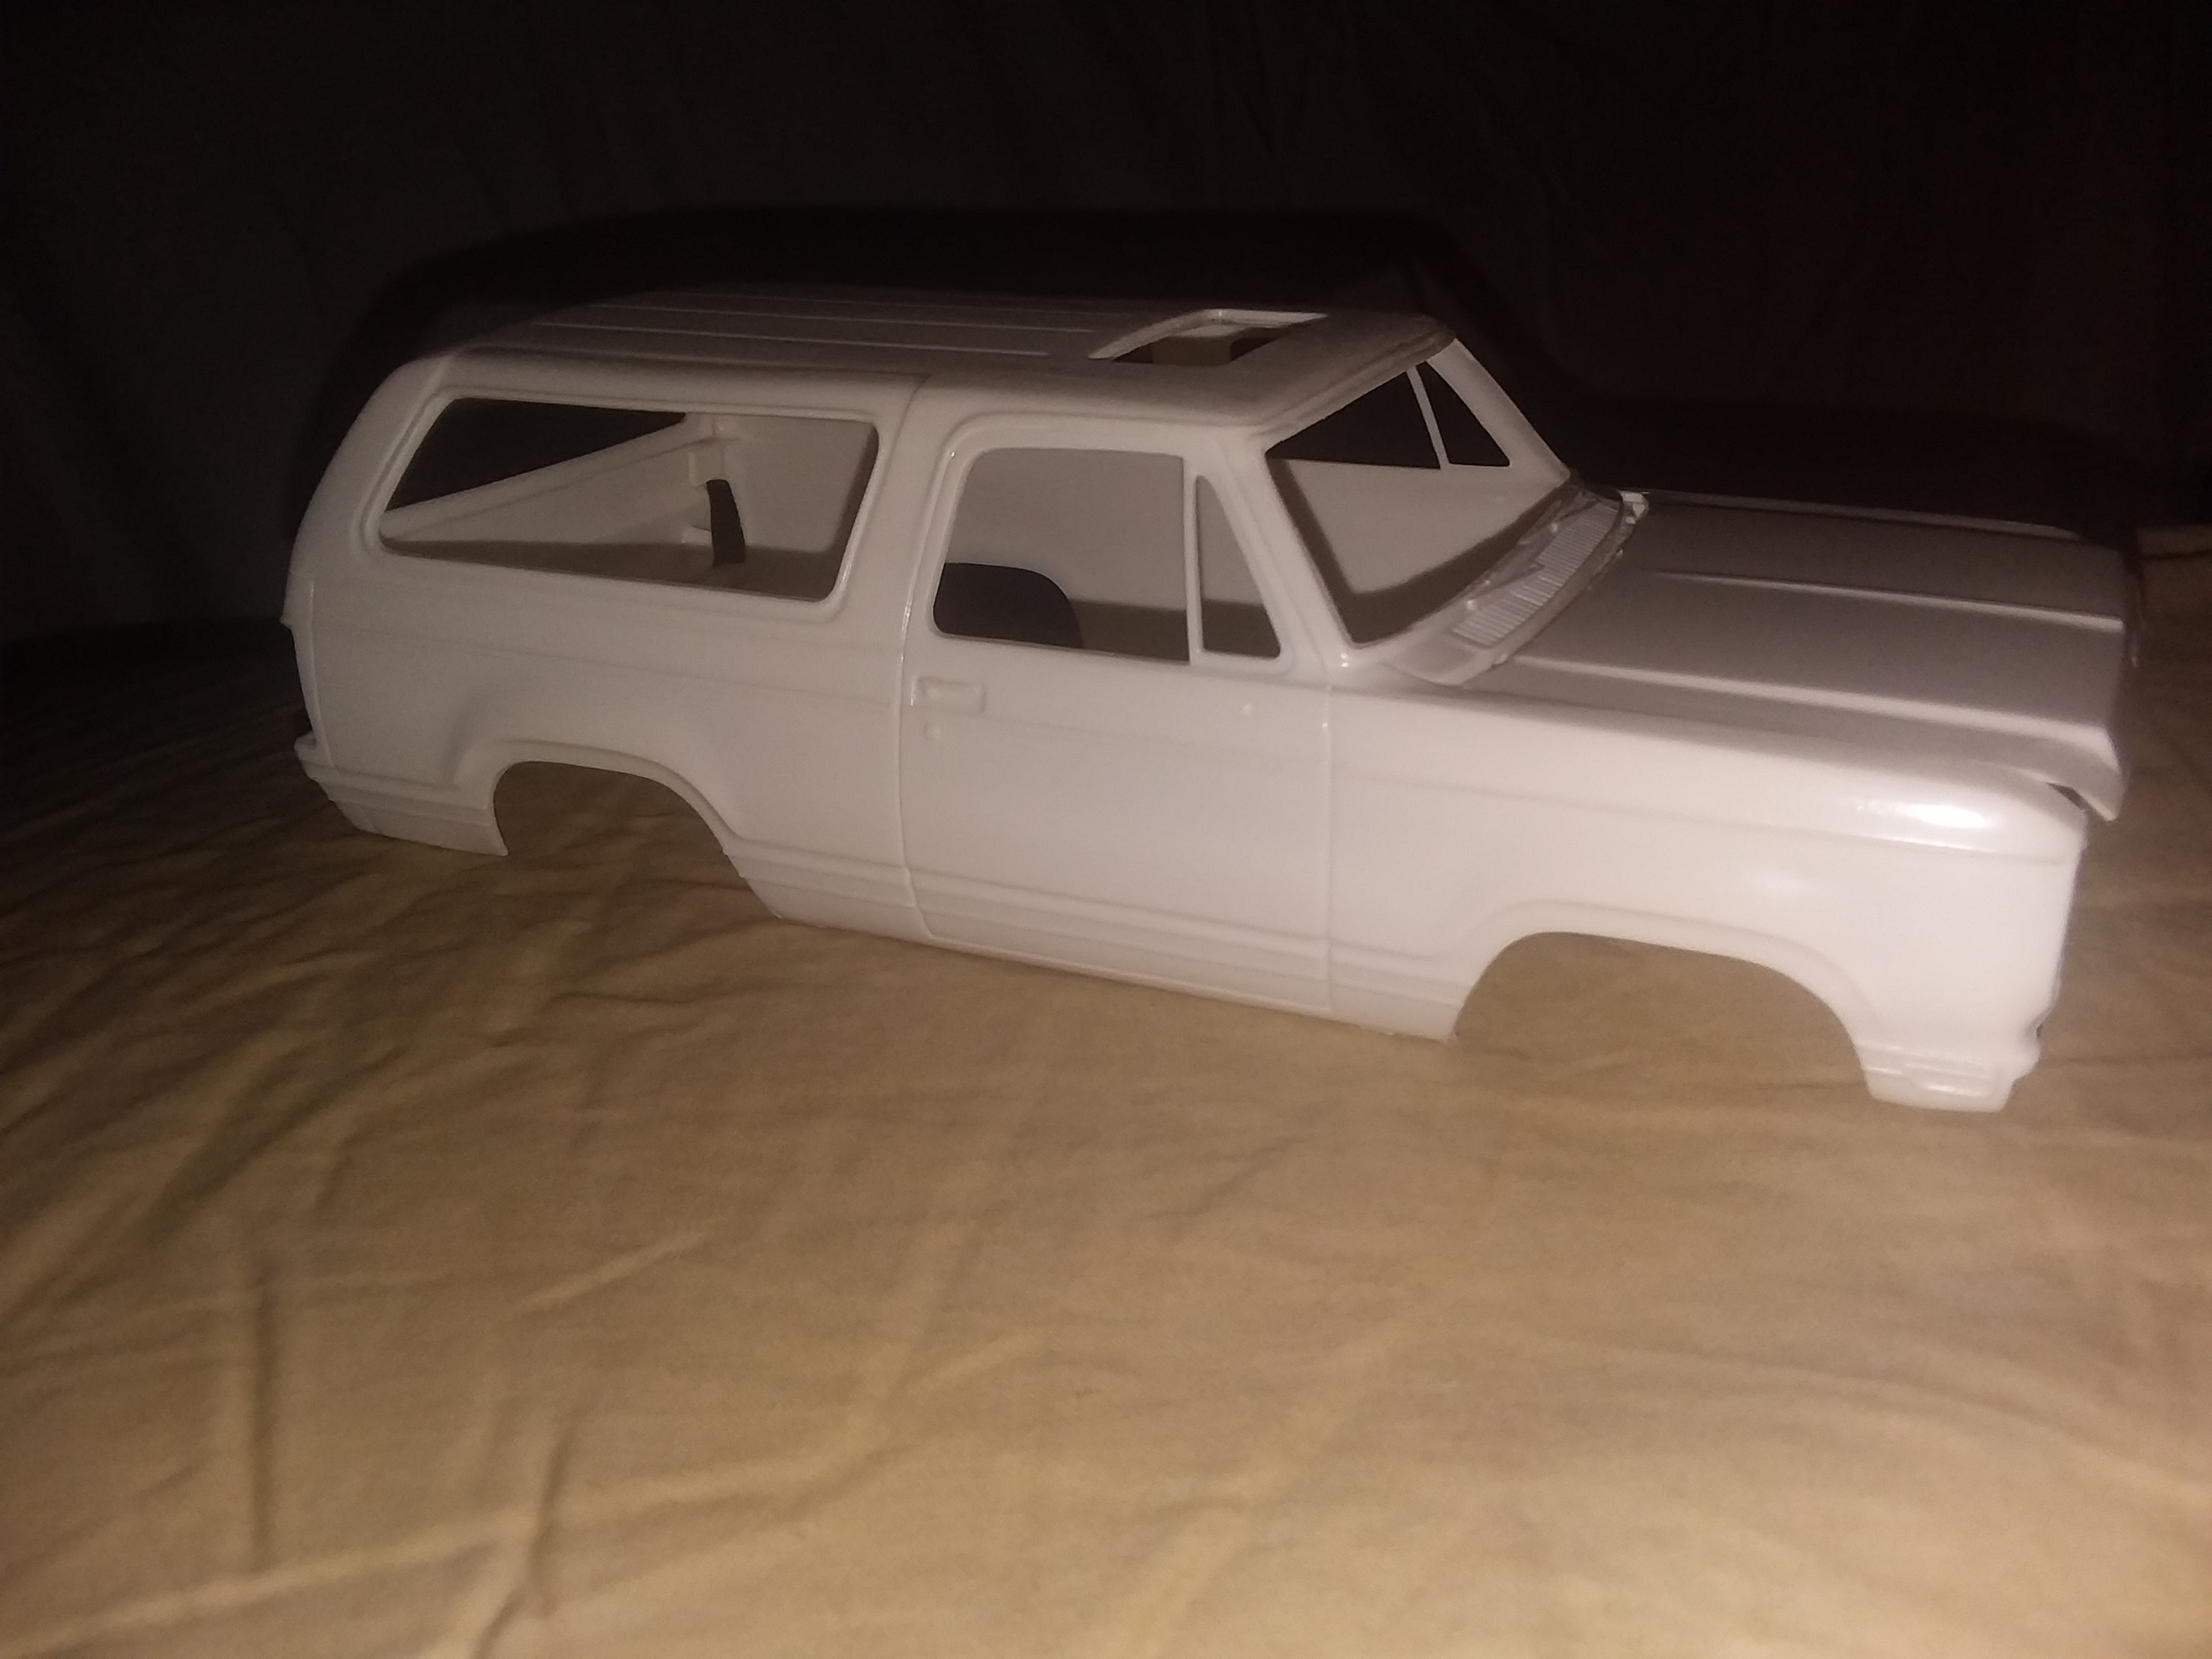
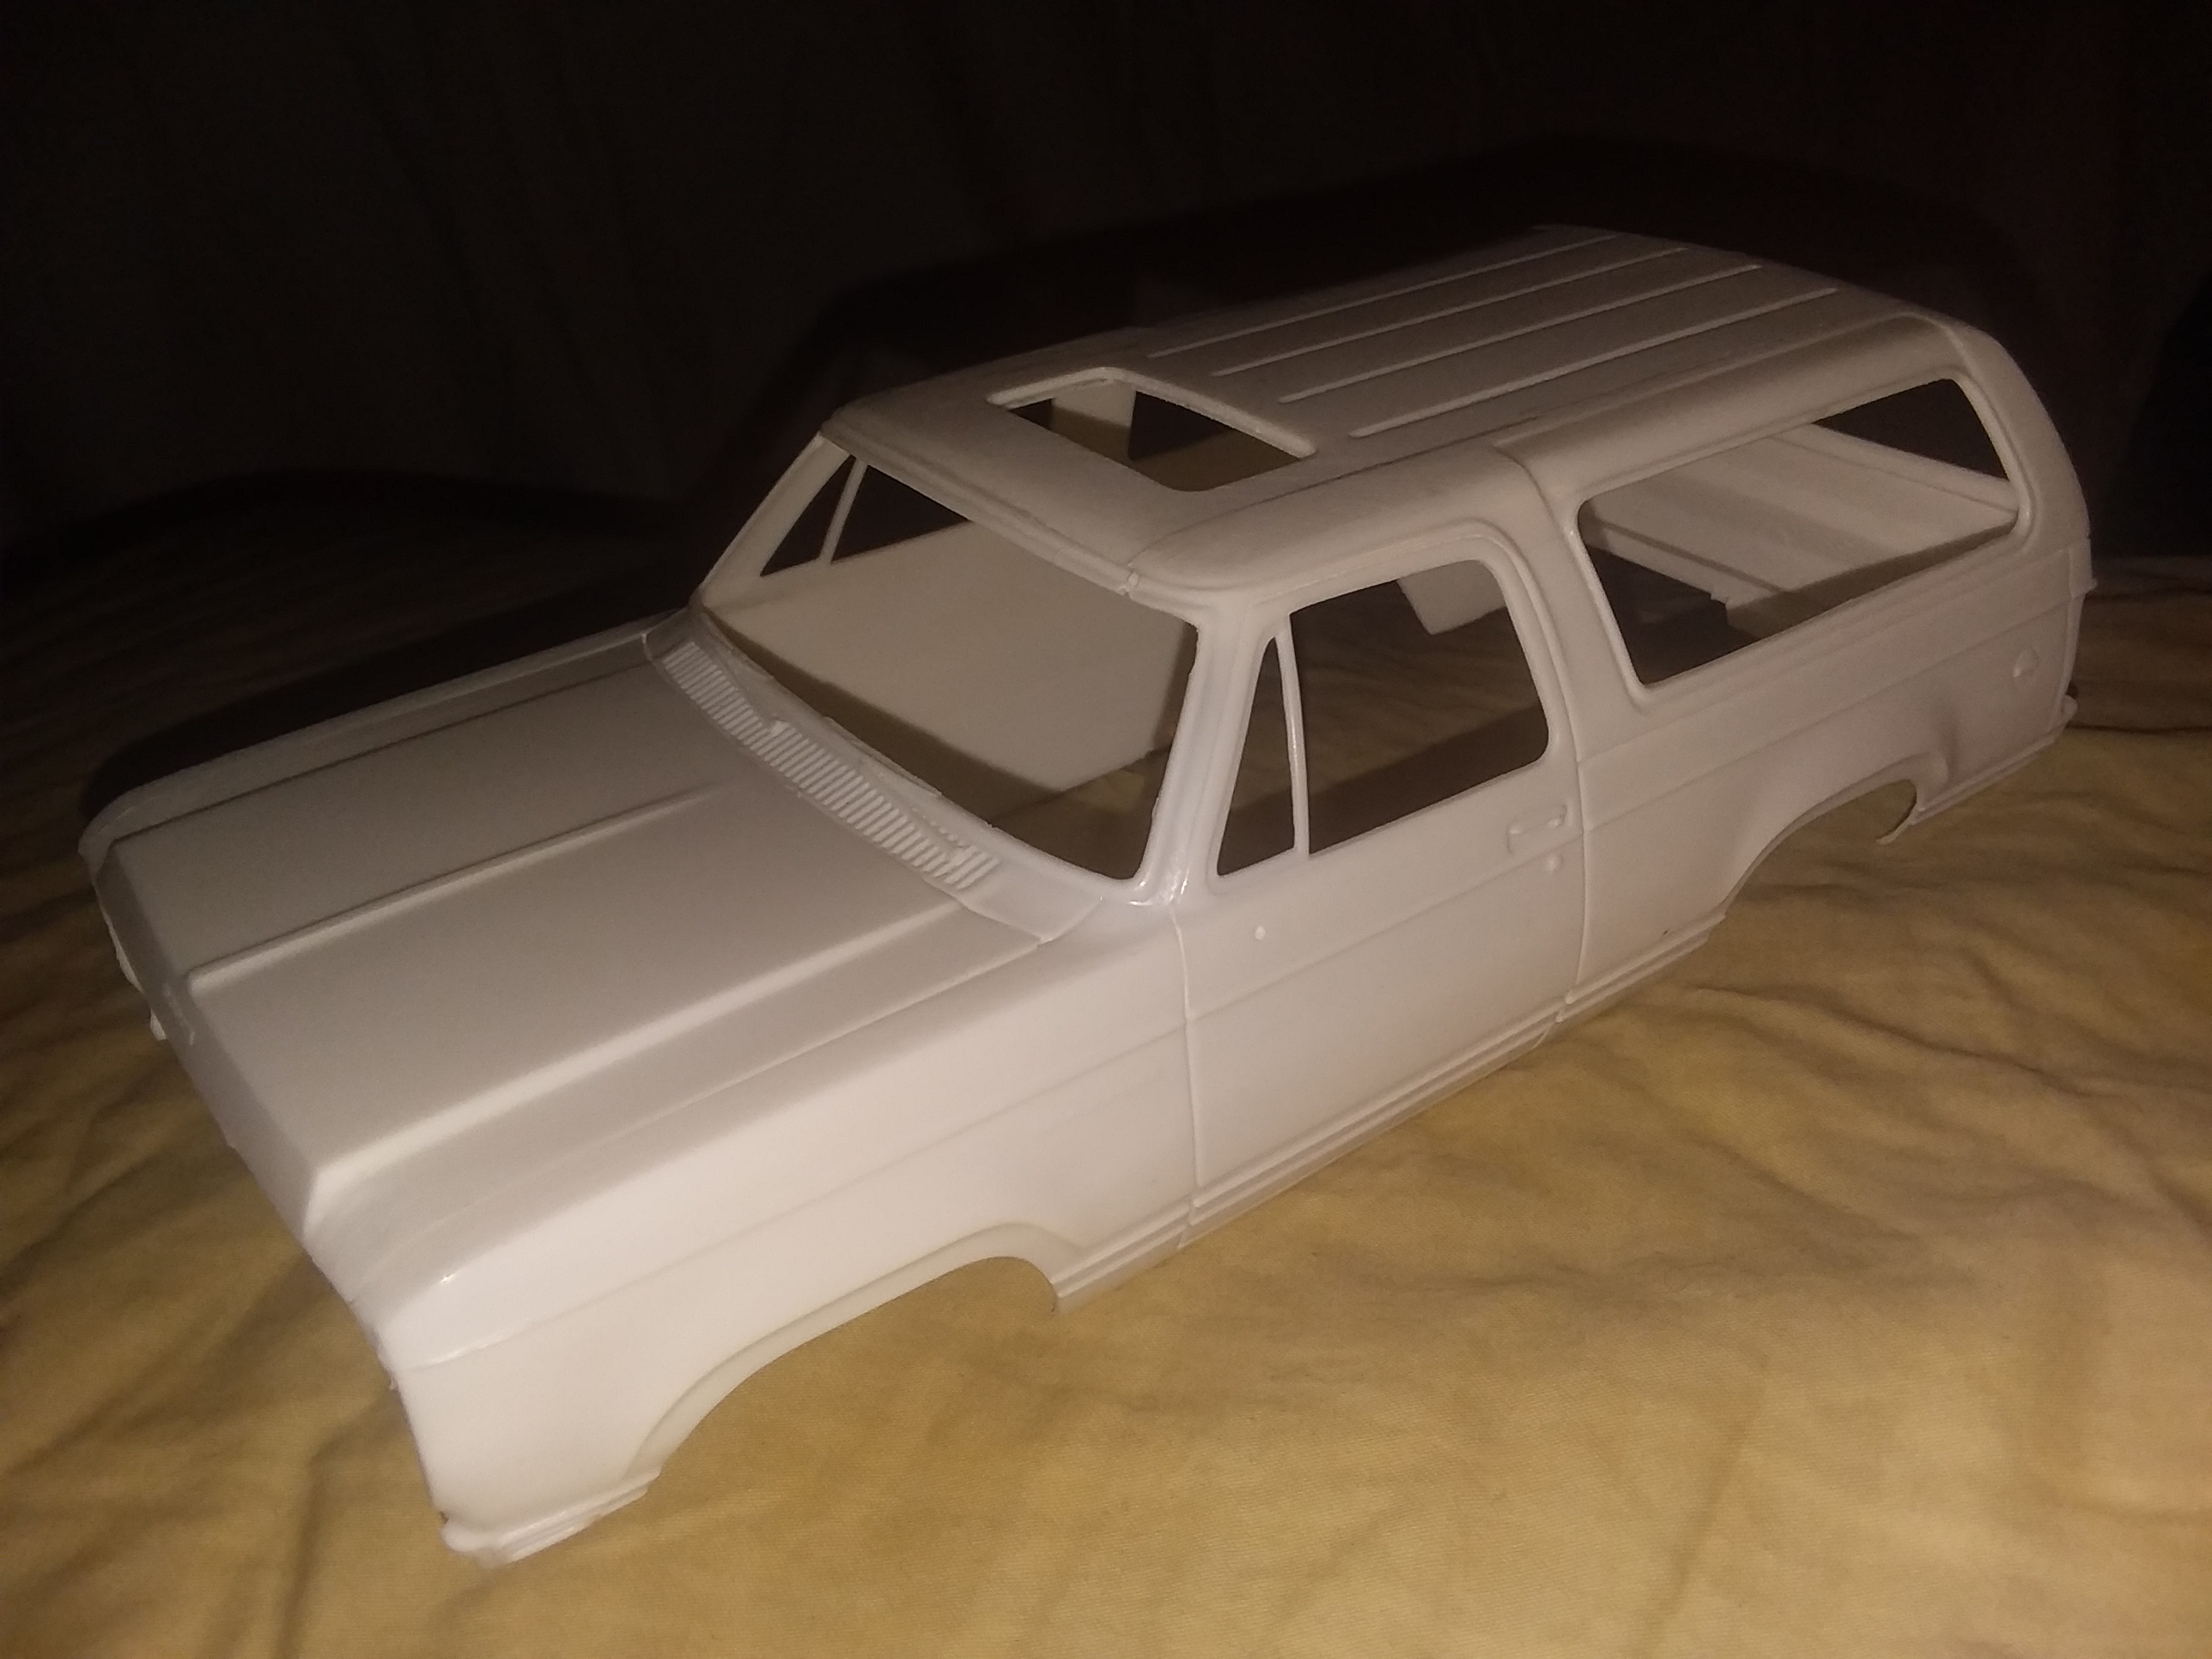
I like the Dodge Ramcharger and it's early sibling, Plymouth Trailduster. The kit, however, has always left me cold. It just never appeared right in my eyes, and I figured out why - the complete shape is just too boxy. I compared the kit to pictures of the real truck and found the sides much more rounded, with more of a pyramid shape in general. Looking at the kit's roof, it's just too flat. It should have a more graceful curve to it. The slab sides are easy enough to fix, albeit require patience. I started there by carefully bending the plastic in the middle of the door area. The driver side is thinner and therefore easier to roll under. Taking your time and letting the heat and friction from your fingers help to convert the shape without snapping any parts. Passenger side is thicker and may require running under warm/hot water to soften slightly. Next, roll the tips of the front fenders under, this should be easy, as the plastic is very soft and bendable. I'm doing this conversion on the current Revell issue, which has more rubbery flex to it and can stand more bending. If you're using an older issue that may not have as flexible a plastic - DON'T FORCE THE BENDS! Be gentle, use hot water to soften it. If it's still too brittle, you may have to find another alternative to convert that kind if material. It's not worth breaking up a body, it'll just be scrap at that point. Do not try to bend the rear quarter panel just yet, it has too much thickness and needs some compound curves removed to allow for bending. Now compare the curves of the side panels and front fenders to the slab sided rear quarters, see how just adding curves to the sides improves the aesthetics of the body already? But were not done yet, it's time to relieve the rear from the support of the rear liftgate and the taillight mounting points. Carefully cut away the liftgate and set it aside. Next, cut out the taillight backing mounts. The taillights are the wrong shape anyway, we'll fix those later, but right now we have to bend the body in the rear quarters and cutting away the taillight areas relieves the thickness in those corners. Next roll the rear quarter panels to match the rest of the sides of the truck. The roof is too flat and has no crown to it. The windows should have more taper to the roof. First thing I did there was to cut the roof off approximately 3/8" on the outside of both outer roof beads. I then rolled the side window areas in for the proper taper. At this point, the roofline will be bent downwards on each side above the side windows, this will need to be GENTLY pulled back up closer to level with the roofline. Next, take the roof panel that was cut off and carefully cut away the front windshield trim right above the driprail line - save this trim for later. Take the flat roof panel and bend a crown into it. Make it even from side to side, front to back. To compensate for the inward taper of the side windows, trim off about 1/8" from both sides of the roof panel. To reintroduce strength in the roof, I laminated a thin sheet of plastic to the underside and left about 1/4" extended out to use for gluing to the side parts. Underneath will show a clean area (when I sand it out) to represent the headliner and eliminate the seams from cutting. Time to install the tailgate and rear hatch. Because I curved the rear quarter panels, the ends above and below the taillights are angled and need to be corrected with a sanding stick. To support the tailgate, I added tabs behind it so I have something to attach to the quarter panels. With all of the modifications to the body shell, the rear hatch will not fit anymore. I tweaked it to fit by trimming away the top part from the hinge to hinge. I then bent the sides of the hatch inward to match the curve of the roof. I filed and sanded the rough areas so the hatch fits the opening, then I glued it in place. Next, I curved and trimmed the header part of the hatch to snugly fit the opening and glued that in place. At this point if you've made all your cuts carefully, you should have a solid body finished with minimal areas that need filling. The last part of the roof to be fixed is the top trim of the windshield that was cut off from the roof when we needed to bend a crown into it. After all the cutting and bending that was done to the rest of the body, this last part is a simple curve, sand rough edges, trim and carefully glue back into position. You should now have a completed body shell that looks like this. Encouraging isn't it? And since none of the main body was altered, the interior shell still fits perfectly and therefore almost all of the rest of the kit. Next up, cutting the glass to fit and taking the box out of the grille.
-
76 Ford Courier
Oldcarfan27 replied to Oldcarfan27's topic in WIP: Model Trucks: Pickups, Vans, SUVs, Light Commercial
I have a sunroof for it somewhere, if I can find it, it's yours. Sorry no decals, this was a built up junker.... And most of it's still junk, the best, usable parts went into this conversion. -
Hey guy's, we've got a converter here, let's welcome him to the light! Charles, great job! I personally have known aircraft builders who won't build cars. They've used all kinds of reasons why model cars s_ _ k, but the most honest builder I ever met confessed to me that gloss paint jobs were very hard to spray and was actually too intimidated to do them. I always admired their great attention to details and their dedication to scale fidelity and realism. Now here's an aircraft modeler who builds cars - that's a force to be reckoned with! All the reference you'll ever need for your details is on "the internets" Keep it up, you're off to a great start!
-
I like a nice gold or silver paint job. But you MUST seal it with a coat of clear to keep it from getting damaged. What ever you do DO NOT use Testors Gloss Cote!!! It doesn't cover the metallic paint well and leaves huge orange peel! Enamels look bright, but turn muddy or bland when covered with clear. I've had the best luck with Dupli-Color Automotive lacquer and compatible clear spray.
-
Bring Out Your Dead... Long Stalled Models
Oldcarfan27 replied to Tom Geiger's topic in WIP: Model Cars
Pretty cool idea. "That thing got a Hemi?" Looks like the best use of a Monogram Camaro. Or is it an MPC? -
Here's one design I always thought looked absurd But at least I know where it came from
-
Quite a bit more than the $28k adjustment for inflation quoted previously. But at least it ain't charcoal grey! But I think I'd rather spend 110 large on something that's done depreciating - like a GTO or a Boss 302. I'd get more looks in those anyway.
-
Wal-Mart model car boxes
Oldcarfan27 replied to Greg Myers's topic in General Automotive Talk (Trucks and Cars)
56 Victoria - red/black 68 RoadRunner - red 70 Monte Carlo - purple 62 Pontiac - 2 types, burgundy and champagne w/fog 67 Impala - orange 70 Baldwin Motion Camaro - red w/painted on graphics. 66 Nova - blue? 65 GTO - black? 77 Trans Am - white/gold 39 Custom Chevy Delivery - red/painted wood 41 Ford Woody - yellow 64 Impala - yellow with roses Maybe more?.... I remember buying them for $3.88 for the unpainted ones and 12.88 for the painted ones. After Christmas, I recall them being marked down from $2 to $6 or $7. They had a lot of varieties. Now when I see those boxes, I won't pay a lot for them because I know how cheap they originally were. The painting on them was pretty nice, details were done very well and the parts were bagged separately. If you liked the color combination the car was painted in, you didn't have to do anything else but glue it together. I gave a bunch to my son as beginning builders and taught him how to assemble them neatly and quickly, as he didn't have to paint anything on them first. -
That's why it's my post name, Love 'em and drive 'em!


.jpg.06b662b1a253598110176d4fbcb9fcc6.jpg)