-
Posts
4,030 -
Joined
-
Last visited
Content Type
Profiles
Forums
Events
Gallery
Everything posted by GeeBee
-
Started to do a little on this today, just getting the rear suspension parts ready for paint, as always I do a dry fit, but part # A22 wasn't quite molded correctly, just sent a replacement parts request to Revell AG, luckily it's not going to stop the build ... The part should look like the one on the right ....
-
You can get them from Spotmodels in Spain http://shop.spotmodel.com/product_info.php?manufacturers_id=19&language=en&products_id=2456
-
He certainly is, he's a drummer, read about him here, http://www.birminghammail.co.uk/whats-on/music/rockin-robbin-wonderstuff-star-steals-1287784
-
I love that programming, we've had a few car restoration programs over here, but Car S.O.S has to be the best, plus Fuzz is a great bloke, he used to work on the Corporation Buses ... Series 2 is on over at the moment, http://www.channel4.com/programmes/car-sos/episode-guide
-
I've only ordered photo etch and other products from them, great company to deal with ....
-
There was a problem some time ago about shipping paint and other liquids here in the UK, no model shops were shipping paints, glues etc even in the UK, I'm pretty sure they have now been relaxed, another E.U ruling that was implemented incorrectly, I've ordered paints over the last few weeks without any problem, the Trabant paint came from Germany, sent by DHL and delivered to me by Parcel force, my grey plastic primer aerosol was delivered by Royal mail without any problems if you want Zero paints, try giving Steve at Hiroboy a all or email, he'll tell you if he can supply you.
-

Ford Escort RS1800
GeeBee replied to afx's topic in WIP: Other Racing: Road Racing, Land Speed Racers
-

Ford Escort RS1800
GeeBee replied to afx's topic in WIP: Other Racing: Road Racing, Land Speed Racers
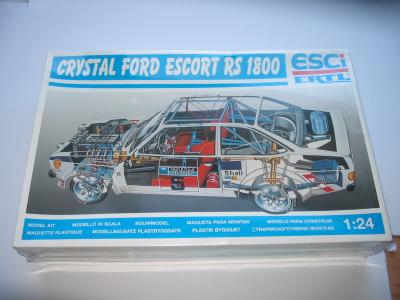
Yes it's the same kit, just the body is moulded in clear styrene -
Very nice build, the photo through the windshield looks very realistic ...
-
I'm pretty sure Steve @ Hiroboy, who makes Zero paints will ship to the U.S, I've dealt with him for years http://www.hiroboy.com/catalog/shipping.php The only thing he can't ship airmail is aerosol cans.
-

What non-auto model did you get today?
GeeBee replied to chunkypeanutbutter's topic in The Off-Topic Lounge
Google Chromecast, pretty nifty bit of kit, now I can have my laptop cast to my 42" TV ... -
I have a couple of the Universal kits in the stash, I still have another saloons to build as well, you'd be surprised just how many shades the little Trabby was available in http://www.trabant-original.de/otdbx/ColorDB_view.php
-
Woops, nearly forgot to fix the headlamp surrounds to the body as they also need to be painted body colour, I'm really not used to building a model with so many body coloured parts and no chrome, there isn't any locating pins to fix them on, but looking at the reflectors which need to go in after the body has been painted, there are little lugs that locate to the top of the surrounds, these need to be done using bmf, although the instruction say to paint them silver, Now that the body is ready for a coat of primer, I came to fix it to my trusty Tamiya paint stand, but no matter how much tension I put on the spring arms, the body just wanted to pop off, came up with this idea, fixing some coffee stirring wooden stick to the inside of the body, held in place with 3M blue tape, which can easily be removed once the shell has been painted ....
-
Very nice build, you wouldn't know you hadn't painted it ....
-
Front inner wing and bulkhead fixed together, and can now be painted as one unit Rear lamp housing fixed into place, these are painted body colour, so might as well go on now Bodyshell ready for paint There's a bracket under the front transverse leaf that need fixing to the chassis, the chassis will be airbrushed satin black, to hold the bracket in place, the spring was held with a few clamps and the bracket was fixed into place, the spring can be removed and airbrushed before going back into place Engine finished and ready for paint, (Yes it really is an engine !)
-
Along the top of the front wings, doors and rear wings are small trim moulding, I thought about putting them on after the body had been painted, but after doing a few dry runs, I decided that it would be easier and make a cleaner job if they were fixed in place first and masked off after the body had been painted, the trickiest part is getting them all to line up ... The roof was glued and clamped in place The inner wings and bulkhead are supposed to go in after the engine has been installed, there really isn't any other way of doing it, as the front transverse leaf spring has to go in before the inner wings go in, but I really wanted to paint the bulkhead and inner wings as one unit, so at this stage I'm using the floorpan as a jig, once the glue on these two parts have dried up, then the other inner wing can be fixed, they will then be painted as one unit and installed after the spring and engine has been fittted ...
-
I've had a few of these in the stash since they were released back in late 2009, but as I like to paint my models in authentic colours I've only just managed to get my hands on some Trabant paint, although I found out after I ordered the paint that a 100% colour match to Trabant Champagne beige is RAL 1024 Ochre Yellow. So back to the bench after being down with a virus for a few weeks, as with all of my builds I started work and prepped the body, the roof panel is a separate part and fits onto the body without any gaps, the bootlid and bonnet are also separate parts and once the model is finished can be opened,they are only in place in the photo's for test fitting purposes, again they fit very well and probably better than the real Trabant. The paint was decanted into glass bottles so it can be airbrushed on.
-

Here's one I have been working on a long time, a 55 Chevy
GeeBee replied to Ron Hamilton's topic in WIP: Model Cars
Looking good, love the colour combo', can't be much to finish her off now .... -
Very nice, what wheels did you use ??
-
Very nice build ....
-

Cheap air brush booth extractor
GeeBee replied to aurfalien's topic in Model Building Questions and Answers
I get mine from Hollywood Trade, they should ship to the U.S, as they weigh hardly anything so shipping shouldn't be a problem ... http://www.airbrushsupplyonline.com/spray-booth -

Cheap air brush booth extractor
GeeBee replied to aurfalien's topic in Model Building Questions and Answers
I've sprayed pretty much everything with mine as well, lacquer paints, tamiya acrylics, enamels and artists acrylics, but one thing I did before even using mine was to get a roll of kitchen grease proof paper and lined the complete booth, and placed a few sheets of paper on the base, all held in place with 3M's blue decorators tape, the paper is easily changed when I do my maintenance on it, i.e clean or replace the filter .... This photo was taken today after doing the needed maintenance before starting the next build, I've had it for around 3 or 4 years and it still looks like the day I bought it. -
Superb build, love the colour combo' ....
-
Welcome aboard .....
-
This one's coming along very nicely, good work on the weathering .....

