NOBLNG
-
Posts
9,943 -
Joined
-
Last visited
Content Type
Profiles
Forums
Events
Gallery
Everything posted by NOBLNG
-

Favorite Classic Truck?
NOBLNG replied to JollySipper's topic in General Automotive Talk (Trucks and Cars)
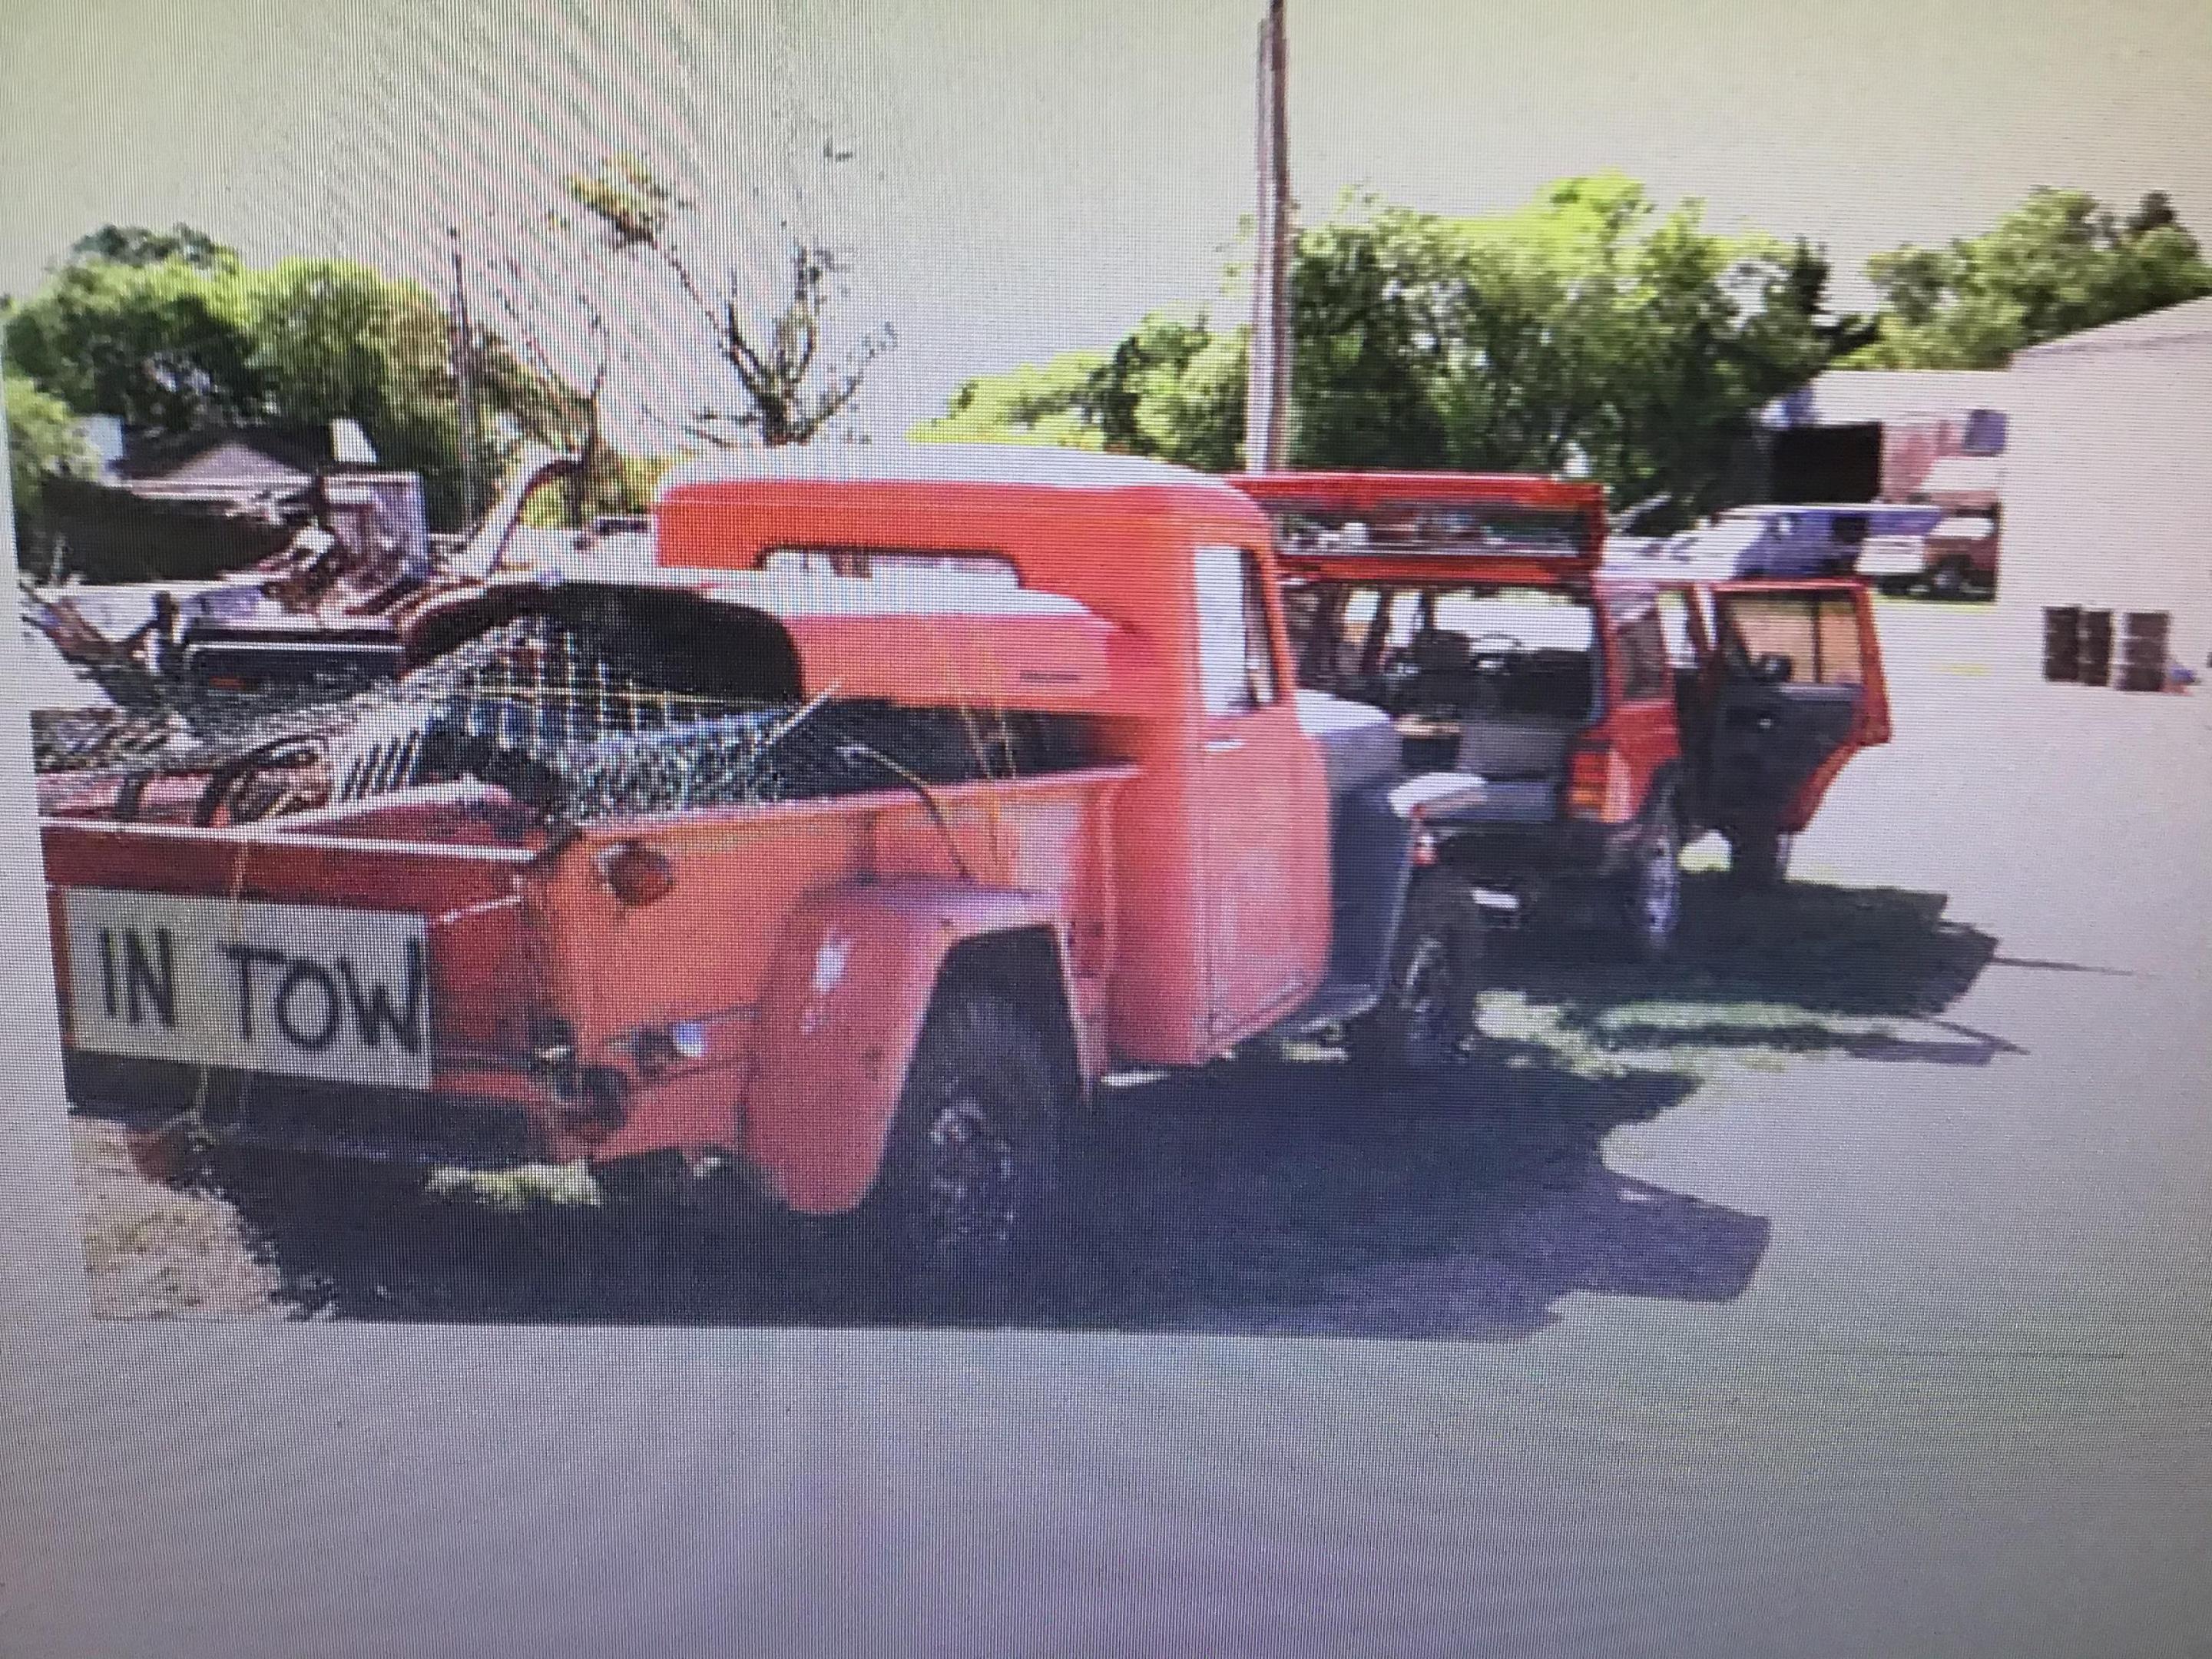
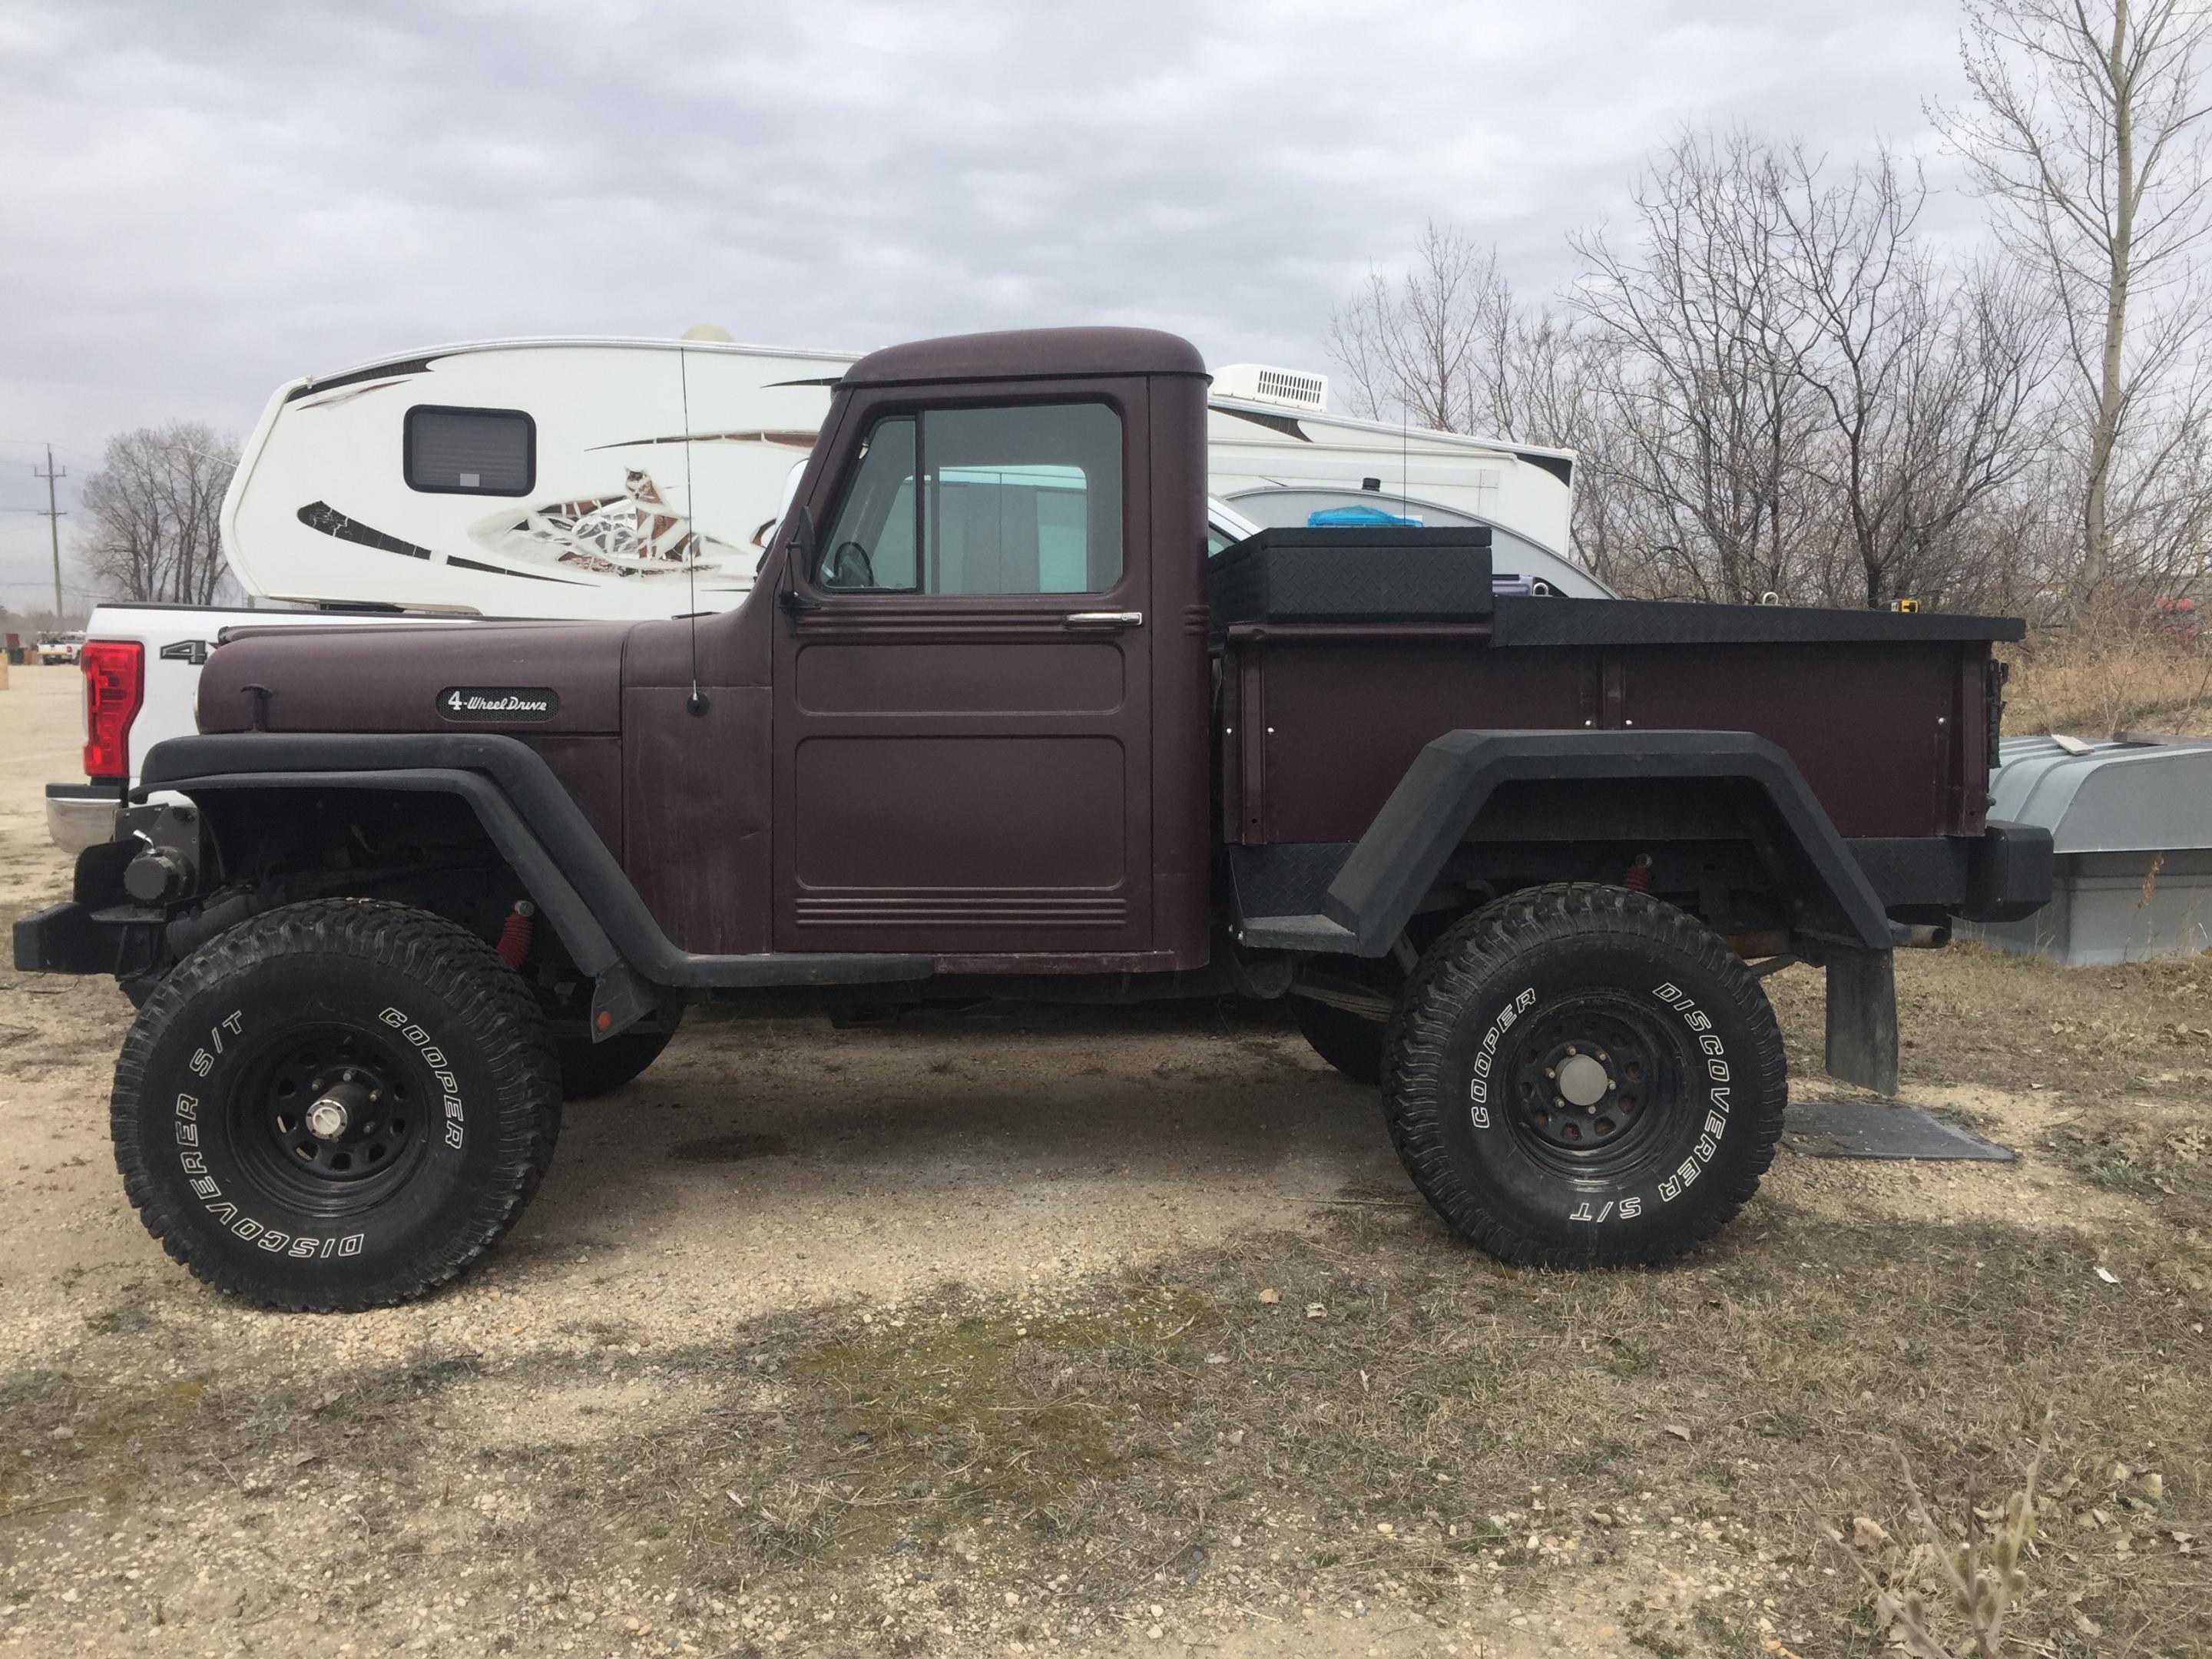
No, the first pic I pulled off the net. The second is my truck that I shortened the box and mounted the body on a Chevy Blazer frame. This is what I started with. I flat towed it 140 miles home behind my Cherokee, with a U-Haul hitch chained to the bumper. The bumper fell off shortly after I got it in my garage. I believe it wanted to follow me home.🙂
-
Favorite Classic Truck?
NOBLNG replied to JollySipper's topic in General Automotive Talk (Trucks and Cars)
Willys Overland pickups.
-
My fingers used to get cracks also when I was working with metal. I agree with Len, the dash looks great!
-
Teds Modeling Marketplace appears to have some really nifty products.
-
Absolutely fabulous work on this Glen!👍 I have a ‘54 Willys PU mounted on a Blazer frame…so I am a big fan of anything Willys Overland or Jeepsters!😎 I’ve cast some Willys cabs myself, built a loose replica of my truck and have a couple of future projects in mind. I might have to cast some more and try a Jeepster now. Thanks for the inspiration.👍
-
Crisis when I was in my late teens-early twenties meant running out of beer on a Sunday.
-
Ferrari GTO Rear Suspension
NOBLNG replied to martsky's topic in Model Building Questions and Answers
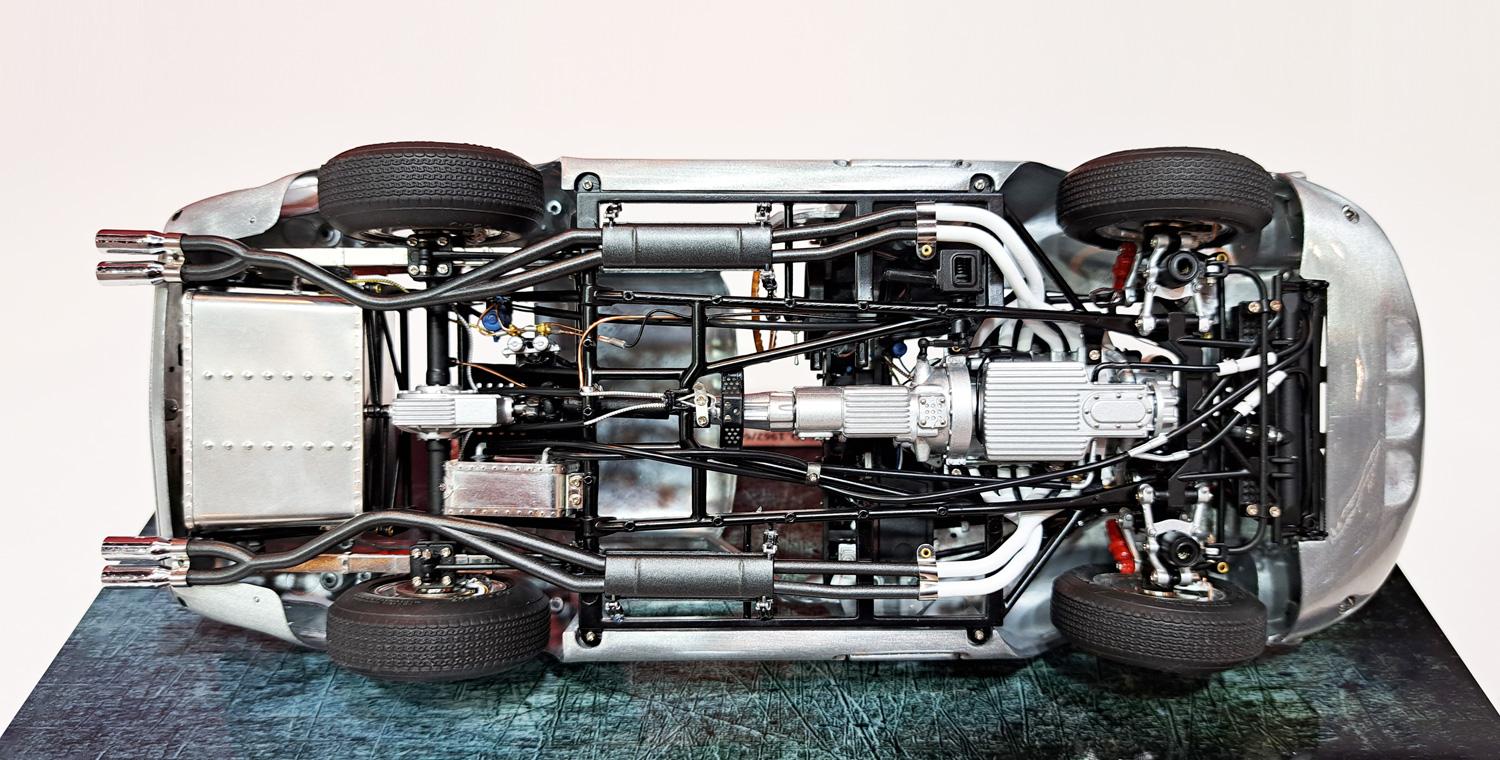
I would think the outer ends should be attached to the frame. The best pic I can find is of the 1:18 scale CMC model. It does not look like they are attached to the leaf springs.
-
Excellent detailing!👍
- 22 replies
-
- 1
-

-
- 442
- oldsmobile
- (and 1 more)
-
Looks great Scott. Nice detailing on the engine.👍
-
Well I have it gooped up with some sprue goo, so we’ll see if I can get that roof blended in nicely….someday.
-
There is a 1/18 scale die cast available.
-
A Thing of Beauty!
NOBLNG replied to NOBLNG's topic in 1:1 Reference Photos: Auto Shows, Personal vehicles (Cars and Trucks)
Yeah, considering there isn’t a speck of body filler on it anywhere.😎 -
I modified and relocated the steering box and got some linkages made. Still have to run a shaft up to the firewall. And I need to fab up some front and rear shocks and that should be about it for the suspension.
-
A Thing of Beauty!
NOBLNG replied to NOBLNG's topic in 1:1 Reference Photos: Auto Shows, Personal vehicles (Cars and Trucks)
Easy, all you need is $$$ and more $$$$$$.😬 -
WOW! 😎 https://digital.modernrodding.com/issue/september-2024hs/the-1936-ford-roadster-built-at-rad-rides-by-troy-is-nearing-completion/
-
Farms produce all my favourite food.
-
Pre assemble before paint?
NOBLNG replied to Chuckyg1's topic in Model Building Questions and Answers
If you are spraying directly from the can it might be a good idea to spray the fenders separately. If you can decant the paint and use an airbrush then I would paint it as one unit. There is a fairly large space between the fenders and boxrail on that kit that could be done with an airbrush…not sure about the spray bomb? -
Styrene solvent glue and Tamiya putty
NOBLNG replied to BK9300's topic in Model Building Questions and Answers
If you need to build up a fairly thick layer, I would recommend a two part filler like Fine White Milliput (my preference) or Tamiya epoxy putty. It sands easily and won’t shrink like a solvent based putty. Then I would use solvent cement to tack the styrene strip to the bare styrene sections of the hood. Once it is perfectly aligned use CA to attach the remainder to the puttied area. -
Thanks Dave! 🙂👍
-
Any good TH400 automatics in kits??
NOBLNG replied to TheBEAUMONTGURU's topic in Model Building Questions and Answers
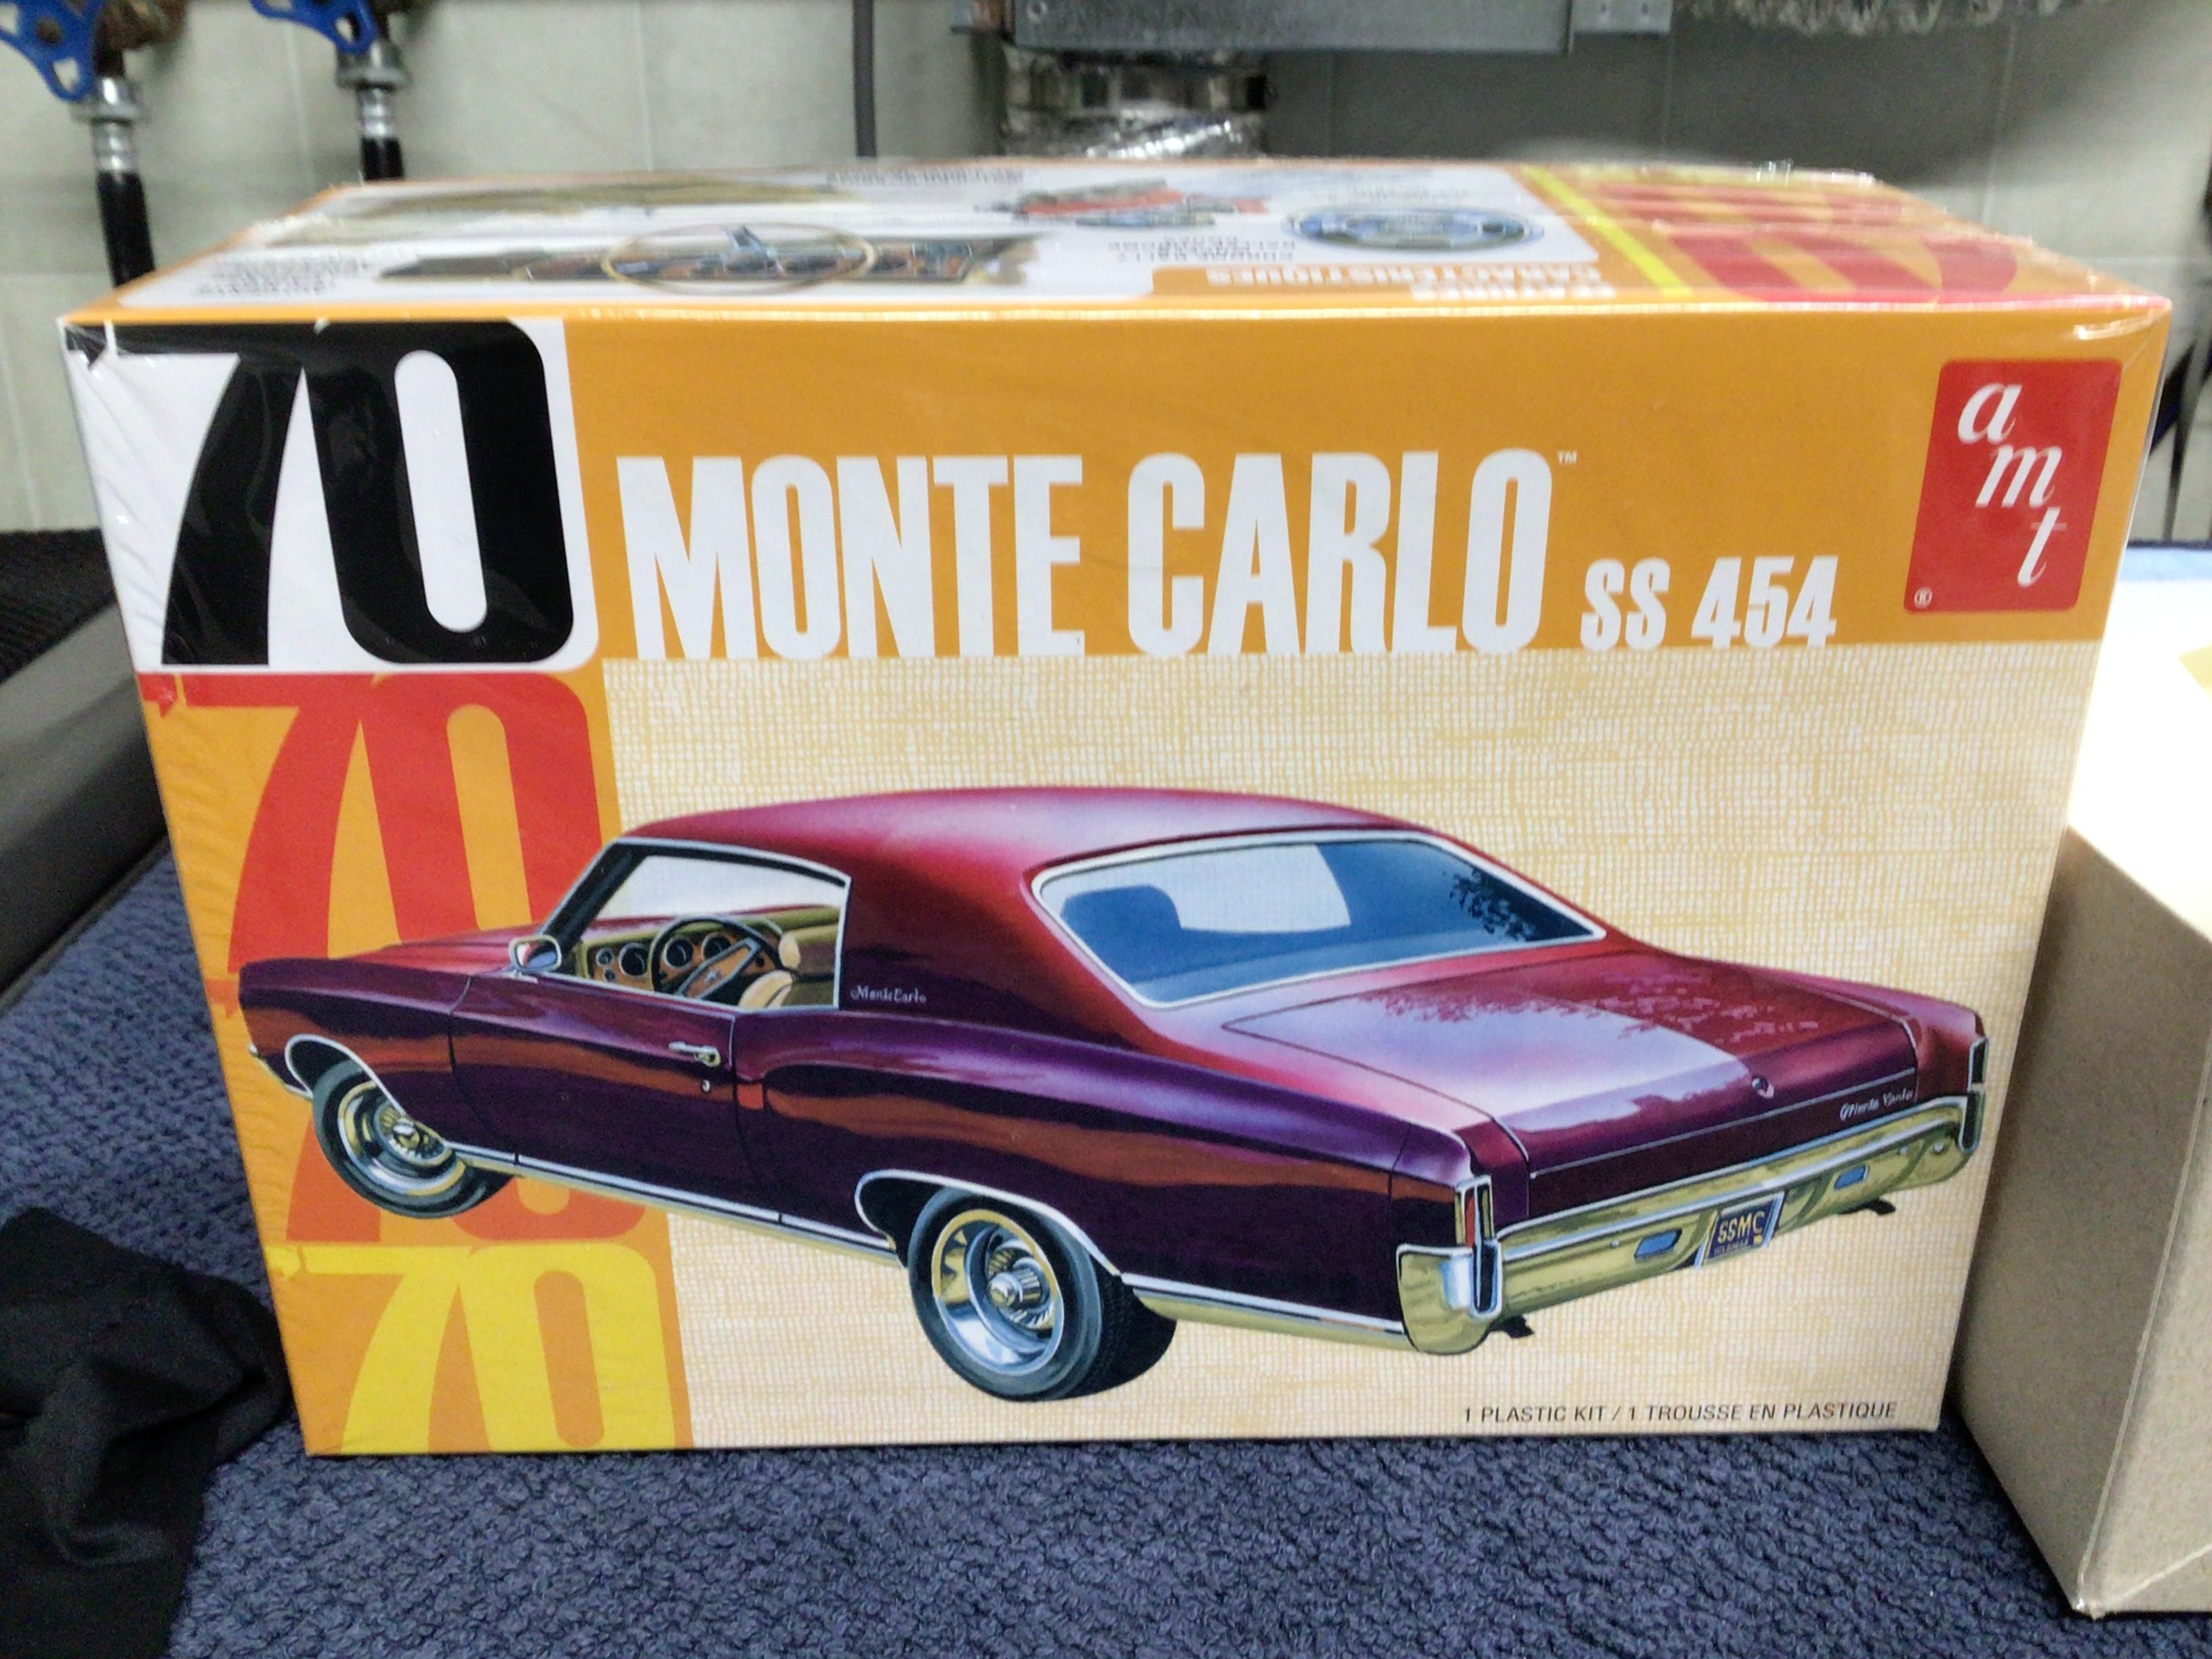
There is one in this kit. 1/25th scale. I don’t know how it compares to other examples?
-
Intelligence…natural intelligence comes from experience and education.
-
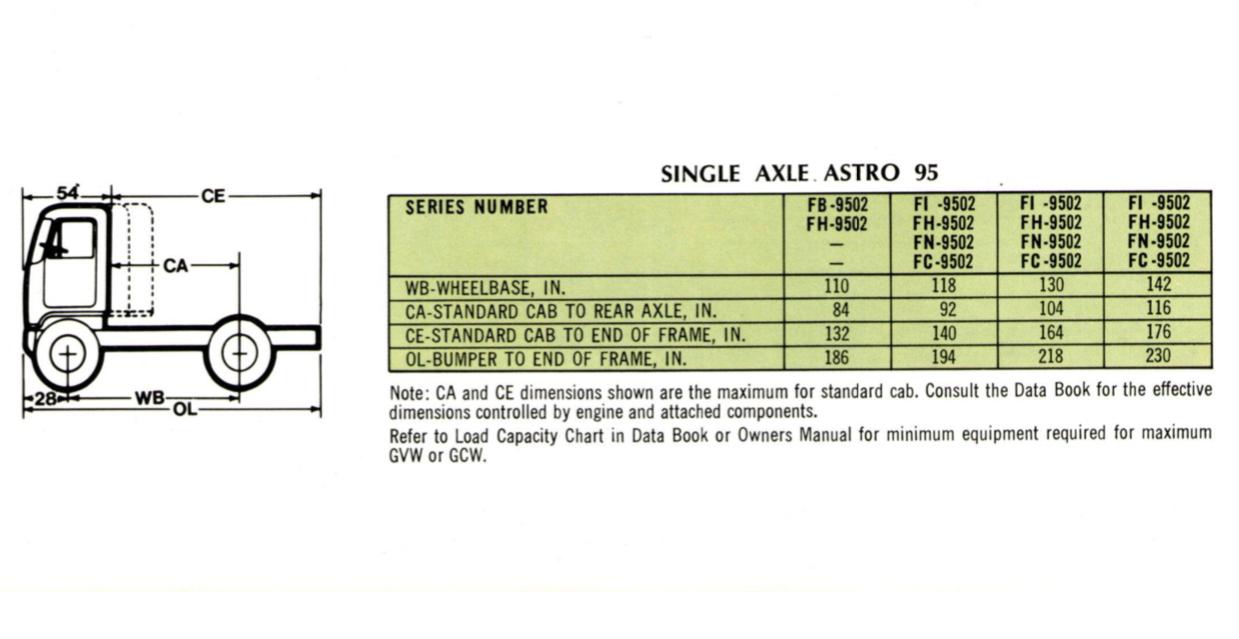
This is what I came up with. https://www.xr793.com/wp-content/uploads/2020/07/1972-GMC-Astro.pdf
-
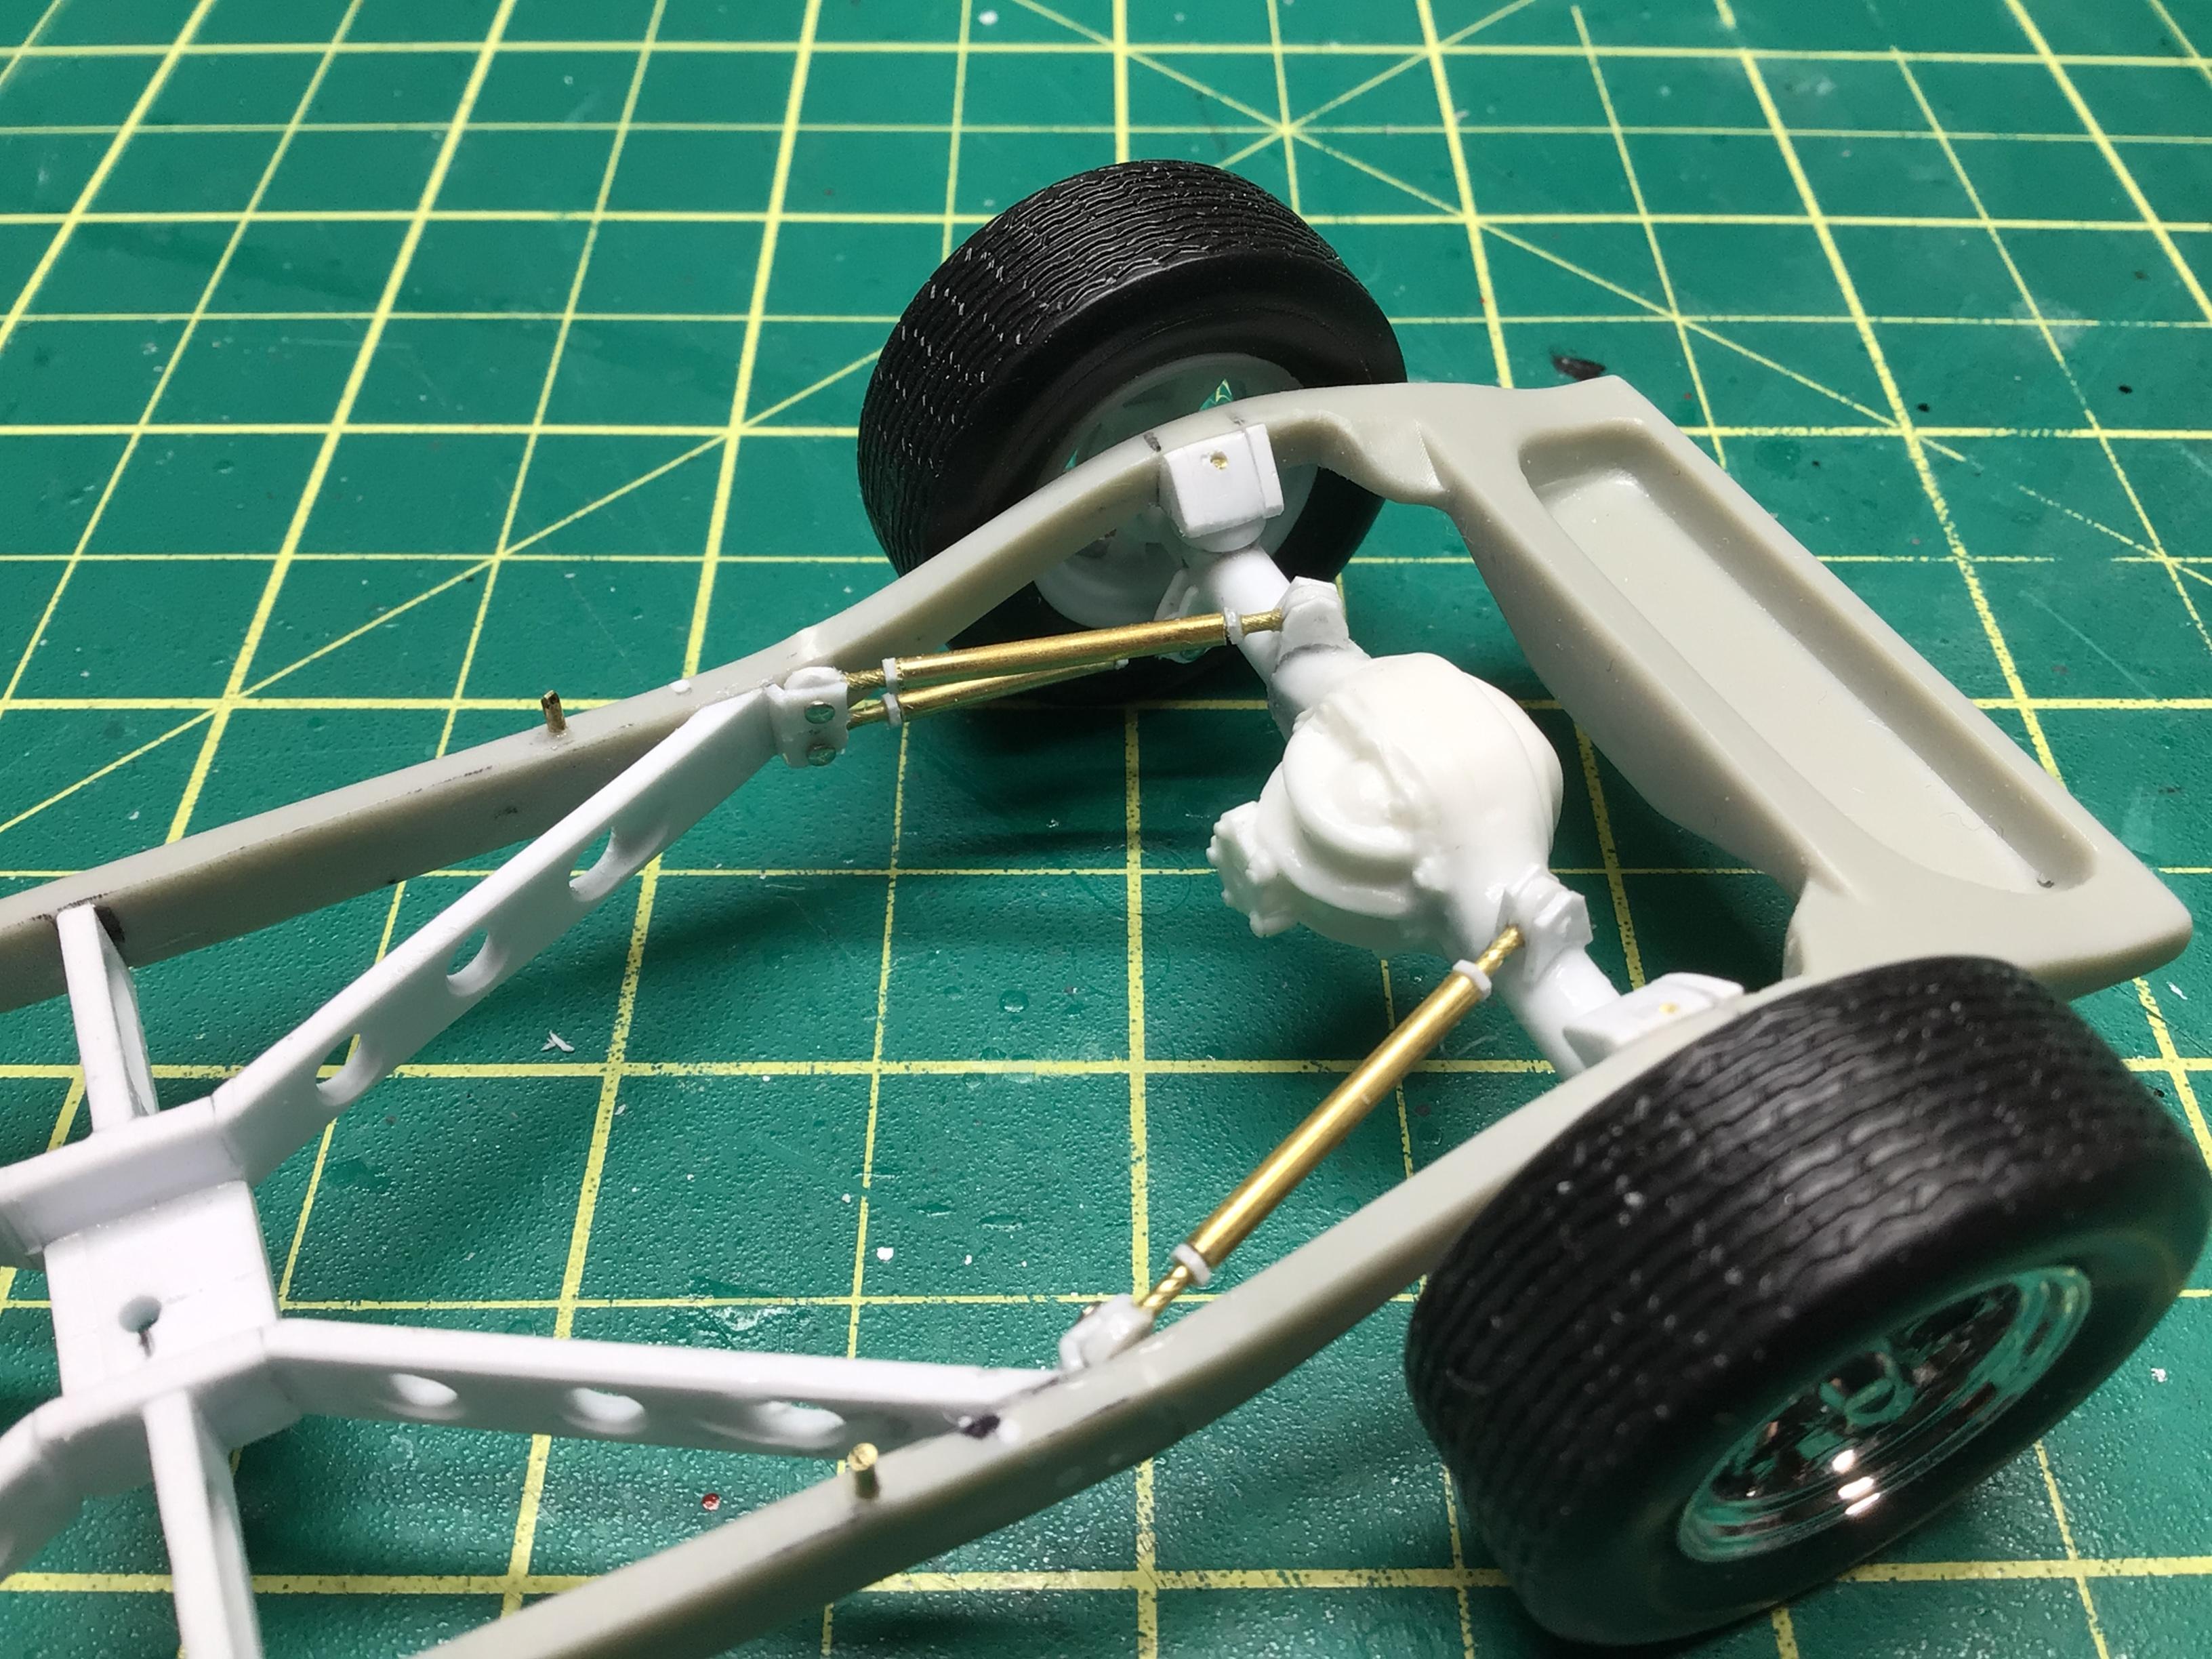
Finished off the links for the rear. They are 1/16” brass tube and .032” rod. The jam nuts are .060” Plastruct hex rod and the rod ends are punched from .040” sheet.
-
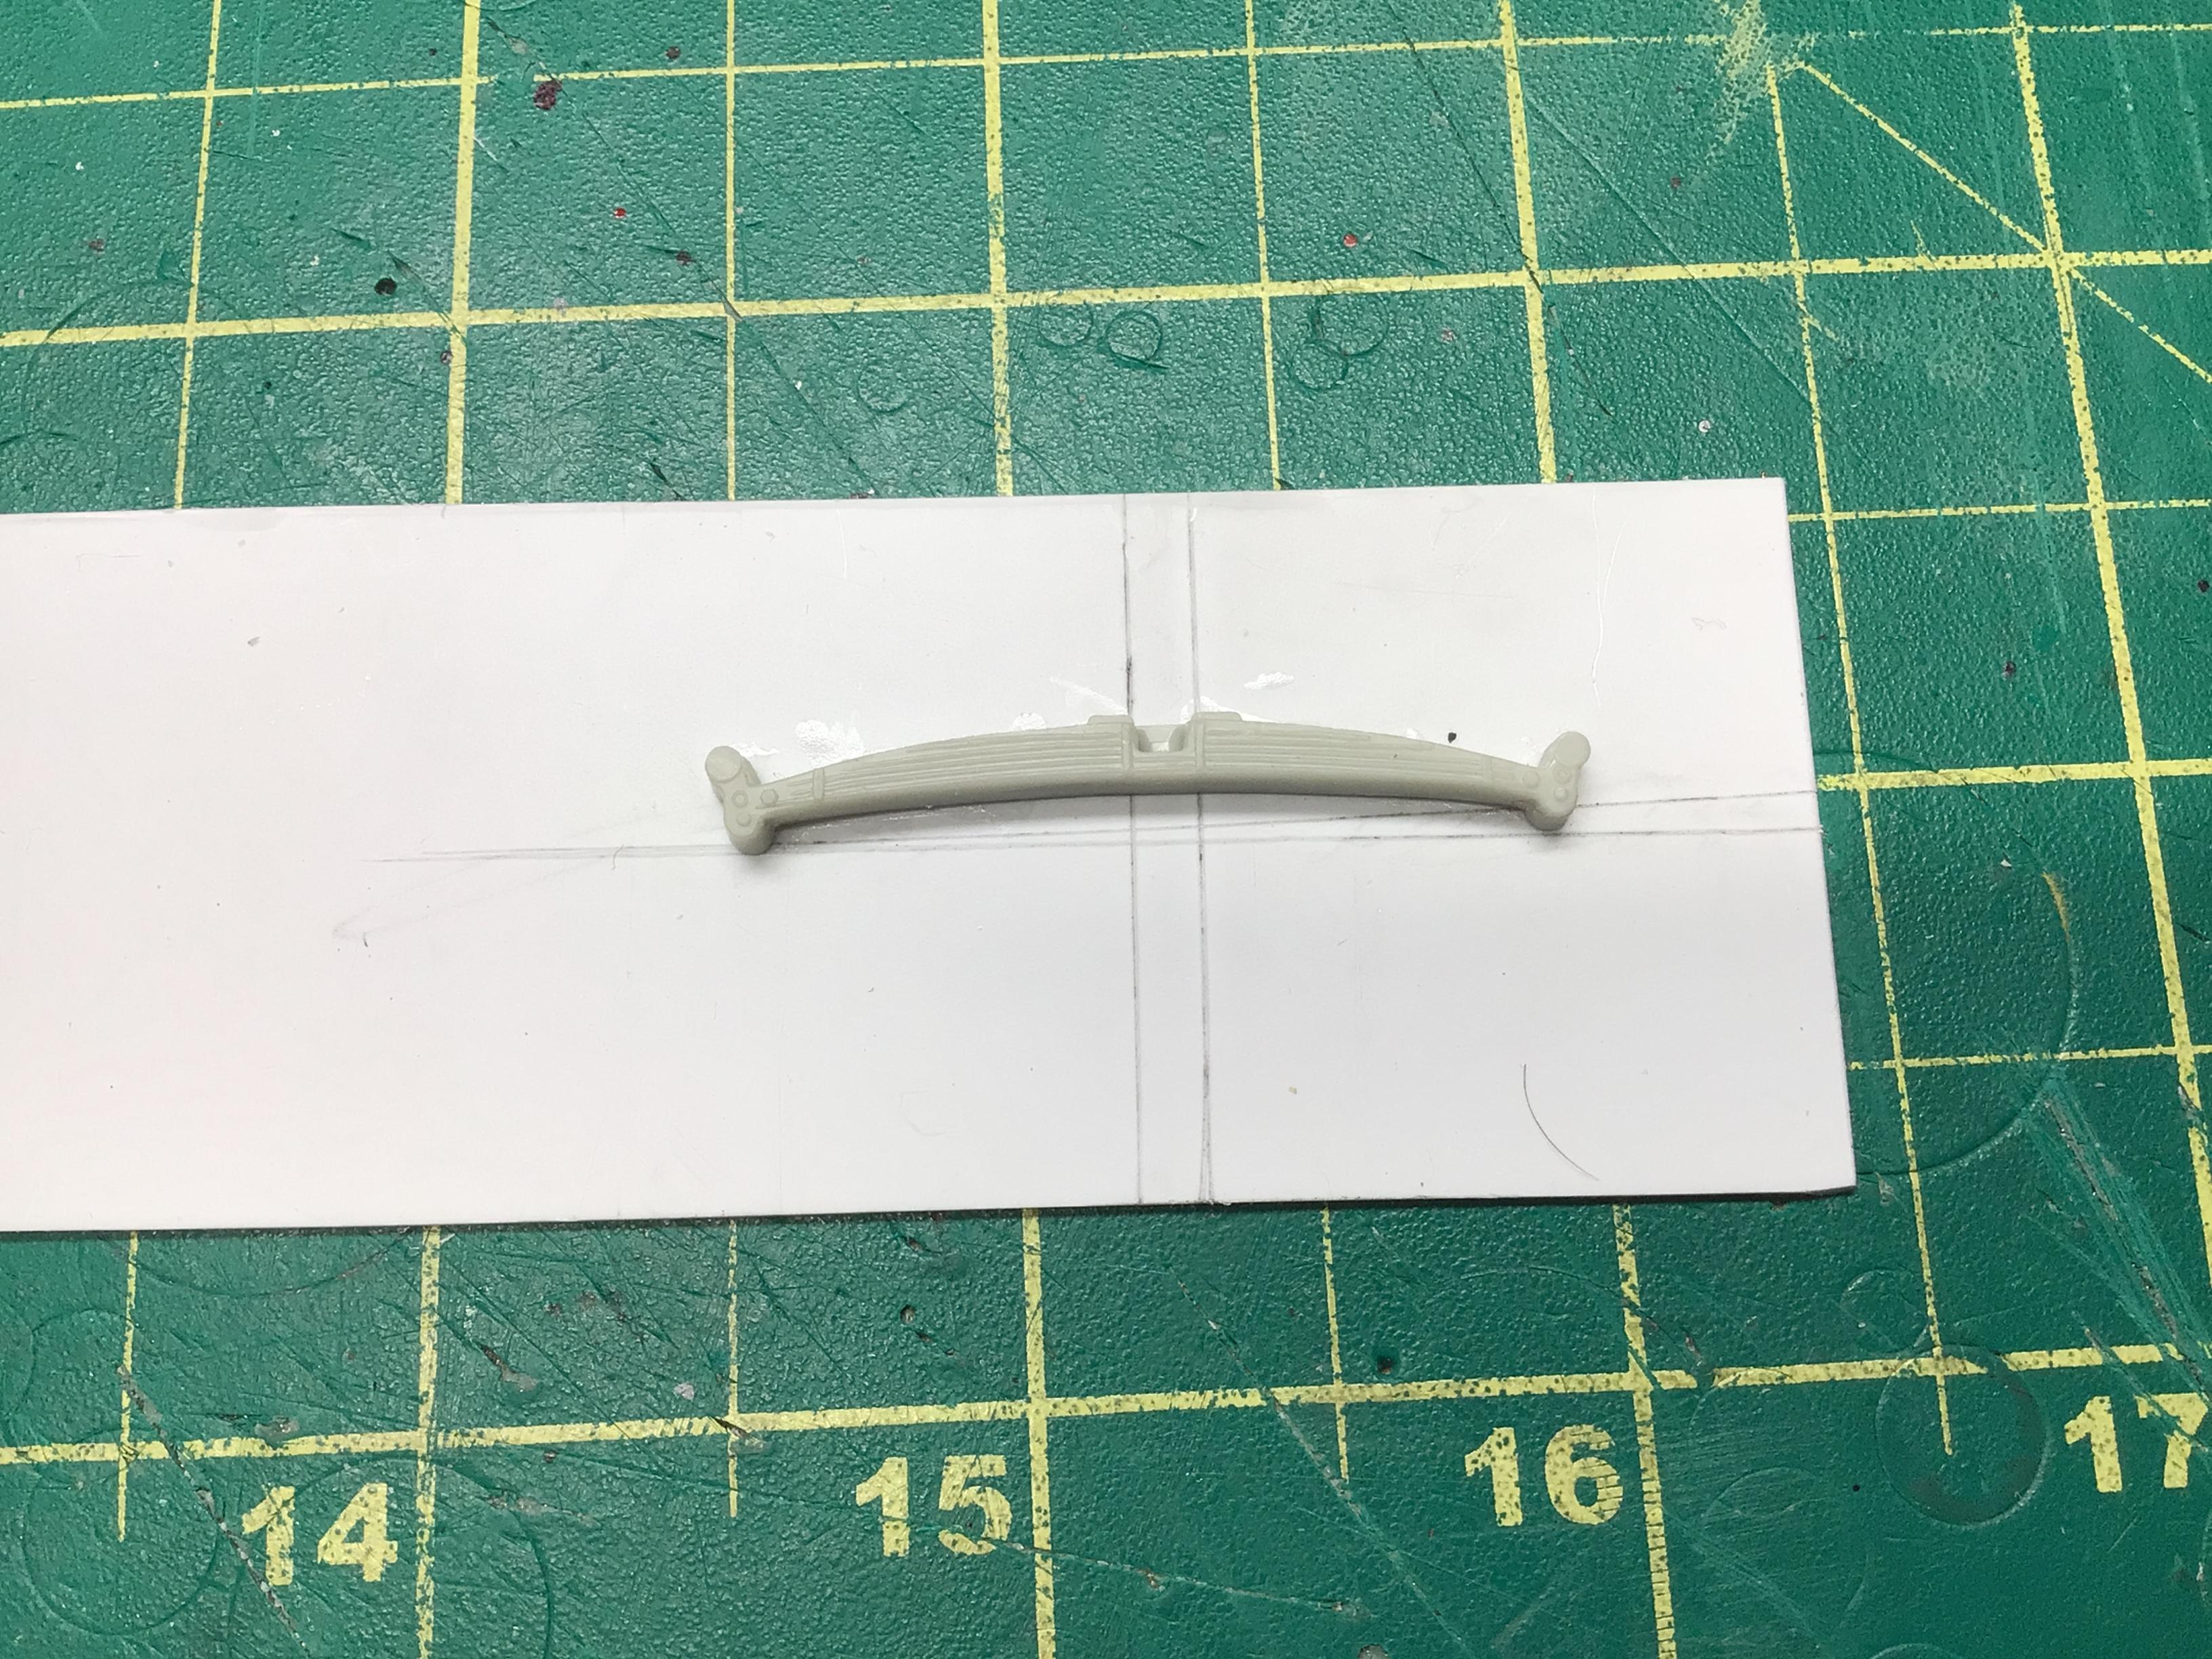
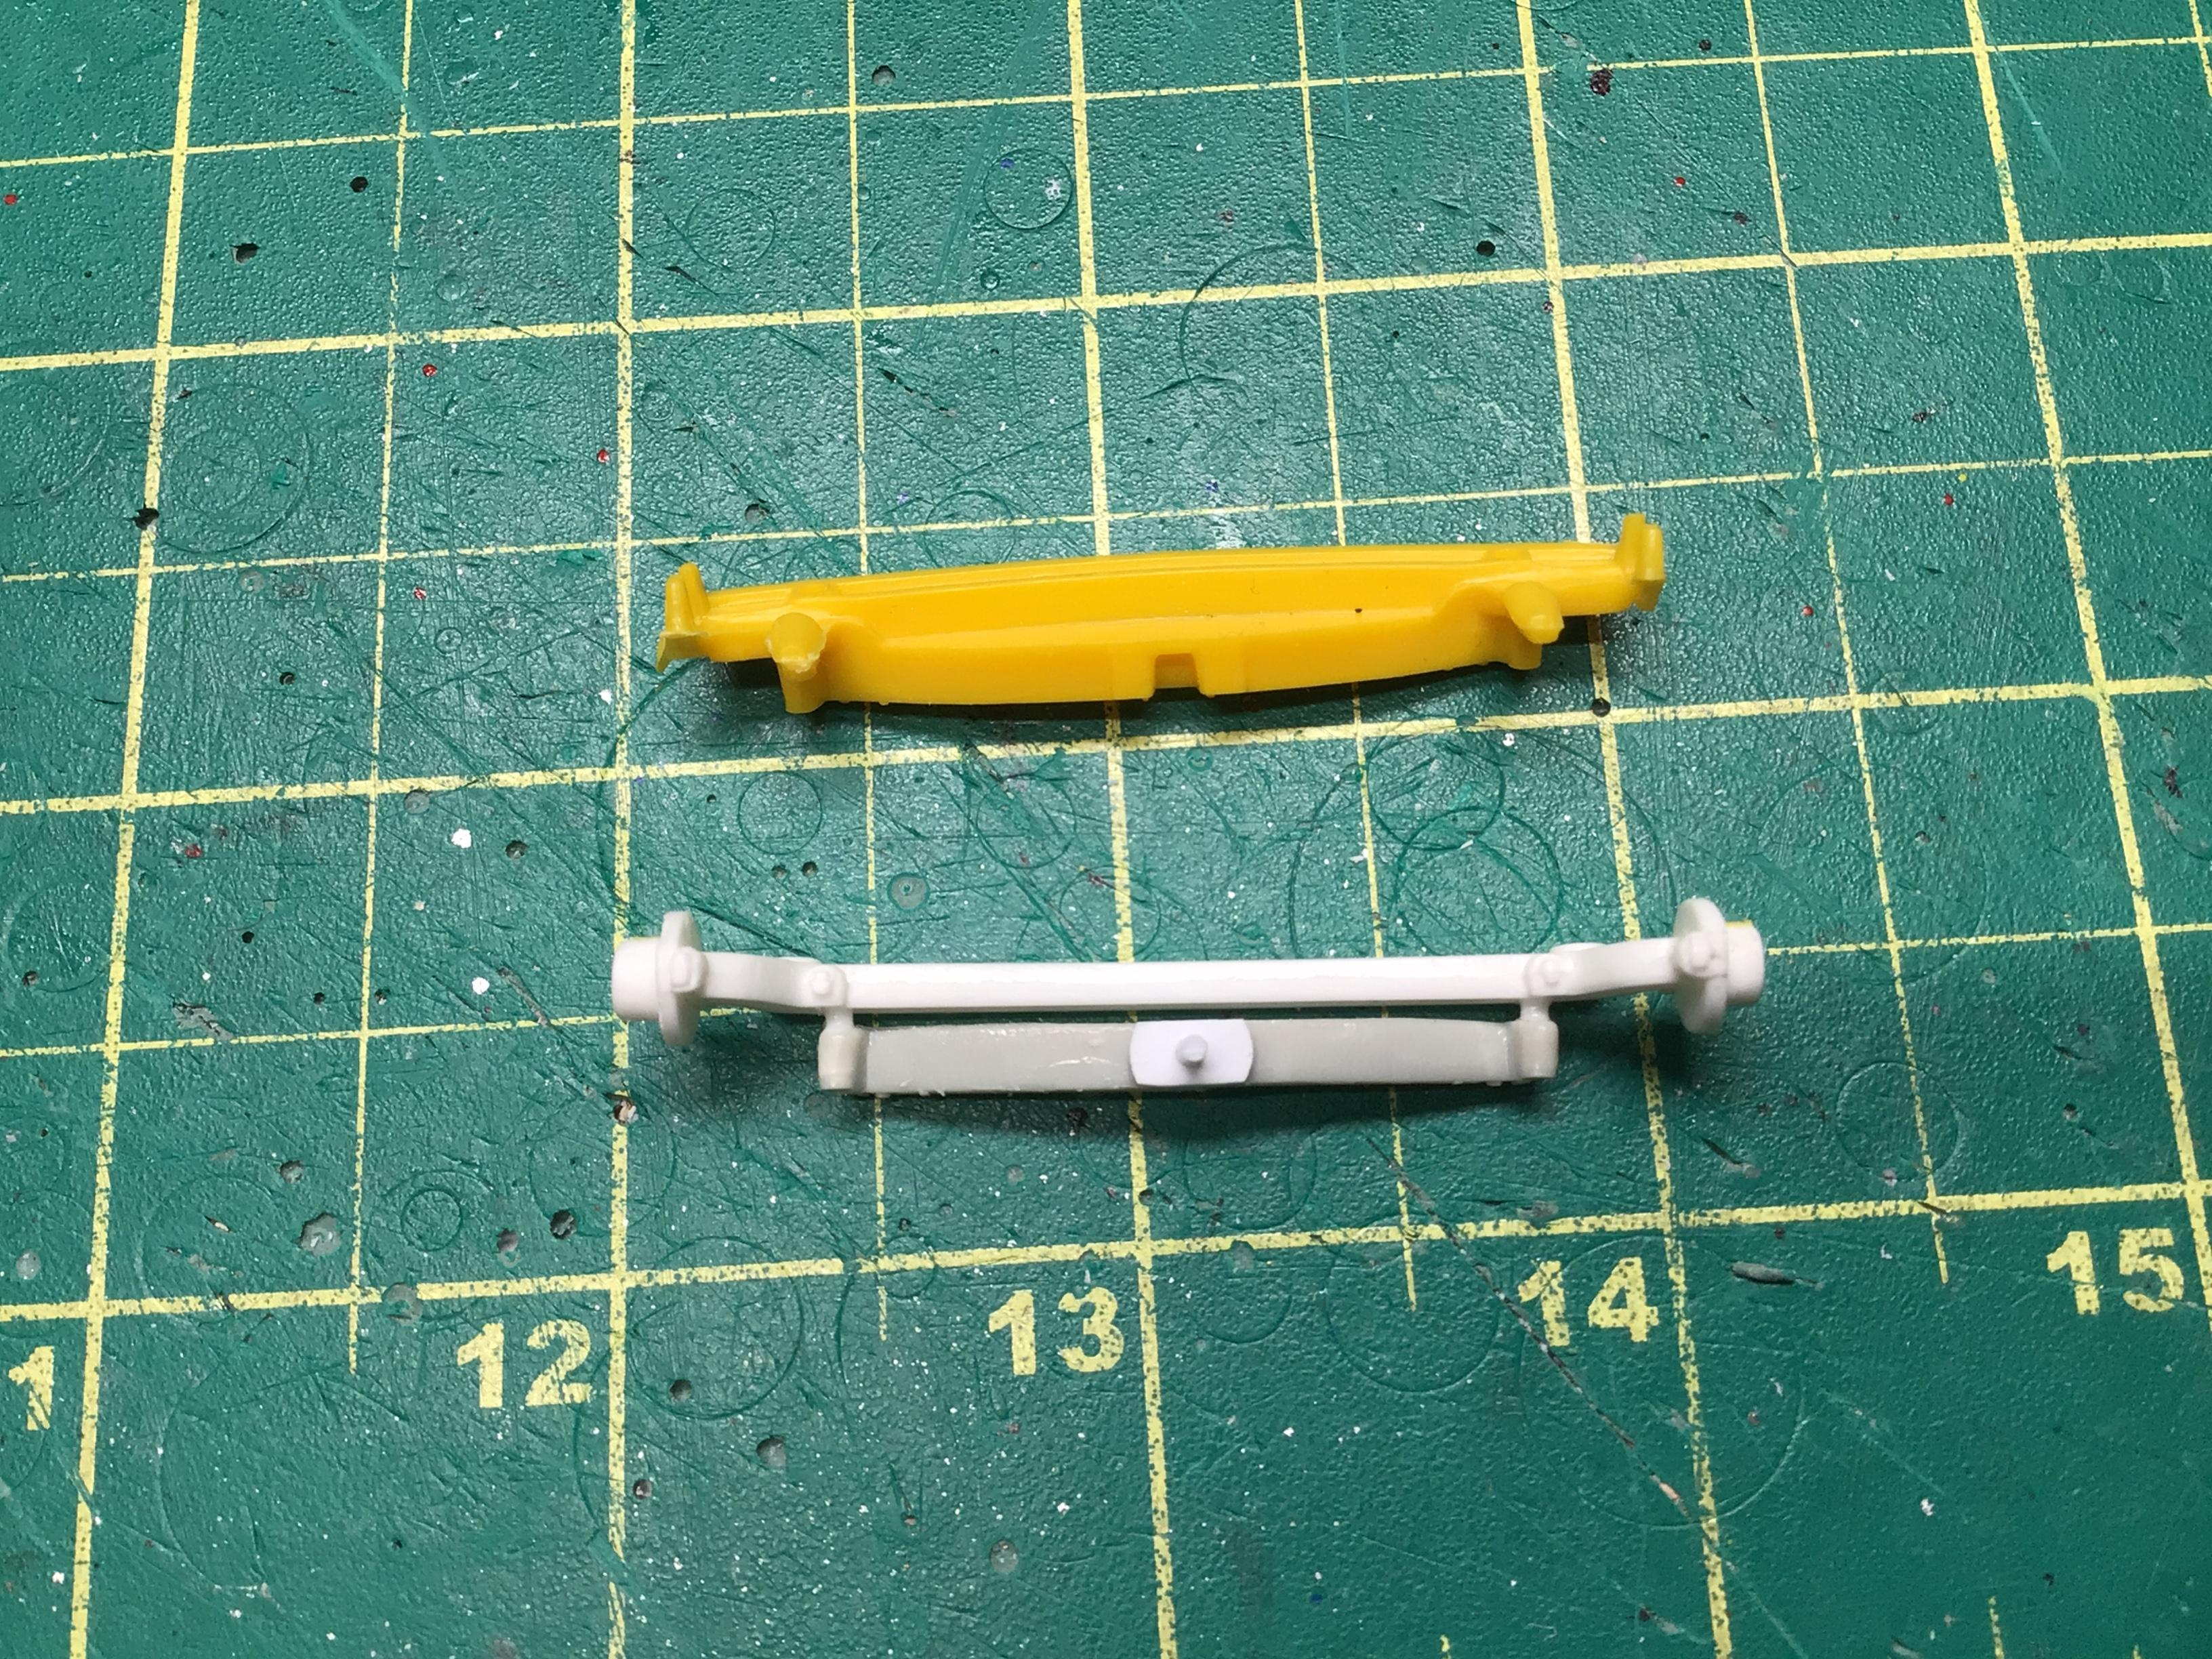
Well I’ve got a 9” rear that I cast glued in place with a couple of shallow air bags, and I got a start on a four link setup. I decided I better get the front suspension set too before finalizing the rear. I don’t like the original metal axle setup and wanted to lower it a bit anyways. So I found a dropped axle in the parts box and cut the spring off the kit piece. I had to narrow the spring a bit the mate up with the axle. I previously made these radius rods for my ‘31 Sedan that I didn’t use, so I figured I’d put them to use here. So the stance is now set!
-
Thanks Len!🙂