Rich Chernosky
-
Posts
2,029 -
Joined
-
Last visited
Content Type
Profiles
Forums
Events
Gallery
Everything posted by Rich Chernosky
-
JPS Lotus 72E 1973
Rich Chernosky replied to Rich Chernosky's topic in Other Racing: Road Racing, Salt Flat Racers
-
Beautiful model, the paint color is spectacular. Good photo work too.
-
Gotta luv them Greenwood Corvettes. This one has aged pretty well.
-
Helmut....this has always been one of my all time favorite kits. You did a grand job on this one and it is well worth restoring. When I did mine the cast front suspension ( some very soft white metal) was broken in several places. I wound up scratch-building the entire front out of brass. It was a lot of work but in the end the wheels steered and it made the rest of the kit. I did mine about 6-7yrs ago as part of a challenge. Take a very rare kit and build it. I don't see them very often nowadays.
-
JPS Lotus 72E 1973
Rich Chernosky replied to Rich Chernosky's topic in Other Racing: Road Racing, Salt Flat Racers
-
JPS Lotus 72E 1973
Rich Chernosky replied to Rich Chernosky's topic in Other Racing: Road Racing, Salt Flat Racers
-
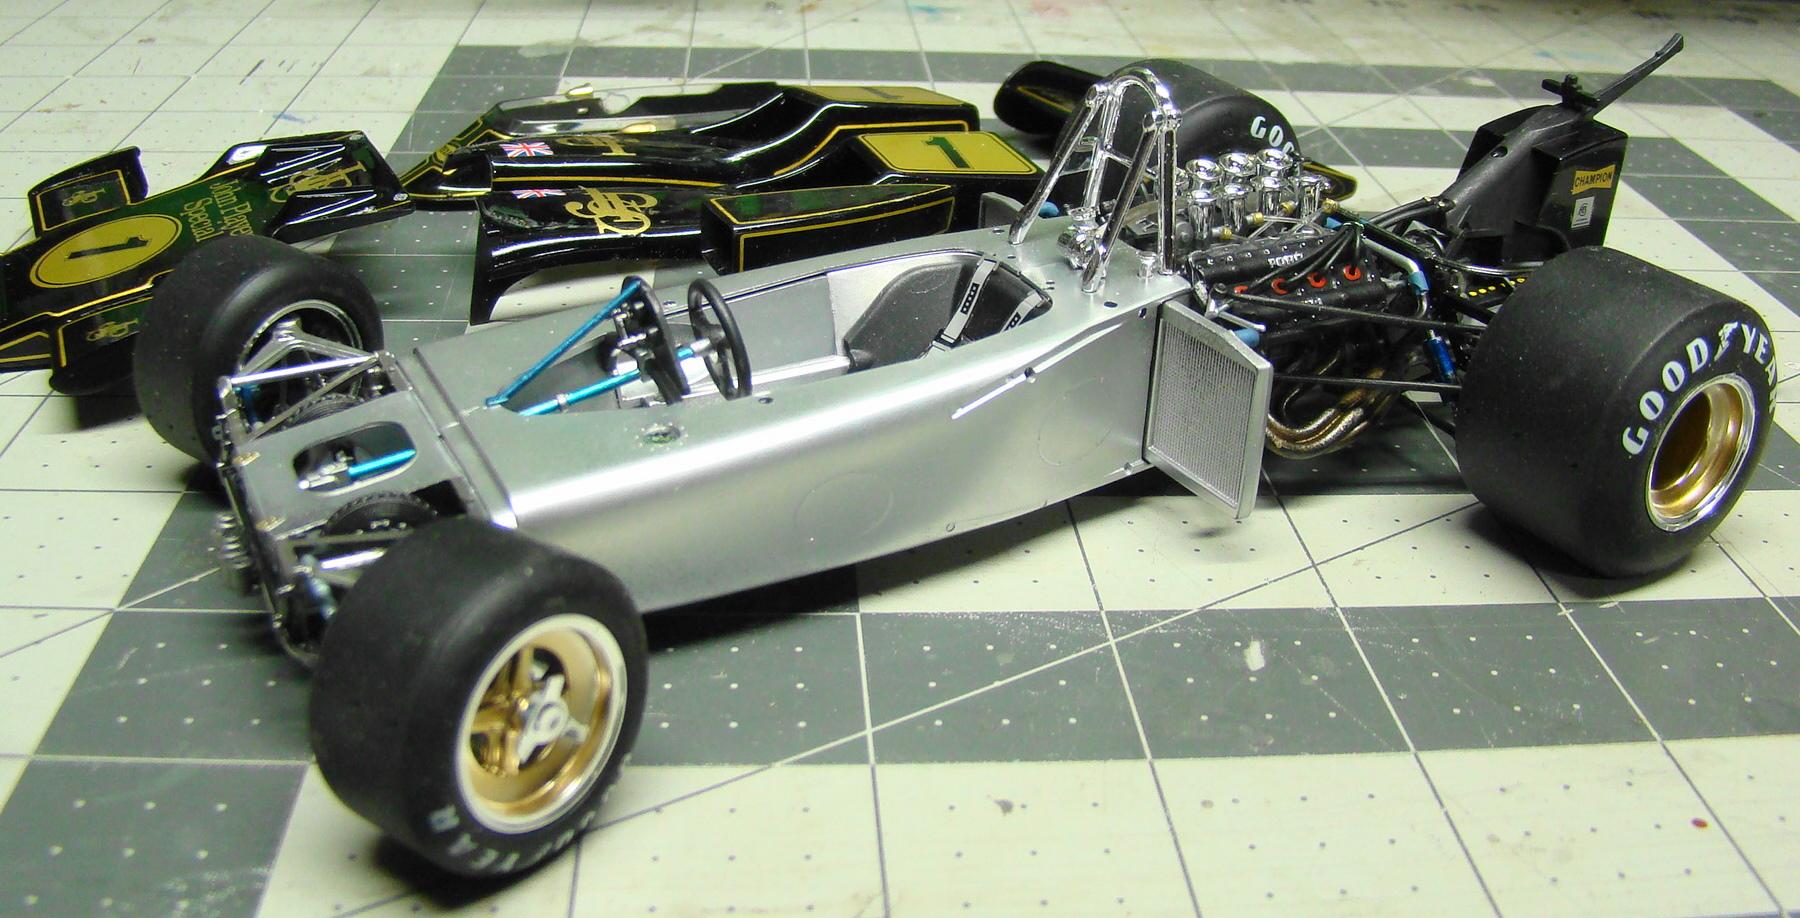
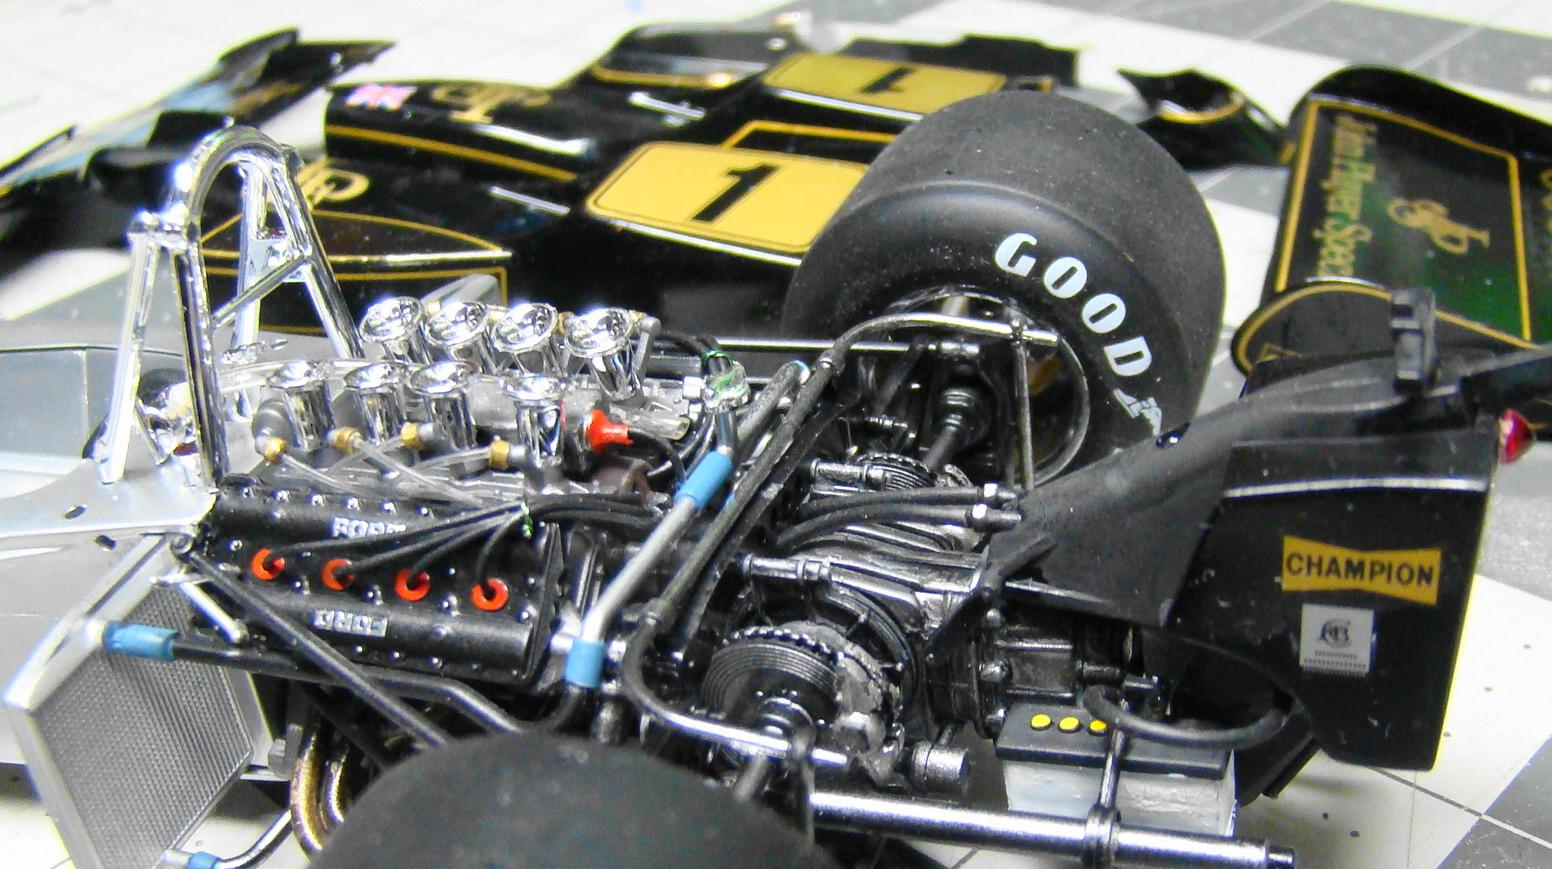
My latest build off the workbench. A very nice kit with few fit problems and a joy to build. But not with out its pain. Body was sprayed with Tamiya TS-14 gloss black then the decals applied. TS13 clear was used over the decals and even after waiting and very carefully applying thin coats the decals discolored and wrinkled. This required more wait time for the clear to cure and the clear was sanded down and more clear applied. the wrinkles still showed although not as bad this time. Further waiting and polishing finally achieved acceptable results. Extras in the kit were aftermarked JPS decals by MSM Creations and wires and hoses. More description in the captions of the pictures. Completed chassis awaiting final bodywork fitment Engine detail, ignition wires, fuel lines oil and water were all extras Front suspension detail showing inboard disc brakes which were unique to this design. Completed car with body work in place. This has always been one of my favorite liveries. rear veiw with oil cooler radiator mounted under the rear wing. The wing itself was worrisome but the extra coats of clear made it all better. The wing itself attached very nicle and required no adjustments to make it look right. Usually a problem with F-1 cars. Side view of this car show the iconic wedge shape that made tis one of the best looking F-1 cars. Couldn't resist taking alll the JPS cars in my collection out for a group shot. The two Lotus 79's are actually different kits, a Hasegawa and a Tamiya. They were also done with different drivers...#5 Andretti, #6 Peterson. Other makes in this picture are Fujimi, Ebbro. 1/64 diecast are Kyosho , Tomica and Polystil.

-
This is one of those topics that if you ask 100 modellers you will get 100 different opinions. But the Paasche H seems to be at the top of the list and that is also my "go to" One of the biggest problems beginners face is how to clean it. I own 6 airbrushes and 5 of them were given ( as in... free) to me by modelers who used them once and they quit working. A simple cleaning and all of them worked. Each had only the slightest bit of of paint in them which will stop an airbrush cold. I use Kwikeze Paint Brush and Roller cleaner, made by Savogram. Green can now. Most hardware stores carry it. It is practically a universal solvent and will dissolve almost any kind of dried up paint including water base acrylics. You don't have to break down the airbrush every time either. Just get most of the paint out with q-tips and pipe cleaners. Spray a little solvent through and you are ready to go again. Make sure you are well ventilated. This is nasty stuff sprayed as you will find out if you ever get a snoot-full.
-
JC...yah...its motorized. A very simple kit with few parts. Body looks pretty good though. Mine is in minty condition, even the decals and the box. Its gonna get built though. No shelf queens in this collection.
-
Gary...thank you so much for posting this. I have this kit (the original Eidai Grip) that I got at a show a year or so ago. It is nice to know decals are available in case my ancient ones fail. The photography rocks too. I also discovered in my box a 1/64 minature of this car done by Hot Wheels (not in the same livery...of course) Don't know how that got in there. Might try and repaint it but decals will be a problem.
-
Tamiya Honda Takata Dome NSX
Rich Chernosky replied to Nacho Z's topic in WIP: Other Racing: Road Racing, Land Speed Racers
You are welcome John. I very rarely give advice like that. But I have finished that kit and noticed you had some difficulty that I was able to overcome. Your project is coming along so well (better than mine) that I didn't want to see you struggle. I have used Gravity Colors and they rock. The Splash line is very similar and work almost exactly the same way and are distributed in the US. -
Tamiya Honda Takata Dome NSX
Rich Chernosky replied to Nacho Z's topic in WIP: Other Racing: Road Racing, Land Speed Racers
John, this is a wonderful kit to build and so far you have done an outstanding job. Two things I have noticed in your build. When I did my seatbelts I used the same material. I cut mine with a heavy metal straight edge and a new razor blade. Hold it down very tight. The way you did it worked so it doesn't matter and they look very good...soooo next time. Decals stick to very shiny glossy surfaces the best. Metallic paint is porous so there is not enough surface area for them to stick. I put a dab of waterbase varnish where the decal goes and that solves that problem. Liquitex Gloss polymer medium is my weapon of choice. Its made by Binney & Smith (the same people who make crayons) and sold in craft stores in the art supply section. Keep up the good work....Rich -
That is one striking model. Never seen a blue quite like it.
-
1958 Ferrari 250 Testarossa
Rich Chernosky replied to 1959scudetto's topic in Other Racing: Road Racing, Salt Flat Racers
Very nice Helmut...thanks for sharing. -
1949 Talbot-Lago F1
Rich Chernosky replied to bbowser's topic in Other Racing: Road Racing, Salt Flat Racers
Bruce...we all get in slumps from time to time. This one was a great way to break out. Nice job. -
NART Ferrari 365 GTBB
Rich Chernosky replied to Gramps46's topic in Other Racing: Road Racing, Salt Flat Racers
Gary...as a Ferrari fan...you know I am going to like this one. I got this one a long time ago as a built up. Re-did it somewhat and then in the back of the case it went. Yours turned out much better. Killer photography. -
Alfa Romeo P2 - MFH 1/12
Rich Chernosky replied to primabaleron's topic in Other Racing: Road Racing, Salt Flat Racers
Museum quality..that's for sure. Thanks so much for sharing. -
Definetly different Ray, but still a Cobra. Very creative and thanks for sharing.
-
Ray..talk to me about Duplicolor 1K clear. I have been using Splash 2K clear with some good results but its expensive and tedious to order. How is it available and what is the mix ratio. Is it foolproof or at the whim of the paint gods, as per usual. That's a cool project BTW and don't listen to anybody. You don't need help, you need encouragement. ...Rich
-
Ford GT Monogram, 1/25
Rich Chernosky replied to Eric Macleod's topic in WIP: Other Racing: Road Racing, Land Speed Racers
Eric...don't try to paint that black stripe. Lay some black vinyl tape (3M makes it) on a piece of glass. Use a thin metal straight edge, a nice sharp knife and cut the stripe. You may have to make several cuts to get the width you want. Then lay it on the model and cut with new xacto blade. It can be moved if necessary and is very easy to do. Practically fool proof and way quicker than painting. I have done this on all my models where a thin pinstripe is necessary. -
Ford GT Monogram, 1/25
Rich Chernosky replied to Eric Macleod's topic in WIP: Other Racing: Road Racing, Land Speed Racers
Eric..the kit you are working on is a re-release of an early Aurora kit....circa 1965. You certainly are going back to the roots of the hobby. Its a nice kit and very well detailed for when it was originally released. You are off to a good start. I finally finished mine in 2020 after having it in my stash for many many years. Here is a link to my build.. Hope it helps you. -
I have built all the Revivals except the Auto Union (which i have) My fingers and brain are still smarting from the Mercedes which is posted on this page. I also saw OUR exchange from a year ago concerning the Autokits Ferrari Sharknose. It was entertaining to say the least but now that I am retired I may actually have to look into that kit again. Thanks for the boost. And congrats on your Alfa find. Can't wait to see it finished.
-
Ray...I built two of these...well sorta...t he second one is 3/4 done. I solved the windshield fit by using jewelers screws to attach the frame to the body. Look forward to seeing what you do to the engine. Mine is in the details stage.
-
Tamiya Toyota GT One IS DONE !!!
Rich Chernosky replied to Fifer's topic in Other Racing: Road Racing, Salt Flat Racers
Very nicely done. I have this one about half done along with the clear cowl version. Seeing yours done and what a great job you did makes me think its time to get those out and finish em. Thanks for sharing. -
FUJIMI Ford GT 40 1966
Rich Chernosky replied to happy grumpy's topic in Other Racing: Road Racing, Salt Flat Racers
Build what pleases YOU. It doesn't have to be accurate....it just has to look good. And yours fits that bill quite nicely