Rich Chernosky
-
Posts
2,104 -
Joined
-
Last visited
Content Type
Profiles
Forums
Events
Gallery
Everything posted by Rich Chernosky
-
Donohue Sunoco Porsche 917-30
Rich Chernosky replied to Rich Chernosky's topic in Other Racing: Road Racing, Salt Flat Racers
Thanks Bruce.....I am afraid MFH kits are a little out of my range, soI will have to live vicarously through you. Your kit is off to a great start BTW. I am sure you will do a awesome job. -
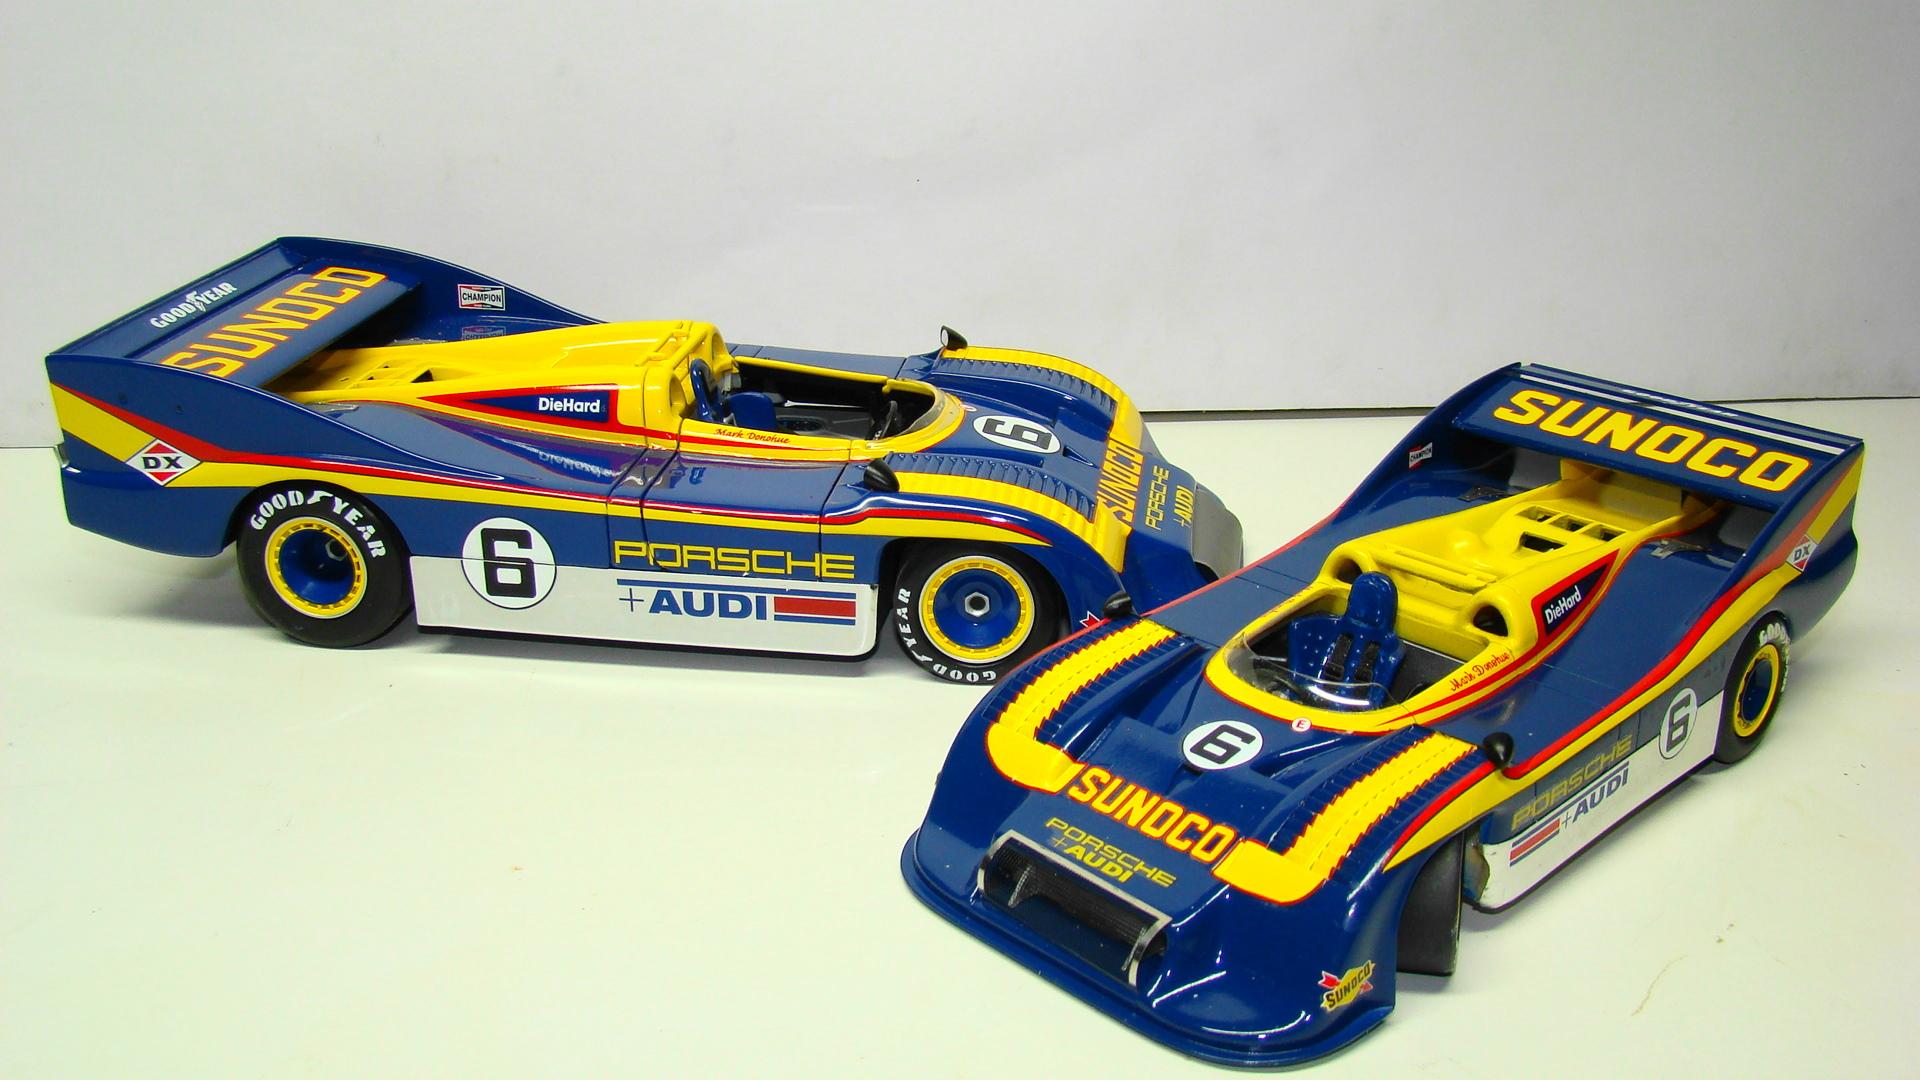
This kit went rather quicker than expected. Although I did clean up parts, make the wheels steer and prime some time ago. From paint top finish it was 3 days. An excellent kit and very well engineered. Paint is Tamiya TS-16 (80%) TS-55 (20%) for the blue. Yellow was Tamiya TS-16 (90%) TS-46 (10%) The yellow had to be mixed several times to match the decals. Only the side decals were used and the rest of the graphics decanted and airbrushed. The thin red accent line is red vinyl tape cut down thin. This proved to be a lot easier than the decals especially over the front fender vents. More comments in the picture captions. Thanks for looking. Making the wheels steer required a little body modification. Goodyear decals out of the stash. Each piece of the red tape had to be cut twice over the fender vents. I have a special tool to do this...now. I made the mistake of attaching the wing then spraying the yellow. It was a little tricky masking when it came to the blue. The thin part of the rear spoiler had to be pinned in place as no glue would hold it. Its adjustable. The bottom of the chassis is real aluminium polished to a medium shine. Its sticky back aluminium used in the label making industry. We have a plant here in town and one of my modeling friends used to work there. Here is the model with its 1/18 older brother. Diecast is by Minichamps and is quite rare now. The colors matched up pretty good considering this is the first time they are seen together. Engine detail of the Minichamps is pretty well detailed for a diecast.

-
Audi R8 LMS GT3
Rich Chernosky replied to Rich Chernosky's topic in Other Racing: Road Racing, Salt Flat Racers
Thanks Paul...didja get the the photo etch set with your kit. I did and it was well worth it. -
Bruce, I am not much of a plane guy. I saw my last aircraft ( I was an engine mechanic) when I got out of the Navy in 1972. But I do know models and I can say that is one sweet aircraft model. Congrats on the awards.
-
Gary...I have a Heller kit that I was going to turn into a lightweight coupe. So I would go with the Heller. Helmut had the best suggestion for the wheels and tires. I would also consult our mutual aquaintance Mr DePooter as he has done both and researched them. Might want to rob the engine out of the Revell as it is the best I have seen.
-
-
Very Nice...I just posted the coupe. Looking at yours, now I really want the roadster.
-
Pretty cool collection of Ferrari's. You got a few I don't have. I'm jealous.
-
thank you Mario. I didn't see yours until after I put this up. Sol I guess you know what I went through. I am going to build the roadster when I get it.
-
Thanks Jim...it was April 1962, and as was walking home from work there sat a Jag E-type. There was nothing like it on the road in my small little town in NE Penna. The E-type was literally THE car that got me interested in cars in the first place.
-
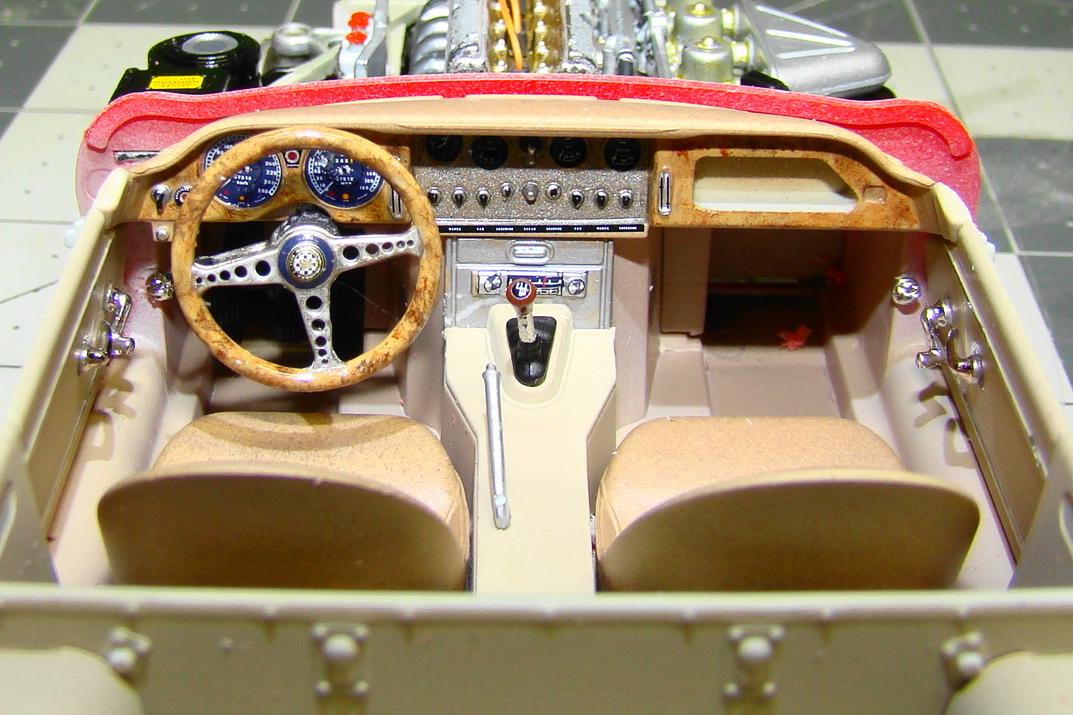
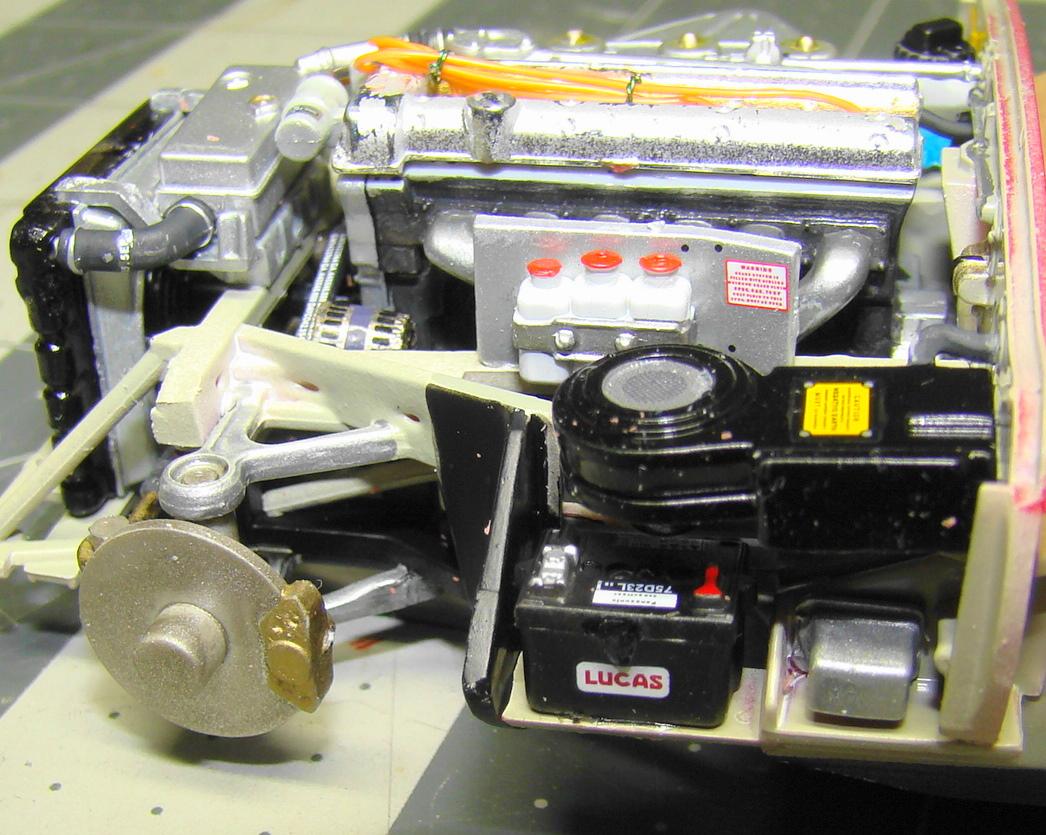
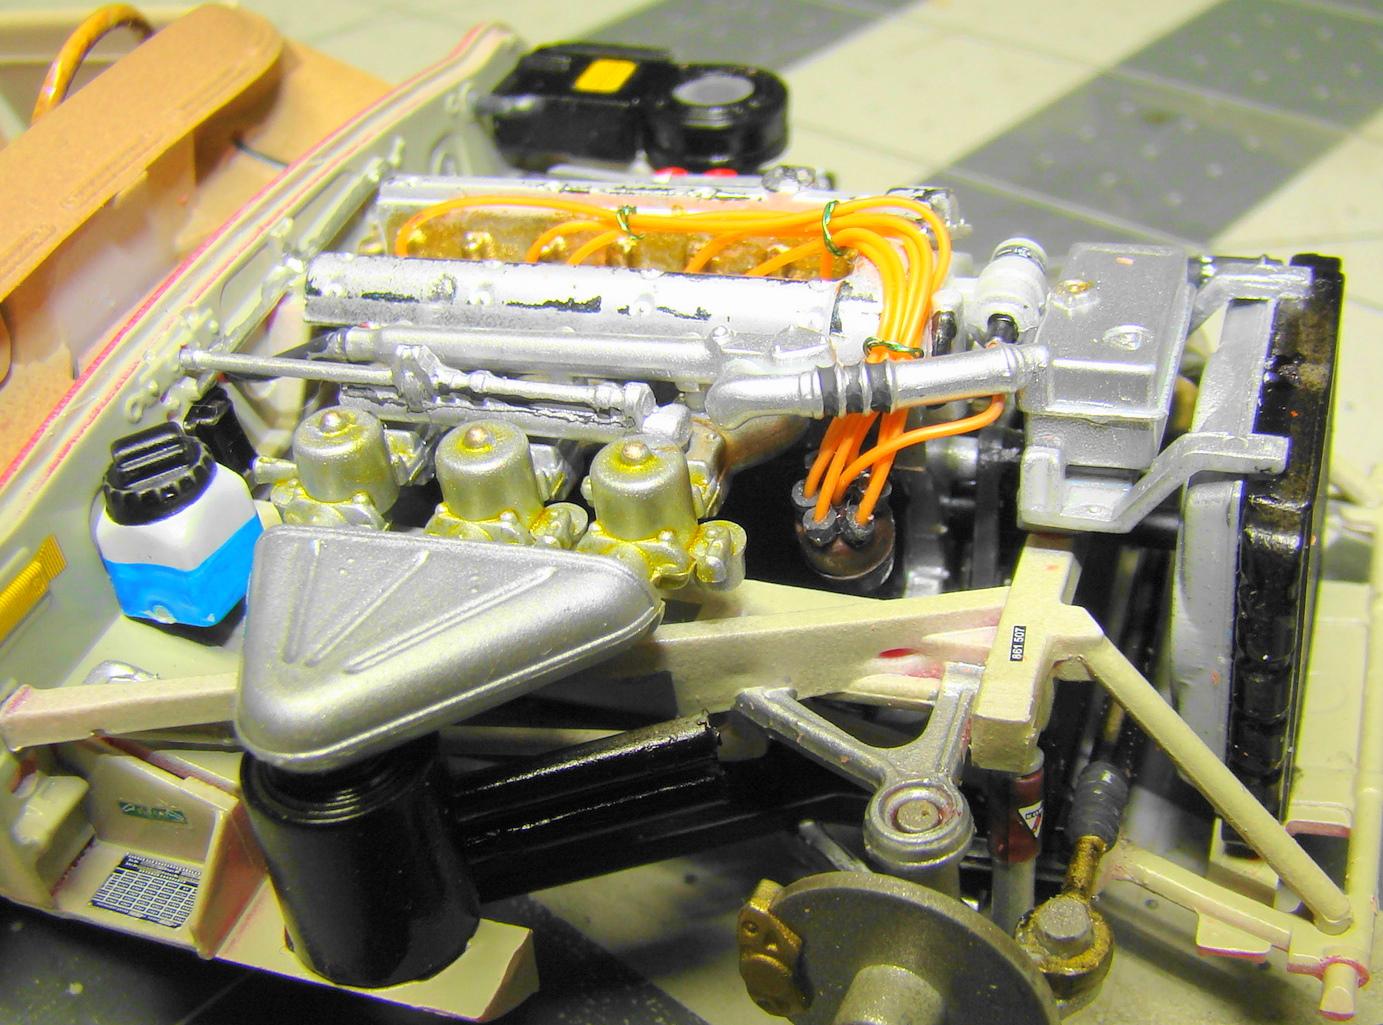
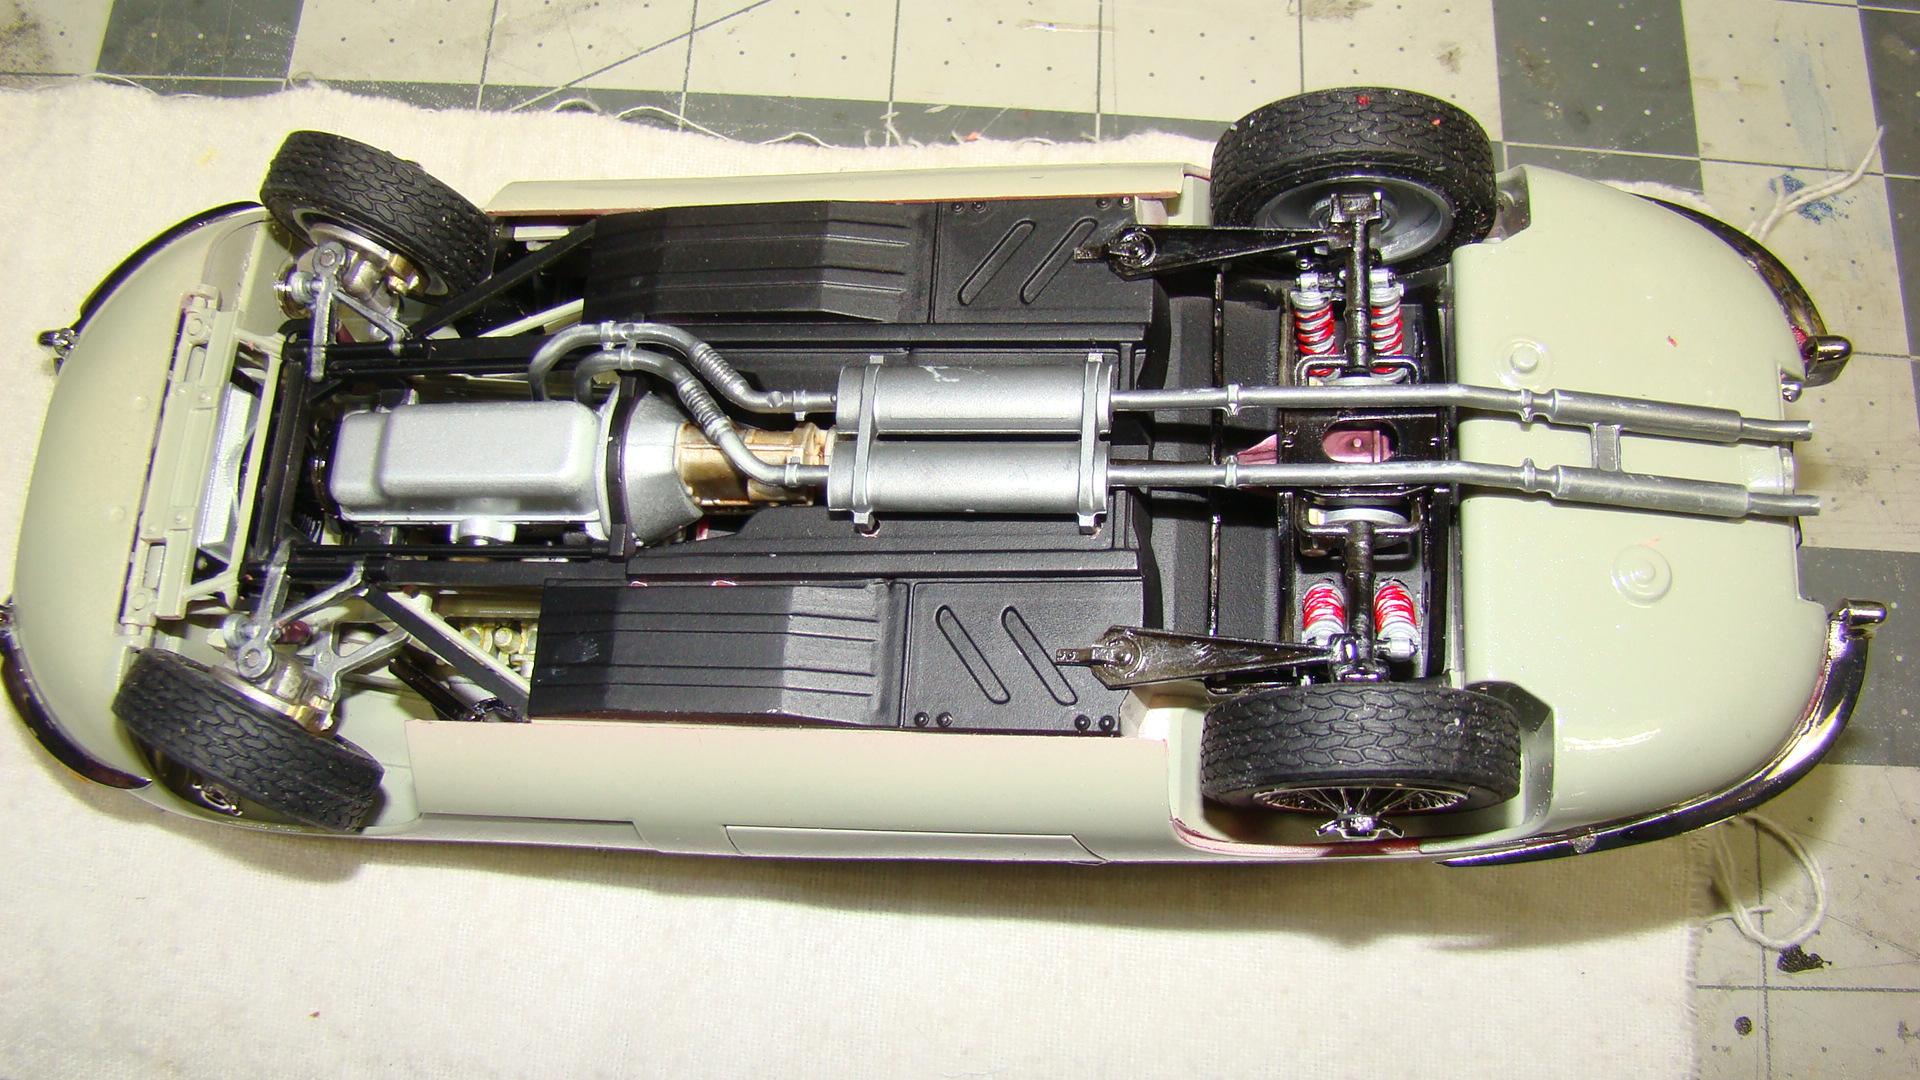
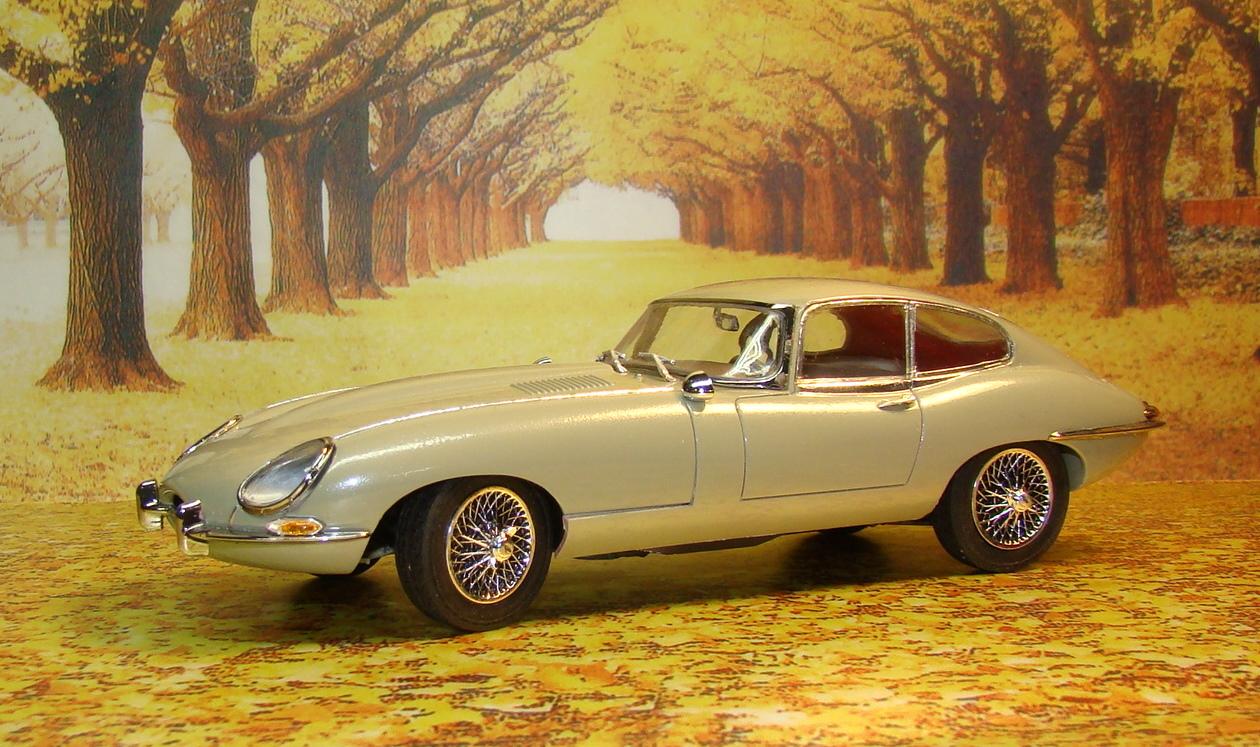
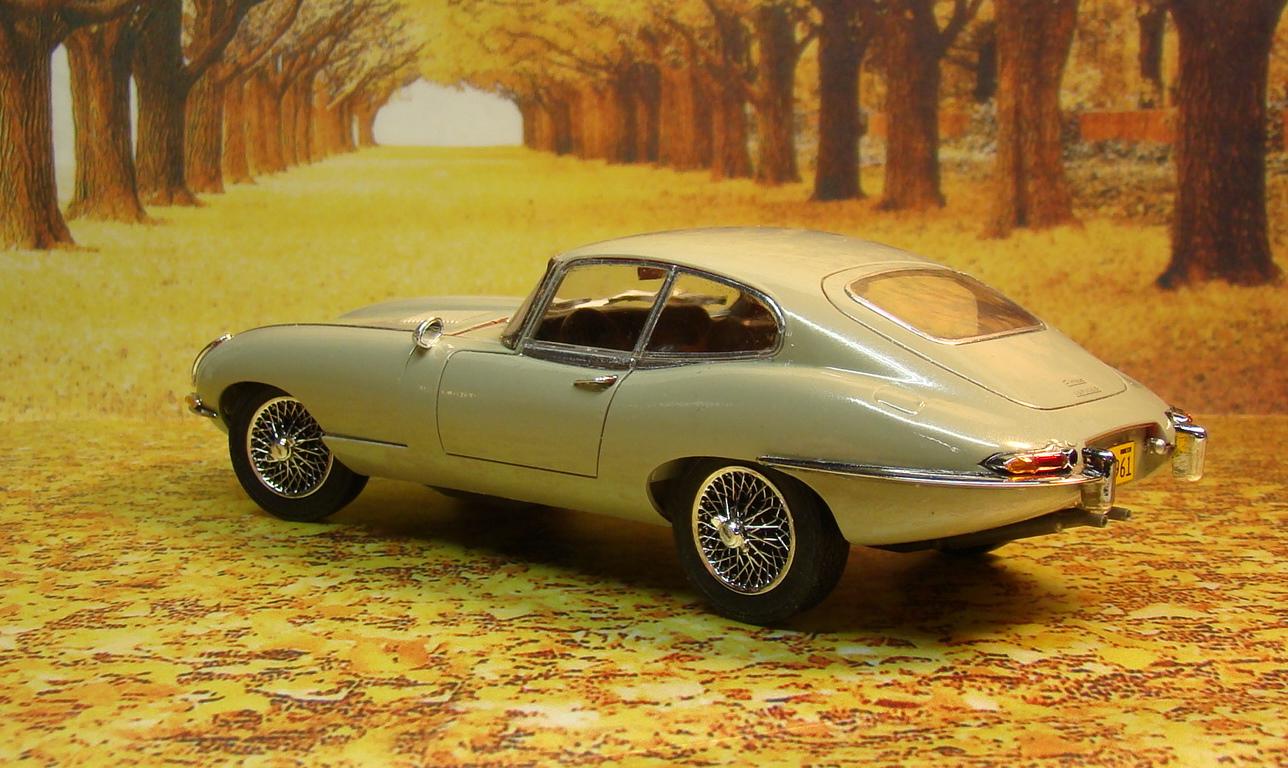
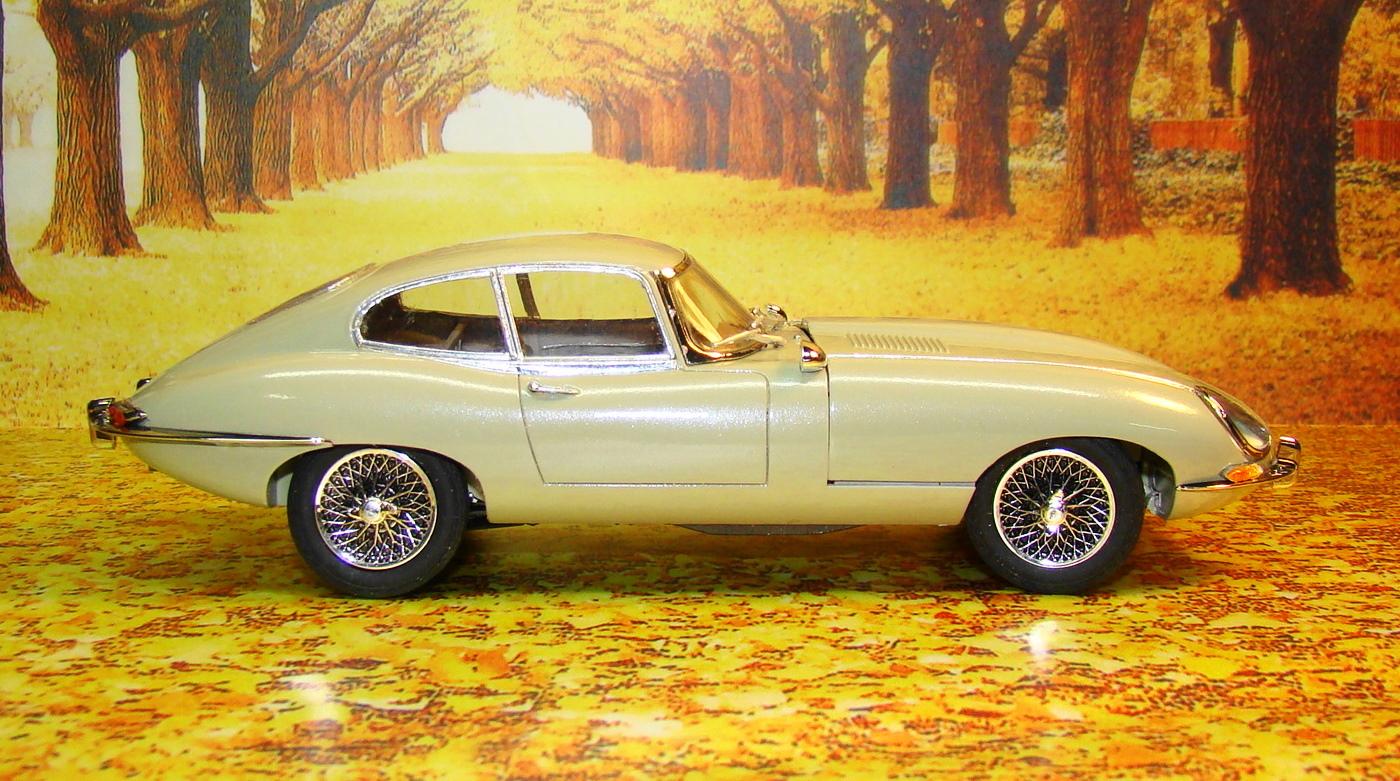
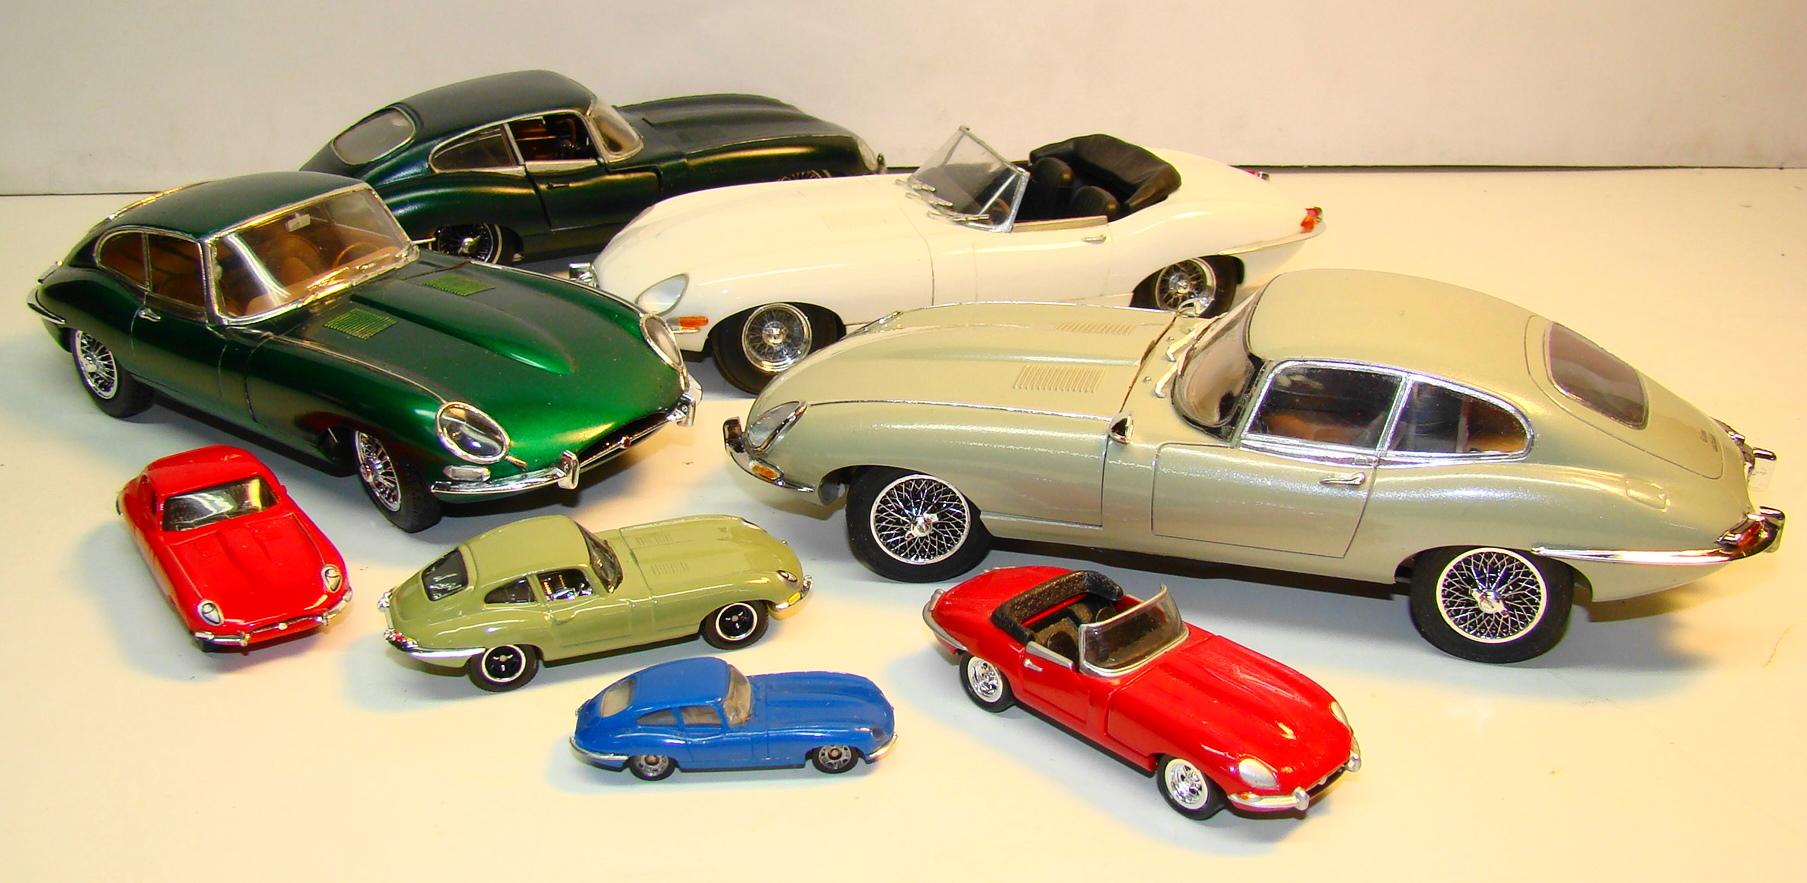
Heard a lot of good about this kit and couldn't wait to get it. When I did I started it right away and it went so well I finished it. a very nice kit with only a few minorfit problems. Revell certainly stepped up to the plate on this one. Color is Tamiya LP33 Gray green + LP-49 clear pearl. Then finished with a coat of pearl then a clear coat of MR Color G100 Super clear. Features on this kit include steering wheels, opening hood and a really nice decal sheet with lots of options. I added a few details and they can be found in the captions under the pictures. Thanks for looking and comments welcome. Interior is difficult to see so this shot was taken before final assembly. Seats and interior are painted using custom mixed Tamiya flats. I mixed some of the exterior color into these colors to make the interior blend better. Woodgrain required several steps. Note the shift pattern on the knob...came with decal sheet. Left side of the engine. With all the accessories it really fills the engine compartment. Revell was thoughtful enough to include the "Prince of Darkness" decal. Right side engine. I added the wiring. There was a lot of detail painting to be done. Note the half filled water bottle. Lots of checking had to be done on this kit to make sure the hood closed properly. There was some cutting and grinding here and there but it snapped down nicely in the end. Under carriage and suspension had a lot of detail so why not show it. finished car on its wheels. all the trim, bumpers and windows fit nicely...that was a relief. Rear view shows all the attention to detail again. I glued the front clip to the nose and sanded the seam. The bumpers in the back cover the seam. The body was installed to the chassis and this area did not need to be glued. It fit that good. Side view shows the beautiful lines of the E-Jag that many consider one of the best looking cars ever. Thought it might be interesting to see different manufactureers take on this car . Metallic green is the Heller. White convertible is Gunze/Sangyo hi tech and in the back the dark green Aurora that was built sometime in the dark ages. The Gunze has been my long time favorite but we will see when I get the roadster version of this kit.
-
Thanks Andy..was on his FB page and he does make wire wheels for Revival kits. May have to order some. Want a couple of his kits too.
-
Porsche 956
Rich Chernosky replied to Silver Foxx's topic in Other Racing: Road Racing, Salt Flat Racers
I like it Bruce, is that a Tamiya or Hasegawa kit. -
What a stunning model. And the photography is perfect for it. I have this kit and your post is inspiration. Thanks for putting it up.
-
Otaki 1/12 scale 1971 (?) Mustang Mach 1
Rich Chernosky replied to cobraman's topic in WIP: Model Cars
Ray...I have this kit in my stash too. Took a look at it yesterday. Mine was bought used and started...so no decals. Luckily most of what was done is minor. I have the same kit in two other scales so I will probably paint mine to match. I will also probably cut the side stripes from vinyl tape if i decide to even go that way. Have to take a look at the other two kits which i think are already painted. Will follow your WIP -
Went to a model show this weekend at the Watkins Glen International Motor Racing Research Center. Took about 60+ of my latest completions. Rather than put all these back in the cases I left them out to be photographed. All of these were featured builds on this forum. Here are the links to these builds: http://www.modelcarsmag.com/forums/topic/163347-bmw-328-endurance-racer/#comment-2432405 http://www.modelcarsmag.com/forums/topic/162960-fia-289-cobra/#comment-2425584 http://www.modelcarsmag.com/forums/topic/161772-martini-porsche-934/#comment-2405413 http://www.modelcarsmag.com/forums/topic/157867-martini-porsche-936/#comment-2336470 http://www.modelcarsmag.com/forums/topic/157623-pescarolo-judd-01-lmp/#comment-2332043 http://www.modelcarsmag.com/forums/topic/154063-lemans-2017-ford-gt/#comment-2271157 http://www.modelcarsmag.com/forums/topic/153270-ferrari-330p4-spyder-coversion/#comment-2258435 http://www.modelcarsmag.com/forums/topic/152448-1964-ford-gt/#comment-2243737 http://www.modelcarsmag.com/forums/topic/167154-andretti-ford-gt-66-lemans/#comment-2501557
-
Some really great background information there Mark. I can see why this kit is so special to you. Will be following. And yes...I miss my friend Dale too.
-
McLaren F1
Rich Chernosky replied to dougwintz's topic in Other Racing: Road Racing, Salt Flat Racers
Feel your pain Doug. I have a had quite a few decals go that way. Nowadays when I see a large expanse of decal I look for ways to paint the graphics. Fortunately for you the project turned out great. That is one nice model and a tribute to your persistence. -
Yah...I would do this too if I won the lottery. This is a real sharp build on a nice kit. Really luv the carbon fibre work and engine detailing.
-
Eagle Gurmey Weslake 1/12 MFH
Rich Chernosky replied to primabaleron's topic in Other Racing: Road Racing, Salt Flat Racers
Not only one of the best looking F-1 cars of its day but one of the best looking models I have ever seen. Awesome -
Gary....It was a fun post. I had a few more to post but they were already done. And in going through my stash I found even more I haven't done yet. And I am really envious of your Ferrari winners. I have a couple but but there are gaps that you have filled with your hand carved ones. That was above my talent skills.
-
Gotta luv those Enthusiast kits. You have mastered this one.
-
Great kit and executed very well.