RCprofile.JPG.6b95b19b856bf00a3becd6aeaaa48f3b.JPG)
Ian McLaren
-
Posts
1,360 -
Joined
-
Last visited
Content Type
Profiles
Forums
Events
Gallery
Everything posted by Ian McLaren
-
RCprofile.thumb.JPG.1691ea753d0f0897fdc1b2510cf06775.JPG) Thanks for the kind words Ron, I've been trying to get the details as close as possible but without a mill or a decent lathe it's a challange. The next round of details will be a step up as my 3D resin printer comes on line. The Moroso covers and dry sump pan are part of the back story on the model ( an older racecar that has stayed with an average racer who has been updating the car as funds allow). Also as I said earlier in this build Morosso cover just scream drag race motor to me. I had a set on my 65 Impala SBC that I kept for my 68 Acadian SS 350 4 gear, and then transfered to my 73 Vega wagon. I then moved to BBC power so the covers went with the Vega and as far as I know they are still going down the track on weekends.
Thanks for the kind words Ron, I've been trying to get the details as close as possible but without a mill or a decent lathe it's a challange. The next round of details will be a step up as my 3D resin printer comes on line. The Moroso covers and dry sump pan are part of the back story on the model ( an older racecar that has stayed with an average racer who has been updating the car as funds allow). Also as I said earlier in this build Morosso cover just scream drag race motor to me. I had a set on my 65 Impala SBC that I kept for my 68 Acadian SS 350 4 gear, and then transfered to my 73 Vega wagon. I then moved to BBC power so the covers went with the Vega and as far as I know they are still going down the track on weekends. -
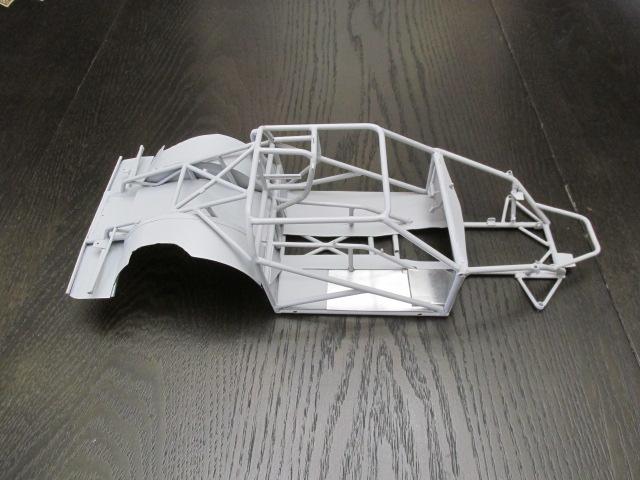
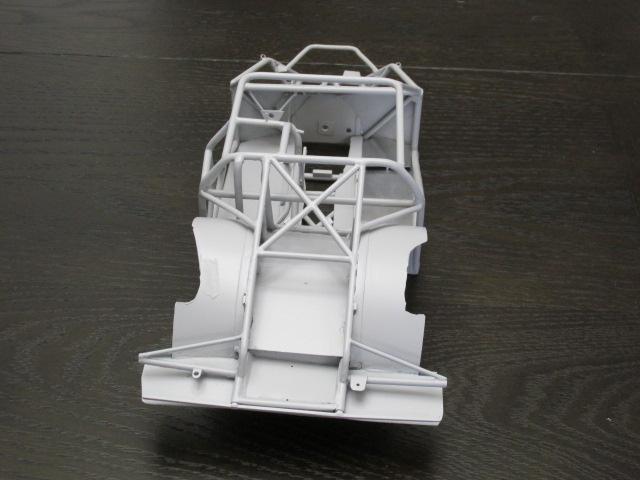
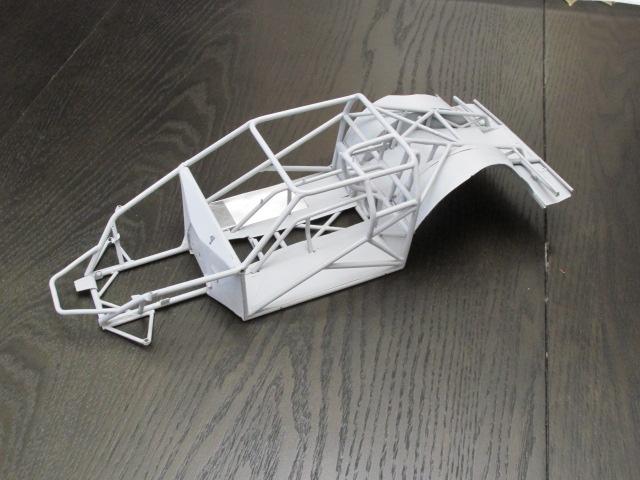
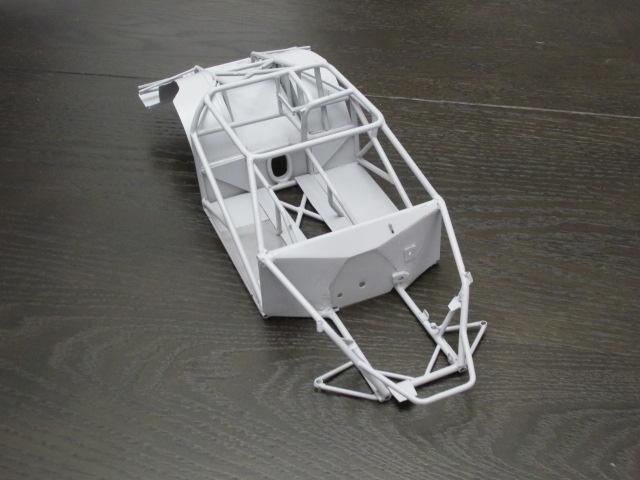
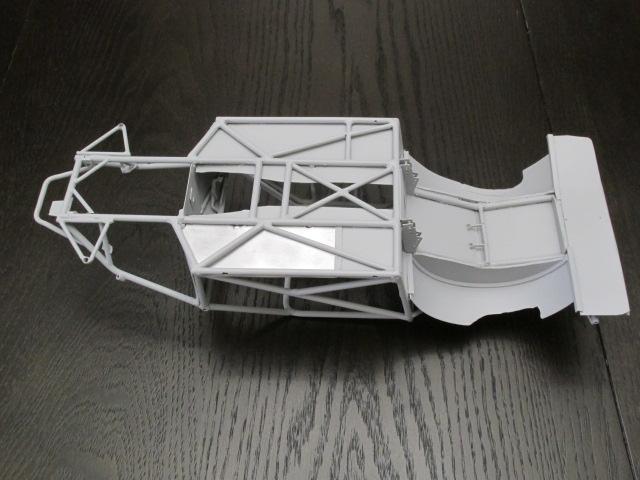
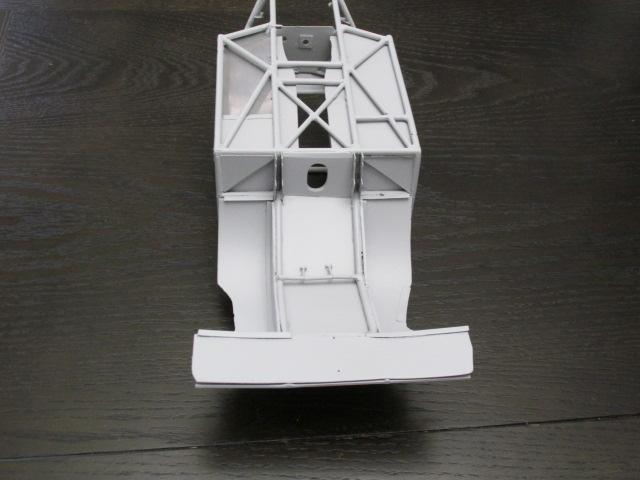
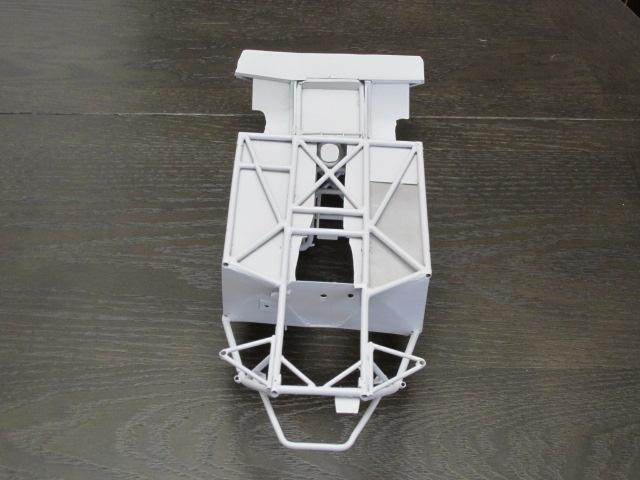
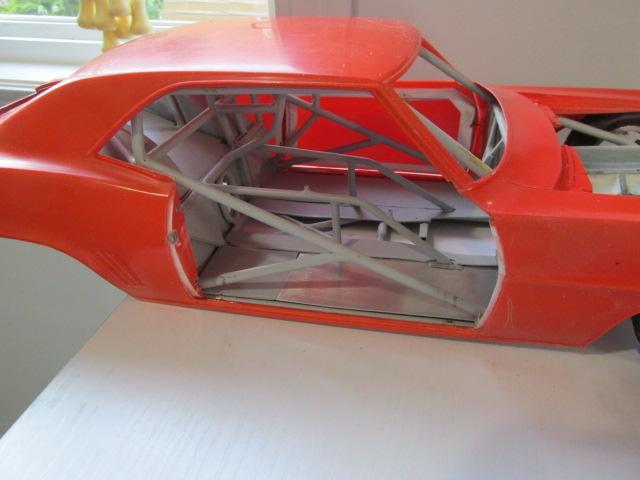
First color on chassis, needed the gloss finish to be able to remove rough spots and other issues. Clean up some joints, add some weld beads and a few brackets then the final color coat before adding the Carbon Fiber decals on the tubs and floor pans.

-
Templating the side windows, and trying to find the best way to replicate the door side window, tubular support assembly
-
Thank you Bob, it's kind of beginning to resemble a functional car.
-
Nostalgia Fuel Dragster--Blower Manifold (01/28/23)
Ian McLaren replied to Straightliner59's topic in WIP: Drag Racing Models
Looking great Daniel, the T handles are spot on and I am definately stealing your tie wrap proceedure. I do however have a question about the wires themselves, what sizes are the and where did you get all of the colors from? Usually I can only find red, green white, and black. What are the head gaskets made of, they look to be brass or copper. -
Front struts fitted and springs fabricated, calipers have already been fitting and clearances checked , strits are ready for detailing painting and installation, upper rad hose roughed in, this one is white as I have more of this material than the black,black hose and clamps will be used for final assembly.
-
Details movingalong, fully scratch built nitrous shutoff valves including the AN fittings
- 352 replies
-
- 2
-

-
- brass
- tube chassis
- (and 2 more)
-
Drilling holes and bolting bits in, starting to get a bit tight in here. still the pan evac system and dry sump pieces to install
- 352 replies
-
- 1
-
-
- brass
- tube chassis
- (and 2 more)
-
See above.
-
Good question Daniel, I think I've become most comfortable with 1/16th, small enough to still fit on a shelf and big enough to detail with old eyes and fat fingers. The only reason I'm doing this in 1/12th is that I have owned the kit for decades, lots of decades, original release. Bought it in California on a trip to the Winternationals. Like you said this could be a never ending project and I have had to set a limit on the detail I'm including as I have other projects I want to build. That being said this is a fun project and thank you for the kind words. PS, I am blown away with your detailing of the dragster it's going to be such a great model.
- 352 replies
-
- 1
-
-
- brass
- tube chassis
- (and 2 more)
-
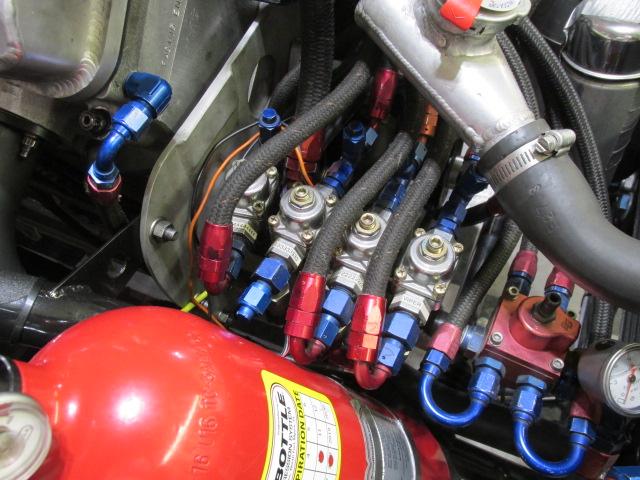
1/12 scale LHP1320 BBC long block and 1050 Dominator carbs. Wilson style intake manifold with 2 added nitrous systems, fogger nozzels in the runners and a Viper Style stage in pleuium system (two solidoids on the front face). Starting to plumb the engine with nitrous and fuel lines, easy stuff done now it's the regulators and fuel blocks from the pump as shown in the photo of the real deal.
- 352 replies
-
- 3
-
-
- brass
- tube chassis
- (and 2 more)
-
Great work Andrew, your solution for the front suspension is an inspired approach, as are your adjustable ride height supports.
-
Great job Marcos, these have to be one of the most difficult drag race vehicles to model and yours is going to be a stand out for sure!
-
MVI_0196[1].MOV Second door just needs the gaps corrected. Now I have to figure out how to fabricate and support the two side windows and cut the access holes.
-
Well I just bit the bullet and cut out the right door to allow more details to be displayed. I also added a 304 stainless top to my work bench to make cleanup easier.
- 352 replies
-
- 3
-
-
- brass
- tube chassis
- (and 2 more)
-
Thank you Bob, it's just about ready to start adding the details
-
Nostalgia Fuel Dragster--Blower Manifold (01/28/23)
Ian McLaren replied to Straightliner59's topic in WIP: Drag Racing Models
Looking great, nice outside the box thinking on the bellhousing, the new scheme looks very good! -
Thank you Daniel.
-
Nostalgia Fuel Dragster--Blower Manifold (01/28/23)
Ian McLaren replied to Straightliner59's topic in WIP: Drag Racing Models
That looks pretty good to me as is, if I was to change anything I would wrap the cowl panel just a tiny bit more around the windscreen with a slightly sharper point, but that is really nit picking. -
Great job on the Lenco, it's hard to tell it from the real deal, well done!
-
WOW John I'll take a complement like that any day, thank you so much, there is a lot of time and effort in this one, I just hope the balance of the build goes well.
-
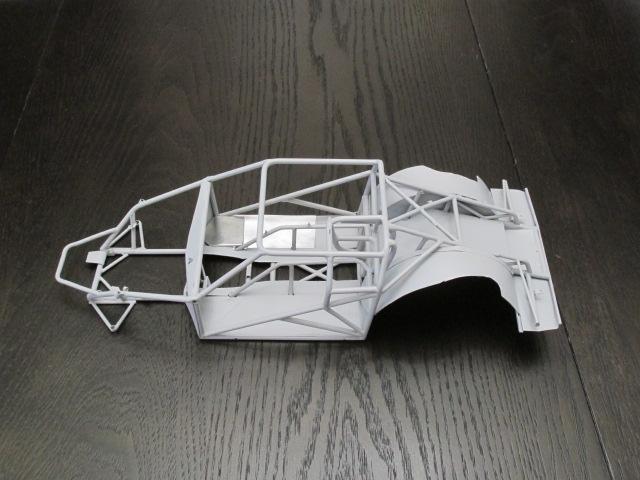
Big step today the chassis is in primer, not perfect but the repair are all minor.
- 352 replies
-
- 2
-
-
- brass
- tube chassis
- (and 2 more)
-
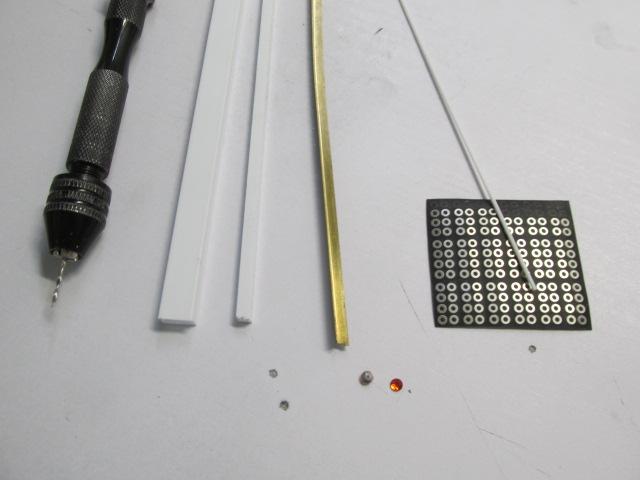
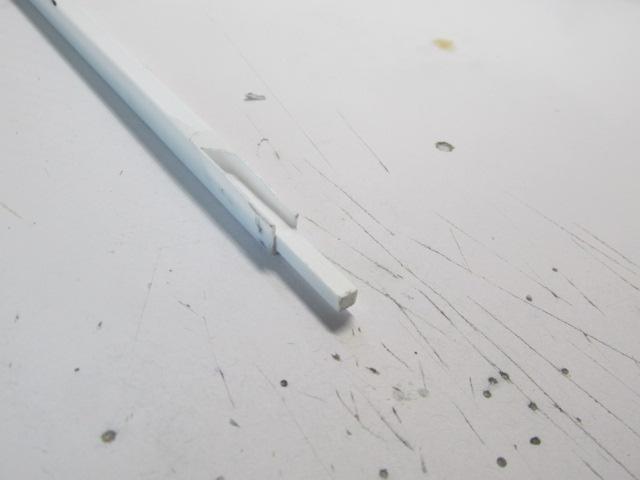
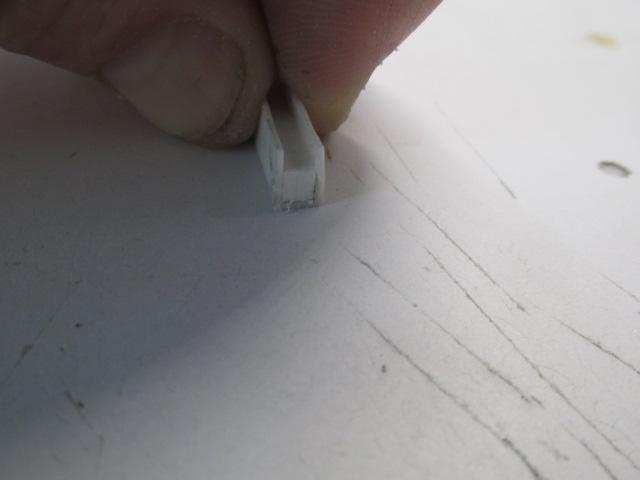
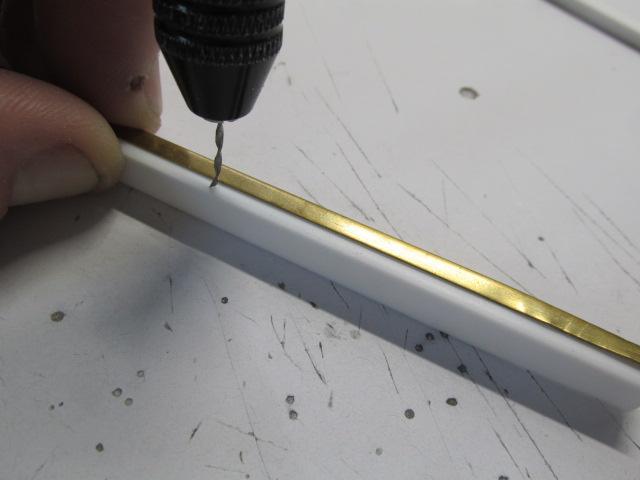
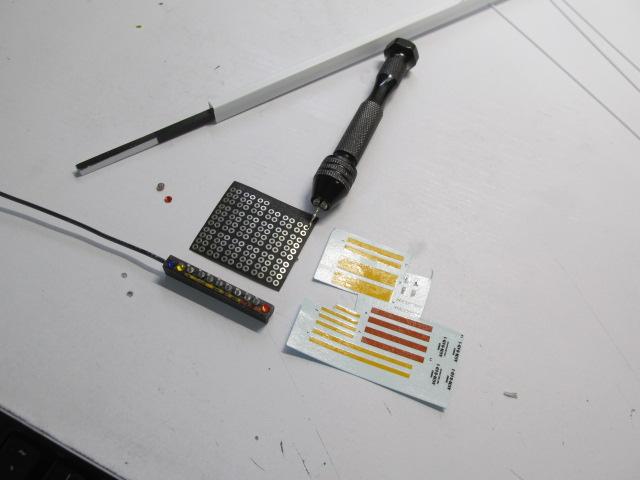
I had a couple of questions asked about what went into this panel, so to answer the questions here are the materials and the process Main body .200 x .300 Evergreen retangular tube (this is for 1/12th scale)grind off one of the narrow sides to give you a U channel, sand to required depth to fit chassis tube. Panel ends .125 square evergreen rod glue a short section at each end to cloes the ends of the panel. The switches are .030 for the handles ( a little over scale but look OK) and .080 dia x .040 hole photo etch washers. I used a brass L channel as a guide to drill the switch holes in a straight line, then paint the panel the color you want it, I chose Tamiya semi gloss black. Cut short but over length sections of the .030 rod and glue them in the holes don't worry how long they are as long as the shortest one is longer than you want the handles to be. Slide the washers over the handles ( I chose to do it before I installed the handle and used a drop of CA to secure both). At this point you can cut all of the handles to the desired lenght and carefully paint them with your favorite silver/chrome paint. The pilot lights are up to you, mine are from one of my wifes Diamond painting kits, but gems like these are available in most craft stores of model raillroad shop. Some are flat mount like these but most will require a mounting hole being drilled (very shallow) The yellow and red stripes are from a left over 1/72 scale aircraft weapons set. and the harness is just a piece of black wire that looked like the correct size.
- 352 replies
-
- 1
-
-
- brass
- tube chassis
- (and 2 more)
-
WOW Paul this is going to be awesome. Having a few Green Elephant kits sitting in the closet I'm really paying attention to how you are approaching the body on this one. Jeff built me a set of Halibrands for a previous project using those centers so I have seen your handy work in person, fantastic quality. I will definitely be following along on this one.
-
Your work on the transmission is outstanding especially the netting, so precise. I just used some .030 evergreen rod for a switch panel and I agree with you on the shape. I wish someone here would step up and stock more Plastruct. Just one model railroad shop has any kind of significant selection.
.JPG.aeb0d624f7420931a19cb2e9c474bbb8.JPG)
.JPG.f7e3b77d5aaafecc544b2c4c1481992c.JPG)
.JPG.9ba34c7ad06c20f80b96783d13af4b6f.JPG)

.JPG.ae08ef147ea0269dc1b6c935f3ef02fc.JPG)
.JPG.44ccb220920d262af737c3d852e43c36.JPG)
.JPG.0976a117e9d8788af45c8b3c458e38ad.JPG)
.JPG.c05b1f2397c276916b0bbd6bc95aa572.JPG)
.JPG.6abc3f002c2061c063fcd1bf1c98e153.JPG)
.JPG.9edade7bc7bea4900345353bdbccd83e.JPG)
.JPG.80f0059451f12bb9fe47ea113c22c0b0.JPG)