RCprofile.JPG.6b95b19b856bf00a3becd6aeaaa48f3b.JPG)
Ian McLaren
-
Posts
1,360 -
Joined
-
Last visited
Content Type
Profiles
Forums
Events
Gallery
Everything posted by Ian McLaren
-
RCprofile.thumb.JPG.1691ea753d0f0897fdc1b2510cf06775.JPG)
1/16th Scale Top Fuel Dragster Eddie Hill 4:99
Ian McLaren replied to Ian McLaren's topic in WIP: Drag Racing Models
Longer than I was expecting. LOL The real car had a wheelbase of 282Inches which should scale out to 17.6 inches, the models wheel base is 17.8 inches or 284 inches. The chassis was originally built as a generic 300 " car with the normal 17" front wheelsa and tires and I guess I messed up the math doing the conversion to the short tire configuration. I did not notice the error untill the body was underway and for an imperceptable visual change it was not worth the effot involved to correct. -
1/16th Scale Top Fuel Dragster Eddie Hill 4:99
Ian McLaren replied to Ian McLaren's topic in WIP: Drag Racing Models
Glad to have you aboard Mike, I hope it lives up to expectations -
1/16th Scale Top Fuel Dragster Eddie Hill 4:99
Ian McLaren replied to Ian McLaren's topic in WIP: Drag Racing Models
Thanks Barry, as I said earlier this is going to be a representation as opposed to a recreation. That being said, the amount of detail included will be substancial but not over the top. -
1/16th Scale Top Fuel Dragster Eddie Hill 4:99
Ian McLaren replied to Ian McLaren's topic in WIP: Drag Racing Models
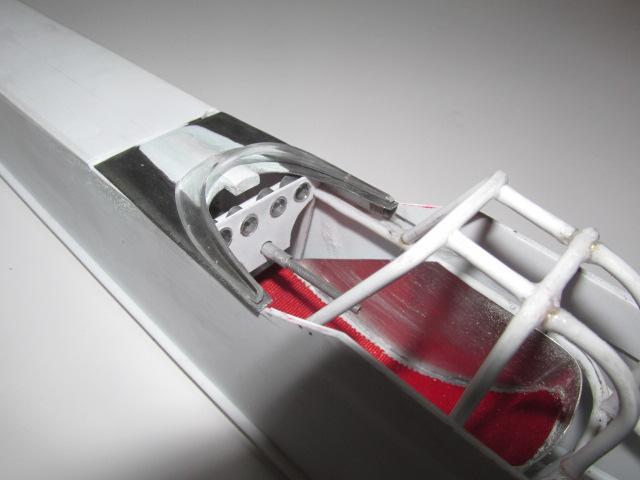
Progressing slowly, but surely, Aluminum seat, rear wing supports Cowl piece and windshield.
- 78 replies
-
- 1
-

-
- scratch built
- super shops
- (and 2 more)
-
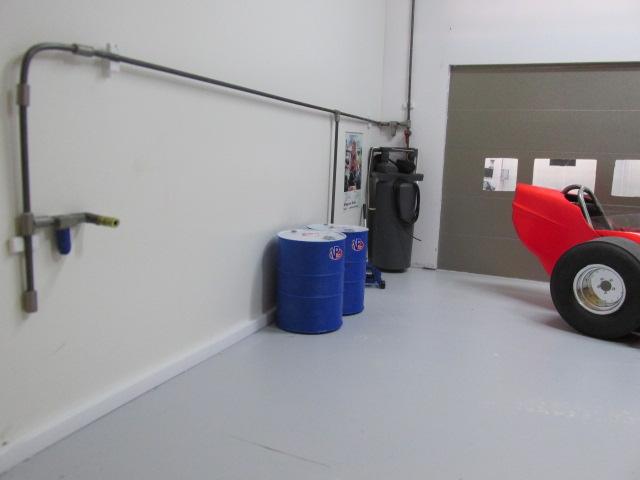
Crew was in and has started running the air lines from the compressor
- 7 replies
-
- 1
-

-
- scratch built
- 16th scale
- (and 1 more)
-
This project started out as a 27" x 16" X 13" high white feature less shelf. I have no photos of it at that stage and as this is a perminate feature none will be forth coming. It needed to be at least this size to properly photograph 1/16th scale modes (its primary purpose). It was not intended to be a detailed model in itself, just a back drop void of full scale tools and windows. Along the way I had aquired a few shop pieces from previous projects, nothing major but it was a start. Now the shop is getting life of its own and I find myself adding more and more items to enhance the illusion. How far this will go is anybodies guess but I think it will become far more than first intended. This photo is the most basic picture I have of the space being used, the green door is just a green file folder cover, everything shown are parts left over from previous model projects except the tool box which I printed from Ron Olsens STL files. The work bench scratch built from left over model railroad materials and the black set of drawers are a leftover from a Hotwheels formula 1 set.
-
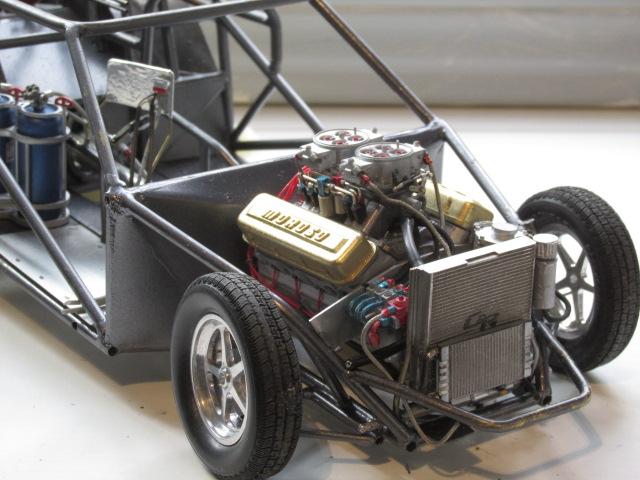
Nostalgia Fuel Dragster--Blower Manifold (01/28/23)
Ian McLaren replied to Straightliner59's topic in WIP: Drag Racing Models
From a comp car guy ----CONGRATULATIONS Daniel!! Best in show very very nice, but best engineered is really something to write home about. Both awards are a fitting tribute to your preserverence, enginuity and overall modeling prowess! Extremely well done my friend!!!! -
Very nice model, cleanly built, well detailed, well finished, no out of scale items. Certainly a model to be proud of!
-
I watched the project from the beginning, This is a very deceptive model just like the real car, it looks stockish but there is a ton of quality work done to get it here. Nice representation of the real car, the owner should be pleased and honered.
-
Thank you Francis for all of the kind words, you of all people understand the mixed emotions at the end of a long haul project. The sharing of knowledge is a two way street and I have become a better modeler from following your projects and methods. It is also very good news that you will be back to the forums soon, you have been missed my friend!
- 32 replies
-
- 1
-
-
- brass chassis
- scratch built
- (and 1 more)
-
Thank you Barry, it was a long project but ultimately satisfying.
-
Thank you very much for your interest Doc, I'm glad you liked it!
-
Thank you so much Peter I really appreciate your comments. glad you like it.
-
John thank you so much for your comments, it makes me feel good to know the WIP was helpful to you. Your comment about the realism is especially gratifying as that is what I strive to convey even if it means showing a little wear and tear to represent being a working race car with a few passes on it. I don't think Tim has much to worry about from this build but I do really like his work.
-
Thank you Bruce, it was a long haul project but a fun experience. Your Shelby is a thing of beauty and an exceptionalmodel.
- 32 replies
-
- 1
-
-
- brass chassis
- scratch built
- (and 1 more)
-
Bob thank you so much for the comment.
-
Thank you Bruce, I glad to liked it, thanks for the kind words.
-
Nostalgia Fuel Dragster--Blower Manifold (01/28/23)
Ian McLaren replied to Straightliner59's topic in WIP: Drag Racing Models
I am simply in awe of the amount of mechanical detail you have added to this model, and the realism factor is off the charts. I'm not sure most people, even from this group appreciate how difficult it is to get to this level. My hat is off to you my frined. -
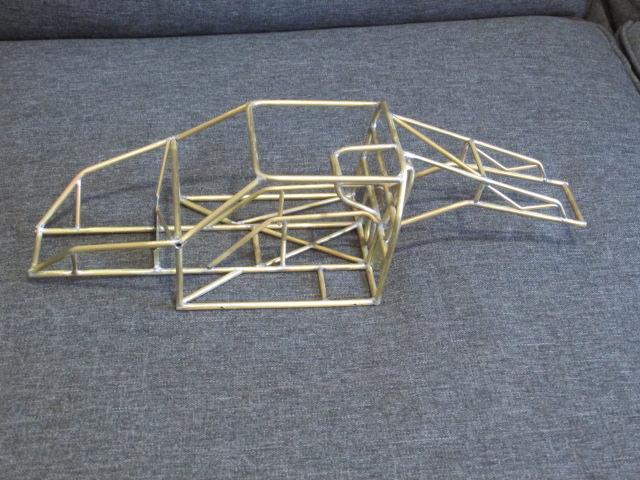
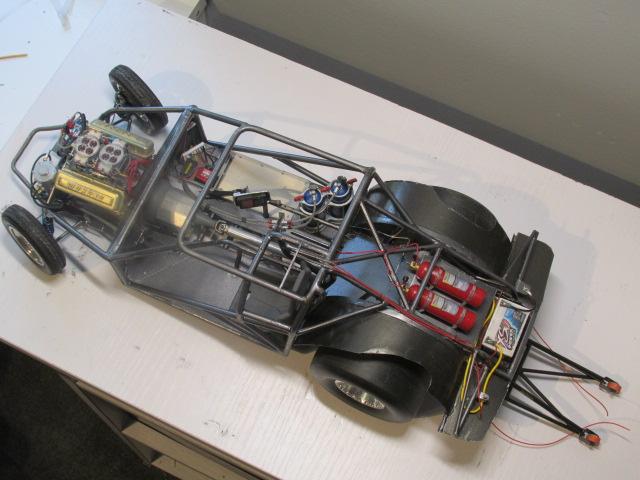
The typical size tubing used in drag car construction for the main tubes is 1 5/8" which converts to 1.625 Real inches divide that by 12 and you get a true scale size of 0.135 inches, cross braching is usually 1 1/2" which is 1.50 divided by 12 = 0.125 1.0 inch tubes are also used occaisionaly 1.0 divided by 12 = 0.083" hope this helps
-
Just a great model Marcos, the amount of detail you put into this build is impressive. A great result from a very challenging subject, very well done my friend!
-
Thanks Micheal, I did for the most part follow the processes and work flow we used on the 1 to 1 cars and I tend to give my models an used but not abused look to enhance the real world look that most competition cars eventually have.
-
Thank you Ron, I put way more hours into it than first intended but it's comments like yours that make these projects more rewarding.
-
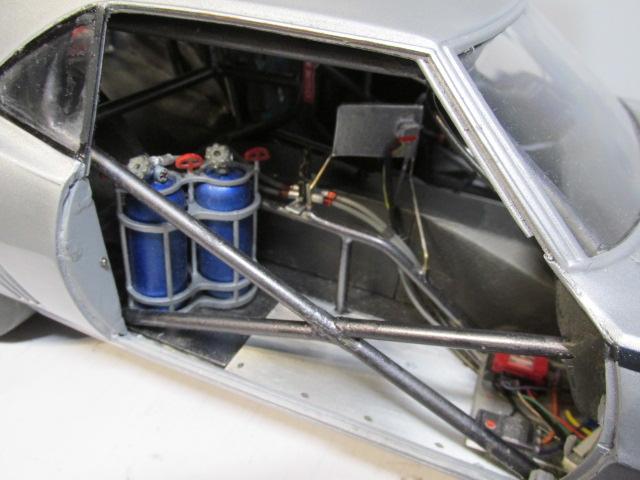
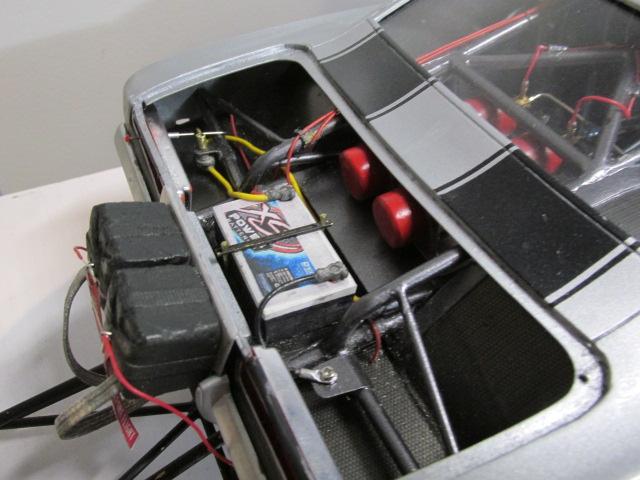
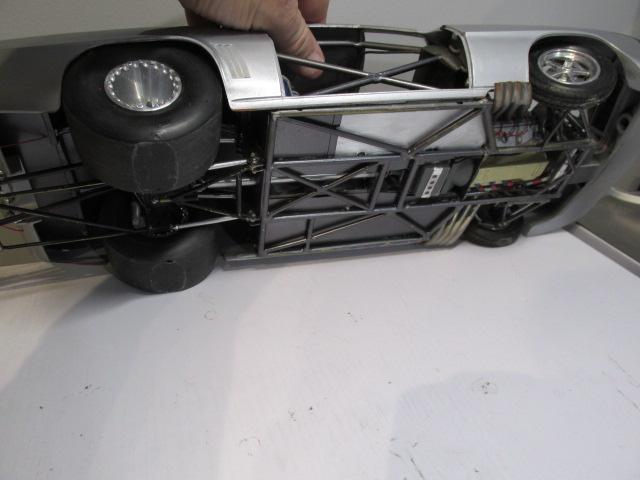
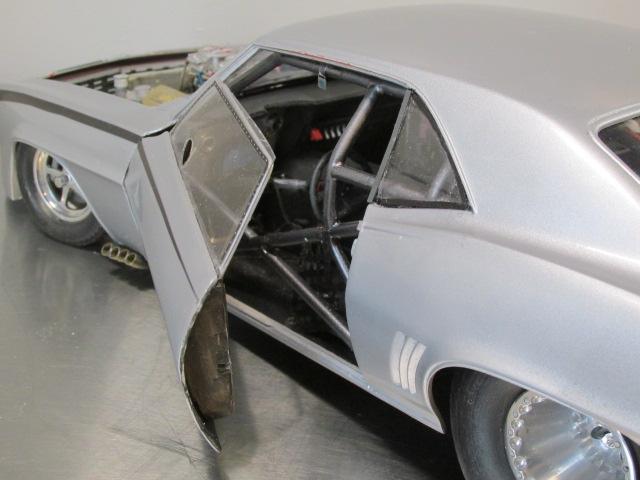
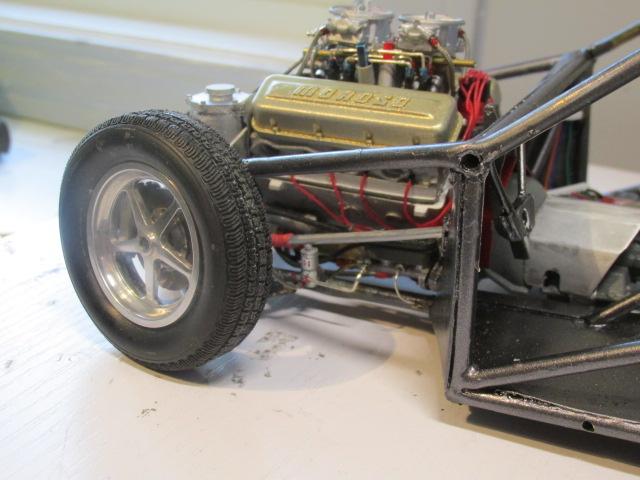
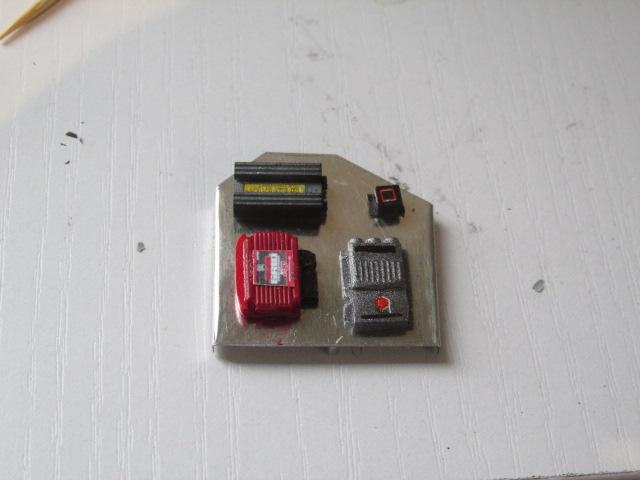
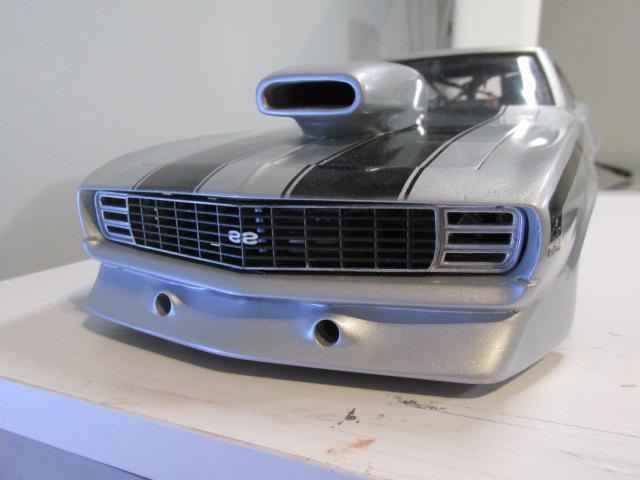
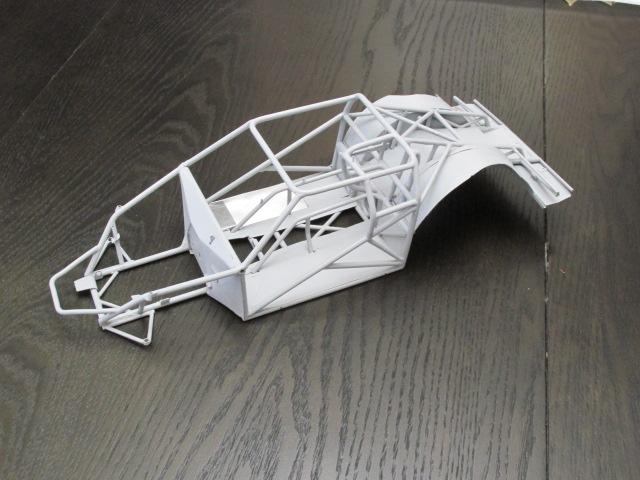
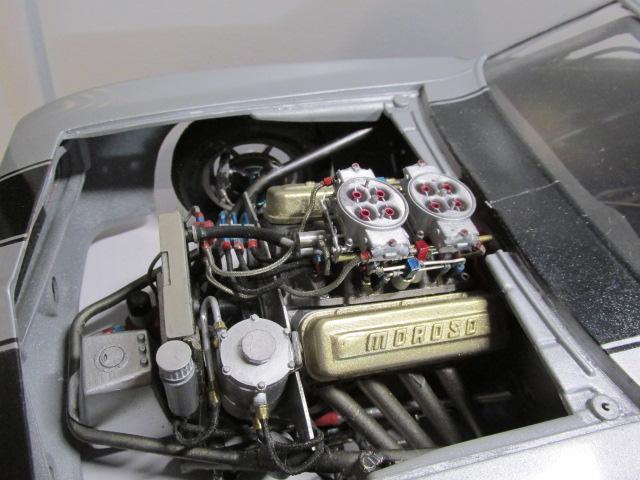
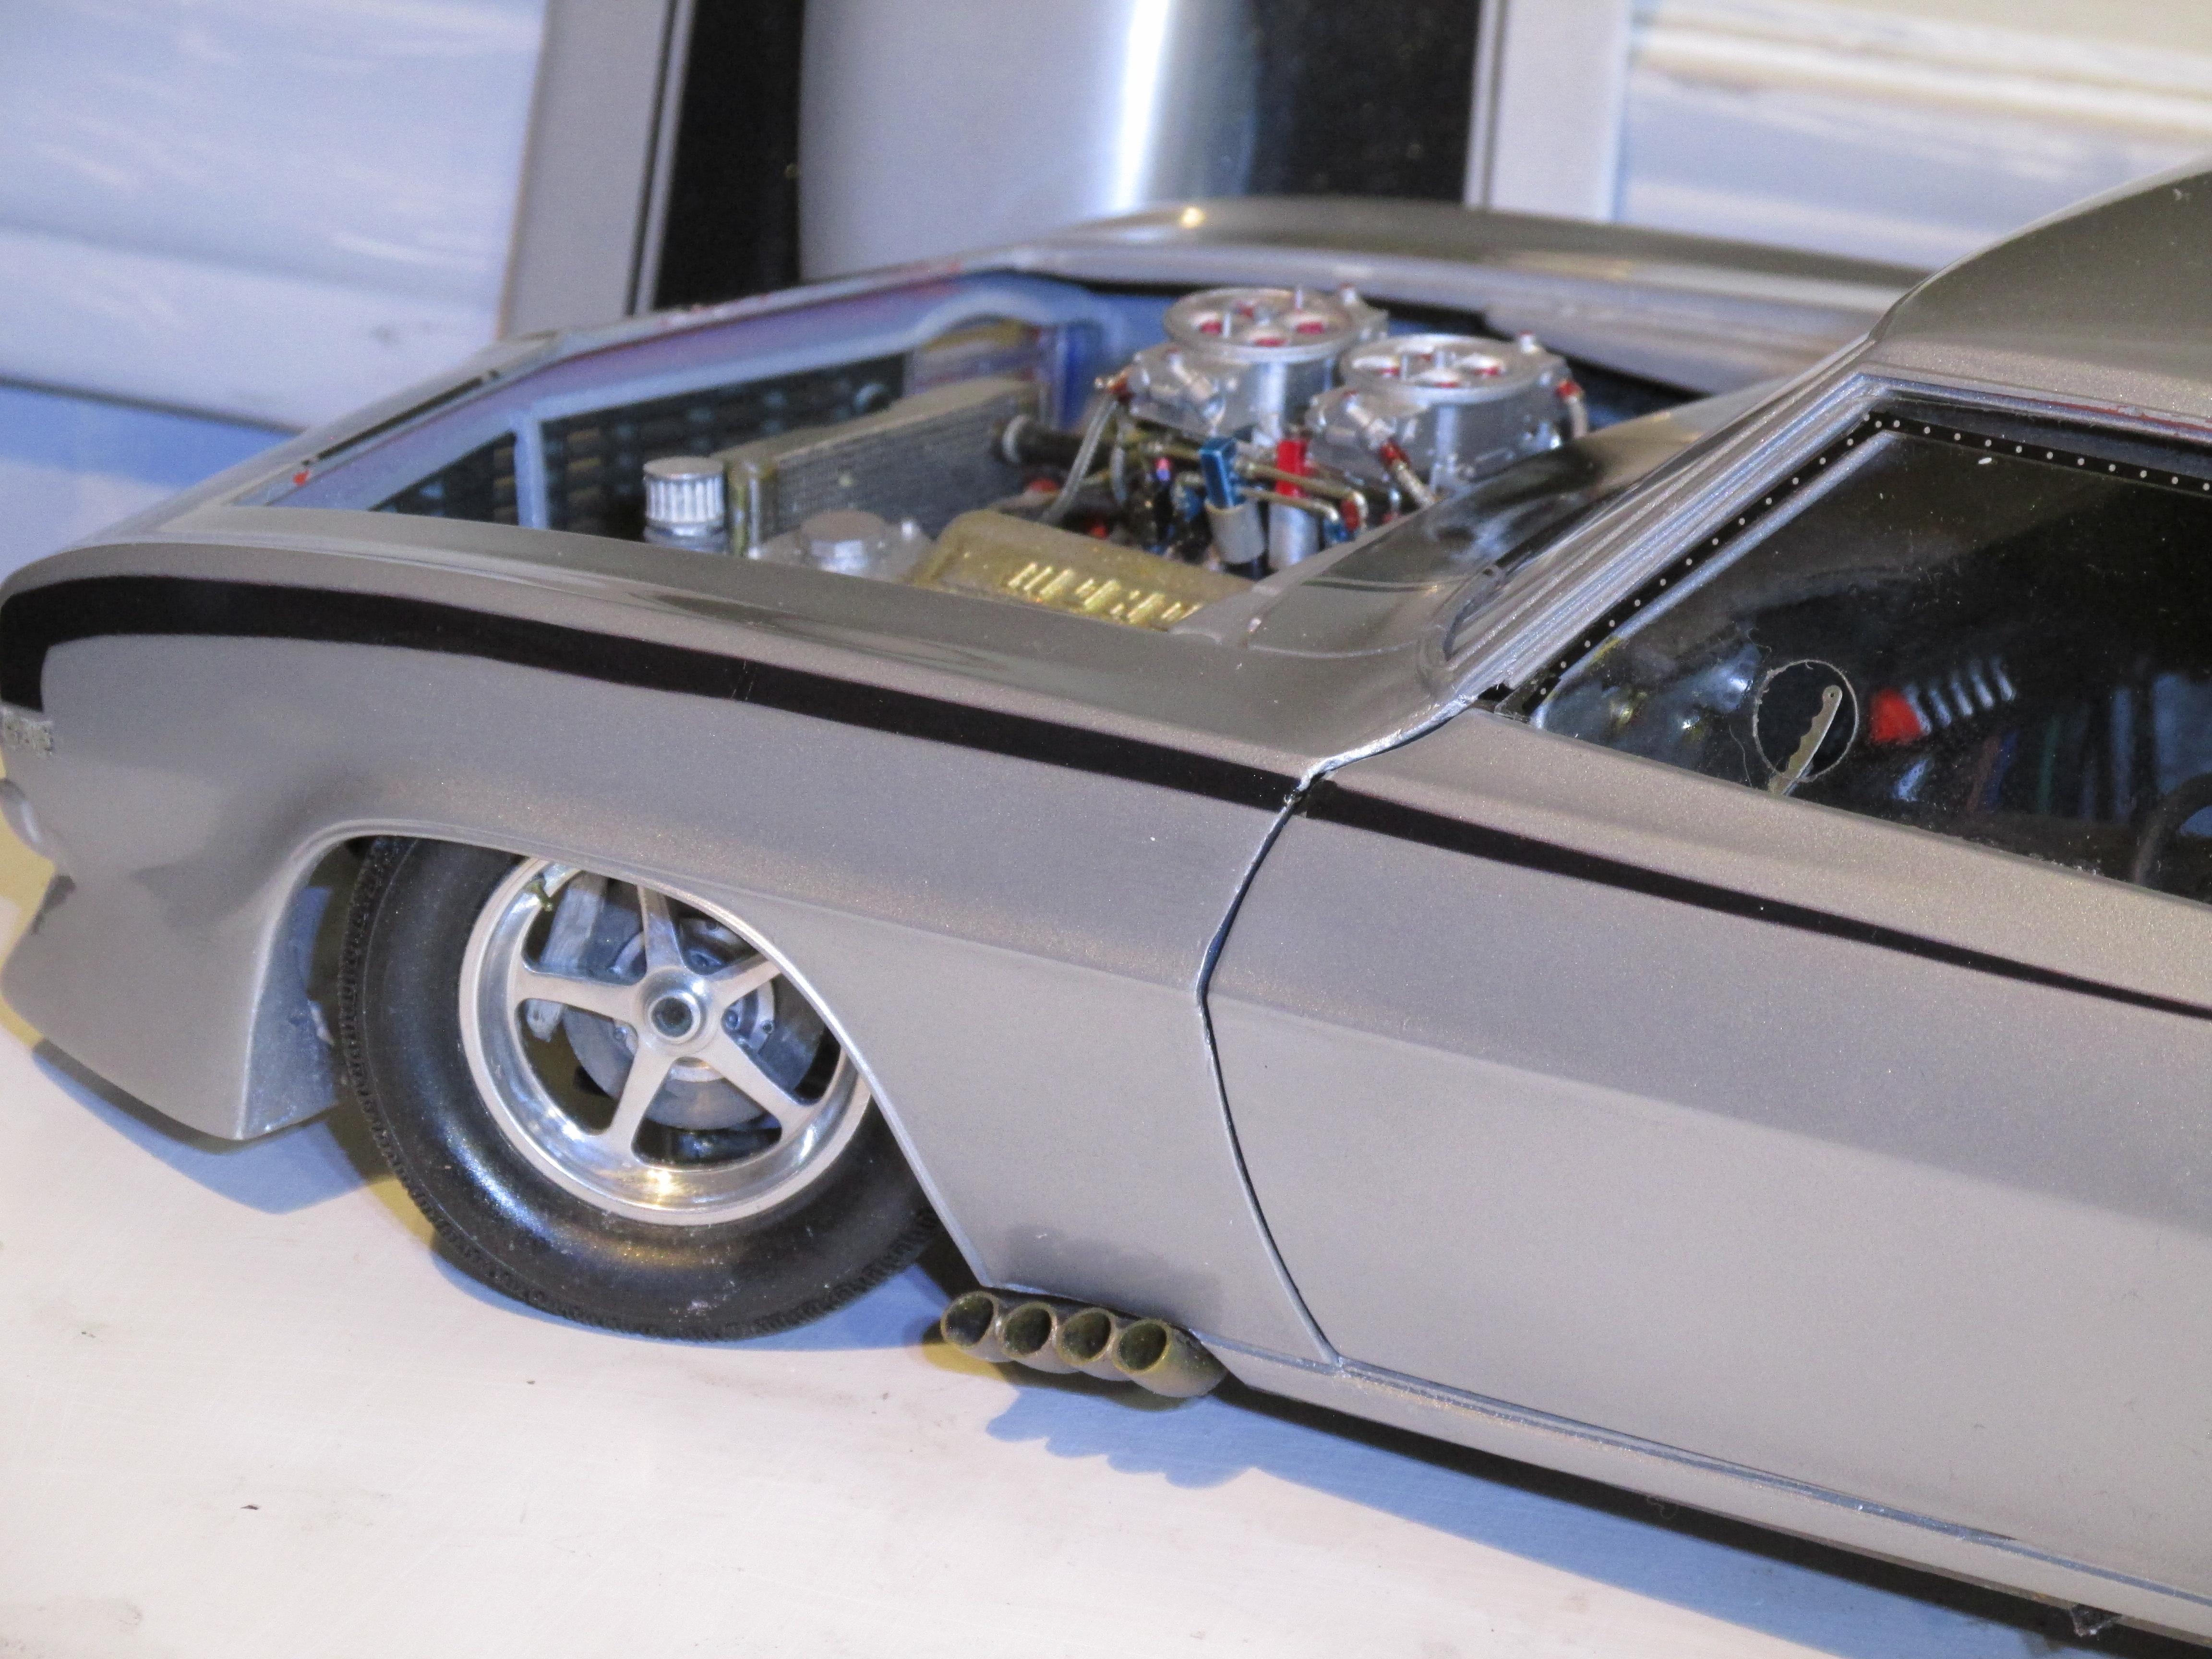
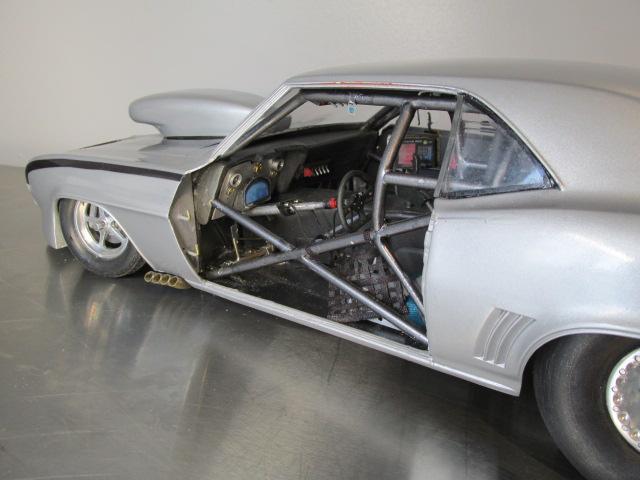
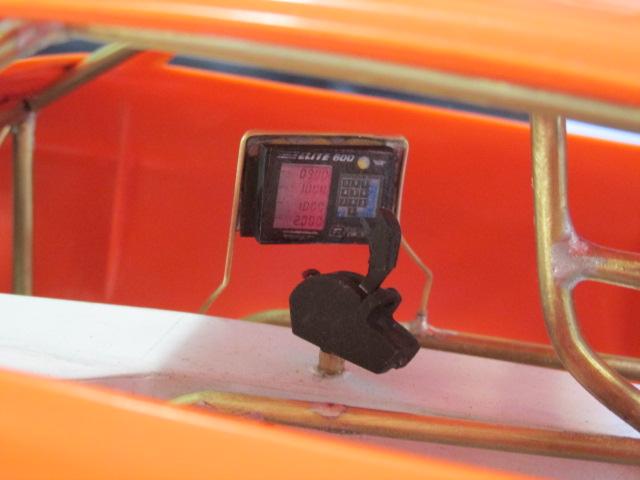
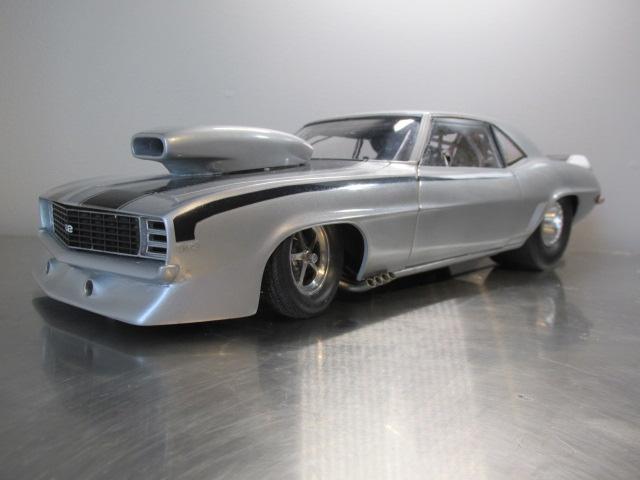
11 month project starting with the Monogram 1/12th scale 69 Camaro Z/28, only kit parts used -- body, front bumper, rear bumper, rear spoiler, tail lamp assemblies, dash pad and windshield. Scratch built, hood and scoop, chassis (brass), wheelie bars (brass), front and rear suspensions, intake and Nitrous systems ( fogger nozzeles Printed by Nick Bradshaw), all interiour tin and rear tubs, Electronics suite, steering rach, master cylinder, line-loc, parachutes, shifter, delay box, Nitrous shutoff valves, adjustable peddle assembly and various detail items. Wheels and tires by Jeff Faris. Paint is Tamiya Mica Silver with gloss black stripes topped with Tamiya Pearl Clear and additional Clear top coats
- 32 replies
-
- 6
-
-
- brass chassis
- scratch built
- (and 1 more)
-
MOVING TO DRAG RACING COMPLETED WITH ADDITIONAL DETAIL PHOTOS
- 352 replies
-
- 1
-
-
- brass
- tube chassis
- (and 2 more)
-
Dennis Thank you for the kind words it makes the time and effort all worth while. Mark thank you, and yes when looked at as a finished model it is a large task, but if you break it down to individual items it just becomes a series of small models, each one completed, in turn and then assembled. So instead of only finishing one model since last November, I finished dozens and dozens and they just happened to go together at the end.
- 352 replies
-
- 1
-
-
- brass
- tube chassis
- (and 2 more)


-Copy-Copy.JPG.7134e62174d43f5a2cb047e62fe1a3e5.JPG)
.JPG.10f7498d9b7b340ae4f575ae1f2b559f.JPG)
.JPG.8030f3de4749a2006ee1fcf56865cbc4.JPG)
.JPG.7fc4d917f3ff51316ac929bb4edf4023.JPG)
.JPG.07185297ce065133eabf3676cd9ab0c9.JPG)
.JPG.144e6aa0c6710b9f9a8d8ed7f545038d.JPG)
.JPG.26eb50883bf8c7496223a3f0bb1743e8.JPG)
.JPG.0a202e27de62d85e0f609e4681fcc201.JPG)
.JPG.c153f3667b55bab7f994ddf0c8554ba6.JPG)
.JPG.e848cc785ada3c31d053d75bb26a8224.JPG)
.JPG.3502fe5c222f483bb022951033d3ec4a.JPG)
.JPG.89402fd9384a9b84aeef9a2d0ba86f2b.JPG)
.JPG.dd2812fdf23fea3d9dab95b3dbae266f.JPG)
.JPG.913f1124d6ade08b3a9e664ce6aa60c5.JPG)
.JPG.a71b6e8ce1bc8400a0910c0e4fed86b3.JPG)
.JPG.8cc1da32ca2737901d84f0bba09677d7.JPG)
.JPG.b8684e90083e166fdd21b42426e560ab.JPG)
.JPG.28cab1e67381767fa6936c836fb6cf62.JPG)