Pete75
-
Posts
538 -
Joined
-
Last visited
Content Type
Profiles
Forums
Events
Gallery
Everything posted by Pete75
-
Lancia Beta Montecarlo
Pete75 replied to afx's topic in WIP: Other Racing: Road Racing, Land Speed Racers
I don't understand how your projects look cleaner & tidier in the body shop than most finished models do: no sanding marks, nothing!! ? -
Great stuff. IMO the silver wheels look really great against black (the world won't miss yet another set of gold rims on a Subaru!) and the cargo box is exactly the right colour choice too. I'm taking the same approach to the glasswork - this time I have documentary evidence that it was my own idea!? But I certainly don't have a hot cheese cutter!? I'm debating whether to use a cut off disk and/or razor saw, but am looking for more advice before proceeding. Also, very interested in this idea of using brackets on to attach the glass - I always seem to make a right mess of gluing in in. The 3D belts look great and I look forward to seeing the finish on the cooler as I've not used Tamiya paint-on primer before. Lots here to stash in my ideas bag!!
-
Ok, I want a javalina!! ?
-
? Guitar strings!! I've got tons of guitar strings. Talk about not seeing the blindingly obvious! That's another issue dealt with. Love those tiny springs - will have to keep my eyes peeled & start my own collection! ?
-
73' BMW 2002 TII with BBS Motorsport E76 wheels [1/24 Hasegawa]
Pete75 replied to e30lover's topic in Model Cars
Wow. So what chrome paint did you use? I need to get some!! -
73' BMW 2002 TII with BBS Motorsport E76 wheels [1/24 Hasegawa]
Pete75 replied to e30lover's topic in Model Cars
Such a cute little Beamer! Finished to such a high standard & in a classy colour. That's A LOT of great looking chrome. I use cans & tend to avoid models with chrome because of it. Did you say it's a combination of pre-finished mouldings & decals? -
She's a real beauty! Love the colour & gleaming chrome ?
-
Great stuff. The camera component for the screen is inspired. I need to find a good mirror source - pity I can't get your brand of coffee!! ?
-
Ditto the other guys: that's a real beauty - awesome chrome work? Sensing Oldmopars might just have a challenger come voting time!?
-
Just when I thought the engine bay was full!? I love the bent fan blades - definitely a contender for the hidden detailing award!?
-
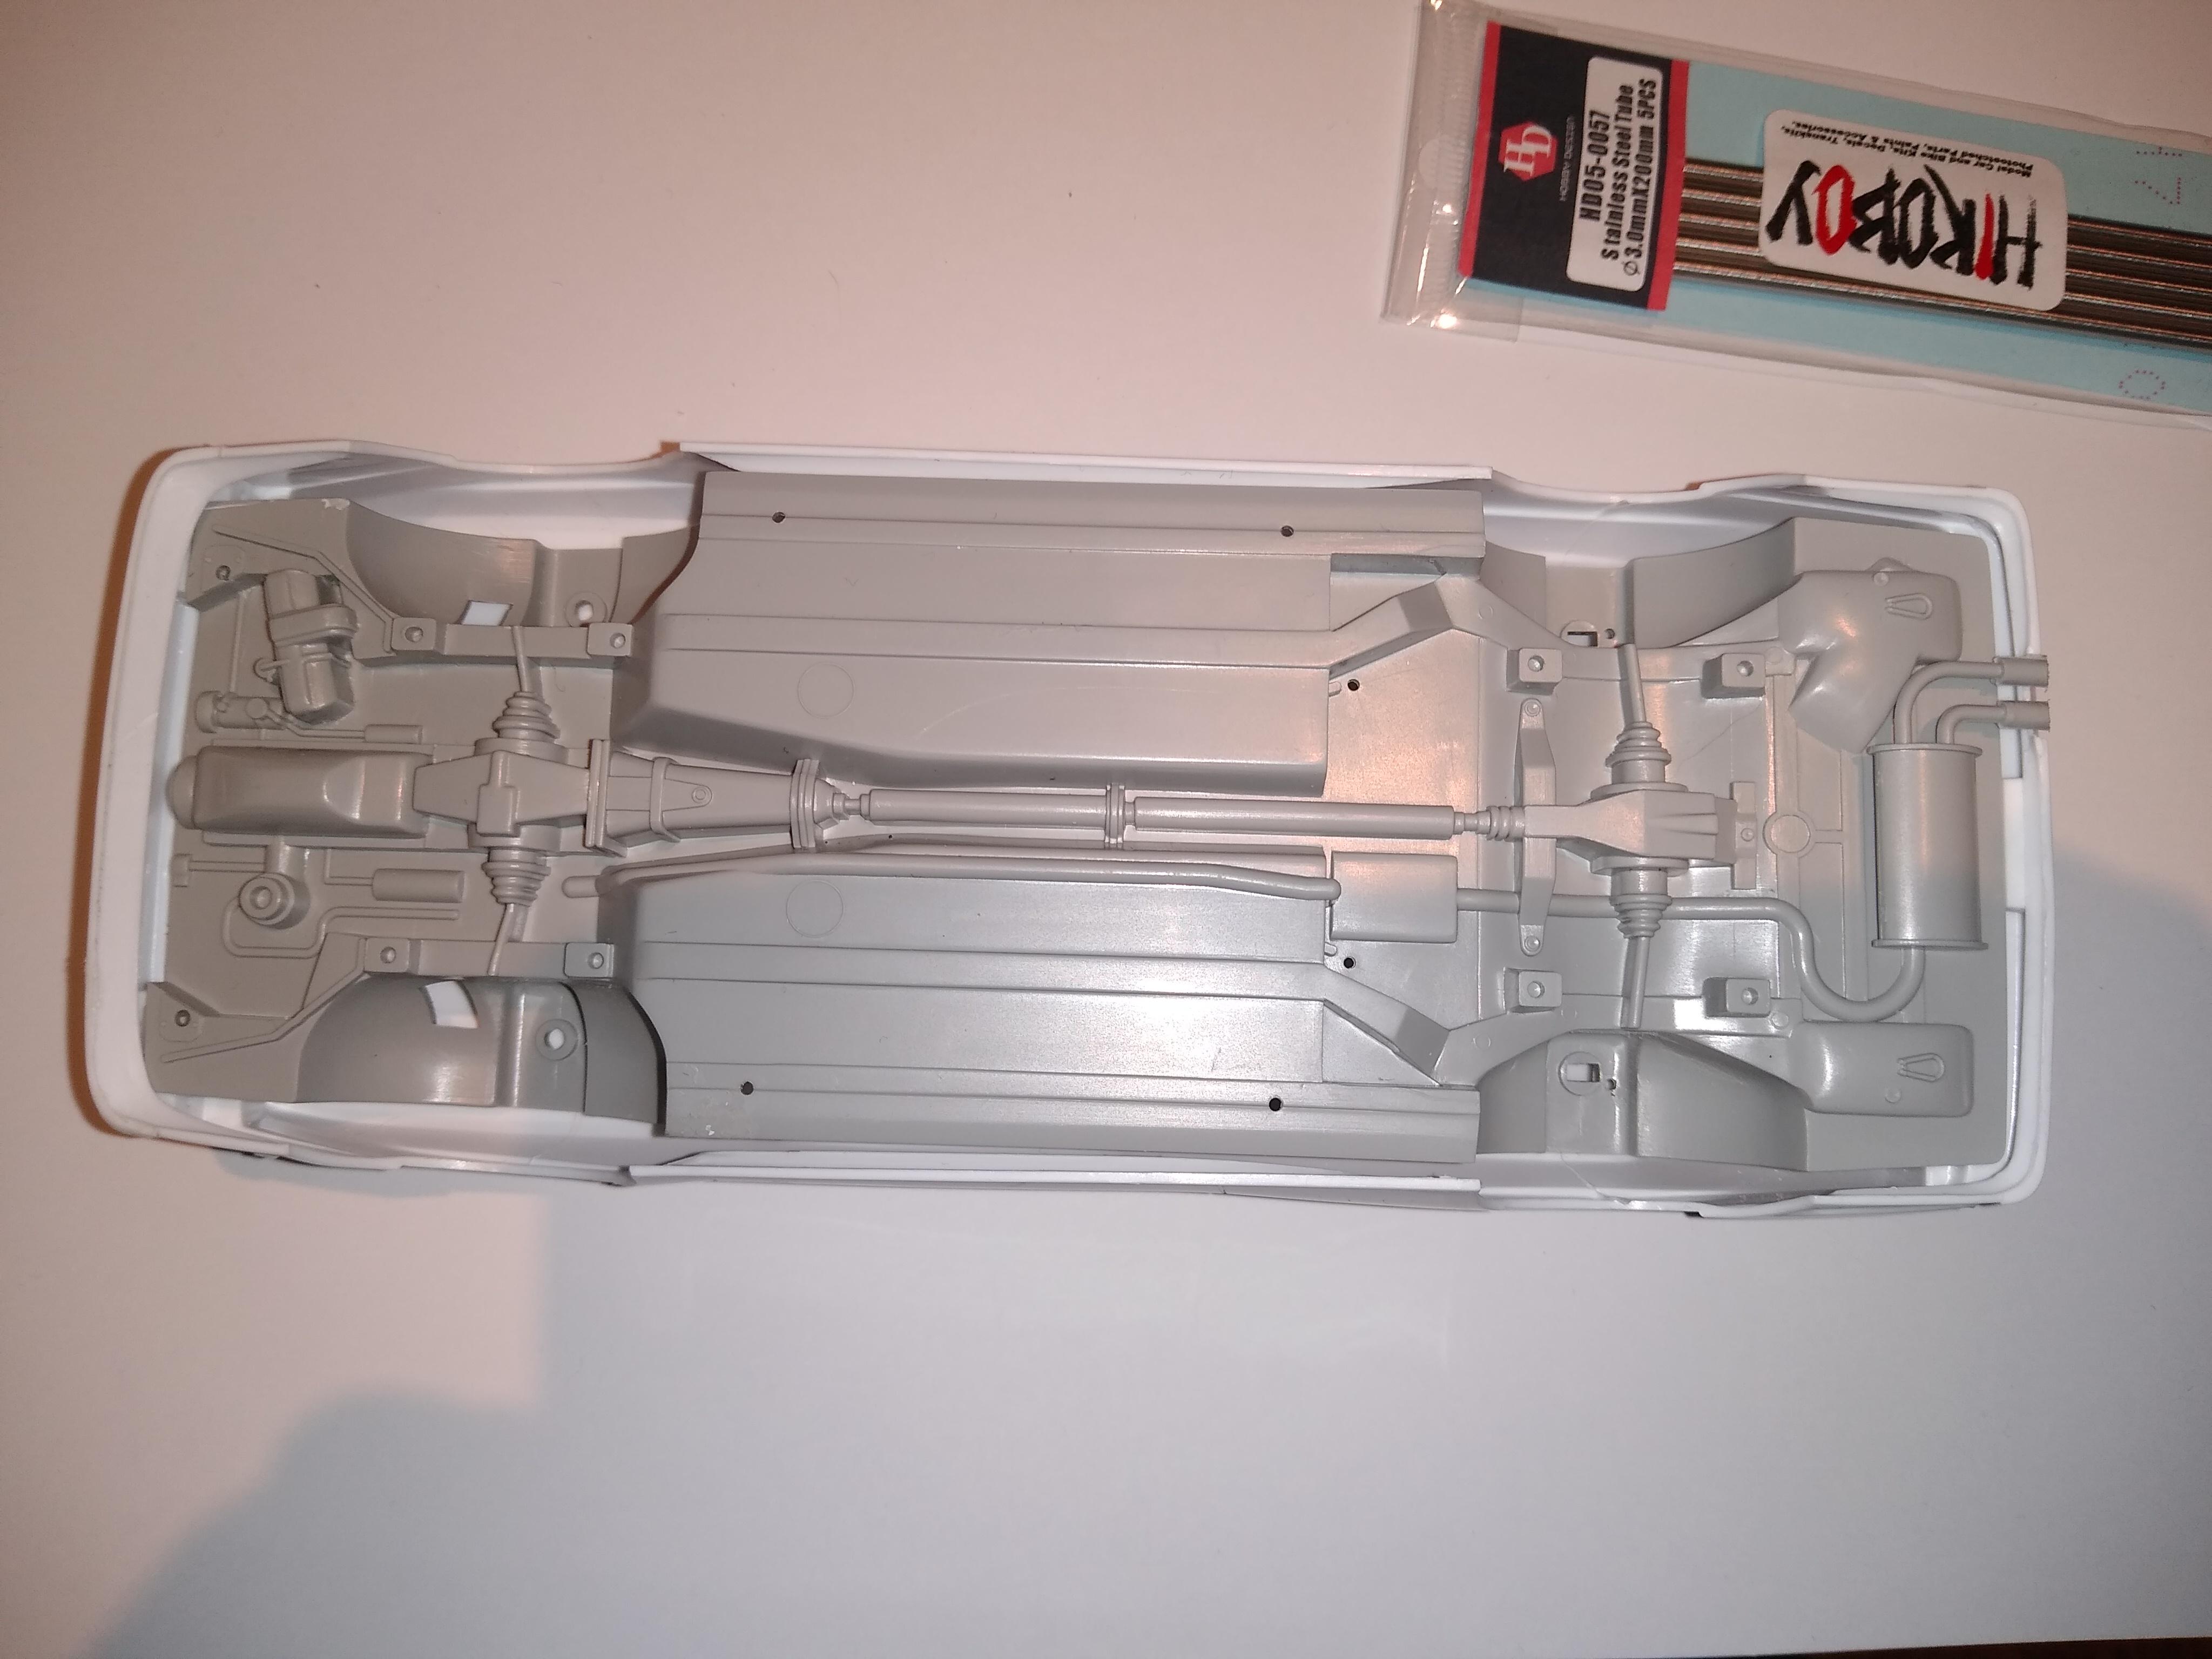
I had every intention of adding to my list of firsts by lowering the ride height. However, the dry fitting revealed that the suspension isn’t set anywhere near as high as I had been led to believe by some pictures I’d seen online: The out of the box stance is pretty typical and any lowering I would aim for would be less than 1mm so I reckon it’s best left alone. (More comfortable for a 25 hour trip too!) The mock-up also allowed me to check the fit of the Ronal tarmac alloys from Reji. Although marketed as being specifically for this kit, when put next to the kit wheels, they didn’t look like had a chance of being a match in terms of offset. Thankfully, I was completely wrong and they sit just fine - albeit after drilling the centres out. A BIG amount of work, though, cleaning up all the flash & cutting the width to fit the tyres: Set about scratch building a replacement gear lever & linkage. My design ended up being a pick-n-mix of various reference photos; I used 2 needles, 1.6mm & 2mm rod, 2.5mm angle strip & 0.5mm plasticard: Always one to put off bigger tasks if there's something nice and small to do, I've manfully tackled the issue of wiring... ? Below is the wiring loom I plan to run from the dash to the trunk, plus a curly cable (wire wound around wire) for the CB handset - all wire from Zero Design. Full disclosure here: 1) I might not have some of the equipment I'm planning (e.g. CB radio) if it weren't for the ideas within an article on real life Cannonballers posted by @89AKurt in the 2020 CBR build thread, so thanks to him. 2) The wiring is fully lifted from inspired by @lghtngyello03 and his awesome Pennzoil Skyline build ?: I did warn him I was studying his work carefully!! Have also taken delivery of the photo-etch set from Reji: I plan to use most of it & save the rest for other projects. The front grill (bottom of pic) has an embossed logo on it which is somewhat smaller than the PE version. Having paid for it, you can bet I'm using the PE one, so I've shaved of the raised plastic with a chisel blade & reckon the upgrade will cover it well enough. I'm still fairly new to PE & am undecided on which adhesive to use here. Any ideas welcome - preferably something from my existing range ?!

-
? It's kind of like cold sand & it's all over England today too!
-
#5 Audi Quattro Contender for the prize for most time spent making microscopic components that won't really be seen! ? Gear shifter & linkage made from 2.5mm angle strip, 2mm & 1.6mm rod, 3.2mm tube and 2 needles. Liking this new scratch building business!
-
Very nice! Got this one lined up to go at some point so I'll be watching ?
-
Welcome to you both Randy & Mike ? - the more the merrier! Anthony & Randy, you guys need to get to work on those other club members! I'm not very experienced & only built a box stock car in last year's Run - it's all about the taking part ?
-
#5 - Audi Quattro Made some adjustments to the front end for the sake of faithfulness rather than the brief per se. The kit indicators are too fat and the bumper recess is set too far rearwards, so I cut down the light units and filled the recess/grooves with plasticard, which was then shaved & sanded back. The remaining gaps were filled with Milliput: Also had fun building a central console to go under the dash (omitted in the kit). The holes have been drilled ready for some photo-etch toggle switches and cable for a CB radio handset; breaker breaker watch out for them smokeys! ?
-
Thanks Marcos - appreciate it!? Some more first-time modification work completed. First up, I built a central console to sit under the dashboard as the kit doesn't feature one. After researching, it seems most rally Quattros had custom layouts and cars were seldom the same, which is cool because this is the first build where I'm allowing myself to go my own way! I based my design (loosely) on picture I found of a later Quattro S1: The top section has holes for some more toggle switches; the middle will be a police scanner and the bottom a CB radio - the hole will house the handset cable. Below is a rear view of the structure which uses angle strip and tubing to brace it. Next, some bodywork alterations. Here is a picture of what a box stock build is supposed to look like: And here is a reference pic of the '81 era road car. Notice that the upper indicators are somewhat different in width, along with the depth of the bumper recess: Not a big deal, perhaps, but as I have a chance here to experiment/learn I figured I'd try altering it. First I cut down the lights with my awesome new Zona razor saw: I actually cut too much away (great start!) and had to build the indicators back up slightly with two bits of 0.5mm styrene. Next, I used 2.5mm angle strip to create a solid square edge up against the lights, plus I glued strips of 0.5mm styrene into the recessed areas beneath: Then I shaved/sanded back the plasticard and filled the gaps with Millput. I also elected to get rid of the repeaters; an idea I got from Nigel's build (above) and because I've come to realise that no car ever had it's looks improved by them! (Where will this new found anarchy end?! ?) Had to sand & re-fill a couple of times, but it's pretty close to where I want it now. I'm guessing the primer/undercoat might show up small imperfections but I plan to sort them with a little Tamiya putty - if it ever arrives from Poland!
-
Scumbags. I got ripped off by a Hong Kong outfit last year because I wanted to believe. I didn't have to wait long to confirm it though - it took 30secs on Facebook to find people warning about them. Wish I'd done that first! I suspect most scams can be avoided that way: these days, why wouldn't international sellers have a Facebook page? And if they do (like my scammers) they probably can't keep a lid on negative publicity.
-
Thanks Snake! Stupidbird gotta breathe or she can't fly!! ? ? Looking cool. May be of interest to the vice squad though, so I know whose shadow to hide in! ?
-
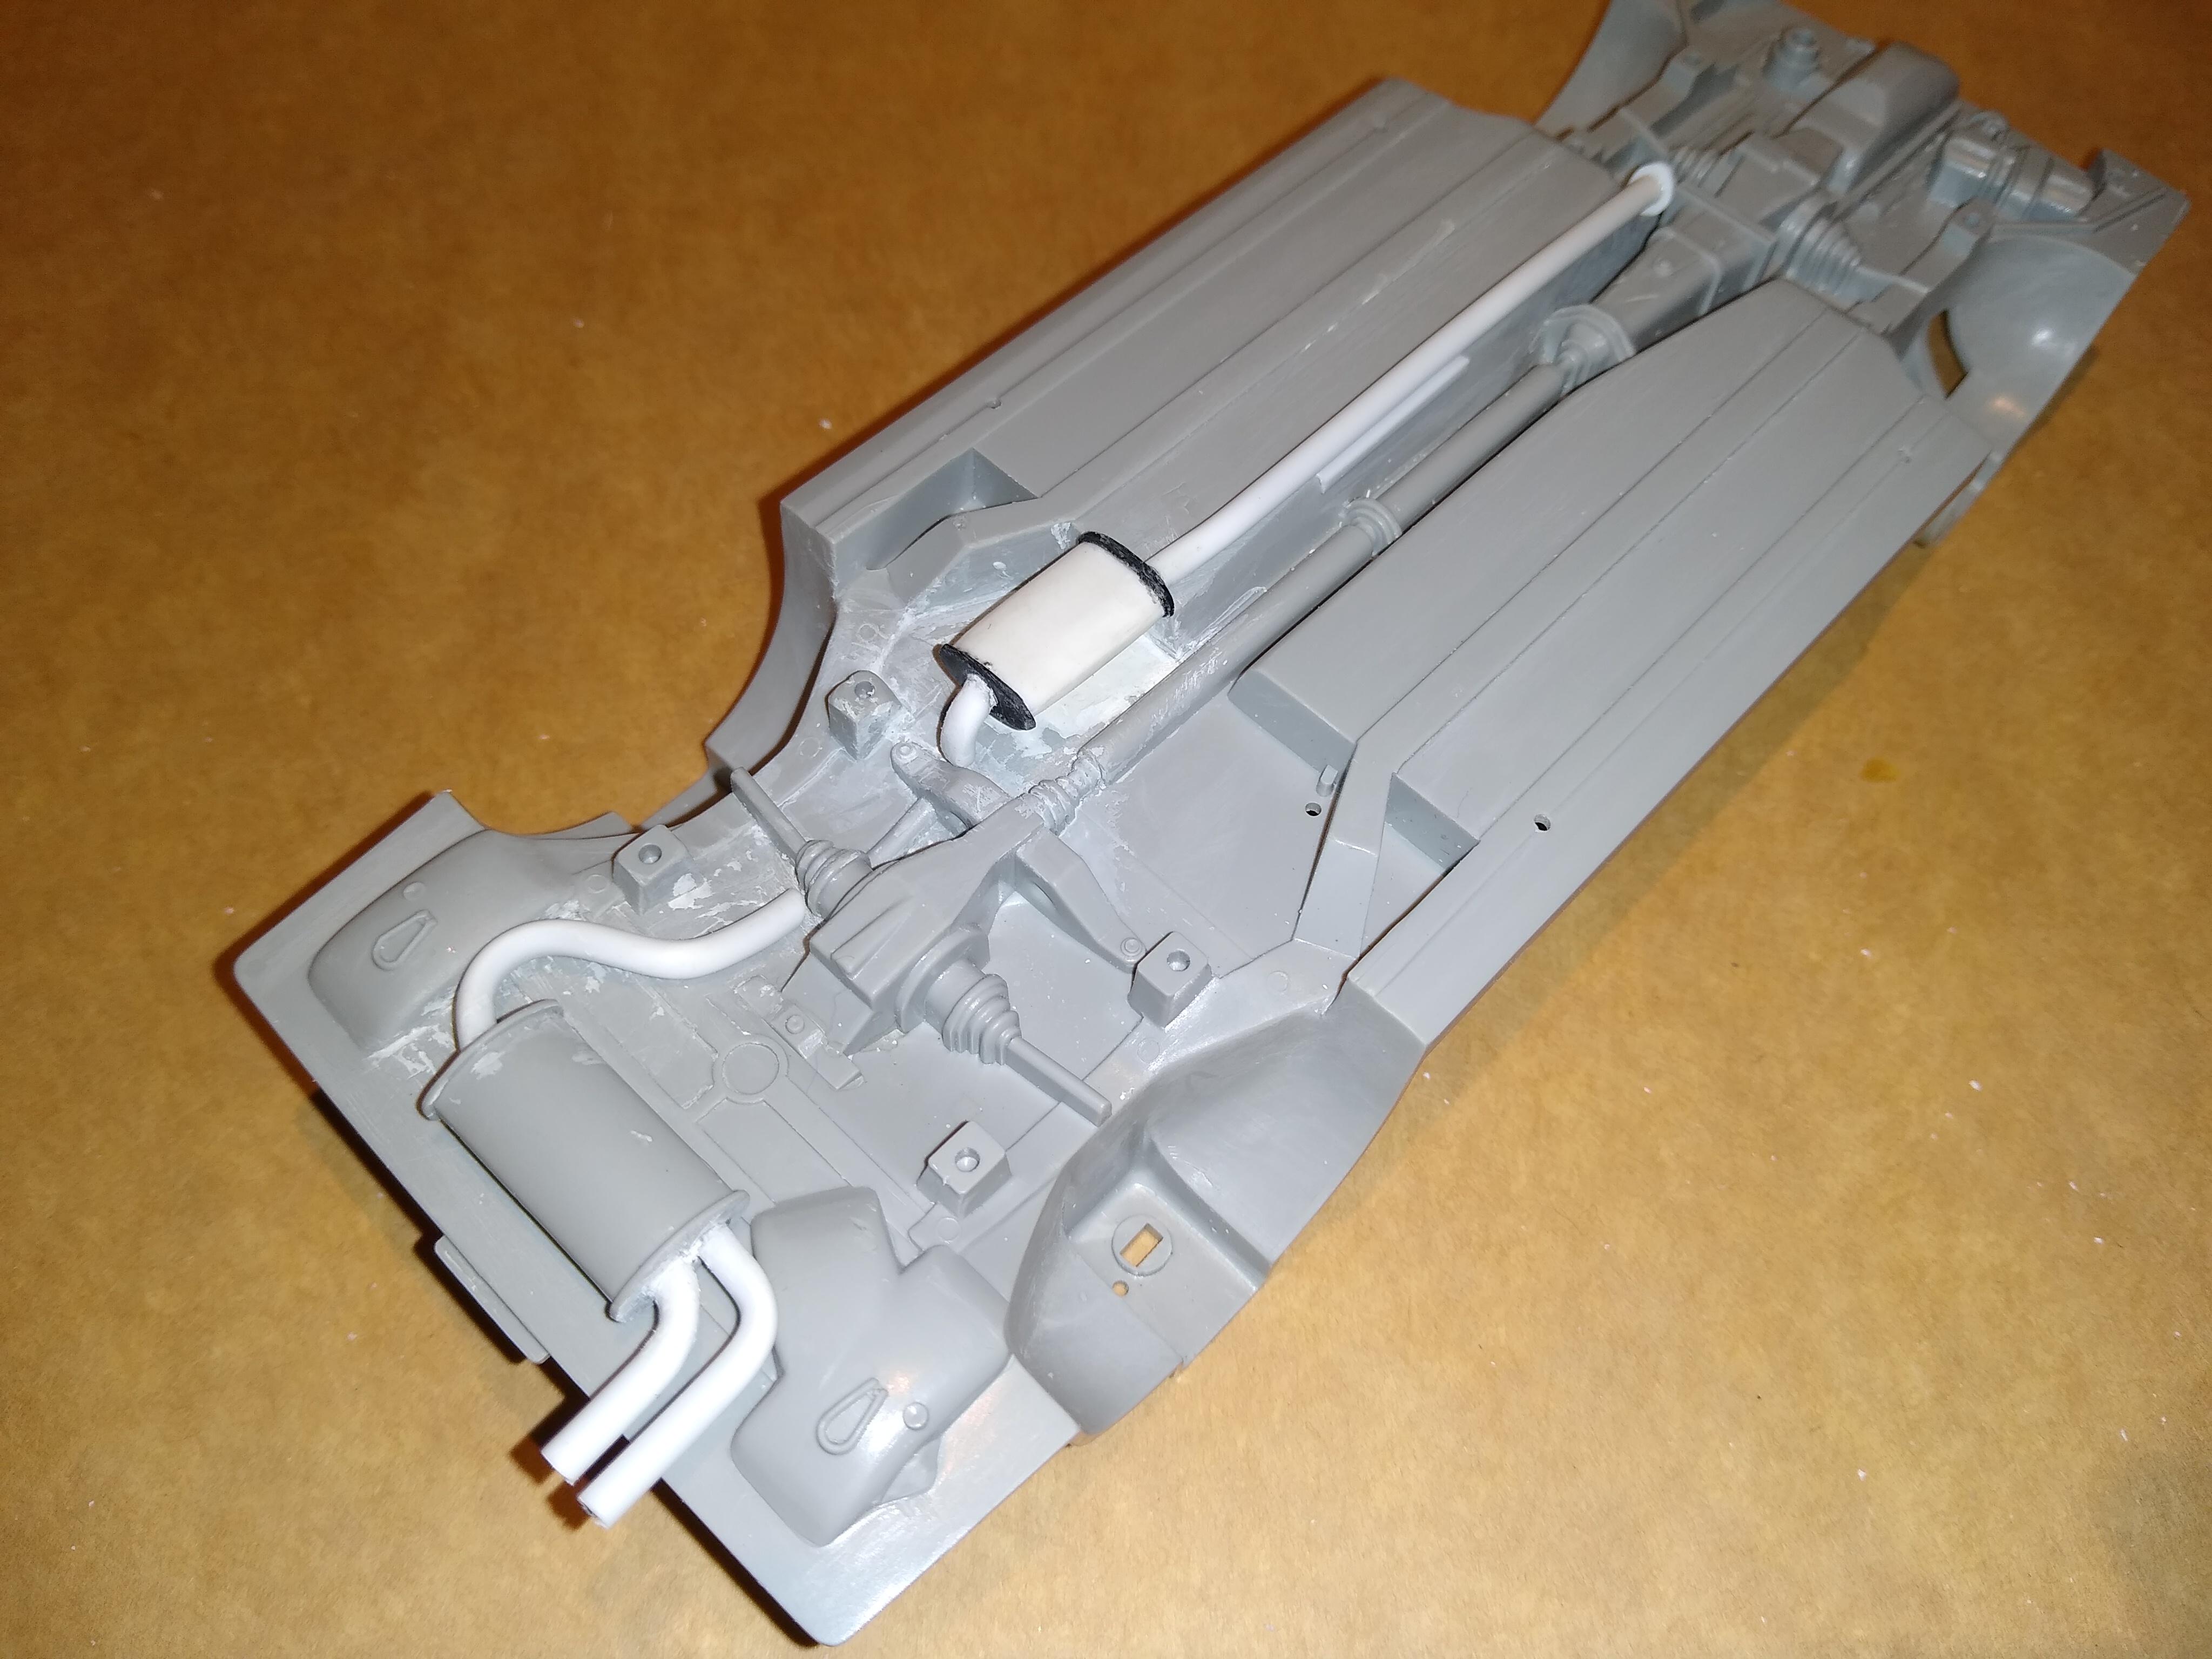
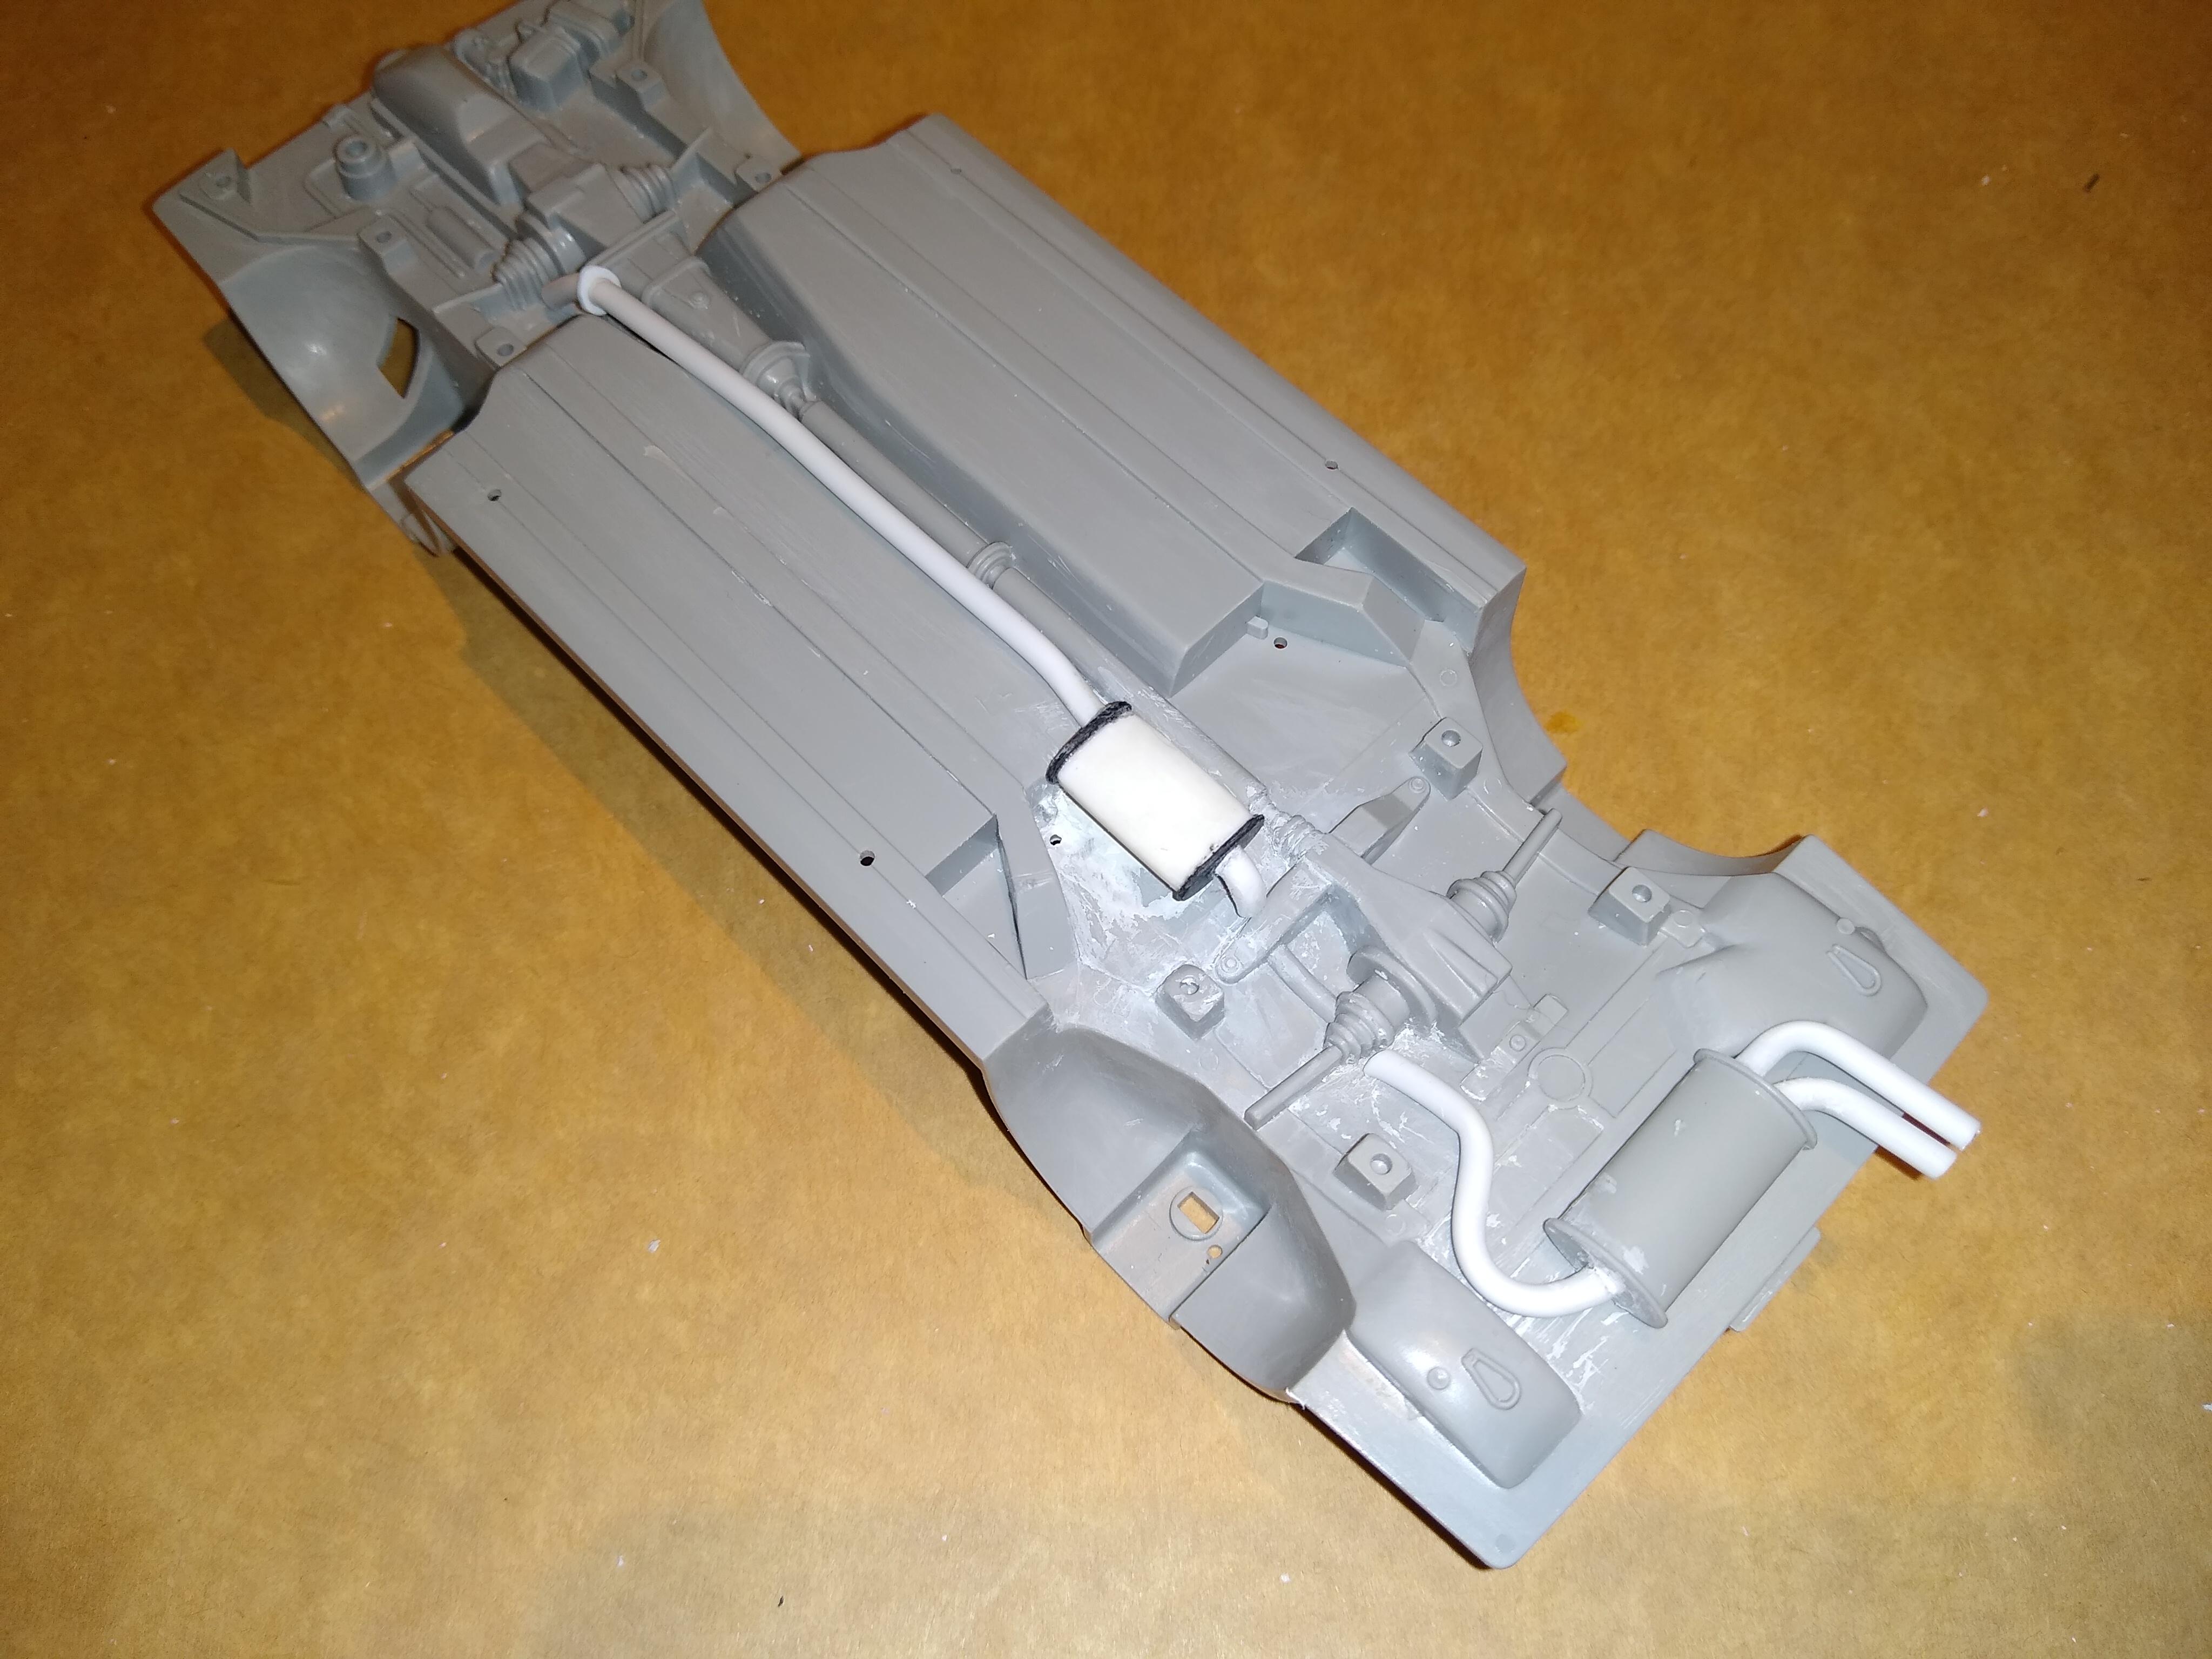
#5 Audi Quattro Got some 3mm steel tube to replace the puny exhaust tips, but the rest of the (largely moulded) system was equally unimpressive and needed to go: Removed the moulding with a chisel blade & tidied up with putty. The replacement pipe is 2.4mm tube with a wire insert. Made the centre muffler from layered/shaped plasticard:
-
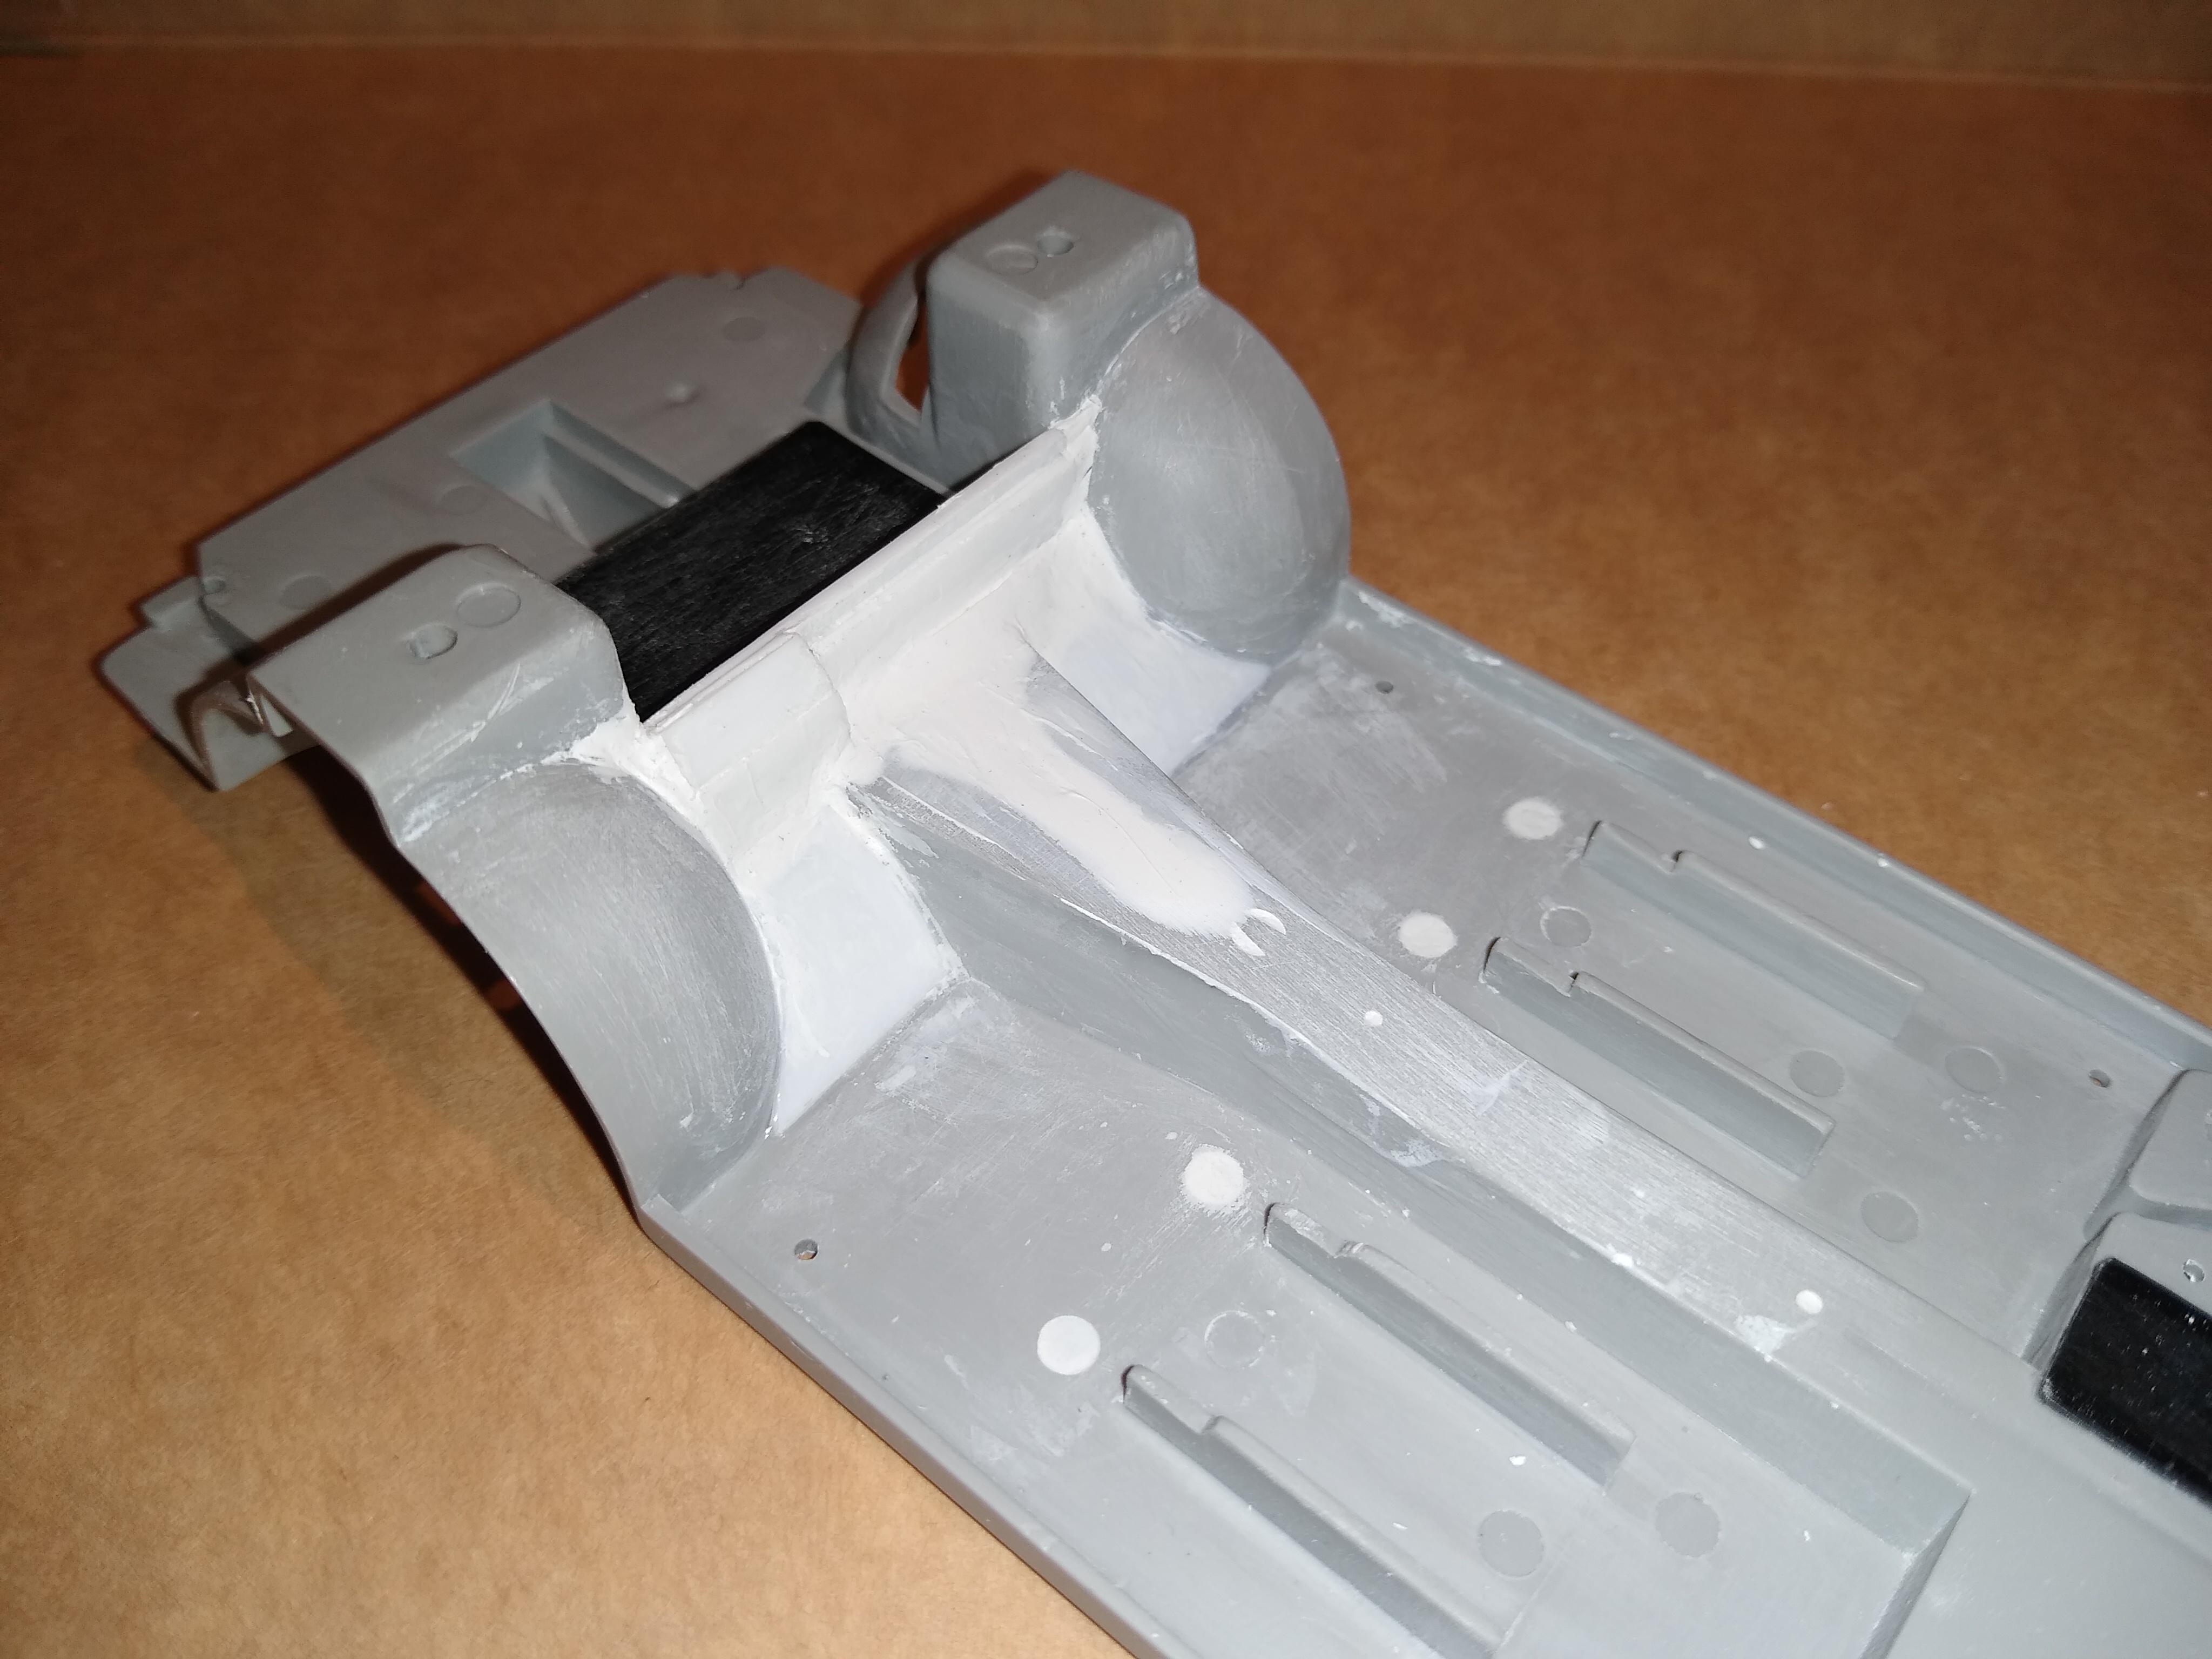
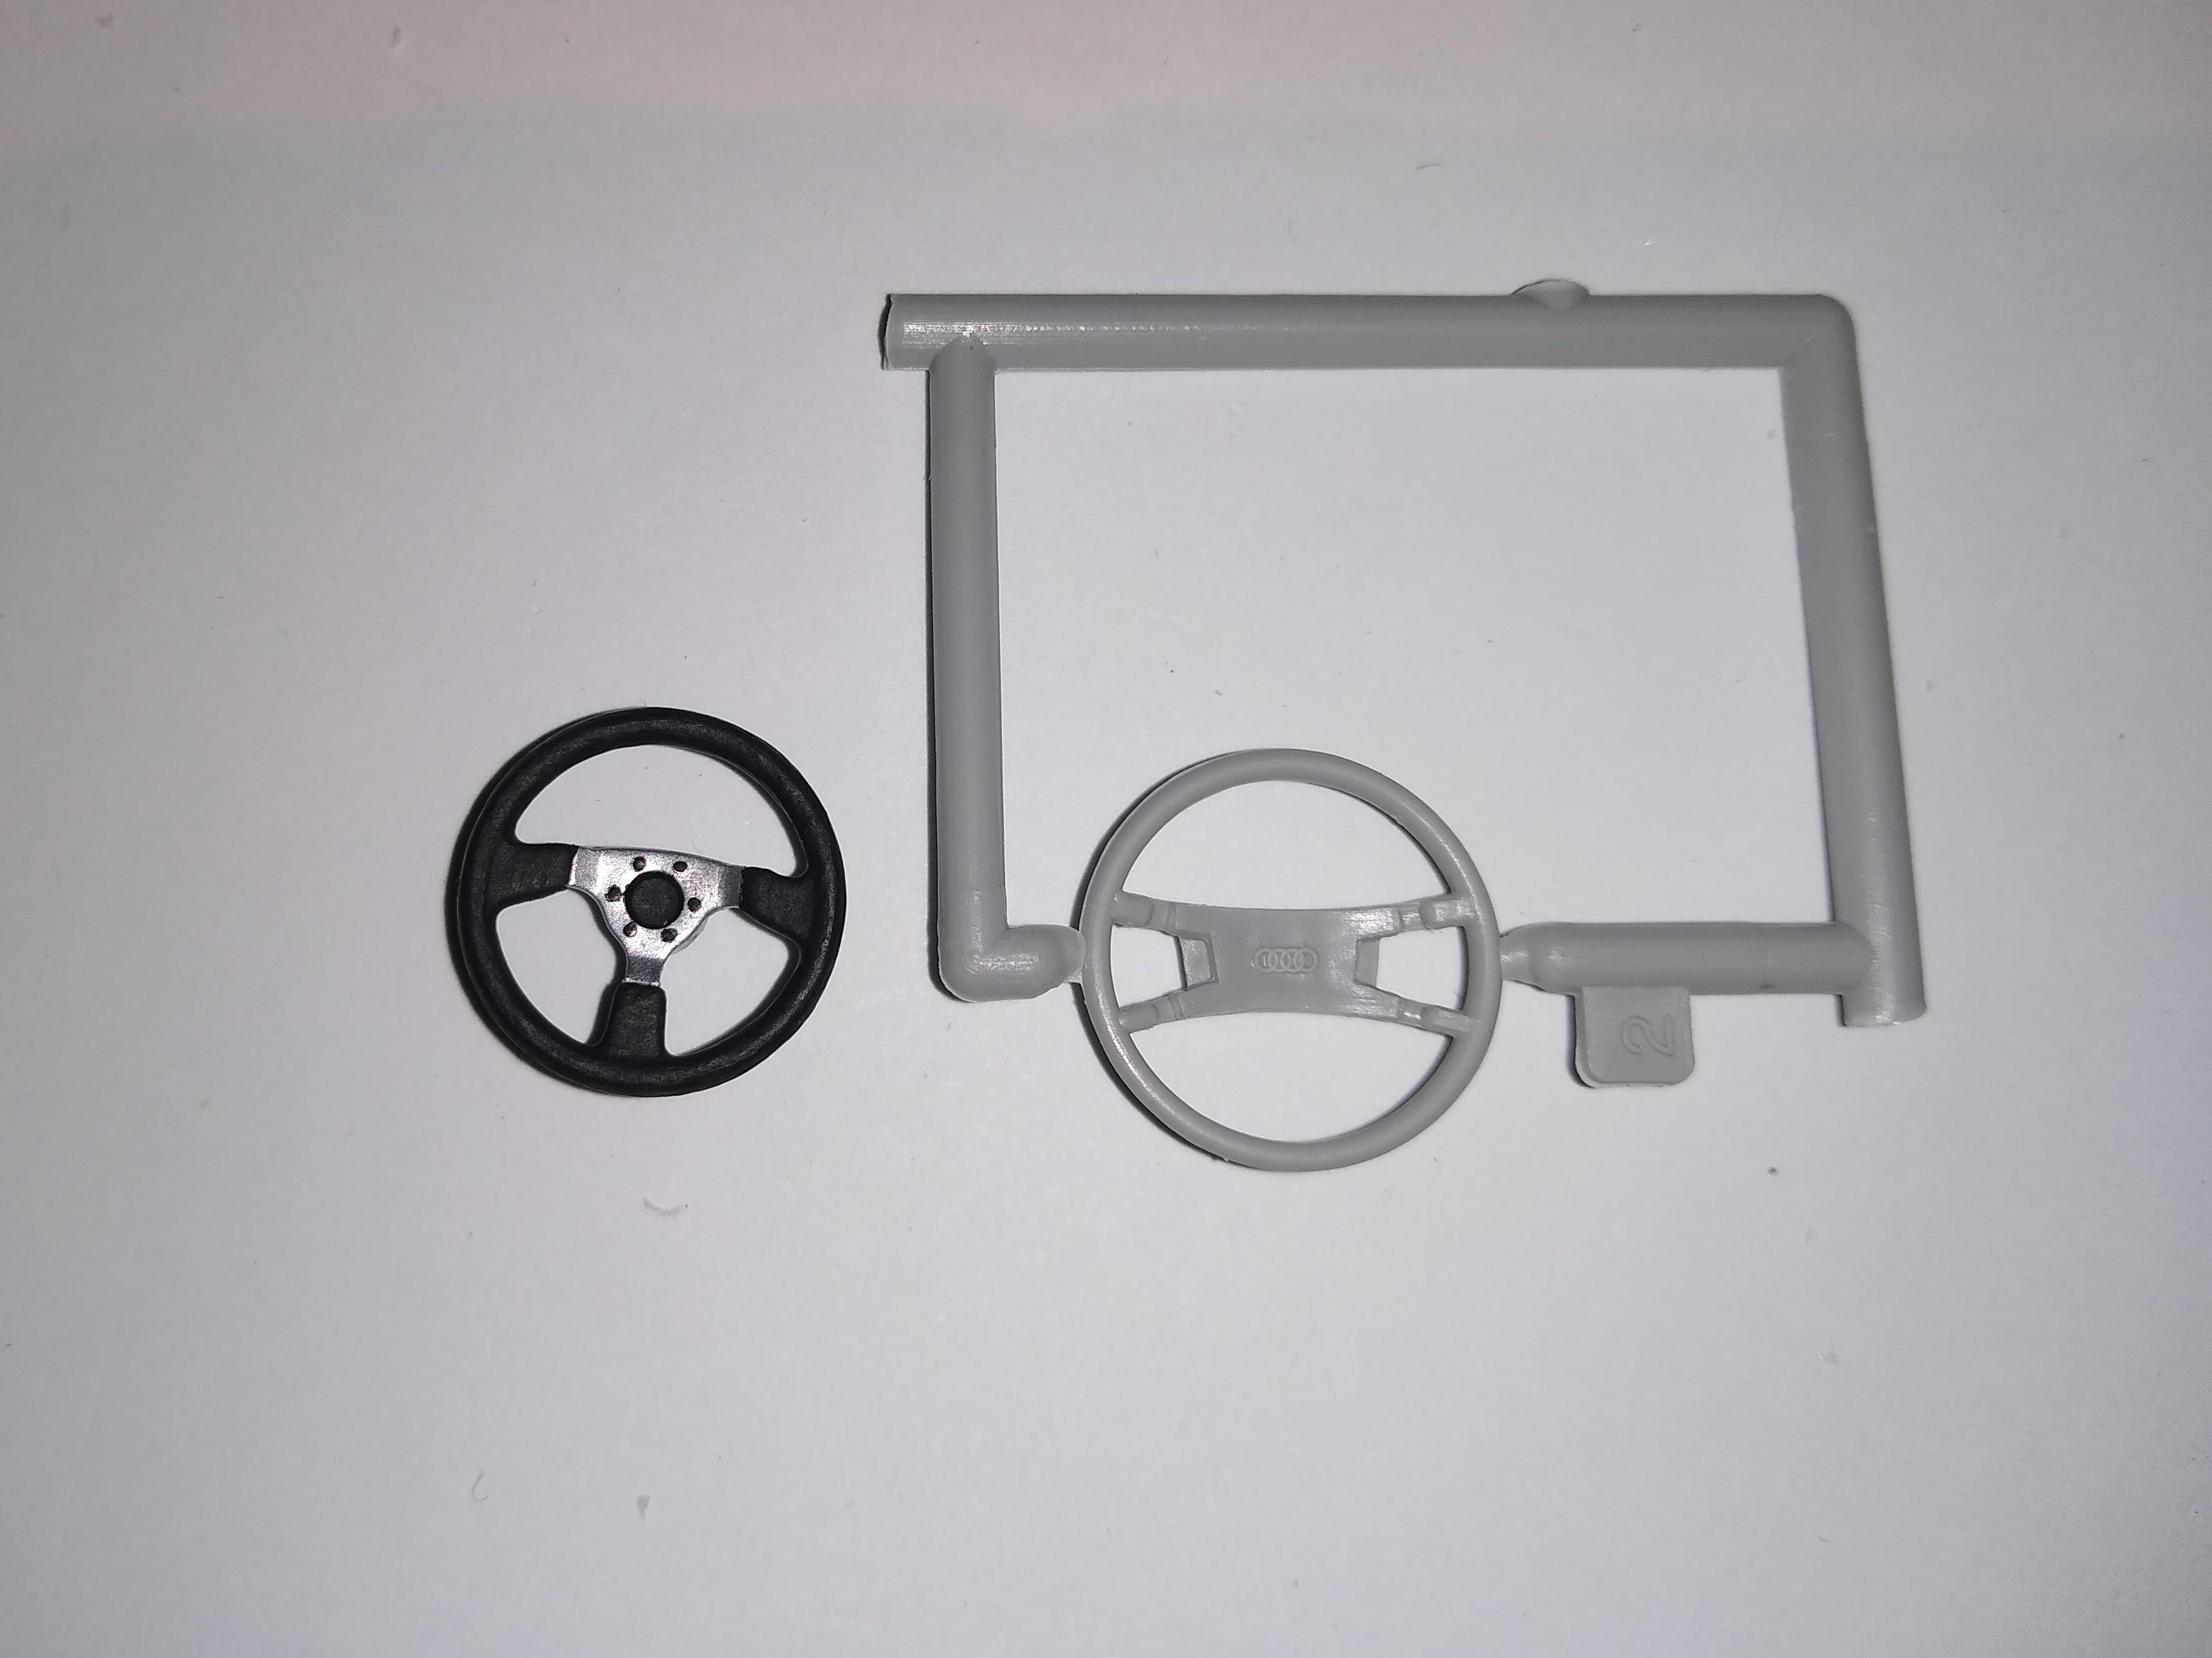
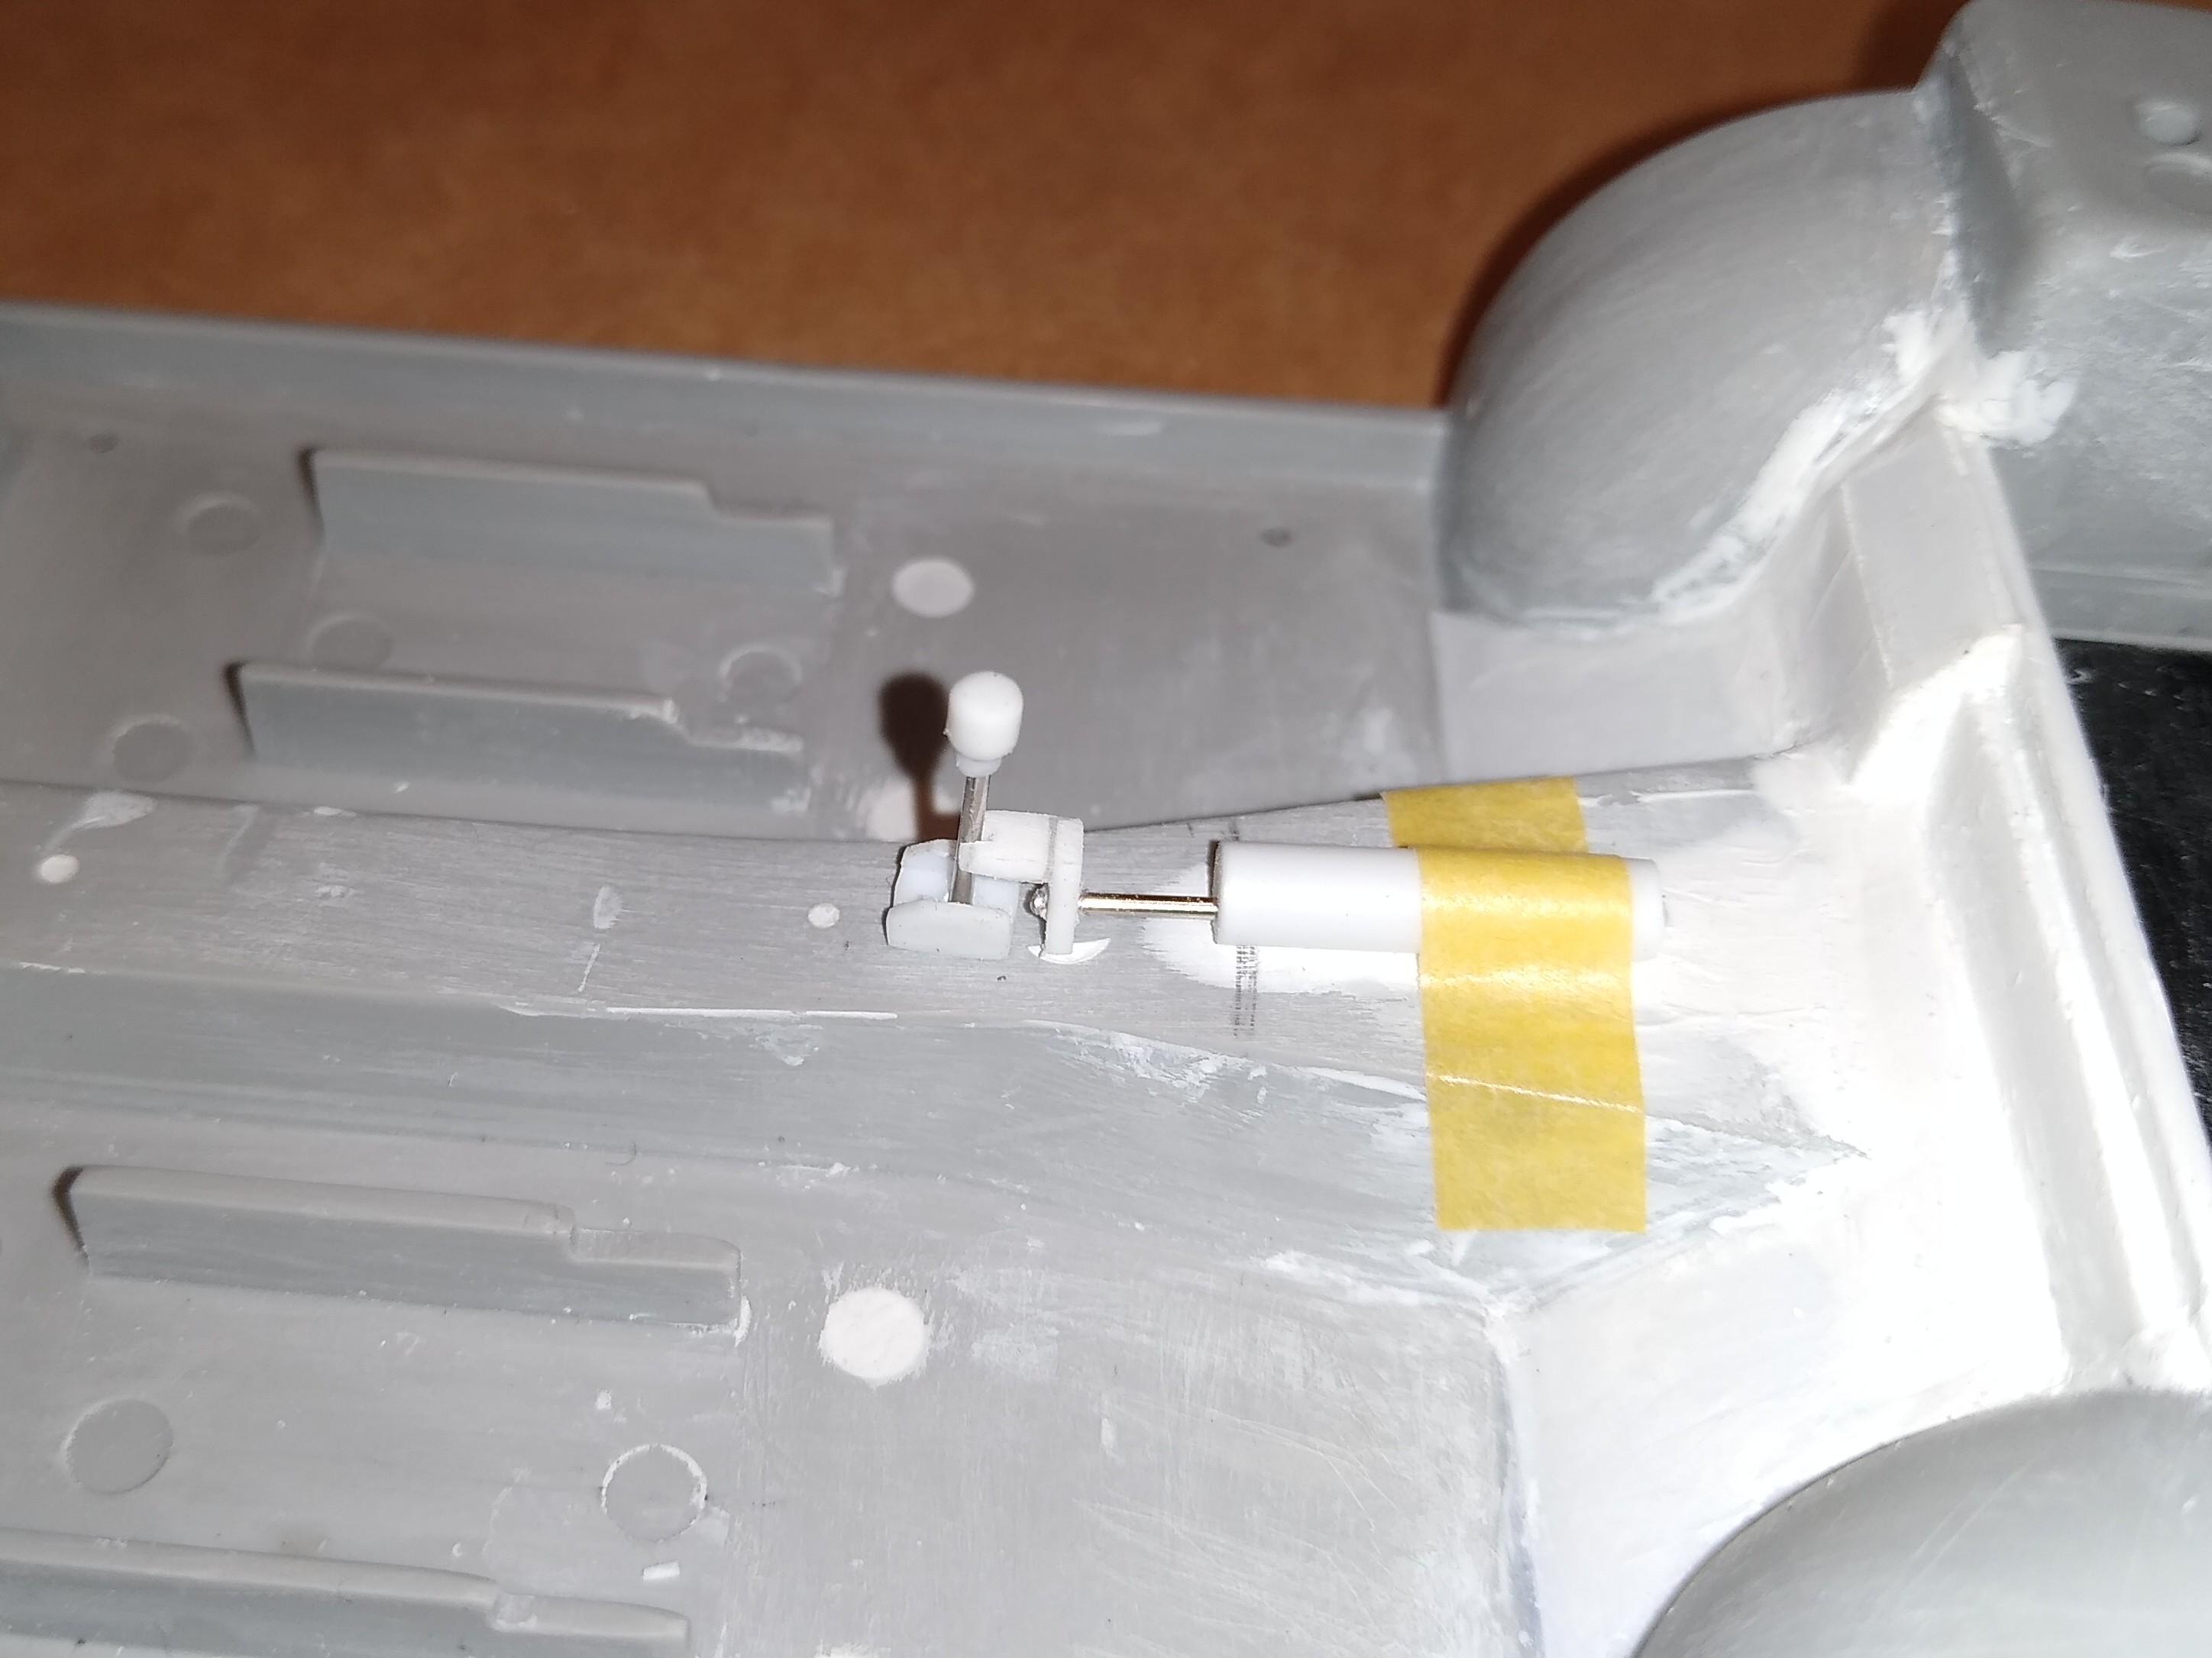
Got myself some 3mm steel tube to do some exhaust tips for the first time, but it wasn't going to look right on the end of the stock system which is puny and moulded to the chassis as far as the rear muffler: I decided to do away with the whole thing (well, almost all) and set about it with a chisel blade & sand paper. The centre muffler turned out to be hollow and left a big hole to be filled... When tidying up (above) I managed to sand away the rear muffler locator tabs, so I drilled them out and glued in some wire. Decided the easiest way to mount the mid section was to glue some 1.5mm angle strip to to the edge of the tunnel to sit under the pipe. Also found I needed to file/sand the corner section of chassis where the mid pipe meets the centre muffler. For the pipe I used 2.4mm tube. I always planned to use wire in the ends as locators but discovered it was best to run it through the whole length of tube to support bending it. I made the replacement muffler by gluing together then shaping plasticard. The final touch was to add a flange towards the front (drilled/shaped plasticard) and close up any joint gaps with putty. Back on the top side (above) I needed to build a bracket to mount the pedals, so got busy with plasticard & Milliput. Not the most elegant solution - it "evolved organically" - but all is now set for the pedal arms to sit exactly where I want & at the desired angle. Finally, I've gotten ahead of myself slightly and finished a replacement steering wheel as the stock one belongs on a station wagon...
-
? I'm a big fan of this "don't know what it is" category. I love cars to drive & look at, but I'm not hugely mechanical so am always having to research the purpose the oily/electrical bits of kits!!
-
Awesome job. Would love to do this kit one day
-
Lancia Beta Montecarlo
Pete75 replied to afx's topic in WIP: Other Racing: Road Racing, Land Speed Racers
Awesome ?. A new one on me - I'll bet the kit is pretty darn rare! My first impression is that the square lines make it even cooler than the 037. Big fan of the Alitalia livery, if you're counting votes! ?
.jpg.c98dc3f926cc659cde0277d21100630d.jpg)
.jpg.ad7c215c4de6686251d799b139e2798b.jpg)
.jpg.bfc6c62d38764aab42c80f36be7fc924.jpg)
.jpg.aef325431a7e0a30566dc760ab6dd952.jpg)
.jpg.5614f73b2ed40b96b069892b55c38046.jpg)
.jpg.8ef42f056b7ef32bd90b42fbafc693b9.jpg)


.jpg.a53254ac7656a22756b89ca09e65a966.jpg)
.jpg.b955cf31aa79fce232cfd2ae3aabe958.jpg)
.jpg.307c1ae256eb217b0c95dd56b9800720.jpg)
.jpg.9ad5f35d2b882d42b8f3ca16c3c6886d.jpg)
.jpg.5023df6d8f1135b1babd190c1d7b74f0.jpg)
.jpg.63b8b26f8c2fd1bd03911ed73c106a20.jpg)
.jpg.0cb444f14b888a27ea66aeca5e908b7b.jpg)
.jpg.6af192b8372a90eac53a603b285e51a3.jpg)
.jpg.533ae25ba3d7d5655dbb674b193172cc.jpg)
.jpg.cbf0def5892978183eacda3317329210.jpg)