AmericanMuscleFan
-
Posts
3,058 -
Joined
-
Last visited
Content Type
Profiles
Forums
Events
Gallery
Everything posted by AmericanMuscleFan
-

’72 Dodge Demon Drag Racer 1/25 scale
AmericanMuscleFan replied to AmericanMuscleFan's topic in WIP: Drag Racing Models
Thanks Dave! The most interesting remains to be done and I hope that 2025 will be a good year to move this project forward. Happy New Year! Francis -
’72 Dodge Demon Drag Racer 1/25 scale
AmericanMuscleFan replied to AmericanMuscleFan's topic in WIP: Drag Racing Models
Thanks Rich, beauty is in the eye of the beholder, it could be even better but it might never end at the same time... 🤔 -
1961 Impala Outlaw Twin Turbo
AmericanMuscleFan replied to streetmachine11's topic in WIP: Drag Racing Models
Great work Jason, it's been a long hiatus but the latest results of your work are first class! 👍 -
Wear a red hat and a white beard and you will be our Santa Claus even if the holiday is over! 🎅
-
Mercedes Benz SSK
AmericanMuscleFan replied to Pierre Rivard's topic in WIP: Other Racing: Road Racing, Land Speed Racers
The best way to try to increase the low value of our poor currency Pierre, I approve of your good gesture! 😁 Beautiful work on the linkage by the way! 👍 -
My year in styrene: still having fun at the bench!
AmericanMuscleFan replied to Claude Thibodeau's topic in Model Cars
Your boots follow your lips as they say around here, your maxim (fun with Styrene) is well demonstrated with all these beautiful models, you are prolific Claude! With your creativity we "never know what you're going to come across" like Bubba said in the movie Forest Gump, you impress the gallery my friend! 👍 -
Mercedes Benz SSK
AmericanMuscleFan replied to Pierre Rivard's topic in WIP: Other Racing: Road Racing, Land Speed Racers
Good scratch building Pierre, you definitely have steady hands, I love what I see! 👌 -
If you have winter tires, continue your journey to Quebec, you will make your trip profitable! 😁
-
’72 Dodge Demon Drag Racer 1/25 scale
AmericanMuscleFan replied to AmericanMuscleFan's topic in WIP: Drag Racing Models
Thanks Brian! Of course, the tools need to be very sharp and using them on non-ferrous materials helps make this last. Speed and feed are also part of the equation, nothing is more frustrating than ruining a part you spent hours making by rushing to separate it from the rod. Thanks Pierre, There is still a lot of work to be done but I will definitely do it when the majority of the parts are ready for pre-assembly testing. Thanks Daniel, you also help to make me smile with your creations my friend. 😊 -
’72 Dodge Demon Drag Racer 1/25 scale
AmericanMuscleFan replied to AmericanMuscleFan's topic in WIP: Drag Racing Models
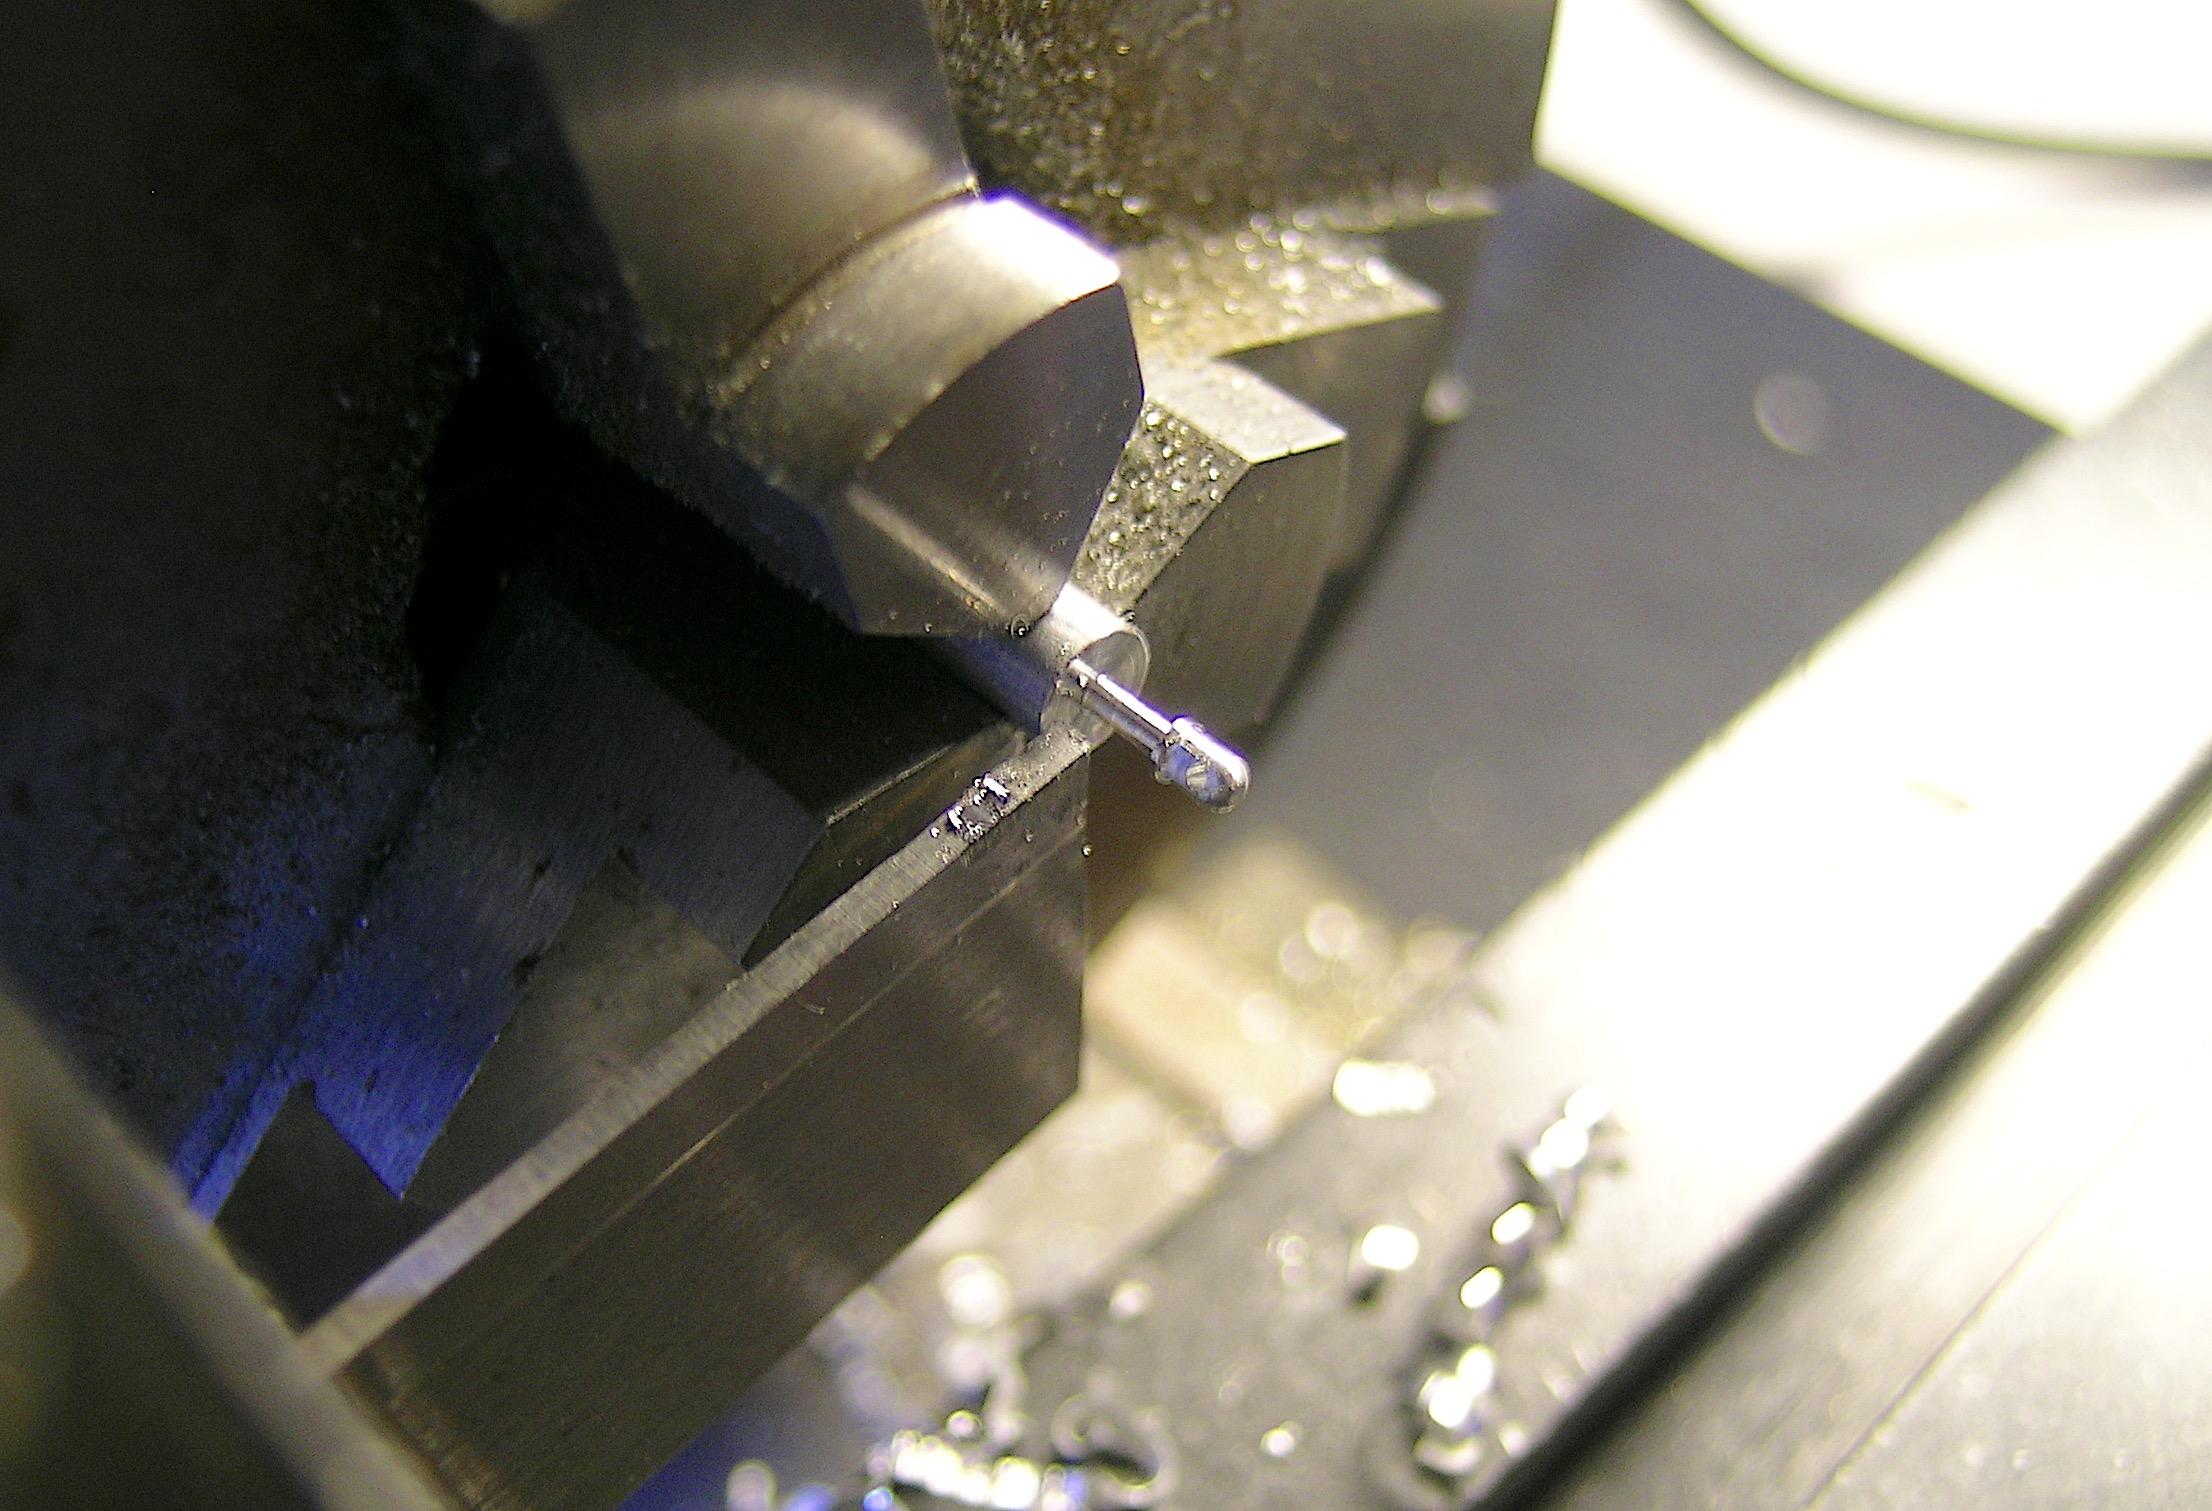
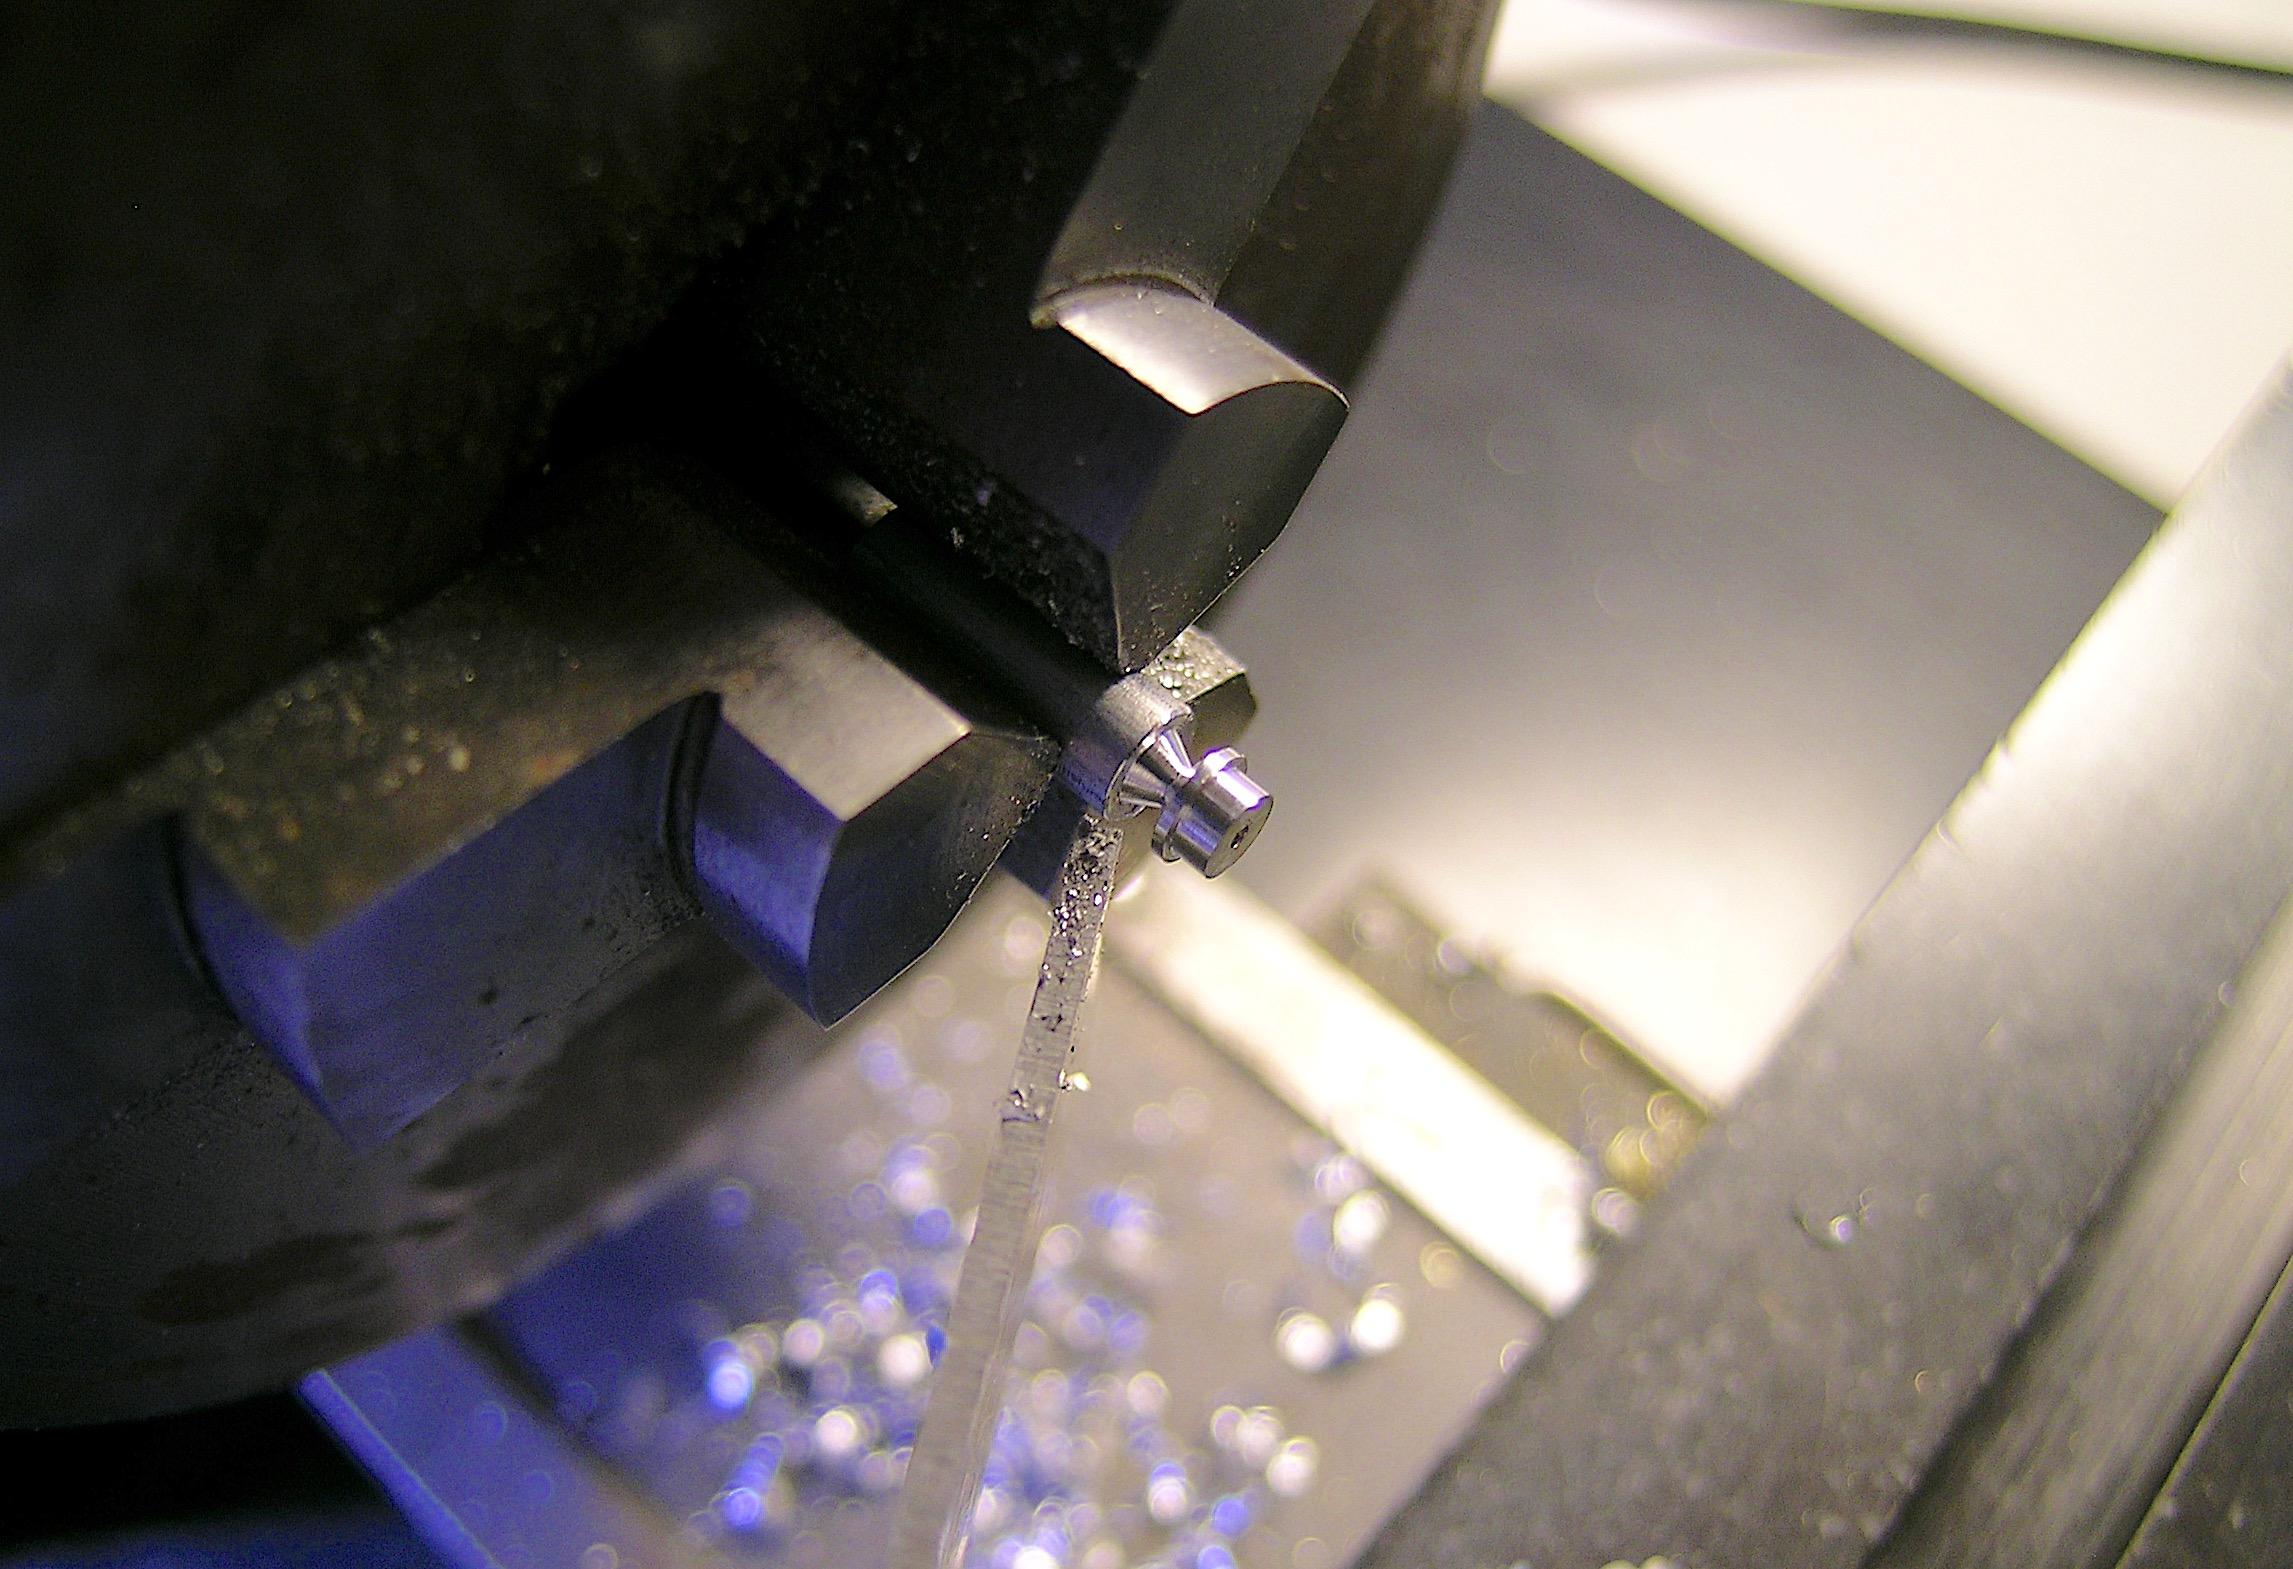
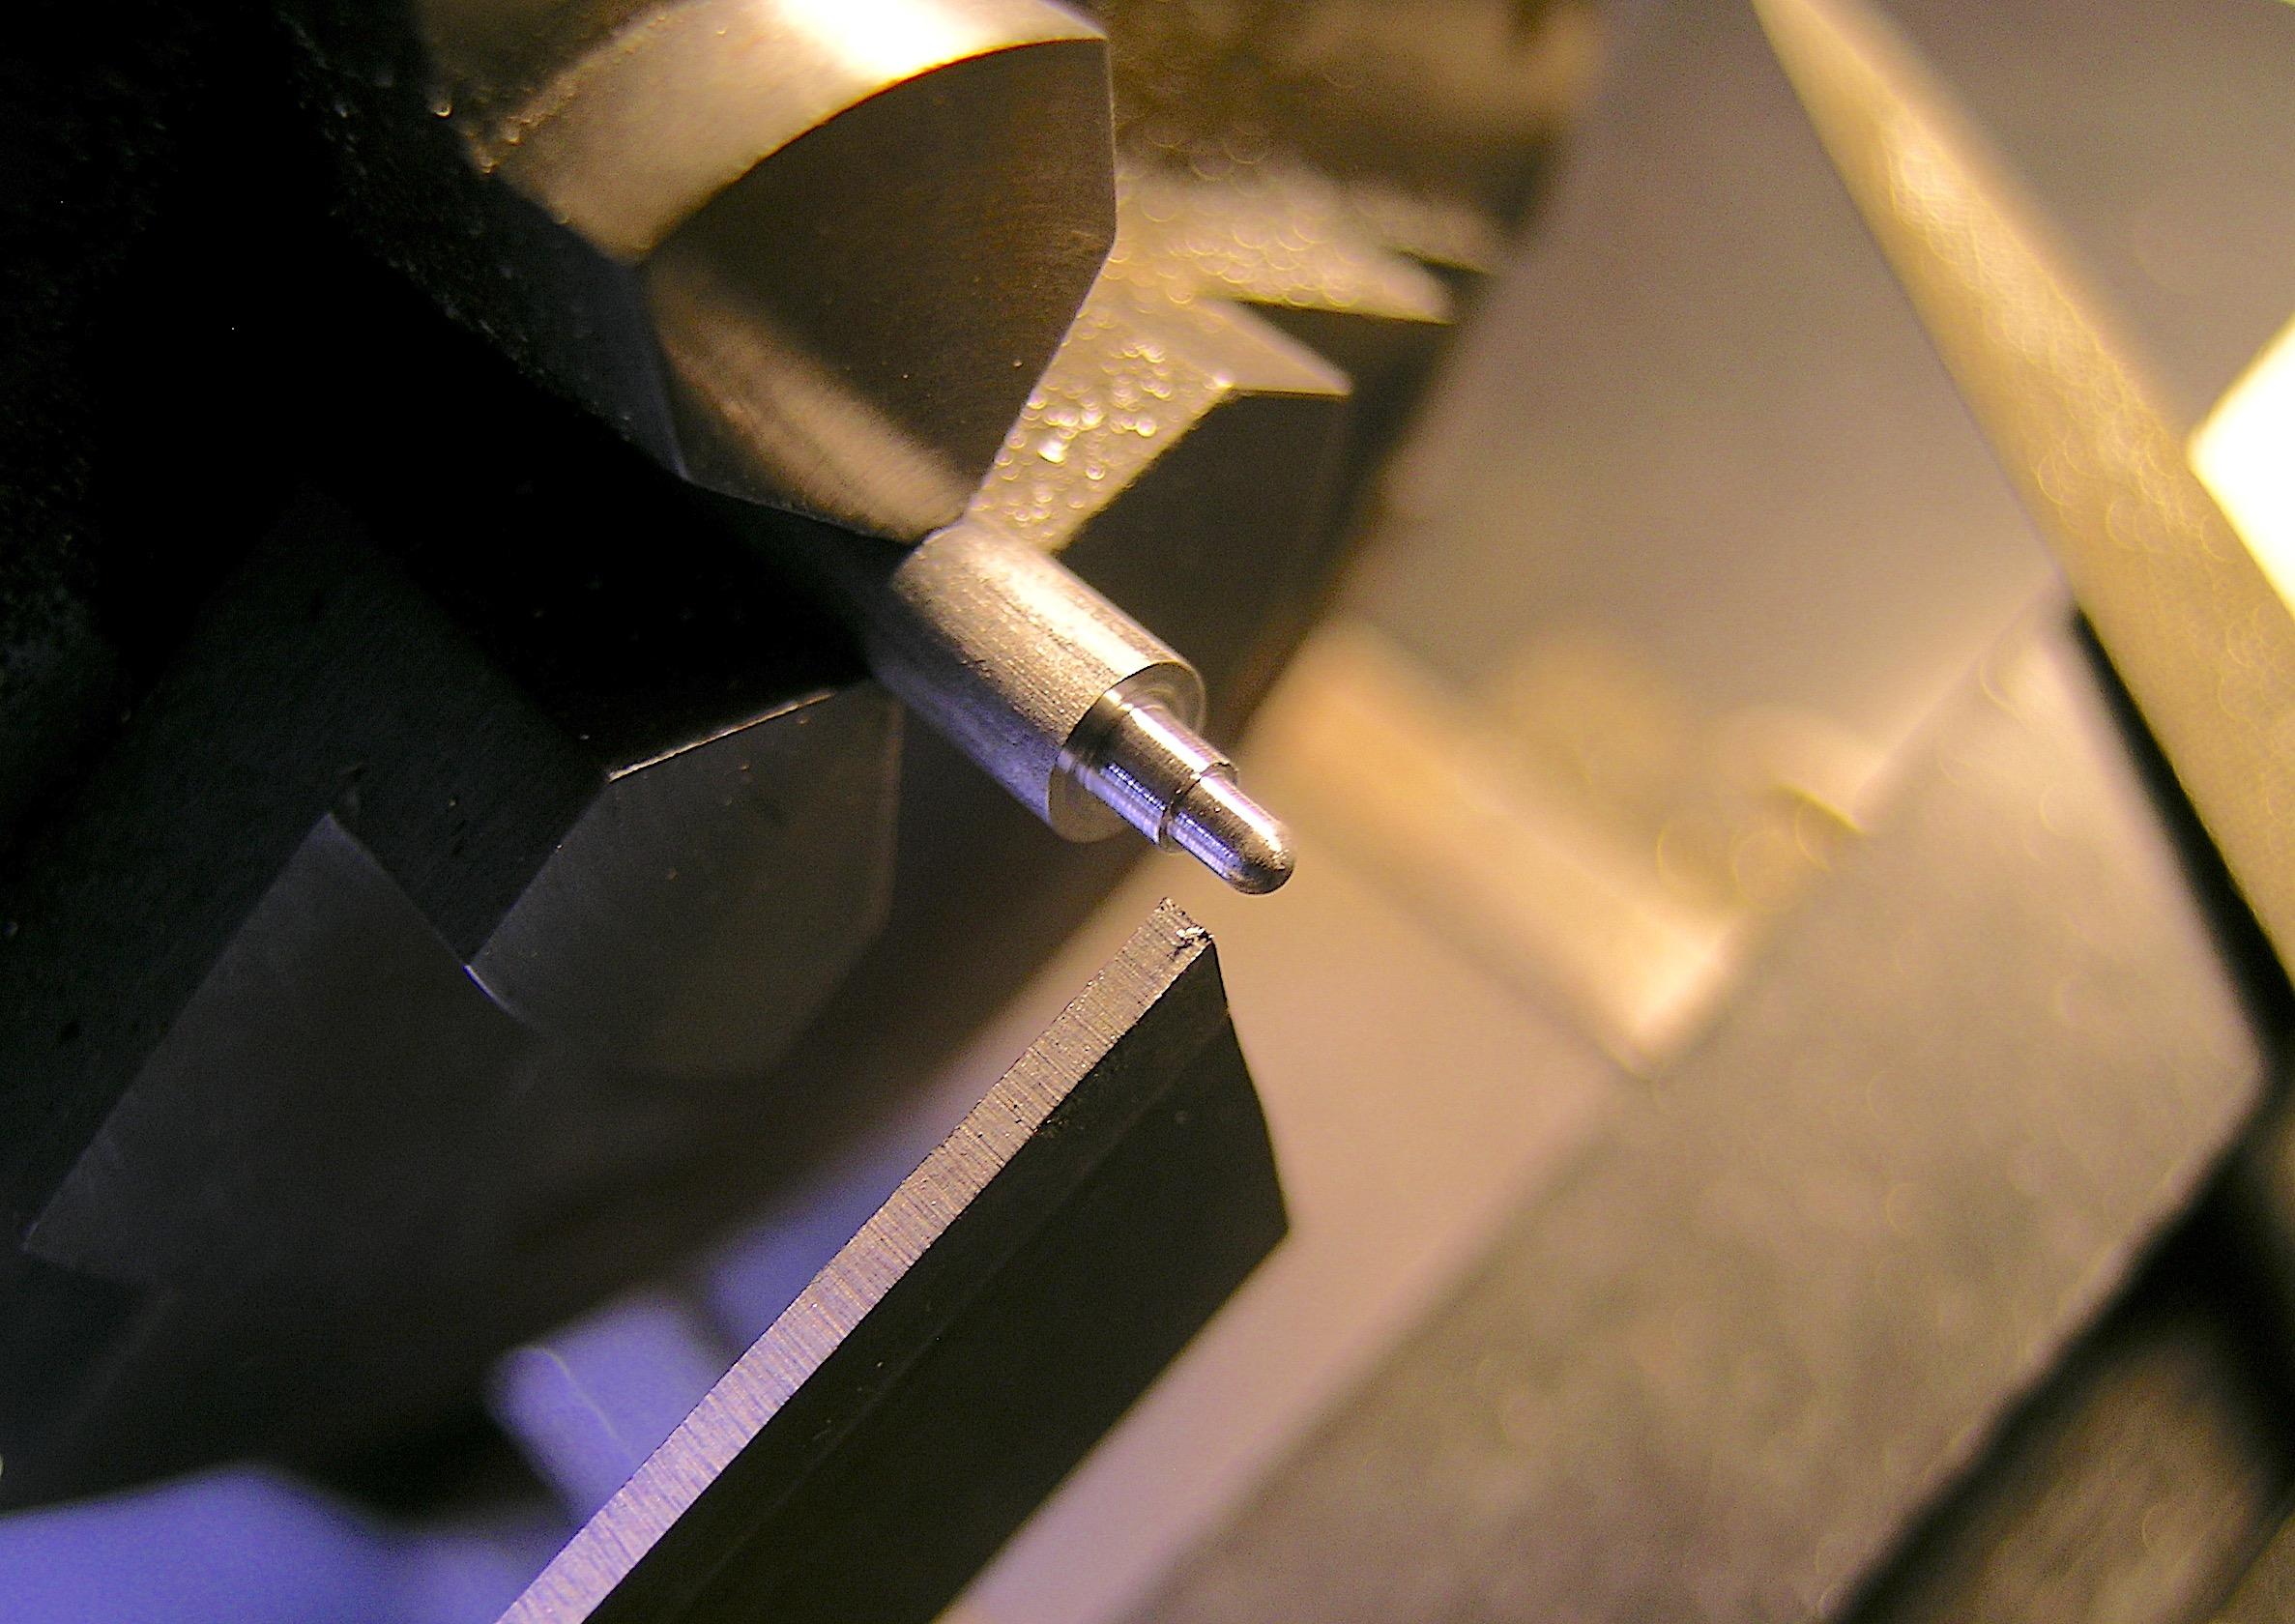
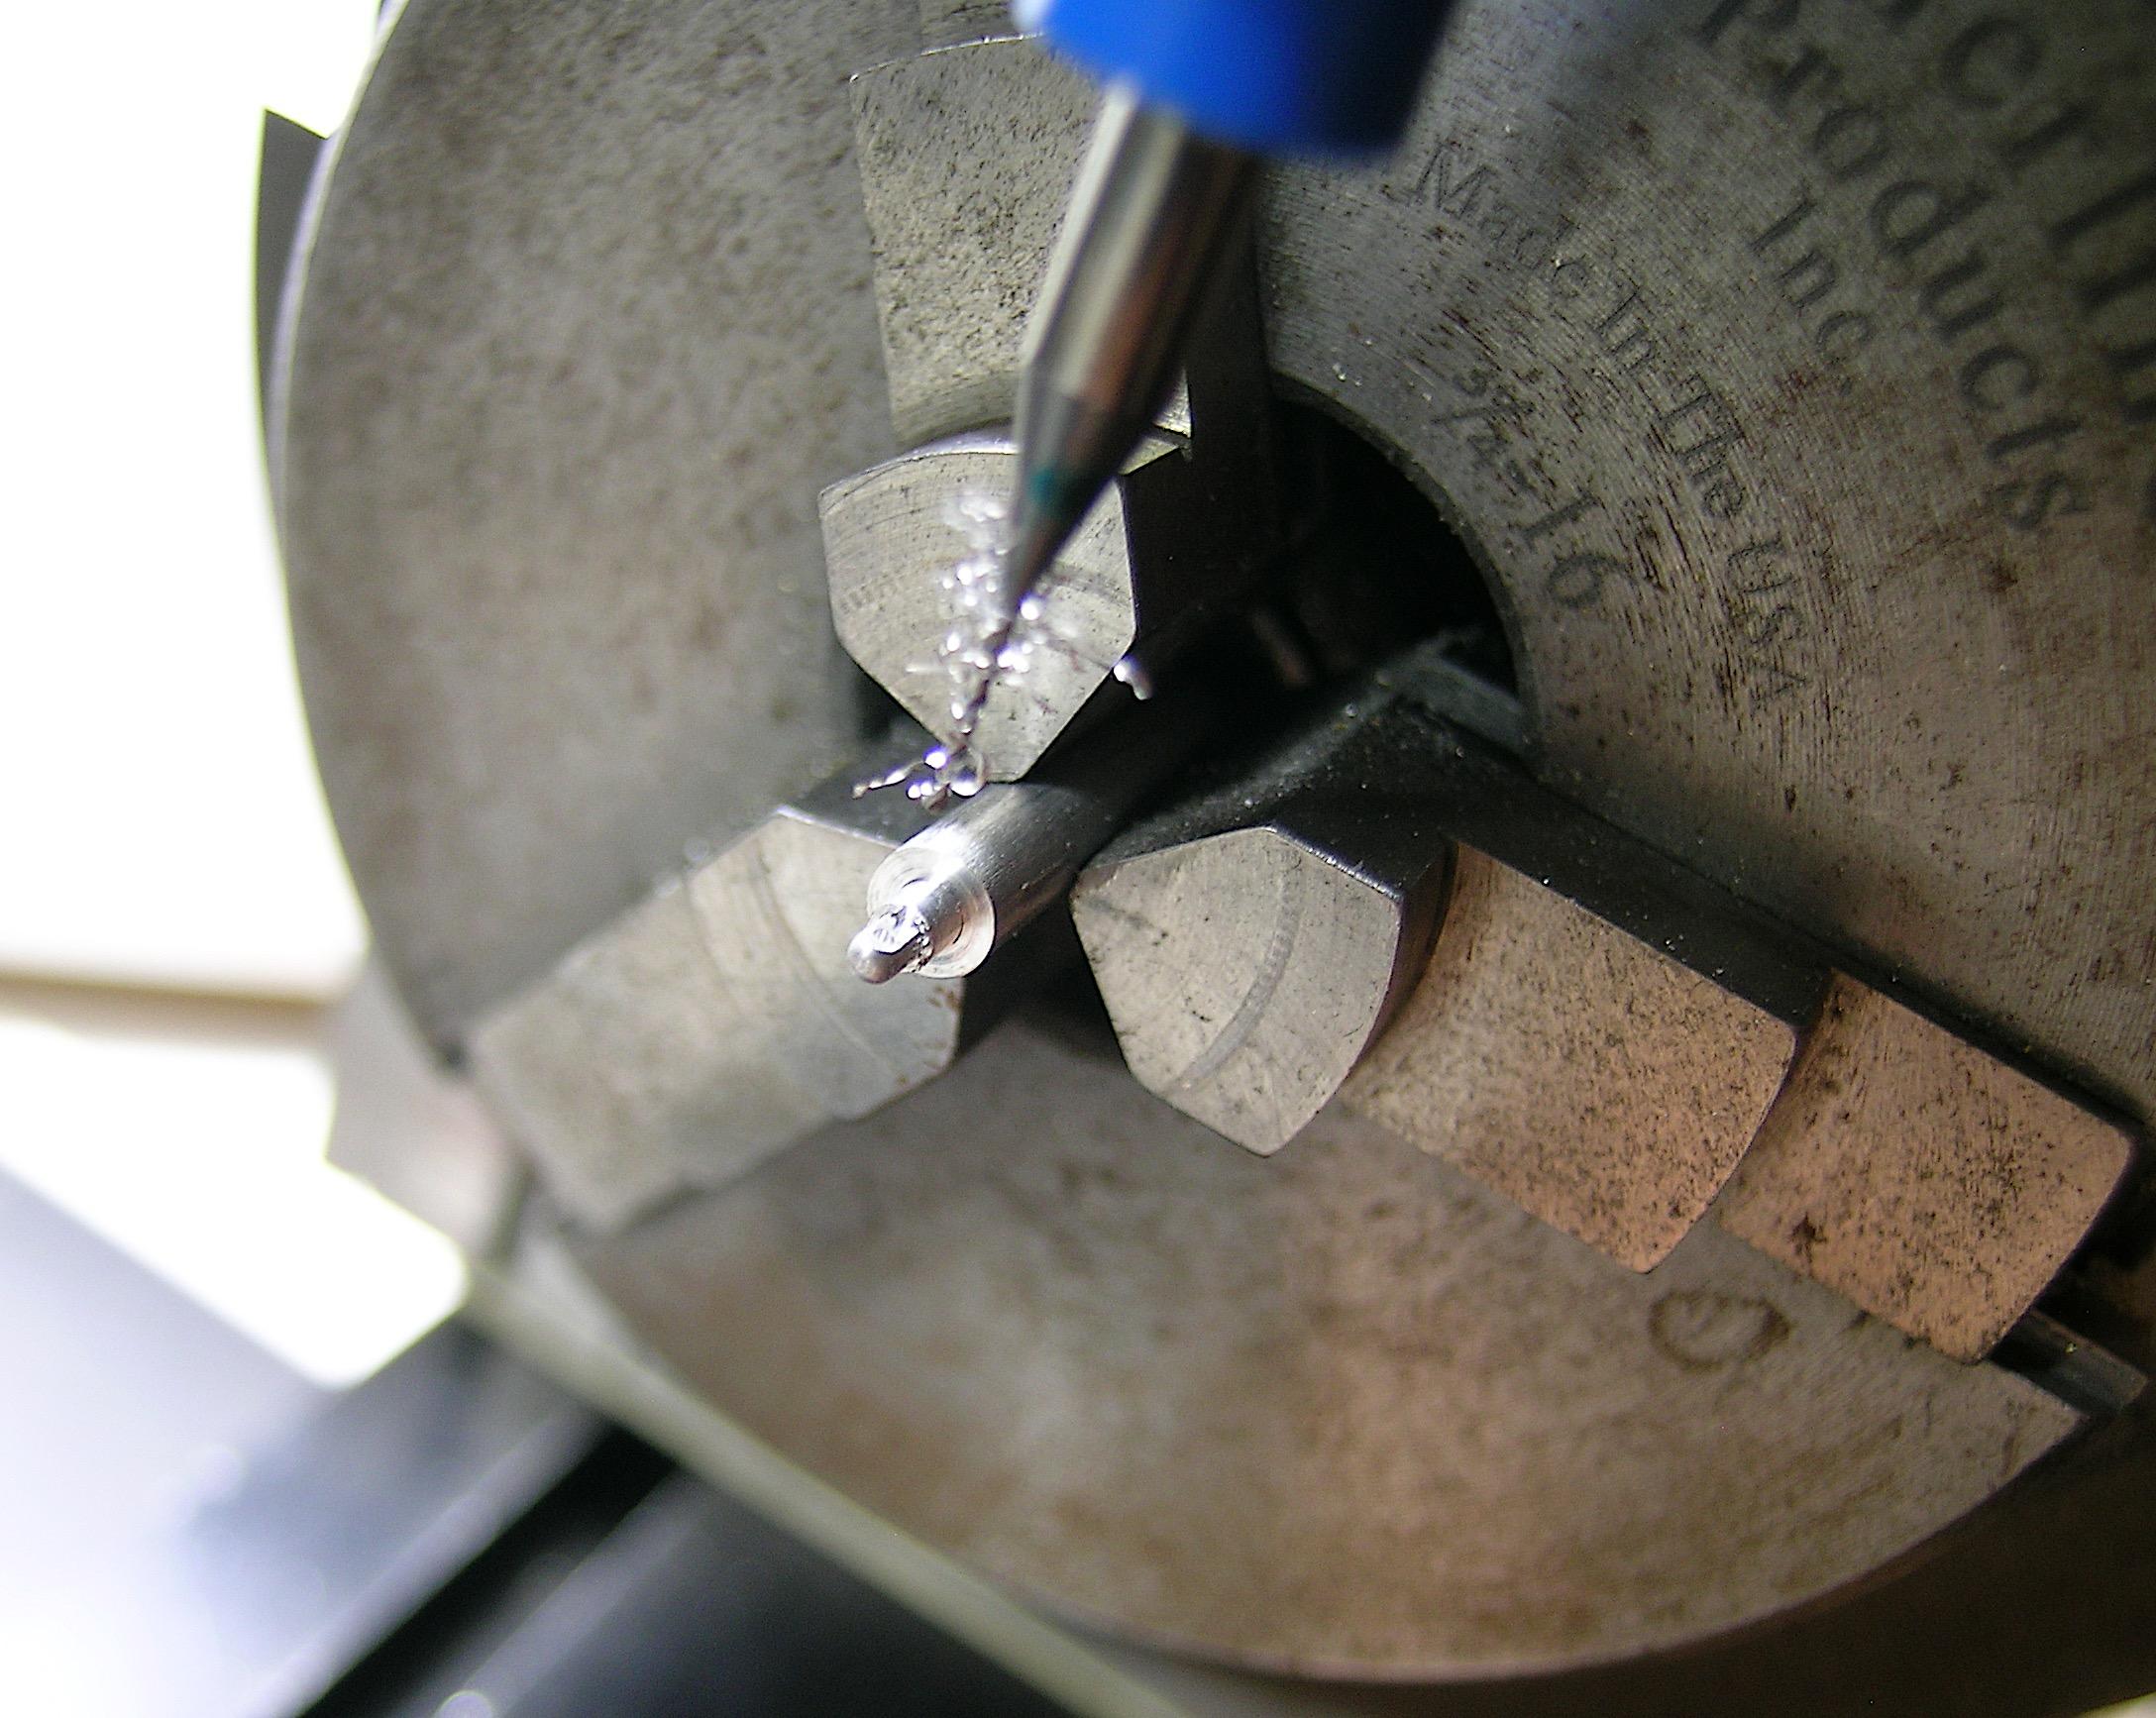
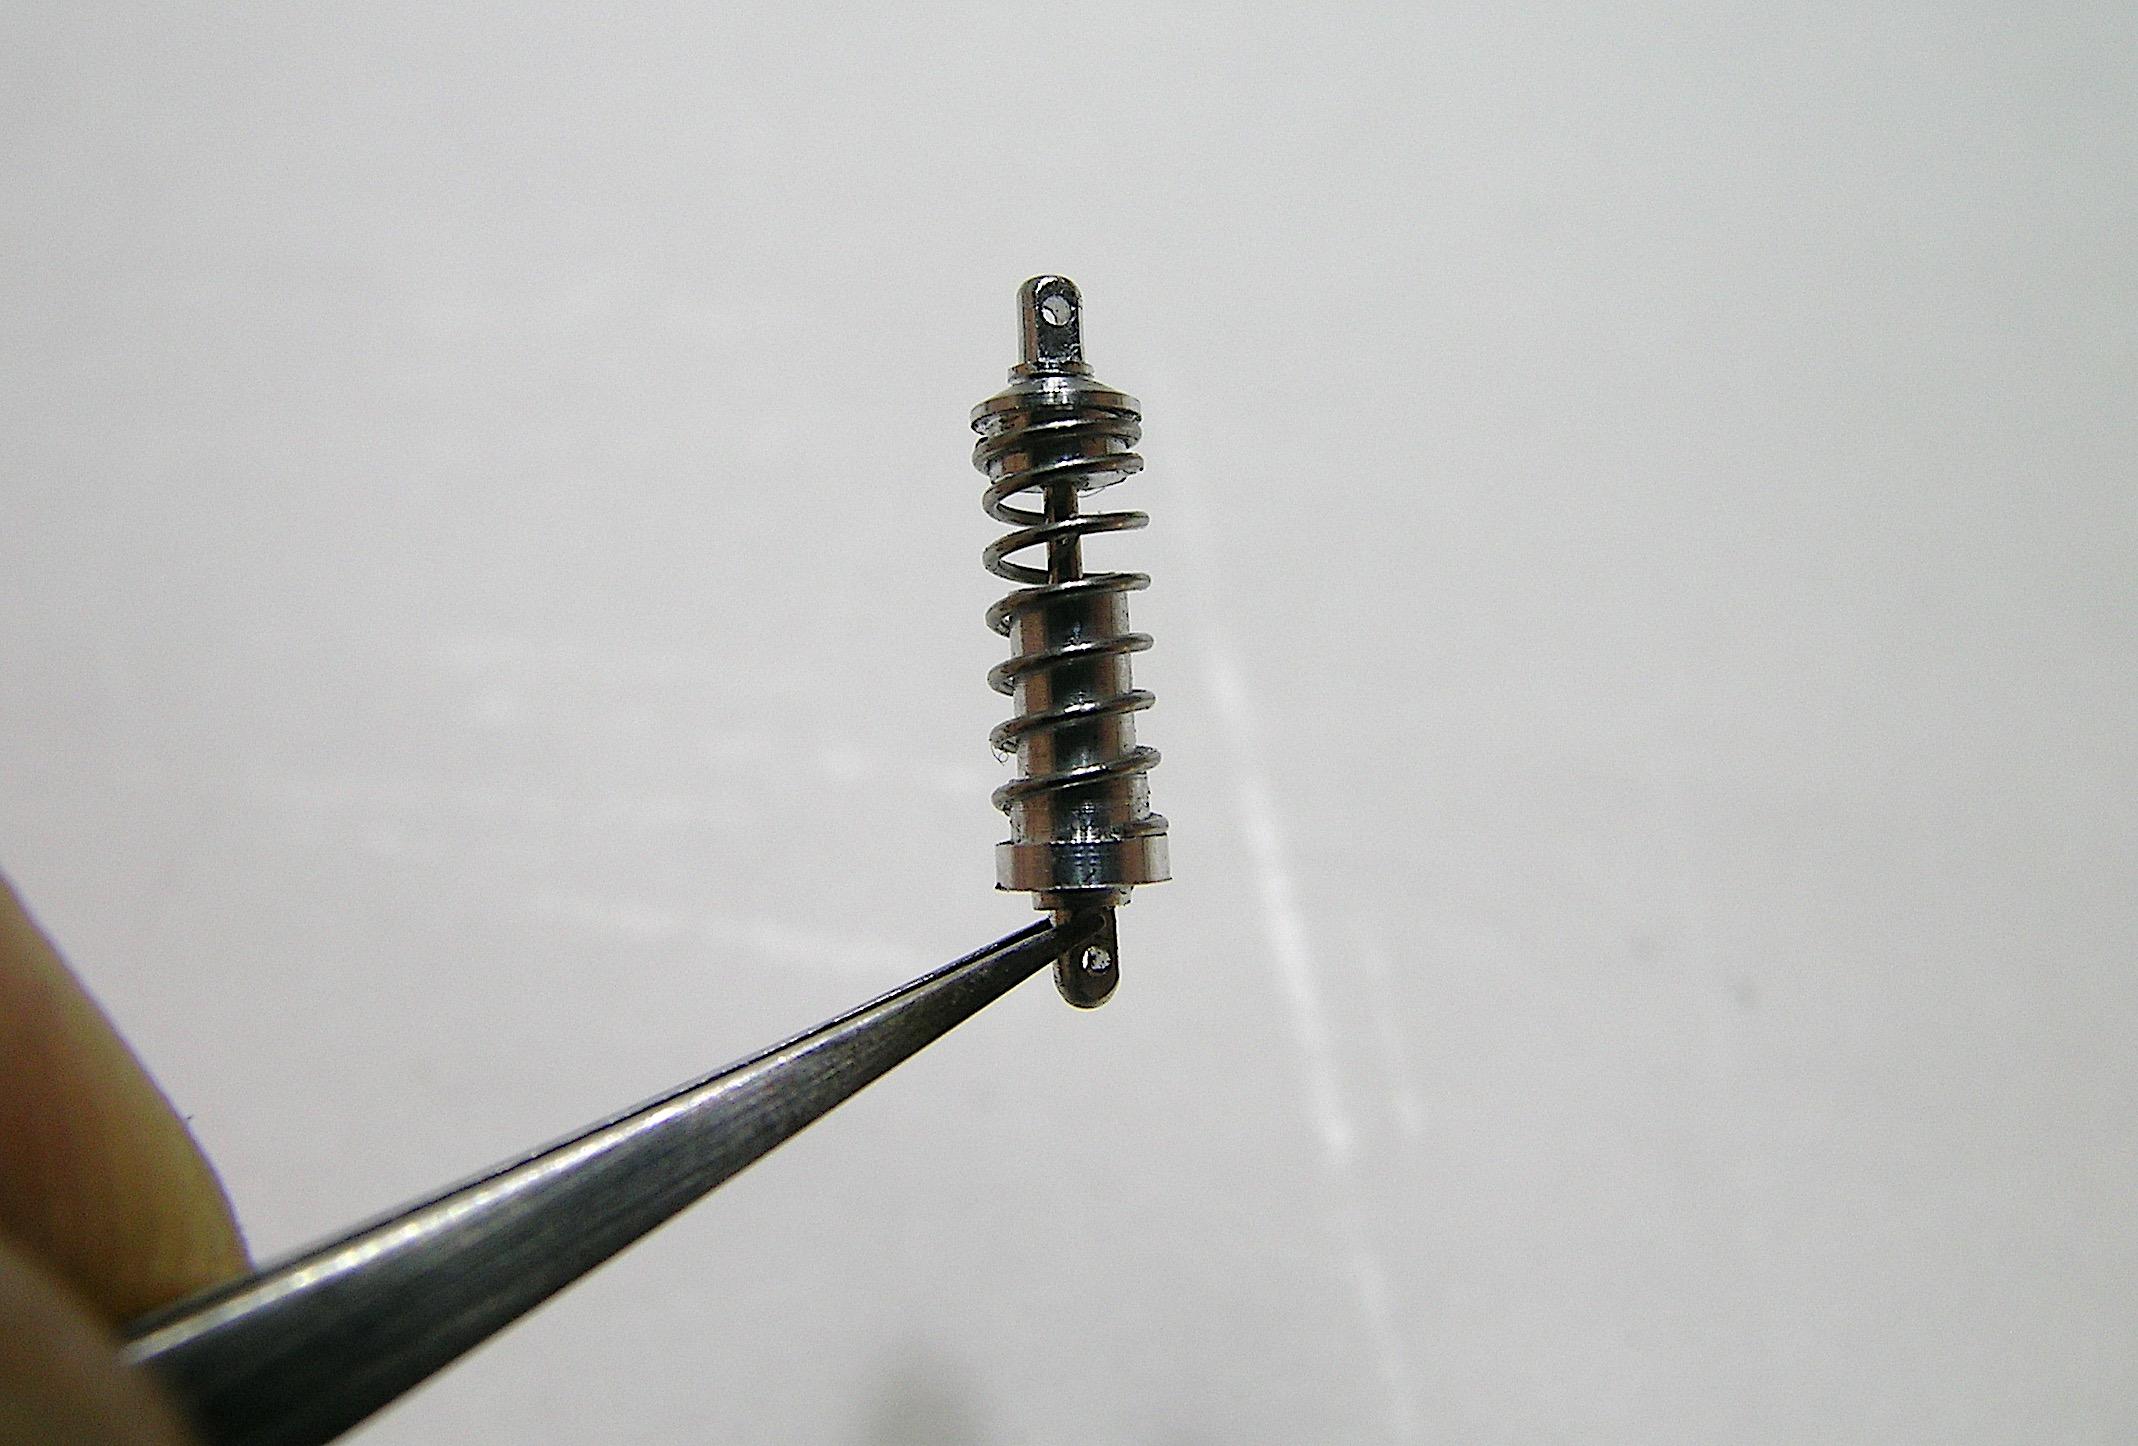
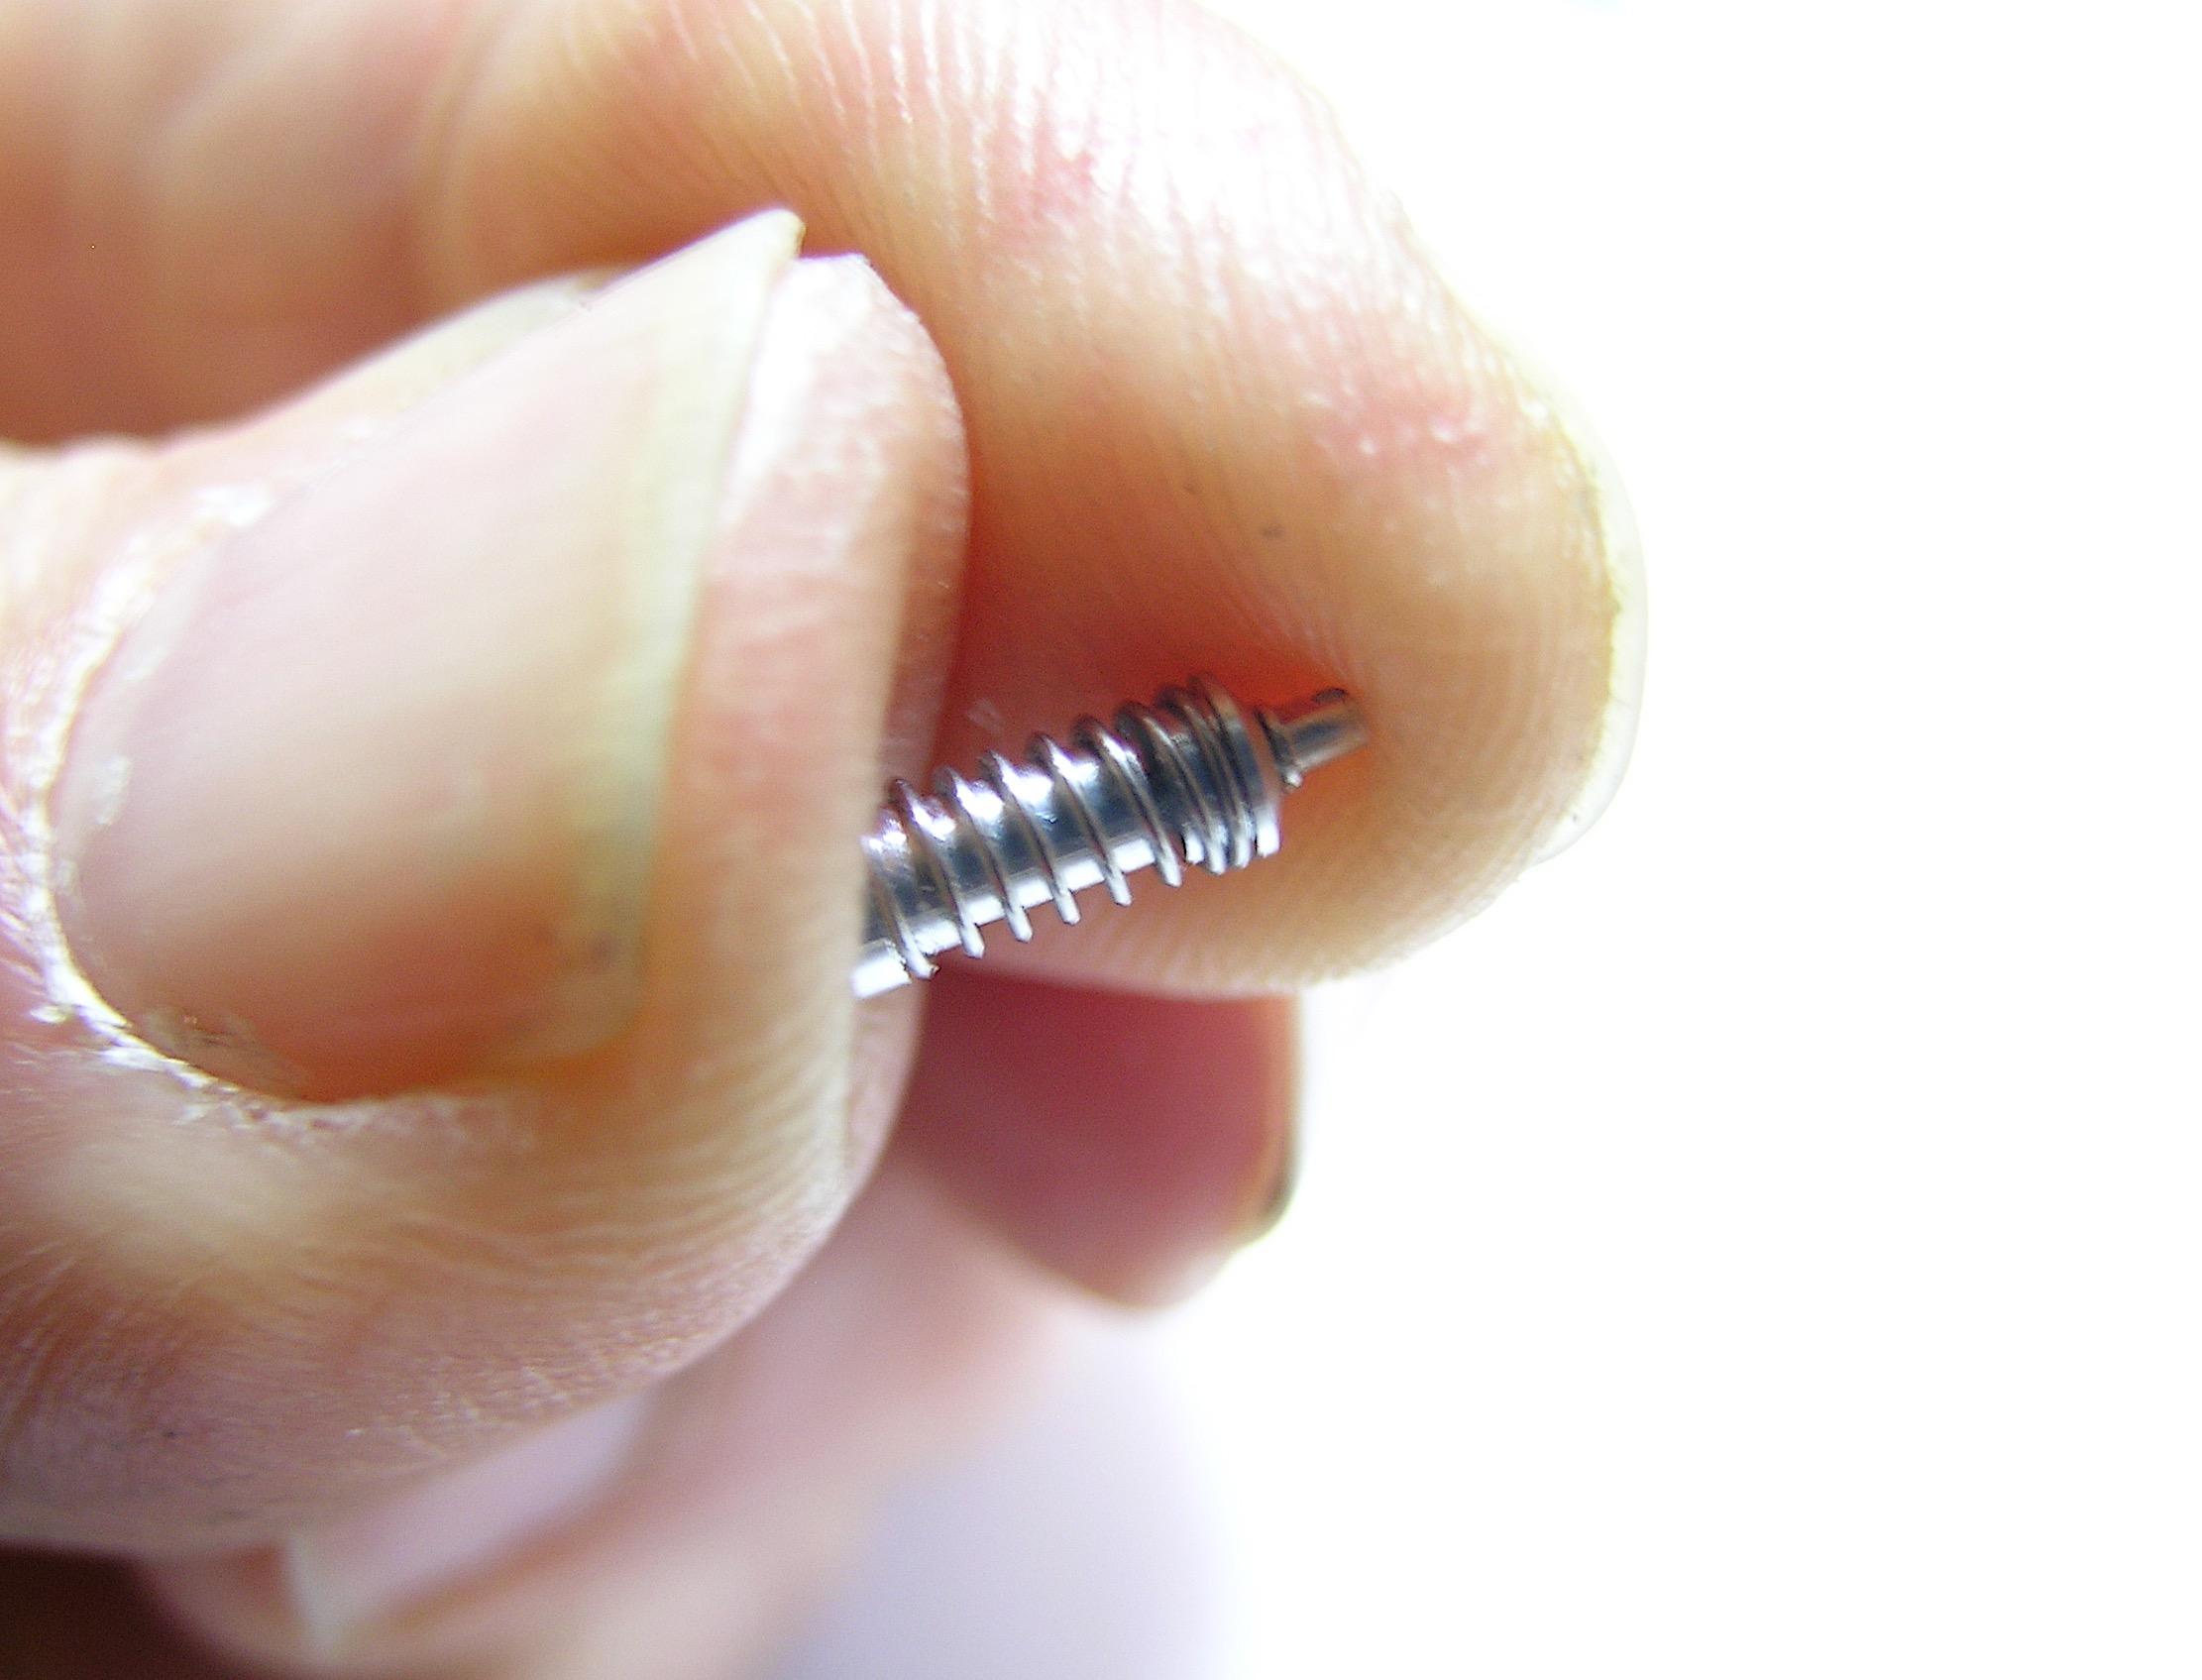
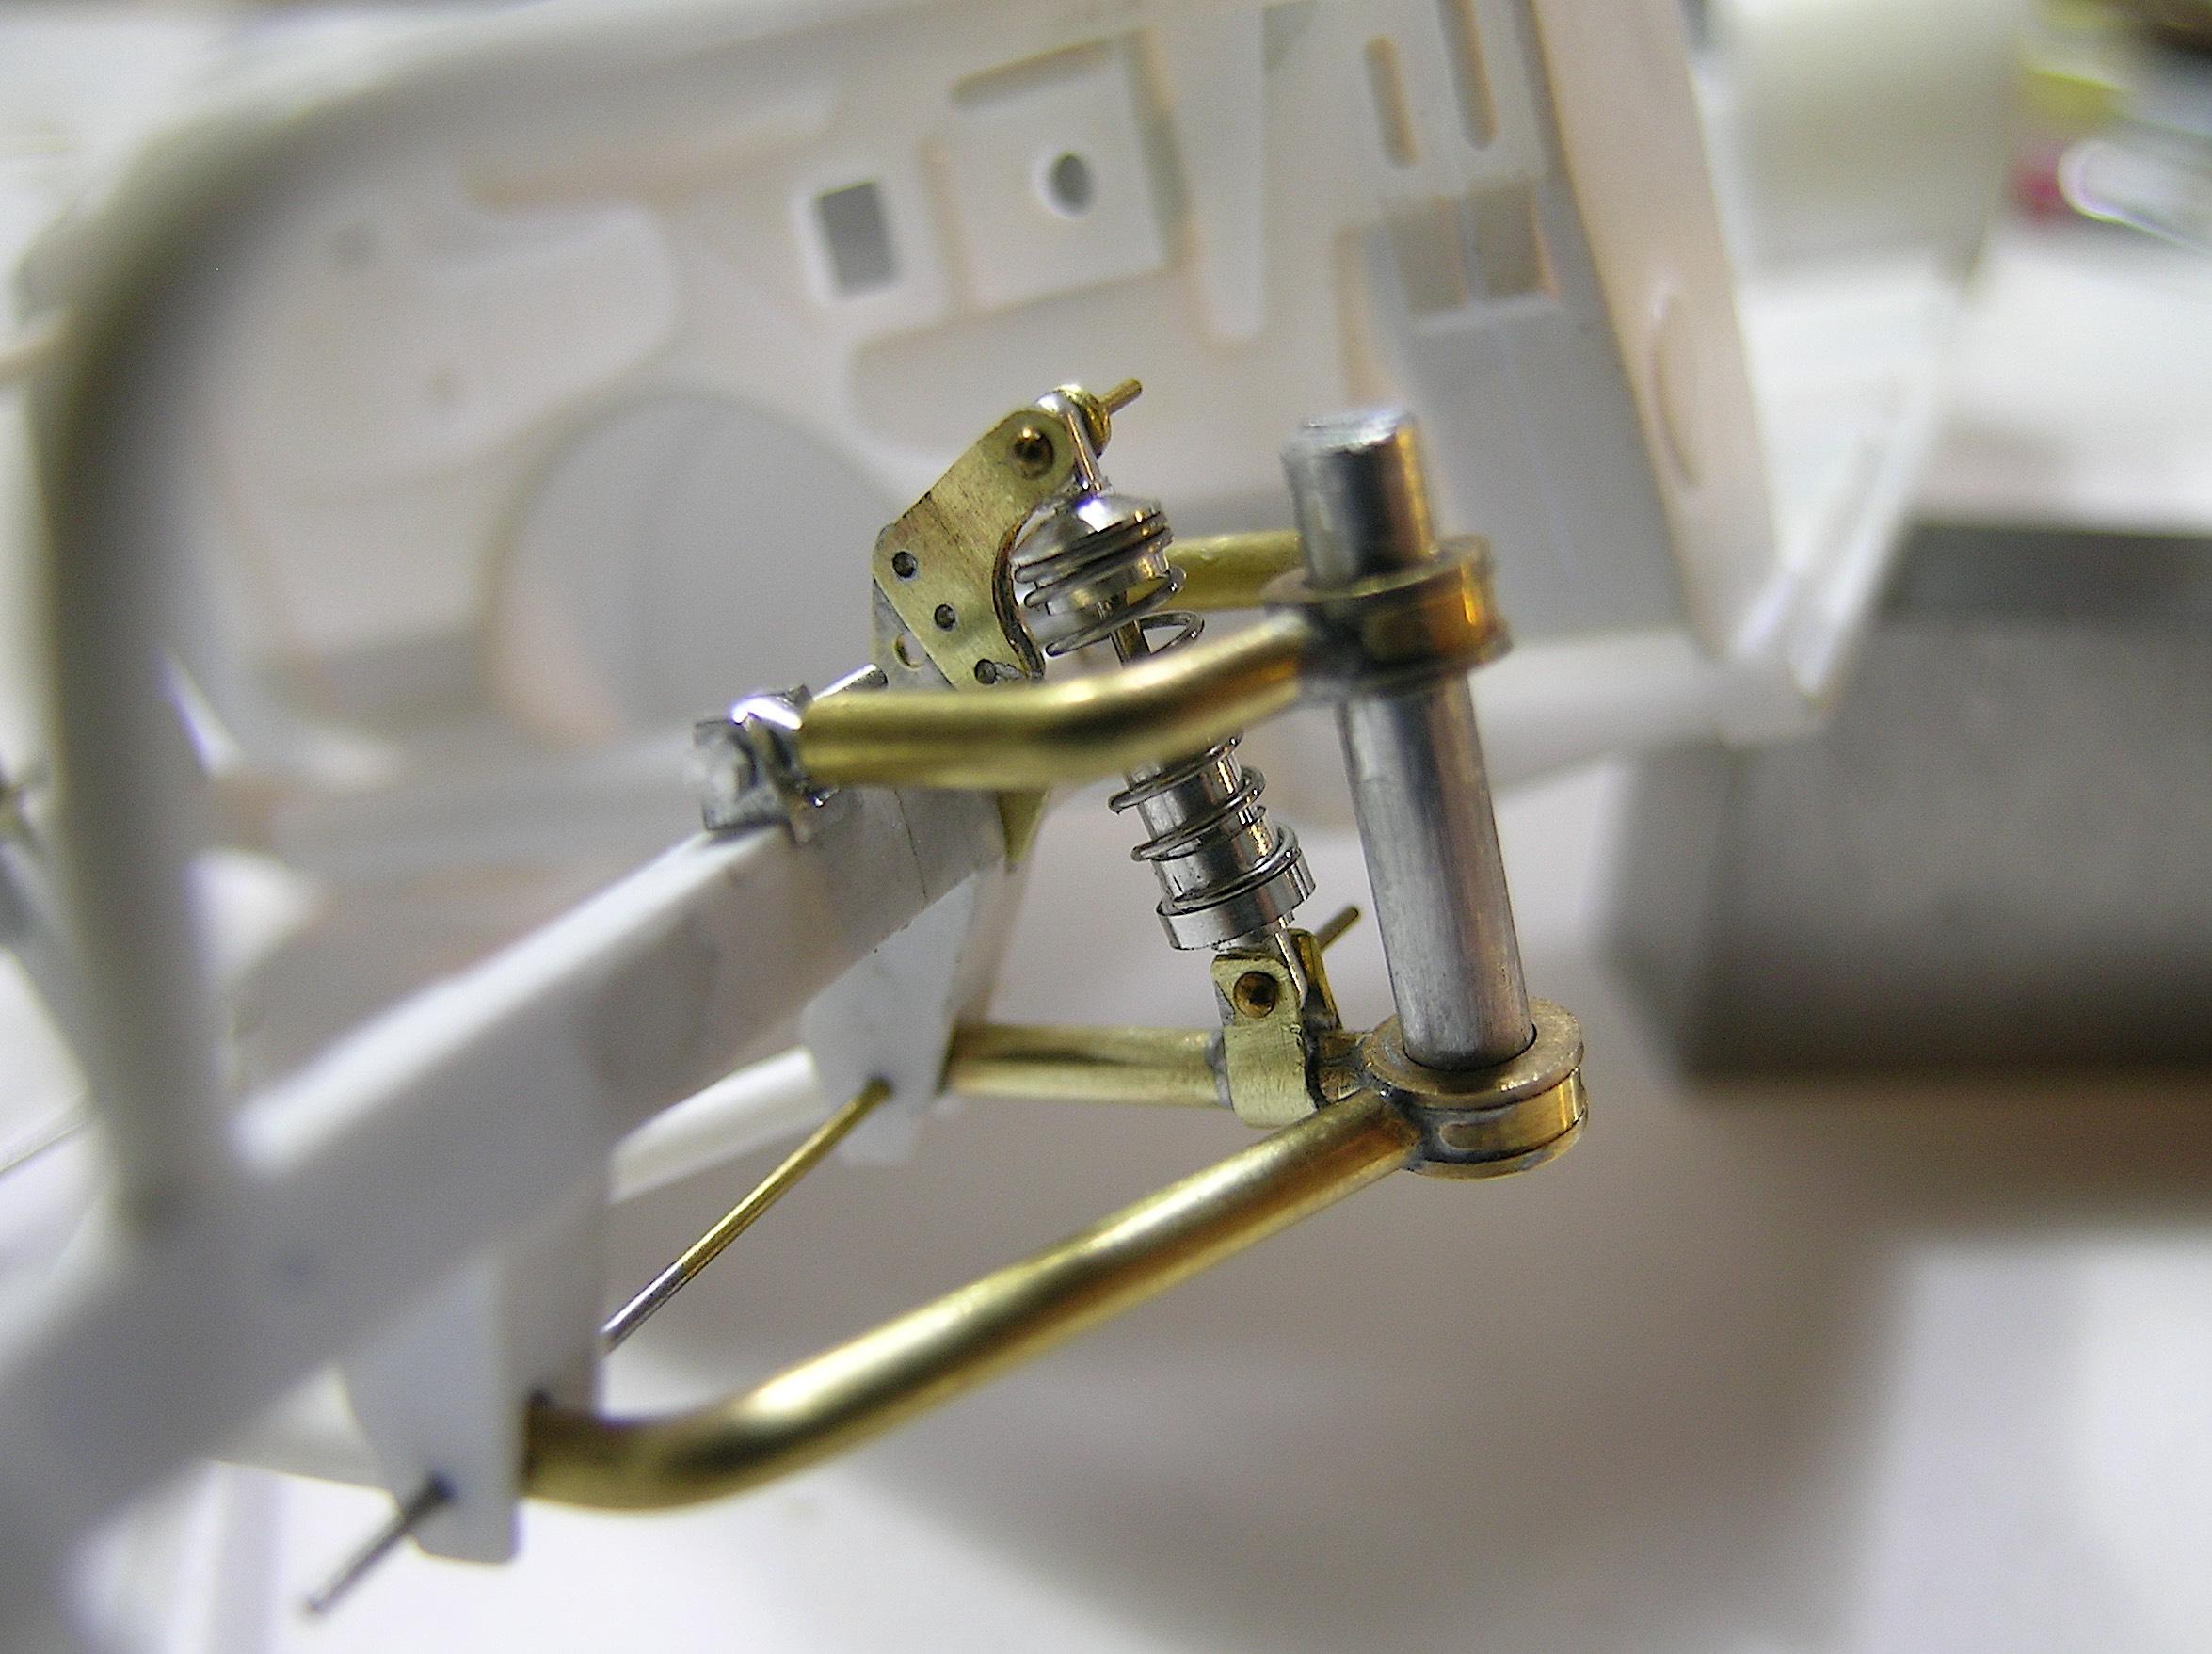
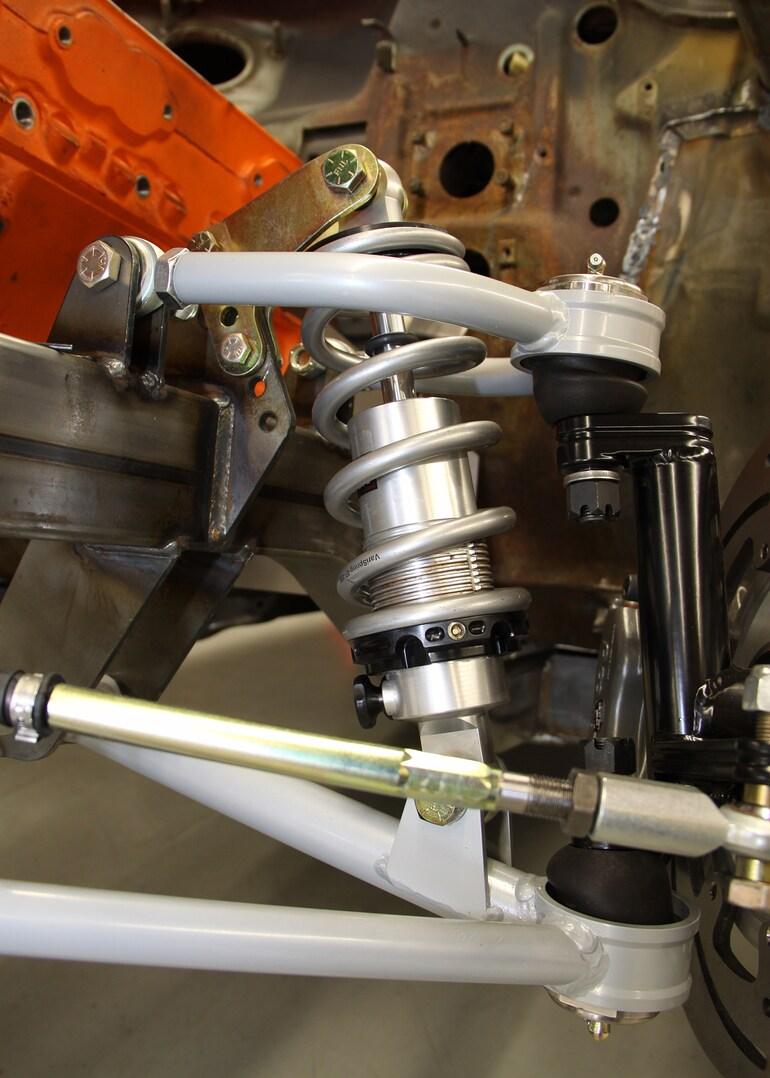
Hello everyone, I'm taking advantage of my short vacation to spend more time on the bench these last few days. Now that the shock mounts are redone, I was able to take measurements for the coil over shock. I didn't reinvent the wheel, I used the same technique as before to make them functional, I could have added more details but I think they look pretty good like that. I also soldered pieces of brass to the two lower control arms to create the second mounting point like the real ones. I'm not sure (and that's not the point) that the front suspension will work smoothly but most of the parts I made should allow it. Fabrication continues! Francis The example I used as a guide but 25 times bigger! 😁 First, I started by machining the rod ends. Then onto milling to make flat surfaces and drill holes. This is one of the shock caps (upper part) on the lathe. Bottom rod end being about to be separated from the rod on the lathe. Final product, sorry I realize I didn't take many photos. I didn't make a video but they are functional, I compressed one between my fingers to show you. Temporarily installed in place to check fit. There's going to be a lot of pieces in there when it's all done... 🤔
-
Badman C/A (ca. 1975)
AmericanMuscleFan replied to Straightliner59's topic in WIP: Drag Racing Models
Mister resourcefulness strikes again! The idea of using headpins to simulate tennis balls is brilliant in its simplicity...! 👍 -
That's good, that's really good, I drink to that!!! 🍺 By the way, the build has a good start, that's the point of this thread, right? 🤔
-
You are a real Andrew, a real enthusiast, even finding space and time to start a new hobby shop and a build during a visit to your relatives. There is nothing that can stop an artist from creating! 👍 Despite its high parts count, I'm sure you'll take this kit to the next level like you always do!
-
’72 Dodge Demon Drag Racer 1/25 scale
AmericanMuscleFan replied to AmericanMuscleFan's topic in WIP: Drag Racing Models
Thanks Will, Andrew! Thank you Tim, regarding the rust, I think that if it is just superficial and not structural rust, there is hope and a good wipe made these long months of inactivity disappear! 😁 Francis -
Mercedes Benz SSK
AmericanMuscleFan replied to Pierre Rivard's topic in WIP: Other Racing: Road Racing, Land Speed Racers
Looks like we're going to have another great OOB build on steorides(😁) from you Pierre. I hope you still have a good inventory of this precious Evergreen stuff, I'm on board! 👍 -
3rd gen Camaro
AmericanMuscleFan replied to MarkJ's topic in WIP: Other Racing: Road Racing, Land Speed Racers
WOW Mark!!! This is a bumper to bumper scratch build project, you are very resourceful and skillful, I love what I see here, sorry to be so late to the party! I realize I missed several great builds and yours is one of them. You can be proud of your work, it's impressive. 👍 -
’72 Dodge Demon Drag Racer 1/25 scale
AmericanMuscleFan replied to AmericanMuscleFan's topic in WIP: Drag Racing Models
Thanks Daniel and Pierre! Now I will be able to make the coil over and move on to the other parts for the front steering, there is still a lot to do and these will be much more technical parts to machine. Merry Christmas to everyone! 🎄 Francis -
It's hard to believe that all those pieces of hammered brass created such a beautiful bodywork, a labor of love of dedication and craftsmanship. You have all my respect and admiration Charlie! 👌🤤
-
Geez! Another Stocker! 70 Formula Firebird B/SA
AmericanMuscleFan replied to R. Thorne's topic in WIP: Drag Racing Models
Cool project Ron, will you use the Monogram 1/24 kit or a resin kit (3D printed body) for your project? By the way, Candy Apple Red is a great color choice! -
’72 Dodge Demon Drag Racer 1/25 scale
AmericanMuscleFan replied to AmericanMuscleFan's topic in WIP: Drag Racing Models
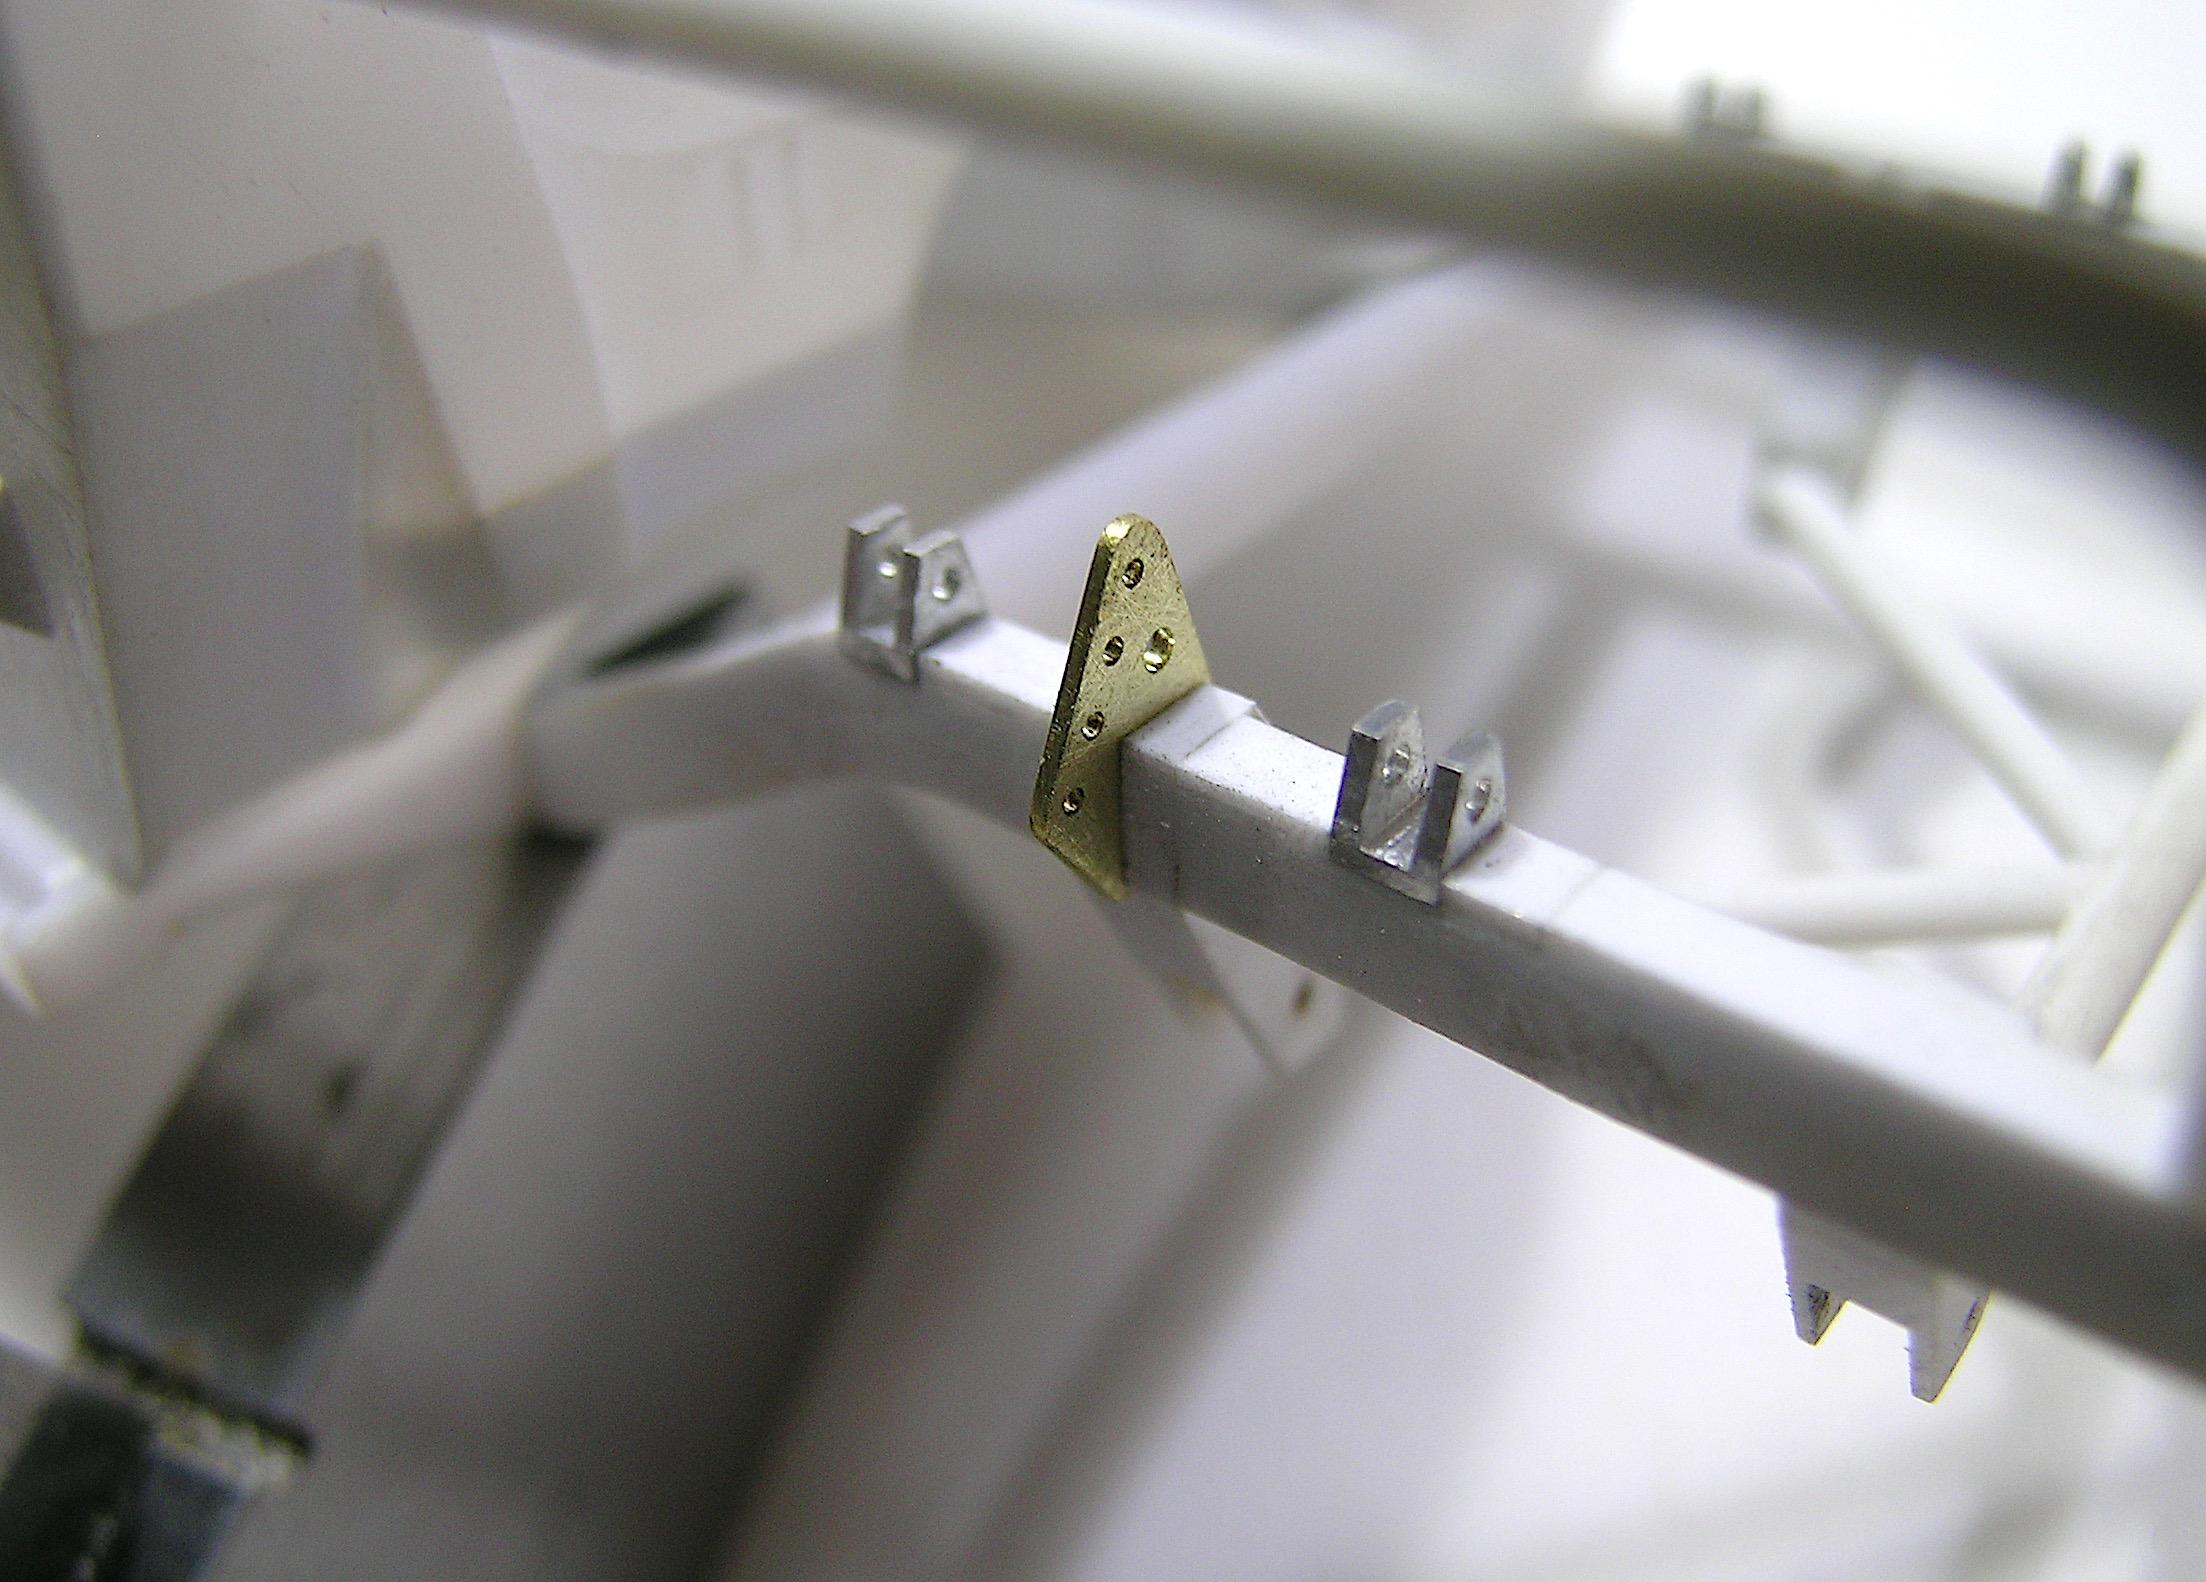
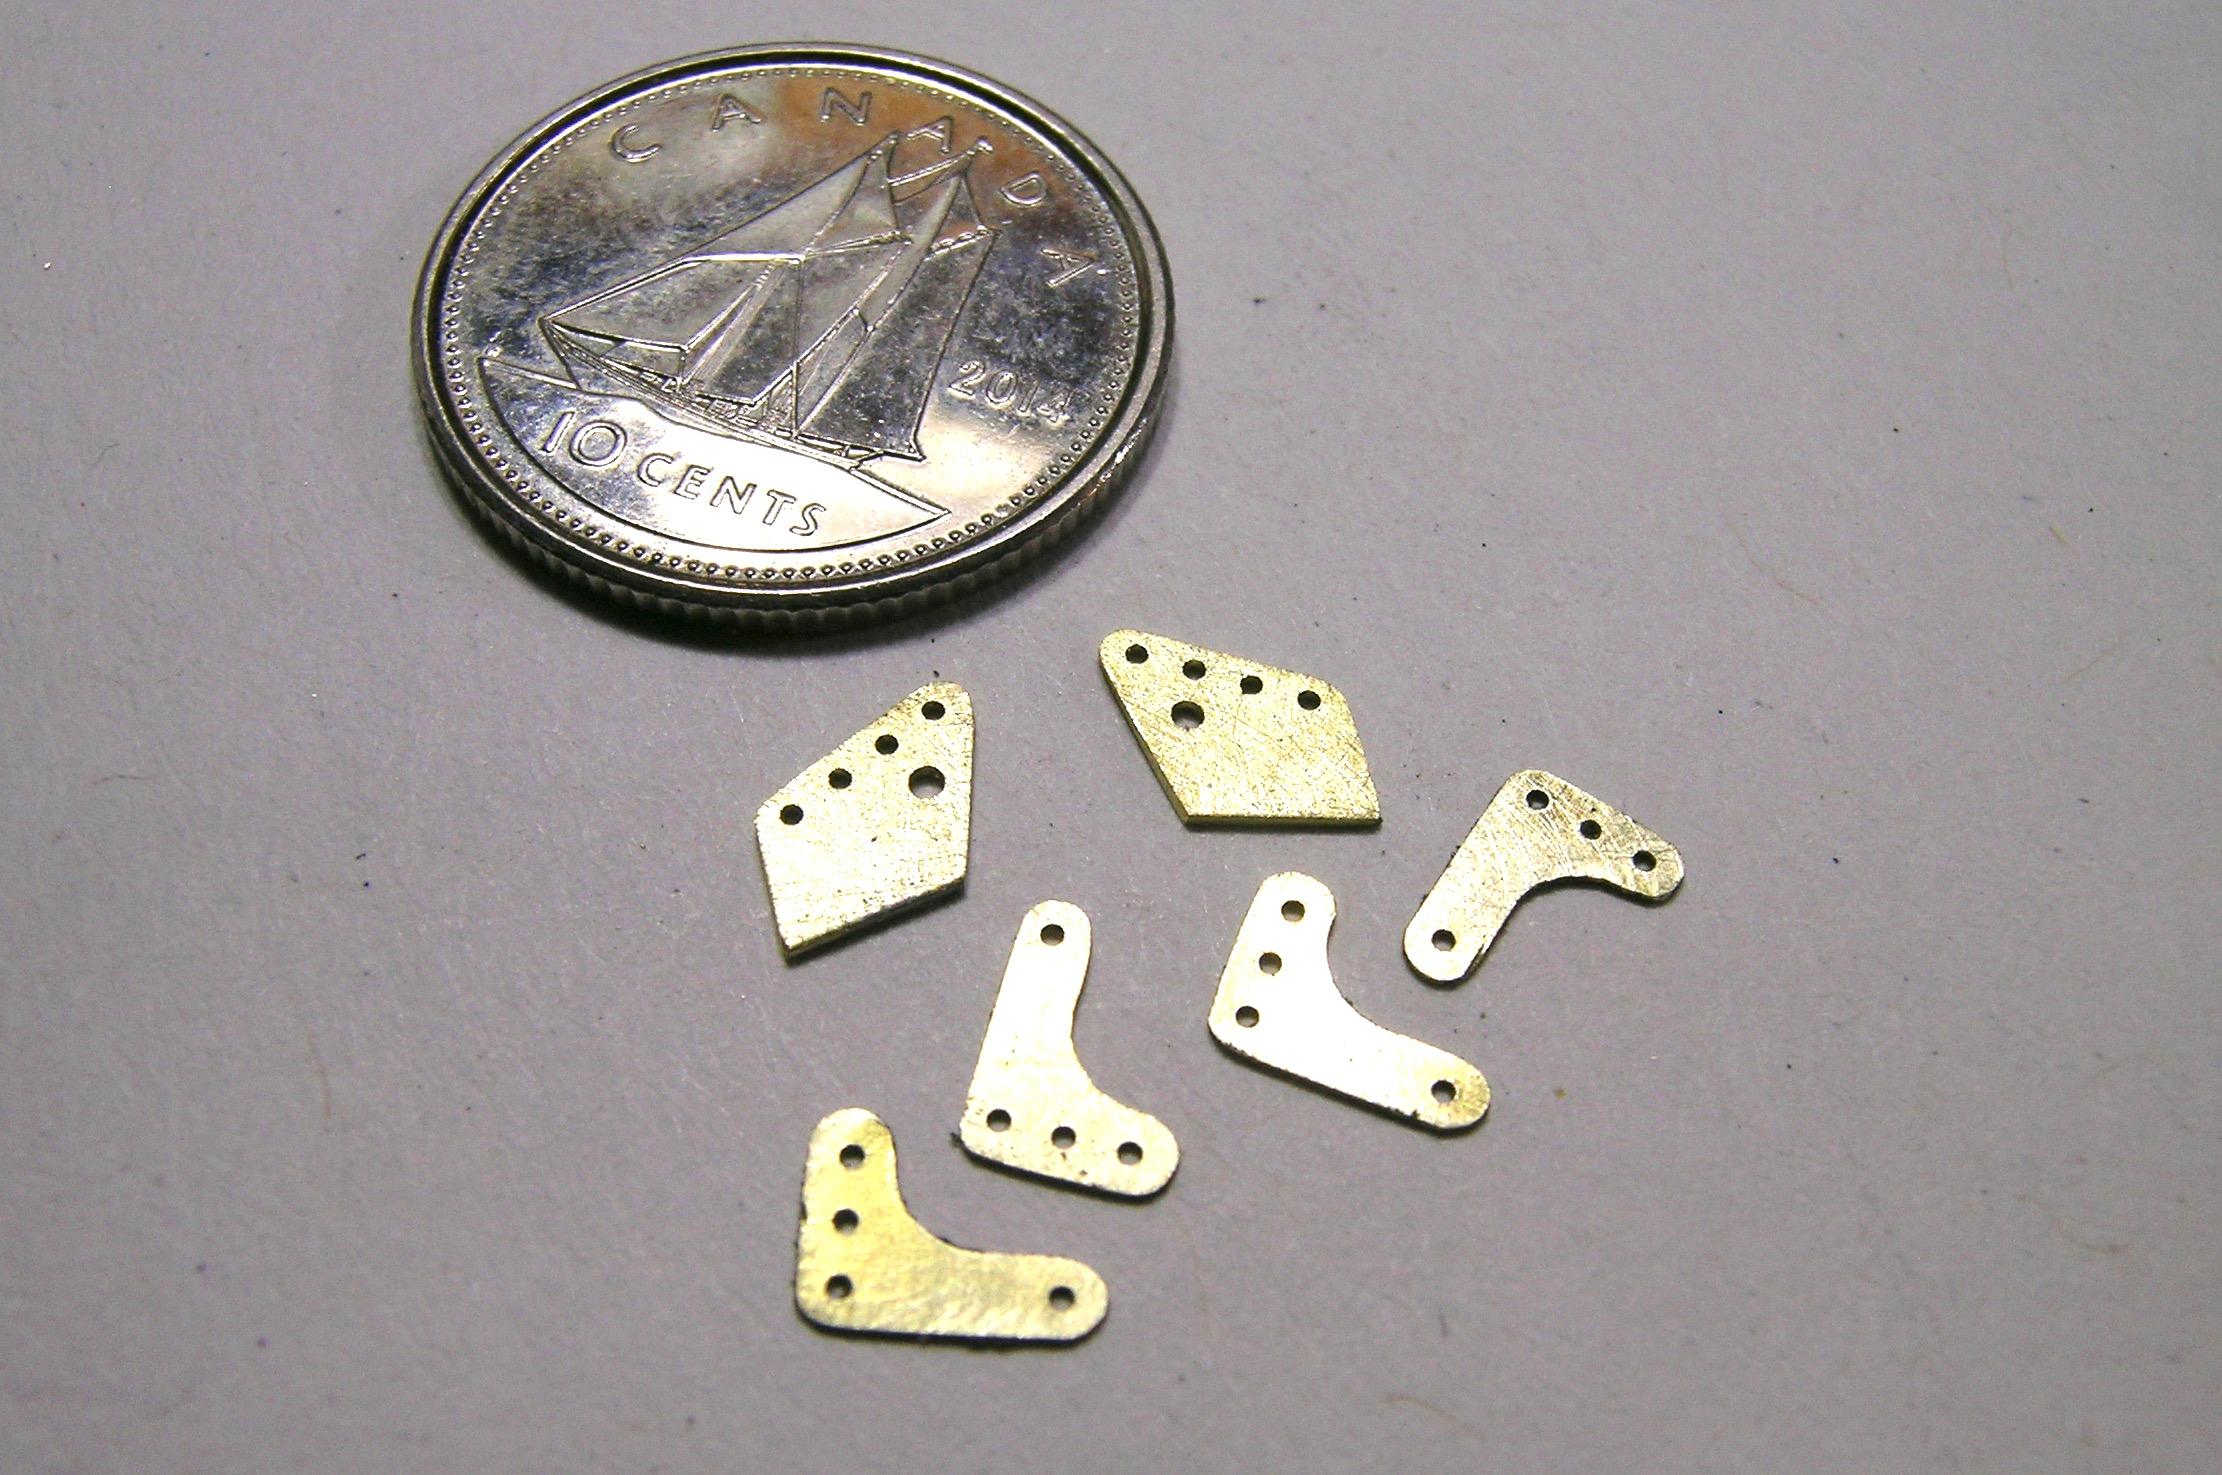
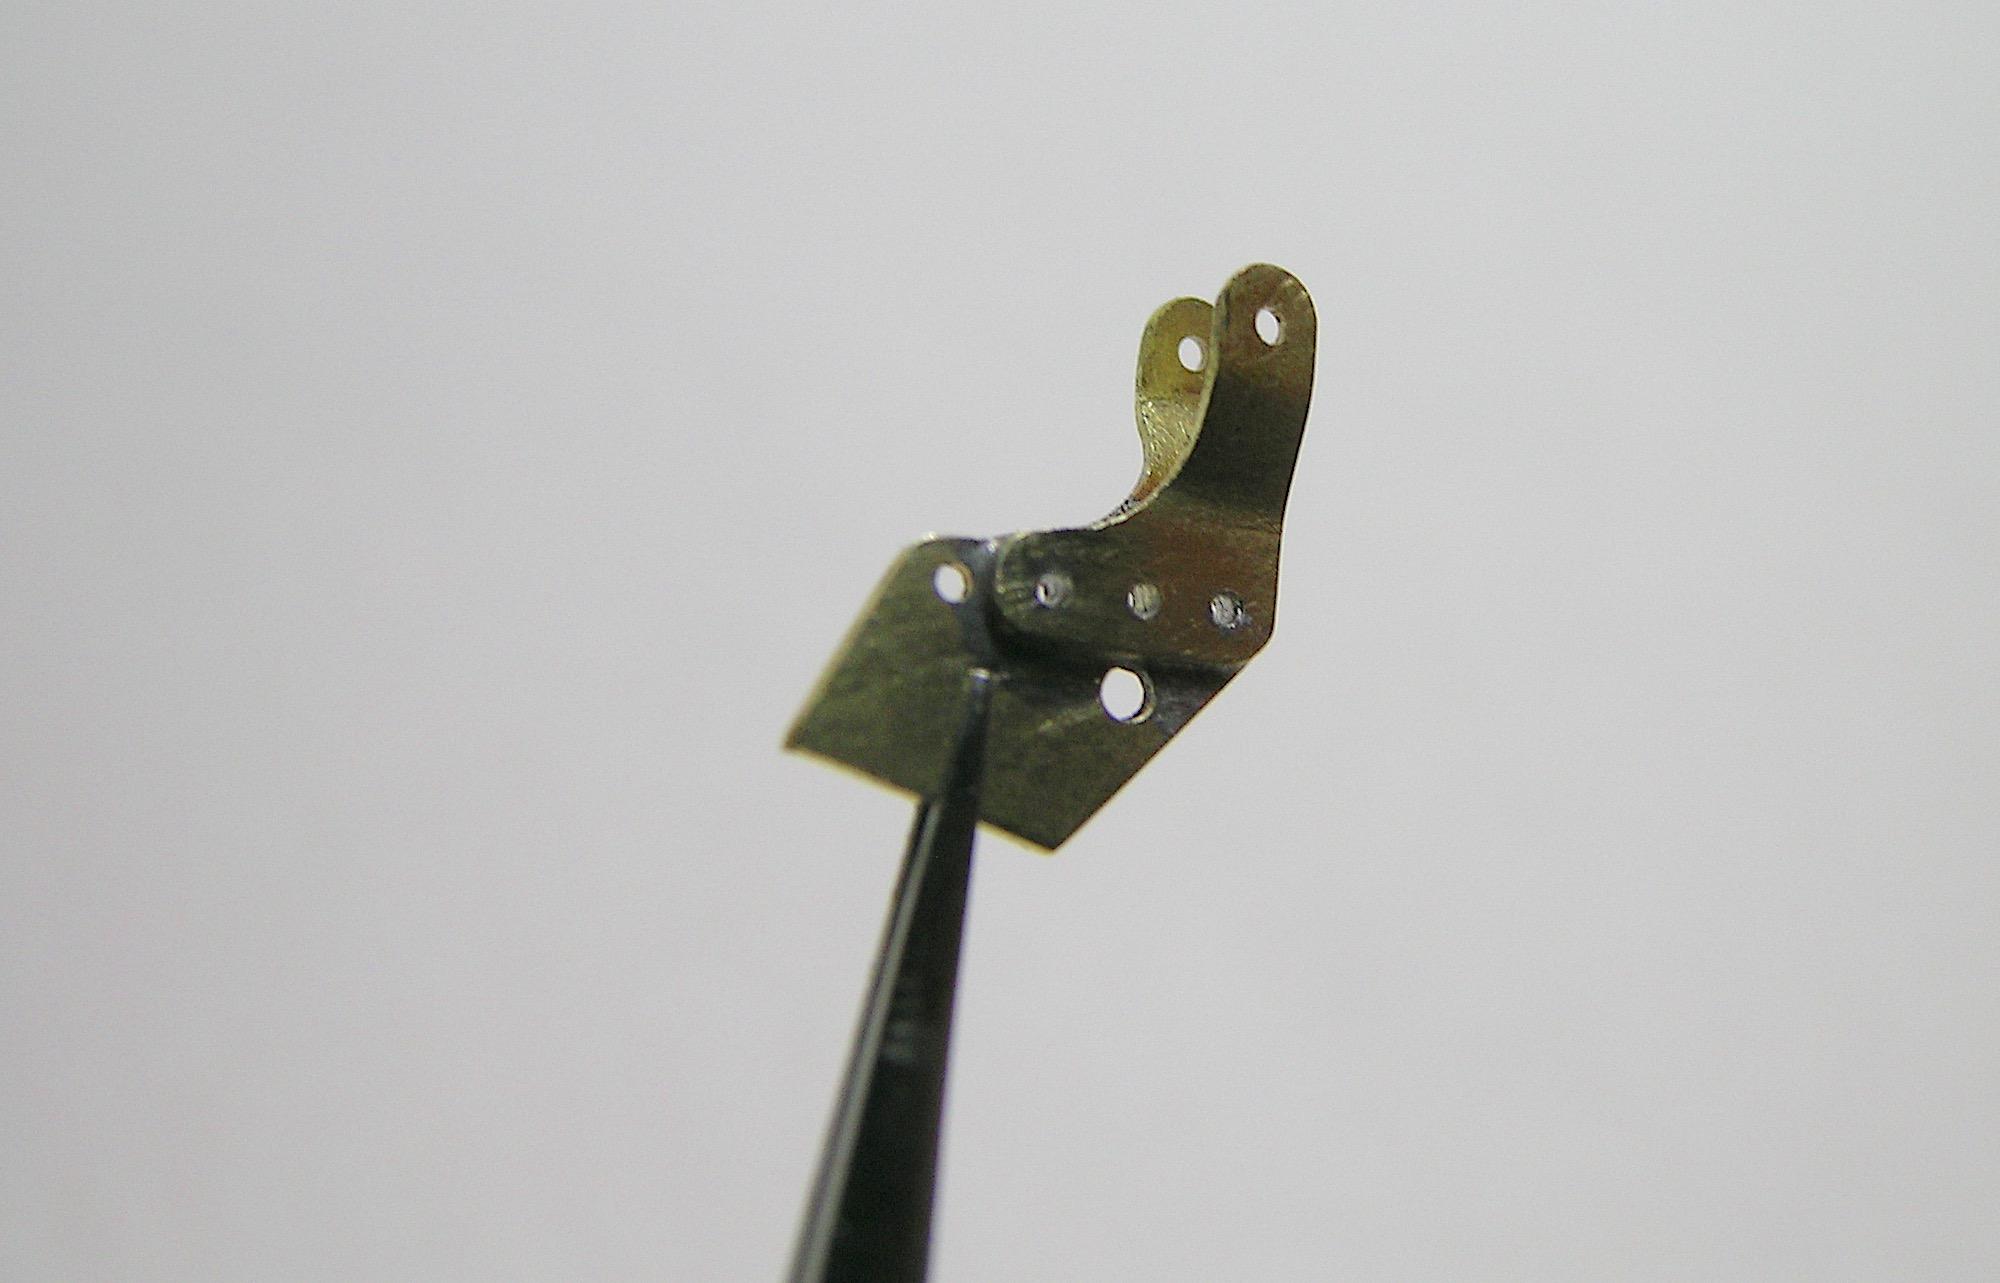
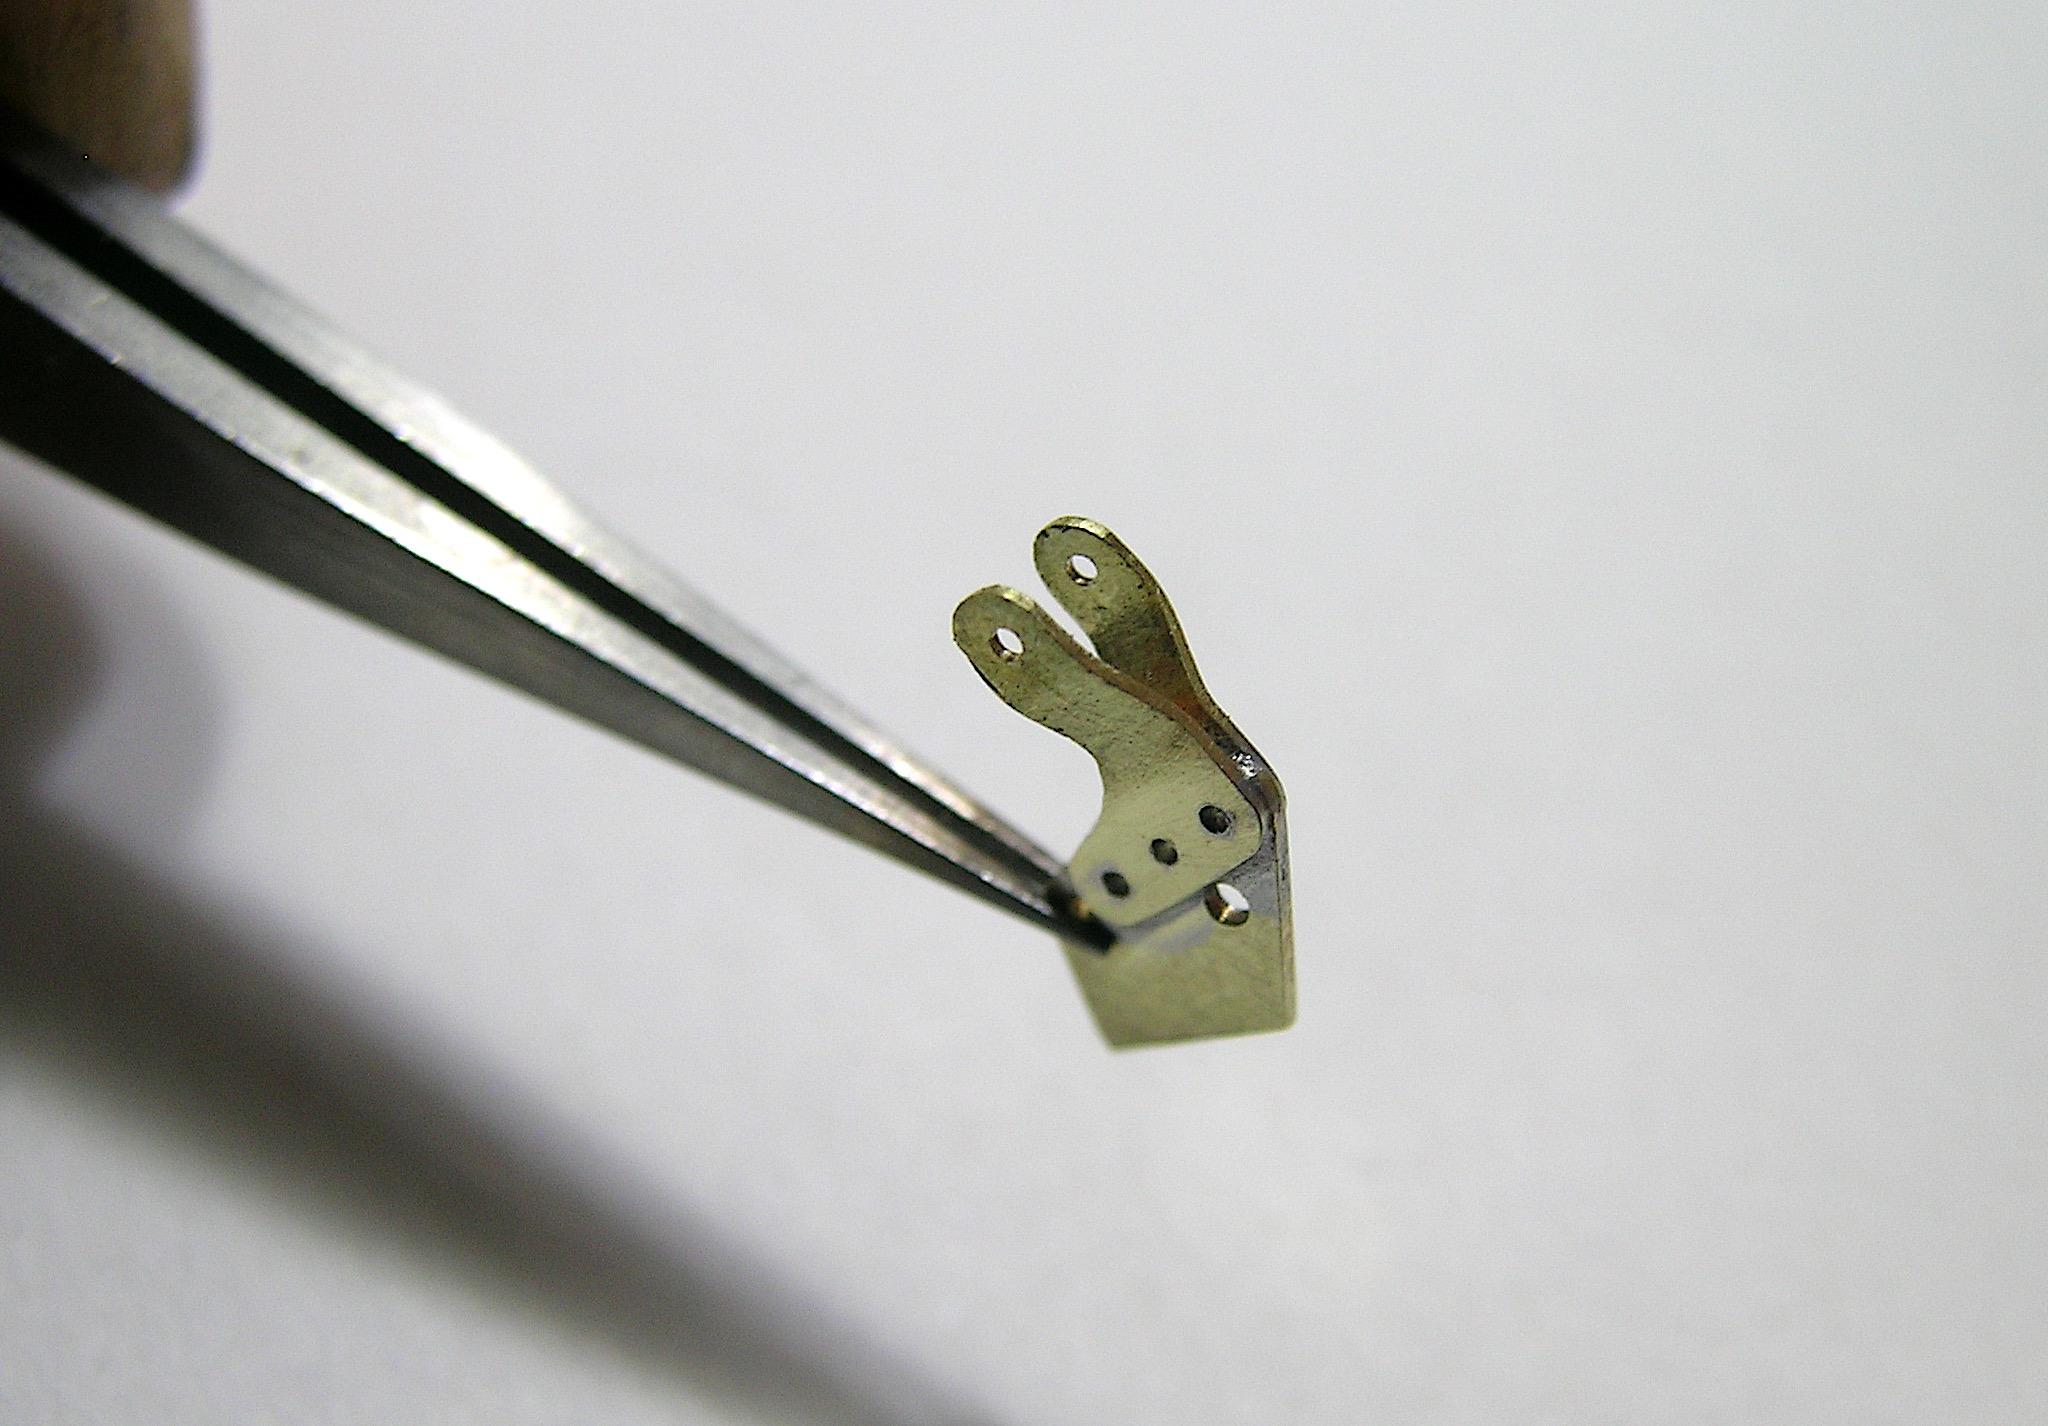
Hello everyone, Like many of us, I have a short holiday break for end-of-year celebrations, so I'll have a little more bench time before I have to return to work. As I mentioned in my last update, I realized that the shock mounts I had made previously wouldn't do the job, it didn't give me enough height for the installation. No room for improvisation, I have to redo them as closely as possible to those of the original kit that I wish to reproduce, I have downloaded the target photo. They will be inserted in the frame rails and painted as part of the frame, I will add small bolts at final assembly only as I don't want to hide them with paint. I used brass again for its rigidity and its soldering quality. Merry Christmas! 🎄 Francis The target. I cut a slot in the frame rail using a hand saw to insert the new bracket, I used 0.015" brass for the main part. I cut and filed the attachments using 0.010" brass. They are now permanently welded, I will add small aluminum bolts during final assembly. Different angle. A little test to see if it will do the trick. Different perspective, now I will need to add the attachment point on the lower control arm and determine the height of the shock.
-
Pony Express 70s BB/FC ex M/T Pinto
AmericanMuscleFan replied to Ian McLaren's topic in WIP: Drag Racing Models
Superb workmanship Ian, a pleasure to watch, very useful too! 👍 -
’72 Dodge Demon Drag Racer 1/25 scale
AmericanMuscleFan replied to AmericanMuscleFan's topic in WIP: Drag Racing Models
Thanks Will, They are not bad but not that good, I would have liked to have brass rods just a little thinner but I was forced to take what I had in hand. The recent strike at Canada Post forced me to make concessions! Thanks Rich! Yes, the shock absorbers will be functional, it's not difficult to do, I have already made some for the rear suspension of my pickup (D100) and they work wonderfully. I'll tackle this in the next few days. Thanks Ian, I don't know what you use for your welds, I use Tix (flux too) and it's very versatile but maybe it's not what produces the strongest joints? Thanks Bob, I hope to get into making more interesting pieces soon, so come back and check back from time to time. Francis -
’72 Dodge Demon Drag Racer 1/25 scale
AmericanMuscleFan replied to AmericanMuscleFan's topic in WIP: Drag Racing Models
Thanks Daniel, I also think that chrome plated would be nice. I inserted 0.020" pins into the ends of the rods for the lower control arms, I don't have 100% confidence in the strength of the welds for the small brass parts yet. Francis -
Badman C/A (ca. 1975)
AmericanMuscleFan replied to Straightliner59's topic in WIP: Drag Racing Models
You are so resourceful Daniel, clever idea with the electric eraser, who would have thought of that except you? 😁 You must be limited to a fairly large hole size however because these carbide drill bits are very brittle (when I say big I don't mean 1/8 inch holes). Your project is progressing well, precision work, what else can we expect from you my friend! 👌 -
’72 Dodge Demon Drag Racer 1/25 scale
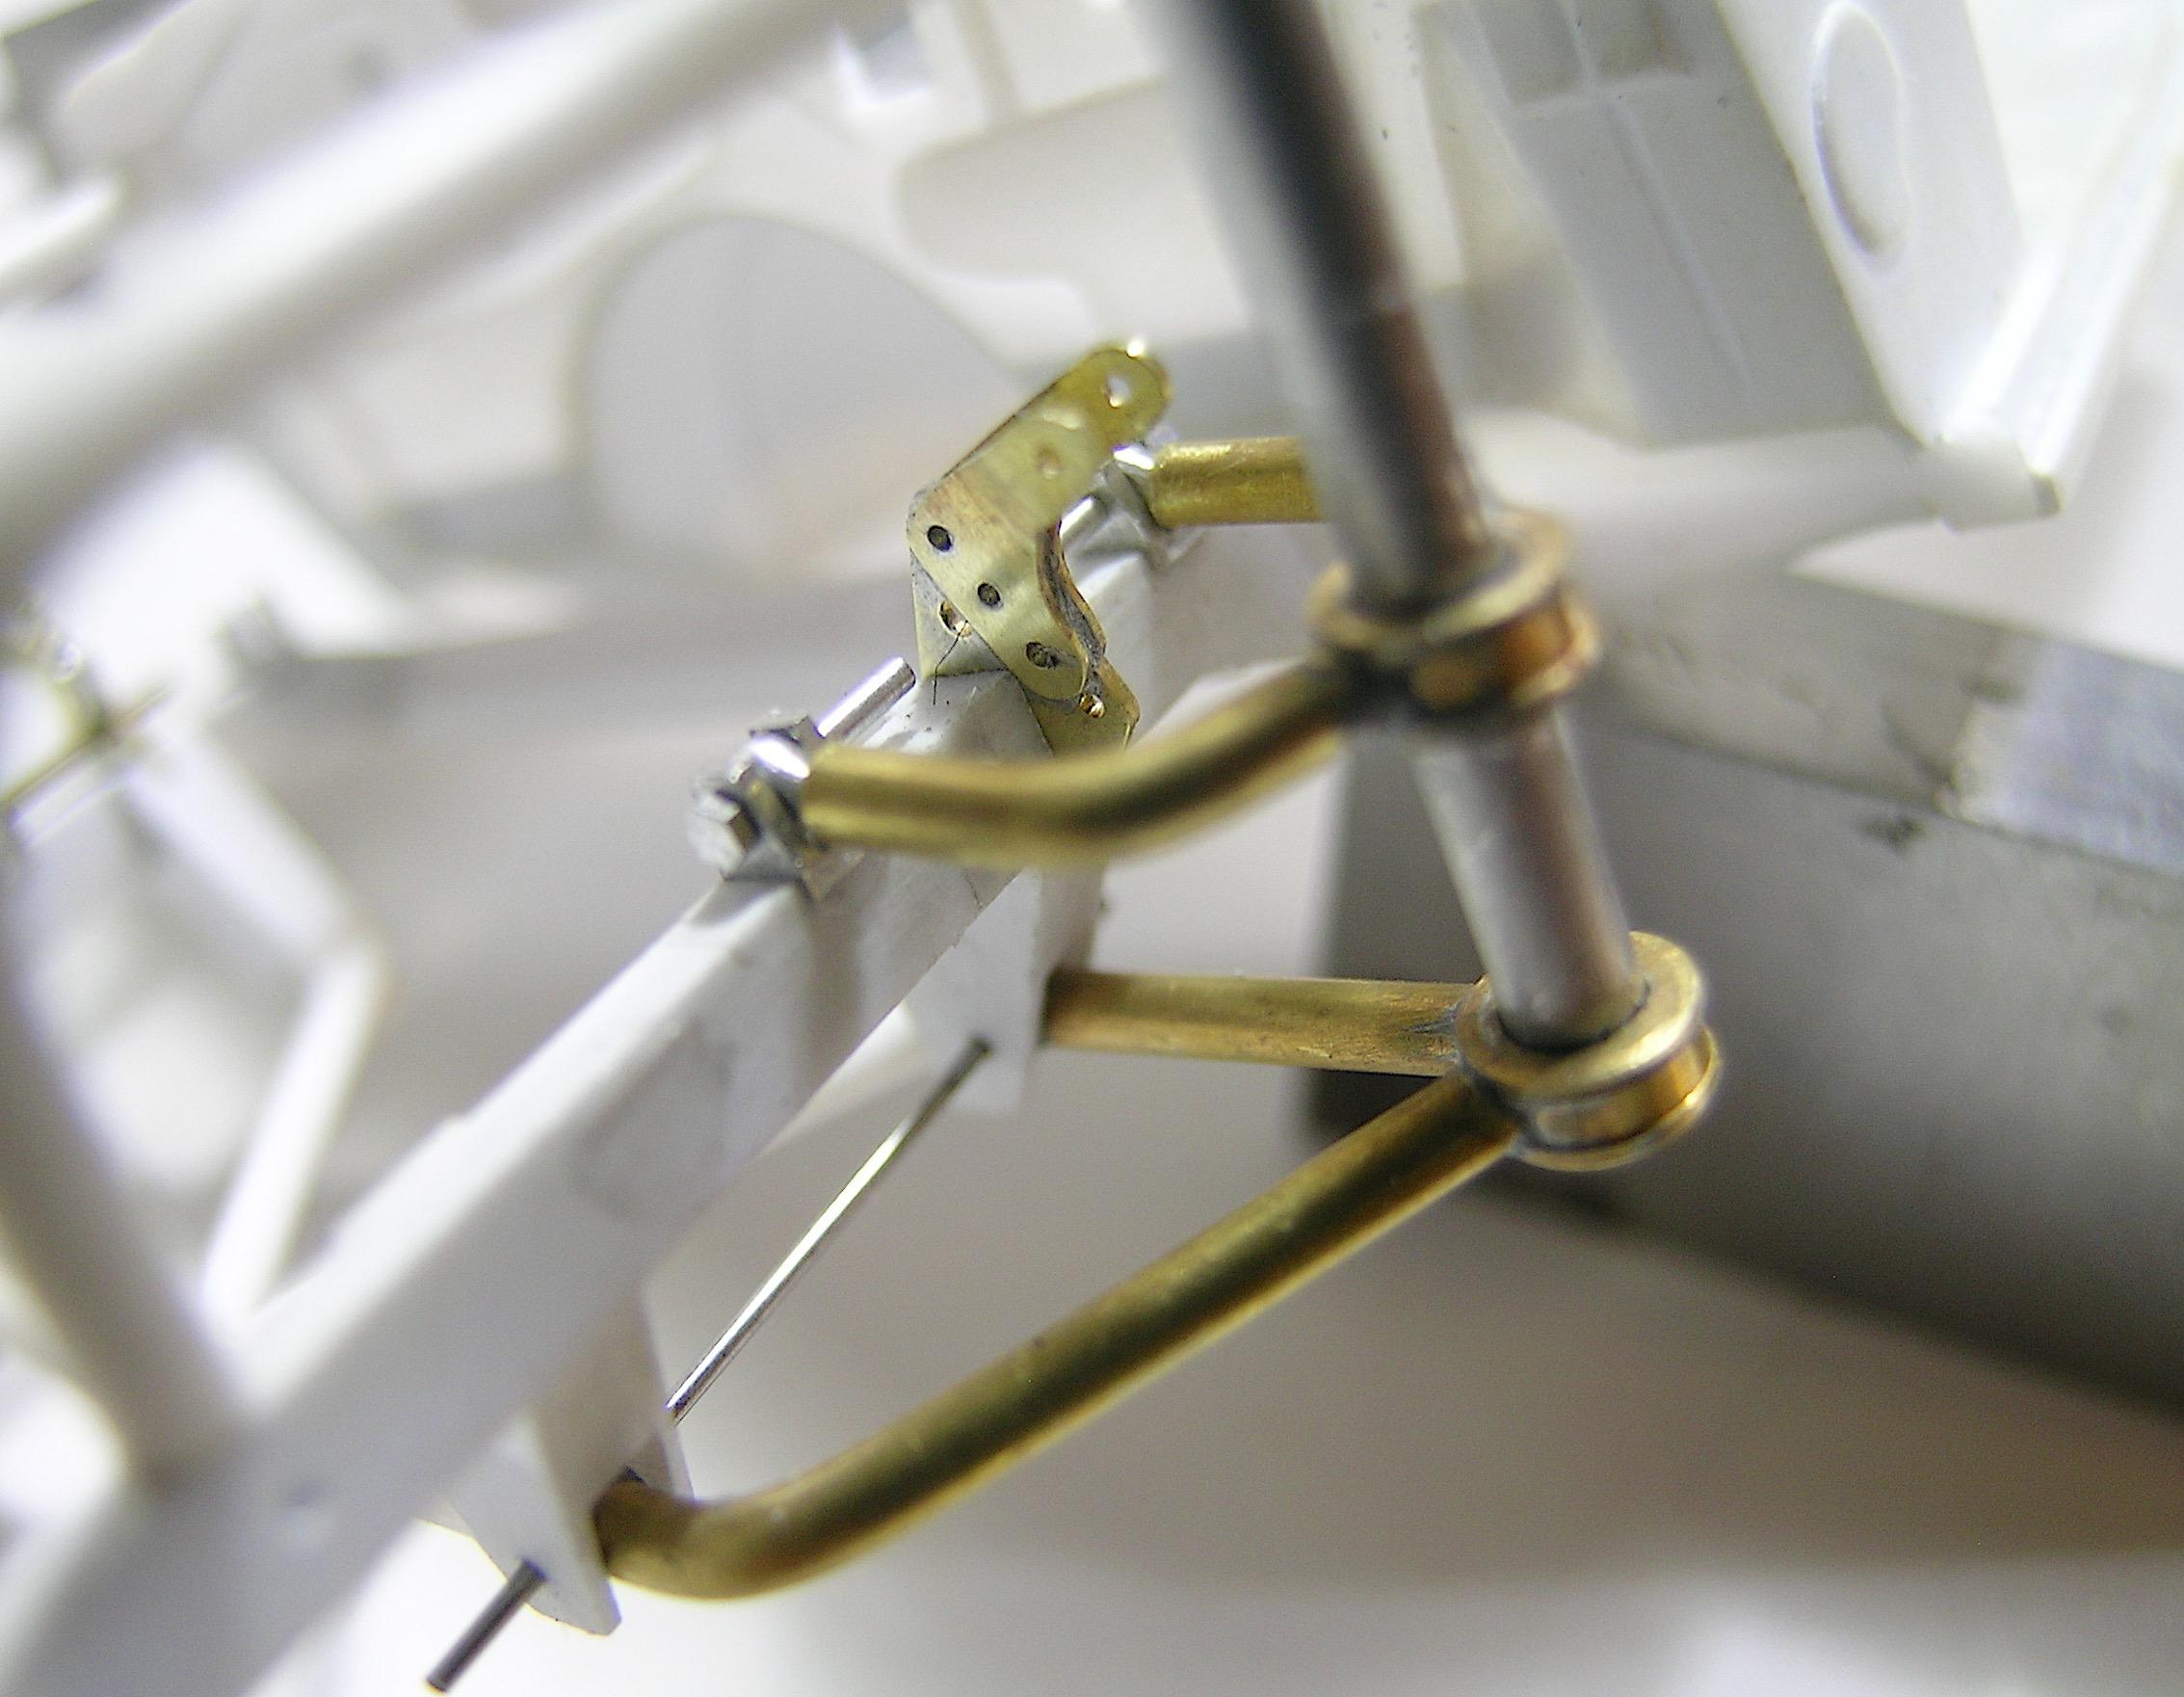
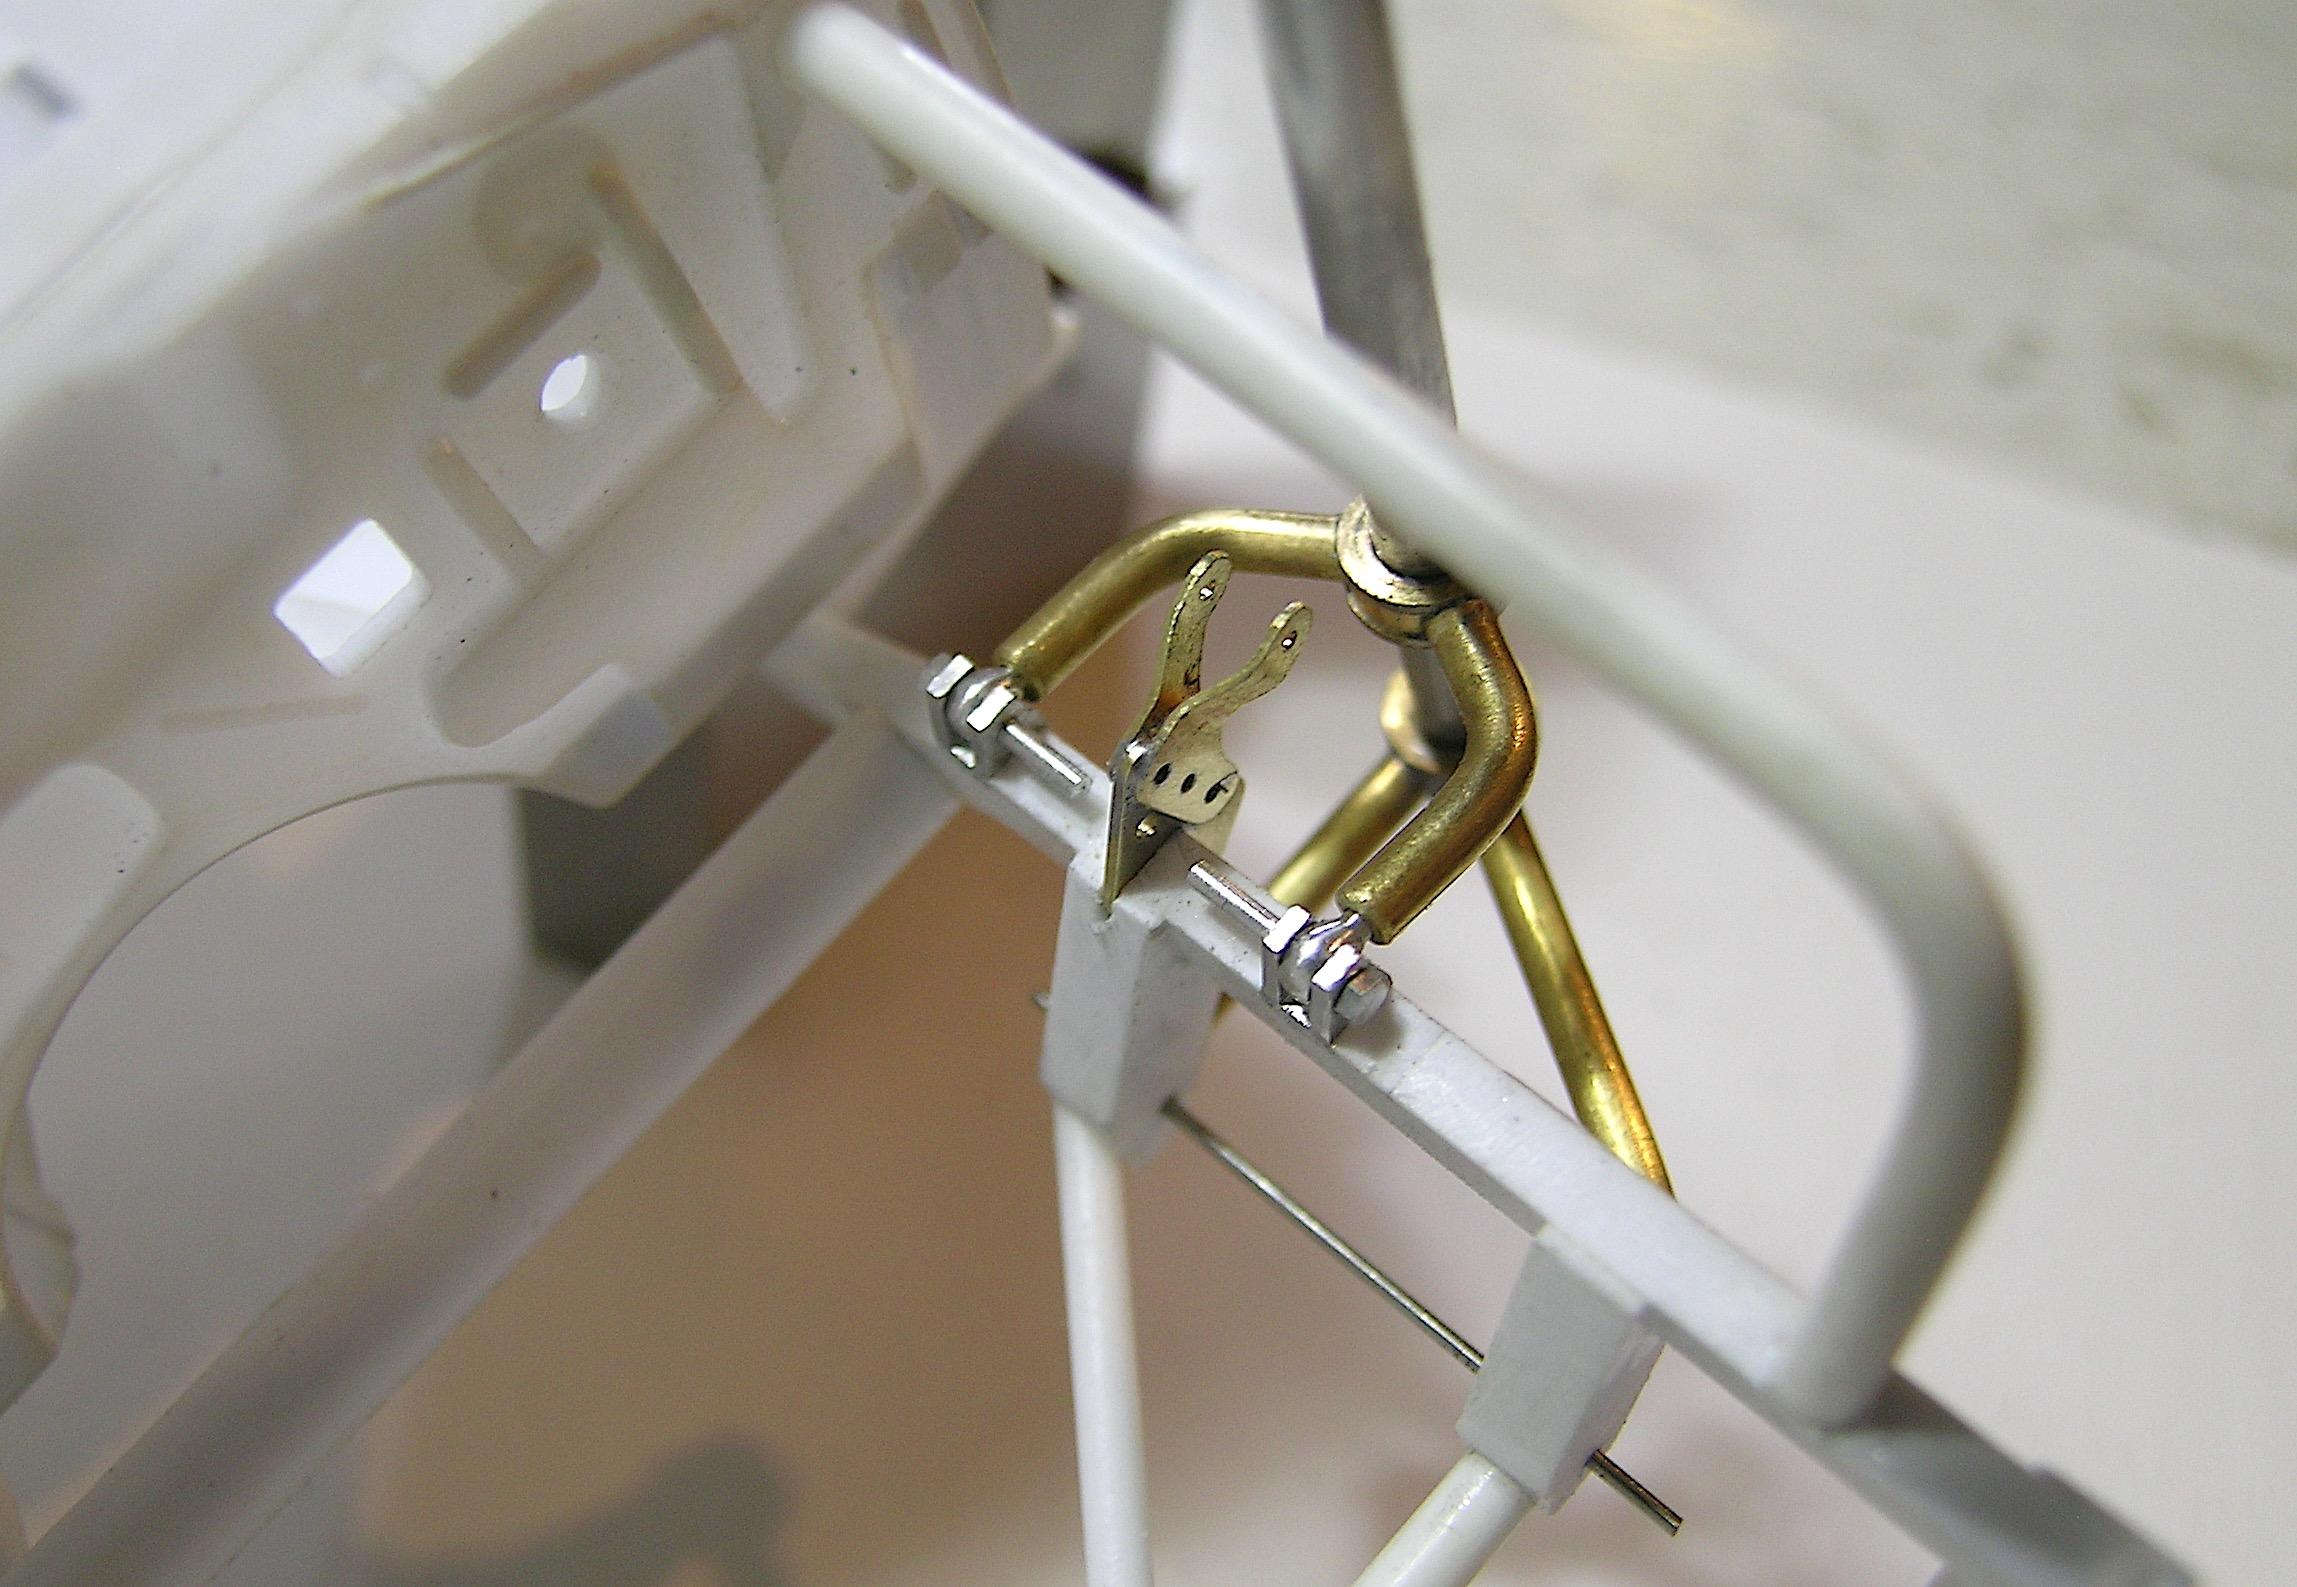
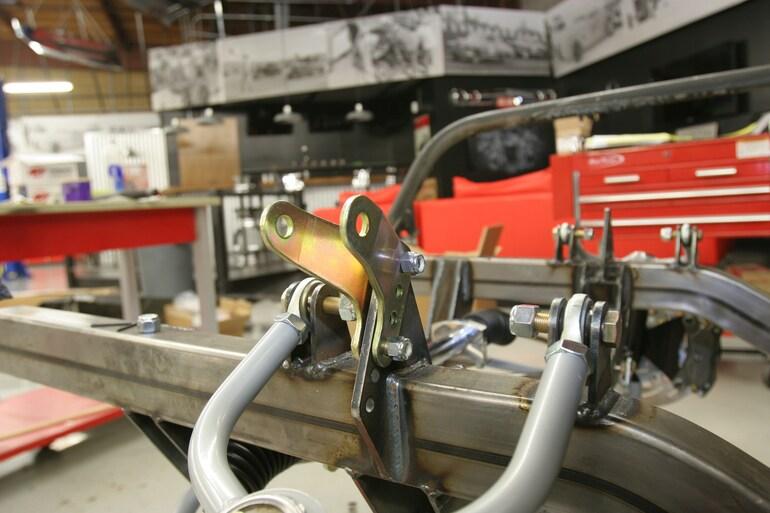
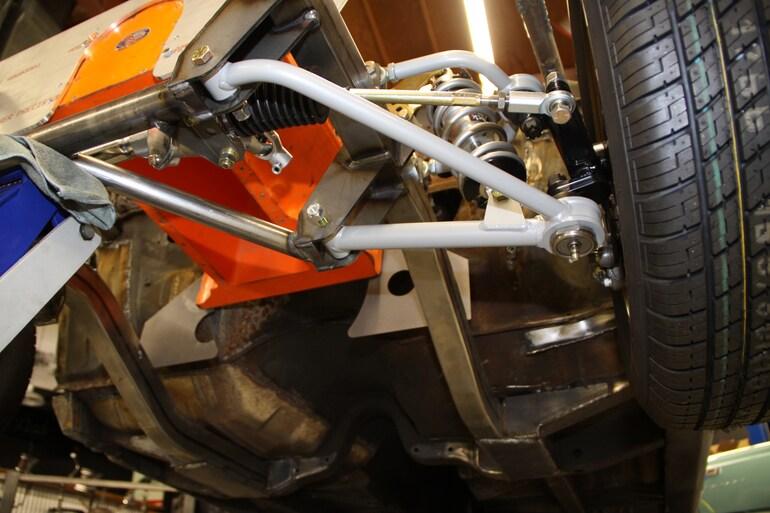
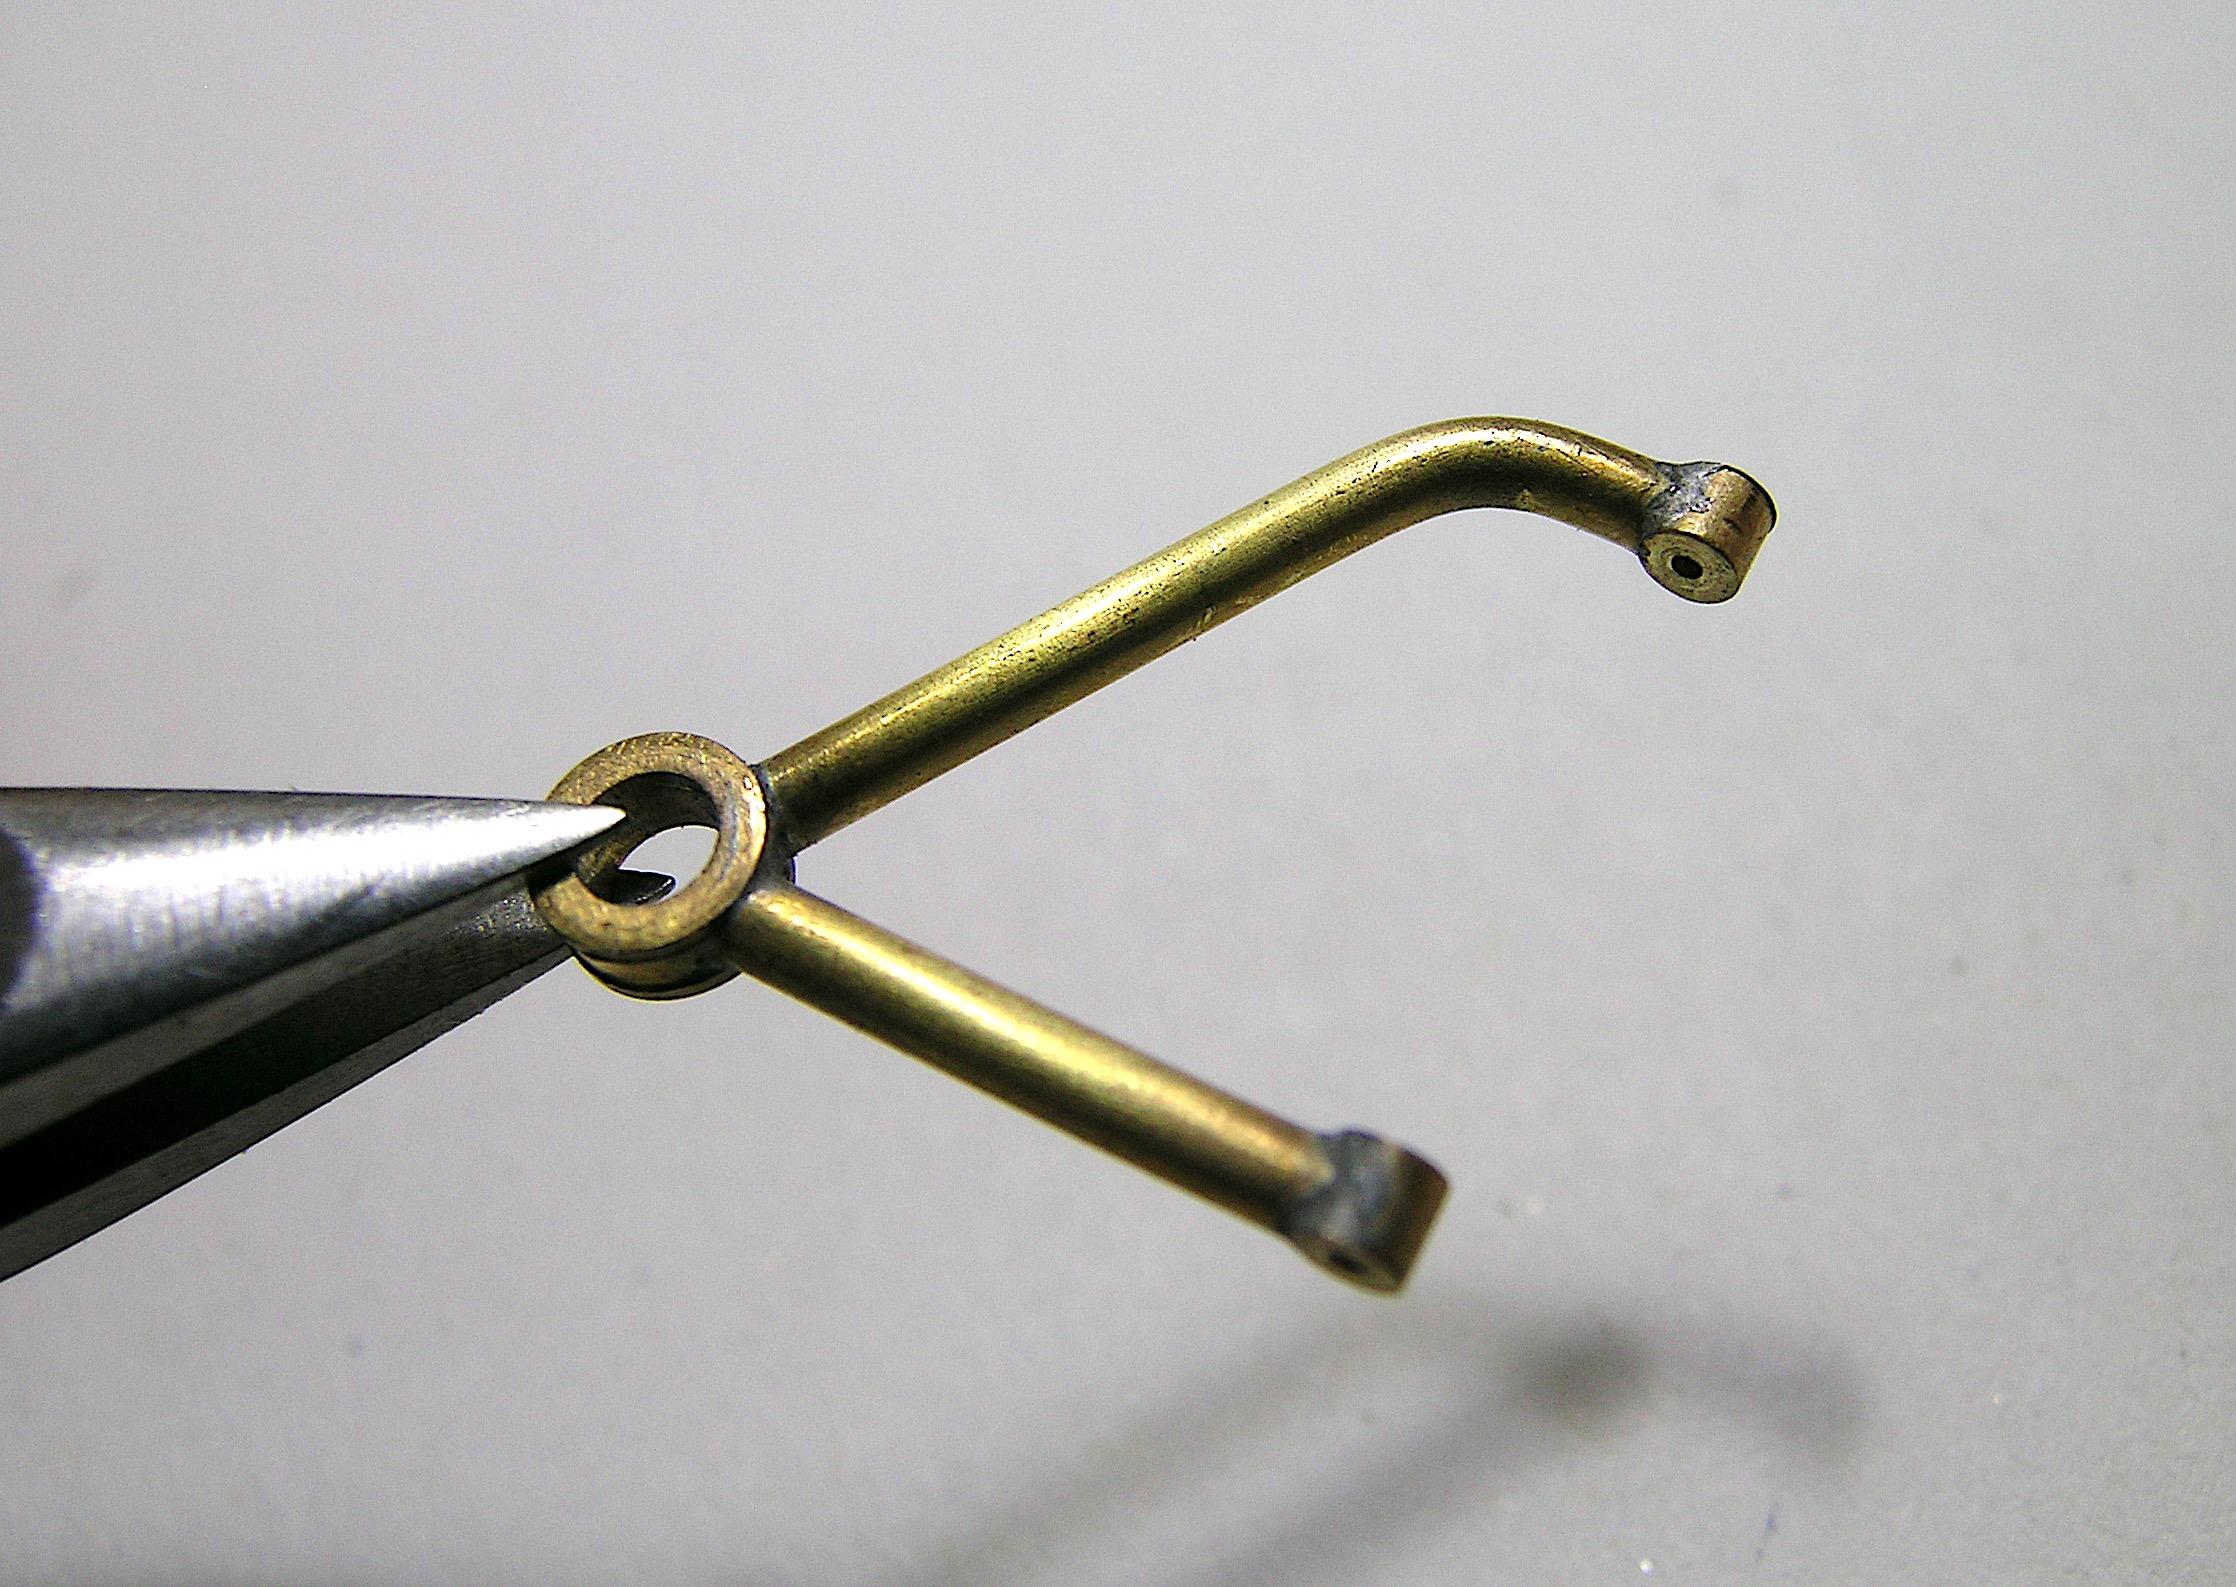
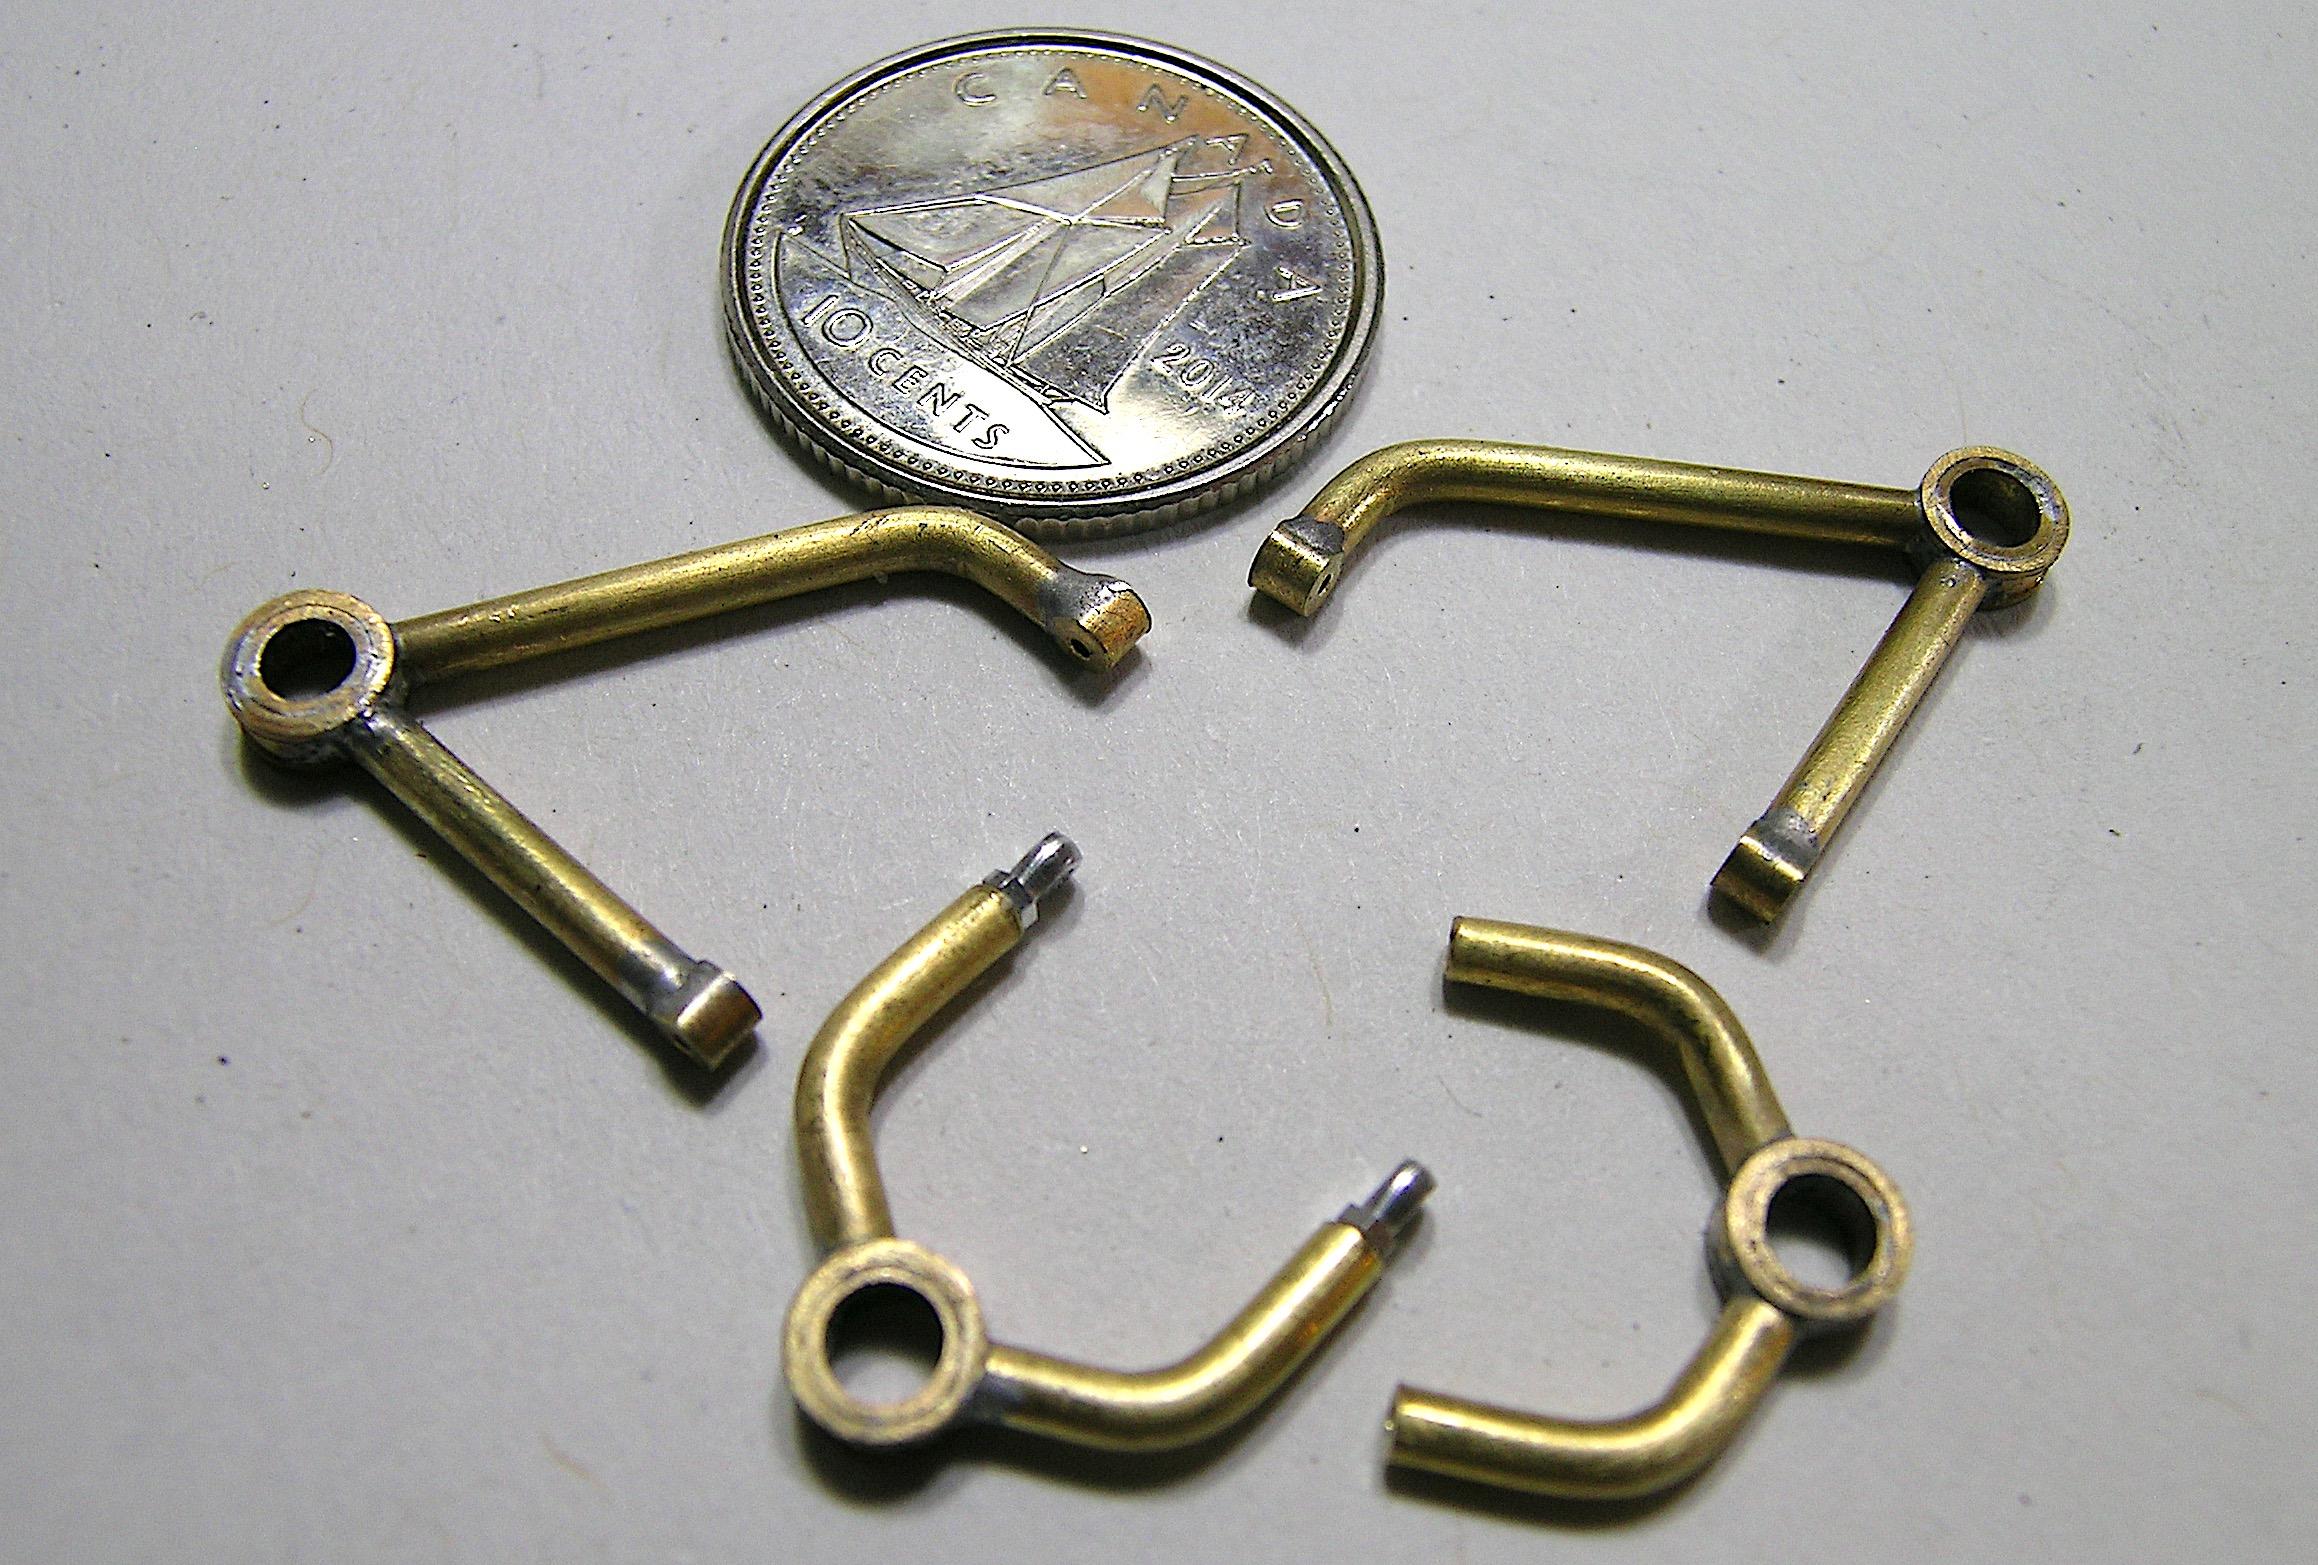
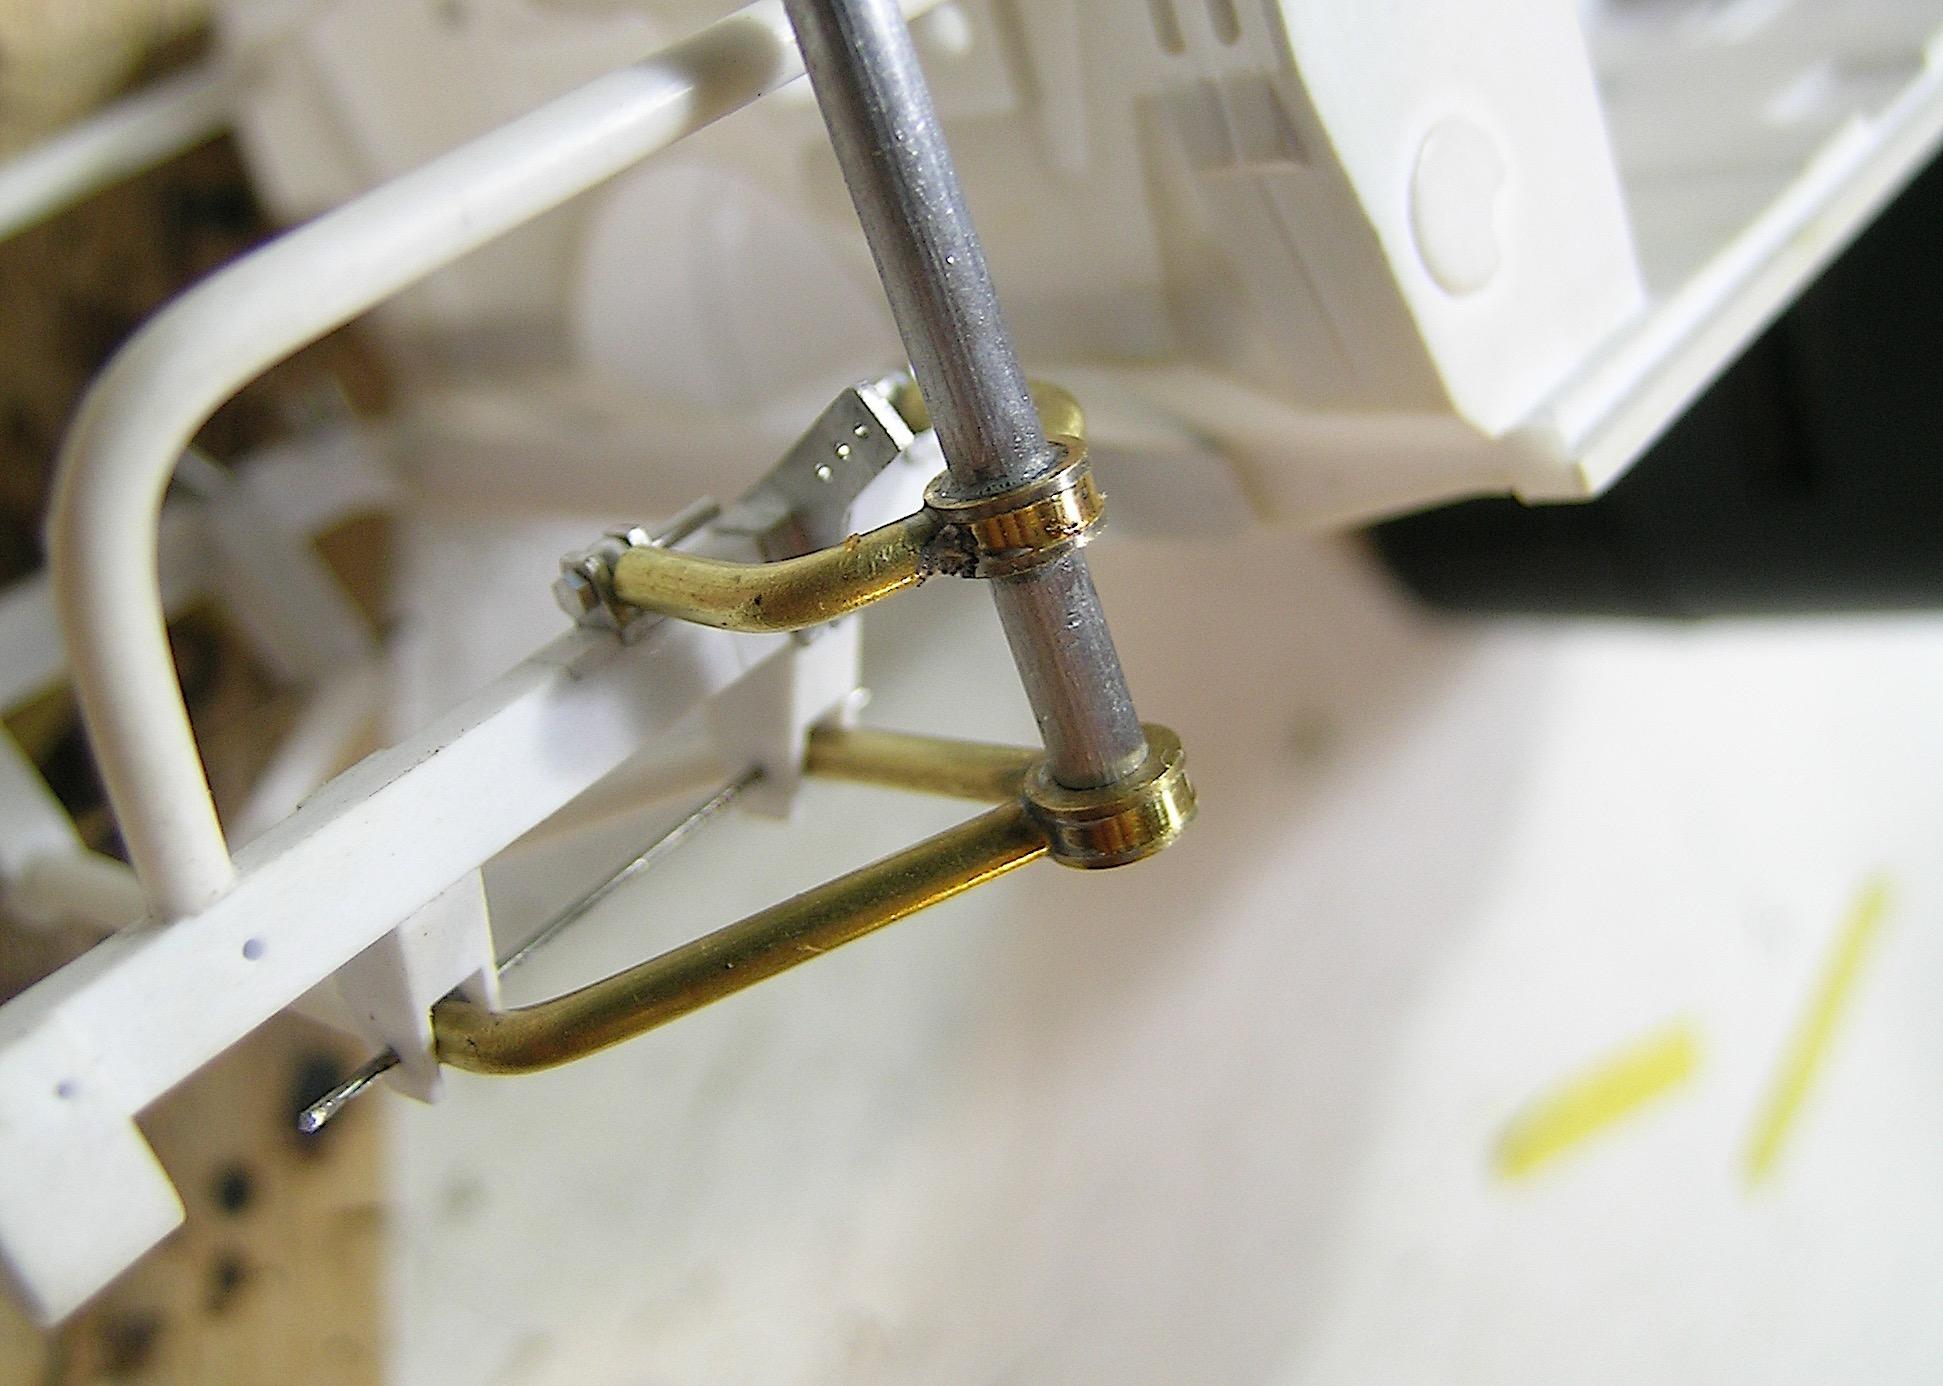
AmericanMuscleFan replied to AmericanMuscleFan's topic in WIP: Drag Racing Models
Hello everyone, Just a quick update this evening to show you the lower control arms I made over the weekend. This is mainly the result of bent brass rods and soldering, I don't have any photos of the process so I didn't see the point in doing it. I downloaded the reference image which I used to mimic the parts. In the last photo I inserted an aluminum rod to check the alignment (which is very good by the way) but I realized that it will be necessary to modify the supports of the coil over shock. I will still have to add the attachment point for the coil over on the lower control arms as you can see in the reference photo. Many small but critical parts will need to be machined, the front direction and suspension combo is one of the most difficult parts of the project in my opinion. I'm in uncharted territory but I like the challenge! Francis The target. One of the lower control arms, I didn't have measurements, I referred to the photo for general proportions. A group photo, I'm thinking of plating them in chrome rather than painting them what do you think? I inserted an aluminum rod to check the alignment and realized that I will have to modify the coil over shock mount on the frame rails, the ones I made will not provide sufficient height.