AmericanMuscleFan
-
Posts
3,058 -
Joined
-
Last visited
Content Type
Profiles
Forums
Events
Gallery
Everything posted by AmericanMuscleFan
-

64 Dodge D100 Pickup Pro Street
AmericanMuscleFan replied to AmericanMuscleFan's topic in WIP: Drag Racing Models
Thanks for your kind words and continuous support Daniel! I'm also very happy to be back on the bodywork and making the final adjustments before I can think about putting paint on it. The primary reason for this thread is the creation of a 1964 Dodge D100 in styrene above all else and the fabrication of the mechanical parts are only accessories to make it a racing vehicle. Thank you for reminding me my friend! ? Take care, Francis -
64 Dodge D100 Pickup Pro Street
AmericanMuscleFan replied to AmericanMuscleFan's topic in WIP: Drag Racing Models
Thanks Ron! You are absolutely right and I have a strategy to put each component in a particular order to assemble the interior. I did some testing and it should be fine but it won't be a piece of cake. There will be no easy as they say and the open doors will certainly help... ? Take care, Francis -
64 Dodge D100 Pickup Pro Street
AmericanMuscleFan replied to AmericanMuscleFan's topic in WIP: Drag Racing Models
You are right Ian! As with any construction, the foundation is often hidden but makes all the difference in obtaining the desired results. A house needs a good foundation to last over time... Take care, Francis -
charlie libby 1965 mustang dragcar
AmericanMuscleFan replied to charlie libby's topic in WIP: Drag Racing Models
WOW Charlie, your stamping die is very interesting and i never thought about using clear lexan for this and it is just smart, I'm going to have to make an inventory of all these types of fancy plastics... I really love the plumbing on your rear end and your steering wheel is stunning! If I lived closer to you I would be happy to help you with the 1mm nuts as I probably have smaller fingers than you and I would be happy to take a look at your fantastic work in person my friend!!! ? -
Very interesting project Stephen! I've seen a lot of this Nova body style on drag racing tracks and they look great. I love big-tire cars and your project fits perfectly into this category! A big block engine would be a must for this car by the way but I think that's what was already included in the kit anyway! ?
-
Very beautiful build Mike! The '71 Oldsmobile (Cutlass or 4-4-2) was one of my favorite GM body styles! I especially love the front end which looks like the Buick GS (or GSX) from the same era which is another great design from GM. There's no denying it, car enthusiasts were spoiled for choice at that time with all these beautiful body models available in car dealership courts, regardless of the brand... Very nice color by the way! Bravo! ?
-
64 Dodge D100 Pickup Pro Street
AmericanMuscleFan replied to AmericanMuscleFan's topic in WIP: Drag Racing Models
I agree with you Marcos, I can clearly see your attention to detail in your own builds so your comment is highly appreciated my friend! ? Francis -
64 Dodge D100 Pickup Pro Street
AmericanMuscleFan replied to AmericanMuscleFan's topic in WIP: Drag Racing Models
Thanks for your support Tim! I have to admit that this part of the build may seem rather insignificant considering all the work done so far, but I don't think a clearly visible scar below the cabin would have been acceptable (at least for me ...) when the primary goal was to reproduce with as much detail as possible every nook and cranny of the original truck. I have for a long time tried to reproduce as many details as possible in my builds but I think I went a little hard on this one, will hope that it will not catch me at the end... time will tell! ? Francis -
64 Dodge D100 Pickup Pro Street
AmericanMuscleFan replied to AmericanMuscleFan's topic in WIP: Drag Racing Models
Hello everyone, Just a little update this morning before I get back to work, it's kind of "small step for my build but giant leap in the next steps". The floor pan is finally glued in place with the cabin support brackets. I don't know how many times I put this part back and forth in the cabin but the plastic was starting to turn yellow so I think that was a sign... Good news, the floor pan fits like a glove and the body is straight as an arrow! I know painting the interior and assembling will be a nightmare but I've always admired artists who assemble sailboats inside a bottle, so I'll get a little idea of the challenge (but with a much larger opening anyway!). I have a plan or sequence to follow to install the components inside the cab, so hopefully everything will work as expected... I was never the guy to take shortcuts so it continues... Comments and suggestions are welcome. Take care, Francis Floor pan permanently glued in place. Different view. Seen from the rear position.
-
De Foosing the FD-100
AmericanMuscleFan replied to butter's topic in WIP: Model Trucks: Pickups, Vans, SUVs, Light Commercial
The A arms look good Ron! Good tip for the glue, it deserve a try... a guy never has too many tricks up his sleeve! ? -
64 Dodge D100 Pickup Pro Street
AmericanMuscleFan replied to AmericanMuscleFan's topic in WIP: Drag Racing Models
Thanks for the comment Scott! I was lucky to still have that negative film I made for a '68 Dart build because I had nothing else in my part bin to make gauges. I would have been forced to make a "custom" type dashboard and it's really not what I wanted for this project! Francis -
Vintage Top Fuel FEDs, 1:16 brass chassis
AmericanMuscleFan replied to Mike Williams's topic in WIP: Drag Racing Models
Another fantastic tip Mike! Your curves are simply perfect and I will follow your advice with all the considerations they deserve when I need to proceed with this kind of operation. Nice bending tool by the way! Francis -
64 Dodge D100 Pickup Pro Street
AmericanMuscleFan replied to AmericanMuscleFan's topic in WIP: Drag Racing Models
Thanks Charlie! Your work is also very inspiring my friend... For anodizing, I bought a variable DC power supply on the internet, but a simple car battery charger set at 2 amps can do the job just fine. There are clever calculations to be done depending on the surface to be anodized but for small parts like we do, I don't think you have to worry. Send me a PM when you are ready to embark on the adventure and I will outline the process if you need help. Francis -
64 Dodge D100 Pickup Pro Street
AmericanMuscleFan replied to AmericanMuscleFan's topic in WIP: Drag Racing Models
Thanks for the kind words Ron! There was minus one for this part, I was about to glue the floor pan in place and there must be a little elf that pulled my ear... Francis -
64 Dodge D100 Pickup Pro Street
AmericanMuscleFan replied to AmericanMuscleFan's topic in WIP: Drag Racing Models
Thanks for your support my friend! I hope I can continue to have this effect on you Tim but I must admit that I am a little surprised when you know what you are capable of achieving my friend! By the way, the postman left a small envelope on my doorstep today... ? Francis -
64 Dodge D100 Pickup Pro Street
AmericanMuscleFan replied to AmericanMuscleFan's topic in WIP: Drag Racing Models
Thanks for the kind comment Glen! I am far from being a watchmaker but I must admit my love for switch watches and their superb movements. Just to think that these movements were invented hundreds of years ago makes me wonder... ? Francis -
Vintage Top Fuel FEDs, 1:16 brass chassis
AmericanMuscleFan replied to Mike Williams's topic in WIP: Drag Racing Models
Masterful technique for a masterful result! The photos speak for themselves, there is not much to add except to thank you for sharing your technique in such detail. I dare to hope that a place like this forum will make it possible to perpetuate this art which tends to slowly disappear to the detriment of the already done... Thanks for wowing us Mike! ? -
68 Charger rear-engined late Hemi Pro-Touring Concept
AmericanMuscleFan replied to Claude Thibodeau's topic in Model Cars
Well we can't say that you like shortcuts my friend... Why keep the engine in the engine compartment when the trunk is big enough to move it there? Just ask to Claude and you get the answer and what an answer...! Another vision that only you can have my friend, you really put your motto into action: "fun with styrene"... Maybe you are starting to get too inspired by the glue fumes? It is now part of the new SRT family which translates to: Super Radical Transportation! Bravo! ? -
Great work Steve, the dash looks awesome! Nice color on the engine block too, is there a sound box between the seats? If so, I'm sure the driver won't hear any noise or crackle from the cabin while listening to Sammy Hagar's "can't drive 55", do you know the tune? ?
-
64 Dodge D100 Pickup Pro Street
AmericanMuscleFan replied to AmericanMuscleFan's topic in WIP: Drag Racing Models
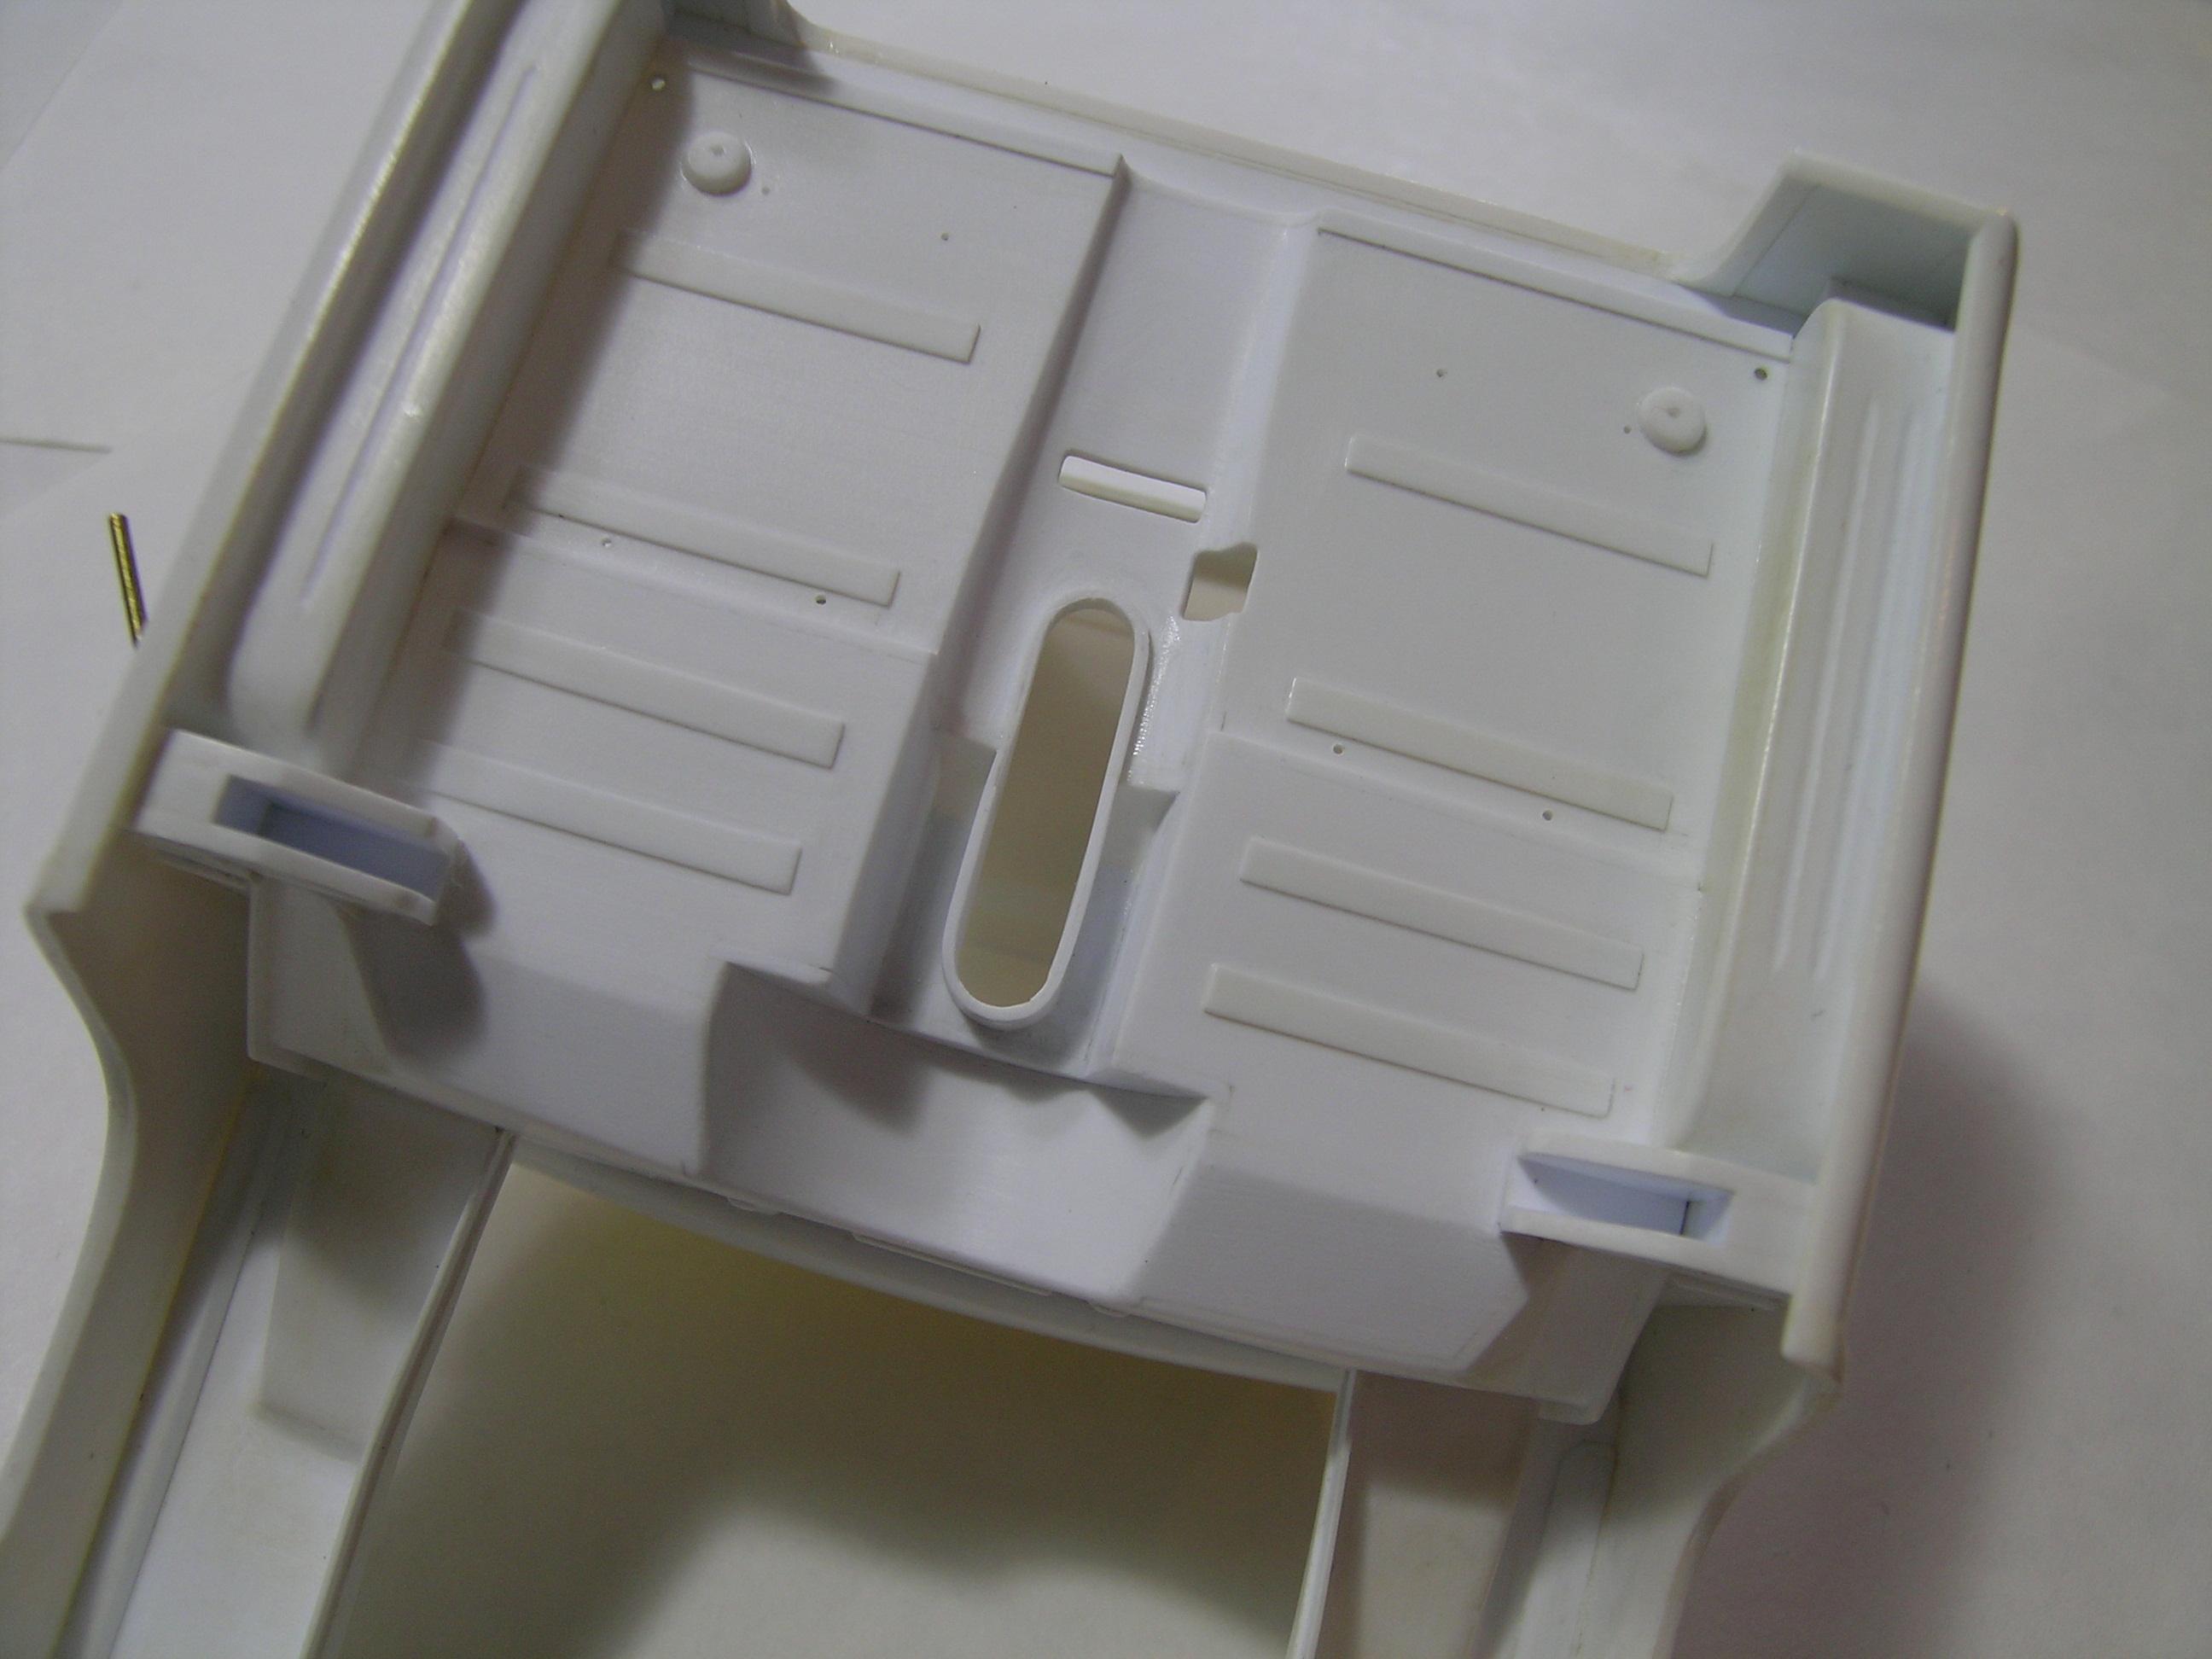
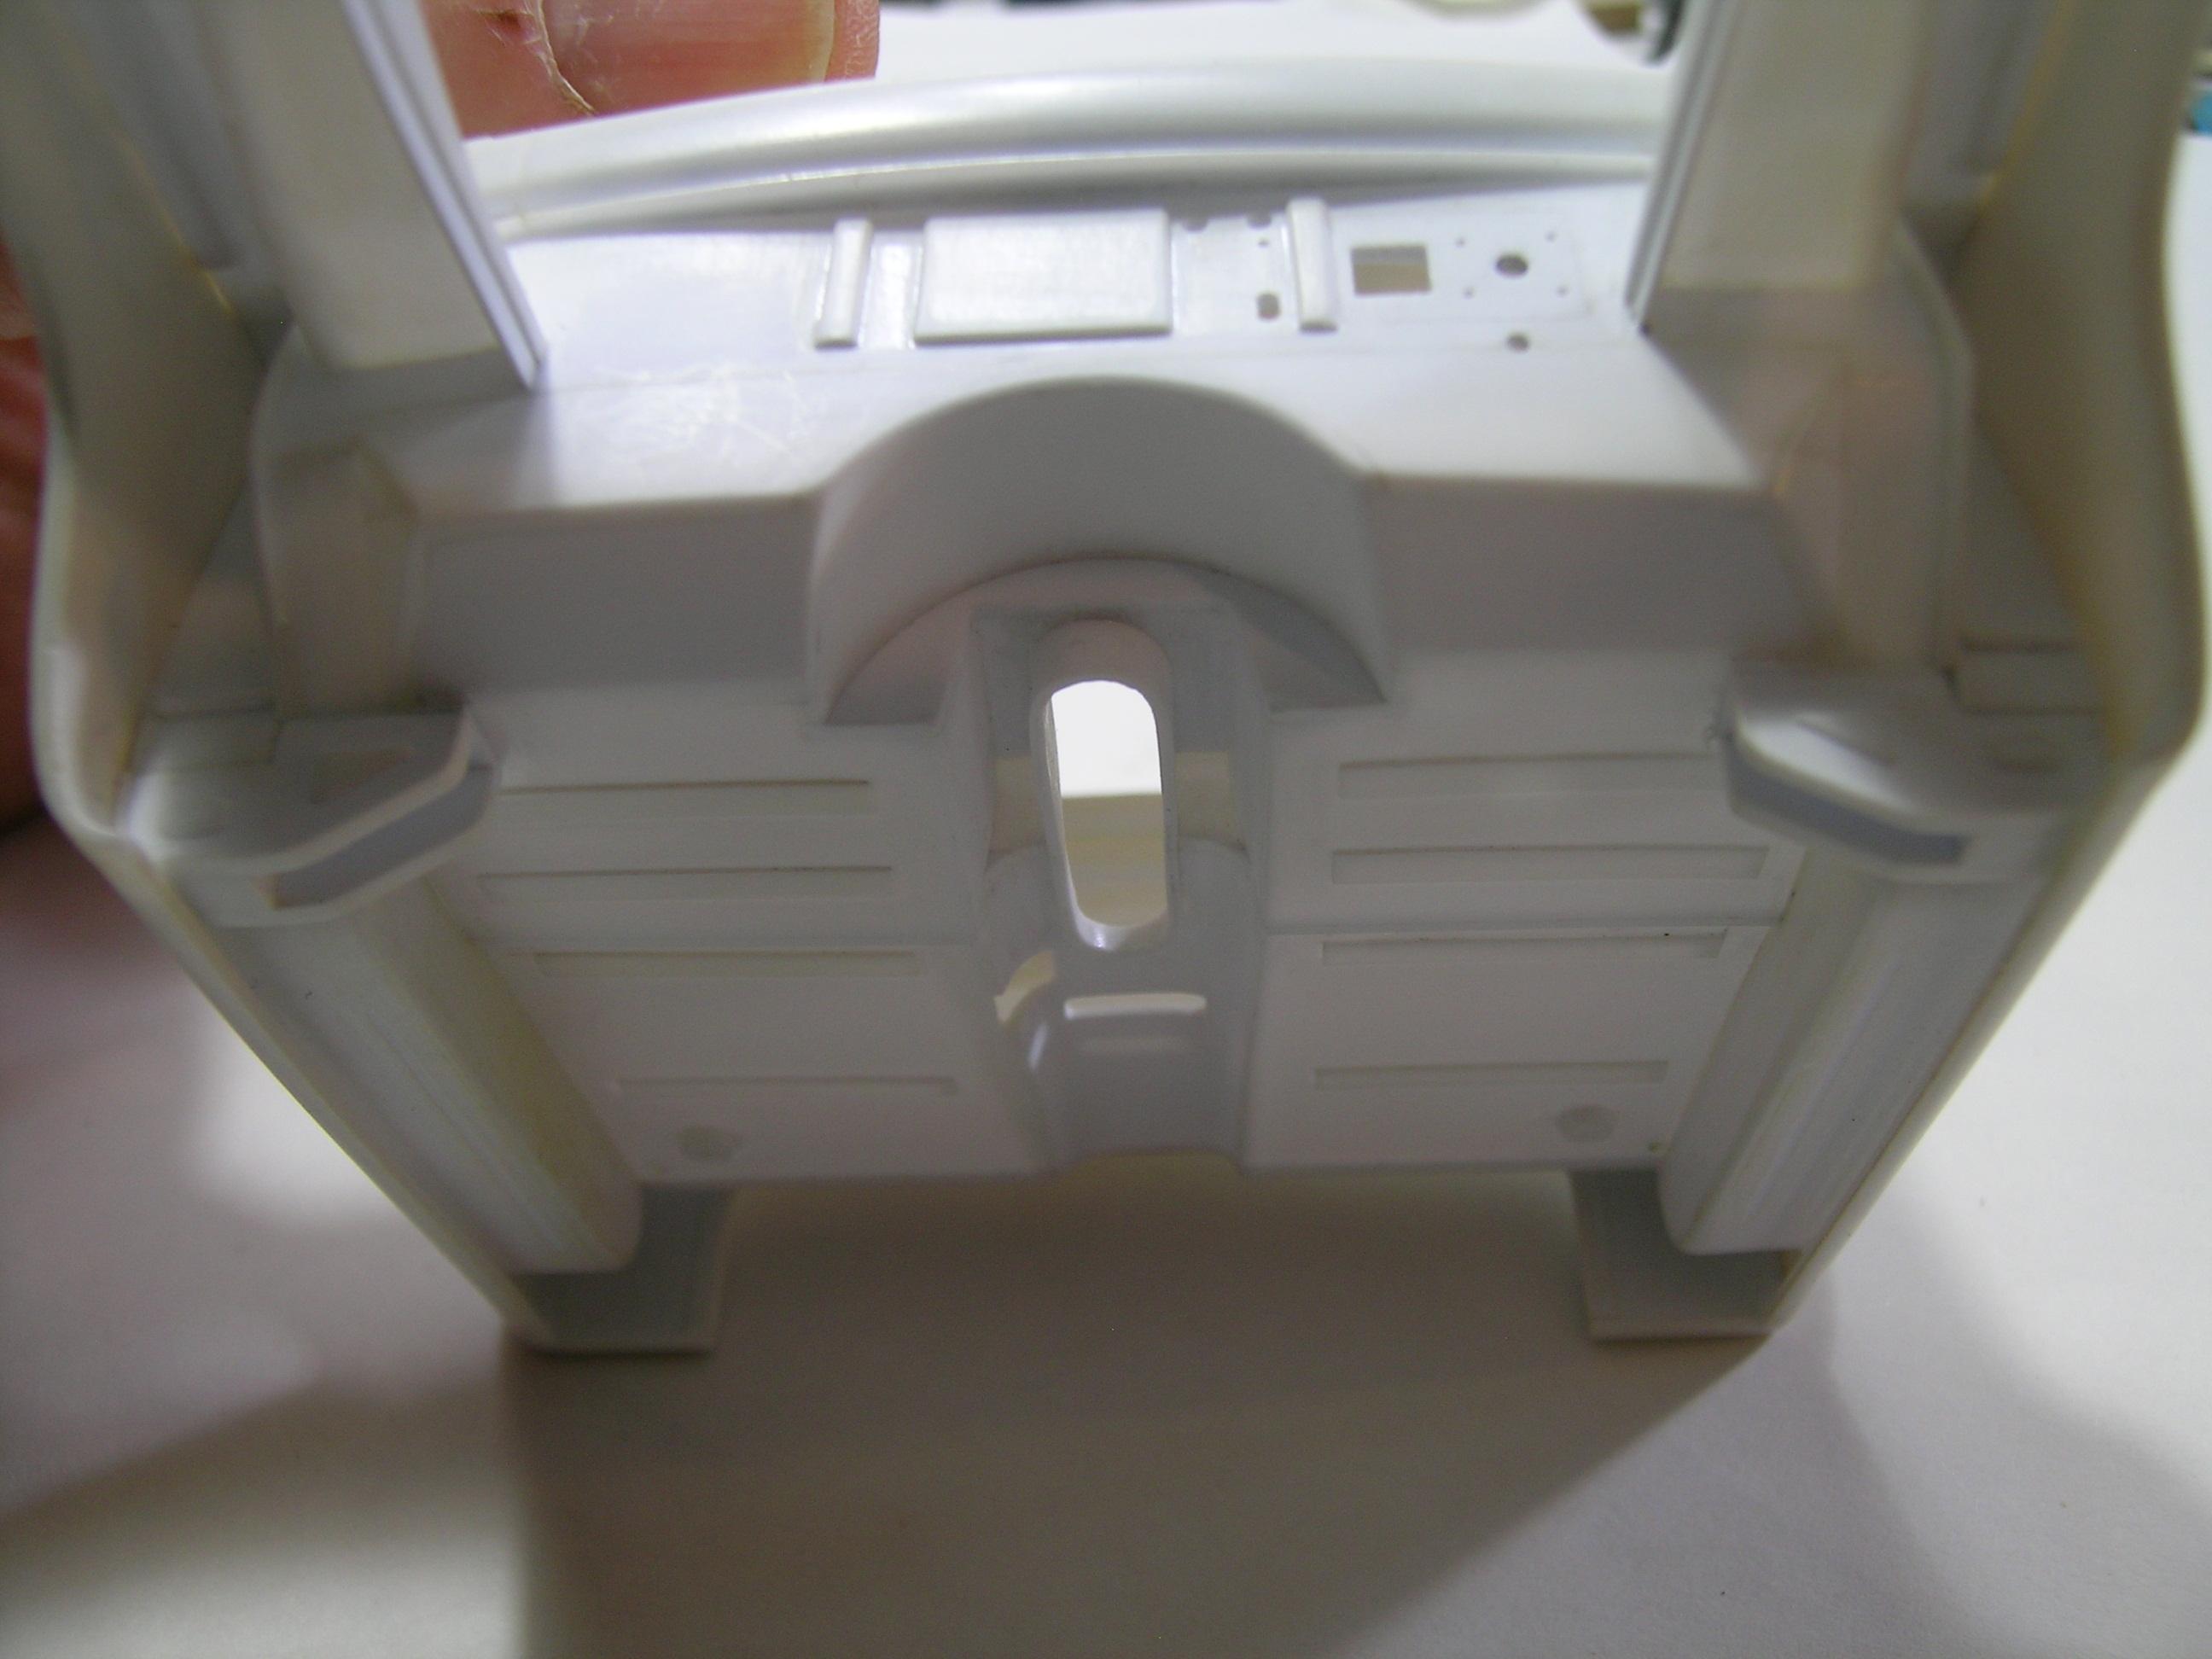
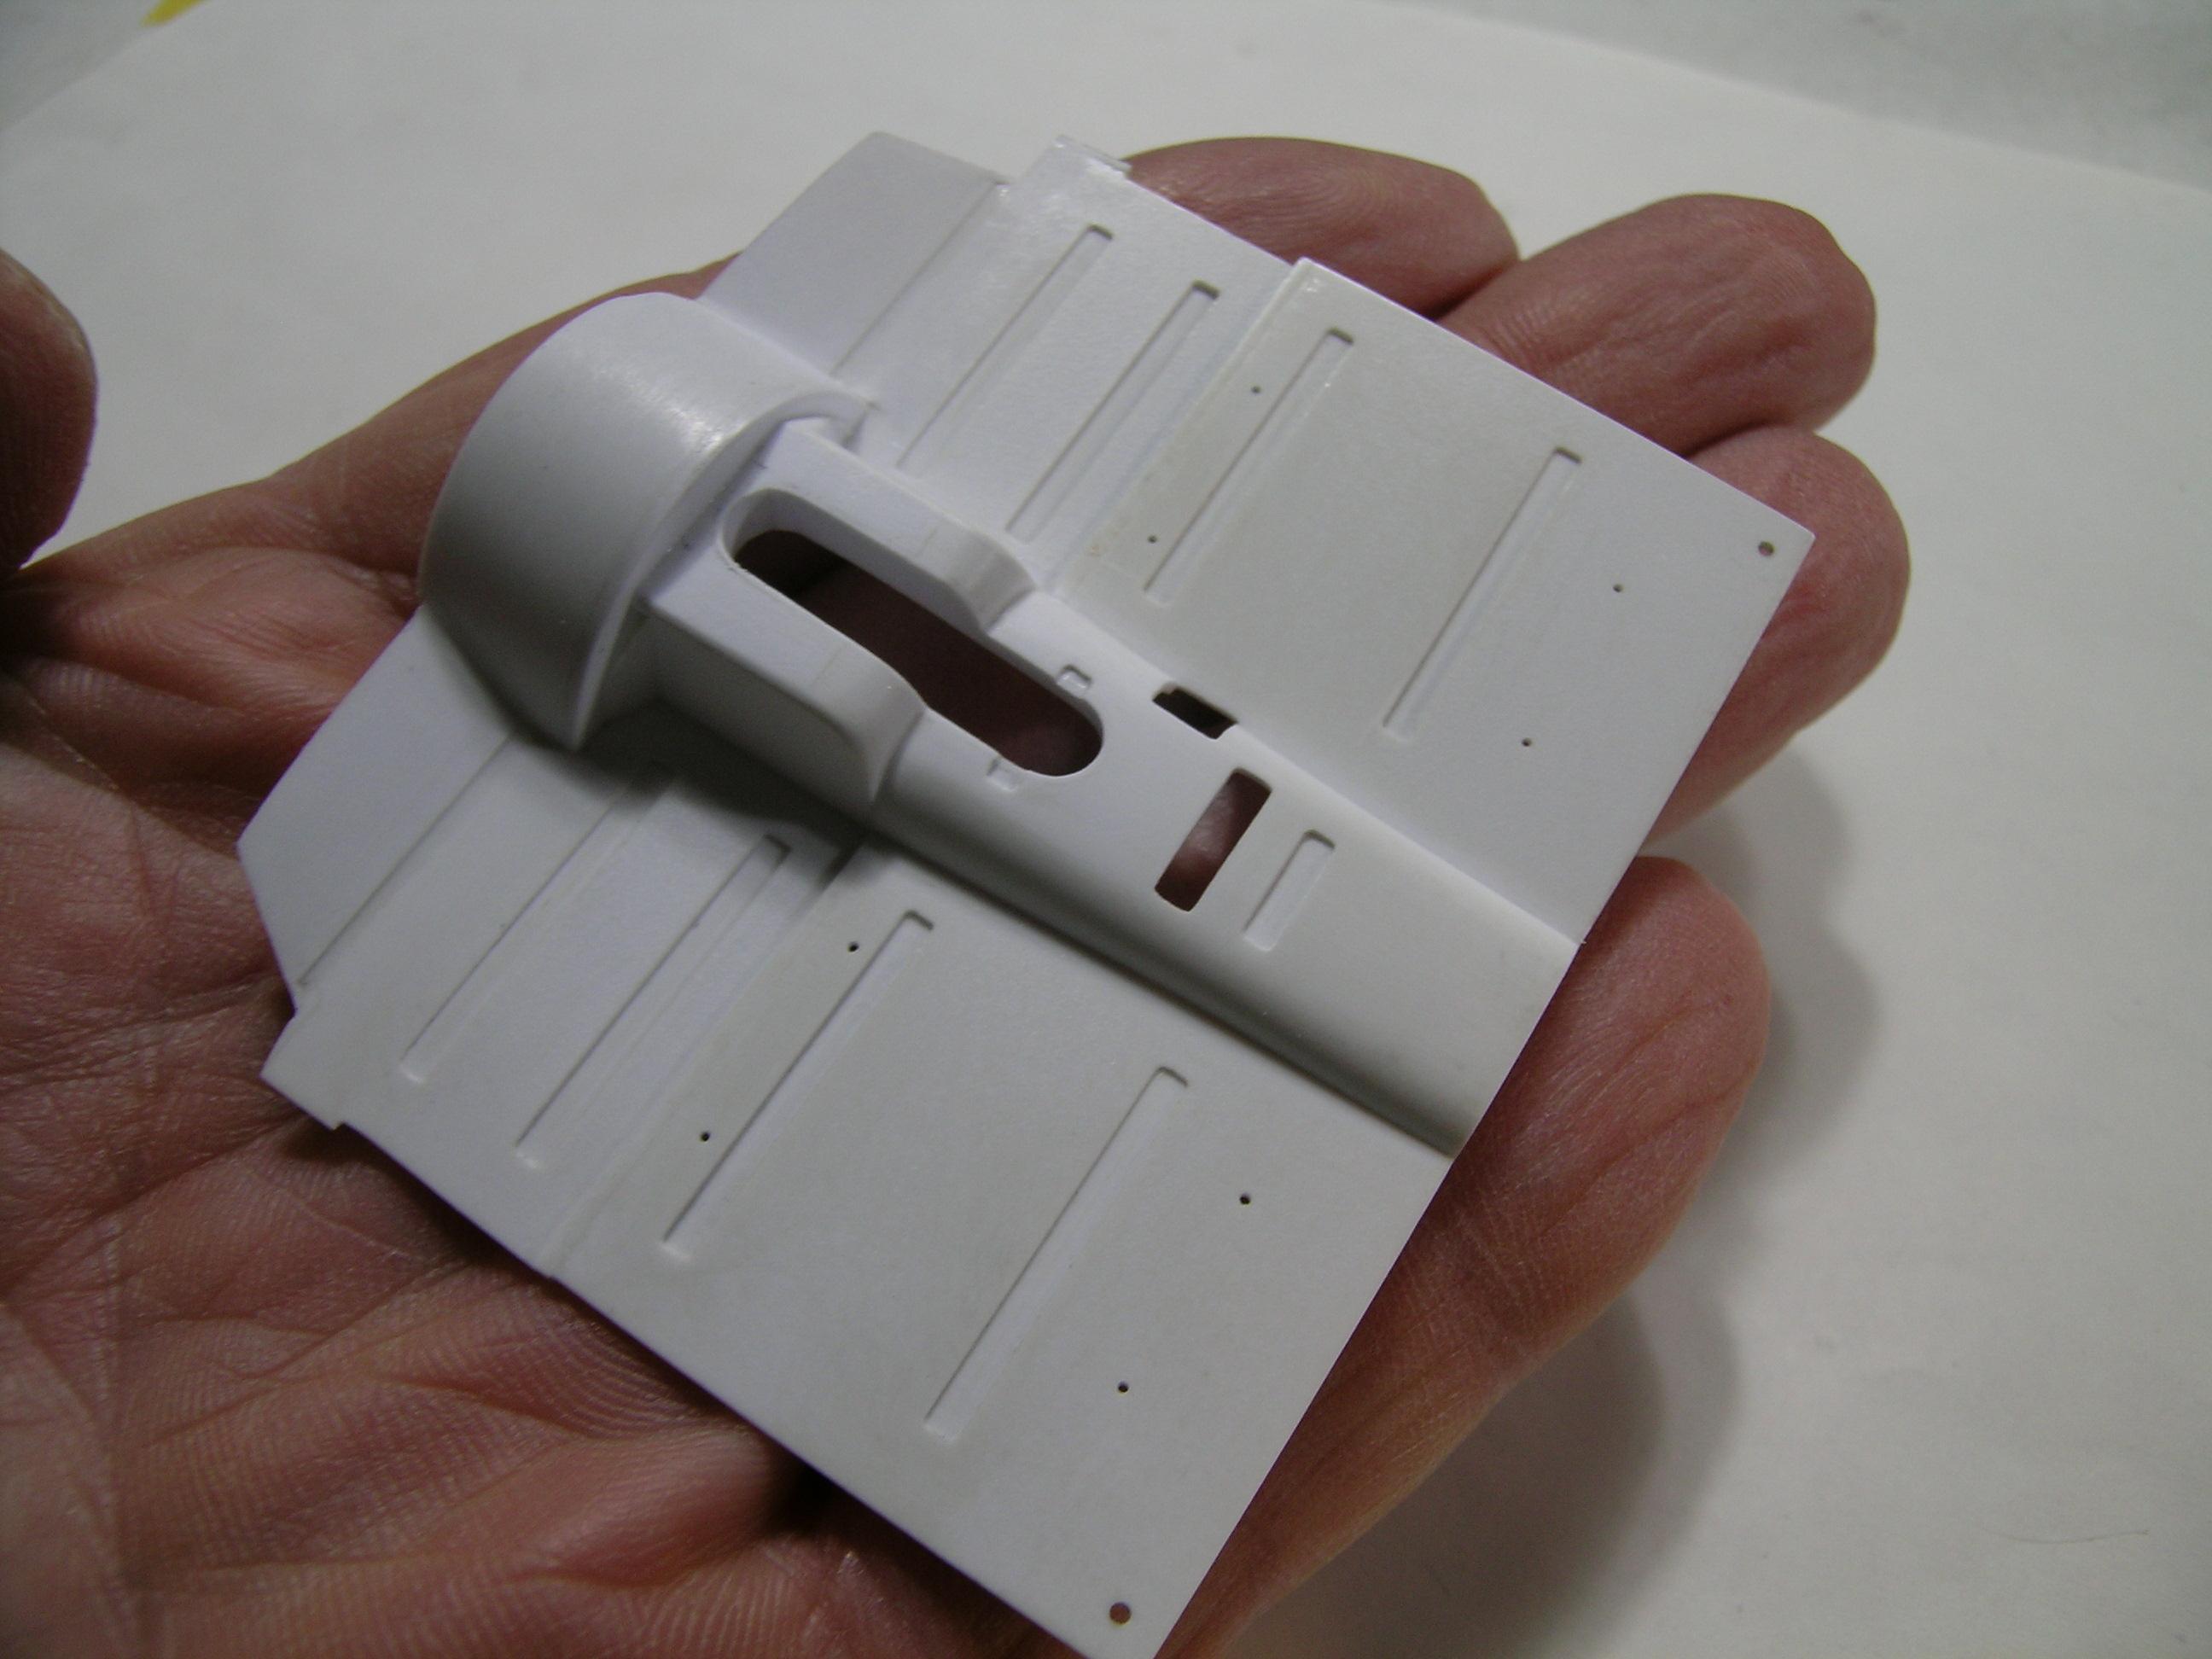
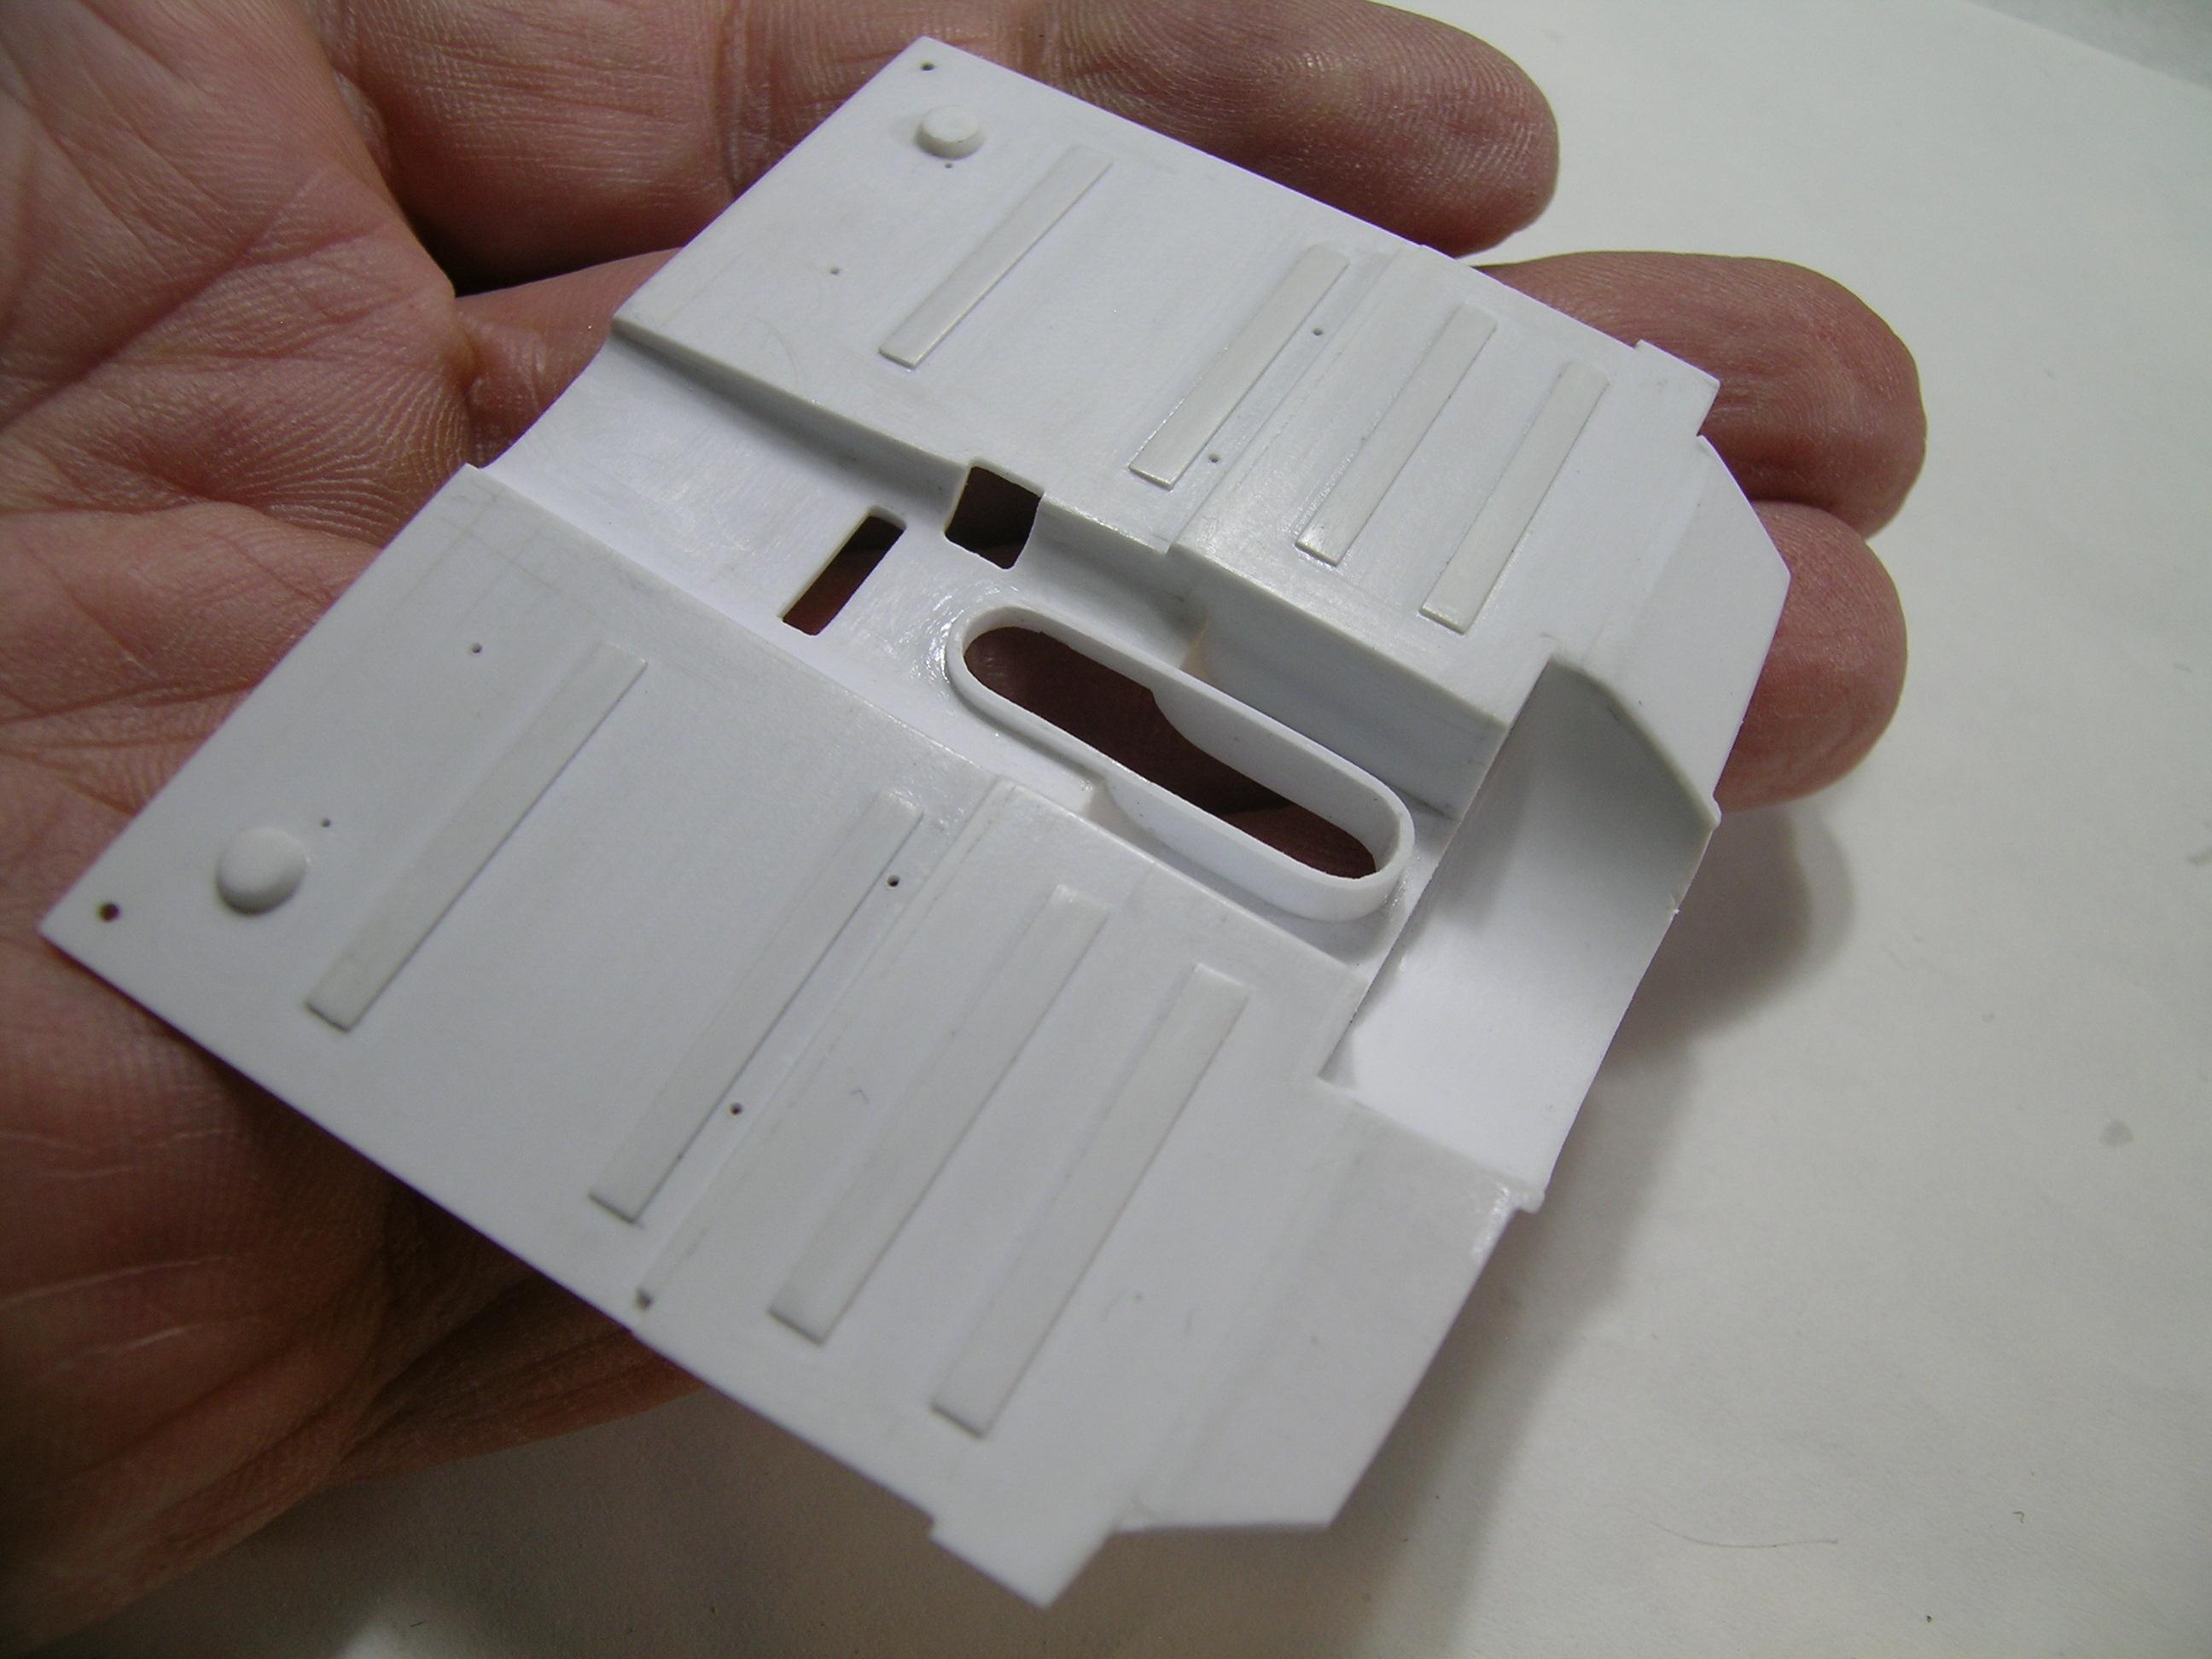
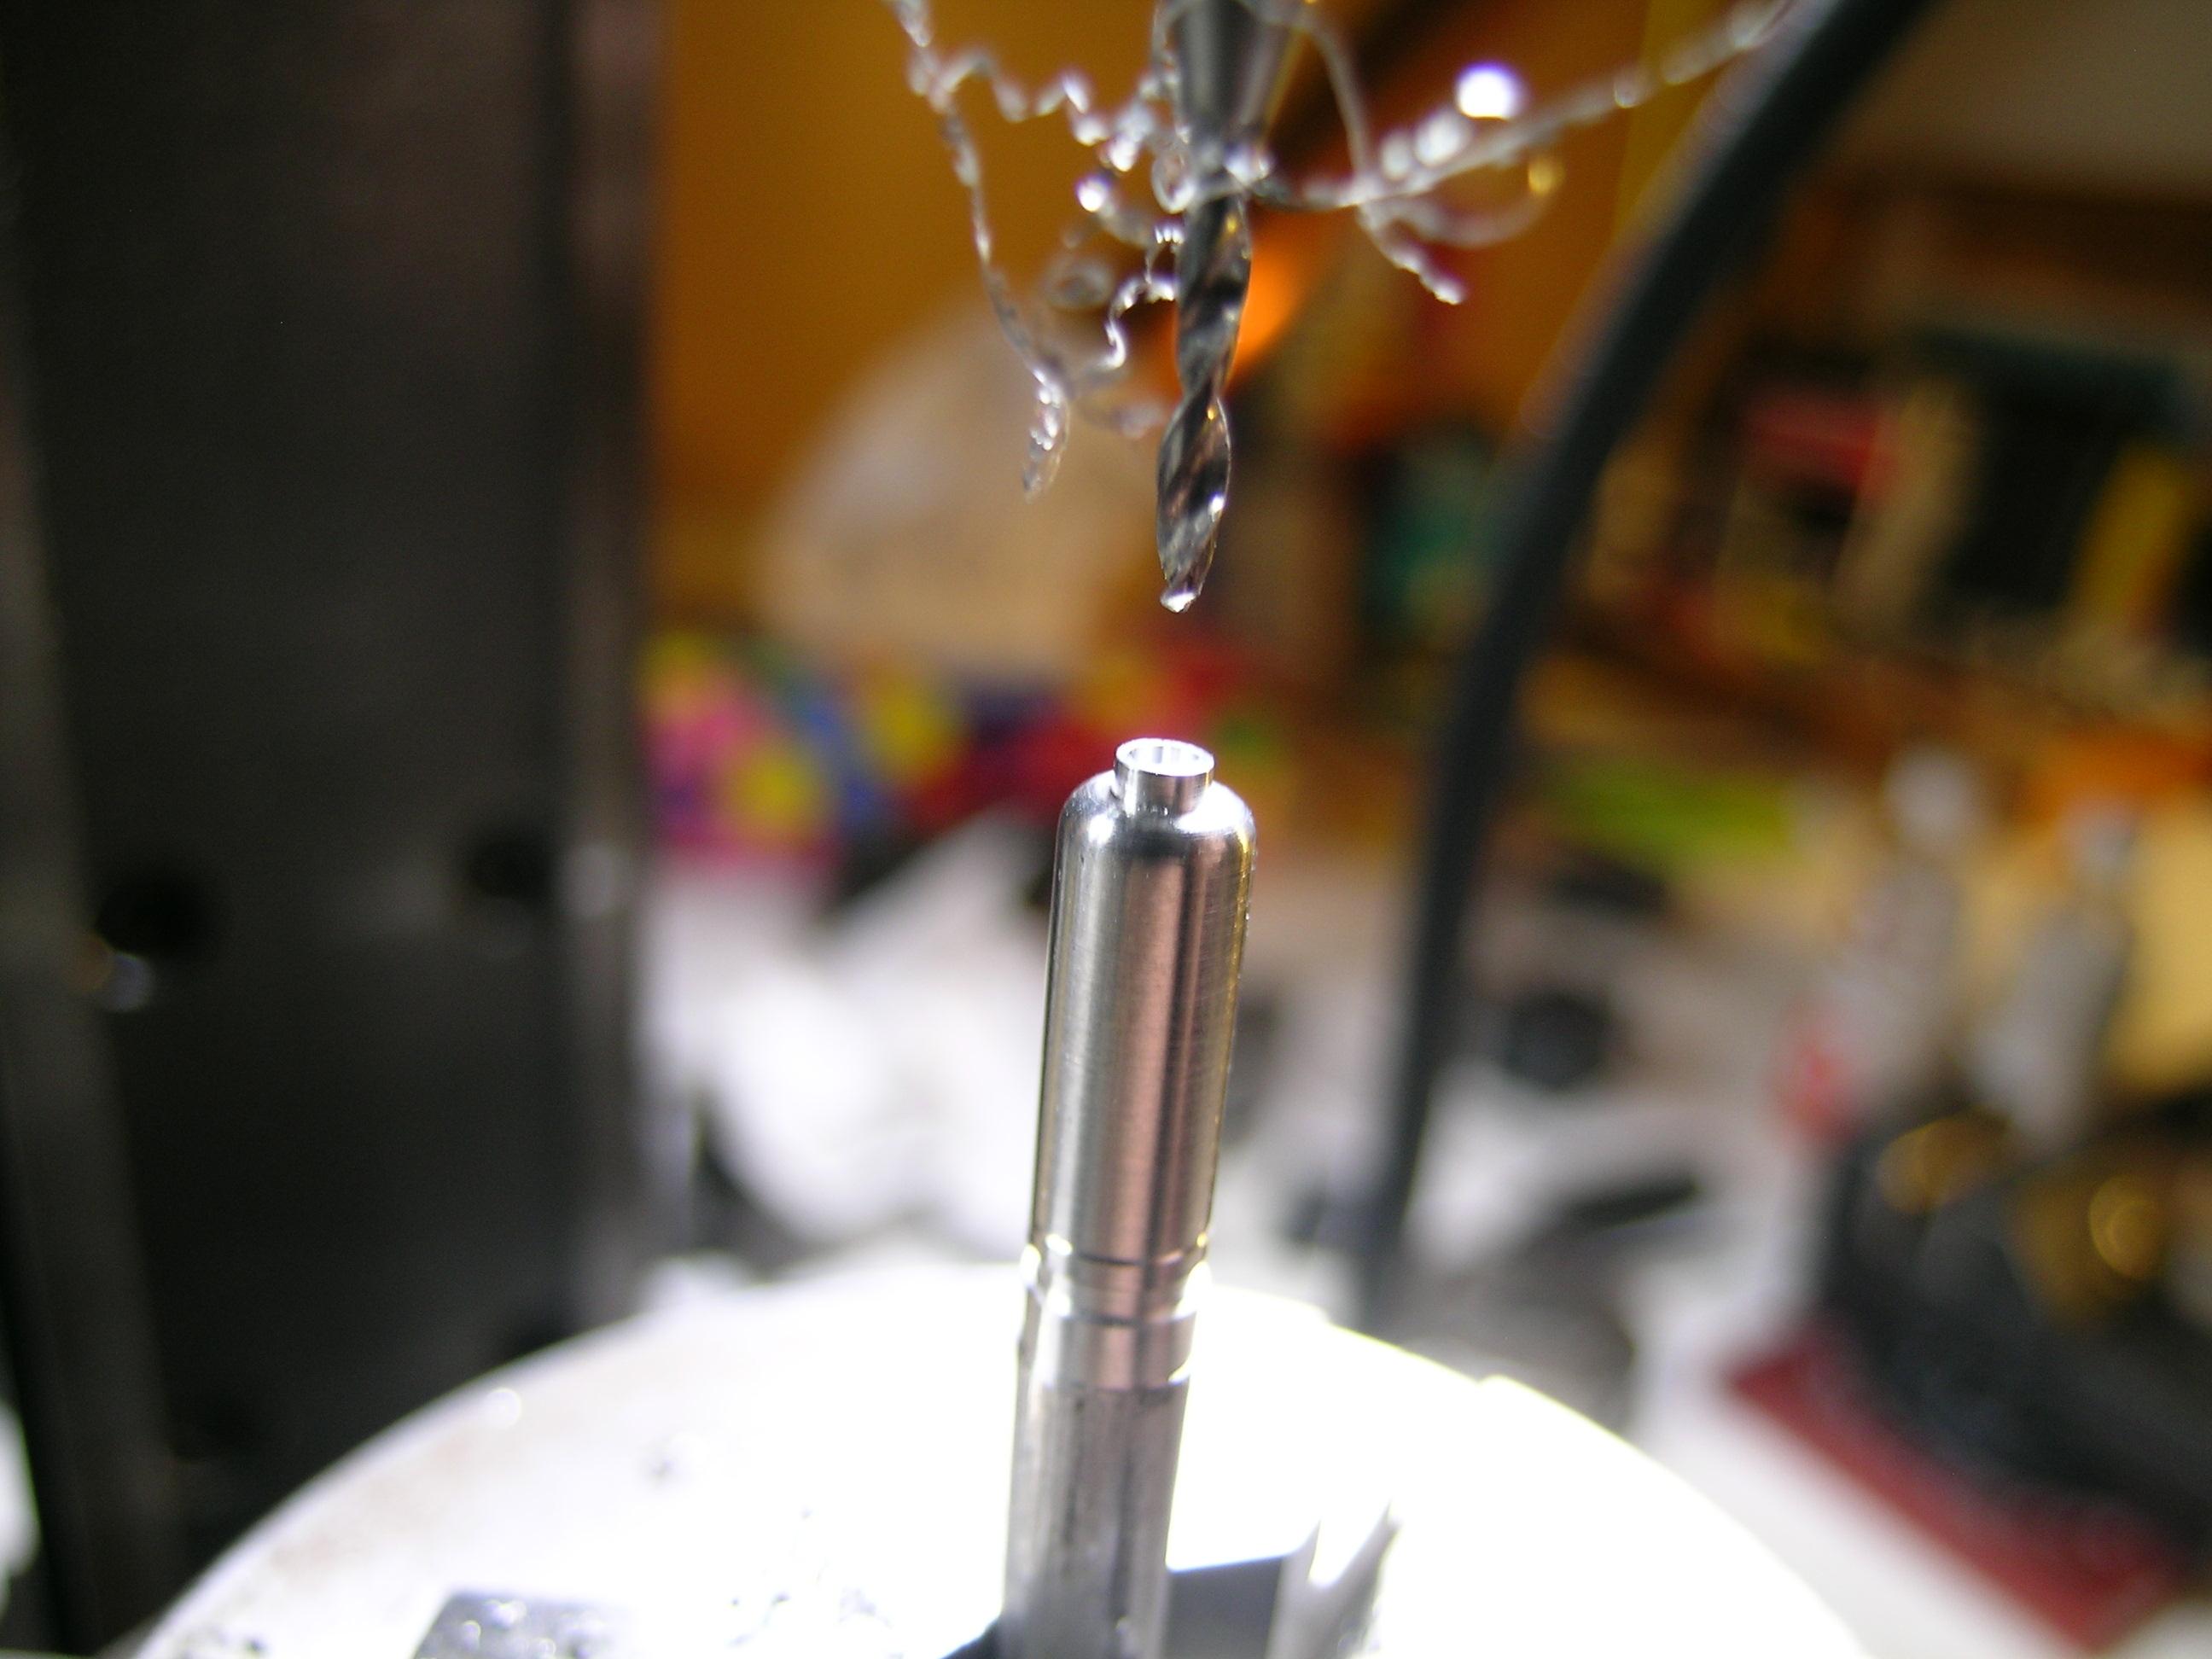
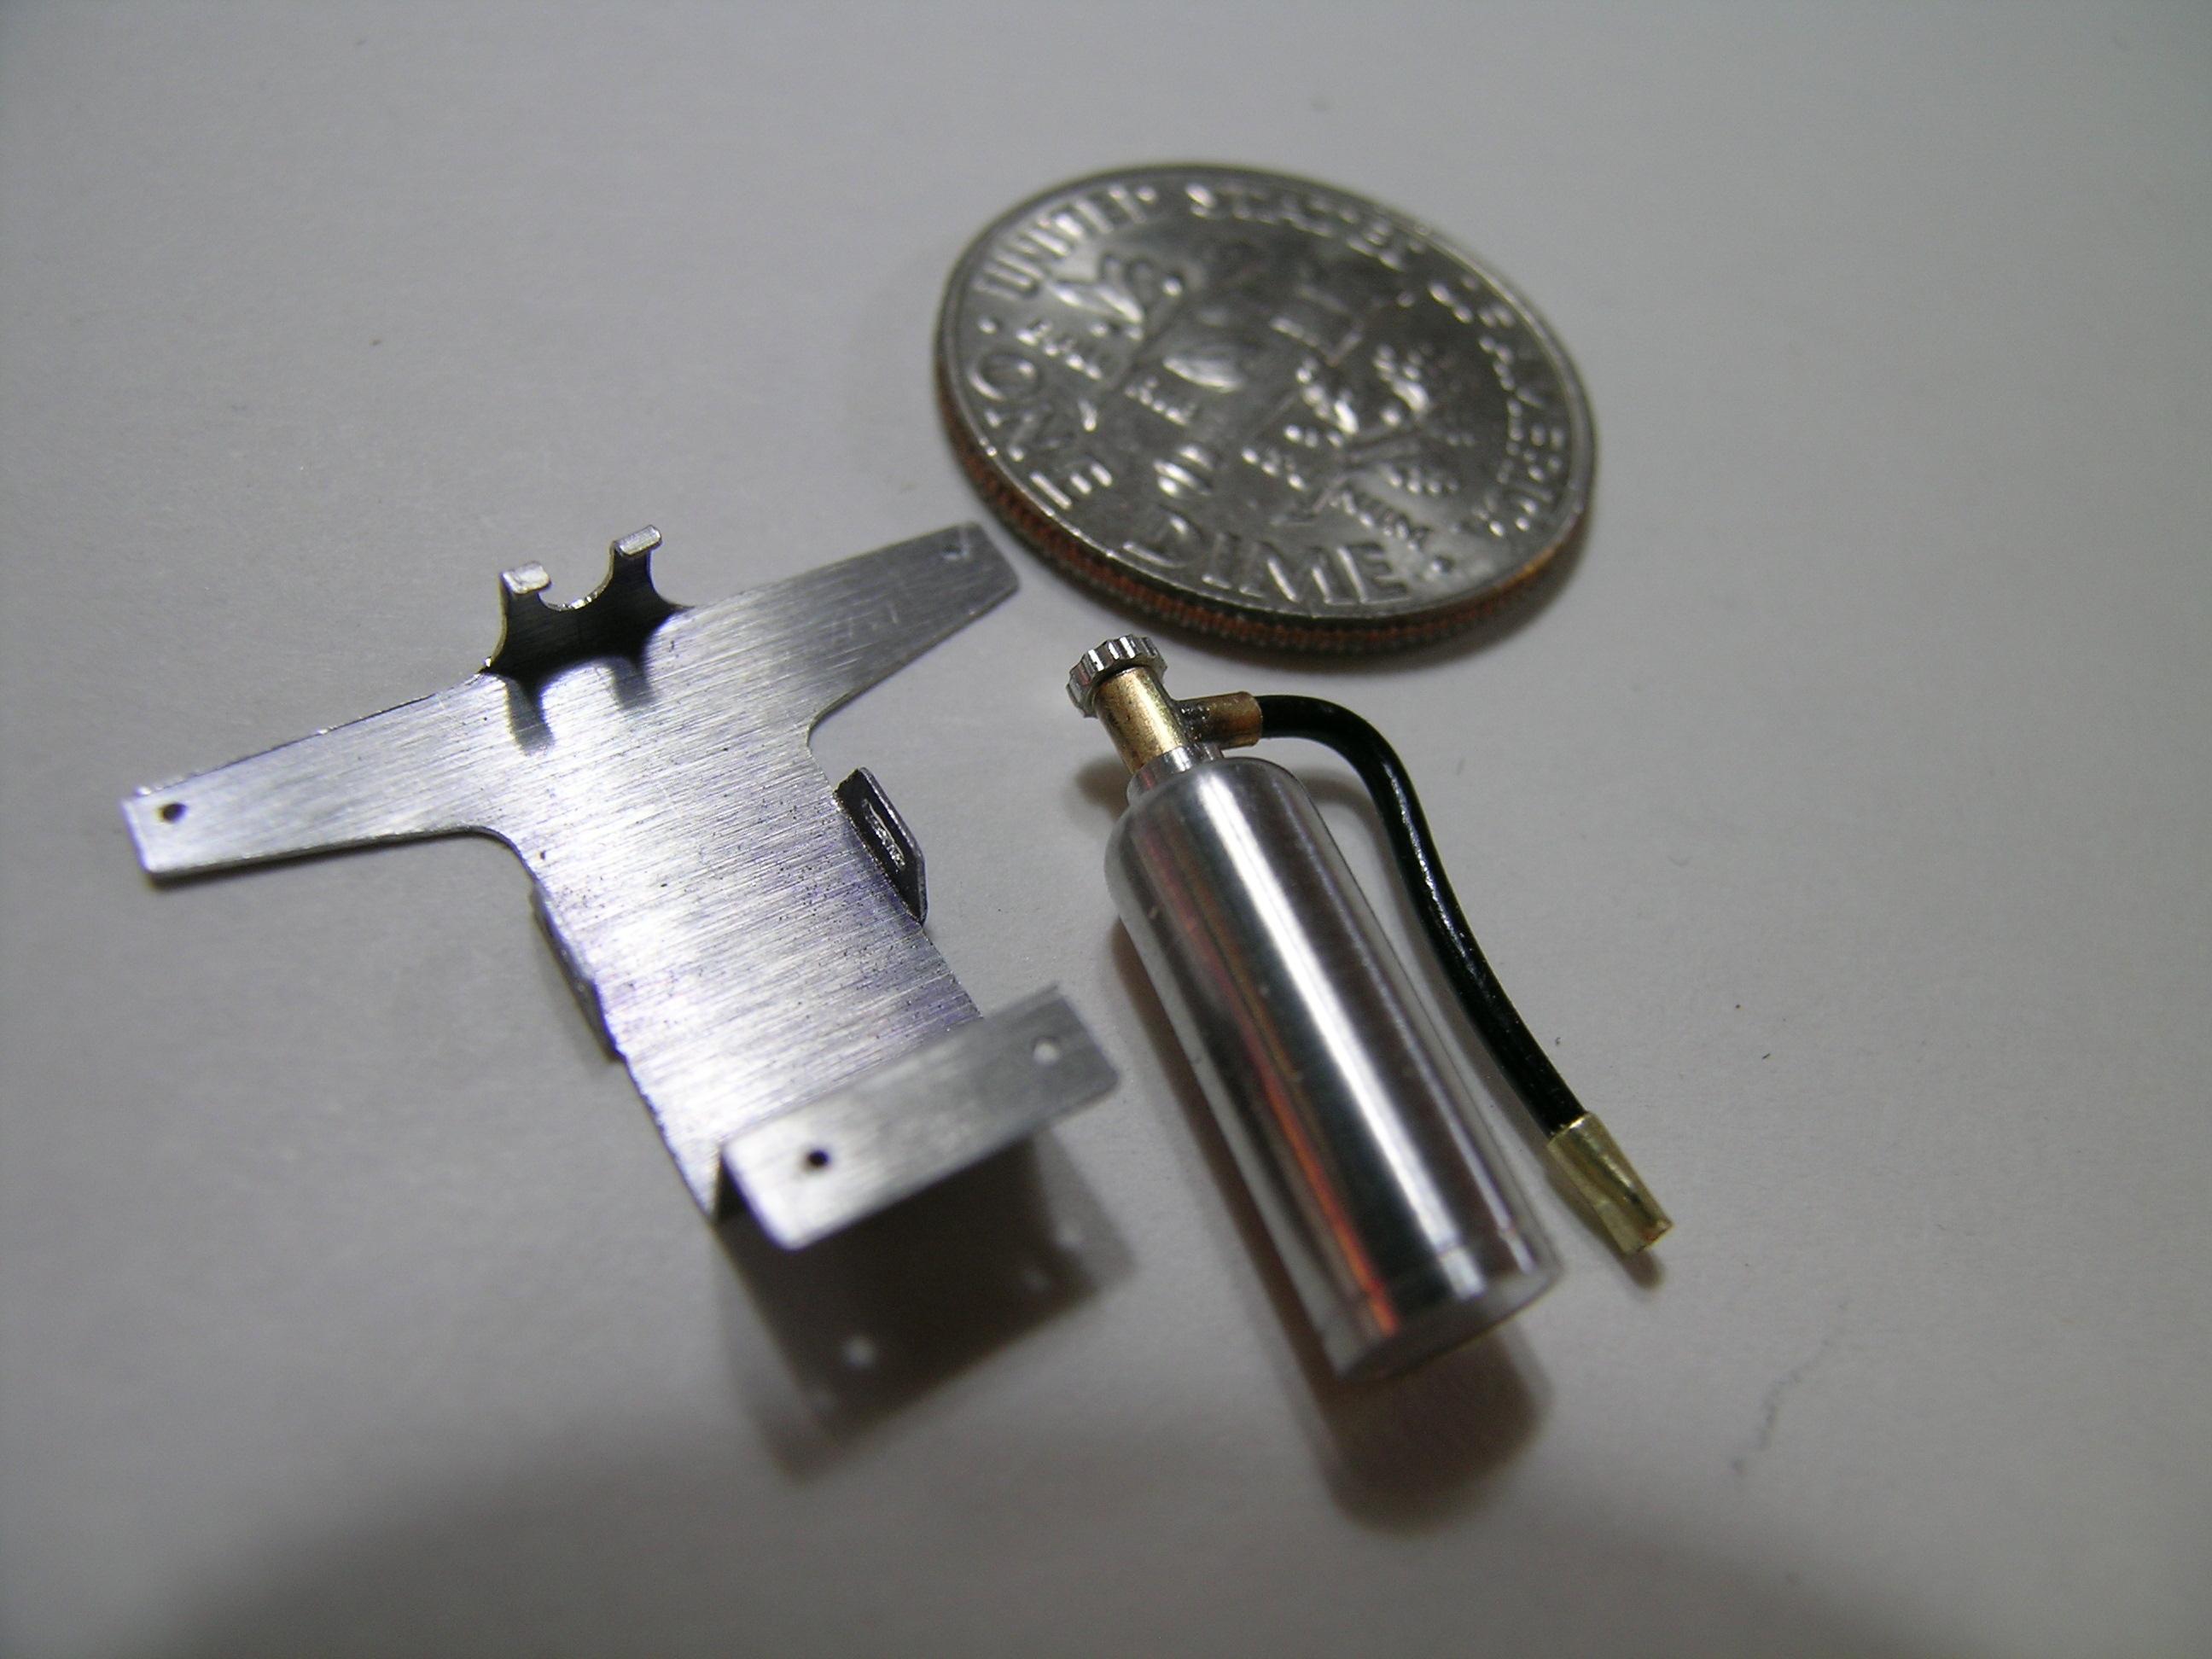
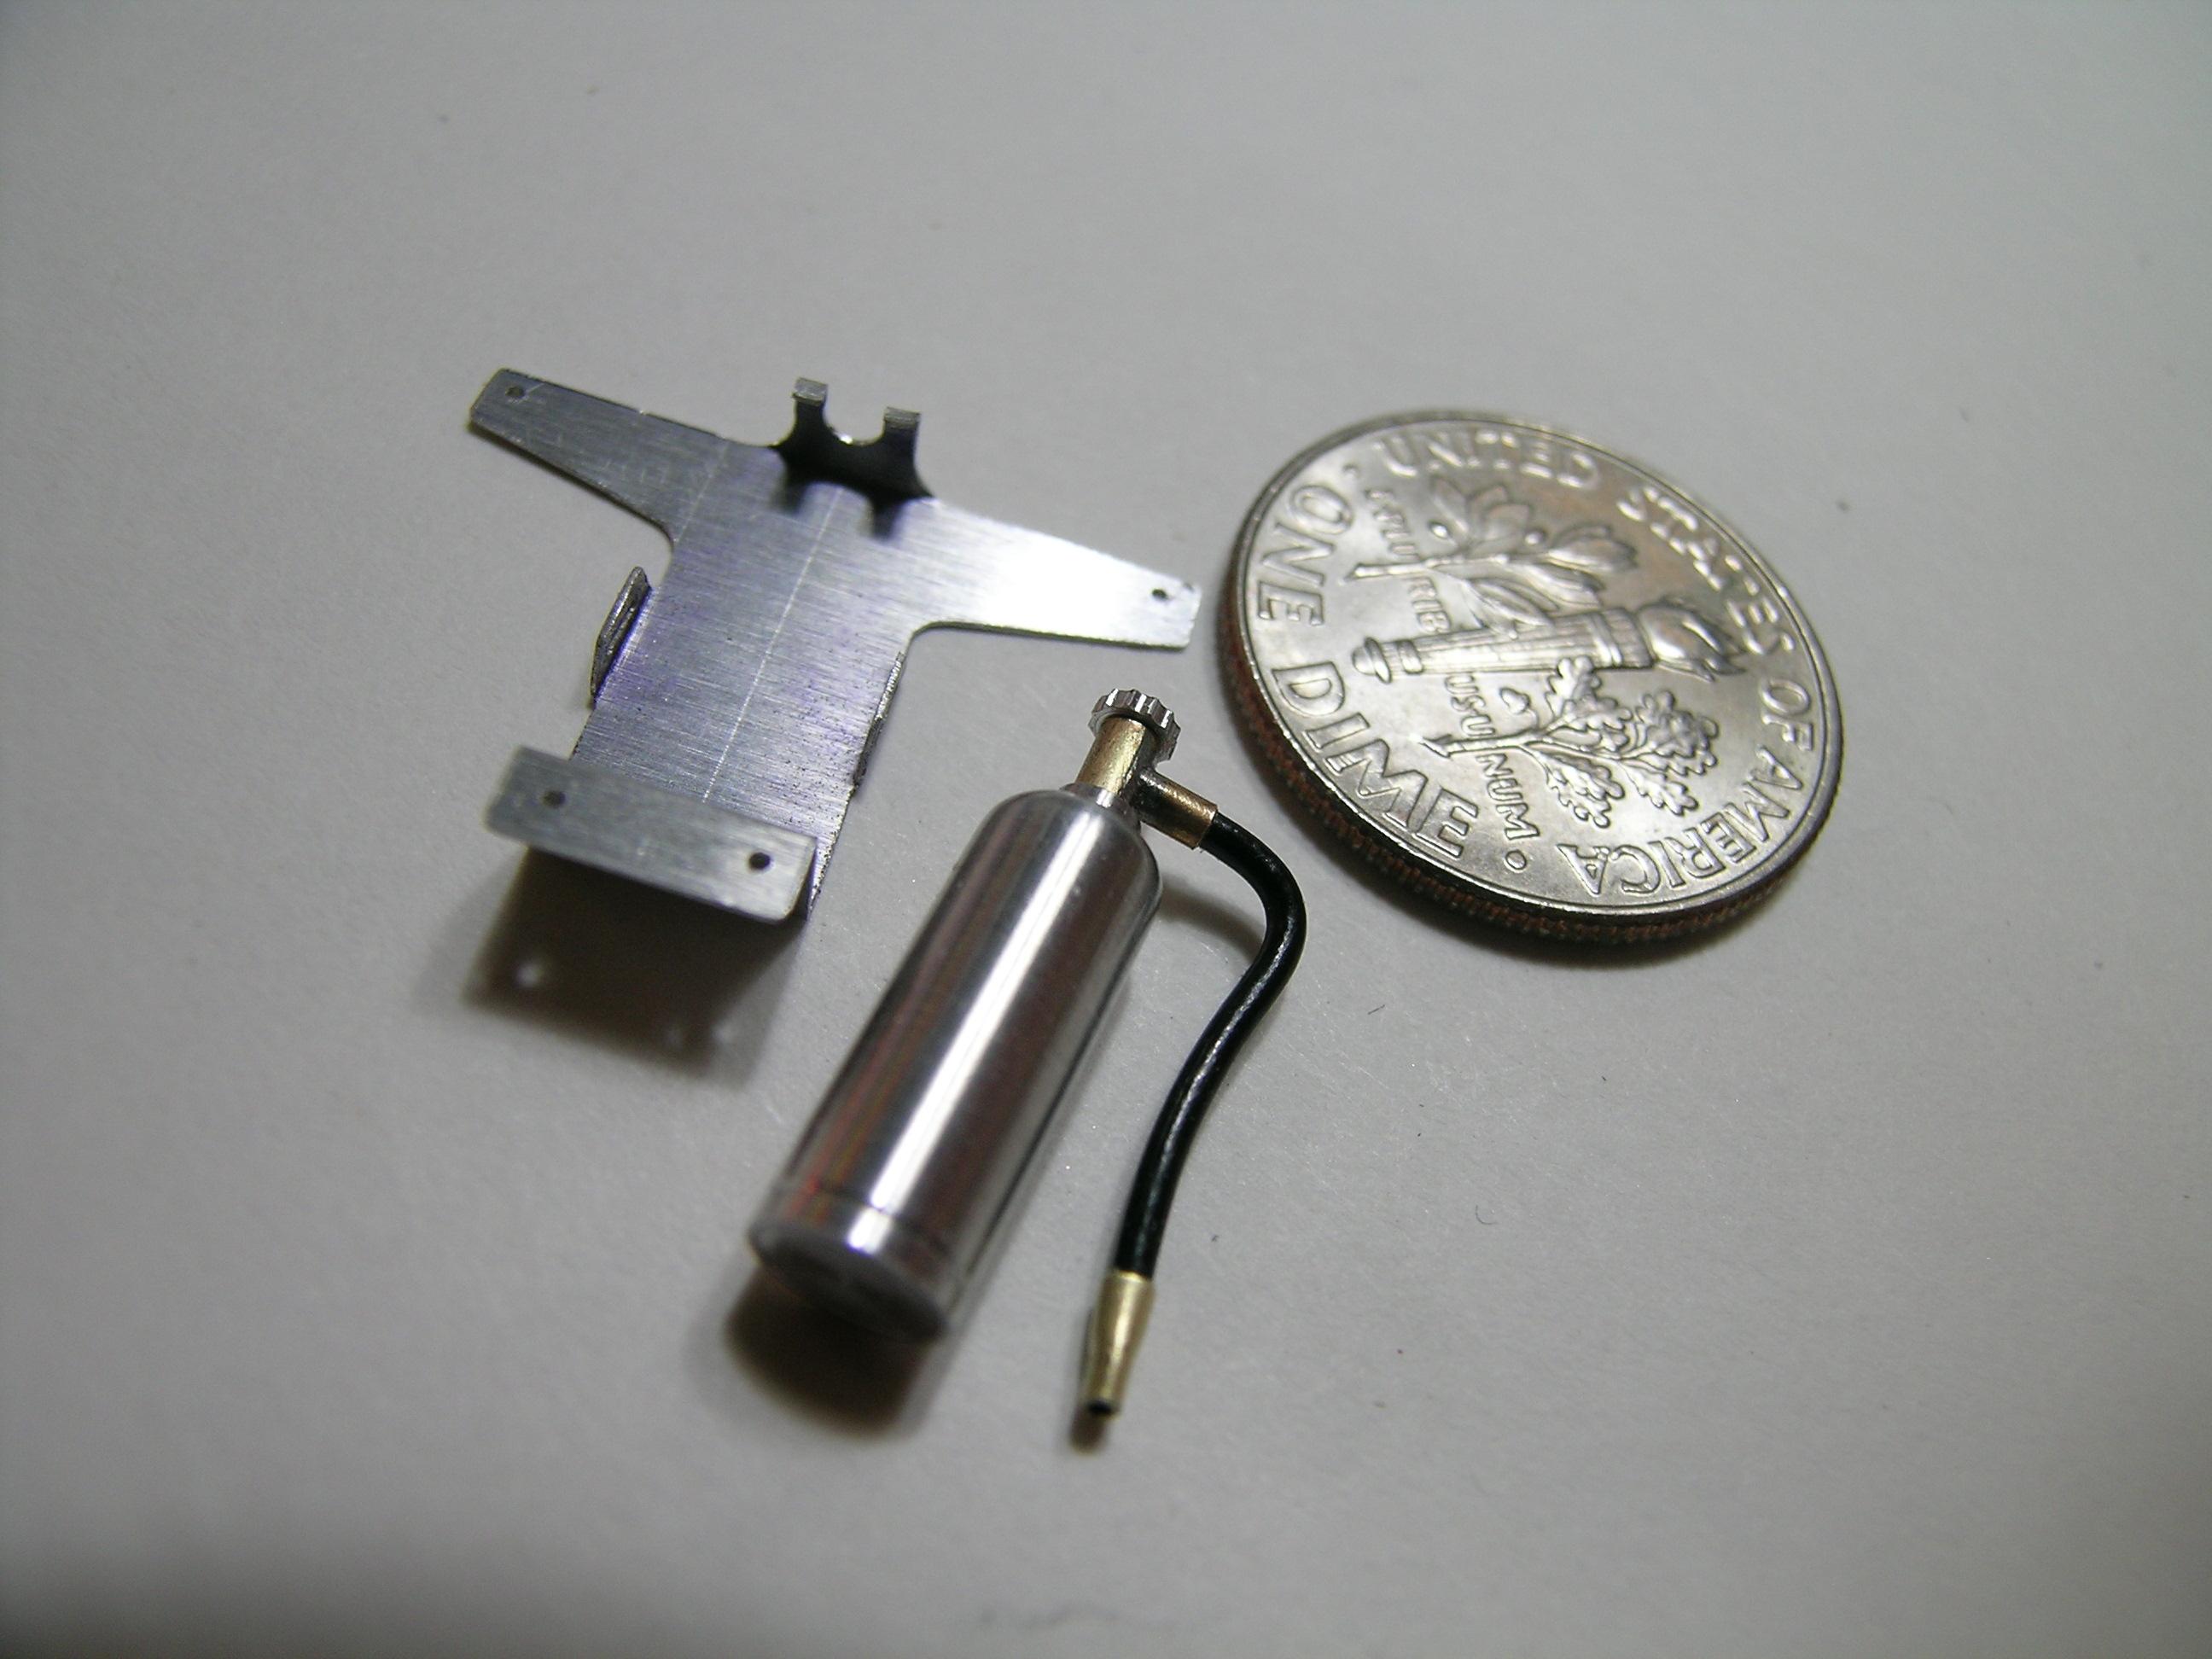
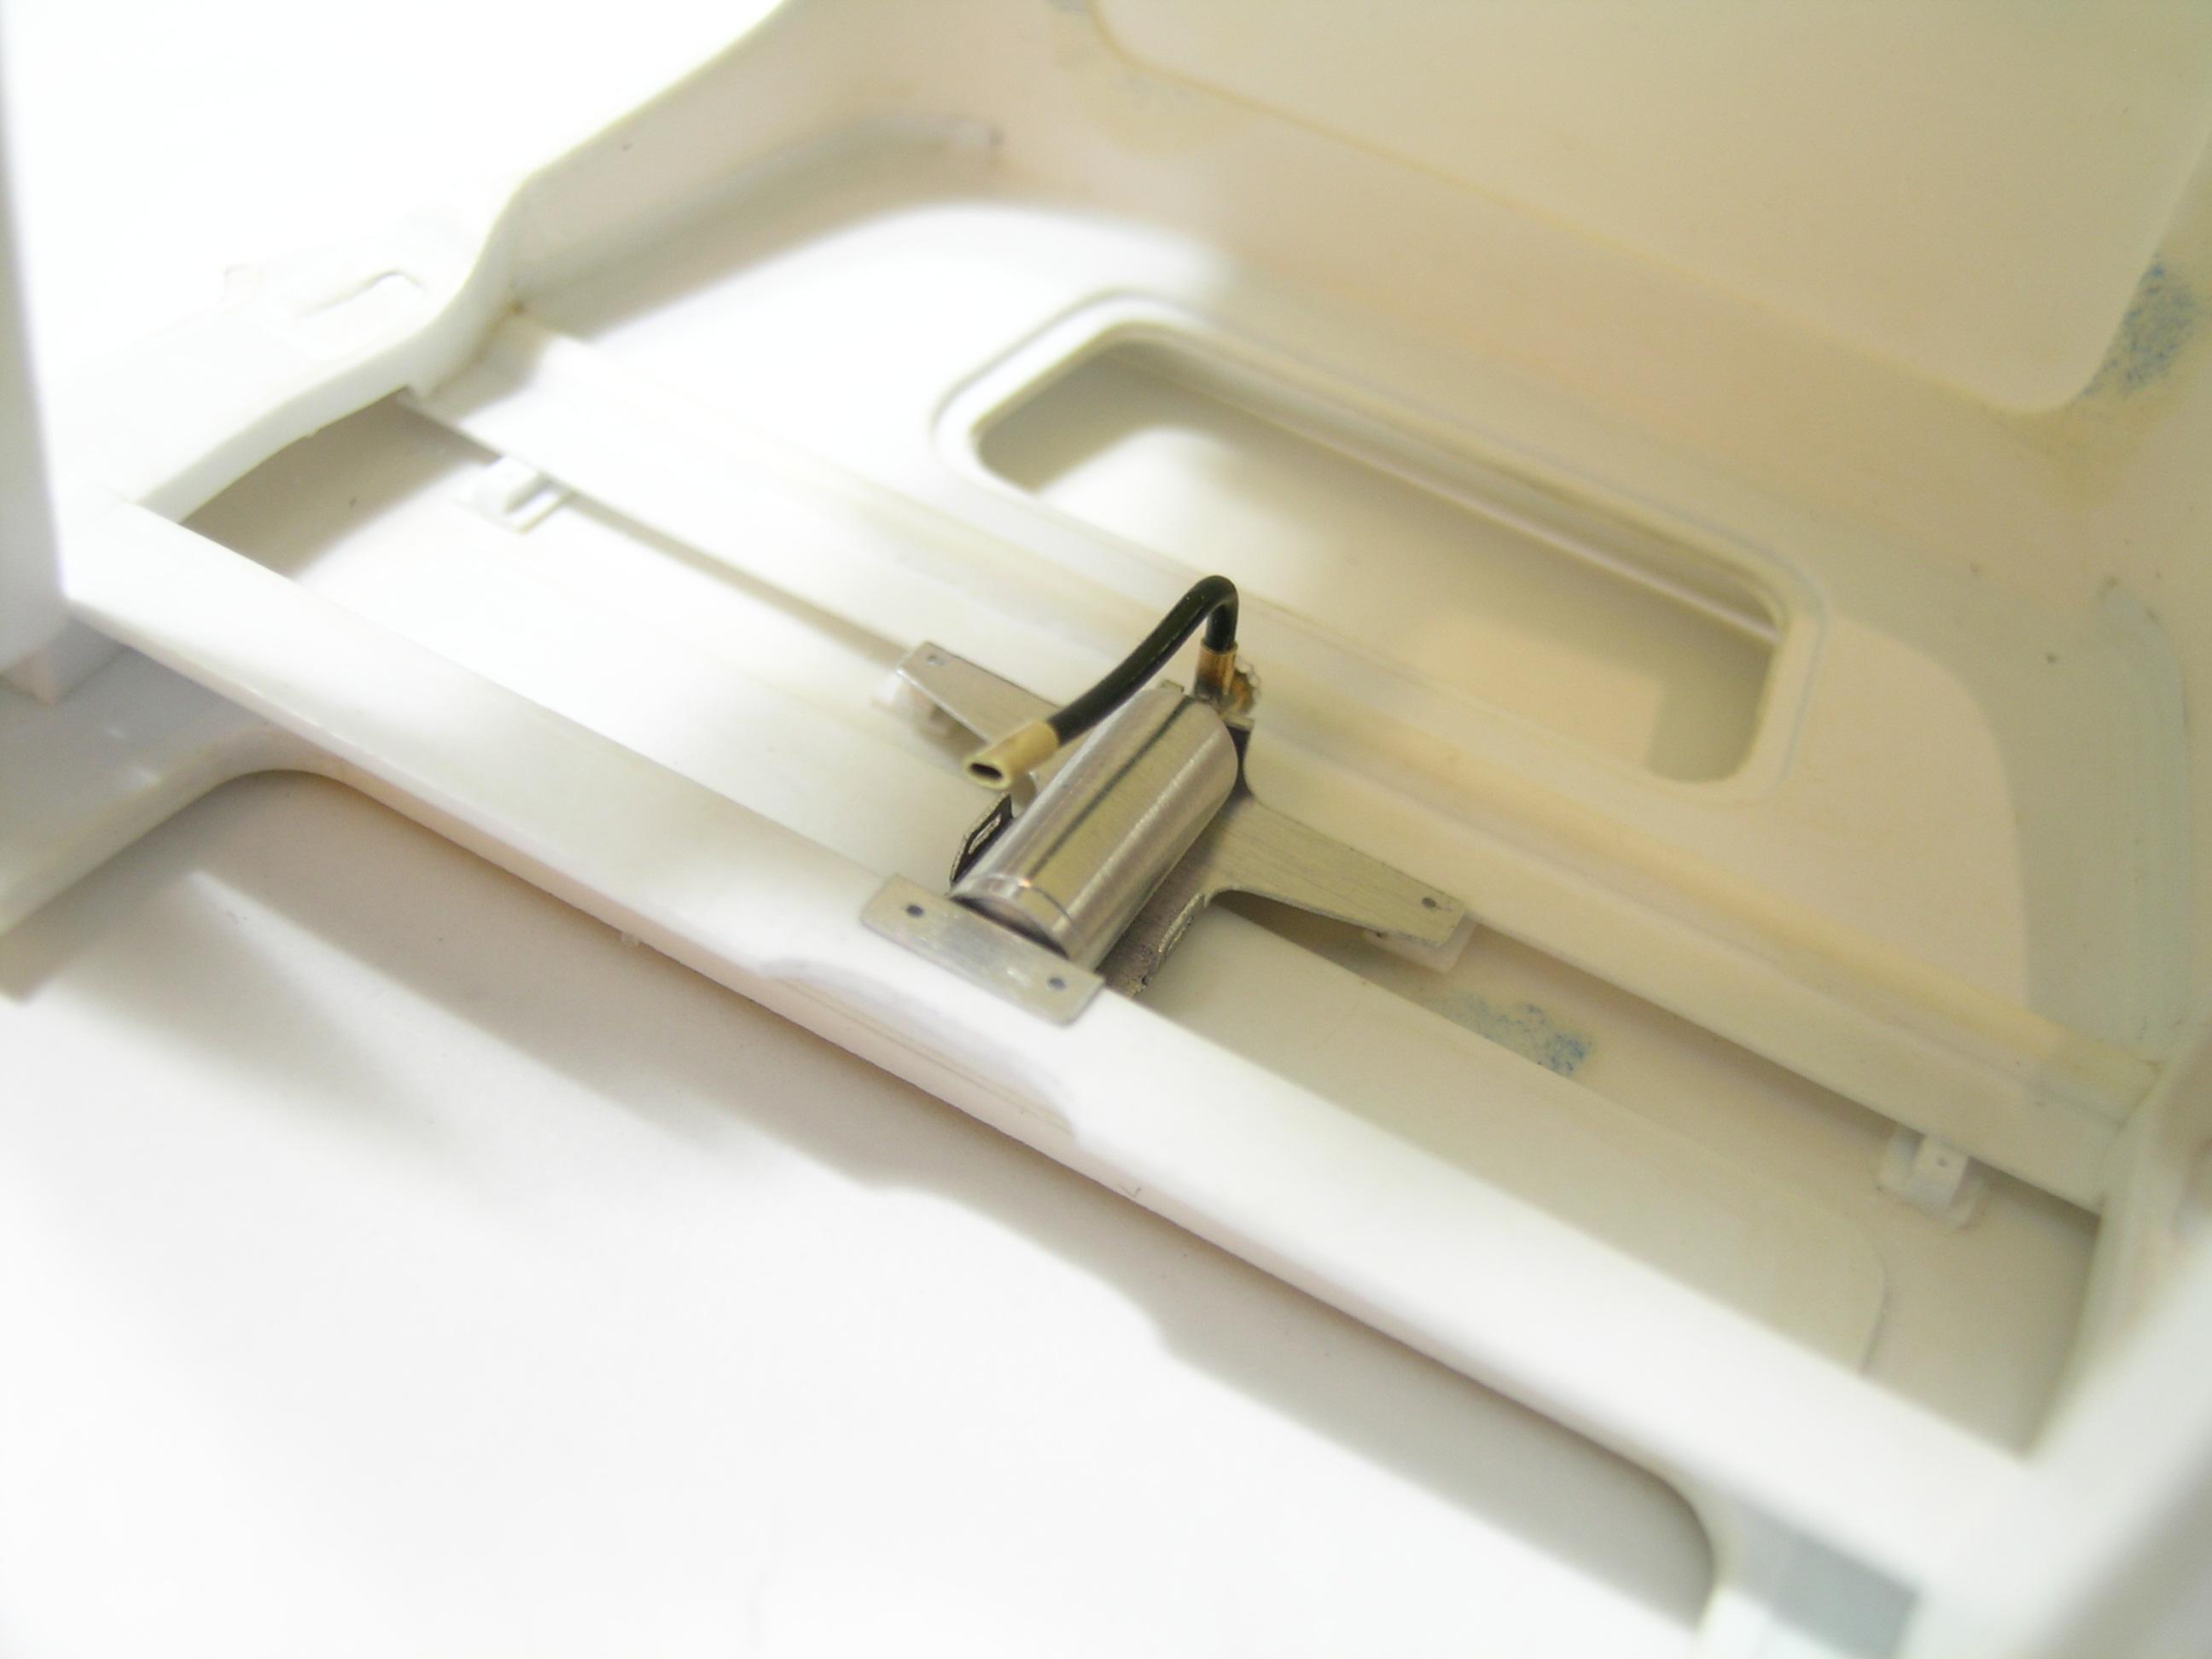
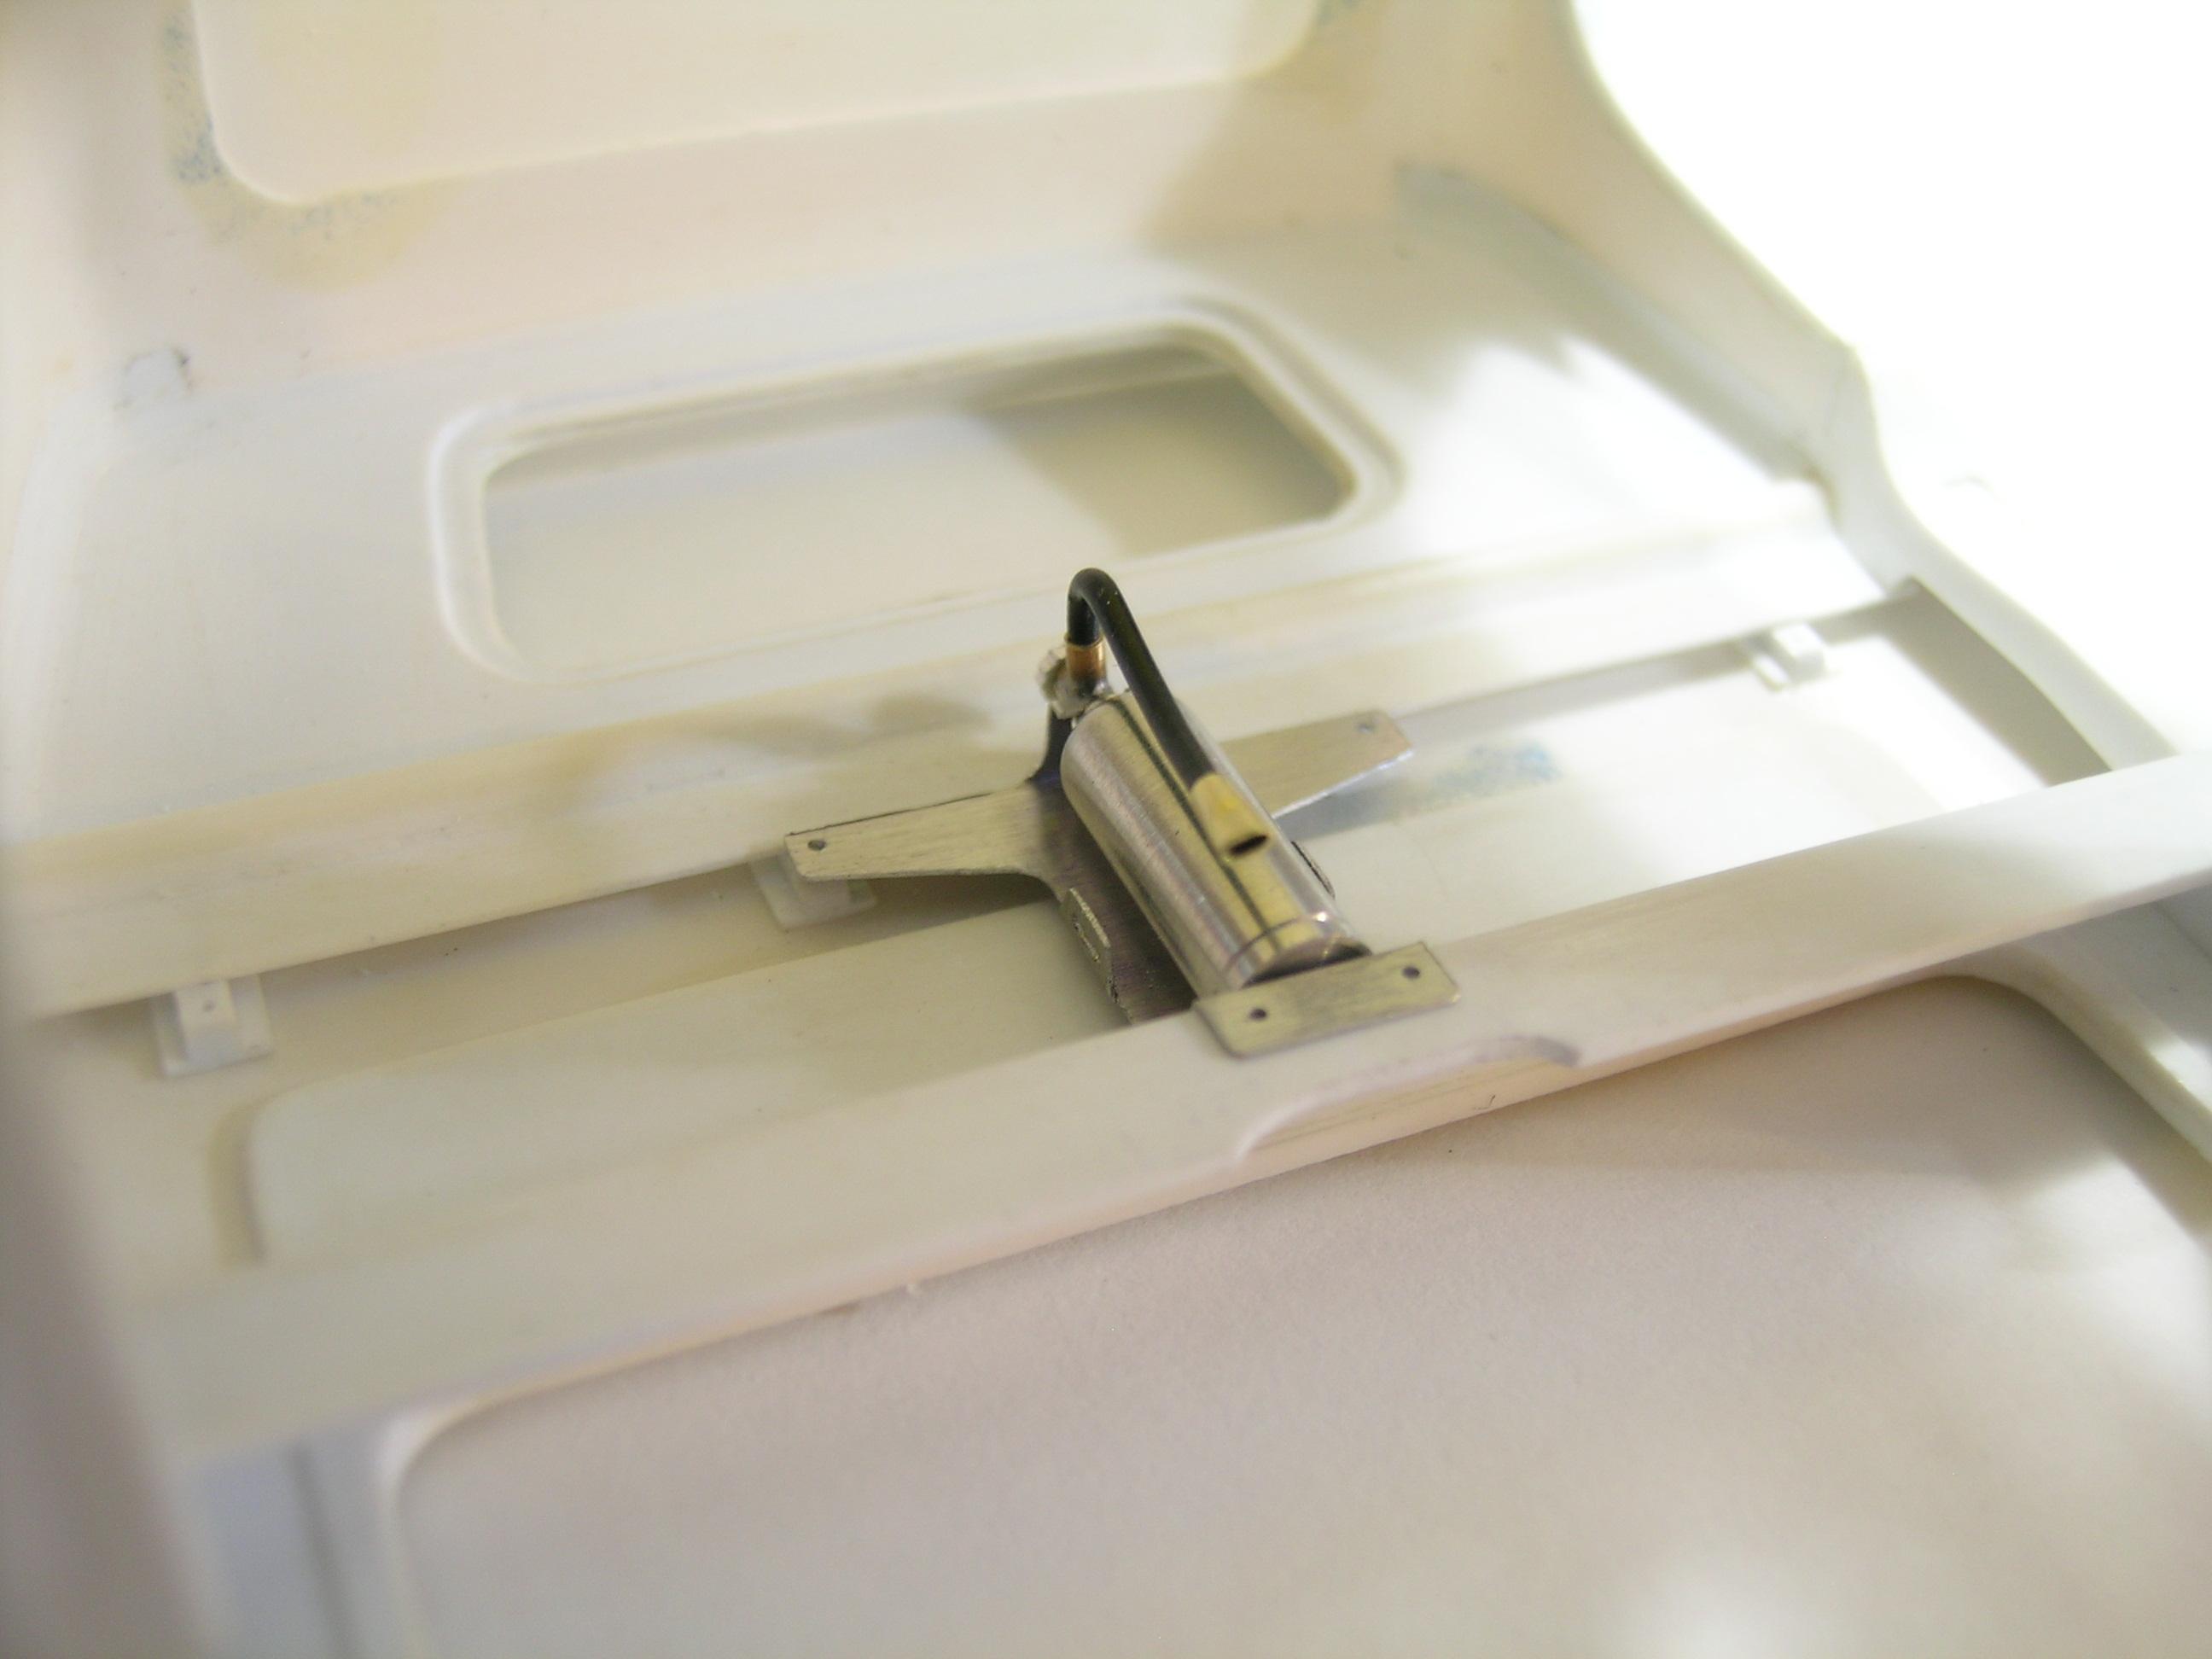
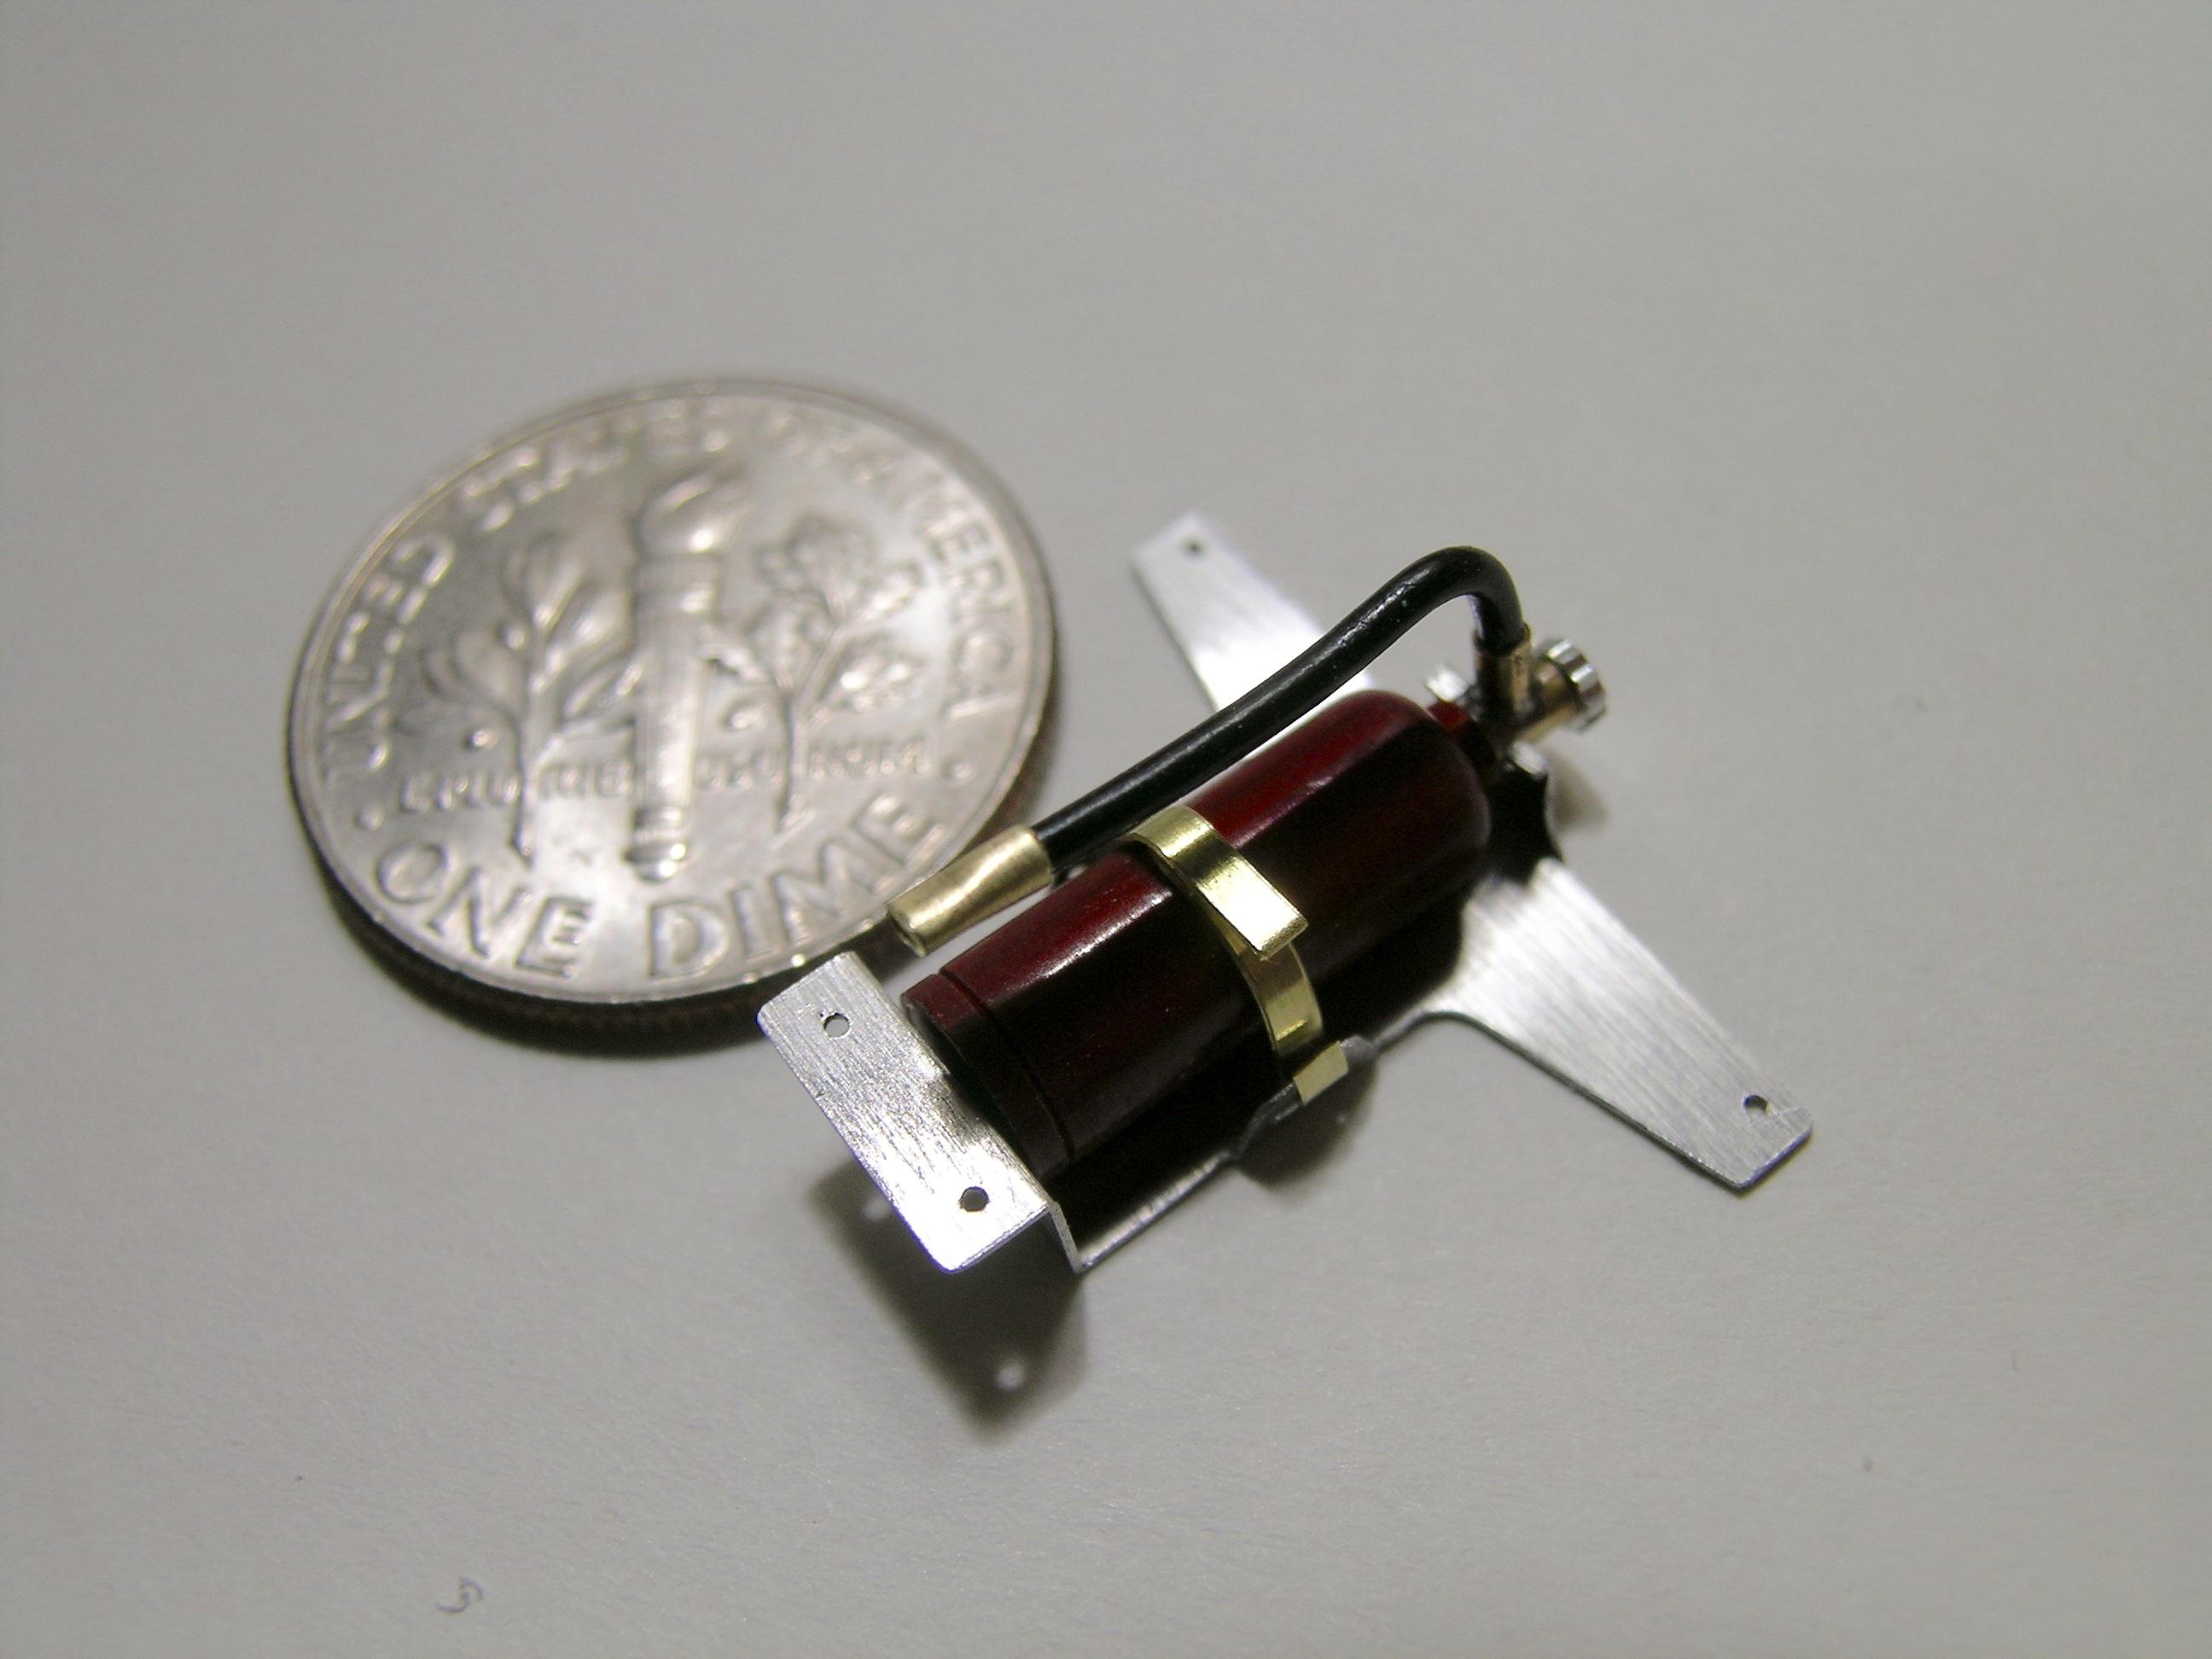
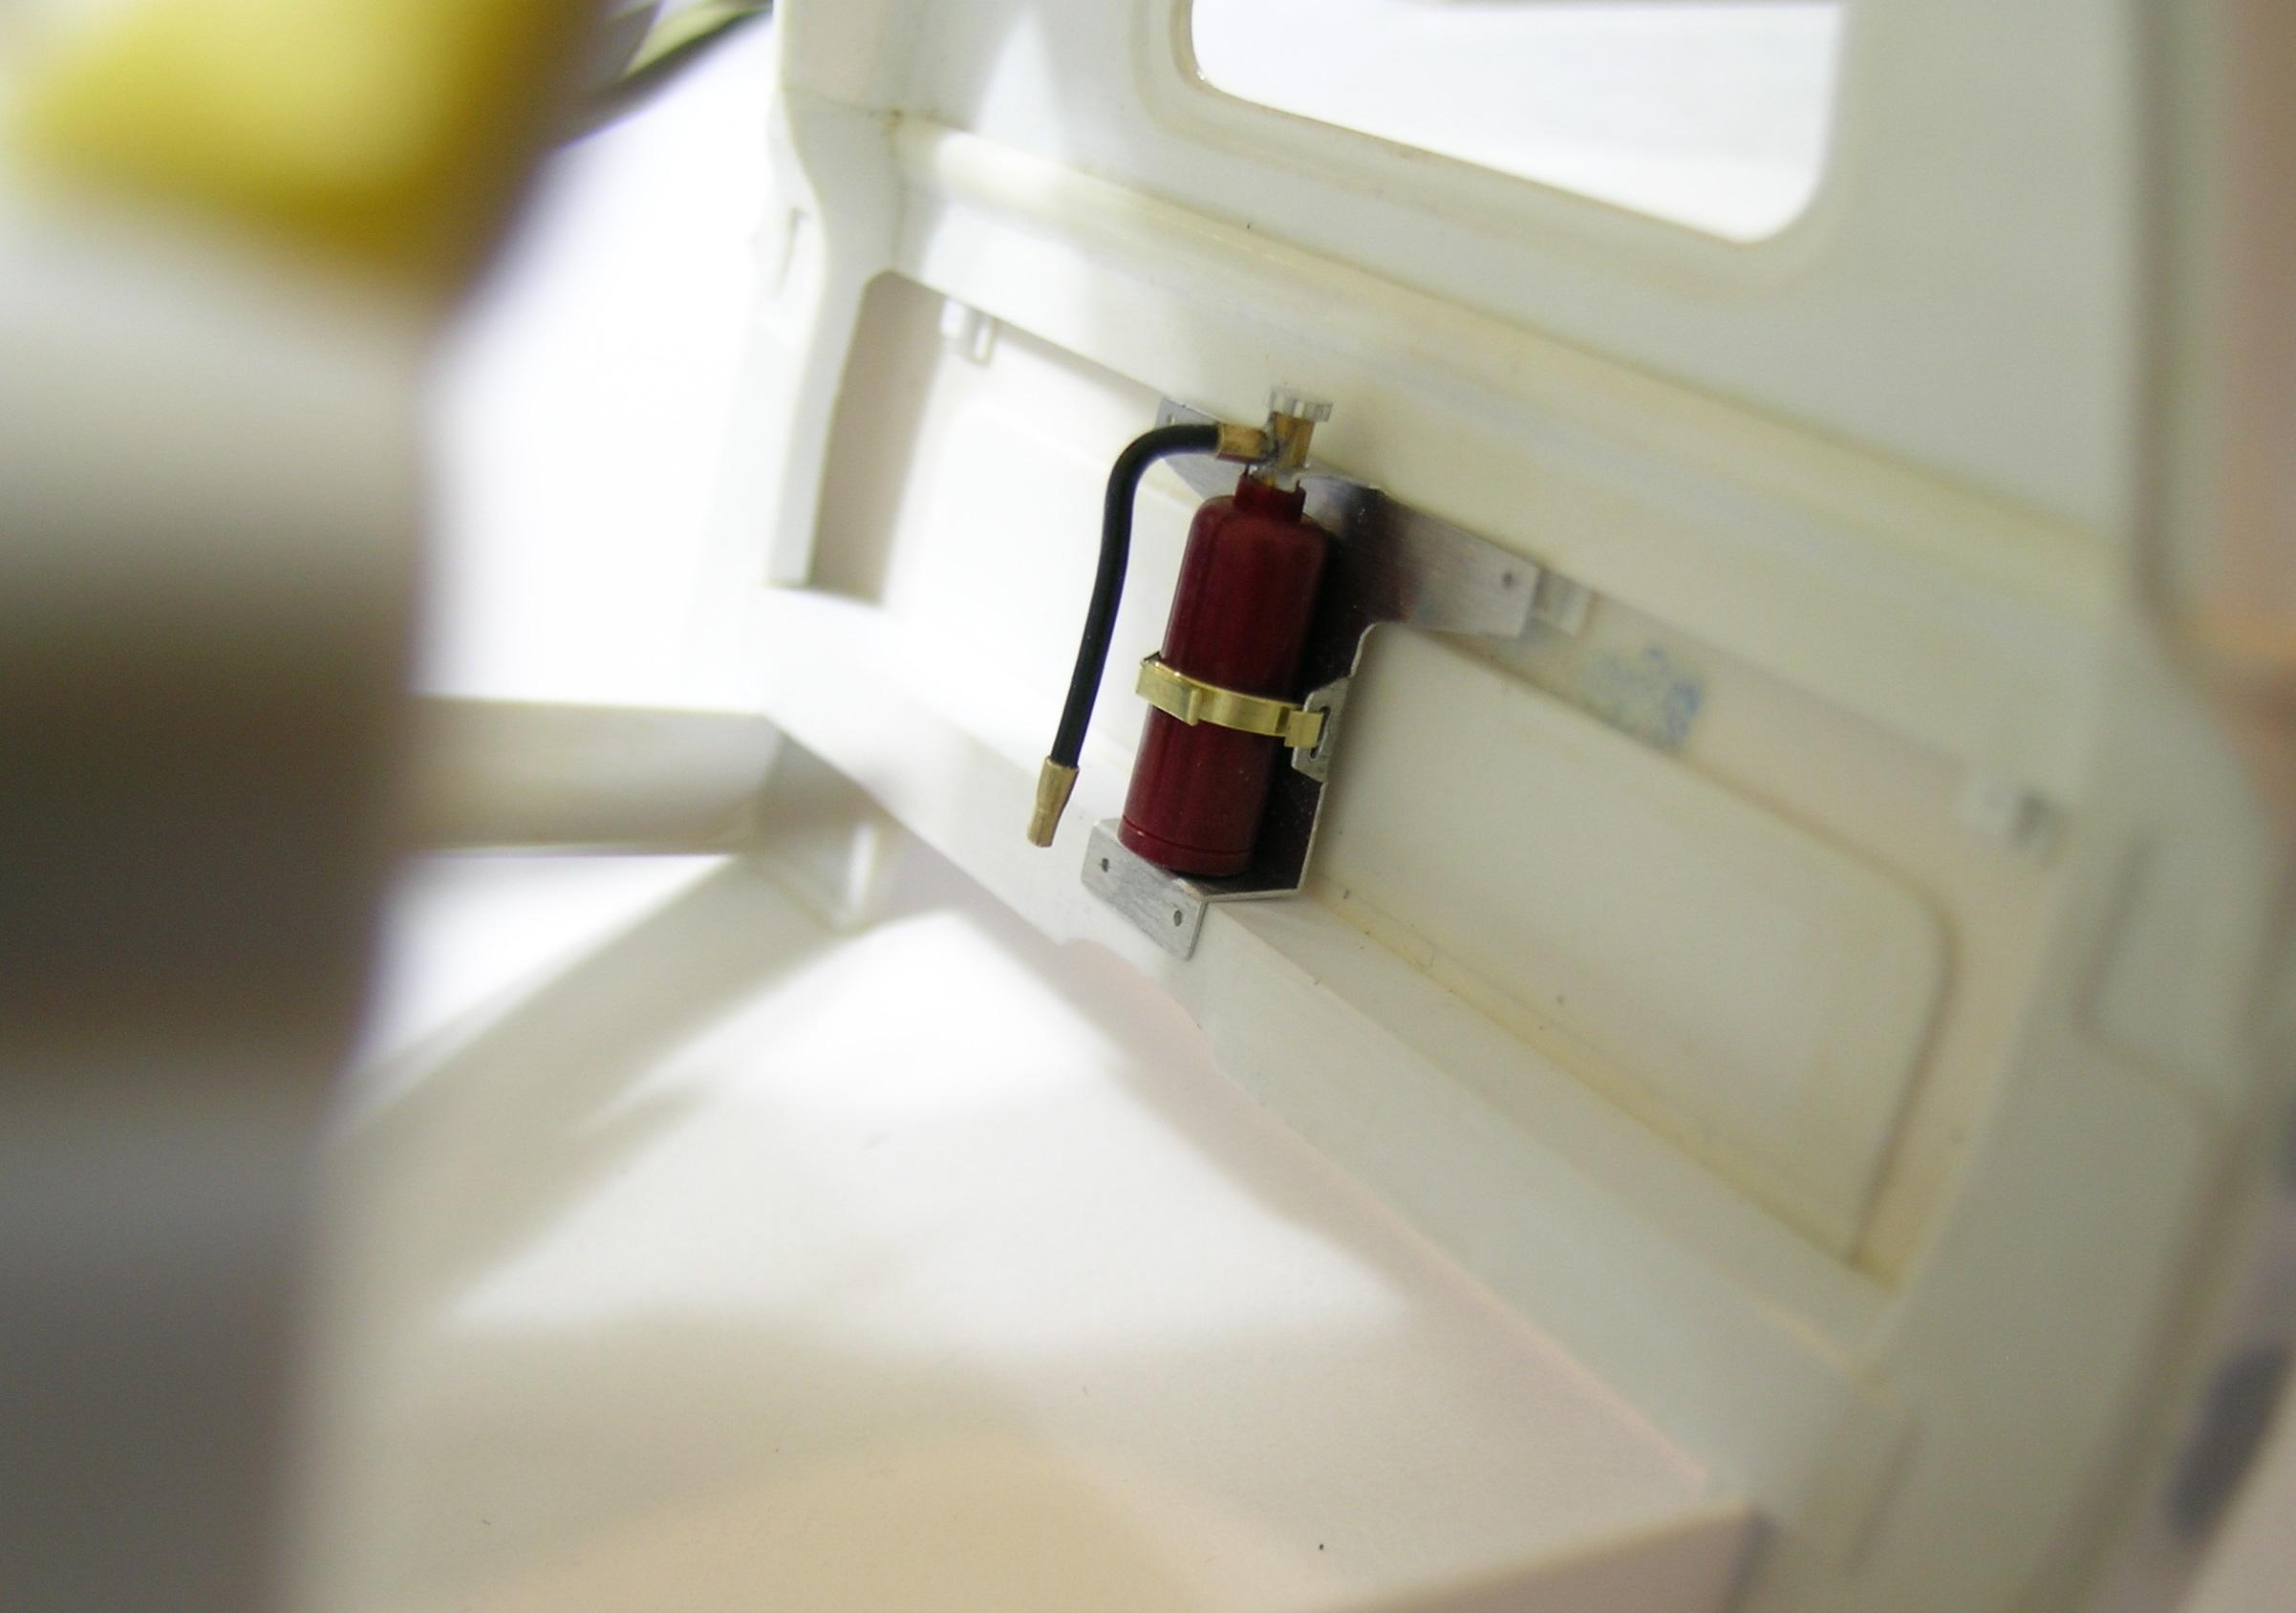
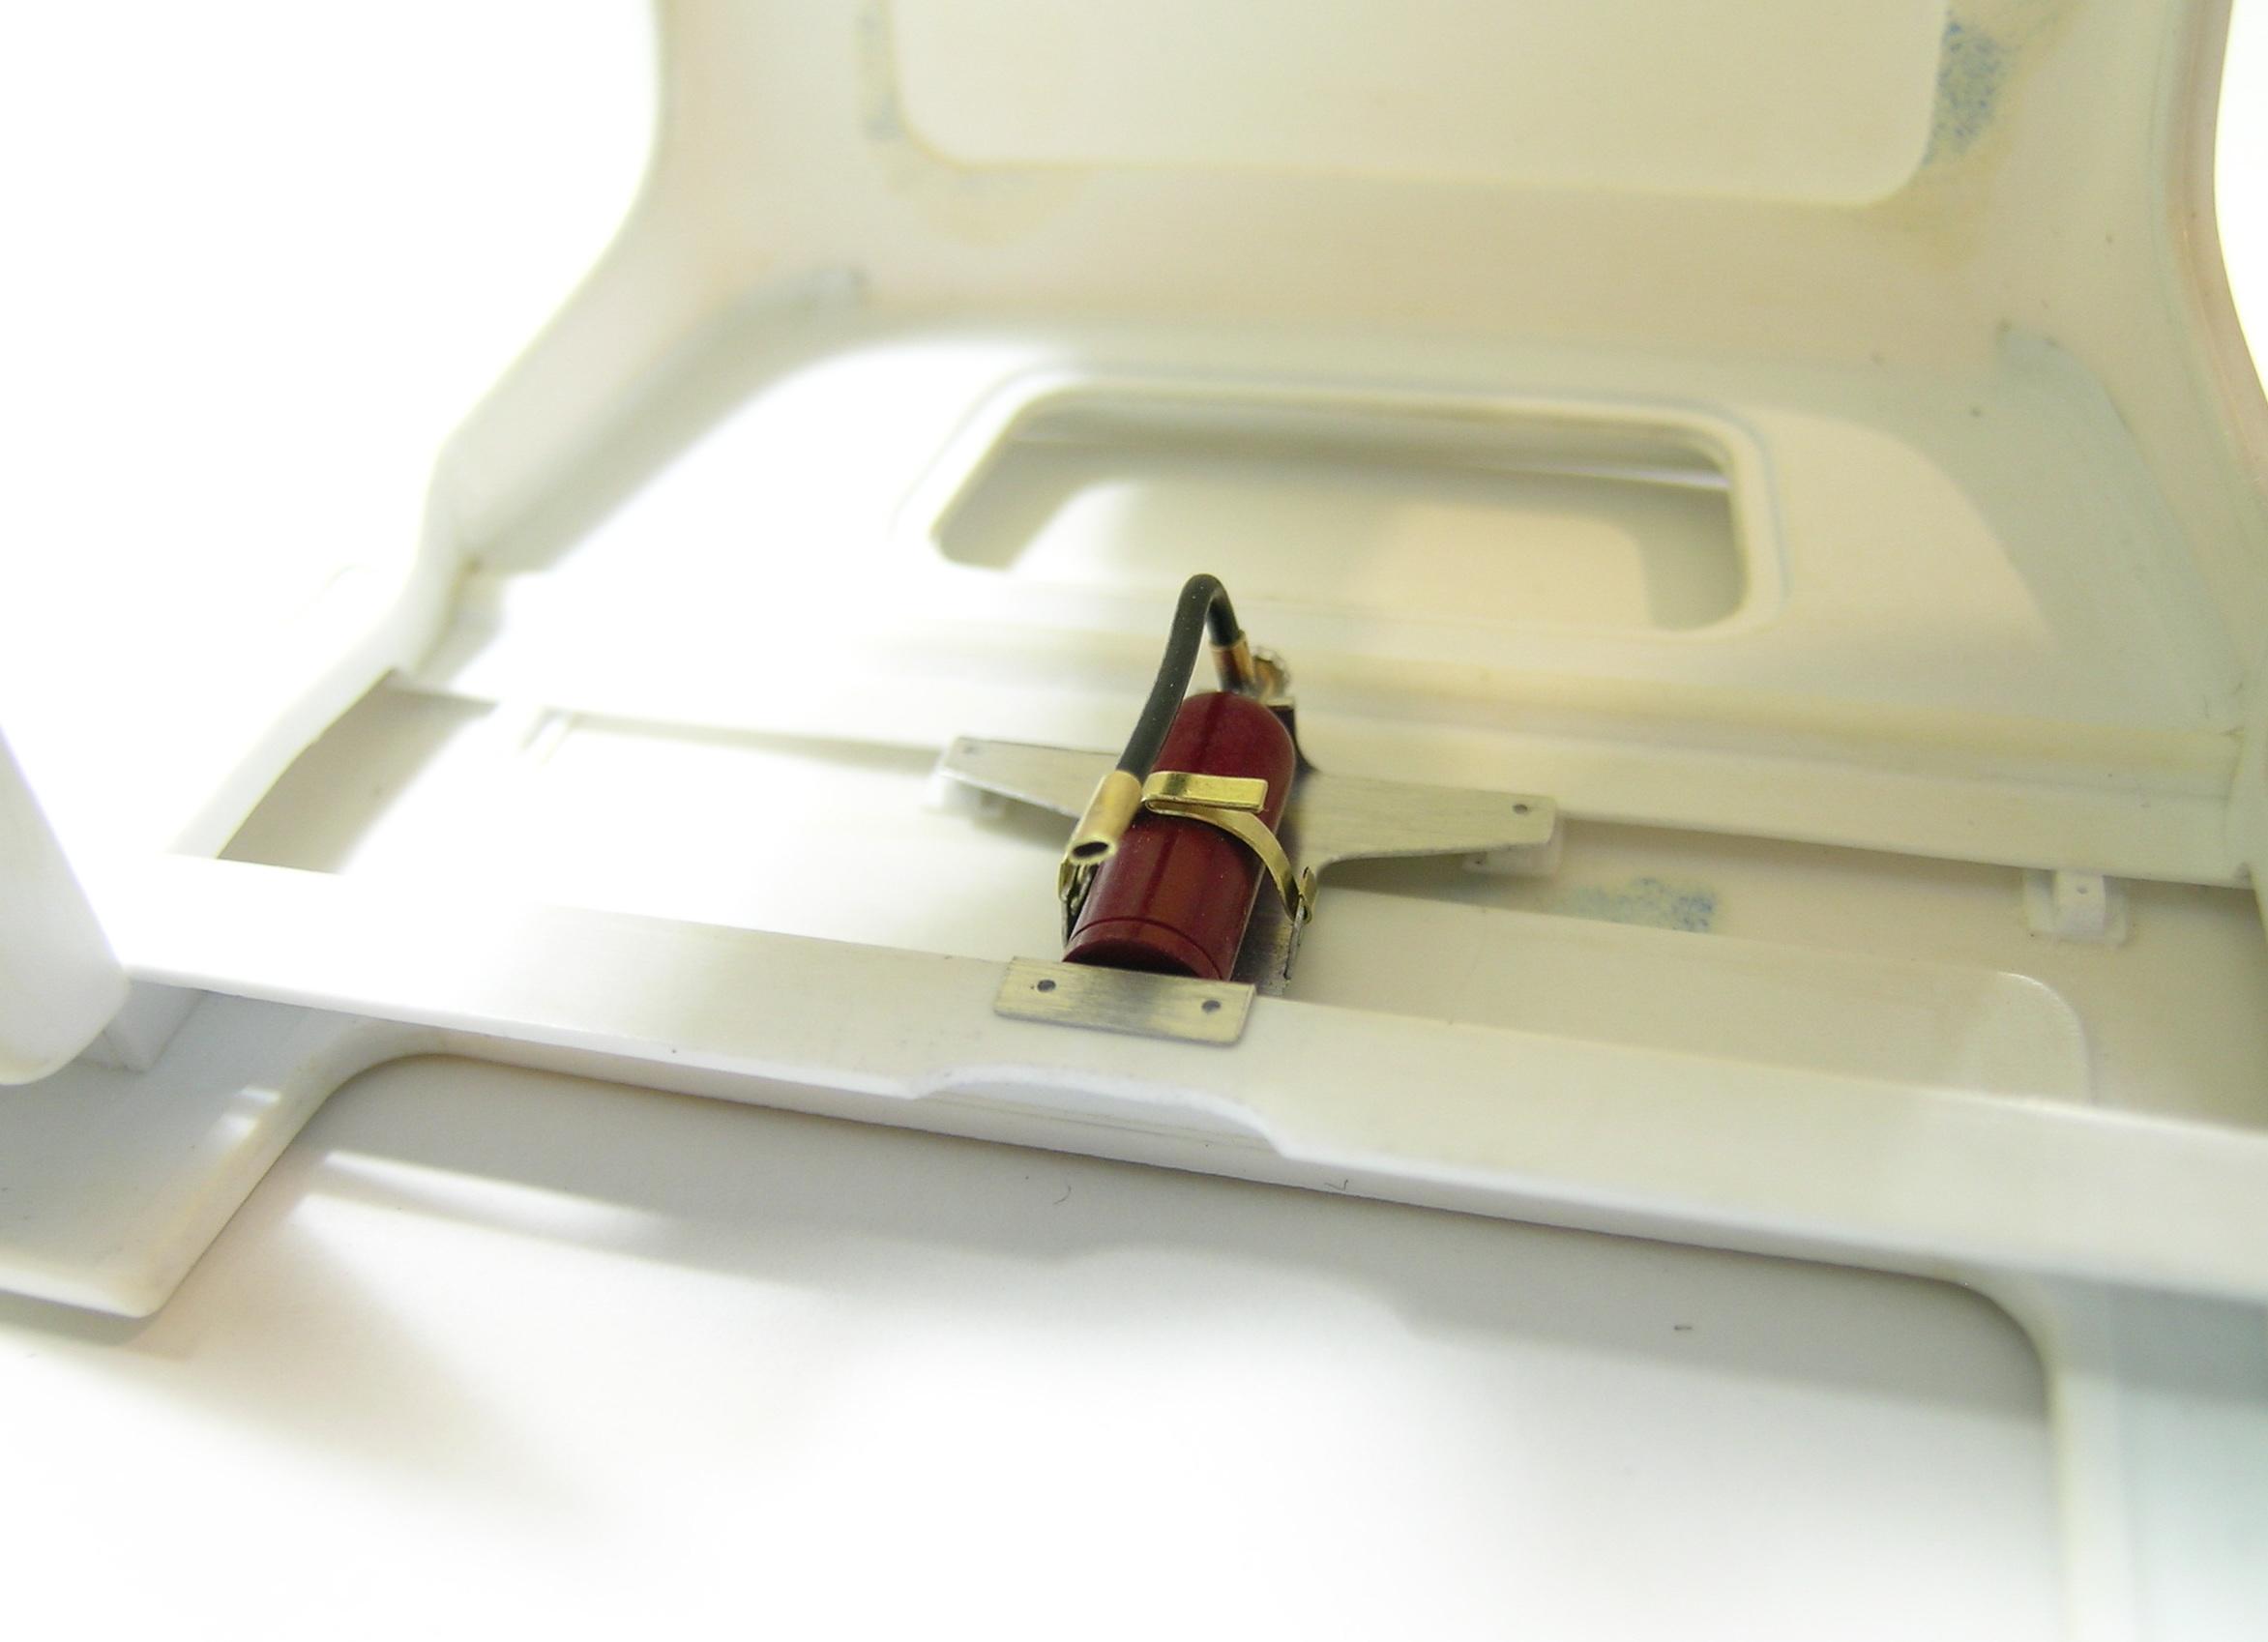
Hello everyone, I was about to permanently install the cabin floor pan and realized that I had forgotten to make an important safety component, the fire extinguisher! I found the perfect place to mount it, between the seats and thought about using the original gas tank anchors to secure it in place. I had to do this part before the floor is in place because I will not be able to work or add parts when it is permanently glued. The latest modifications to the floor pan are made with all the openings made for the components of the Lenco gear levers. I have probably mounted and dismantled the floor pan hundreds of times so hope it will adjust as I expected, I will take this step soon. Comments and suggestions are welcome. Take care, Francis Openings for the shifter components are made. The large opening is for the 3 forward levers, on the right for the reverse gear lever and the other in the rear is for the shifter mounting bracket. Underside view, I made a kind of duct to close the void between the transmission and the floor pan. I also added some round embossing shapes for the rear cabin brackets. Fire extinguisher in progress. The fire extinguisher mount was made with 0.006" aluminum. The bottle neck is 2 part of brass welded together and the opening lever is machined aluminum. Different view, the tip is a small brass tube, the end of which I crushed to make the diffuser and the pipe is an electric wire shield. Test fit. Different view, the bracket will be secured in place with tiny aluminum bolts. Fire extinguisher anodized in red. The release strap is 0.005" brass material. Last test fit. Different view.
-
Server Upgrade Started
AmericanMuscleFan replied to Dave Ambrose's topic in Model Cars Magazine News and Discussions
Thank you for the good and much appreciated work done by the entire forum team Dave! Hope all goes well for smooth operation for years to come!!! -
charlie libby 1965 mustang dragcar
AmericanMuscleFan replied to charlie libby's topic in WIP: Drag Racing Models
Great update Charlie! I really love the new parts you've made. Did you used some Delrin for the gas tank? It also looks like you did some embossing on the aluminum foil, did you heat the part to do it, looks like 0.016" thick aluminum? Your new axle is fantastic by the way! -
Superb Trans Am sir! Very clean build from bumper to bumper, the stance is absolutely perfect and I love these snowflakes spoked wheels! Burt Reynolds would have loved your build too! ?
-
Hubert Platt's 1970 Maverick
AmericanMuscleFan replied to mustang1989's topic in WIP: Drag Racing Models
I am glad to see you back with another project in this category Joe! I know that you are a very good and a real enthusiast of scale models (including airplanes) but I met you here on the forum in the category "Drag Racing Models", so it's more natural for me to see you here if I can put it that way... I love your newest project by the way!!! ? -
Vintage Top Fuel FEDs, 1:16 brass chassis
AmericanMuscleFan replied to Mike Williams's topic in WIP: Drag Racing Models
Impressive work as usual Mike! Your laced wheels are a work of art and few people (including me...) are able to venture into this kind of work! Question: What kind or brand of chrome paint do you use on brass? Do you need to add some primer or base color for the chrome paint? Francis