AmericanMuscleFan
-
Posts
3,058 -
Joined
-
Last visited
Content Type
Profiles
Forums
Events
Gallery
Everything posted by AmericanMuscleFan
-

’72 Dodge Demon Drag Racer 1/25 scale
AmericanMuscleFan replied to AmericanMuscleFan's topic in WIP: Drag Racing Models
Thanks Tim, I'll take that as a compliment! 😁 Francis -
You are such a perfectionist Tim! Wanting to imitate the color of the original Lenco case is a detail that few modelers would have tried to achieve, myself included! 👍 It's promising!
-
’72 Dodge Demon Drag Racer 1/25 scale
AmericanMuscleFan replied to AmericanMuscleFan's topic in WIP: Drag Racing Models
It was all basically a trial and error, I had this piece of rubber the right size in my parts bin. I think it was a piece of gasket that came from the lid of a 5 gallon oil bucket. The center of the gasket is hollow and the right size (or very close...) for our scale (1/25). Sometimes you have to do what you can with what you have on hand! I hope your research is fruitful, in any case, you will have motor oil in stock. 🤔 -
’72 Dodge Demon Drag Racer 1/25 scale
AmericanMuscleFan replied to AmericanMuscleFan's topic in WIP: Drag Racing Models
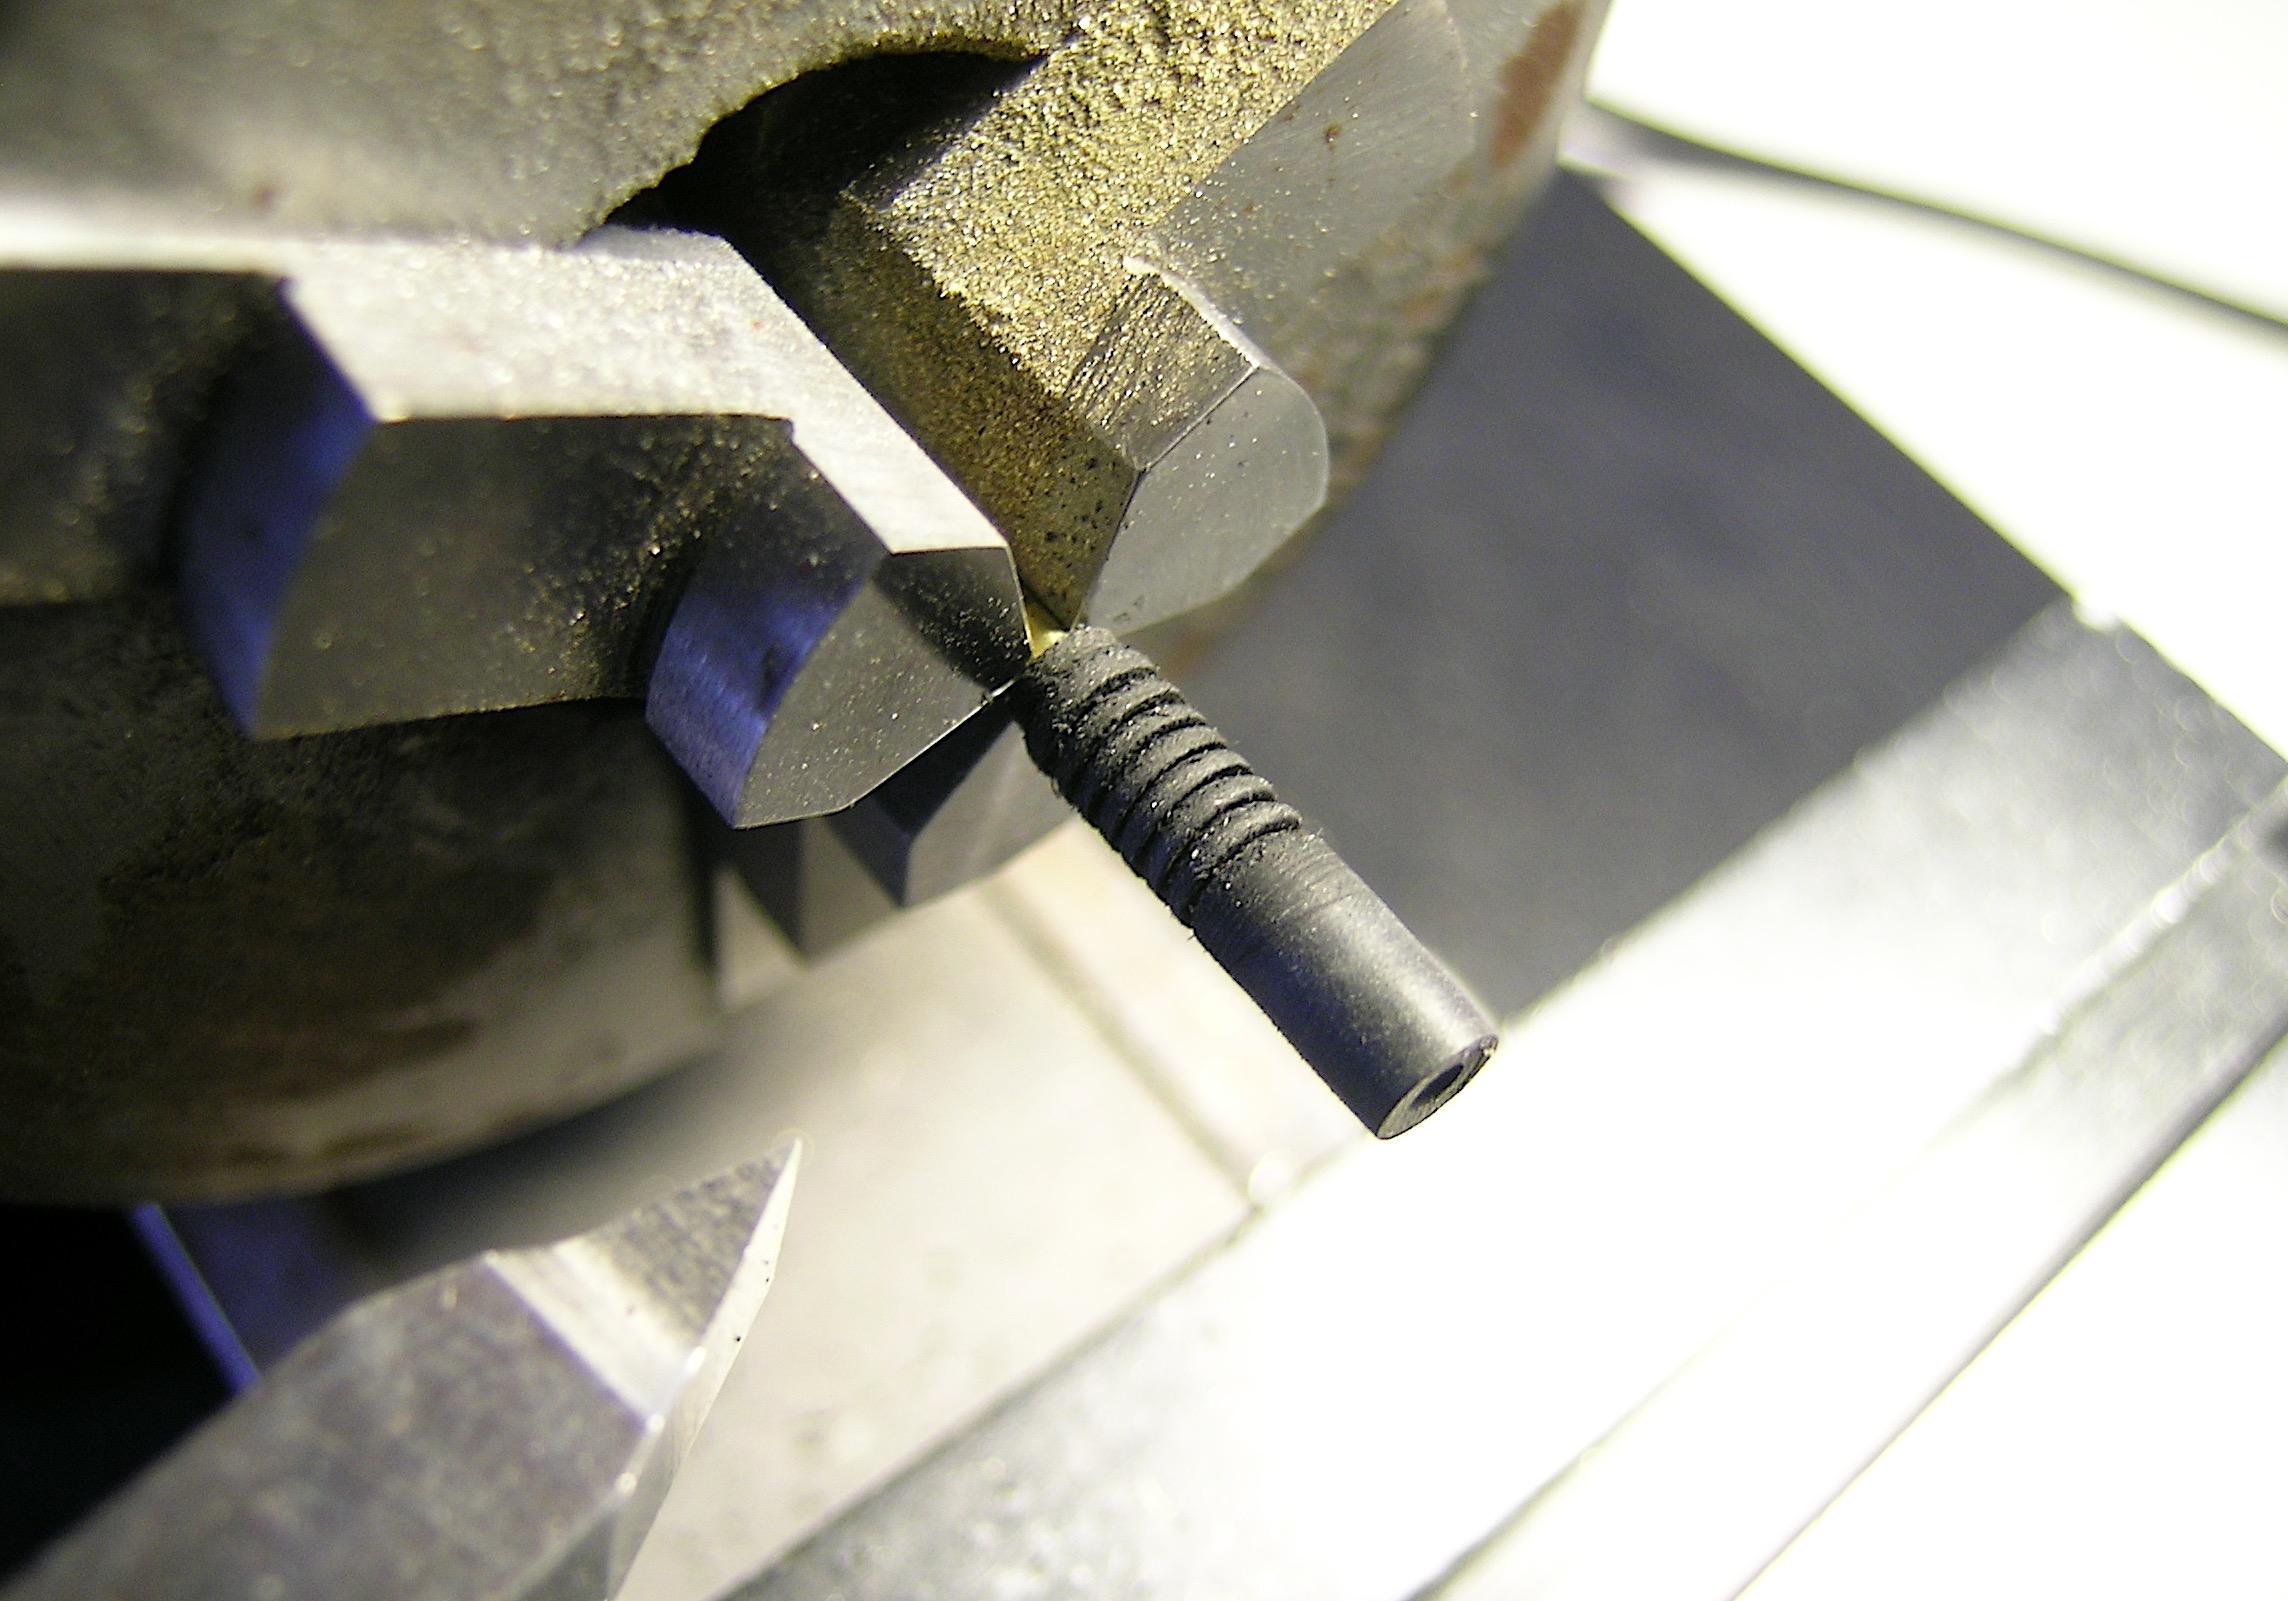
Thanks Robert ! Tanks Andrew! I started with a "V" shaped cutting tool on the lathe to initiate the groove (guide line). I then used the tip of my Xacto to accentuate the "V" shape, then I used sandpaper (180) to smooth the grooves with the lathe at low speed. It's not perfect but not bad in my opinion! Francis -
Pony Express 70s BB/FC ex M/T Pinto
AmericanMuscleFan replied to Ian McLaren's topic in WIP: Drag Racing Models
WOW, the wheels are awesome, your project is going in the right direction my friend! 👍 -
Well, I just woke up or I'm way late... I never would have imagined finding you in this category Randy but you have to understand that genius has no boundaries! There are no words or superlatives to adequately comment on what we are witnessing here. You have the gift of putting our feet back on the ground and putting into perspective what we do on our own projects and there is nothing negative in what I say. The only downside is that I could spend all day looking at the wonders you do and not have time to work on my own project. I'm going to shake myself up and use the lesson in humility you give us to try to increase the quality of the details of what I do. I could add more but I won't add more for the moment except to say that the undisputed master shows us what humans can create, assuming that you are! Breathtaking!!! 👌🎩
-
You are a Styrene artist my friend, this is high quality work, the photos speak for themselves! 👍
-
It was the best thing to do Steve, the replacement section you created is 100% better than the original, kill two birds with one stone as they say! I don't like the translation of the French expression though, I'm a bird lover! 😁
-
’72 Dodge Demon Drag Racer 1/25 scale
AmericanMuscleFan replied to AmericanMuscleFan's topic in WIP: Drag Racing Models
Thanks Steve, It's always a pleasure to share, that's the reason for the WIP category and this forum, right? 😊 I still have many things to make and share so come back whenever you want! Francis -
Badman C/A (ca. 1975)
AmericanMuscleFan replied to Straightliner59's topic in WIP: Drag Racing Models
The color is superb Daniel, it's a change from the red, black or yellow that we usually see on these 55 Chevy. 👍 I really like the inner fender skirts, they dress up the engine compartment very well, I was just thinking about adding some to my Demon, you gave me the kick to go ahead with that! -
Mercedes Benz SSK
AmericanMuscleFan replied to Pierre Rivard's topic in WIP: Other Racing: Road Racing, Land Speed Racers
WOW Pierre, the modified radiator face looks fantastic and the whole exhaust system is an example of superb workmanship, it makes the original kit parts look bad but that's kind of the point of the exercise, right? The pieces of mesh on the pedals is genius, the visual effect is right on! 👌 -
Badman C/A (ca. 1975)
AmericanMuscleFan replied to Straightliner59's topic in WIP: Drag Racing Models
I can't wait to see this color Daniel, it's going to be awesome! I've been working nights this week and I'm battling jet lag at the moment, it's a tough work schedule and I admire that you're so awake in everything you do. 👍 -
’72 Dodge Demon Drag Racer 1/25 scale
AmericanMuscleFan replied to AmericanMuscleFan's topic in WIP: Drag Racing Models
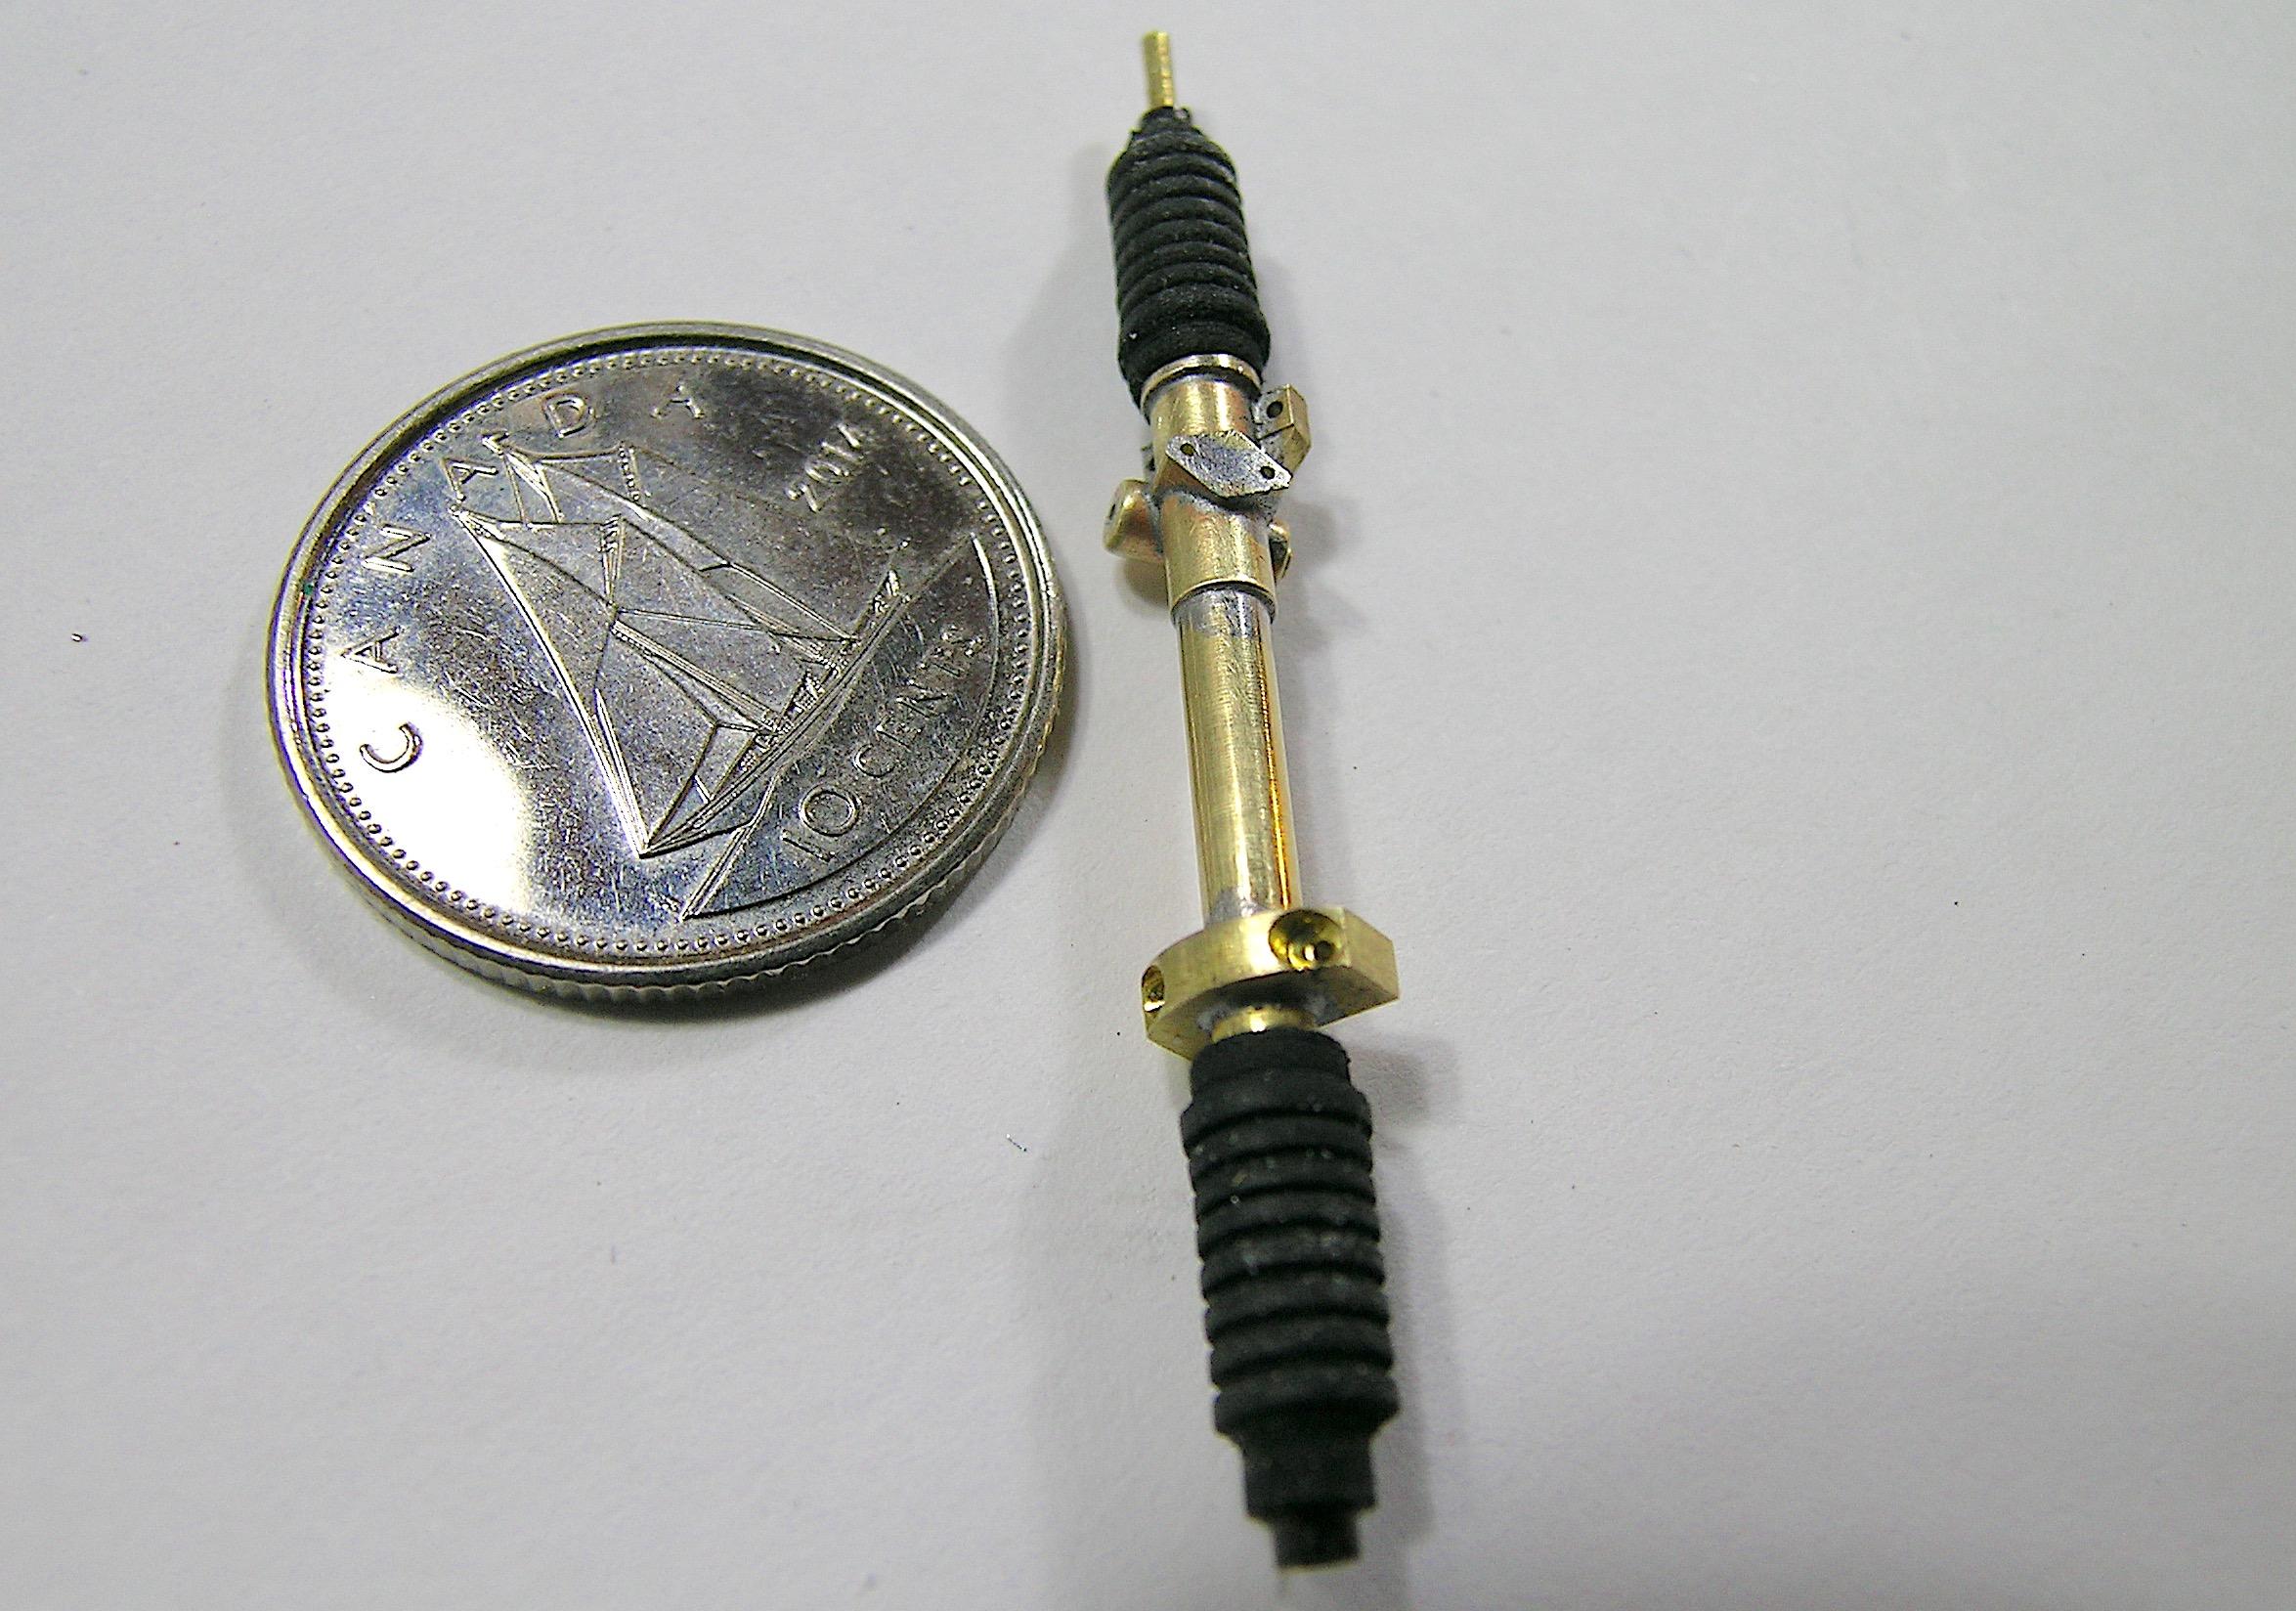
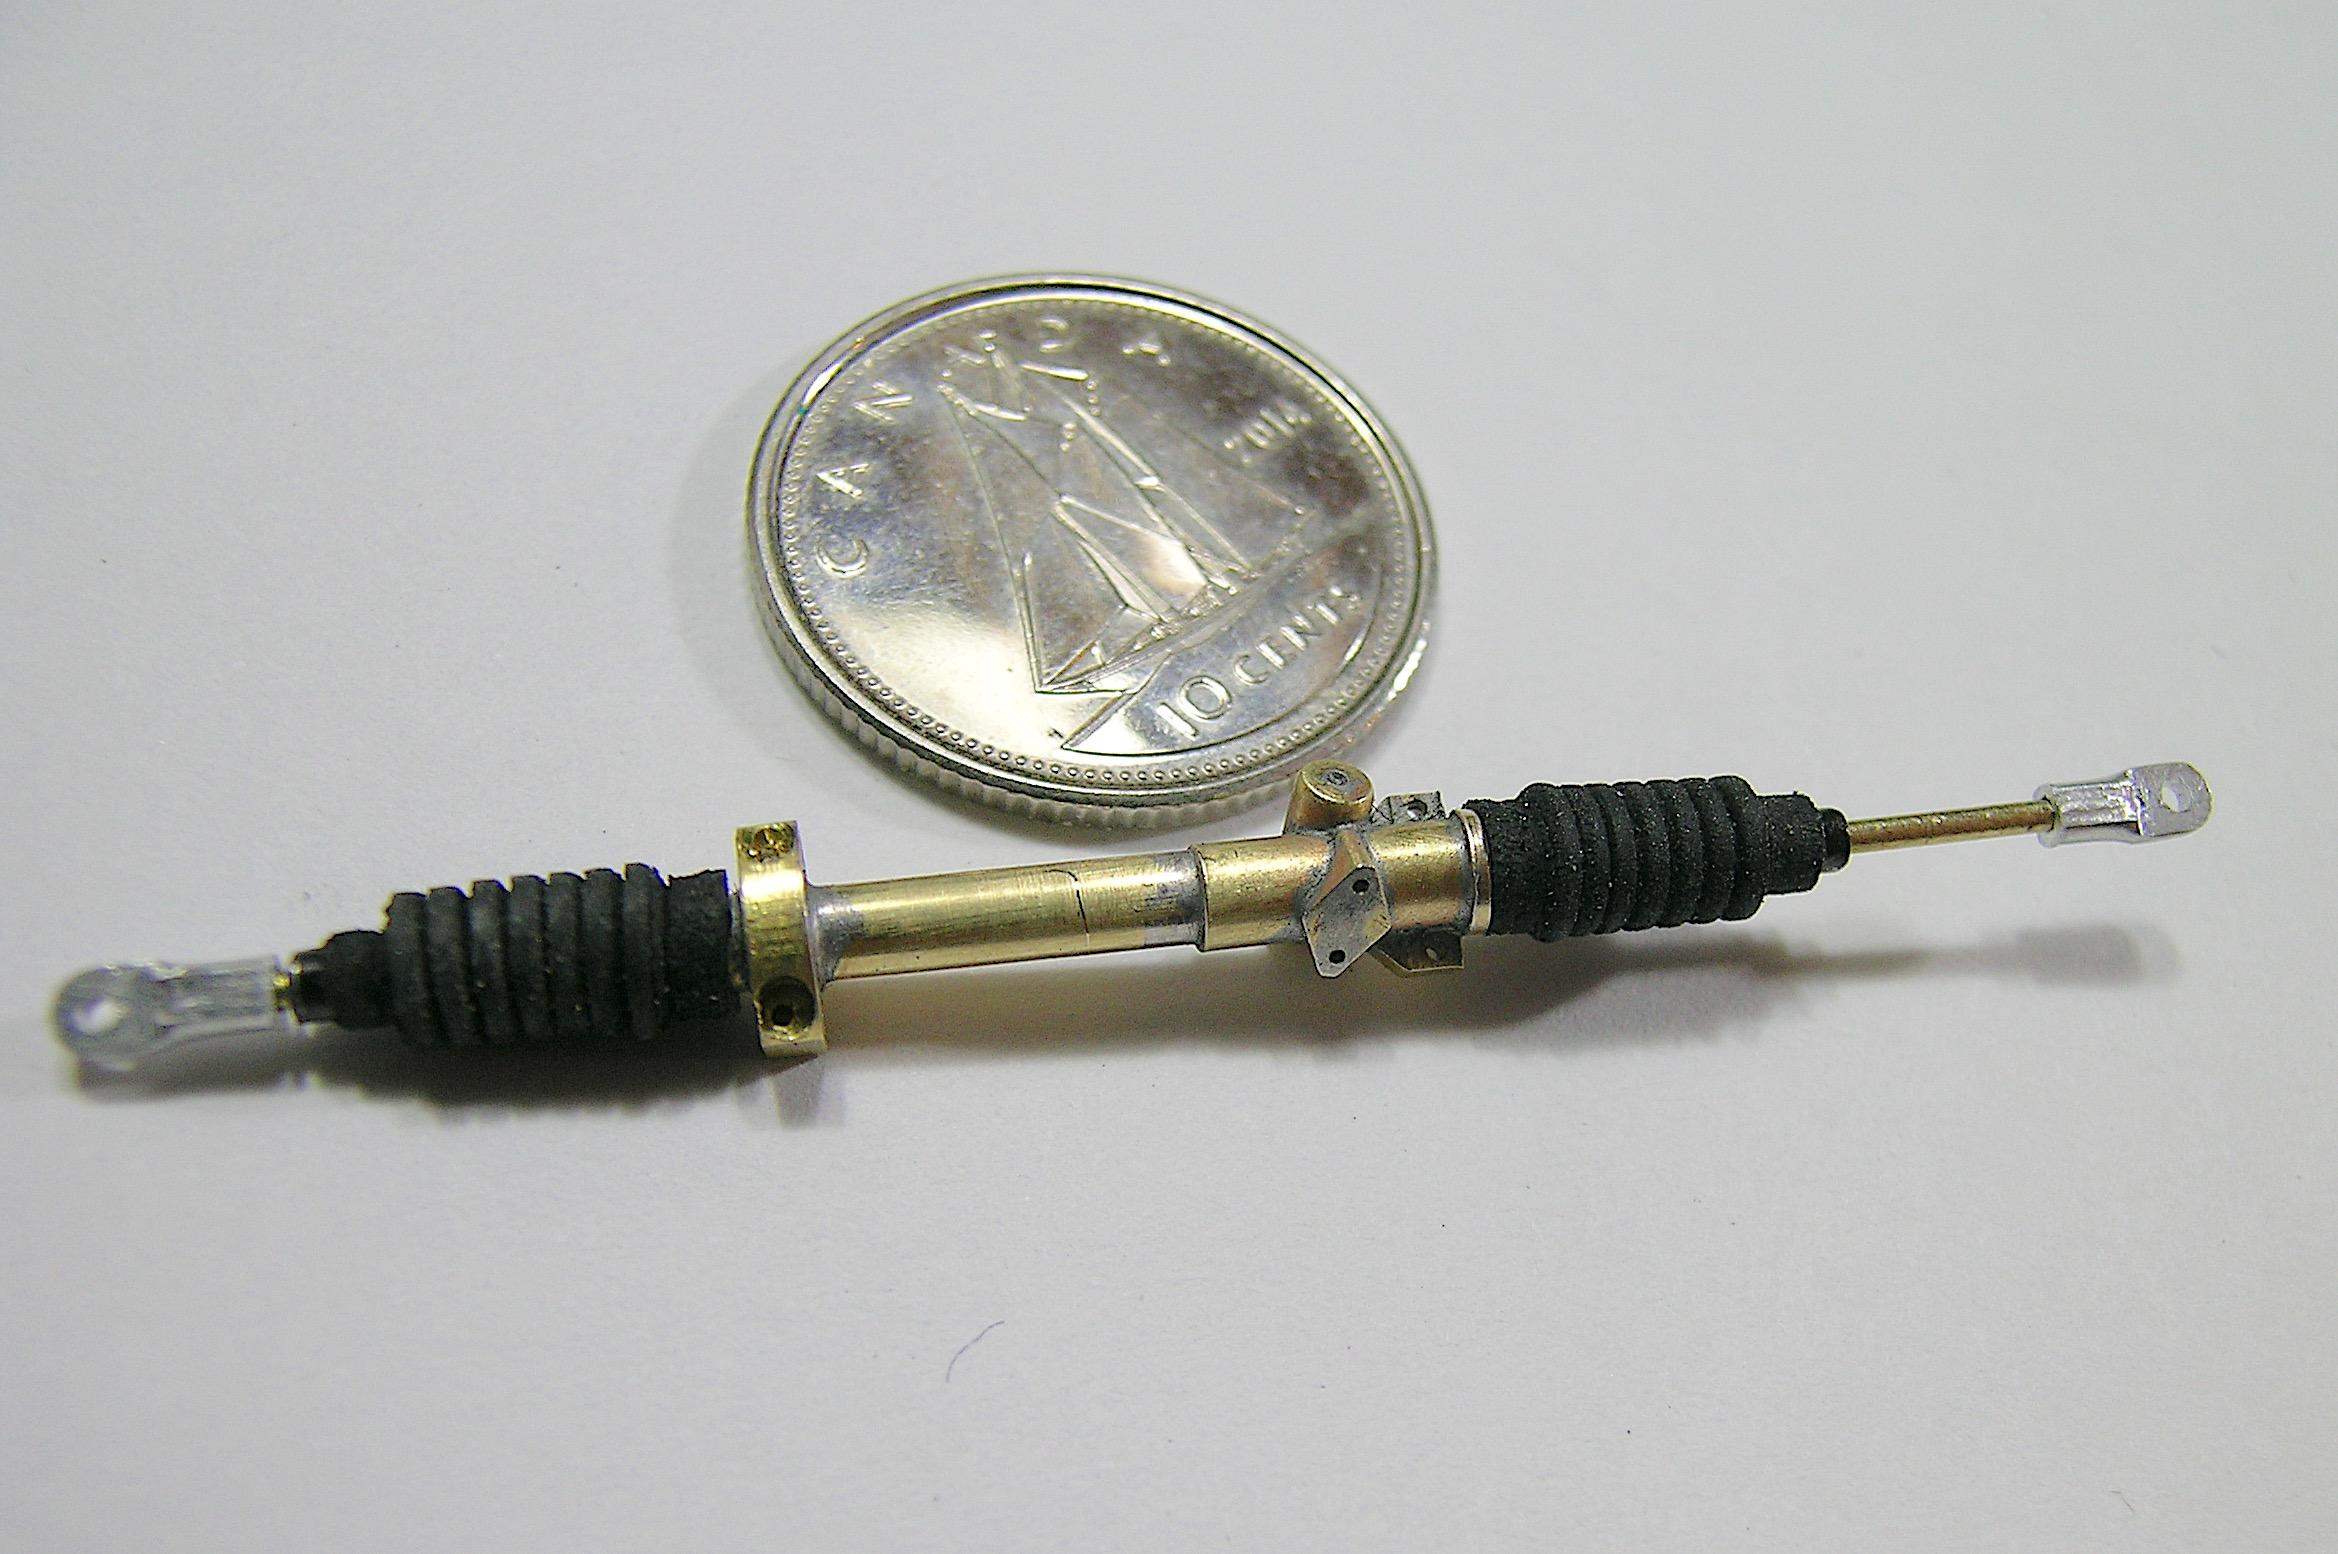
Thanks Brian, I have to admit that at one point I thought it was over, I think I made at least 10 attempts and I think I found the cause of my problems. Anyway, the most important thing is to be back and to be able to continue sharing my passion with all of you. As for soldering and positioning all the elements in the right places and angles, my resistance welding unit is probably more the reason for my success. I am in admiration for those who use a small torch, they are real magicians and having already tried, I can confirm that it takes patience and know-how! Thanks Scott, This is definitely my most detailed yet but there is always room for improvement, you have to draw a line and accept your limits because it will never end. I still have a lot of projects in mind and the car in your profile picture is my favorite Mopar model, I hope to get on board with this project one of these days! Thanks Daniel, This is the best solution I found and I thought of you when making them because you are good at this kind of thing, it is ironically the most difficult part of the set to make (or to make credible) and there are few solutions available to replace them. Thanks Pierre, It's the dime that does all the trick!😉 There is still a little finishing to do and a few details to add like simulated bolts and collars but the part will only be visible from underneath the vehicle, I will have to display it on a mirror so that we can see it. Thank you again for your support and comments, it makes sense to it all! 😊 Francis -
’72 Dodge Demon Drag Racer 1/25 scale
AmericanMuscleFan replied to AmericanMuscleFan's topic in WIP: Drag Racing Models
Third part. I sort of "machined" the boots from a hard rubber tube. A little test to check if it makes sens. I think it will do the trick! It will look like this! It will be chrome plated later when most of the brass part that need to be chromed is all made. The steering is supposed to work. the rod inside slides left to right.
-
’72 Dodge Demon Drag Racer 1/25 scale
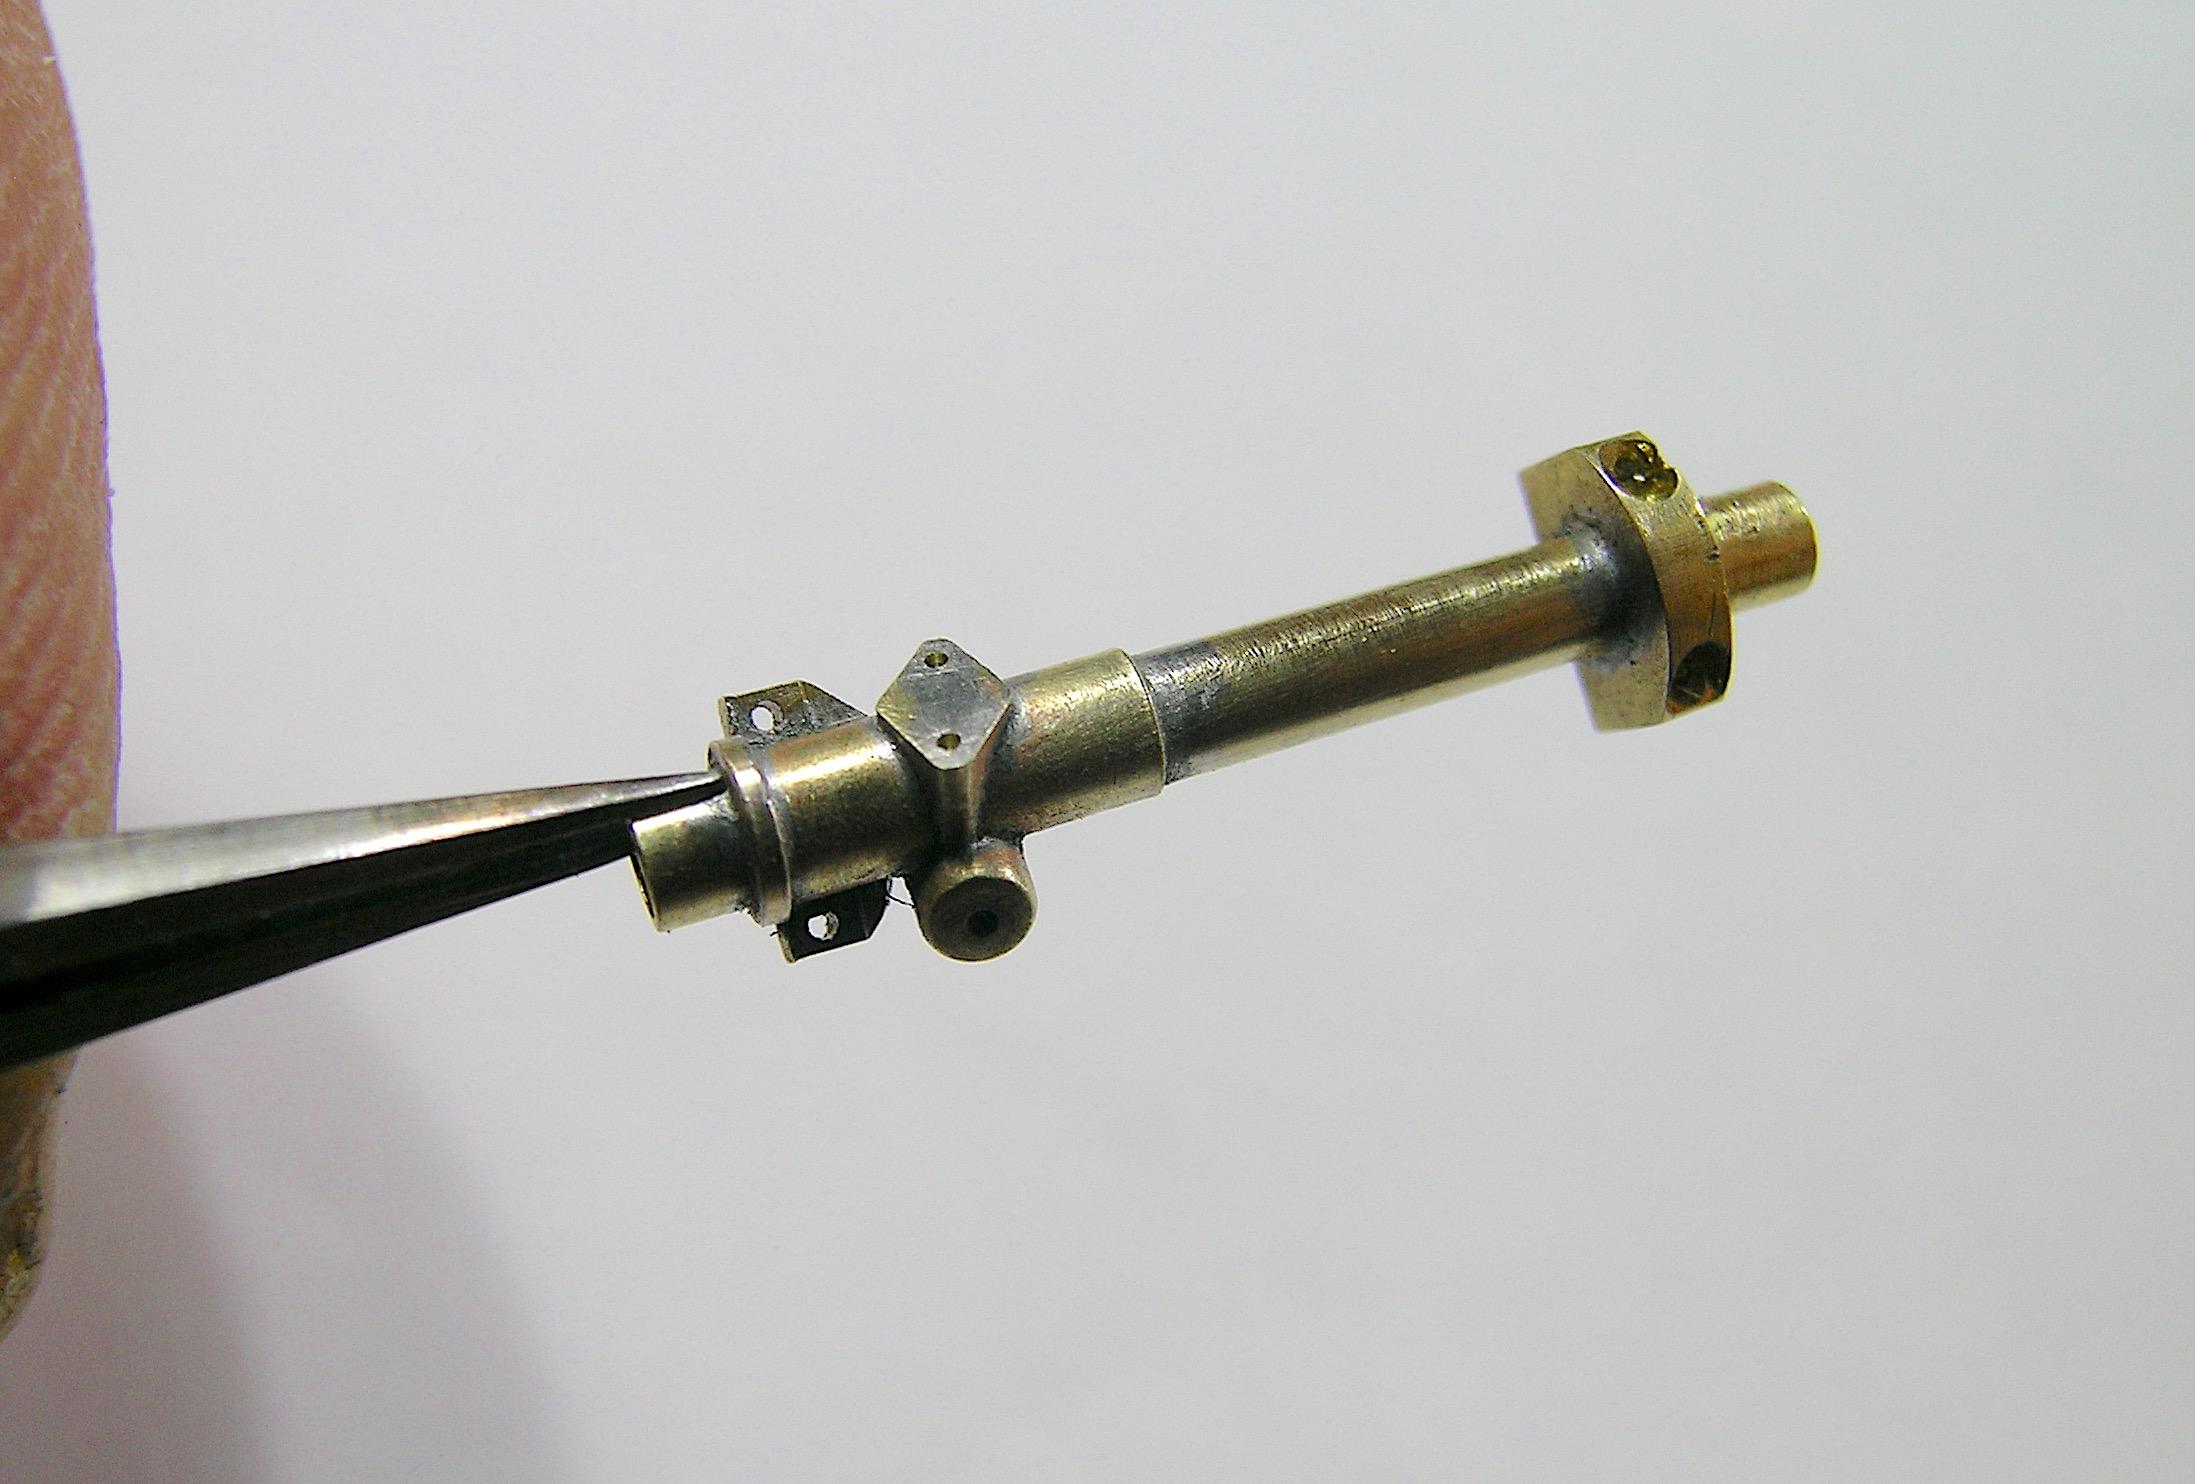
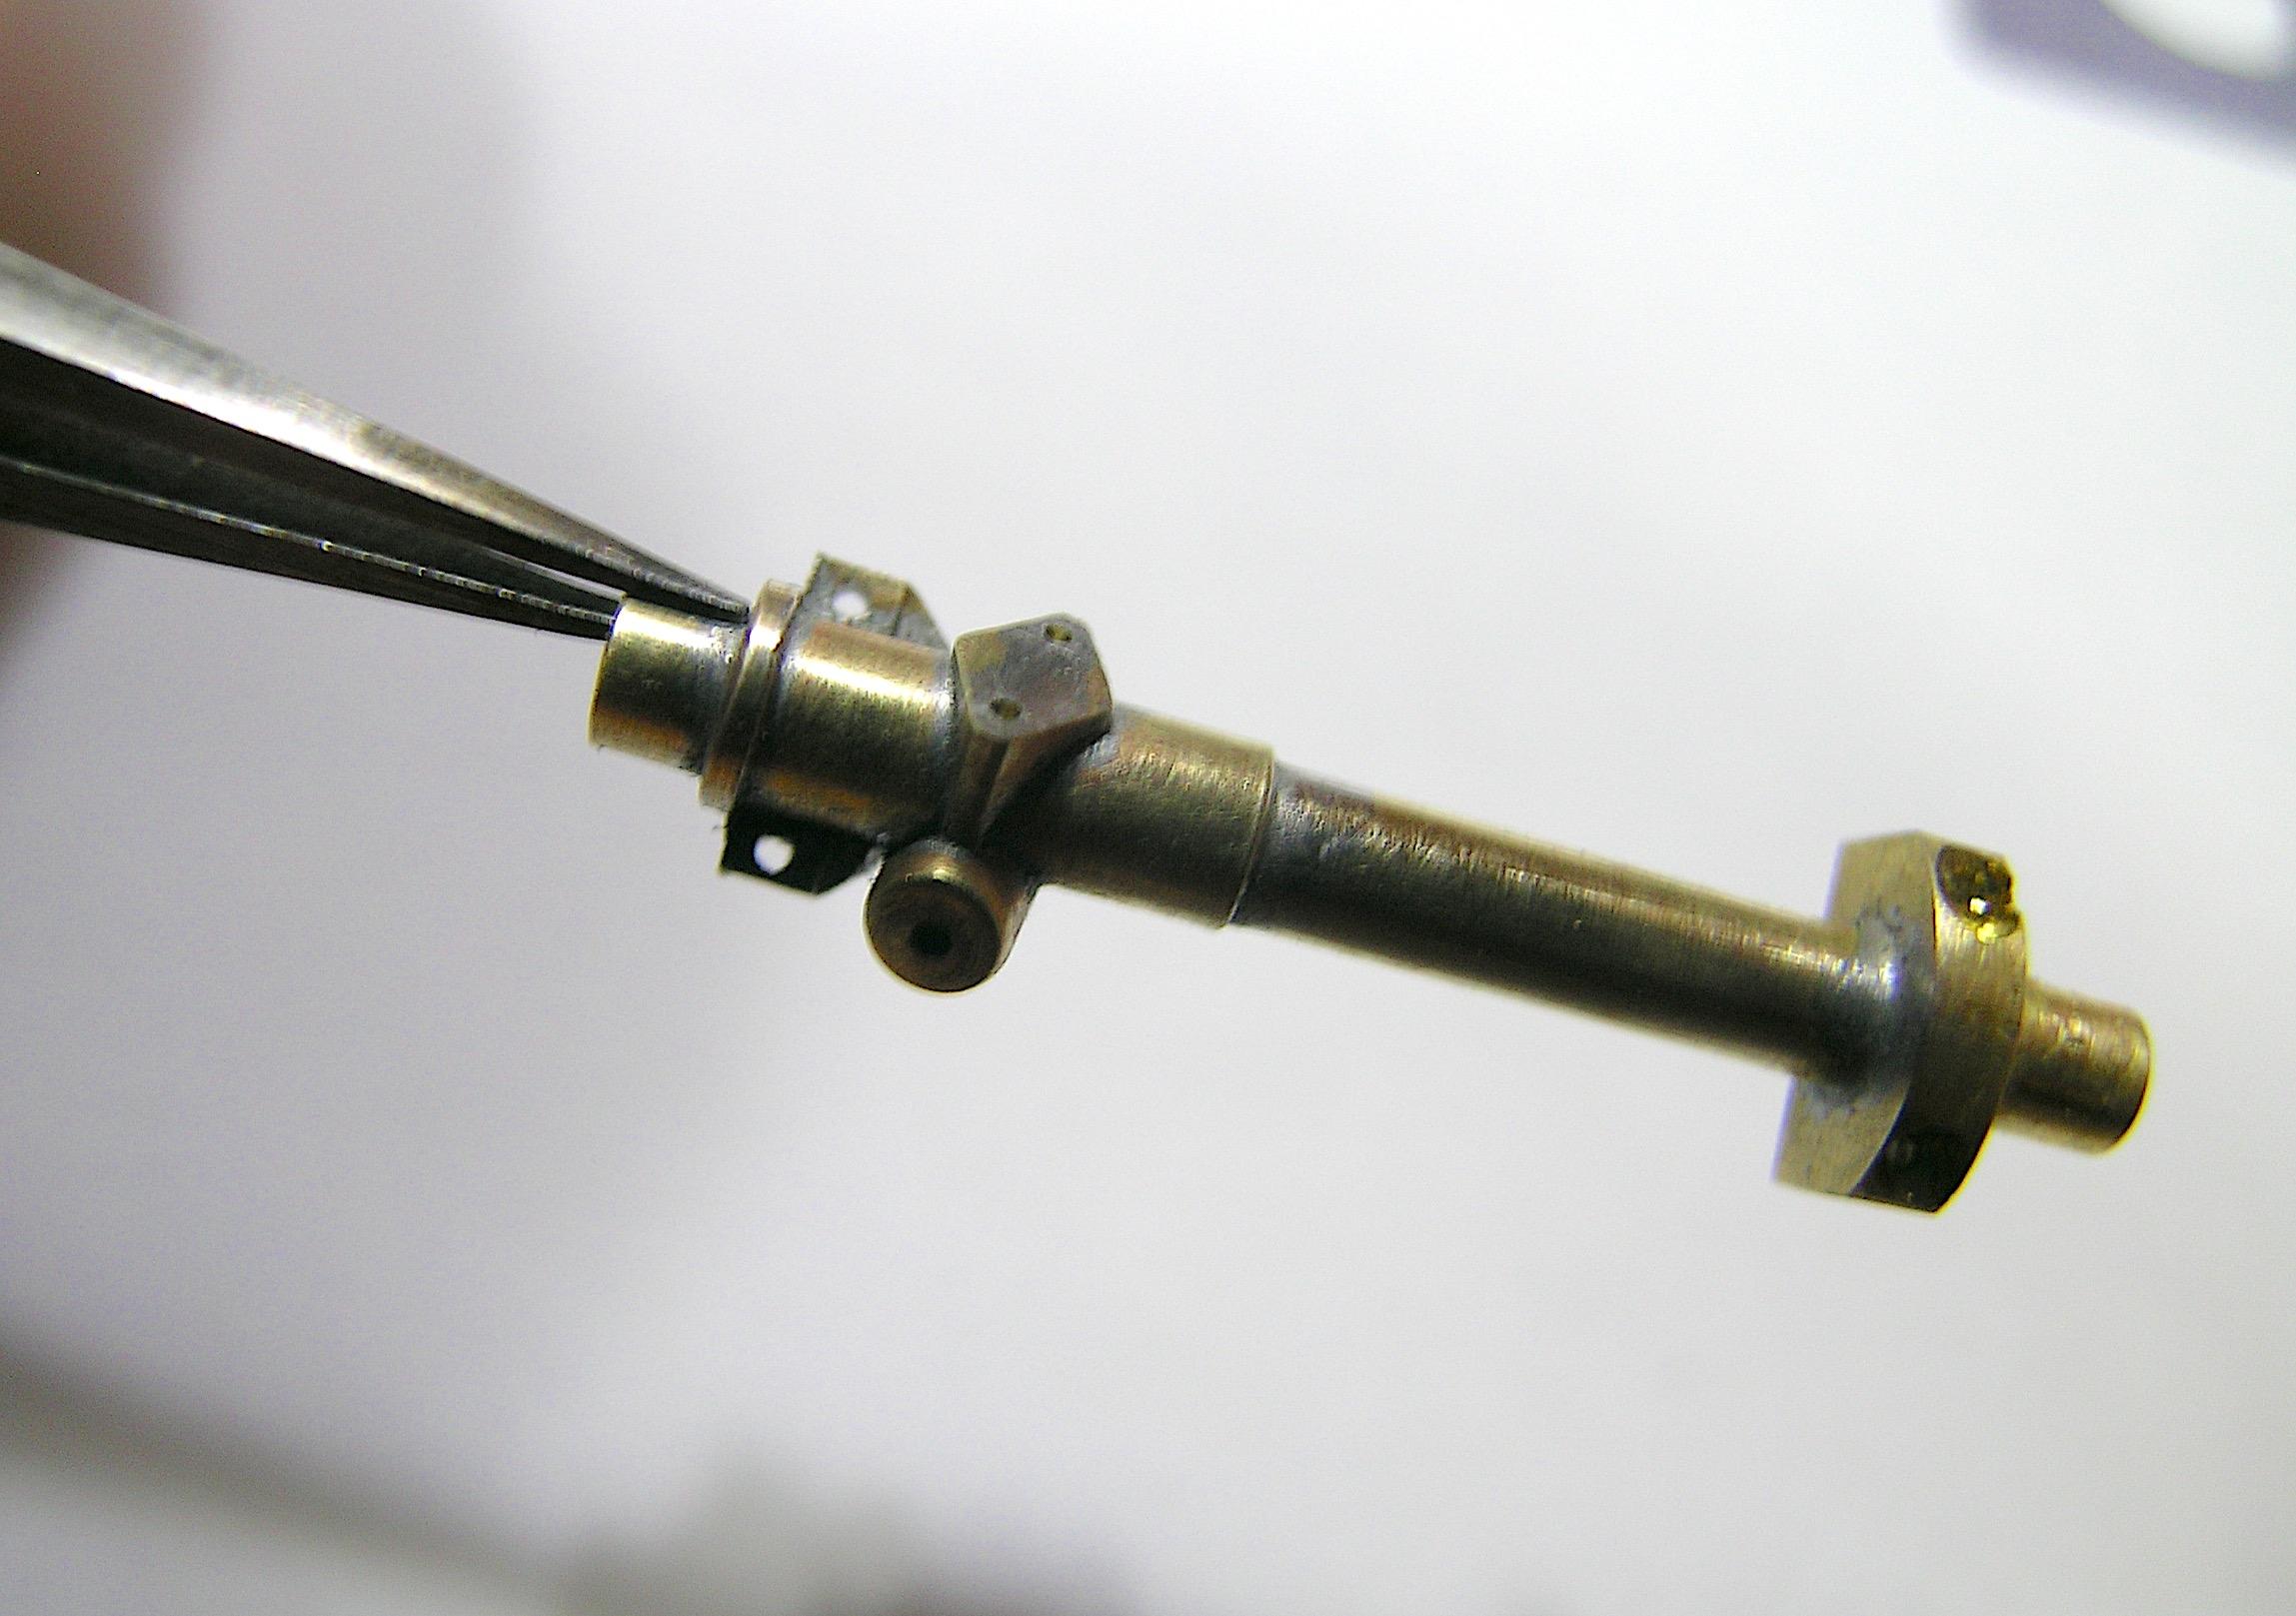
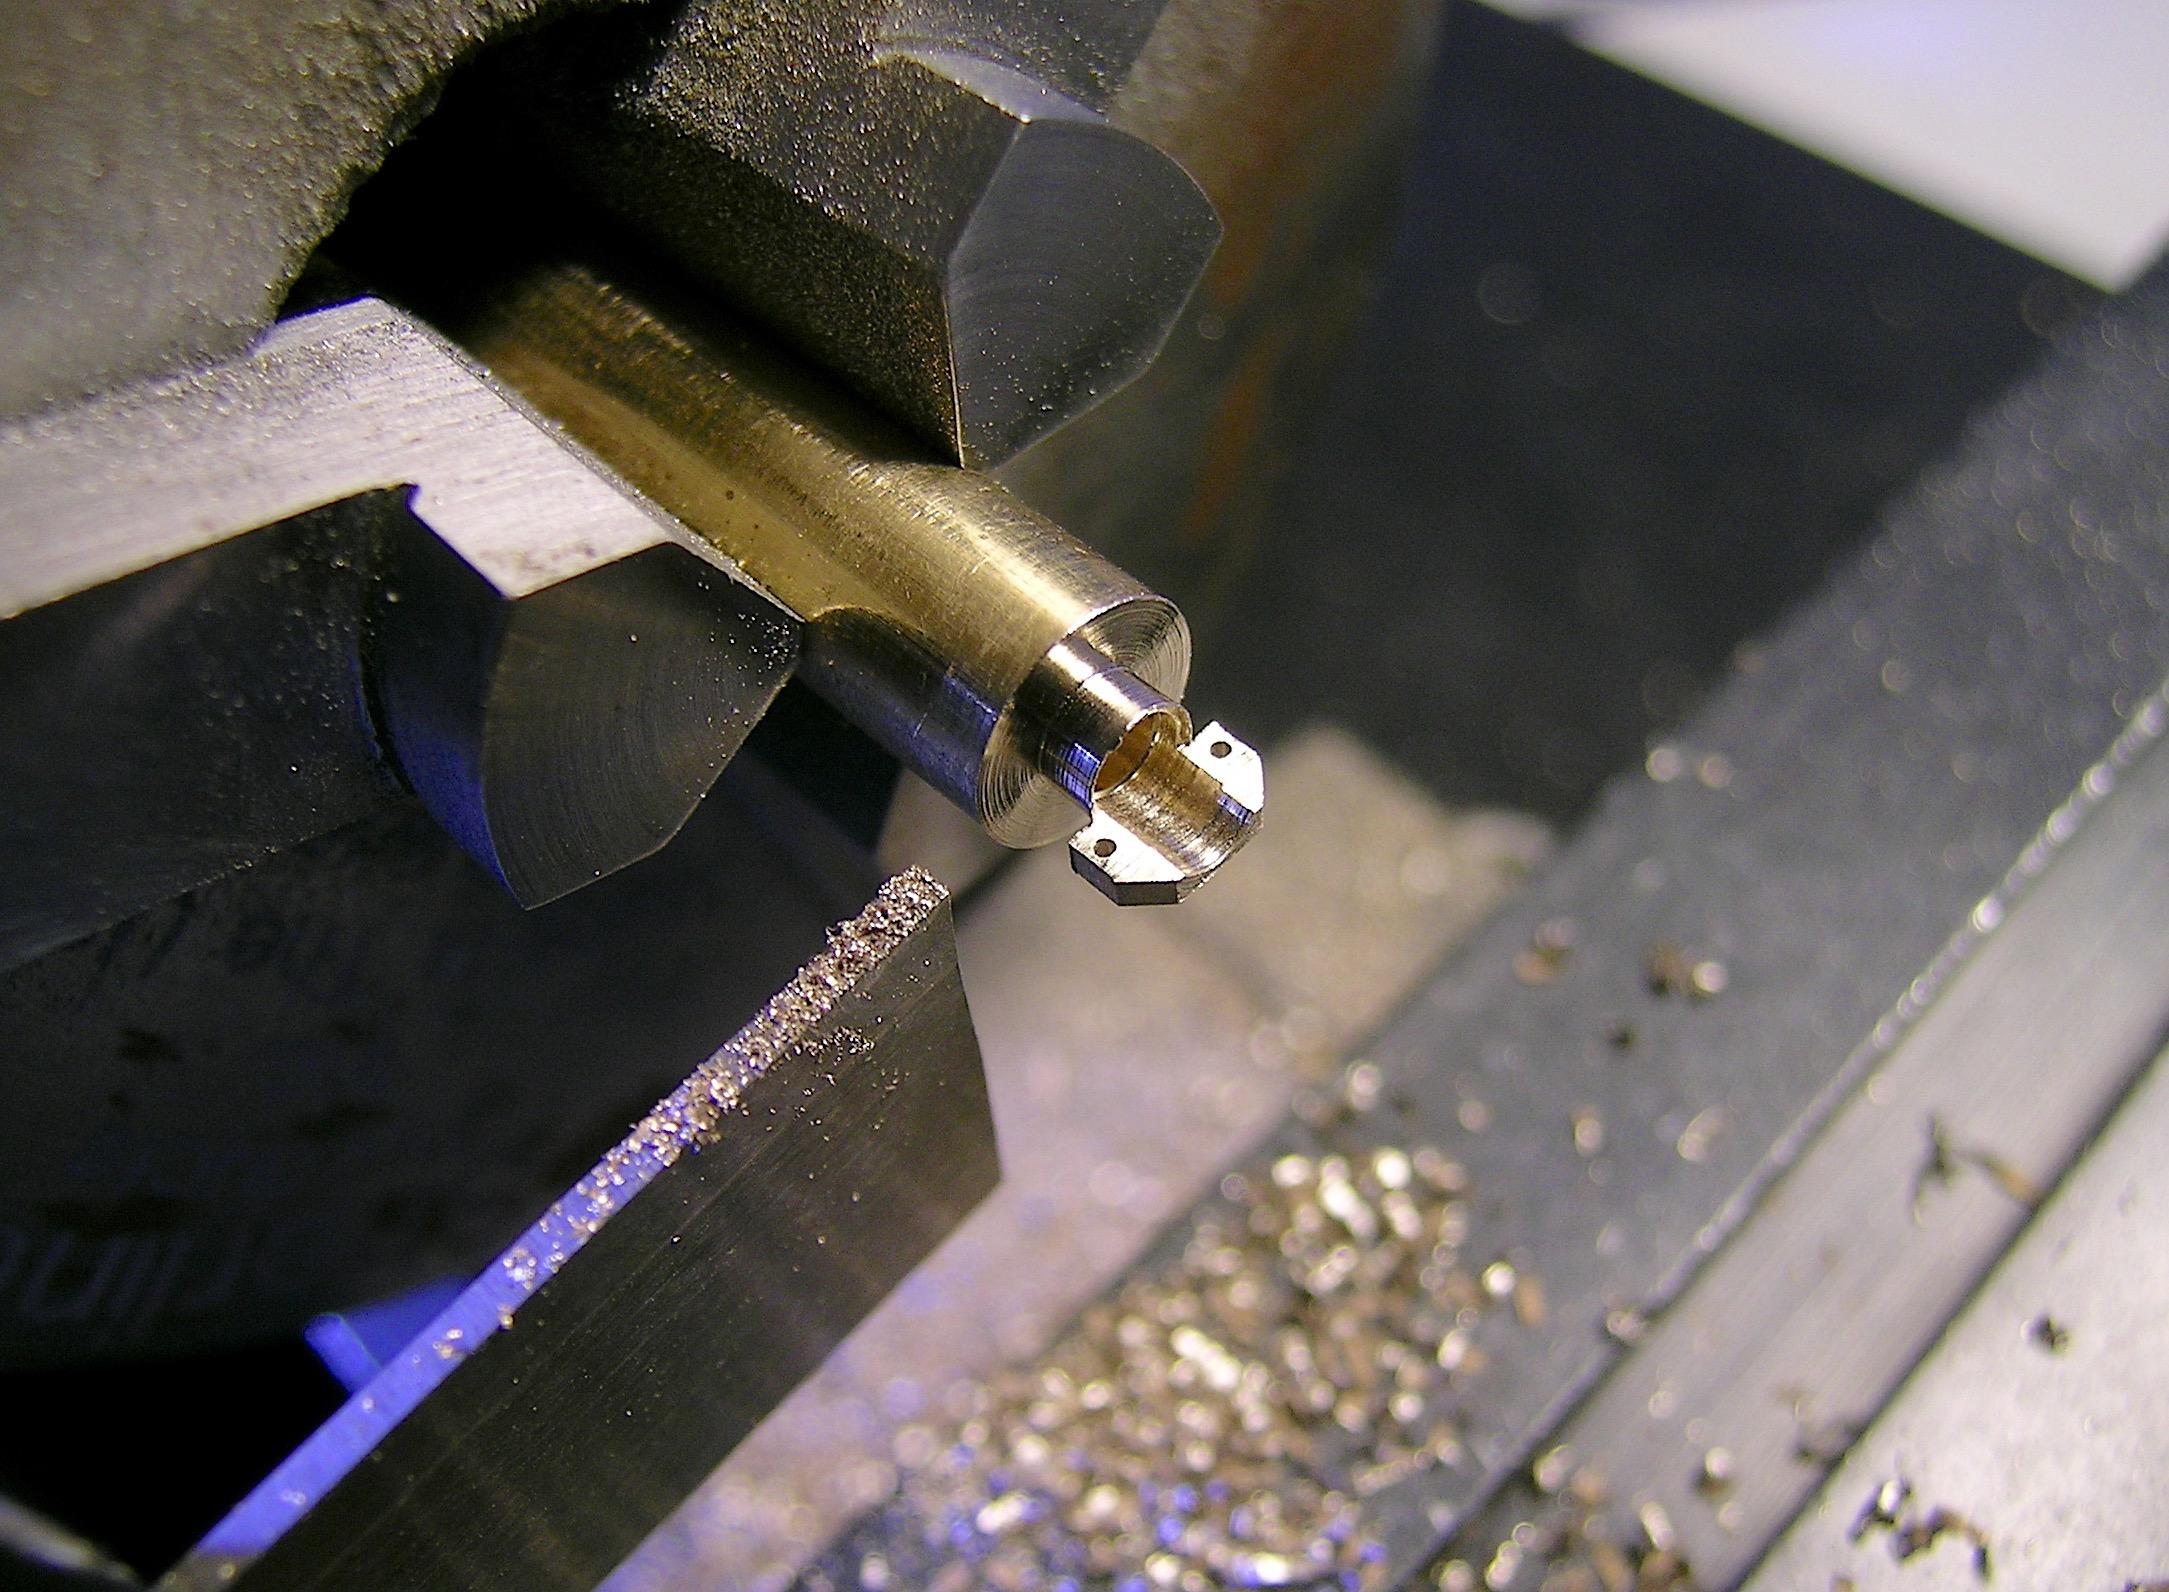
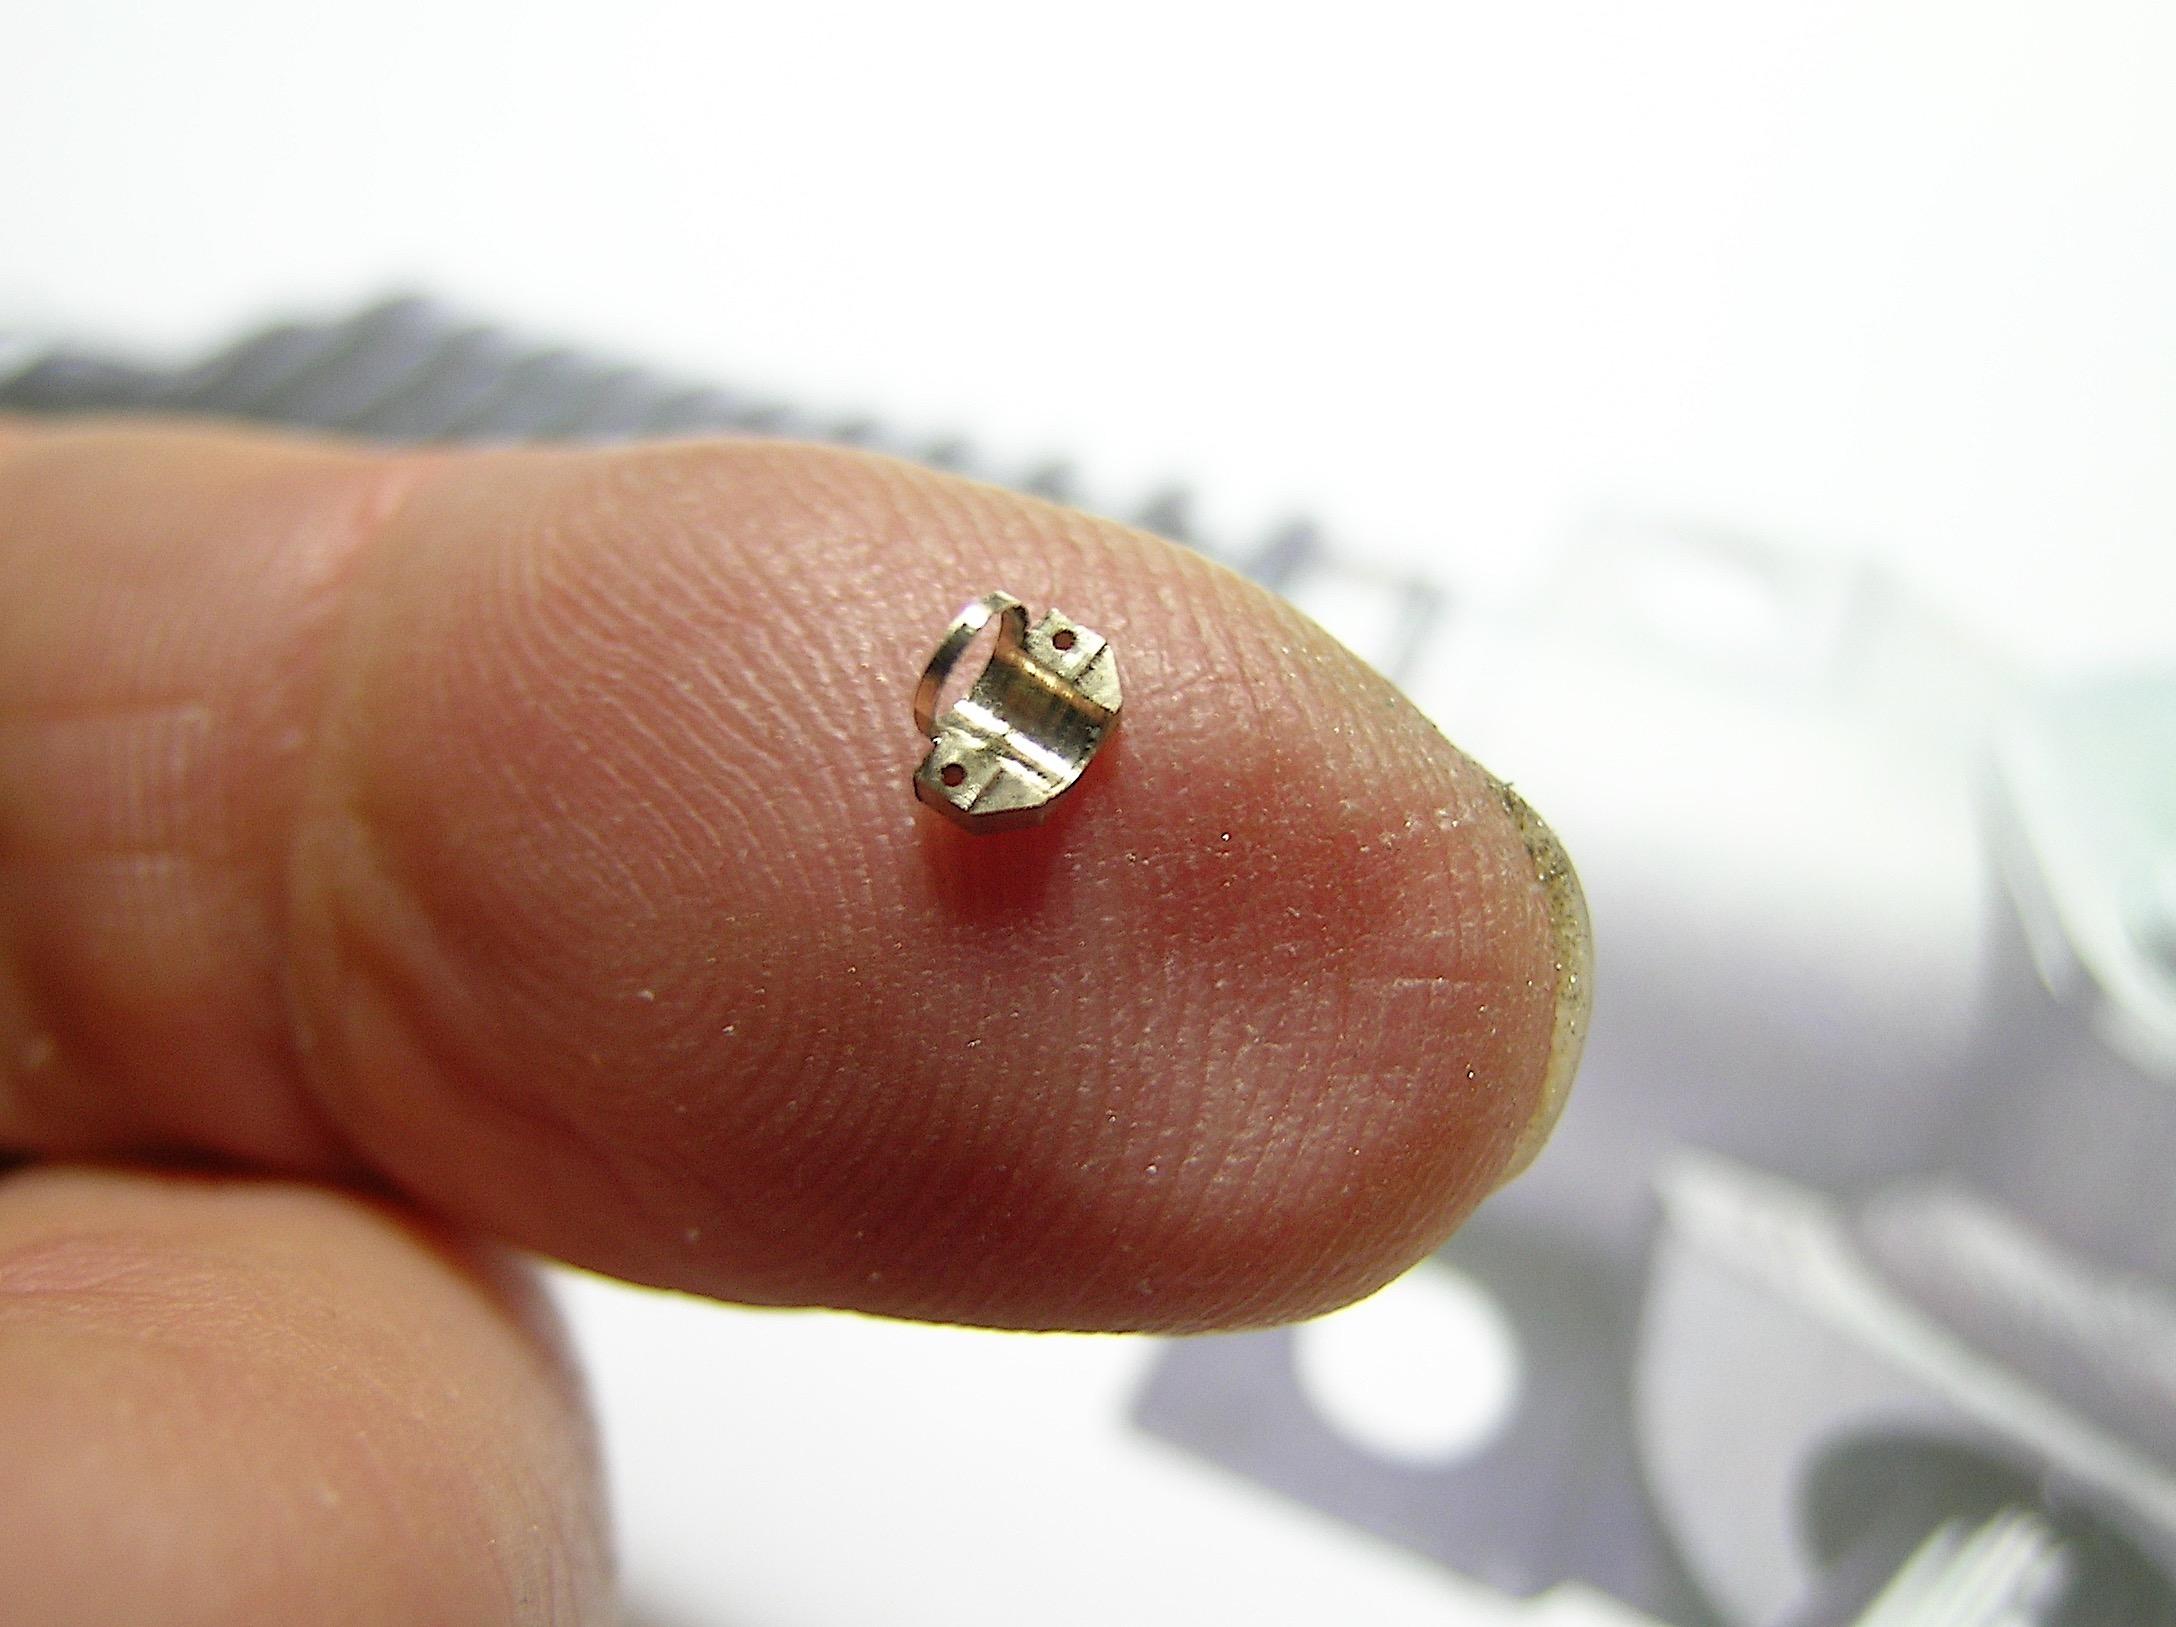
AmericanMuscleFan replied to AmericanMuscleFan's topic in WIP: Drag Racing Models
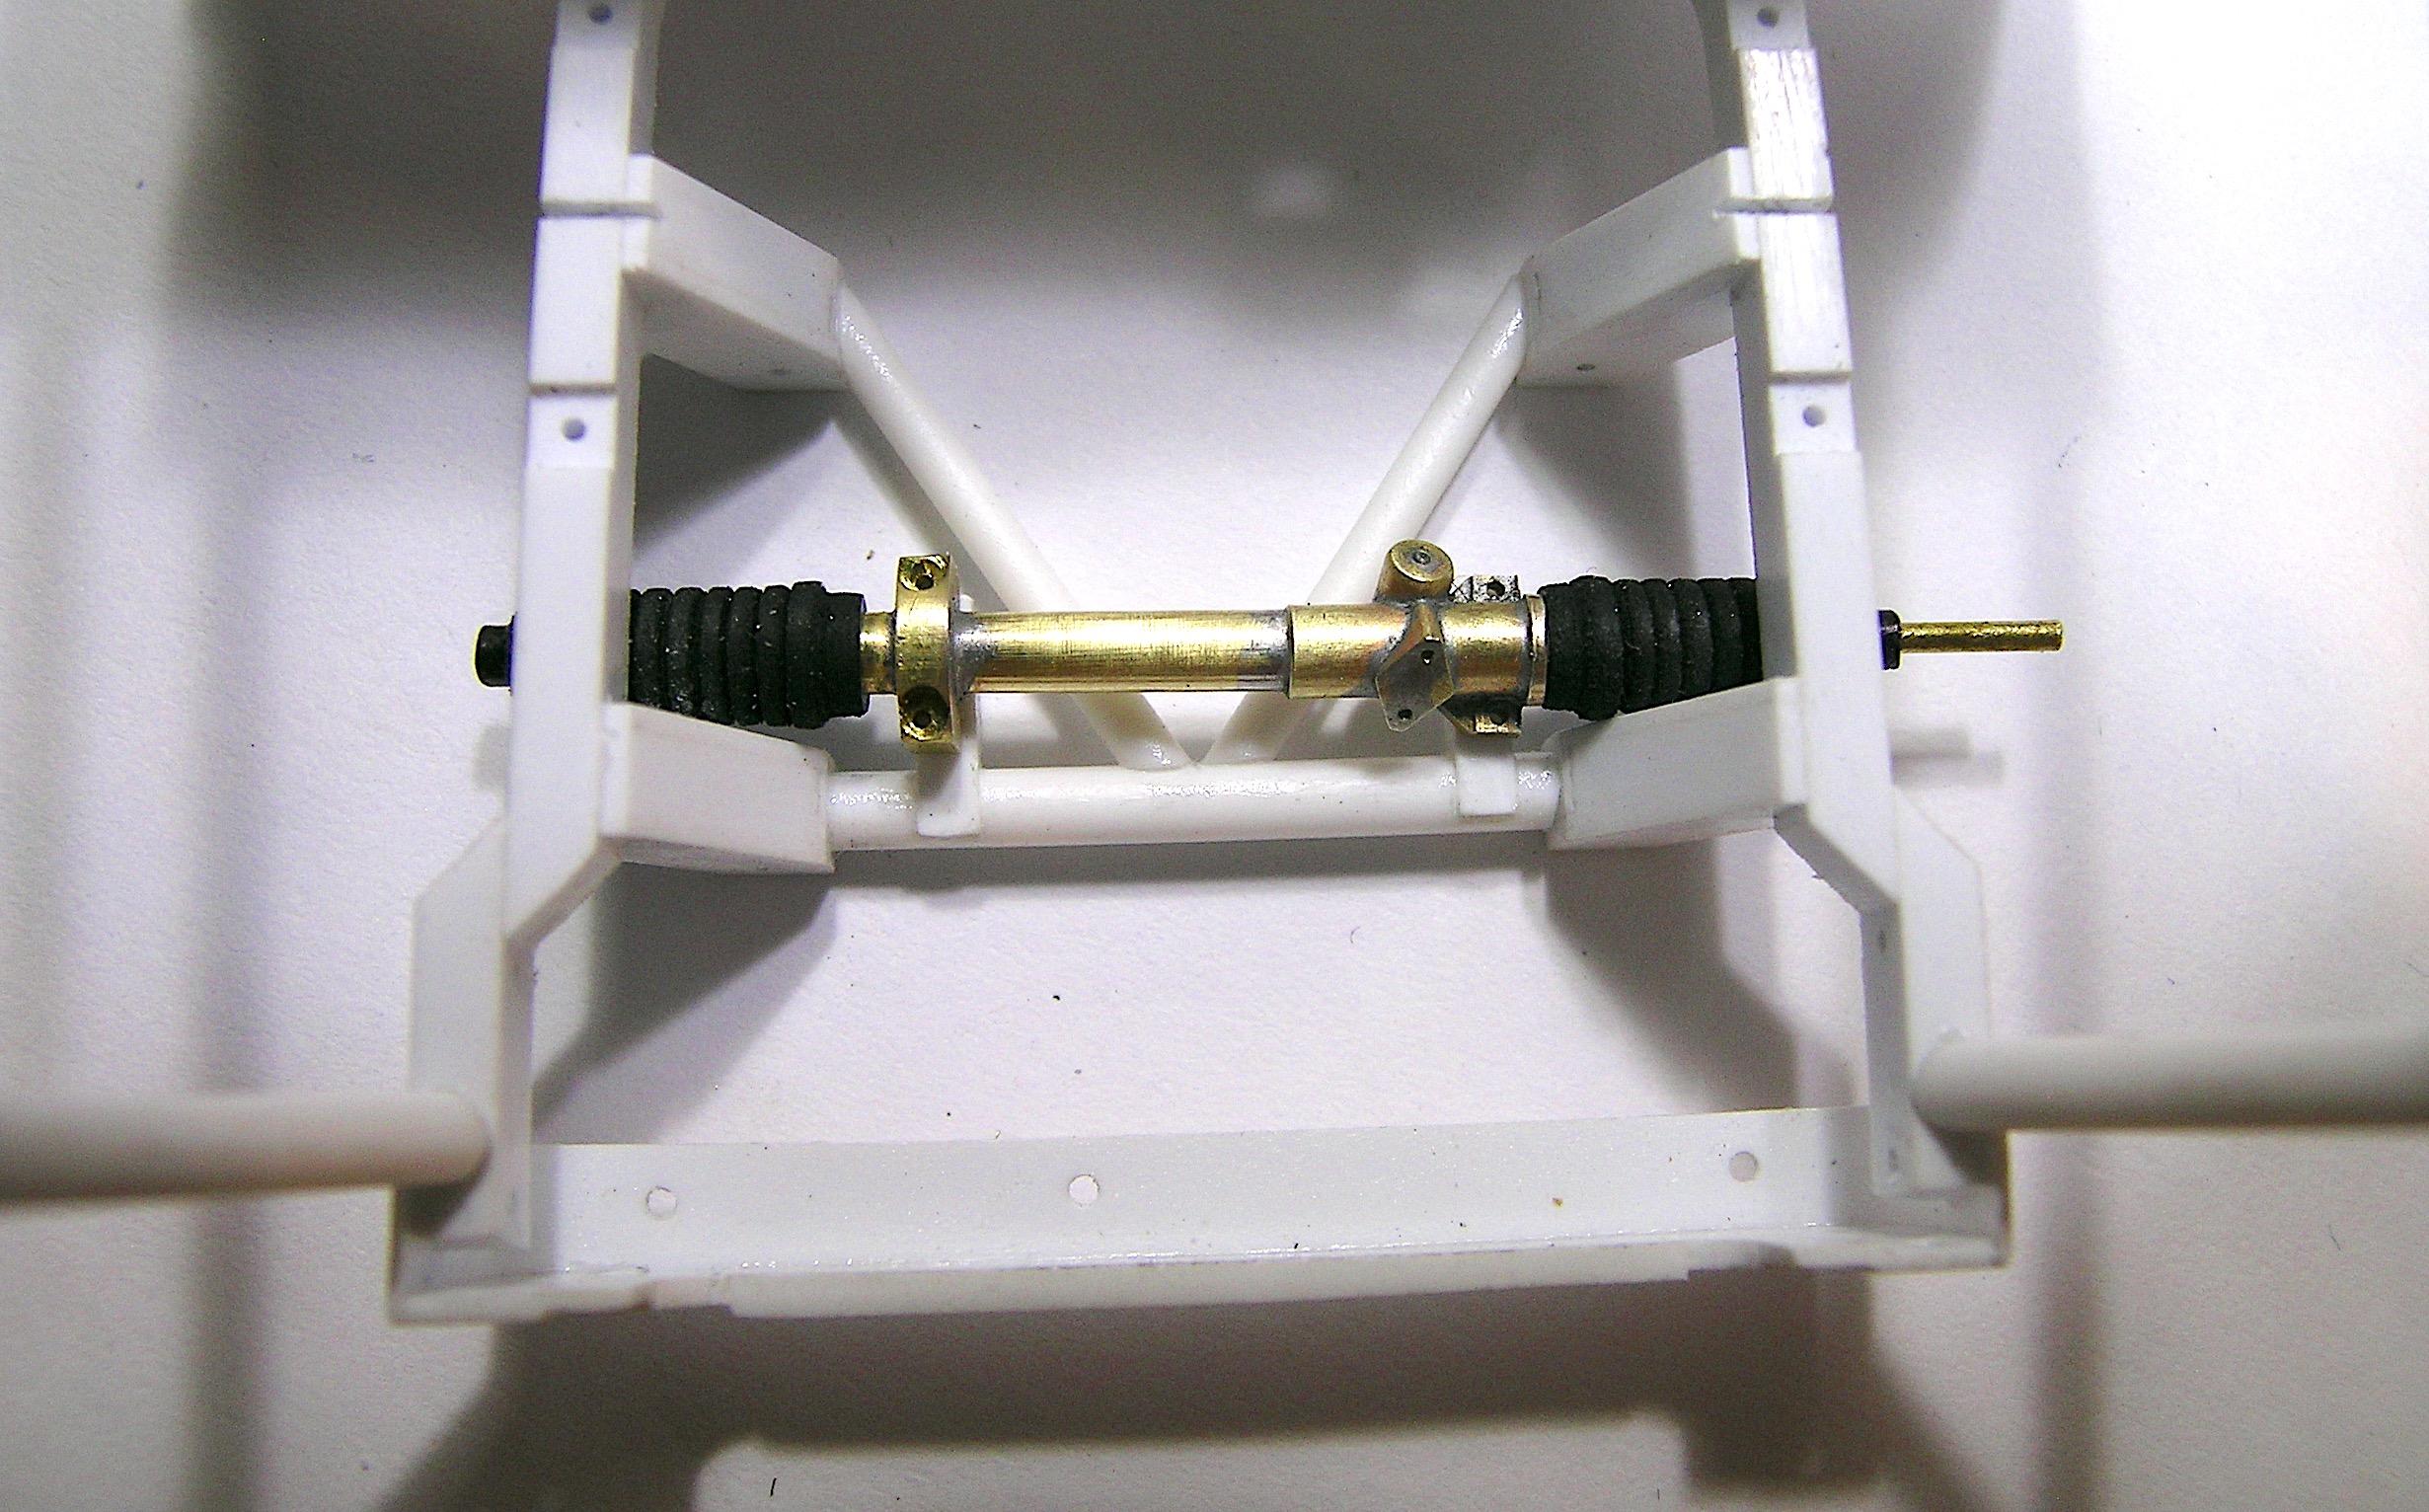
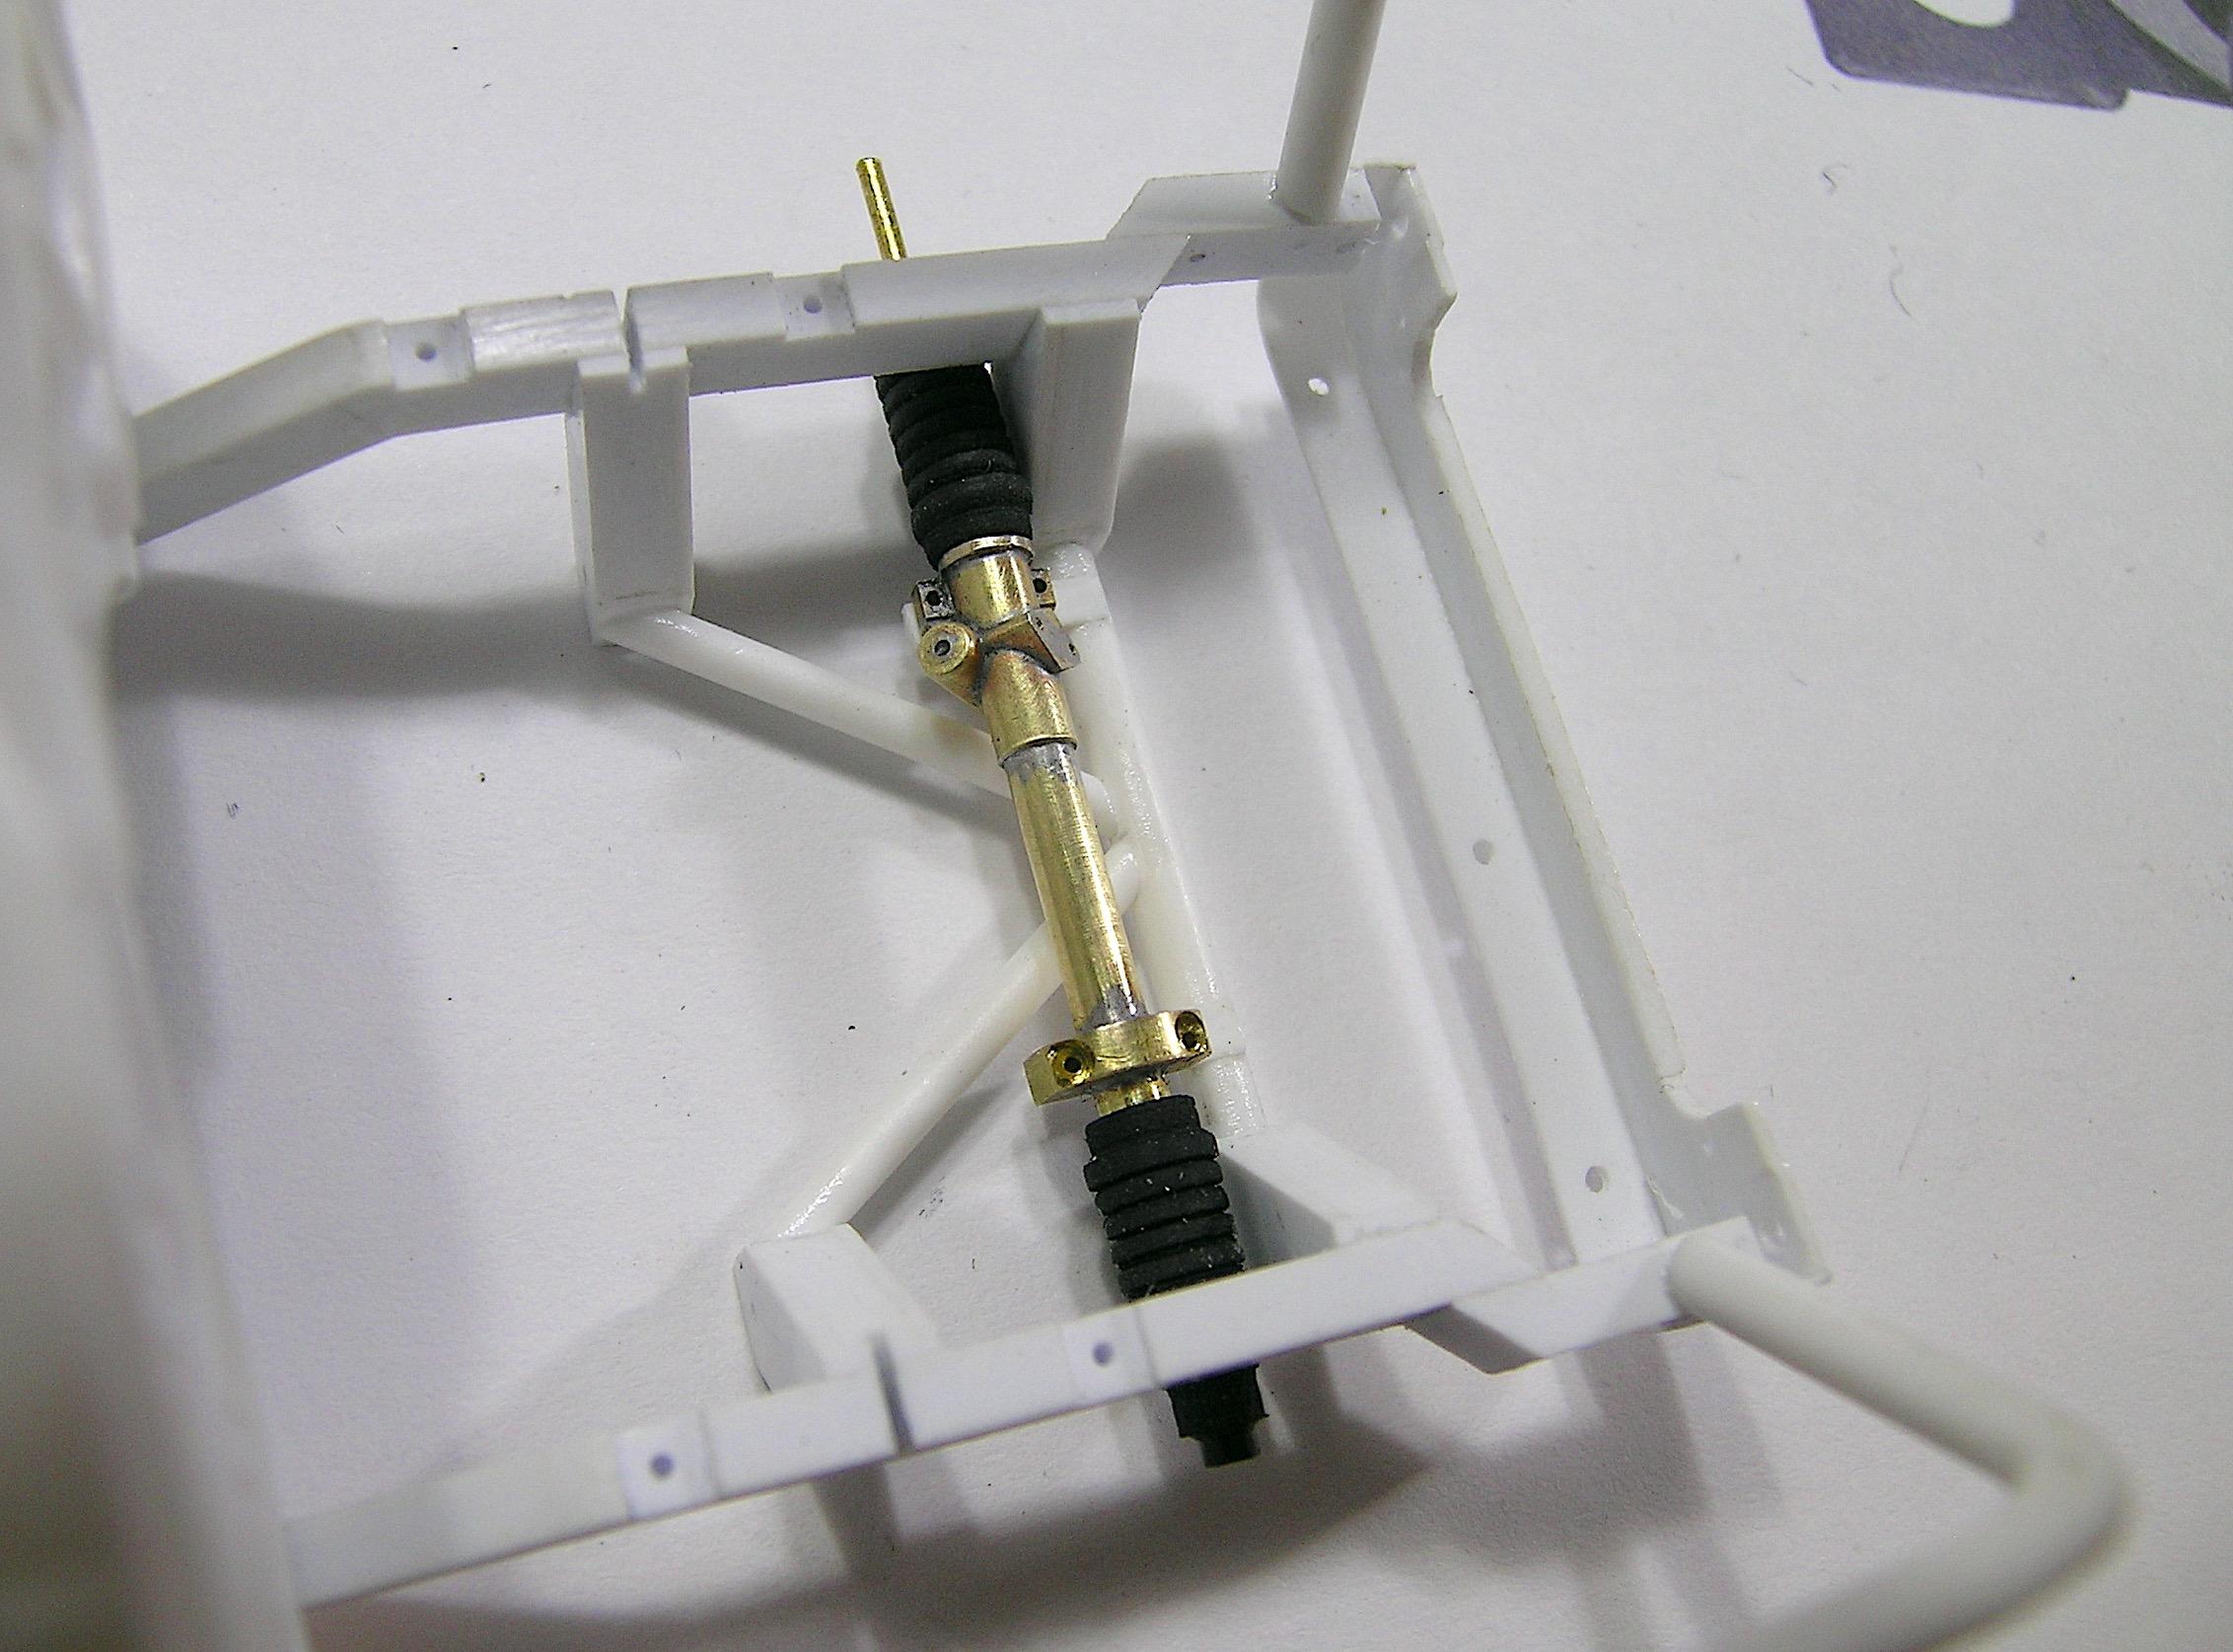
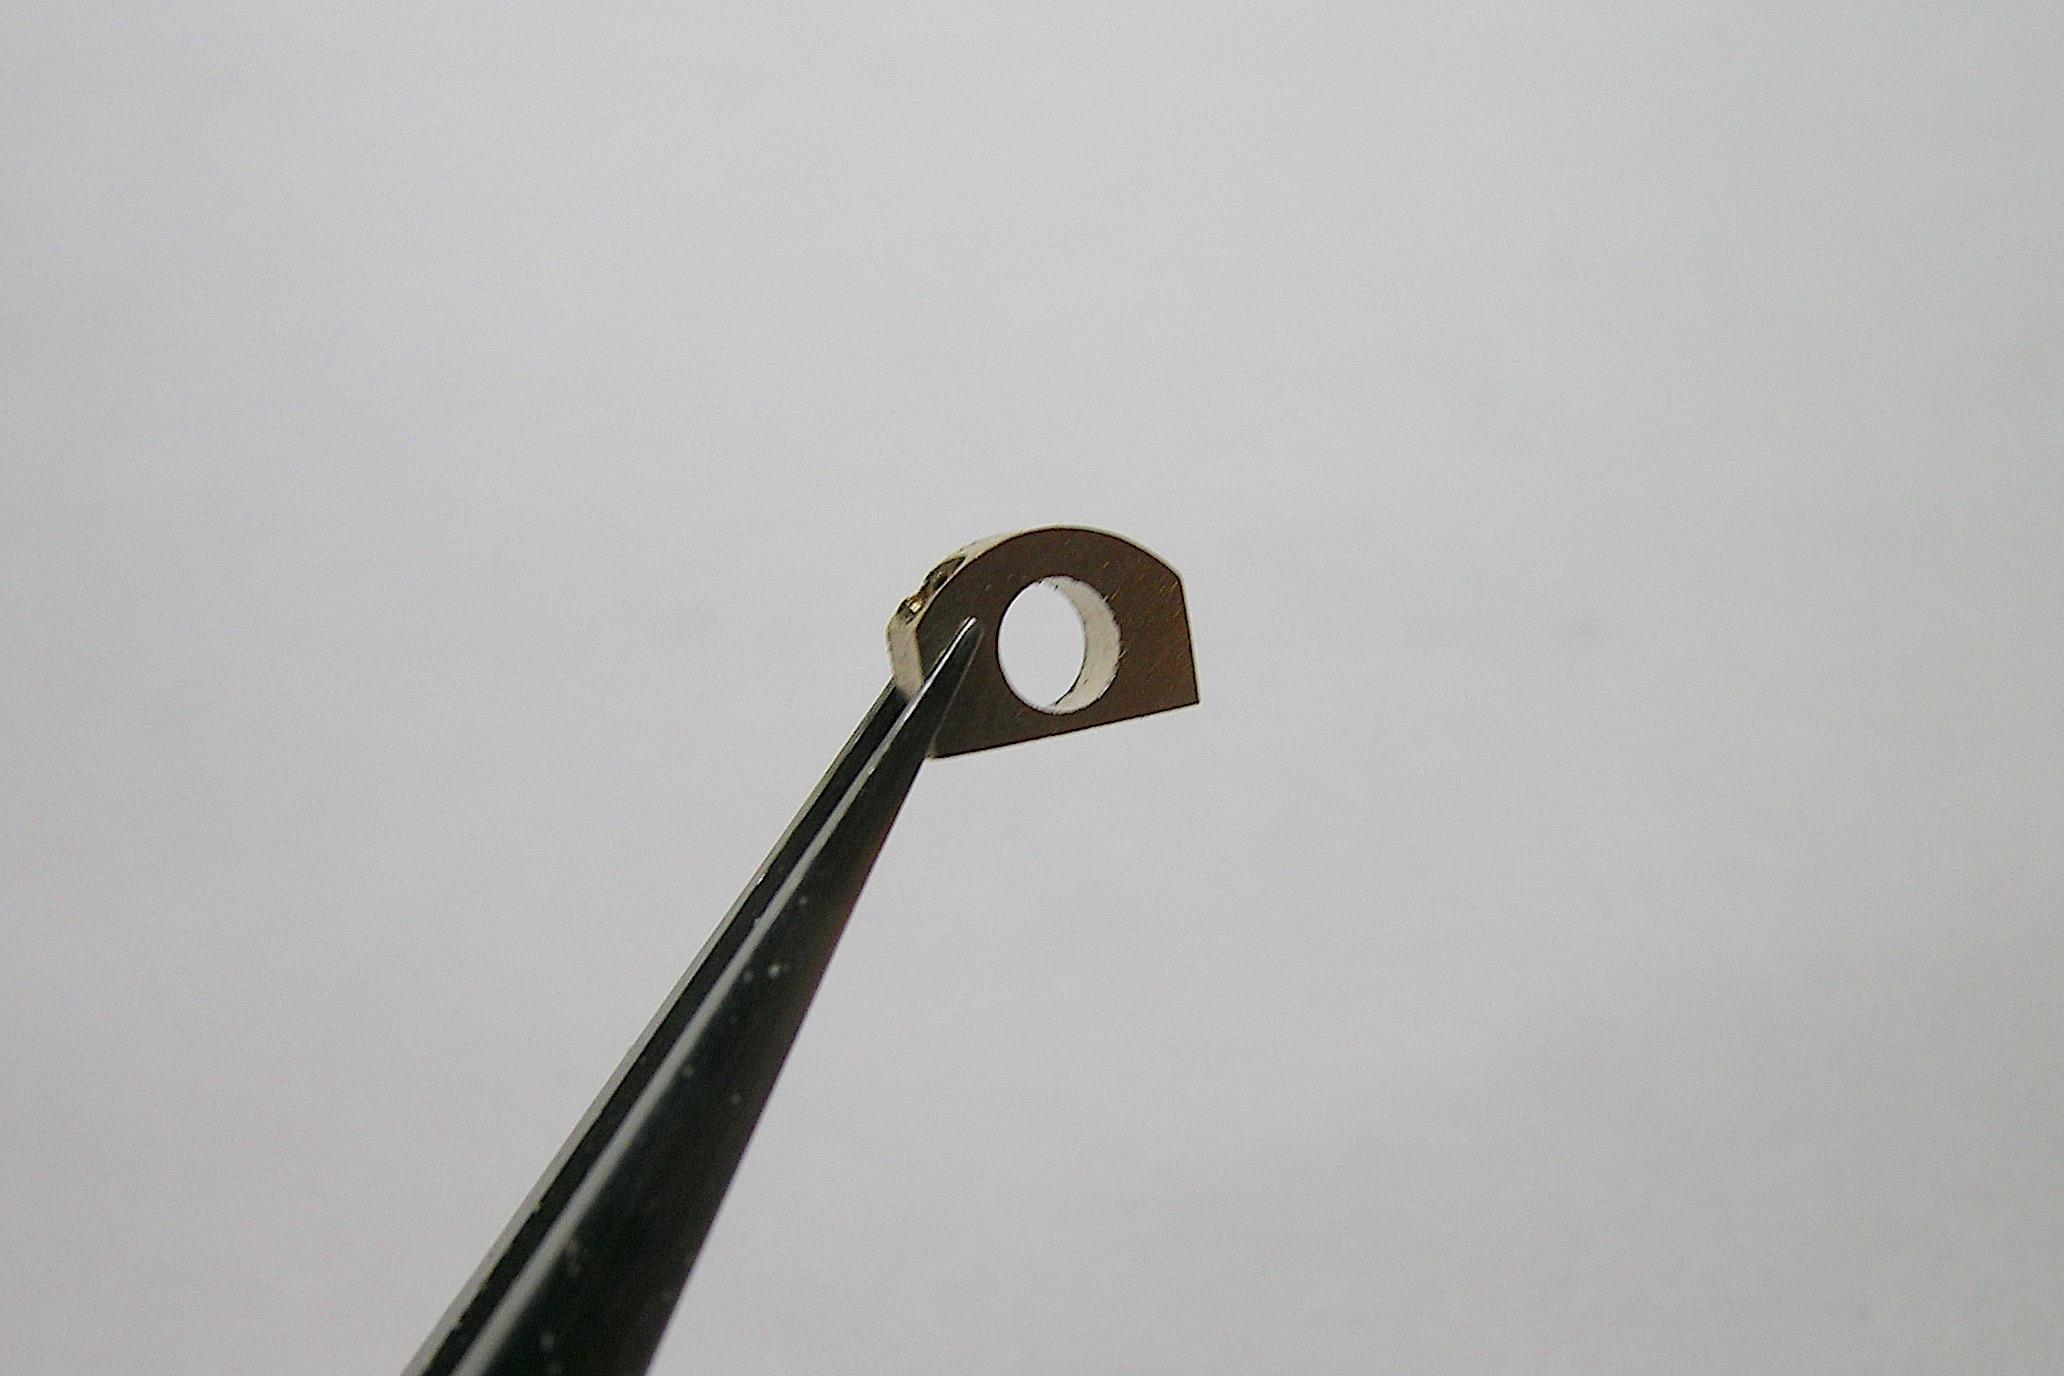
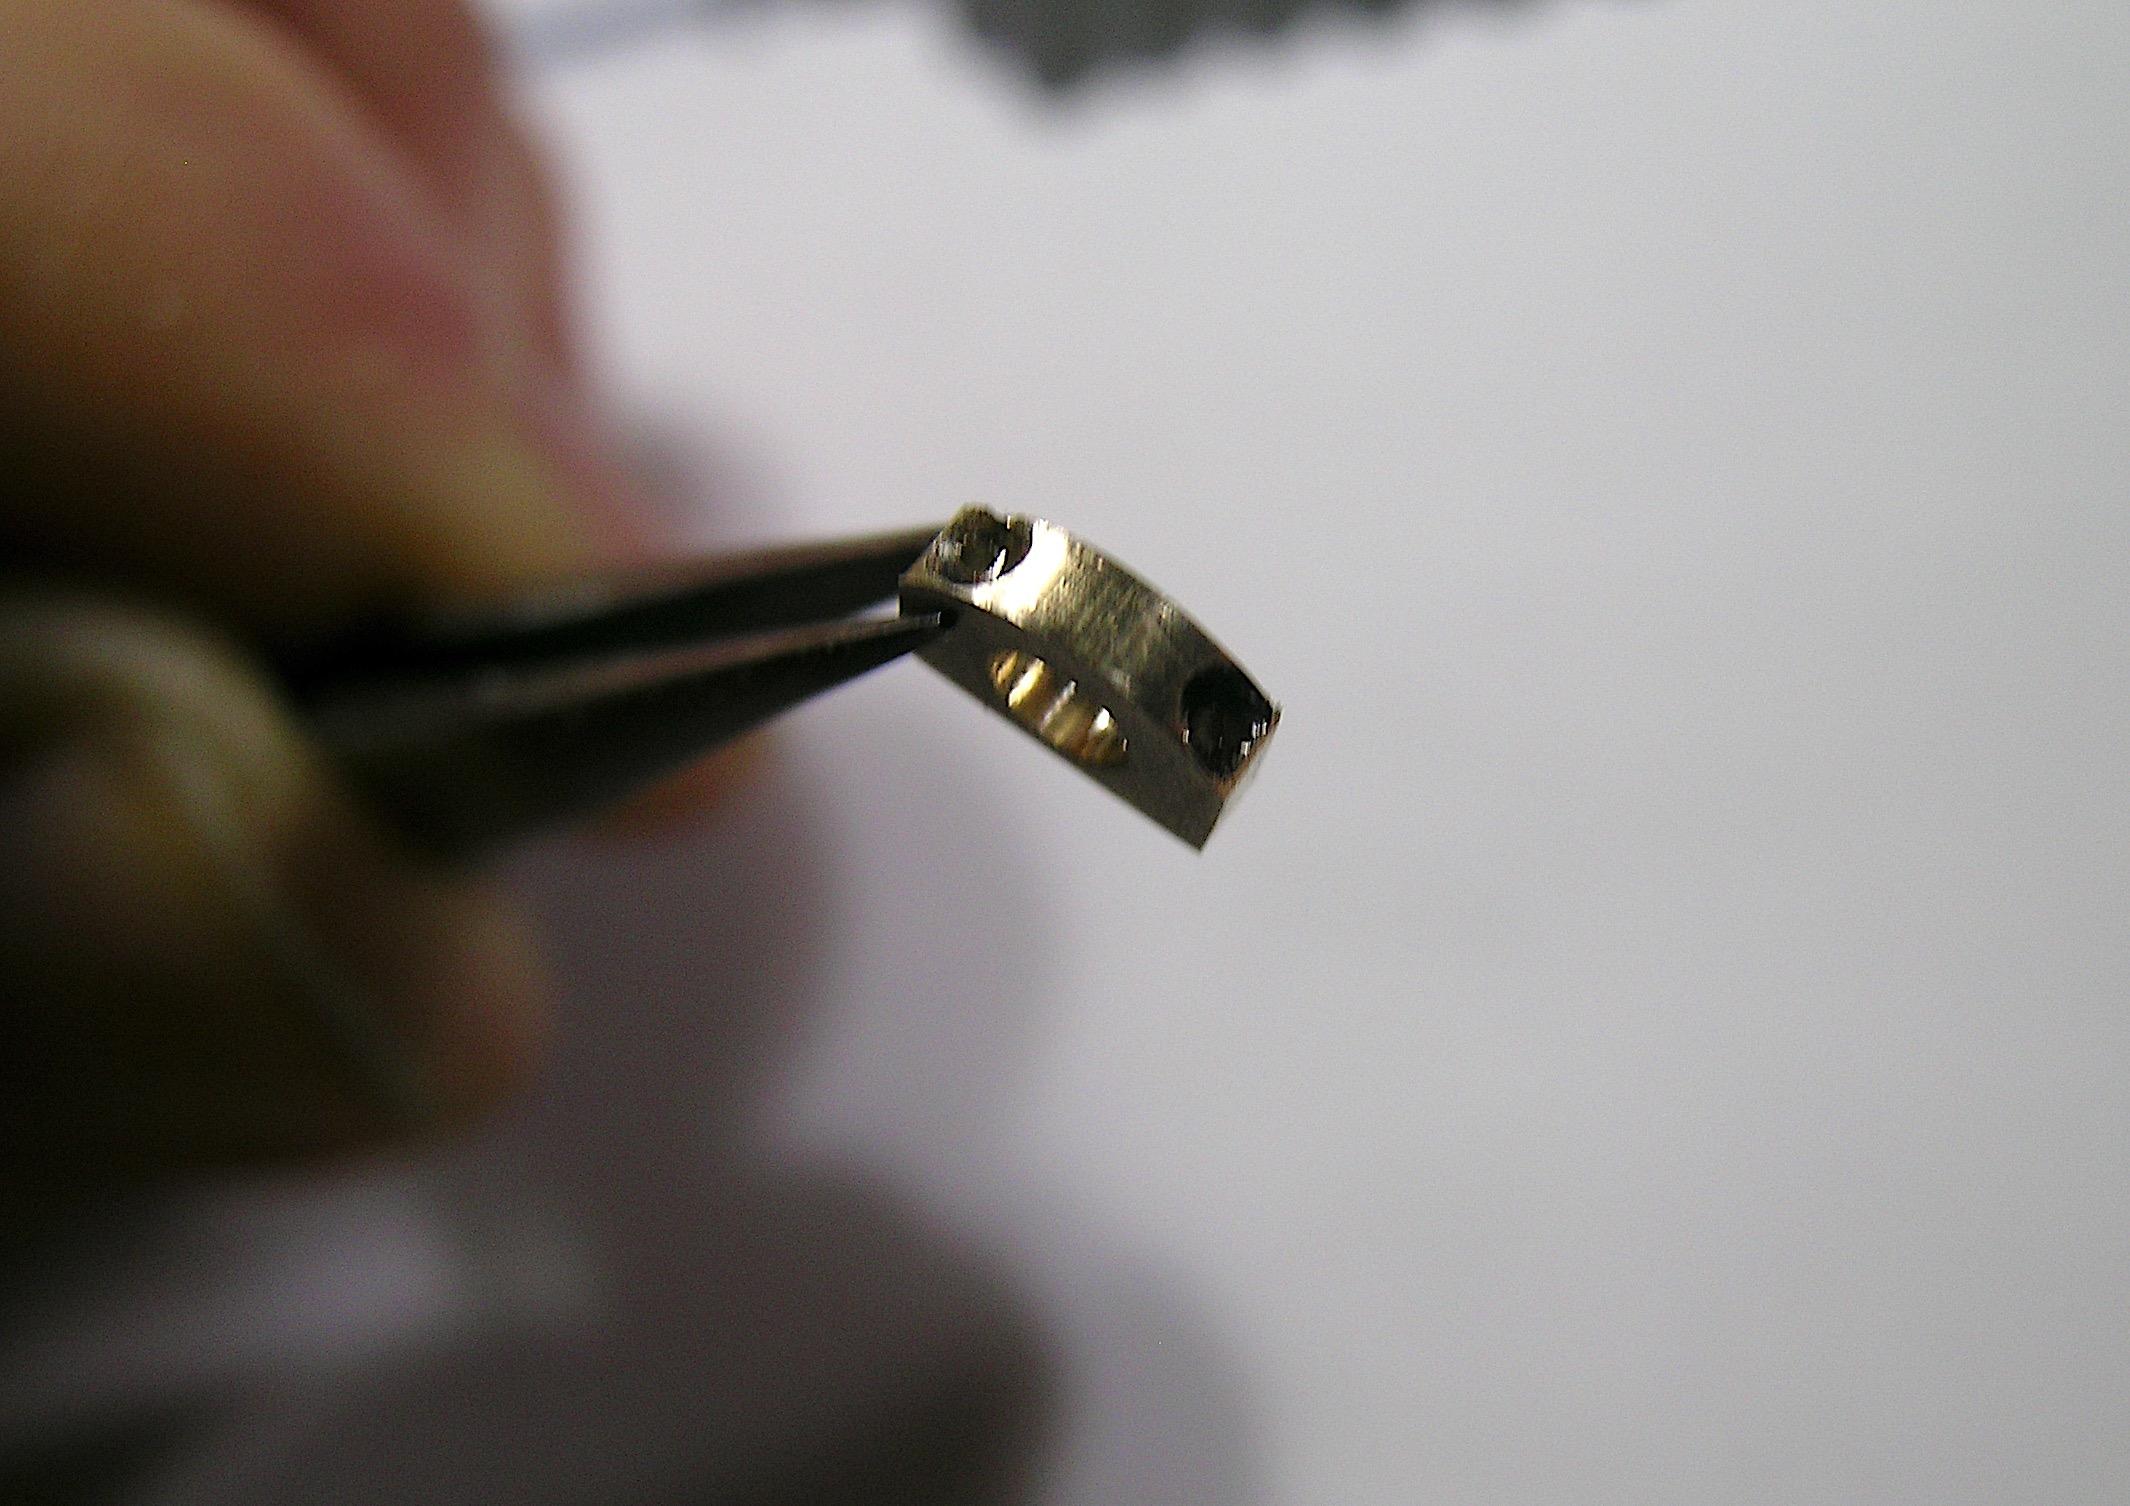
Second Part. The mount for the other end. View of the top, I will use 2 brass pins for the final assembly. I don't know how to call this part but I think it's an access to inspect and make some maintenance to the rack. Another fairly small part. Most of the machined parts are now soldered to create something. From a different angle.
-
’72 Dodge Demon Drag Racer 1/25 scale
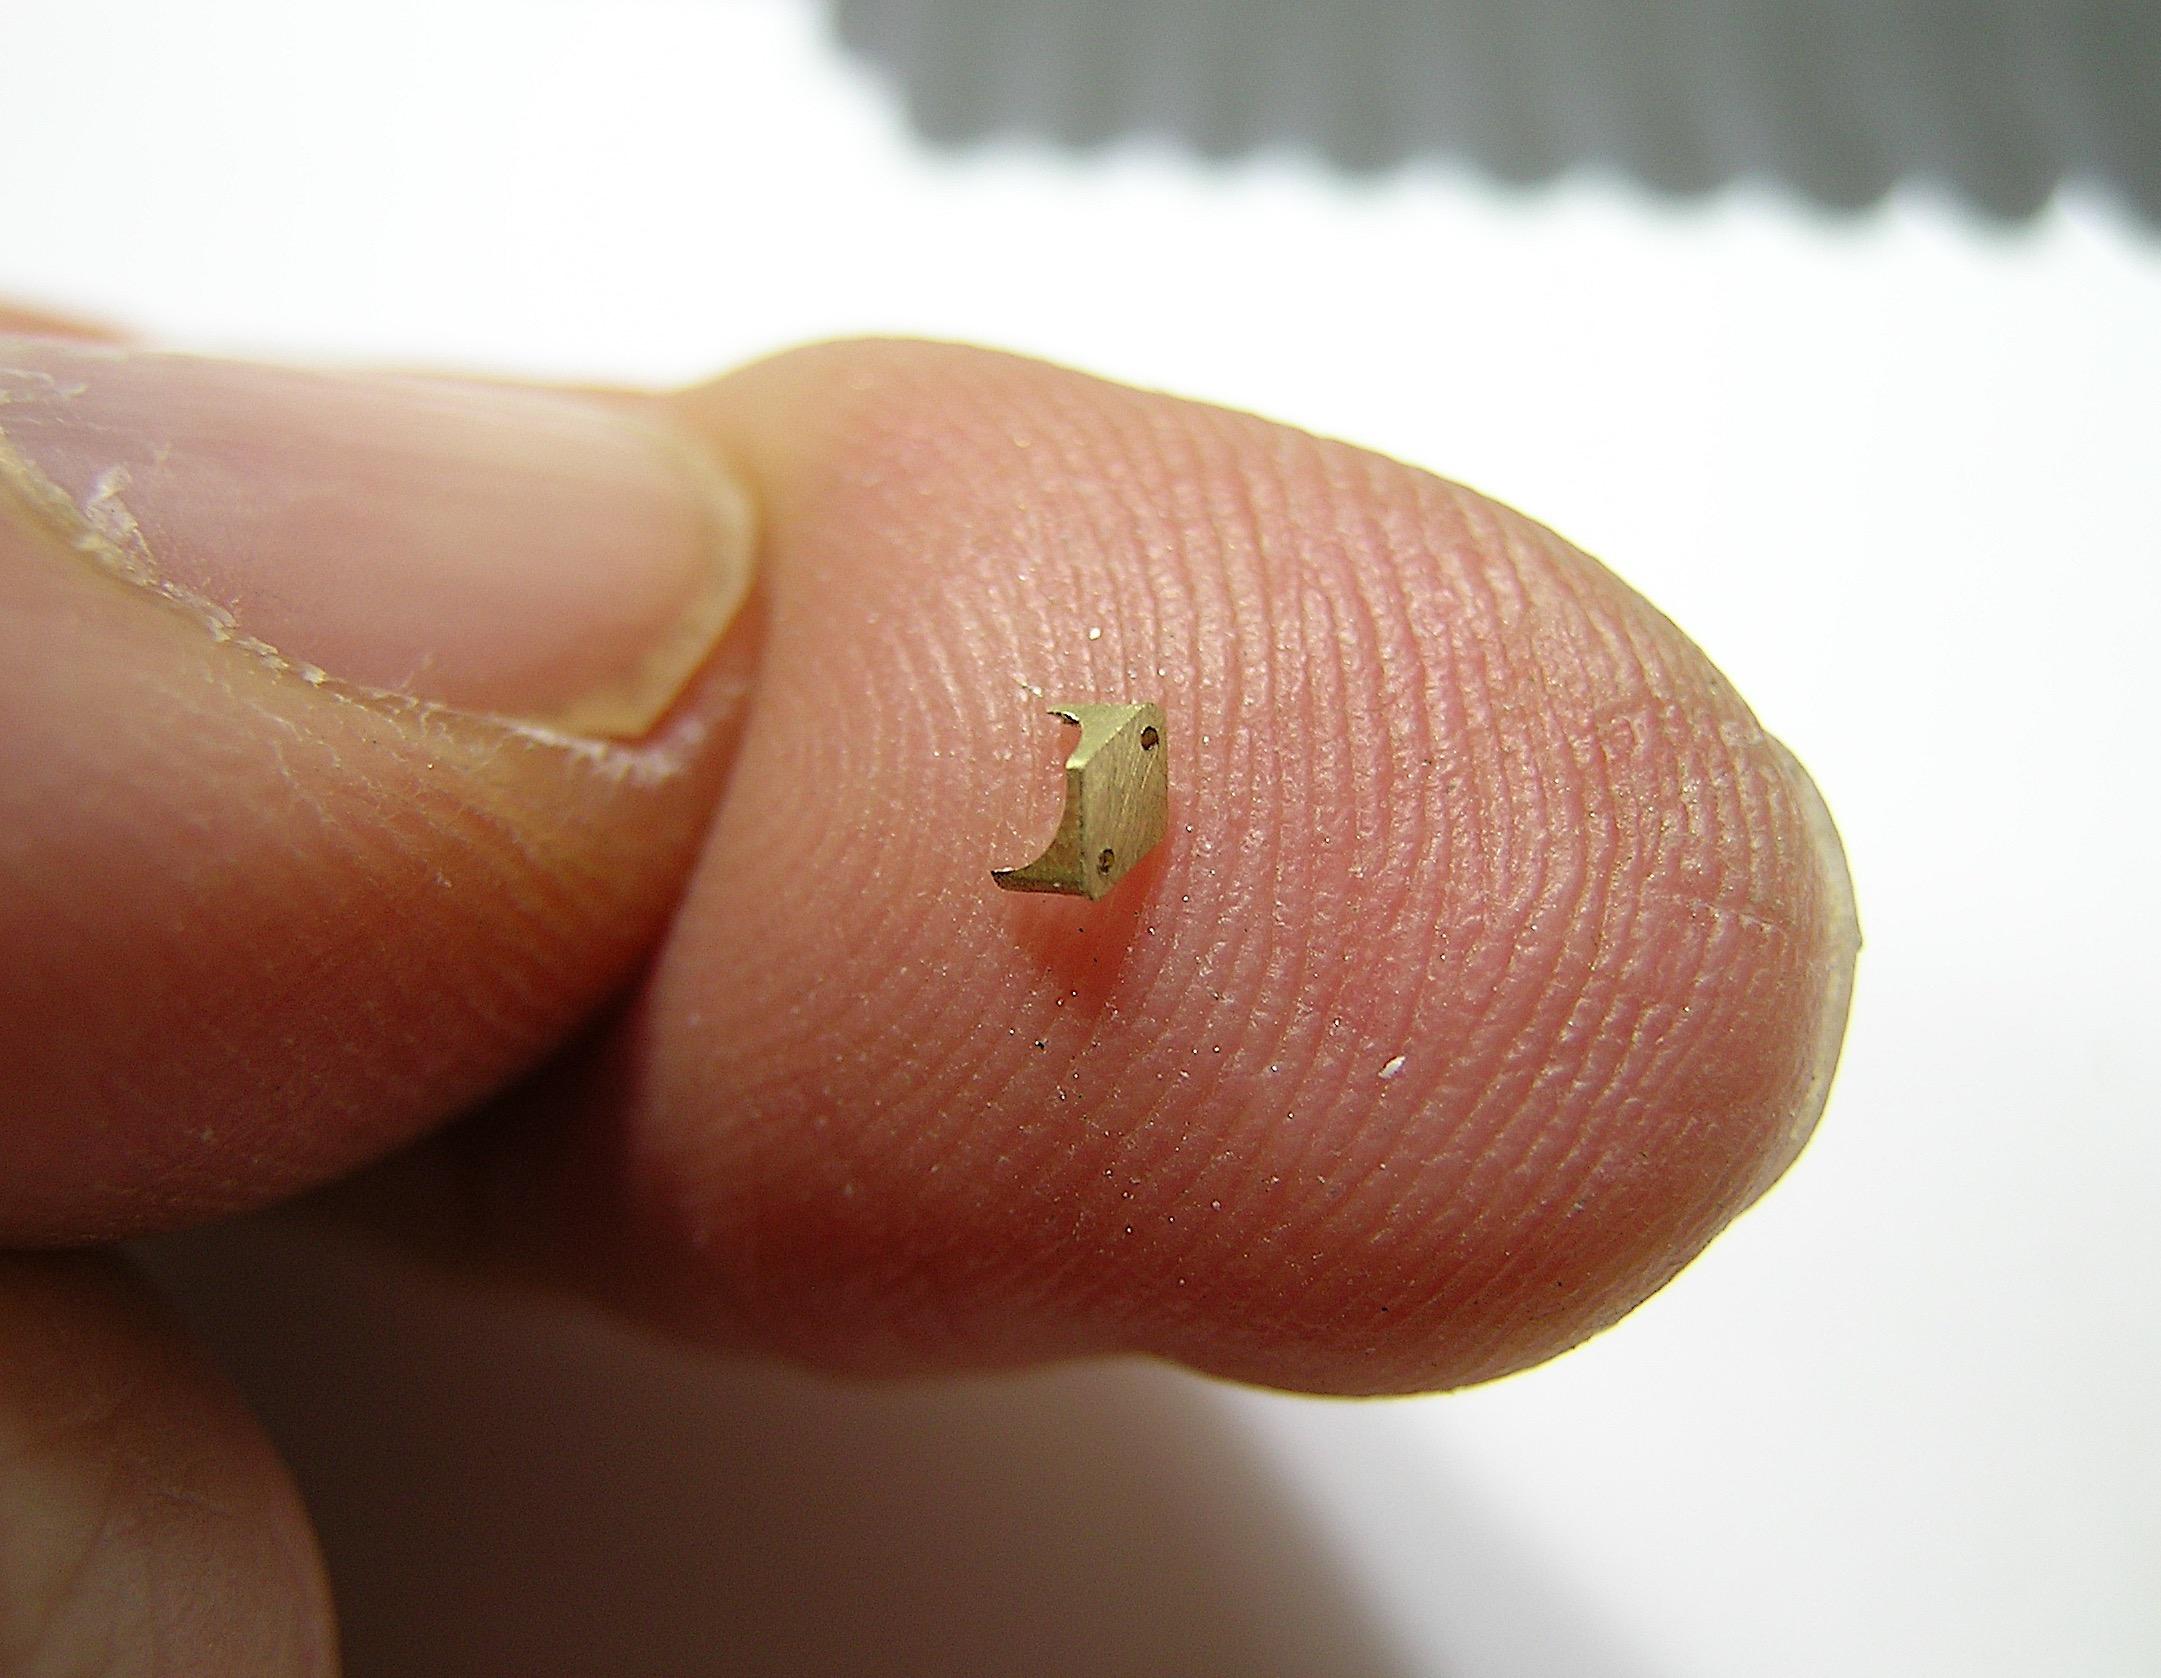
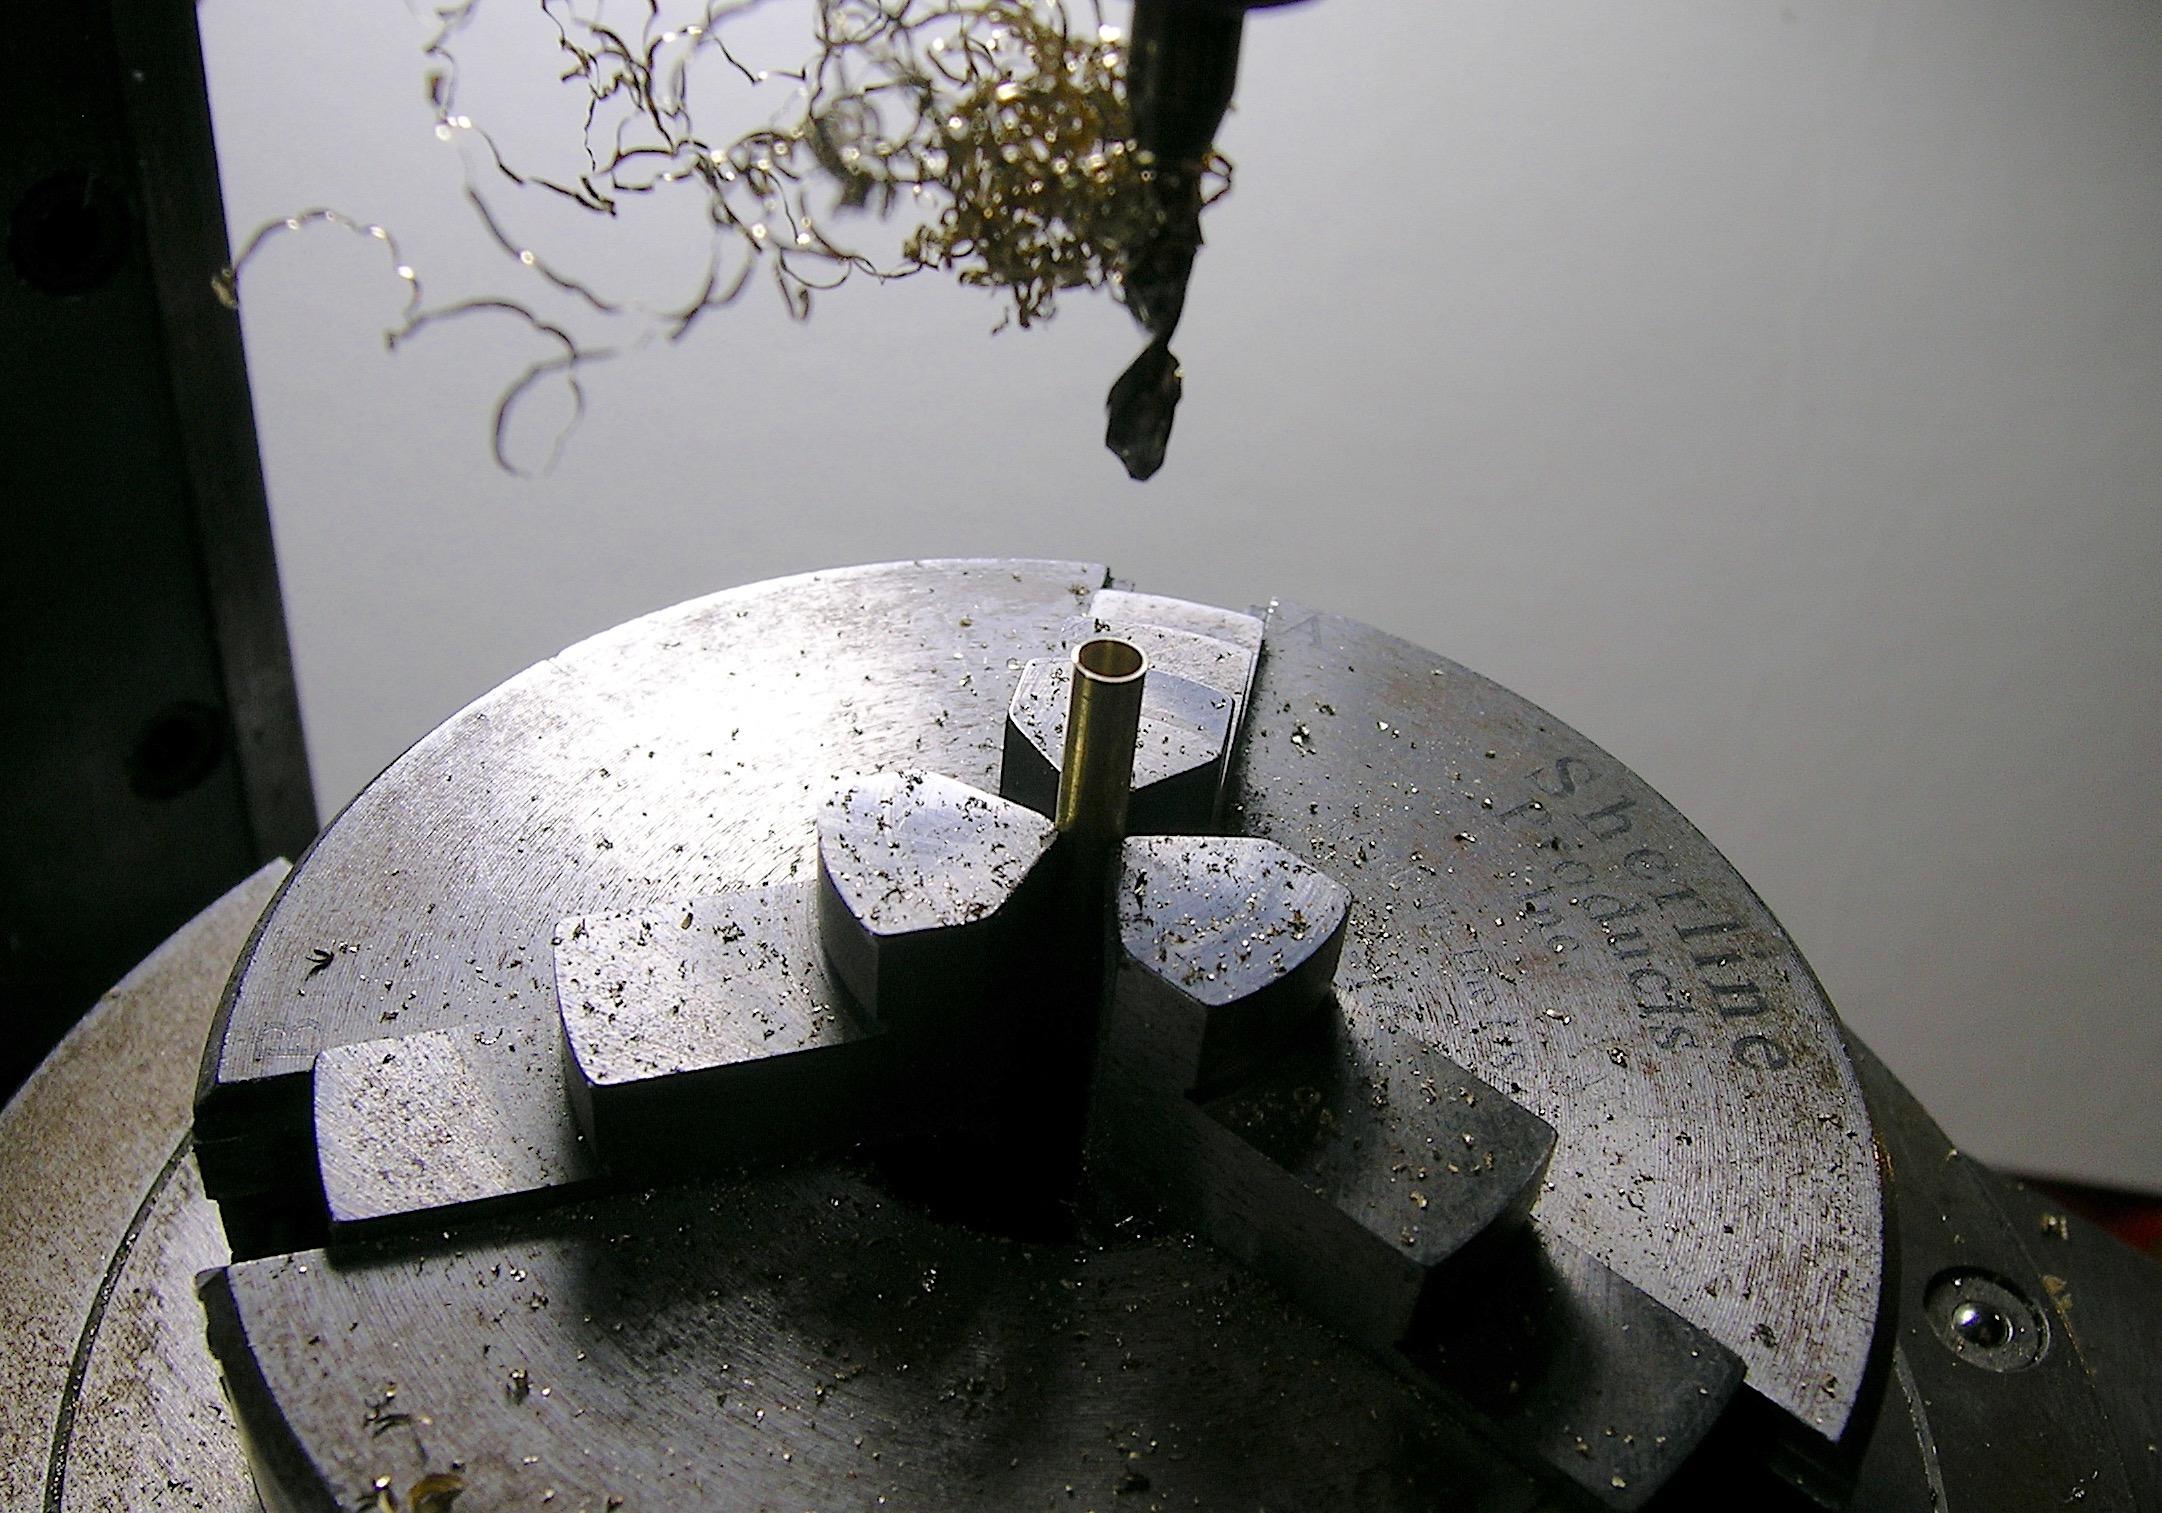
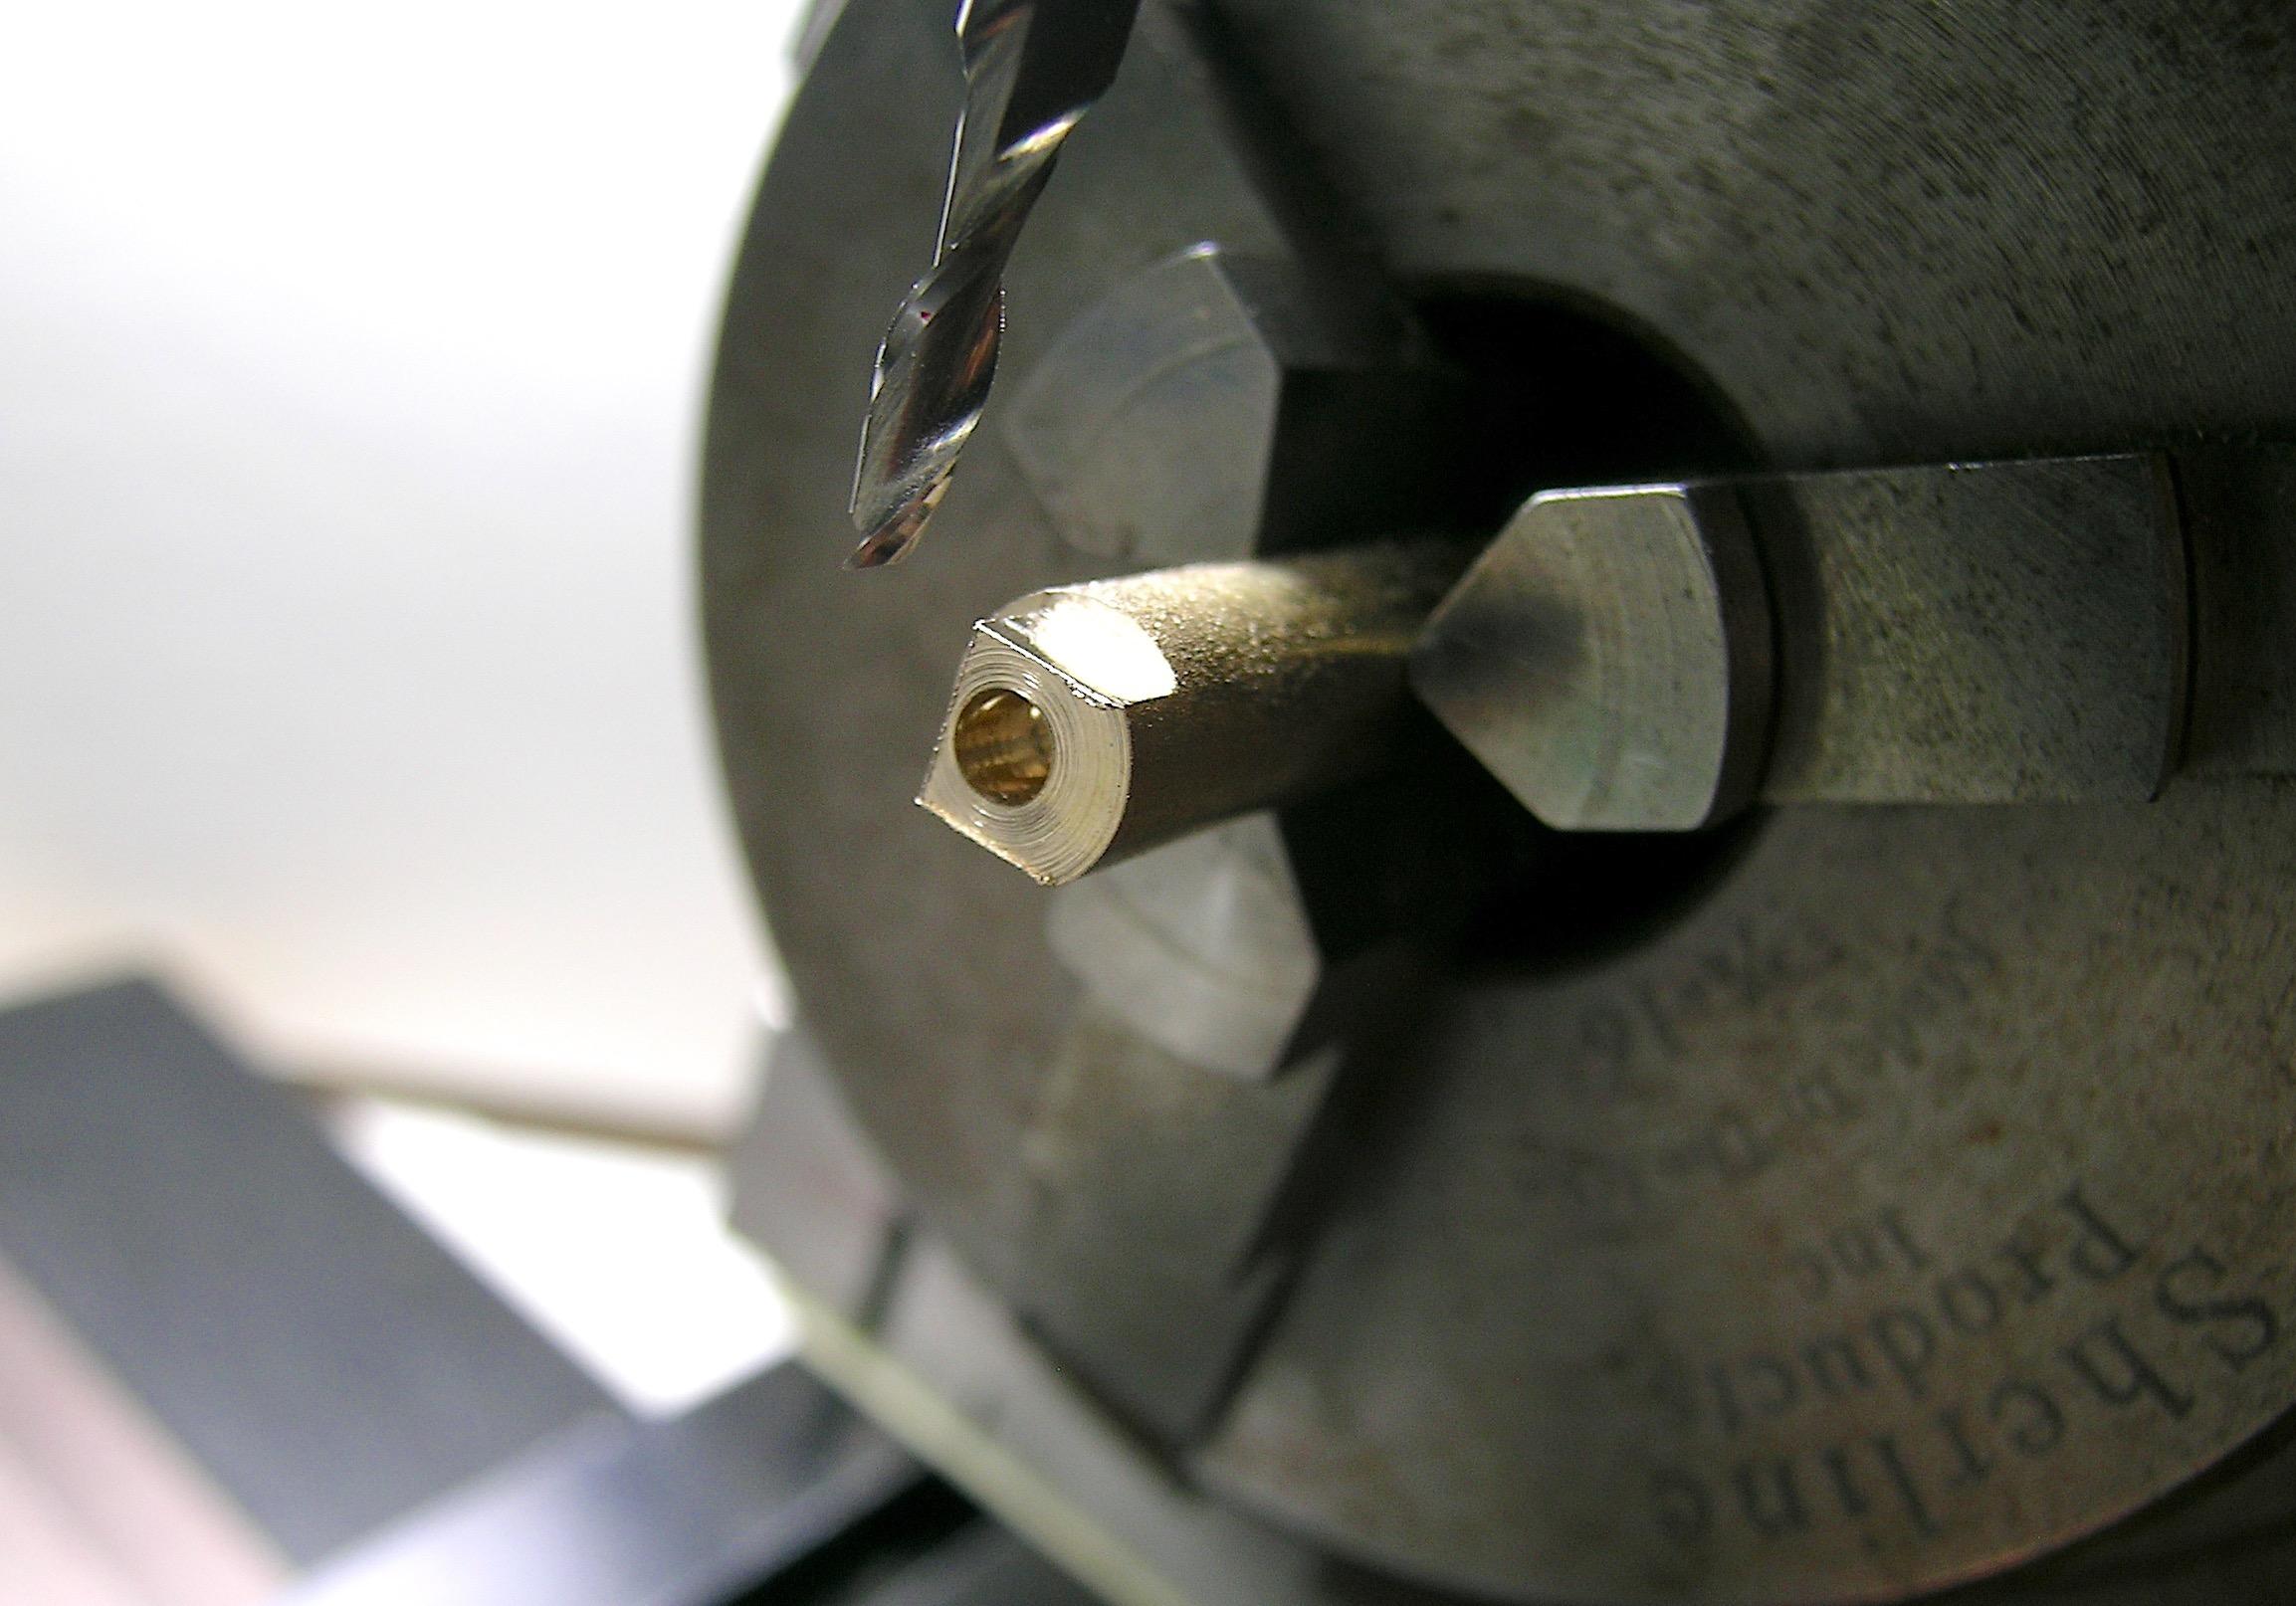
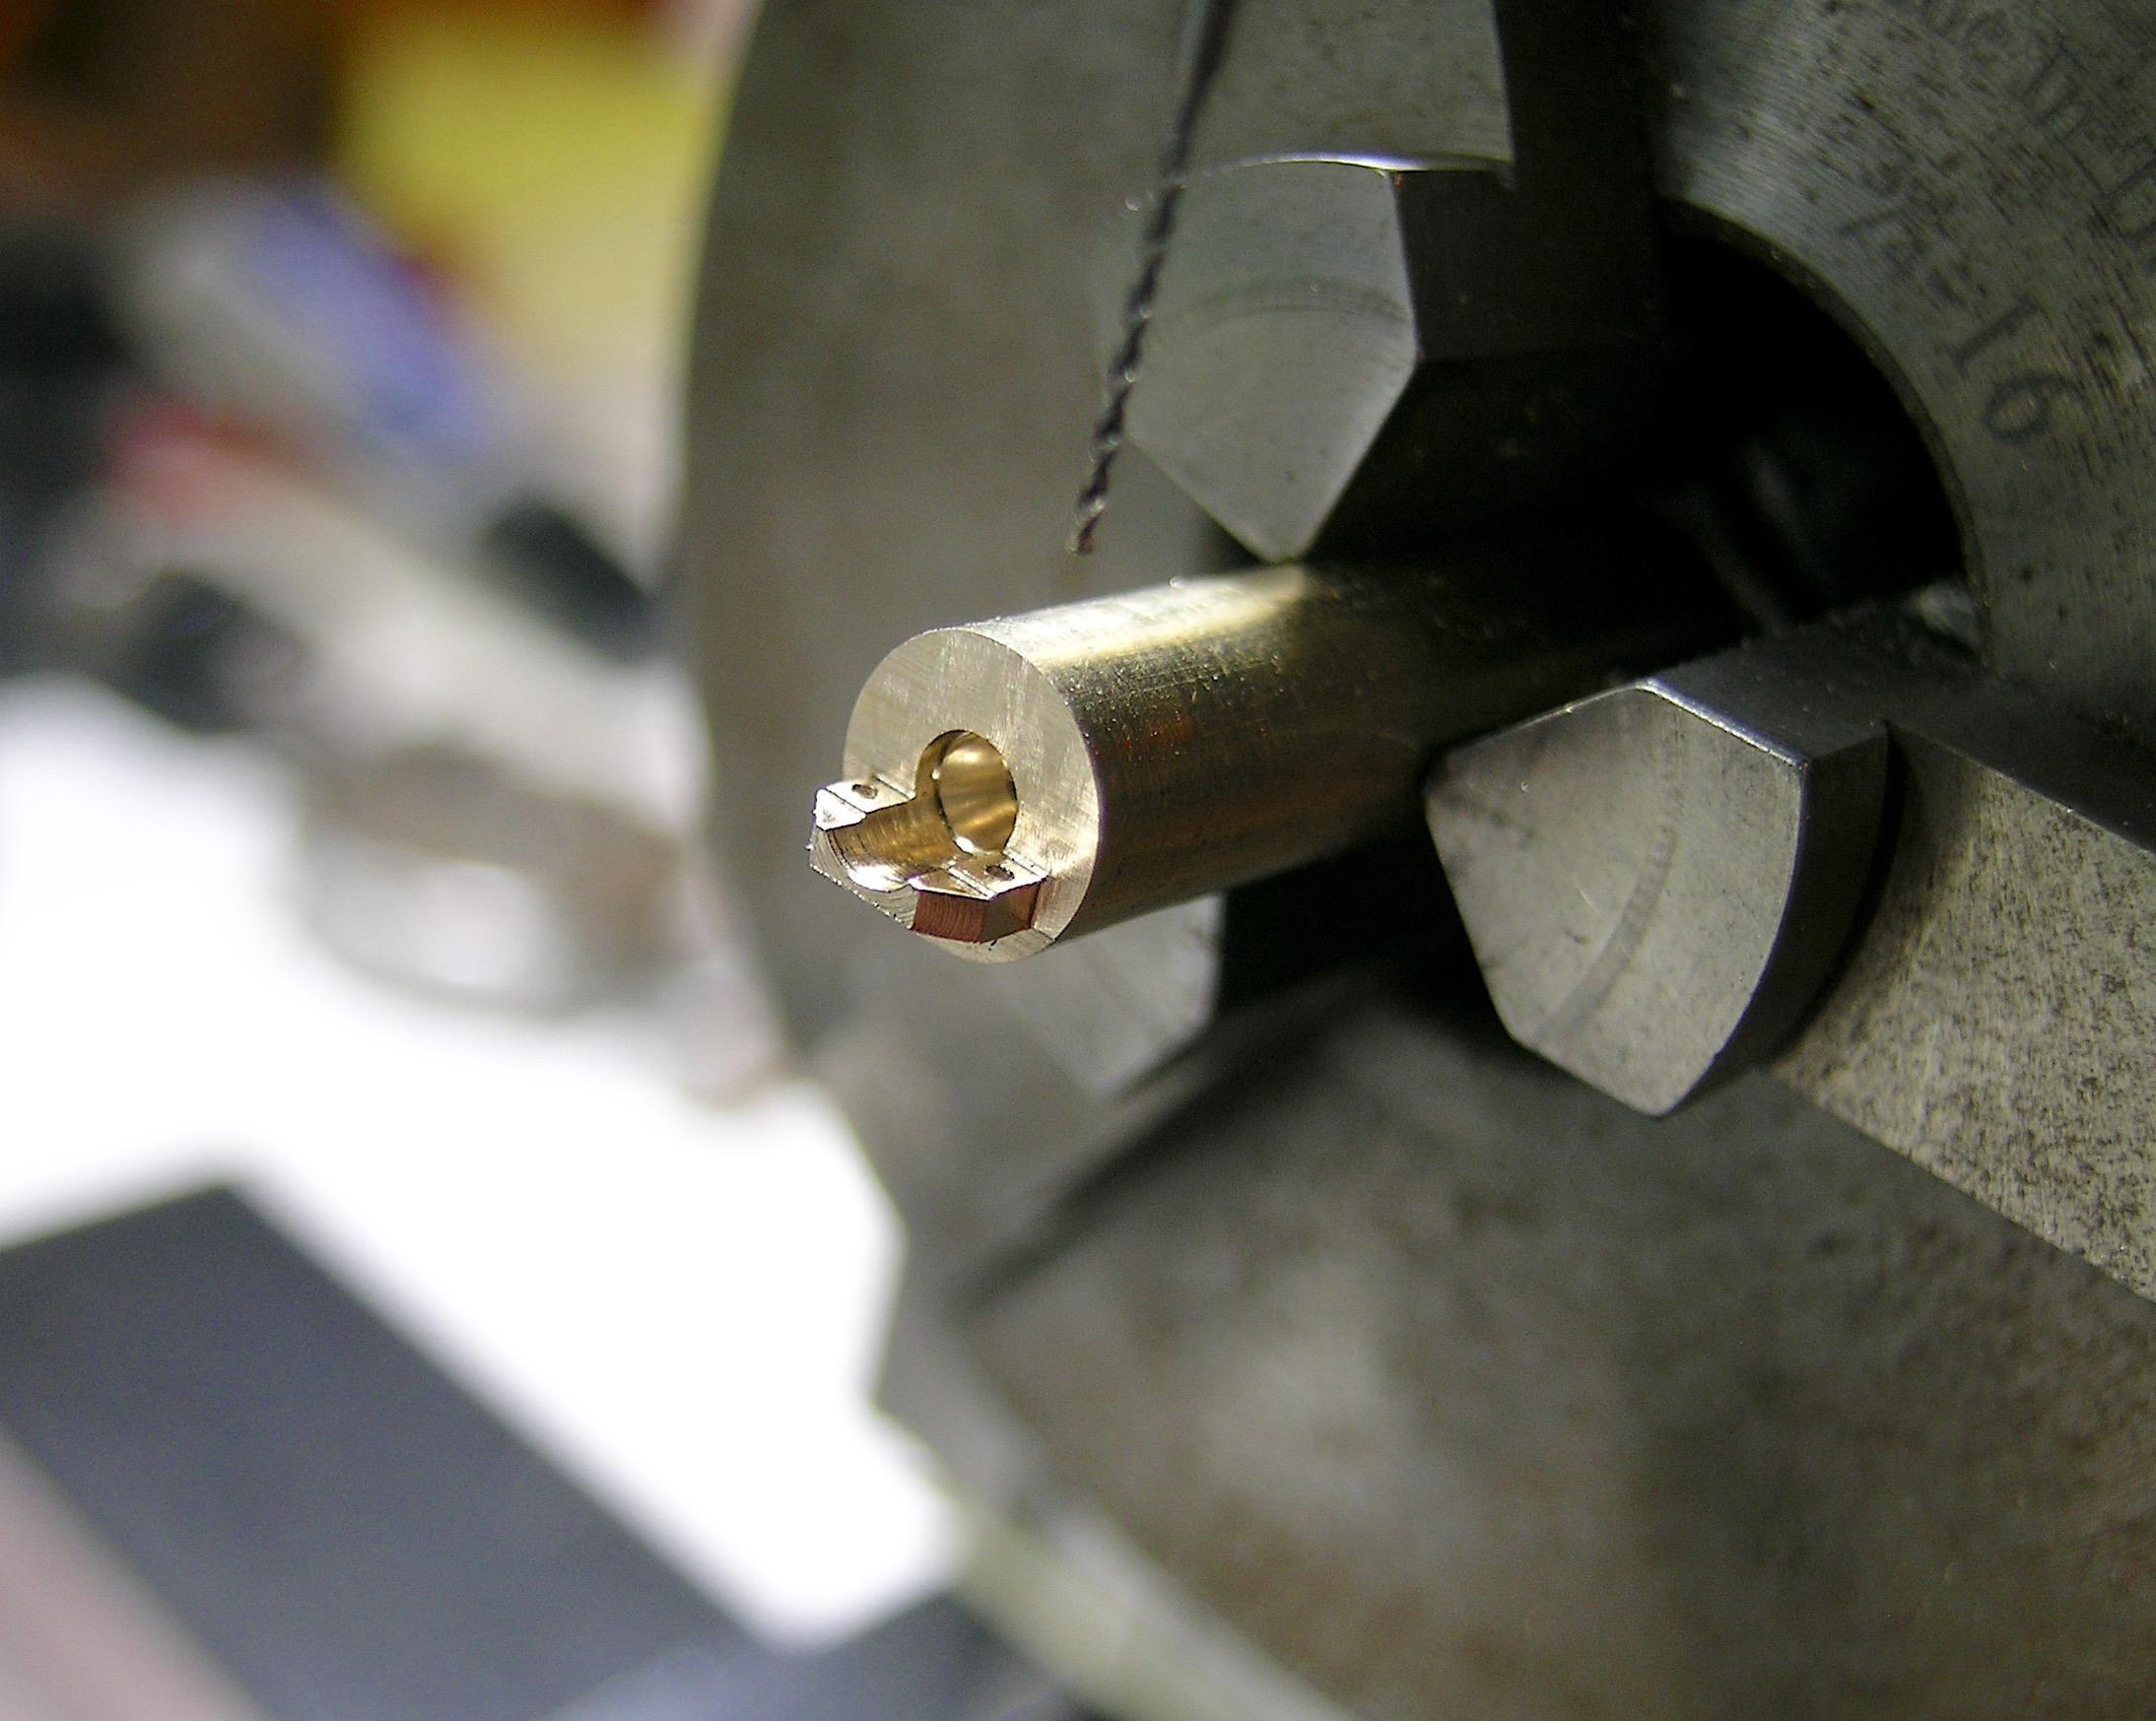
AmericanMuscleFan replied to AmericanMuscleFan's topic in WIP: Drag Racing Models
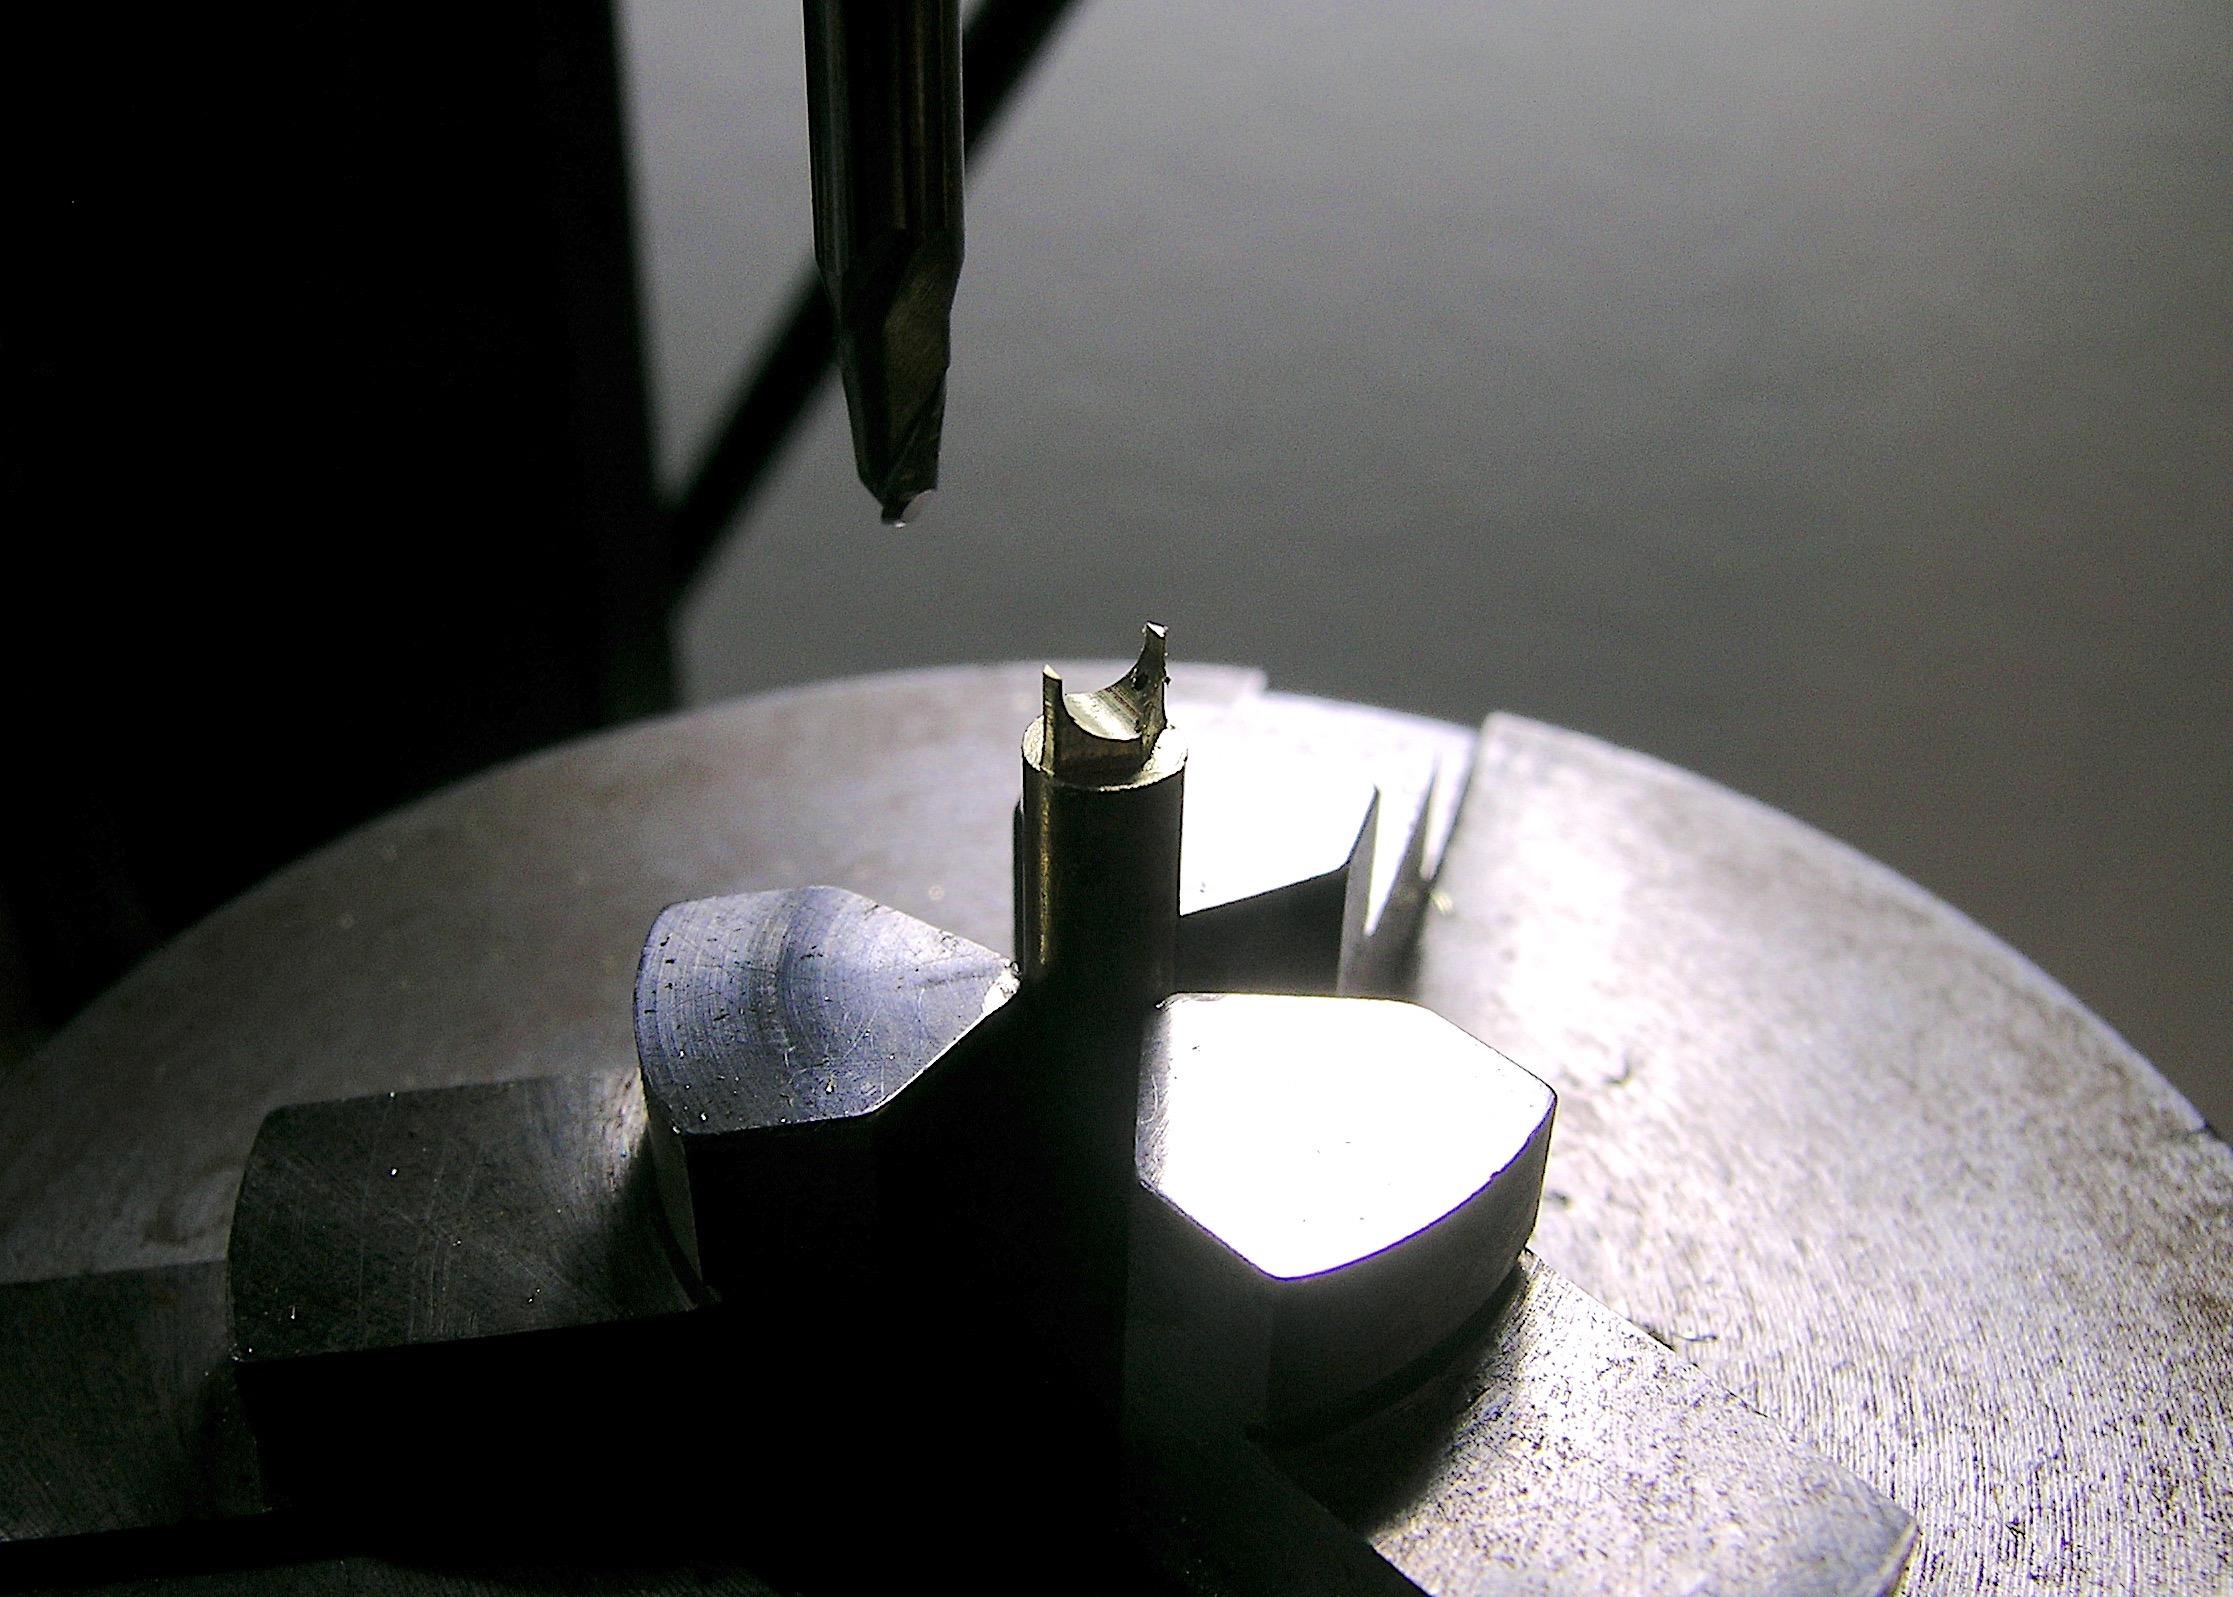
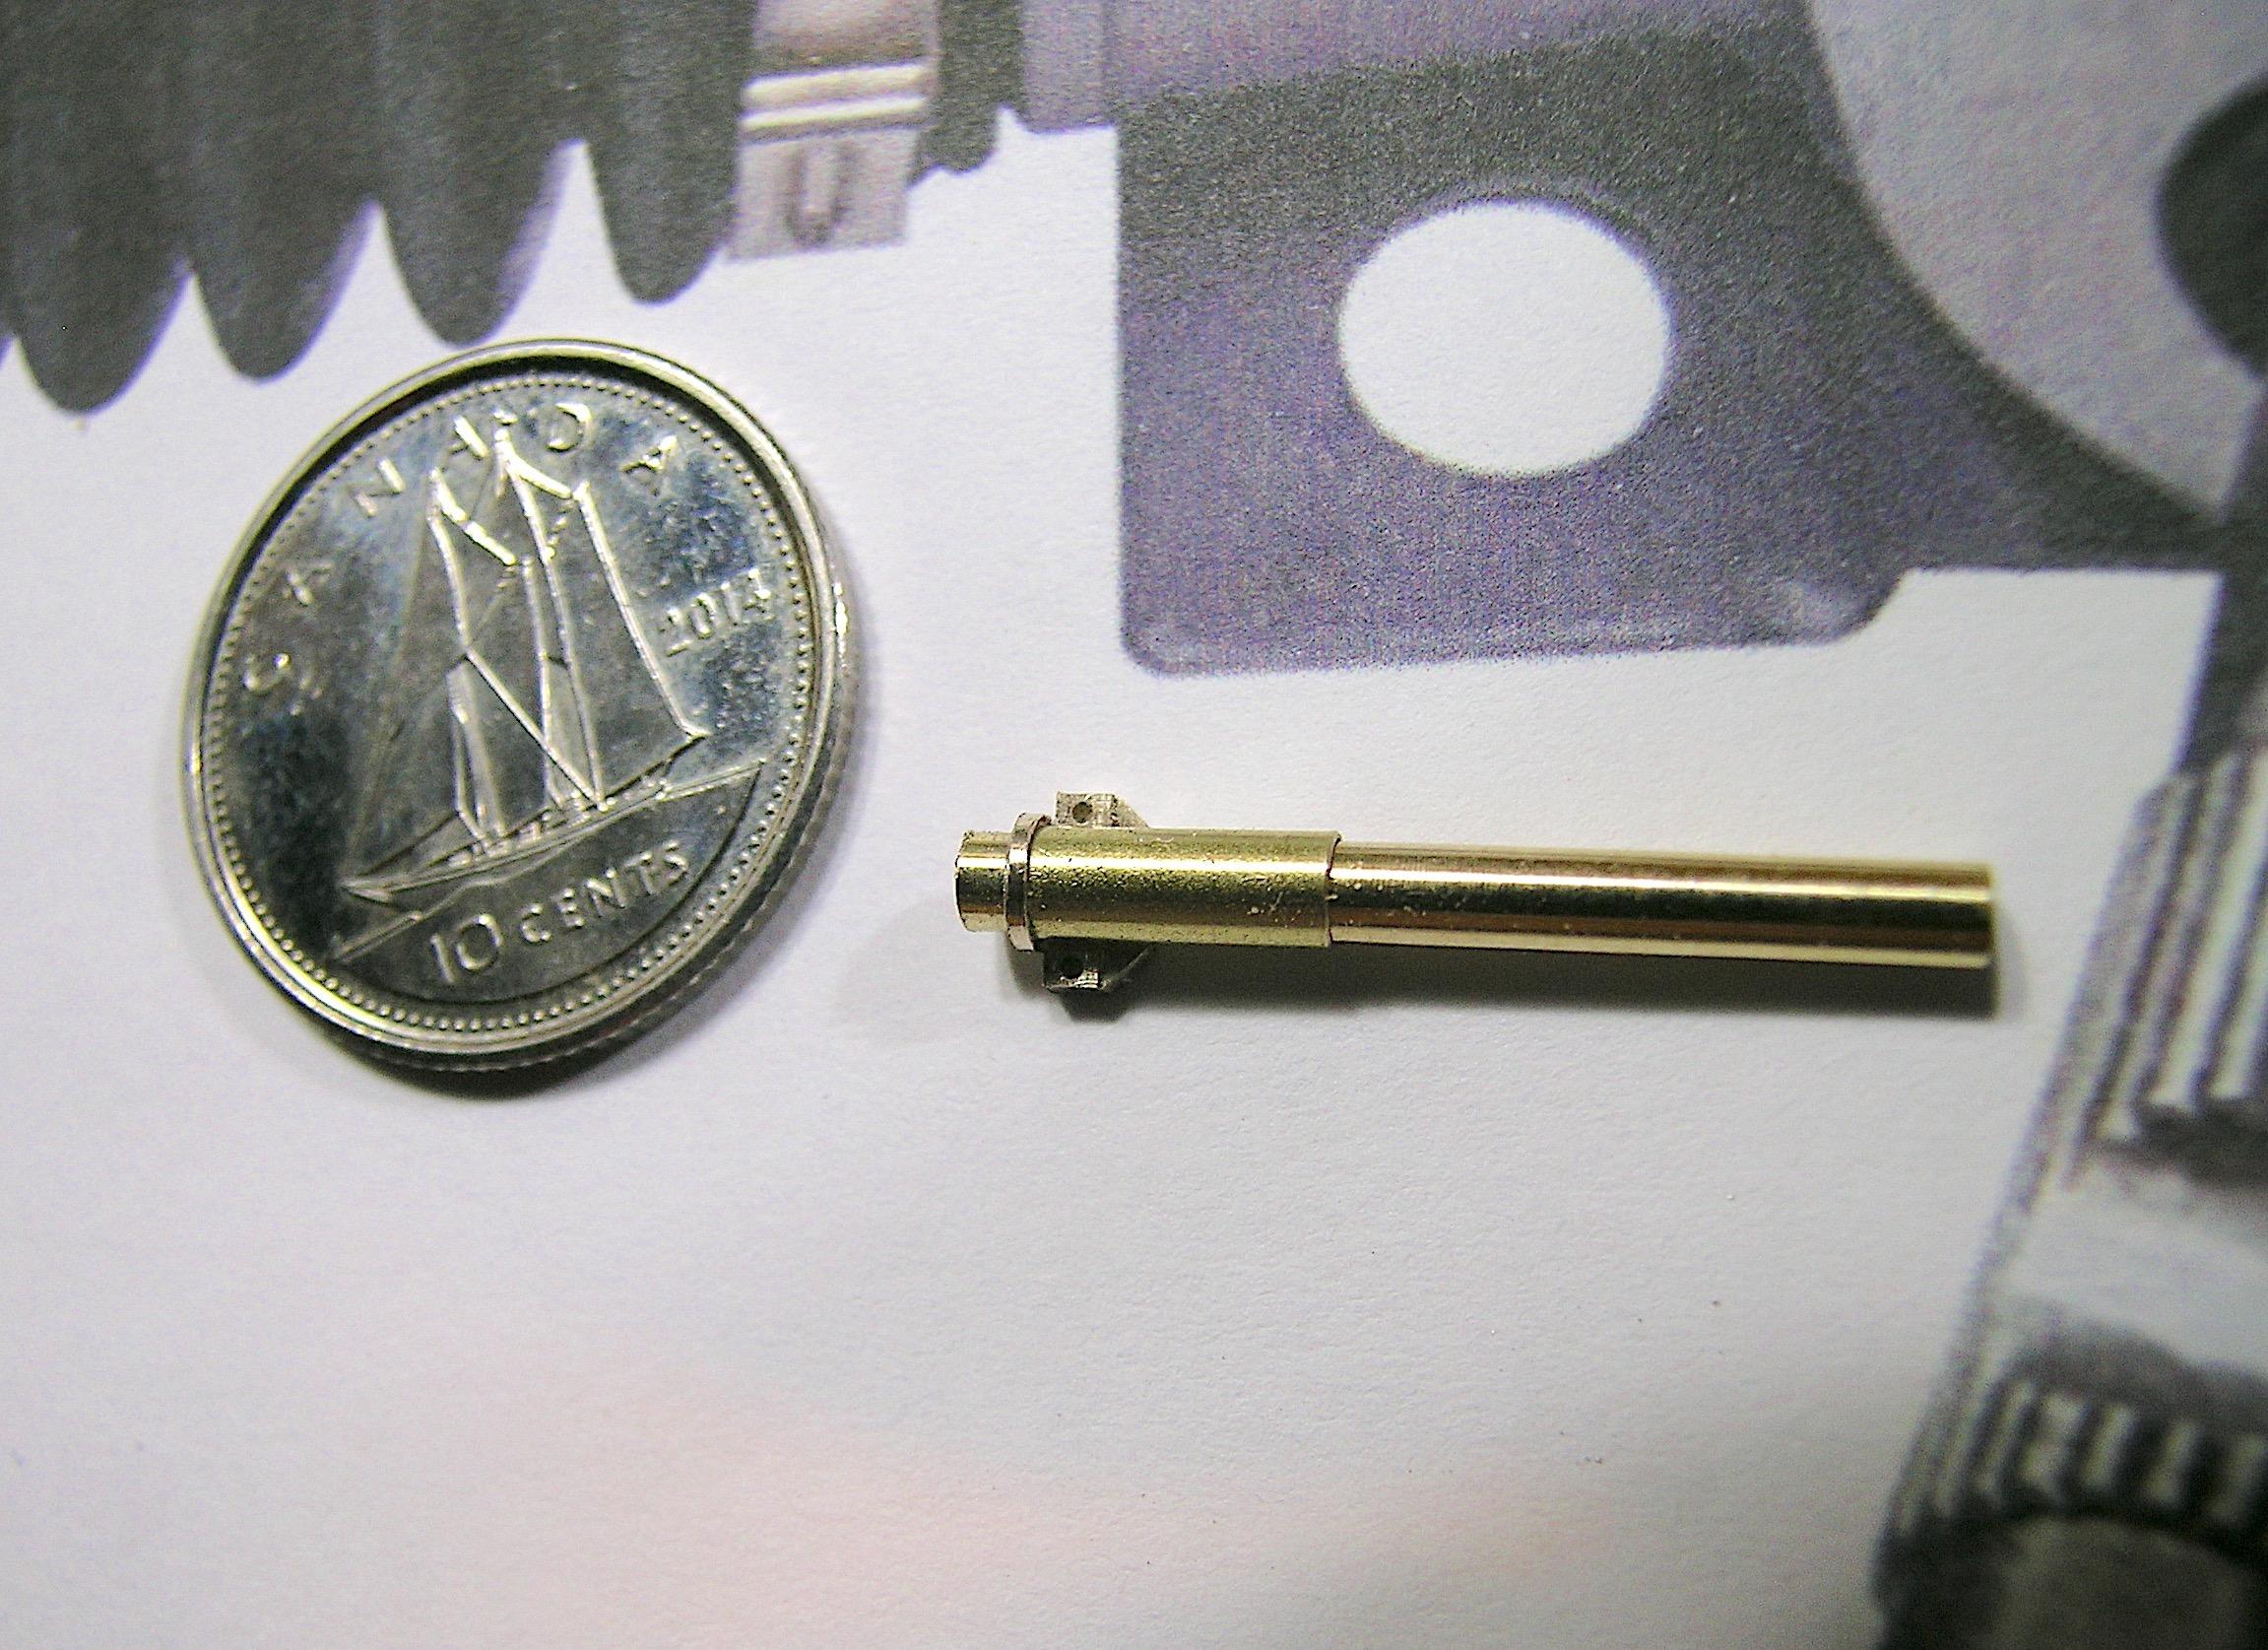
OK guys, I've had a lot of trouble posting this update since the beginning of the week so I'll keep my explanations to the minimum in case the text was the cause. Francis I didn't want to machine the main body, so I drilled a brass tube to simulate the larger section where the rack is placed. This is the driver side mounting flange at early stage of machining. After further cuts on the milling machine. Now in the lathe chuck to separate it from the raw rod. A lot of work for such a small part! This is were the final part will be finally installed. You can see part of the print I used as a model.
-
Badman C/A (ca. 1975)
AmericanMuscleFan replied to Straightliner59's topic in WIP: Drag Racing Models
The photo where we see the car 3/4 in front (number 2) is impressive, there's a lot of work in there! 👌 -
’72 Dodge Demon Drag Racer 1/25 scale
AmericanMuscleFan replied to AmericanMuscleFan's topic in WIP: Drag Racing Models
Thanks Les! My last test worked fine with just one photo, I have to leave for work but will try again tomorrow afternoon. I respect your work guys, I know it's not your full time job and we have to be patient (which I am!), there seems to be light at the end of the tennel. 16:00 pm EST, Mac 10,15.7 Firefox 135.0 -
Cool stuff you received Brian, the 3D printed parts are really good quality now with the improvement in printer resolution and resin quality. This remains at the 1/25 scale but the parts for heavy vehicles in your category are a little bit larger than those for cars of the same scale and that is an advantage I think. One way or another, 3D technology has come on in leaps and bounds and all these little gems help keep interest in this wonderful hobby alive, you couldn't ask for more! 👍
-
’72 Dodge Demon Drag Racer 1/25 scale
AmericanMuscleFan replied to AmericanMuscleFan's topic in WIP: Drag Racing Models
As mentioned yesterday, I can't update due to a technical problem with the forum? You can see in a previous post the screenshot of the error message I receive on each attempt. I haven't seen an answer to my question on the thread How To Use This Board: (Can't seem to post to a thread?) and (Oops, That page can't be found.) about whether the admins are working on a solution but I know I'm not the only one having this problem. I'm doing another try (test) with only 1 photo just out of curiosity but I don't know if I will be able to continue posting updates on this thread. The build of the Demon continues but I may not be able to continue feeding this thread until the situation returns to normal. Sorry for this inconvenience, this message could be outdated by the time you read it if whatever is blocking the pipe clears the way! TEST
-
’72 Dodge Demon Drag Racer 1/25 scale
AmericanMuscleFan replied to AmericanMuscleFan's topic in WIP: Drag Racing Models
Yes I know, I just commented and my text passed without problem, I tried different save formats and reduced the resolution but nothing works. Maybe it's a sign that I've reached the end of the story, who knows! 😢 -
It seems you have better luck than me my friend, I haven't been able to post any updates since yesterday but I see it's working well on your side! 😉 I love this one, very nice and clean build as usual ! It reminds me of the style of JF Launier (JF Kustom) whose creations are spectacular, what you are offering us today is once again of high caliber! It will definitely turn heads at the next exhibition! Beautiful choice of color, very classy as they say! 👌
-
’72 Dodge Demon Drag Racer 1/25 scale
AmericanMuscleFan replied to AmericanMuscleFan's topic in WIP: Drag Racing Models
I don't understand, I wrote a message to explain the inconveniences I had with the forum and "poof" the photos that I tried to post 5 or 6 times were published without me trying to include them, it's really strange! I deleted the photos and edited the post stating the reason. I'll give it another try... 🤔 -
’72 Dodge Demon Drag Racer 1/25 scale
AmericanMuscleFan replied to AmericanMuscleFan's topic in WIP: Drag Racing Models
There is clearly a problem with the forum, I tried again this morning by reducing the resolution of the photos and the number and it still does not work. I can post messages or replies without problems but no photos, curiously I was able to upload the screenshot of the error message (png), maybe there is a problem with the .jpg format of the photos? Hoping the problem is resolved, I will try again in a few days, I have no plans to create a new thread for this project, it is half as long as my D100 pickup and has more photos. Sorry to those who are interested in my project, this is a situation that is out of my control. -
’72 Dodge Demon Drag Racer 1/25 scale
AmericanMuscleFan replied to AmericanMuscleFan's topic in WIP: Drag Racing Models
That's very kind Scott but if that were the case I know a lot of members who would have the same problem! I'm going to try again tomorrow to do my update and I hope for a happier ending otherwise the project will continue but alone in my basement! 🙄