BIGTRUCK
-
Posts
2,739 -
Joined
-
Last visited
Content Type
Profiles
Forums
Events
Gallery
Everything posted by BIGTRUCK
-
 Quote: I have tons of interesting kits and resin and you see what I play with! Thats a 100% true Tom, most builder / collector that have been building for some time tend to tinker with others discarded builds seeing something good . I can't explain it , but am guilty of it myself.
 -
I always like to have 2 builds going on at one time so paint or clear on one can cure fully. This one was a partial builder I had for years so after I checked all the parts , its time to build Cooter's Tow Truck. The only thing I may alter is the toy like boom, I'm going to use it, just opening the flat surfaces so it don't look so bulky. The crank I'm not sure about it.

-
Paint is on and and once its cured we can start again. The glass is starting to get better , the tire burn was pretty deep. Im going to keep trying but if it dont come out soon I'll just cut one out and add the vent glass from the original.
-
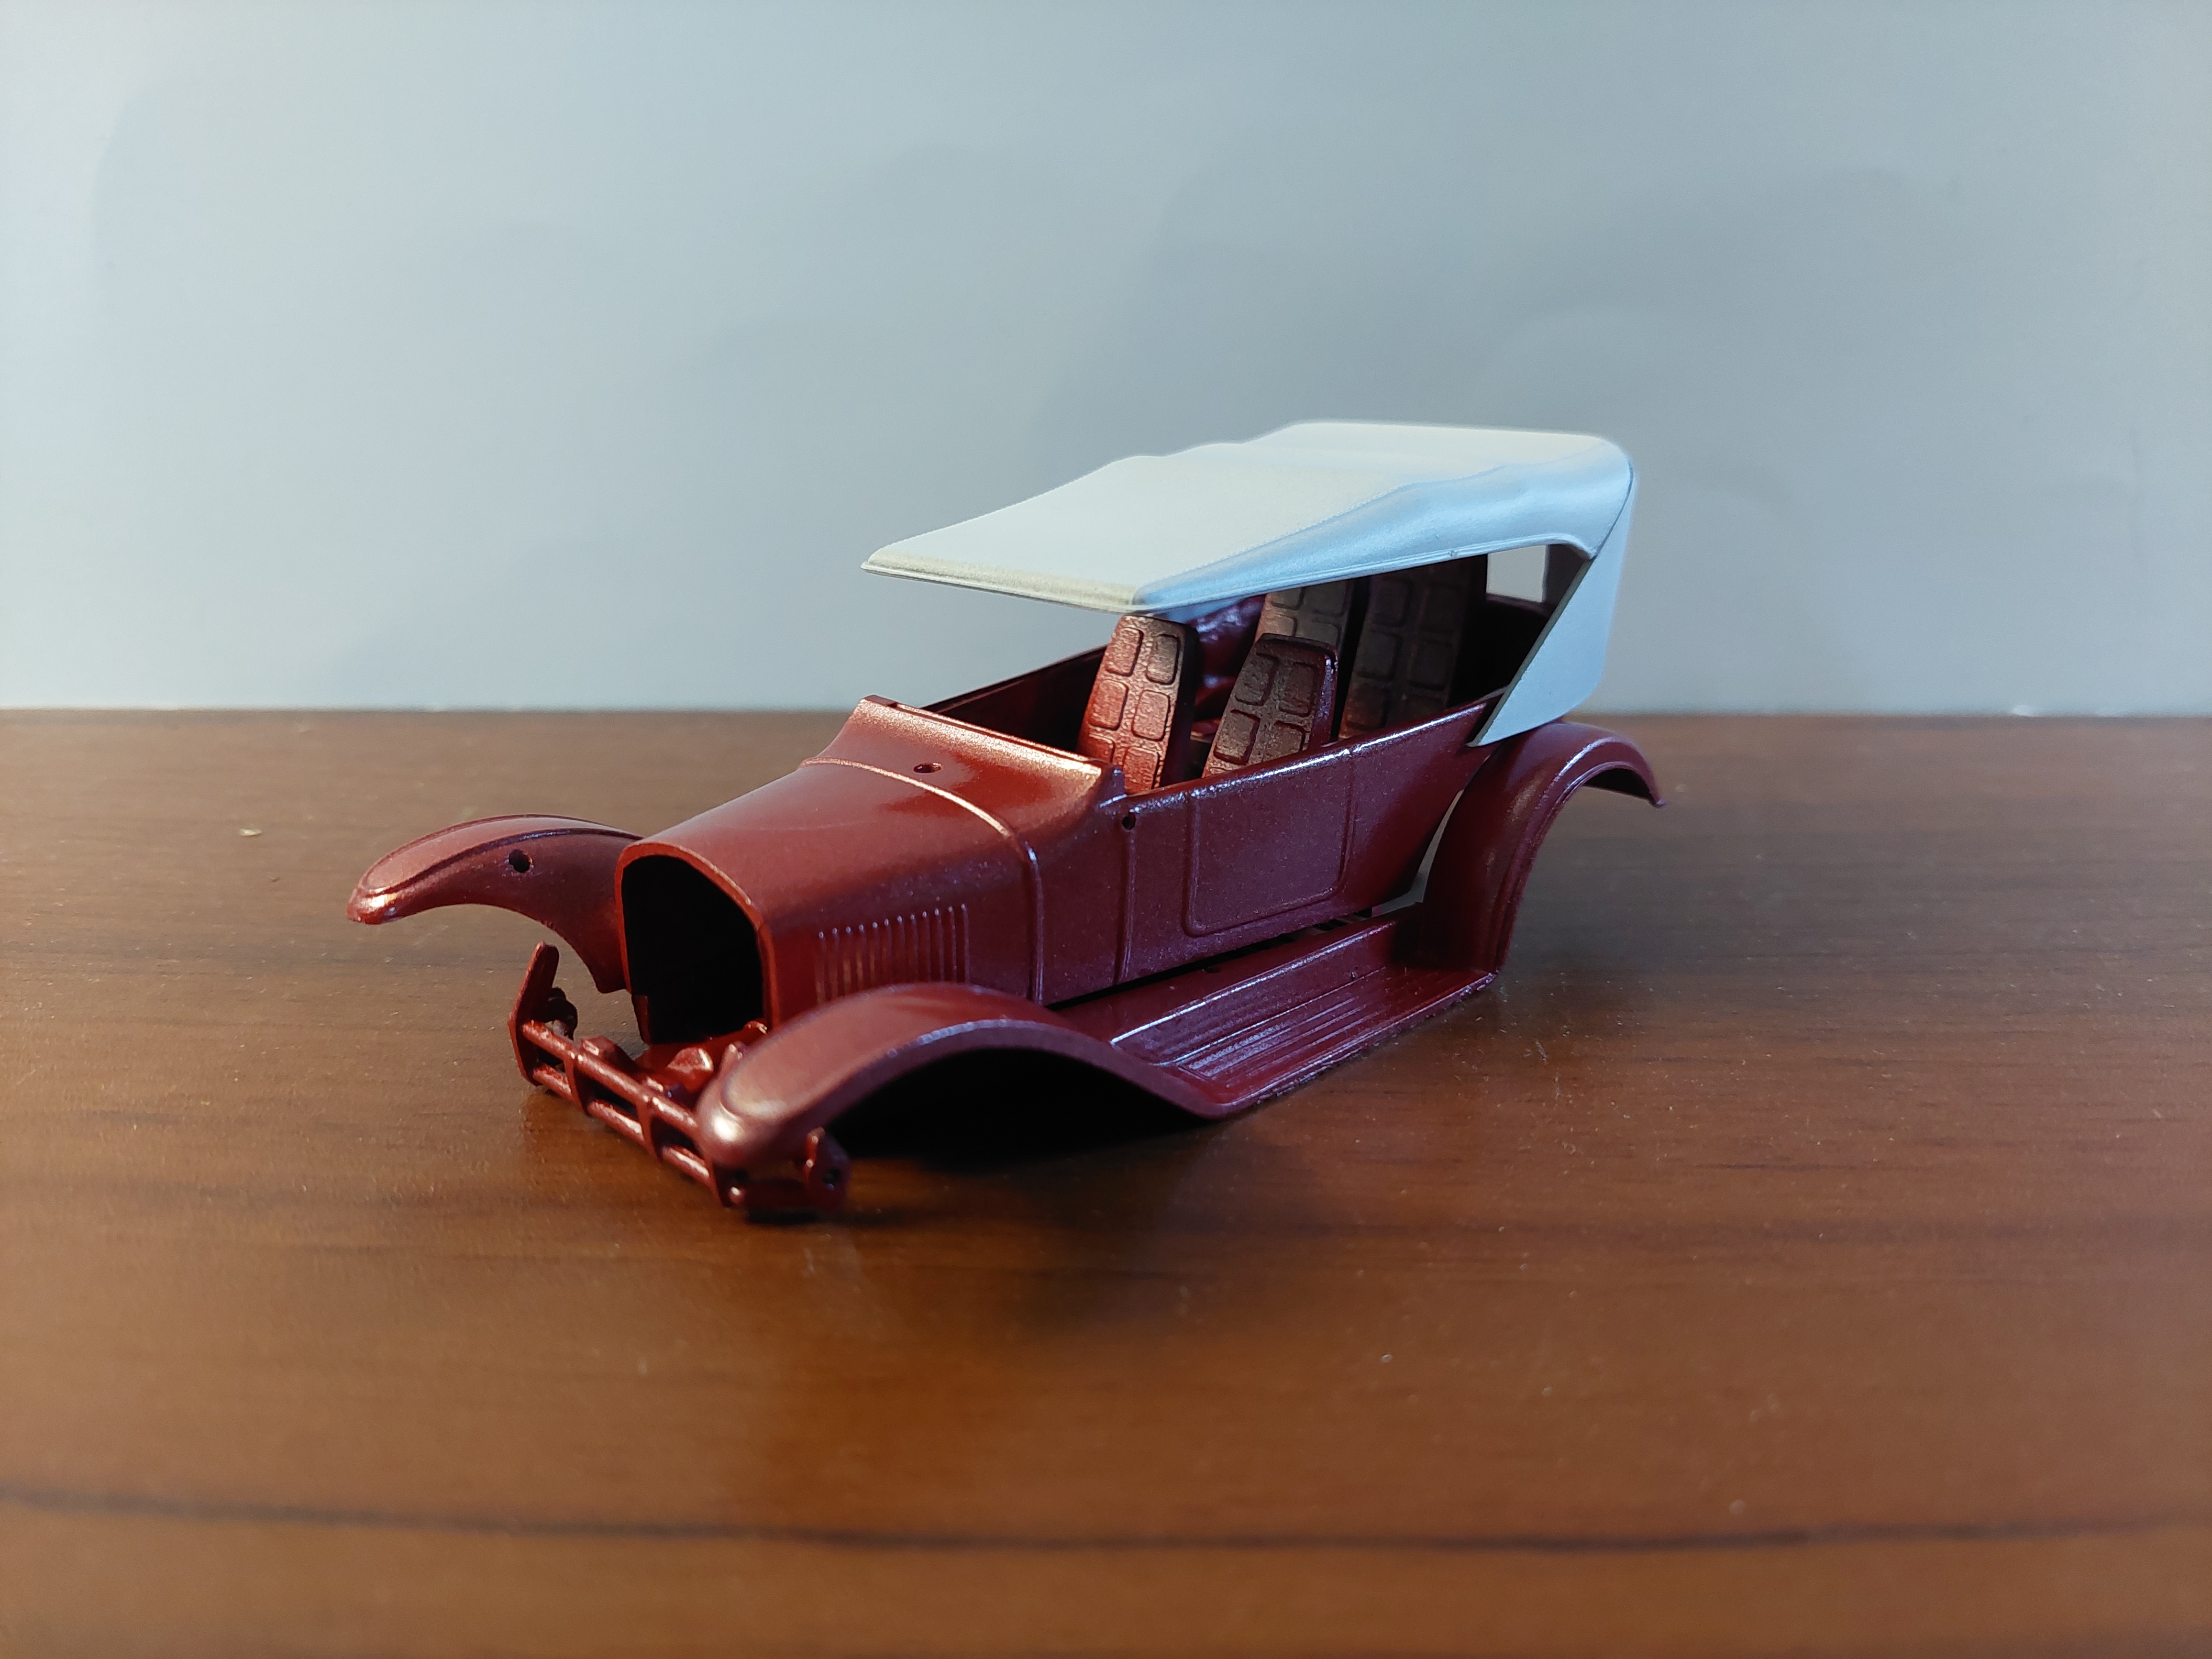
Red metallic over gold and pearl clear coat, and red/white interior. White top.
-
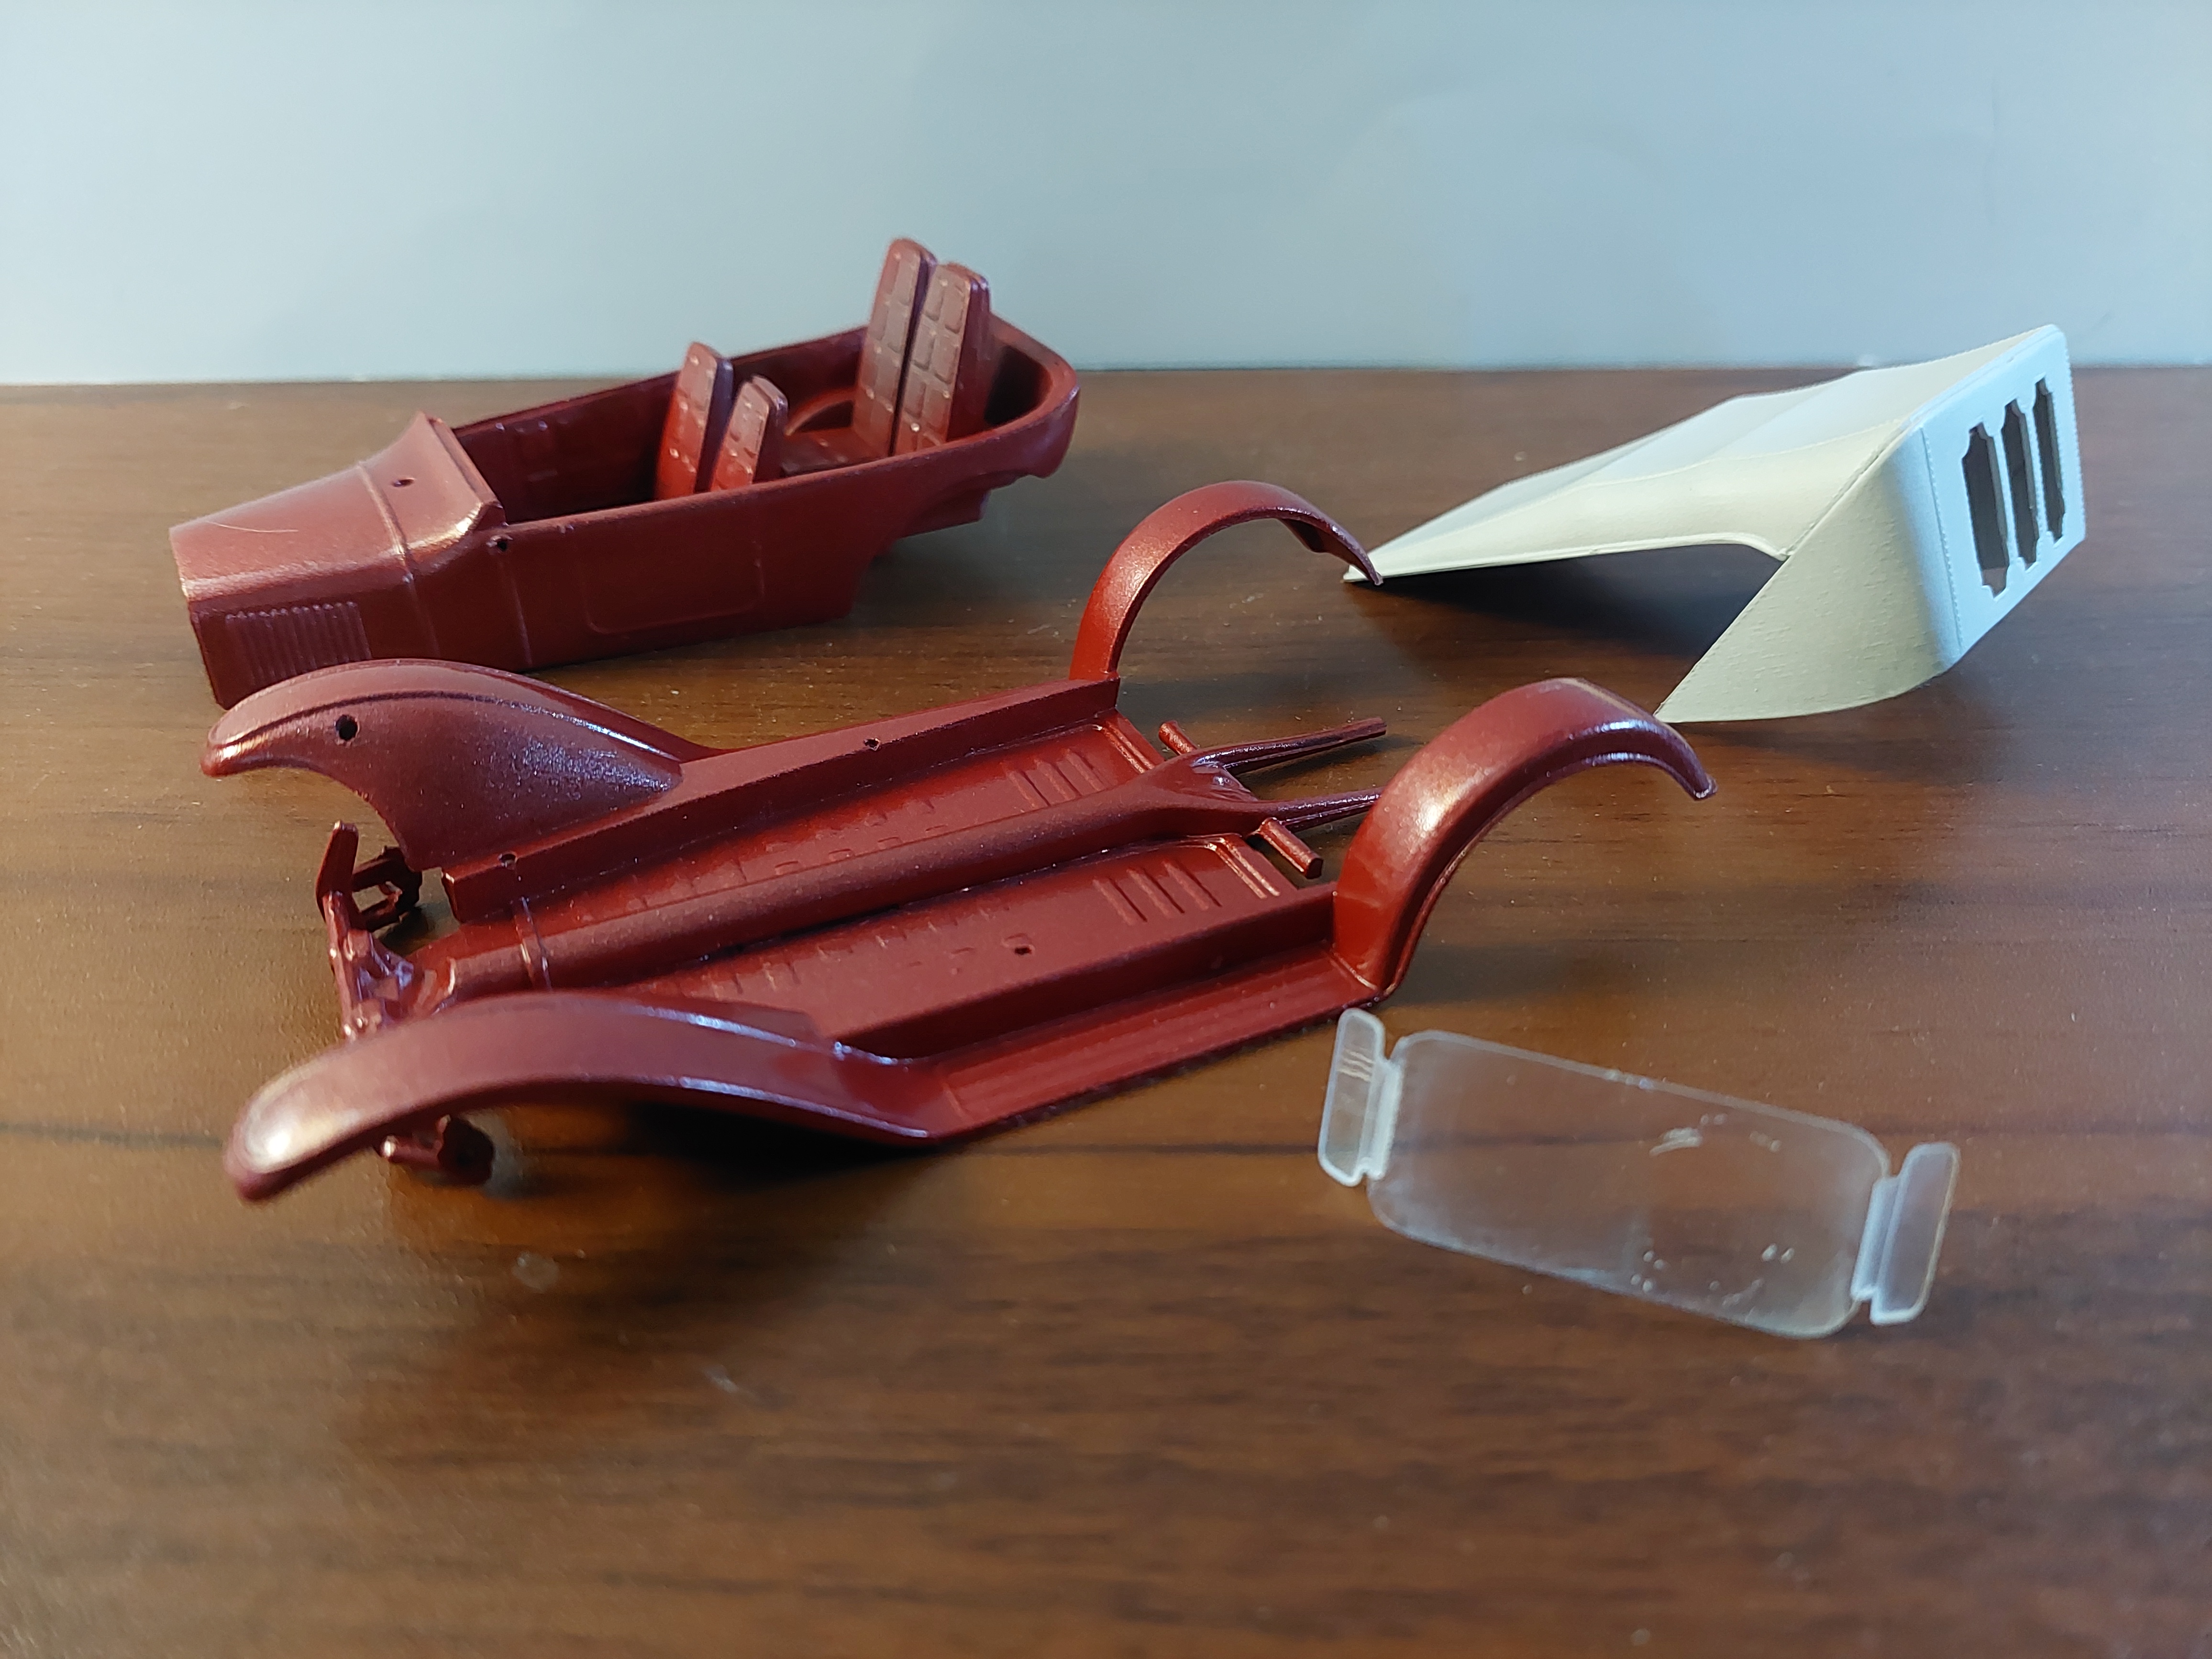
All the body, engine and chassis are clean up and in primer, a glue spots gone and gaps filled in. Found some replacement mags and wheel backs that will work. The rear axle was a melted mess so I will have to scratch up one. The 2 support arms were a mess also but was able to file it open the arch.
-
Going to give it a shot, but 2 of them are pretty deep.
-
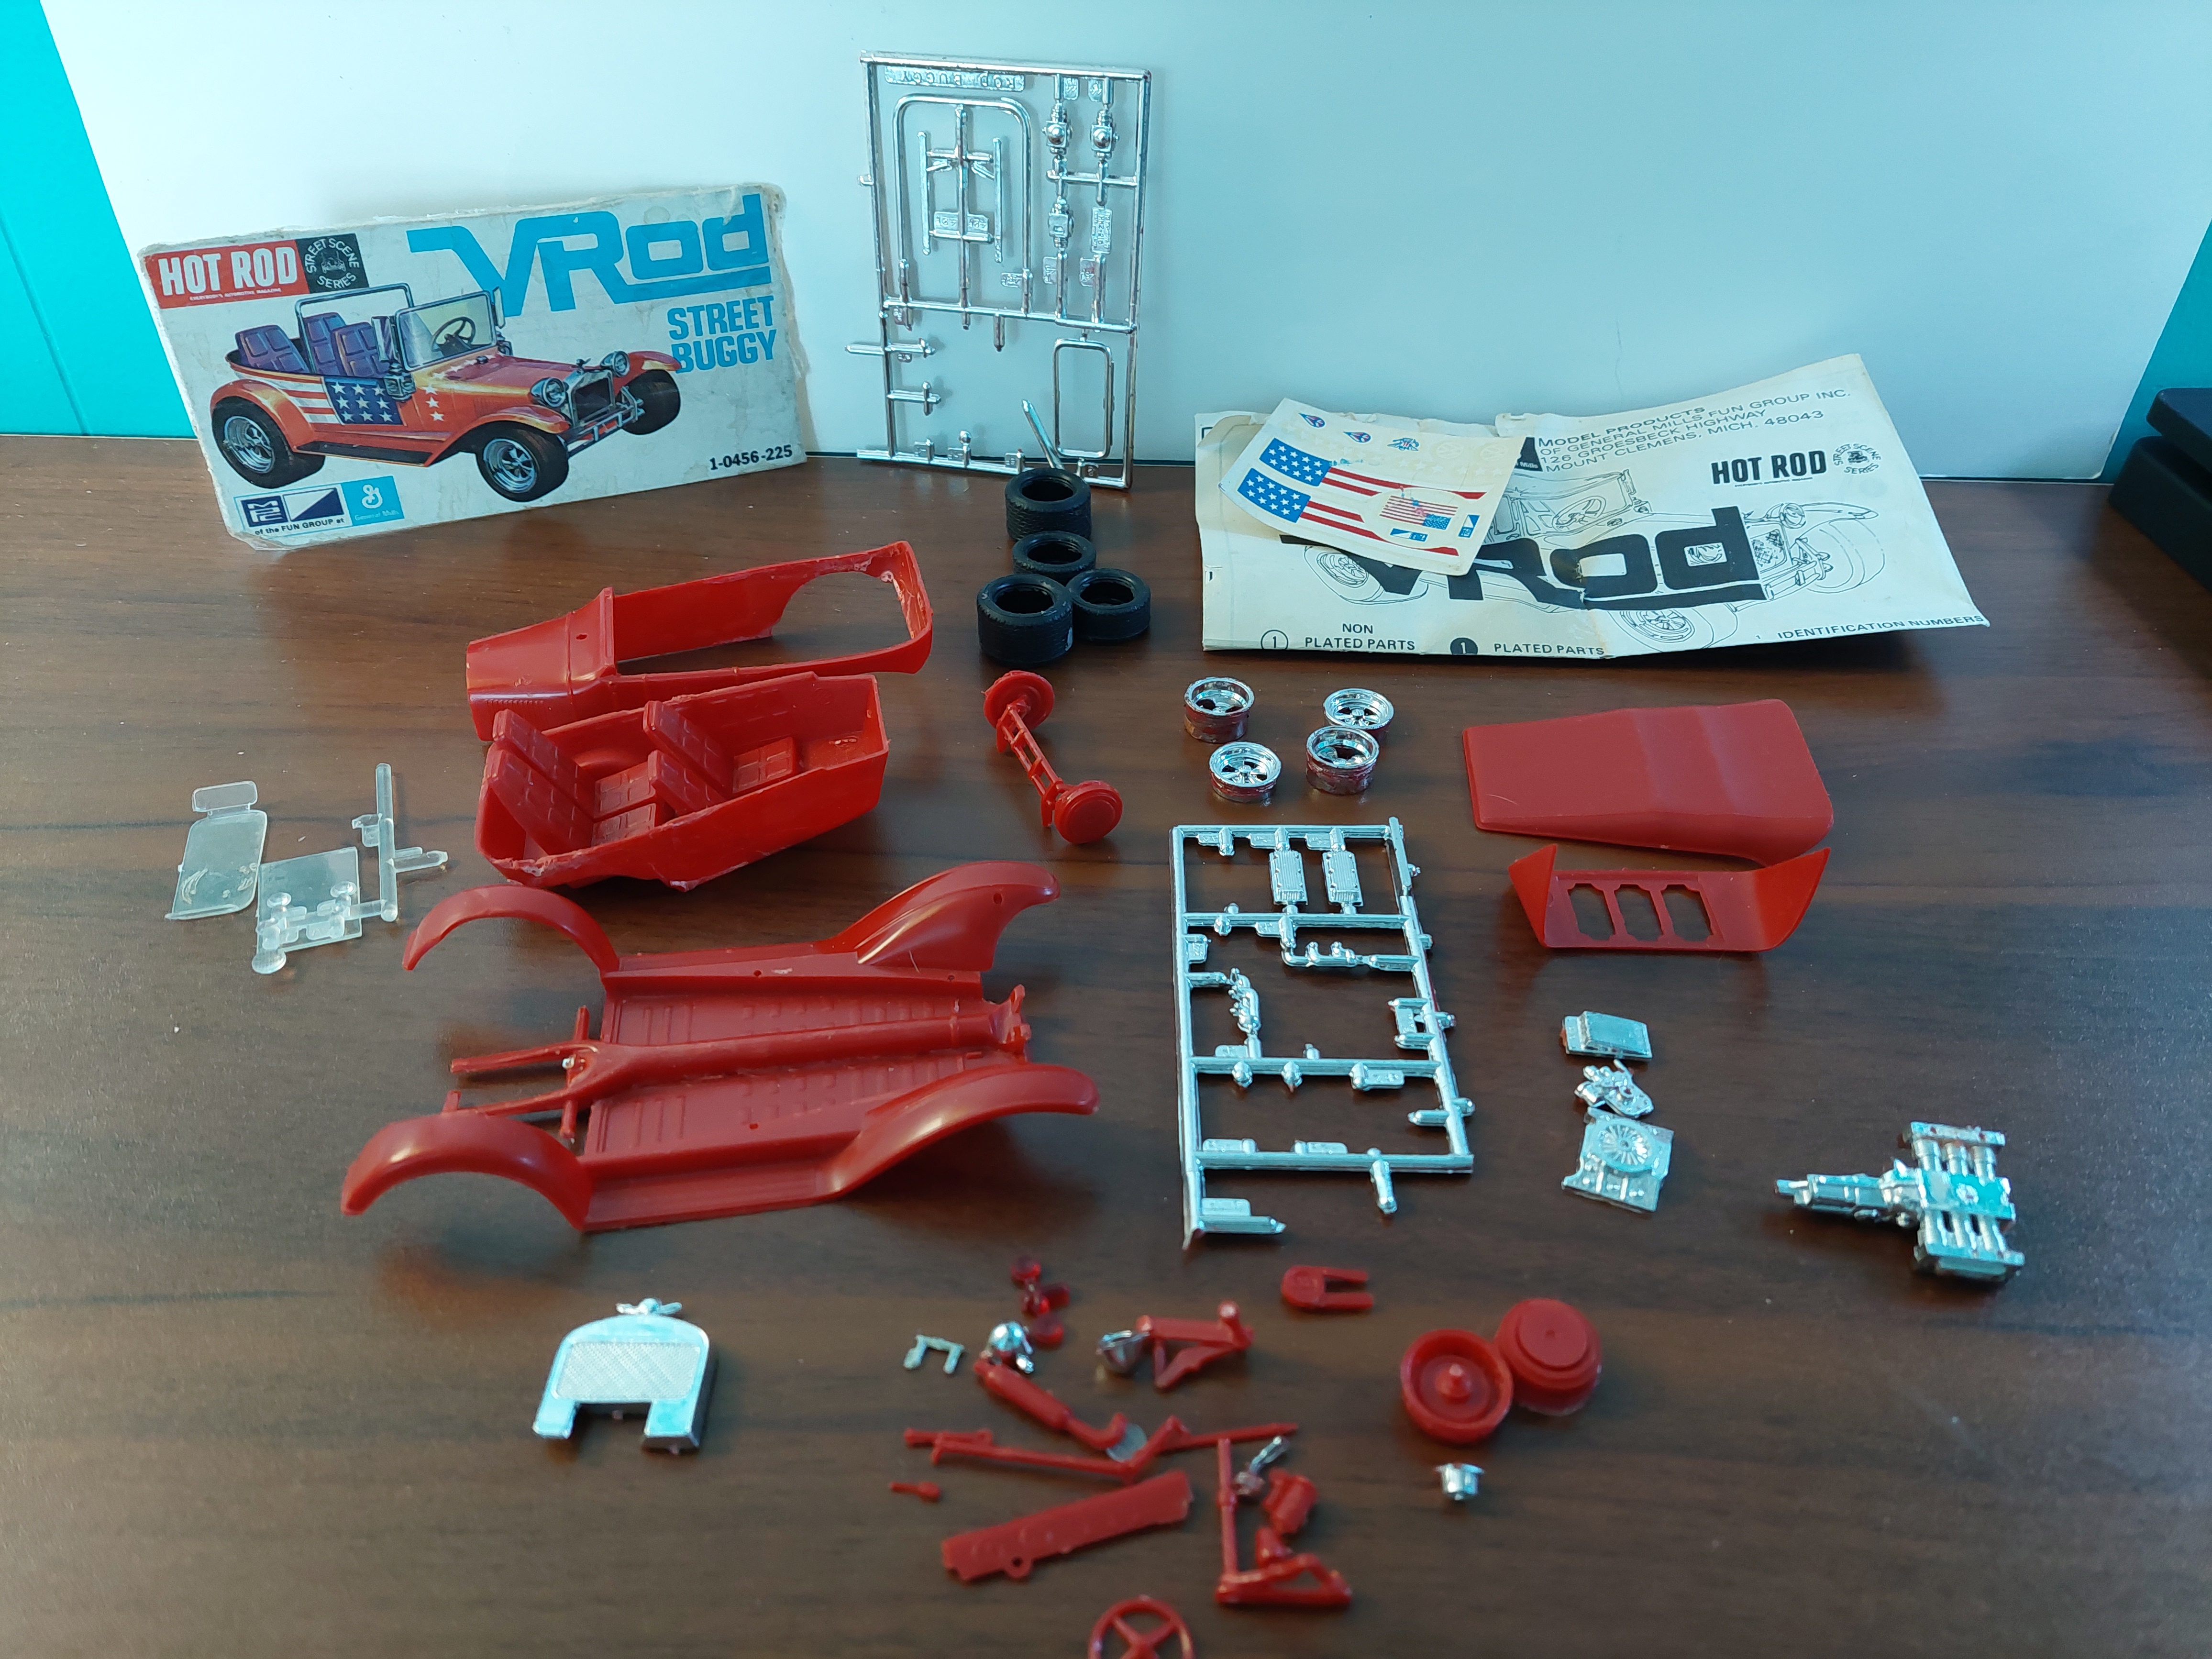
Another neat kit I picked up in trade with Phil (FordF100), this time a street buggy. After tearing down the stuff that was built, it seems like the windshield with a deep tire burn and the rear suspension are the only 2 things I will have to remake. Decals are a little sketchy and would have liked to use them as they are the ID for the buggy, but we will see. Like many of things I work on some things do need the chrome removed , but this time just a little.
-
Pretty straight forward eliminating body parts as I go ?, but had to add material all along the body bottom gaps and re-do the exhaust. The driver figure just didnt work out no matter how I cut and arranged the arms or shaved the back body area. The steering wheel is just way far left. Plus I tried cutting on the seat to make it work, but all that did was I had to make a new seat. Made two small brackets to make the windshield driver only. Its done and I probably would never have built this one the way it was intended.
-
I retired in January of 2021, and is it all they say it is ? You Betcha !!!!
-
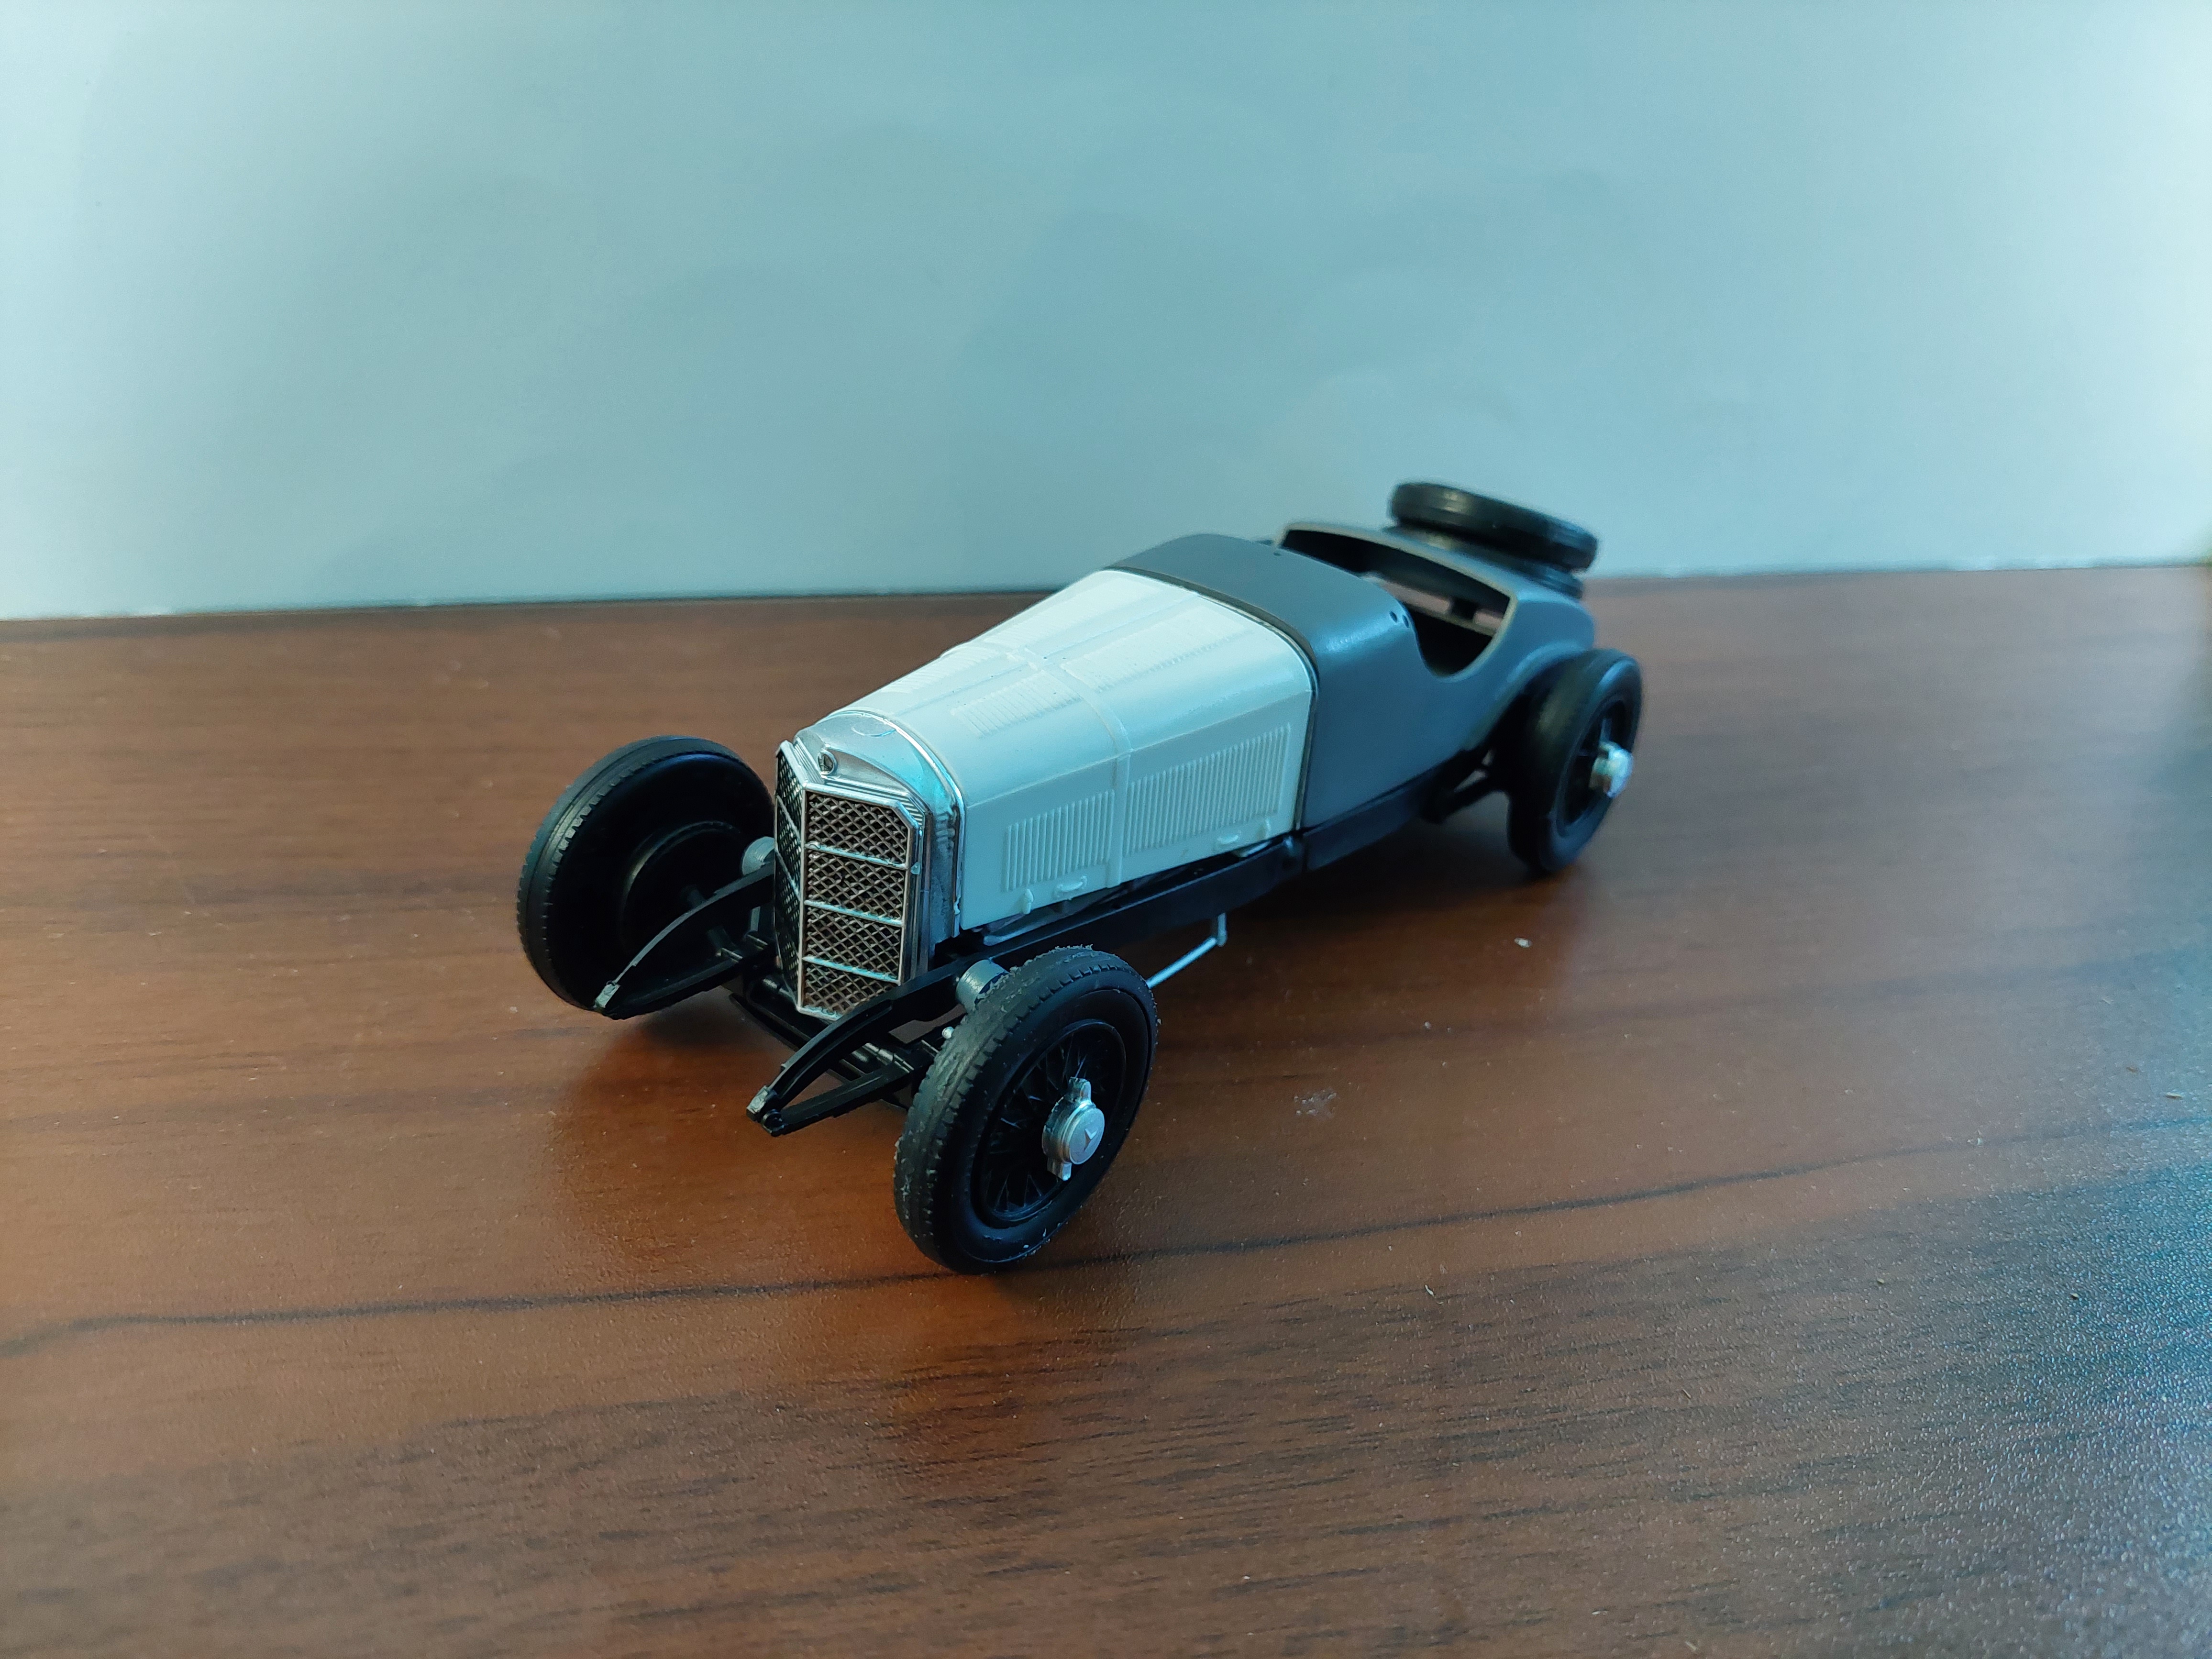
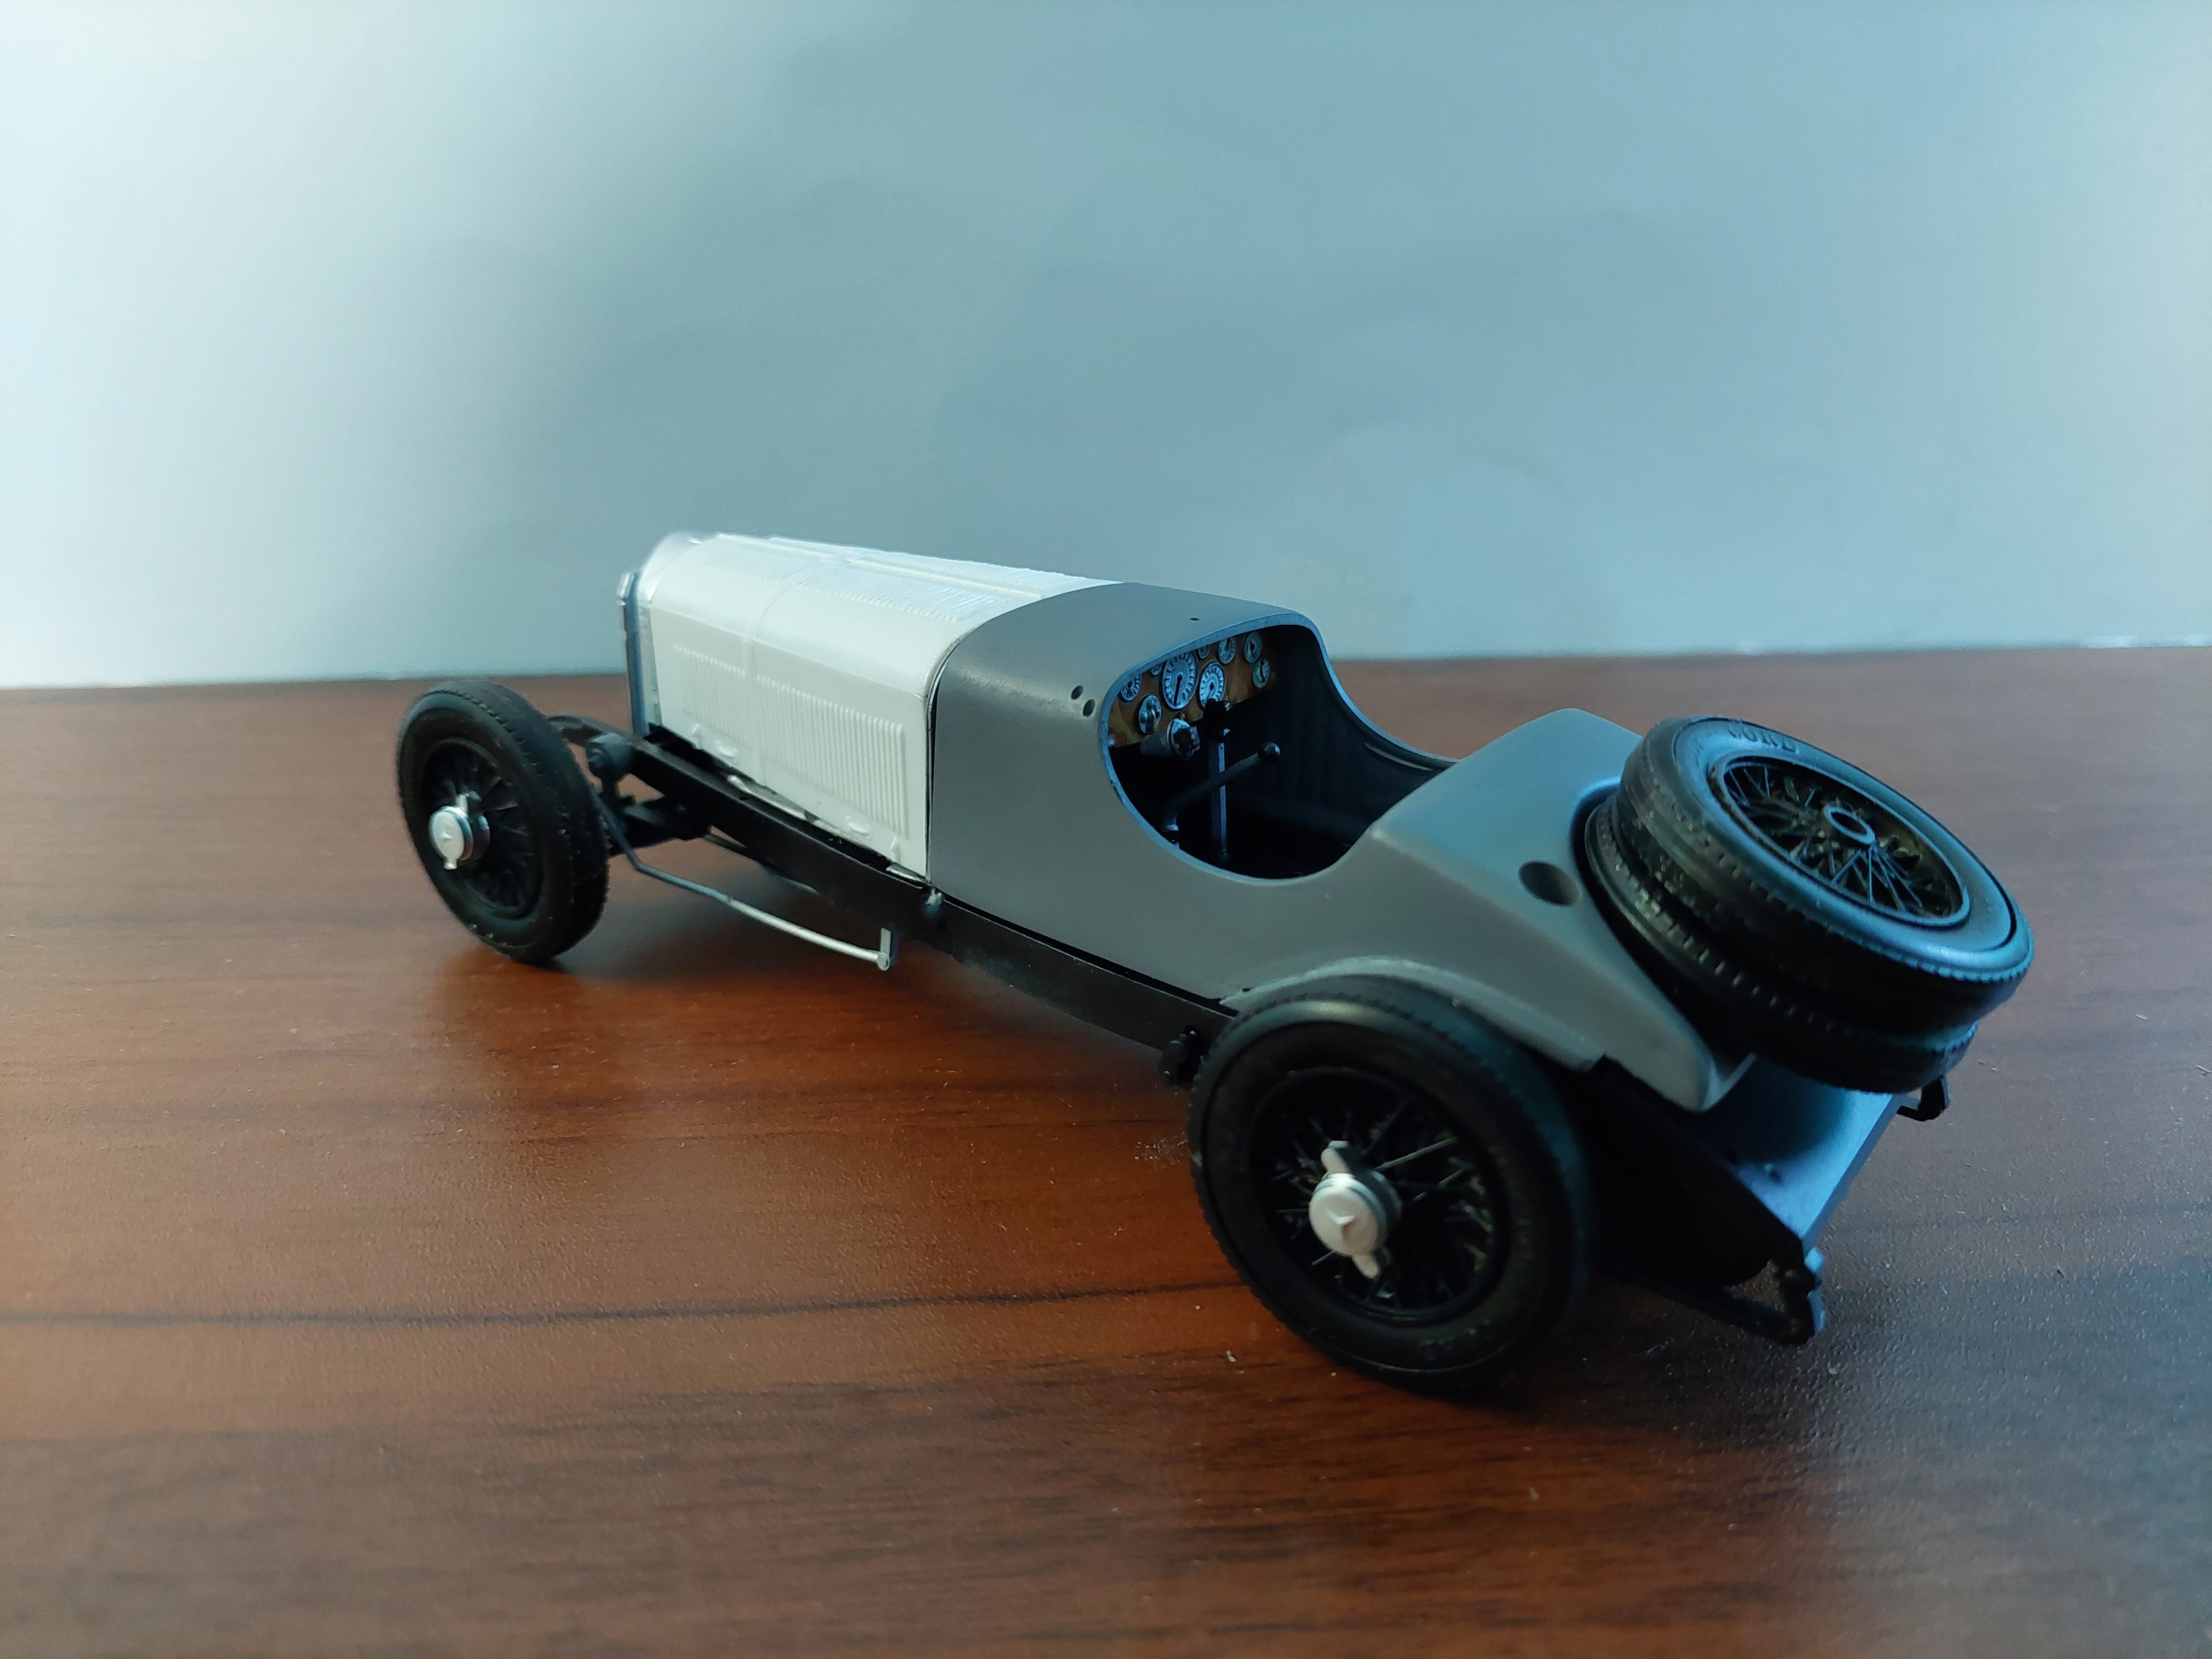
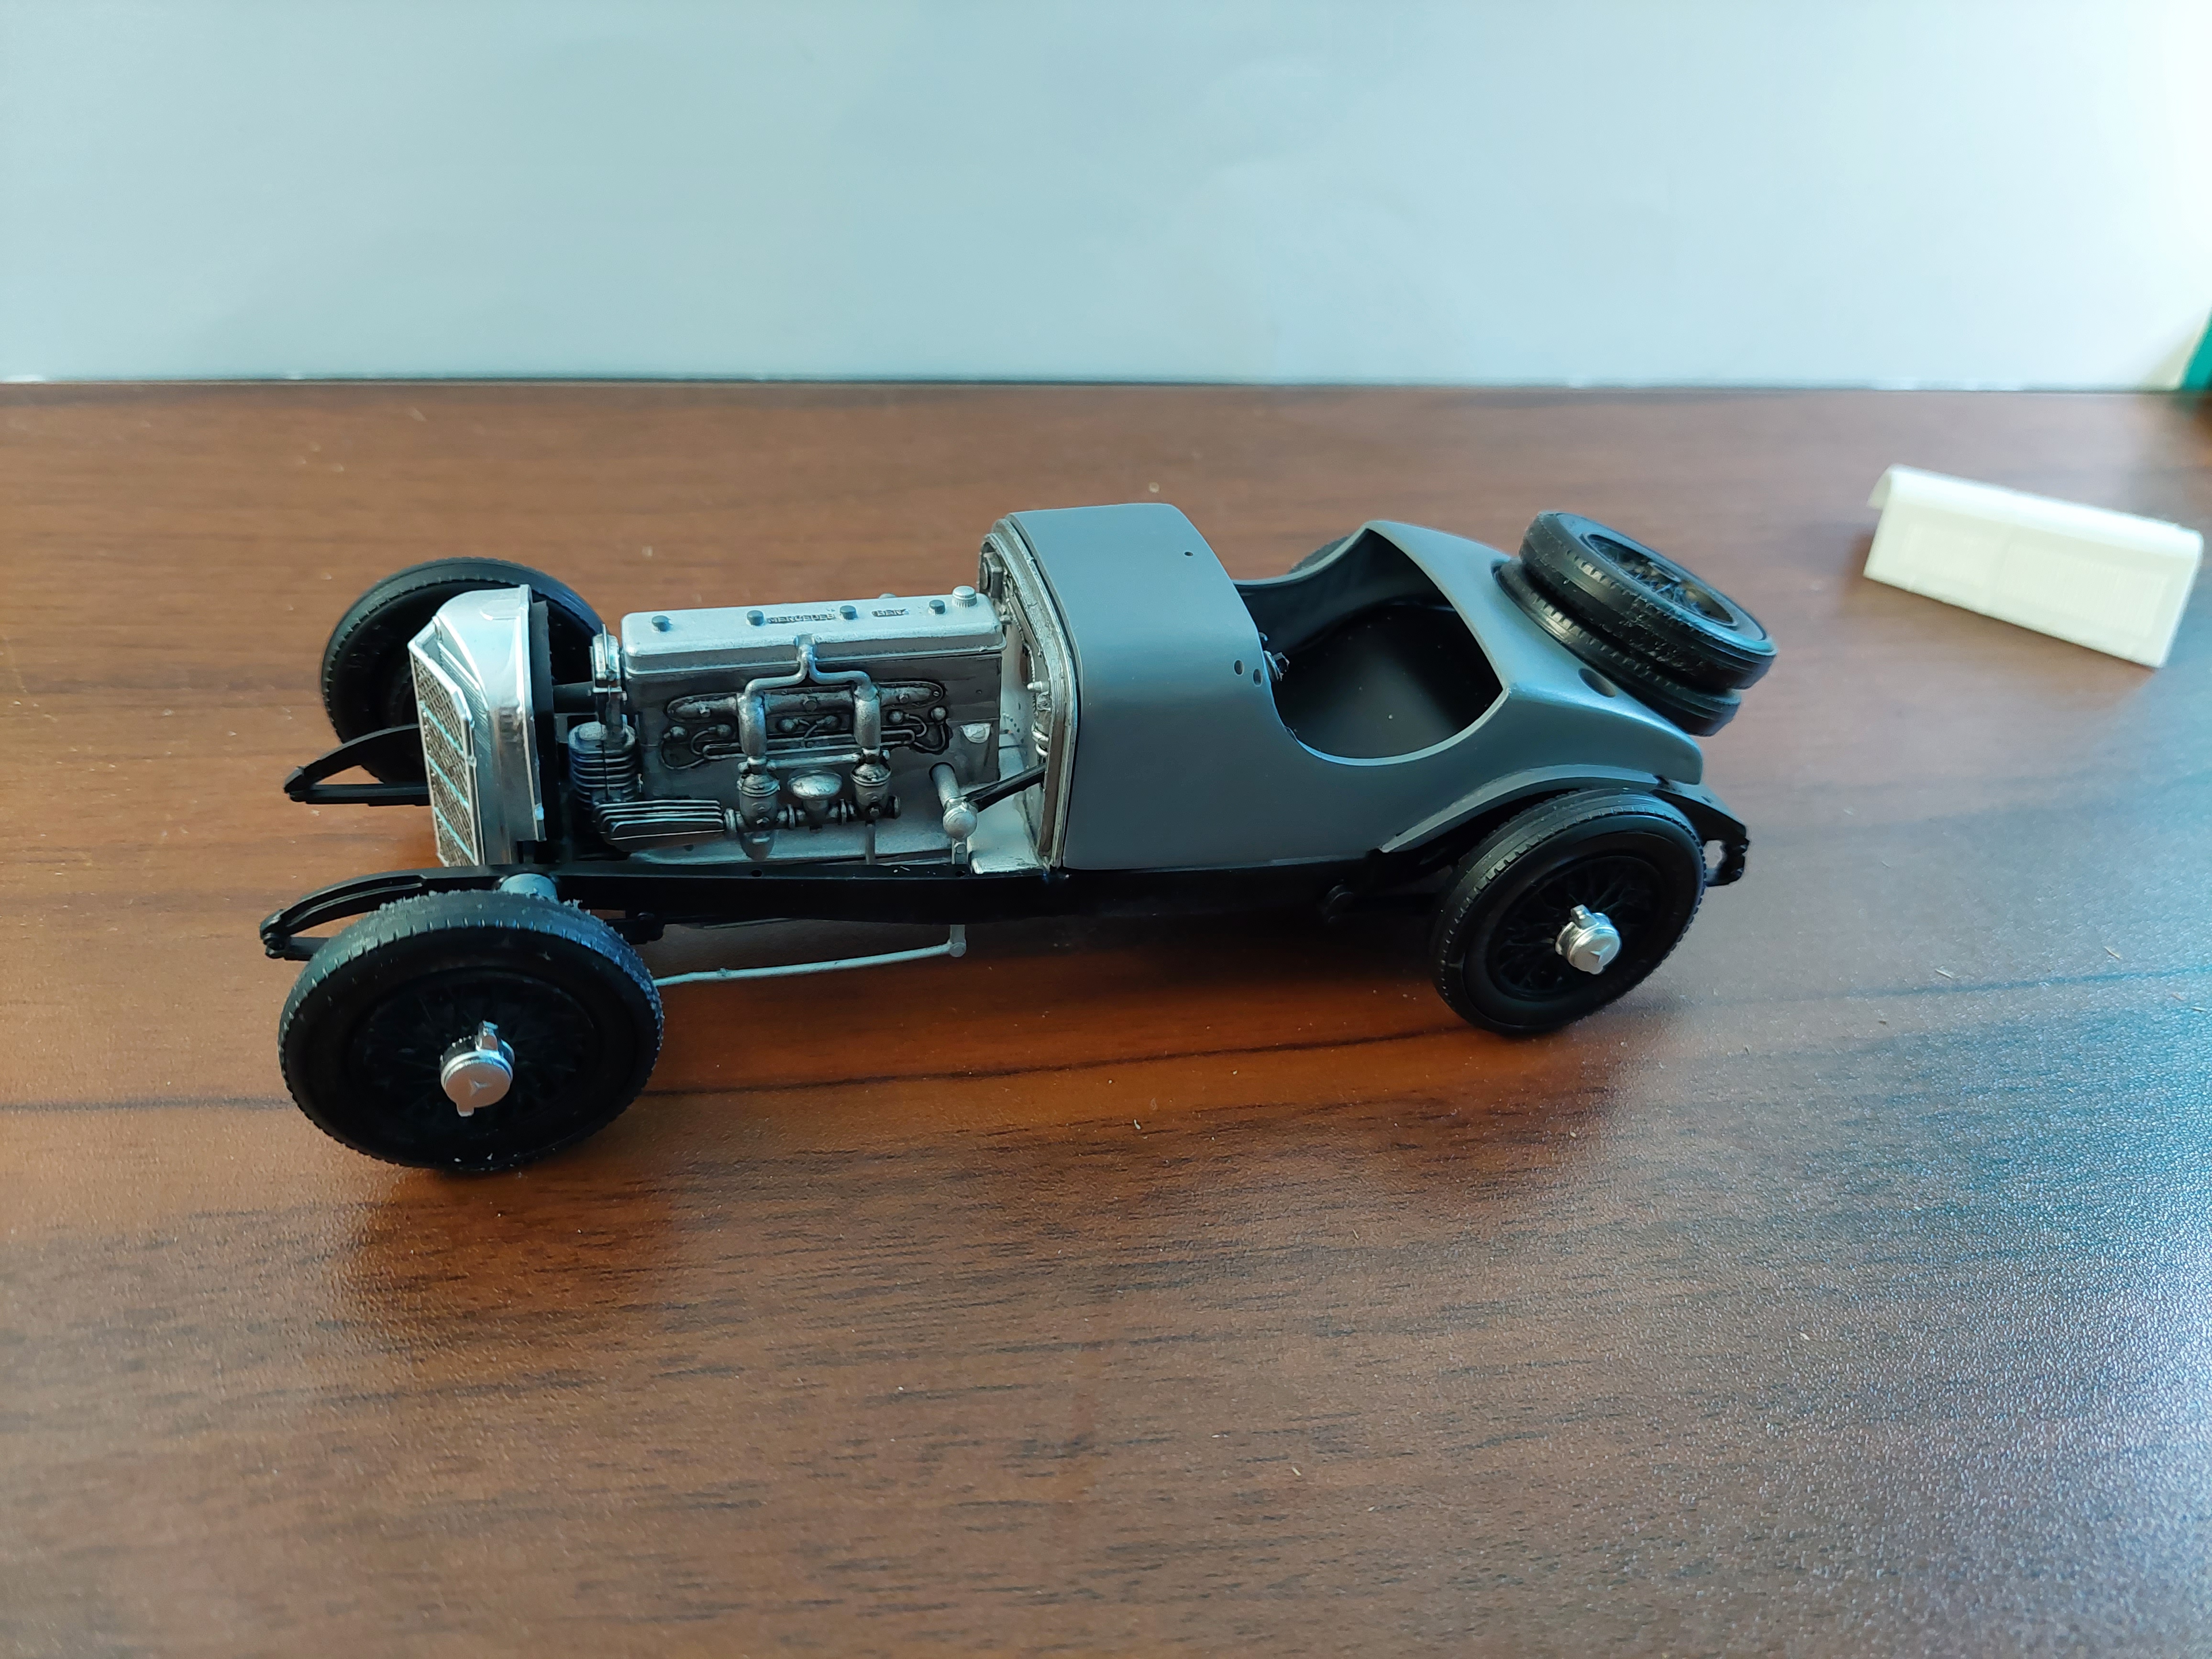
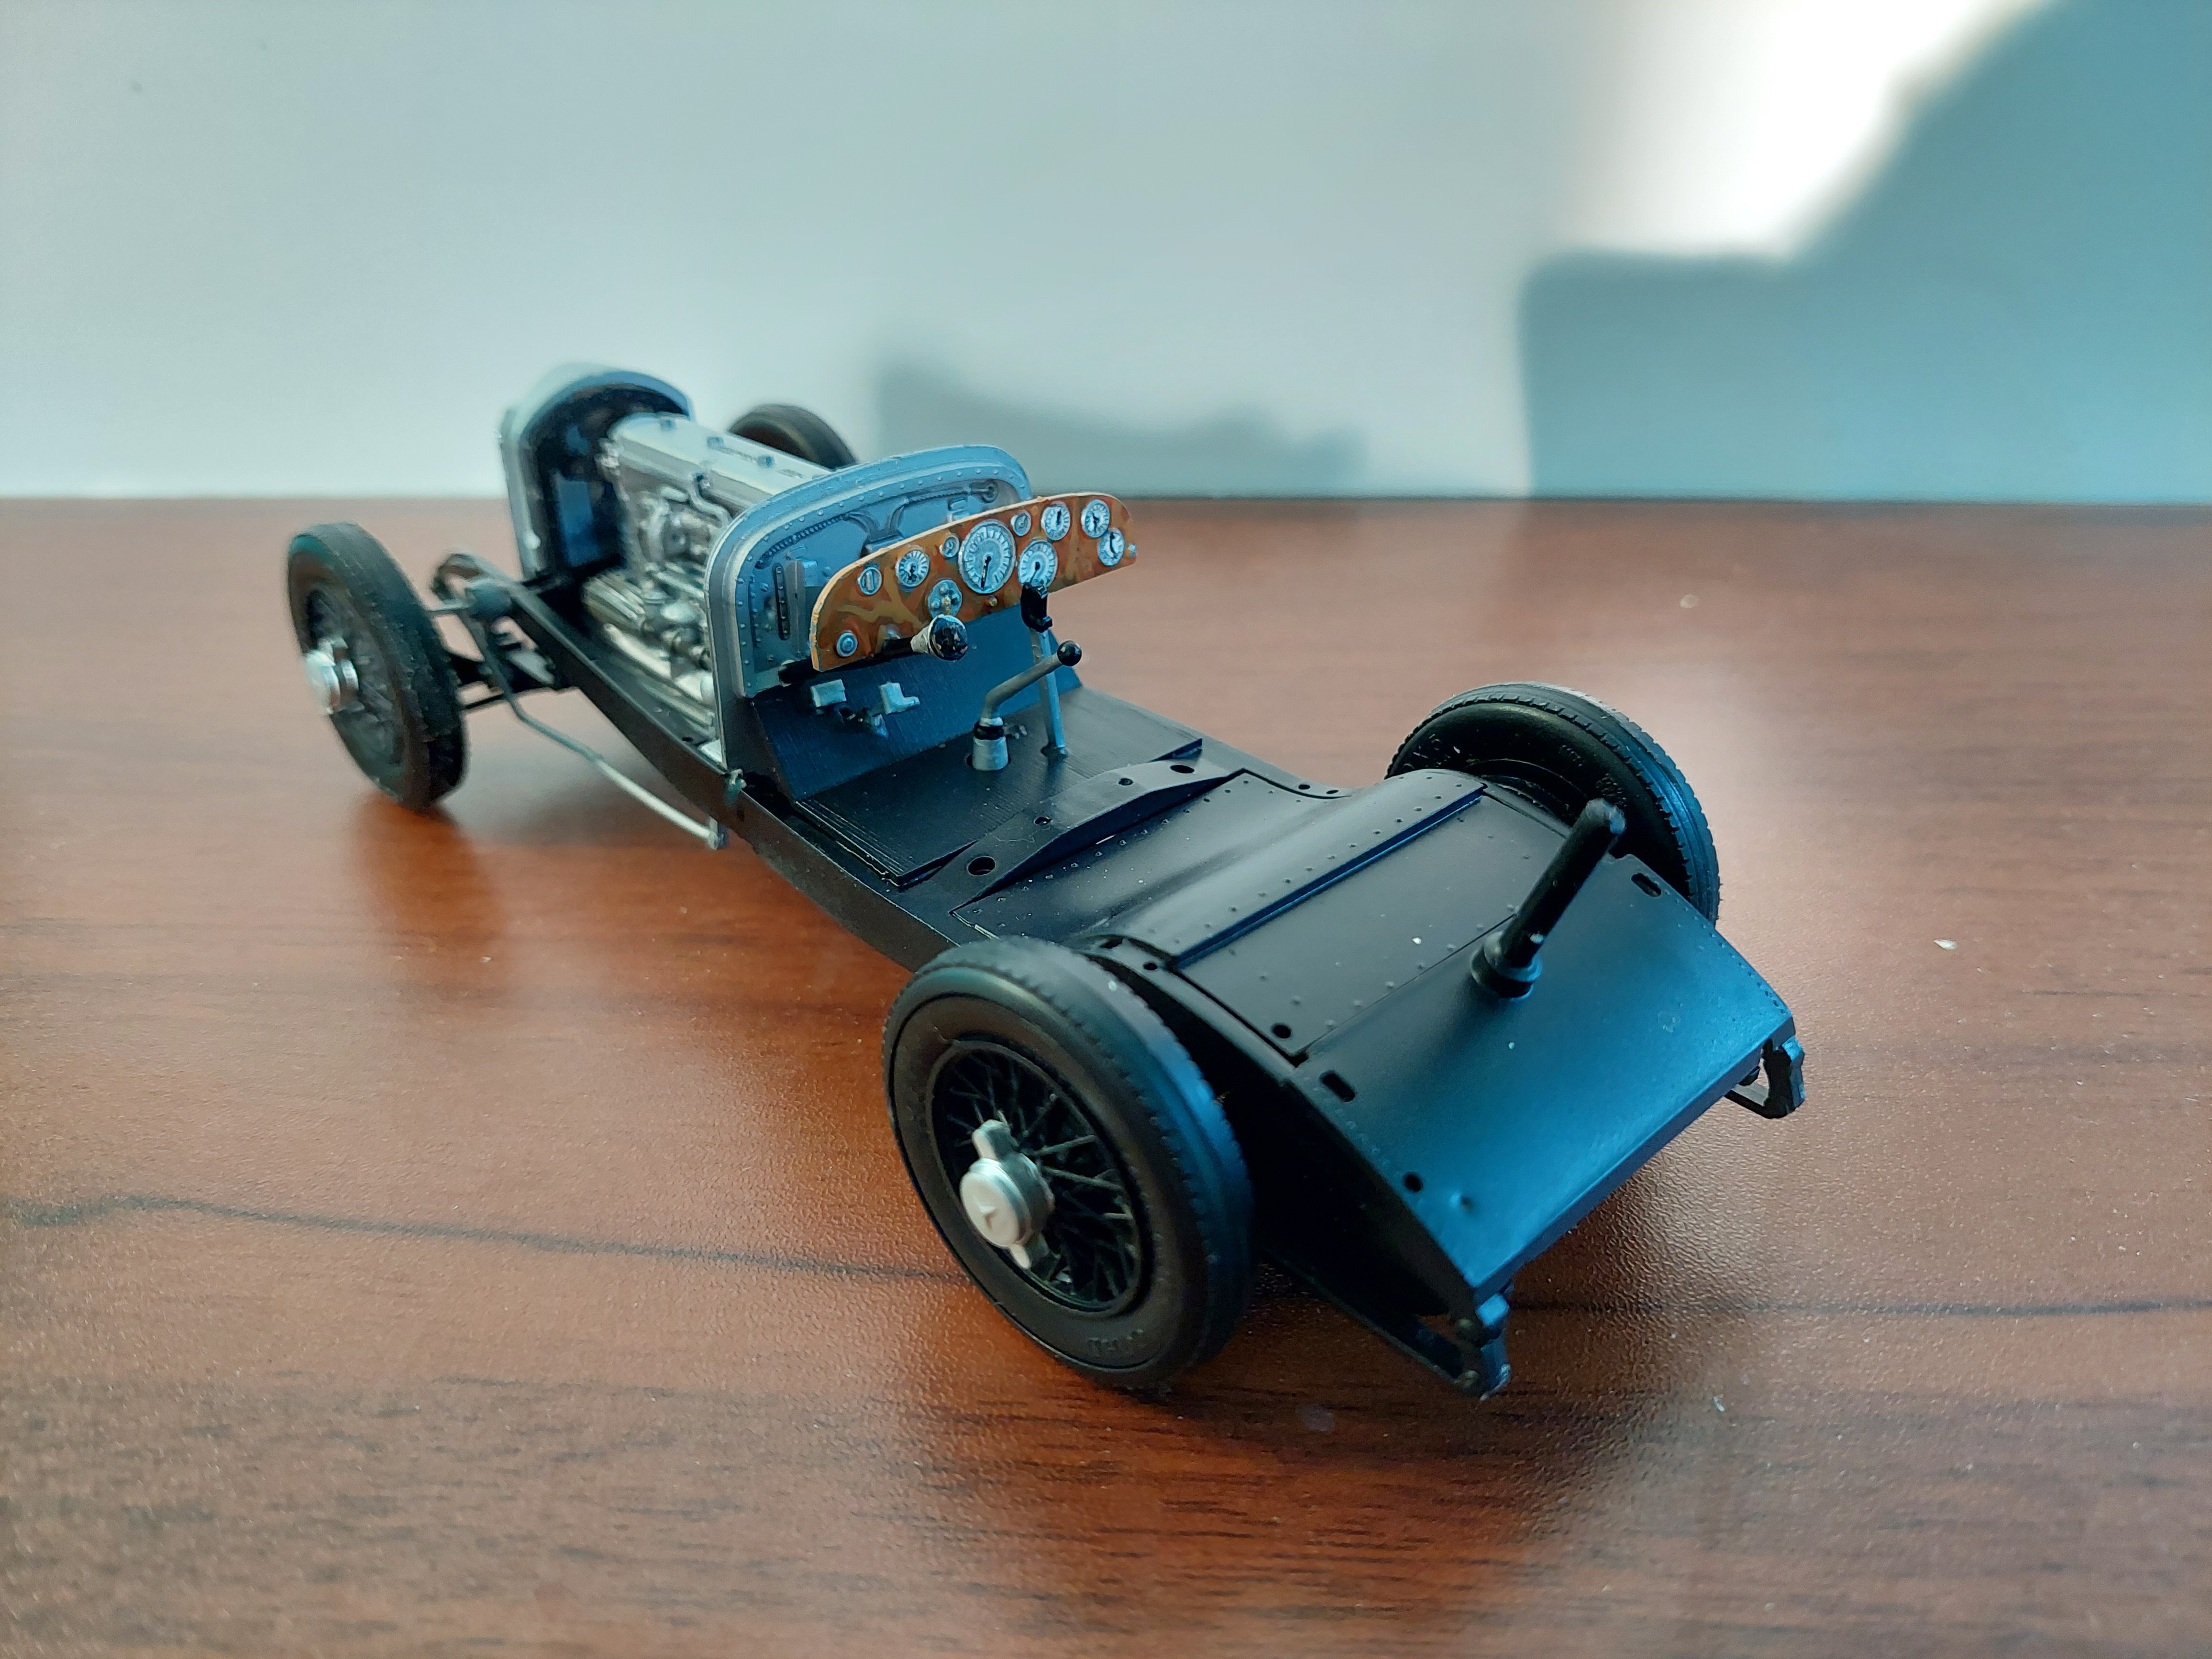
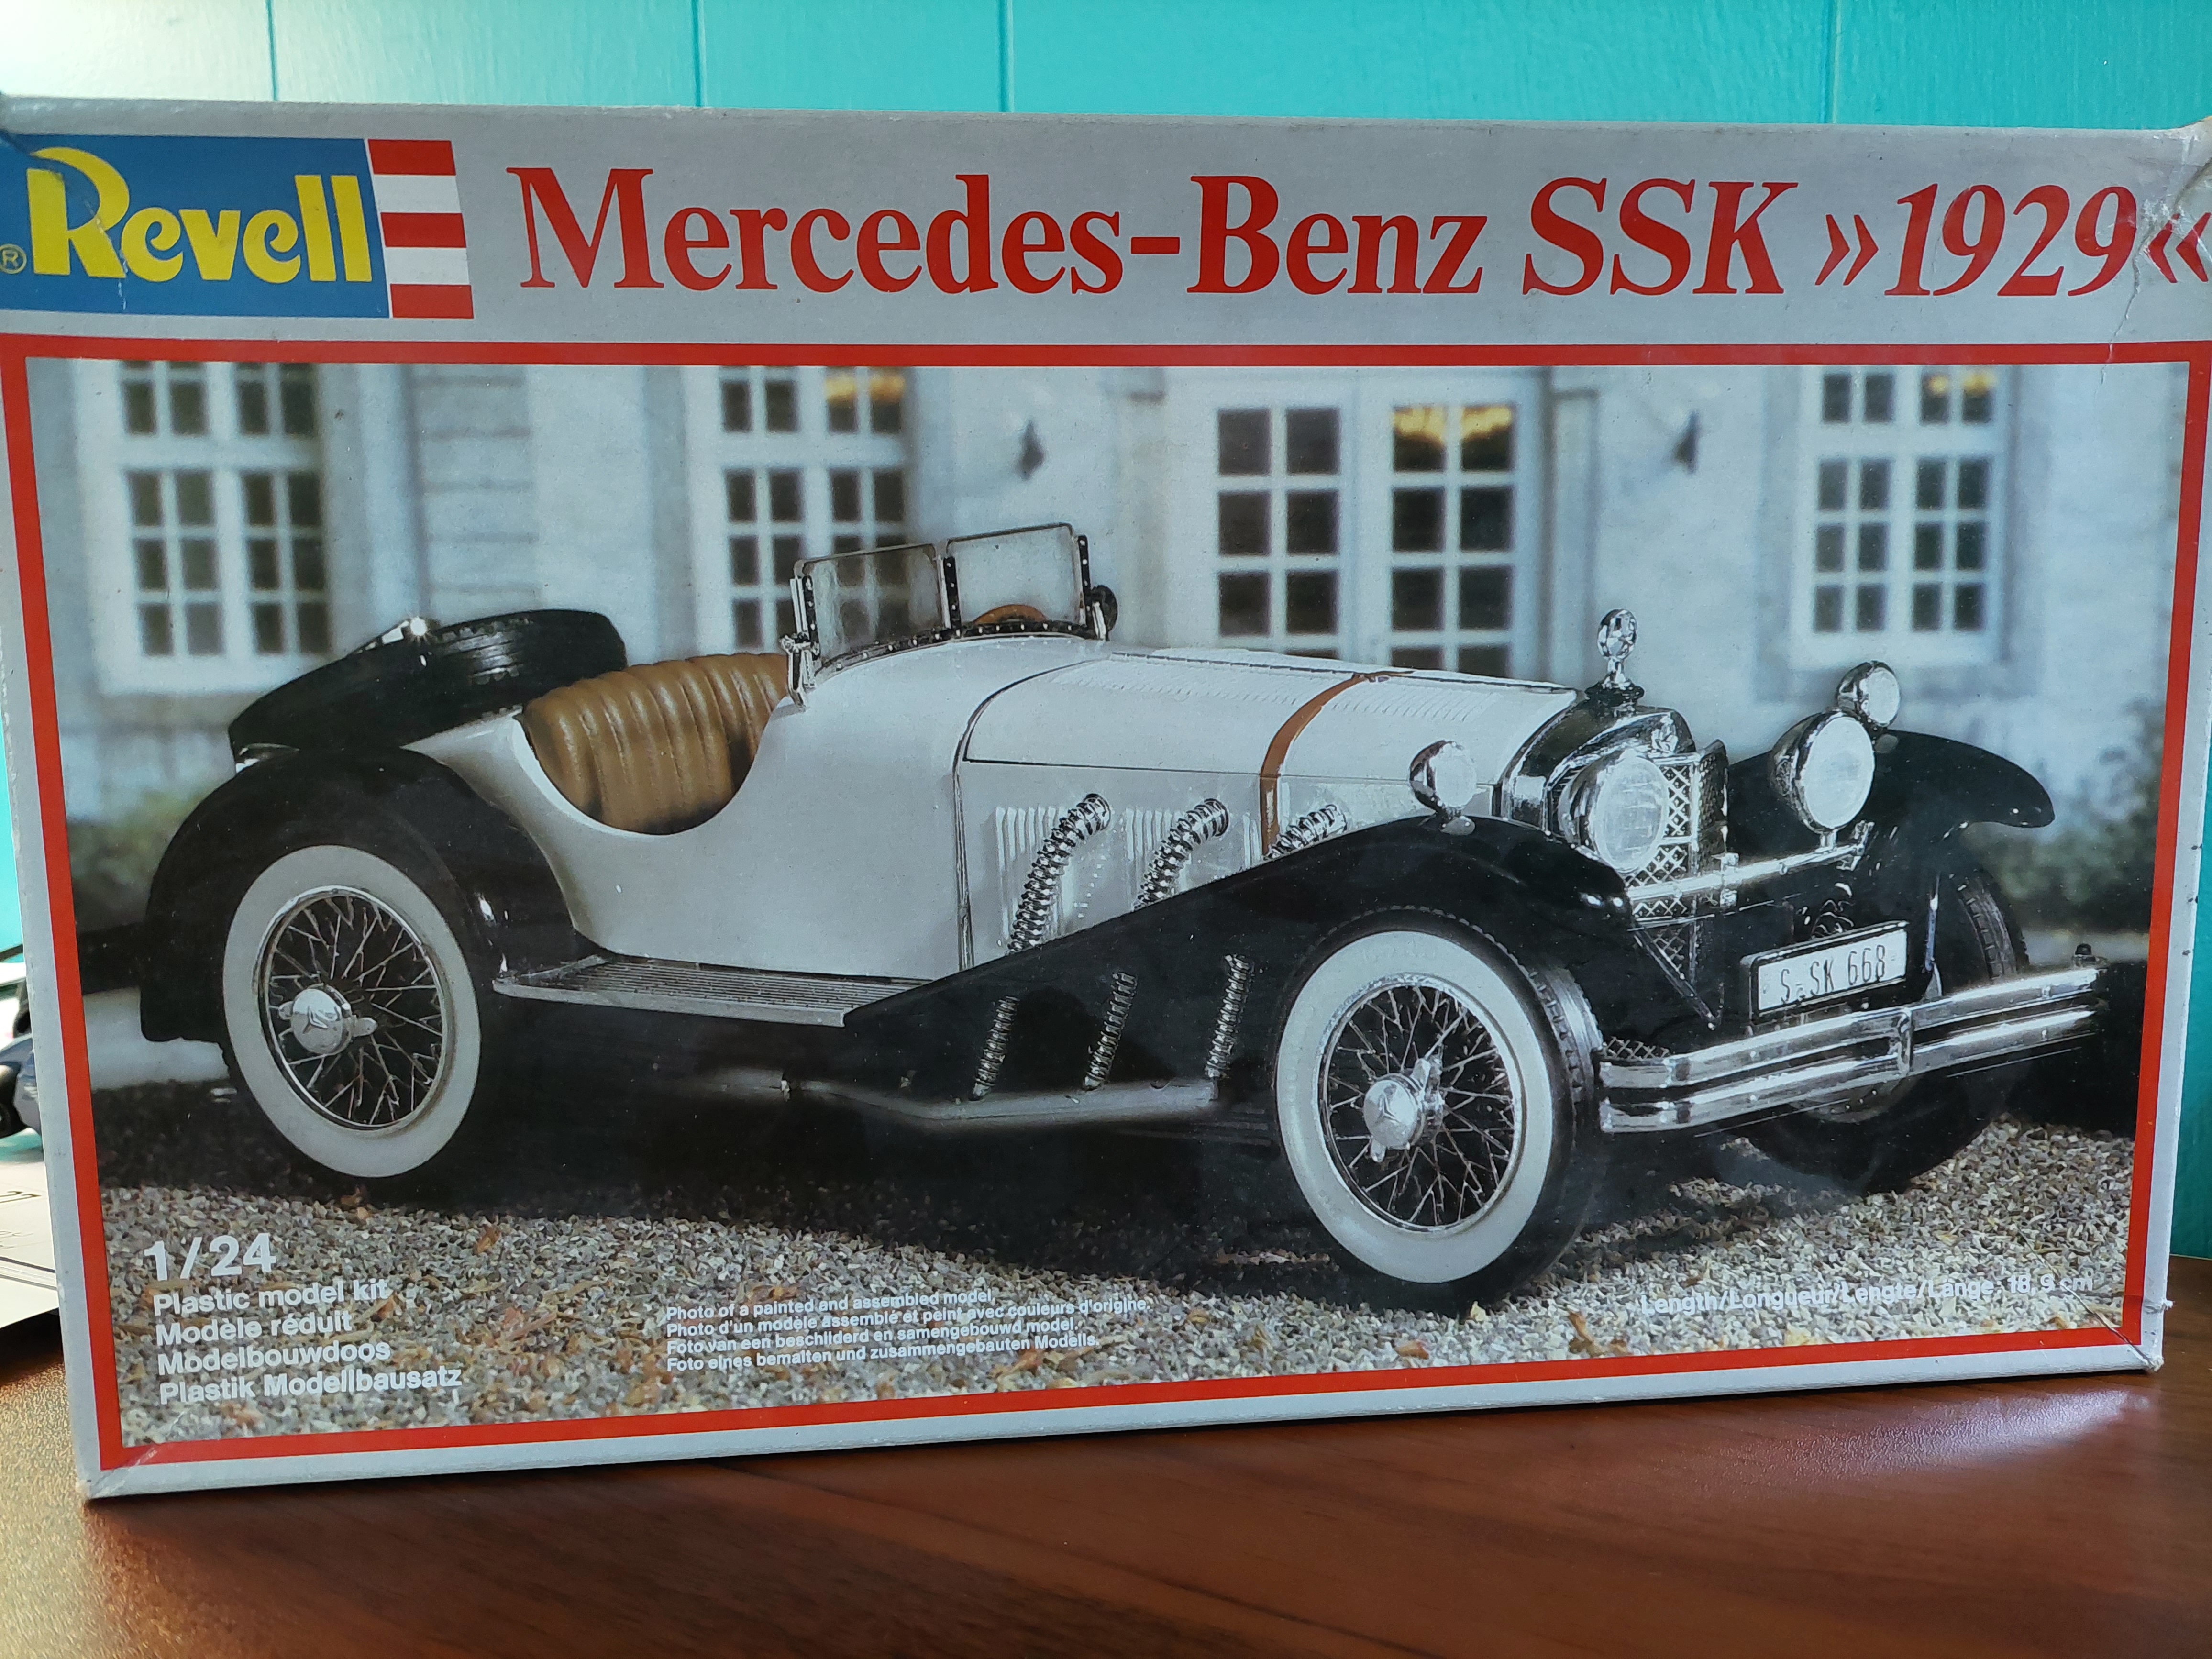
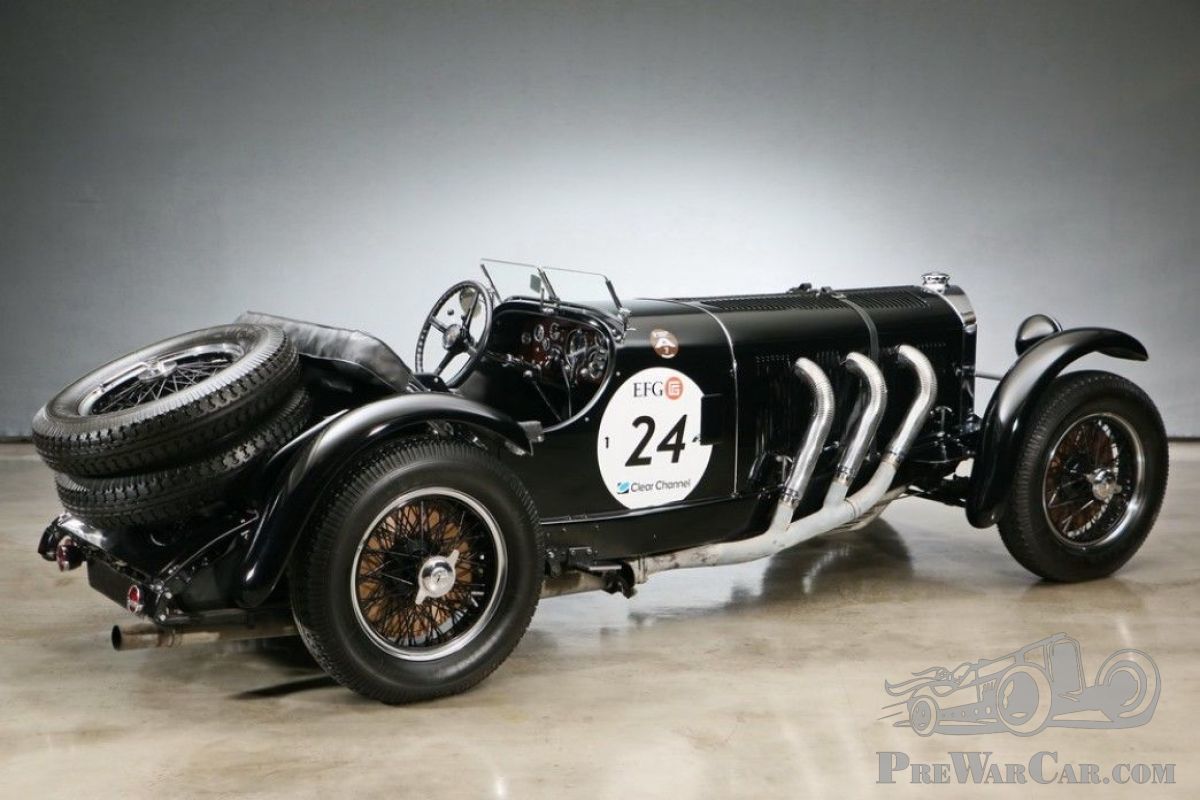
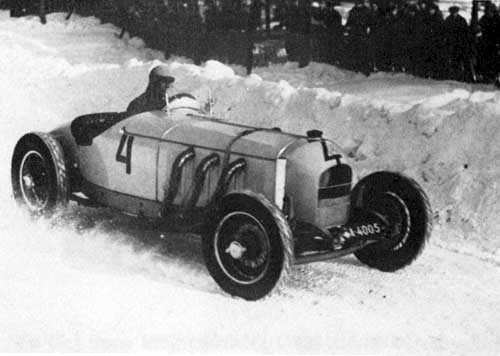
29 Mercedes SSK racer
BIGTRUCK replied to BIGTRUCK's topic in WIP: Other Racing: Road Racing, Land Speed Racers
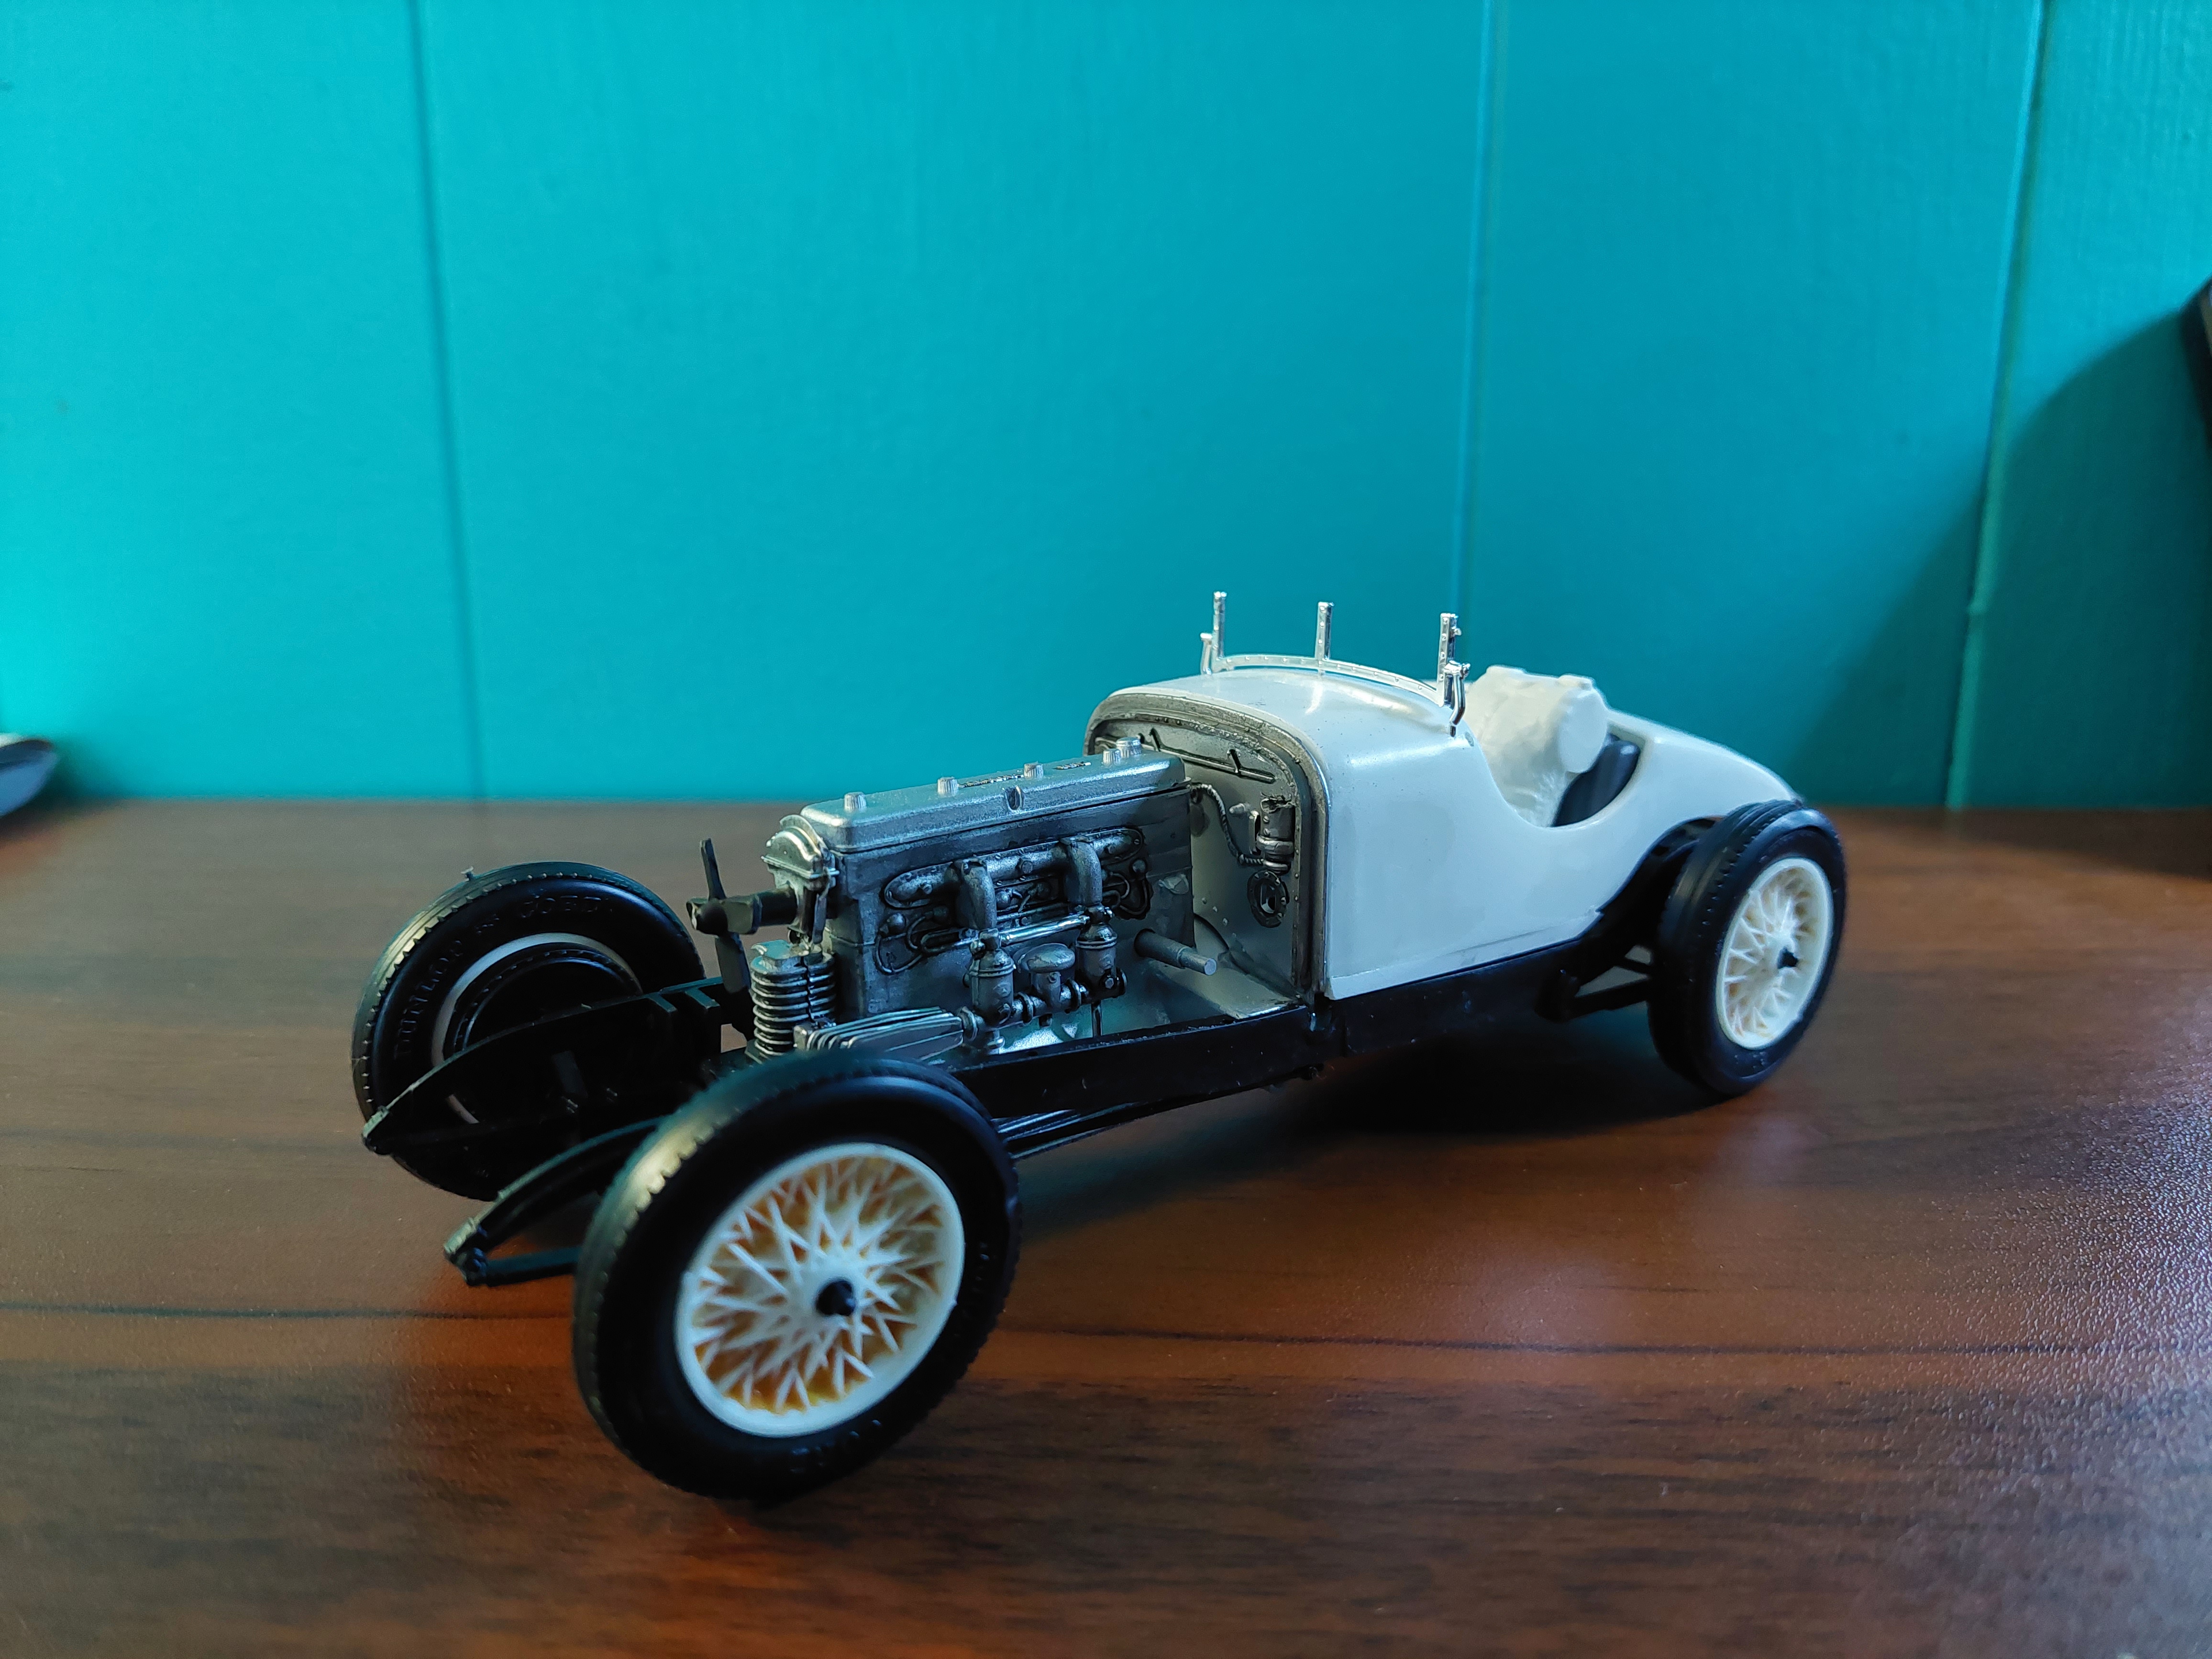
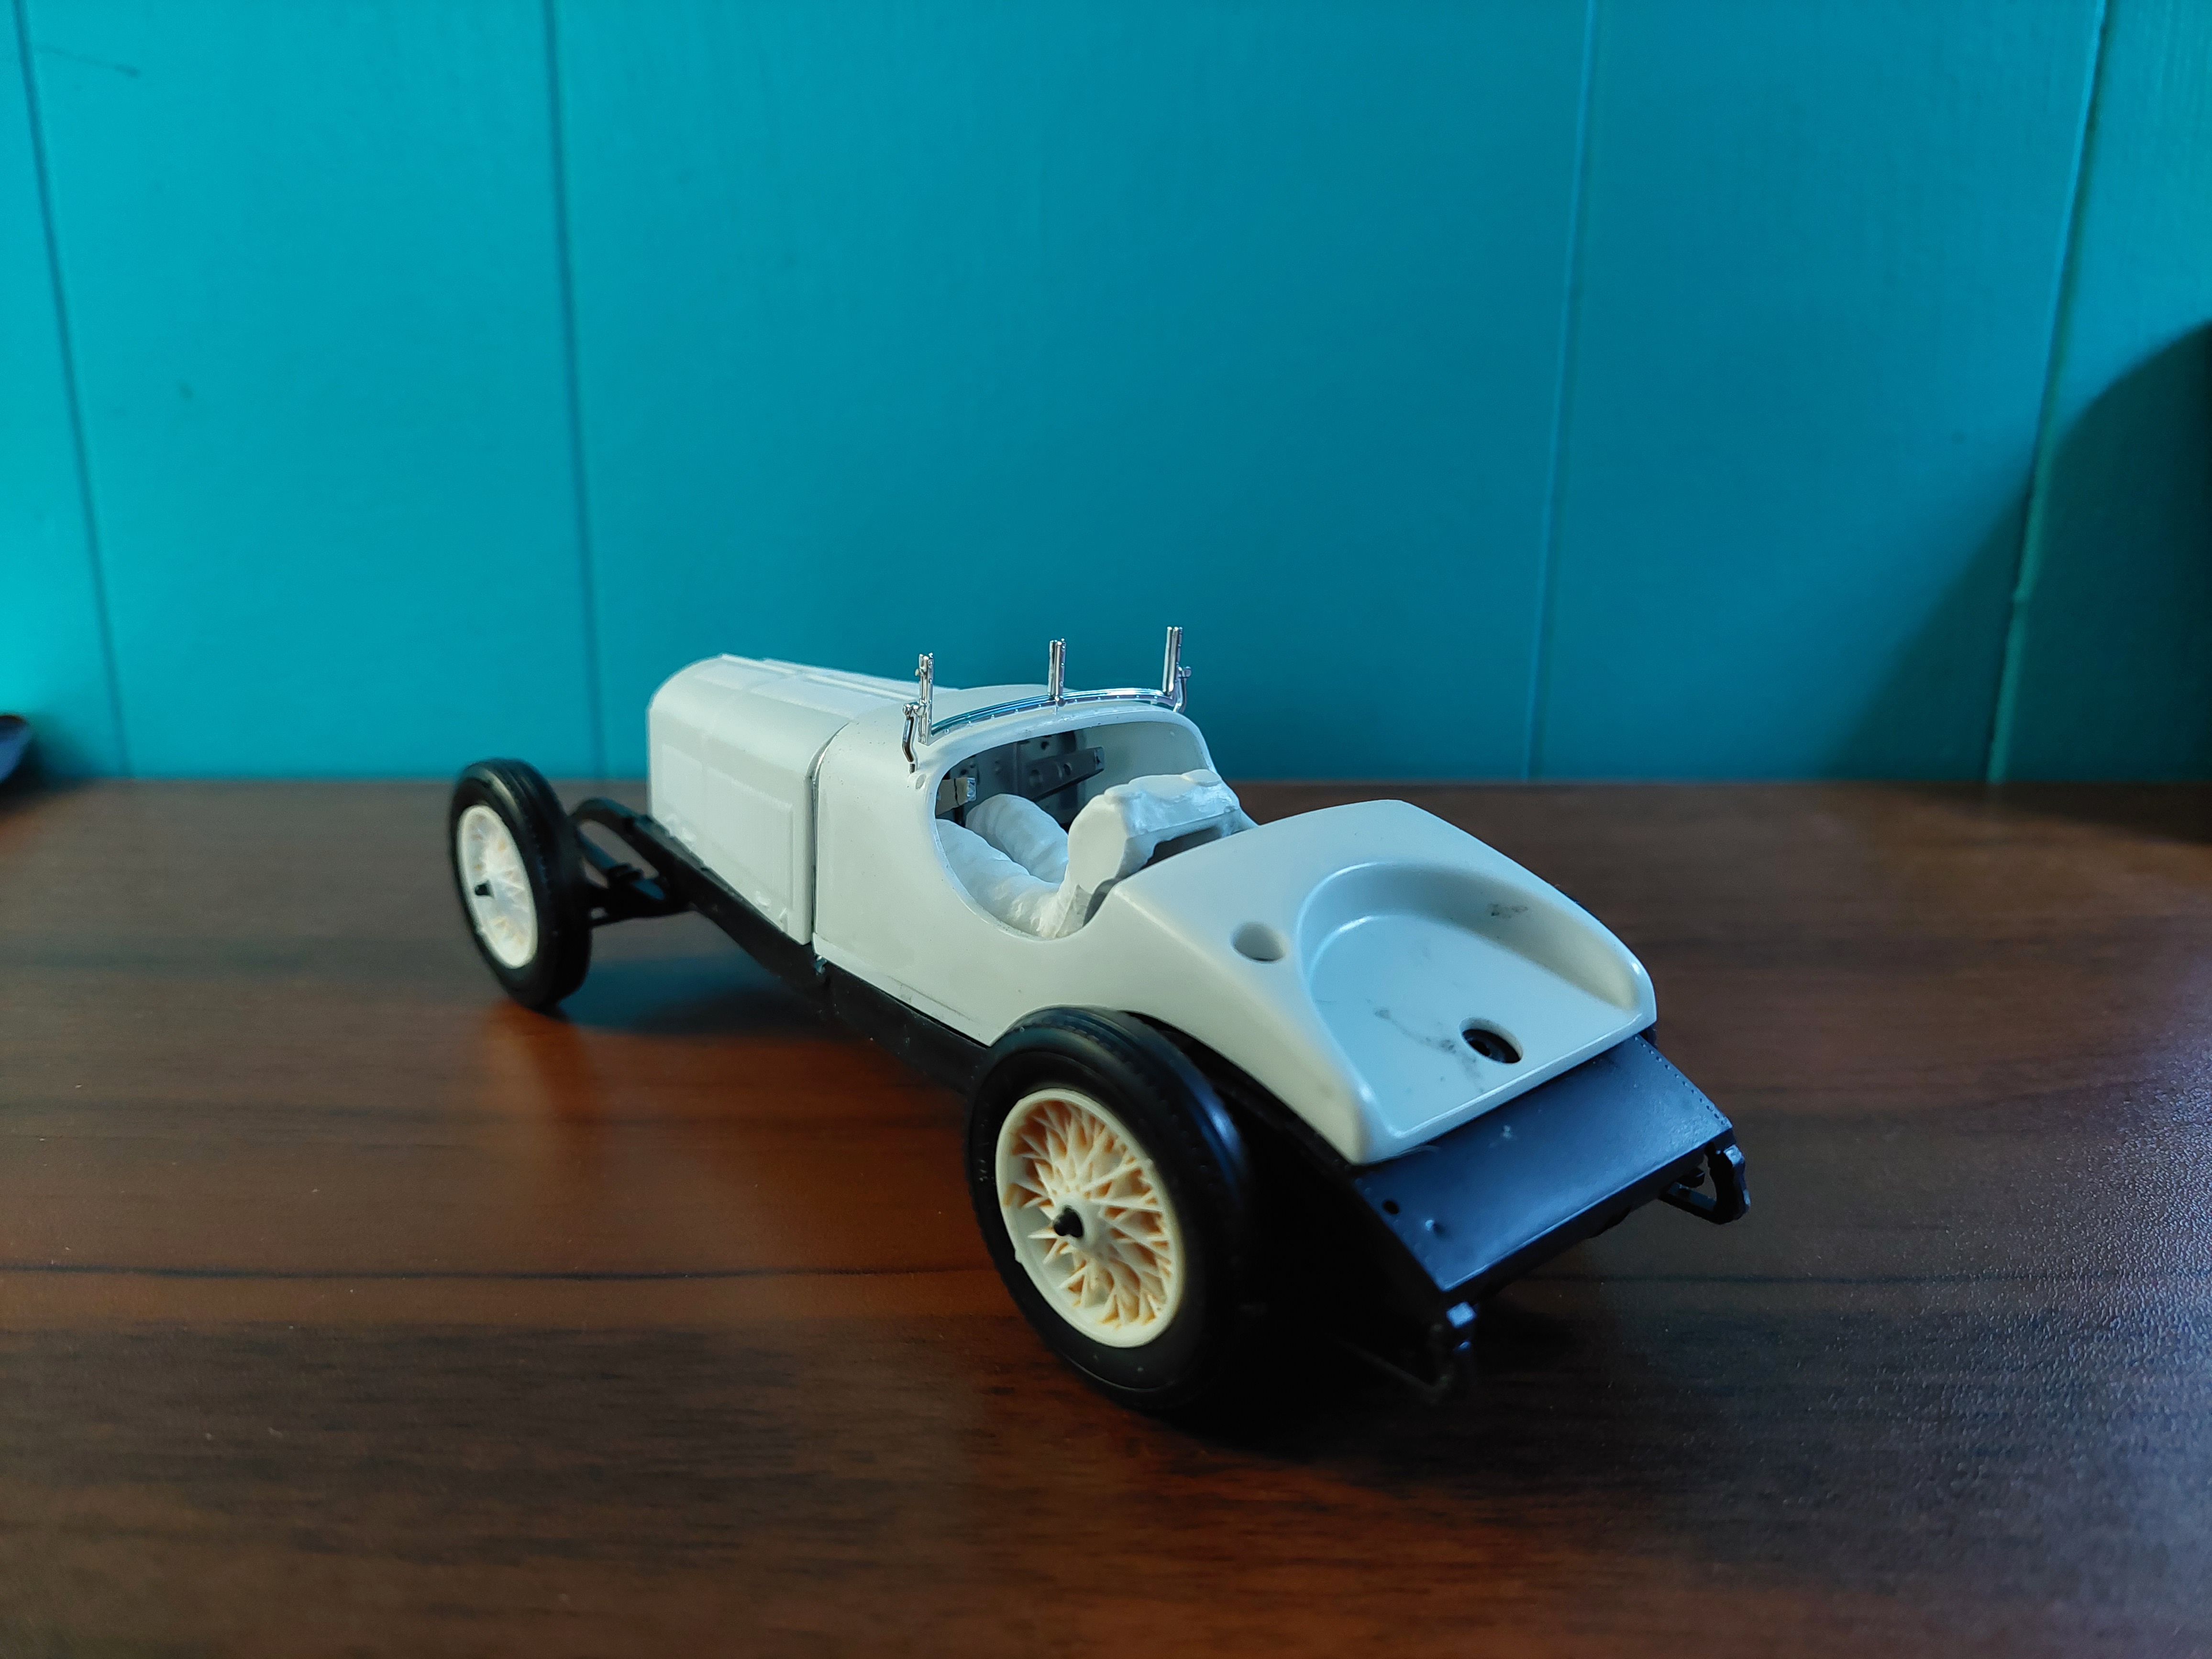
Made some progress but ONE big change in plans is every driver I have nothing fits, even with cutting up the seat. I got a Nascar driver altered enough to fit except the steering wheel is located way left to work. Driver was ground down to fit but his left arm was nowhere near the steering wheel. Next move is omit the driver, and locate a seat that fits.
-
29 Mercedes SSK racer
BIGTRUCK replied to BIGTRUCK's topic in WIP: Other Racing: Road Racing, Land Speed Racers
Revell and a Lindberg, not sure if its a shared tooling or not. -
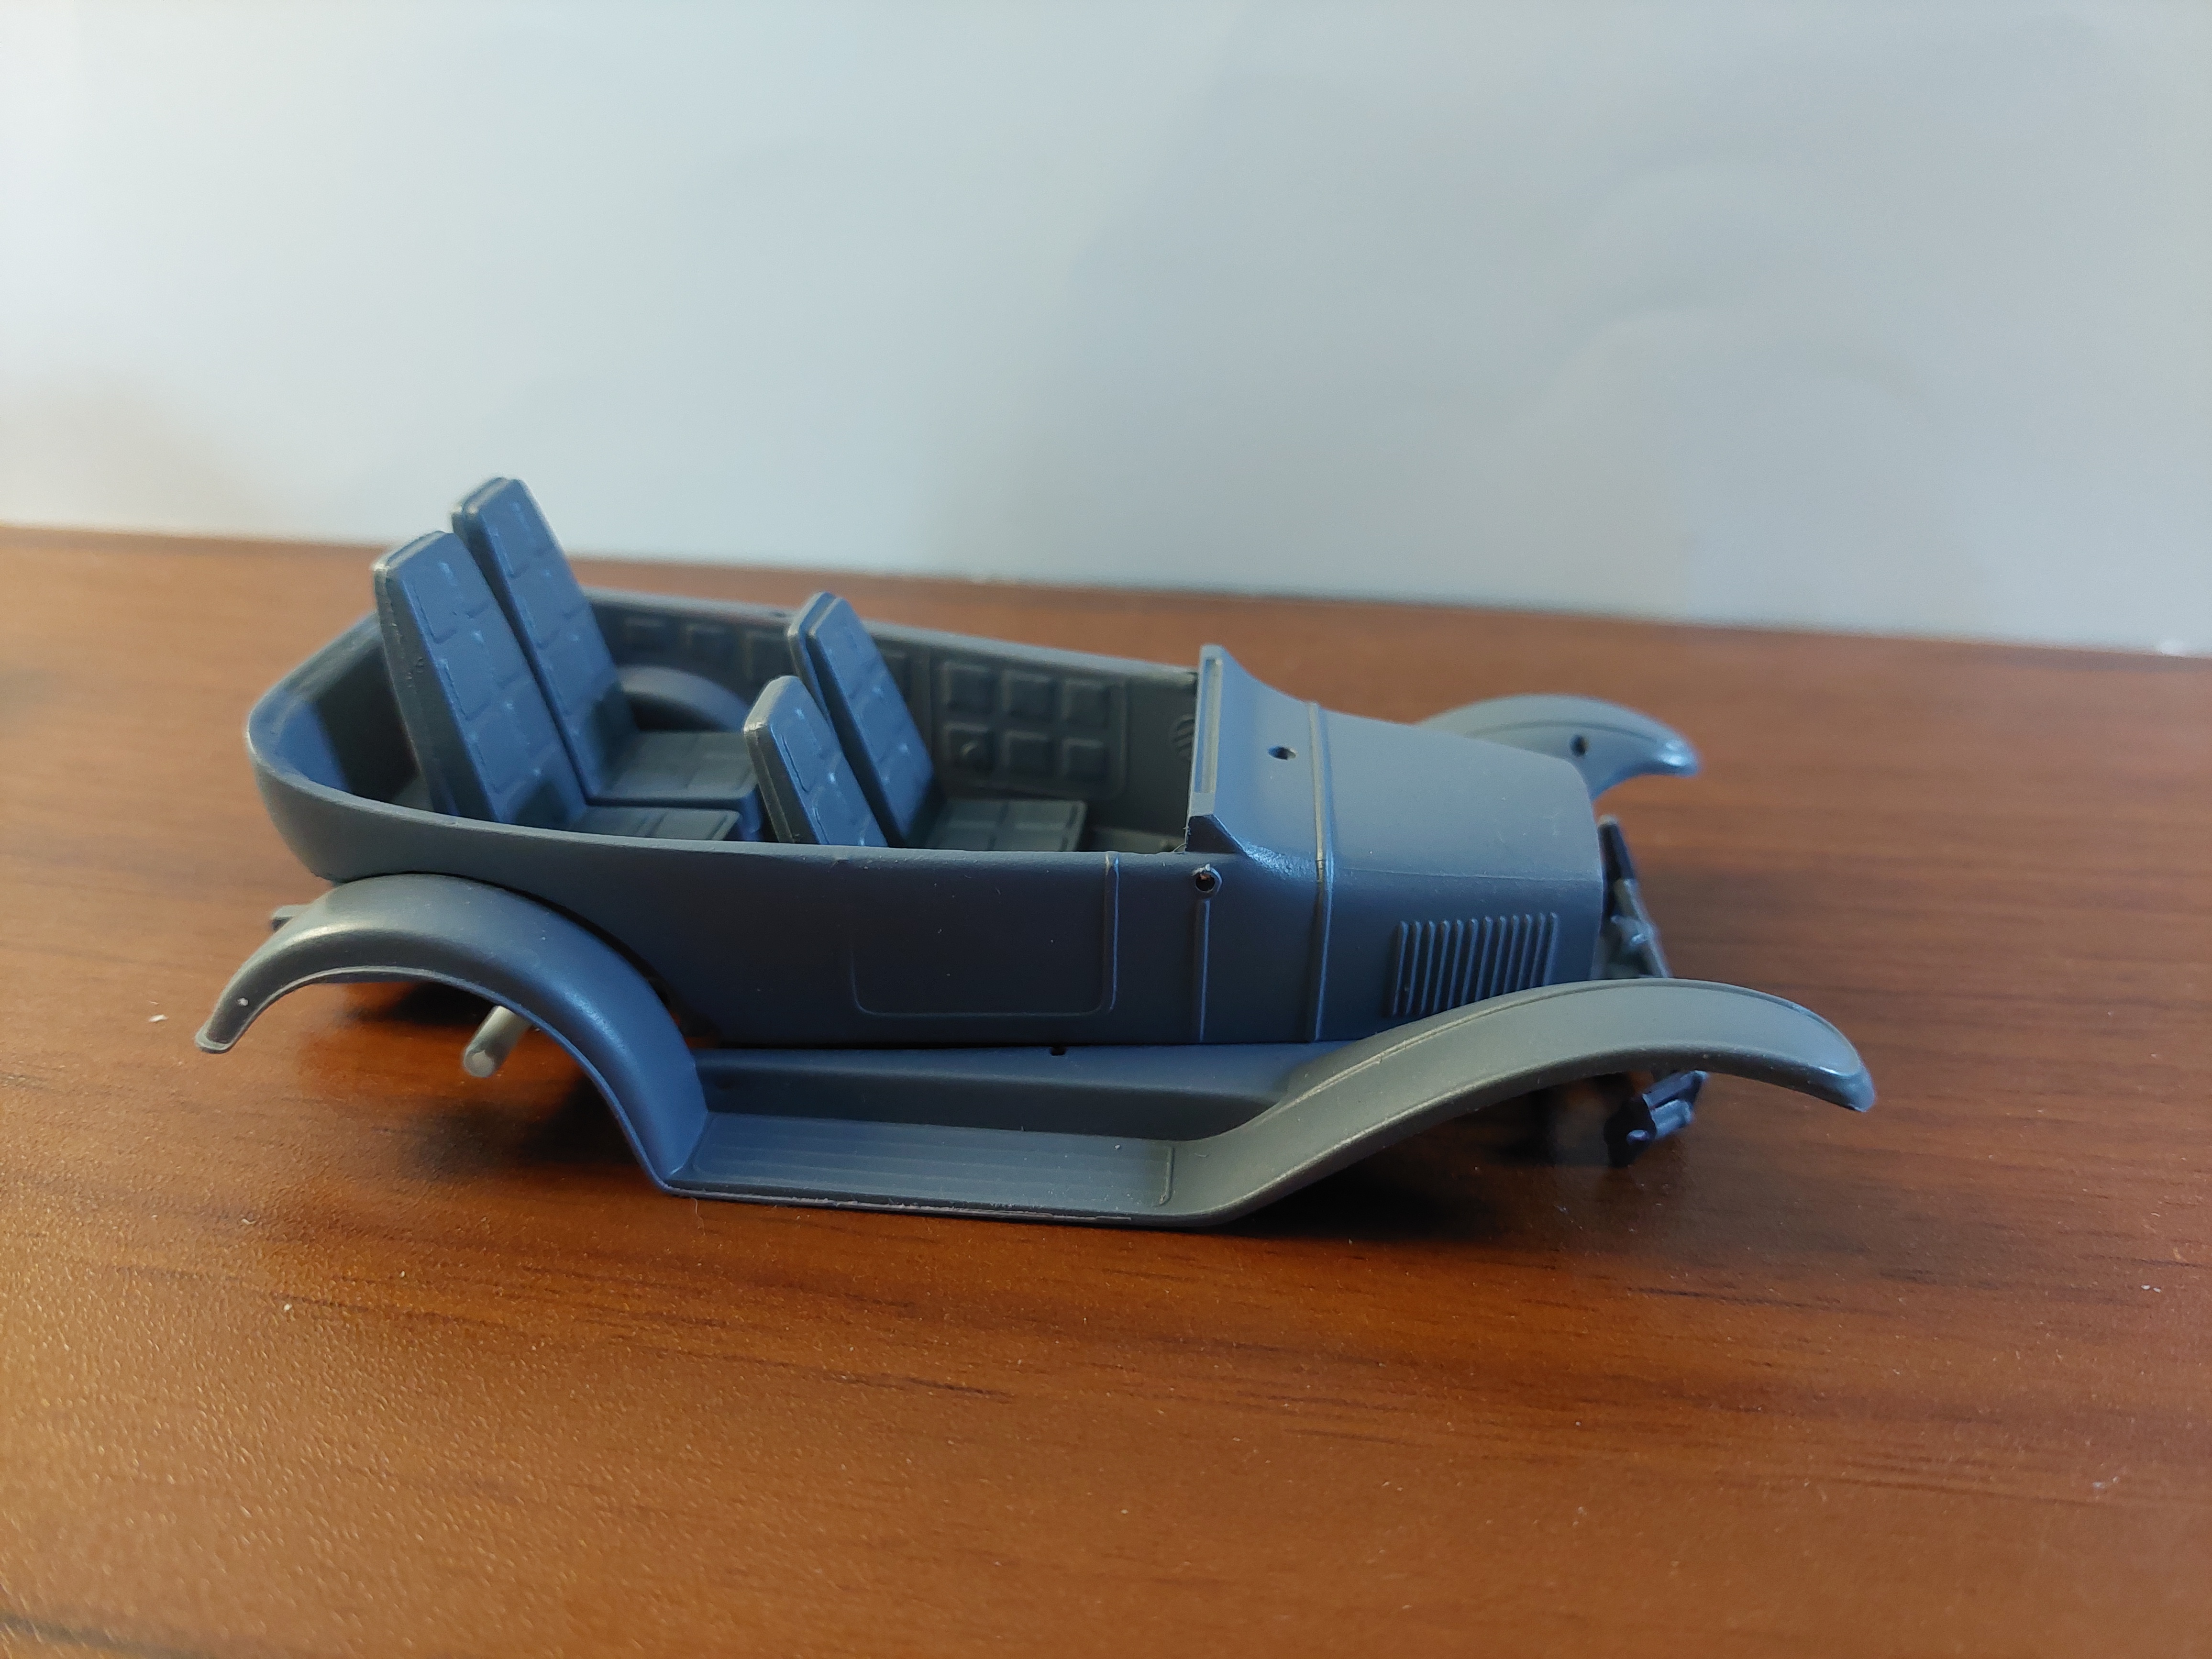
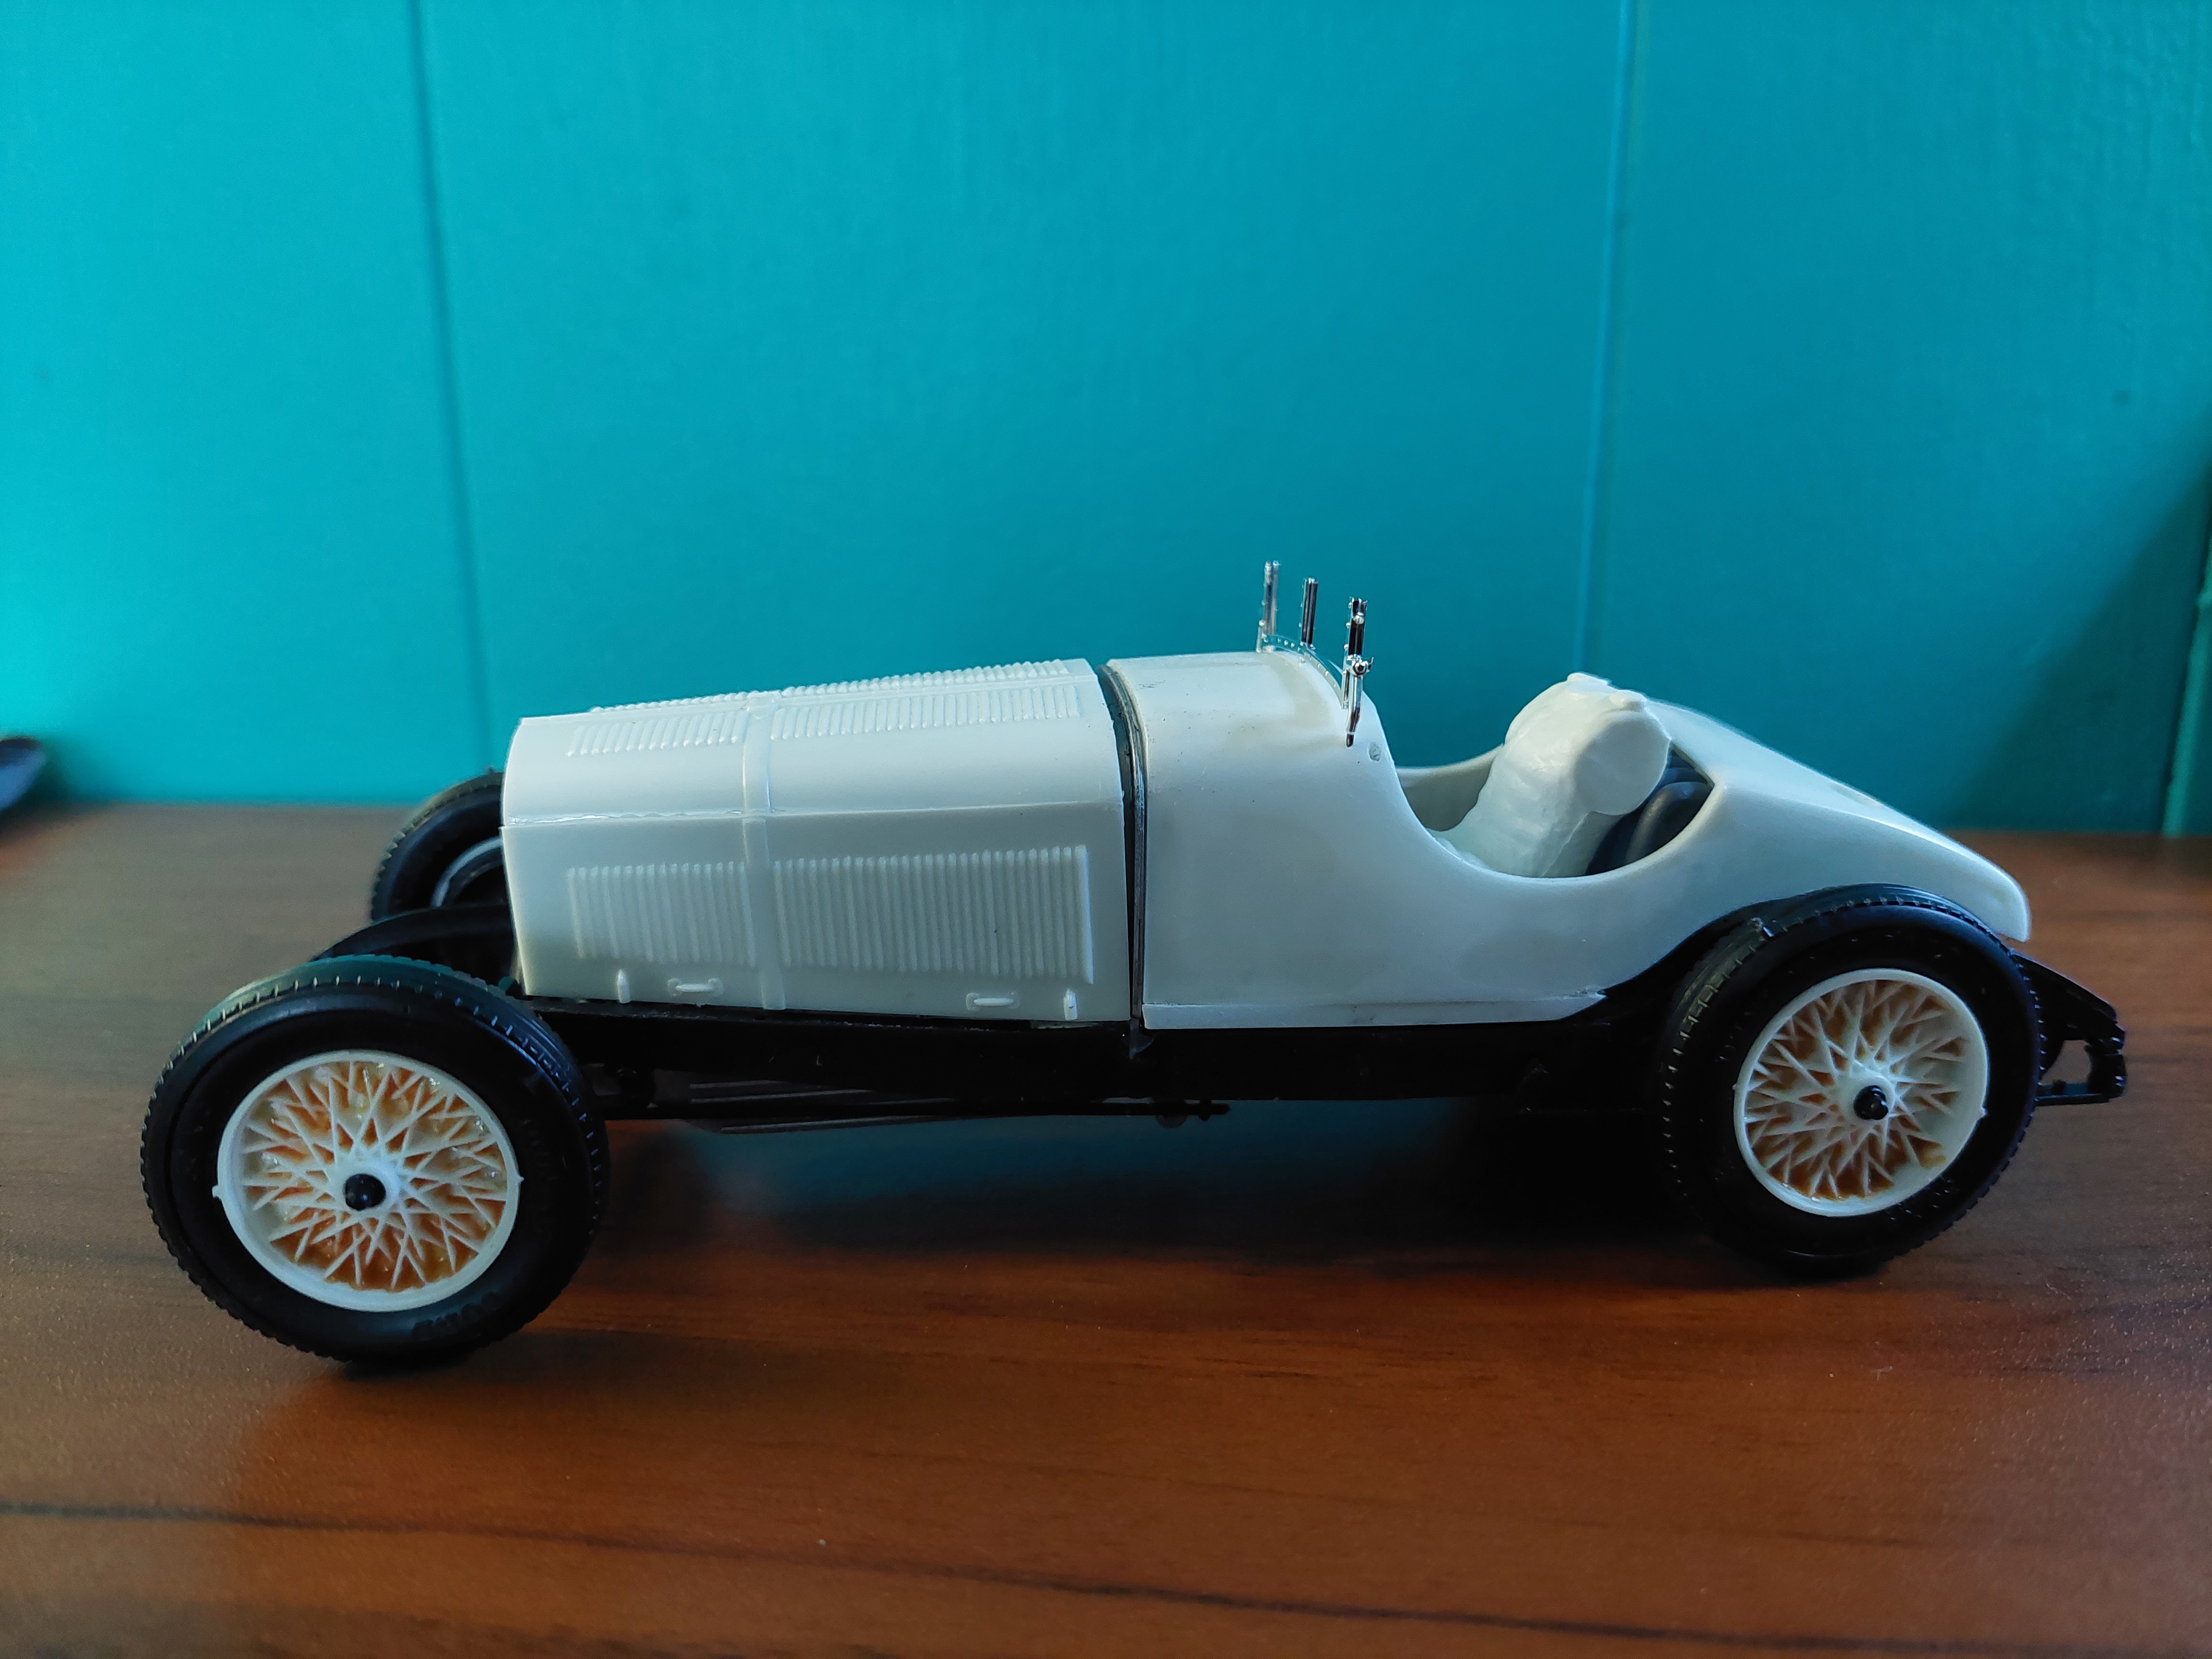
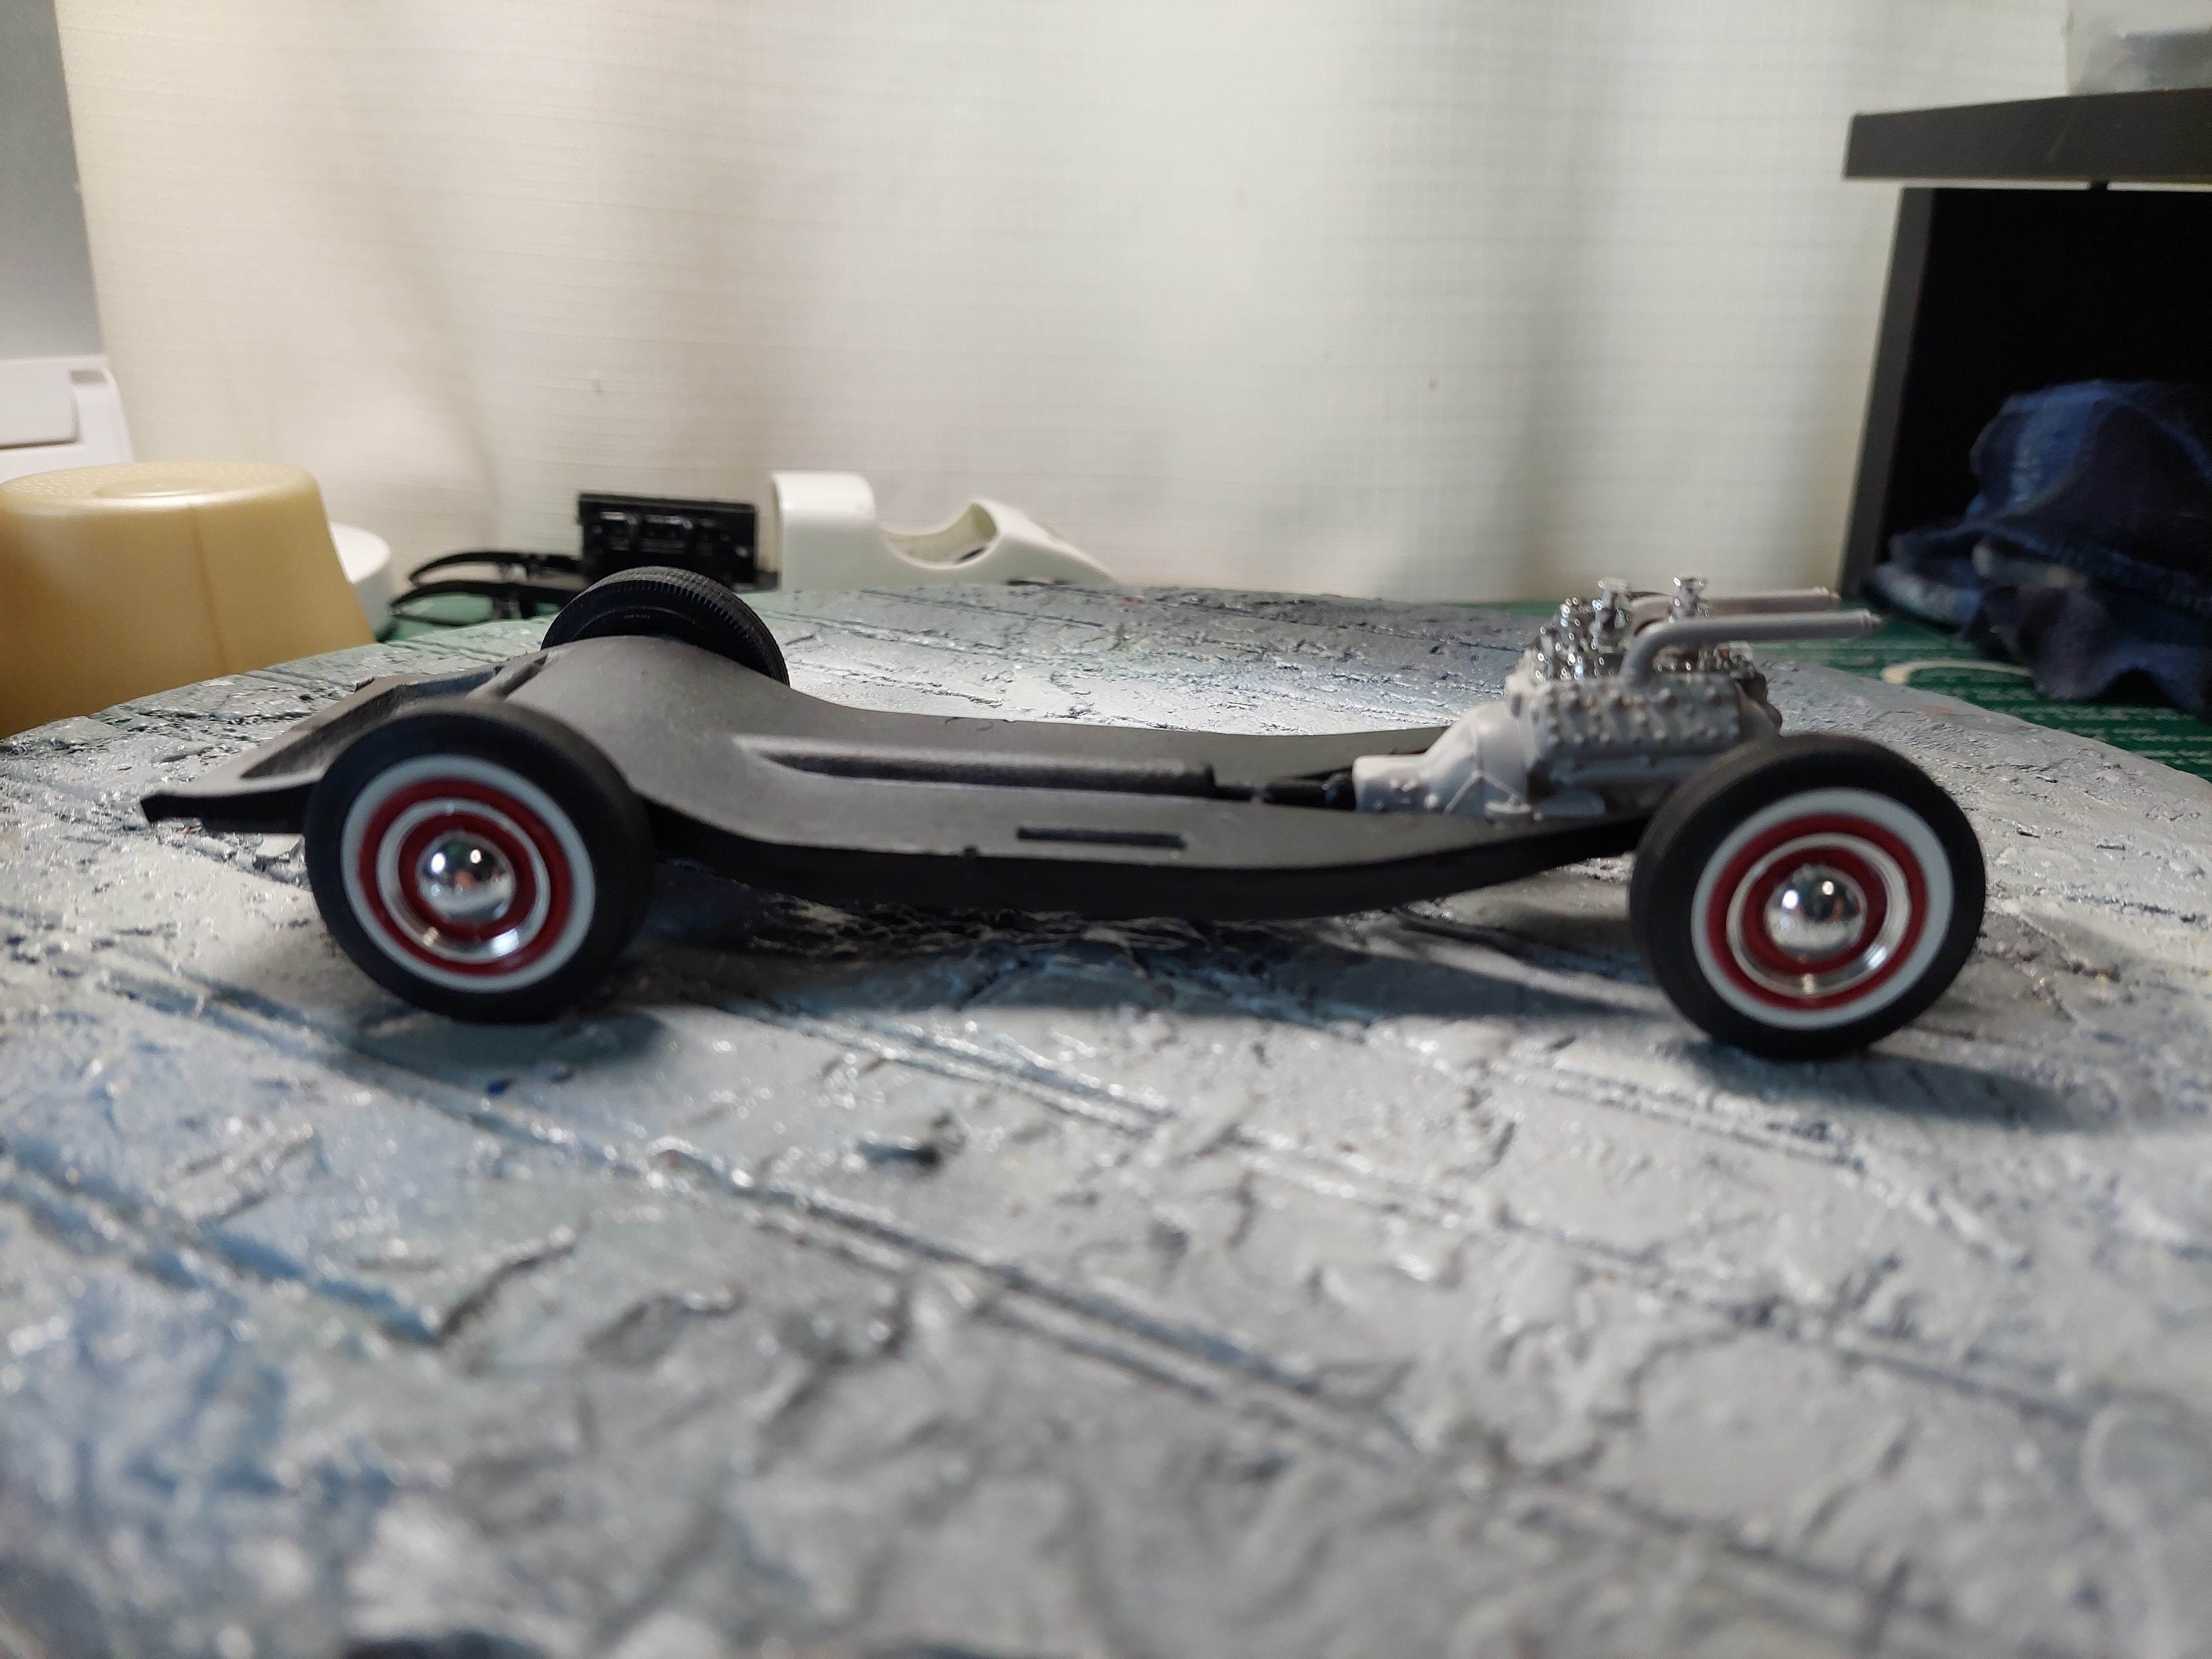
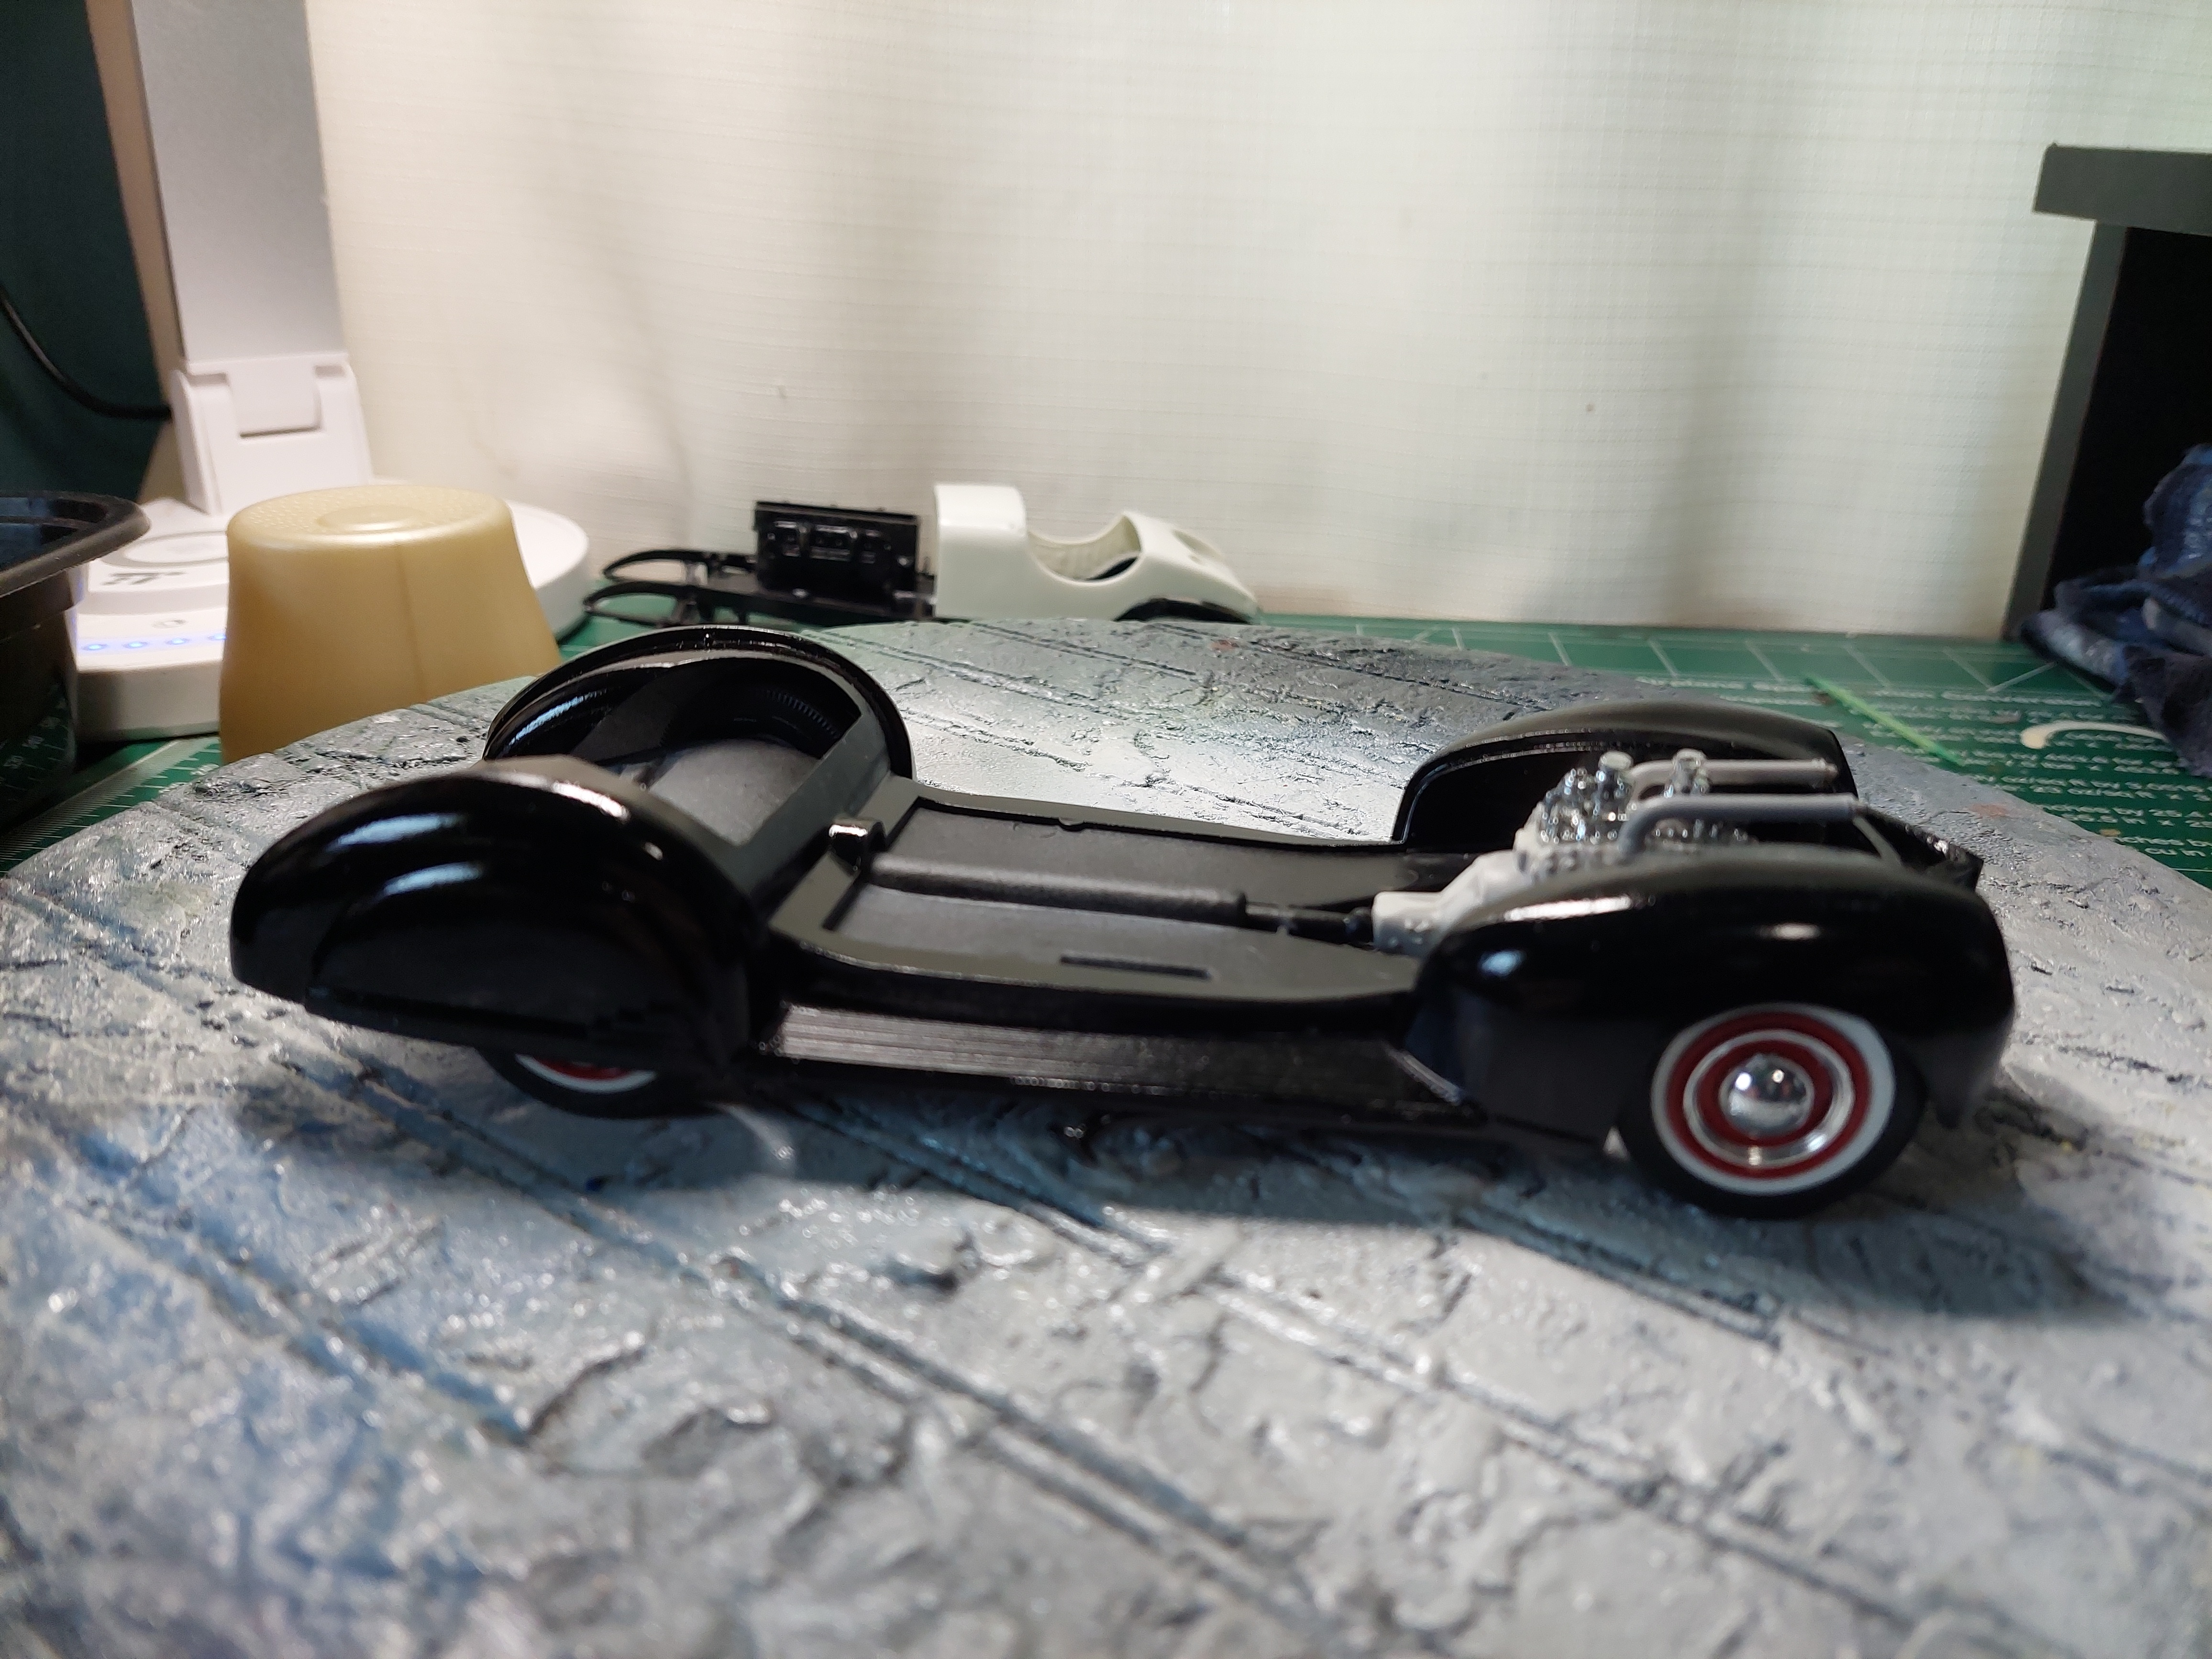
I had this kit on the shelf for a long time, dont know where I got it but its always been there. Decided to build it a fenderless race style car with driver. When I looked for info on the net for ideas I found there was alot to choose from. On some racers the 2 spare tires on back were deleted and had a rear body mod to cover the opening. I found one with the tires so thats the route I went with. The body had a 1/8th gap where it meets the chassis once I eliminated fenders and running boards. I removed the chrome off of most parts but this chrome is tough, soaked for 3 days to remove the chrome, scrubbed clean of chrome but the varnish they used was the tough part to remove. Got rid of the reddish varnish by trying a soak in simple green. The spokes wheels are soaking now.
-
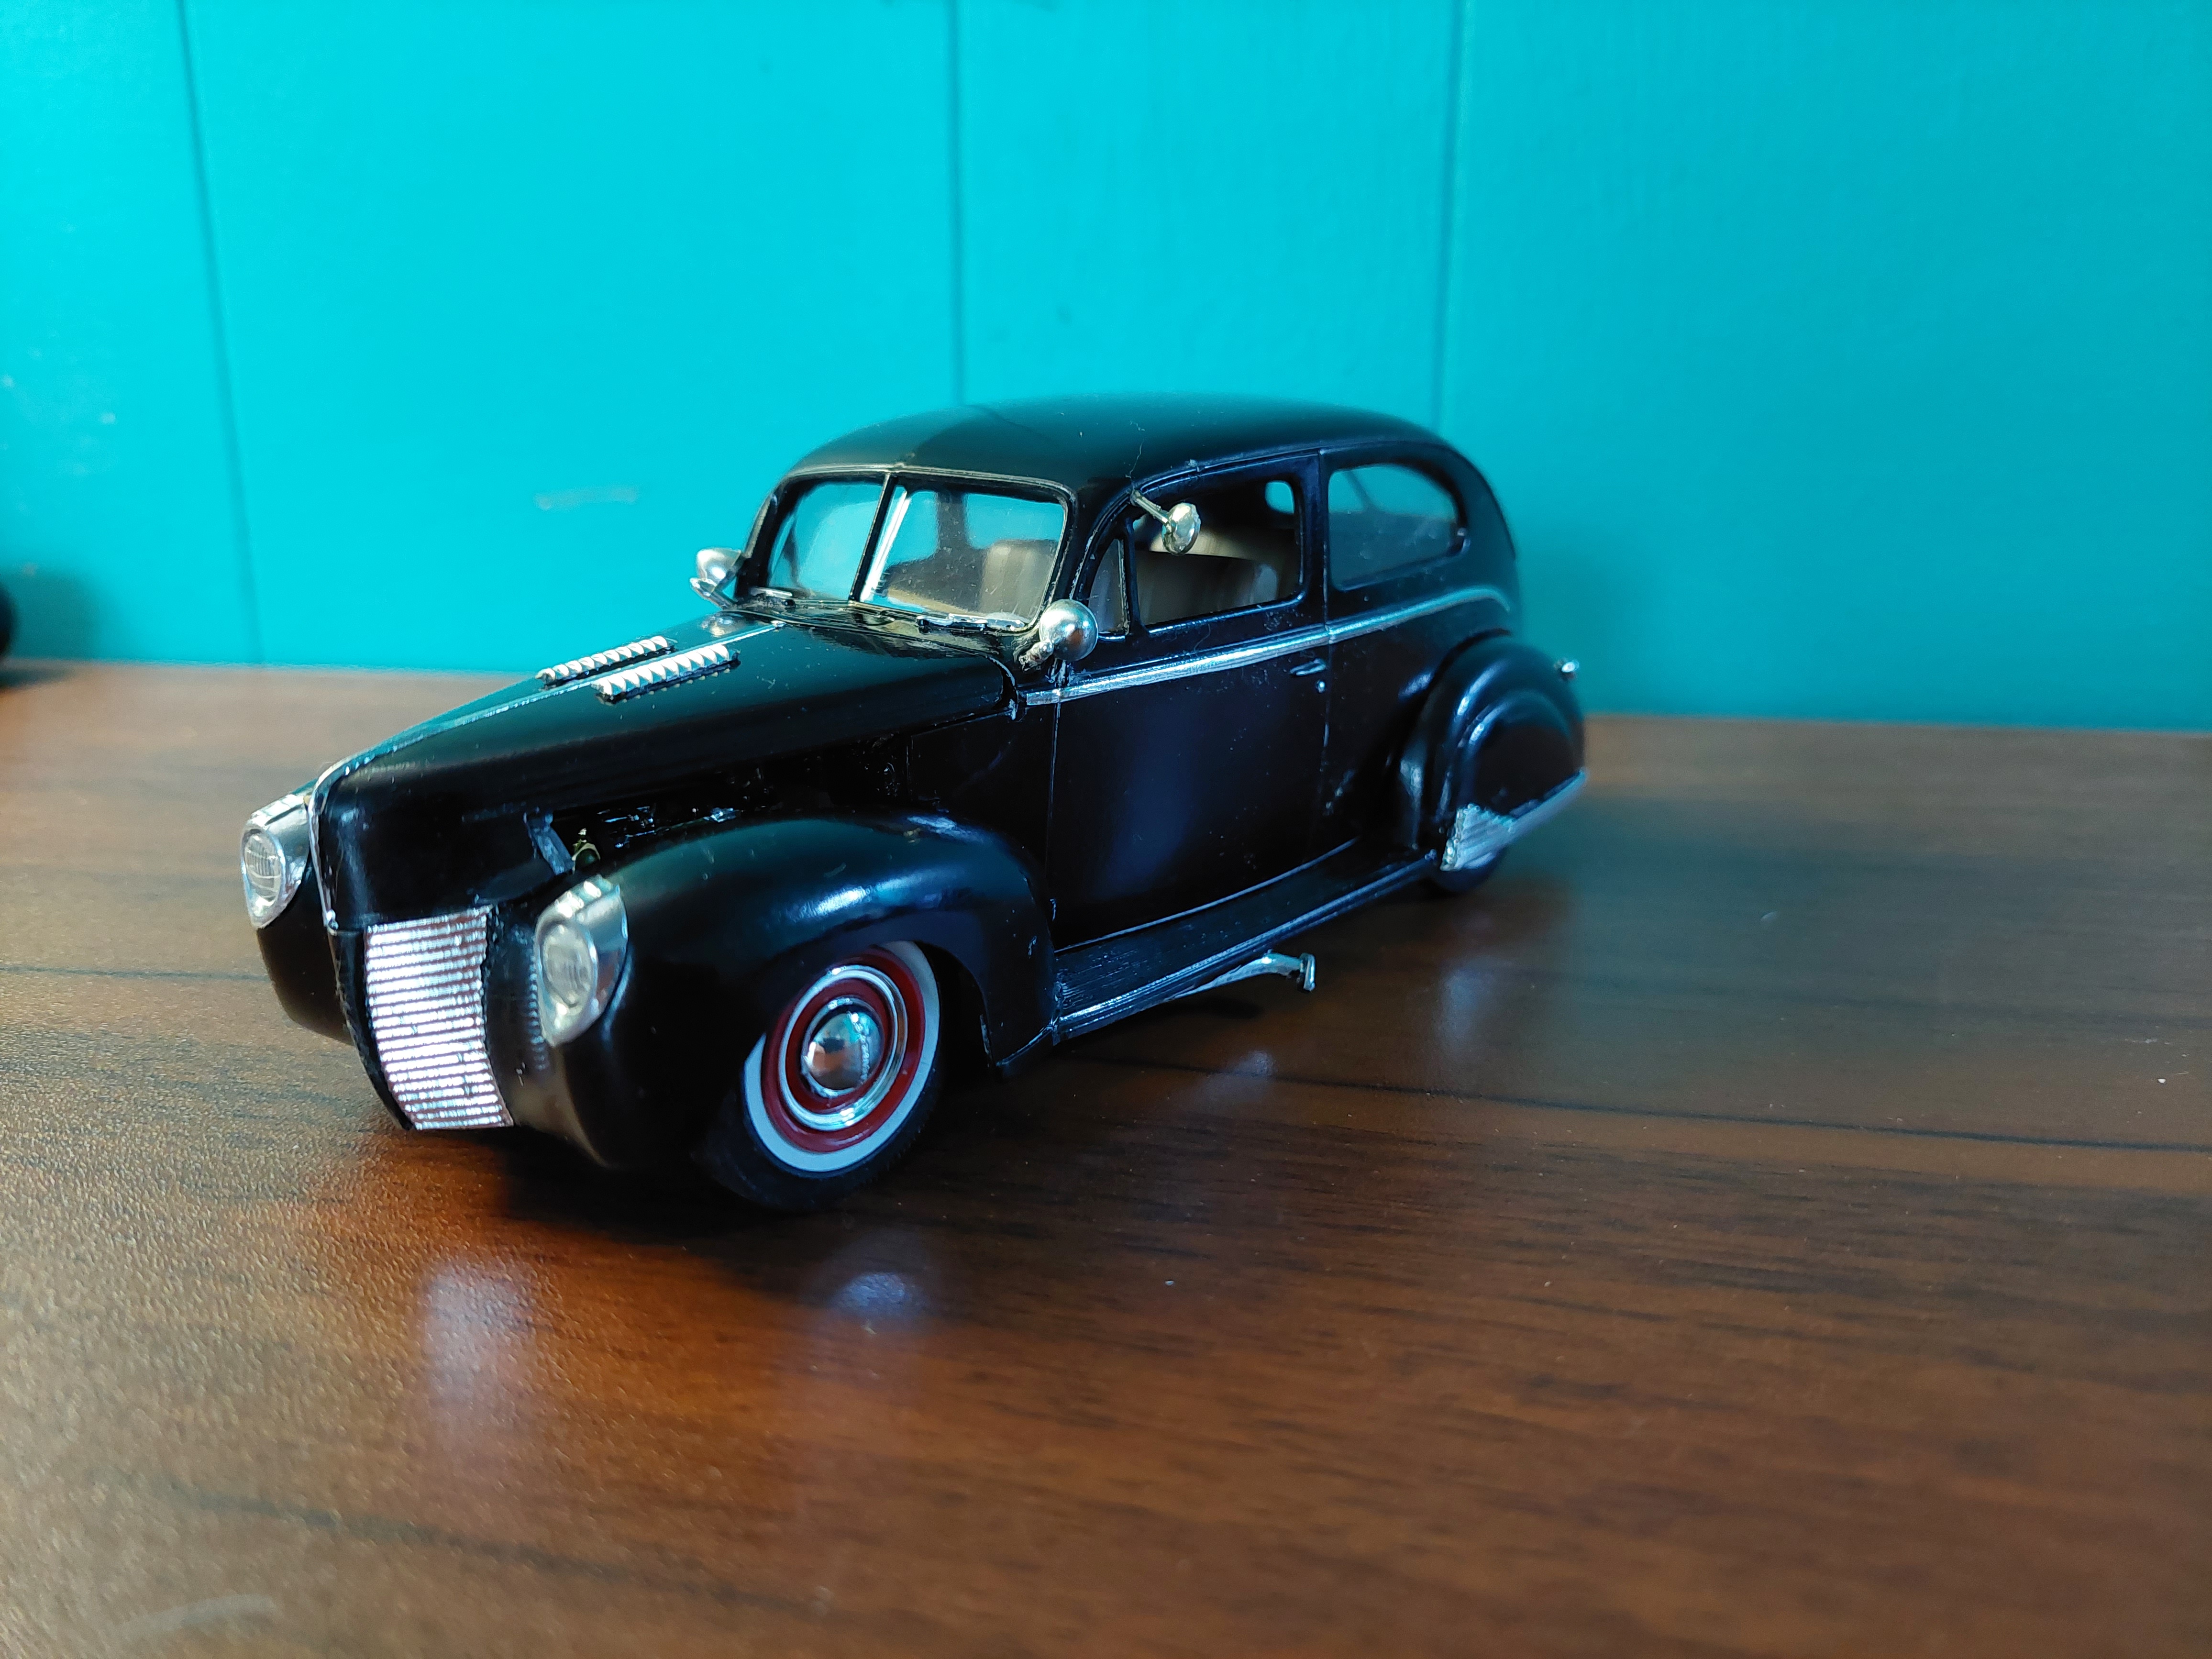
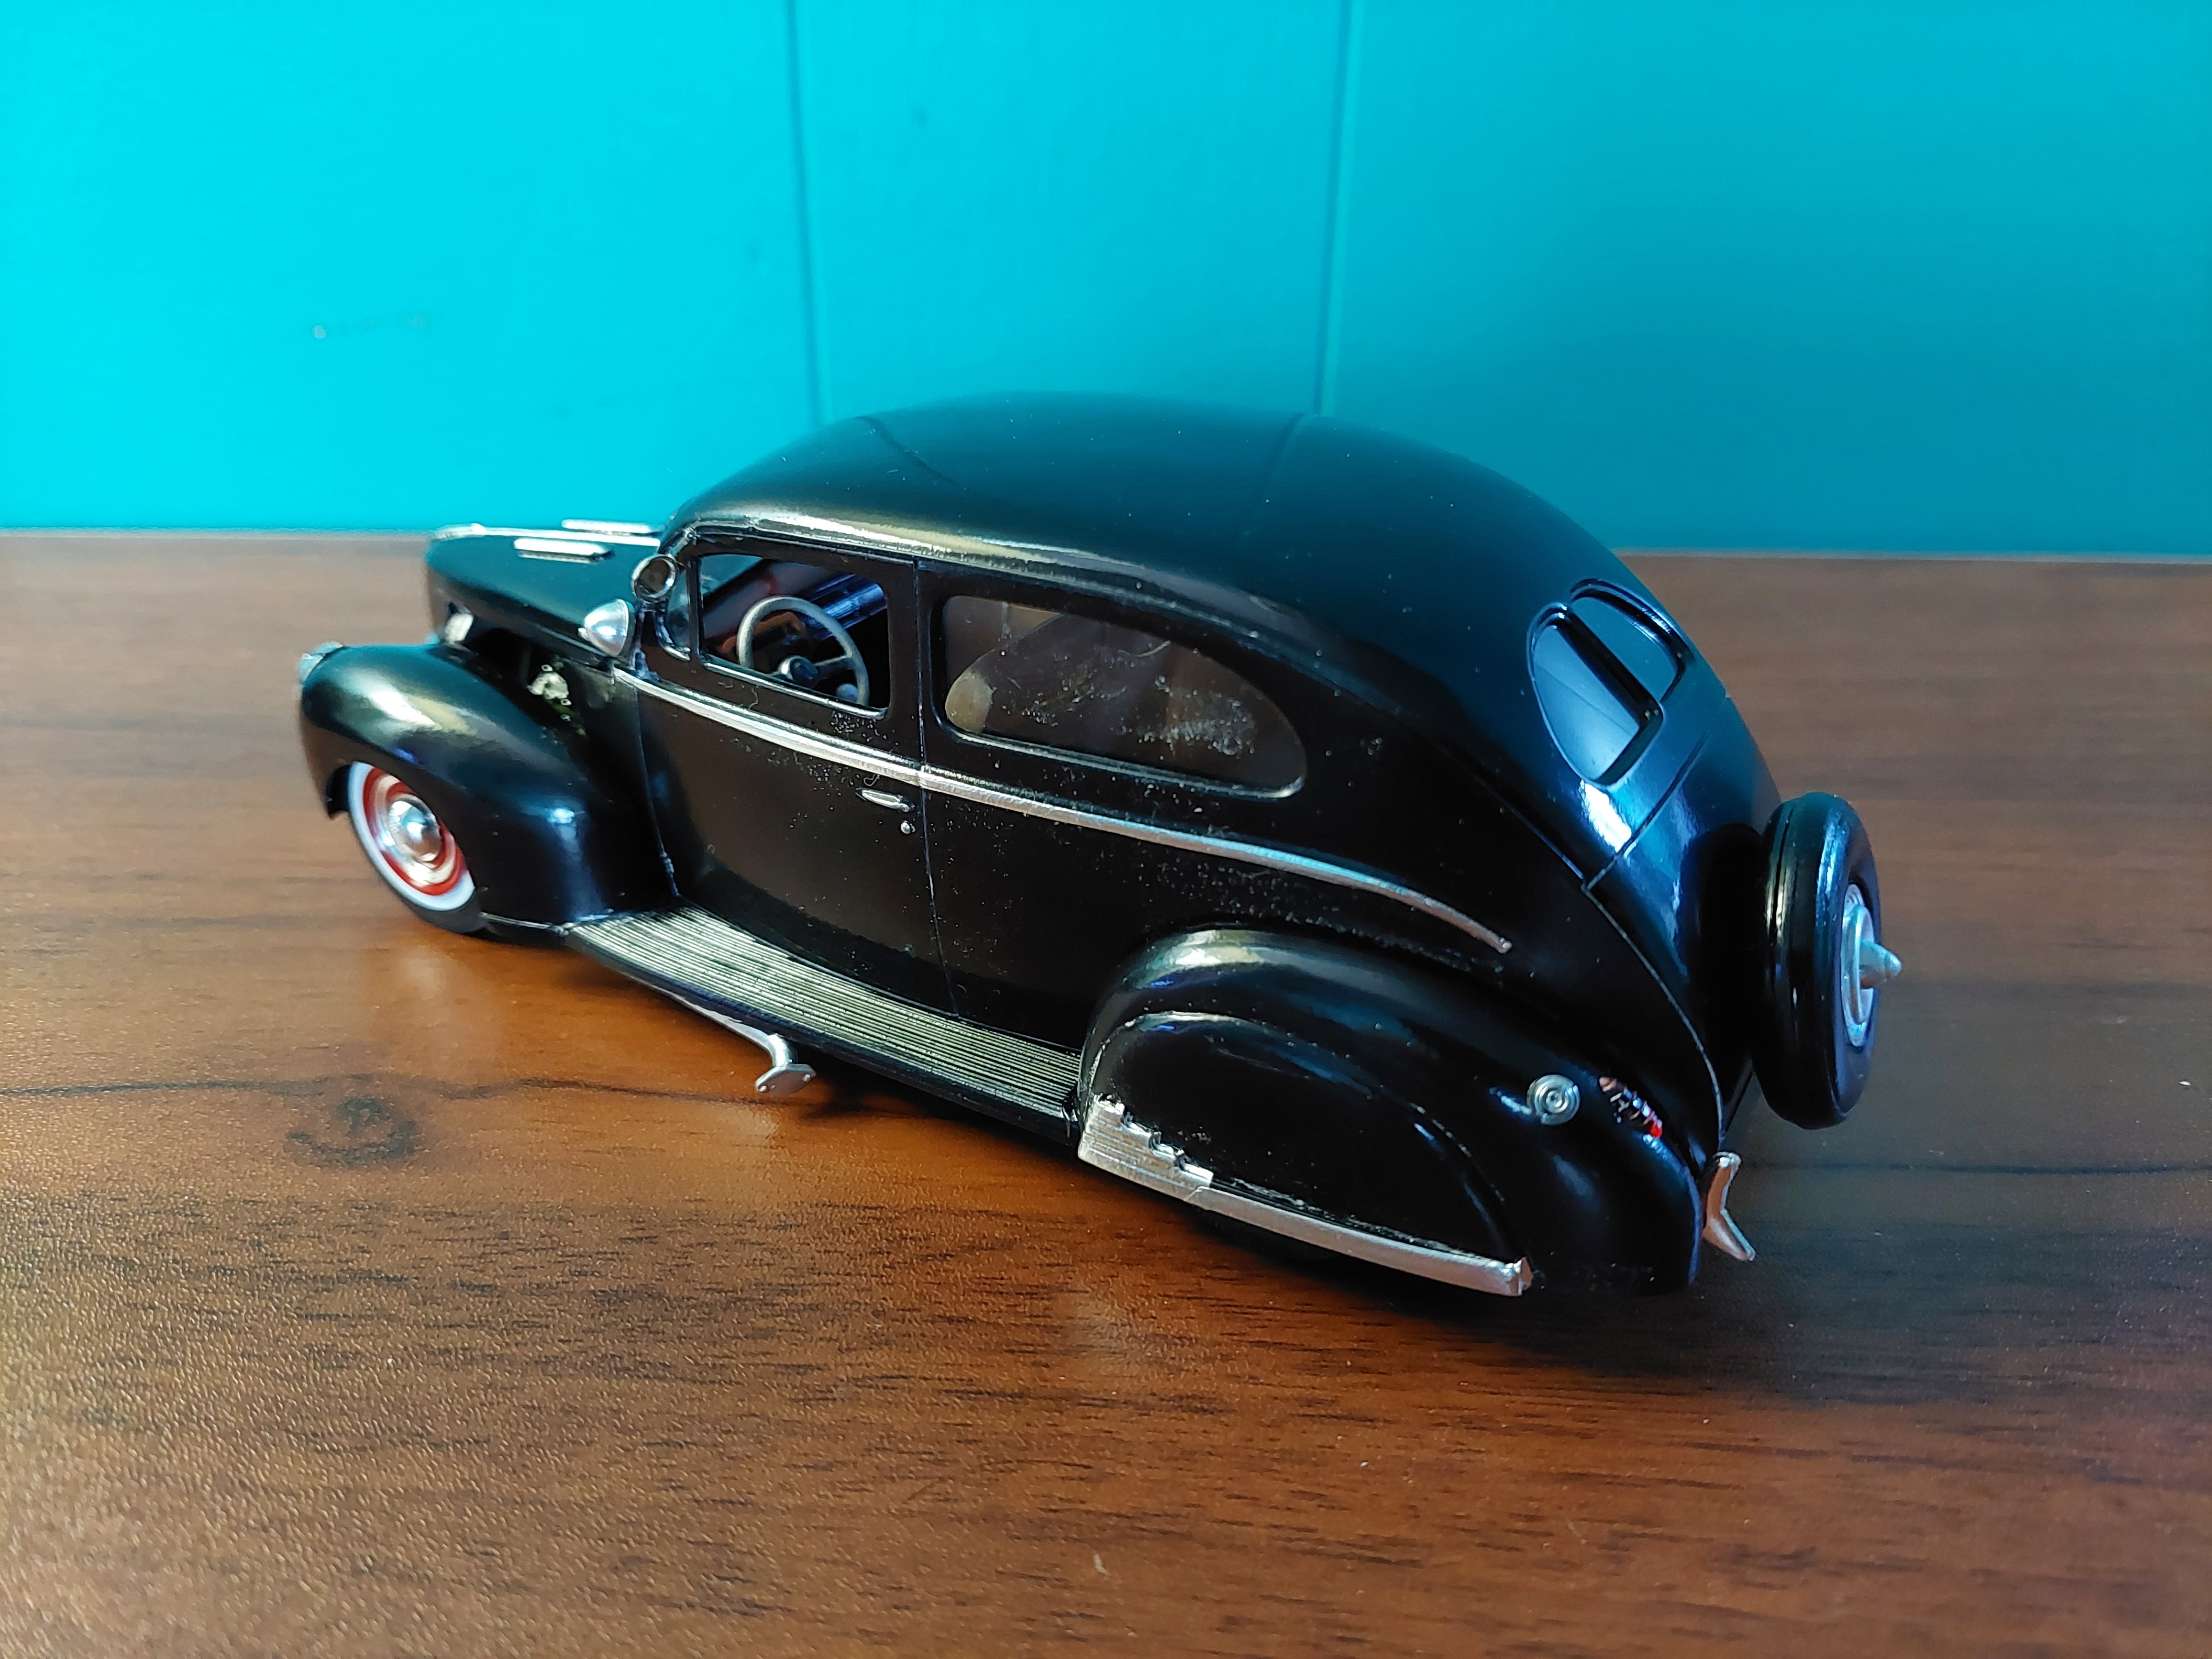
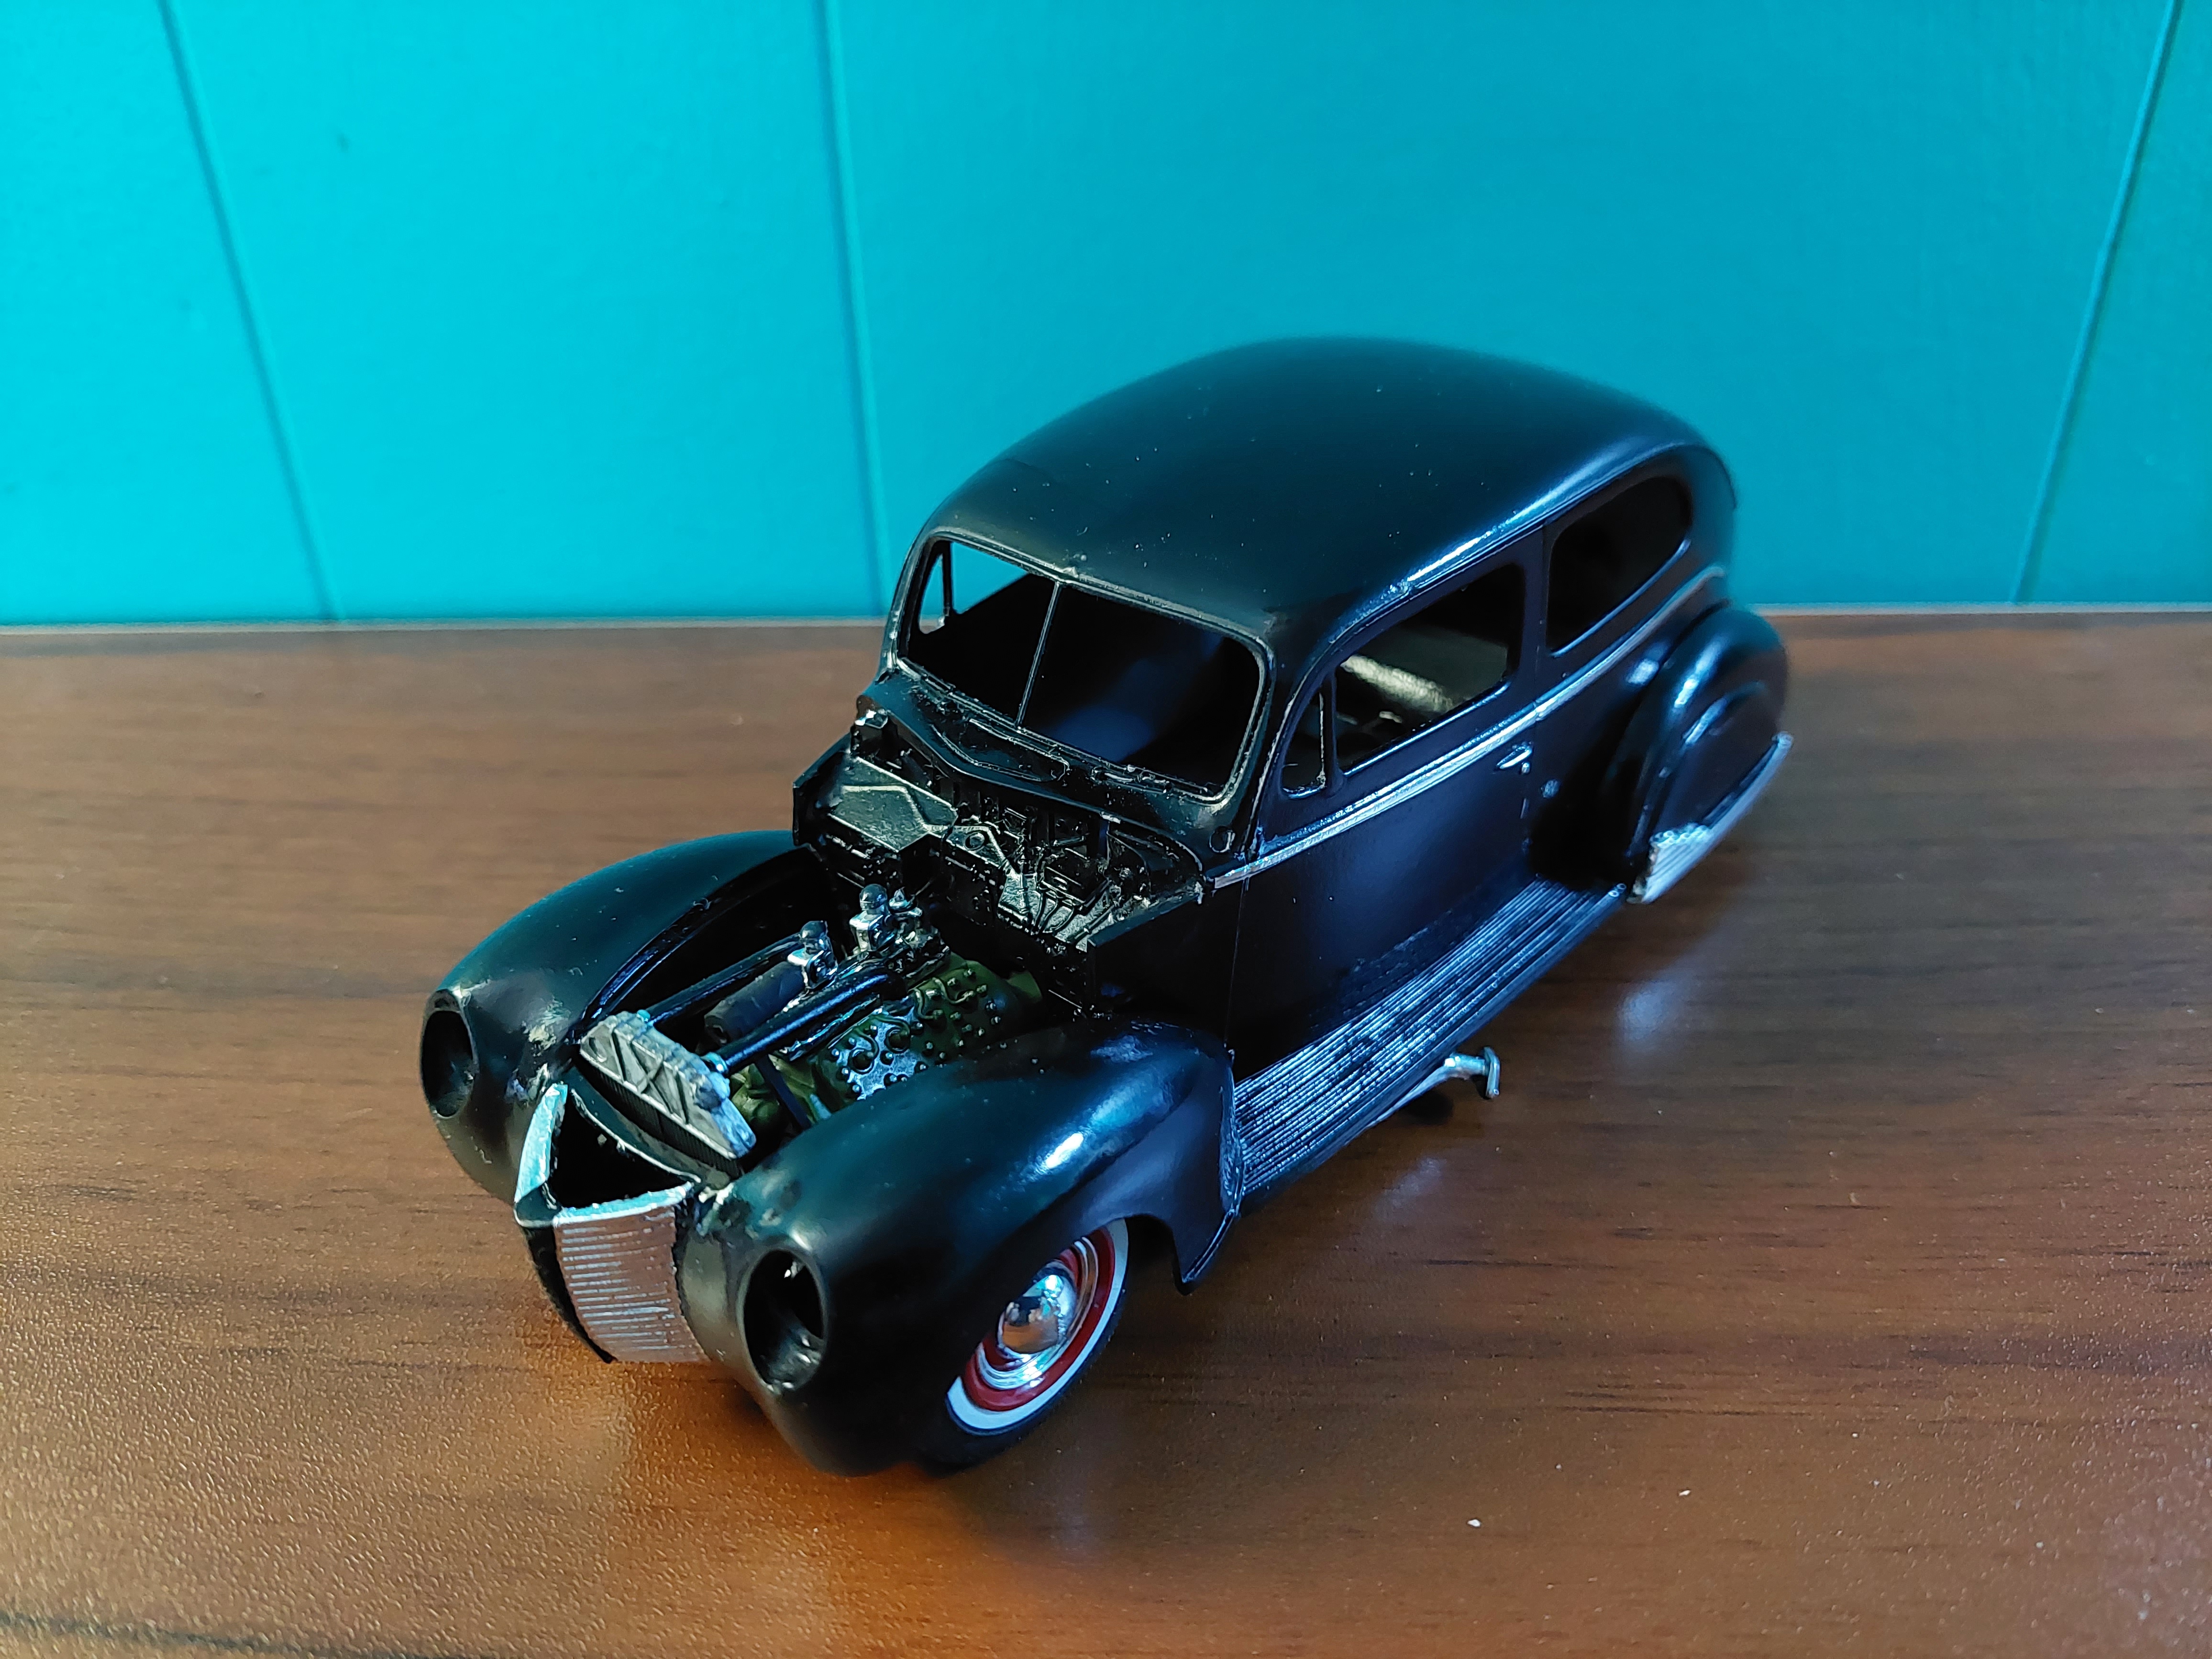
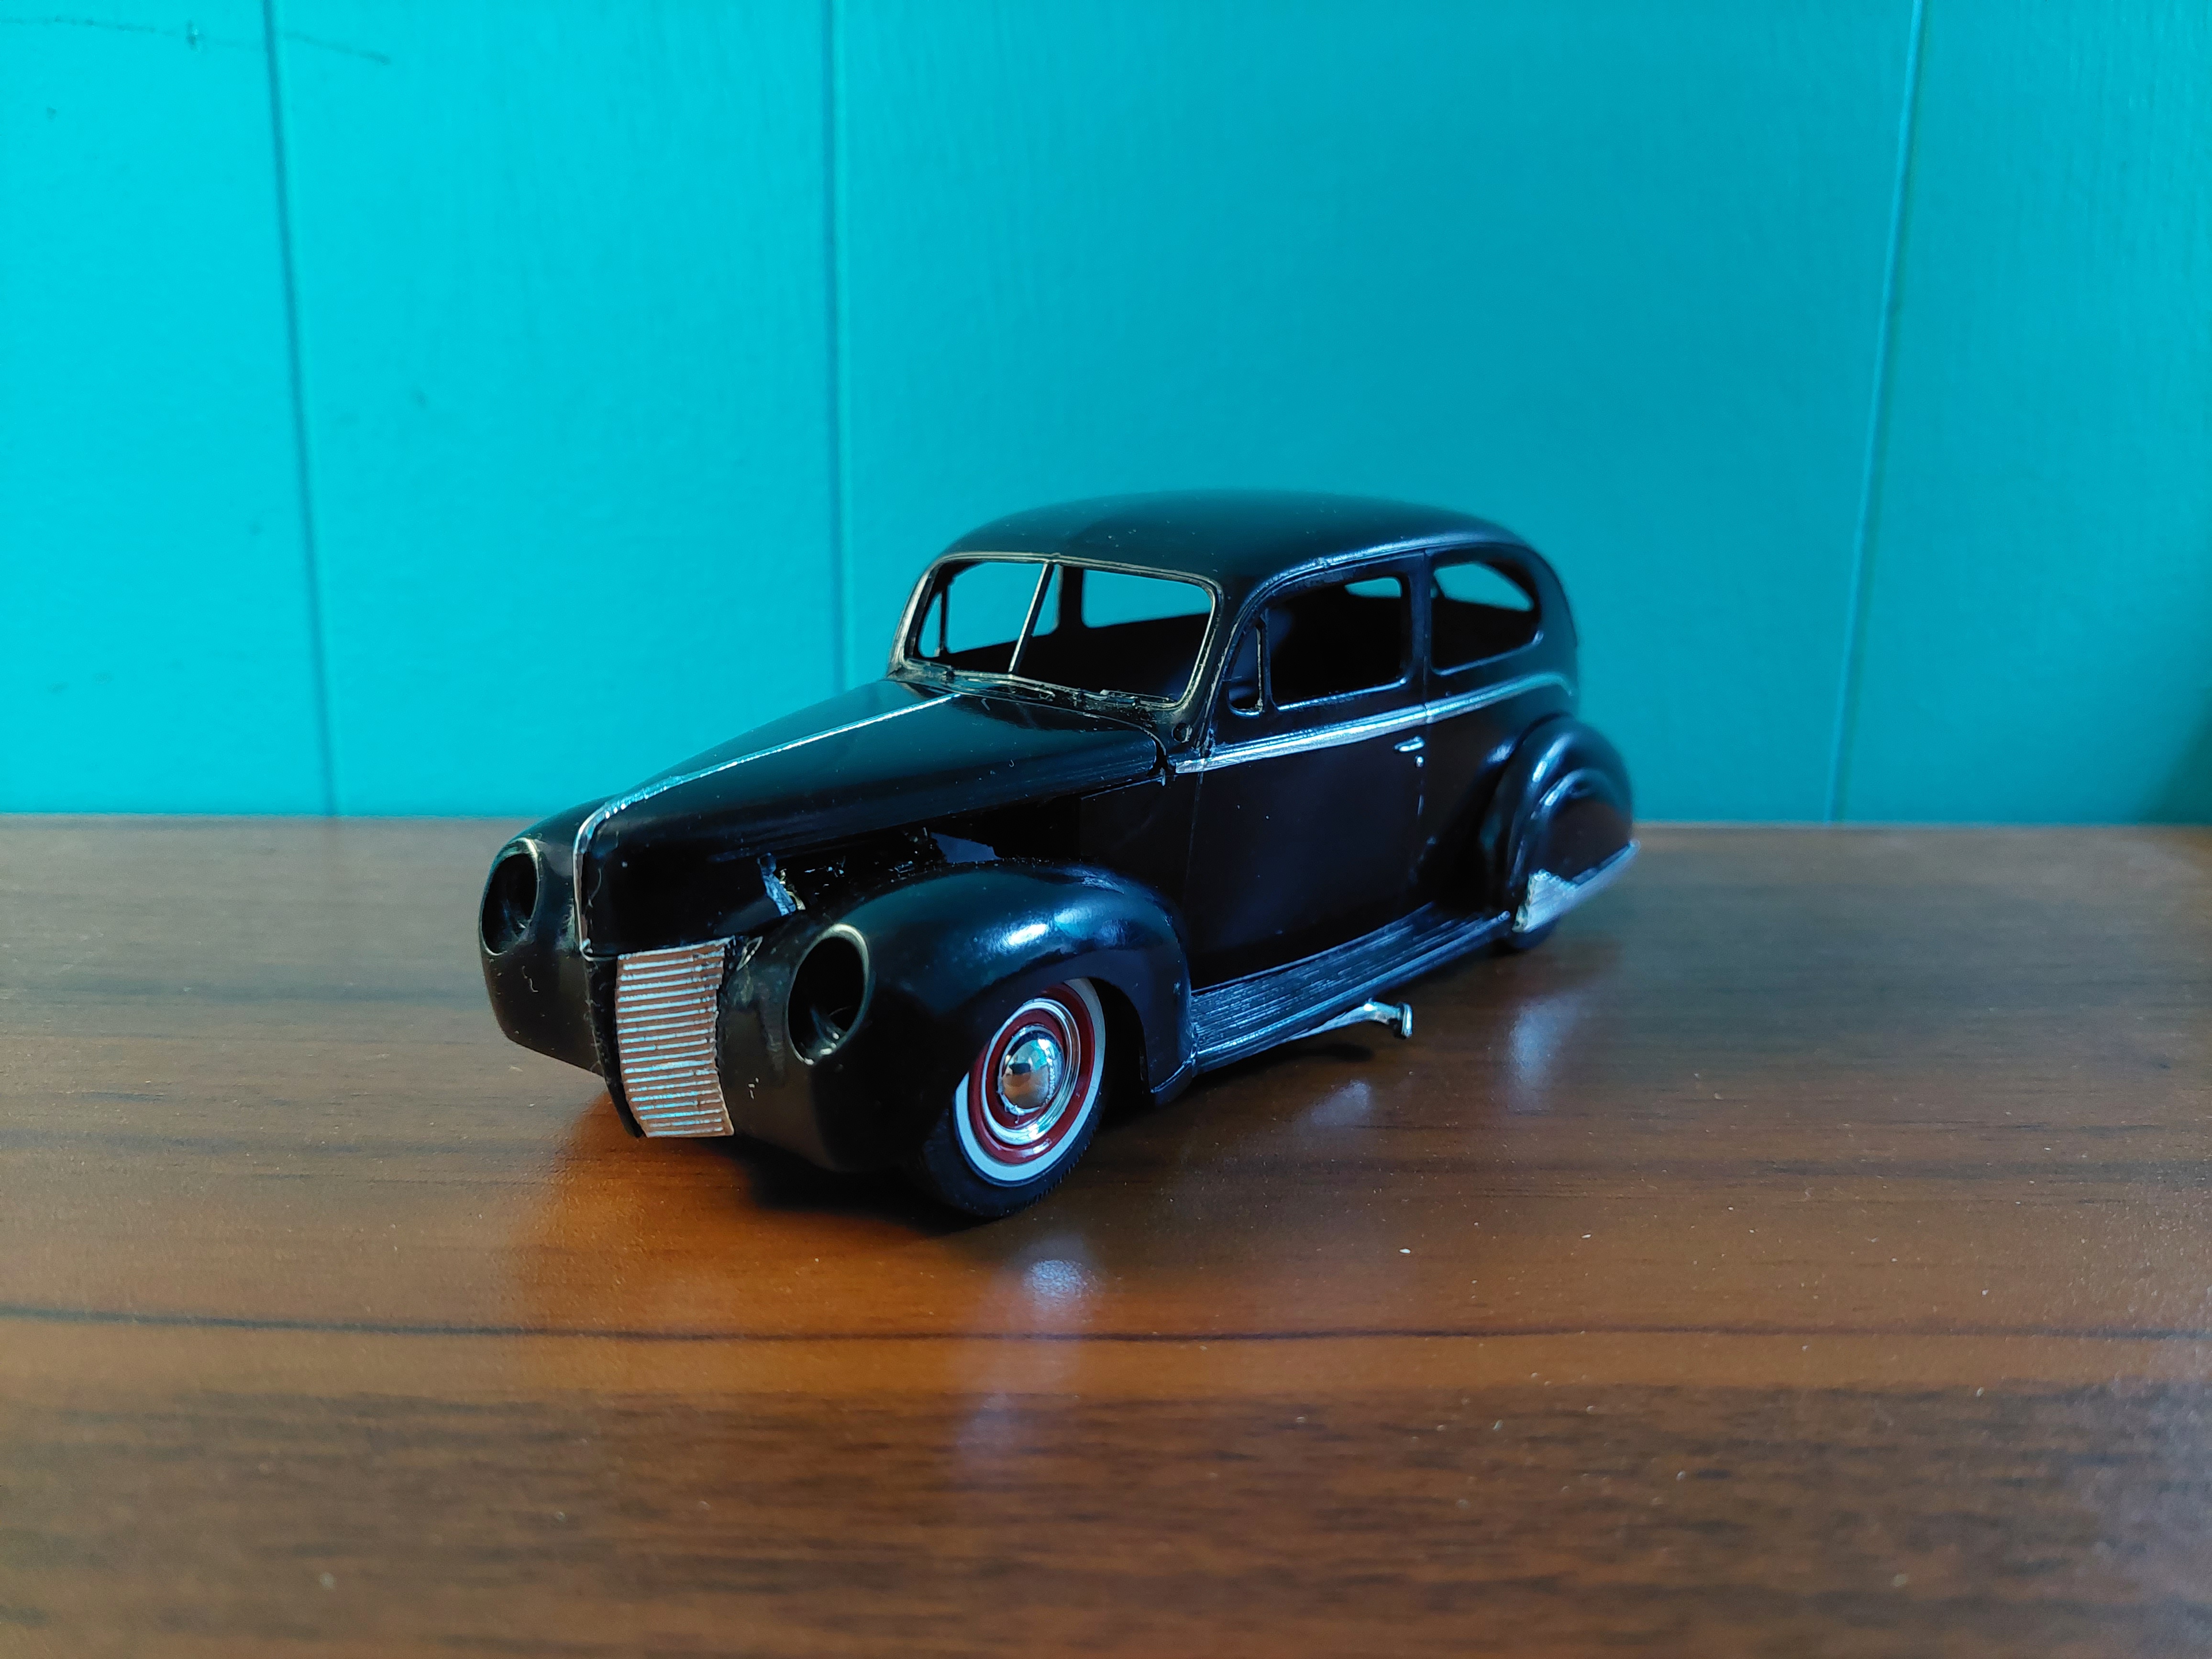
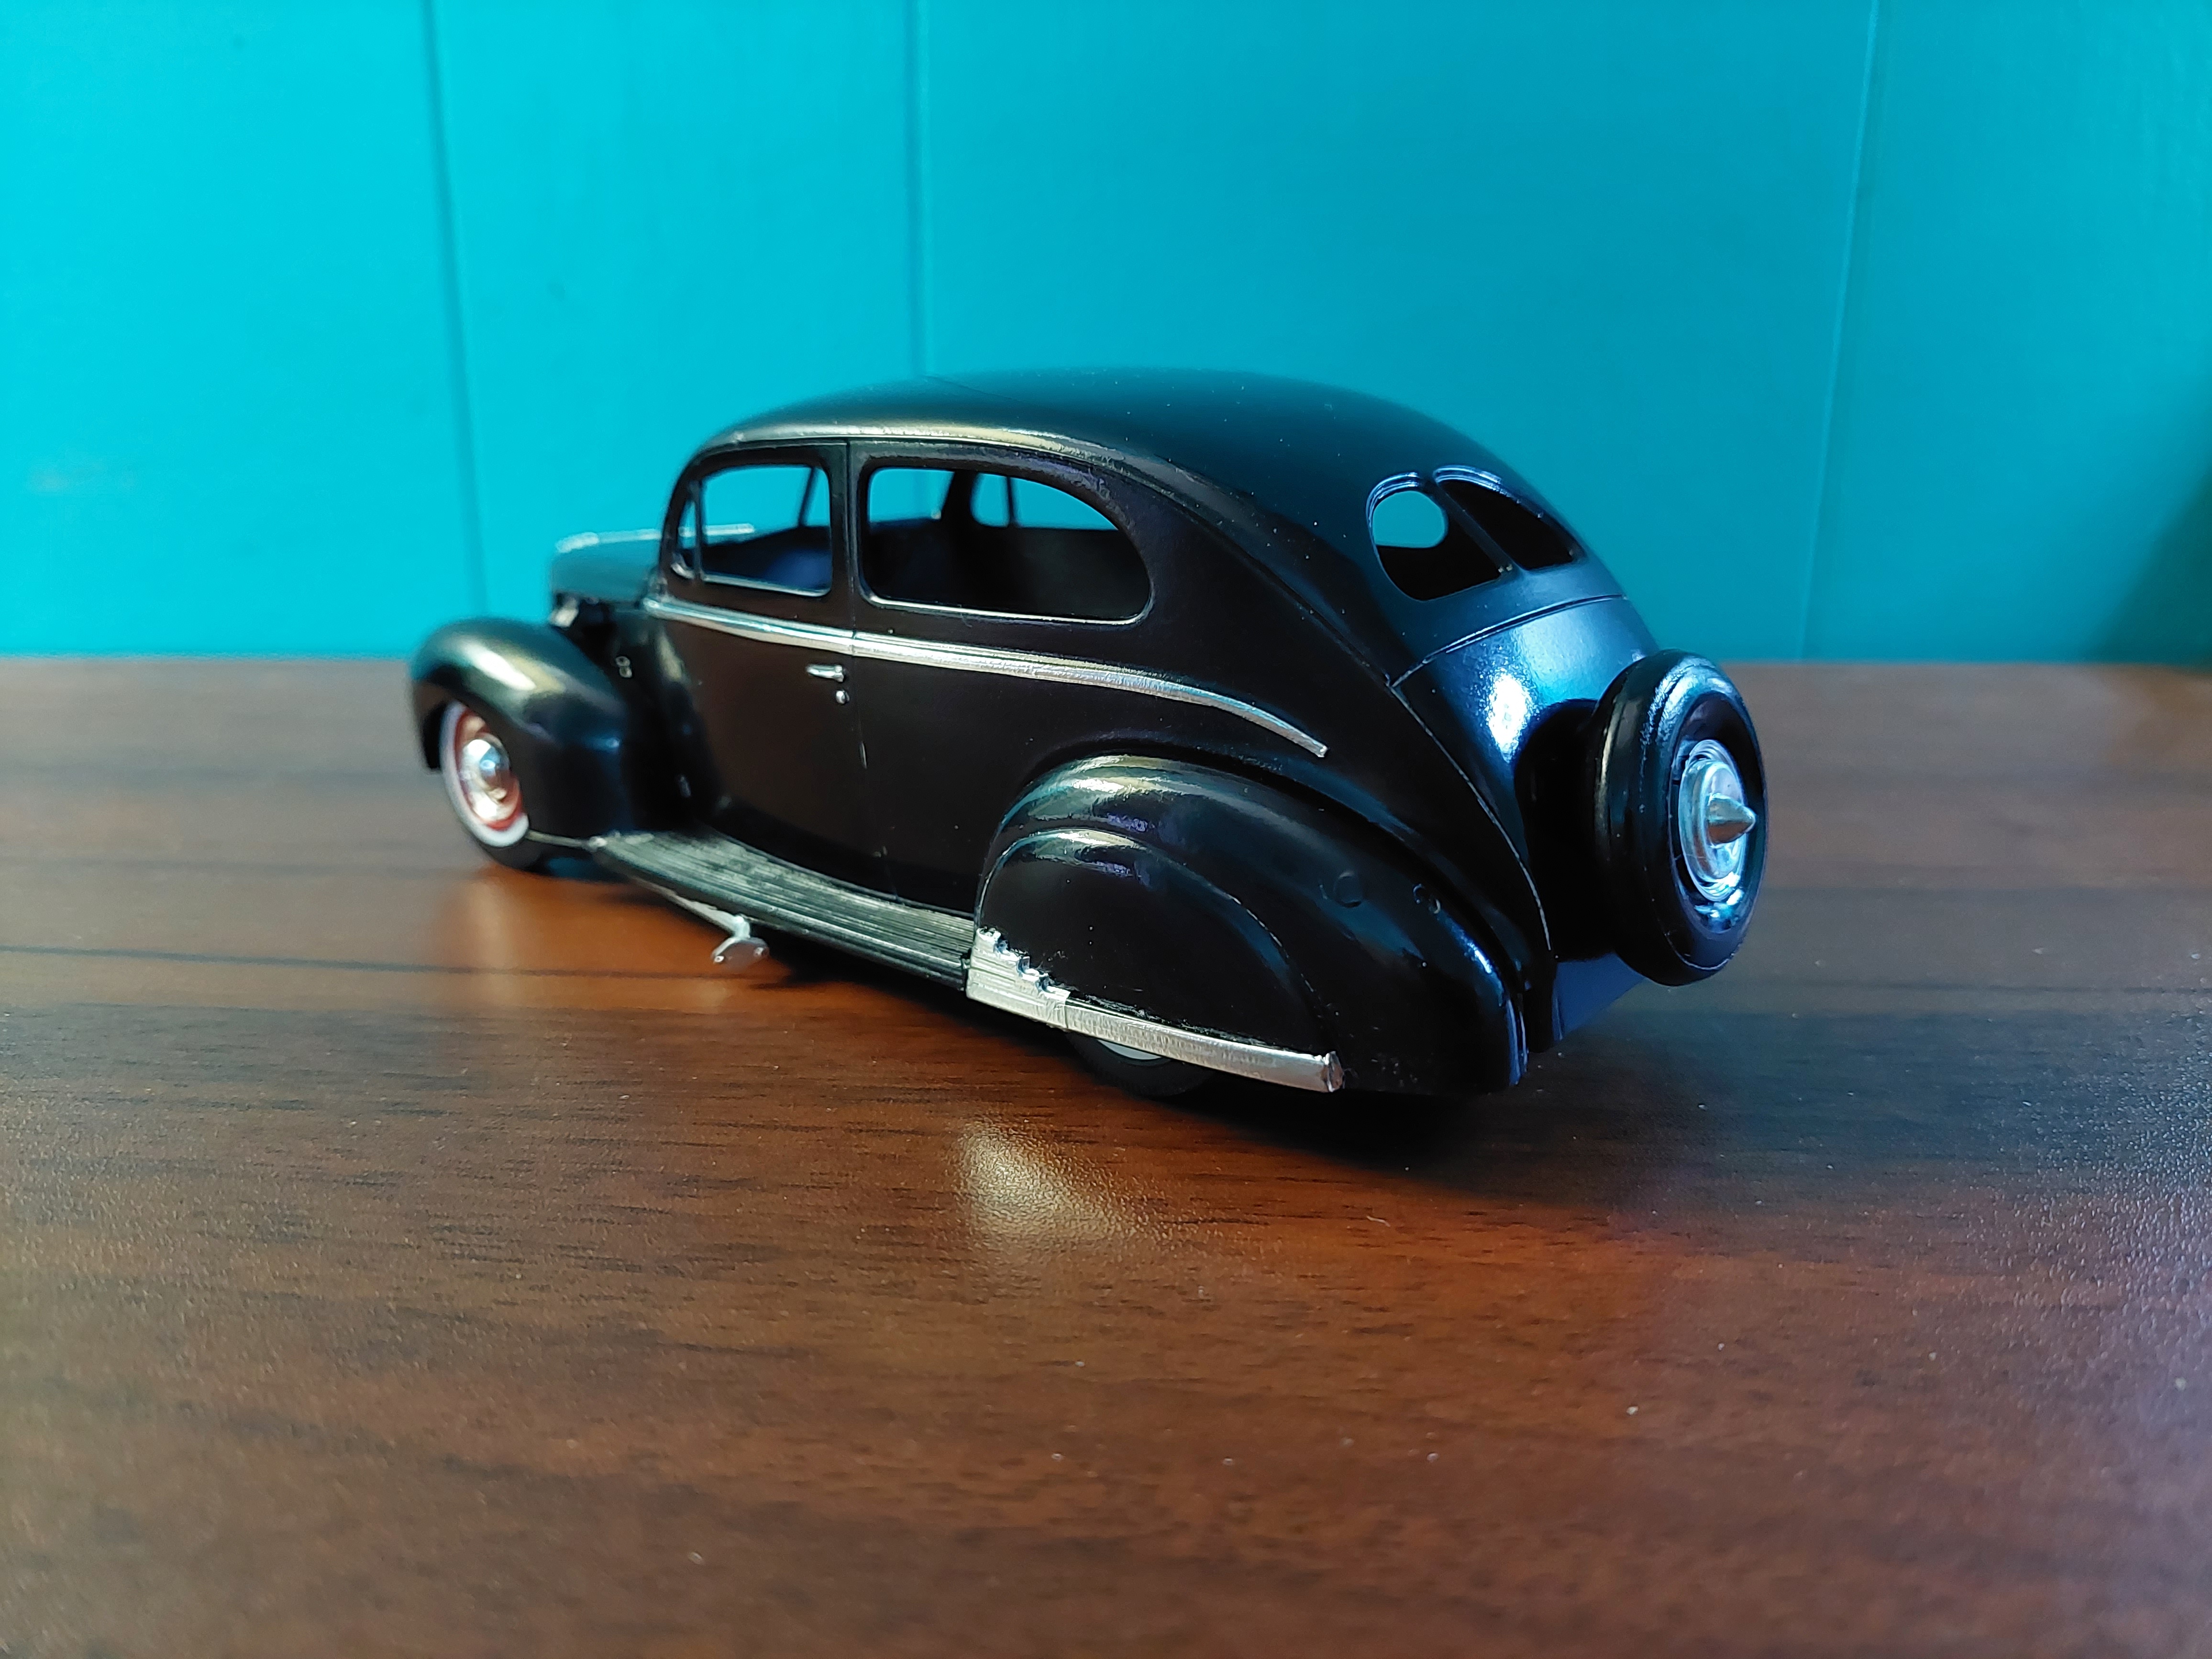
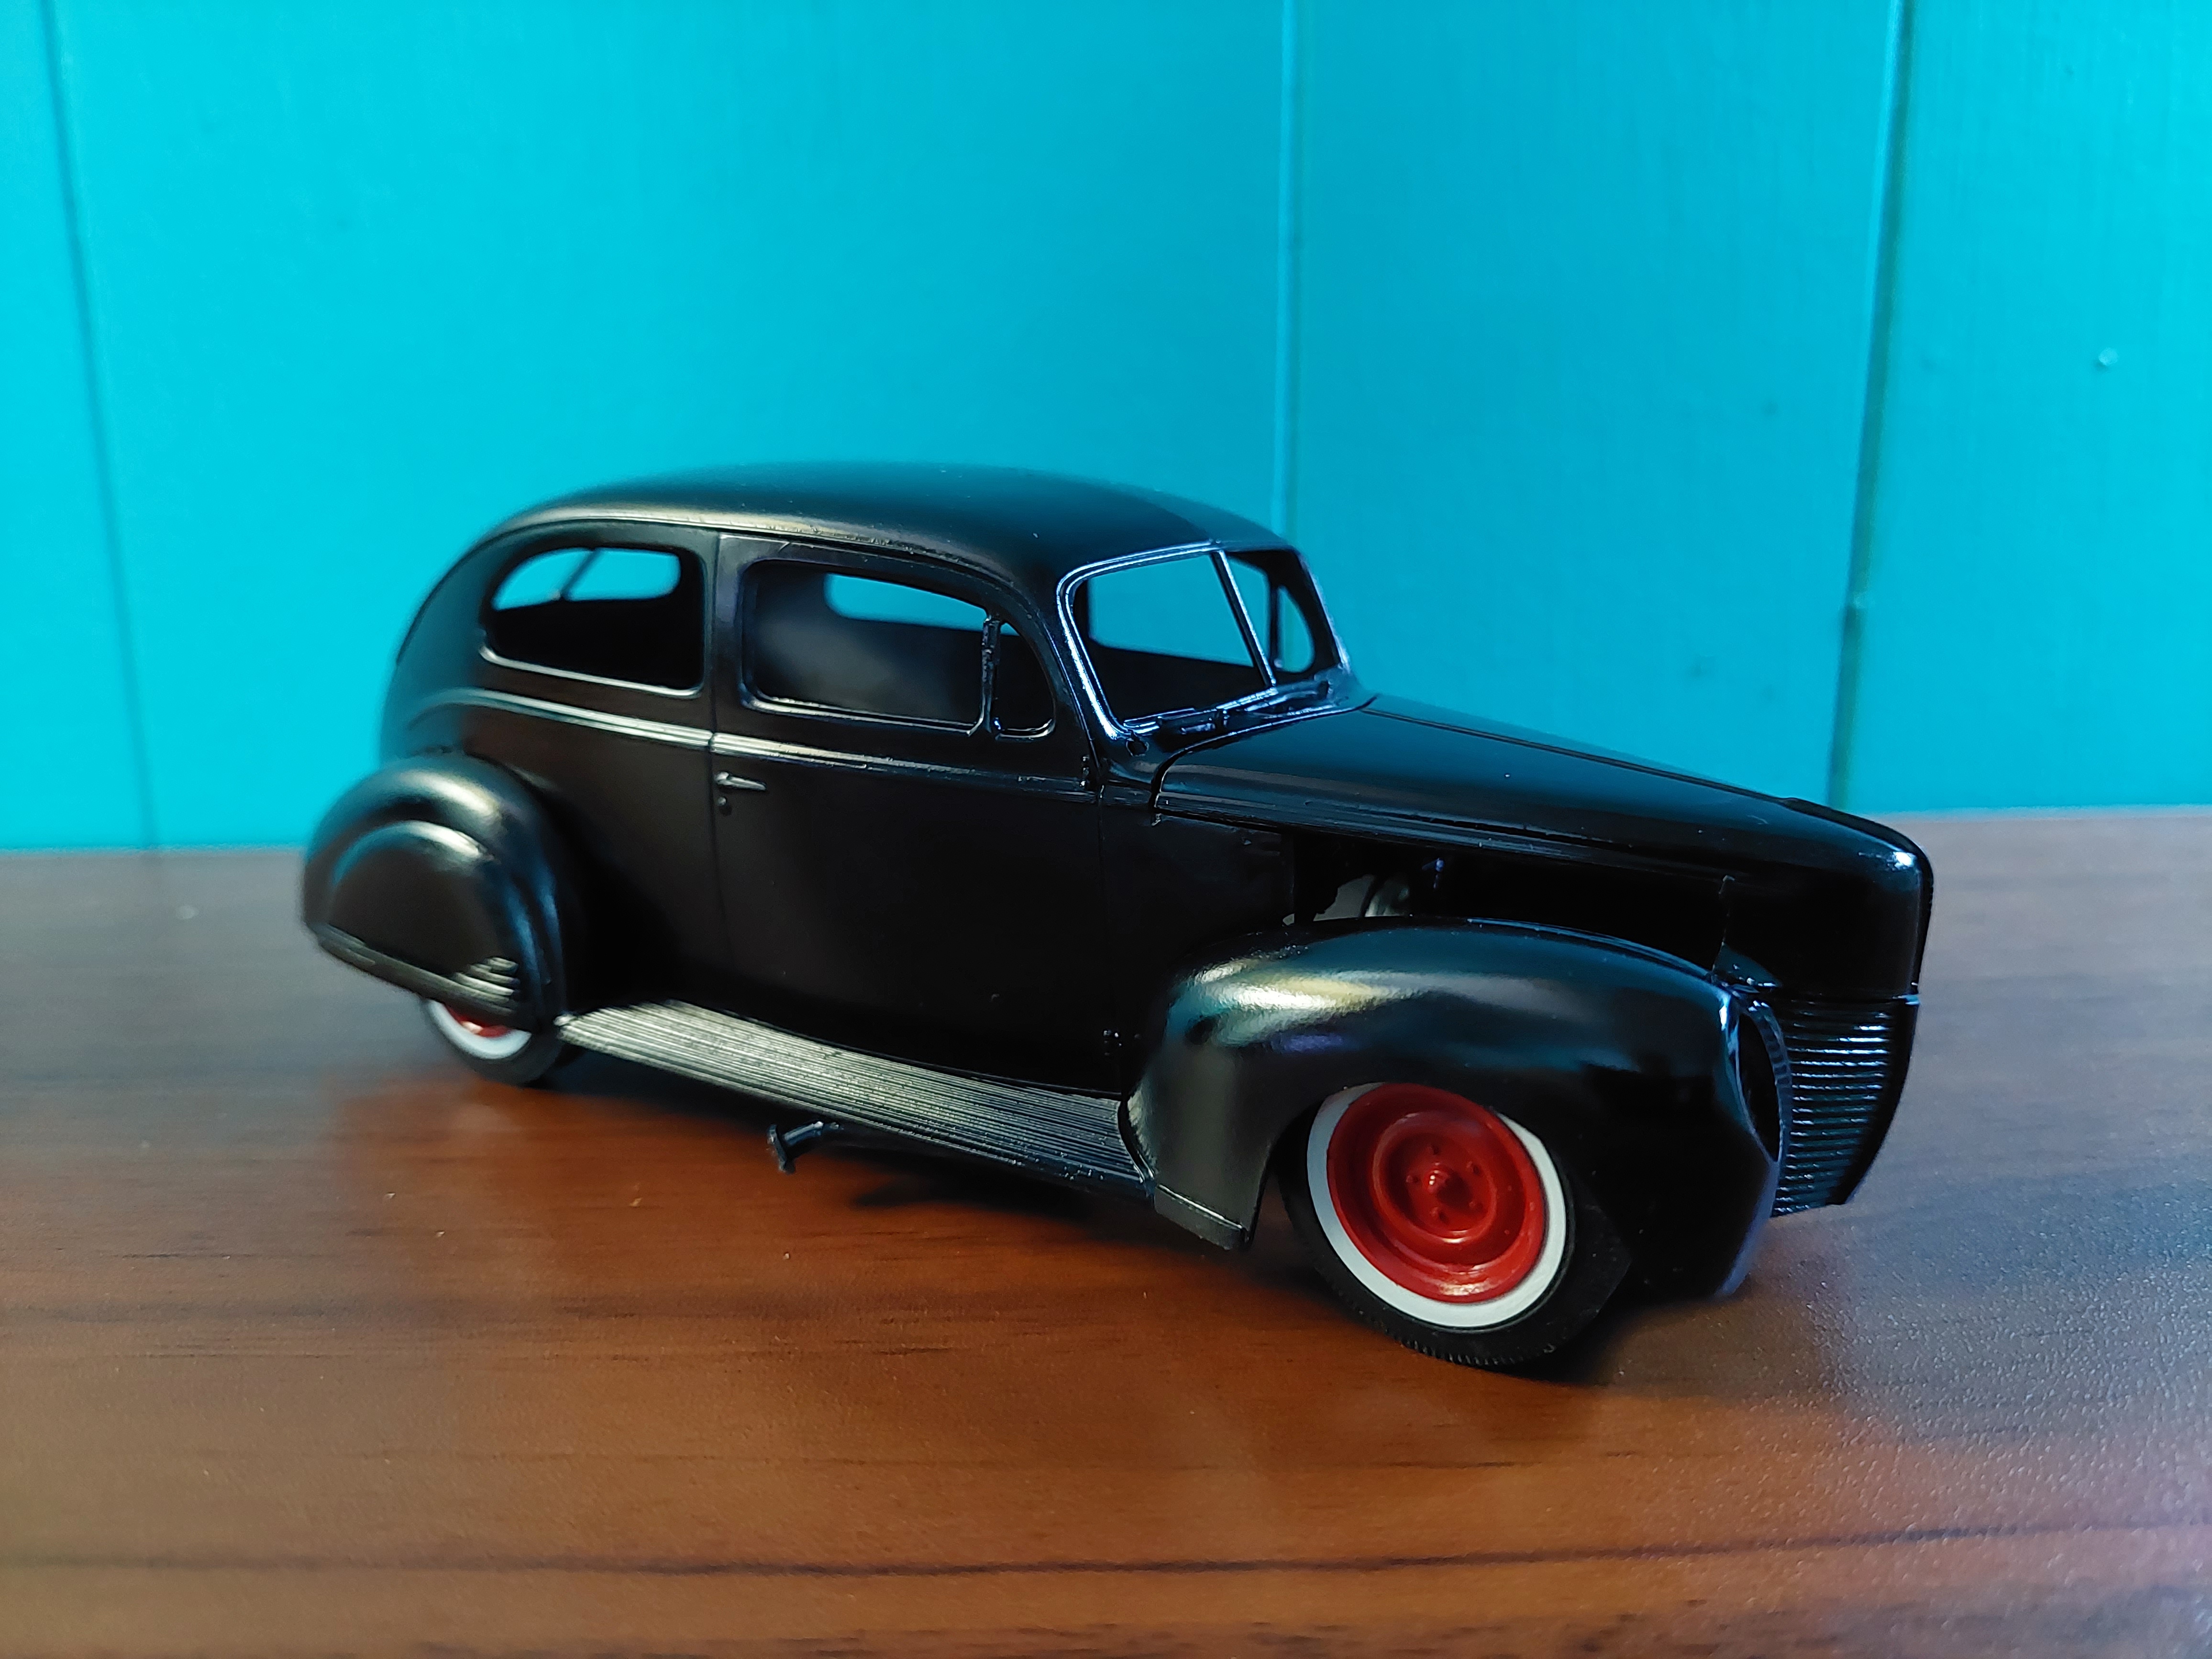
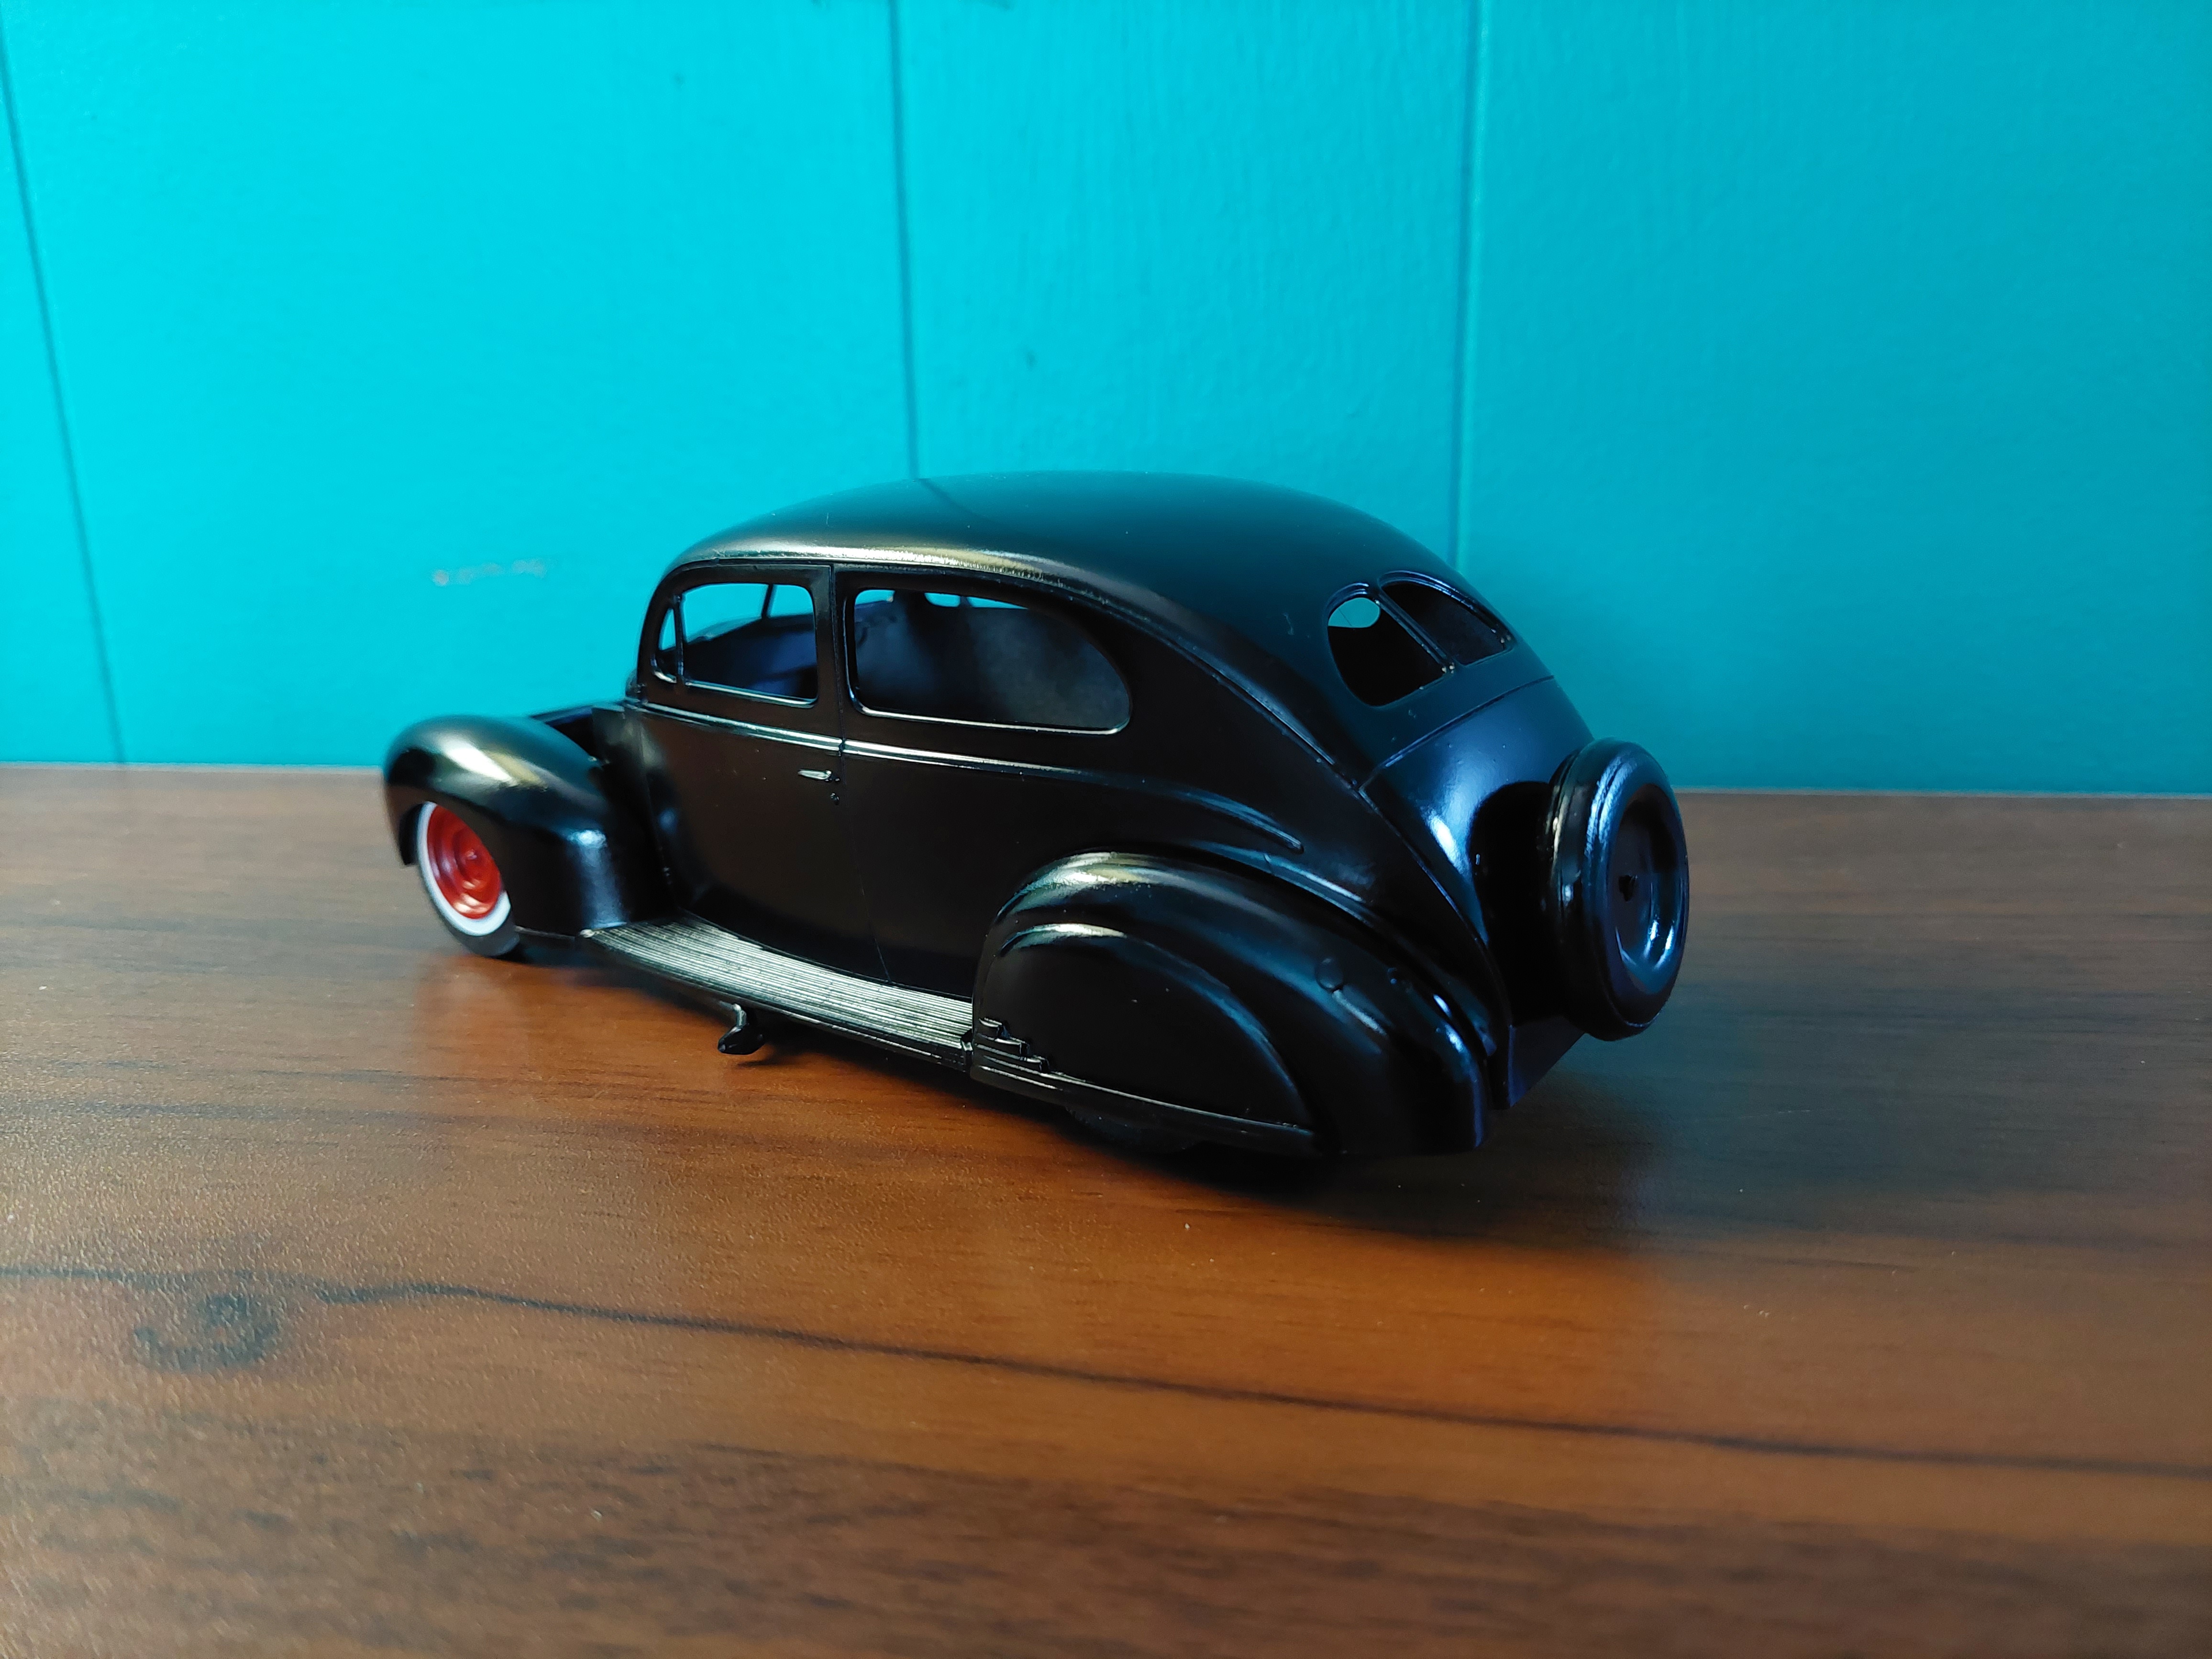
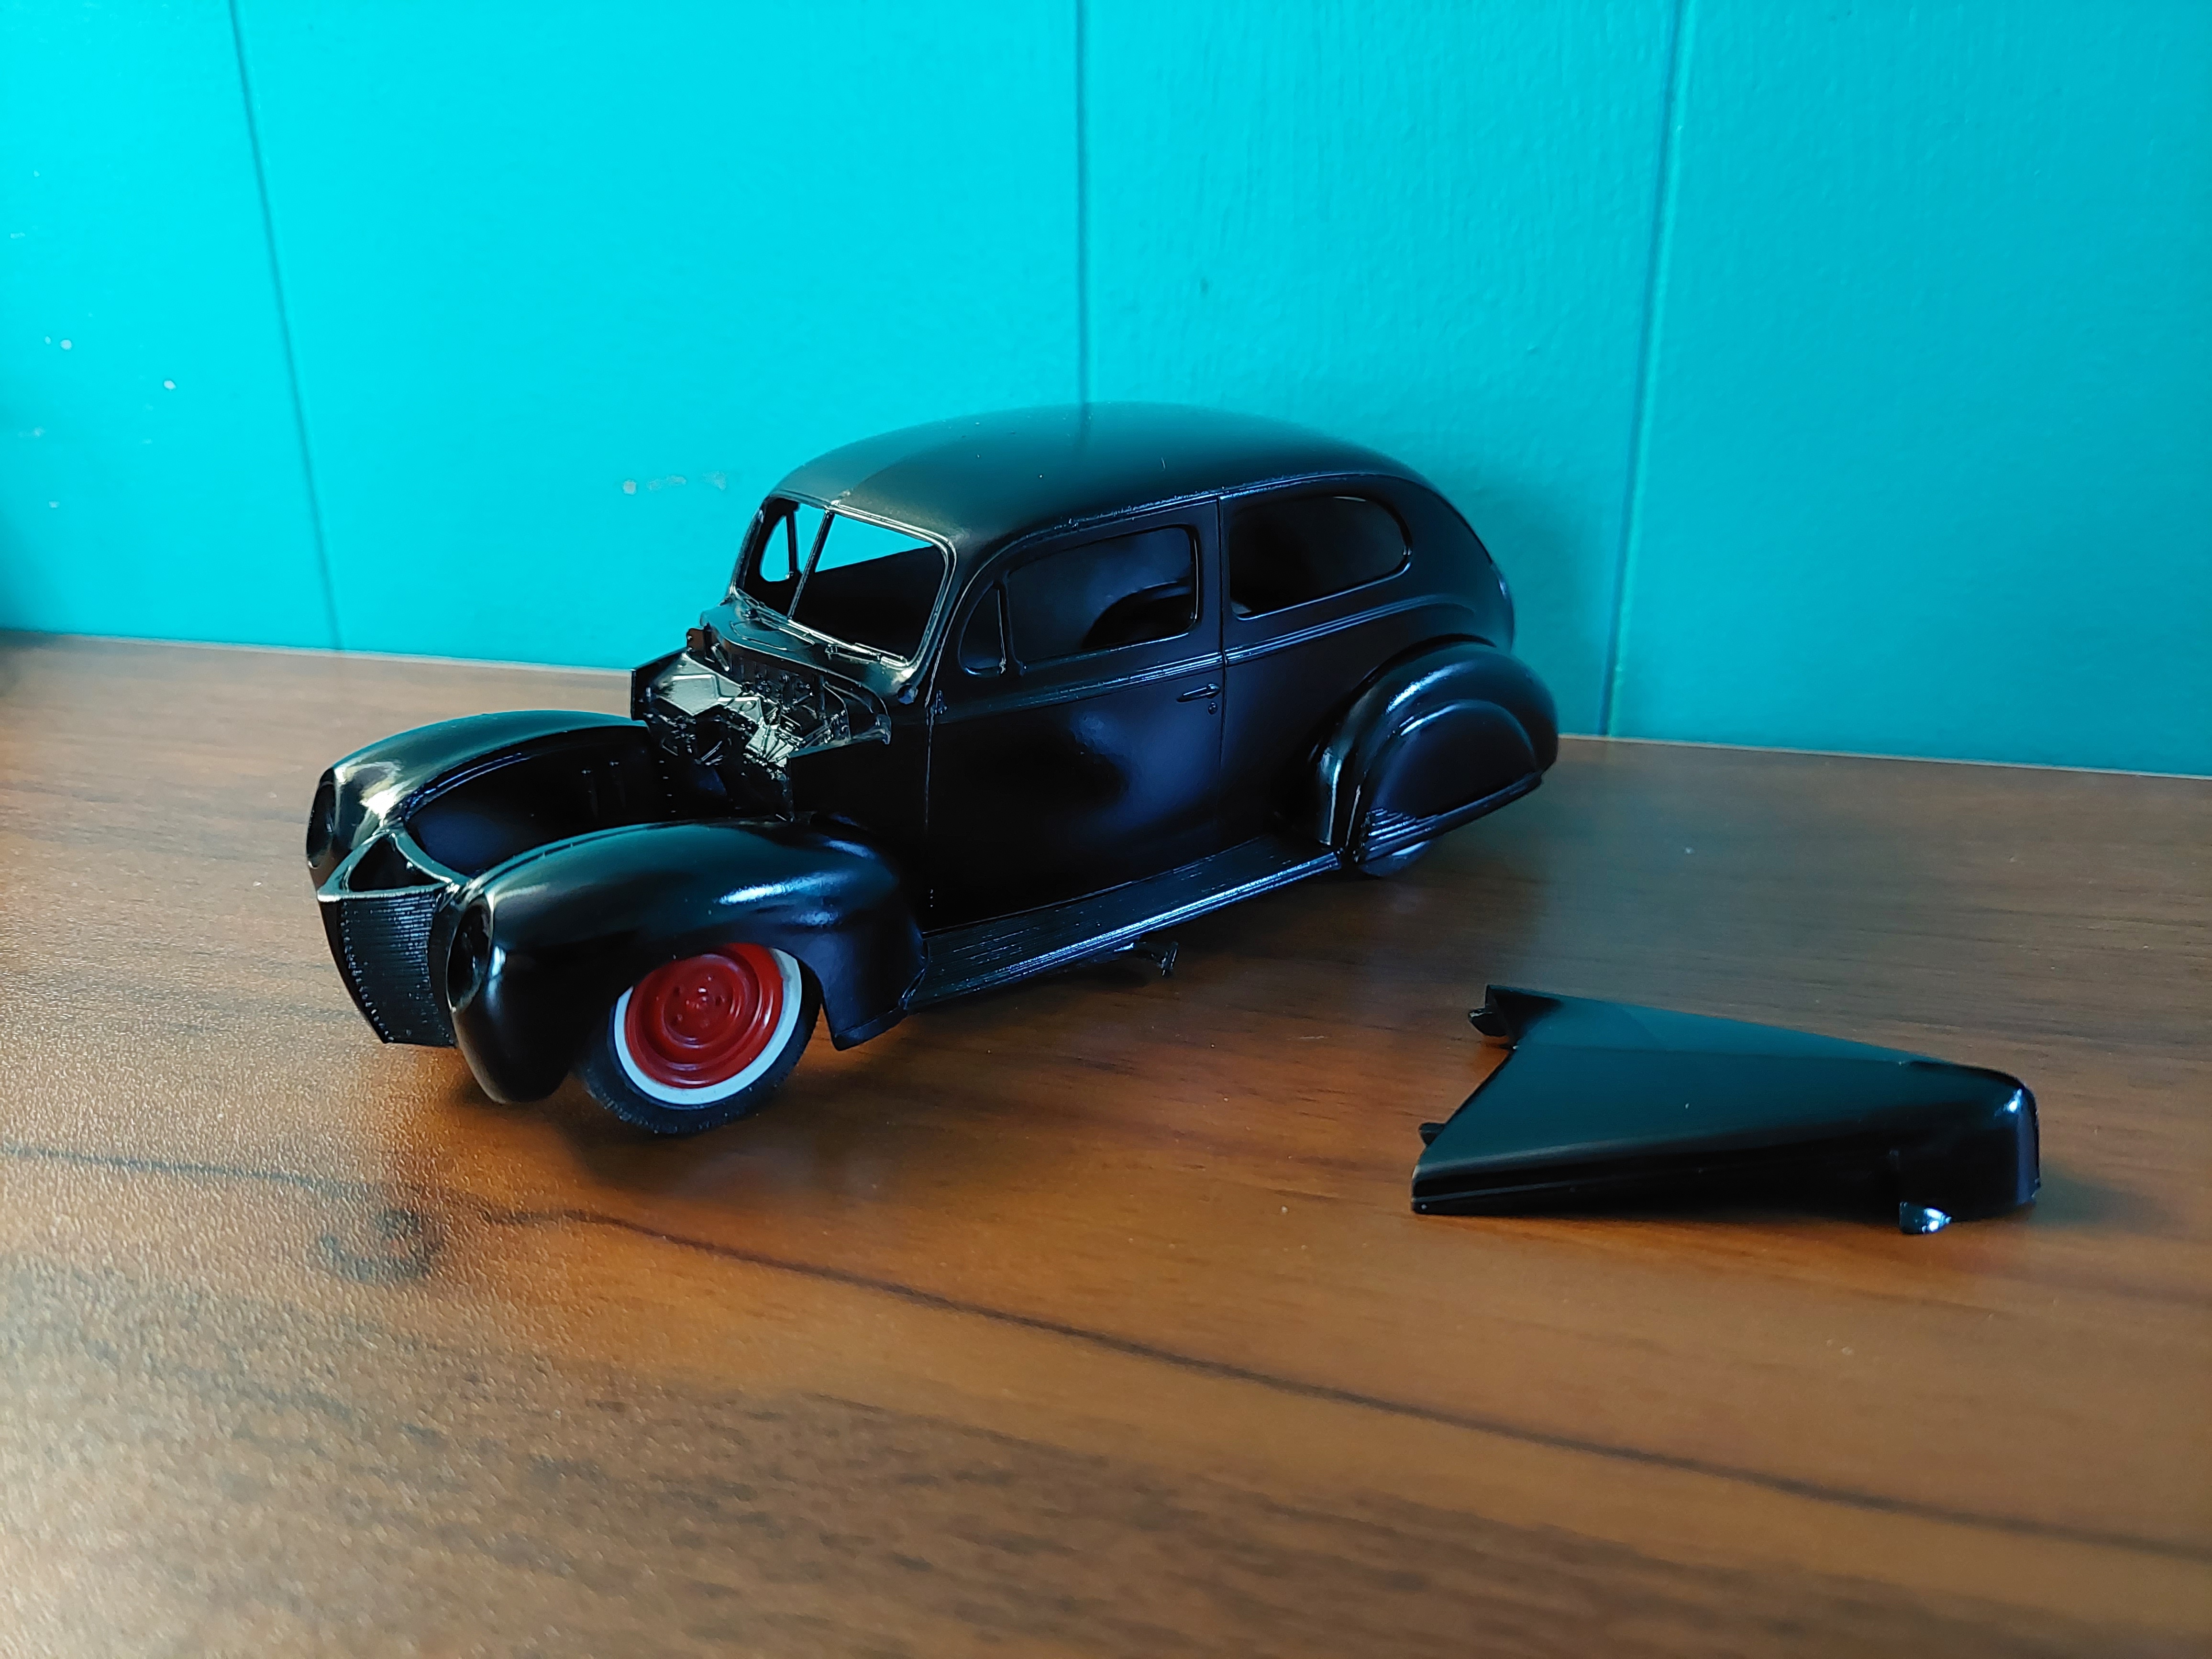
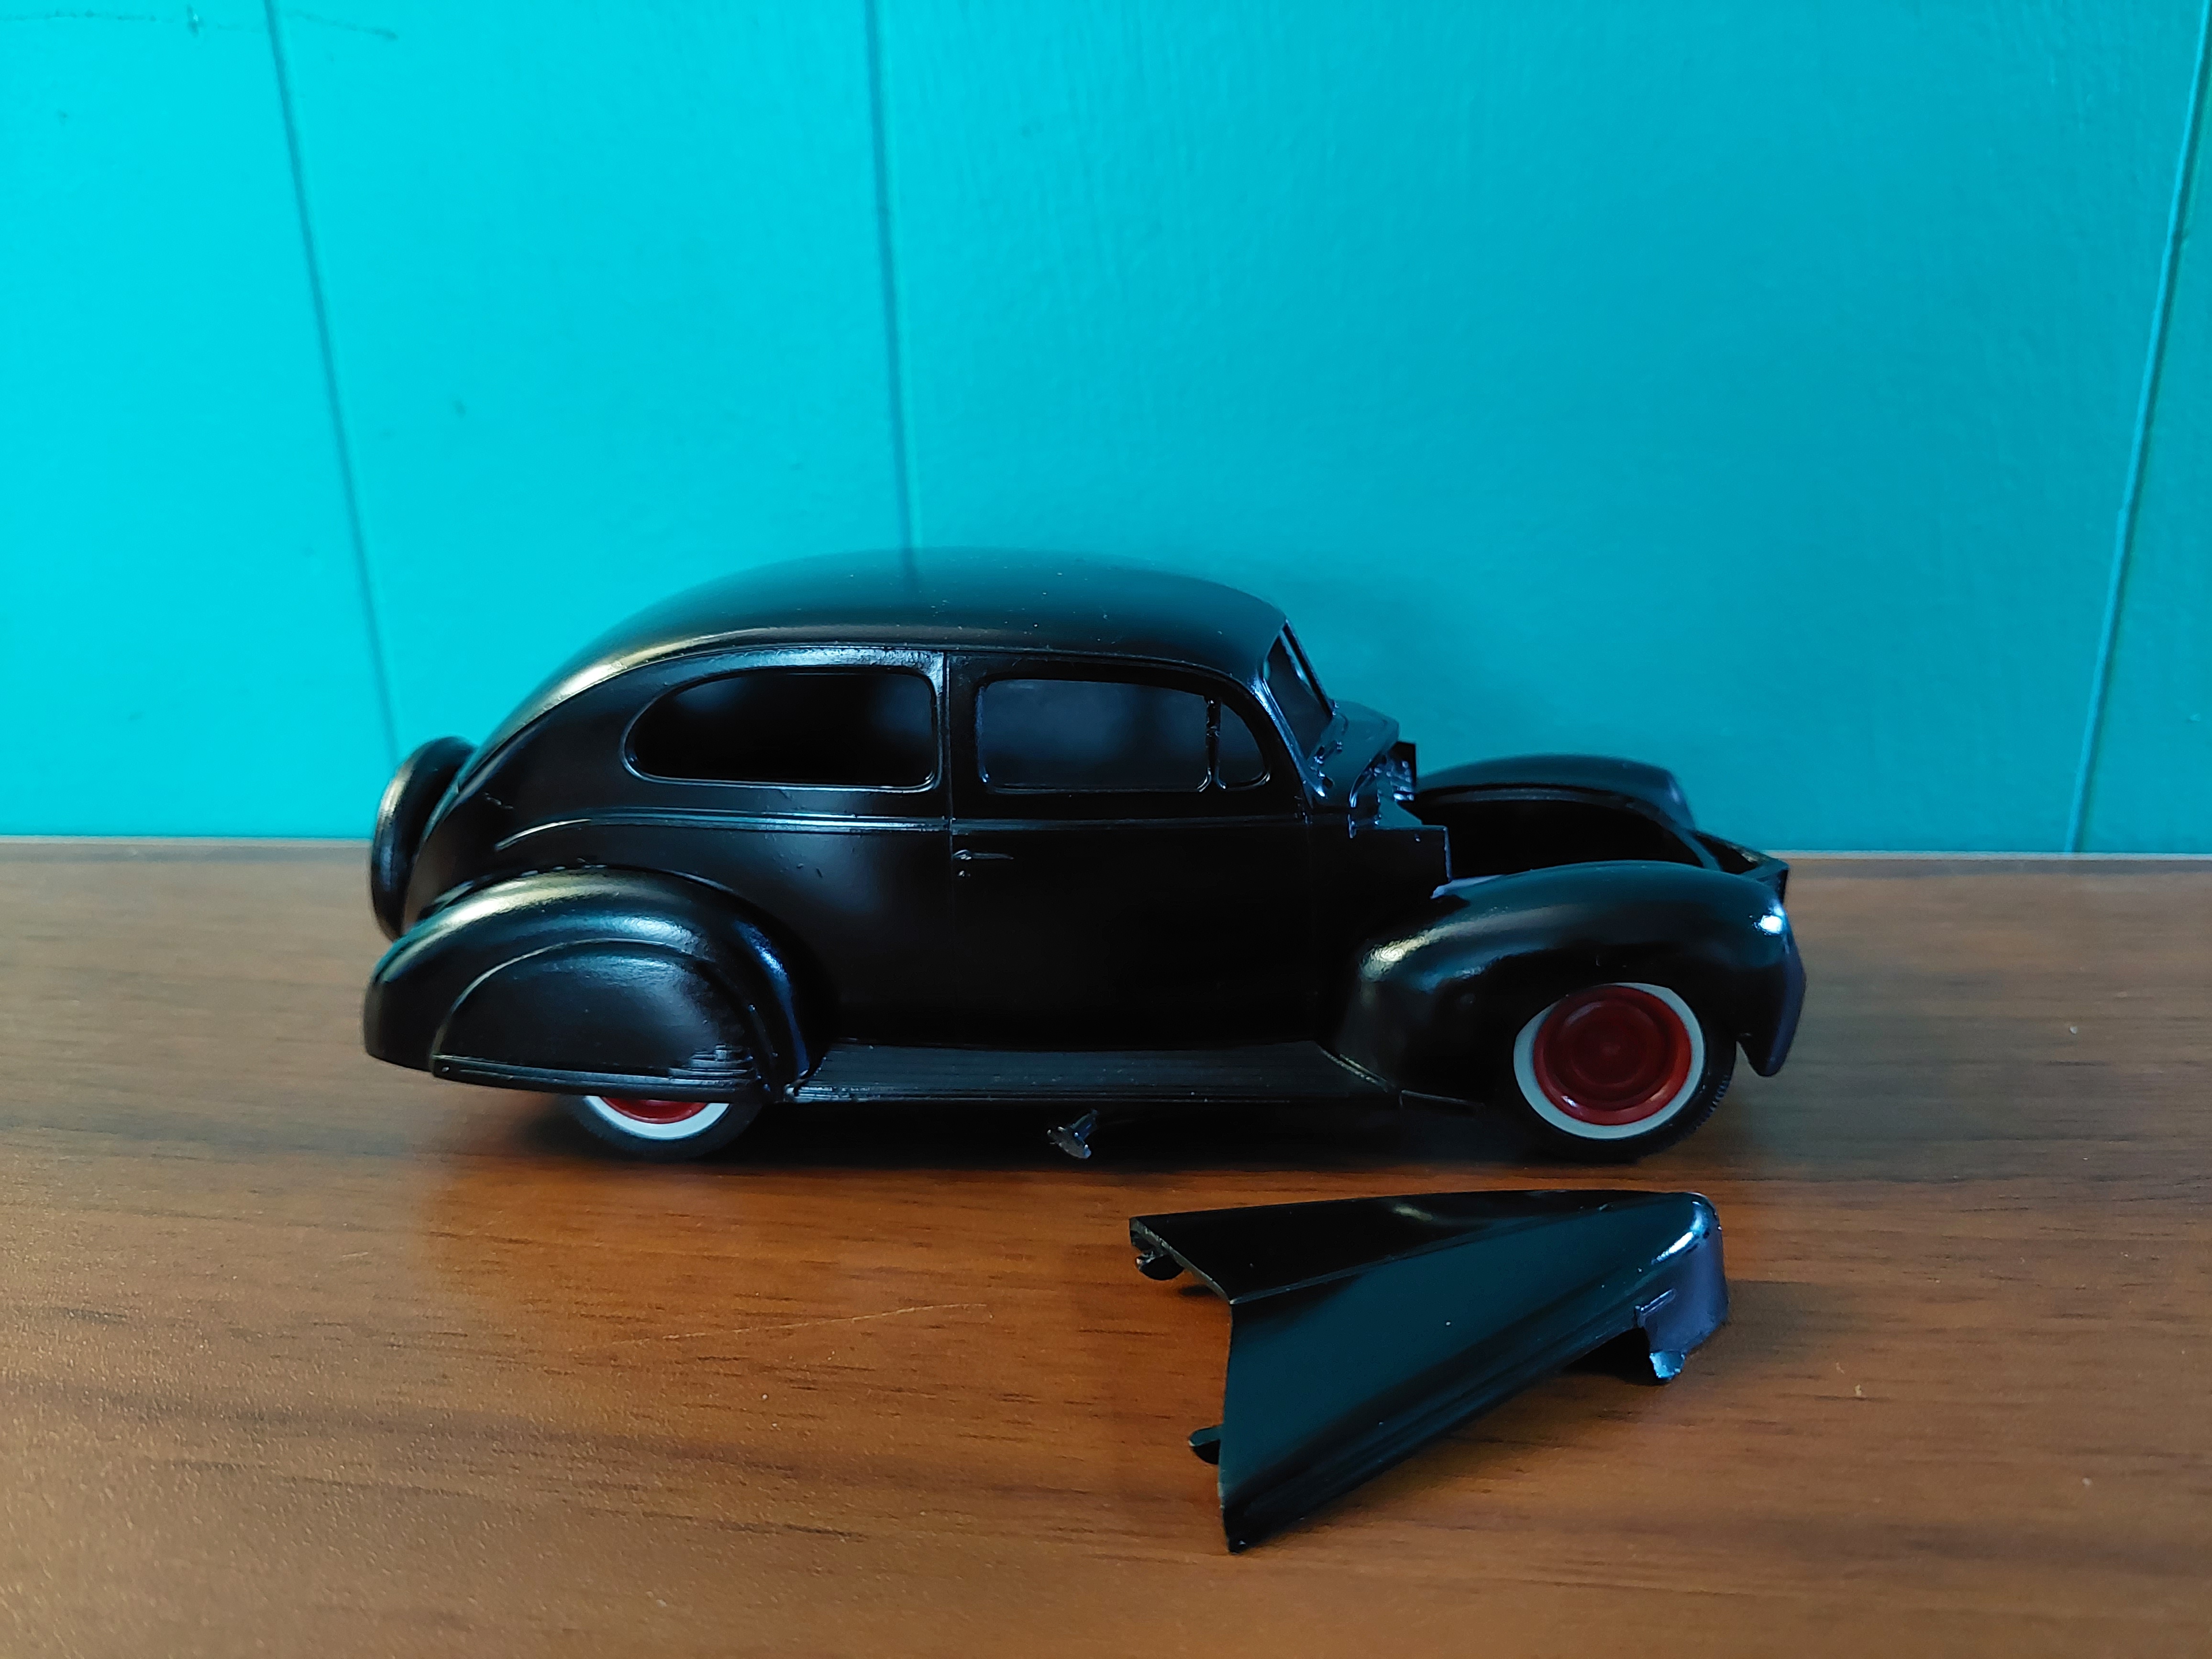
Finally done. Pretty much all AMT 40 Ford sedan kit parts although its from many 40 Ford AMT kits ,except the 40 Merc grille, its resin.
-
Thanks Carl, I shot the interior Tamiya Dark Earth (almost a light cocoa color) with darker accents on seats inserts and strip on the doors with deep maroon for the dash.
-
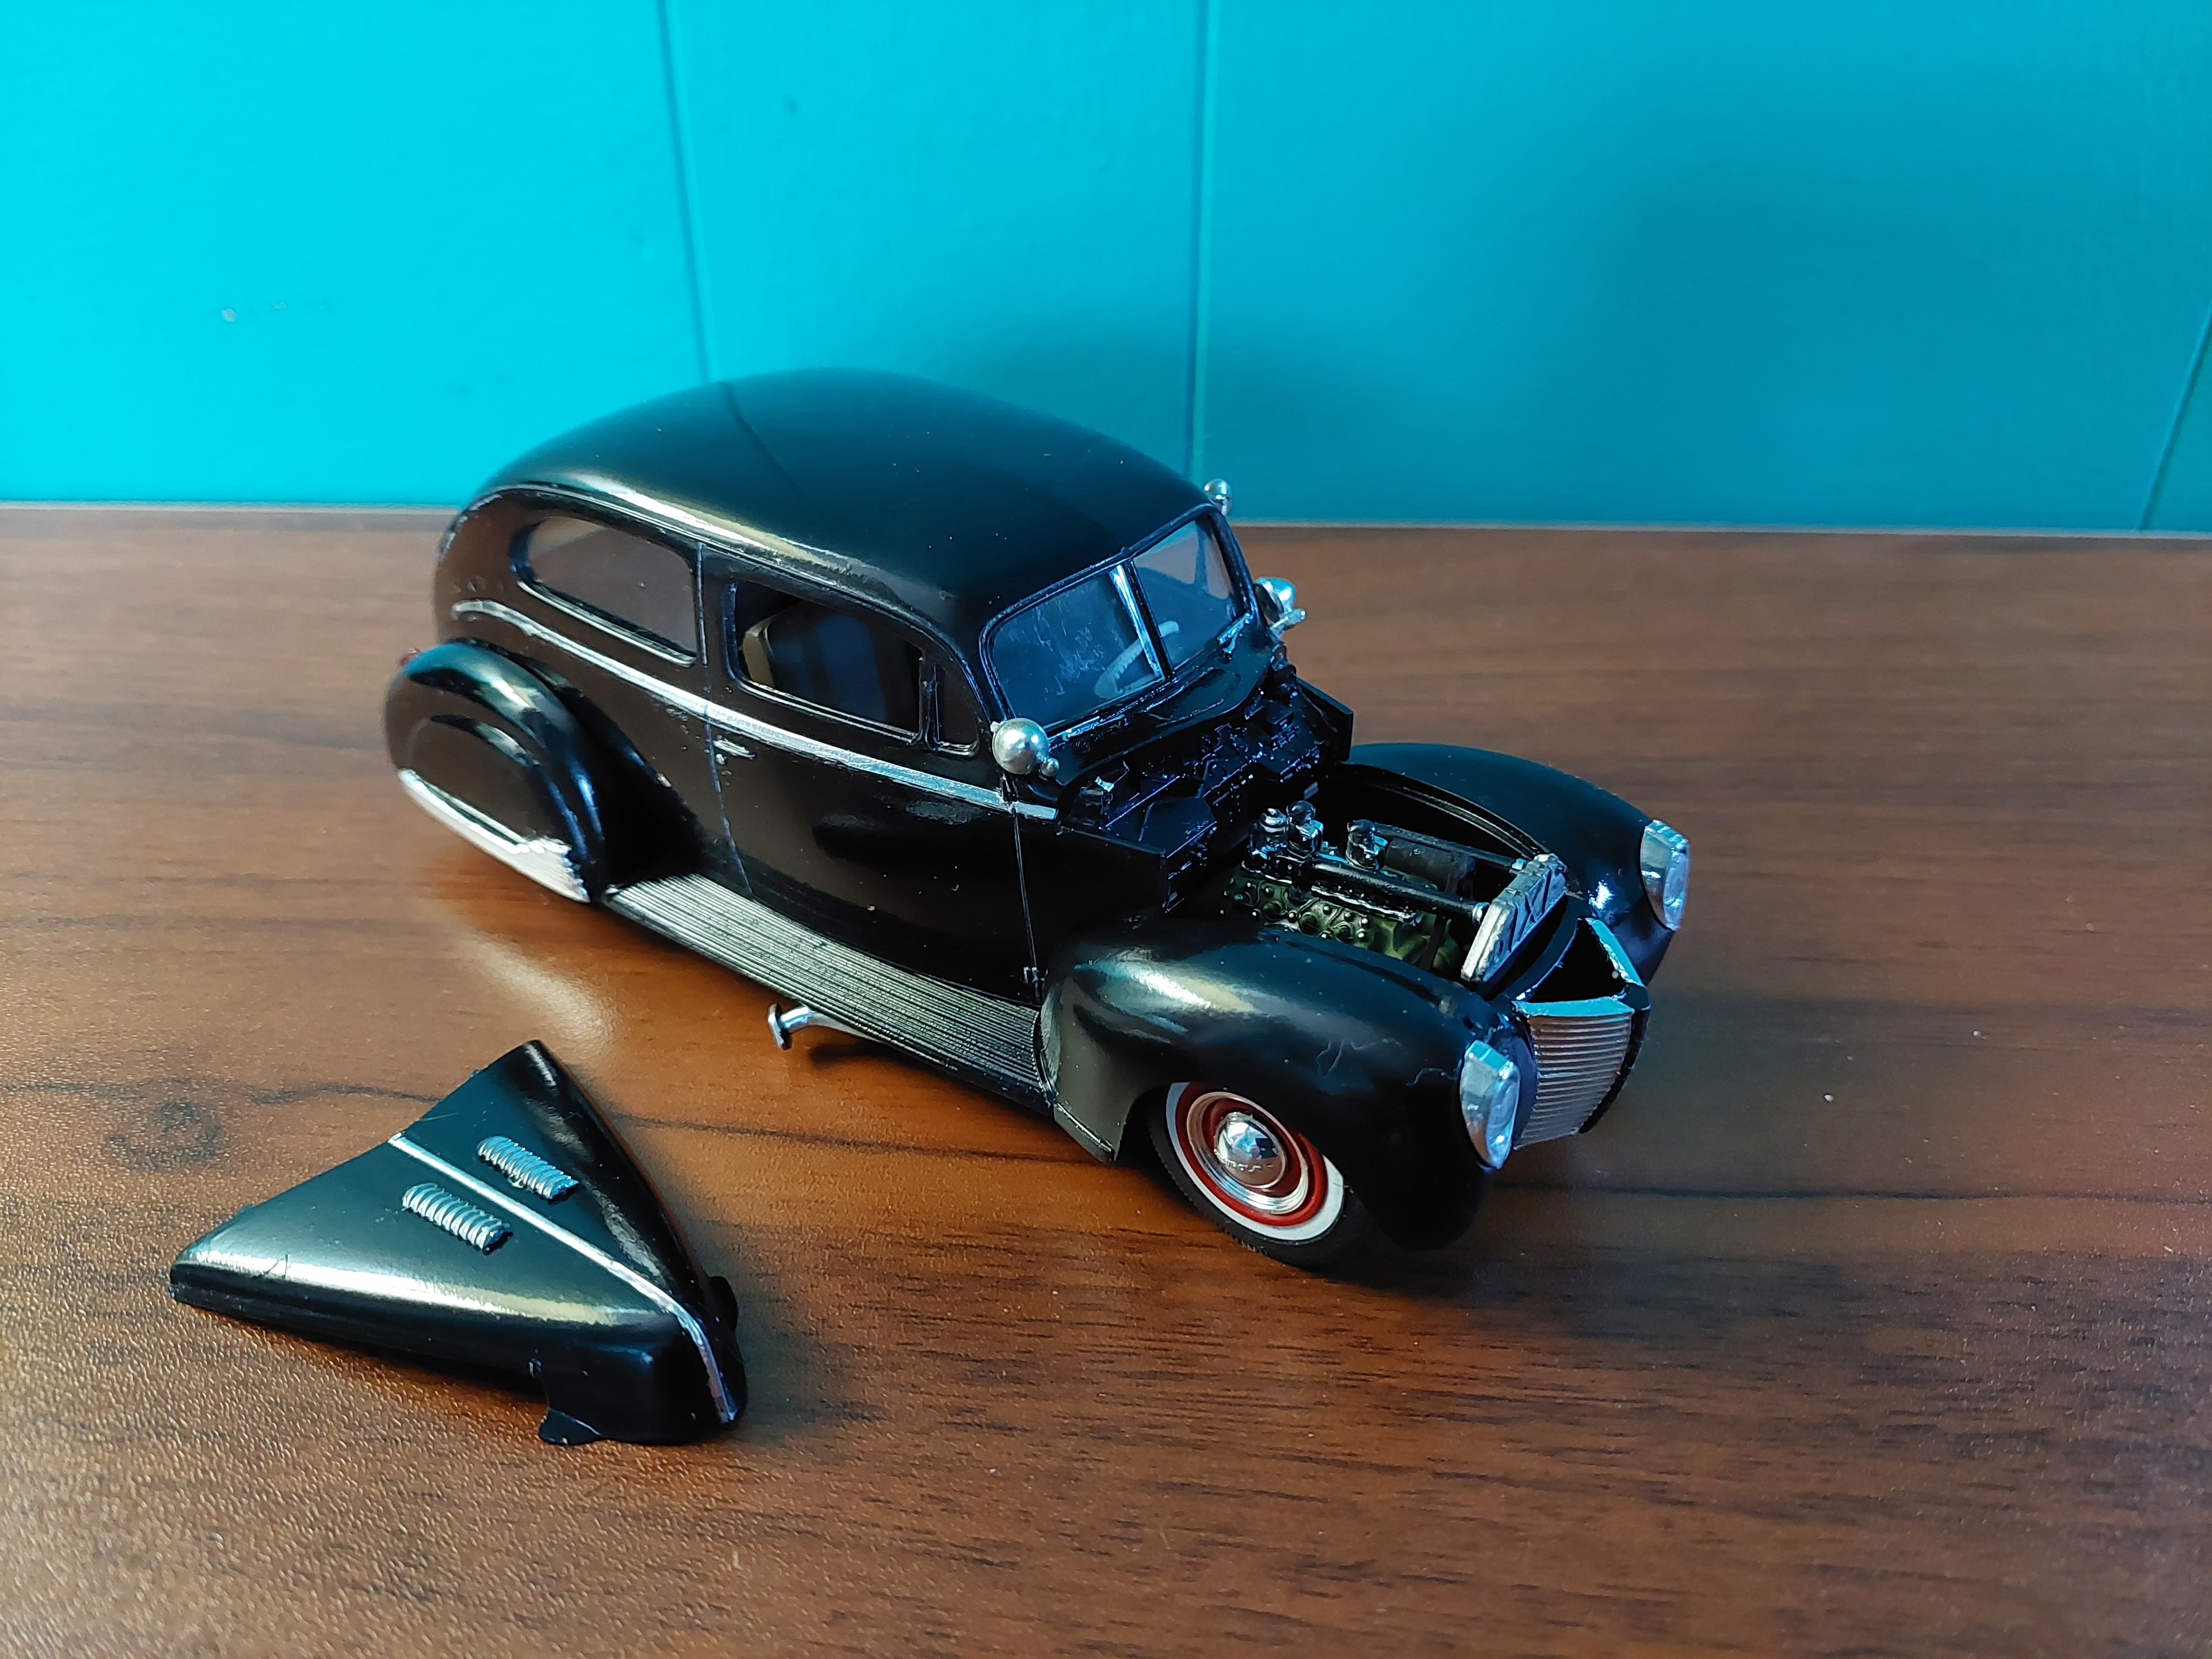
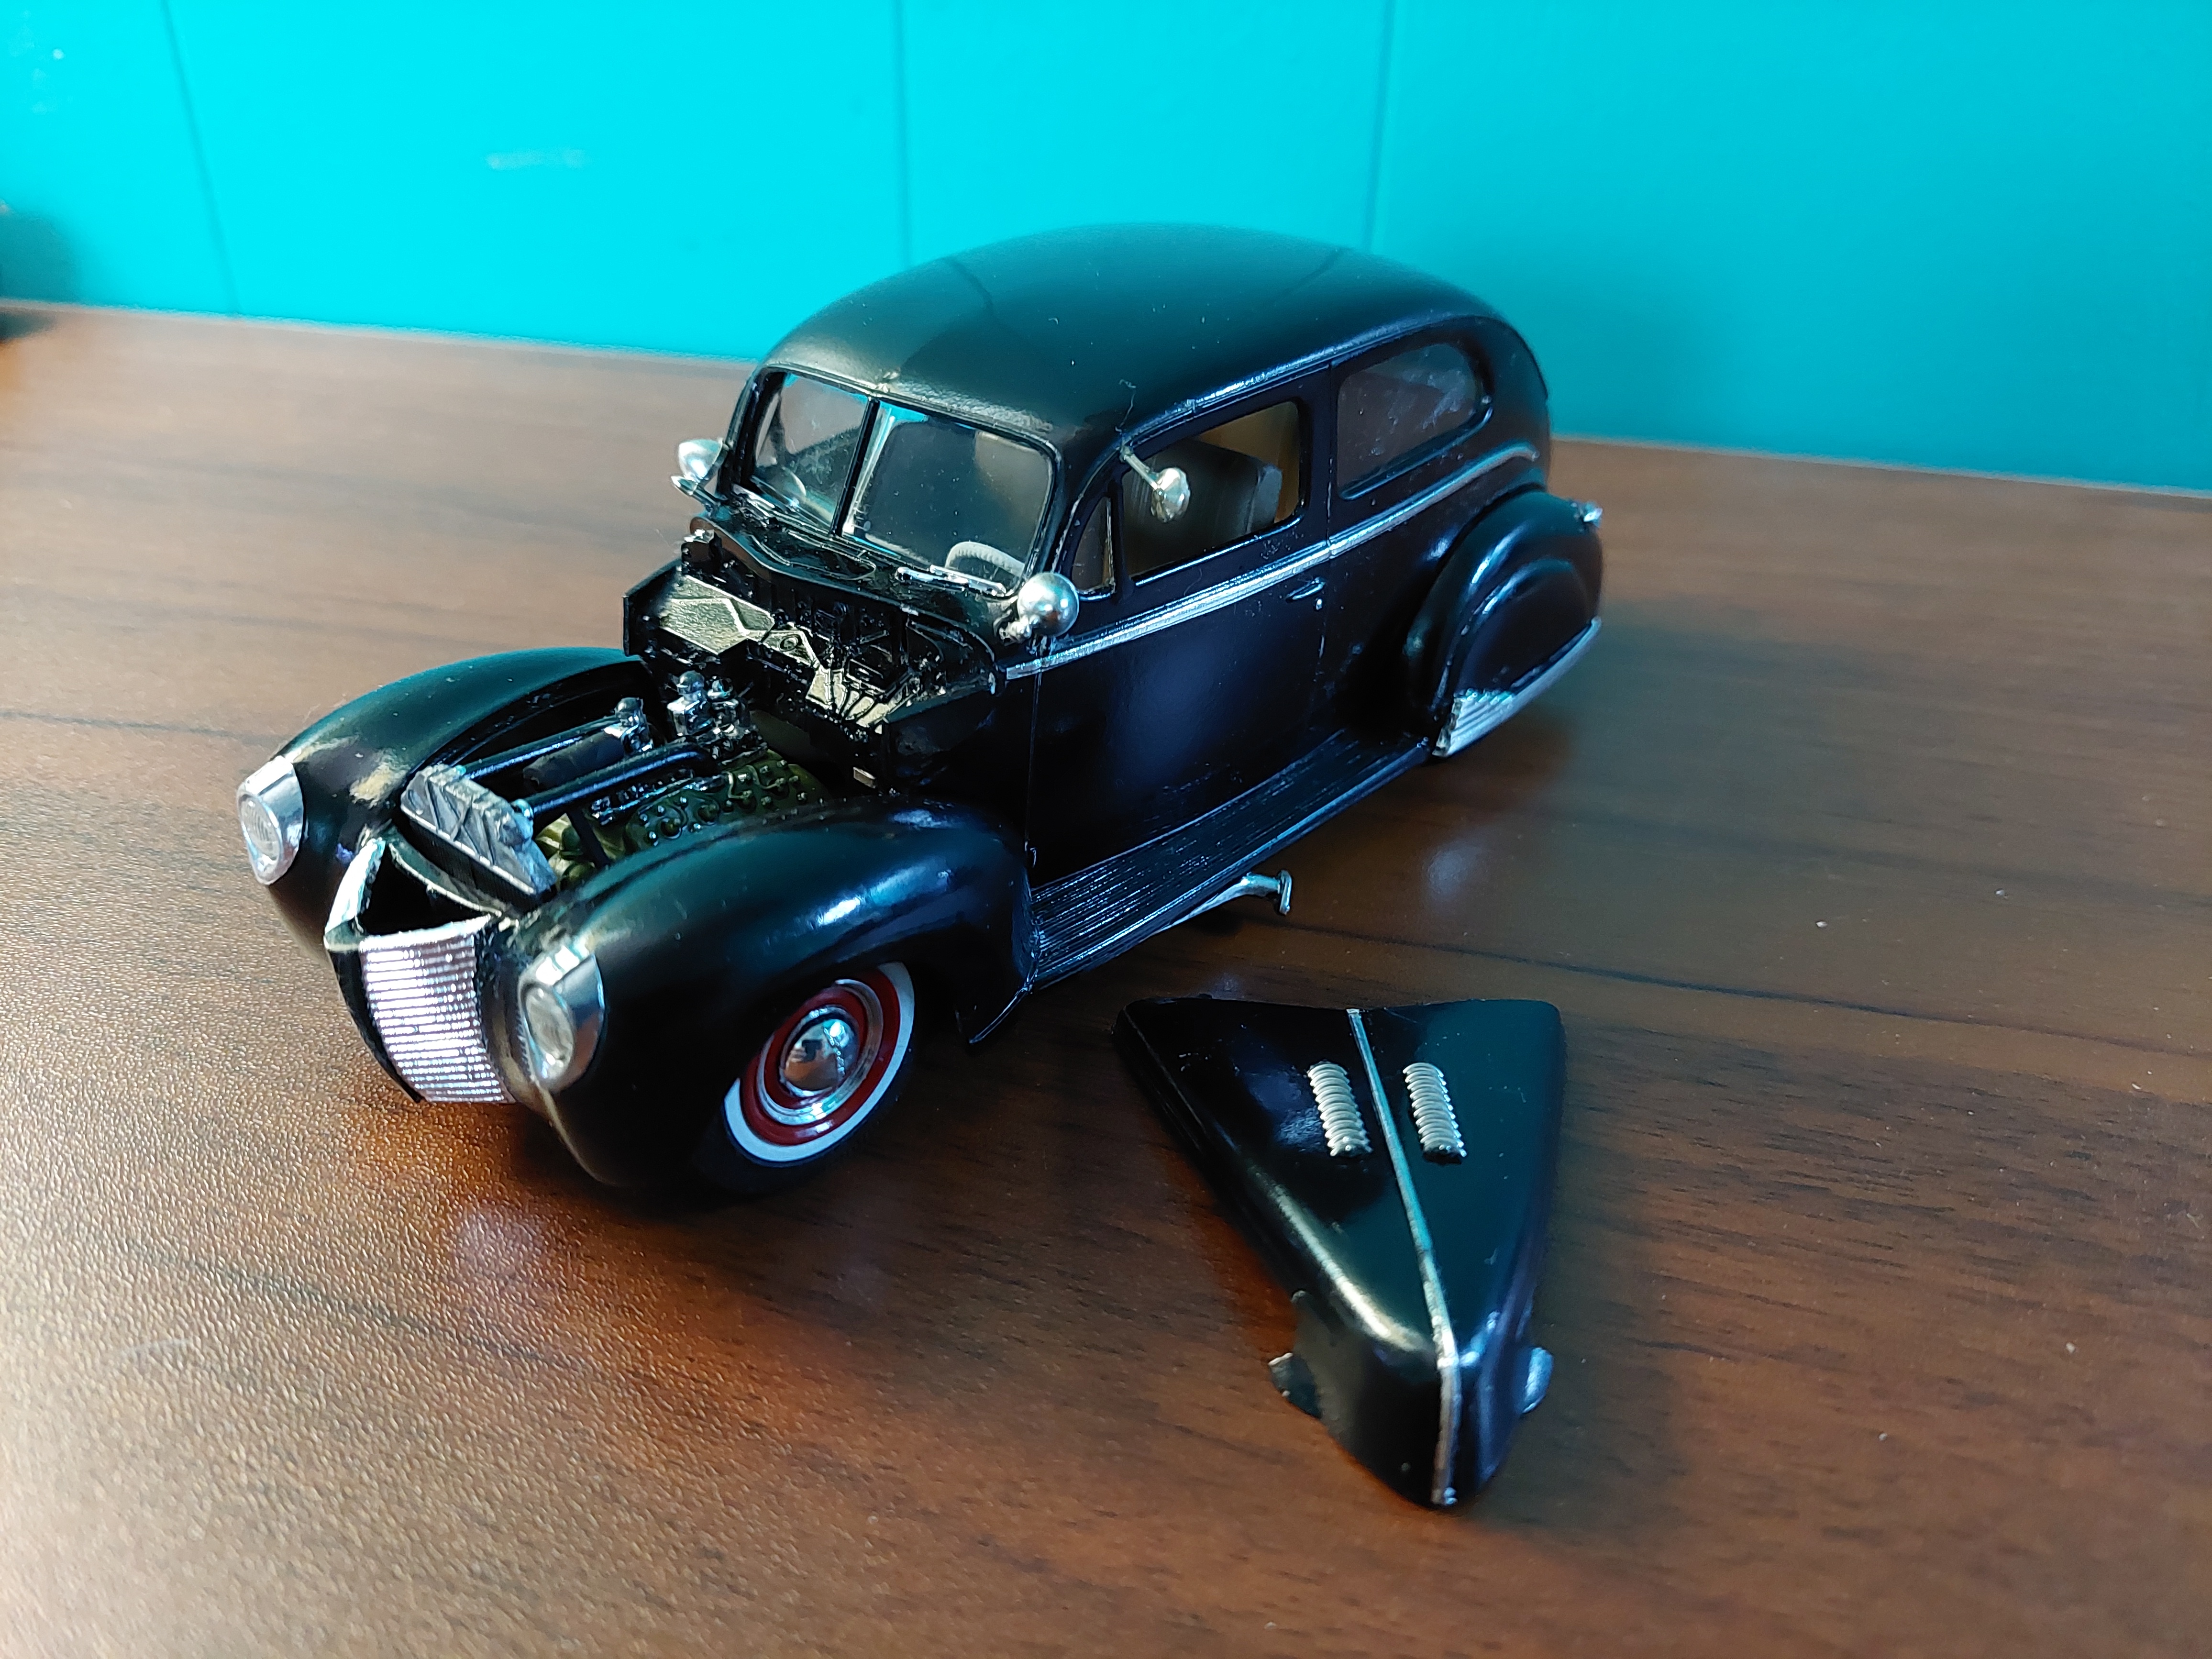
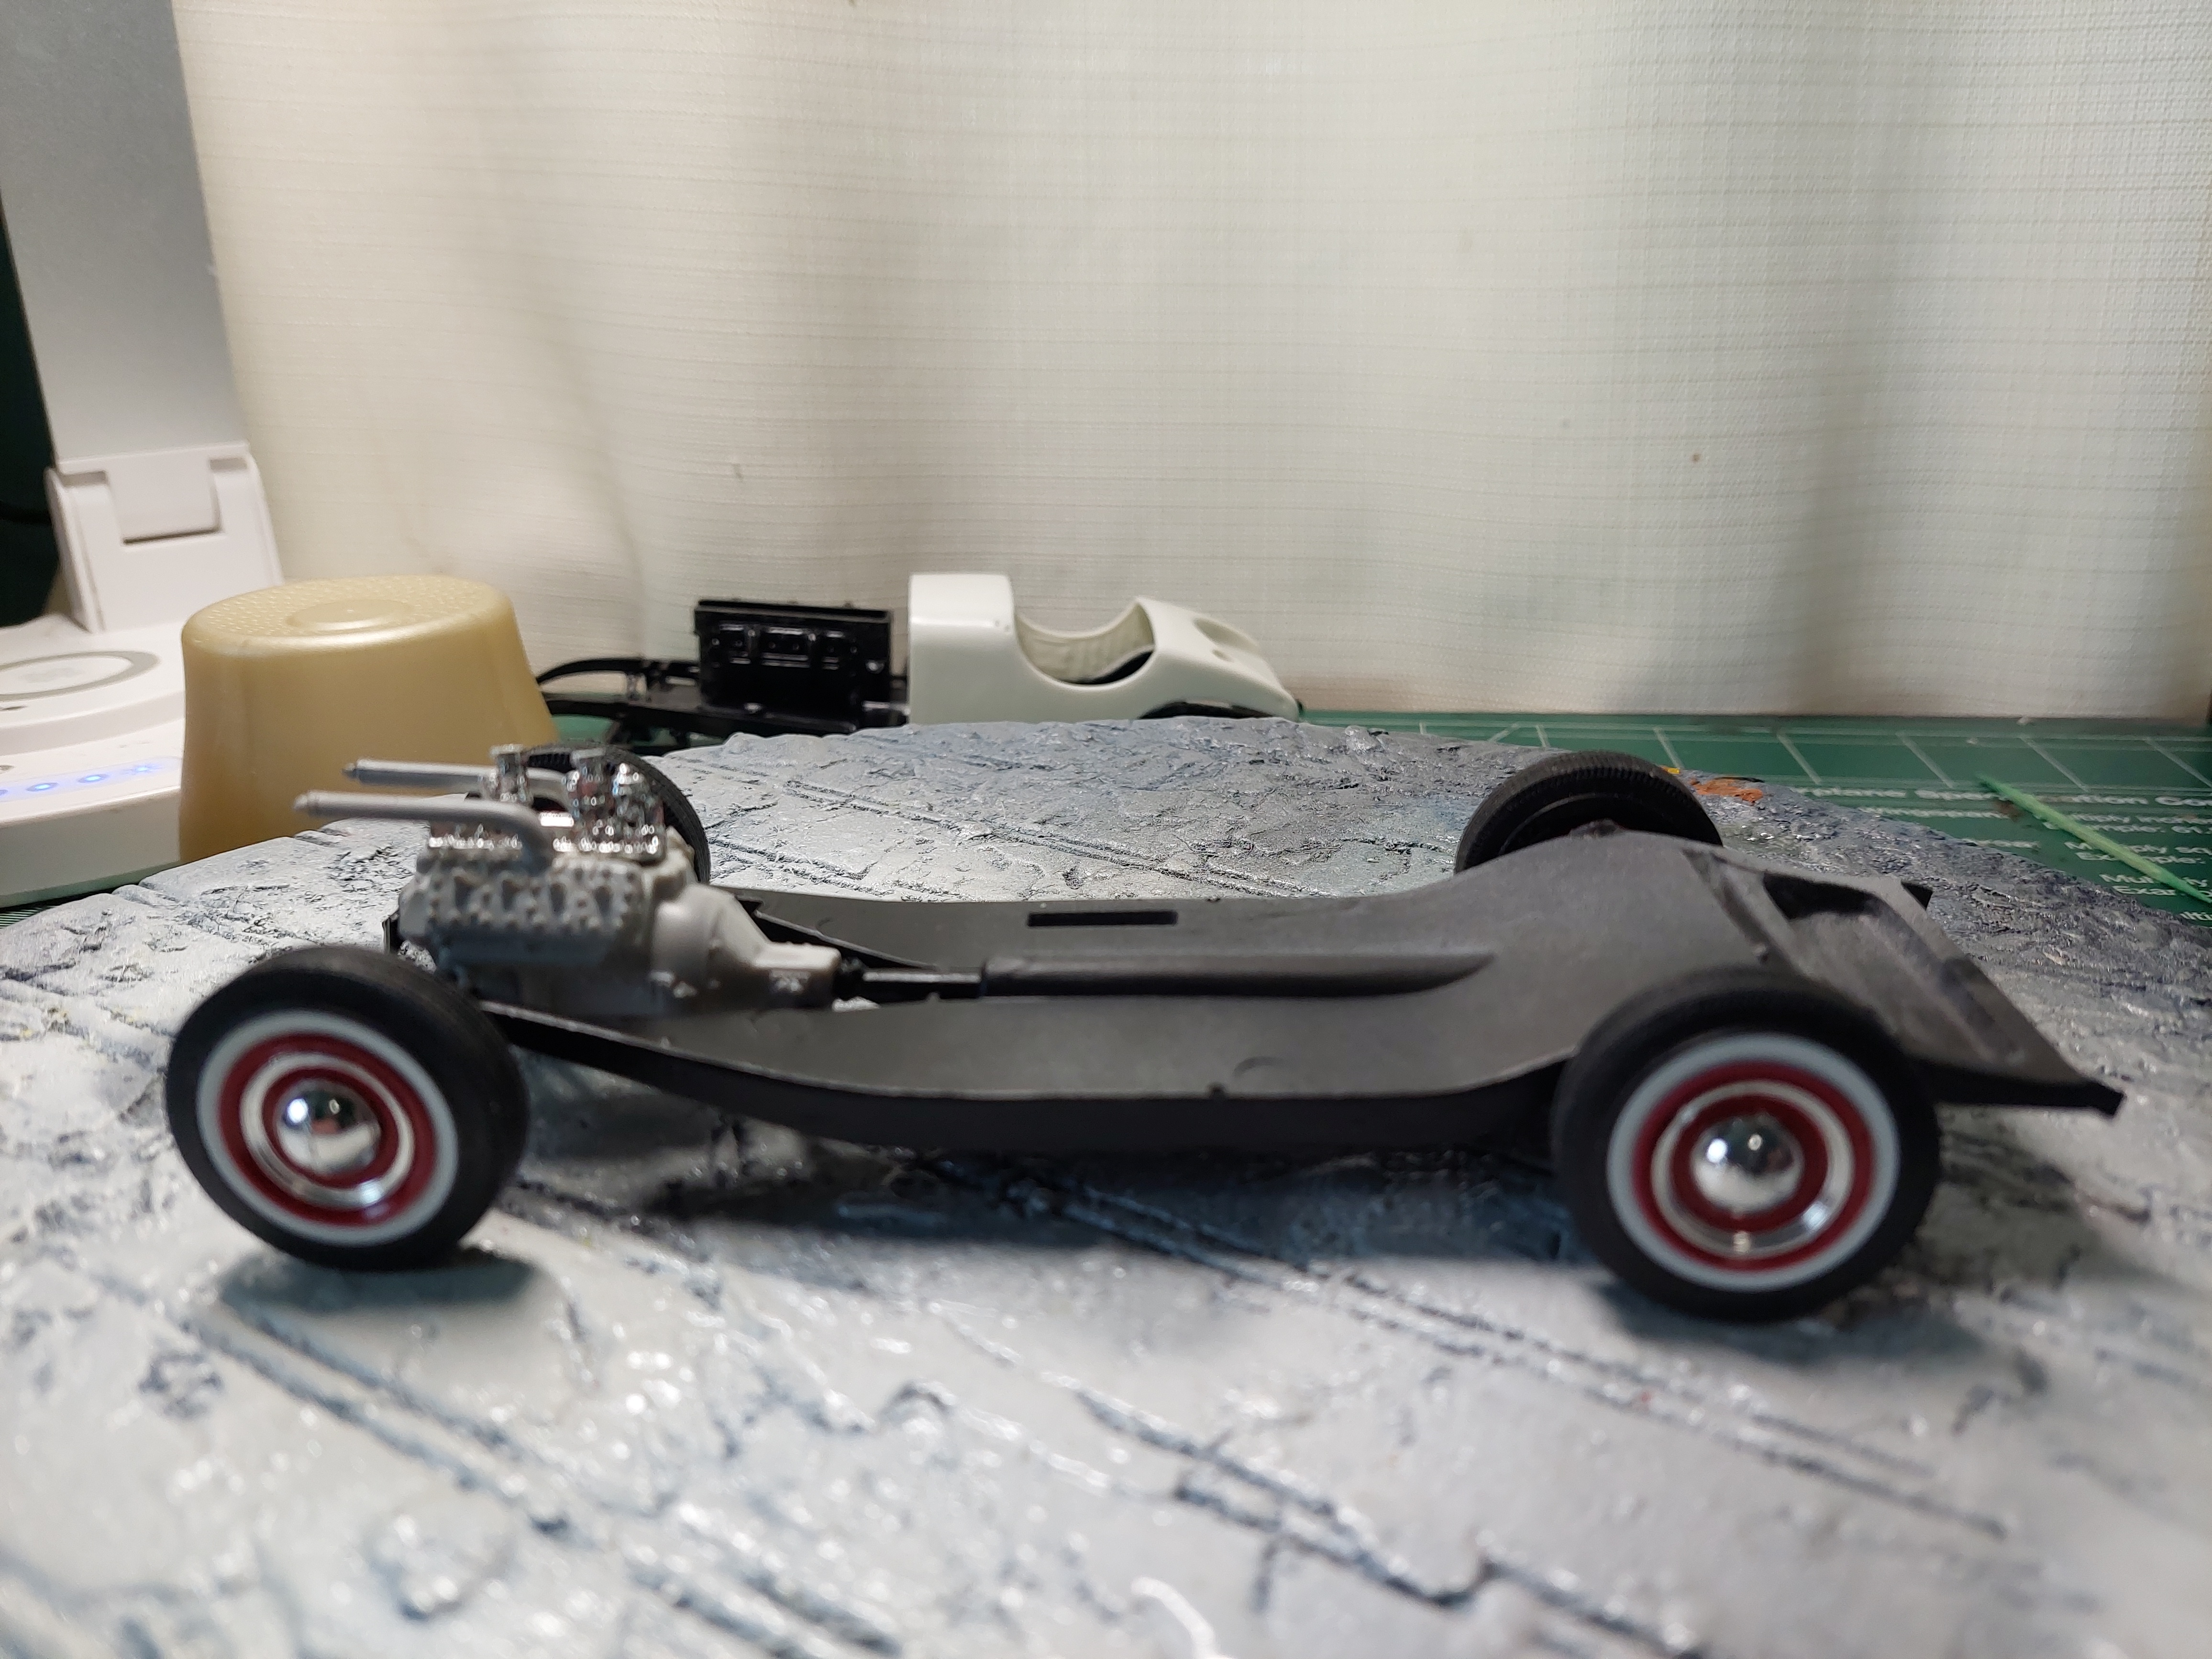
This week is getting the chrome foiling done. Most of the flathead is done and installed. Interior is in primer but not sure on the color.
-
Chassis done, body has last coat of clear on ,that makes 3 coats. Soon as that cures up I'm trying out Tamiya rubbing compounds. I've only used polishing cloth method before never used the coarse,fine and finish compounds. I think black is not going to be the color to test new waters on.?
-
Body is done. I changed a few things with the hood sides and attached rear of hood corners to the firewall. Color is Tamiya semi-gloss then cleared. Now the wait for this to cure, so the interior and flathead up next. Mercury resin grille blended in fine with the help of evergreen strips on the sides.
-
Had a trade with "slusher" . No muss no fuss just some old fashion honest horse trading, thanks Carl . Ken
-
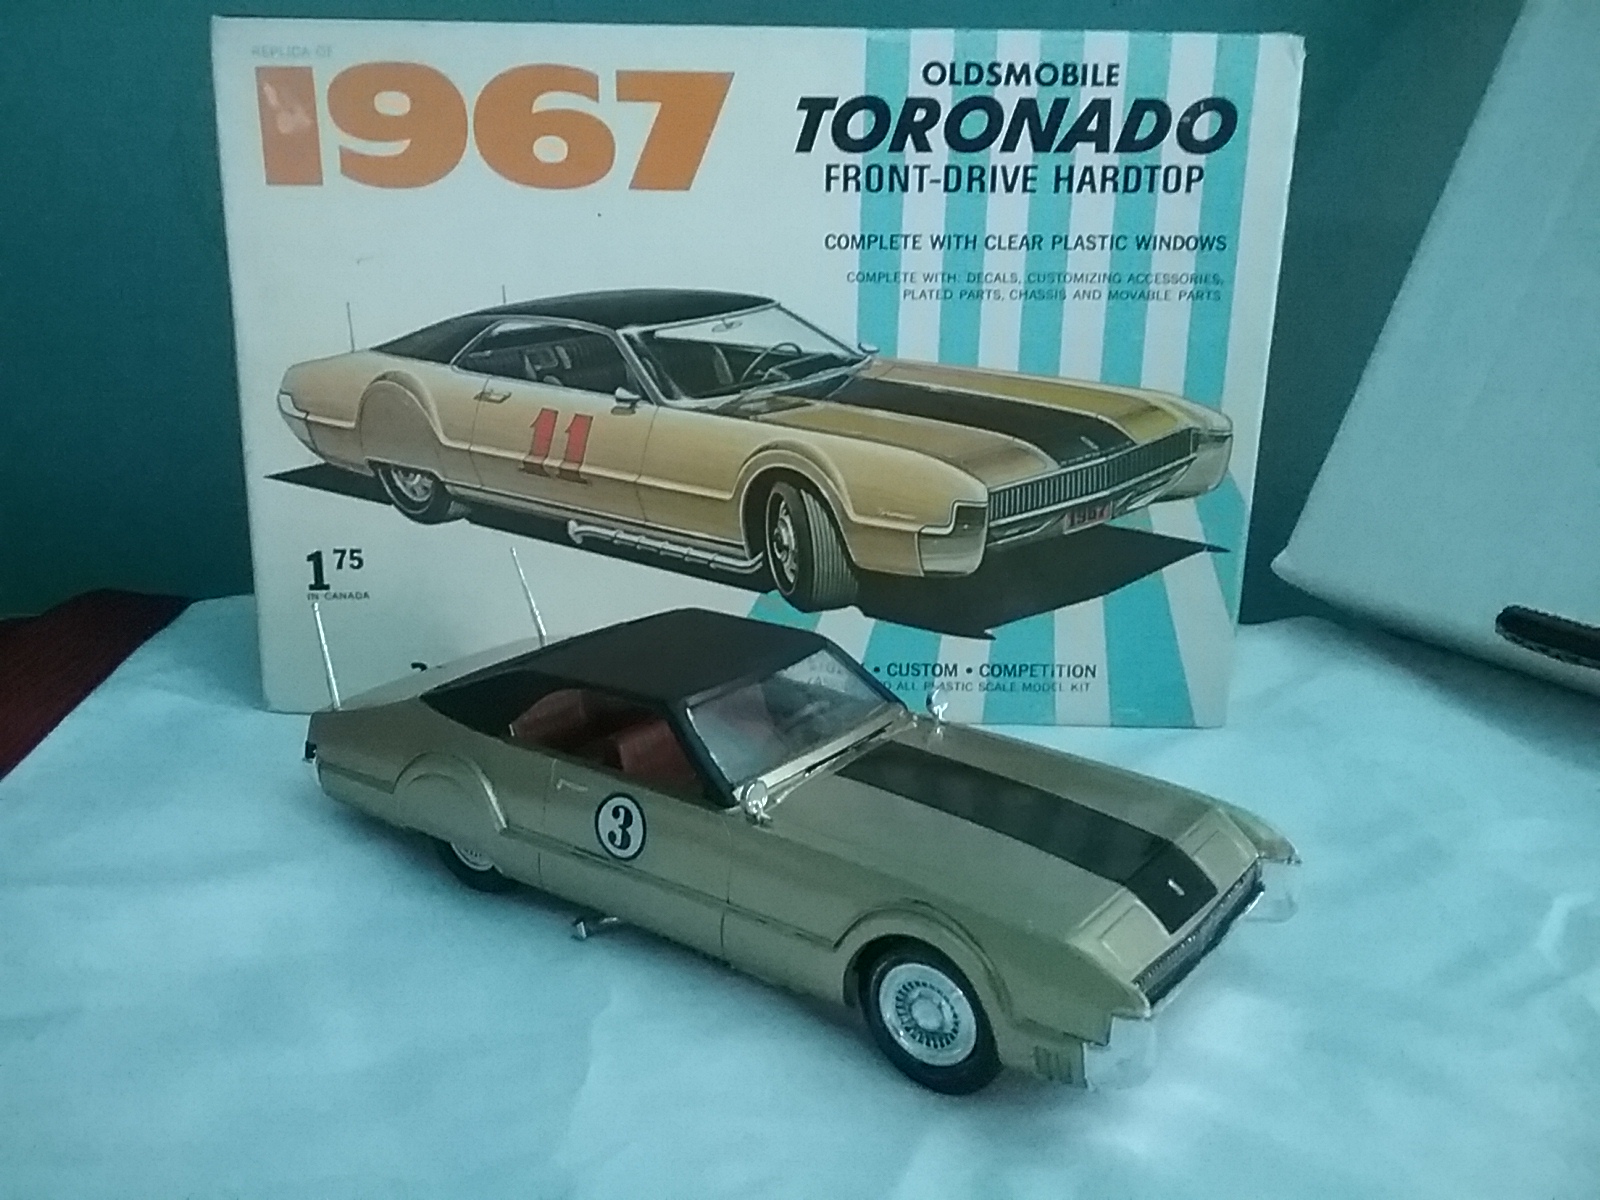
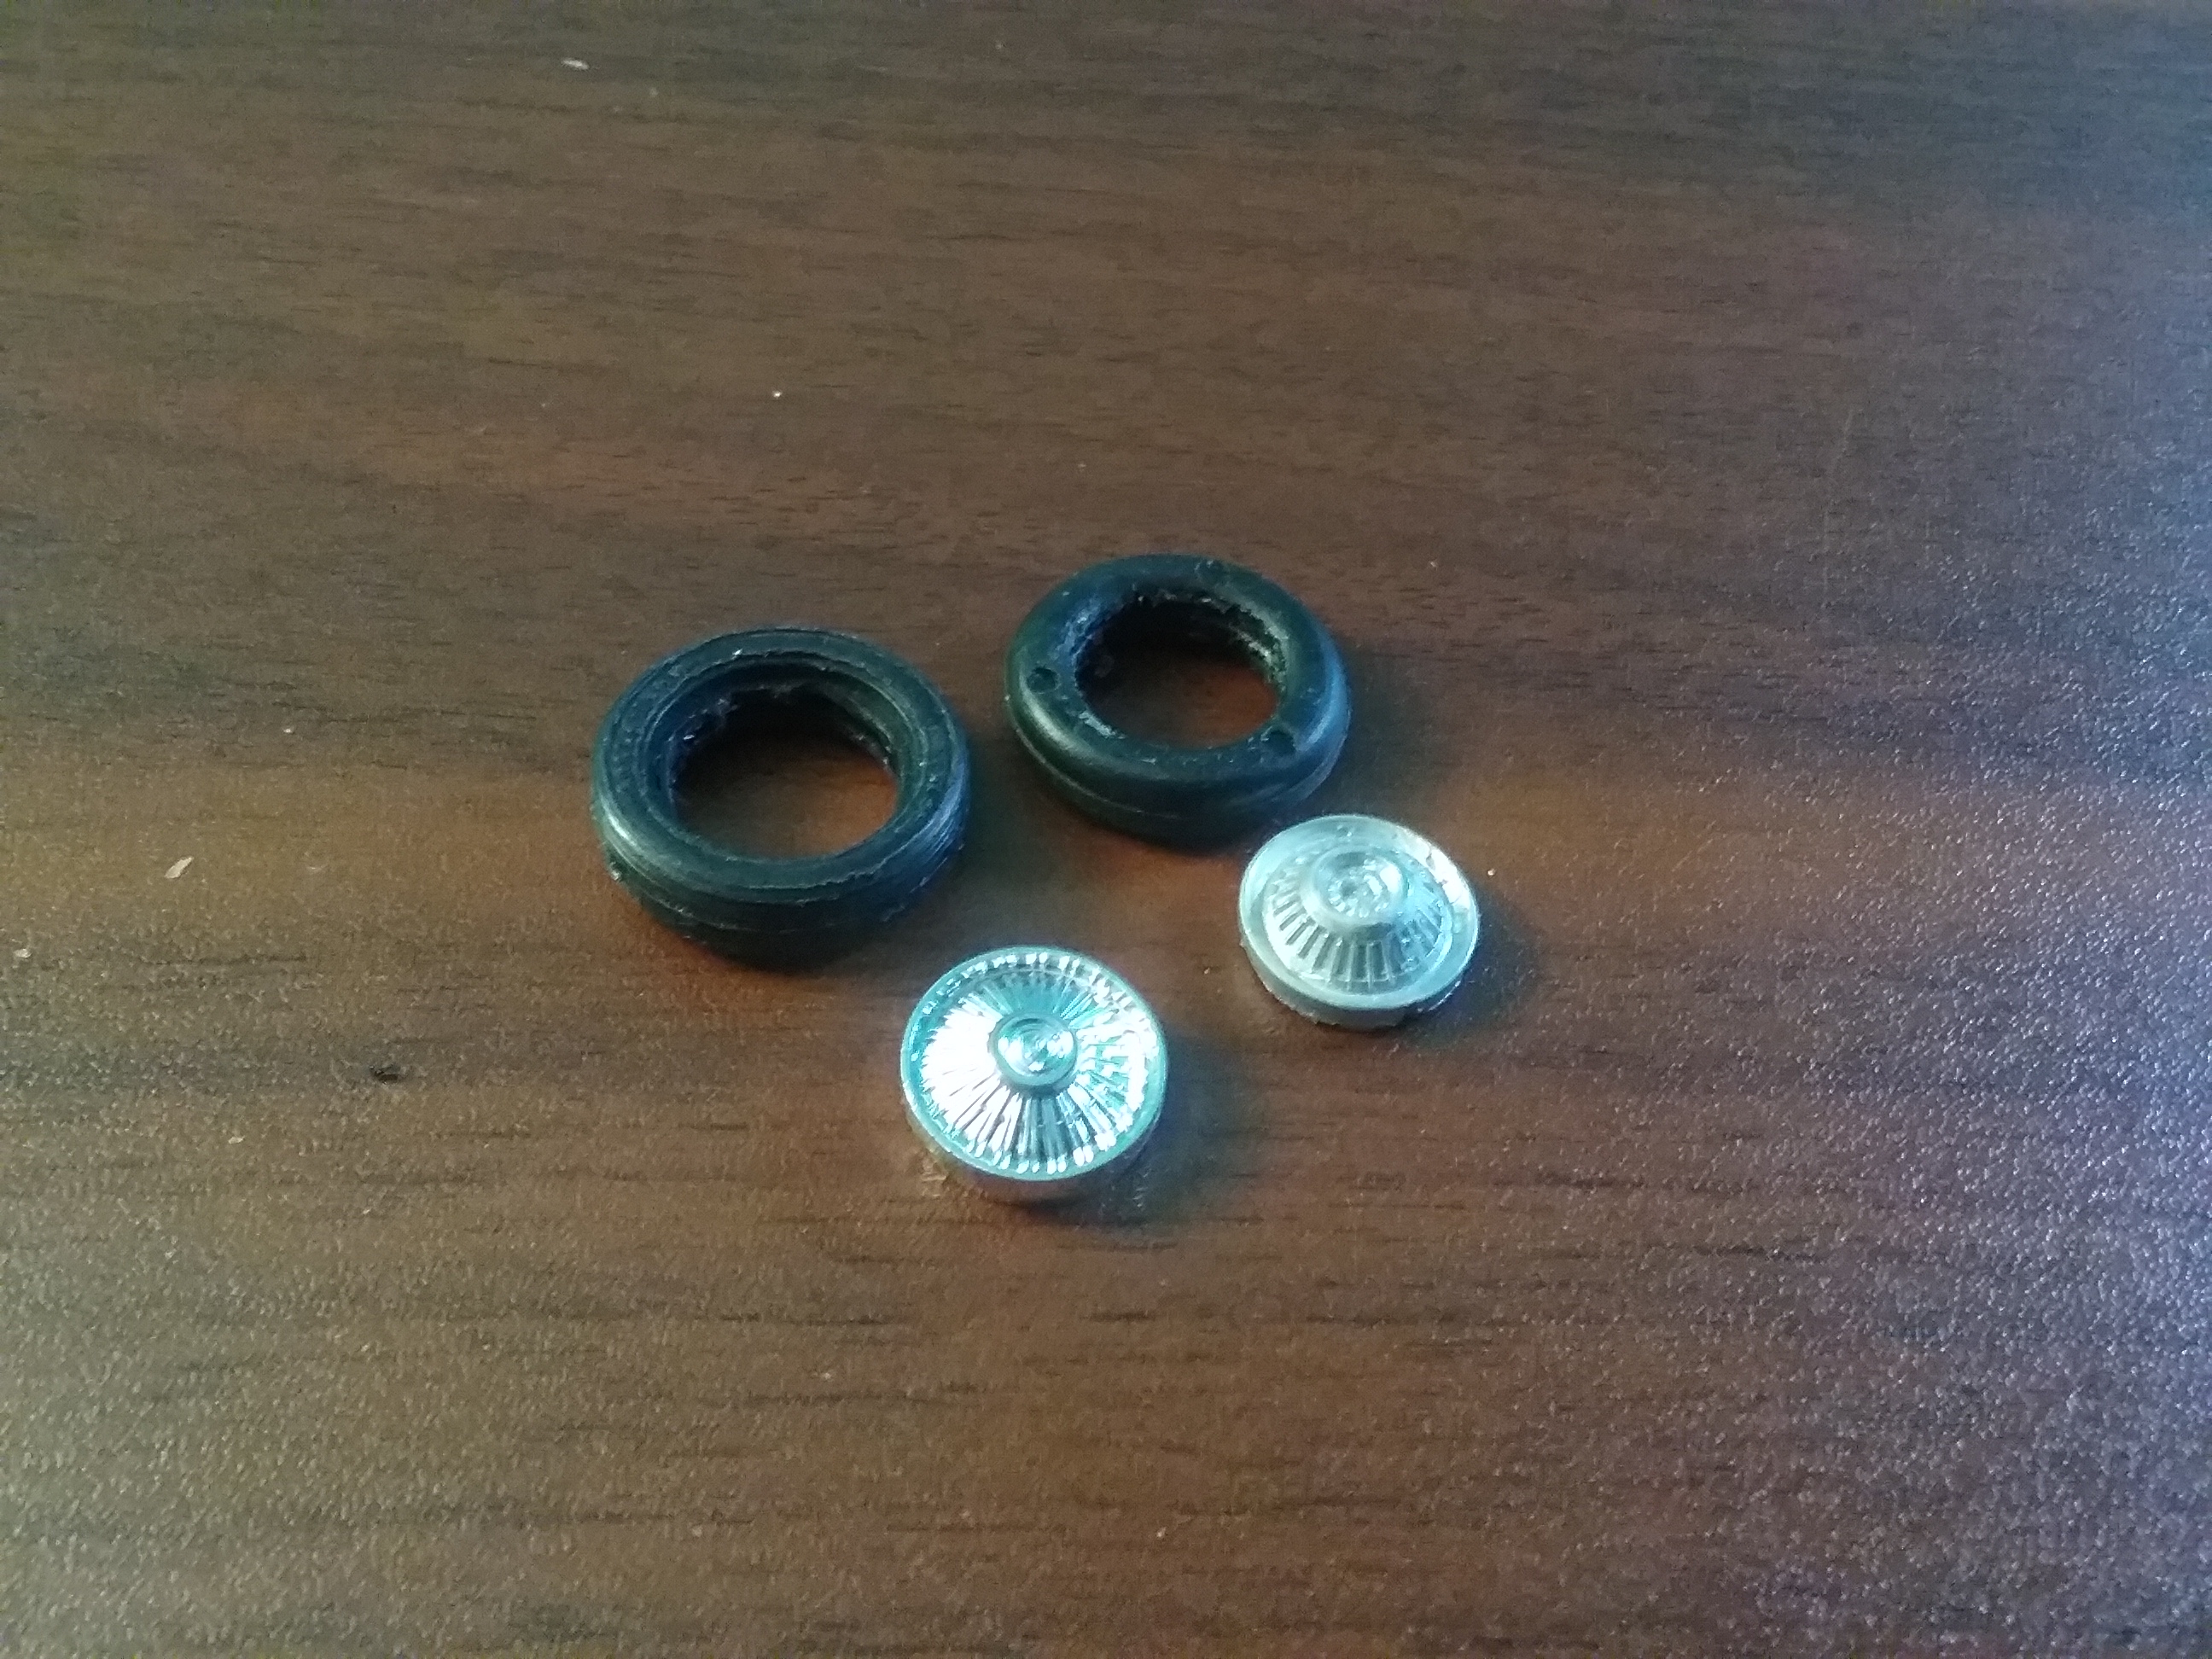
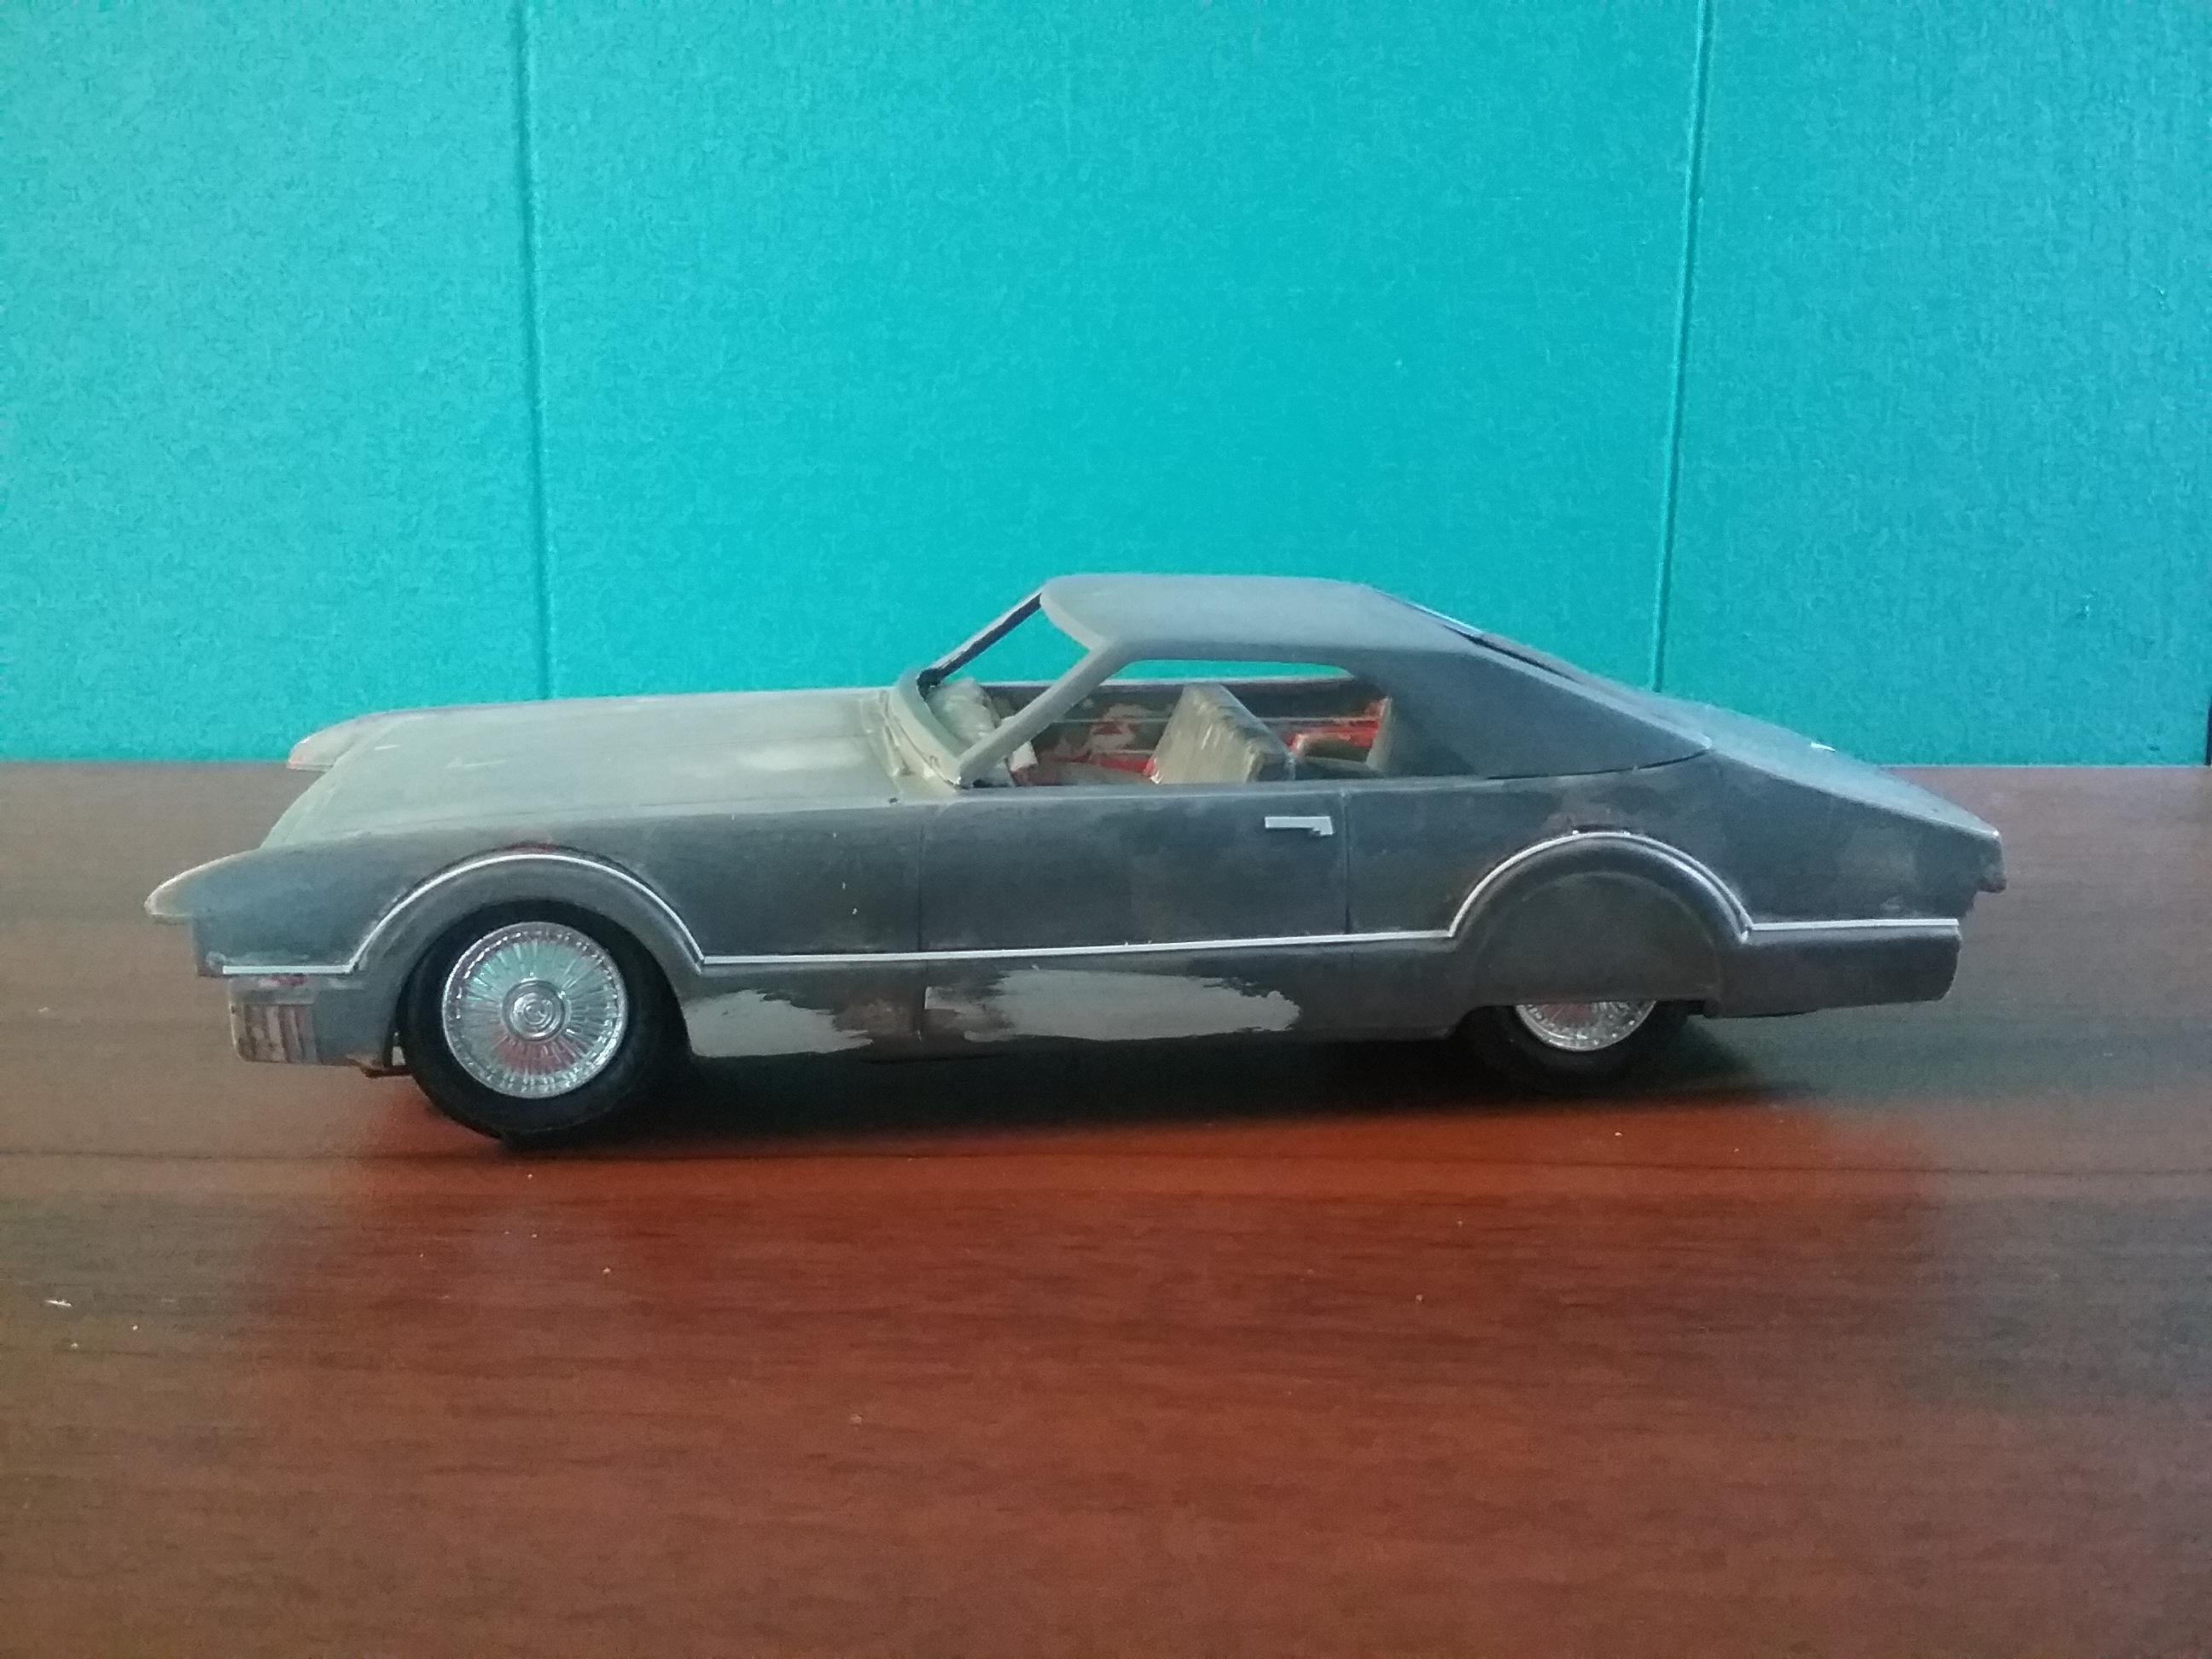
That's a fact...I'm not sure even what oddball scale it is. I used 1:25th tires and hub caps on this Toronado.
-
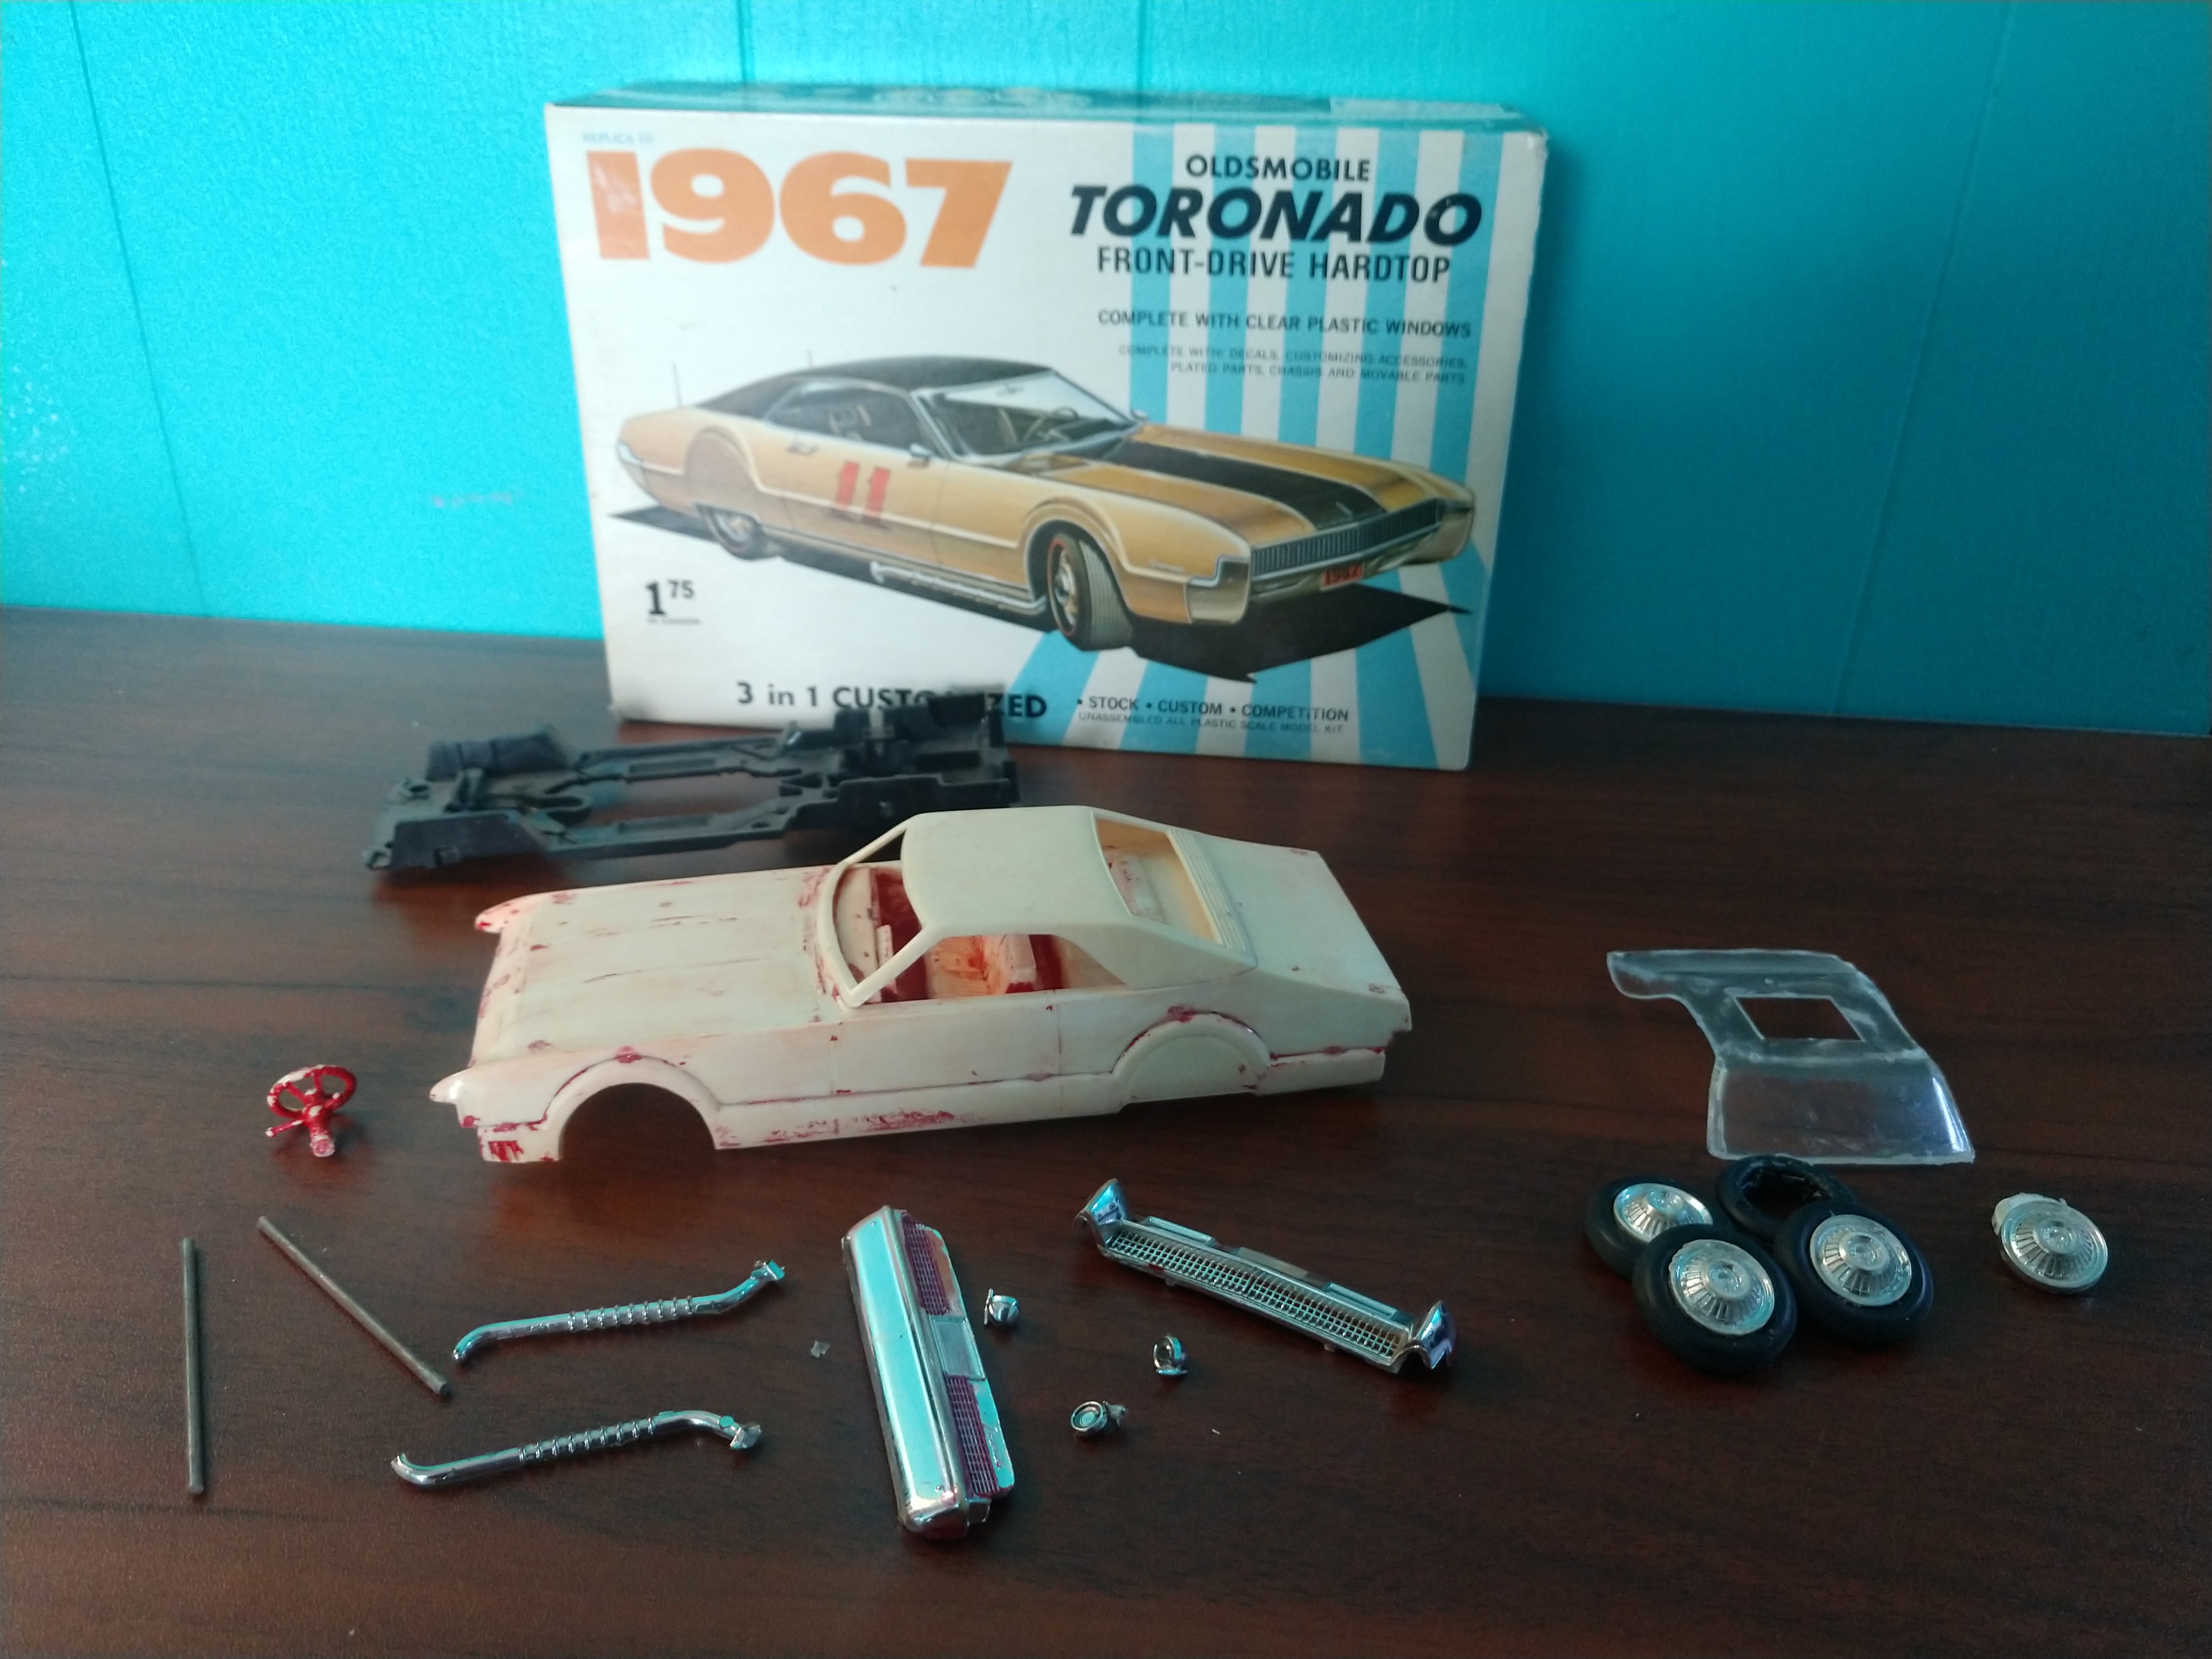
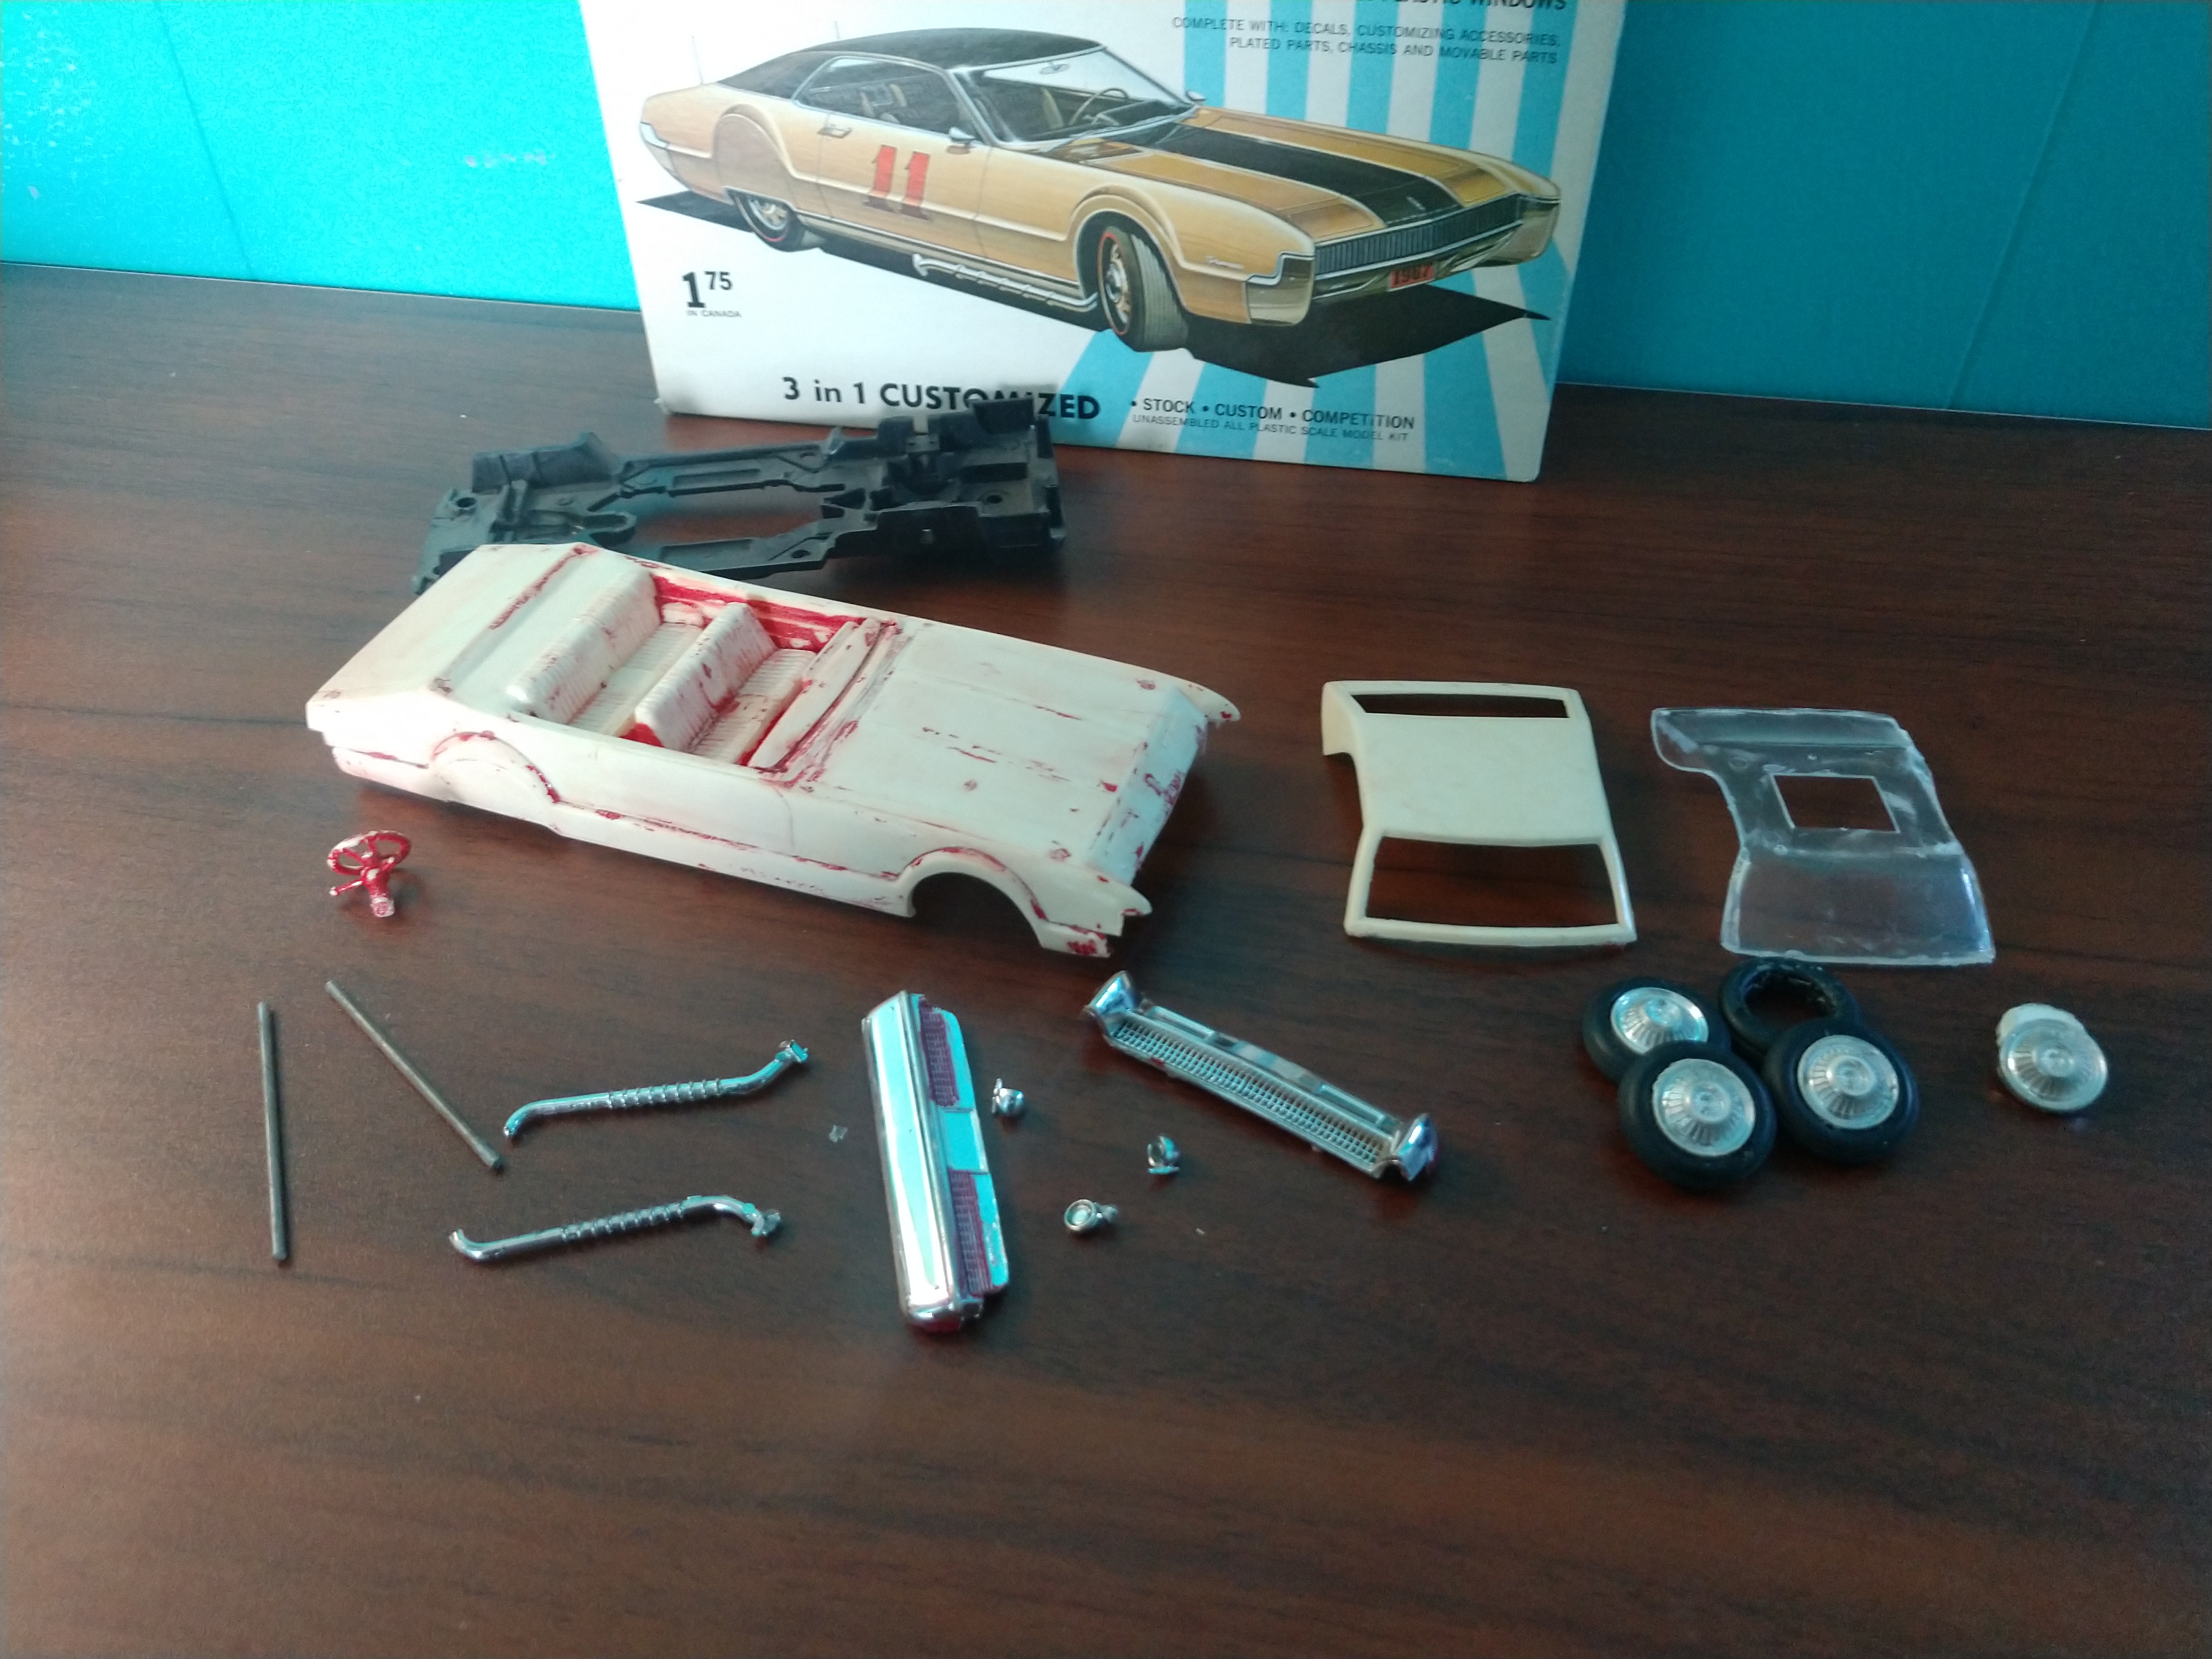
Now I can say "Built that-Done that". The one thing that really baffles me is when models were all the rave in the 60s and 70s with Johan ,MPC , AMT , Revell and Monogram , this $1.75 price tag printed on the box was only slightly lower than the other manufacturers of that era.
-
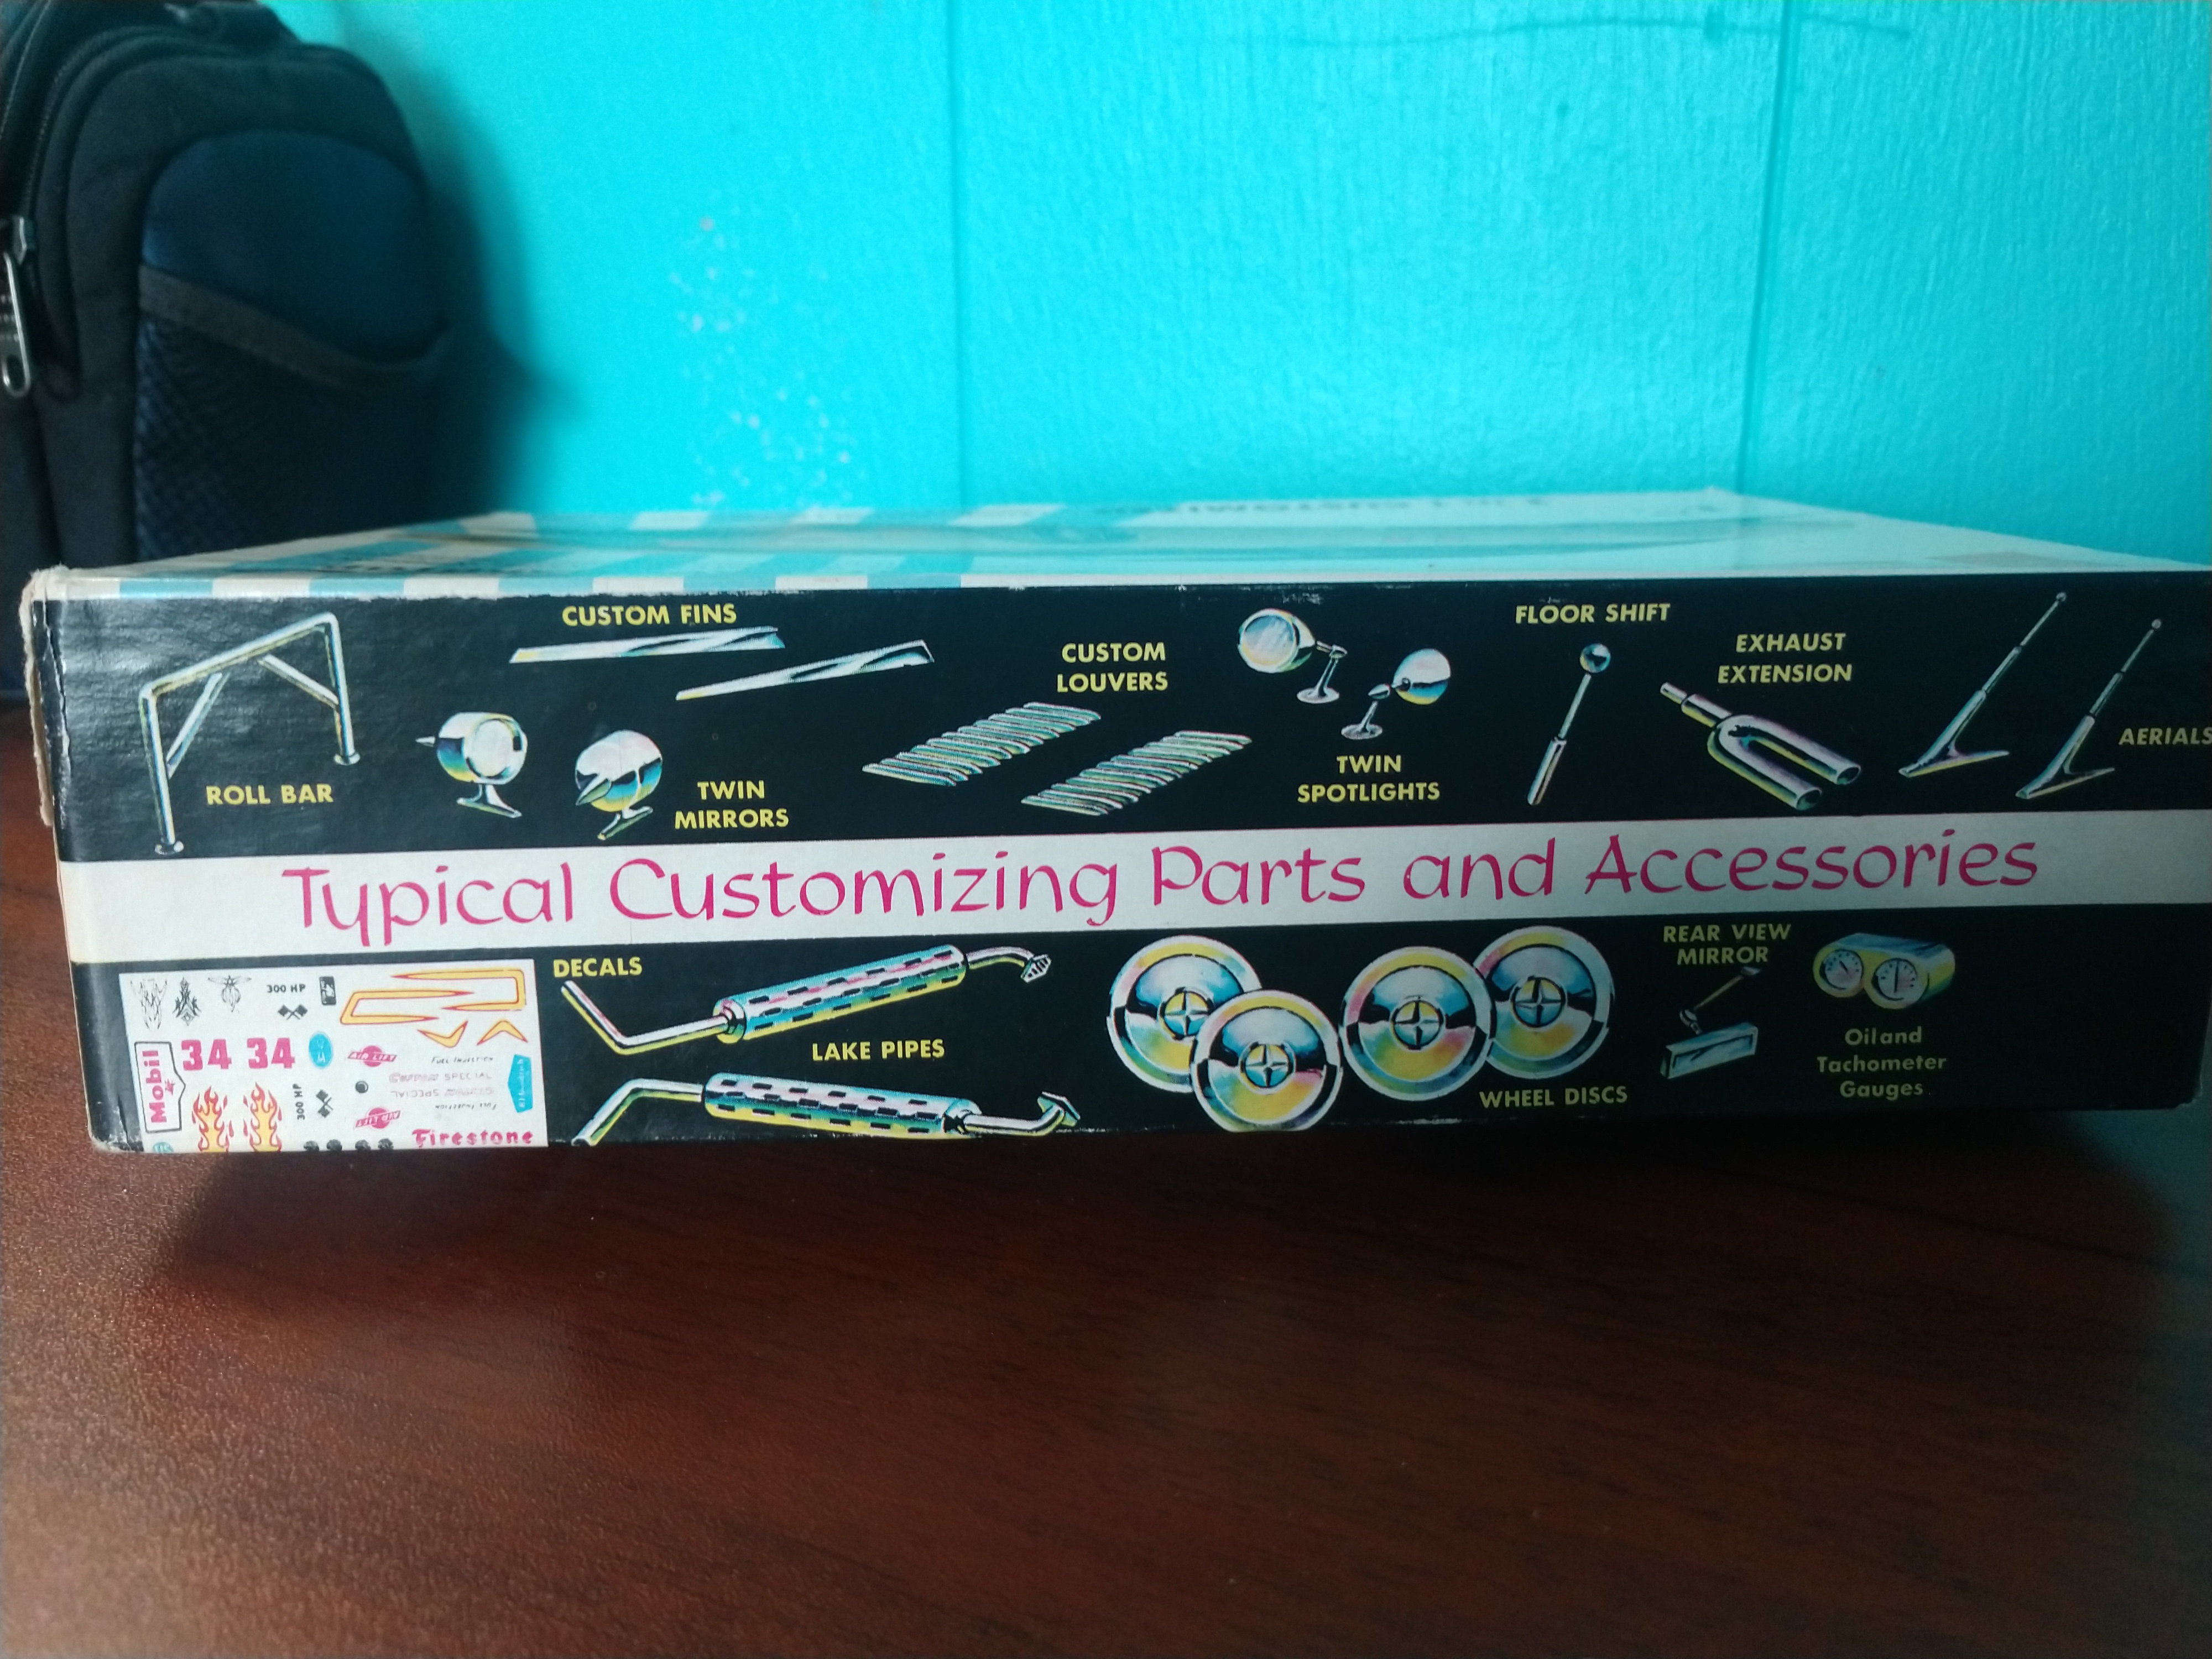
Building a Palmer kit is something you rarely built if you were spending your own money, and cringe if you got one as a gift when you were a kid. The picture on the box is what sucked you in .
-
Didn't the Falcon come with a trailer?
-
I filled the gaps on the body sides and repaired some blems from glued areas. Even tho' it does not make this kit correct, I added slightly bigger tires and some close enough hubcaps that are from the 65 Chevelle wagon. I think pretty soon it should look like a little version of the MPC Californian . This will never look close to stock so some kind of custom it will be. New on left, original on the right.
-
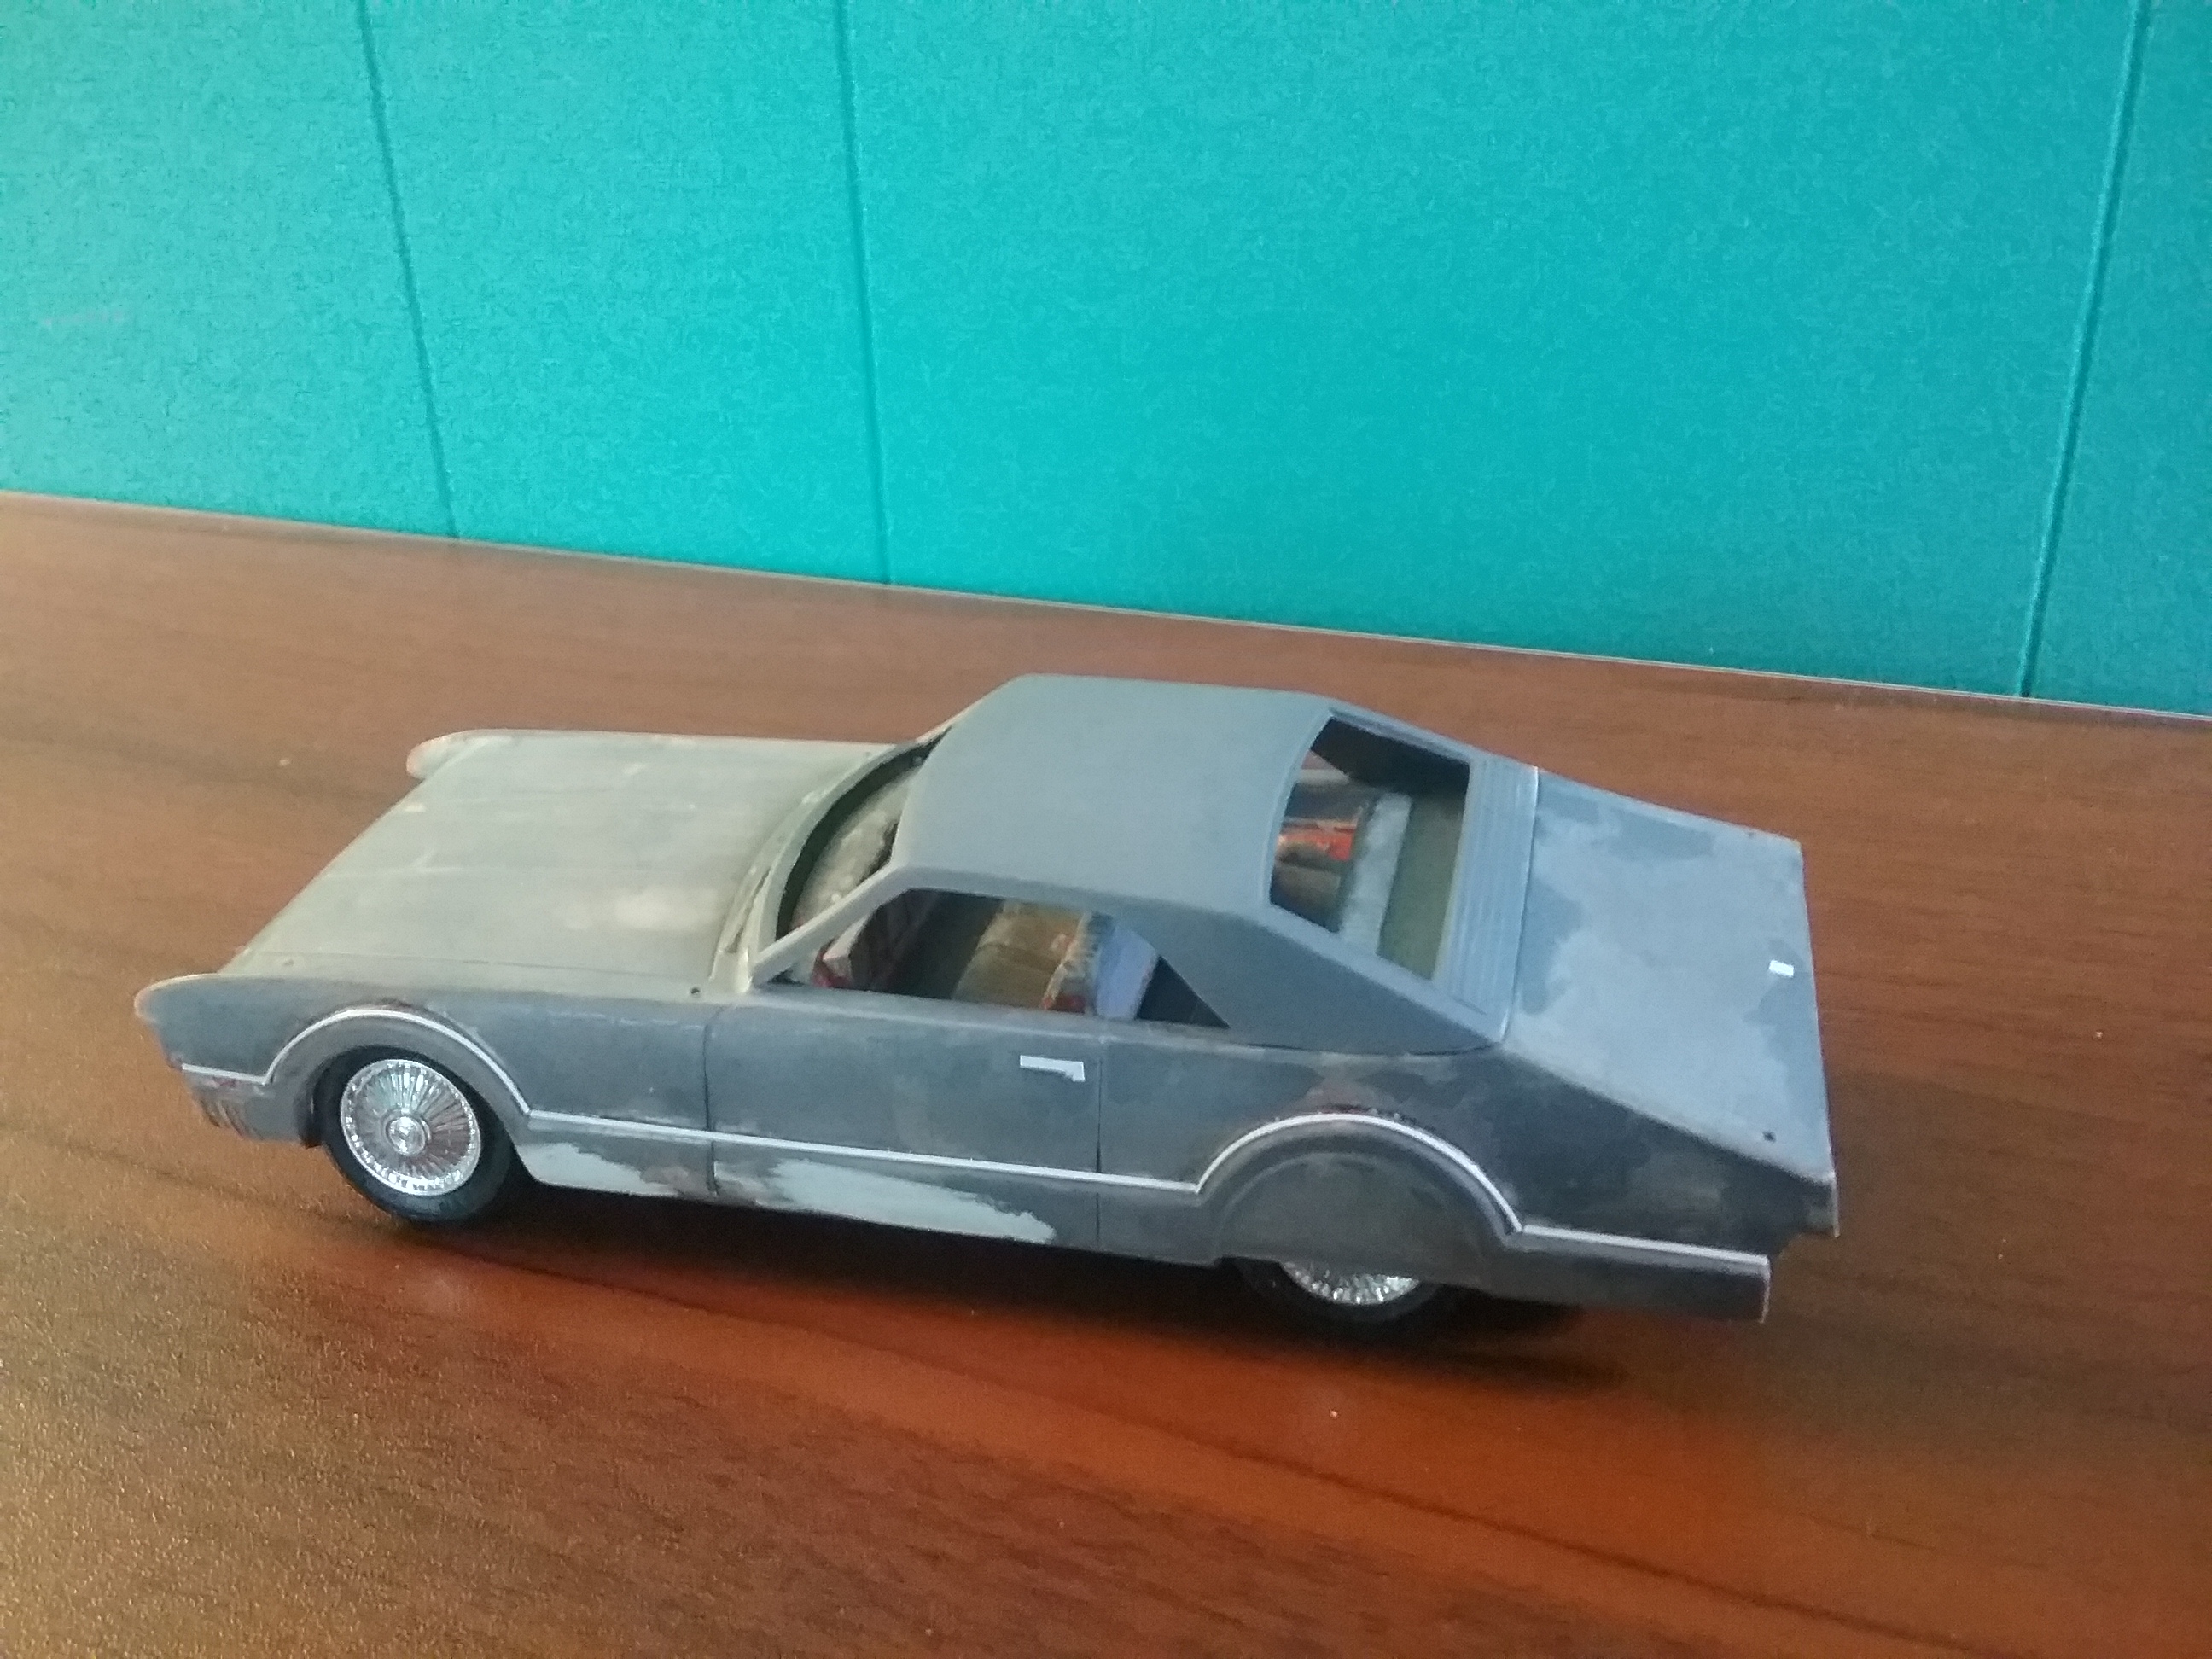
These kits are sketchy on a good day but man thats some artwork. My only memory of building a Palmer or Premier kit was when I was a kid of 9 or 10 tops and on vacation with the family to my mothers sister in California. My mother picked up one of these kits molded in red with some grey parts and kind of looked like the car on the box. I rolled my eyes then and rolled them now , but I am going to build this one at age 66. I have a few in my collection of kits but this one had the body and interior painted in red. I let it soak in Castrol Super Clean for a week and its pretty clean so now just gonna do it.? I epoxied the left and right lower body halves to the top piece and now need to blend in what will not come off. Not really going to try and remove those molded in skirts , thats what gives this Toro its funk, but believe this , all those extra chrome parts on the side flap will not make it better. That same side flap of chrome items is on a bunch if Palmer kits from the 60s.
-
I never saw this done as a street car. Cool idea .