.jpg.b9265433dc8c3b550370b1d0e4e4d2fc.jpg)
MarkJ
-
Posts
4,702 -
Joined
-
Last visited
Content Type
Profiles
Forums
Events
Gallery
Everything posted by MarkJ
-
.jpg.b9265433dc8c3b550370b1d0e4e4d2fc.thumb.jpg.915f5b46e3c9402eeaa6972073121c87.jpg)
Mercedes Benz SSK
MarkJ replied to Pierre Rivard's topic in WIP: Other Racing: Road Racing, Land Speed Racers
Fenders look magnificent, Pierre. They are mirror images of each other. How you get things to match perfectly is amazing. -
Thanks, Helmut. I didn't mean for it to last this long but I'm getting a little long in the tooth and make a lot of mistakes which causes a lot of do overs. I'm hoping my next build won't have as much scratch building involved. but sometimes the scratch building can be very rewarding to have something that has only been done once even if it's not that great, it's one of a kind.
-
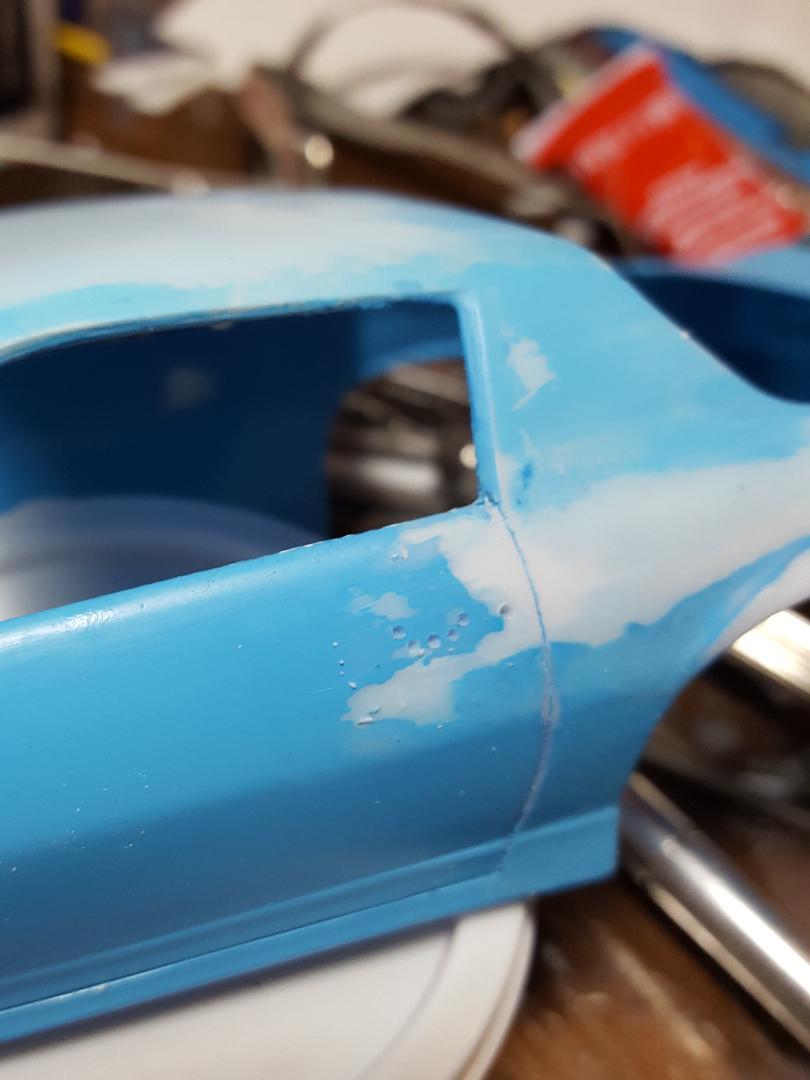
Finally got the park light inserts finished. I will paint them black and install them after I repaint the body just like the door handles. Hopefully it will make for a cleaner look which I'm not that good at doing. Like to do the same thing for the headlight covers and hood louvers but that's just too much work. I don't want to spend another year on this thing.

-
Some more fine work from your bench, Andrew. Some of it I'm not sure what I'm looking at, but I'm sure it will come clear to me down the line. At least I hope so and if not I'm sure you will splain it to me.
-
T41 Bugatti sport coupe
MarkJ replied to charlie libby's topic in WIP: Other Racing: Road Racing, Land Speed Racers
Wow, Charlie, that wheel you made is amazing. you can do the 1/18 size just as well as the big Bugatti whose dash is something to behold. Thank you for the latest edition of your work for me to savor. -
Cool, we are watching an awesome small one come together, now we get to see a big one. I'll be watching for sure.
-
I had to round up the corners of the park lamp openings before I can make fillers for them. I won't install the fillers till after the body is painted. Just like the door handles.
-
Yes, chrome would not be a good choice for headers unless you never cranked it up again. Thanks for the clear up.
-
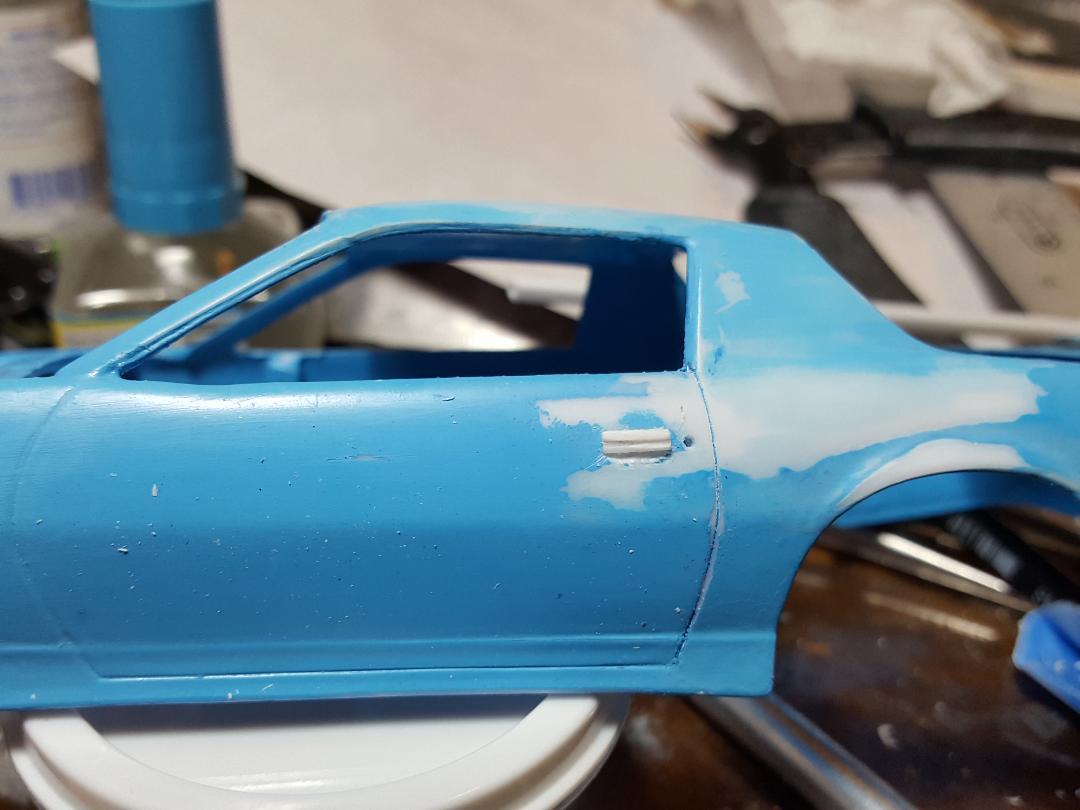
Had to make the park light openings less wide to get them to look like the openings on the IROC race Camaro. For some reason they are not as wide as the stock Camaro park lamp openings. I used a rate pair to figure out the dimensions from a front photo of the IROC race Camaro. Also finished the left door handle. I just need to add a raised border around each park lamp opening and also add a filler piece in the opening which I may do later since it will be black. IROC Camaros before 1989 had cooling hoses coming from the park lamp openings, I guess for the brakes but not in 1989, the year I'm doing.
-
Andrew, thank you for all the ref pictures you provide us. You have the scale modeler in mind when you take your photos, and it is very appreciated. Are those chrome headers?
-
Looks good.
-
Thanks, Anton. Yes, I will be brush painting the body, but I want to try the Mr. Surfacer 1000 rattle can primer first to get a much better surface to paint on this time than what I had last time. the Vallejo brush paint primers are not a very good surface primer. They don't sand out very well or like a scriber used on the door and trunk gaps. it just leaves a very rough edge on the gaps. It actually dries too hard for good sanding to take place if you can understand what I'm saying. You would have to experience it yourself to know what I'm talking about.
-
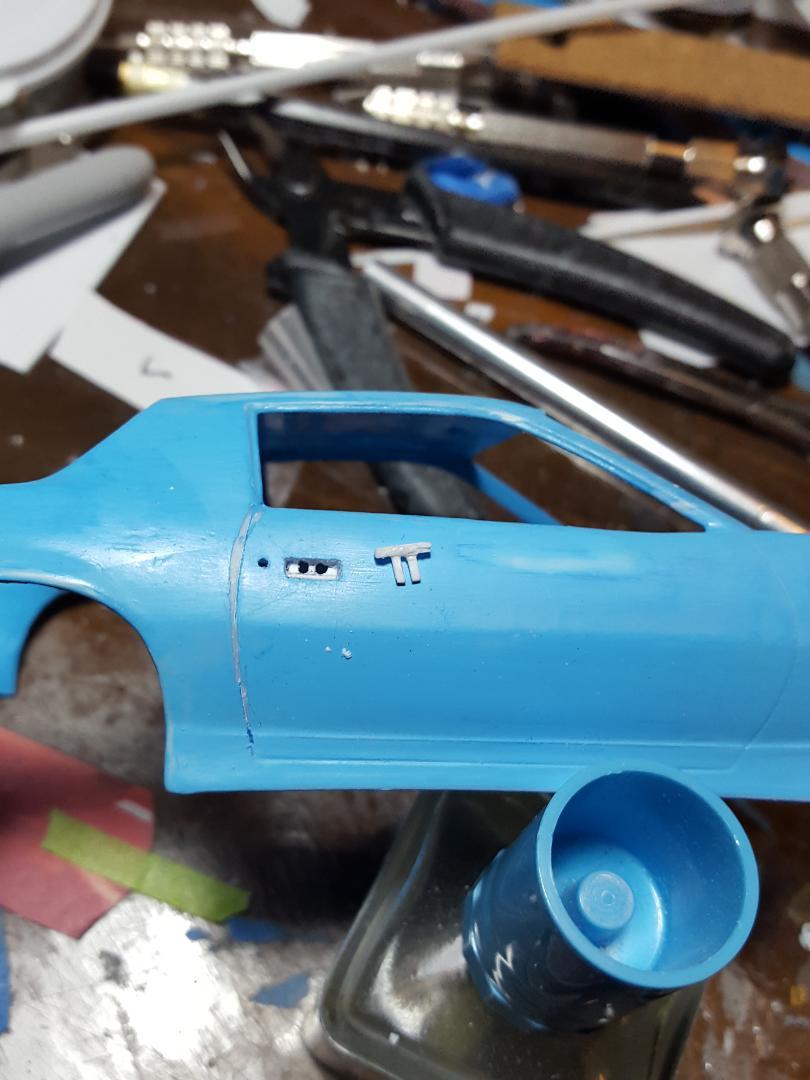
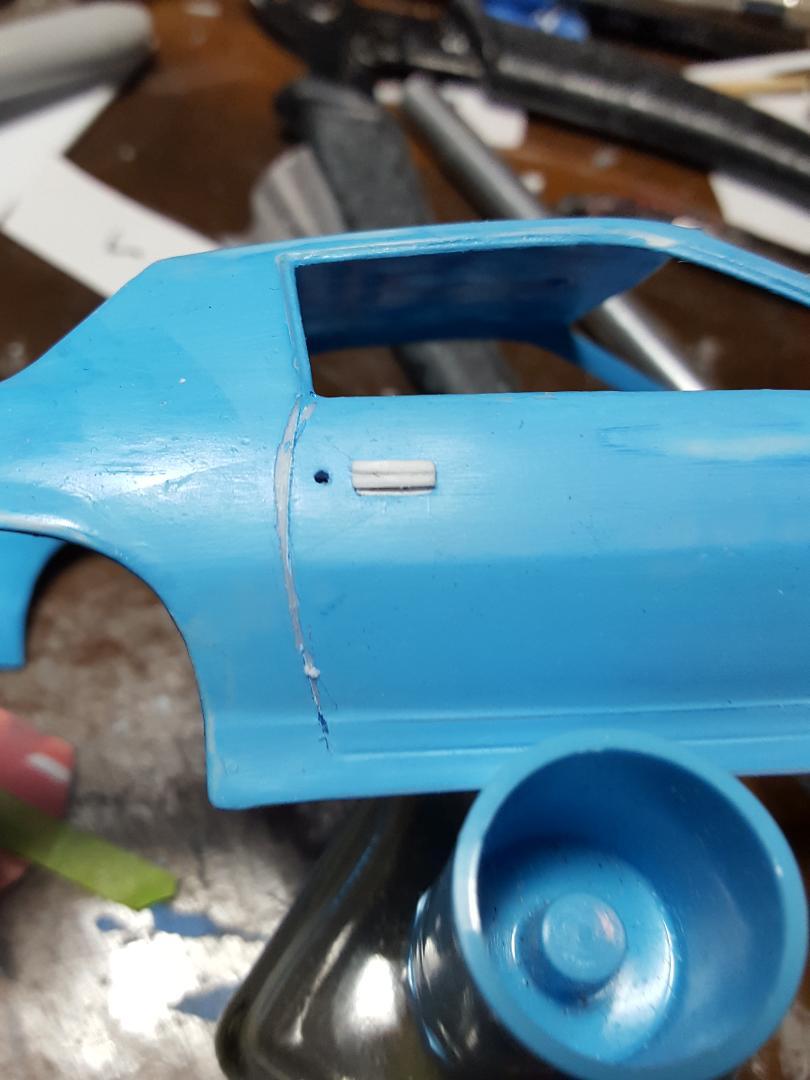
Got some more work on the body done. Glad I will be able to put the handles on after the body is painted.
-
Got some stuff from Micro-Mark. You know how it goes. You think of one thing you need and then decide, oh yeah, I need that too and then you finally end up ordering 5 things.
-
M.M. It looks pretty perfect to me. How you got a model that small to end up so crisp in construction and paint and decaling is a major feat. You should definitely be proud of this one.
-
Mercedes Benz SSK
MarkJ replied to Pierre Rivard's topic in WIP: Other Racing: Road Racing, Land Speed Racers
Amazing work again, Pierre. I'm guessing that's a return spring you created that looks like a garage door spring I have in my garage that I had to replace a couple of years ago. One day it just broke and it sounded like a gunshot went off followed by a violent unwrapping noise. Not something you want to hear in the morning. Again, your scratch building is on another level than us mere mortals who try to do it. -
Excellent job on Graham. Looks just like him. I'll bet being a rower helped keep him in shape for driving. Good idea for keeping the suspension from sagging from sitting so long. Can't wait to see some numbers on this excellent creation you have there.
-
I will make the handles where I can install them after the body is painted and they are painted. should be a lot cleaner looking. I will also make a lock cylinder that will slide in the hole. that will also be pre painted. Starting the process of cutting out the park lights. I've decided to reprime the whole model before I repaint it. Found that Mr. Surfacer 1000 that Andrew recommended at HobLob and will try that. Hoping it sands out smoother than the Vallejo primers I have had a lot of trouble with.
-
Mercedes Benz SSK
MarkJ replied to Pierre Rivard's topic in WIP: Other Racing: Road Racing, Land Speed Racers
Thats perfect, Pierre. You don't need that other stuff. Let your fingers do the fancy stuff. They work just fine. -
Thanks, Mike and Pierre. Yes, Mike it's been one step forward two steps back for over a year now. Pierre, that's my middle name, forgot. But at least I caught it in time.
-
I was going to start on the repainting of the body, and I realized I needed to make some door handles that eventually got removed from all the body prep that kept on happening the first time I painted it. I also need to make some openings where the park lamps usually go. I need to fill the square holes for the handles with a sunk in tiny piece of plastic for the doors. And the park lamp openings will have some aquarium filter mesh put in them. The door handles on this car were nonfunctional, but they were there so I need to make them. So were the park lamp openings. I will make the handles so I can install them after the model is painted. The oob handles are almost an after thought.
-
Thanks, Anton for stopping by and commenting on the build. I just wish the real car I'm depicting had not had a white chassis.
-
Yes, even the hair looks right.
-
Great. That would not be right if he didn't. That would be like a clean-shaven Earnhardt senior.
-
Cool idea for a display base. Will you be giving Graham a mustache? Just sayin.