.jpg.b9265433dc8c3b550370b1d0e4e4d2fc.jpg)
MarkJ
-
Posts
4,702 -
Joined
-
Last visited
Content Type
Profiles
Forums
Events
Gallery
Everything posted by MarkJ
-
Thanks, Ken. The touchup was hard with the highly contrasting colors of yellow and white right next to black. Tiny brush and thank goodness at 73, I don't have shaky hands yet.
-
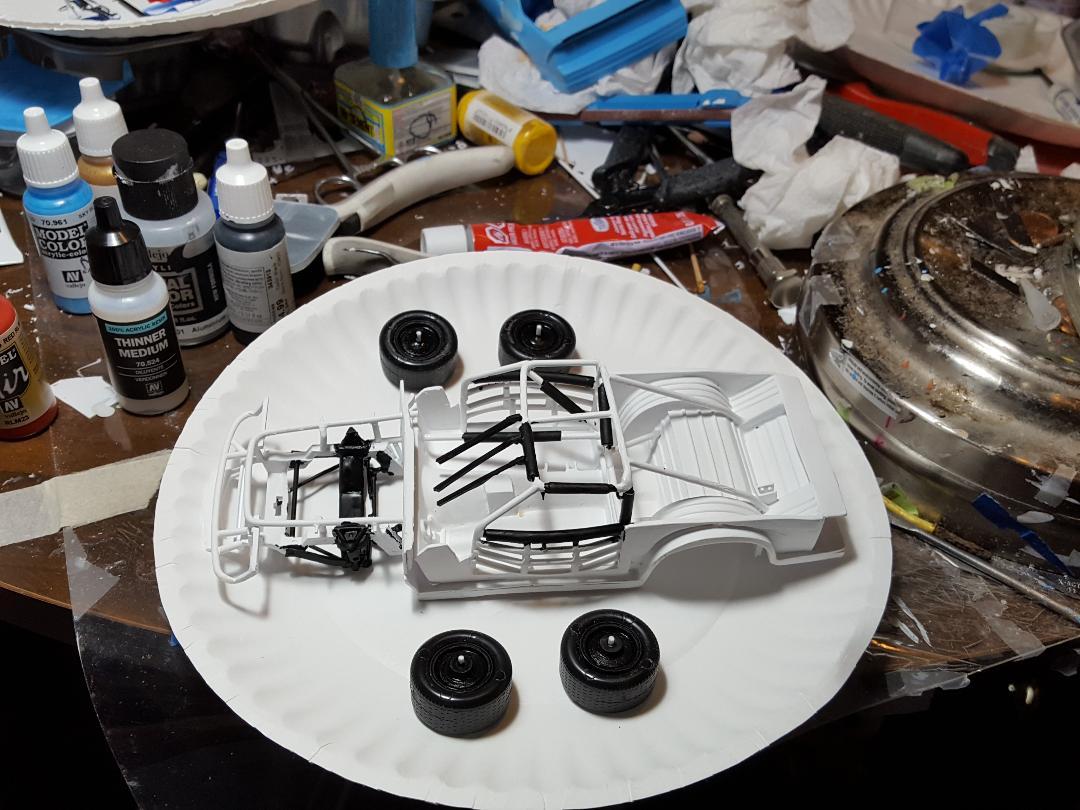
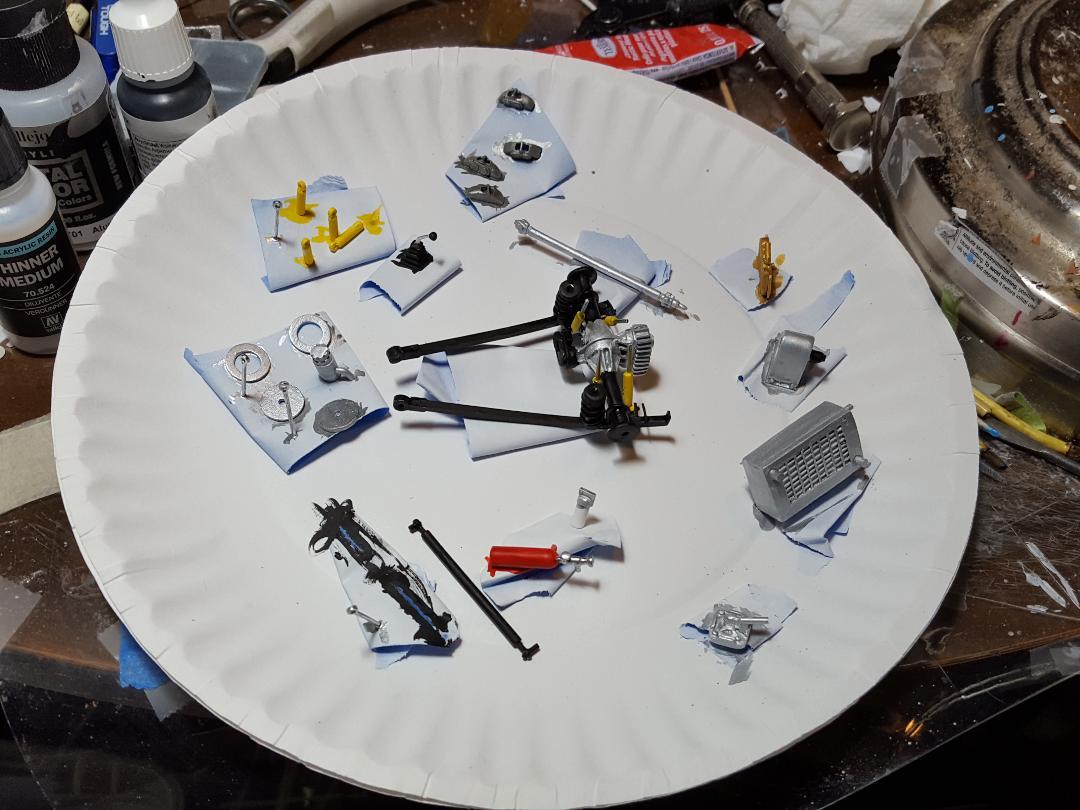
Got some stuff painted and touched up. The parts to put on the chassis are slowly diminishing. I keep having house emergency's I have to fix like auguring the pipe for my kitchen sink. Never a fun task to do. beats having a plumber come out and charge a fortune to do it.

-
.jpg.b9265433dc8c3b550370b1d0e4e4d2fc.thumb.jpg.915f5b46e3c9402eeaa6972073121c87.jpg) That Mr. Surfacer looks like a great product. The Vallejo primers I have been using don't sand out very well. It kind of balls up instead of sanding smooth. The Vallejo paints polish out well though. I don't understand why their primers don't. Can't wait to see some paint on these babies.
That Mr. Surfacer looks like a great product. The Vallejo primers I have been using don't sand out very well. It kind of balls up instead of sanding smooth. The Vallejo paints polish out well though. I don't understand why their primers don't. Can't wait to see some paint on these babies. -
Okay, that splains it.
-
I believe that is worth a major "YUP". How will you fill in that horizontal crevice right below the driver's compartment?
-
Wow, Matt. You are really doing an outstanding job with this kit.
-
I've been thinking and if it warms up enough next week I might sneak outside and repaint the air cleaner with Revell Chrome and try really hard not to touch it anymore. I did get around to installing the rear axle assembly and I need to decal the tires so I can install them to the chassis, but I really need to install the engine and the rest of the parts on the chassis. I still have the body to repaint. Not looking forward to that.
-
Thanks, Pierre. the wheels are still okay except for the very outer edge because they are mostly inset and your finger doesn't touch most of it when handling it. I went ahead and futured the air cleaner and wheels to hopefully not dull them anymore. I'm going to try to rescribe the air cleaner element and redo the weathering on it. I might just paint the top of the air cleaner aluminum like the engine.
-
Looks totally clear to me. So, you are making two?
-
If you go back to page 13 of the wip ,you can see how much better the air cleaner looked right after it was shot with the Revell chrome spray. Like I said, maybe some future will protect it from dulling out from handling it. I guess I should have used plastic gloves but it's not really easy to work with them on if you've ever tried that. It's hard enough for me with no gloves at all.
-
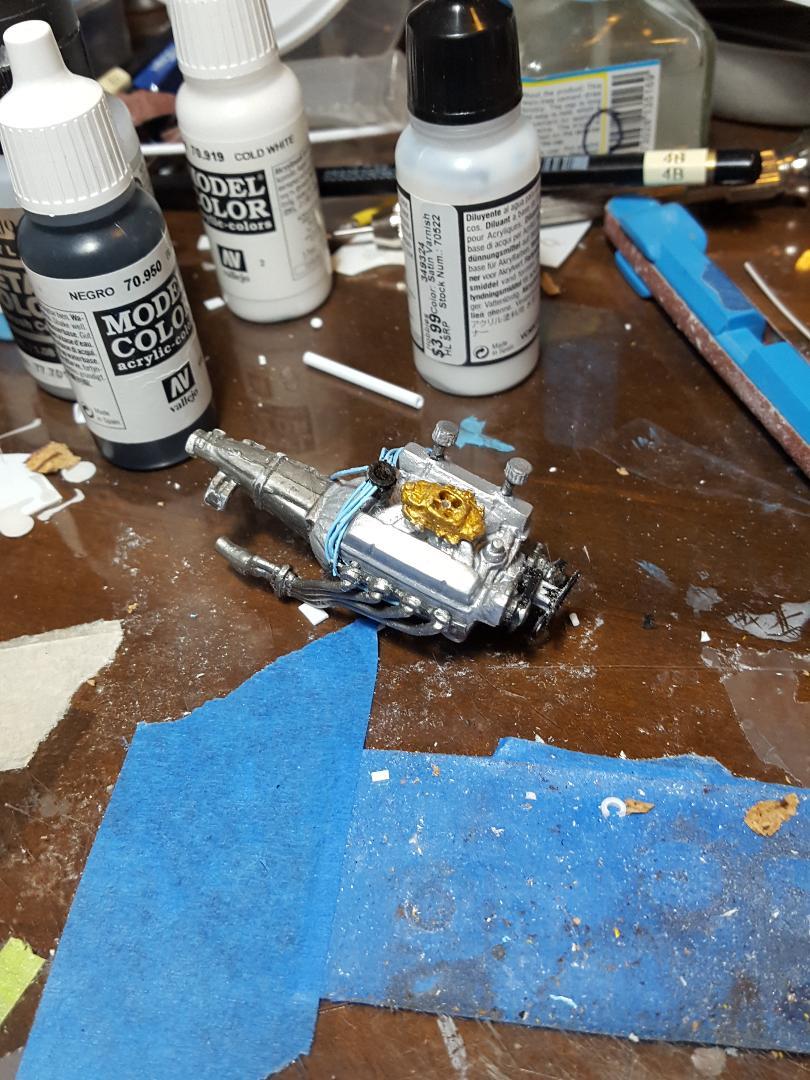
Finally got the engine finished. Not the results I was looking for. The Revell chrome does not like to be handled. tried a little weathering on the air cleaner element with some soot. That did not turn out well either. Oh well I can just display the engine with the air cleaner off. Time to move on to completion and build something else.
-
Now you're making my head hurt, Andrew with this talk about removing a scale inch. If I tried that I would remove 5 inches before I could stop and have to get a new kit and start over. Trouble is I could never be able to find and purchase the first kit to begin with. Superior work as usual.
-
Mercedes Benz SSK
MarkJ replied to Pierre Rivard's topic in WIP: Other Racing: Road Racing, Land Speed Racers
It really looks like Tazio said those exact words with the look he has on his face. Like he's trying to say I accomplished more with less with that sly smile. Great comparison pic of the two engines. -
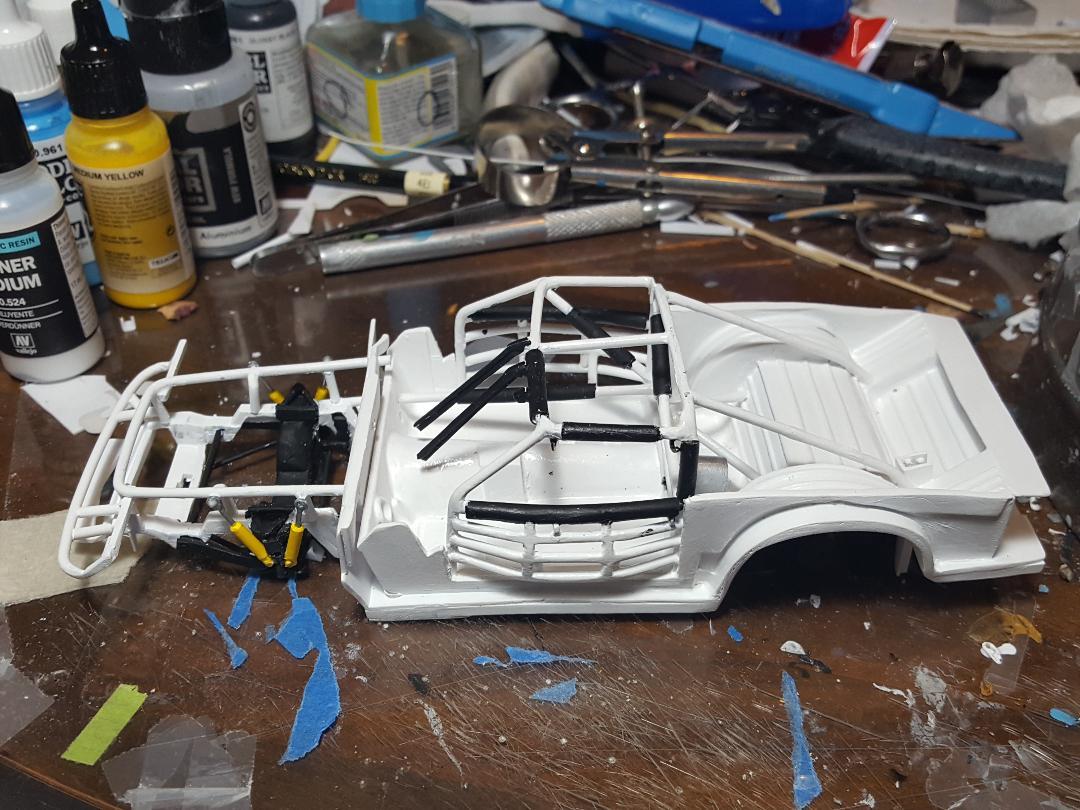
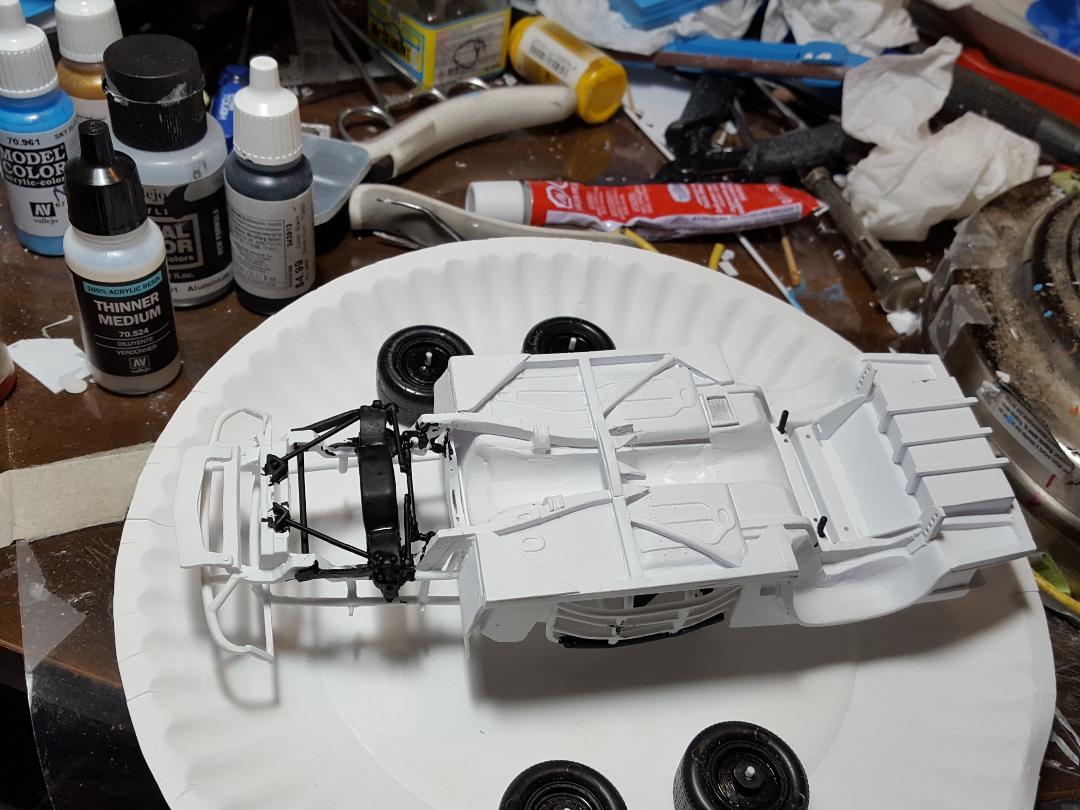
Slowly getting the items fitted to the chassis. Turns out the fan was too far forward on the engine, so I had to cut it off and shorten the spacer between the fan and the pulley. Also been touching up the white where it meets the black on the chassis like the cage pads and the front suspension pieces. Vallejo makes a paint called cold white that does a great job doing this touch up work. It is a very opaque white. usually when you touch up black near white with regular white paint it just turns it gray because of the bleed through. The cold white takes longer to dry though.
-
Mercedes Benz SSK
MarkJ replied to Pierre Rivard's topic in WIP: Other Racing: Road Racing, Land Speed Racers
Its wild how real that engine looks. Looks like you found a real engine out of a full sized one and shrunk it to scale. Thats scratch building, painting and weathering at the highest degree when you can get that done. Amazing work. -
Mercedes Benz SSK
MarkJ replied to Pierre Rivard's topic in WIP: Other Racing: Road Racing, Land Speed Racers
Even the plastic parts look like metal and the spark plug boots look real as well. I hope somebody at Lindberg gets to see this build when finished. -
T41 Bugatti sport coupe
MarkJ replied to charlie libby's topic in WIP: Other Racing: Road Racing, Land Speed Racers
Looks like a fully functional master cylinder. Some more amazing work. -
Ok, Andy. If you say so. But there is no plastic containers used in this build. I googled bl plastic. Apparently, glue will not stick to it.
-
You will have to help an old man, Andrew. I've been trying to figure out what bl plastic is but have no clue. But basically, the little stuff on the plates is not from the kit including all of the rear axle assembly and the front suspension. the engine is basically kit, but the valve covers and intake manifold and carb and air cleaner are not. the wheels and tires are ppp products, but the wheels have been highly modified. The body is kit, but the front and rear have been changed a lot. The rest of the chassis has had a lot of styrene square rods added to it and the gas tank is not kit. The roll cage is not kit either. I might have missed some stuff that is not kit. But thank you so much for stopping by and inquiring about the build. it is highly gratifying that a master modeler would be interested in my little old build.
-
Thank you, Edgar, for stopping by and commenting on the build. I appreciate the kind words. I'm starting to see light at the end of the tunnel.
-
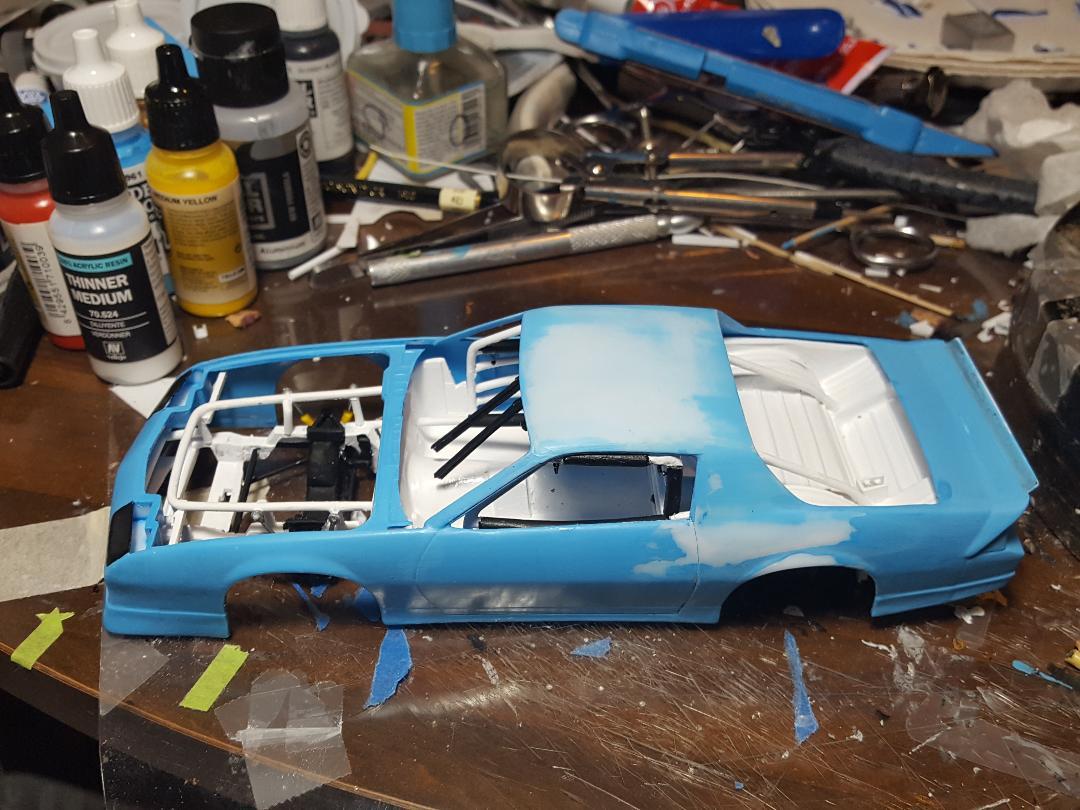
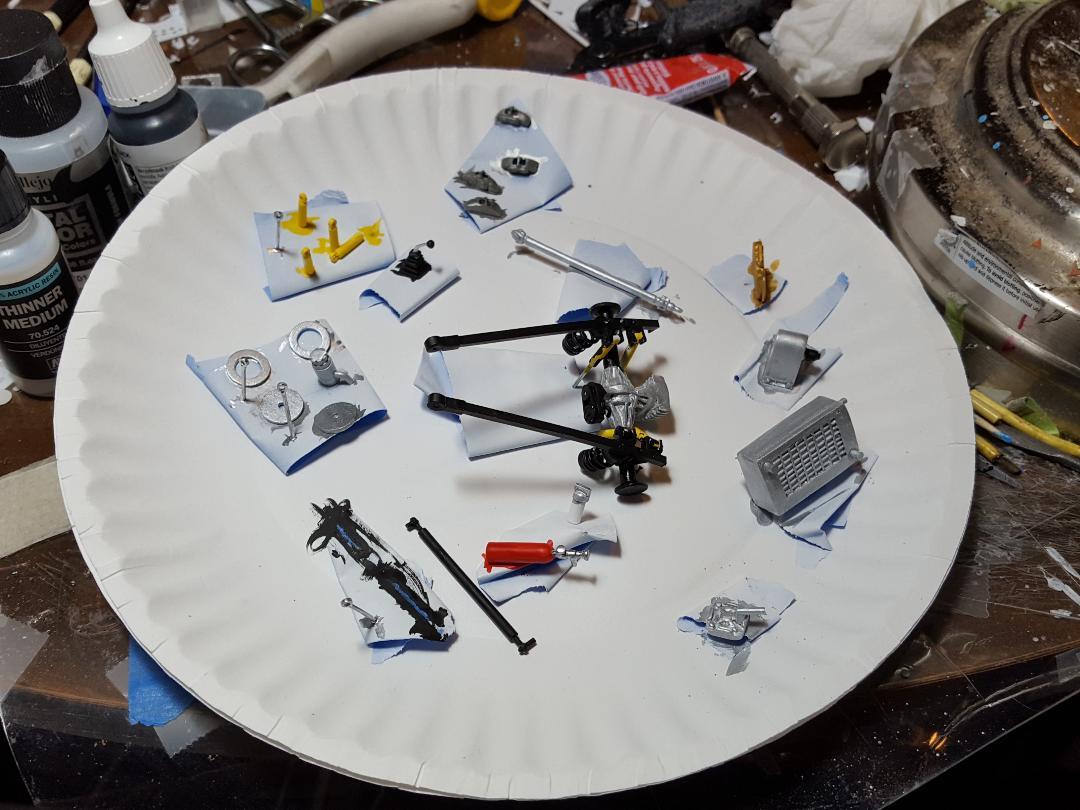
Finally got some stuff painted. Will have some major touch ups to do after I get the parts installed. This always happens. It's just part of the process when you have to paint after you make an assembly like the rear axle assembly.
-
Mercedes Benz SSK
MarkJ replied to Pierre Rivard's topic in WIP: Other Racing: Road Racing, Land Speed Racers
So, the mystery is solved. That is one awesome looking oil reservoir. Love the use of the balls to add realism. Those cuts around the reservoir are so crisp and clean. You've done it again oh master of the styrene and metal. -
Mercedes Benz SSK
MarkJ replied to Pierre Rivard's topic in WIP: Other Racing: Road Racing, Land Speed Racers
Excellent as always, Pierre. Those parts are so small but yet so detailed, if I could make something that small, I would probably lose it. Interesting engineering on these old vehicles. That steering rod is so long but the idler is also very long, I bet even with a huge steering wheel it would take Charles Atlas to drive one of these babies. Especially at racing speeds. I doubt if a guy like Tyler Reddick could even attempt to drive one. -
Brabham BT45
MarkJ replied to Chris Smith's topic in WIP: Other Racing: Road Racing, Land Speed Racers
Simply, WOW. You are one of those few master modelers who show up to make the rest of us feel unworthy to even try to build a model. This is as close to perfection as a human being can get. Chris, you are human, correct? -
Airfix Jaguar XKR GT3 1:32
MarkJ replied to Funkychiken's topic in WIP: Other Racing: Road Racing, Land Speed Racers
Nice save on the split decals. great color matching. Great save on the paint as well. You're a brave man to do a 1/32 scale build. I would not even attempt one at my age.