.jpg.b9265433dc8c3b550370b1d0e4e4d2fc.jpg)
MarkJ
-
Posts
4,702 -
Joined
-
Last visited
Content Type
Profiles
Forums
Events
Gallery
Everything posted by MarkJ
-
.jpg.b9265433dc8c3b550370b1d0e4e4d2fc.thumb.jpg.915f5b46e3c9402eeaa6972073121c87.jpg)
Jordan 197 R.Schumacher 1997
MarkJ replied to Mattilacken's topic in Other Racing: Road Racing, Salt Flat Racers
Oh, okay. Somehow, I knew there was something not quite right about the red bull. -
Okay, Andy. Thanks.
-
Jordan 197 R.Schumacher 1997
MarkJ replied to Mattilacken's topic in Other Racing: Road Racing, Salt Flat Racers
Wow, Anton. those are some fine builds in that super fine garage you have there. Excellent work all around in those photos. -
Thanks guys. When you think about it, tires are the best part of a race car.
-
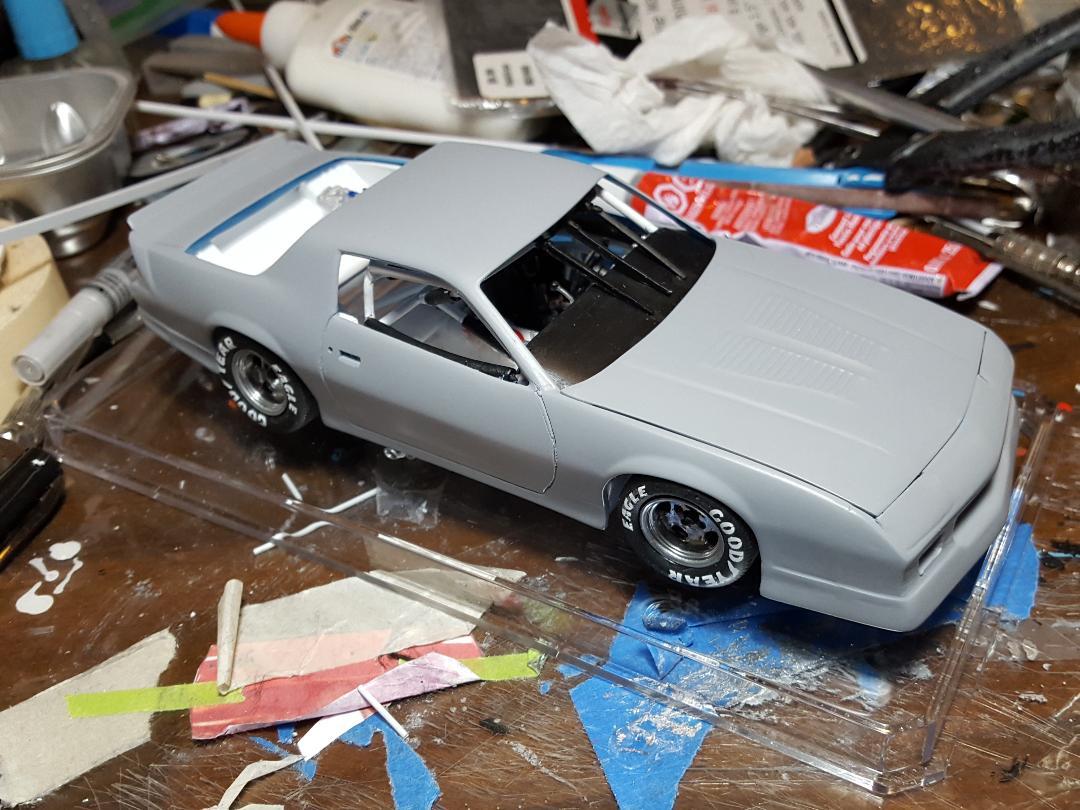
Got the tires on and having the rear axle functional allows all 4 tires to sit on the ground. The travel limit chains allowed me to do this. Without them the rear axle would have come loose from the chassis every time I picked up the model due to the weight of the tires and wheels. On to the body painting and eventual finish line for the build.

-
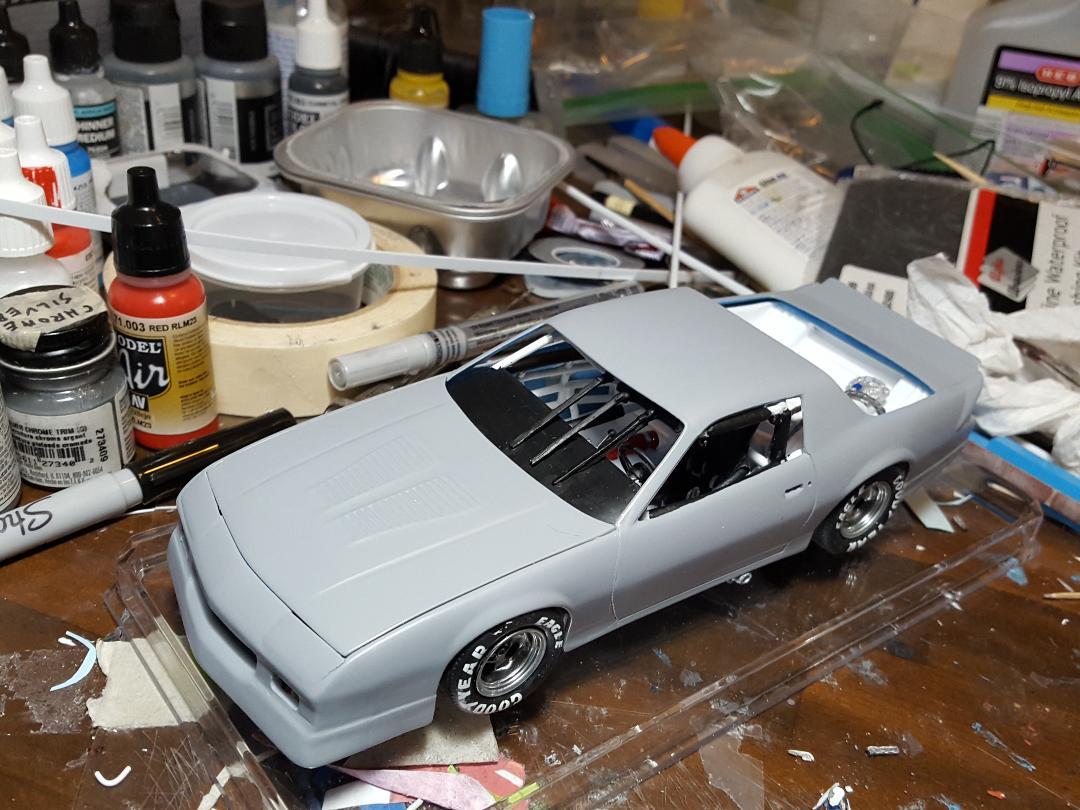
All I lack is installing the tire /wheel assembly's, reinstalling the windshield braces that keep getting knocked off and another general touch up, and the chassis will be done. Then hopefully next week, I can airbrush the body. I bought a gram scale to help mix the paint correctly and I got some filter baskets to try to keep the paint from clogging up the airbrush. Once I get the body painted, I can install the glass and decals and finally future the body and I will be done after a year and a half of messing around with this thing.
-
Are we going to be automatically logged out? I never log out. Do I have to do anything?
-
Have you updated your account yet, or is that a scam at the top of the screen in red? I don't even remember my password. Why is a login change coming?
-
Why the switch in primer? Just wondering.
-
T41 Bugatti sport coupe
MarkJ replied to charlie libby's topic in WIP: Other Racing: Road Racing, Land Speed Racers
Charlie, so sad to hear of your unfortunate injury. I know you will recover fully and will be back to your normal exceptionally fine work creating masterpieces from metal. There are probably only a handful of people who can do what you do so we need to have you back at it, giving us all the inspiration to try to achieve what you do so we can try to emulate you at the things we have a passion for, albeit that pale in comparison. Praying for your speedy and complete recovery. -
Thanks for the info. Awesome work going on here.
-
1928-31 Mercedes Benz SSK
MarkJ replied to Pierre Rivard's topic in Other Racing: Road Racing, Salt Flat Racers
There are no words left to describe this masterpiece you are sharing with us. Magnificence abounds with this latest build you have here. Looks like you took a real car and shrunk it to this scale which escapes me at the moment. The only thing I can possibly see that might be missing, and this is over the top picky on my part, is two pieces of luggage for the right short running board with maybe a shirt hanging out of a corner of one of the pieces. But that would just mess up the lines of this beautiful racer from so long ago, and that would be a travesty. Can't wait for what you have in store for us next. I'm waiting with bated breath. Model on Obi-Wan. -
What exactly is white metal anyway. I remember toys I had back in the fifty's that were made out of it.
-
Mercedes Benz SSK
MarkJ replied to Pierre Rivard's topic in WIP: Other Racing: Road Racing, Land Speed Racers
Pierre, that hold down belt is off the charts. If this build doesn't look like a race car MB SSK nothing ever will. It just exudes speed and performance. Another in your long list of extremely Awesome builds. Give us a link when she's over at Underglass. -
1964 BILL STROPPE Mercury Marauder
MarkJ replied to gami8630's topic in Stock Cars (NASCAR, Super Stock, Late Model, etc.)
Great job on your Stroppe Mercury. I always loved the lines of the 64 Mercury Marauder. Thought it was very racy and streamlined looking compared to the other cars of the sane year. I did Rex Whites Bud Moore car many moons ago. One of my favorite builds. -
Bubba Wallace's MoneyLion Toyota
MarkJ replied to Merkur XR4Ti's topic in Stock Cars (NASCAR, Super Stock, Late Model, etc.)
Looks excellent, Steve. -
Beautiful builds, Oleg. Looks like you took photos of the real car. I haven't looked, but if you haven't put these photos in the underglass forum you should. People sometimes do not follow the wips and they will miss out on these Awesome builds.
-
Salvinos JR Next Gen Camaro
MarkJ replied to Brutalform's topic in WIP: Stock Cars (NASCAR, Super Stock, Late Model, etc.)
I just noticed from watching the races this week that on the Xfinity cars and probably the cup cars they don't call them Camaros and Mustangs anymore. they have Ford, Toyota, and Chevrolet on the bumper and rear fascia. -
Mercedes Benz SSK
MarkJ replied to Pierre Rivard's topic in WIP: Other Racing: Road Racing, Land Speed Racers
The thread really came through for you on the steering wheel. You had the skill to pull it off. I've used thread before for window nets but always had fits working with it. You have definitely tamed the frizzies. Kens tip about the glue was really good and something I wished I had used on my current build for the hoses. I guess I could always go back and try again. I think I made them too big anyway. -
1966 Richard Petty Plymouth
MarkJ replied to jjsipes's topic in WIP: Stock Cars (NASCAR, Super Stock, Late Model, etc.)
You are right, Jason. The most accurate reference shots of a car are usually you tube video screen shots. The trouble sometimes is getting a clear enough shot to make out things and you can also get the contingency's correct for a certain race you want to make the car for. You have found a good screen shot there for sure. -
Mercedes Benz SSK
MarkJ replied to Pierre Rivard's topic in WIP: Other Racing: Road Racing, Land Speed Racers
Wow even better installed. Love that shade of yellow. -
Salvinos JR Next Gen Camaro
MarkJ replied to Brutalform's topic in WIP: Stock Cars (NASCAR, Super Stock, Late Model, etc.)
I've been told the newer kits can make the body removable and the fit is good. I had to add a small bracket to the front of my two next gen builds that basically lock the front together and just keep the rear loose. It is a shame to glue the body and chassis together with all the detail going on inside that's hard to see. -
Mercedes Benz SSK
MarkJ replied to Pierre Rivard's topic in WIP: Other Racing: Road Racing, Land Speed Racers
Pierre, the dash looks like you made it from wood. The gauges are perfectly round. Amazing work again from your bench. Such a joy to watch the master at work. -
Airfix Jaguar XKR GT3 1:32
MarkJ replied to Funkychiken's topic in WIP: Other Racing: Road Racing, Land Speed Racers
If there's something wrong with the clear coat, I sure don't see it. Looks like an excellent build to me and at 1/32 scale that really makes it impressive. -
1966 Richard Petty Plymouth
MarkJ replied to jjsipes's topic in WIP: Stock Cars (NASCAR, Super Stock, Late Model, etc.)
Jason, I knew I had some good ref pictures of the interior and the taillight area but I can't seem to find them. I lost a lot of pics in the wip I did at Randy Ayers that I lost the first time they shut down. I lost some more on other builds the second and final time they shut down. I should have put them here at MCM and I would still have them.