.jpg.b9265433dc8c3b550370b1d0e4e4d2fc.jpg)
MarkJ
-
Posts
4,702 -
Joined
-
Last visited
Content Type
Profiles
Forums
Events
Gallery
Everything posted by MarkJ
-
.jpg.b9265433dc8c3b550370b1d0e4e4d2fc.thumb.jpg.915f5b46e3c9402eeaa6972073121c87.jpg)
Curtis Turner Smokey Yunick Chevelle
MarkJ replied to Hobbyguy's topic in Stock Cars (NASCAR, Super Stock, Late Model, etc.)
Robert, I am also a member of the high school class of 69. We had a guy name Richard Bulot who had a 65 GTO with a 389 3 deuces power plant. He loved to burn them down on the road right in front of the High School just about every day. It didn't matter because he had dropped out of school his junior year and got a well-paying job. Trouble is I think he got drafted and I really never heard anything about him after that. Might have ended up in Viet Nam. It was going strong at that time. That car sure was sweet. Silver blue metallic. -
Jaguar XK120 Race Car
MarkJ replied to Pierre Rivard's topic in WIP: Other Racing: Road Racing, Land Speed Racers
Looks like you figured out the hood. Fits like a glove now. The body prep is coming along very nicely. No one will ever know this body is metal unless you tell them. -
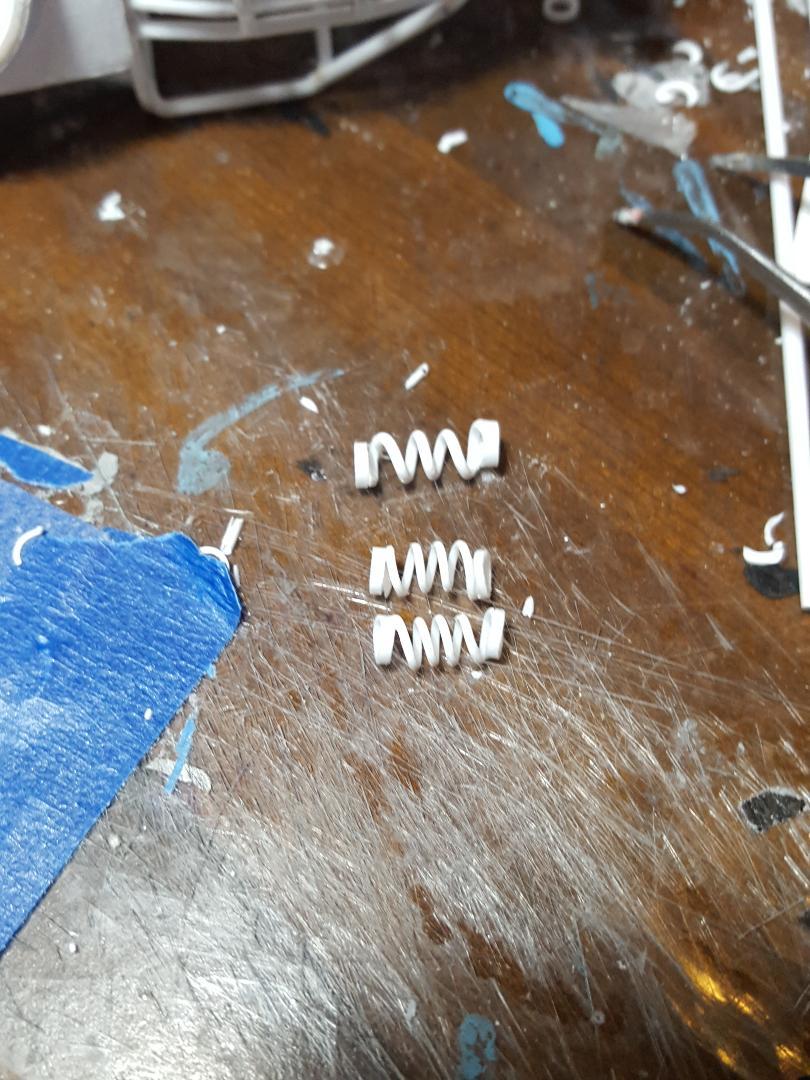
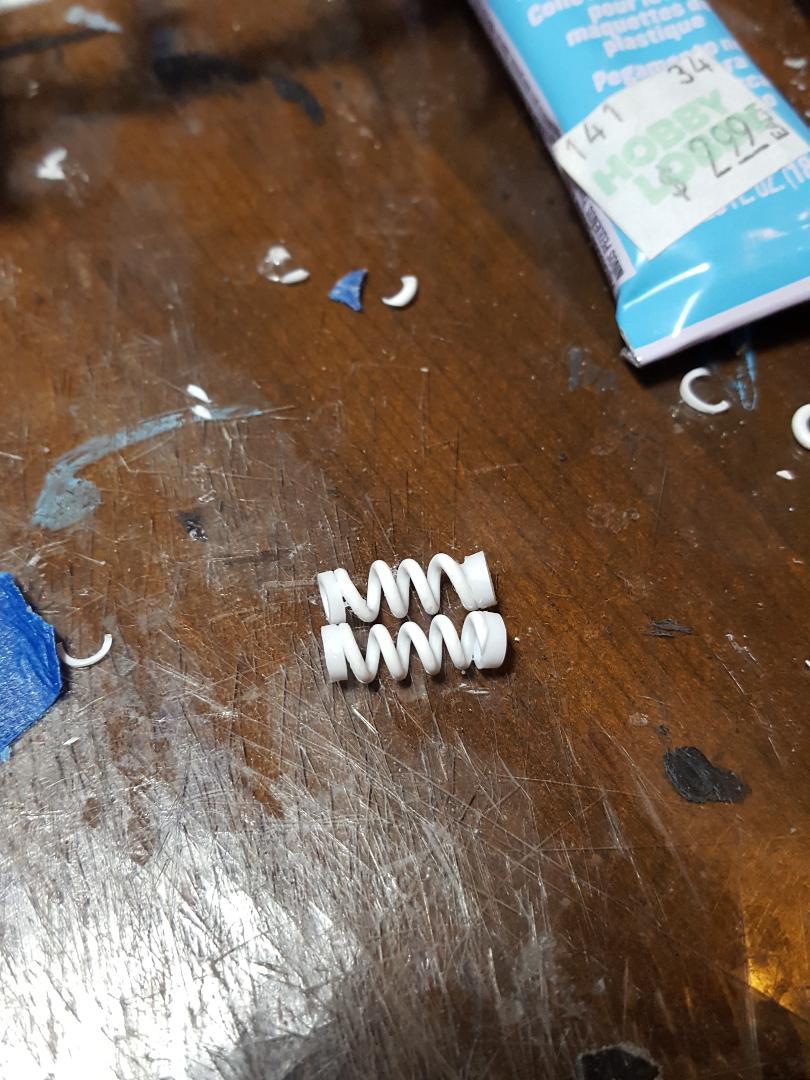
Thanks for dropping by, Ken. As long a you wrap the spring tighter and smaller than you want, it works out fine because the styrene relaxes into a bigger size. I finally ended up using .035 syrene rod to make the springs. I wrapped it around a 3/32-inch styrene rod. Works better than I thought it would.
-
Jaguar XK120 Race Car
MarkJ replied to Pierre Rivard's topic in WIP: Other Racing: Road Racing, Land Speed Racers
Great to see your back at it. Pierre. I have missed you performing your magic. This metal body is going to be super interesting to watch how you transform it. Looks like you already have a great start going on. -
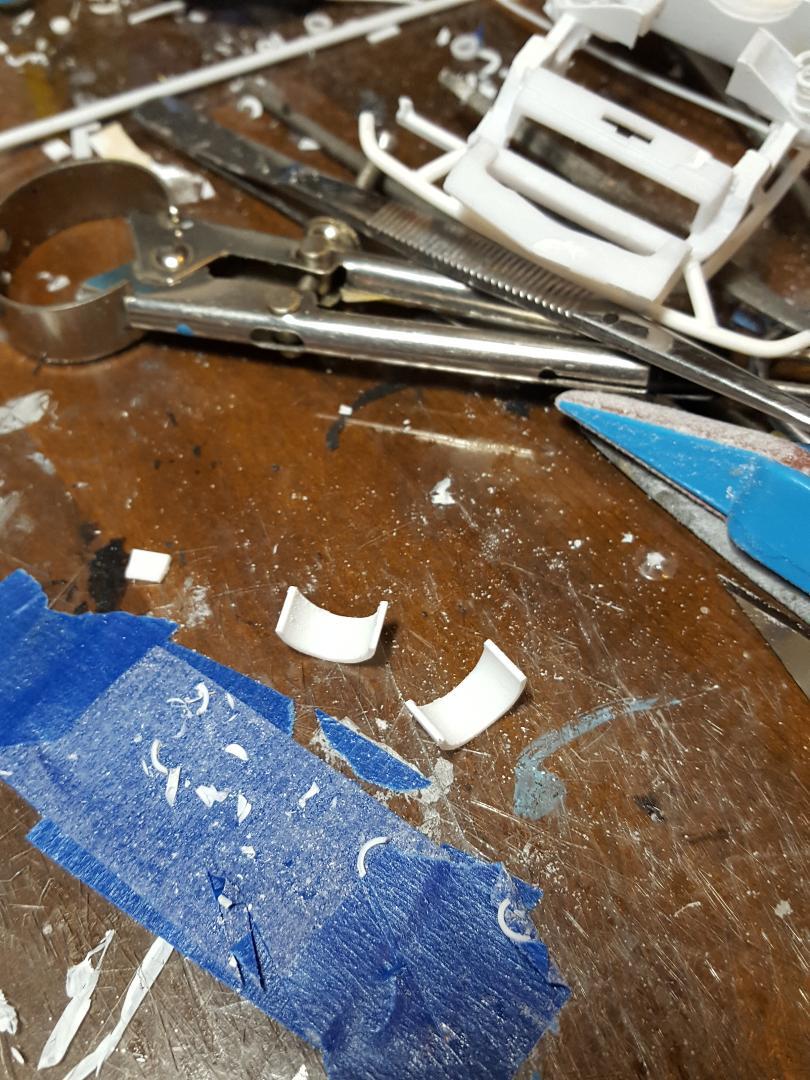
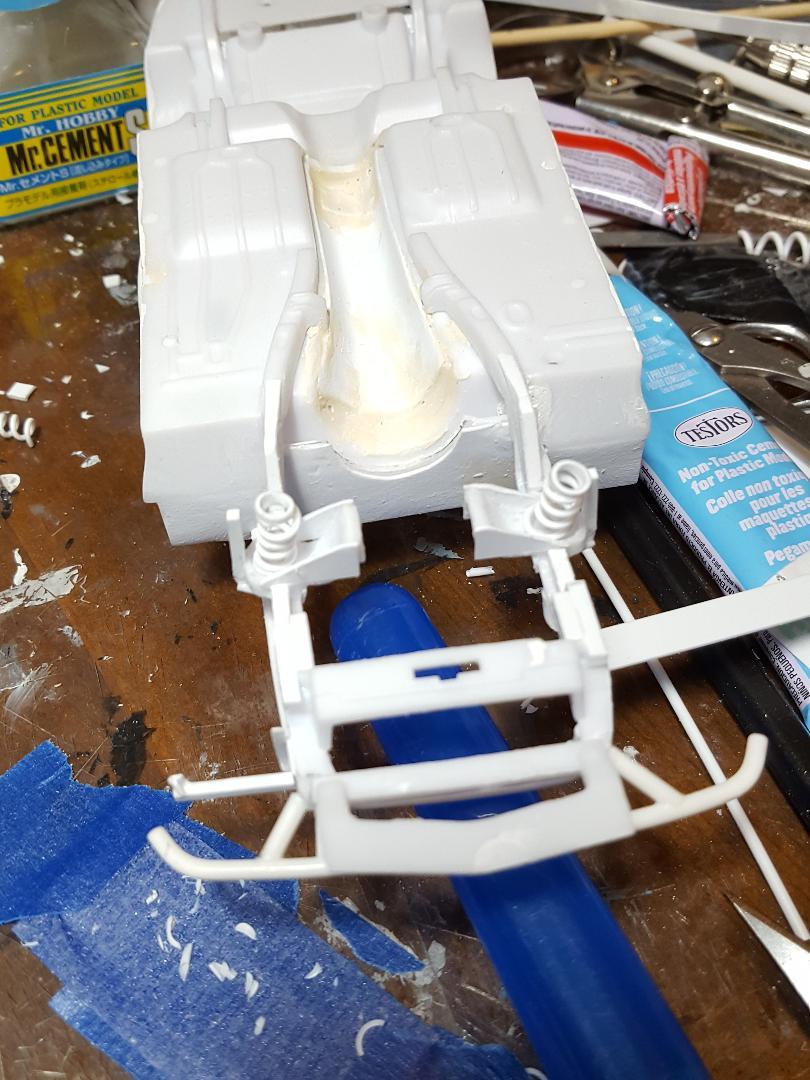
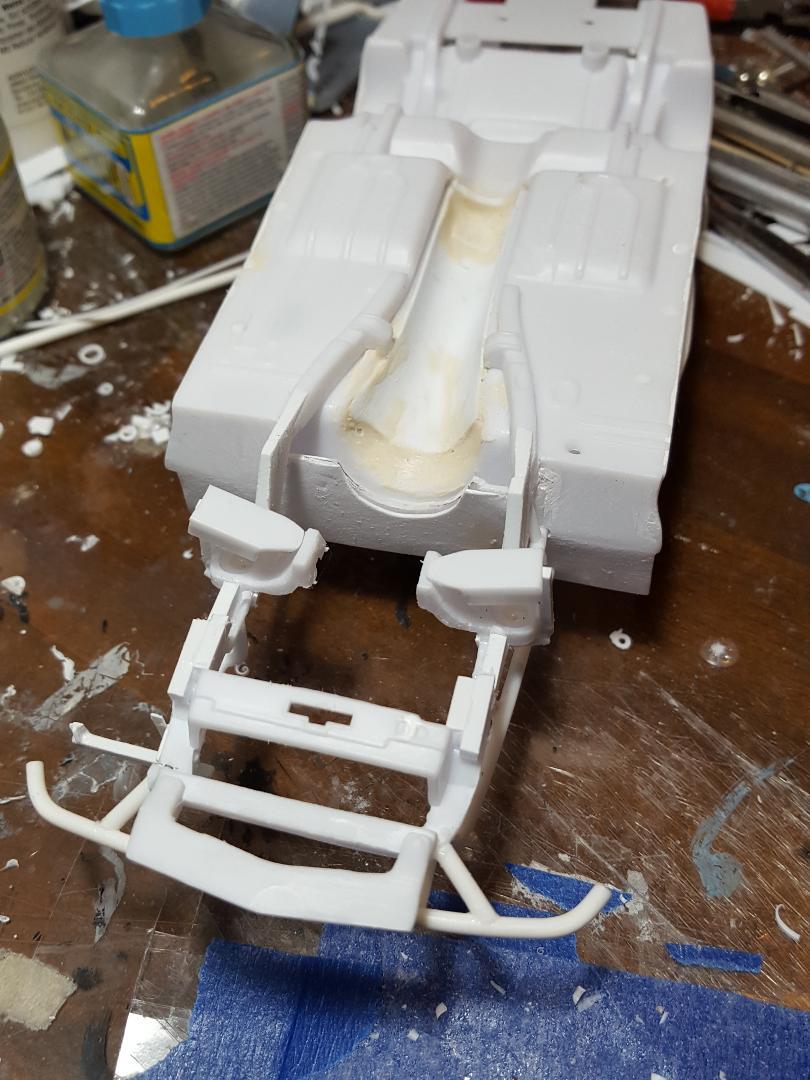
I found a ref picture of an Iroc dodge that came later but basically has the same chassis as the 87 Iroc Camaro and I noticed that the lower spring arm that attaches to the spring is actually curved. the spring arms I made were copied from an 87 Nascar Monte Carlo chassis I used on an old build. Those spring arms are basically flat. So, I felt like I needed to make some curved spring arms which the pics below depicts. I think the springs will attach better to the curved arms. I had to cut the springs down by one loop in order to get the spring arms situated correctly when I glue them to the springs.

-
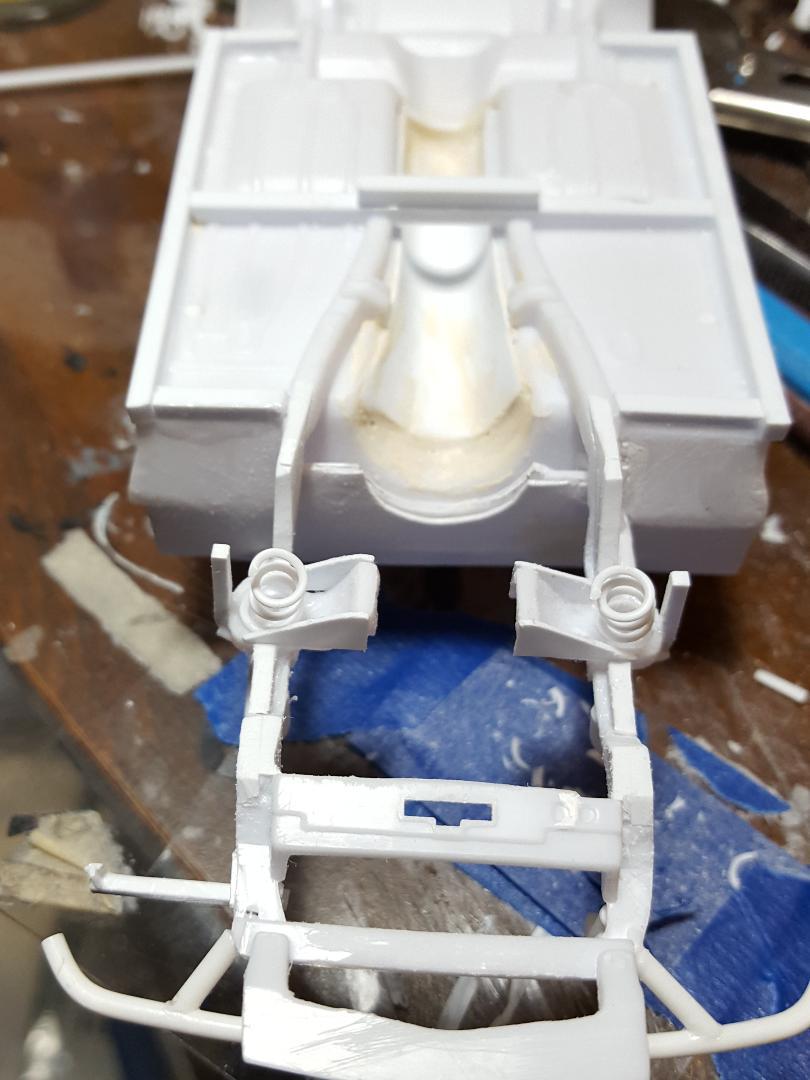
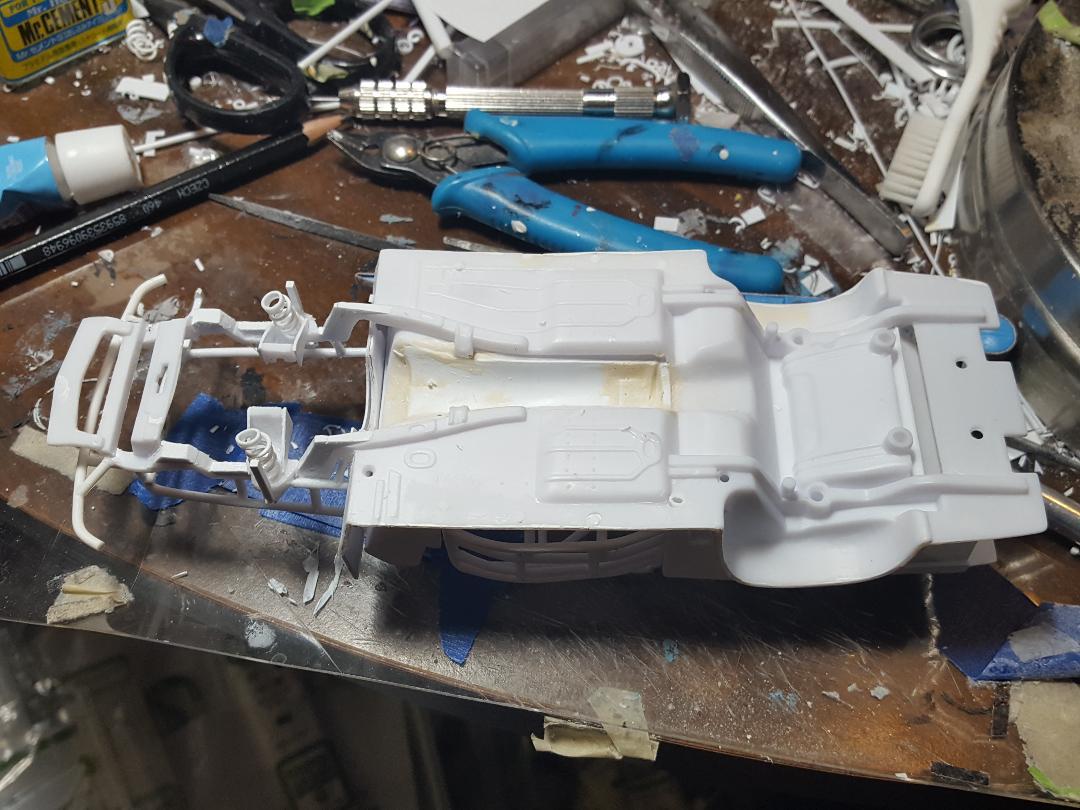
Glued the springs in and got started adding square rod to the chassis to make it look more like a Banjo and less like a unibodied stock Camaro chassis. it won't be correct but will be in the ballpark.
-
Anton, yes, any metal wire makes great springs, but I would have to epoxy them in and usually I mess up the installation and cutting out an epoxied part would be very difficult for me. Thanks for dropping by and making your comment. I love to hear anybody's opinion about anything when it comes to building these wonderful things we build.
-
Thanks again Steve for your interest in the build. Maybe someday I will actually finish it. We shall see.
-
Made new springs from .035 rod. They look more scale than the first ones I did. Once the springs are under the spring arms, they are really hard to see anyway. I'm trying to duplicate the 1987 IROC suspension as best I can using ref pictures and the model 1987 nascar Monte Carlo frame I put under the Earnhardt car. Won't be correct but look more like a Banjo chassis than a stock Camaro chassis would have.
-
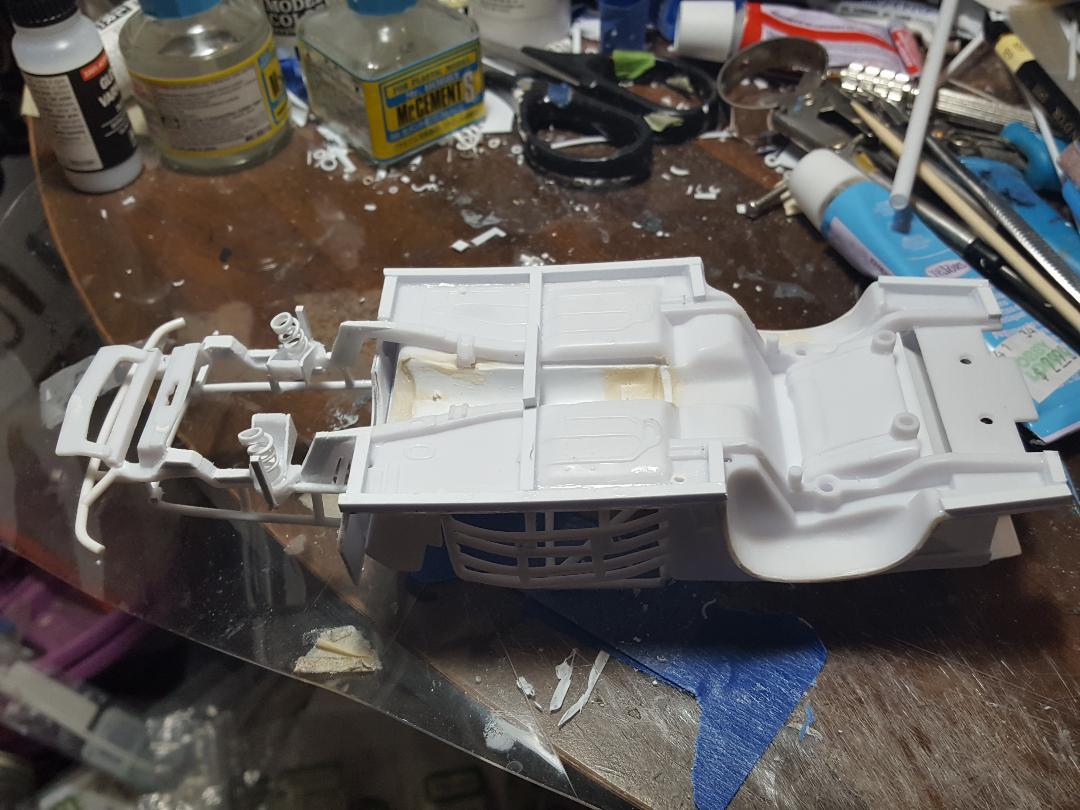
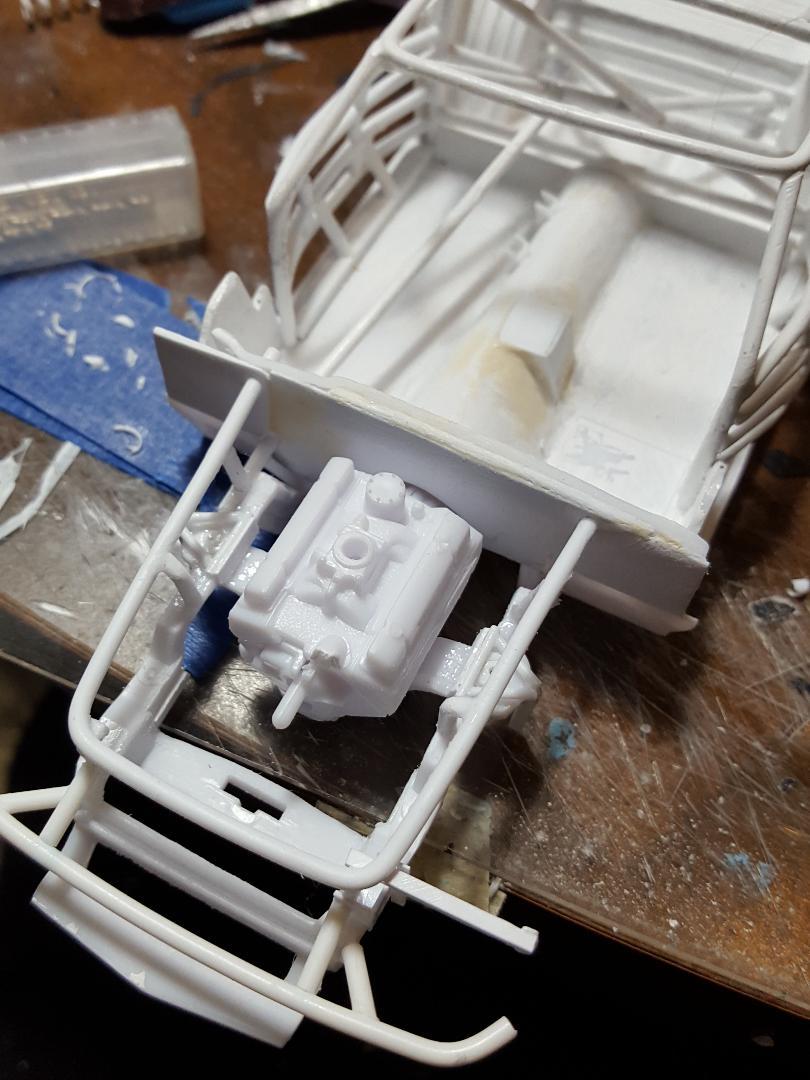
I made the front springs, but after looking at my ref pictures again, I have made them too thick. I placed the engine in the frame just to see how things are lining up and you can see the upper A arms which need a little more added to them. The top half of the engine is one piece including, manifold, throttle body, distributor, and valve covers. If I want to make the engine more realistic I will have to do some surgery on it and add some stuff which doesn't look like it will be much fun. The build has a Holley carb. They really tried to cut corners on this kit.
-
Thanks , Pierre, but I think I have made them too thick now as you will see in the pics below. It's okay they are relatively easy to make
-
NASCAR Next Gen tips wanted!
MarkJ replied to dawgvet's topic in WIP: Stock Cars (NASCAR, Super Stock, Late Model, etc.)
Good, I'm too lazy to clean it up. Just shove everything to one side and make a space to work. -
Trumpeter Ford GT40 with my twists
MarkJ replied to kensar's topic in WIP: Other Racing: Road Racing, Land Speed Racers
Looking at all those drilled holes makes my head hurt. Let's see, if it took you 5 hours that would have taken me 15, and there would have been a lot of misshapen holes. -
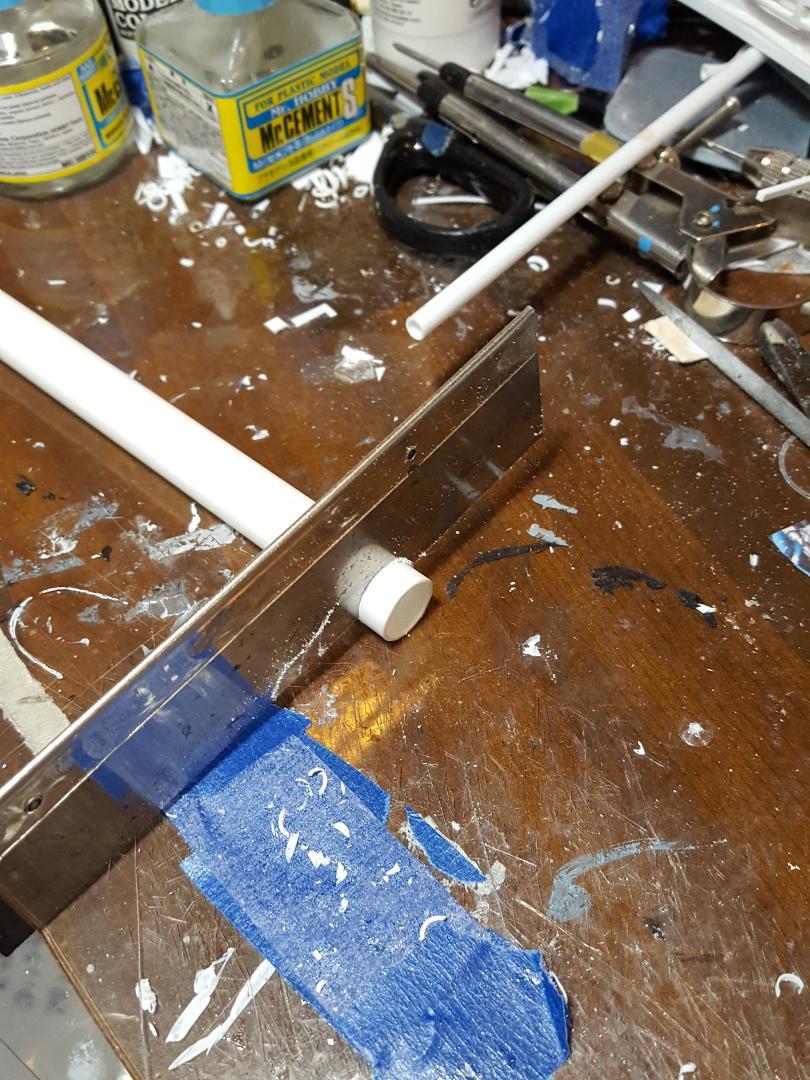
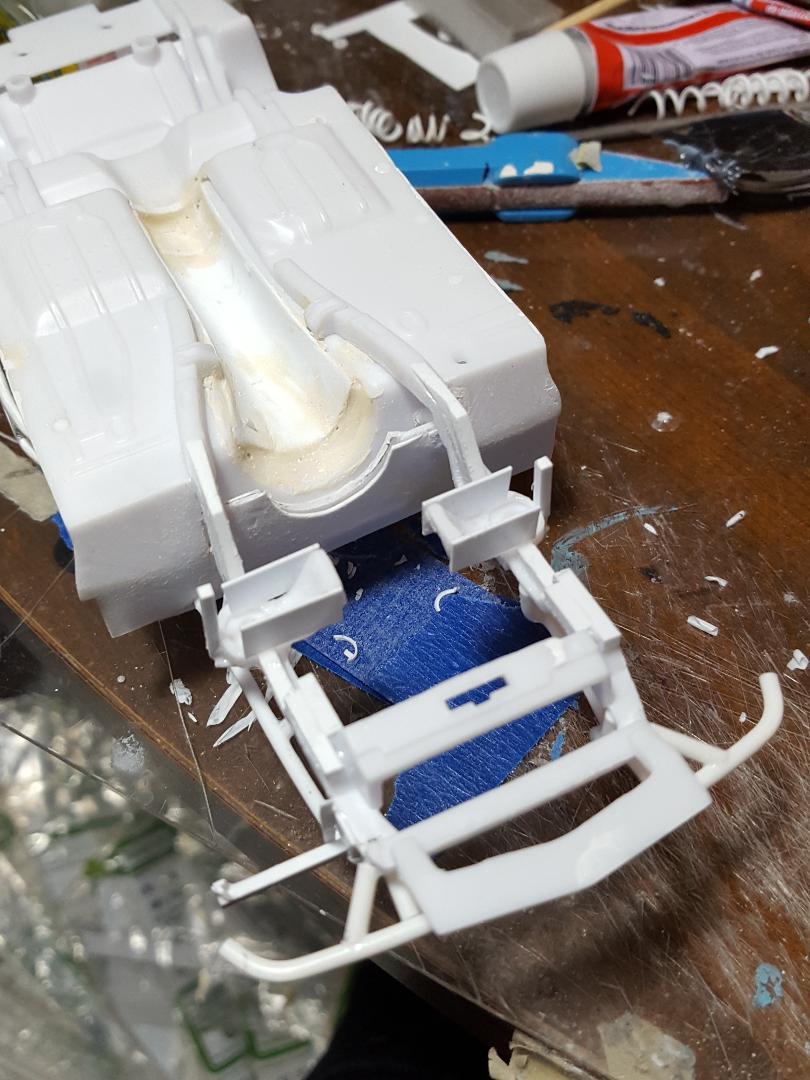
Started working on the front suspension. Made the lower spring arms from square tubing. Made the springs from small rod, .030 thick, wrapped around another rod to form the spring. I have to do over on the springs because they are just a little too thin. you wrap them around a smaller rod, than the diameter of the spring needs to be, because after you wrap the plastic around tightly and you let go of it, it relaxes to the correct diameter. Unlike kit springs, these look like real springs even though they are hard to see after they are installed. Already did the upper A arms but forgot to take a picture of them. Basically, just triangles sitting on top of the frame.
-
NASCAR Next Gen tips wanted!
MarkJ replied to dawgvet's topic in WIP: Stock Cars (NASCAR, Super Stock, Late Model, etc.)
Jim, I forgot all about that wip. Seems like a million years ago. Shows me that I need to clean up my workspace for my current build. It's getting way out of hand. The longer I spend on a build the messier it gets. -
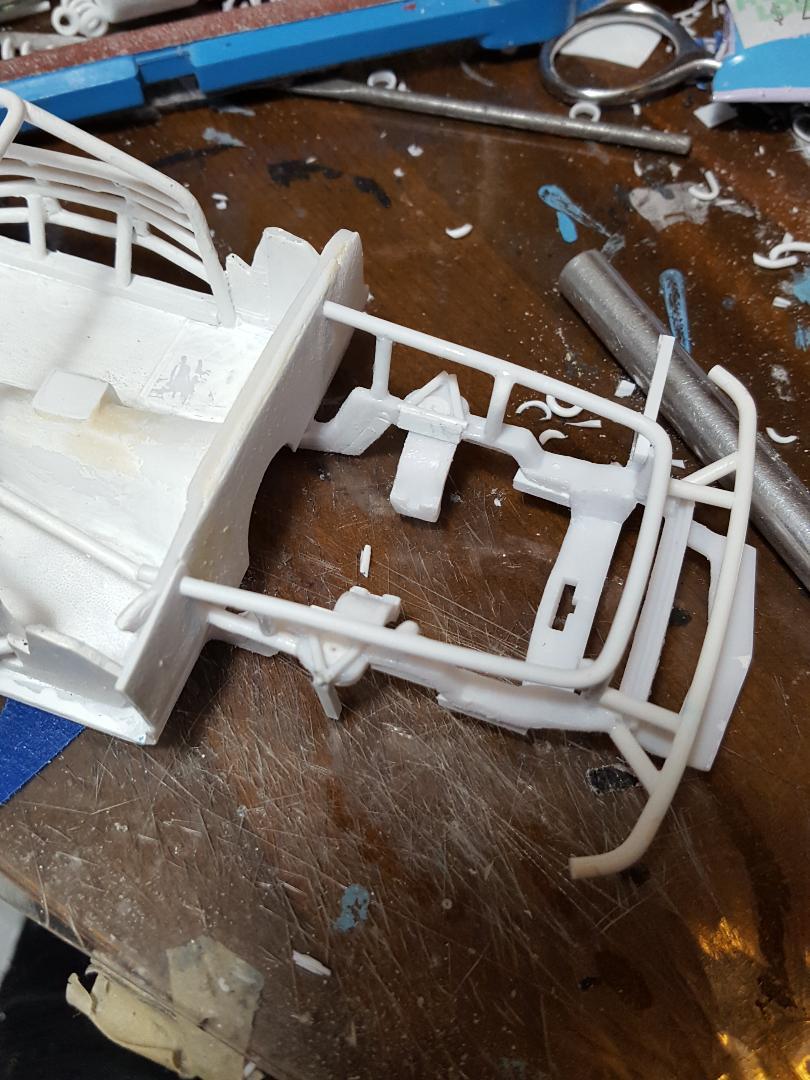
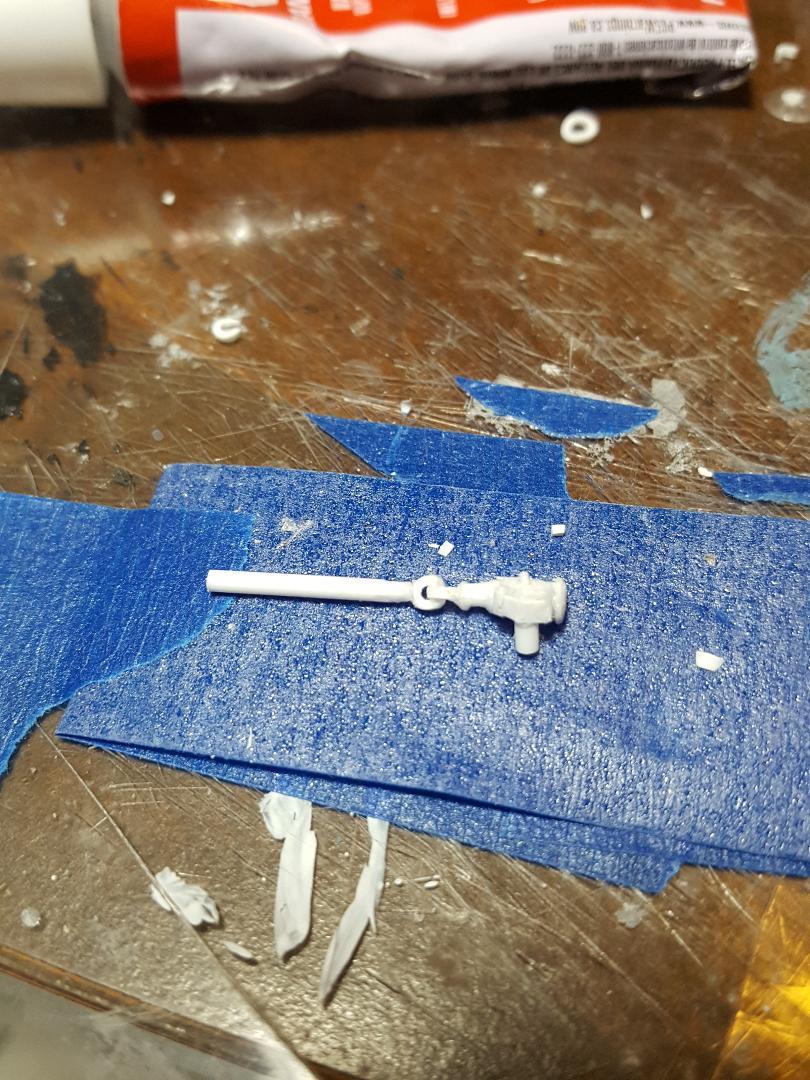
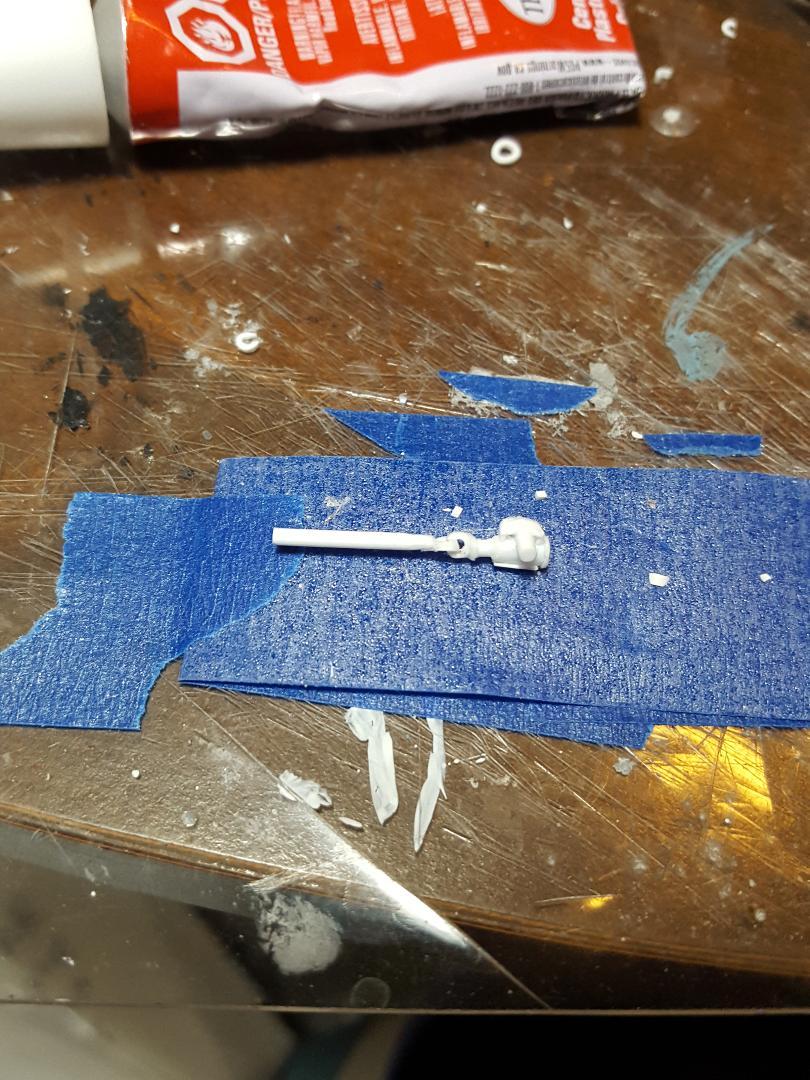
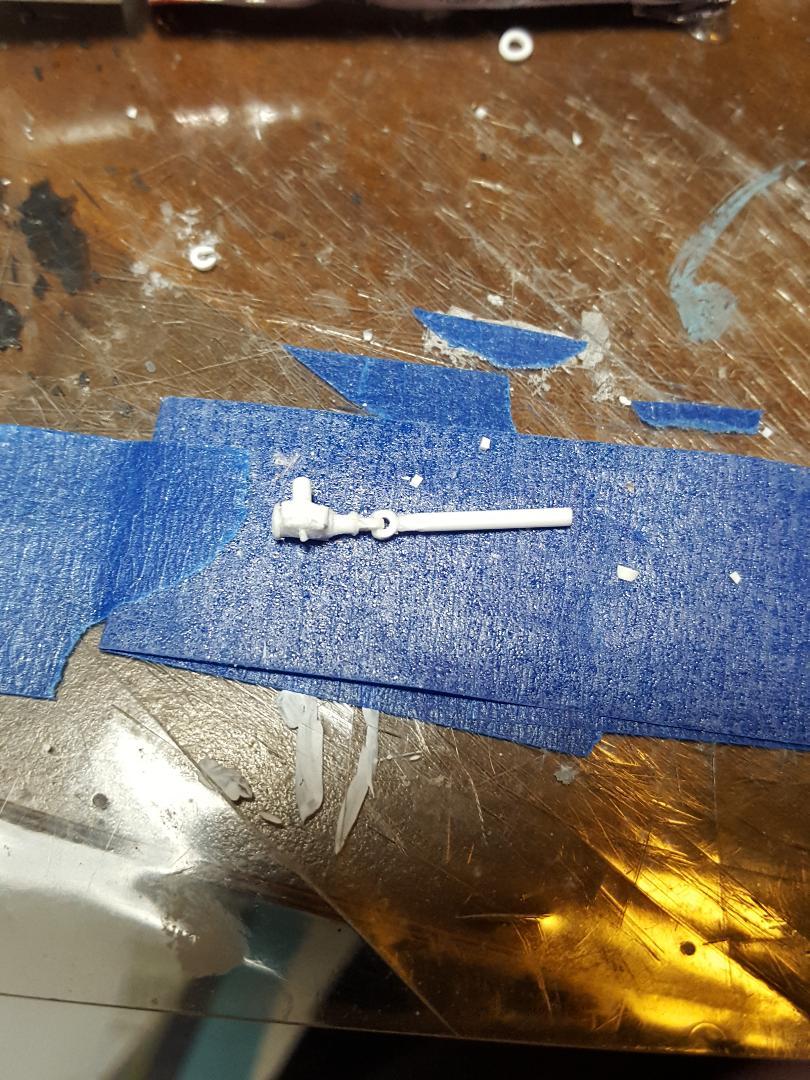
I'm going to call the steering box and shaft finished. I need to shorten the little nub on top of it and may have to shorten the lower shaft where the pitman arm attaches. When all these loose parts get finished, I will have a mass primer session and then a mass painting session to get them all the right colors.
-
Trumpeter Ford GT40 with my twists
MarkJ replied to kensar's topic in WIP: Other Racing: Road Racing, Land Speed Racers
Ken, I agree with you on the seats and your solution is awesome, but the work is going to be astronomical drilling all those holes and installing all those crimp tubes. The addition of the seams and wrinkles goes a long way to adding some fantastic realism. Keep up the amazing work. This build is going to be one for the ages. -
I guess you have a point there, Ken. But I know if yours was in 1/25 scale it would still look a lot better than mine. I'm just getting too old for this stuff anymore. The eyes and fingers just don't want to do what I'm trying to tell them to do. Take care, and thanks again for dropping by.
-
Thank you, Ken. if I could only put out the level of scratch building that you do, this build would be fantastic. Your work on the Ford GT40 is very upper-level work. It's amazing how your parts look better than the kit parts. Thanks again for dropping by and saying the nice words about my build. I'm in great anticipation about seeing your build come to the finish line and the awesome work that will be revealed.
-
Pretty much finished the steering gear. Added some more bars to the engine compartment.
-
Ken, really awesome build on the Vicky. Sounds like you did a lot of work to make it look just right, which it does. Really love the flat head v-8 and the stacks for exhausts. Thats a really cool touch. Again, excellent build.
-
Wow, Dustin. Such a great detailed and nicely weathered build. Excellent job adding the resin nose. I think a lot of people pass on doing this car because they don't think they can handle that part of it. Your skills keep getting better and better. Glad to hear you are healing nicely from your surgeries and this model is proof of that. Oh yes, and the Harley J. Earl trophy is a really cool addition to the build. Was that scratch built? If so, that is really impressive.
-
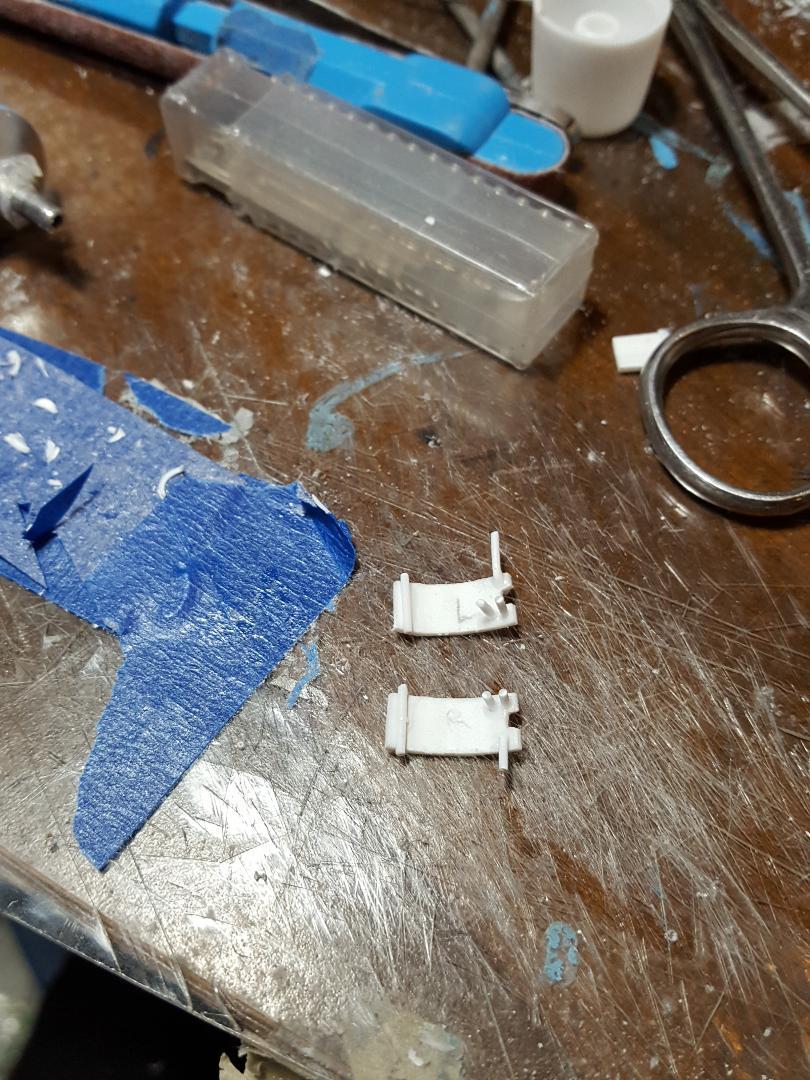
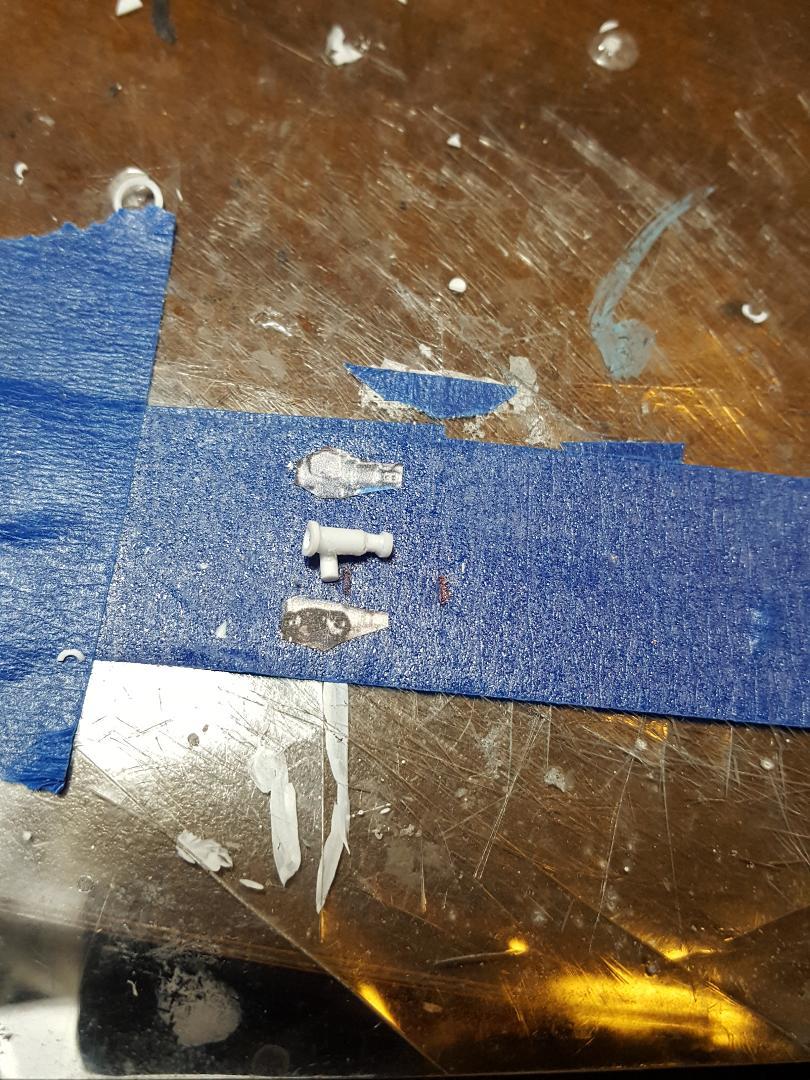
I took the pictures I made of the 1987 Monte Carlo nascar kit chassis and made them into actual size of the model, or 1:1 photos of the front suspension of the model. That way I can make parts right off the images like the steering box and the other parts of the front suspension. I've done this in the past for bodies of the models to make decals that fit exactly on the model like the roof and door numbers and all the other decals as well. The steering box is so small that it just needs to be a simple part with not much detail added to it, like the actual kit parts that come in the nascar kits. You can see below what I have so far for the steering gear box. It needs some more cutting and sanding and some sheet styrene added to the top of it. Just need something to connect to the steering shaft coming out of the firewall and the tie rod link for the front suspension. I will have to make a tiny pitman arm to connect steering gear box to linkage.
-
Thanks, Jason. I appreciate you dropping by for a look and comment.
-
I like everything about it. Your modeling skills are undeniable and your ability to crank them out so quickly is amazing. Keep up the great work.