.jpg.b9265433dc8c3b550370b1d0e4e4d2fc.jpg)
MarkJ
-
Posts
4,771 -
Joined
-
Last visited
Content Type
Profiles
Forums
Events
Gallery
Everything posted by MarkJ
-
.jpg.b9265433dc8c3b550370b1d0e4e4d2fc.thumb.jpg.915f5b46e3c9402eeaa6972073121c87.jpg)
Rolls-Royce No Chemicals, No Paint, No Harmful Glues
MarkJ replied to Anglia105E's topic in WIP: Model Cars
David, you are making great progress. One thing I'm not sure of is the back glass molding around it. Will this be chrome or something else. I must have missed something earlier in the discussion. Model on, I'm liking what I'm seeing. Mark J. -
Bocar XP5 - a 3D print
MarkJ replied to kensar's topic in Other Racing: Road Racing, Salt Flat Racers
So, Ken. You made your own kit and built it. Very impressed with your results as always. Beautiful race car. -
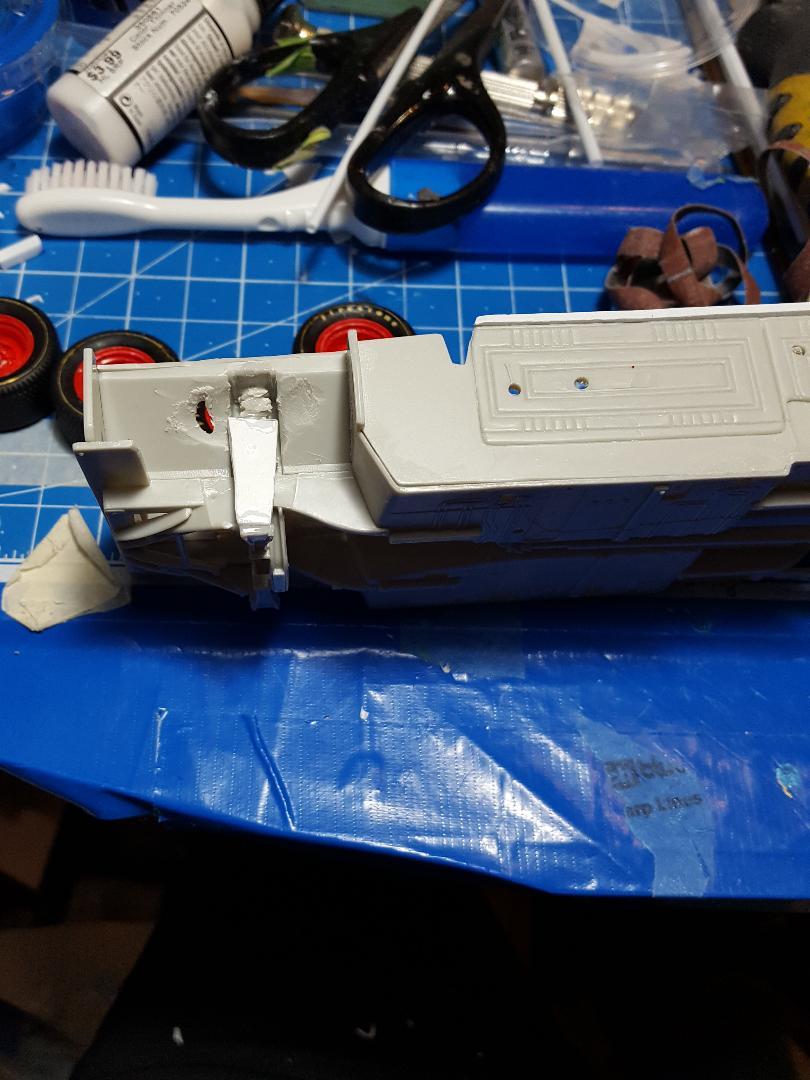
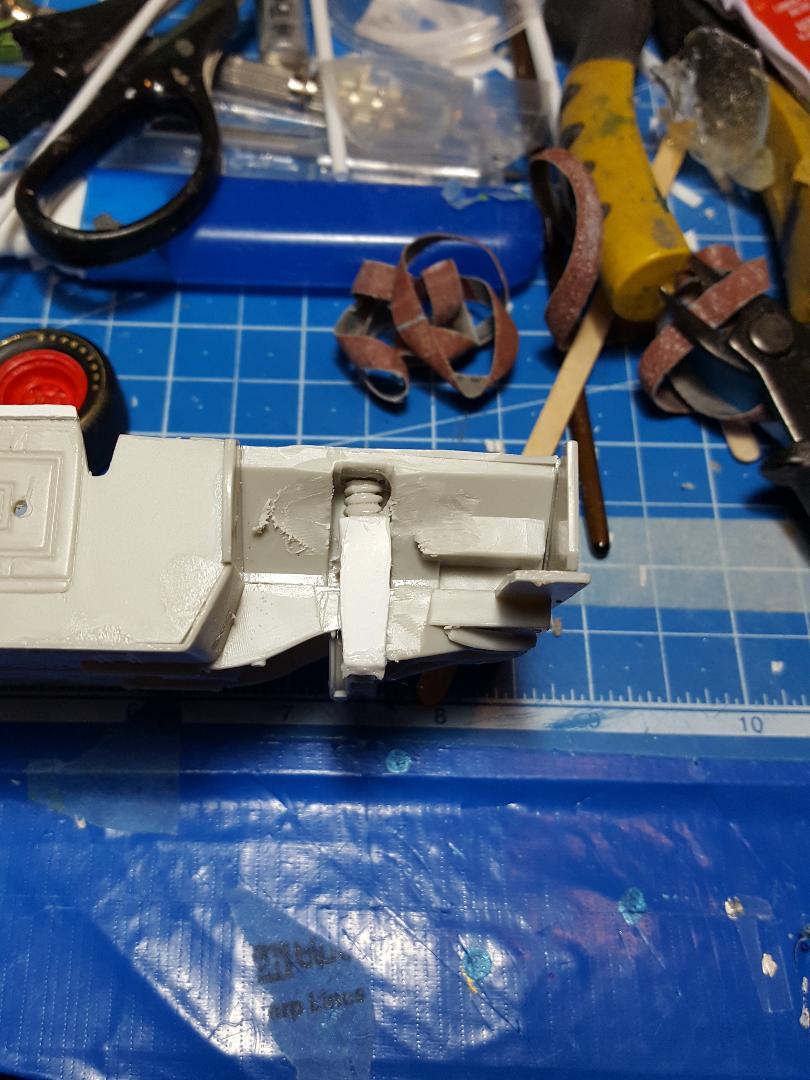
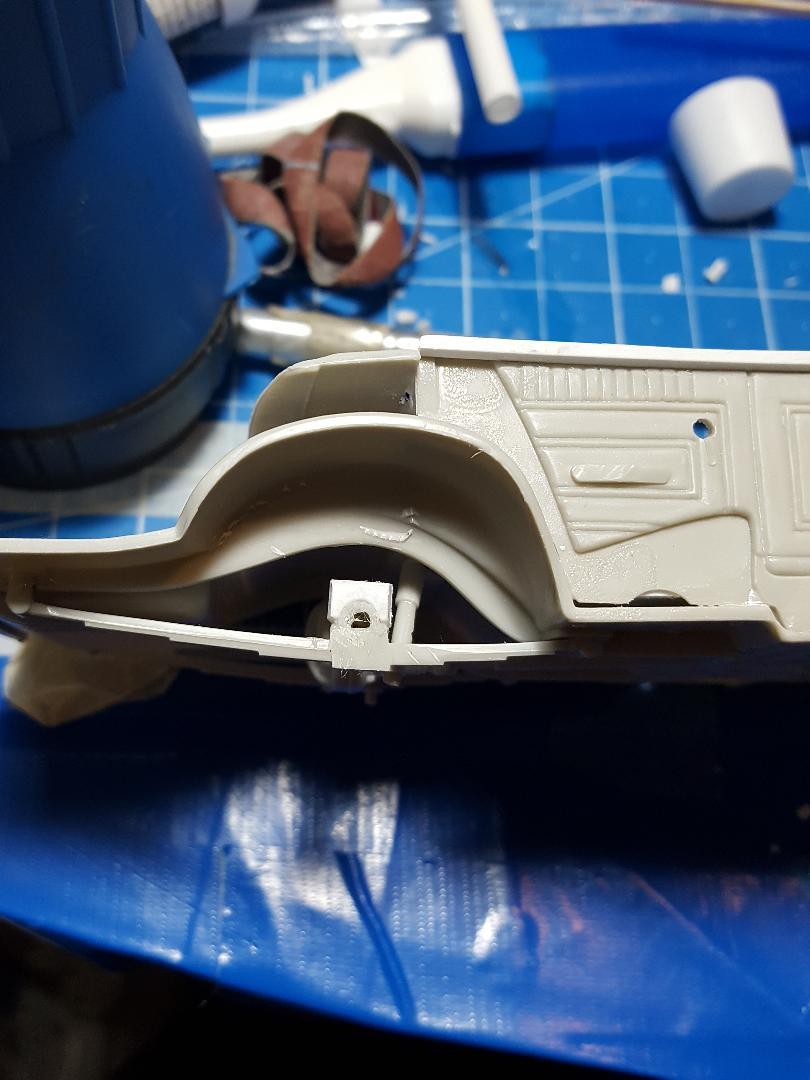
Made places where the huge tires can be mounted to the build and have the correct stance. Trying to make the suspension like the real car would have taken so much time and effort it would not have been worth it. So, I just went for the easy route instead as the photos below will show. I will have no views of the bottom of the car when I post the final photos. They are not necessary. This is a pure shelfer and that's it.

-
Thanks, Kevin for the advice. I will give a bigger brush a try and see if my results are better.
-
Rolls-Royce No Chemicals, No Paint, No Harmful Glues
MarkJ replied to Anglia105E's topic in WIP: Model Cars
I think you will have the results you are looking for. Great idea. -
Thanks, D.W. for stopping by and sharing your thoughts about the build. Appreciate it very much.
-
Rolls-Royce No Chemicals, No Paint, No Harmful Glues
MarkJ replied to Anglia105E's topic in WIP: Model Cars
David, Sorry to hear that. Keep us informed the best you can. I'm sure you will come up with a solution for this unforeseen problem. Mark J. -
Rolls-Royce No Chemicals, No Paint, No Harmful Glues
MarkJ replied to Anglia105E's topic in WIP: Model Cars
Thanks, David. -
Thanks D.W. Sounds like a good idea but I'm never going to have any views of the build from below because there is no engine or anything else under the car except places to hold the tire assembly's and two exhaust pipes so the treads will stay perfect on this model.
-
Rolls-Royce No Chemicals, No Paint, No Harmful Glues
MarkJ replied to Anglia105E's topic in WIP: Model Cars
David, excellent job on the foglamps. Your attention to detail is evident in every step you take, So the fog lamp's act as fog lamps as well as turn signals? Do I understand this correctly? Mark J. -
Rolls-Royce No Chemicals, No Paint, No Harmful Glues
MarkJ replied to Anglia105E's topic in WIP: Model Cars
Interesting about the fog lamps. The headlamps came out perfectly. Does the flying lady radiator ornament come in the kit? When will she find her way to the build? Mark J. -
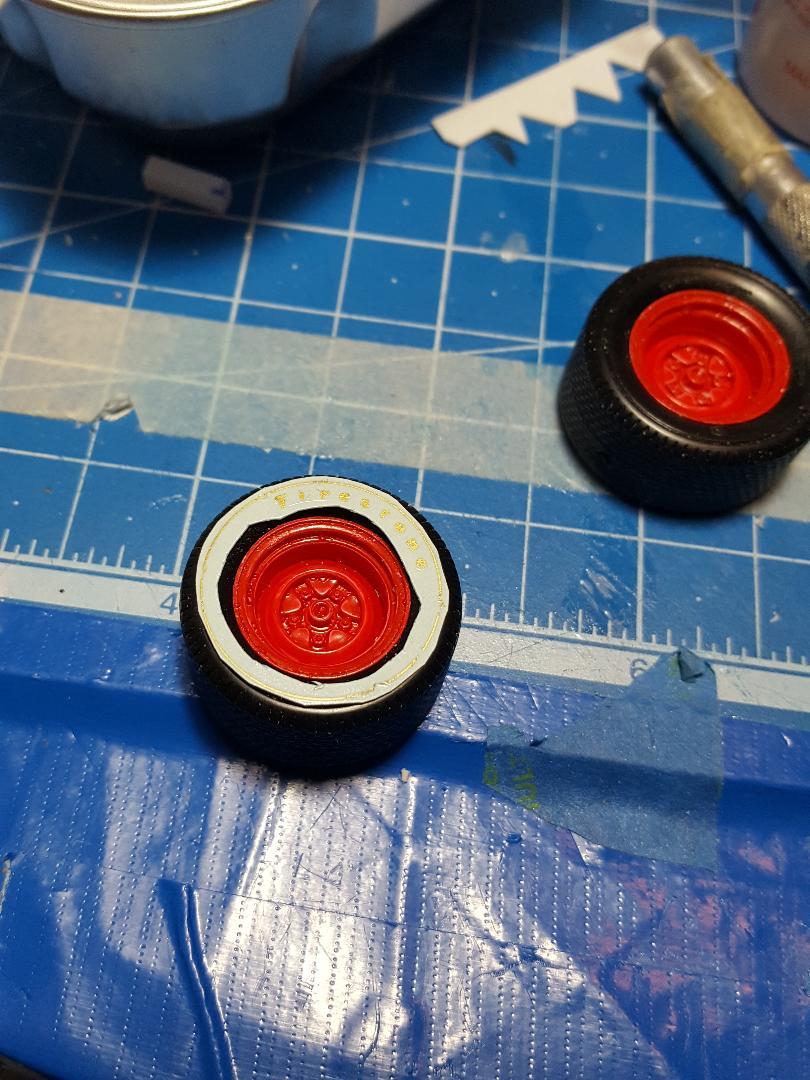
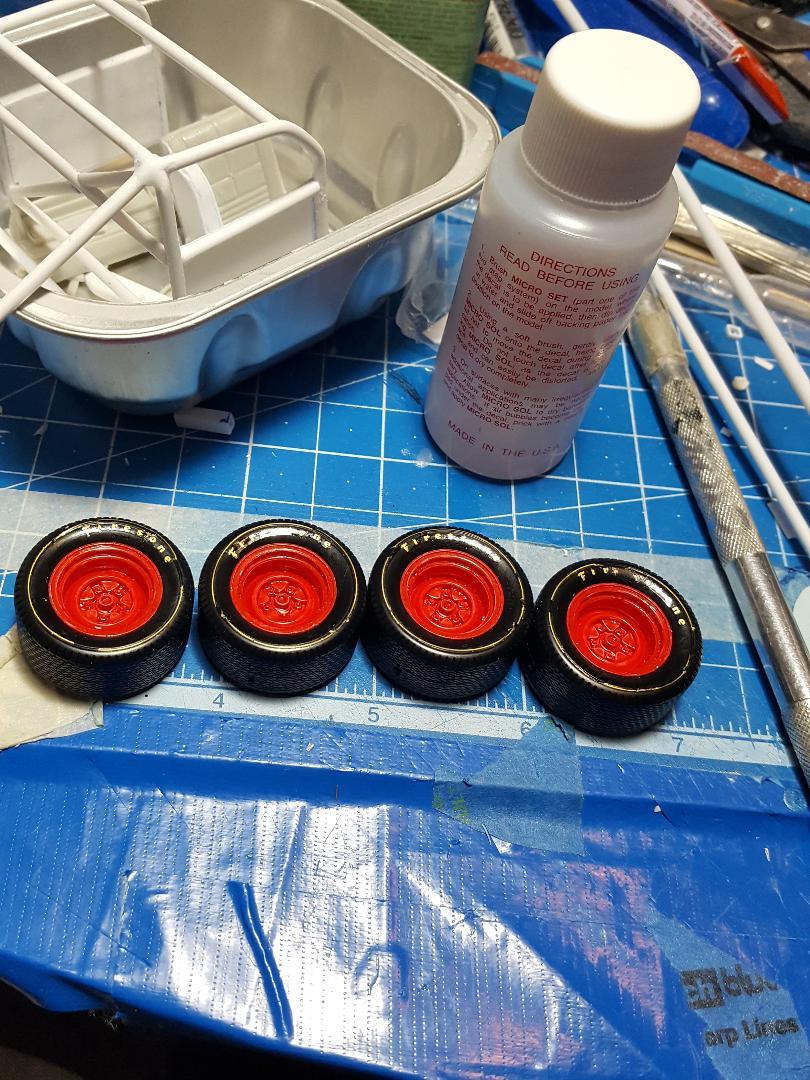
The tire decals were very old and very brittle. I pieced them together on the tires the best I could and will have to live with the results. I will try to fill in the gaps with a very sharp toothpick and gold paint. It is what it is. I'm not buying another set of tires hoping the decals enclosed will be any better. Not worth the time and effort. I can never remember anyone posting a model with these tires with these decals on them. Now I know why.
-
Rolls-Royce No Chemicals, No Paint, No Harmful Glues
MarkJ replied to Anglia105E's topic in WIP: Model Cars
David, this build looks better and better every time I view it. Keep up the great work. Mark J -
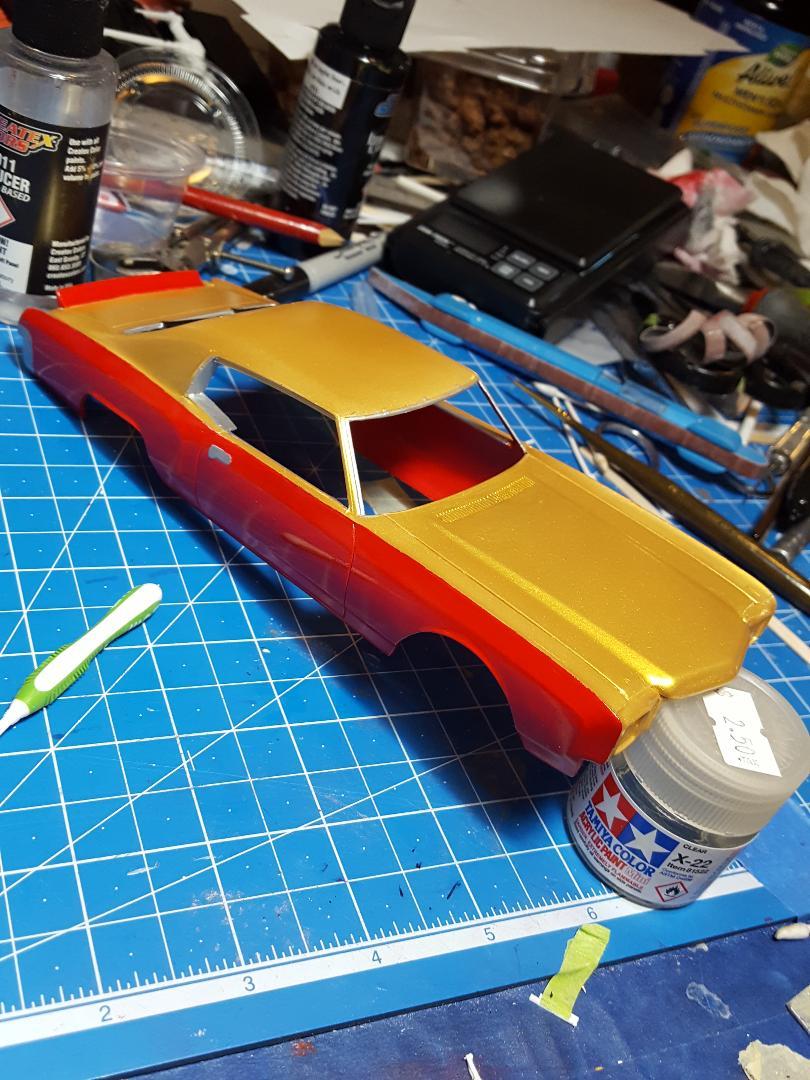
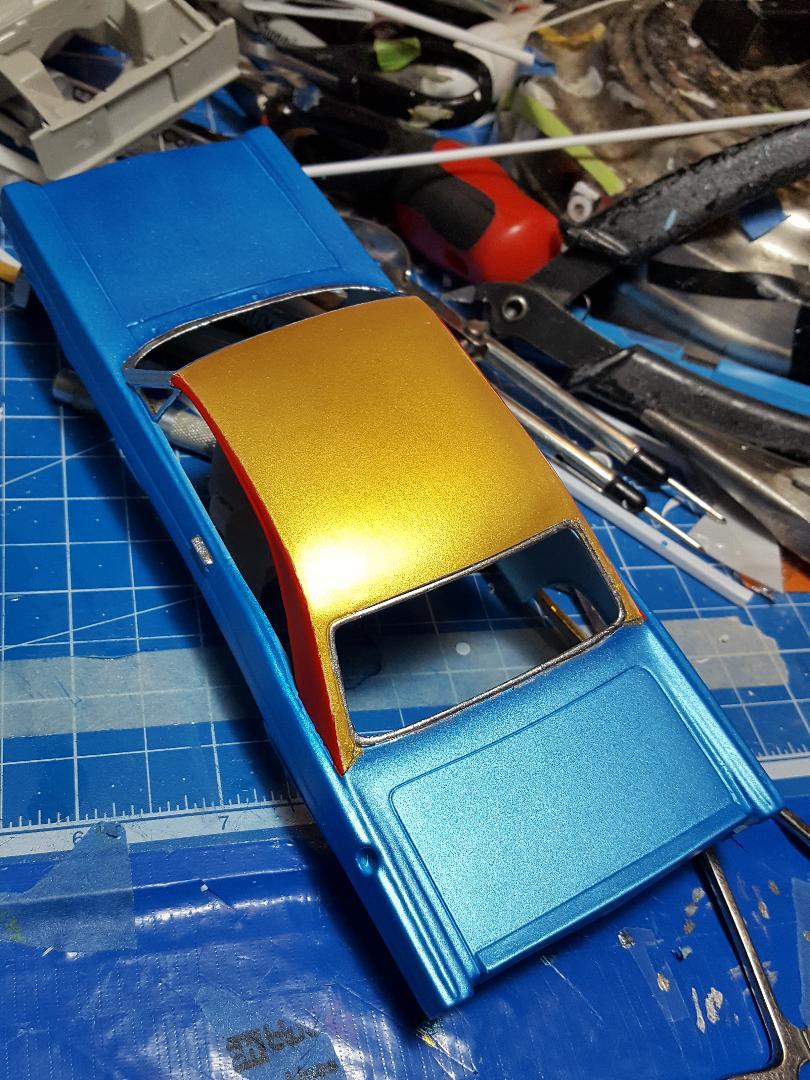
David, yes it should work because I have had to do it before when I use to bristle brush everything. It would come out glossy but have brush strokes in it so I would clear it with a brush and use very fine grits of sanding pads from 3400 to 12000 to get it smooth and glossy but it was always a lot of work which I don't usually have with the air brush. As you will notice the gold is already glossy and smooth, so I won't have to sand or polish it. I didn't have to sand or polish the Monte Carlo I finished before I started on this build. Mark
-
Great job on those stripes, David. So that's what a 1/12 scale model looks like. You did a great job on the whole model too. Below are the pictures I mentioned, glossy but grainy at the same time. I have my work cut out for me. Mark
-
Thanks, David. The finish is now glossy but grainy at the same time especially on the hood. I will post a photo later showing this. My aim is to get the graininess gone and have a smooth glossy finish. That will take a lot of polishing and probably another coat of clear. I will wait a couple of more days before I start the polishing process. In the meantime, I will try to prime all the interior pieces and get them painted and then assemble the interior. I also need to decal the tires with firestone decals and a gold stripe. This is very painstaking work to get the gold stripe evenly all around the tire using a toothpick to nudge it into place and hope that the decals are not too old and brittle. A tiny drop of dish detergent in the decal water will help in making the stripe move easier into place. Then I can start thinking about final assembly. Mark
-
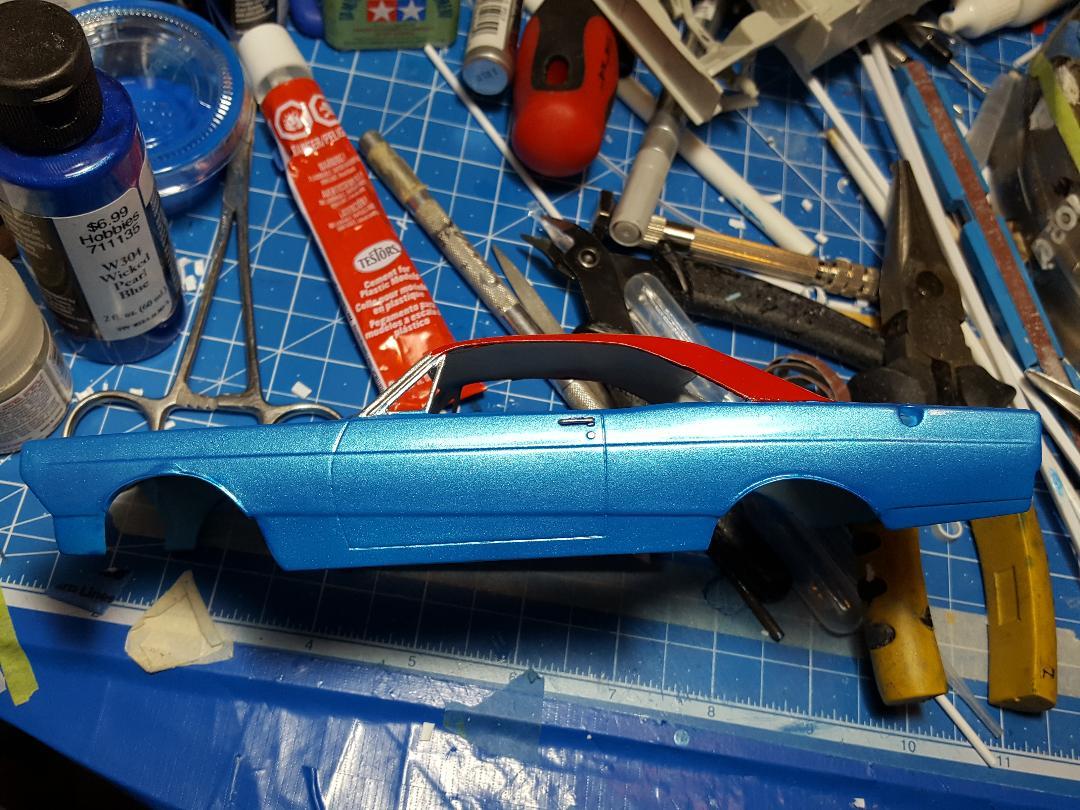
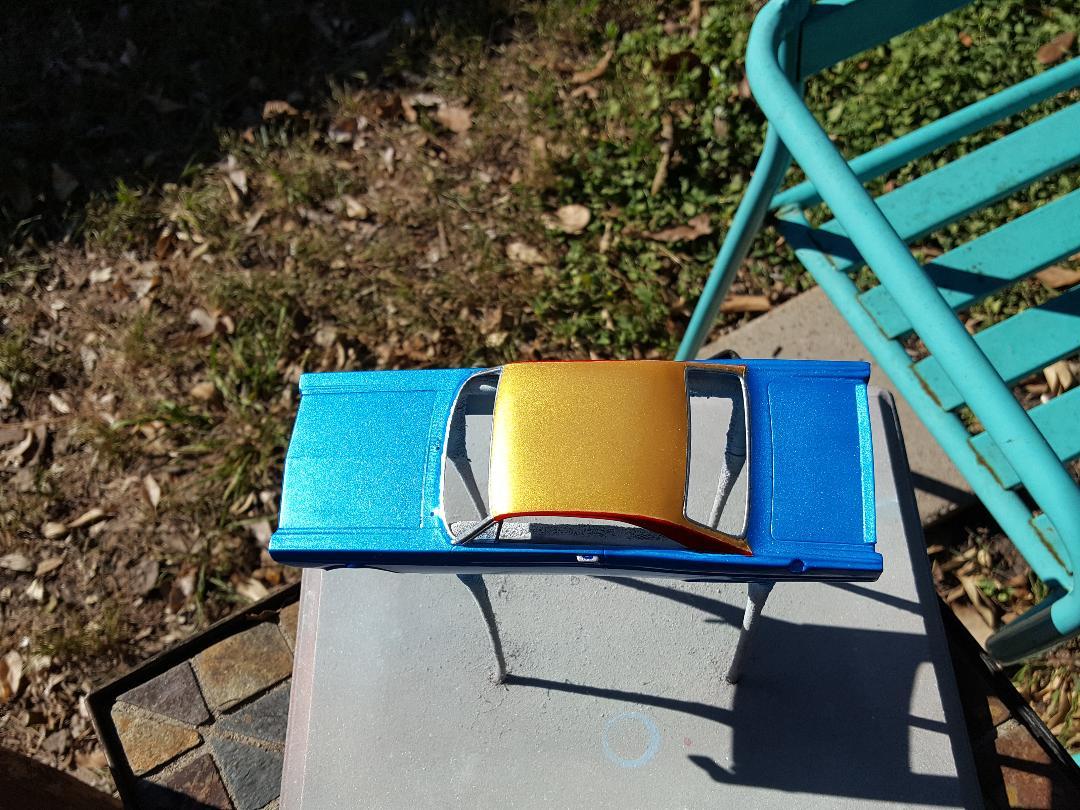
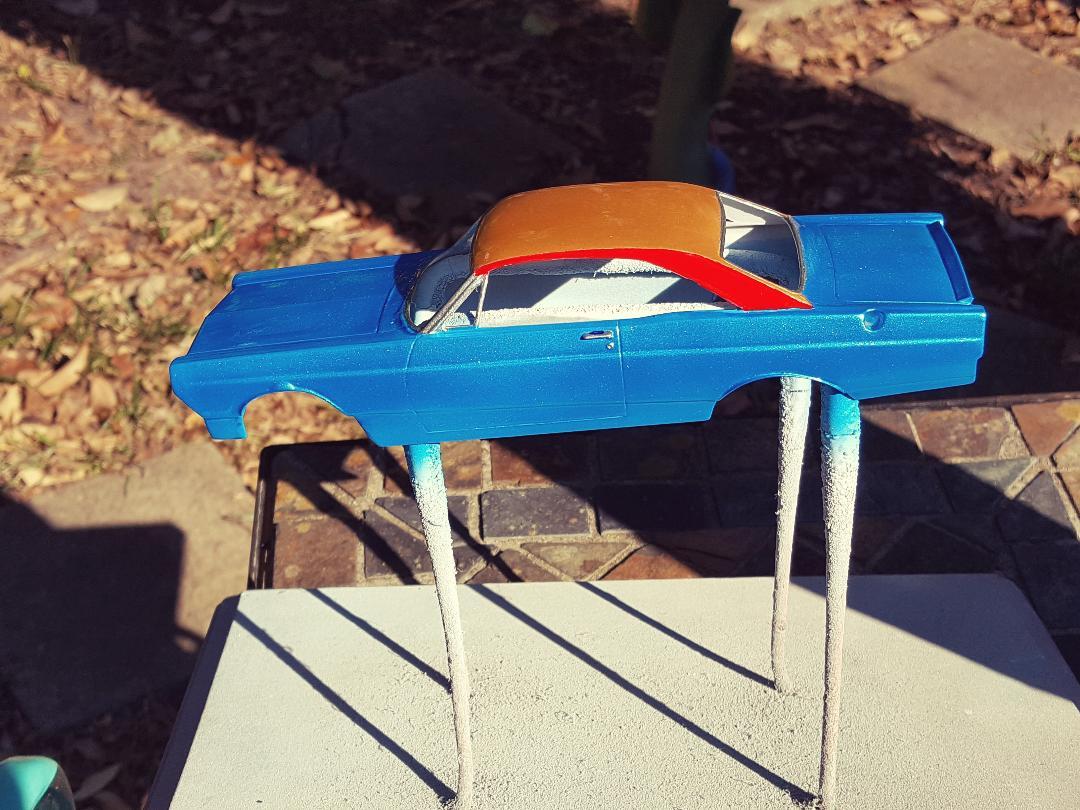
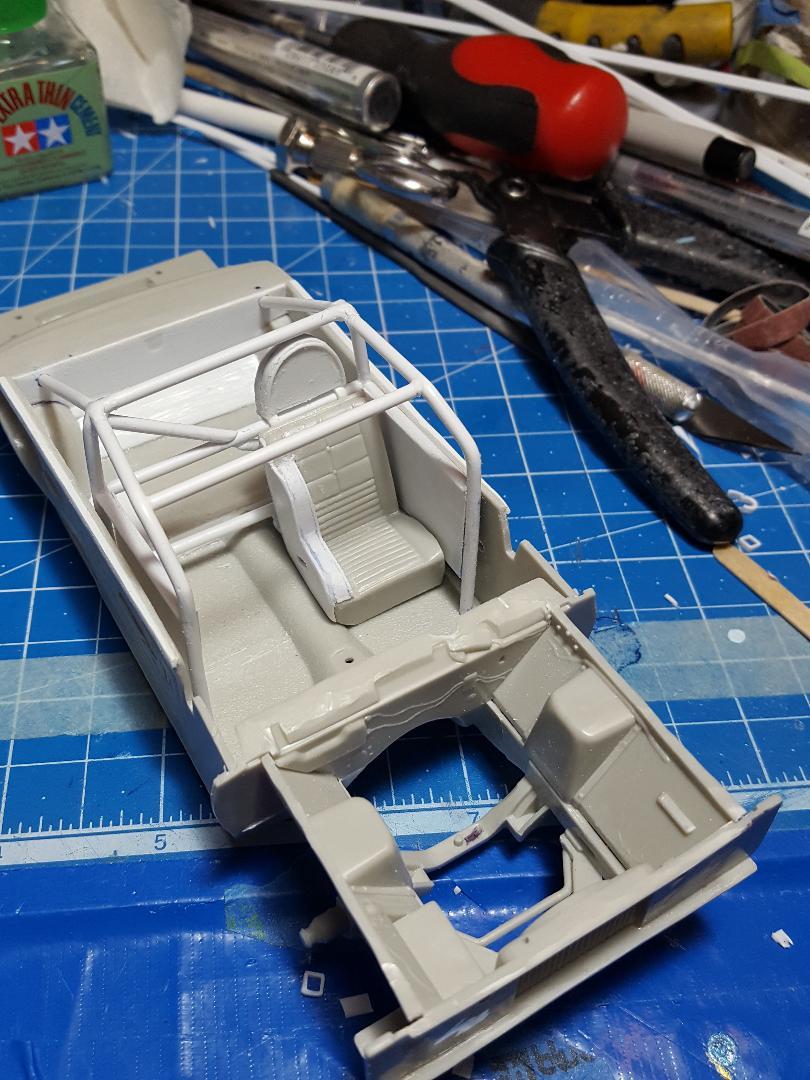
Got the body cleared and I will have to sand the blue and maybe reclear it if I go through to paint. The blue did not go on as smoothly as the gold. I don't know if it was because it was a mixed paint and the gold was not. Maybe with mixed paint the ratio of paint to thinner needs to be tweaked a little. maybe a greater percentage of thinner to paint. I'll wait a few days before I try polishing with sanding pads. probably start at 3600 and go up to 12000 being very careful not to go through. the clear. Got the head support done and the seat except for harnesses that go on after painting.
-
Rolls-Royce No Chemicals, No Paint, No Harmful Glues
MarkJ replied to Anglia105E's topic in WIP: Model Cars
Wow, David. That sounds like quite a list. Model on and enjoy the journey. Mark J. -
Rolls-Royce No Chemicals, No Paint, No Harmful Glues
MarkJ replied to Anglia105E's topic in WIP: Model Cars
David, I'm glad you got your fit issues figured out about the dash. Looks like you're getting pretty close to the end. Mark J. -
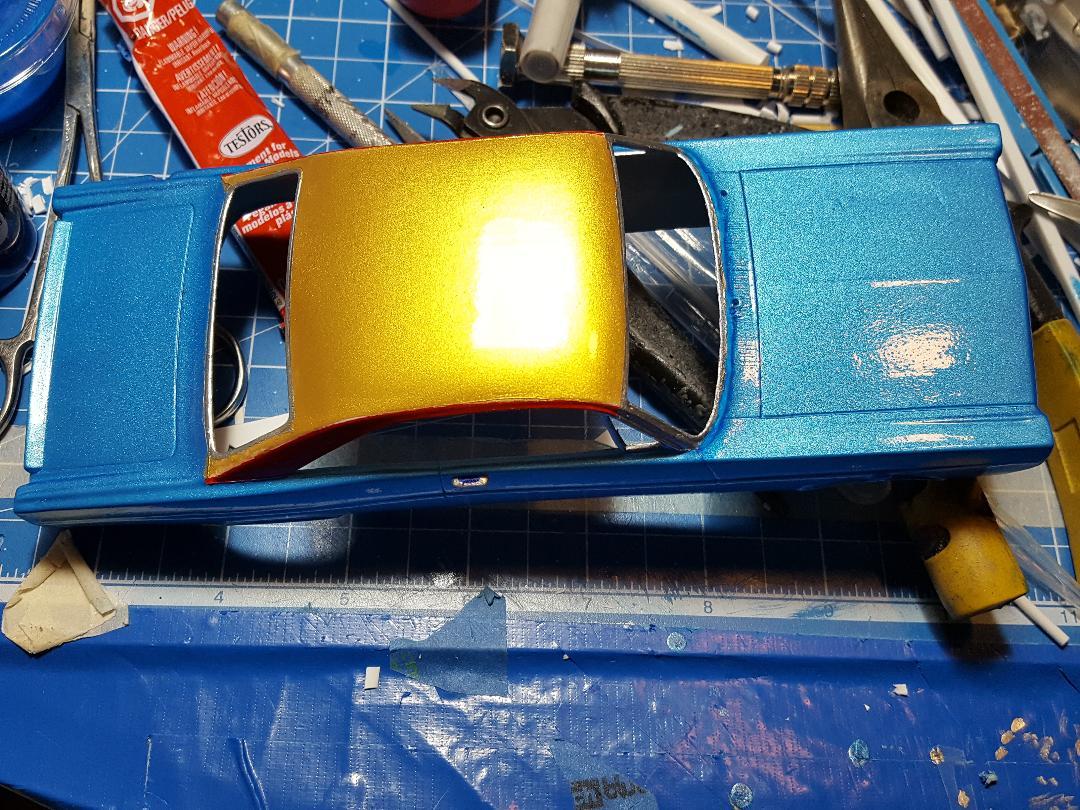
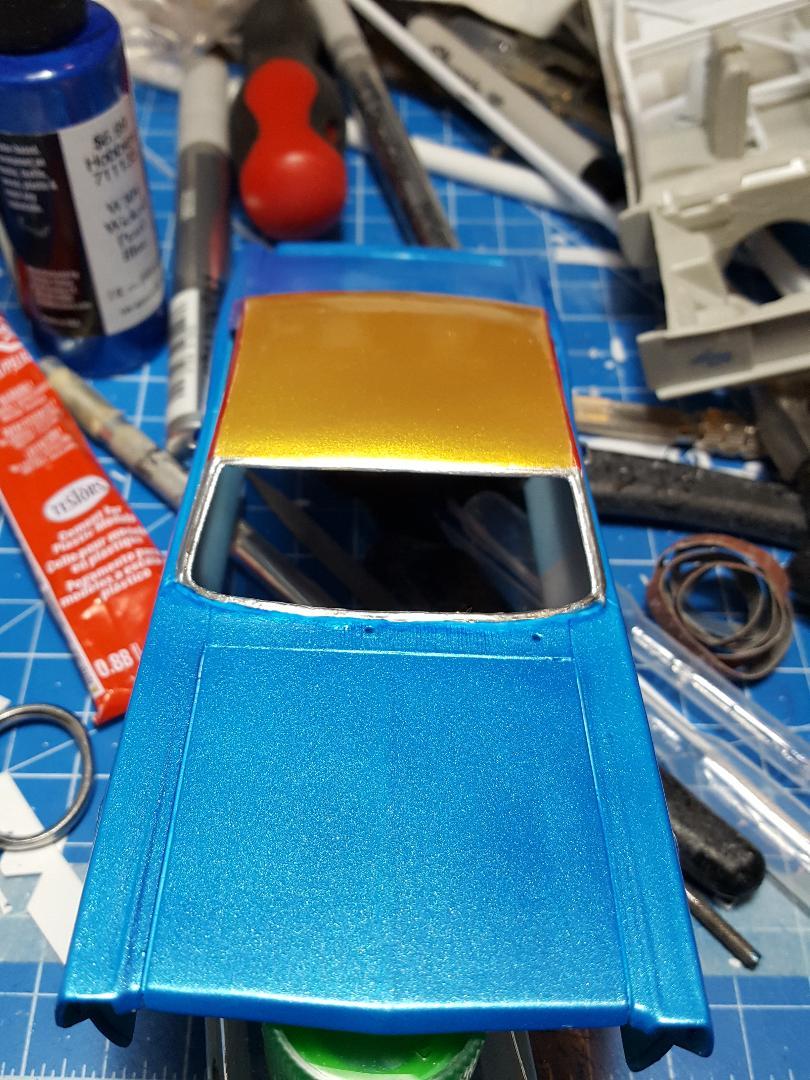
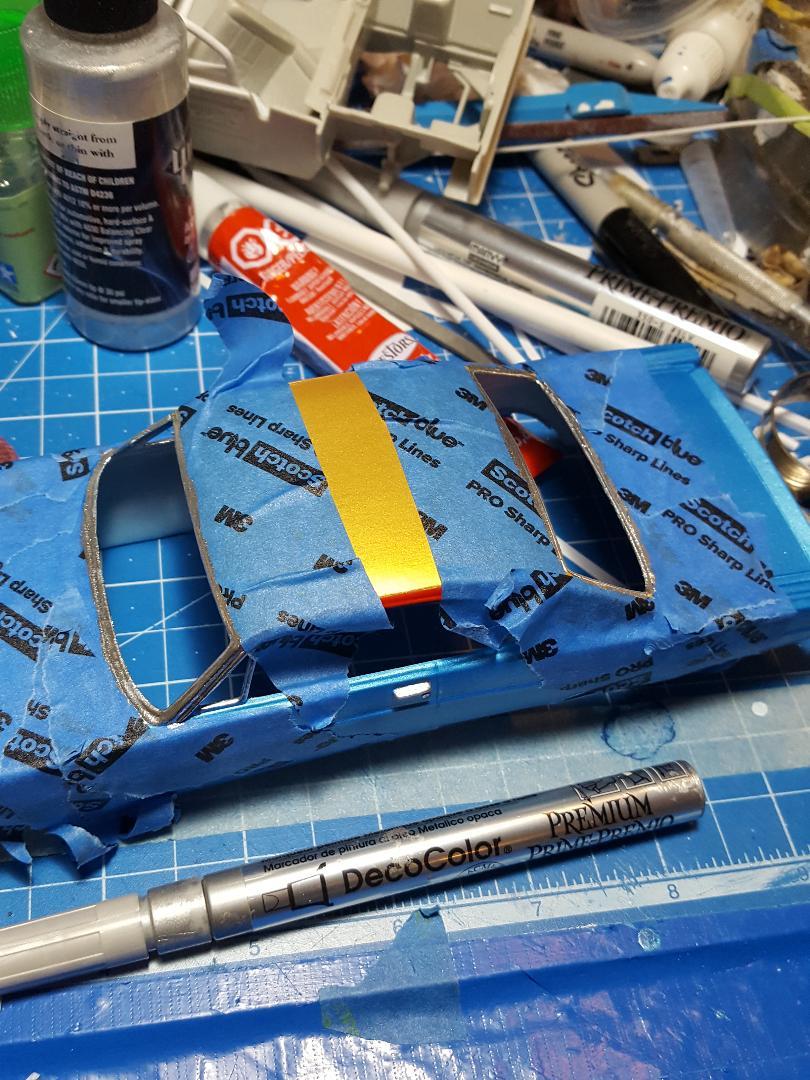
Thanks , David. Your work with the sharpie reminded me to try that silver paint pen with the sharpie tip on it. I never tried to use it before with masking tape and that's why I never got good results. So, you led me to a new way for me to do my chrome moldings. I believe the body might finally be ready for clear so I might try to do that today. Mark J.
-
Thanks, Steve. I will check it out.
-
Thanks, Steve. Its slow going. As usual every step forward, I take I take two steps back. I keep trying to use the Tamiya liquid glue, but it takes forever to actually hold the part strong enough to continue the build on the piece I'm working on, so I revert back to the old testors tube glue that also takes forever to set but at least it holds the parts together once it does. I wish somebody would make a fast setting glue that actually holds the parts together that isn't dangerous for my lungs.
-
I will need to find the wip on your build. is it here in mcm forum?
-
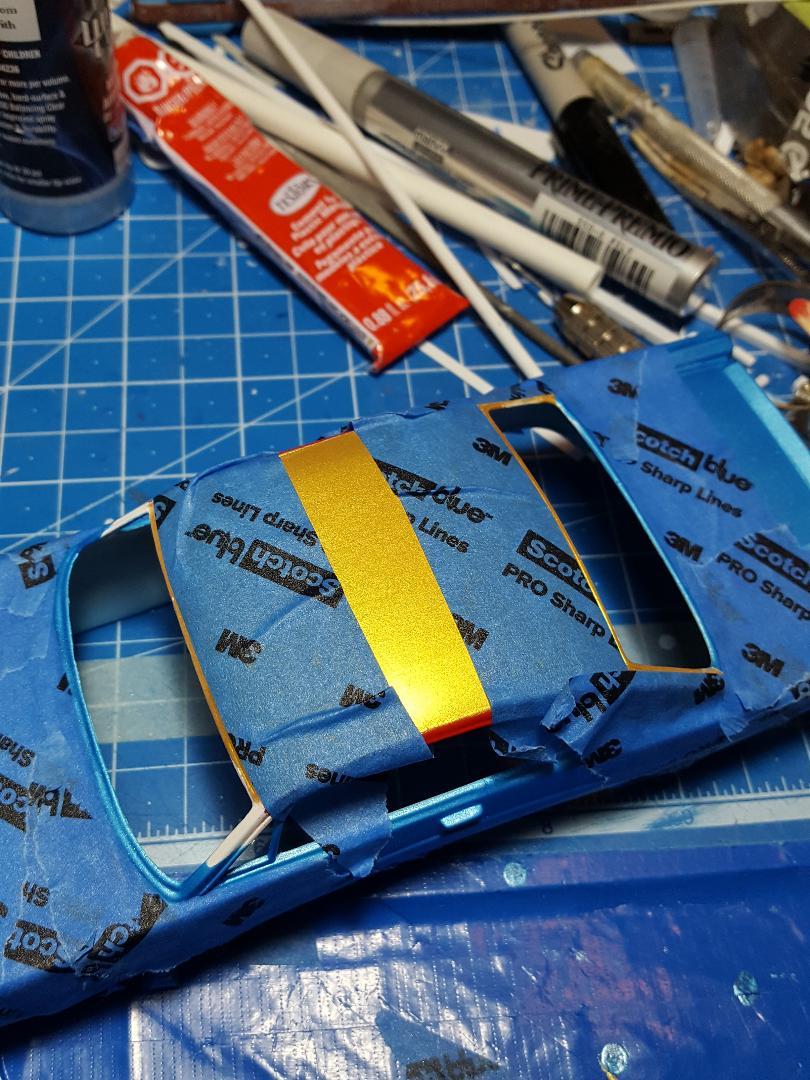
Tape removed. Looks good enough till I clear it.
-
Got the glass moldings painted using a paint stick.