.jpg.b9265433dc8c3b550370b1d0e4e4d2fc.jpg)
MarkJ
-
Posts
4,693 -
Joined
-
Last visited
Content Type
Profiles
Forums
Events
Gallery
Everything posted by MarkJ
-
.jpg.b9265433dc8c3b550370b1d0e4e4d2fc.thumb.jpg.915f5b46e3c9402eeaa6972073121c87.jpg)
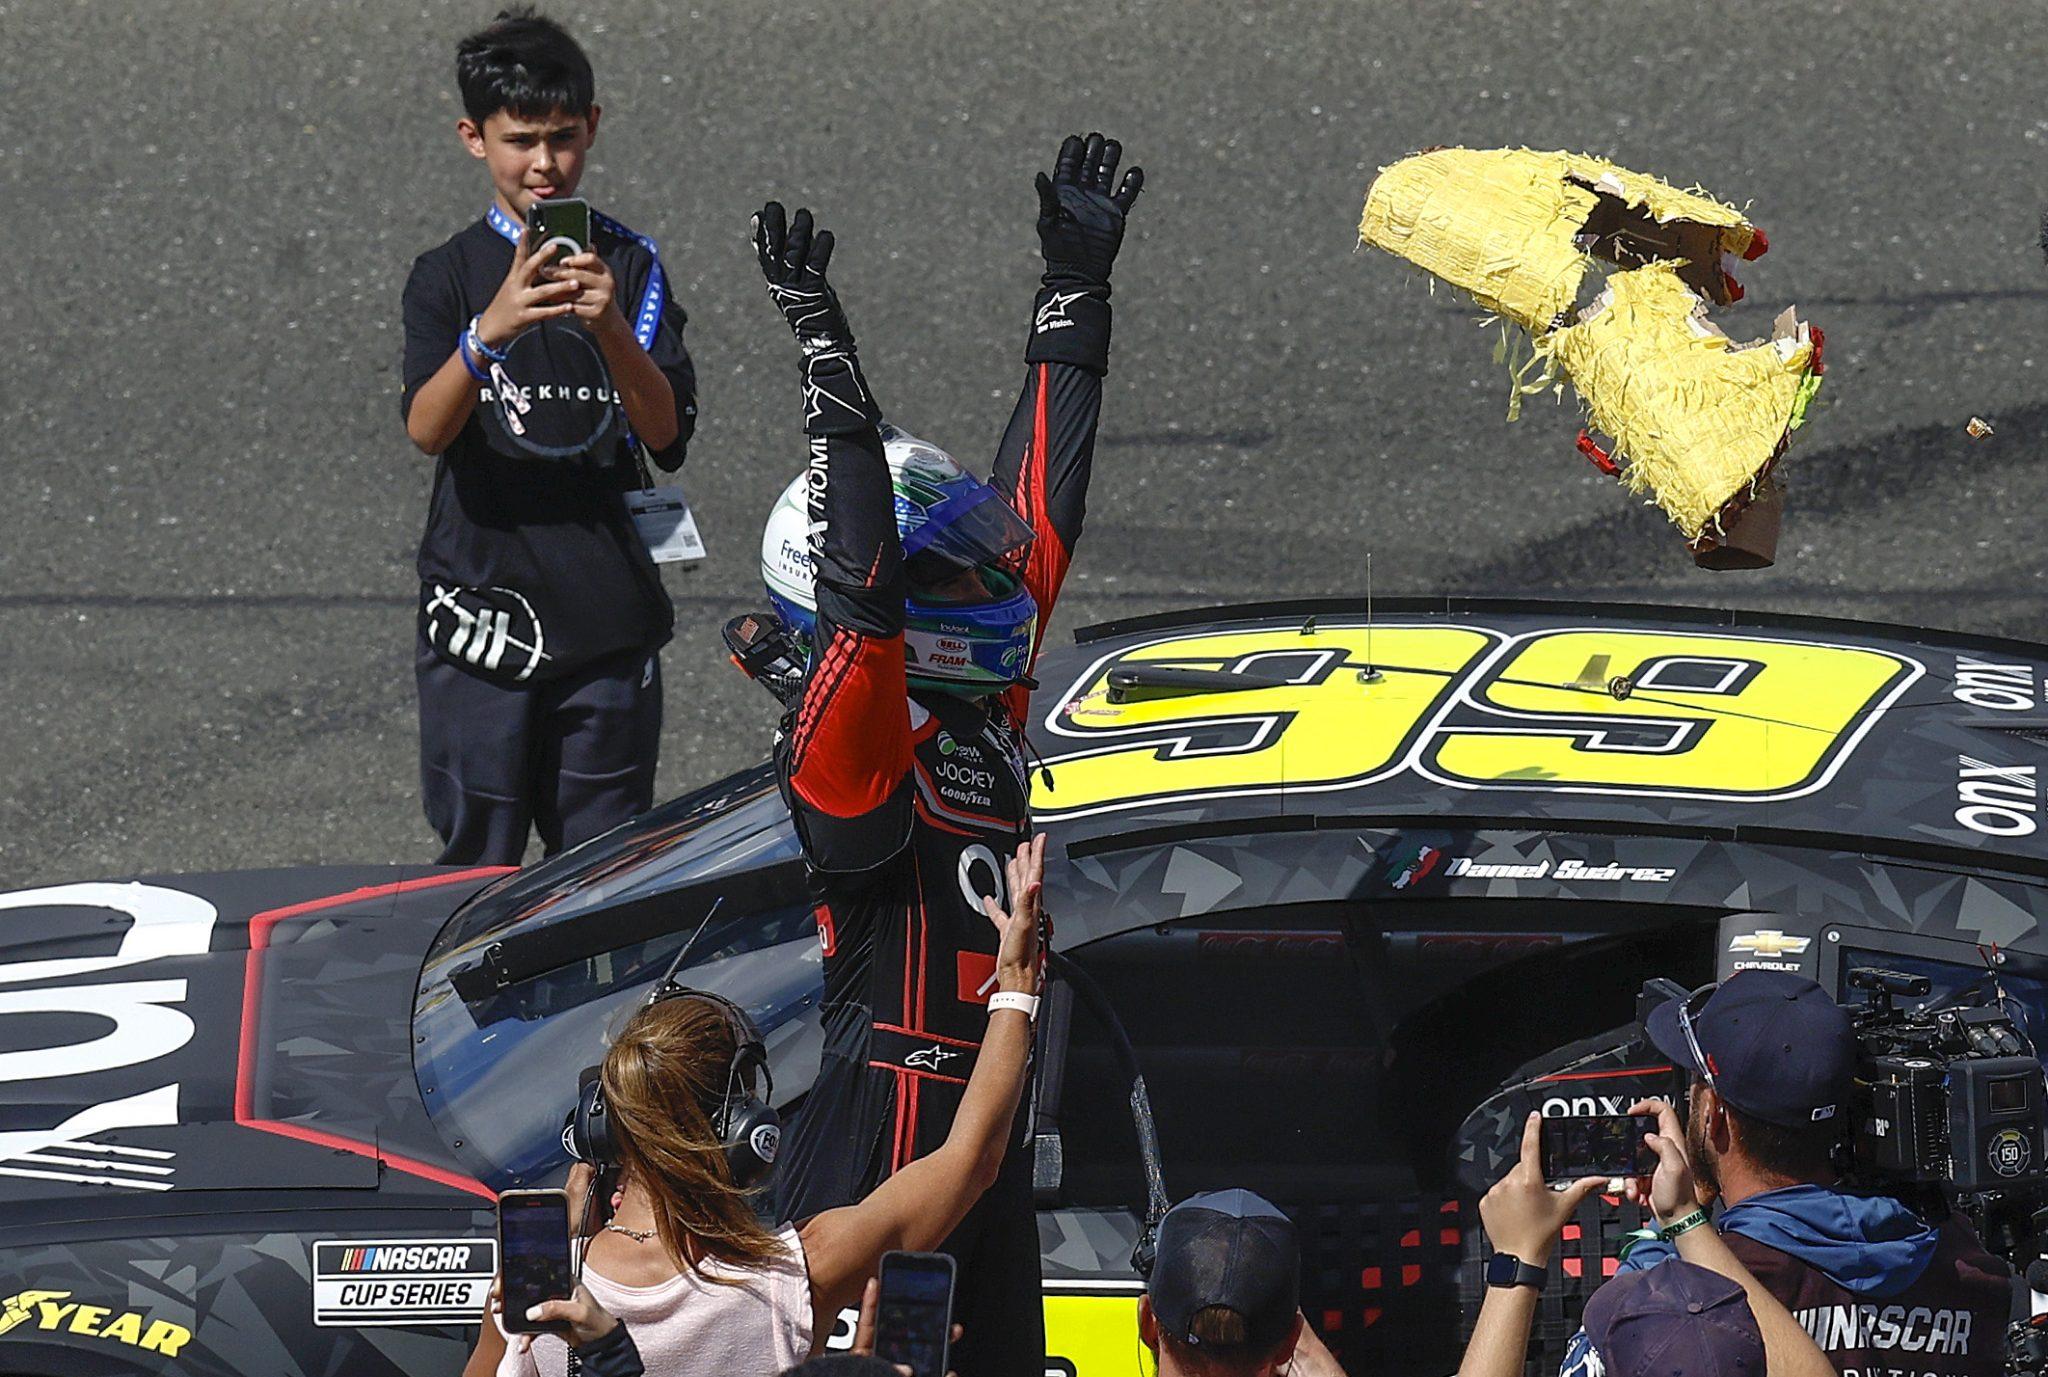
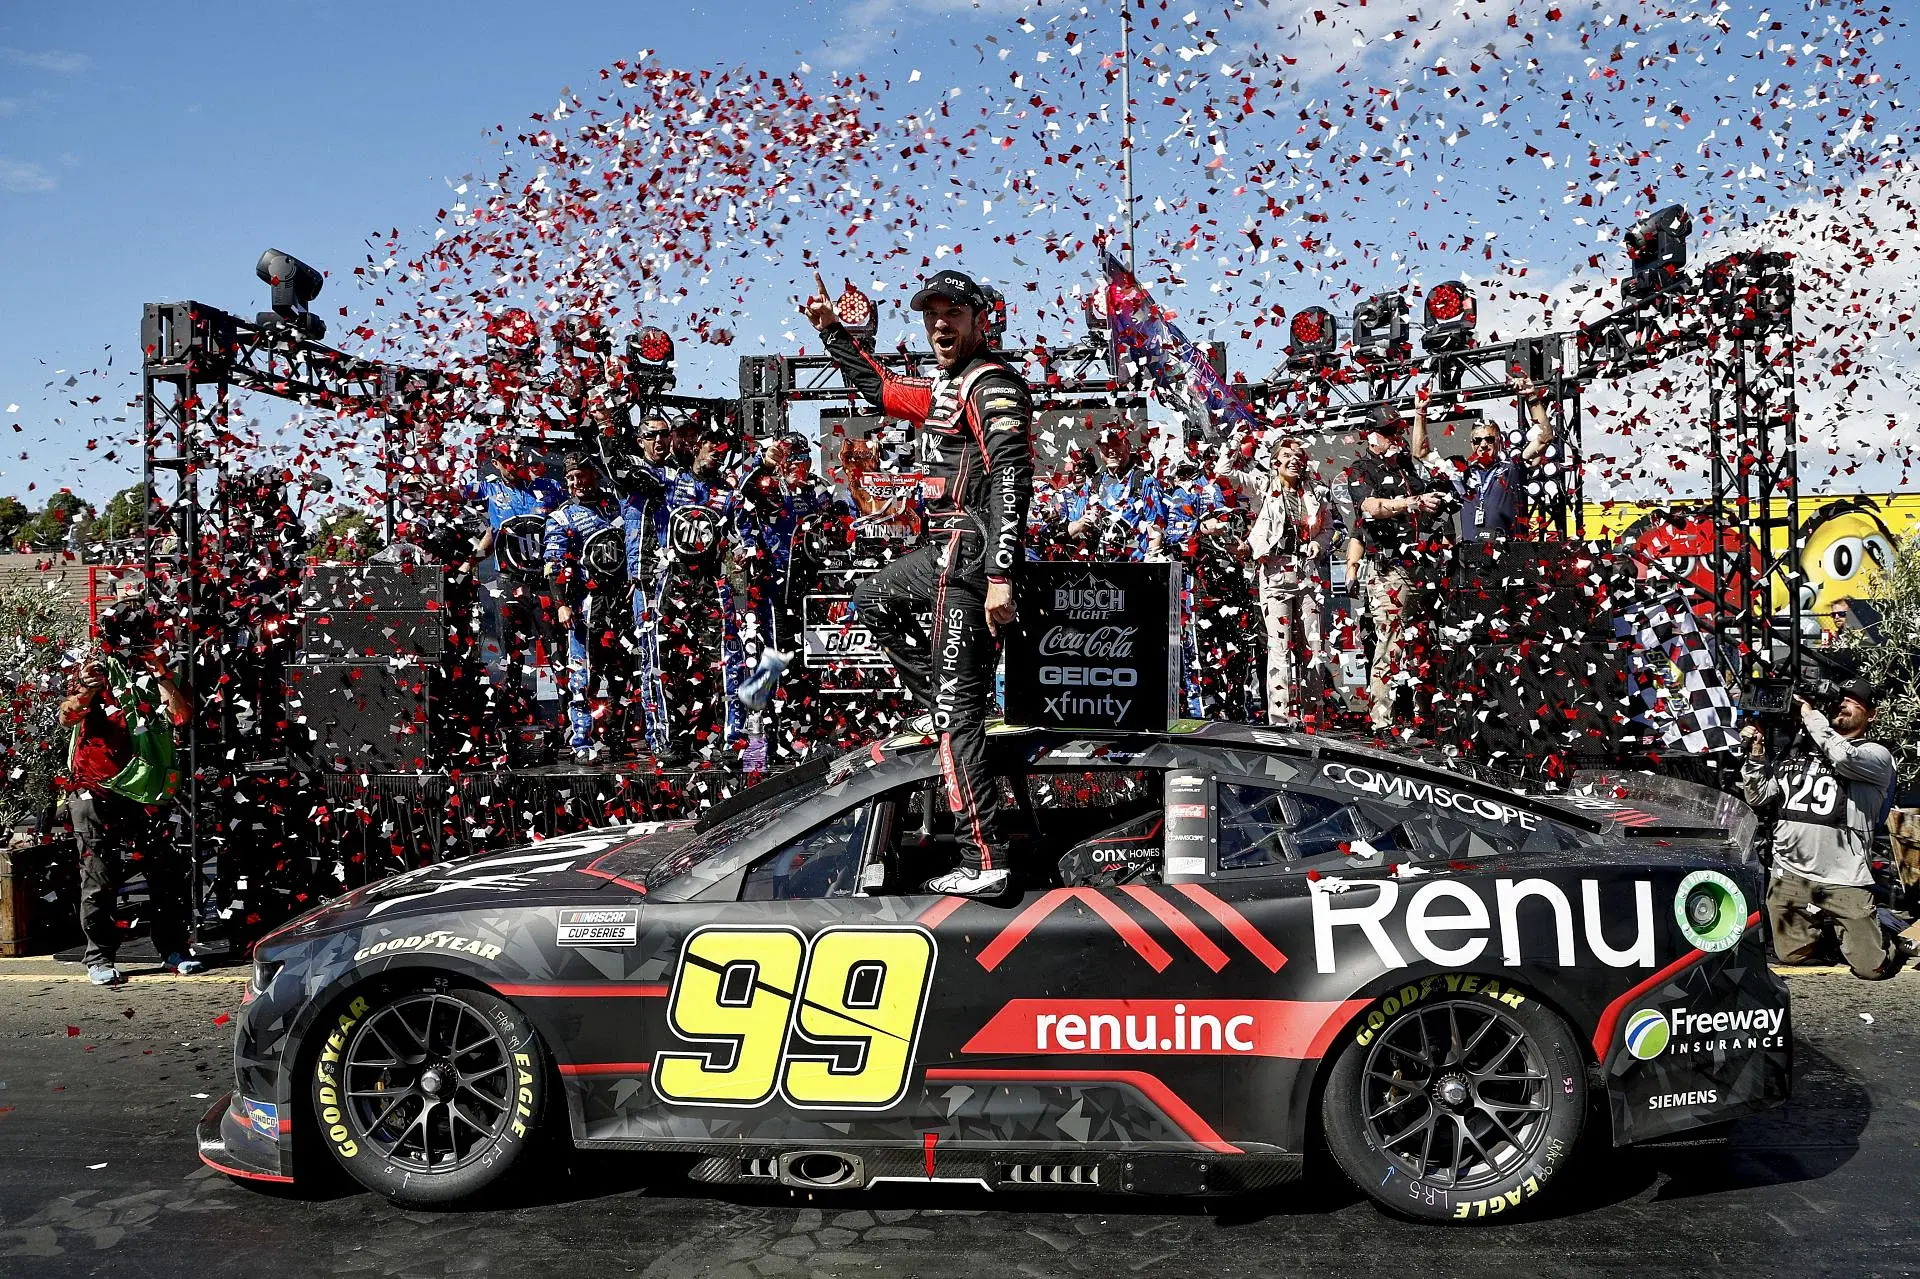
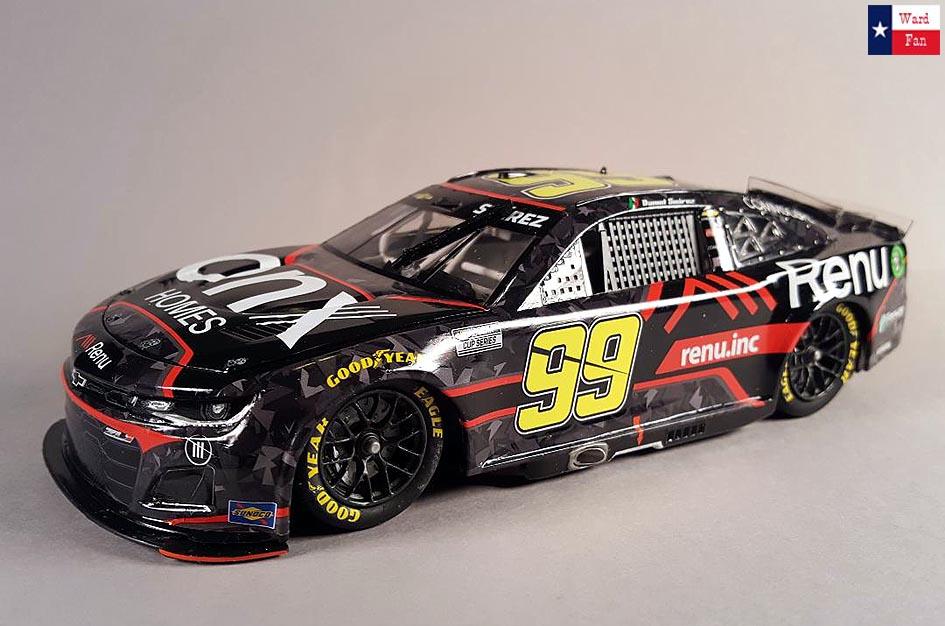
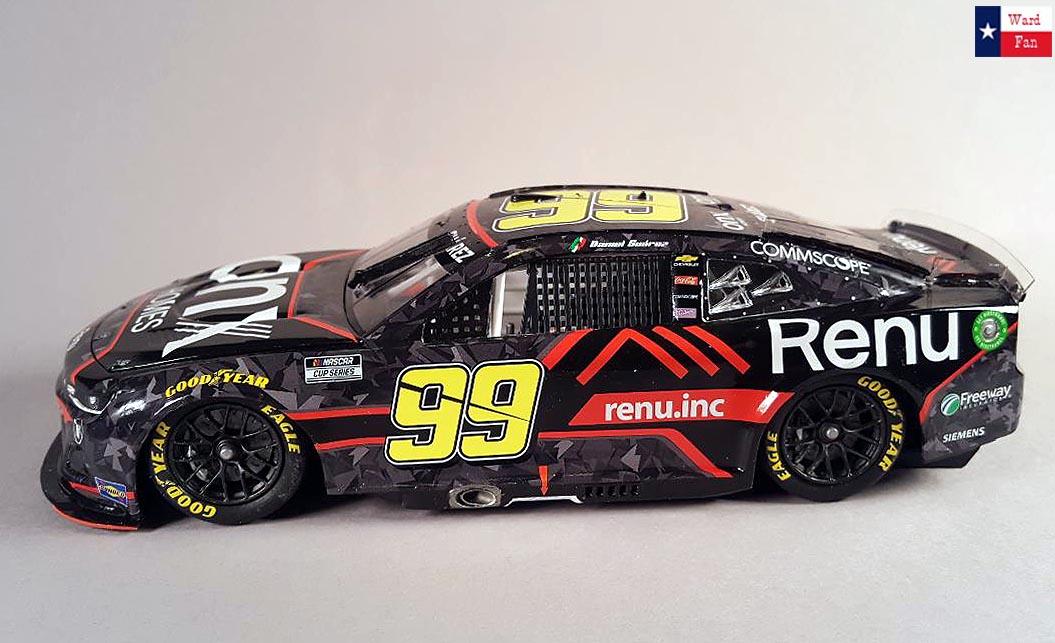
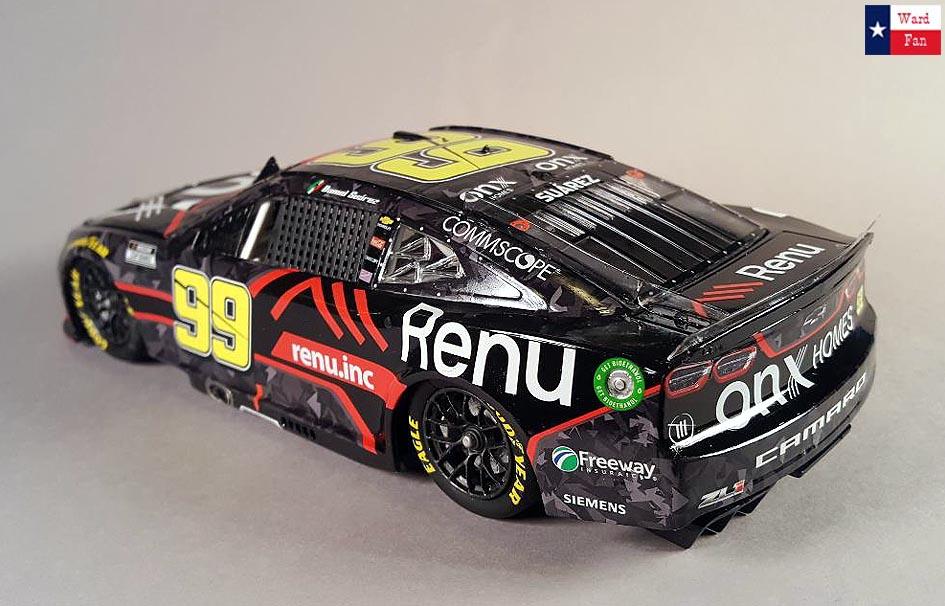
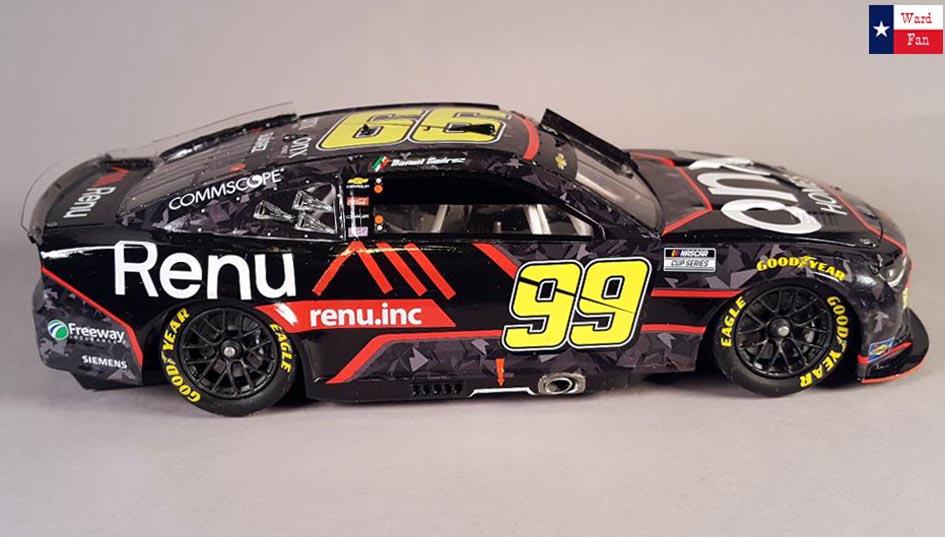
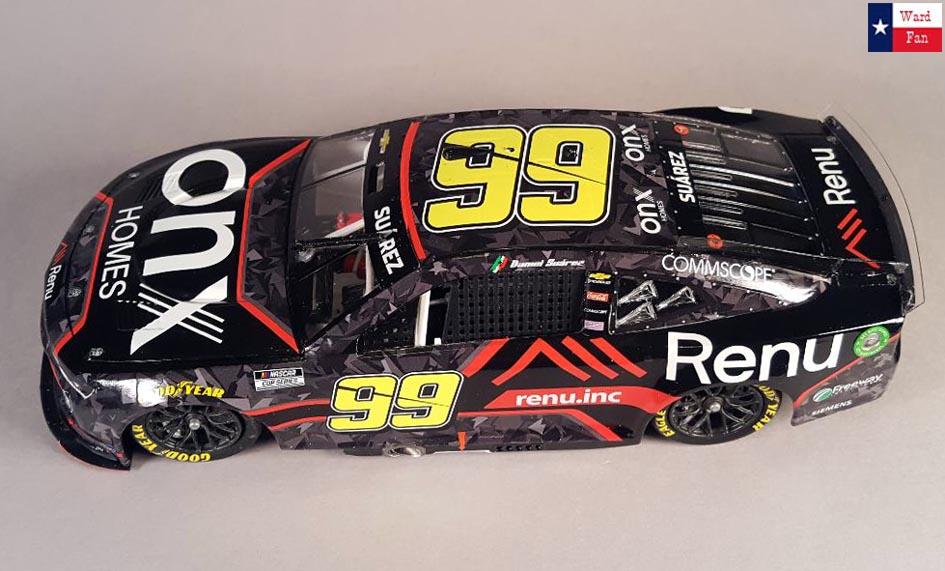
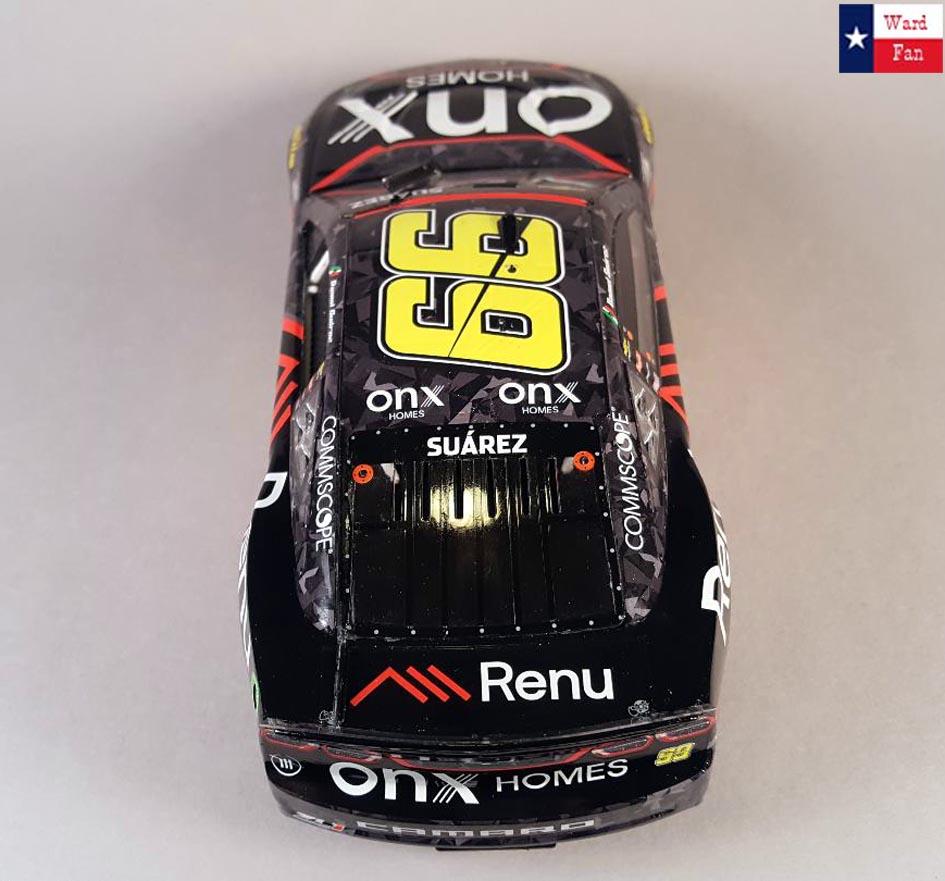
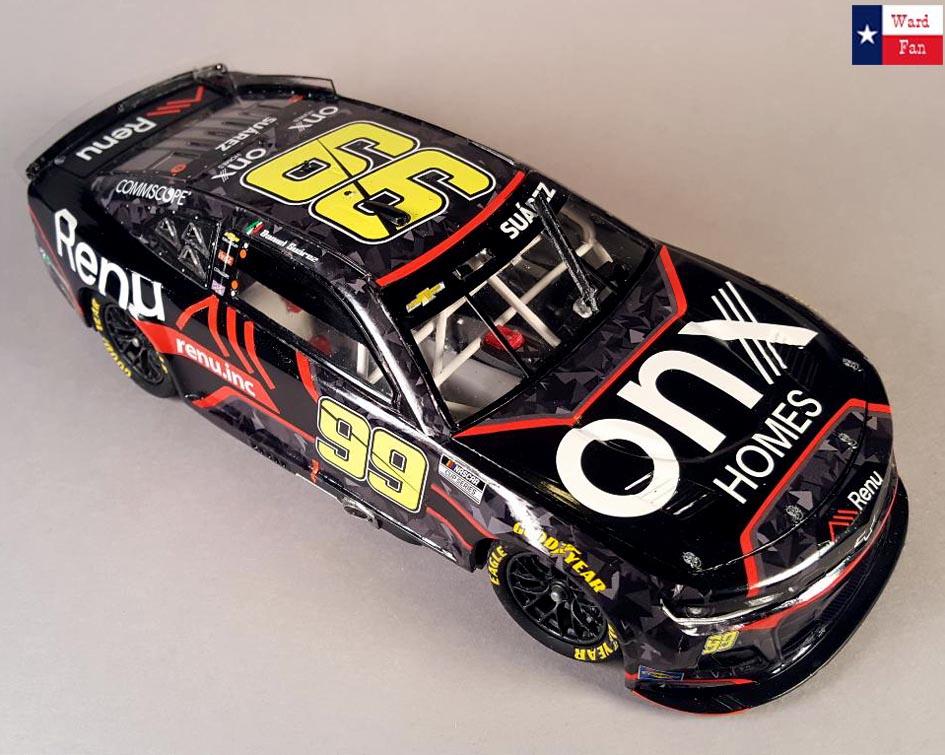
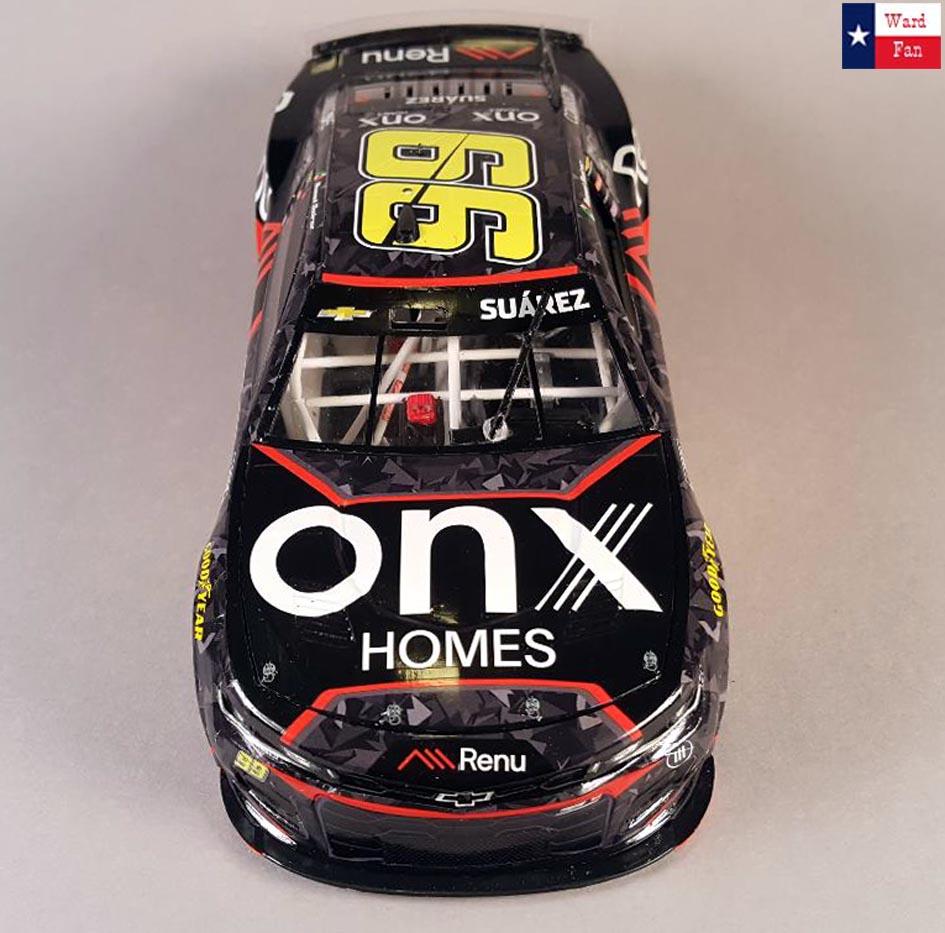
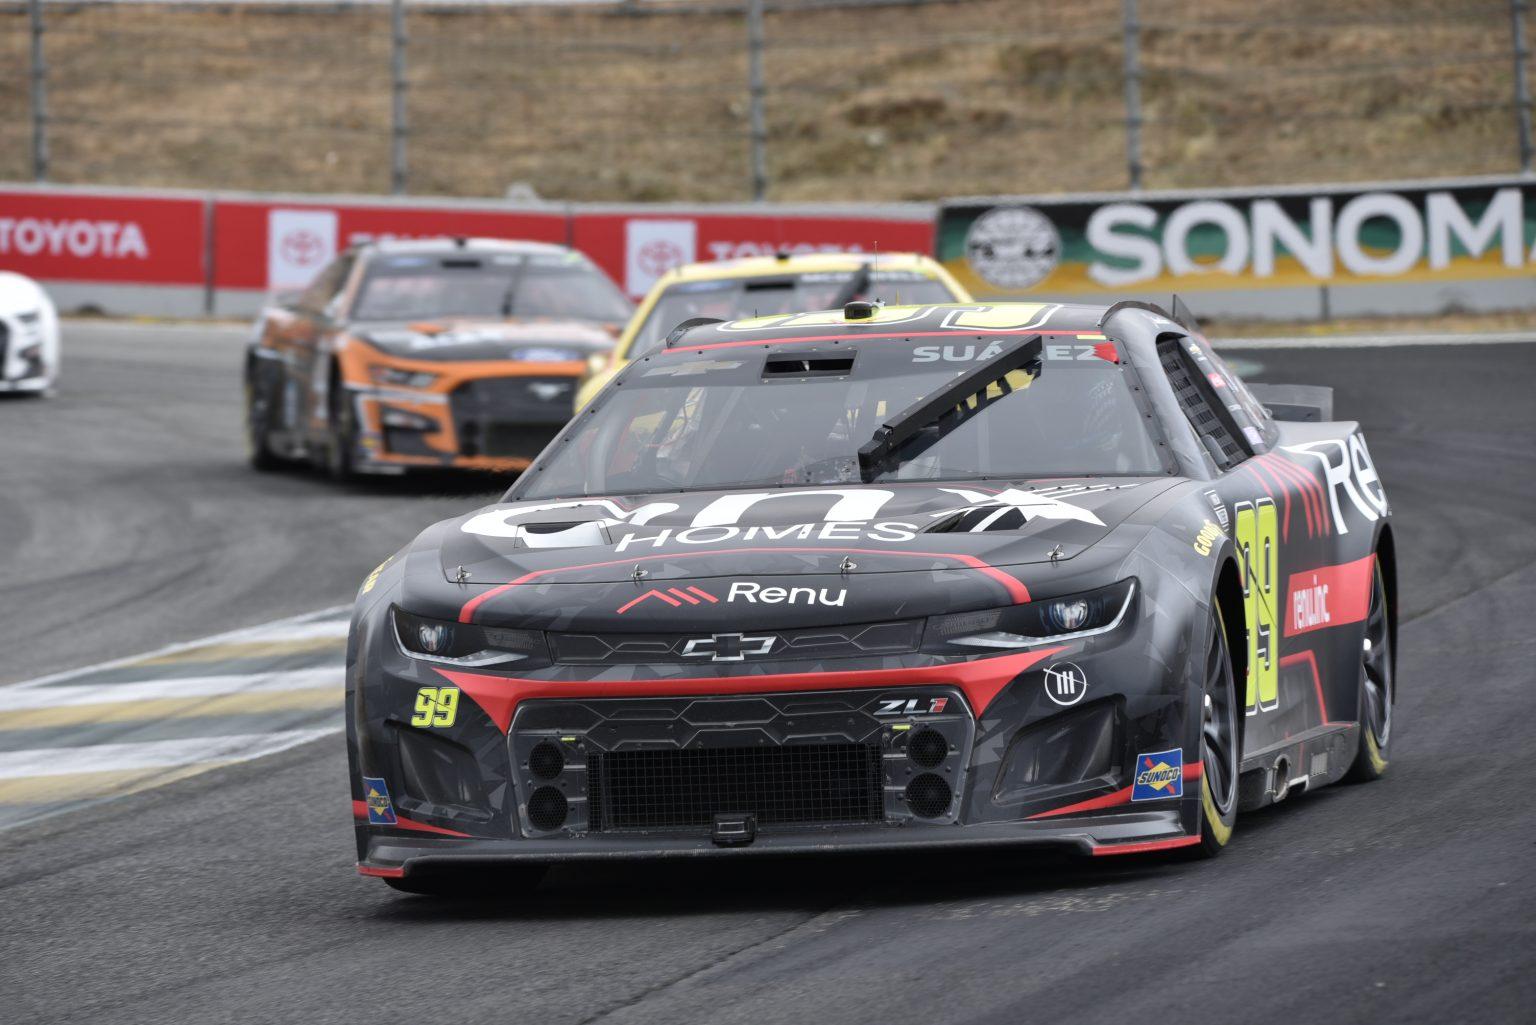
Daniel Suarez 2022 Camaro first cup win
MarkJ replied to MarkJ's topic in Stock Cars (NASCAR, Super Stock, Late Model, etc.)
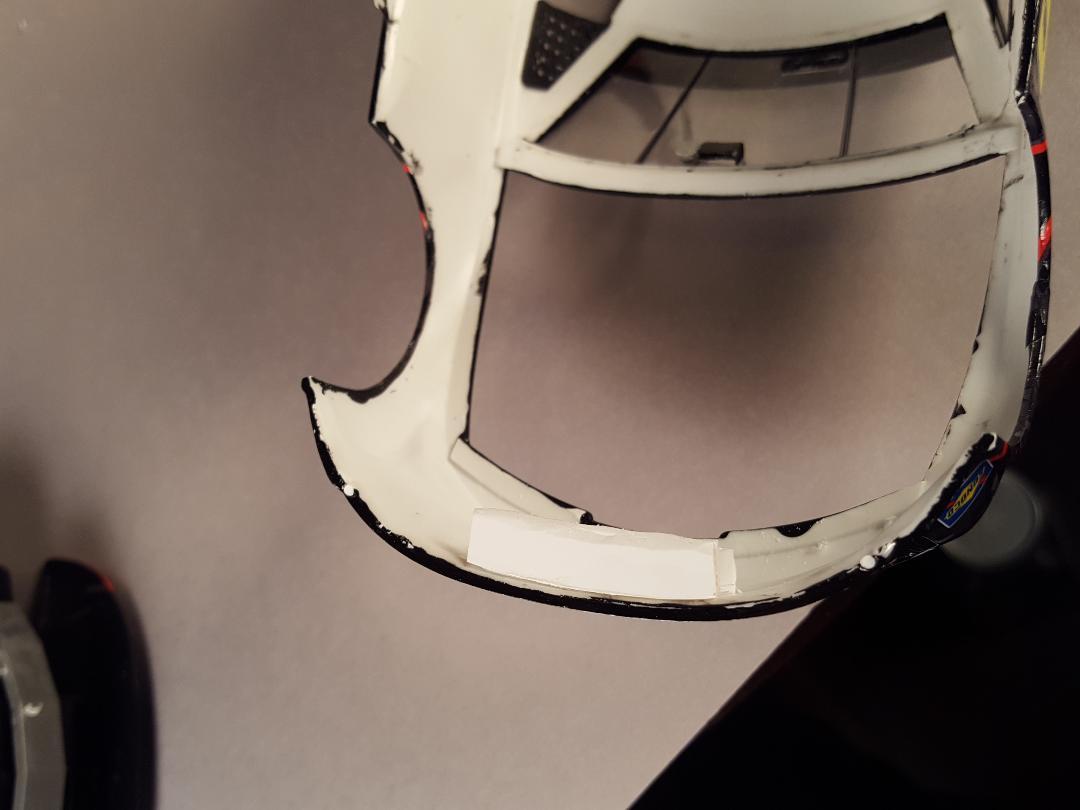
Forgot the front
-
Daniel Suarez 2022 Camaro first cup win
MarkJ replied to MarkJ's topic in Stock Cars (NASCAR, Super Stock, Late Model, etc.)
More refs.
-
Daniel Suarez 2022 Camaro first cup win
MarkJ replied to MarkJ's topic in Stock Cars (NASCAR, Super Stock, Late Model, etc.)
Thanks, Bruce. Make sure when you do the decals that you do all the big decals first. if there are any that border the grille opening, they will overlap the opening just a little bit so you have to put the grille decal on after you do those. I found that out the hard way. -
Daniel Suarez 2022 Camaro first cup win
MarkJ replied to MarkJ's topic in Stock Cars (NASCAR, Super Stock, Late Model, etc.)
Here is what the real car looked like.
-
It's free. But you have to buy a bunch of paint in dropper bottles sold by Vallejo and some high-quality artist brushes to get the paint to flow on properly. But you never have to worry abought orange peel or grainy paint or any of the other things that can happen when you are spraying. Thats why Pierre's paint jobs are always perfect. He has figured it out completely. i'm still working on it.
-
Daniel Suarez 2022 Camaro first cup win
MarkJ replied to MarkJ's topic in Stock Cars (NASCAR, Super Stock, Late Model, etc.)
Thanks, John. They are not all that hard to build. You just have to make sure you put the parts in correctly. Some parts can be installed upside down, but if you do, then you cannot proceed because the next part has no place to go. I have to blame Trackhouse racing for giving me the incentive to build a couple of these. They came on the scene this year with two drivers that have really added a lot of excitement to the sport. I will eventually get back to the vintage cars after I get through with my next new one. Plus, they are kind of expensive. -
Andrew, join the brush painter's society and you will never have a hair in the paint problem again.
-
Daniel Suarez 2022 Camaro first cup win
MarkJ replied to MarkJ's topic in Stock Cars (NASCAR, Super Stock, Late Model, etc.)
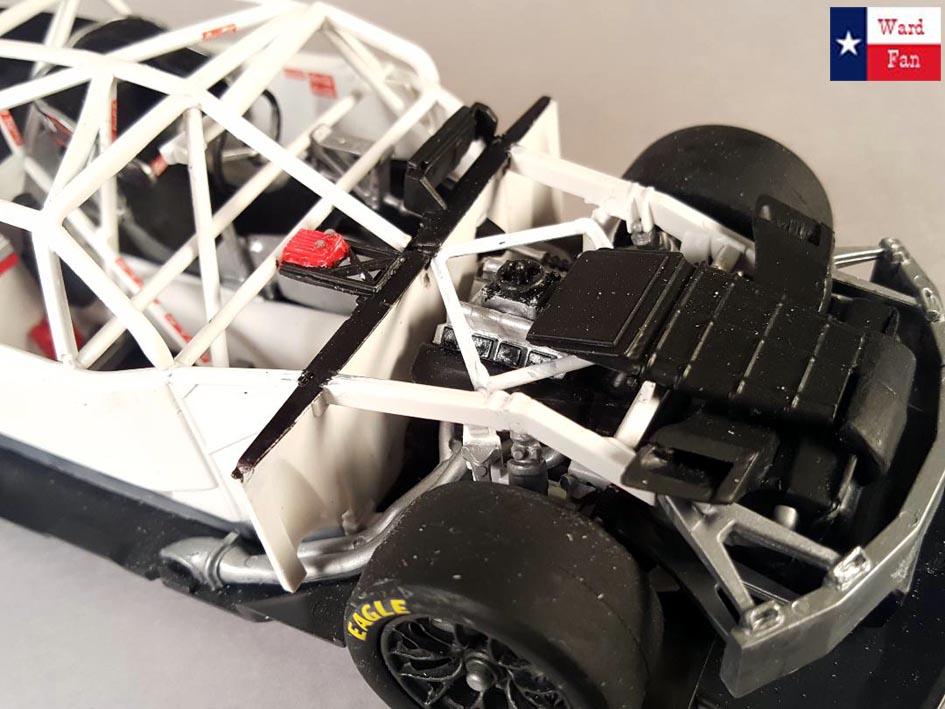
I forgot to mention I had to make a wiper blade for it and a 4-inch half clear half black rear spoiler. -
2022 Nextgen Camaro
MarkJ replied to MarkJ's topic in WIP: Stock Cars (NASCAR, Super Stock, Late Model, etc.)
Thanks, Jason and also for checking in from time to time on the wip. -
2022 Nextgen Camaro
MarkJ replied to MarkJ's topic in WIP: Stock Cars (NASCAR, Super Stock, Late Model, etc.)
Thanks, Bruce. Now I know the things I won't have to paint on my next one because you can't see them. My next one is also a black car and the body comes black so I'm thinking about just futuring it instead of painting a black car black. I just wonder if the future will stick to unpainted styrene or if it might flake off. That would sure save a lot of time not having to paint the body. -
Daniel Suarez 2022 Camaro first cup win
MarkJ replied to MarkJ's topic in Stock Cars (NASCAR, Super Stock, Late Model, etc.)
Thanks, Steve. I appreciate you weighing in on the wip while it was going on. -
Daniel Suarez 2022 Camaro first cup win
MarkJ replied to MarkJ's topic in Stock Cars (NASCAR, Super Stock, Late Model, etc.)
Bob, actually there were three sheets. One was bigger than the other two. And they were excellent sheets. After I ordered the Elliot kit they made a Suarez kit but it wasnt the first win car. -
Daniel Suarez 2022 Camaro first cup win
MarkJ replied to MarkJ's topic in Stock Cars (NASCAR, Super Stock, Late Model, etc.)
I put the tip in the tips and tricks but it's about 10 posts down from the top and it's not in bold print. -
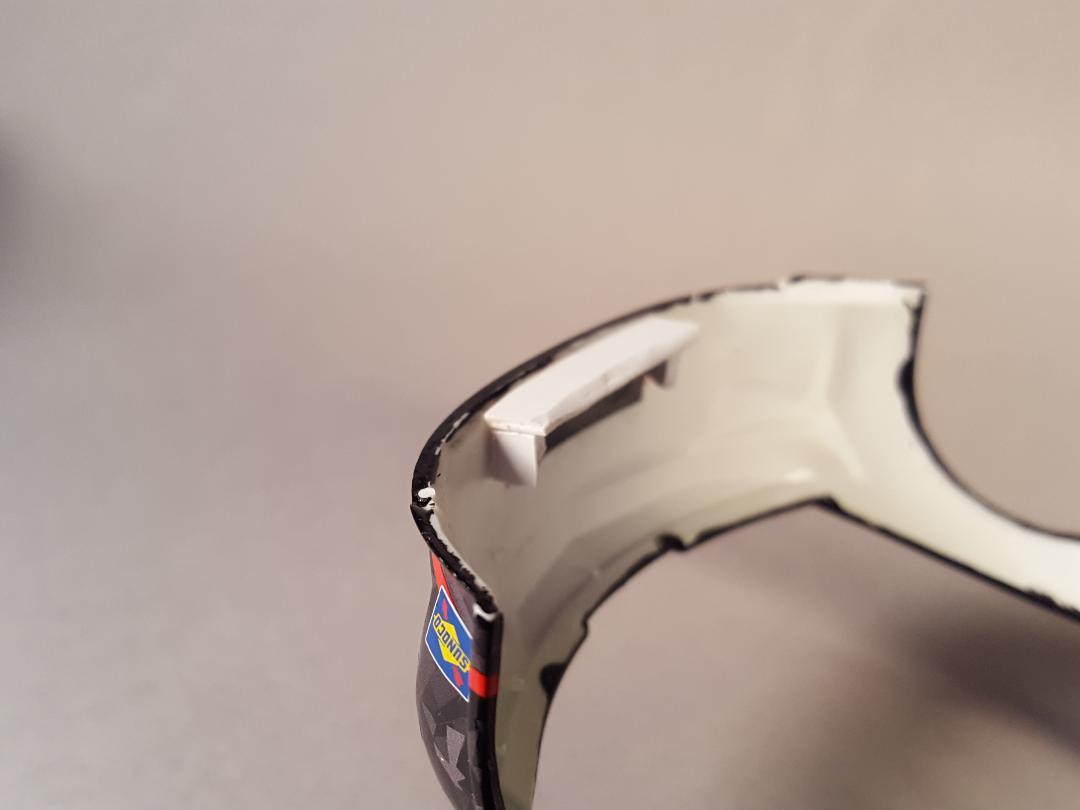
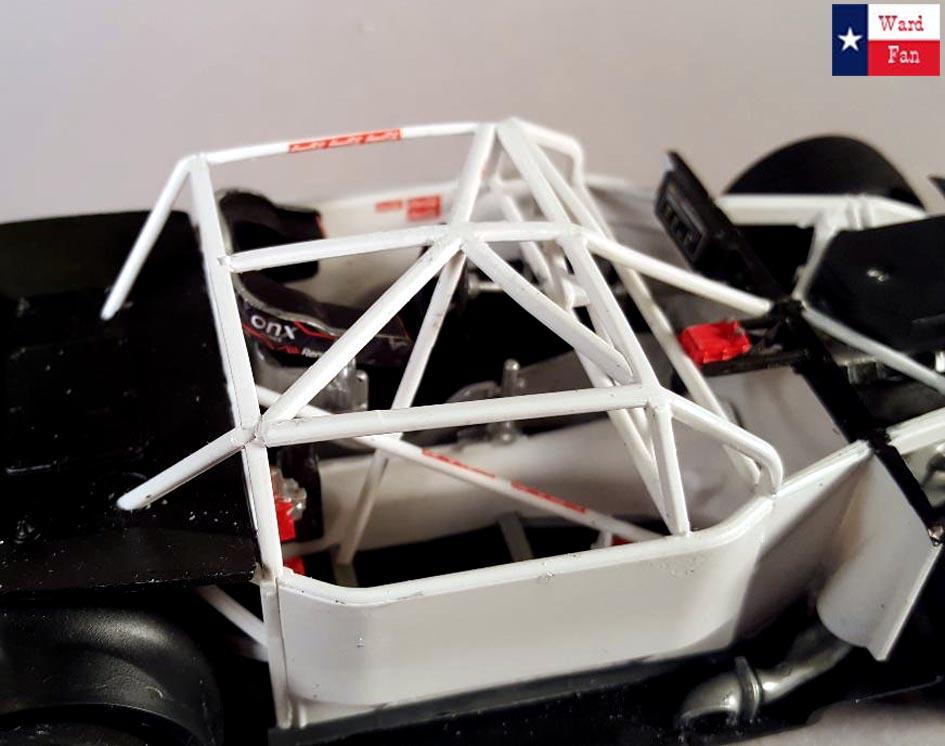
You just need to make the parts below from styrene sheet material. I had to use 2 pieces of .020 sheet because it has to be .040 thick to work. What you're doing is getting the part you make to slide under the radiator extension duct. You install the body a smidge in front to allow this to happen and then slide it backwards into the correct position. there is enough leeway between front fender tire opening and tires to do this.
-
2022 Nextgen Camaro
MarkJ replied to MarkJ's topic in WIP: Stock Cars (NASCAR, Super Stock, Late Model, etc.)
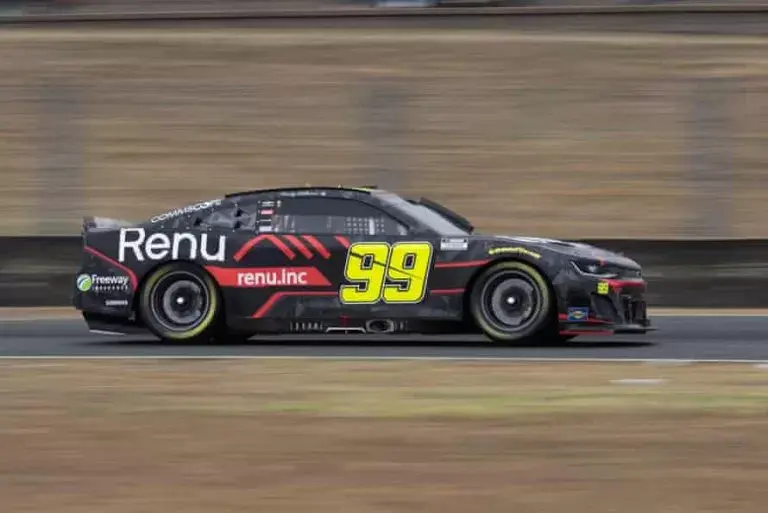
Finally finished. More pictures in the finished Nascar forum, Daniel Suárez
-
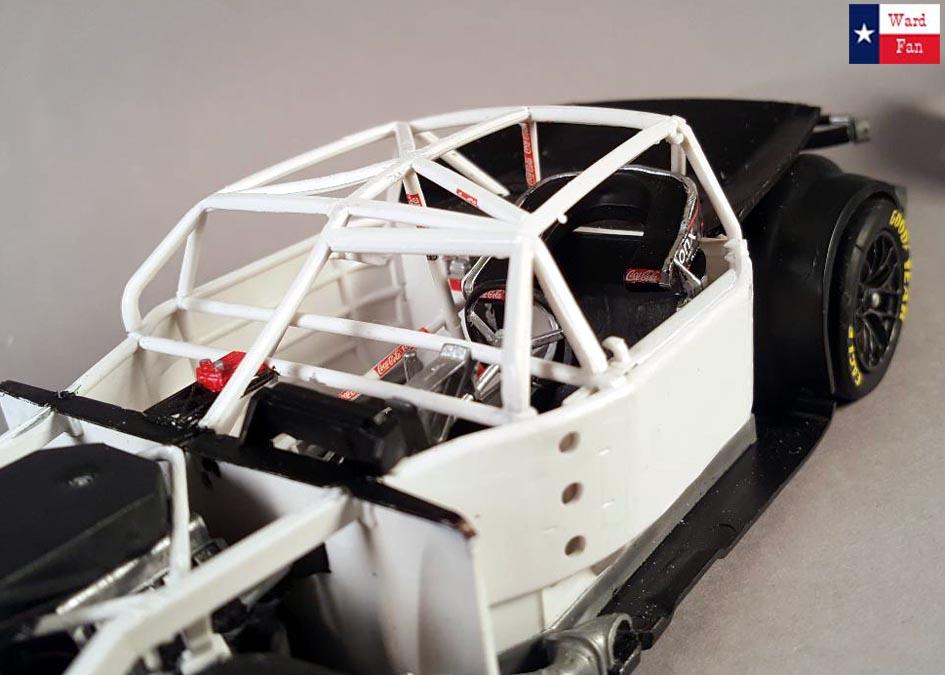
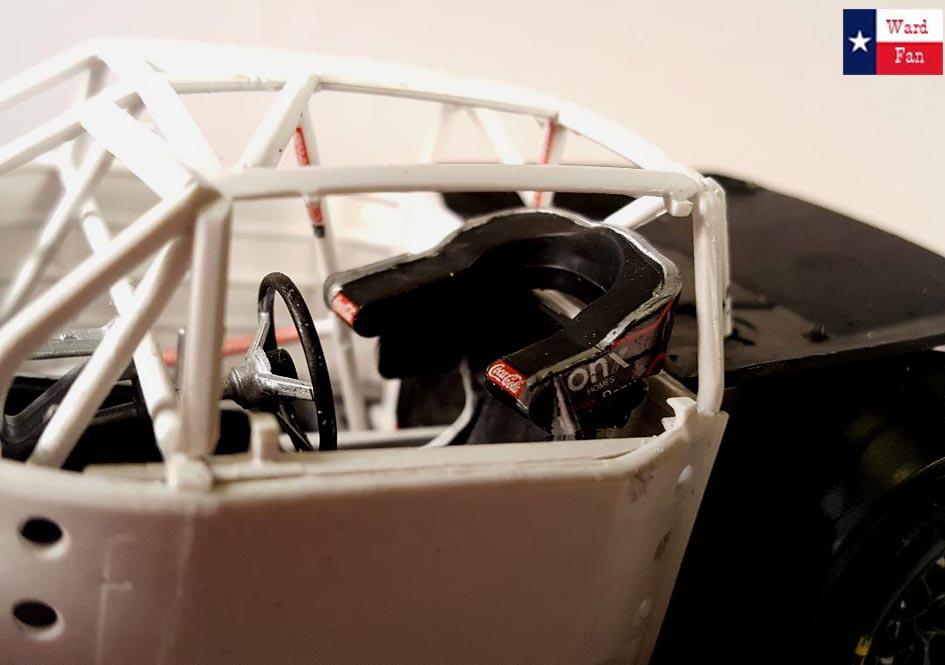
Finished my first Nextgen Camaro and I really enjoyed it. It took 88.5 hours, roughly about 2 months. This was Daniels first cup win car. He pretty much dominated the field for Trackhouse Racing at Sears Point. I came up with a way to hold the body to the chassis without gluing it. I will post the process in the tips and tricks forum. It's a pretty easy deal and it's not visible, except when you remove the body.
-
Wow, Andrew. You have some real master modeling going on here. At first, I had my doubts about this project, but it's going to be through the roof Awesome for sure.
-
2022 Nextgen Camaro
MarkJ replied to MarkJ's topic in WIP: Stock Cars (NASCAR, Super Stock, Late Model, etc.)
Jed, I can describe it to you but it's better to show you with a picture. It works very well though. You will be surprised how simple the fix is. -
2022 Nextgen Camaro
MarkJ replied to MarkJ's topic in WIP: Stock Cars (NASCAR, Super Stock, Late Model, etc.)
Well, my first NextGen model is complete. I will try to take the final photos tomorrow. I really enjoyed building it. It took 88.5 hours to complete. I only had to make two scratch-built parts and device a system to hold the body to the chassis without gluing it. I will post it in the tips and tricks section after I post the final photos. Its a pretty easy solution . Its seems a shame to glue the body to the chassis hiding all the neat stuff some of you guys add to the chassis . -
2022 Nextgen Camaro
MarkJ replied to MarkJ's topic in WIP: Stock Cars (NASCAR, Super Stock, Late Model, etc.)
I hope you have better luck than I had. It did not turn out well on the model and I had to end up using future after all. I thought the test with the red truck body was good but not so much. It was more of a flat finish than a satin one. -
Excellent tip. Now I can see what you're talking about. I'll have to try that. what do you use for the wires?
-
2022 Nextgen Camaro
MarkJ replied to MarkJ's topic in WIP: Stock Cars (NASCAR, Super Stock, Late Model, etc.)
Ouch, Pierre. I see what you did there. Very funny. We shall see. I'm sure this microscale stuff has been around for a while. I just wonder why I have never heard of it before. -
Black Widow Barn Find
MarkJ replied to Pierre Rivard's topic in Stock Cars (NASCAR, Super Stock, Late Model, etc.)
Wow, Pierre. The realism of this build is off the charts. You have a special talent for weathering for sure. -
Wow, Excellent build, Steve, and one you won't see duplicated very much like the Nextgens. I can see why you are extremely happy.
-
2022 Nextgen Camaro
MarkJ replied to MarkJ's topic in WIP: Stock Cars (NASCAR, Super Stock, Late Model, etc.)
Thanks, Pierre. Microscale also sells a gloss and a flat in the same product. What I like is that this is specifically designed to use as a decal sealer and thinned properly, it goes on just like the future floor finish and takes about the same time to dry. On the next model I do that I want a glossy look I will use the gloss instead of future.
.jpg.797d96acd7b8e4788cfee3fd71e92378.jpg)