Pierre Rivard
-
Posts
2,579 -
Joined
-
Last visited
Content Type
Profiles
Forums
Events
Gallery
Everything posted by Pierre Rivard
-
Holy cow Martin, I thought the first pictures were real car reference material...awaiting the pictures of the 1/25 scale model to appear... and it never happened. What's the date...April 1? Seriously I have seen some beauties out there but never one that looks so lifelike. ?
-
It all looks wonderful and the engine compartment looks so realistic. A joy to follow your work Louis.
-
Porsche 356
Pierre Rivard replied to afx's topic in WIP: Other Racing: Road Racing, Land Speed Racers
Making your own headlamps and door handles...beautiful craftsmanship! -
1962 Rolls Royce Silver Cloud II by Minicraft Models: WIP
Pierre Rivard replied to David G.'s topic in WIP: Model Cars
Coming along beautifully. Not to add to your misery but since the subject is spectacular and you can now see you can make this horrible kit body beautiful... you should consider sanding off door handles and wipers and add aftermarket parts? -
Chassis and engine look fabulous Phil. Wonderful build so far.
-
Thanks Daniel. I made a typo, they're actually 0.65mm but there is a range of size available, from 0.2 to about 1 mm. They might also work out pretty good to simulate rivets.
-
Thanks for the advice Andy. Adding to my to do list for the engine. Yup, Amazon, $10 CDN including delivery. 2500 of 'em in a jar. That's a lot of balls! Drum roll?
-
Trying something new. 0.56mm solder balls to simulate the snaps on the cockpit tarp. Small indents were molded in already so I gust glued them in. I lost a few along the way but no worries, that little bottle contains 2500 of them.

-
So while my engine consultant is assessing the situation I am noodling away fixing little things like decal silvering. Done by touching up with red paint. Before and after pictures
-
Thanks Andy, here's one more ref pic and 2 of my parts. The distributor is molded into the upper engine and sits in the middle of the head (lateral) where it should more to the right side. Unless I got something wrong distributor surgery will be needed.
-
But Pierre's Alfas will not have such beautifully and accurately detailed engines!
-
Another way to create rusty areas
Pierre Rivard replied to Mittagskind's topic in Tips, Tricks, and Tutorials
I like it! Have you tried Vallejo Rust. That stuff is also pretty good. -
Engine on mine not started...kind of staying away as I have no clue what to do with it. Watching what you do with your's and might copy a few bits. I need an engine for dummies tutorial.
-
Thanks Mark. Early in the planning stage I decided to go the low/no gloss route as it appearrs more period correct to me. I want to add a bit of race weathering as tracks of the era were not pristine clean as today and cars spitted oil all over. How to achieve that is the big question...
-
Thanks Daniel. I'm happy with the direction I took with the rad grille. This resin kit is a big challenge (for me) so any little win adds up.
-
Ace, for tail lights you may want to check out GeminiModelcars. They have a variety of sizes available. Clear colored resin drops over PE.
-
Beauties!
-
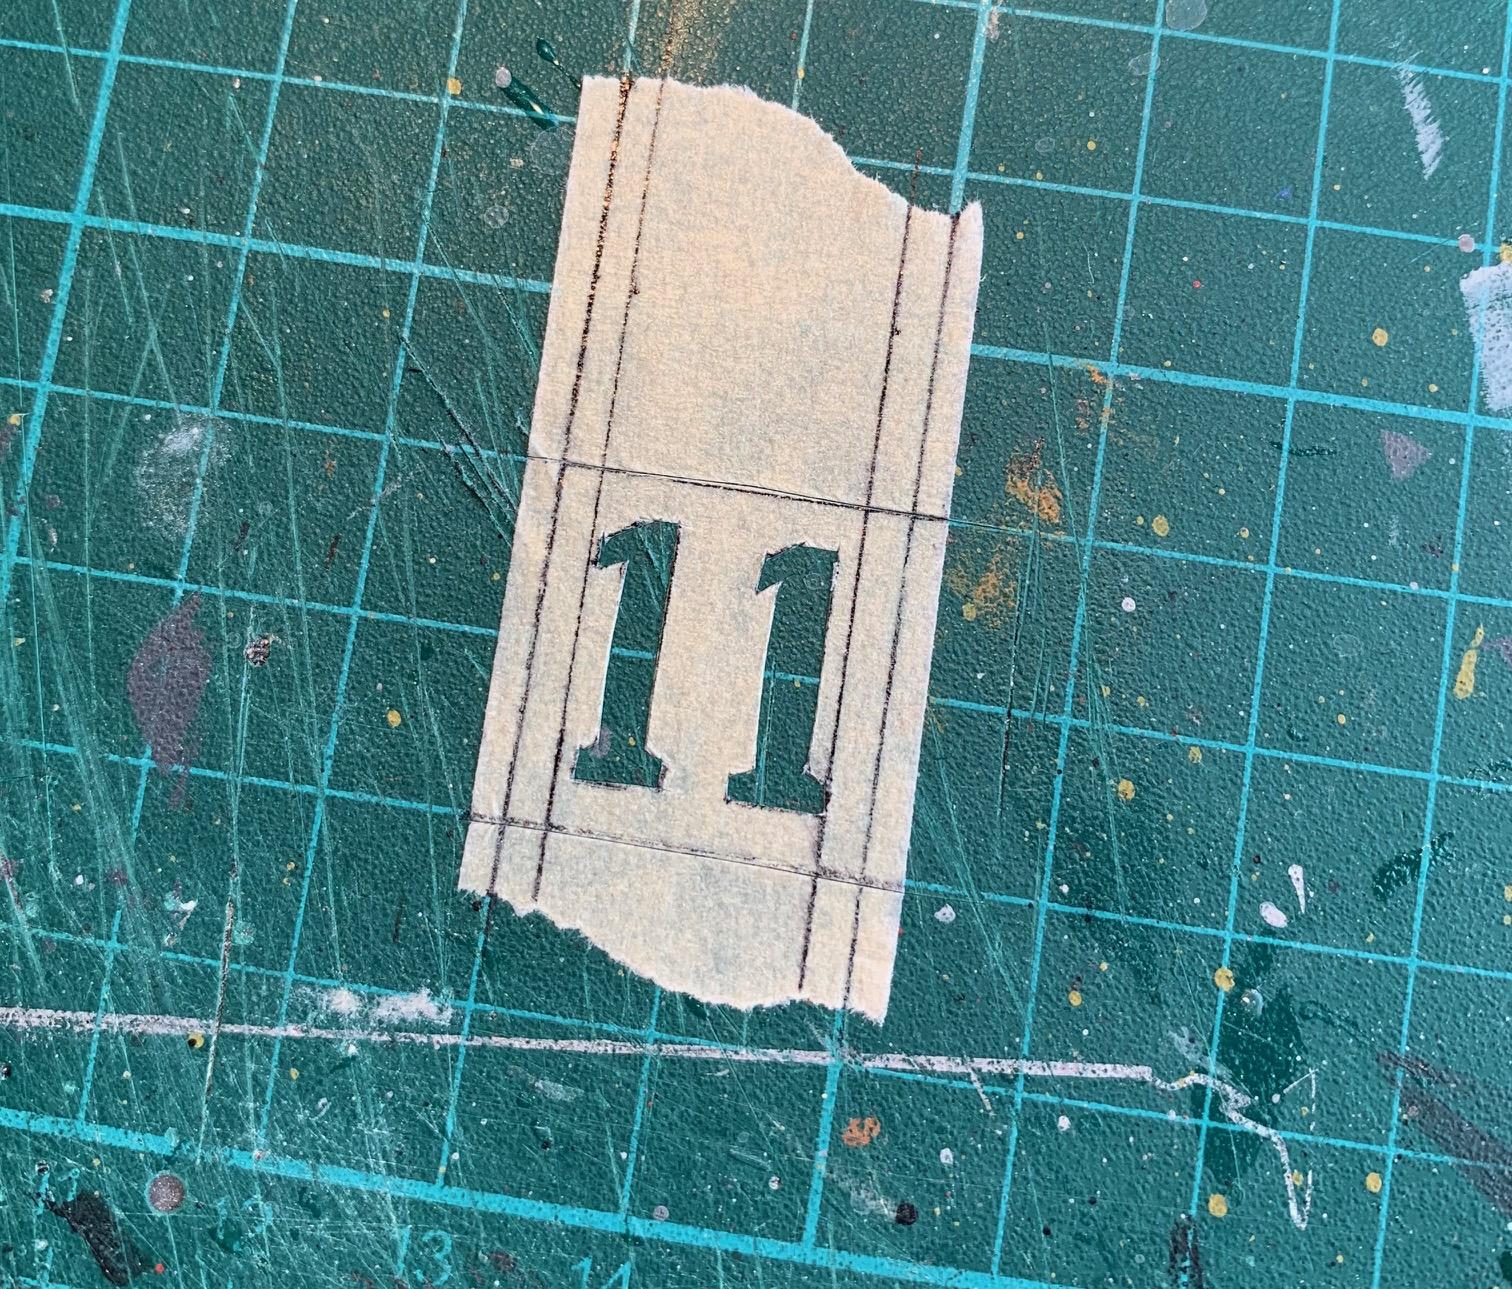
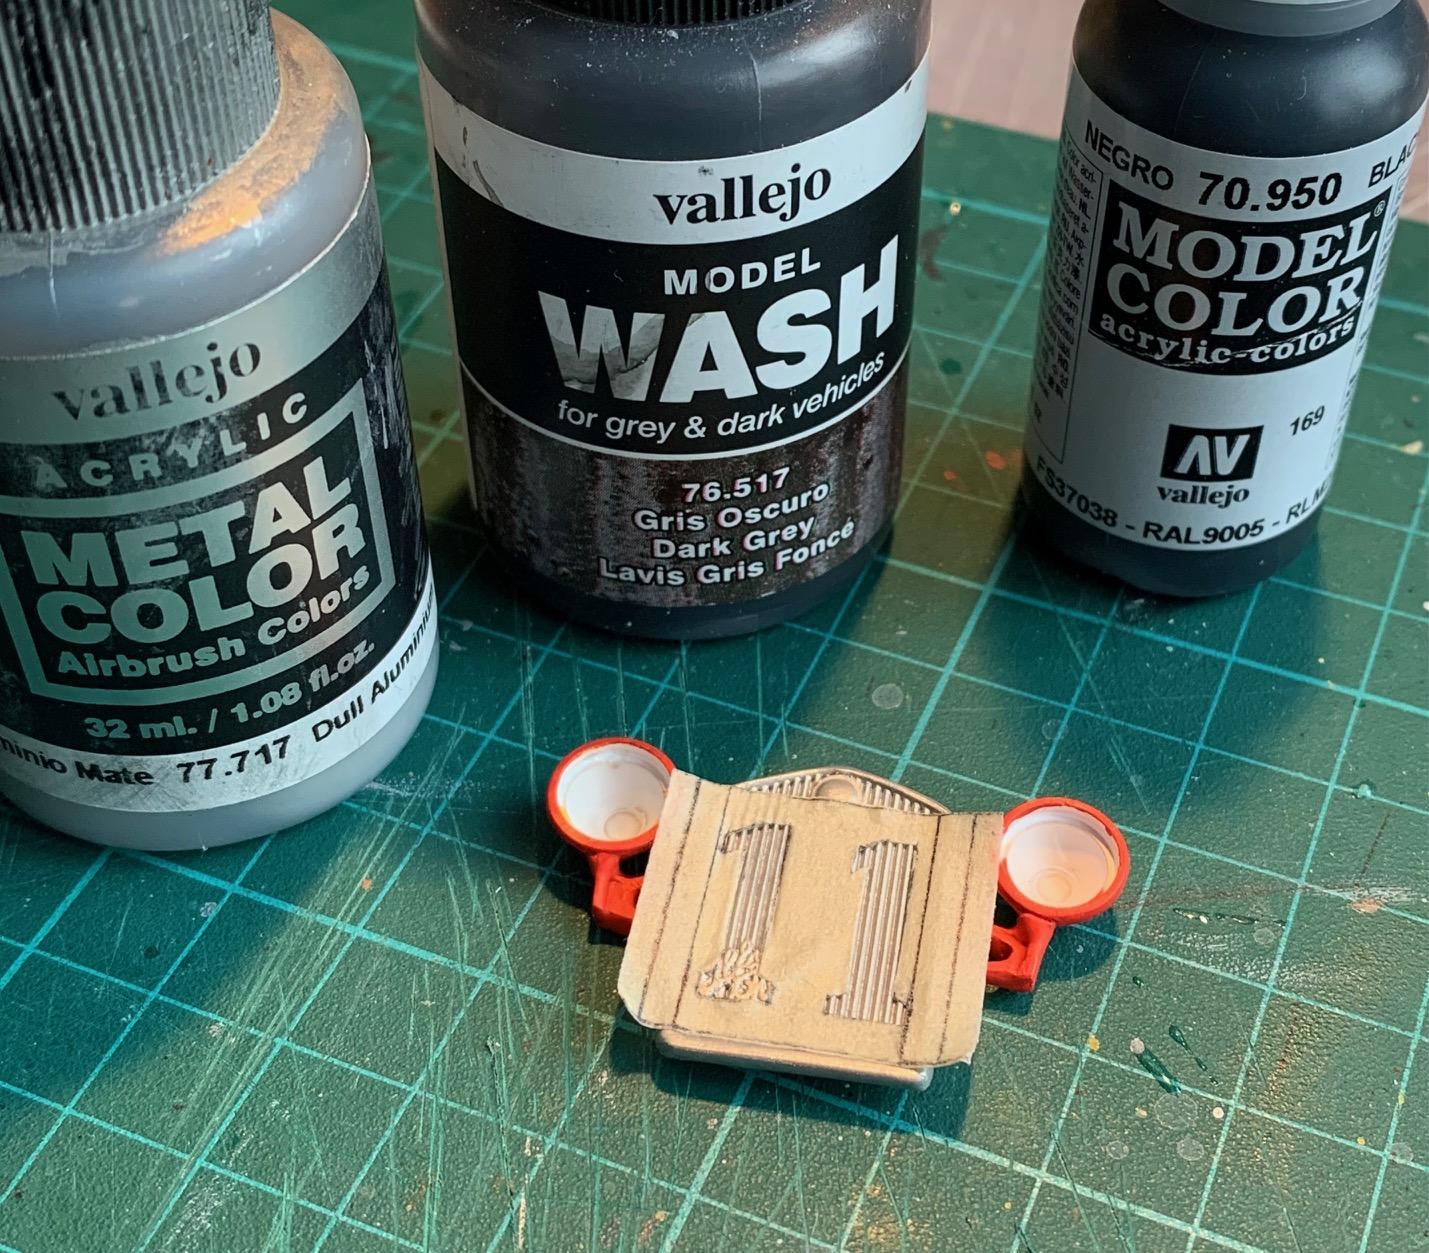
Work on the front grill and headlamp assembly. The kit has a race number decal for the grille but I don't trust it can be made to conform so I decided to paint the number instead. I photocopied the decal and used that as a template to cut the number on masking tape, painted the number & black washed the grille after that. The headlamp covers are solid resin pieces and I wanted to imitate the clear red covers used by the period race Alfas. After primer I coated a mix of Vallejo cooper and dark red, then later a thick coat of Tamiya clear red.
-
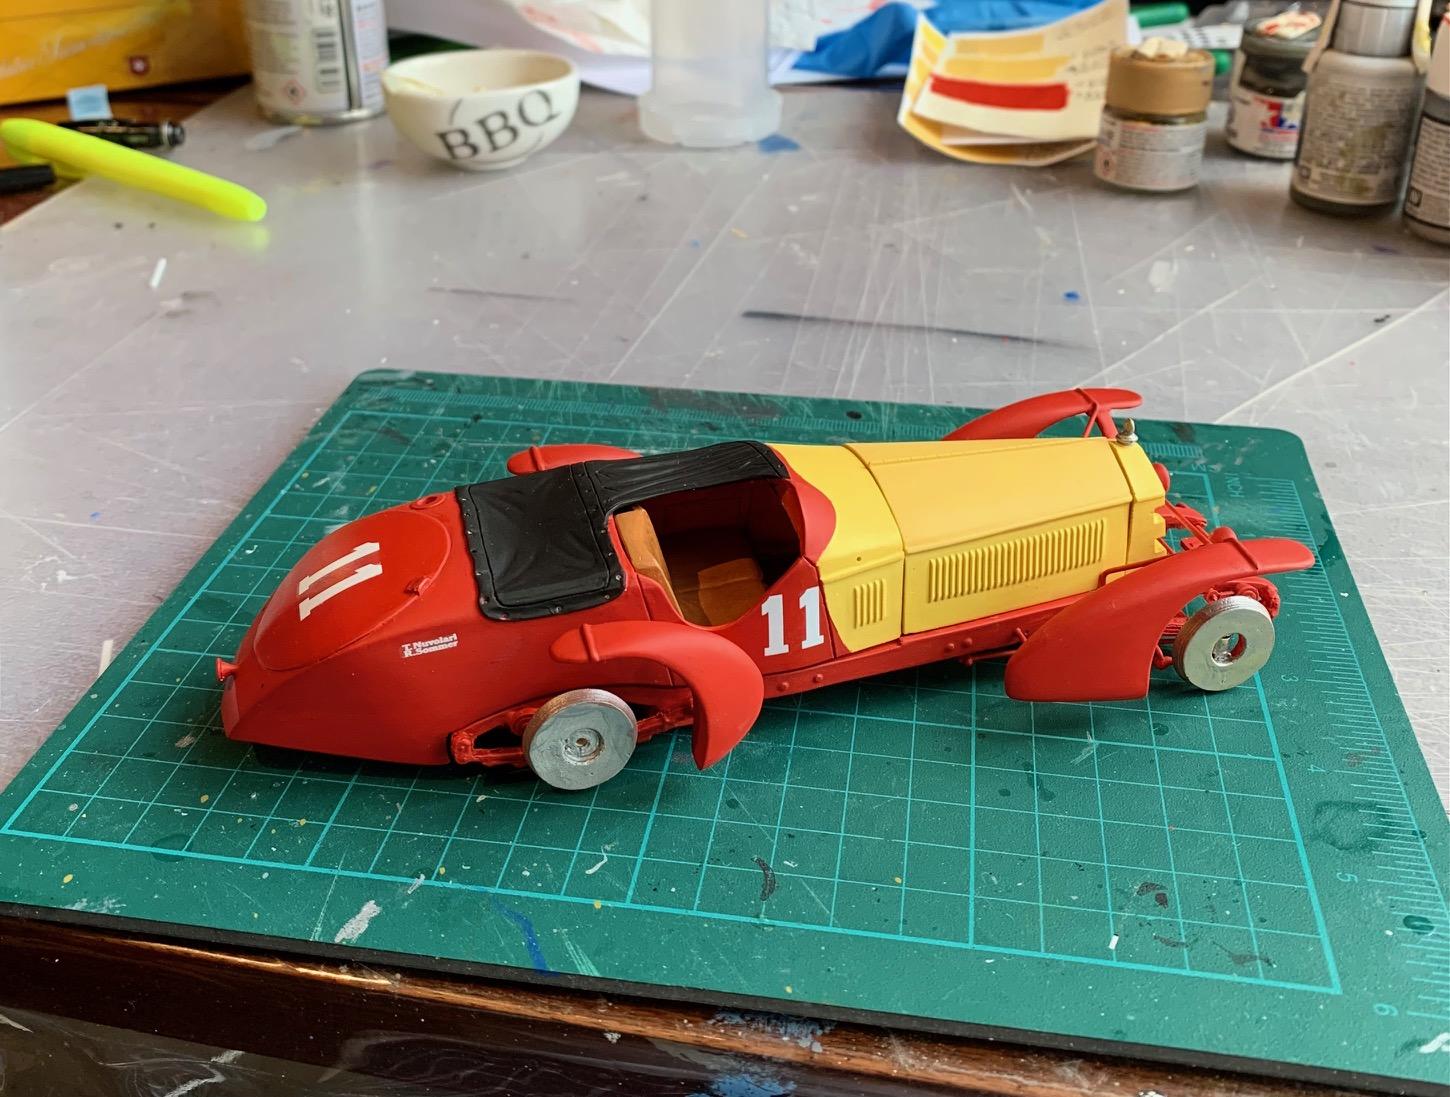
Body has been painted and the few decals applied. It did not goo smoothly with a few repaints and struggling with my color formulations. The yellow is Vallejo 1 part flat yellow and 2 part sand yellow. The red is AK matt red. Colors have been brush painted. At this point I'll let this dry for a while while I do some experimenting on weathering techniques...
-
Those are excellent. Thank you sir!
-
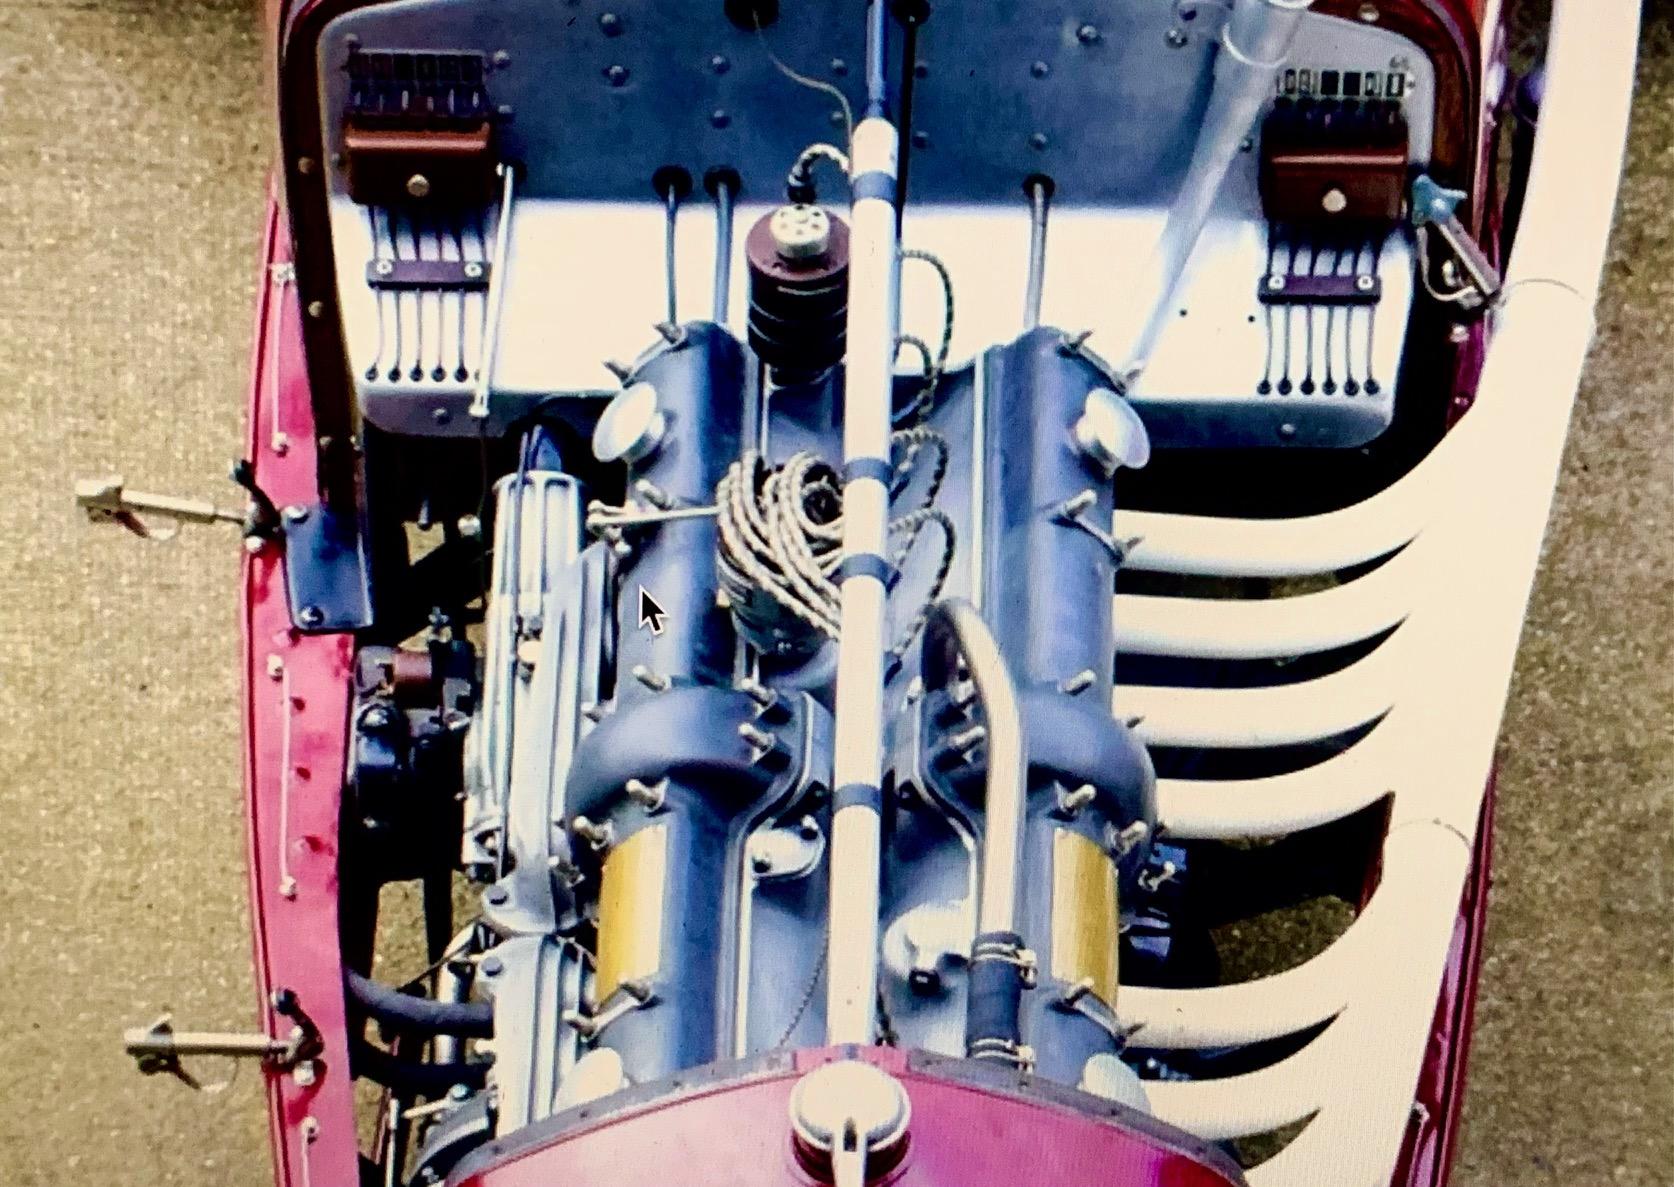
Thanks Andy, please post them, I'll use any help I can get. In the meanwhile I found these and they look similar to the engine in my kit. I'm guessing that's the setup typical of Monza or Le mans types 8C. First I need to survive the body finishing and paint. This one's not cooperating...
-
Thanks JC. Every little win counts. This one is fighting me...
-
Fiat 806 Fran Prix....Italeri 1/12scale
Pierre Rivard replied to louis Carabott's topic in Model Cars
The body on this fabulous build ls lovely but the engine & chassis are so incredible they deserve to be displayed without the body. The car looks to be 1/1 scale. You are an exceptionaly gifted builder Louis. -
Looks very good Ace. Fixing the transition to the body sides is a must for this old kit and you nailed it. Vac forming windshield will be a big plus (something I don't have skills to do) and will further boost the realism of this replica.
-
1962 Rolls Royce Silver Cloud II by Minicraft Models: WIP
Pierre Rivard replied to David G.'s topic in WIP: Model Cars
Beautiful work David, and I love the color you chose. That Rolls is my all time favorite. You are literally making something out of nothing. I'm rooting for you man!