Pierre Rivard
-
Posts
2,579 -
Joined
-
Last visited
Content Type
Profiles
Forums
Events
Gallery
Everything posted by Pierre Rivard
-
Ferrari 312T4
Pierre Rivard replied to Belugawrx's topic in WIP: Other Racing: Road Racing, Land Speed Racers
Come on Bruce! You gotta do it! It would make Canada proud! ?
-
Thanks Gary, some helpful ref pics I had not seen before. Interesting to see the production fuel filler door was left untouched...after I spent all that time filling the one on my model... Evidence or the rear red wheels on every pic (darker on b&w shots). Should I go back and paint my rears ???... the accuracy vs elegance dilemma.
-
70's F1 cars are wonderful, each one different from the others. What scale is it and what donor kit are you using? Thanks for sharing, it will be fun to watch.
-
Model Factory Hiro 1963 Ferrari 250 Lusso
Pierre Rivard replied to Brudda's topic in WIP: Model Cars
Looking really good. A lot of reworks but you have nailed the stance. Bravo! -
You're right Andy, the A arms on this kit are rather simplistic, surprising considering this is a newly tooled kit. Thinking if I should do something about it. Still need to do a battery tray and have yet to figure out the oil filter arrangement on the dry sump setup. On wet sump engines it runs horizontal on the right side.
-
Scratch built collector reservoir and dry sump reserve tank. Now I need to paint and assemble all that stuff.
-
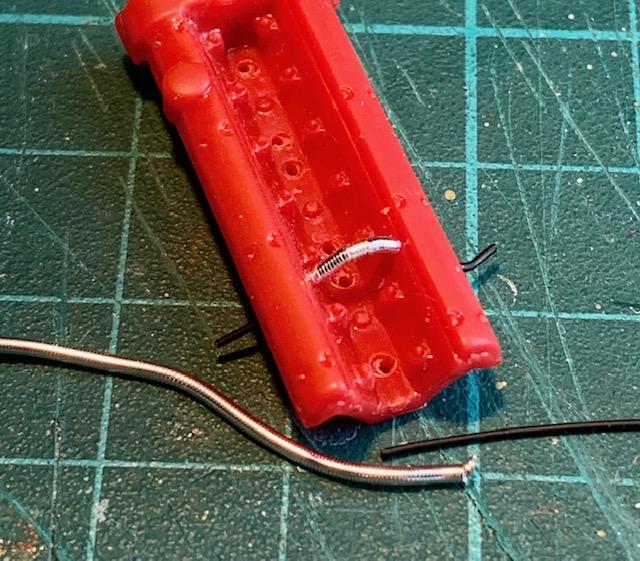
Found this hollow wrapped wire lace at the jewelry department at Michaels. It is 0.75 mm diameter and matches well to a scale 3/4 inch reinforced hose. I'll be using it for the oil breather hoses. Using cheap 0.6 mm wire for the leads at both end or the runs. The wrapped wire slips right on Stop me if this is to much details...
-
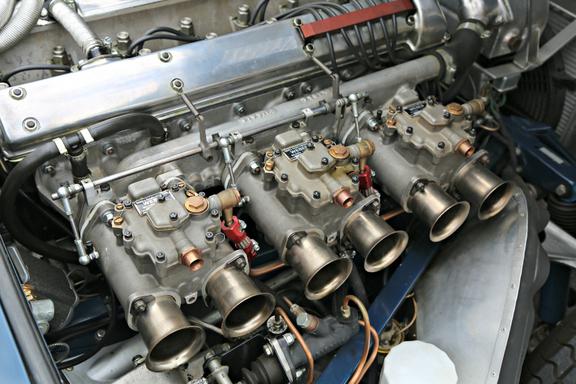
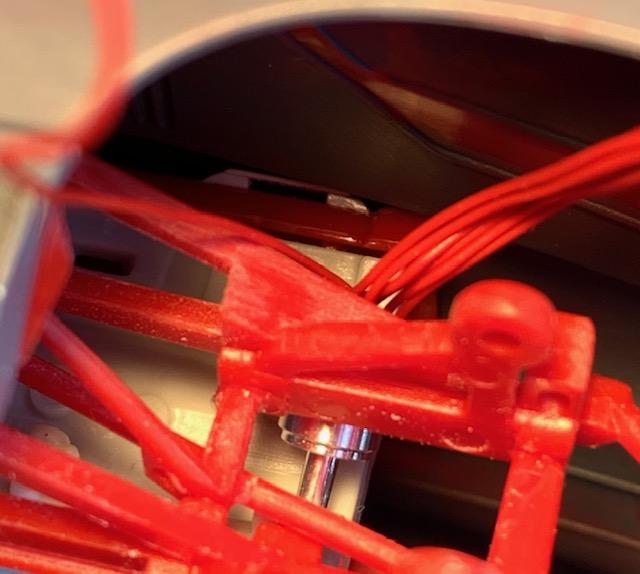
Distributor and feeding wires to the plugs is a tight fit with the distributor sitting at an angle at the front end and somewhat under the first Weber carb, then wires feed between the coolant run and the head, wrapping over the cover held by a bracket. Location of the bracket is critical to clear the hood. It's tight but doable. Connkur distributor (the best), the rest scratch built.
-
Pennzoil Porsche 911 GT1
Pierre Rivard replied to Pierre Rivard's topic in Other Racing: Road Racing, Salt Flat Racers
Yup, same thing happened to me when I put a lot of effort on fixing apparent joints around turbos & ducts only to find out they're not visible in the end. Generally I like race cars from the 60's or earlier in part because the mechanical bits are less "wrapped" by body work -
Ferrari 312T4
Pierre Rivard replied to Belugawrx's topic in WIP: Other Racing: Road Racing, Land Speed Racers
Arnoux - Villeneuve... that was epic! -
Ferrari 312T4
Pierre Rivard replied to Belugawrx's topic in WIP: Other Racing: Road Racing, Land Speed Racers
A beauty Bruce. For sure it will be #12 right? I was at the Canadian GP the previous year when Gilles took his first win. -
Ferrari 333SP
Pierre Rivard replied to Chris Smith's topic in WIP: Other Racing: Road Racing, Land Speed Racers
OK Paul, get busy, there's a race going on and we don't want you to get lapped! ? -
So the making of a masterpiece resumes!
-
Super nice Thomas. All your builds are exceptional. Must have been quite the challenge masking and painting stripes on the louvered bonnet!
-
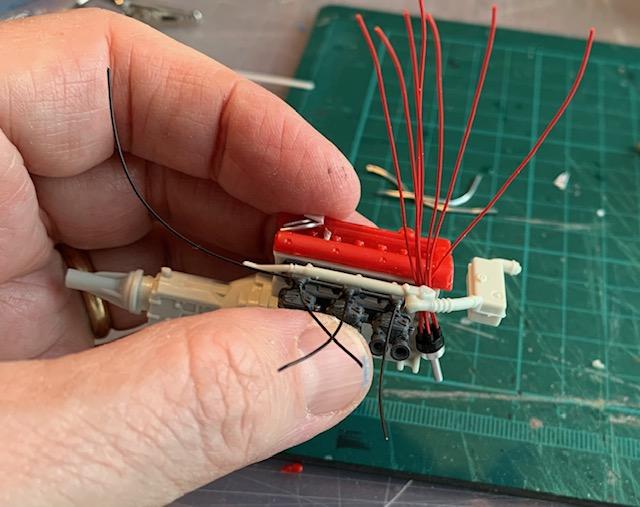
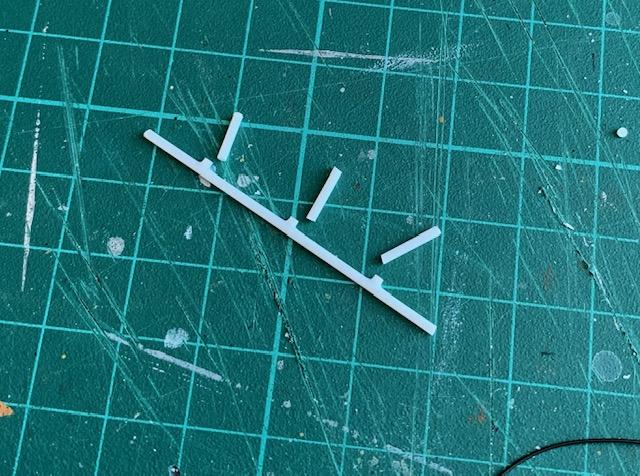
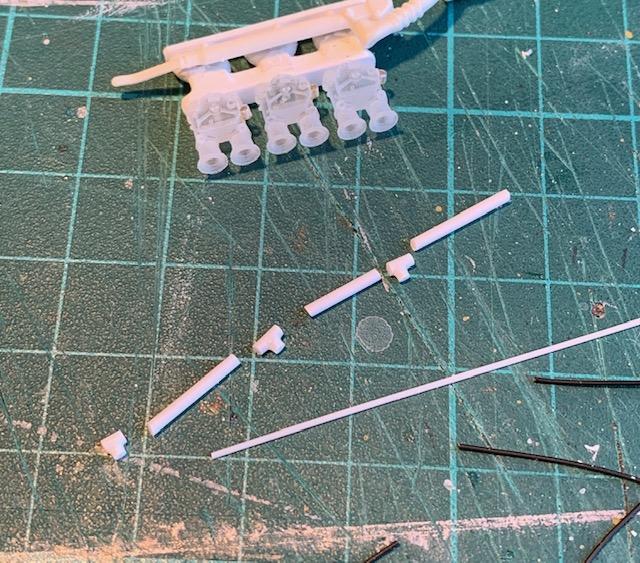
Fuel delivery to Webers. This is where RB Motion stuff would help but since my last purchase still needs time to get here I will try to scratch build it using styrene 0.5 and 1,2 mm rod and some ignition wires...
-
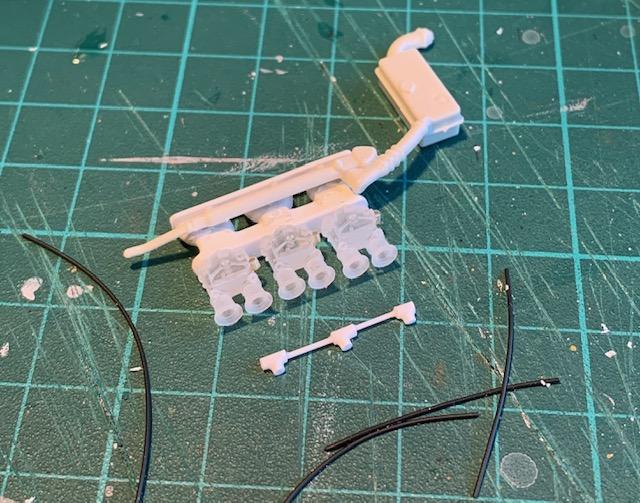
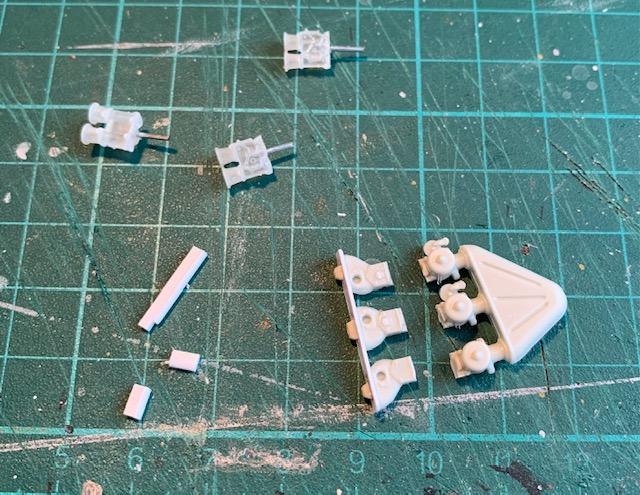
Starting with Weber carbs with Shapeways surplus from the spares
-
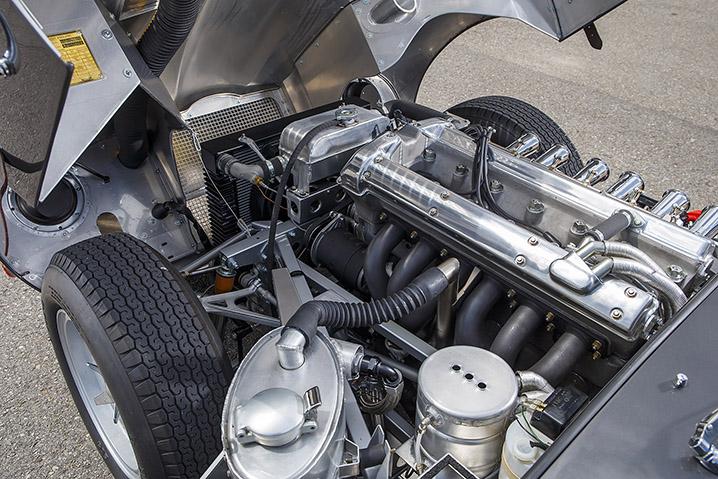
Starting work on the engine. First pic is mock up of kit parts to see how everything generally fits and experiment with assembly sequences. The Revell sequence sometimes contradicts with what I'd prefer to do for assembly and painting steps. Second picture is one of the many ref pics I will go by. This one is a continuation lightweight. Again I have questions about how my race car was restored as it does have Weber carbs nut a wet sump oiling system. The Cuningham car has a dry sump, The D types before did and the Lightweight did. So that' s it, I will try to scratch build some of the visible componentry as well as Weber carbs, fuel delivery and a few other details to get the look that I want.
-
2012 Corvette C6R ZR1 Le Mans #73
Pierre Rivard replied to AJM's topic in WIP: Other Racing: Road Racing, Land Speed Racers
Good start sir! A complex but beautiful shape. Lots go work (and fun) with all the changes you are planning -
MFH Ferrari 333SP 1/12
Pierre Rivard replied to 2whl's topic in WIP: Other Racing: Road Racing, Land Speed Racers
I don't know if your red will pop more but anything to see that pink disappear...? -
Nice!
-
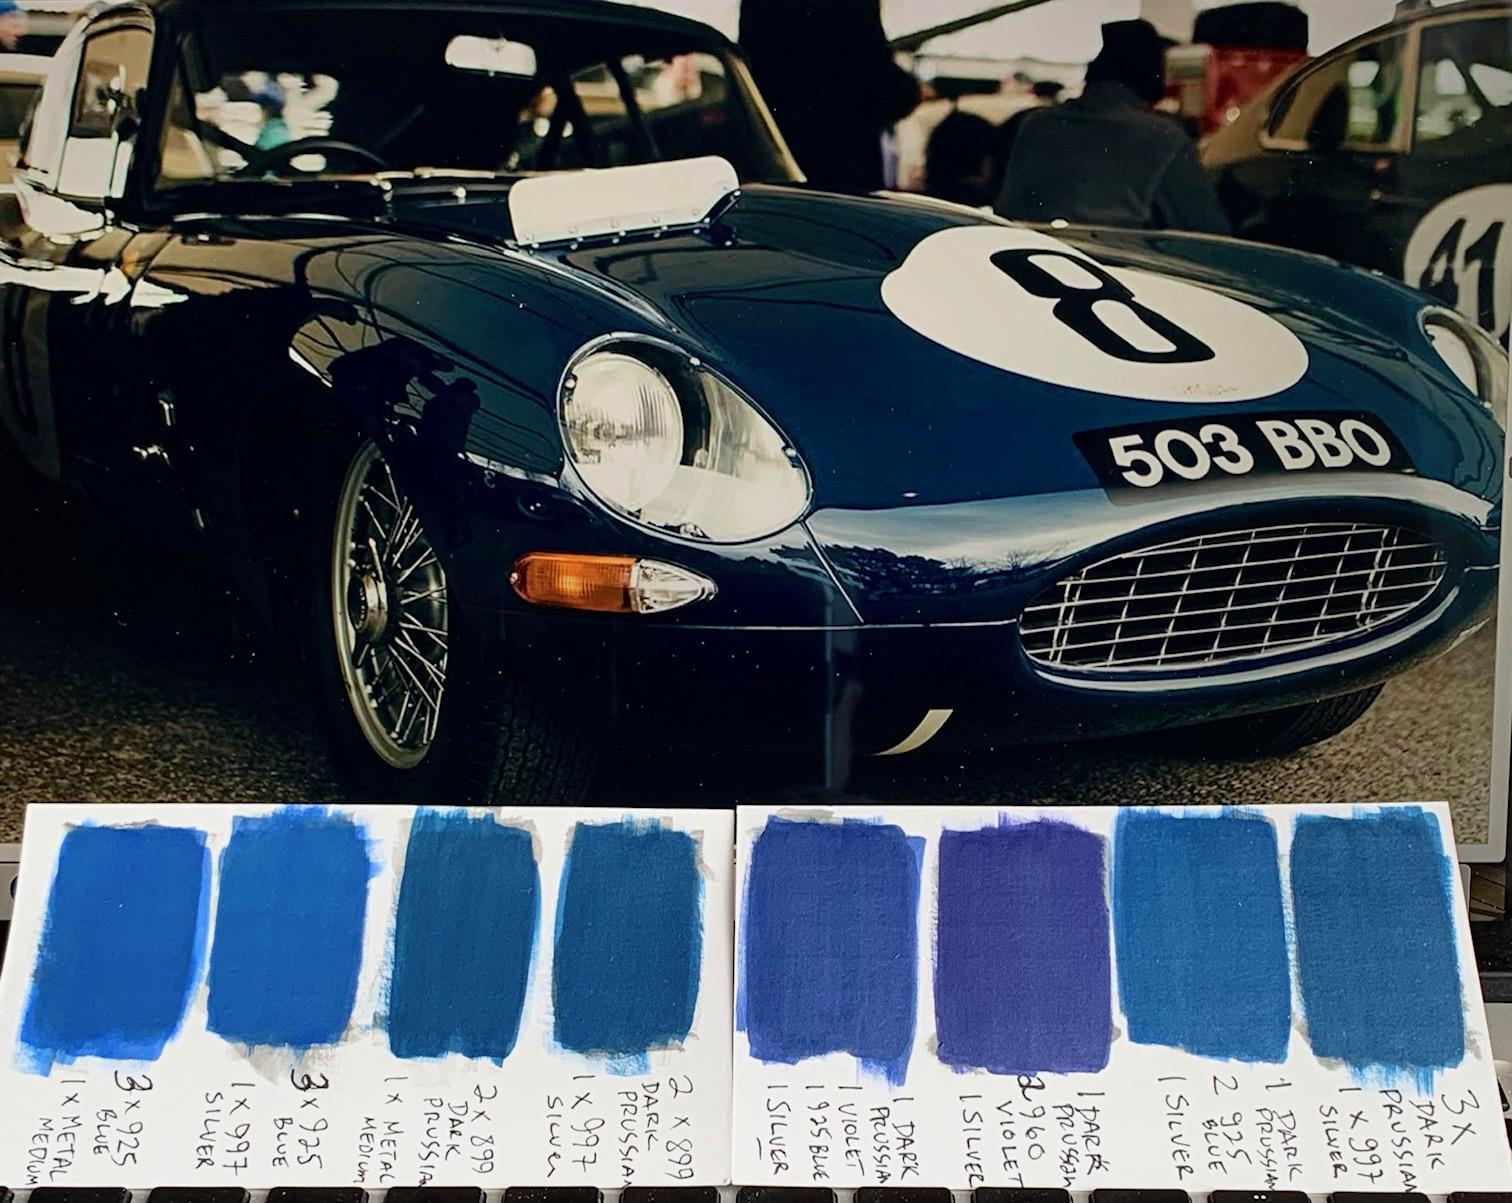
Not sure yet when I will paint the body but I felt like playing with color formulations this morning. Pic 1 is the actual race car in the pits in 62, thanks to Gramps for providing this rare period color pic of this race car. Pic 2 is the restored car at Goodwood in 2018, not sure about that color. Pic 3 is a production car painted dark opalescent blue.
-
This is mind boggling, surreal, unbelievable stuff mr. Jones! Thank you for sharing. OK, gotta go back to my little styrene & putty project...
-
Welcome back JC. Thanks for the info about wheels. I de-chromed and painted my cheapie wheels. I have used the Goodwood pictures as part of my references although with caution as far as accuracy of restorations. One thing I have not done is the red rear wheels...just looks odd to me.
-
Took time but you got it done. Resin body right?
-
Still Vallejo, with 20-30% water thinning, 2 coats. This way it goes on very smooth. It does not have a filling property but provides a good foundation for color coats. I spend time prepping the body before. After mods the whole body was wet sanded all the way down to 4000 grit before primer.