Casey
-
Posts
15,091 -
Joined
-
Last visited
Content Type
Profiles
Forums
Events
Gallery
Everything posted by Casey
-
Oatey CPVC cement? Is the foam bare or coated with a layer of vinyl or similar? You might try 3M headliner or fabric adhesive.
-
 We understand, we just don't agree. While it's nice to have both, having the former is no guarantee of the latter.
 -
Ideal donor for 70-73 Firebird.
Casey replied to om617's topic in Model Building Questions and Answers
Tommy, try sending a Private Message to member ratnasty/Chuck: http://www.modelcarsmag.com/forums/index.php?showuser=4836 He offered the body and other pieces not too long ago, but not sure if there are any plans to offer it/them again. I would try the recent AMT '70-1/2 Camaro Z/28 kit (the Baldwin-Motion version would also work) for the chassis/floorpan, firewall, headlight lenses, and windshield: http://www.round2models.com/files/instructions/amt854.pdf The interior builds up platform style, so you might be able to use the floor, too, and create new door panels. -
Solution: Buy AMT '40 Willys Coupe/Pickup kit, remove wheels and tires, part out remainder of kit on eBay and end up with the wheels and tires for nothing.
-
That has changed. They are once again separate. You can use search terms to exclude, like "-NASCAR,-decals,-decal,-ONLY,-GMS..." etc. to exclude certain items and/or sellers who regularly use certain keywords or acronyms in almost all of their listings.
-
This appears to be the case. Each member is allowed a limited amount of free storage space to host and upload/attach images here on the forum... ...and this is the best solution. You can edit your images to your heart's content on pb and will likely never run out of storage space nor bandwidth.
-
1/25 Studebaker Turbine Truck
Casey replied to Casey's topic in WIP: Model Trucks: Big Rigs and Heavy Equipment
No guarantees it will ever get to that point. I'm trying to figure out how to best locate the dual fuel tanks and the four batteries, and I'd prefer things to be symmetrical, so I'm still considering my options. I may end up filling in the steps on the Astro's tanks and casting some copies, too. It's going to be a tight fit between the back of the cab and front of the bed, but it should all fit. -
Truck Kits You've Scored Recently
Casey replied to Superpeterbilt's topic in General Automotive Talk (Trucks and Cars)
'twas a good day: Lookout, Jon, you've got company. -
GMC Astro Front Air Brakes?
Casey replied to Casey's topic in General Automotive Talk (Trucks and Cars)
Thanks. Would they be the same diameter as the rear drums, too? -
The first rule about buying models is: You do not talk about how much you spent. The second rule about buying models is: YOU DO NOT TALK ABOUT HOW MUCH YOU SPENT.
-
I'm using the AMT GMC Astro 95's wheels and front brake parts for another project, and while I can find plenty of reference pics of rear drum brake setups, I haven't found much for the front brakes. The kit omits everything between the wheel and backing plate: Is the front brake drum similar to the drums found on the rear, just a narrower drum?
-
Looks like it's out:
-
-
AMT Stealth promo worth?
Casey replied to chunkypeanutbutter's topic in Model Building Questions and Answers
As Roger said, these are easy to find for $5-$10. Pretty much any early to mid '90s AMT kit or promo is not worth much- Taurus SHO, Ford Probe, GEO Storm, etc. -
-
Look here, please, Zach: http://www.modelcarsmag.com/forums/index.php?showtopic=83153
-
1/25 Studebaker Turbine Truck
Casey replied to Casey's topic in WIP: Model Trucks: Big Rigs and Heavy Equipment
Thanks, J.T. I like to work off a plan, but sometimes I do more seat-of-the-pants engineering, like tonight, and that can cause problems. I decided to use the Astro 95's rear cross member, which is basically an H-beam to which the ends of both track rods attach, so I made three more H-beam cross members using styrene C-channel and strip the same width. I centered the Astro H-beam between the rear axles, then spaced back the rear cross member so the rear axle would clear it, then spaced the front cross member to match: Not long after the glue dried on the front cross member I realized I failed to leave space between the frame rails for the front axle's differential, so the front cross member had to come out. More sanding and cleaning up the frame rails, and more borrowing of parts from the Astro 95 kit, namely the remaining frame cross members. I already had the front half of the trans crossmember in place, so I narrowed the rear half and glued it in place: At least the funky twists on the added frame rail sections (mostly) disappeared once the rearmost two cross member were added, and once I decide what to do with the frame rail ends, I'll probably add one more. I picked up a GMC Truck service manual, too, so no shortage of good info and reference material inside: -
Stock, race or something else? Mark Johnson makes an excellent resin cast BBC, though it's more geared toward race than street: He's a member here (edboys is his screen name), or you can e-mail him at: mjaafd1@msn.com
-
You're not seeing things.
-
1/16 scale Charger into Petty Road Runner completed 1/10
Casey replied to Jim3's topic in WIP: Model Cars
I like where this is headed. -
The forum content from Nov. 25 until a few days ago was lost permanently, sorry.
-
USFS Brush Truck
Casey replied to Chariots of Fire's topic in WIP: Model Trucks: Big Rigs and Heavy Equipment
I never tire of seeing excellent work like yours, Charles. Looks good so far. -
1/25 Studebaker Turbine Truck
Casey replied to Casey's topic in WIP: Model Trucks: Big Rigs and Heavy Equipment
I also test fit the air compressor to the engine and added some bolt and port detail to the top: *PB images long gone* -
1/25 Studebaker Turbine Truck
Casey replied to Casey's topic in WIP: Model Trucks: Big Rigs and Heavy Equipment
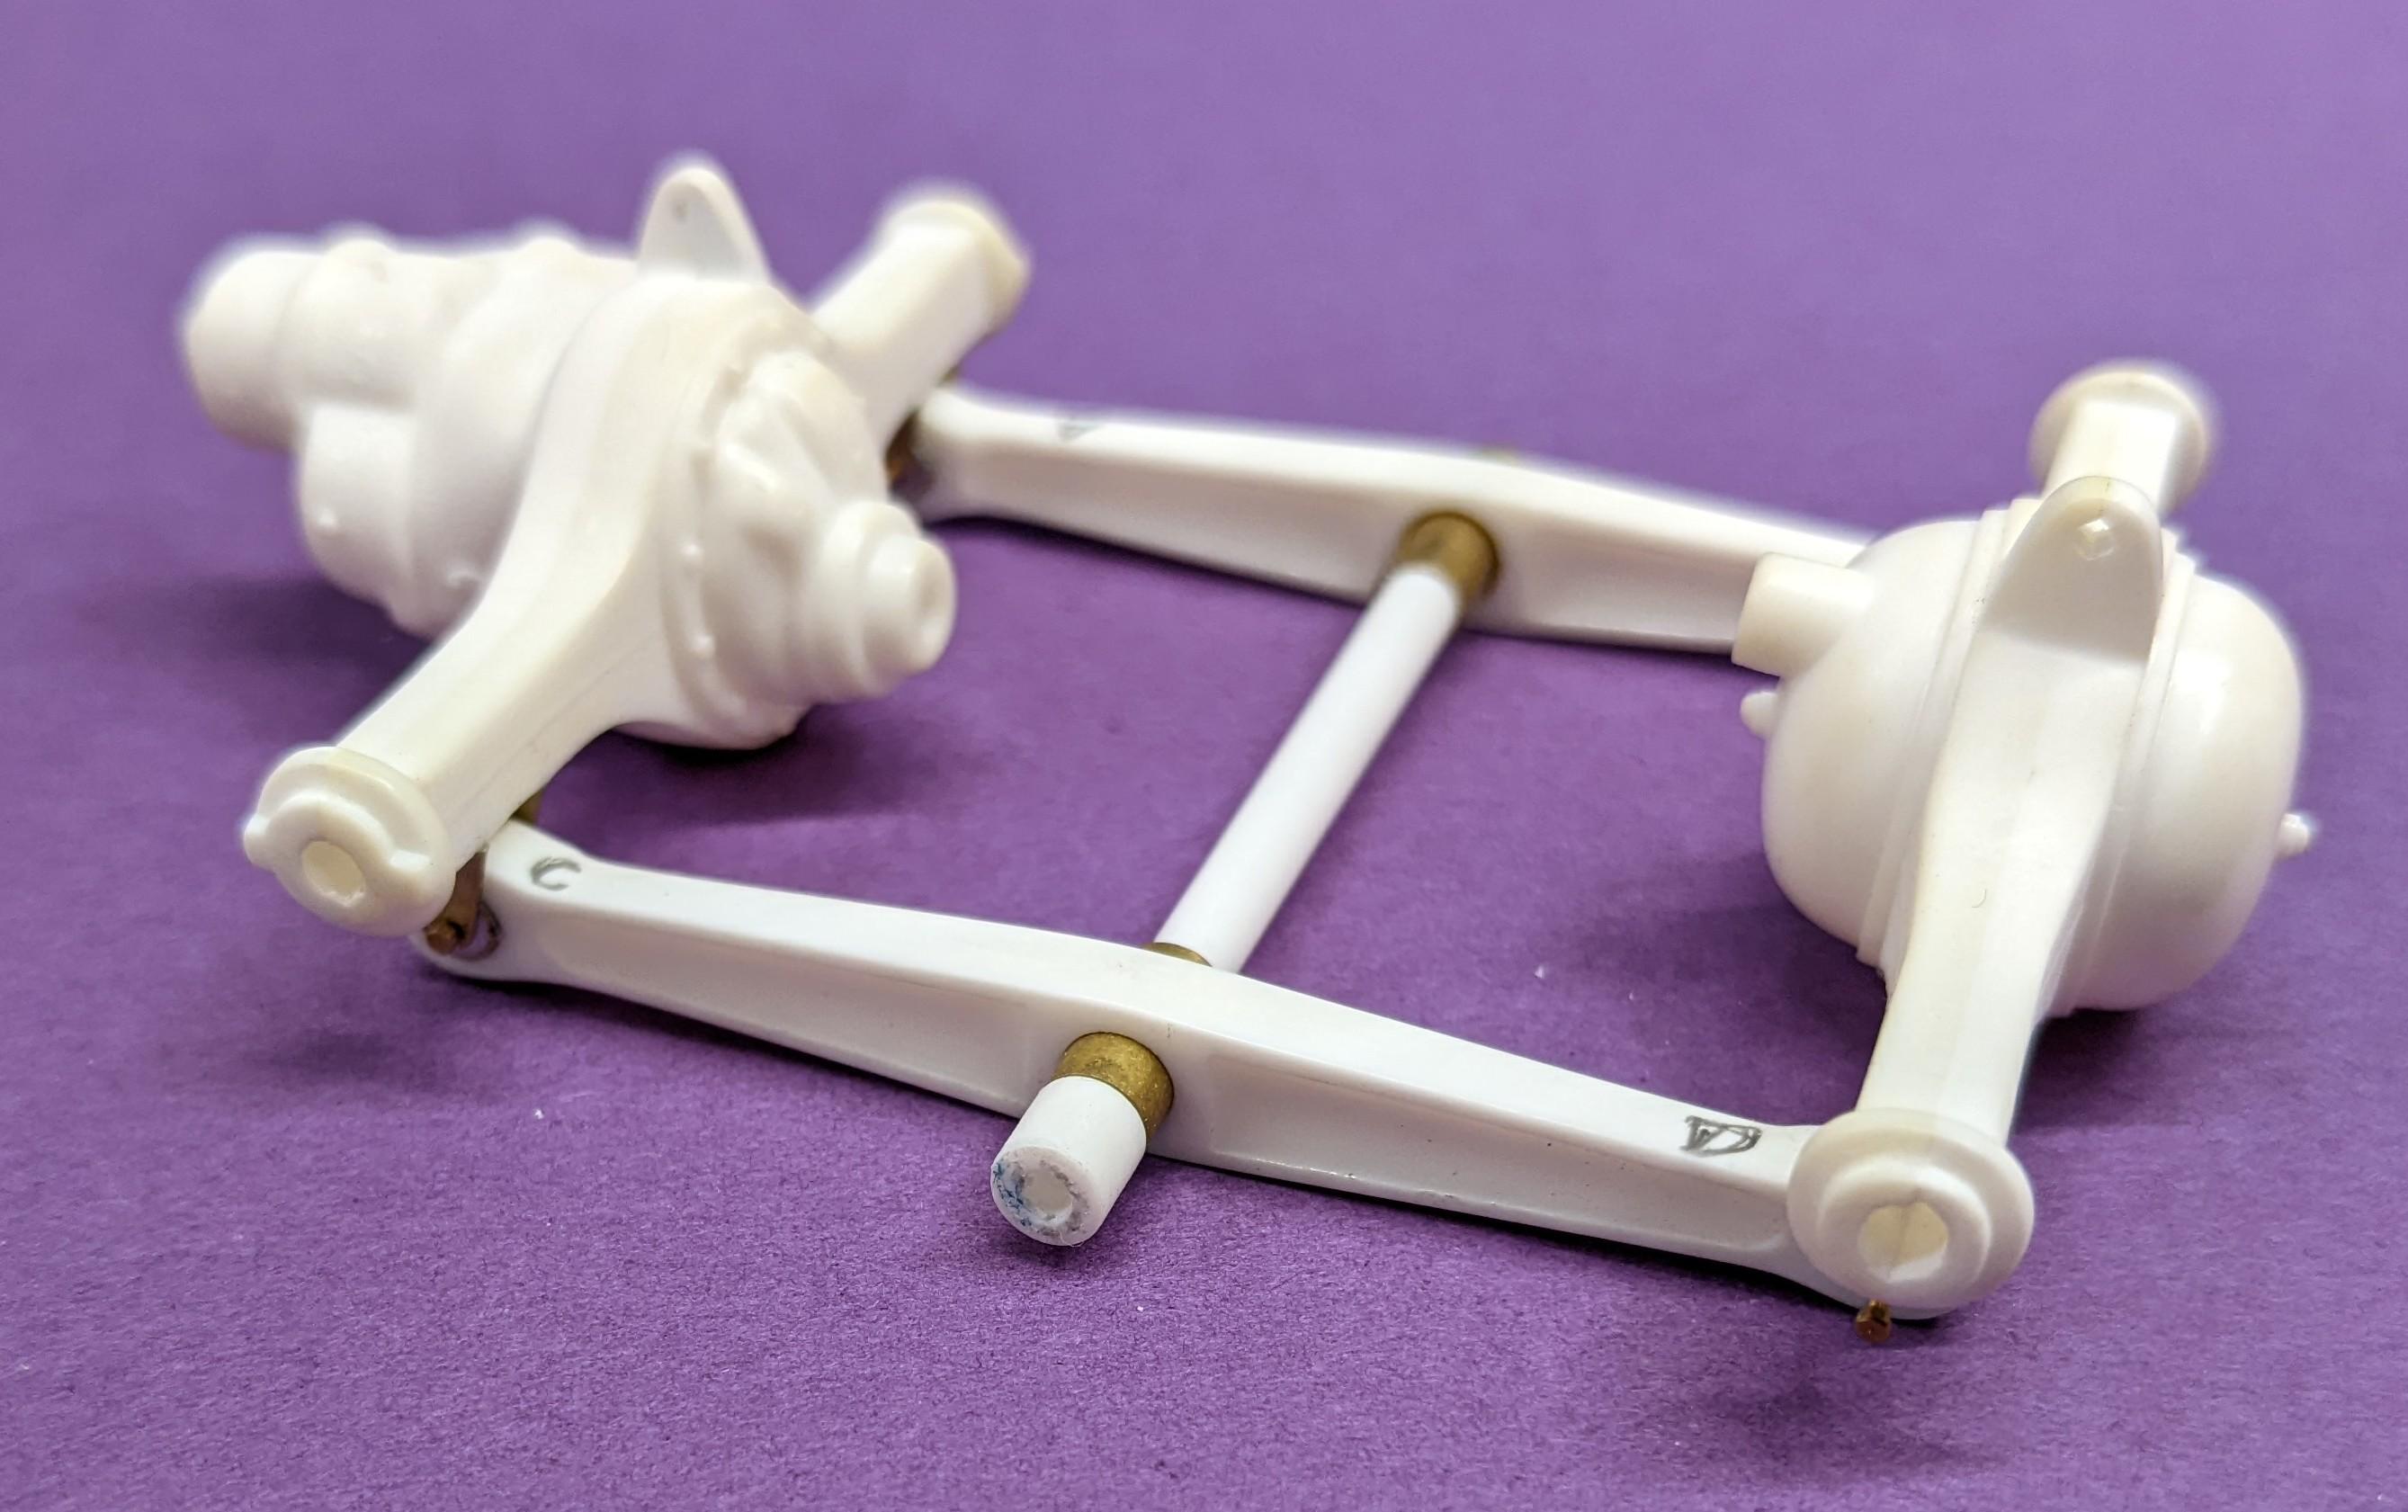
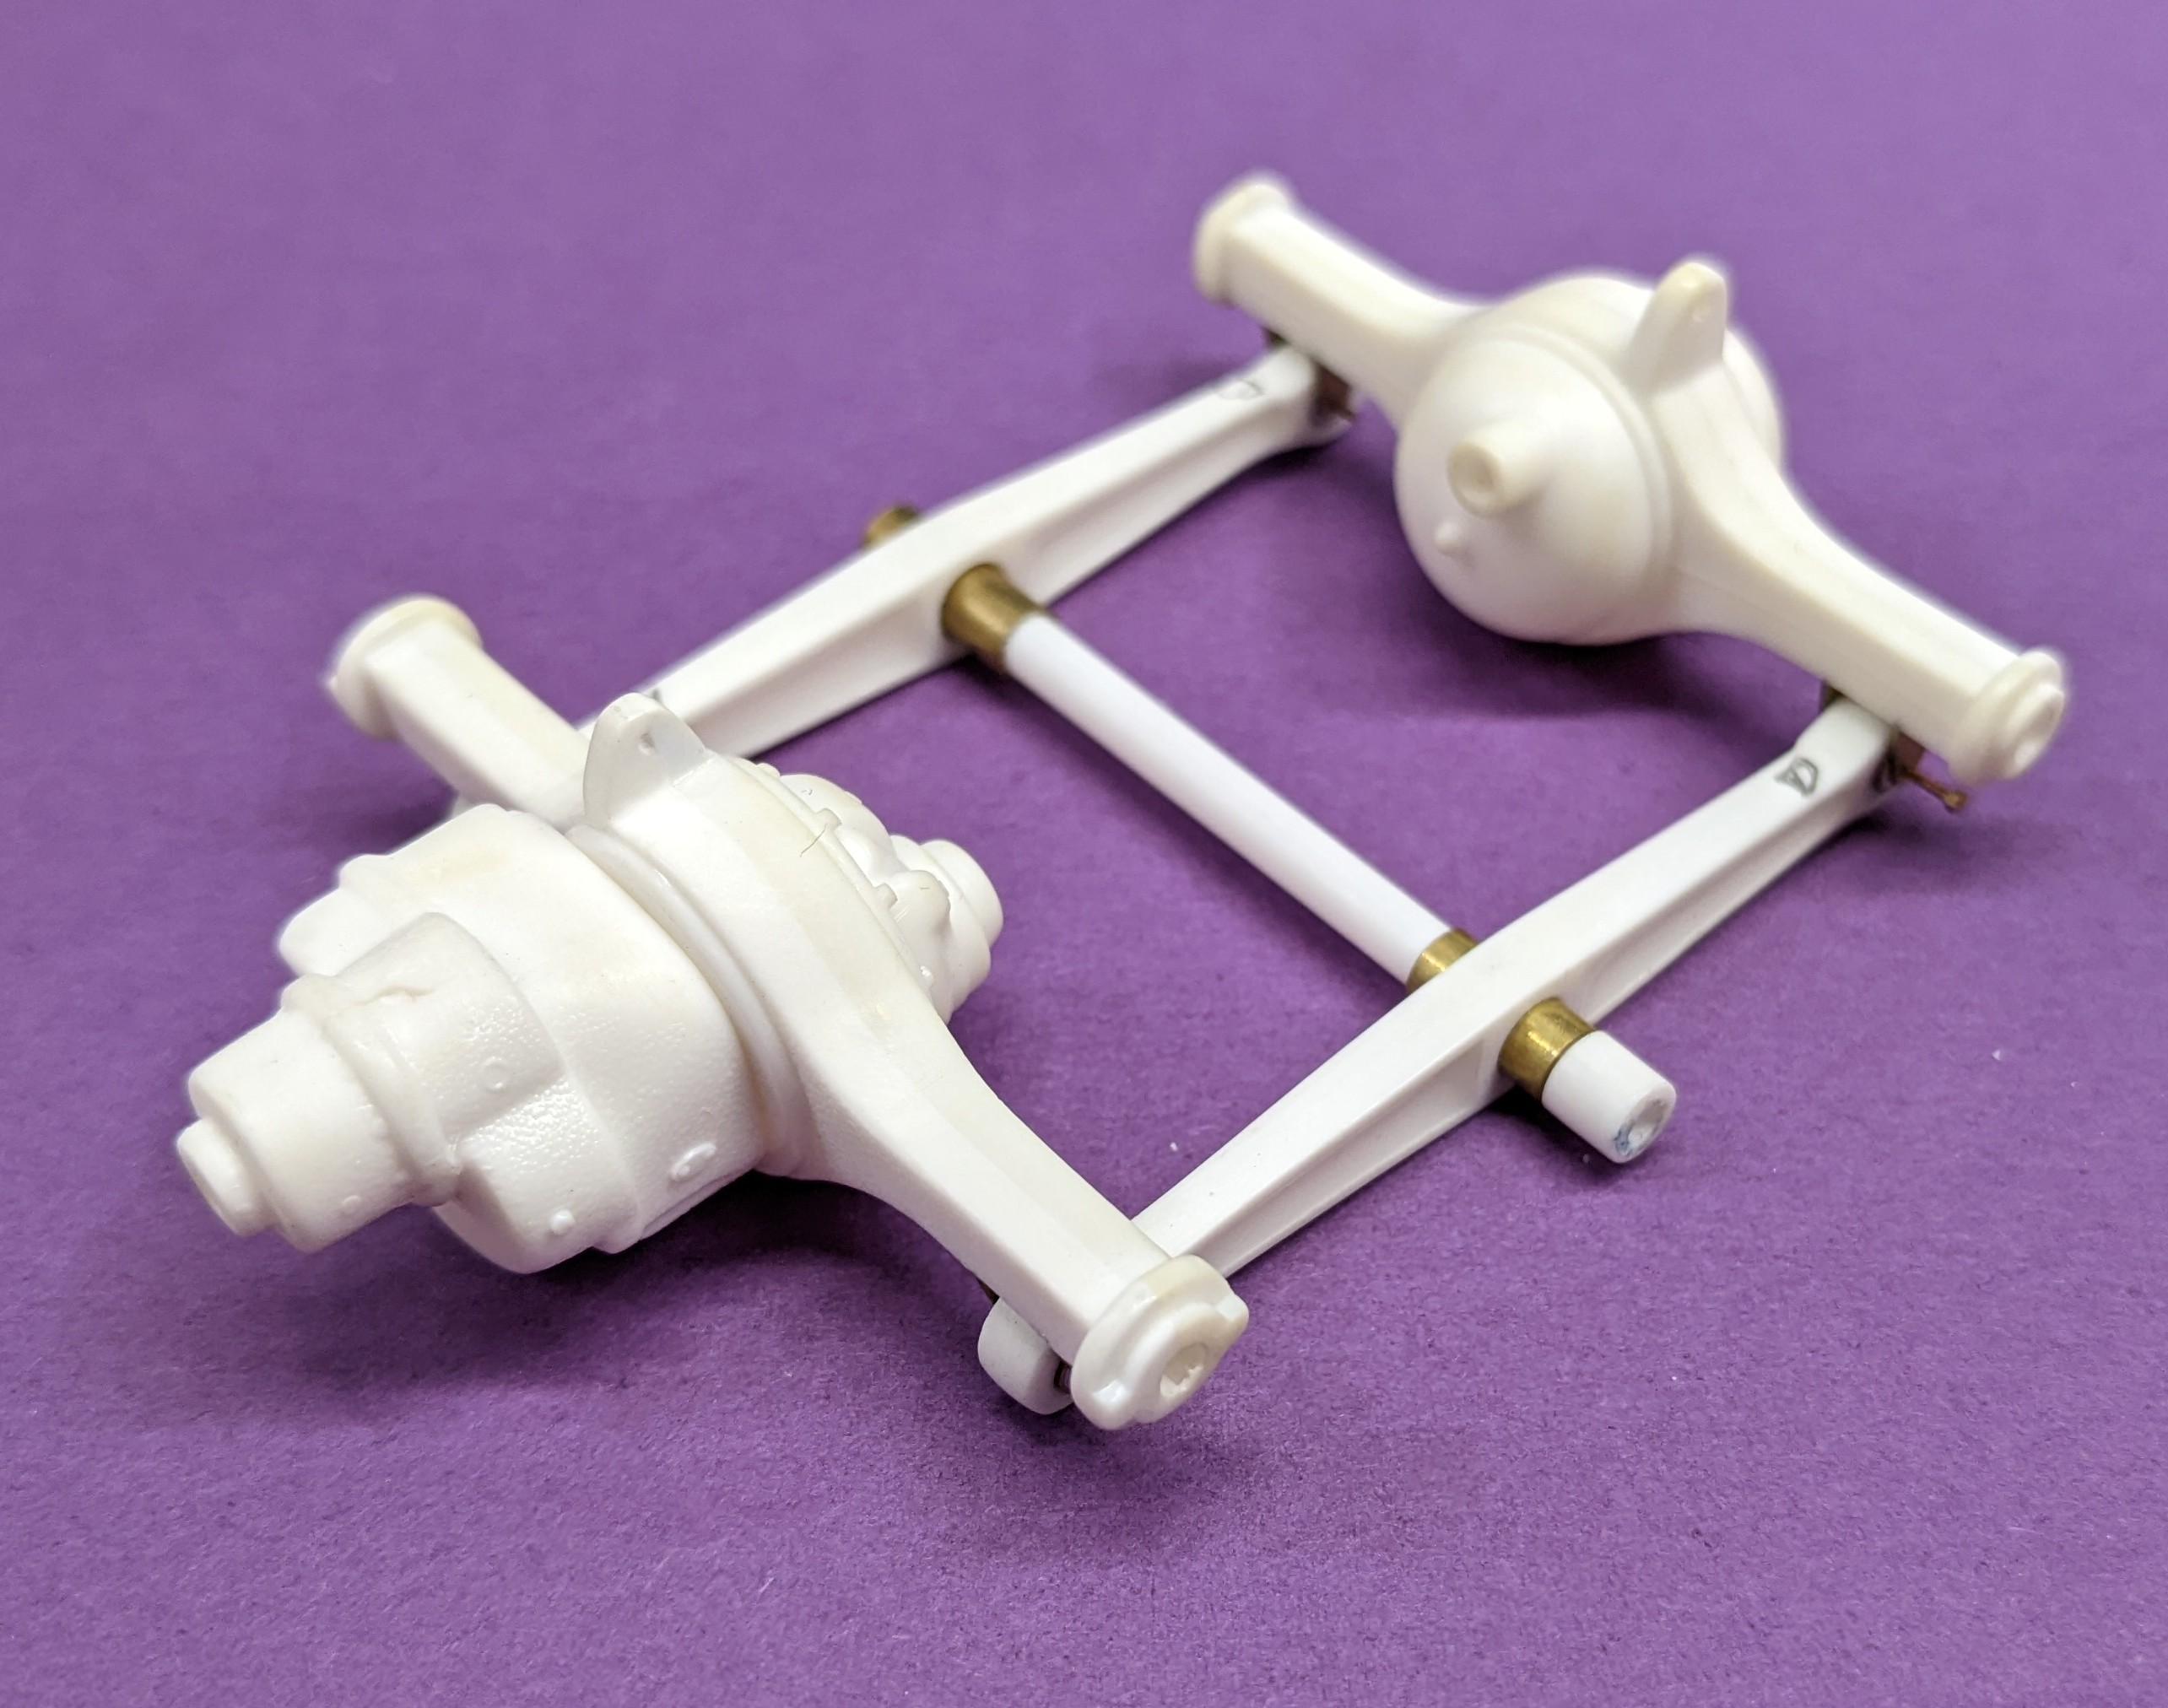
I decided to make the frame rails full thickness along the entire length, save for the last few feet where they taper slightly. I used donor frame rail sections from another AMT Ford C-series kit. I felt I needed to beef up the frame rails because I decided to use the tandem rear suspension from the AMT GMC Astro 95 kit, and I wanted the rear leaf spring brackets to be located forward of the frame rail's taper. I didn't quite get the brackets entirely forward of the taper, but the overlap is very small and is acceptable to me. I want to thank member Cornpatch (Jeff Rae) for sending me the two missing rear axle housing pieces from the Astro 95 kit I needed, so Jeff, thanks again. With those parts now in hand, I was able to clean up and assemble both axle housings, then add the 2-speed(?) differential to the front housing, and get everything sanded, ready for primer (post assembly shot below):
-
New to this awesome plastic world!
Casey replied to BoostGod77's topic in Welcome! Introduce Yourself
Welcome aboard, Nick.