BK9300
-
Posts
1,993 -
Joined
-
Last visited
Content Type
Profiles
Forums
Events
Gallery
Everything posted by BK9300
-

1/32 Freightliner cabover
BK9300 replied to Rockford's topic in WIP: Model Trucks: Big Rigs and Heavy Equipment
Maybe one day we’ll get to see a pic of your new display area - bit of an adventure ahead to get it (and moving house) all sorted! -
GMC Astro double bunk
BK9300 replied to The Brush's topic in Model Trucks: Big Rigs and Heavy Equipment
I agree with Jeff regarding your paint job (and all the details!) - all that masking would be a real patience tester and your paint laid down really well! -
Not Another Freightliner
BK9300 replied to Rockford's topic in Model Trucks: Big Rigs and Heavy Equipment
Forget my question in your WIP - its paired with your reefer. Awesome job and great truck/trailer combo! Good luck with your new place. -
1/32 Freightliner cabover
BK9300 replied to Rockford's topic in WIP: Model Trucks: Big Rigs and Heavy Equipment
Such a huge difference from what you started with, Steve - looks exceptional. Maybe I missed it, but do you plan to pair it with any trailer in particular, or just whatever the load is at the time?! -
Western Star 4900 FA plow truck
BK9300 replied to BK9300's topic in WIP: Model Trucks: Big Rigs and Heavy Equipment
I'm still glad when you do stop by and the comments you do leave are always appreciated! Like I said awhile ago, though, maybe too many pics! -
Western Star 4900 FA plow truck
BK9300 replied to BK9300's topic in WIP: Model Trucks: Big Rigs and Heavy Equipment
Hey Steve - glad you had a look! Trying to make some things work can be very frustrating; thankfully simpler worked this time. -
Resto Rod Autocar
BK9300 replied to Gary Chastain's topic in WIP: Model Trucks: Big Rigs and Heavy Equipment
I remember the fixture solution from your International Paystar build - great idea! (sent you a PM about the Tyrone engine) -
Resto Rod Autocar
BK9300 replied to Gary Chastain's topic in WIP: Model Trucks: Big Rigs and Heavy Equipment
Gary, if you'd prefer to have a Neway air suspension, I have three extra ones, unopened from Auslowe, if you would like to see it fits for your build. If want me to send it along, PM me an address! Going to be a great build!
-
Western Star 4900 FA plow truck
BK9300 replied to BK9300's topic in WIP: Model Trucks: Big Rigs and Heavy Equipment
Thanks for the kind words, Jürgen! Will be great to see how your trailer progresses. -
Western Star 4900 FA plow truck
BK9300 replied to BK9300's topic in WIP: Model Trucks: Big Rigs and Heavy Equipment
Appreciate it, Randy, and hope we get to see an update from your bench soon, too! -
Exceptional build!
-
Amazing work as always, Alberto - sure coming along nicely!
-
I think you've created a great pickup model, given all the problems encountered along the way - great colour combo!
-
Western Star 4900 FA plow truck
BK9300 replied to BK9300's topic in WIP: Model Trucks: Big Rigs and Heavy Equipment
Thanks for having a look, Victor, and I appreciate the compliment! -
Western Star 4900 FA plow truck
BK9300 replied to BK9300's topic in WIP: Model Trucks: Big Rigs and Heavy Equipment
Thanks very much, Gary - the cooler sure has been a tester! -
Western Star 4900 FA plow truck
BK9300 replied to BK9300's topic in WIP: Model Trucks: Big Rigs and Heavy Equipment
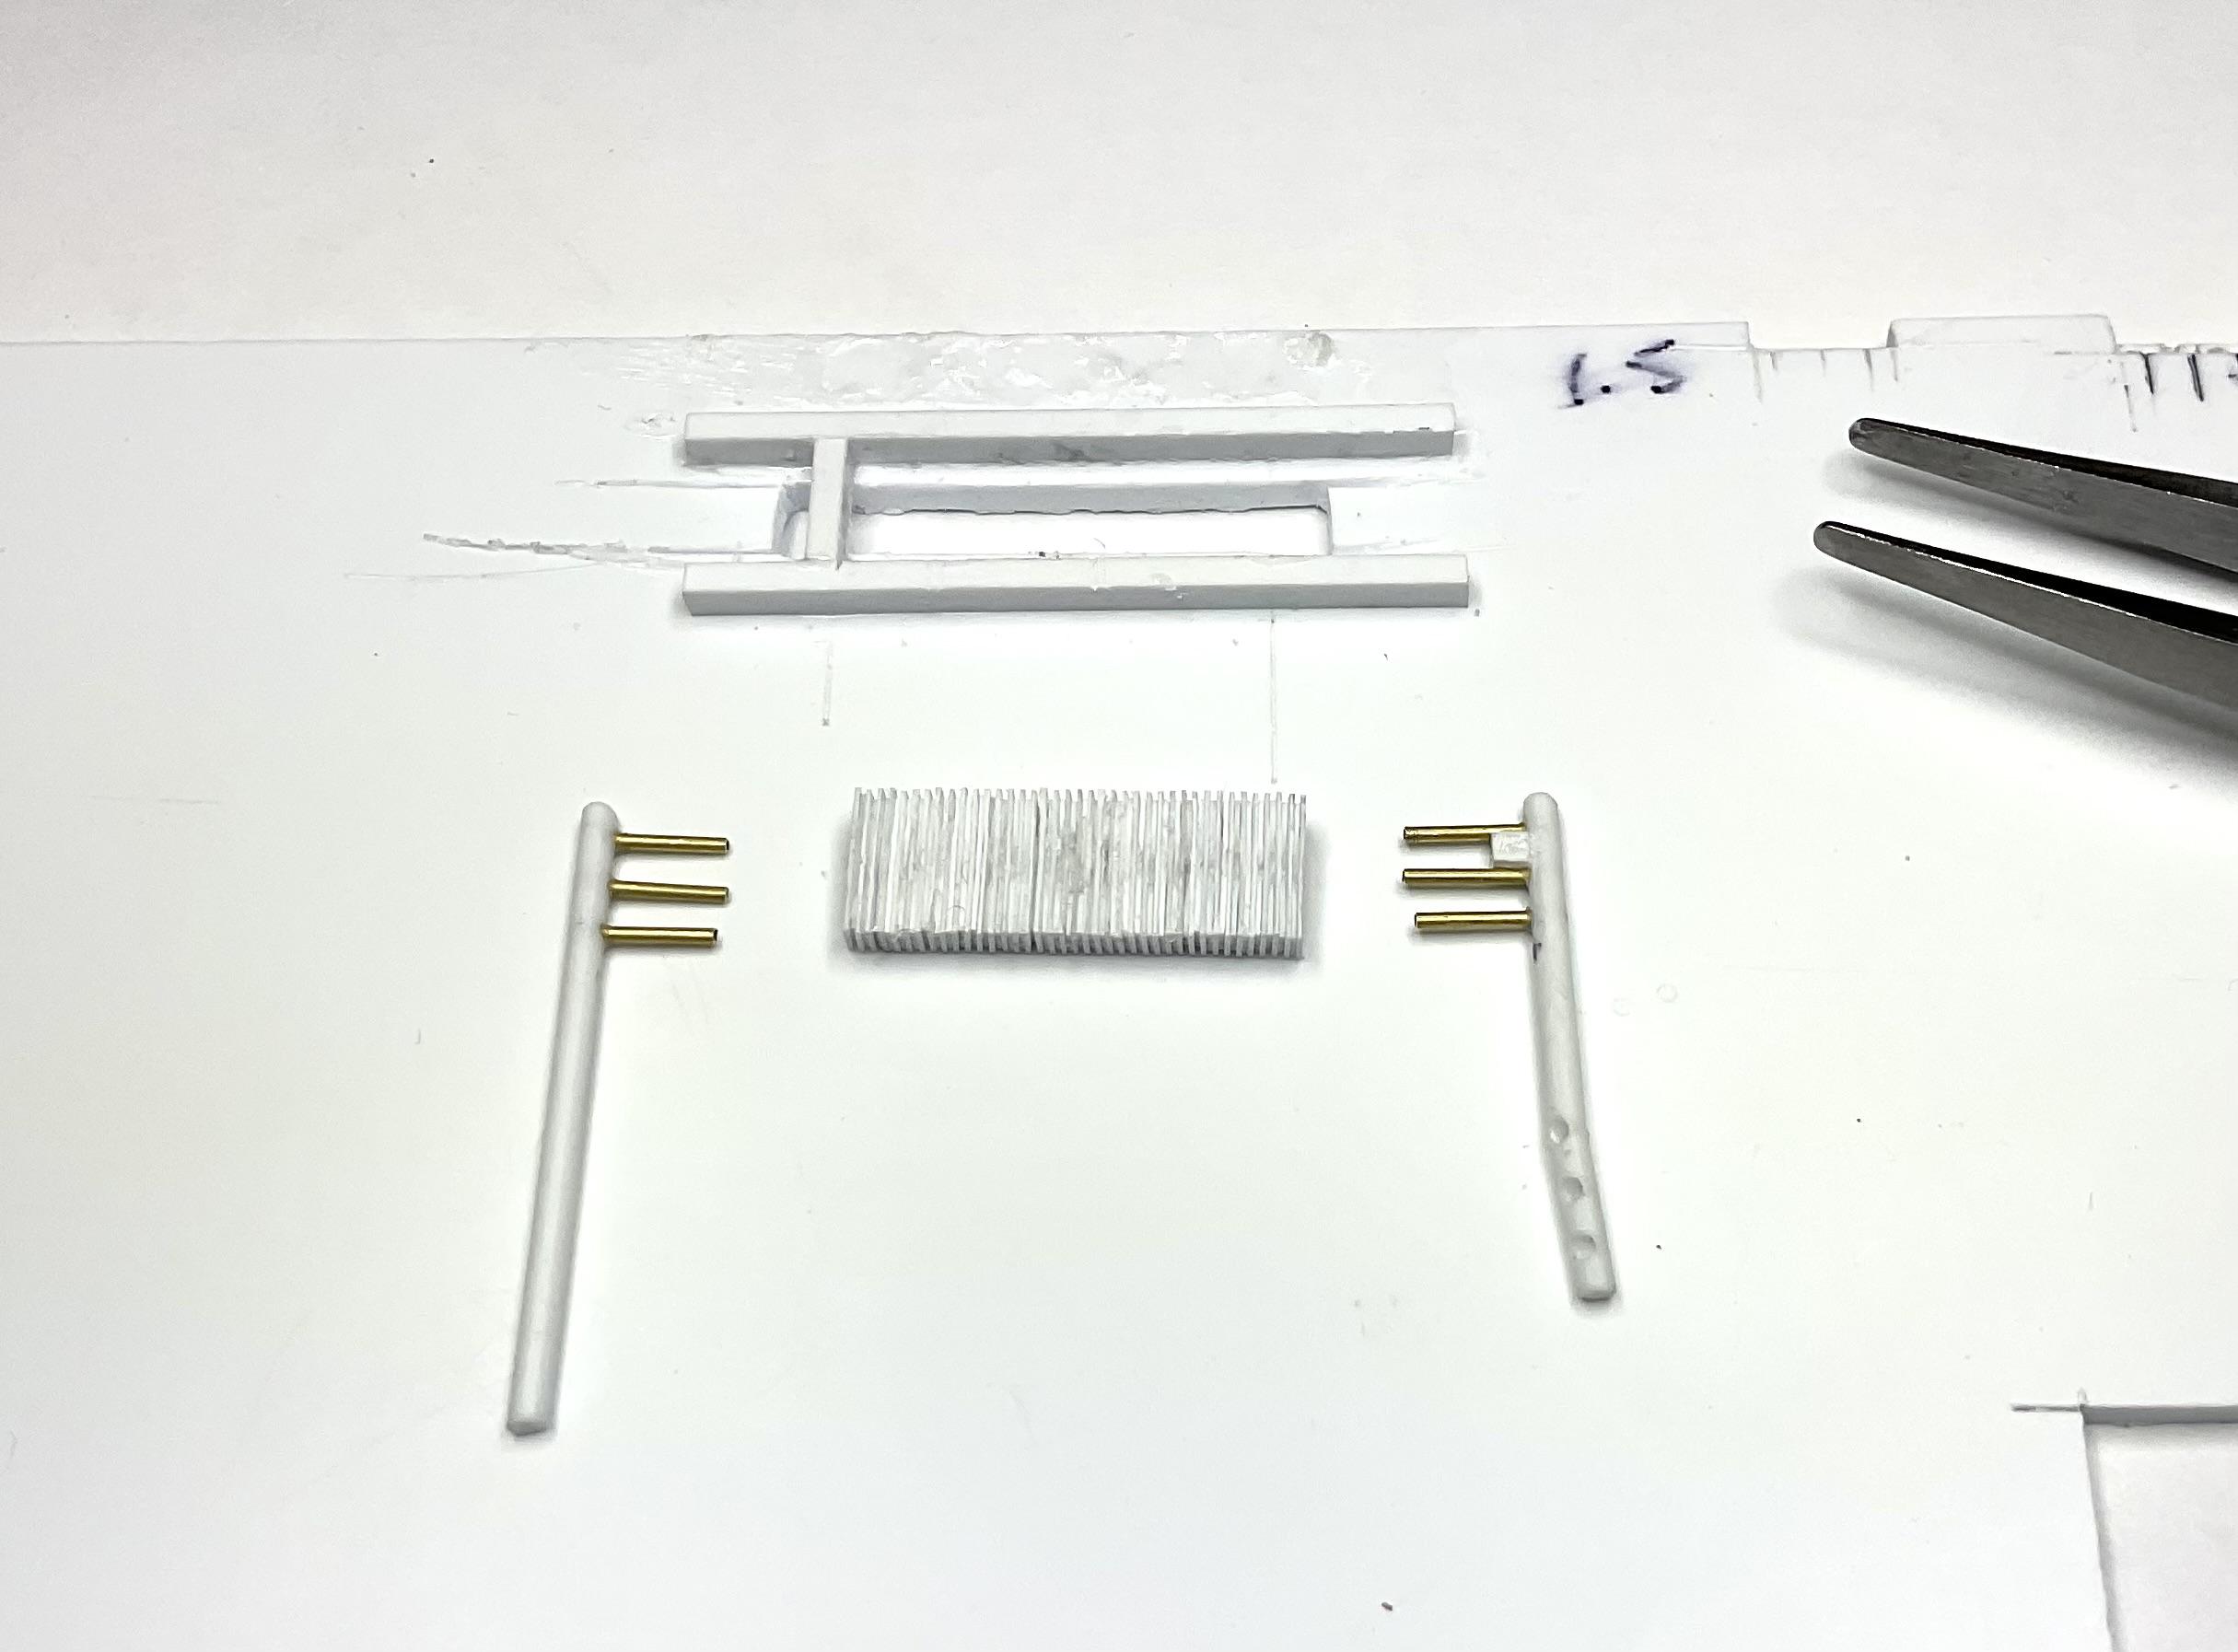
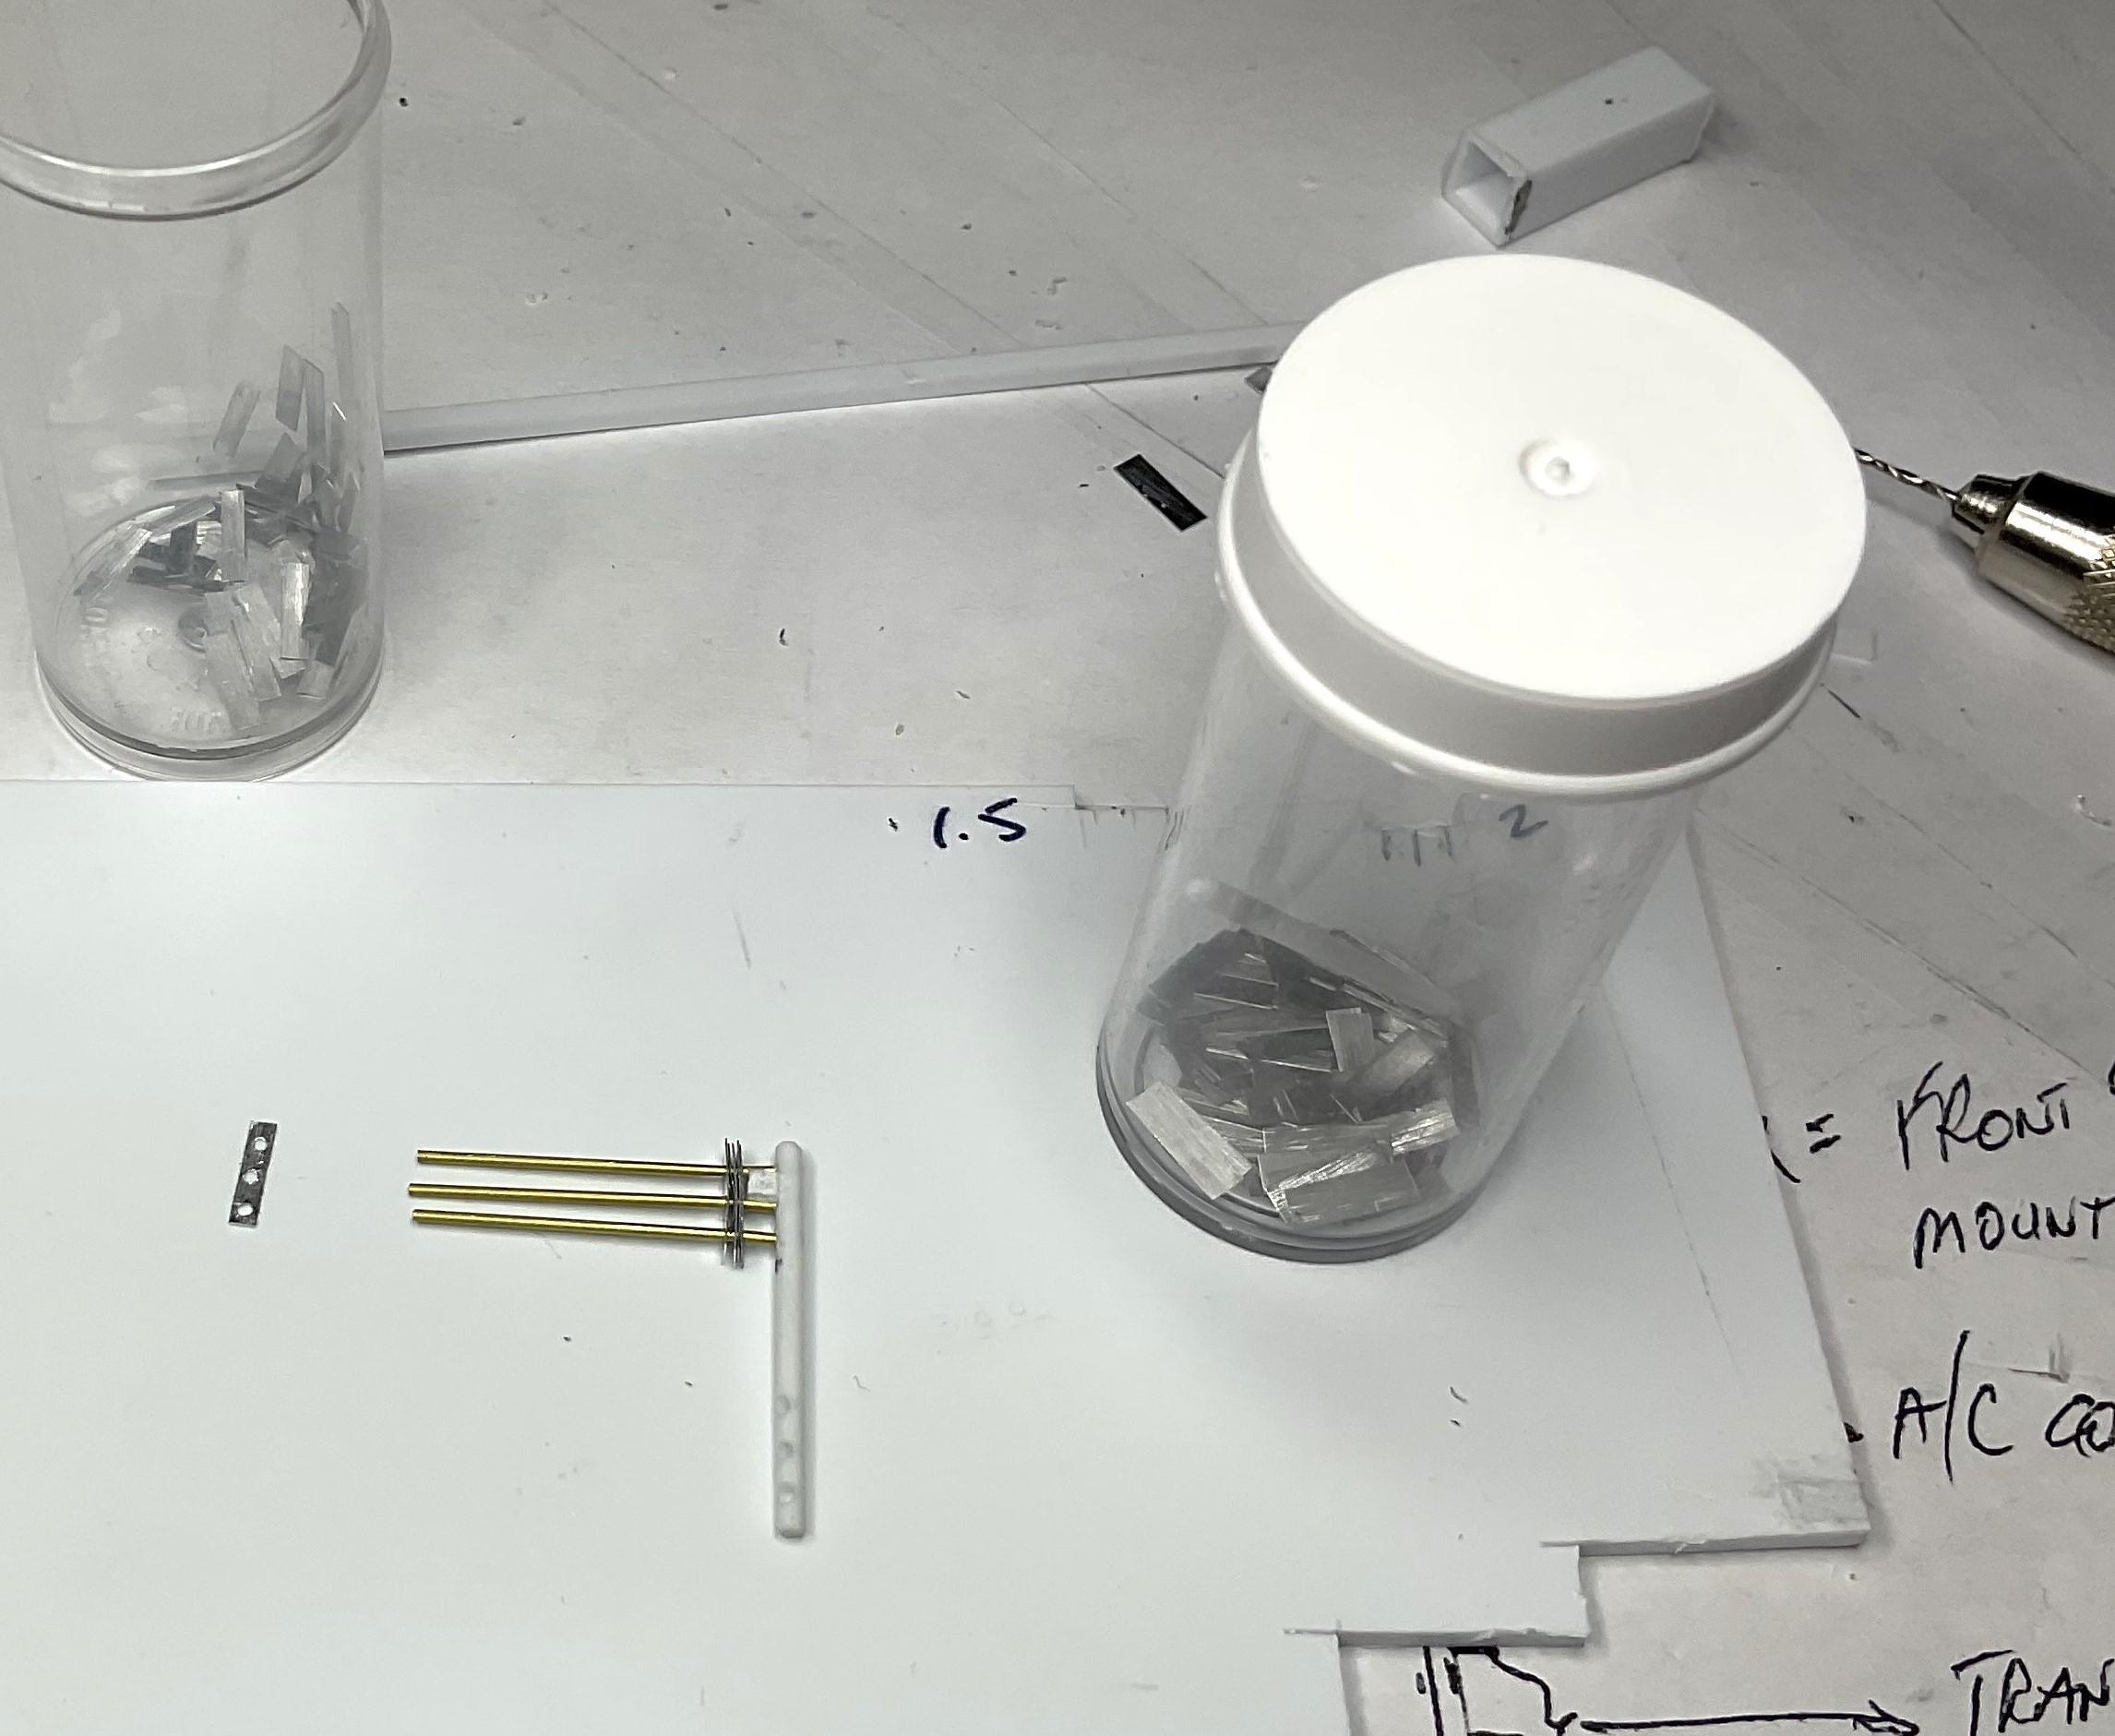
Not much today - just a quick update on the transmission cooler, before that and the AC condenser get painted and attached to radiator frame - I needed to get the cooler re-built after the initial disappointment yesterday. Still needs a bit of cleanup then out to the shed for painting. Trans cooler basically built - still a bit of cleanup between the vanes, if possible. Still two small brackets need to be made to bolt the cooler to the rad frame. Might bend the corners of a few vanes - managed to do that to a few just from handling the piece while building it! Mock up of AC condenser and trans cooler in their spots on the rad Painting may need to wait until tomorrow - don't have a colour I thought I had. Once this assembly is finished, I can paint and add the fan to the engine, mount the rad in the frame, hook up a couple hoses and get on to the fuel tank - lots to do yet!
-
Very fine job stitching your roof back together. Sure like the stance - hope you can get the rear end to cooperate!
-
Western Star 4900 FA plow truck
BK9300 replied to BK9300's topic in WIP: Model Trucks: Big Rigs and Heavy Equipment
Didn't get back to your earlier posts - got too wrapped up in figuring out the cooler! (I think the cooler figured me out instead, so had to change direction) - thanks for your comments! -
Western Star 4900 FA plow truck
BK9300 replied to BK9300's topic in WIP: Model Trucks: Big Rigs and Heavy Equipment
Well, good idea - poor execution! Drilling the little vanes did not go well, overall. My little jig cutout wasn't the good idea I thought it was, and the drilled hole alignment wasn't acceptable. Also had trouble with using CA glue to bind together the little bit that I did drill ok. So, decided to make the vanes out of 0.25 styrene strips that I scraped and sanded to get them a little thinner. Made another small jig to glue the alternating different size vanes, compacting them in the jig as more were added. So, some progress today, just not what I had hoped for at the start! Poor job of drilling and hole alignment; CA glue wouldn't hold together the few pieces I did get right. Another jig to align the different length styrene strips in place while gluing them together, along with a bit of compression every so often! Need to clean up between the vanes with a micro saw, drill 6 holes (instead of 120!) to insert the coolant tubes, trim the ends of the coolant manifold to length and add the plumbing fittings to attach the hydraulic lines. Not what I had envisioned achieving today, but it will be acceptable once it is cleaned up, plumbed and painted, then hidden behind the truck's grill! As always, appreciate you looking in - thanks!
-
Tigercat 880E longer 1/48 scale
BK9300 replied to François's topic in WIP: Model Trucks: Big Rigs and Heavy Equipment
Spectacular work, François - simply amazing! -
Super detailed reefer, Steve - looks great!
-
The Same but “ a little “ Different
BK9300 replied to Biggu's topic in WIP: Model Trucks: Big Rigs and Heavy Equipment
Your engine looks great in place - from the looks of it, I imagine mechanics didn't like working on them very much! -
Roanoke Railhouse Beer GMC General
BK9300 replied to Gary Chastain's topic in WIP: Model Trucks: Big Rigs and Heavy Equipment
I watched you do a different kind of fender repair on one of your previous builds and all turned out fine - this will too, I'm sure! -
Pete 359 tanker with trailer
BK9300 replied to Jürgen M.'s topic in WIP: Model Trucks: Big Rigs and Heavy Equipment
Looks awesome, Jürgen! -
Western Star 4900 FA plow truck
BK9300 replied to BK9300's topic in WIP: Model Trucks: Big Rigs and Heavy Equipment
Been a slow week, waiting for decals for the sander. However, once the decals are here and the sander finished, it needs to get on the truck. So, I also need to finish up some loose ends underneath the truck and get it up on it's wheels. Need to mount fuel tank, get fuel lines hooked up to tank, and make a transmission cooler to finish part of the plumbing to the front of the truck. Out of all that, I decided to attempt the transmission cooler first. Laying out the pieces of cooling system made to date, to better determine layout for cooler (black rubber is basic size and location of the version of cooler that was on the real truck) Started cutting cooling vanes from 0.2mm aluminum - a bit thick for scale, but hoping it will look ok Fashioned part of the cooler manifold and one of the mounting blocks to bolt it to rad frame (will have to trim the end of the manifold to size later) Long bench day ahead today! Made a little jig - cutouts at bottom left will hold vanes in place while I do my best to drill three, 0.7mm holes in each one (going to stack three or four and drill at same time to minimize screw ups in spacing the holes!). I have two widths of vanes, to hopefully provide a better relief when detailed. A few alternating widths of vanes in place, and one ready to go on - once I get several more on, I will compress them and put a bit of CA glue on from behind, and move on to adding another group Not sure how it will turn out in the end but giving it a go! Your thoughts and comments are always welcome. I'll see how the day goes - maybe more pics later. Thanks for looking in.