cifenet
-
Posts
856 -
Joined
-
Last visited
Content Type
Profiles
Forums
Events
Gallery
Everything posted by cifenet
-
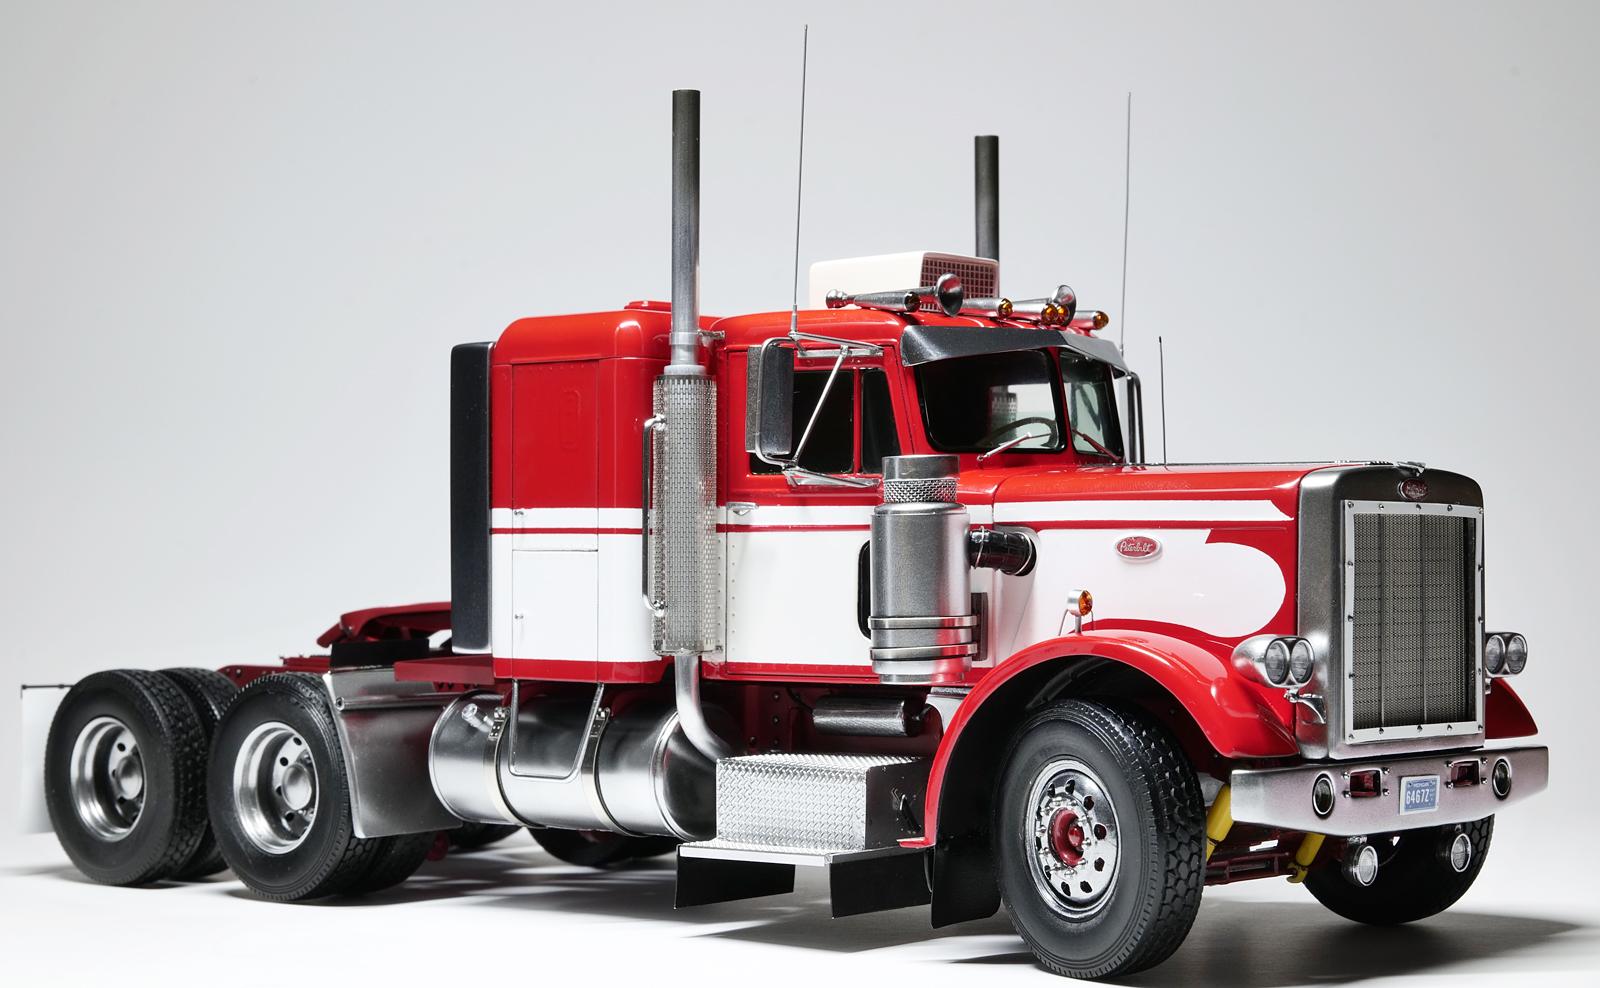
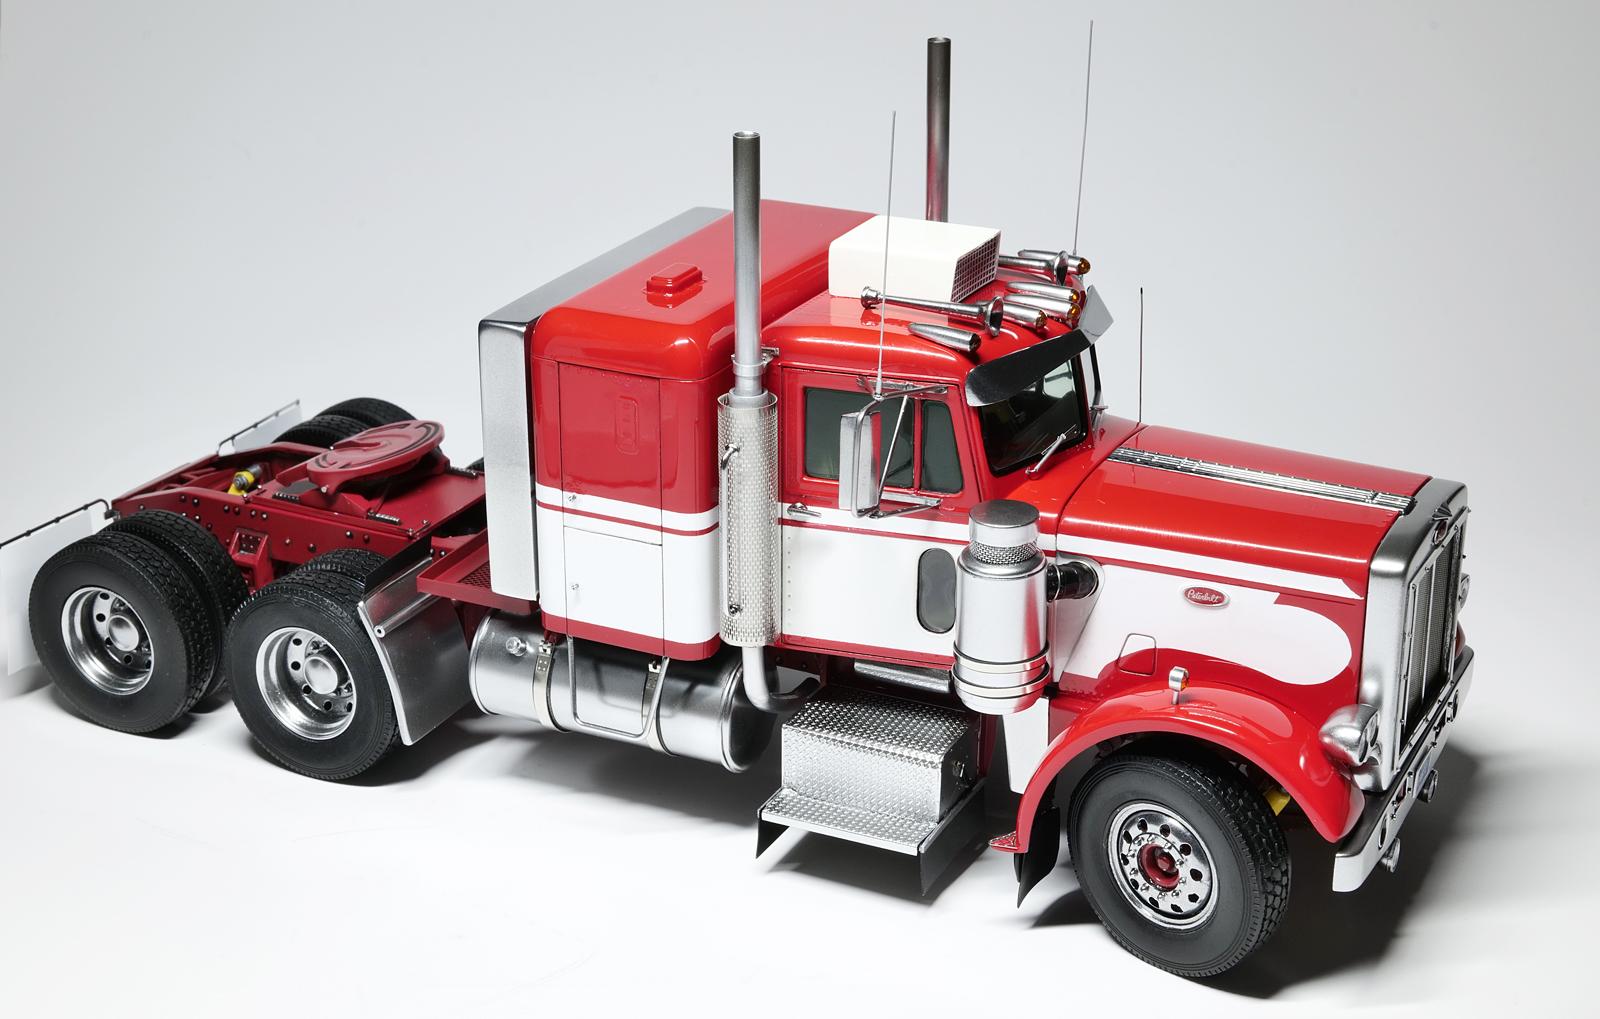
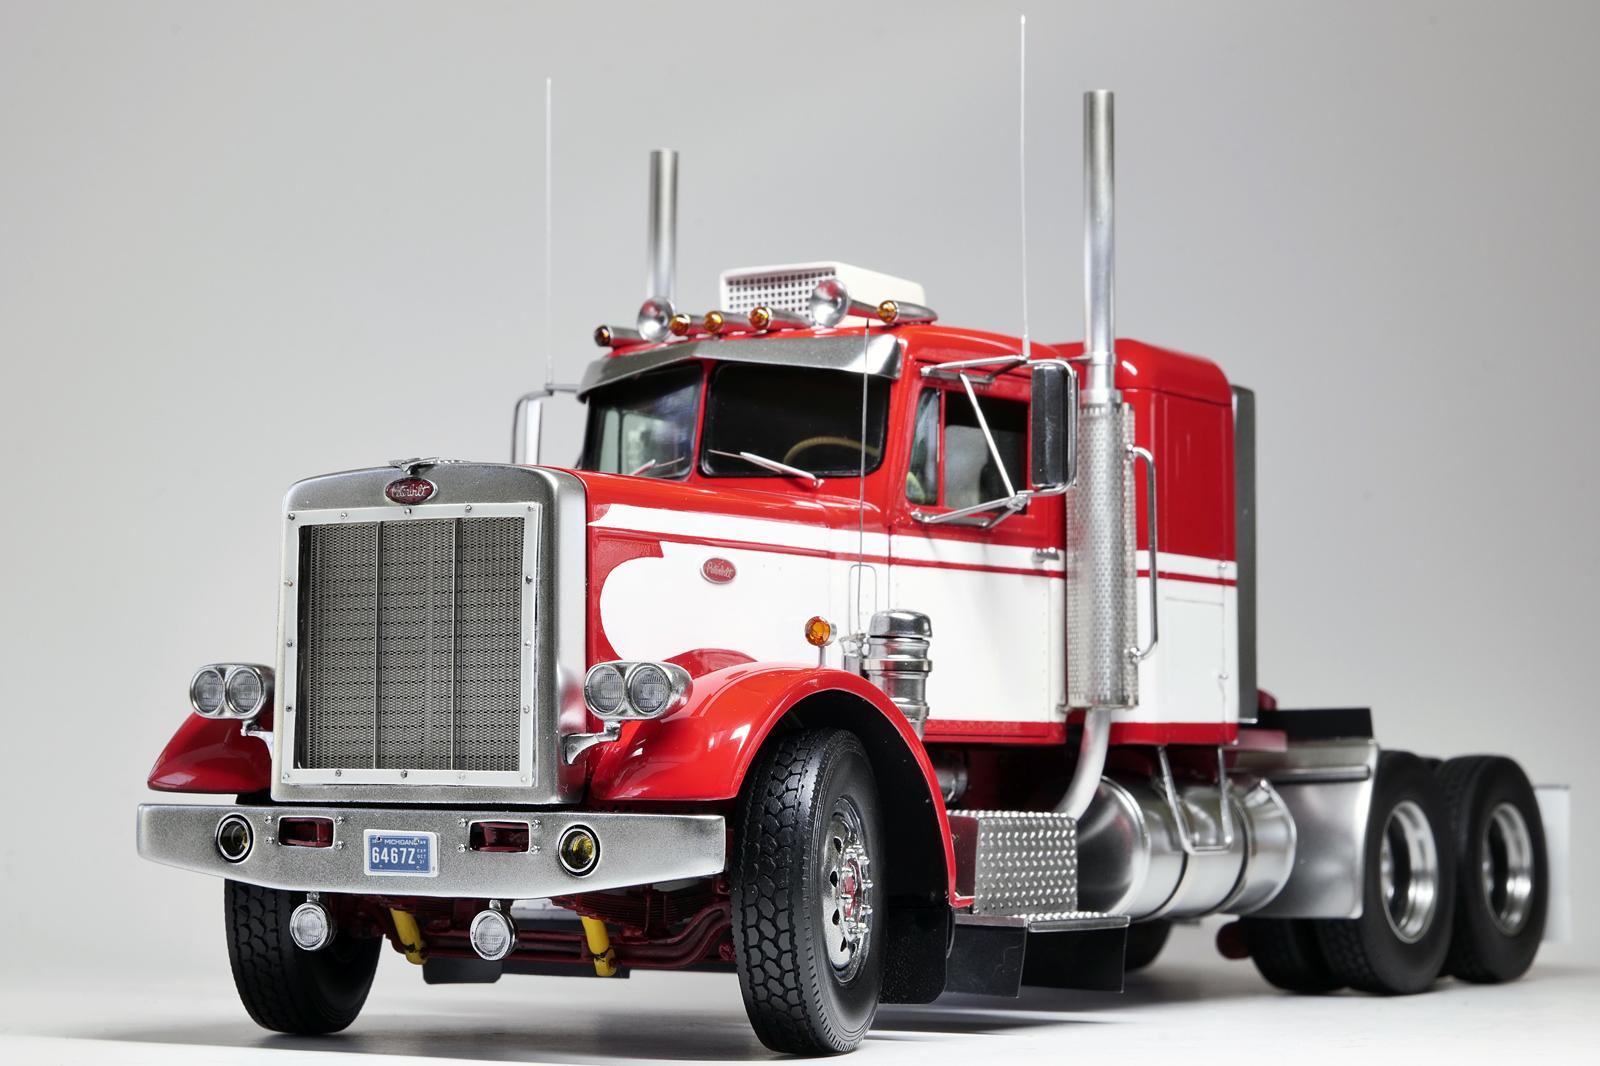
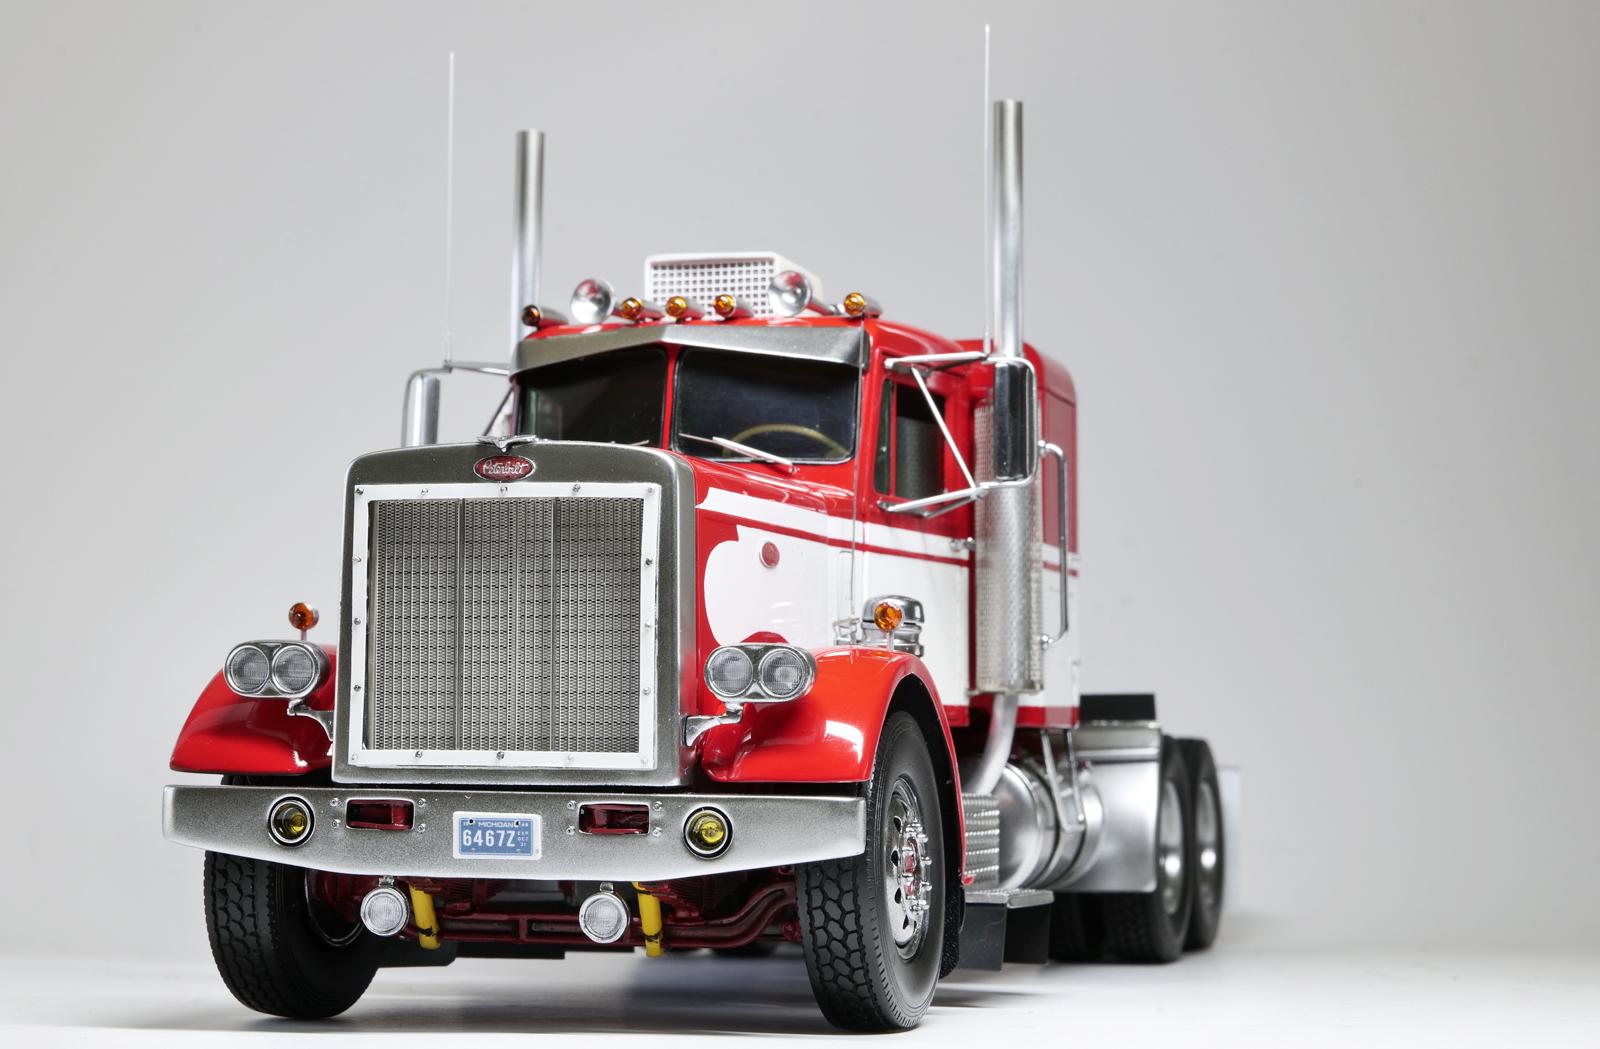
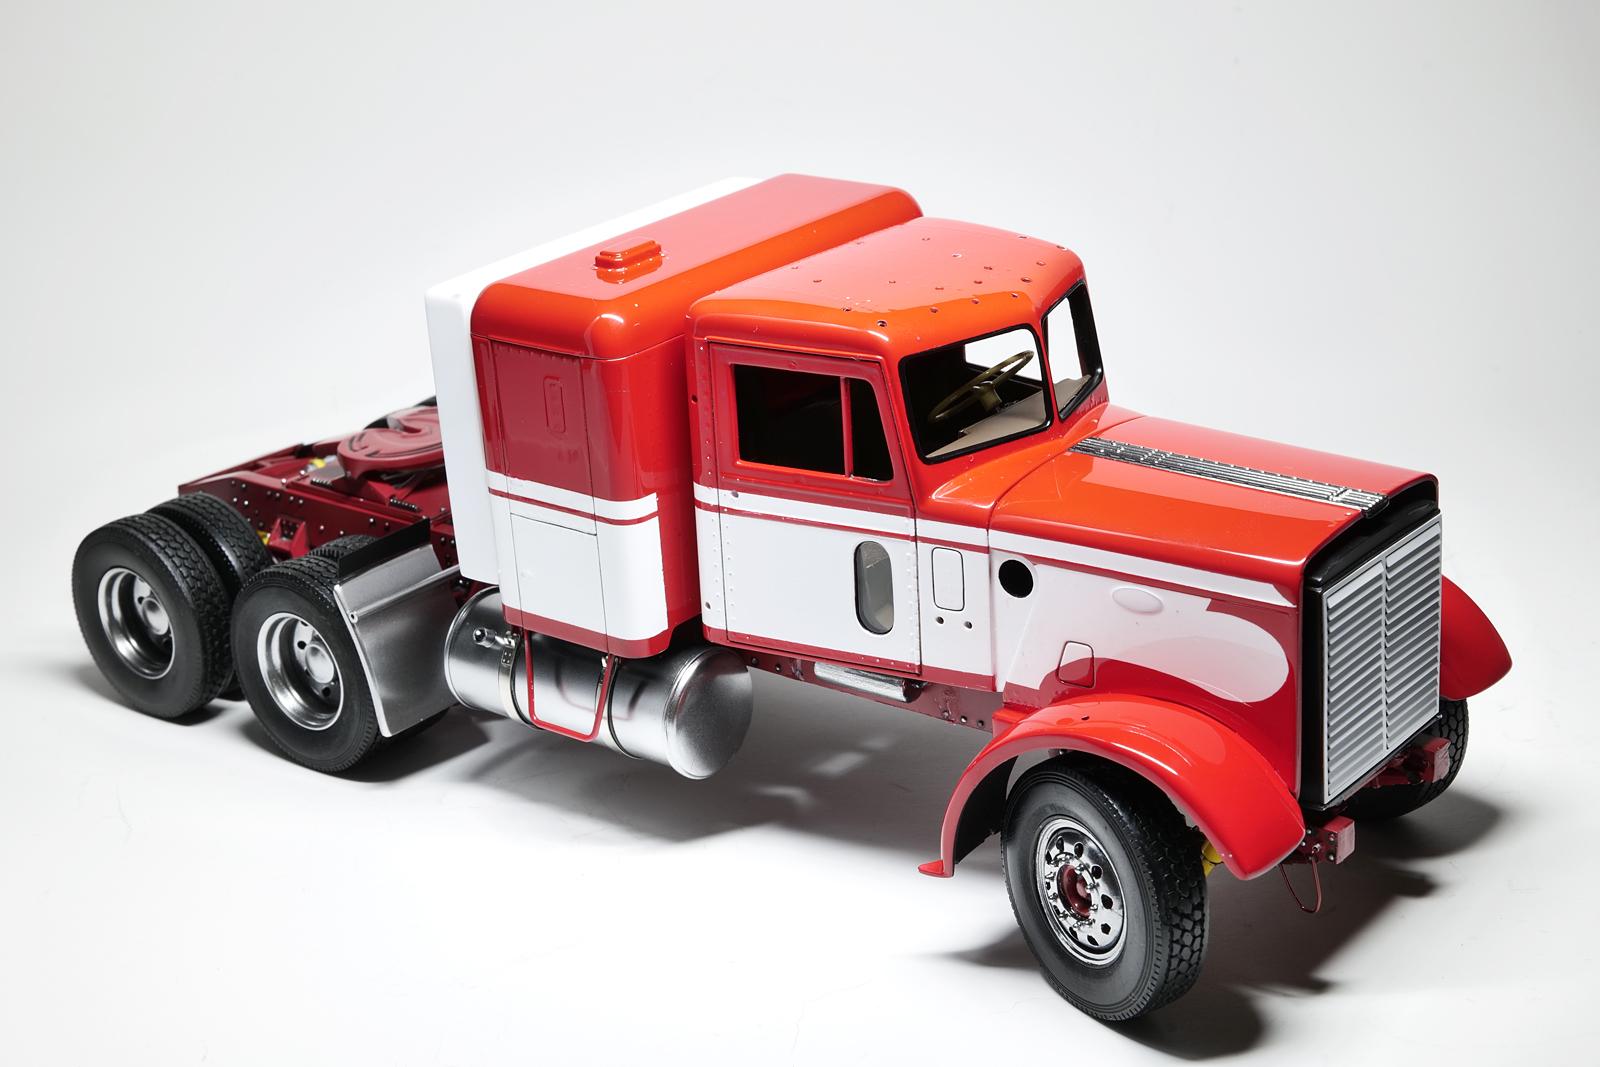
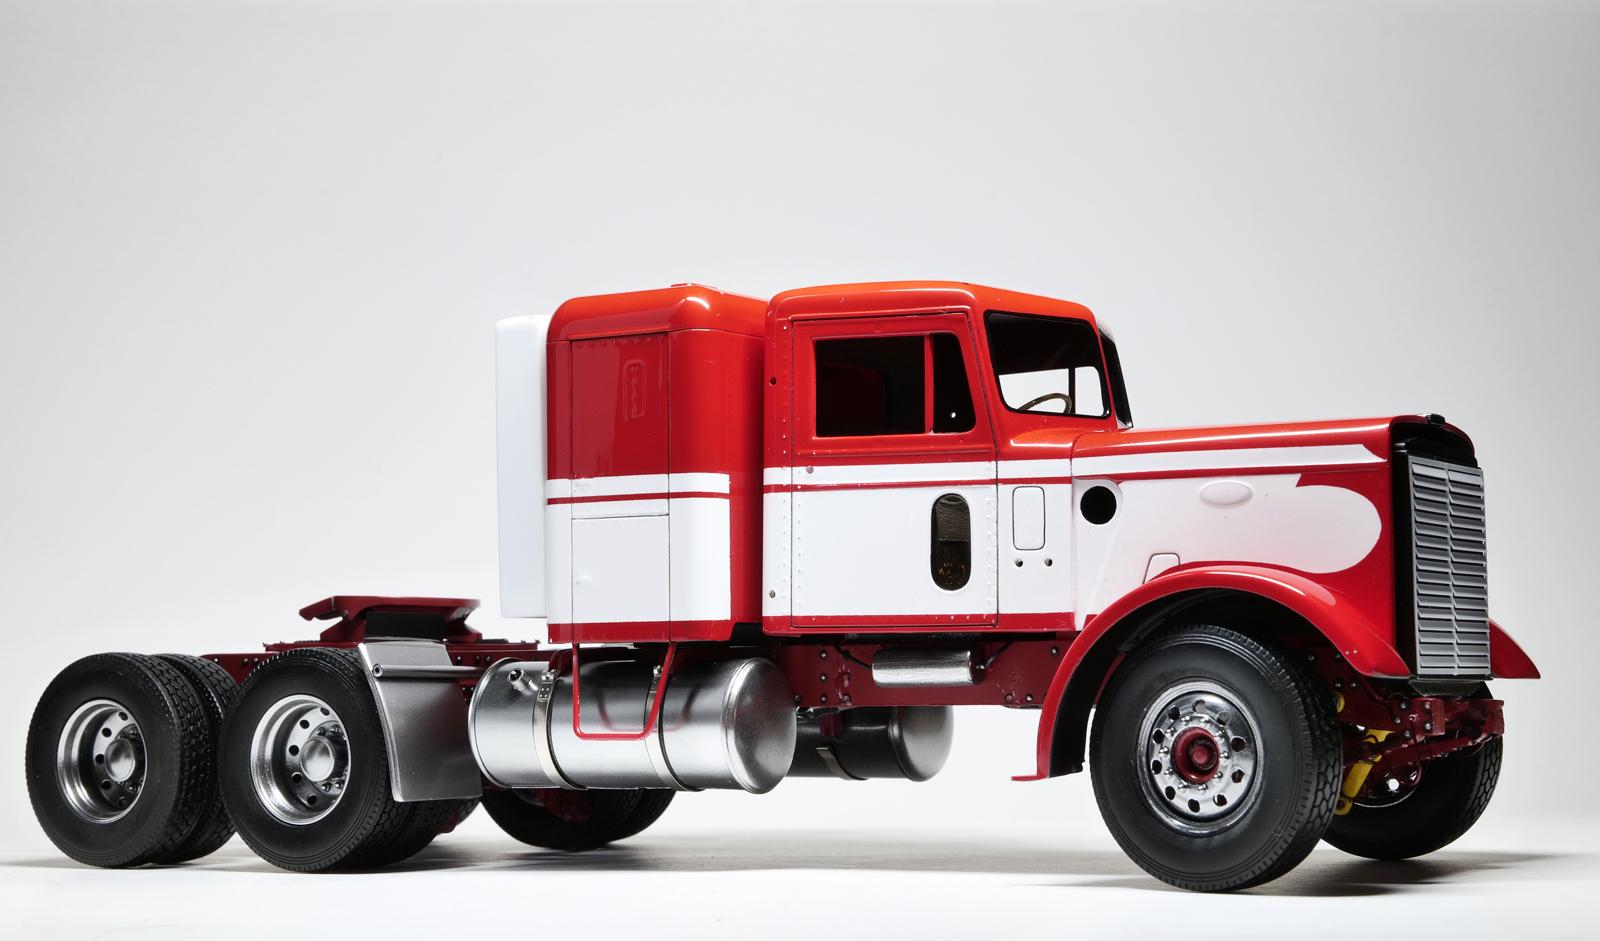
 INTRODUCTION: I began building this kit back in early February and roughly took 10 weeks to complete. If I think back on the overall effort on "man hour" term, I may have been putting 60 to 80 hours from start to finish. I am mentioning this because when I initially started to work on this kit, I really wanted to build this out of box style and get it done quickly. Finishing this kit within two weeks seemed very doable at first. I honestly thought I could really pull it off. After all, I really cannot afford to spend multiple years building a kit, I am still buying more kits than I can ever finish building! (this is a big problem of mine lately) It is funny how things just change and I found myself building this kit for more than a couple of months... There are many parts where I decided to make my own and there are many areas where I changed how the stock parts get built. My main focus was certainly not to make the vehicle to be "period correct" or to be "an actual existing vehicle", but rather I was going for the aesthetically pleasing look (my way) and also to be convincing enough to say "yeah, it is the old Peterbilt 359 with UniLite cab". All I envisioned was something red, has metallic shine throughout, clean, and has to look good to my eyes. WIP: My WIP is documented in another section (the link below) and it has details on how I built this kit: PETERBILT 359: SUMMARY: It was an absolutely incredible experience and it builds into something that you can be proud of. I still cannot believe this kit was designed more than 50 years ago and that I just got to build it for the first time... Just mind blowing. No matter how it turns out, the kit is a challenging one and when you finish, you will feel the satisfaction of accomplishing something that is both demanding and fun at the same time. Another words, it is very additive! Lastly, I do want to thank all the members who supported me with helpful advice and positive encouragement throughout the building process! You guys rock!
- 21 replies
-
- 11
-

-
What a great story and it is amazing that you are able to reproduce this truck as real as possible. Incredible work and it is definitely a special vehicle! The trailer is looking very nice as well.
-
Revell's Peterbilt 359: WIP
cifenet replied to David G.'s topic in WIP: Model Trucks: Big Rigs and Heavy Equipment
The details on the dash and bedding are excellent. Nice touch on the posters, you will definitely find more people staring into the windows. 😁 And that is why you are spending enough time to make the interior looking good! -
Mack Superliner
cifenet replied to Jürgen M.'s topic in WIP: Model Trucks: Big Rigs and Heavy Equipment
Going all "Mack" here! Should be a good looking setup when all staged! -
Looking very technical! I really like it! Very interesting to see how the driveshaft position is offset, marvelous stuff!
-
Western Star 4900 FA plow truck
cifenet replied to BK9300's topic in WIP: Model Trucks: Big Rigs and Heavy Equipment
Looking very good, Brian! As usual, this is another fun update and great showing us several outstanding implementations. And lastly, the use of the punch and an old hair dryer, they are definitely the correct application! 😄 -
D9R Armored Bulldozer
cifenet replied to Scale-Master's topic in WIP: Model Trucks: Big Rigs and Heavy Equipment
The tracks look wonderful! Nicely detailed machine too, good work! -
Lowboy by Double Take Replicas
cifenet replied to landman's topic in WIP: Model Trucks: Big Rigs and Heavy Equipment
First-class workmanship! Wooden planks are looking sweet! -
8 Car Transporter (71 Mopar’s)
cifenet replied to Mopar - D's topic in WIP: Model Trucks: Big Rigs and Heavy Equipment
It is getting there and looks quite complex too. I would hate to make a mistake loading/unloading cars though, you can easily destroy multiple vehicles very fast. 😁 -
Revell's Peterbilt 359: WIP
cifenet replied to David G.'s topic in WIP: Model Trucks: Big Rigs and Heavy Equipment
The interior is looking good, the dash detail is fabulous! -
Oh man, you will need to grease all the joints so they can move without squeaking noise! And you must make sure you torque those bolts correctly to ensure proper operation! 😀 Very nice work!
-
Amazing teamwork in action here! That tank resin looks awesome and now we all know how it got created and the story behind it. Keep up the good work!!
-
GMC B7000/Holmes 750...
cifenet replied to Tom Hall's topic in Model Trucks: Big Rigs and Heavy Equipment
Sophisticated work and amazing result! I must say it is very unique and one sweet looking wrecker. Great craftsmanship building this truck this good! -
KENWORTH K123 Cabover
cifenet replied to Brutalform's topic in WIP: Model Trucks: Big Rigs and Heavy Equipment
Superb work, the frame looks great so far! And I almost smell the diesel fuel coming out from the gas tanks! -
Sparkling blue is sharp on this one. Good work coloring the door trims also!
-
Mack Superliner
cifenet replied to Jürgen M.'s topic in WIP: Model Trucks: Big Rigs and Heavy Equipment
This is almost 1 meter long? Wow, that’s some length. I guess that is the definite advantage designing and printing your own parts. Those hydraulic shocks under the ramps are nice touch, good details! -
Kenworth W-925 (mild custom)
cifenet replied to Gary Chastain's topic in WIP: Model Trucks: Big Rigs and Heavy Equipment
The side stance is looking very nice here. Did you scratch build the fuel tank? It is nicely done. And I like how you used those I-beam looking base to support your parts and mock up. Very handy! -
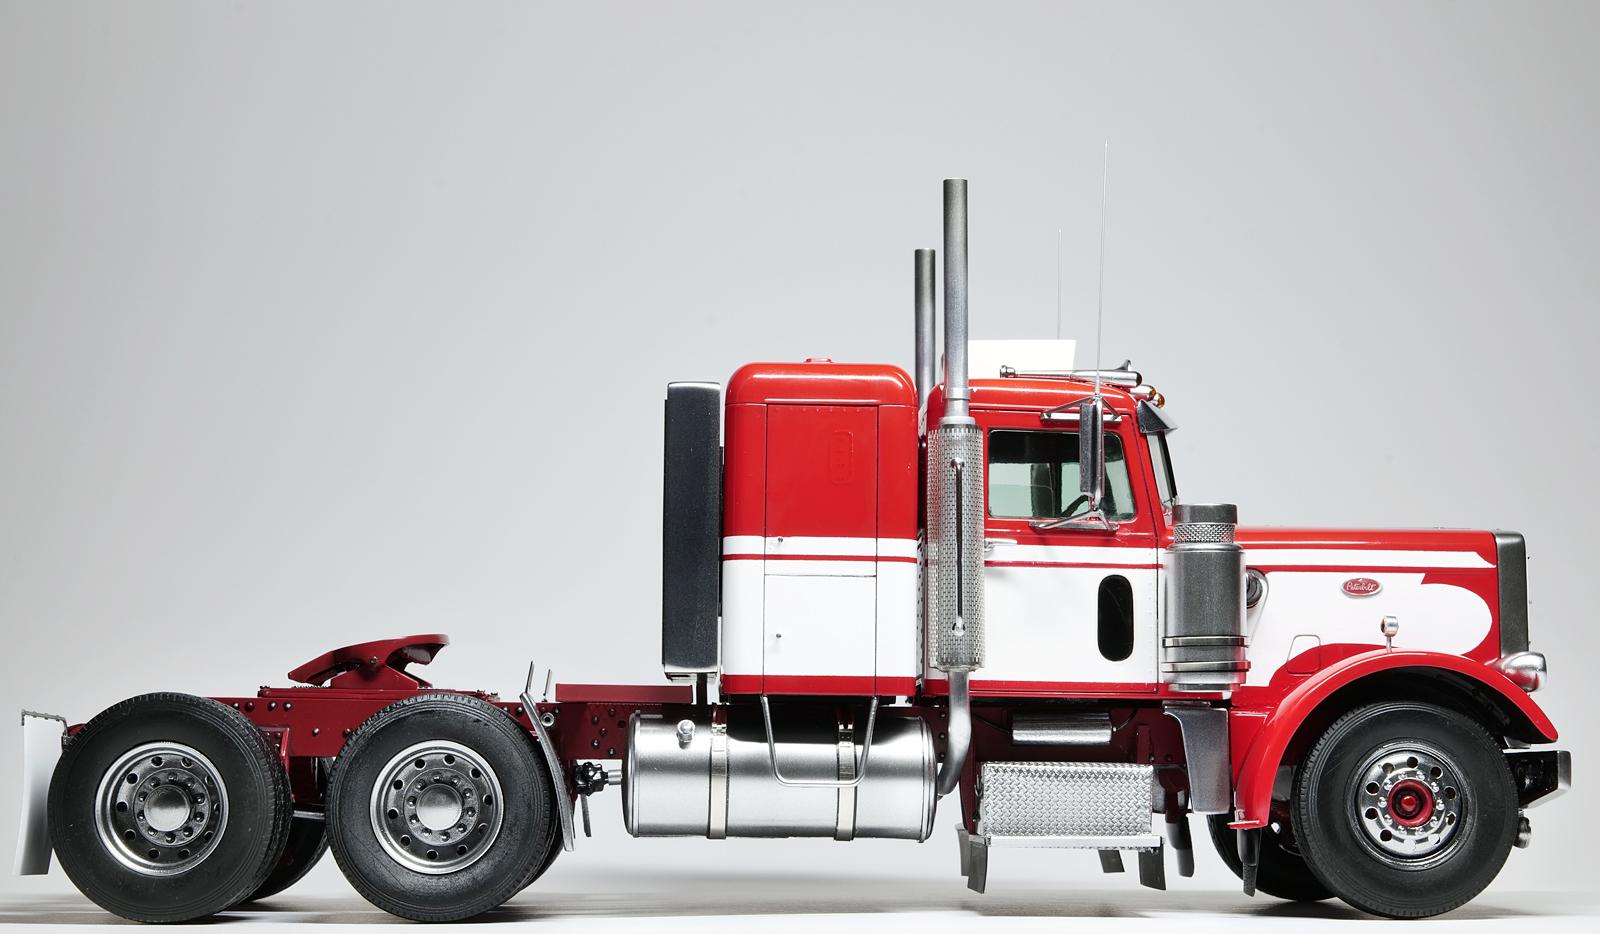
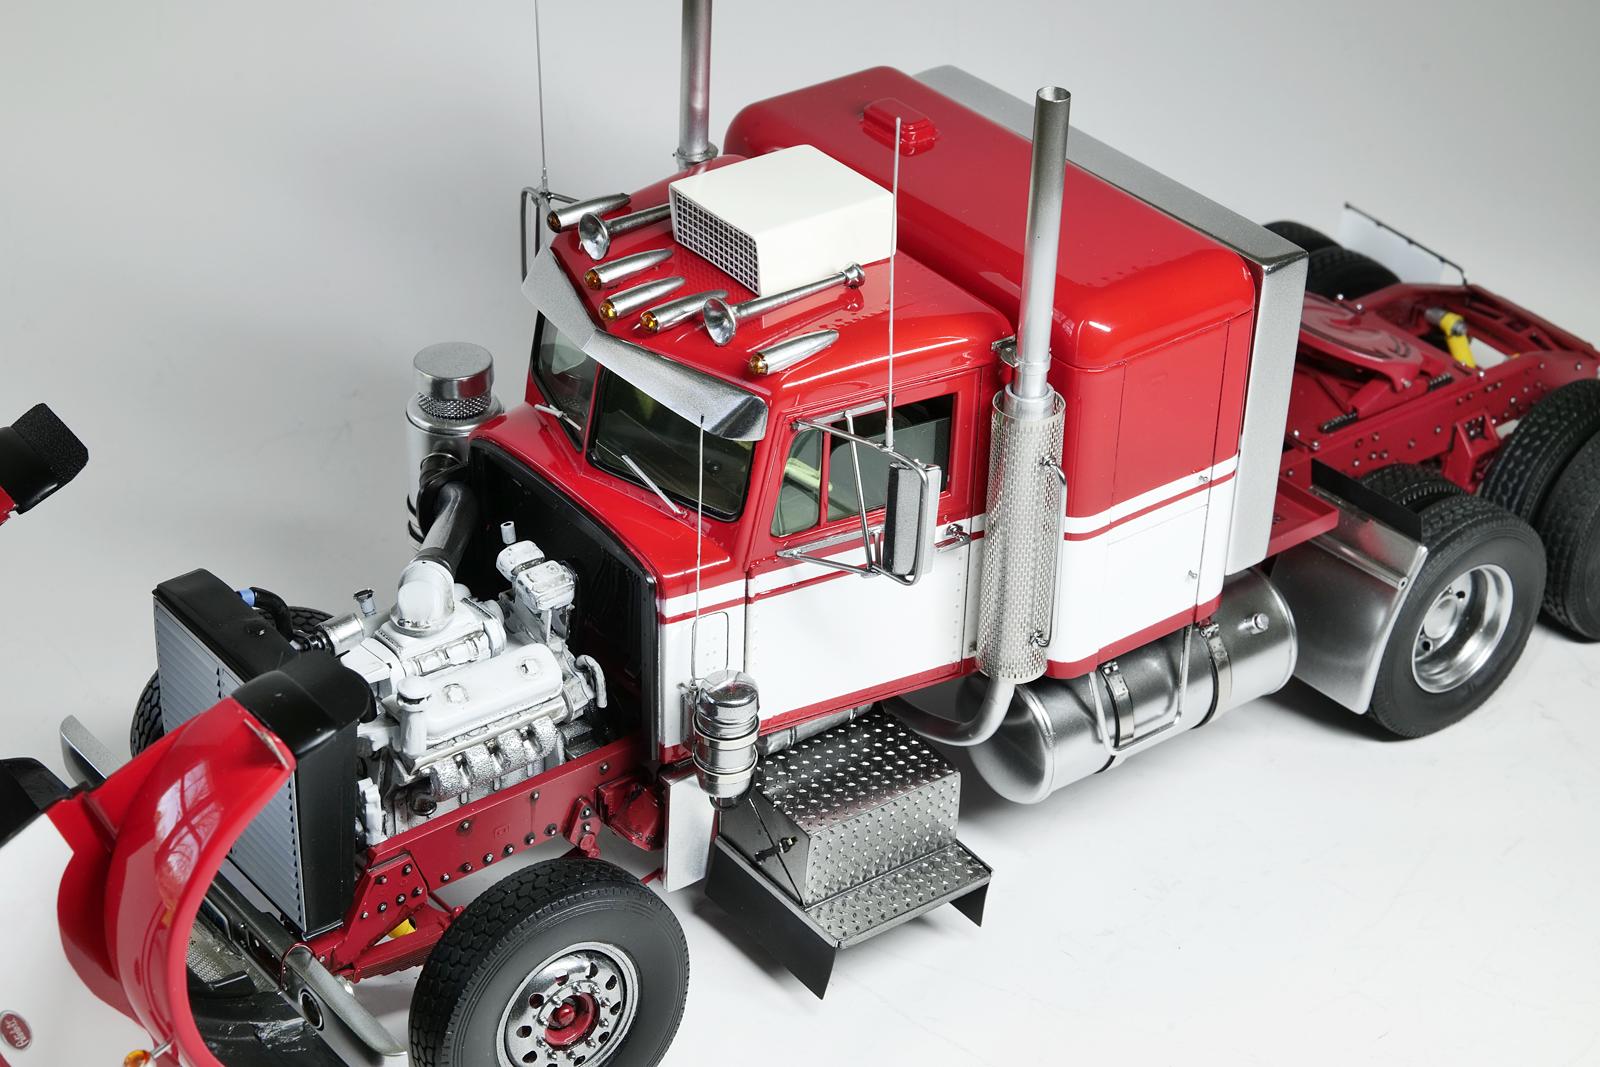
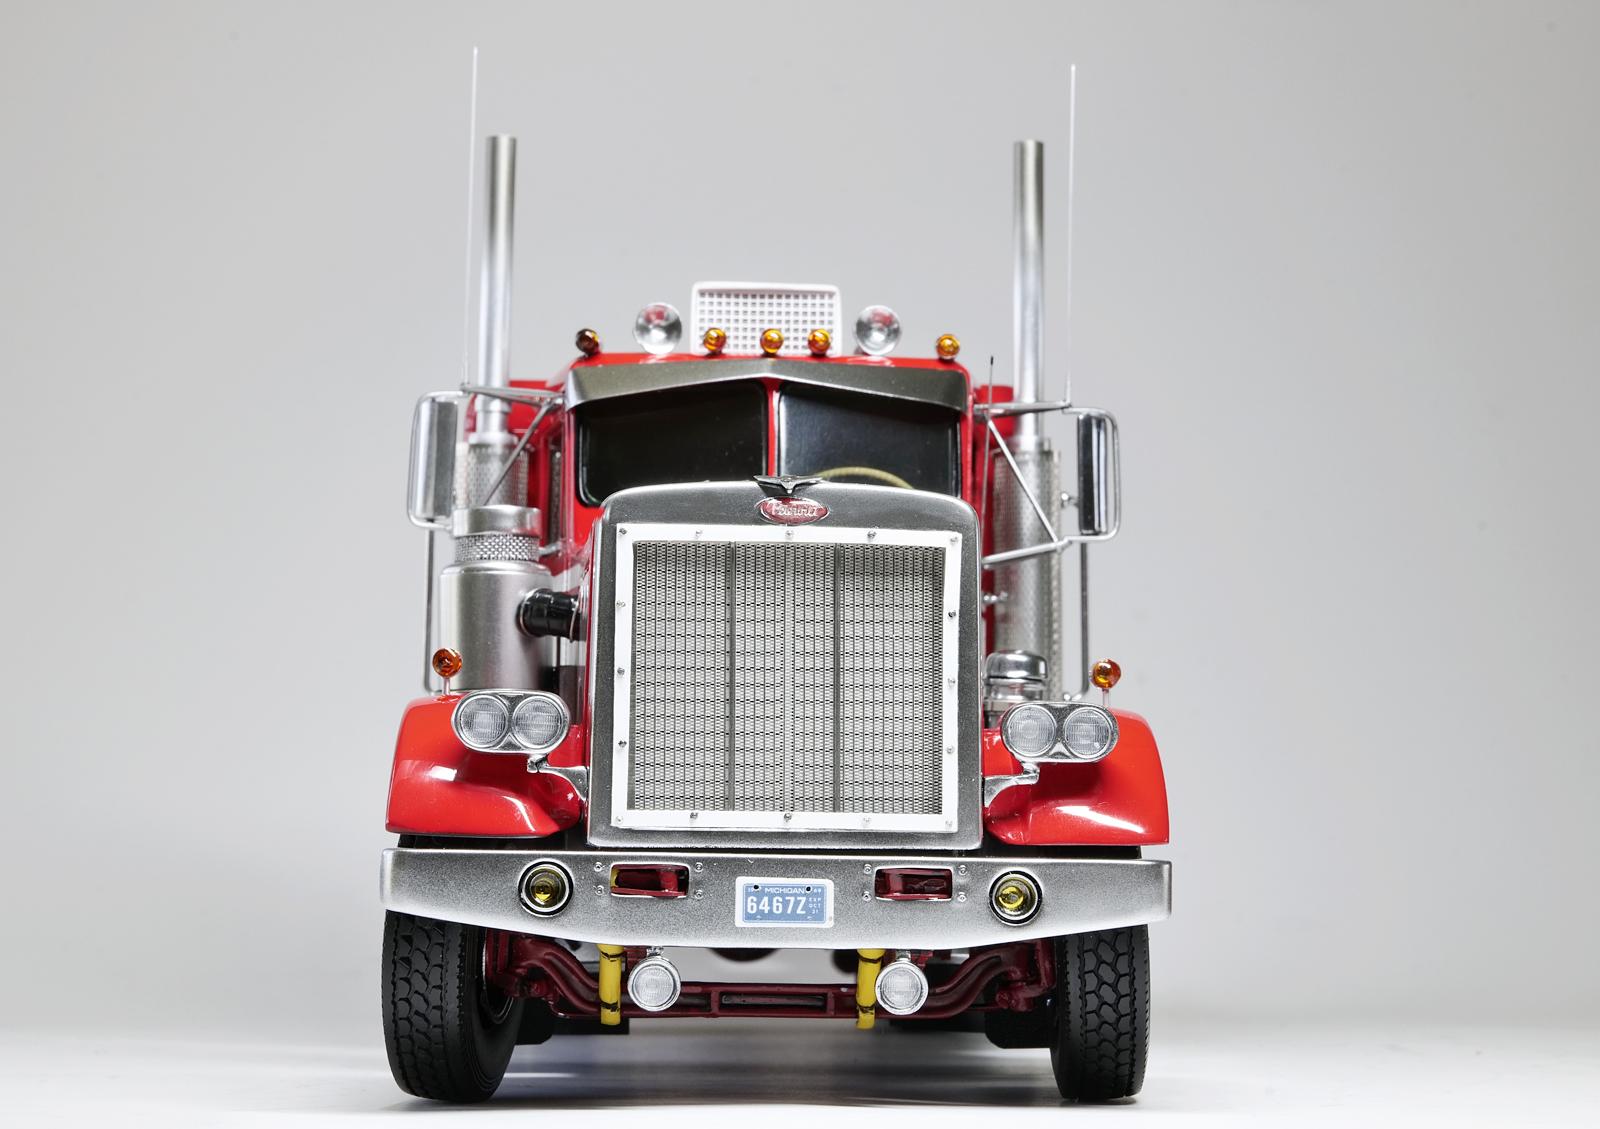
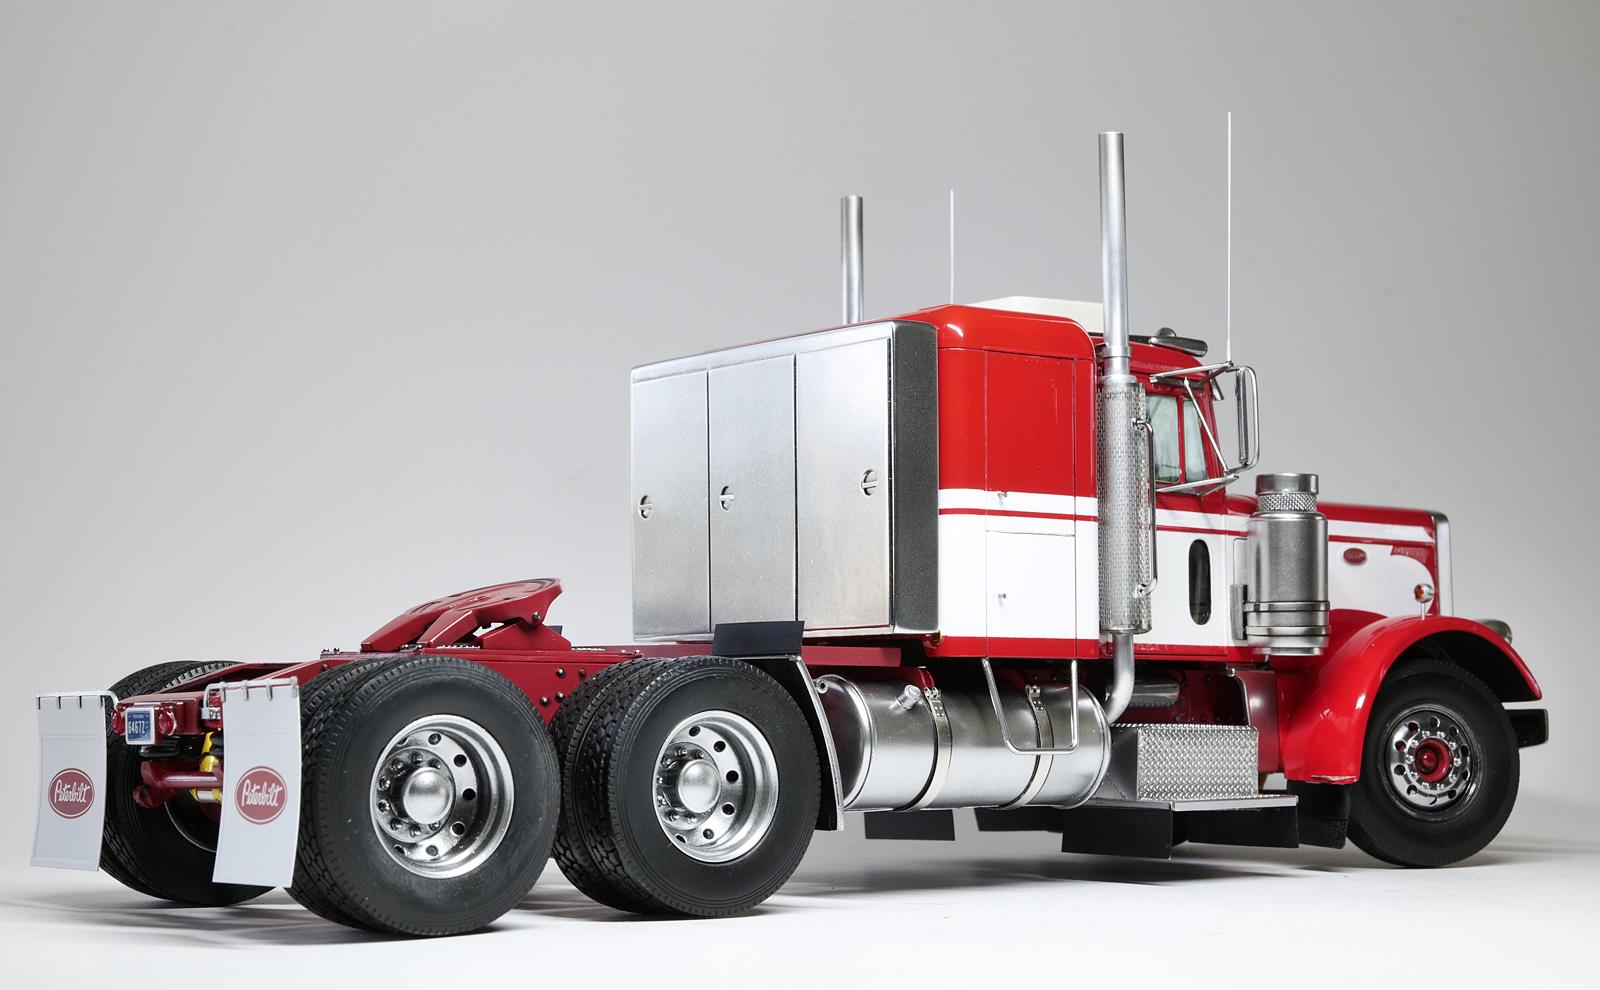
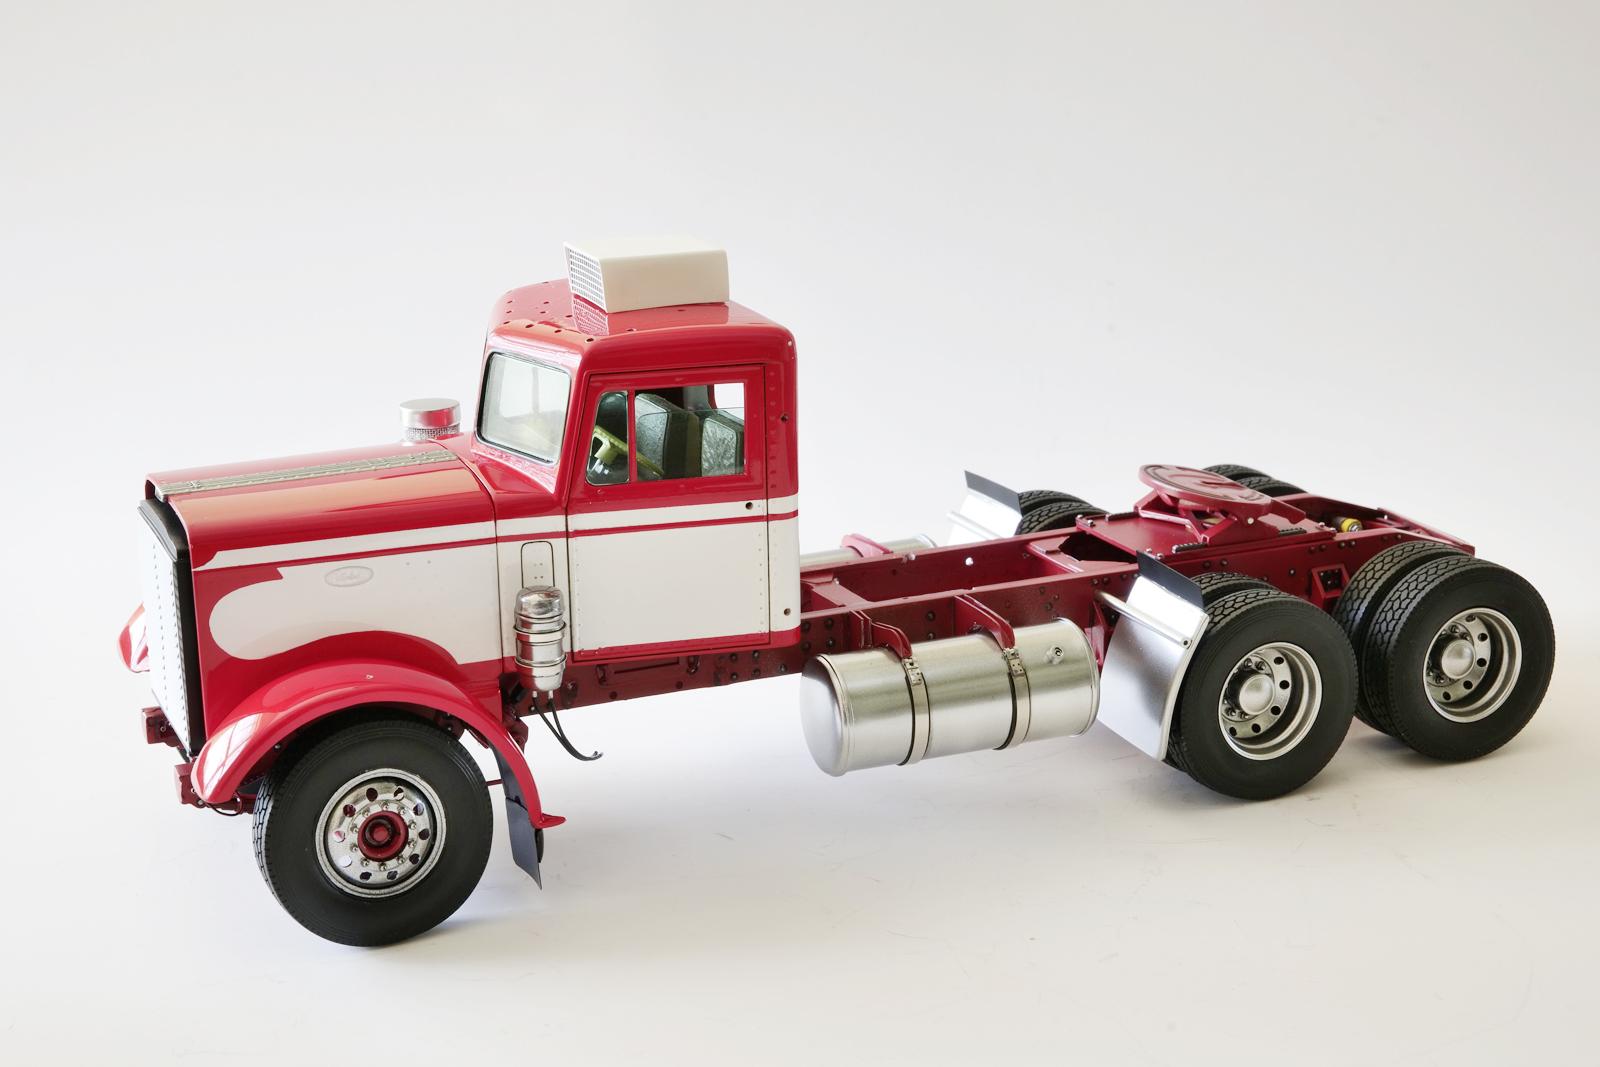
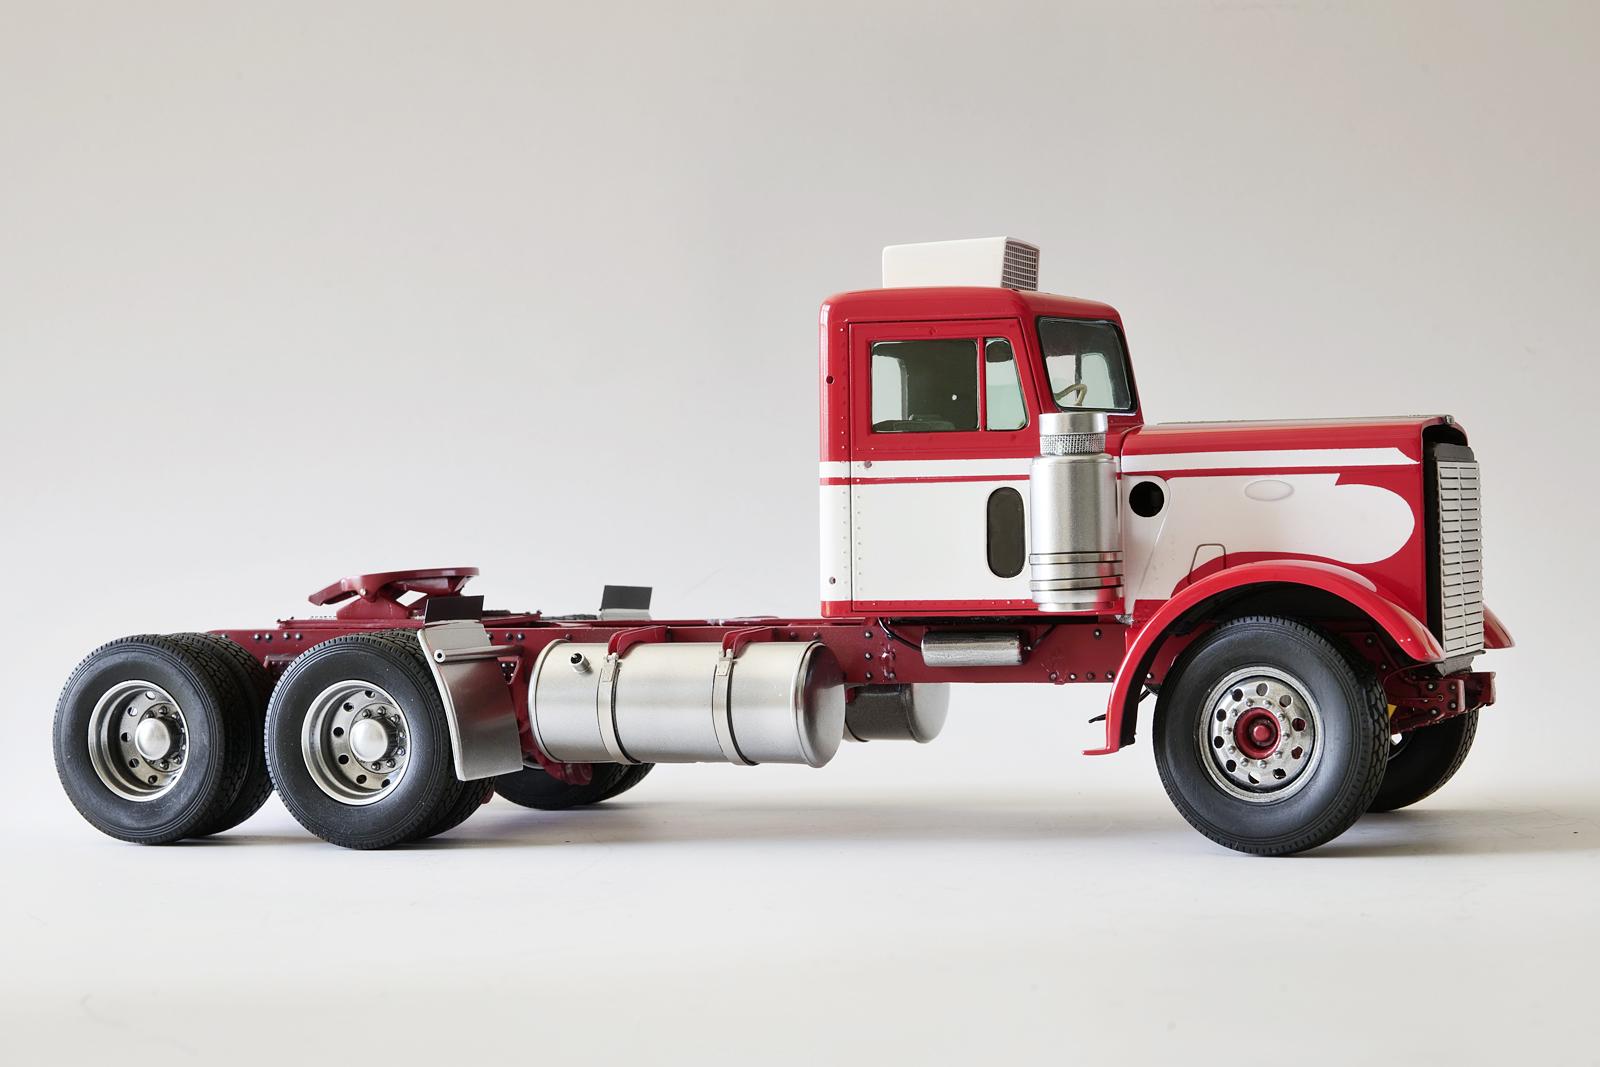
I was preparing for the contest mentioned above and could only make minor progress on Peterbilt 359 before this update. I used clear smoke paint + flat black paint mixture to imitate diesel soot here. For windows trim, it is easier to mask it with a template. I made this template by tracing the window opening first. Then cut the masking tape using the template to attach... I know some folks also use a black Sharpie pen to color the trim and do very good job. To making things interesting, I am painting the center panel of the hood with bright metallic silver. First a gloss black coat for the base goes on here. Then metallic silver coat on top. For the metallic finish, I use low air pressure on my airbrush and I slowly mist from 5-6inches away from the surface. That is why you see large "over spray" around the masking paper. For the lacquer paint I use, I don't want to apply wet coat for the metallic finish (the paint will pool up), I need the paint to dry quicker on the surface, and hence I mist it from some far distance. With the windows trim painted and the hood split trim painted, the truck is getting detailed little by little. I have been playing around with the tint level of the windows. My first try was too light and now this second attempt looks too dark and green. I am going to remove and re-do... Not only I removed the tint, I cut out the driver side window so I can display it as rolled down half way. I just thought this type of detail will make the build more interesting. I mounted my luberfiner (it is such a cool word) and A/C unit on the top. You can see the tinted windows rolled down here. This is the tint level I am going with now. Now here comes the hideous side; I mounted the air canister and stared at it for a long time... Have you seen the air canister this big?!? It too TOO BIG, I thought. But then again, more I look at it, it may be okay. I do not know at this point. I am willing to RE-DO the air canister, but I am also getting lazy again today. I am going to wait a day or so and decide...
-
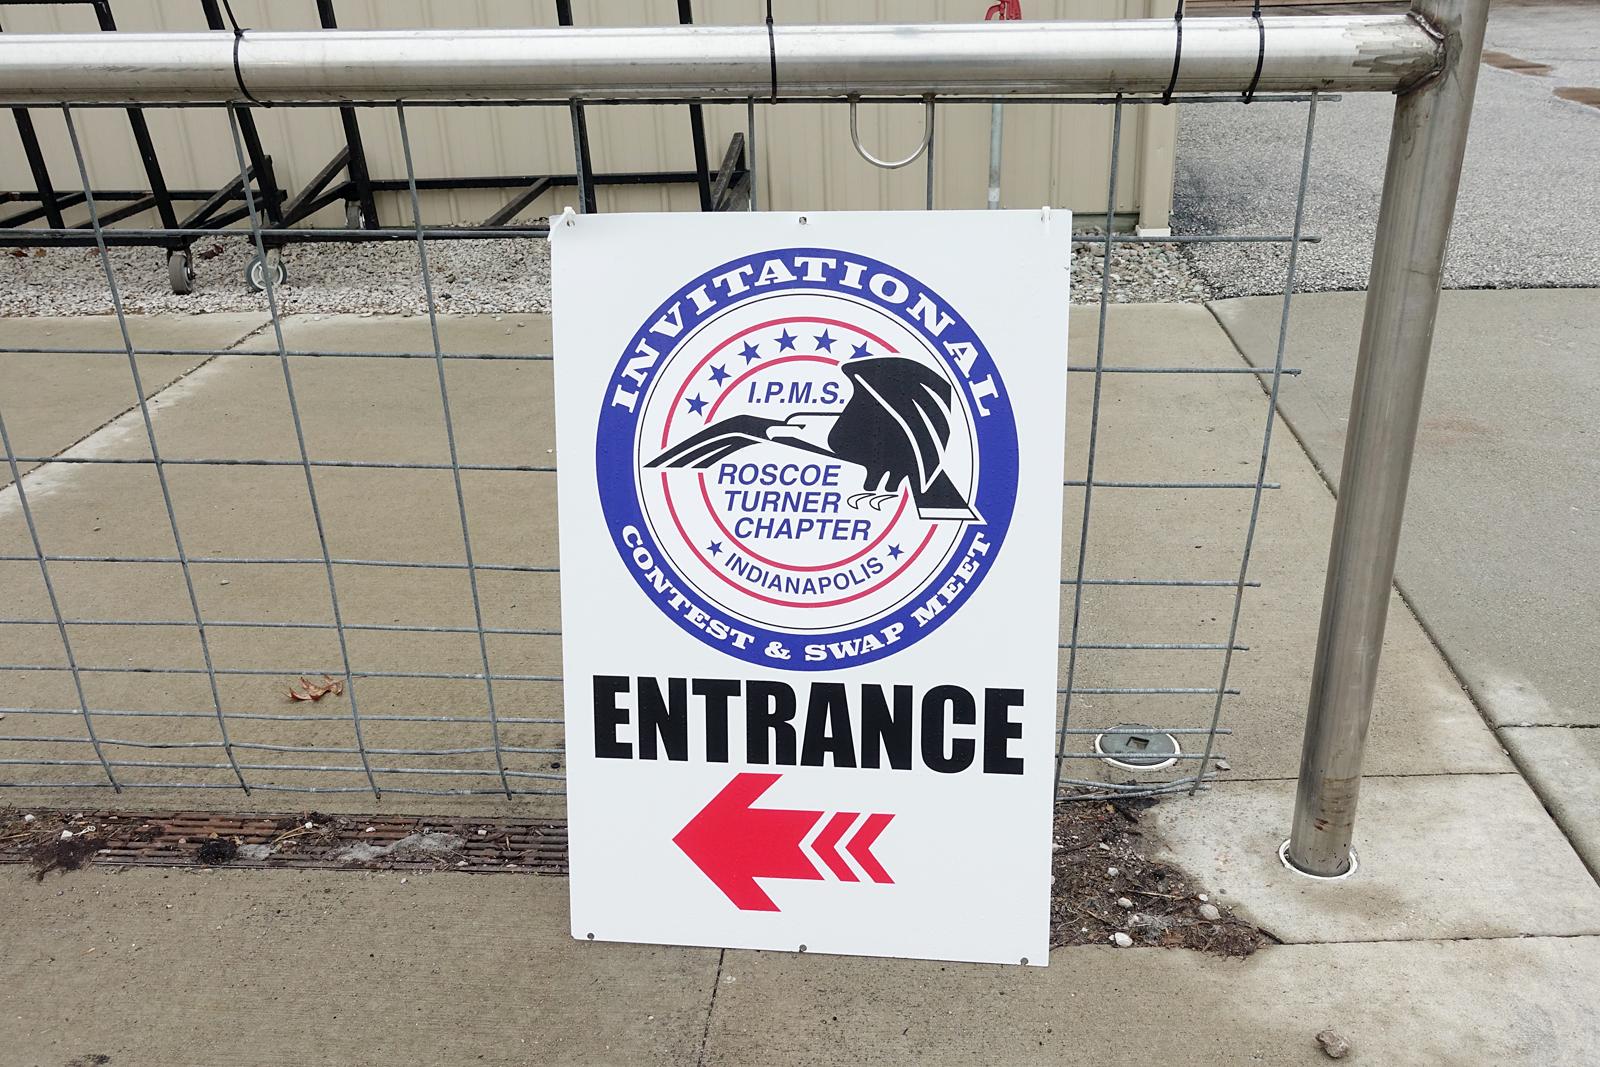
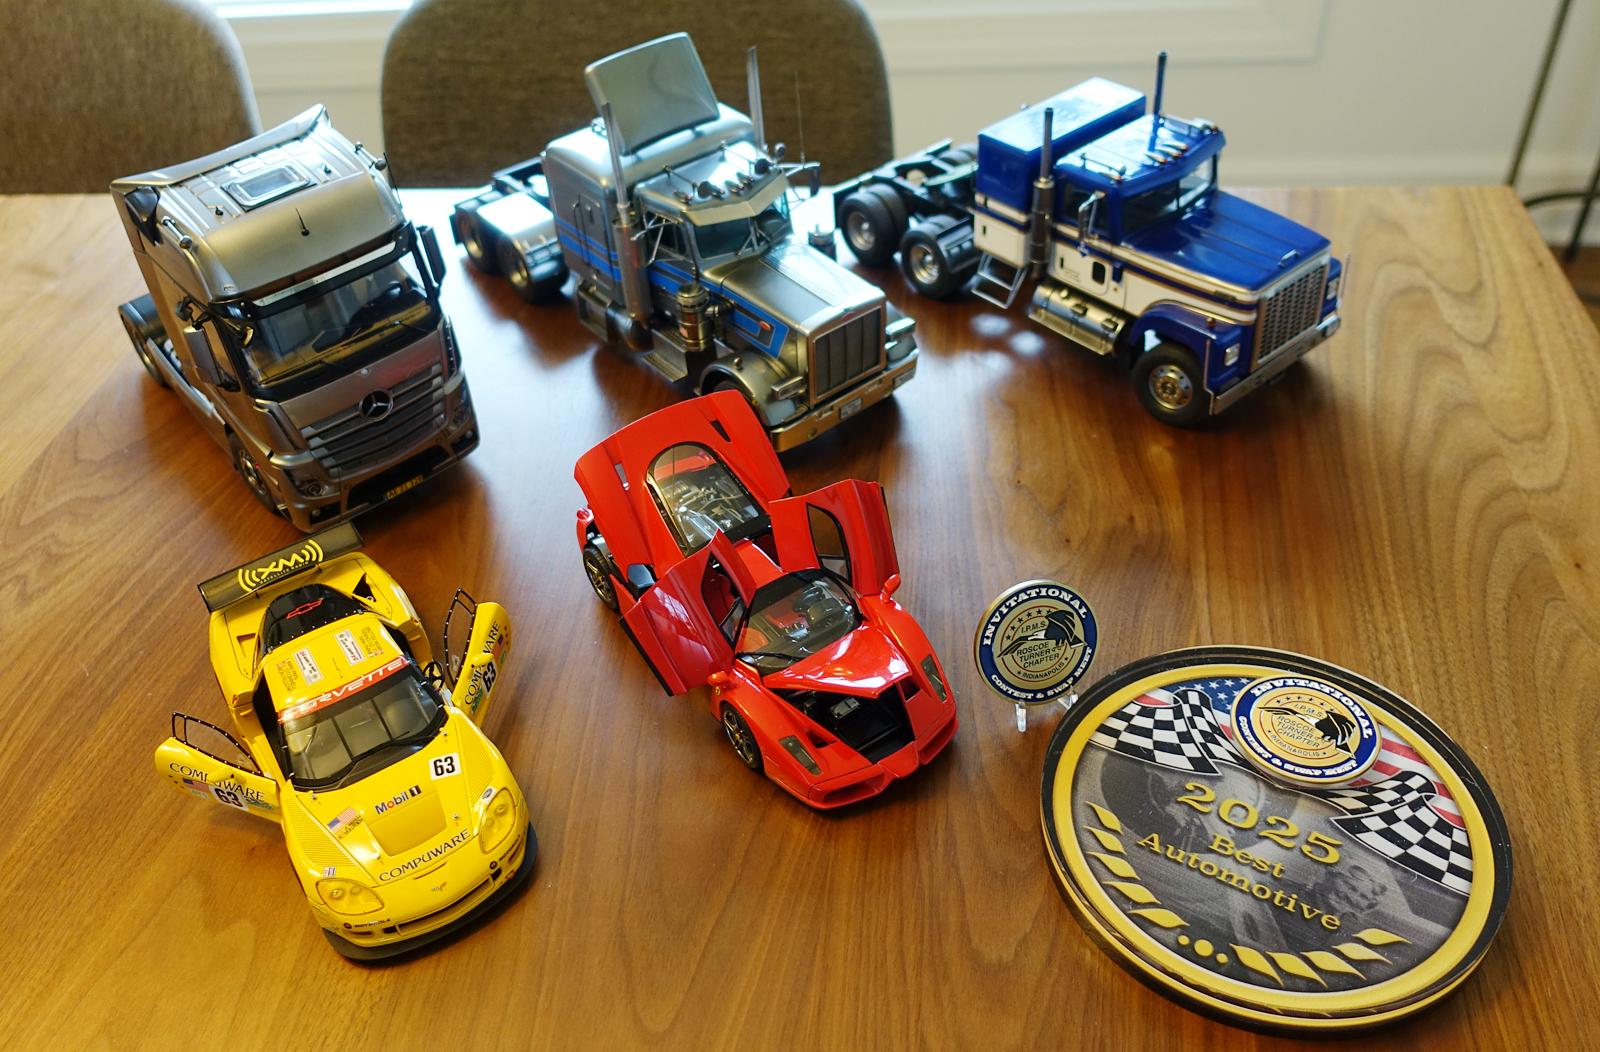
IPMS Roscoe/Turner "Indy Invitational Contest & Swap Meet" event was held yesterday (north of Indianapolis, IN) and I participated the event by entering with several models I have including some trucks. It is one of the largest events in the Midwest and even though it was raining all day, so many folks showed up making it a very entertaining event. I believe there were probably 200-250 models on the contest area (my rough estimate). The swap meet was just as amazingly large and super fun to browse. So many kits to browse and opportunities to acquire! Some sellers would entertain offers and others would give out huge discounts. I did buy several model kits/paints and the prices I paid were more than reasonable. 😁 (note: I blocked out faces for obvious reasons) You can get some good discounts, you just have to ask and find out. As the event went on, more sellers were willing to unload unsold kits and you could definitely find bargains. I think the early birds will get to buy the rare and hard to find kits, and the later comers will get the deals. And even you don't get to buy anything, it surely is a fun activity going around checking out all kind of model kits. There were some good truck models on the contest table. THIS IS NOT MY BUILD (I need to make sure I do not take credit), I don't know who built this Ford truck (could be a member here?), but this one caught my eyes. I thought it was very well executed. Good details, beautiful paint finish, and clean/accurate assembly work. What a gorgeous build it was. My trucks didn't win, but I got lucky and I was able to take home the best automotive award with red Enzo Ferrari. I was secretly hoping my Peterbilt 359 would make it instead... 😁 I think there is already uploaded Youtube showing the entire event, it is definitely entertaining to watch.
-
KW 86 inch Aerodyne
cifenet replied to k100's topic in WIP: Model Trucks: Big Rigs and Heavy Equipment
Now the frame details coming alive. Fantastic to look at all. All the plumbing work showing off, I like it! -
Haha, I am also curious what you will build, Landon. Another Kenworth? I am hoping to build a trailer, but I am not sure exactly what and how yet... Thanks for taking a good side on this for me, Helmut! 😄 Håkan, always feels great getting compliment from you!! 👍 Thank Jürgen for the helpful tip! 👍 Your advise is a great one for sure and it would have helped in this case. Now looking back, I should have done just that. I actually use "clear" to seal minor masking edges before my second color coat, but I got too lazy and trusted my ability (or inability) to mask which failed... Again, appreciate your feedback and it is a good one!
-
Gary, I didn't know you are working on multiple projects at the same time. 👍 This is something I cannot do, I am bad at multi-tasking when it comes to scale modeling~ Curious to see how your custom 359 will come out to be! Thank you and checking this WIP and appreciate your kind feedback, Jay! Thanks, Jeff! Hope your schedule frees up and that you get to enjoy the hobby again~
-
D9R Armored Bulldozer
cifenet replied to Scale-Master's topic in WIP: Model Trucks: Big Rigs and Heavy Equipment
No doubt it can’t be fun doing this type of work, but the tracks do look real and quite detailed! -
KENWORTH K123 Cabover
cifenet replied to Brutalform's topic in WIP: Model Trucks: Big Rigs and Heavy Equipment
Brilliant! It is coming out very nicely. I really like the orange color choice also, it goes very well with this truck. -
Wow, this js very painful to watch (I mean this in the most positive way), so many little details and repetitions required! But the effort is very rewarding here, it is turning out to be incredibly awesome.