cifenet
-
Posts
856 -
Joined
-
Last visited
Content Type
Profiles
Forums
Events
Gallery
Everything posted by cifenet
-
Looks very promising, Jeff! The heating method did the trick! Fenders wrapping the wheel quite nicely here~. And the wheel looks beautiful btw.
-

Mack Superliner
cifenet replied to Jürgen M.'s topic in WIP: Model Trucks: Big Rigs and Heavy Equipment
Impressive stuff you are generating here. The whole setup looks super massive also! Nice job~ -
Kenworth W-925 (mild custom)
cifenet replied to Gary Chastain's topic in WIP: Model Trucks: Big Rigs and Heavy Equipment
Anyway you build it, I know this one is going to be special. And very fun watching all your custom parts being put together and then you repeating the whole process again w different combo till you find your sweet spot. I am jealous of all the parts from different MFG companies you got going. 😁 I need do my research and explore what is out there~ -
What a sweet truck! I can see extensive customization effort went into the truck and it is looking awesome!
-
Western Star 4900 FA plow truck
cifenet replied to BK9300's topic in WIP: Model Trucks: Big Rigs and Heavy Equipment
1991 version looks good too. Everything looks like operational! Never knew the blades are like that. -
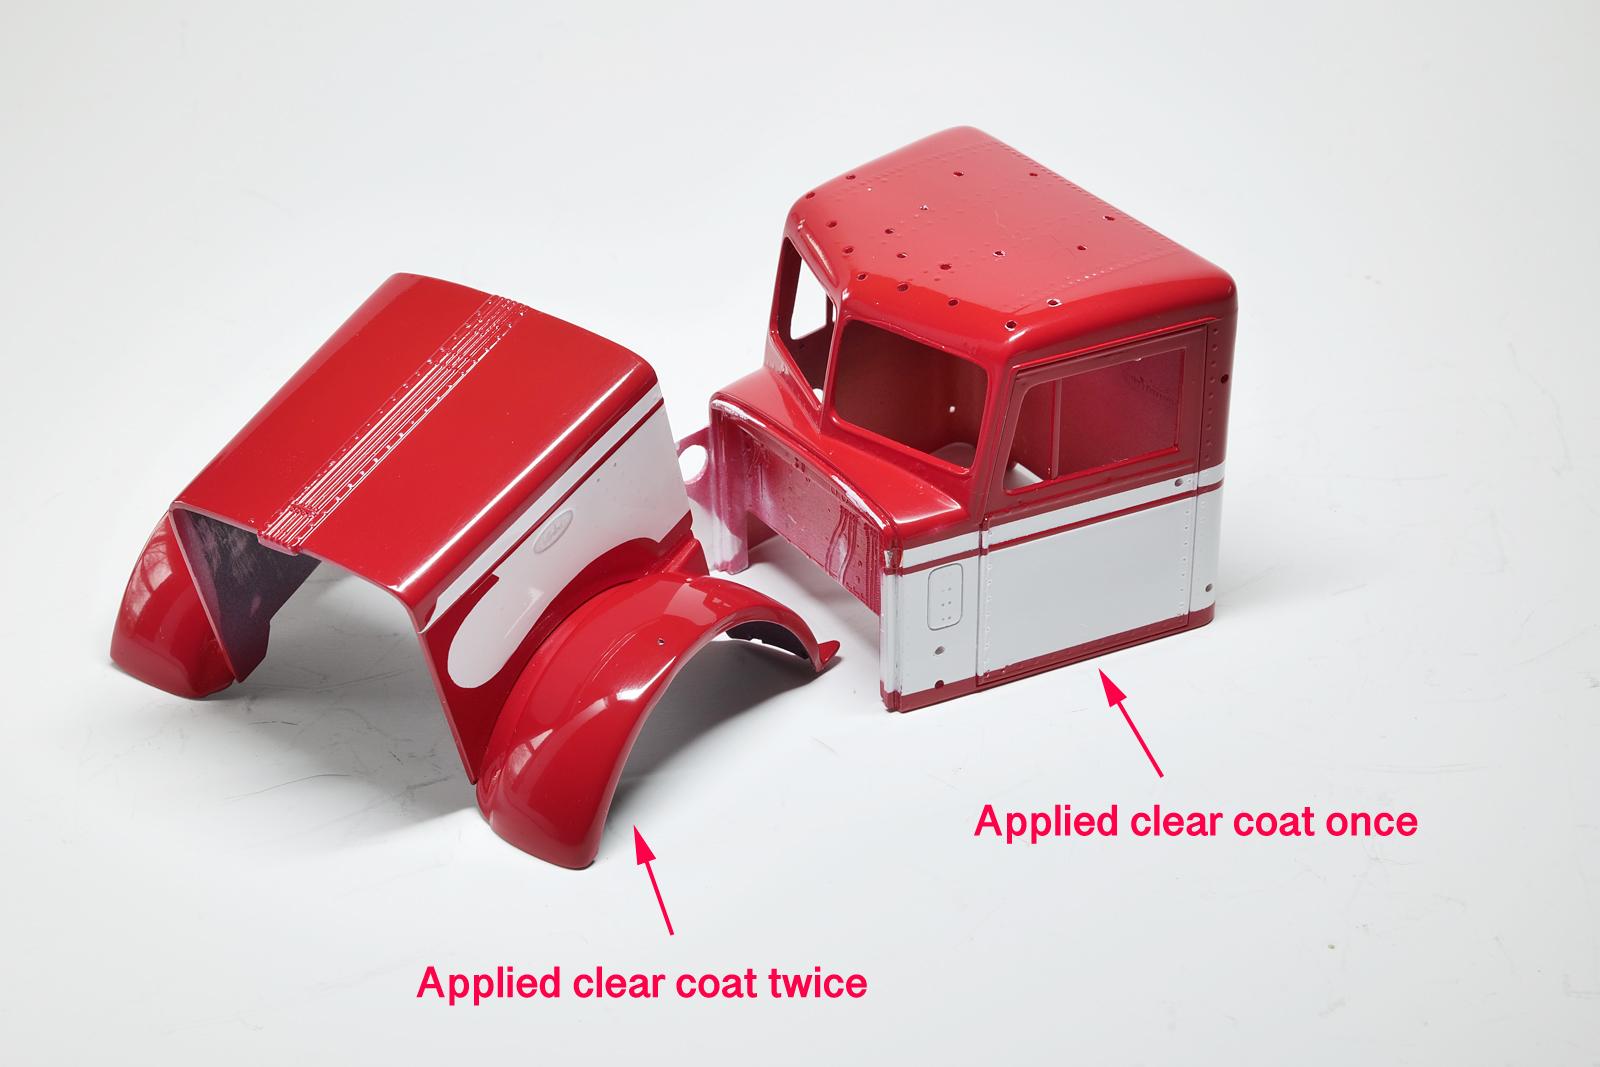
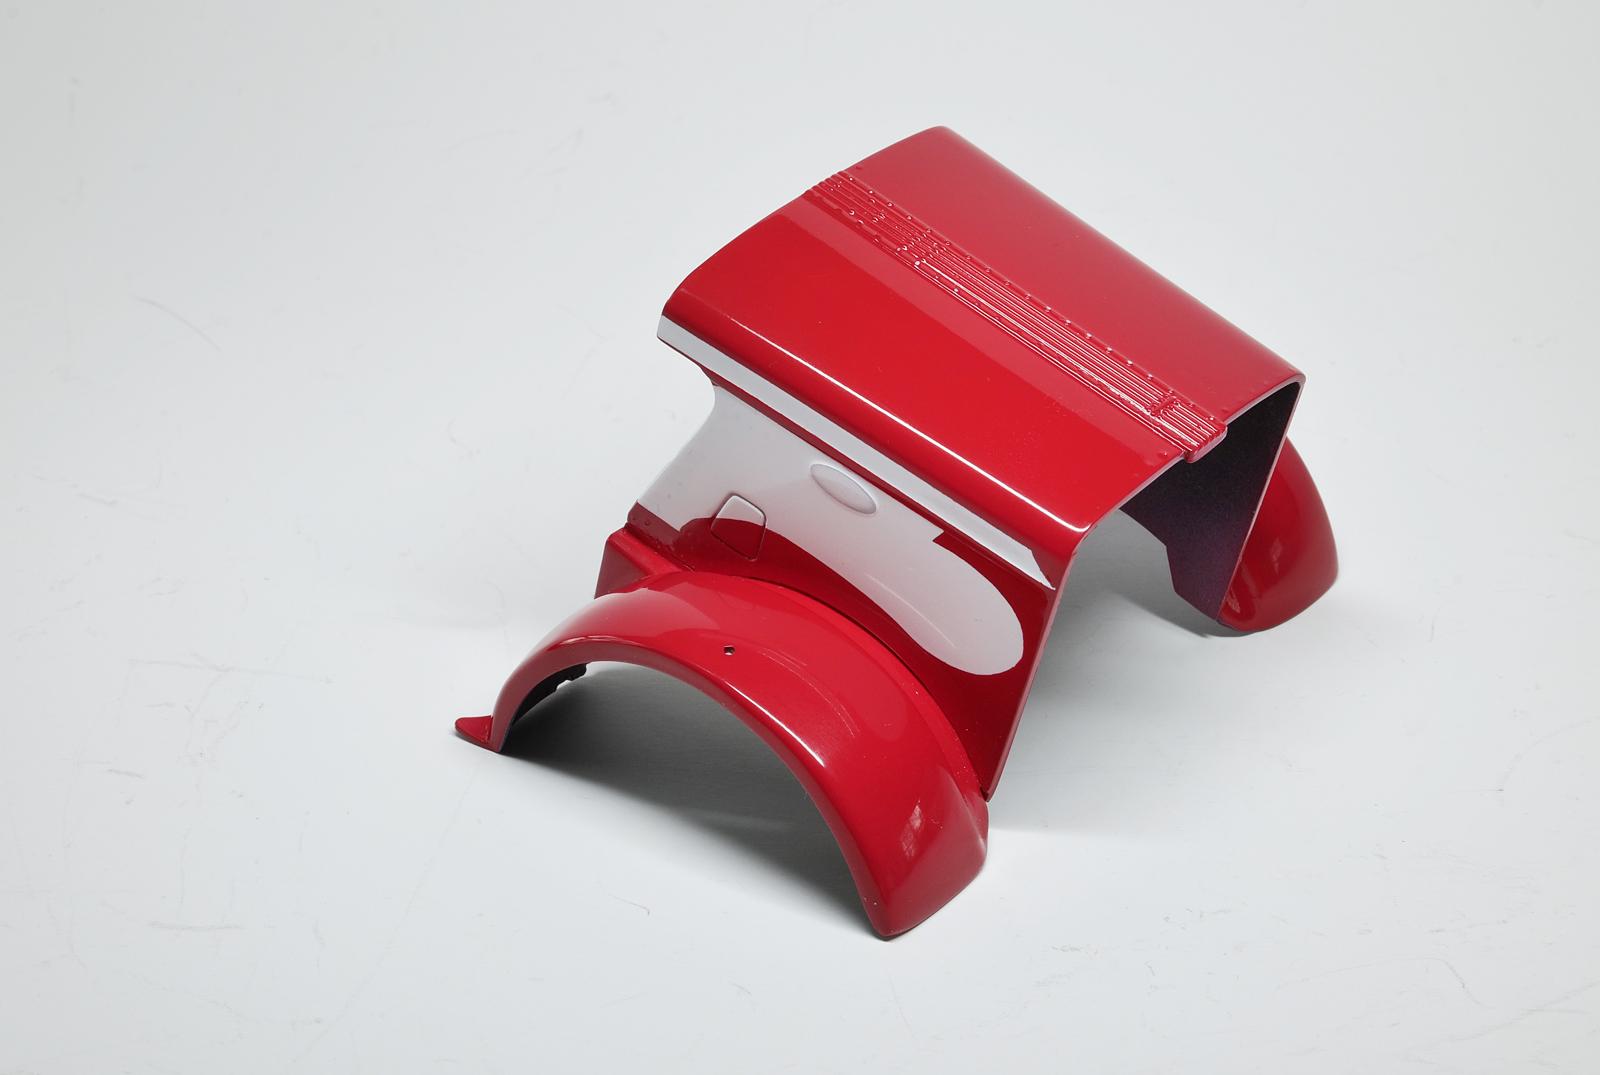
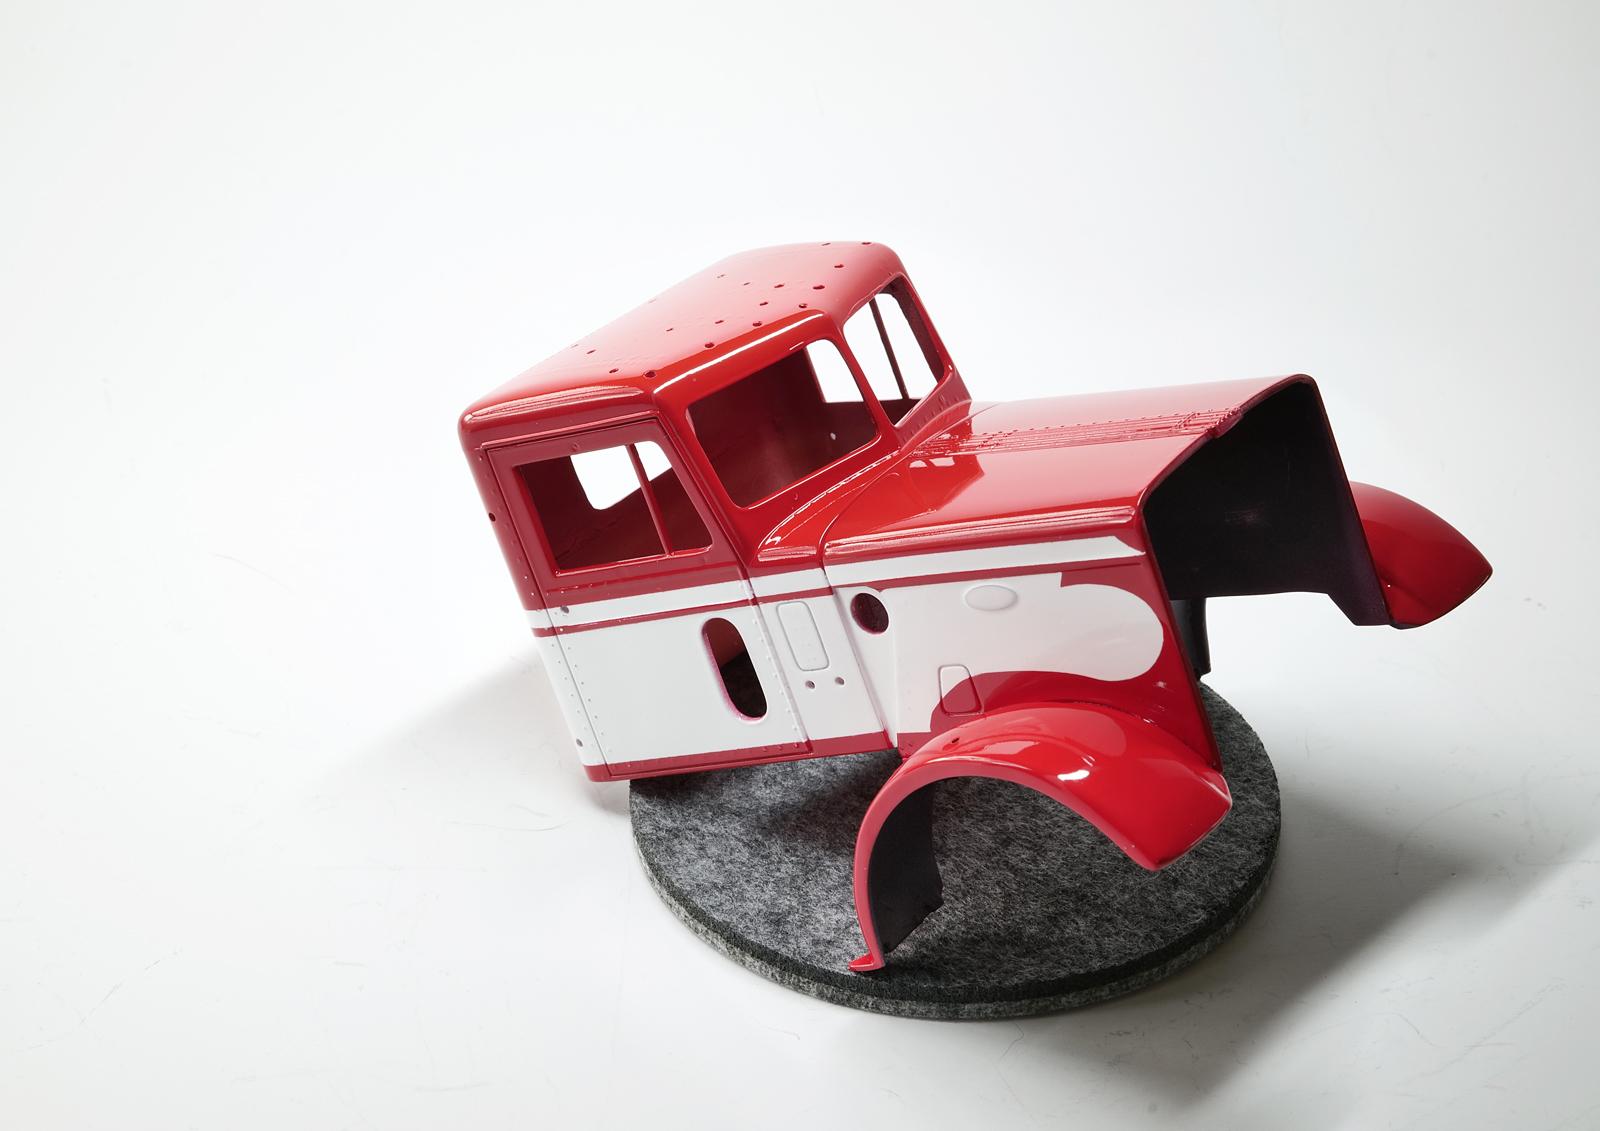
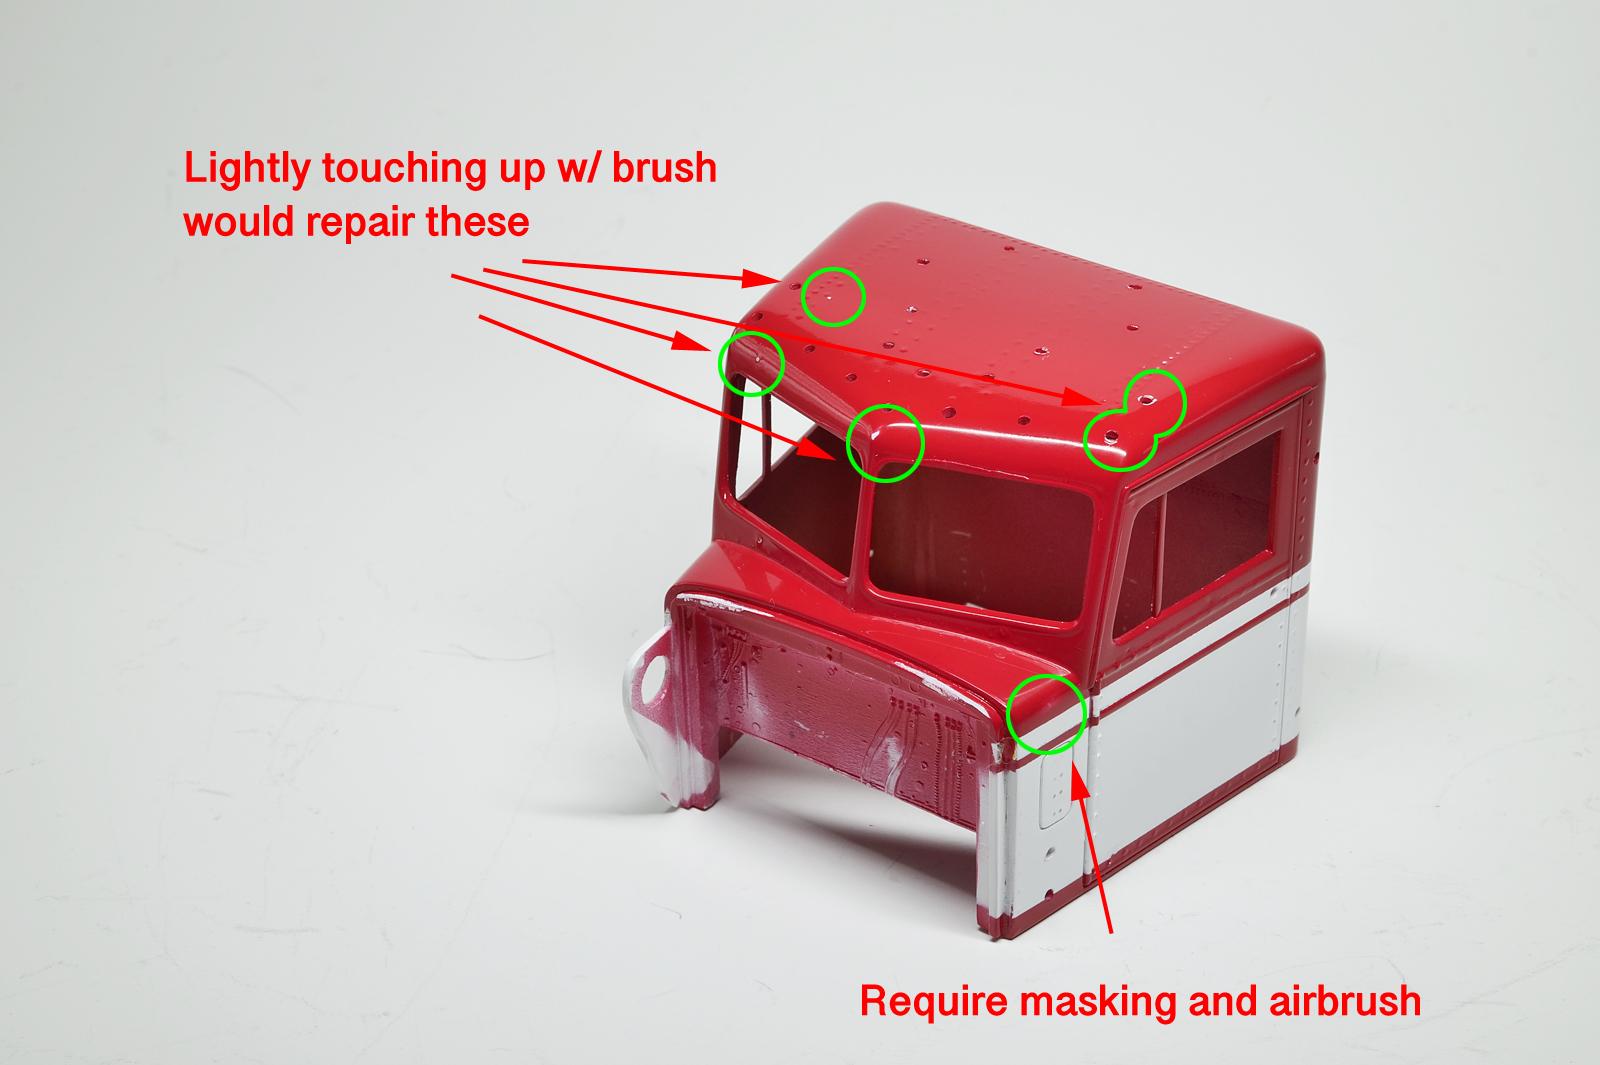
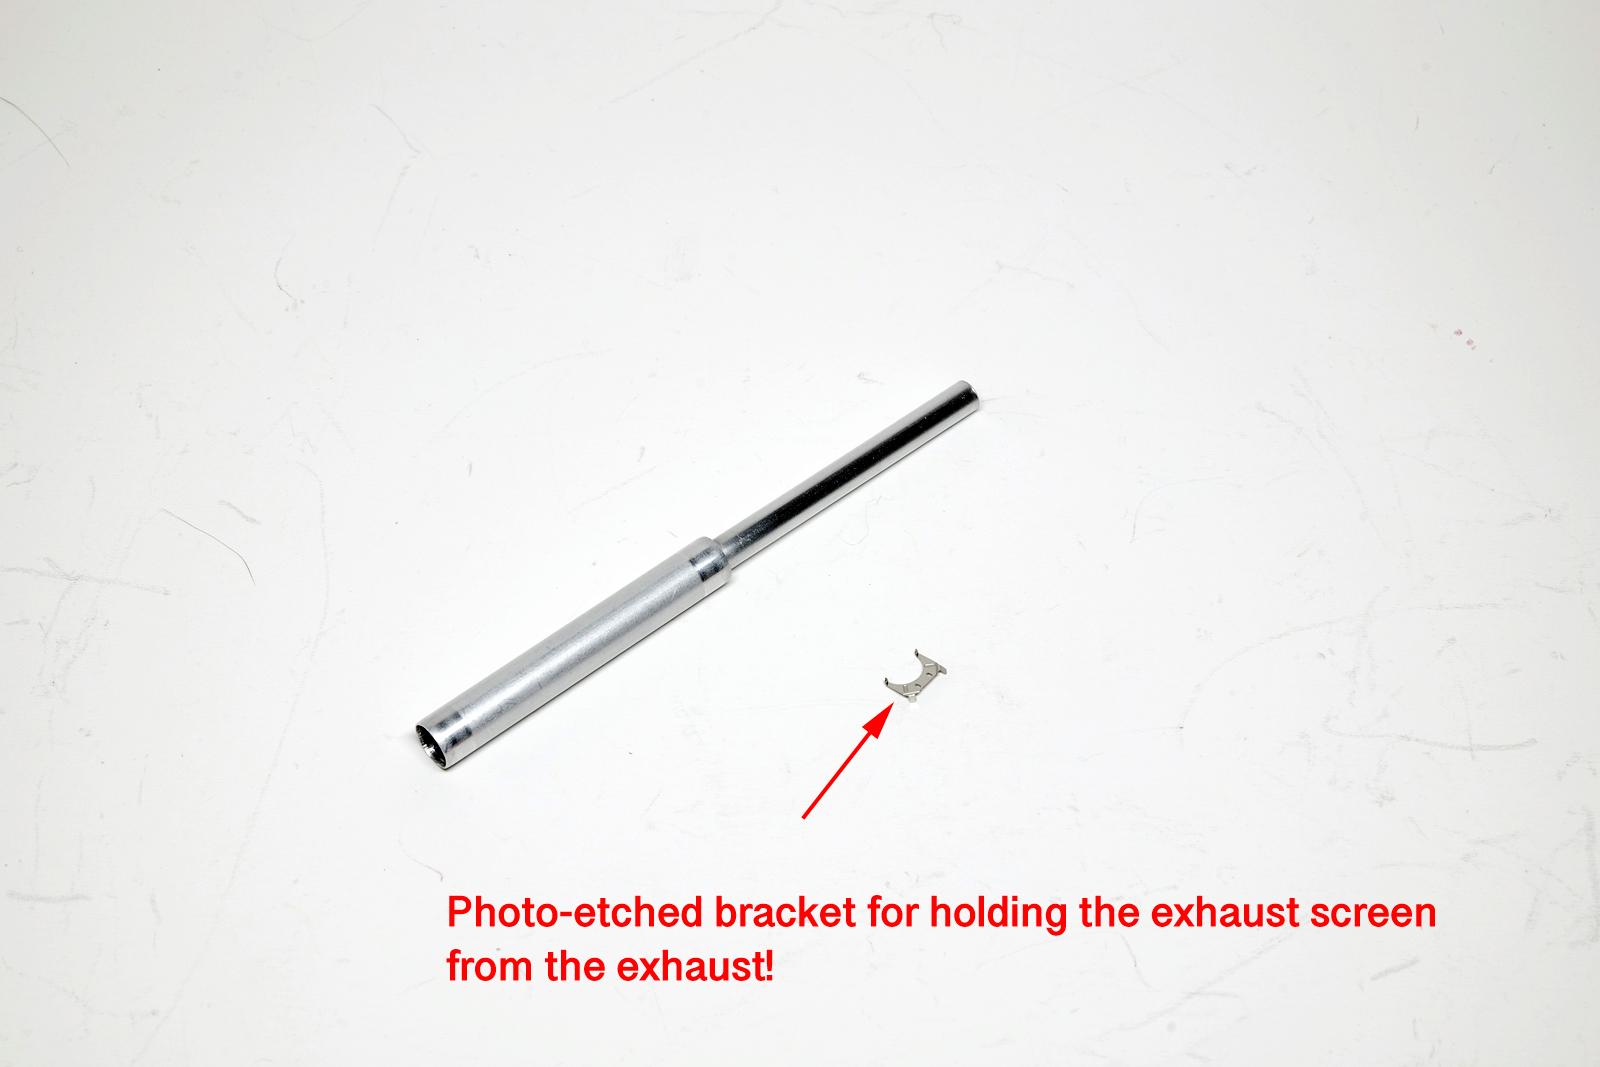
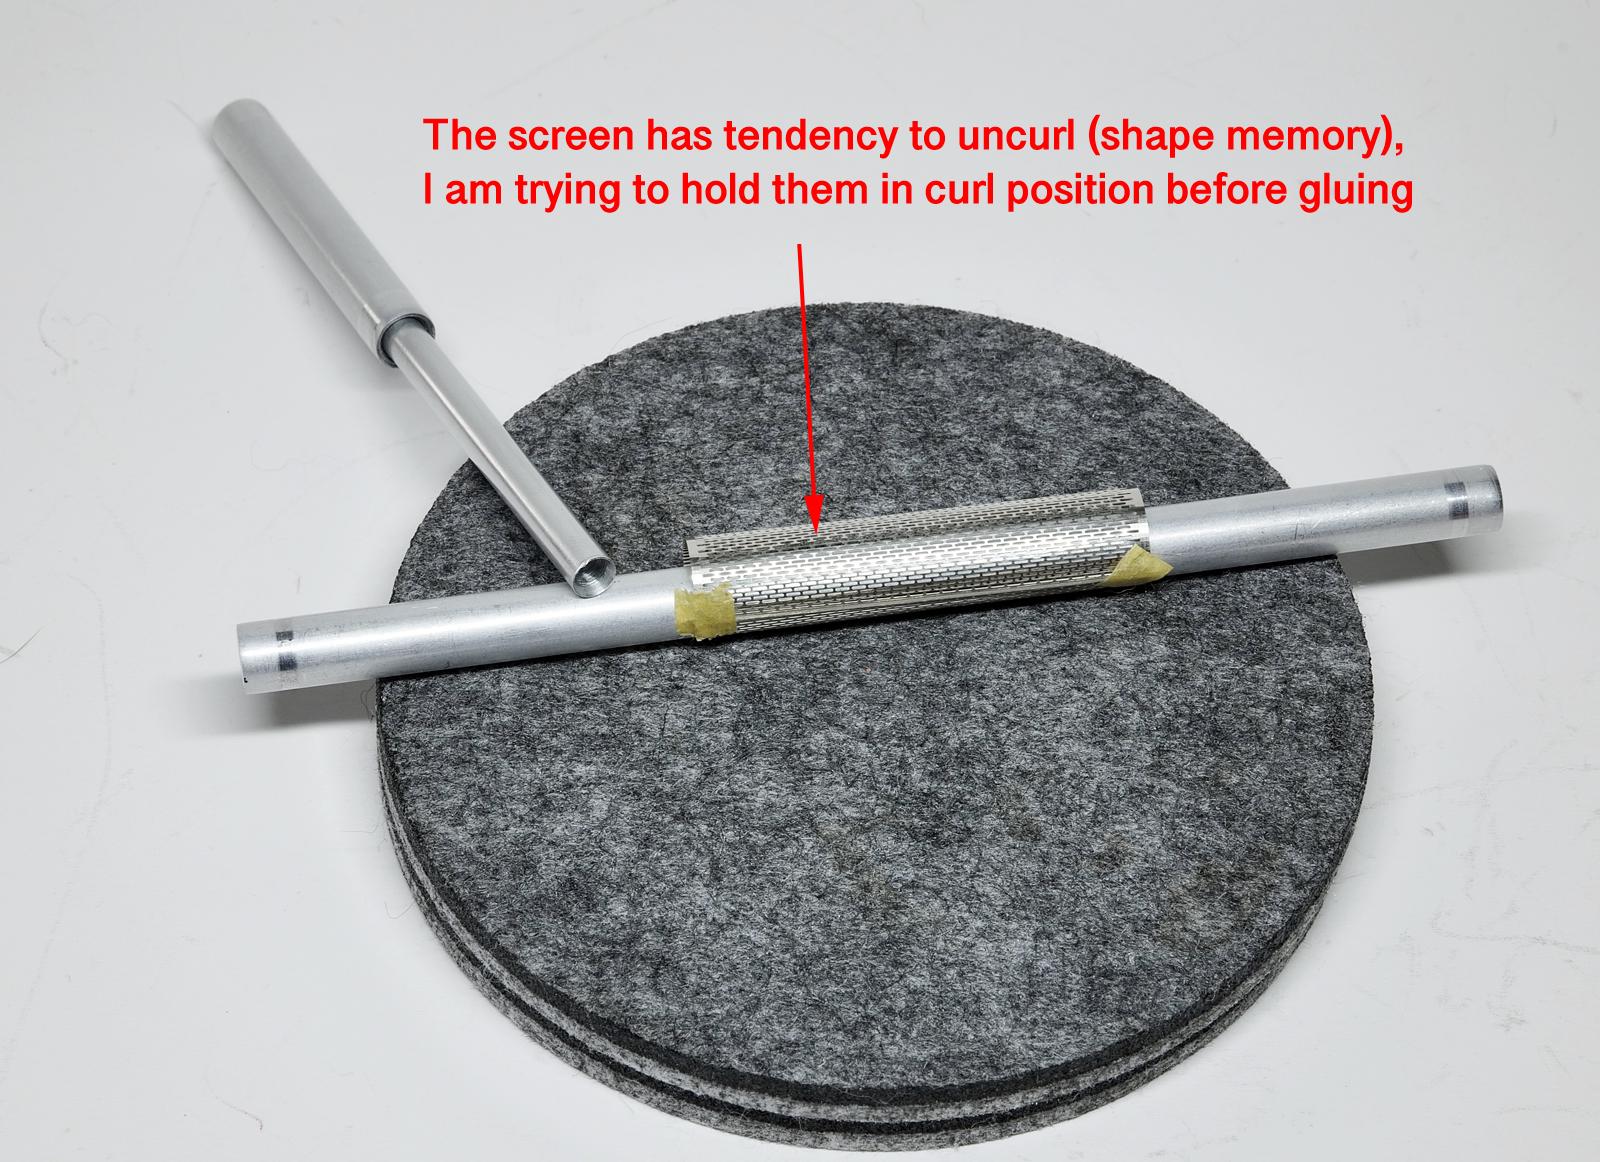
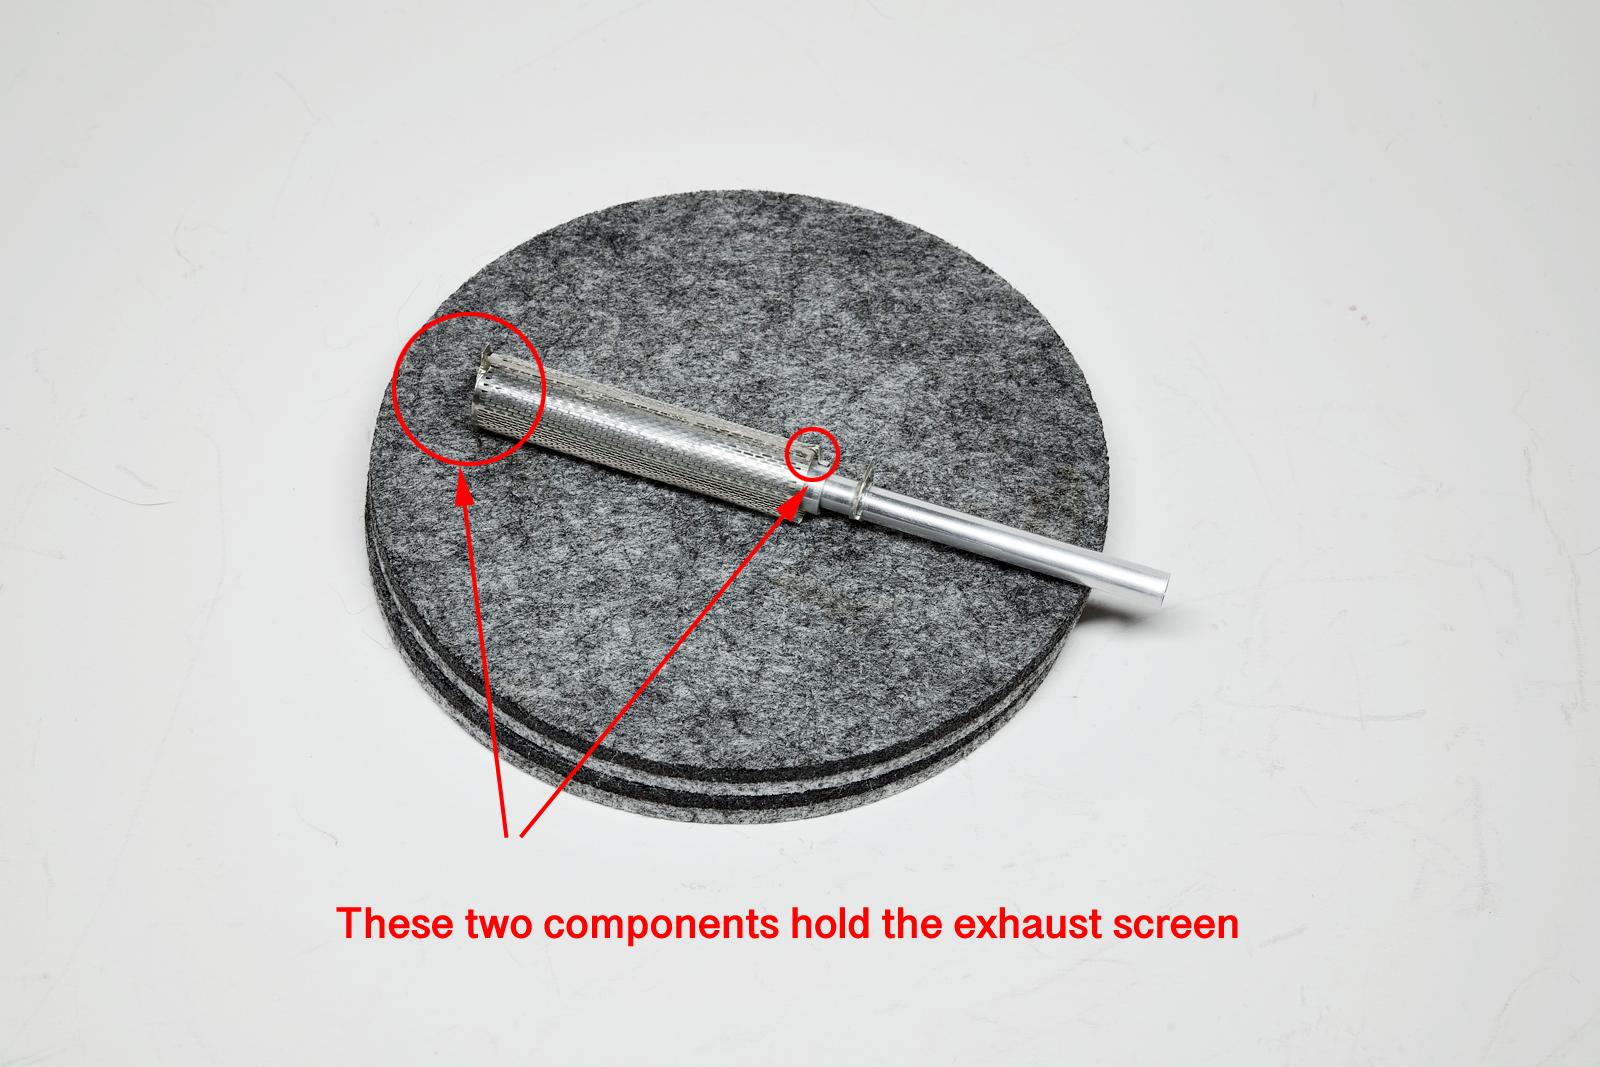
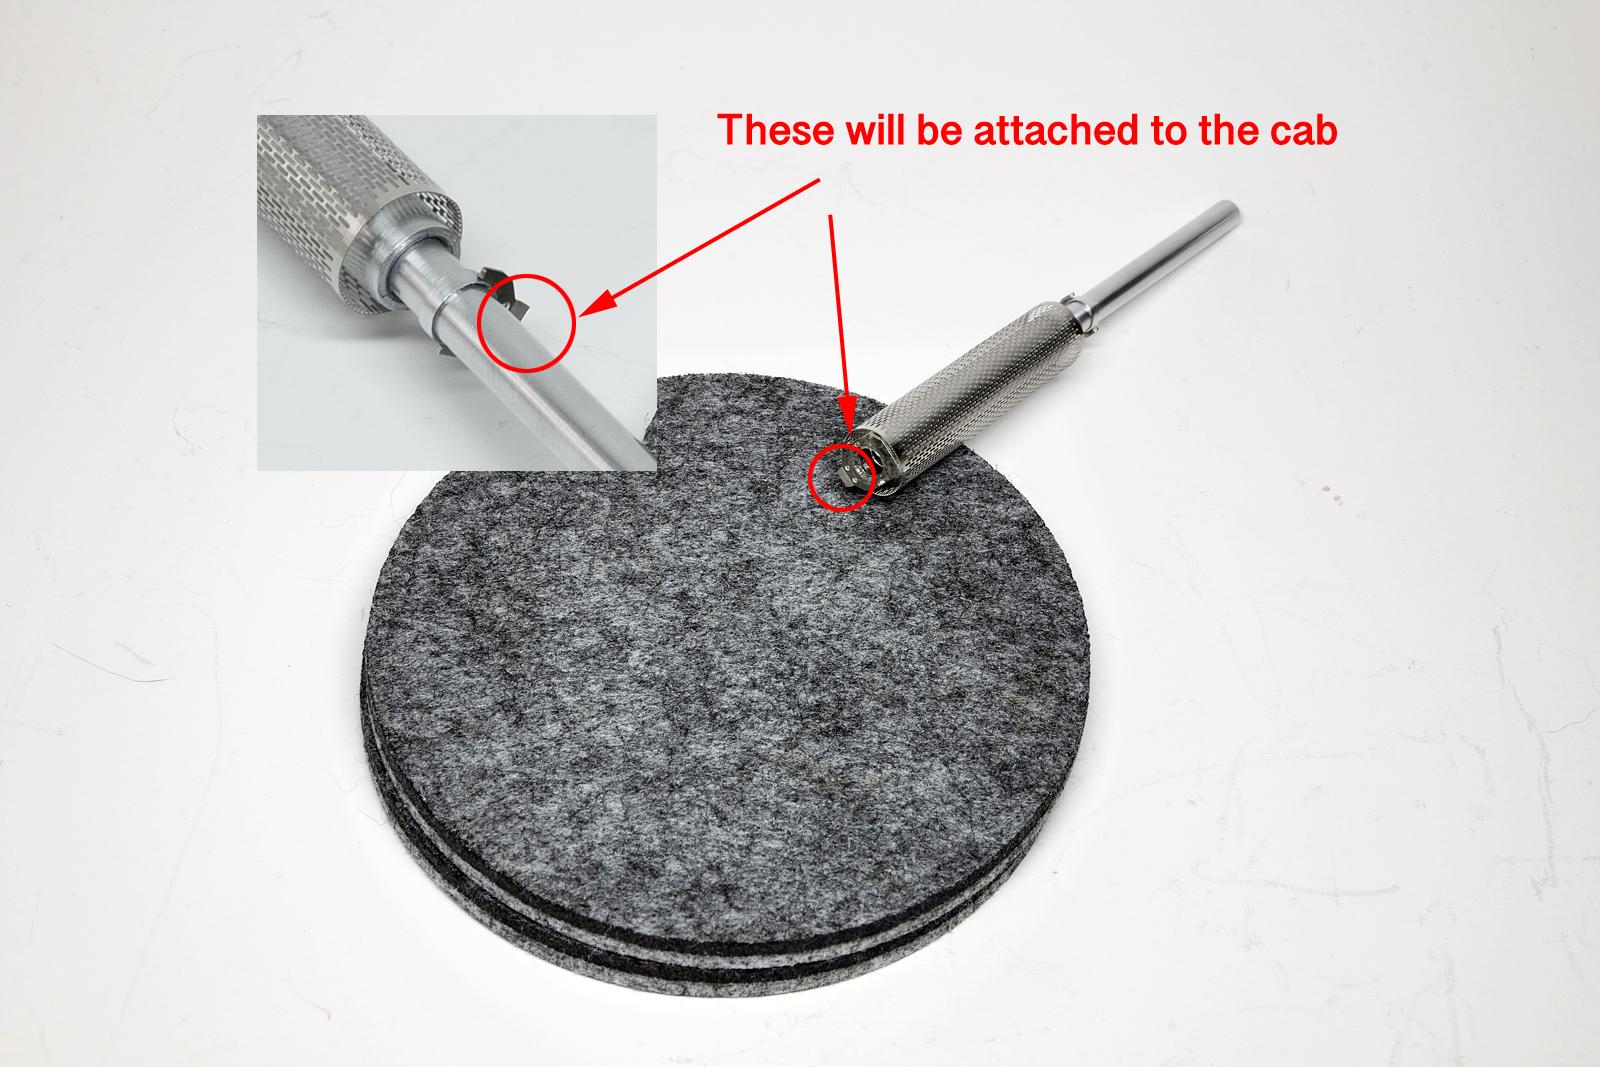
My painting activities continue today and they are all about laying out clearcoat and polishing them out. Just going through steps of applying clearcoat and polishing. Then repeating the whole cycle again. The hood piece just received the second layer of clearcoat here. Starting to see deeper surface shine and I think one more session is going to complete this. This is after the first clearcoat and first polishing session on the sleeper. You can see from the photo, I took some paint off while polishing. This happens often for me. I just need to perform touch up on these spots and be more careful next time. Again, the same story goes for the cab. During the polishing stage, I took too much paint off. This is after applying the second clearcoat and waiting to dry. Then I will repeat the polishing work again. You can see I repaired the paint issues here. The cabin also received two layers of clear here and waiting the paint to completely dry. Then I will polish the surface for even and deeper shine. Unfortunately, I won't be able to attach anything and anything external till the end of polishing process and this makes everything difficult. I must rely heavily on the use of CA glue/epoxy and no mistake is allowed at this point (otherwise I need to rollback what I did including painting and start over). While my second clearcoat is being dried, I resume my work on exhaust pipes. The exhaust pipes pictured here are from the kit and while they are absolutely usable, I decided to build my own. Working with various aluminum tubes, it was quite easy to construct exactly what I was looking for. I made my own exhaust using the aluminum pipes here. The photo-etched detail kit includes mounting brackets for the exhaust as well as the exhaust shield. Spent some time studying on how to put these together and found out they are quite tricky to attach and assemble… The exhaust shield wasn't helping me either, I had to keep it rolled up for sometime before I can use epoxy glue to set its position. The one advantage of using aluminum pipes is that you can polish them with sandpaper. They produce very convincing metal shine. I tried to quickly build one, but this took some time... I also de-burred the pipe ends using a sharp hobby knife which made them look...sharp! I built the exhaust using my own fabricated parts knowing what I had to do to hold the screen. I made sure the exhaust is positioned in the center of the shielding screen. CA glue wouldn't work well, I had to use epoxy glue for attaching all of these. Now I just need to figure out how to attach these onto the cab...

-
Blue Rig Completed
cifenet replied to Chariots of Fire's topic in Model Trucks: Big Rigs and Heavy Equipment
What a fantastic blue duo! Great craftmanship, looking mighty good! Both of them~ -
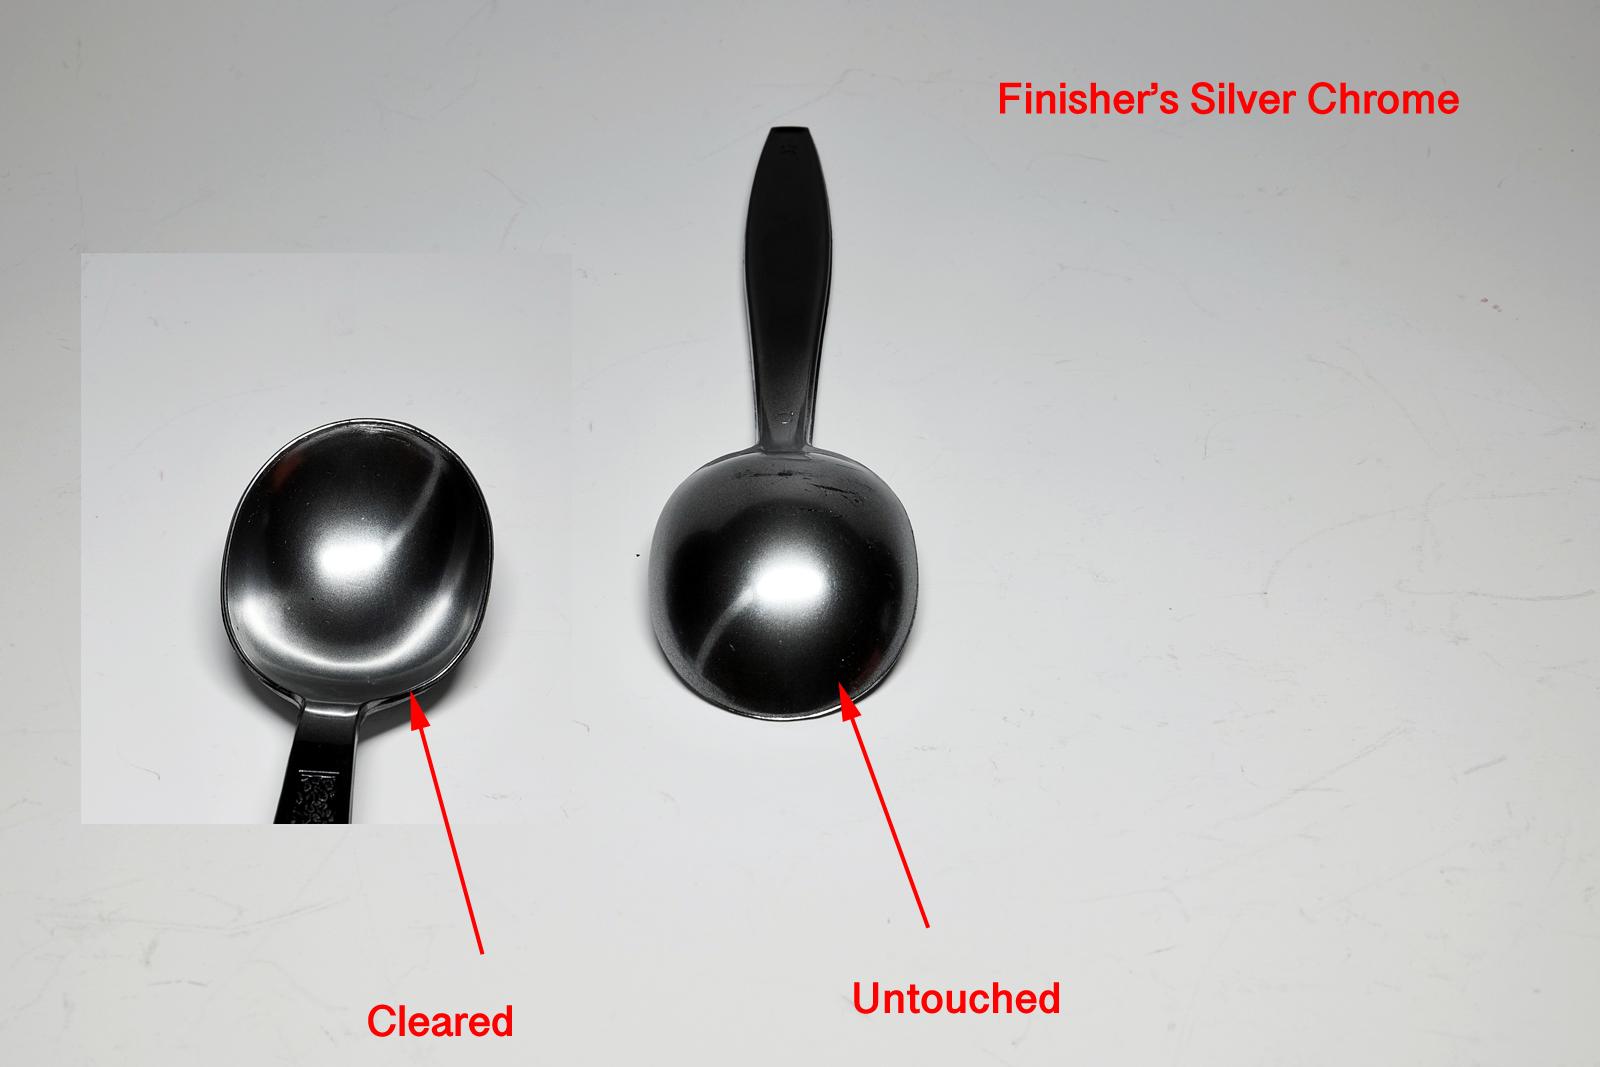
Landon, thanks for checking on this thread so far and being very supportive! I just hope to not screw up anything serious at this late stage. 🤞 Thanks, Brian! My chrome parts are basically painted with metallic silver/aluminum based paints (not really chrome, i.e. silver-chrome) which is much easier to paint/handle (but not quite reflective). I hope to try some of those "mirror"-like chrome finishes though. I know that Revell now has a spray can version which I think fantastic (but pricey) and should be easier to get the quality result. Thank you, Scott! Appreciated!
-
Mack Superliner
cifenet replied to Jürgen M.'s topic in WIP: Model Trucks: Big Rigs and Heavy Equipment
Sweet looking trailer, Jürgen! Nice work putting all together and the hood looks great also. -
Western Star 4900 FA plow truck
cifenet replied to BK9300's topic in WIP: Model Trucks: Big Rigs and Heavy Equipment
Now that you lay out what you have accomplished in the "aerial photo", all I can say is you have done brilliant work so far! -
Kenworth W-925 (mild custom)
cifenet replied to Gary Chastain's topic in WIP: Model Trucks: Big Rigs and Heavy Equipment
You are making rapid progress on this, Gary. Great start and the truck is visually beautiful as is already! -
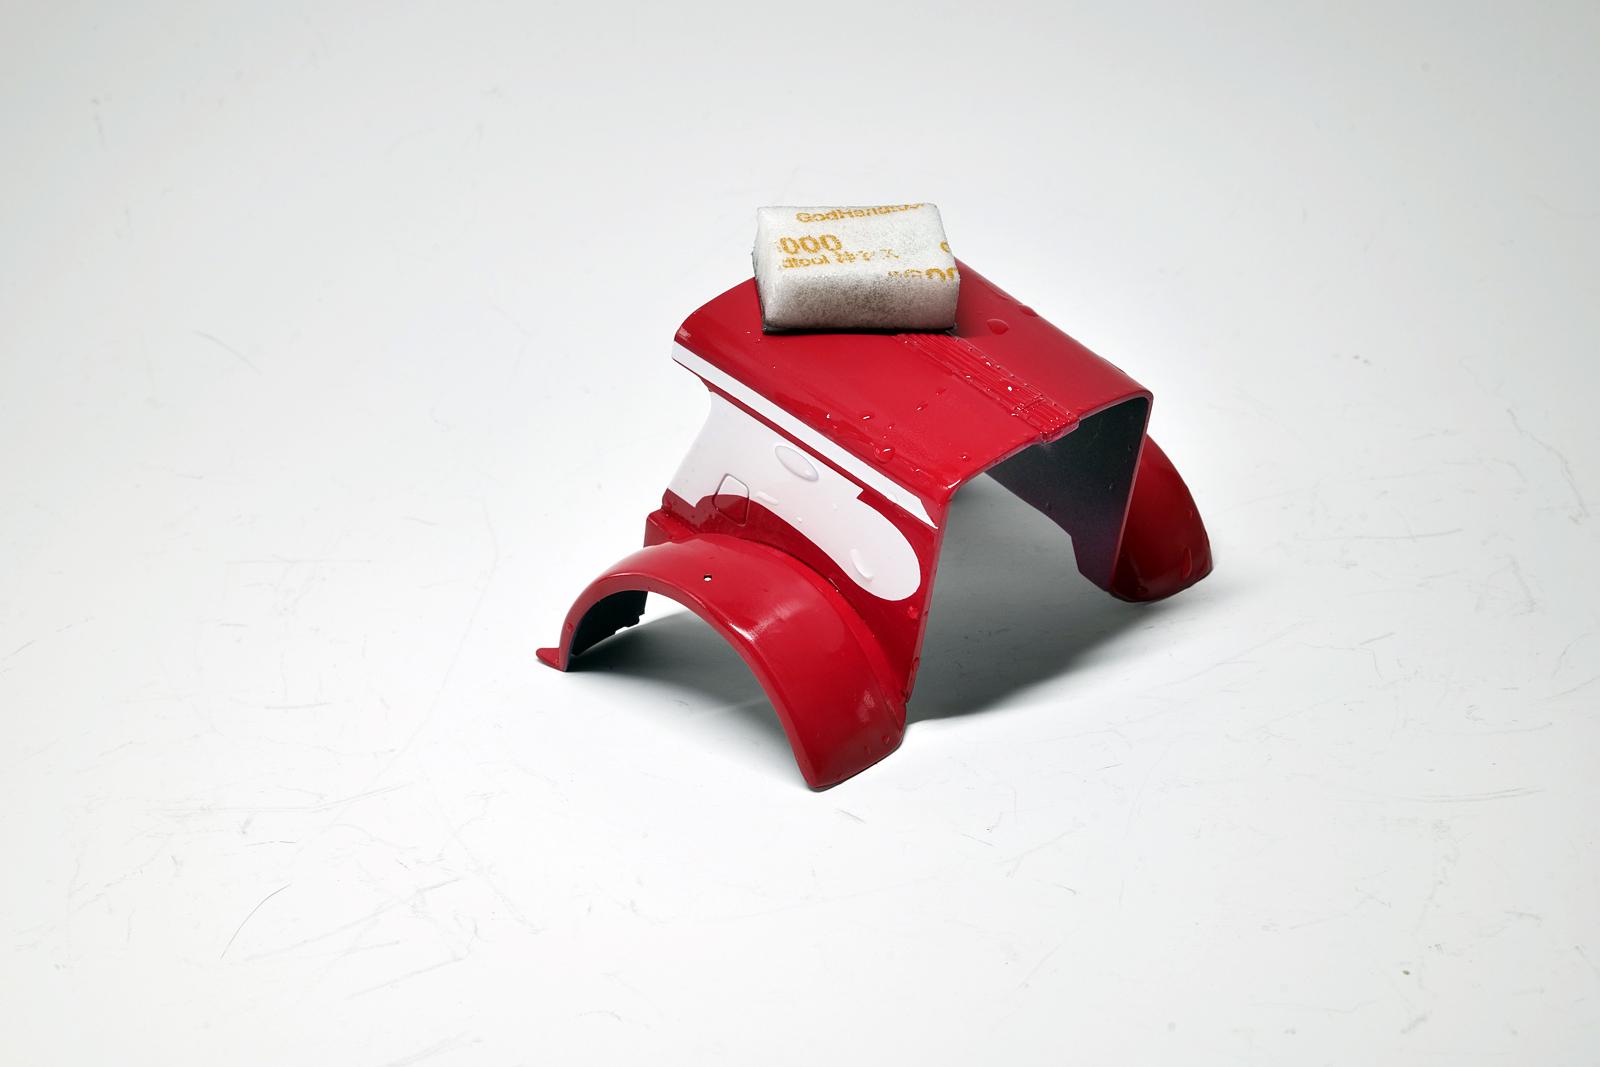
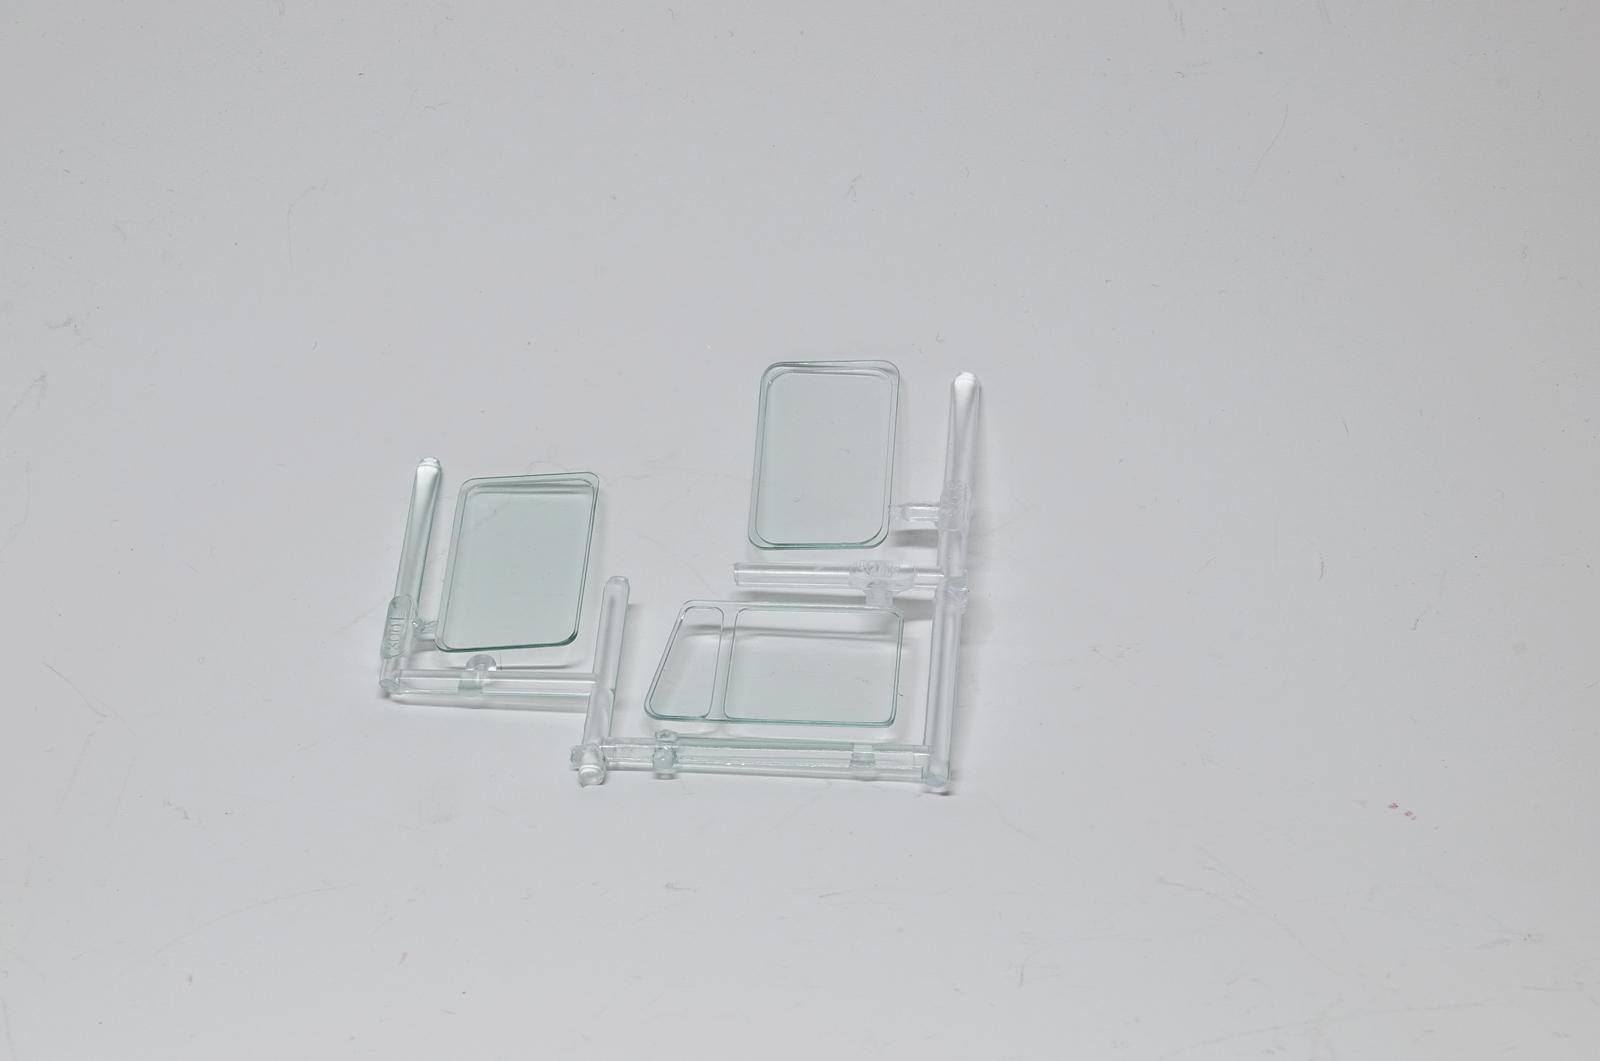
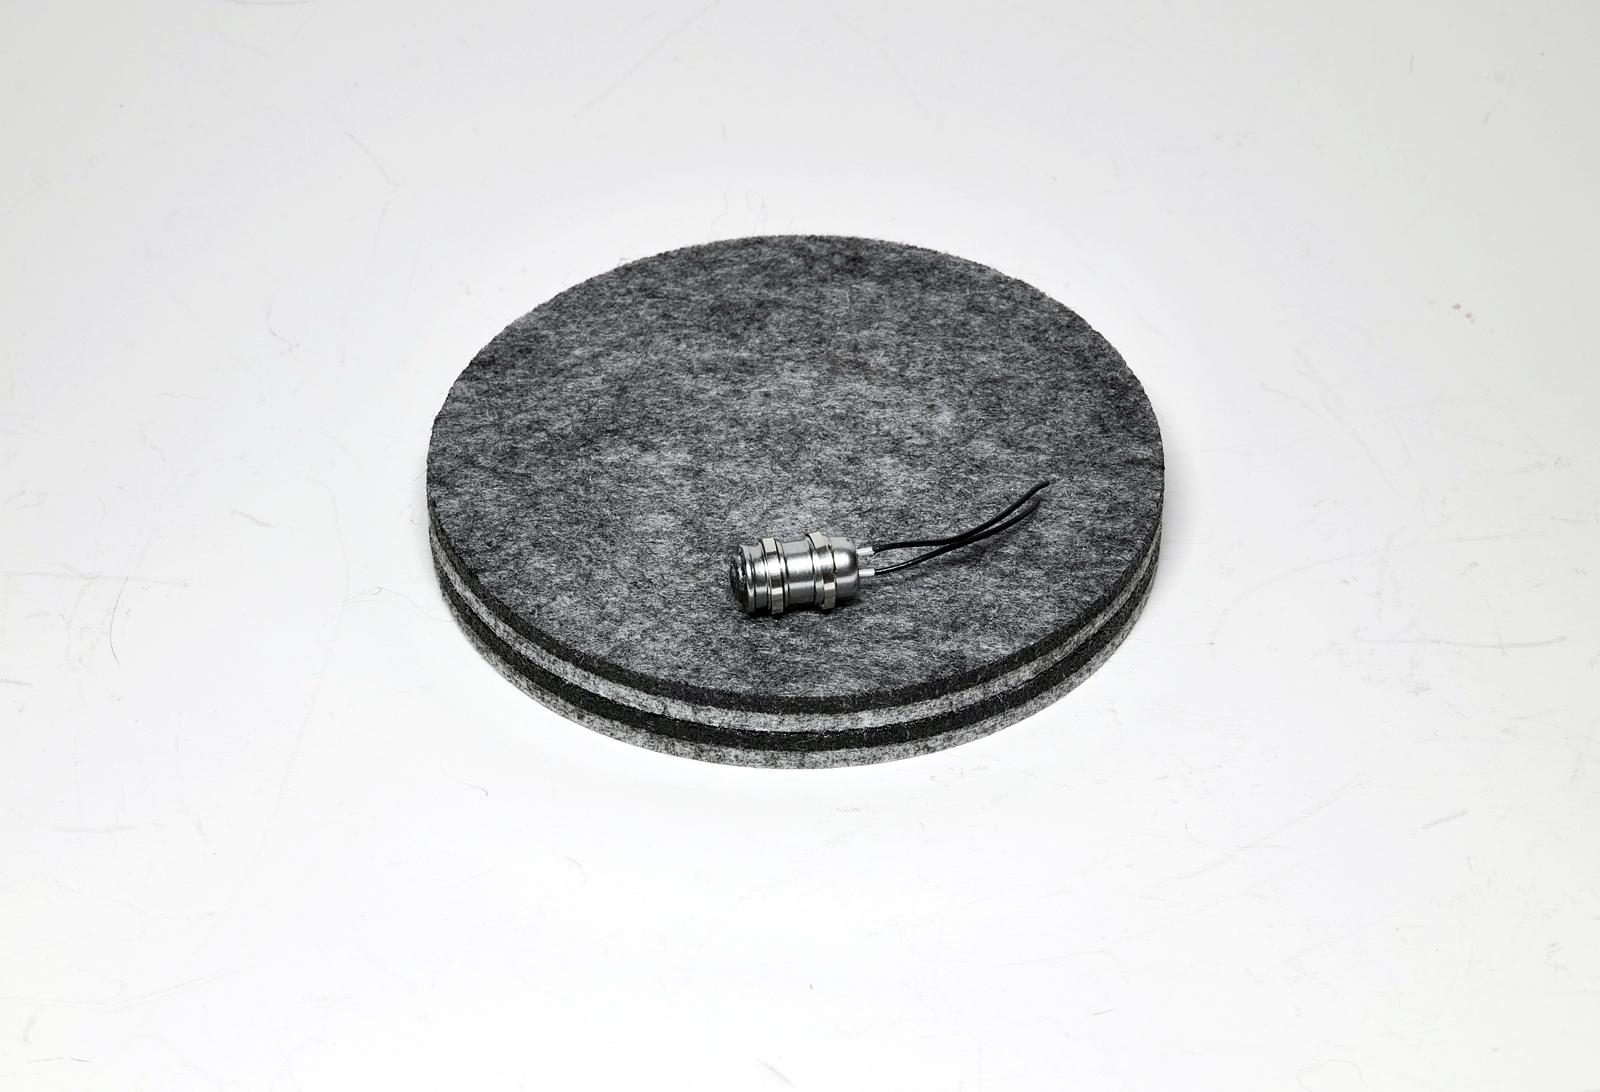
First, am I in trouble for getting this kit? I have heard many challenging stories especially with chrome plated tanker kits, I decided to pick this one up as this one was on sale. I glanced the contents inside and it looked quite okay. Nonetheless, I may chicken-out and not build this next... I also completed the luberfiner assembly and it is bigger in diameter as I wrapped around using thin metal straps. Added return oil hoses also. Since I knew I had to handle the luberfinder multiple times with hands while attaching the straps and oil hoses, I protected the metal surface using Tamiya's X-22 acrylic clear. As you can see, you don't lose the metal shine and it does prevent its finish rubbing off when handled. Are these tow hooks? I tried to mimic these using various plastic materials. I finally made the matching mirror mount after I made the driver's side. I usually avoid difficult and hard tasks and this was one was one of them. It was tricky for me dealing with thin aluminum tubes and bending them to match both sides. I used slow curing CA glue so I could adjust the positions till I was satisfied with the look. Also completed the second session for touching up paint spills. I made sure I don't spray wet trying to avoid another paint spill. For the hood piece, I got a head start, I began applying gloss clear coat on it. I usually apply three clear coats and polish between the sessions in several days. My polish work started with #4000 polishing pad (sandpaper with thick foam backing). I will wait a day and apply my second clear coat. For the final polishing session, I will go all the way to #12,000. These clear parts seem too clean and clear to me. I would want tinted windshield and windows for this truck, I thought. Slowly applied clear blue paint using my airbrush just enough to tell it has bluish hue. These clear parts appear to have fitting issues. The glass pieces have round corners while the windows themselves do not. They need to have straight lines not round lines in the molds... Oh boy. I think I could replace them with clear plastic sheet (maybe)... Once I finish applying clear coat and polishing, I should be able to complete the build as I attach all these small parts...
-
Your faith is appreciated, Brian! 😃 Thank you, Jeff! I haven't seen your work posting here lately, hope things are well with you! Thanks Landon for the motivating words!
-
Restorod Autocar
cifenet replied to Gary Chastain's topic in Model Trucks: Big Rigs and Heavy Equipment
Simply A. M. A. Z. I. N. G! The tri-axle setup, round fender covers, chrome finishes, and the exposed engine showing off details…. Just incredible work you have shown here. Bravo, Gary! -
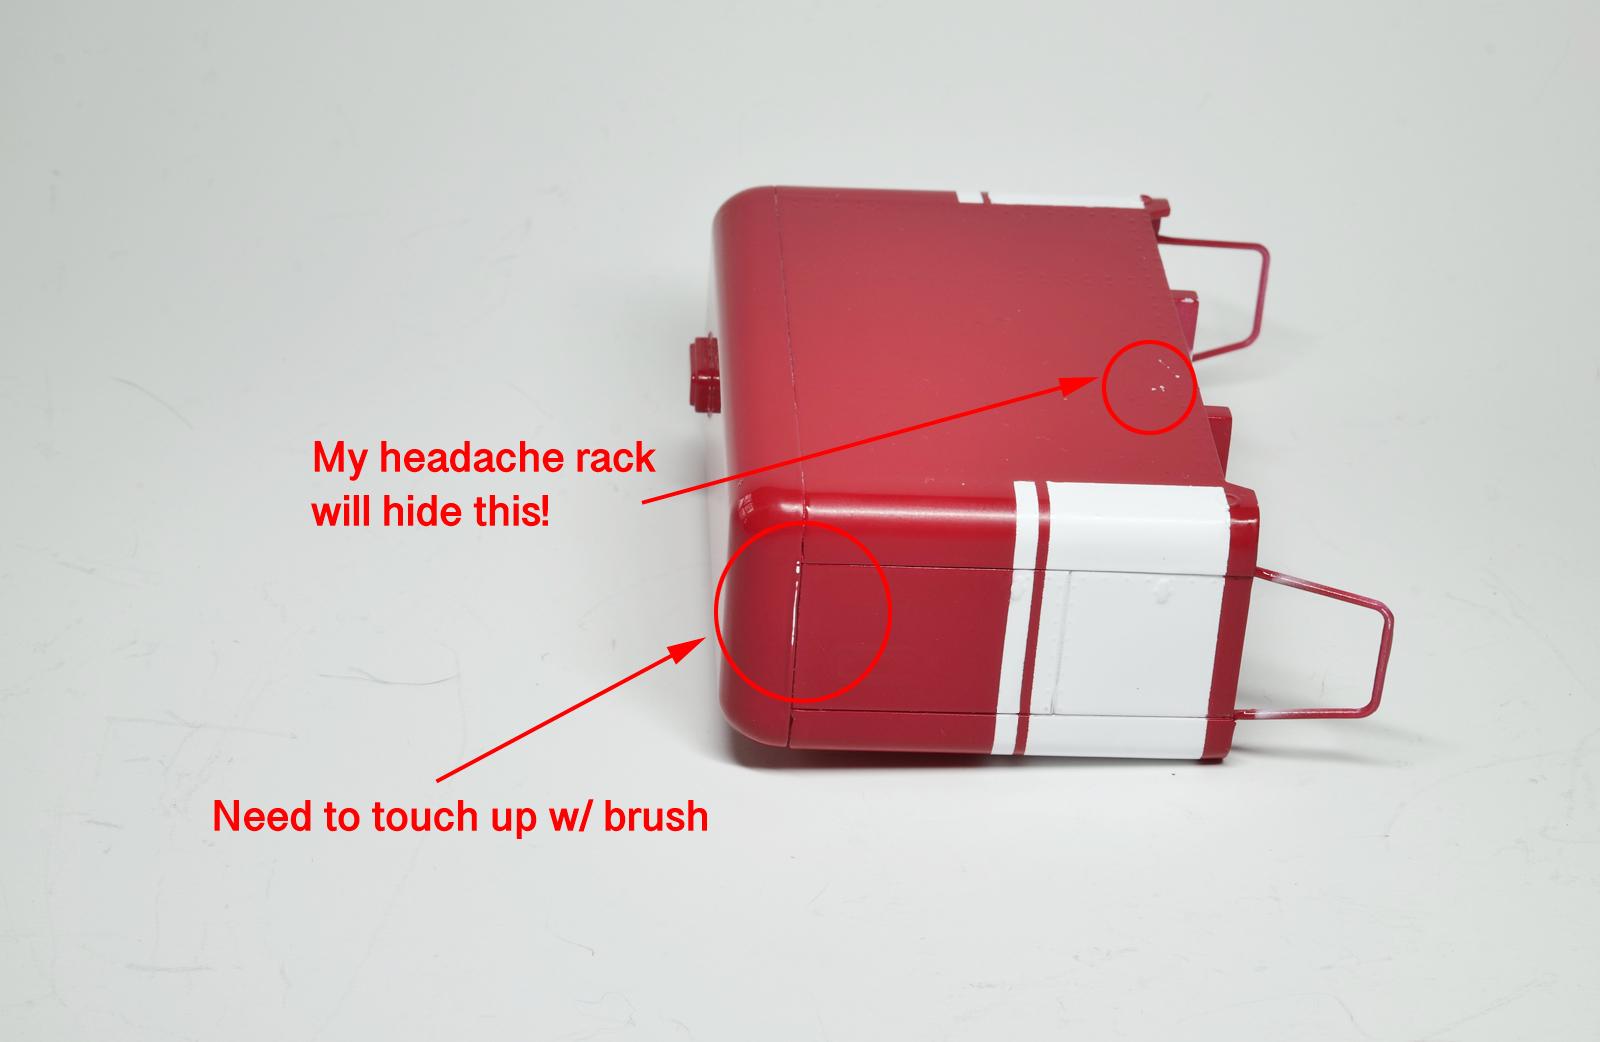
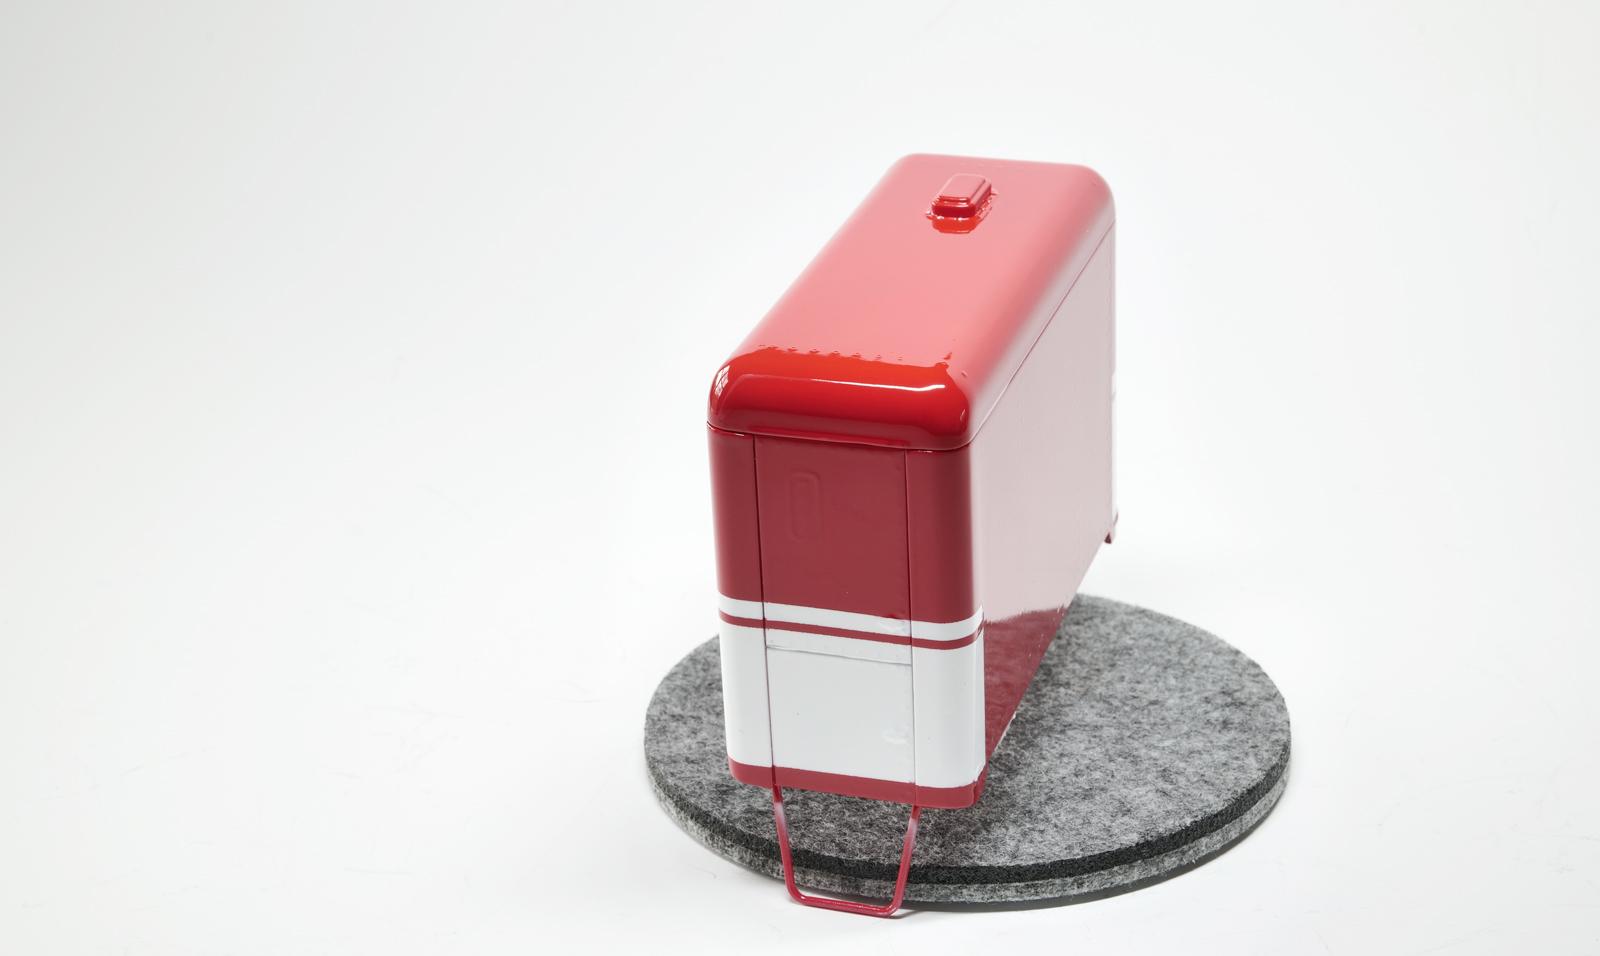
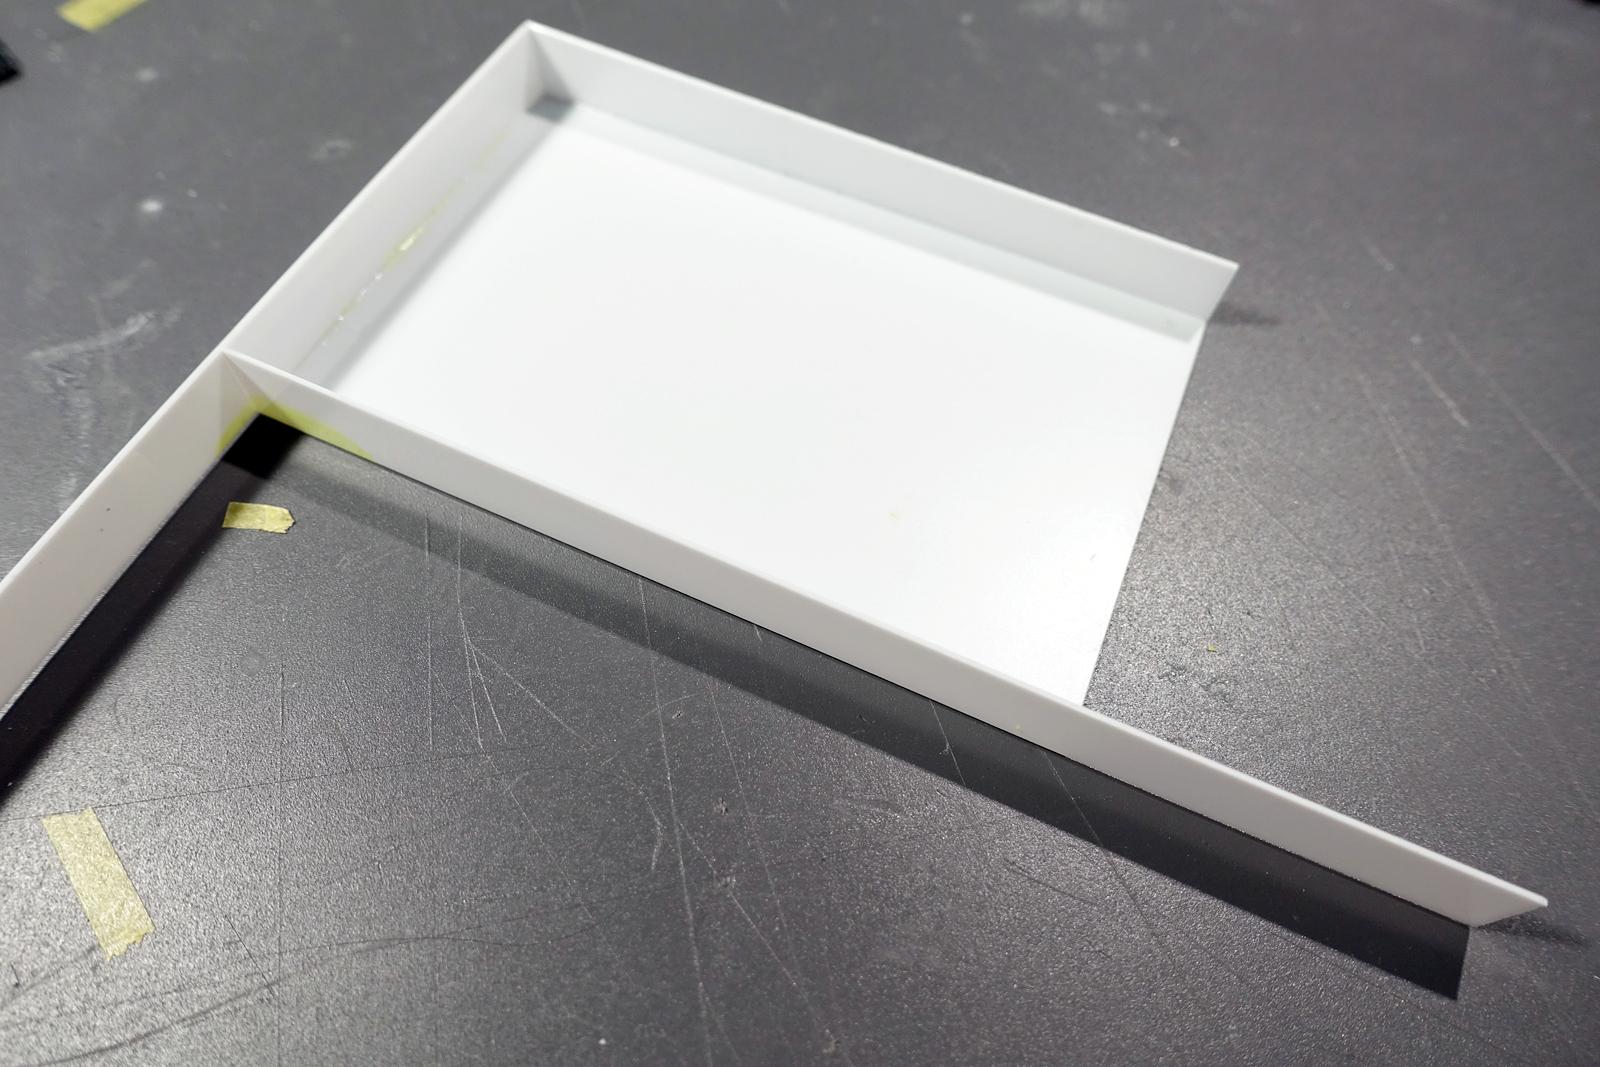
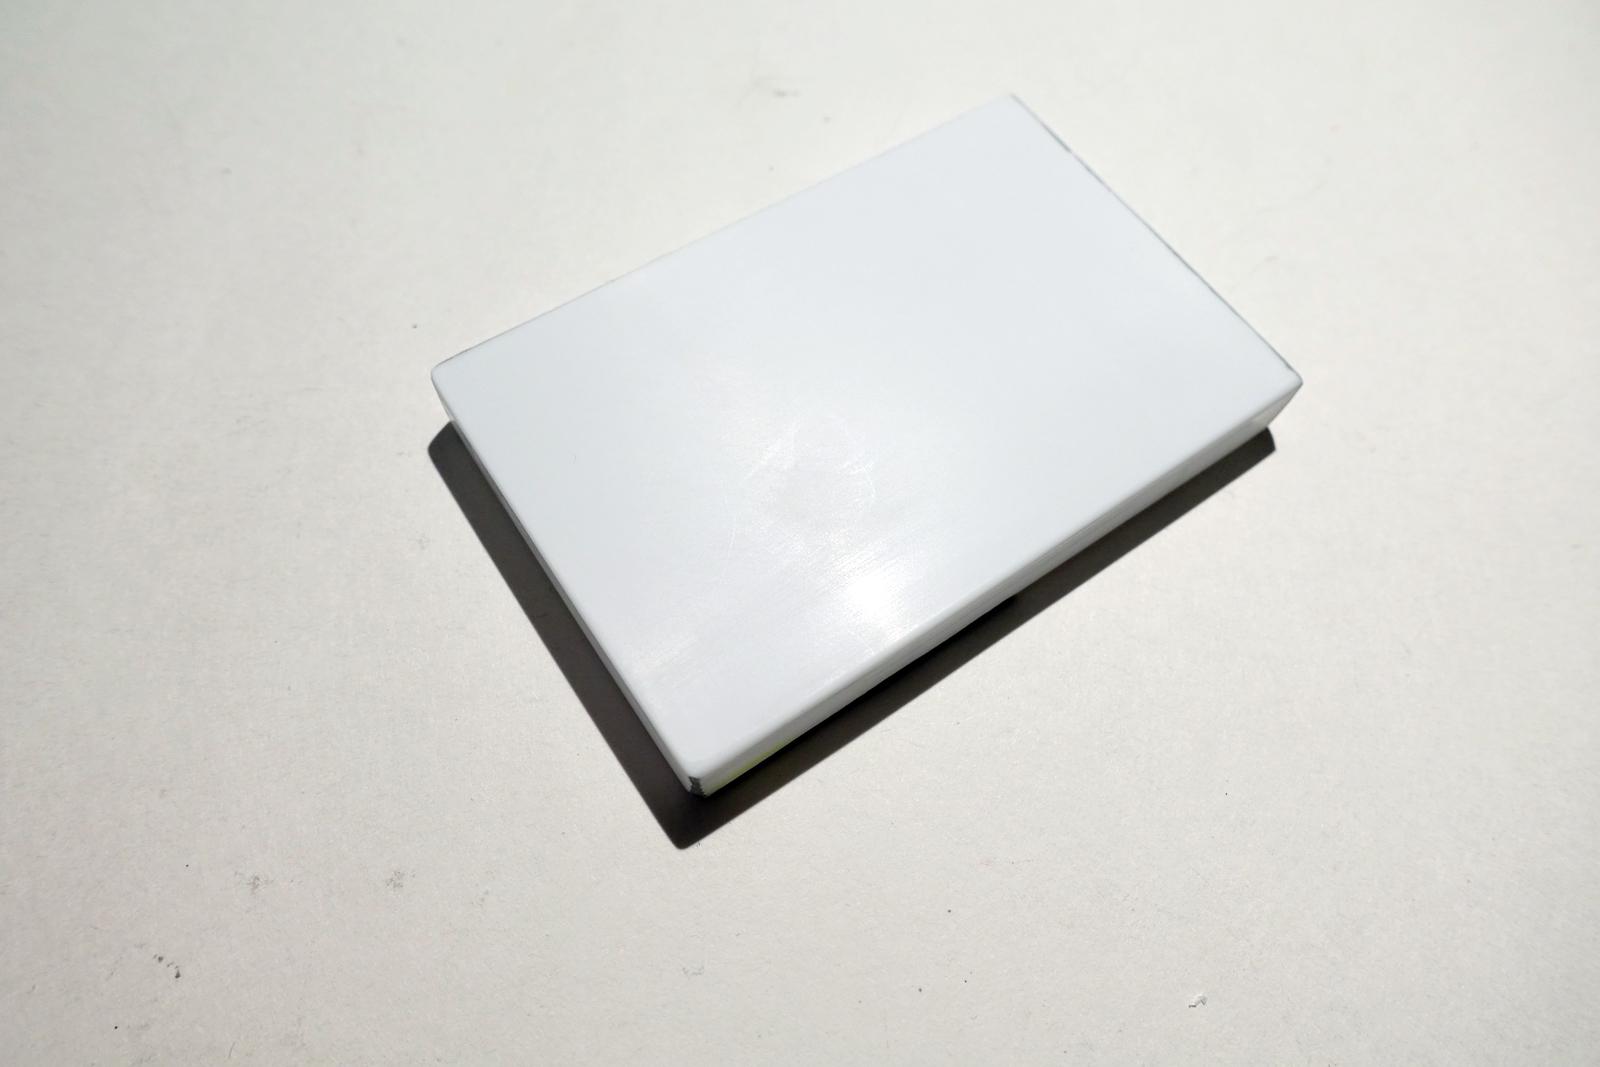
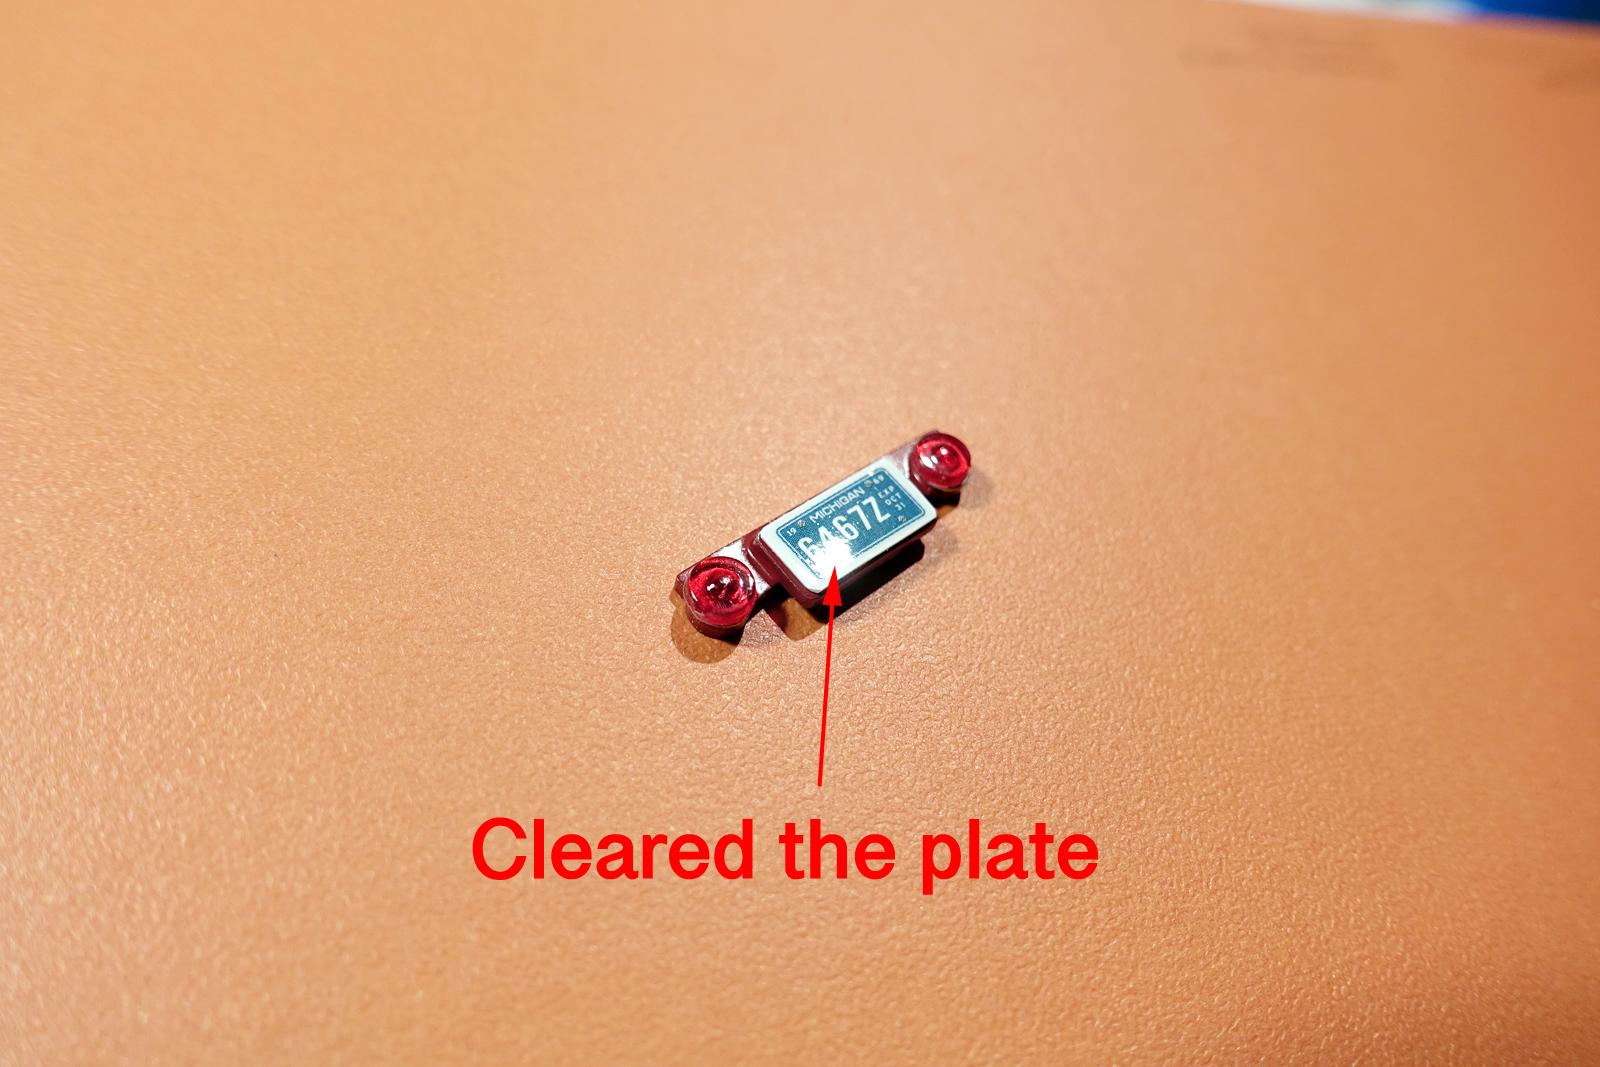
My storage bin/floor is complete. I can probably throw some chain or hoses on top (or/and any other common items used by truck drivers). Some kind of headache/rack is needed now. I screwed up the paint work on the back of the sleeper so this rack is going to hide it. More on this later. I don't want anything fancy, I just want something boxy with three doors. And shiny. I made this using thin plastic sheet and the hardest part was to cut things straight. I have a problem with measuring for some reason, I am always off by little, my pieces often do not line up perfectly... I had to fill the gap and putty the end plates multiple times. I made a simple paint sample part (metallic finish) where I can look and pick the finish I want by comparing them together. They were painted and cleared (gloss/semi gloss/flat) using various shades. I think for my headache, I want the finish pictured as #5. The rear brake lights and the license plate were assembled. I picked a Michigan plate for this truck and I cleared the plate to make it look also "shiny". This is probably the theme for this truck, being "bright red and shiny"... Here are the paint problems I was facing and you will understand why I was disappointed. First, on the hood, some unknown chemical reaction made the painted surface to wrinkle. Keeping the surface clean is important, but I failed to do so here. This type of the problems is somewhat easy to fix, it must be sanded down smooth and repaint the surface carefully. A common masking tape mistake, looks like they weren't sealed completely especially the raised area. I really should have painted the back by wrapping the white around, but I didn't. This looked very inconsistent with the paint scheme, hence I am hiding the back with a large headache rack... When fixing these problems, I am going to focus one thing at a time and work slow. To fix all of the mistakes, I will likely need to do three passes where I mask and re-paint each time. This is after my first repair session. You can see from the over-sprayed areas on masking tapes (indicated by arrows), I tried to use very little paint and apply thin layers to perform the repair. Getting better than before, I will do two more passes to repair over-spray spots on several areas. Temporarily attached the floor bin (mesh) and the headache rack to see how everything lines up. The floor bin is hitting my quarter fender guards, so I will need to further adjust the location,but shouldn't cause any issue. Once the paint correction session is finished, I will apply three coats of gloss clear and let it dry for several days. I want the truck to have decent shine, so I will polish the clear also. After that, I will start installing all of the external components such as mirrors, air filter/luberfiner, exhaust stakes, etc... Fun stuff!
-
Steve, you are a such gentleman, I have seen your phenomenal work. Let's not lie. Jeff and Gary, you are guys kind. 👍 I think every each build, we all try to better the previous build, but this time, it could be that my expectation was being too high for what I thought I can realistically achieve... Bad me, I thought I should get better, but still making silly mistakes and such... Landon, thanks for making me feel better! I can go through some of the mistakes I made in the next update and share~ Thanks Brian, I just wasn't happy at all with the paint work when I was quite confident how it will turn out.. Now I must work the double amount to just fix things.. Understood, Håkan! I hope to acquire some of these kits mentioned someday and also check them out per your info. In general, I do prefer bigger tires/wheels on any vehicle just because they simply look better. But that is just my taste. BTW, you and Tommy need to draft a sheet or chart on this type of info and post up in info section so we all can bookmark it. After 3 months from now, I don't think I would remember any of these (unless I remember to come back revisit). Thanks, Germán! Appreciate your positive word!
-
‘95 Peterbilt 378 - Still On The Road Today
cifenet replied to vincen47's topic in Model Trucks: Big Rigs and Heavy Equipment
It is great that you considered all aspects of the truck and improved and enhanced them to make it to be your own. It really shines with details and aesthetic quite pleasing to look at. Nice Pete you built! -
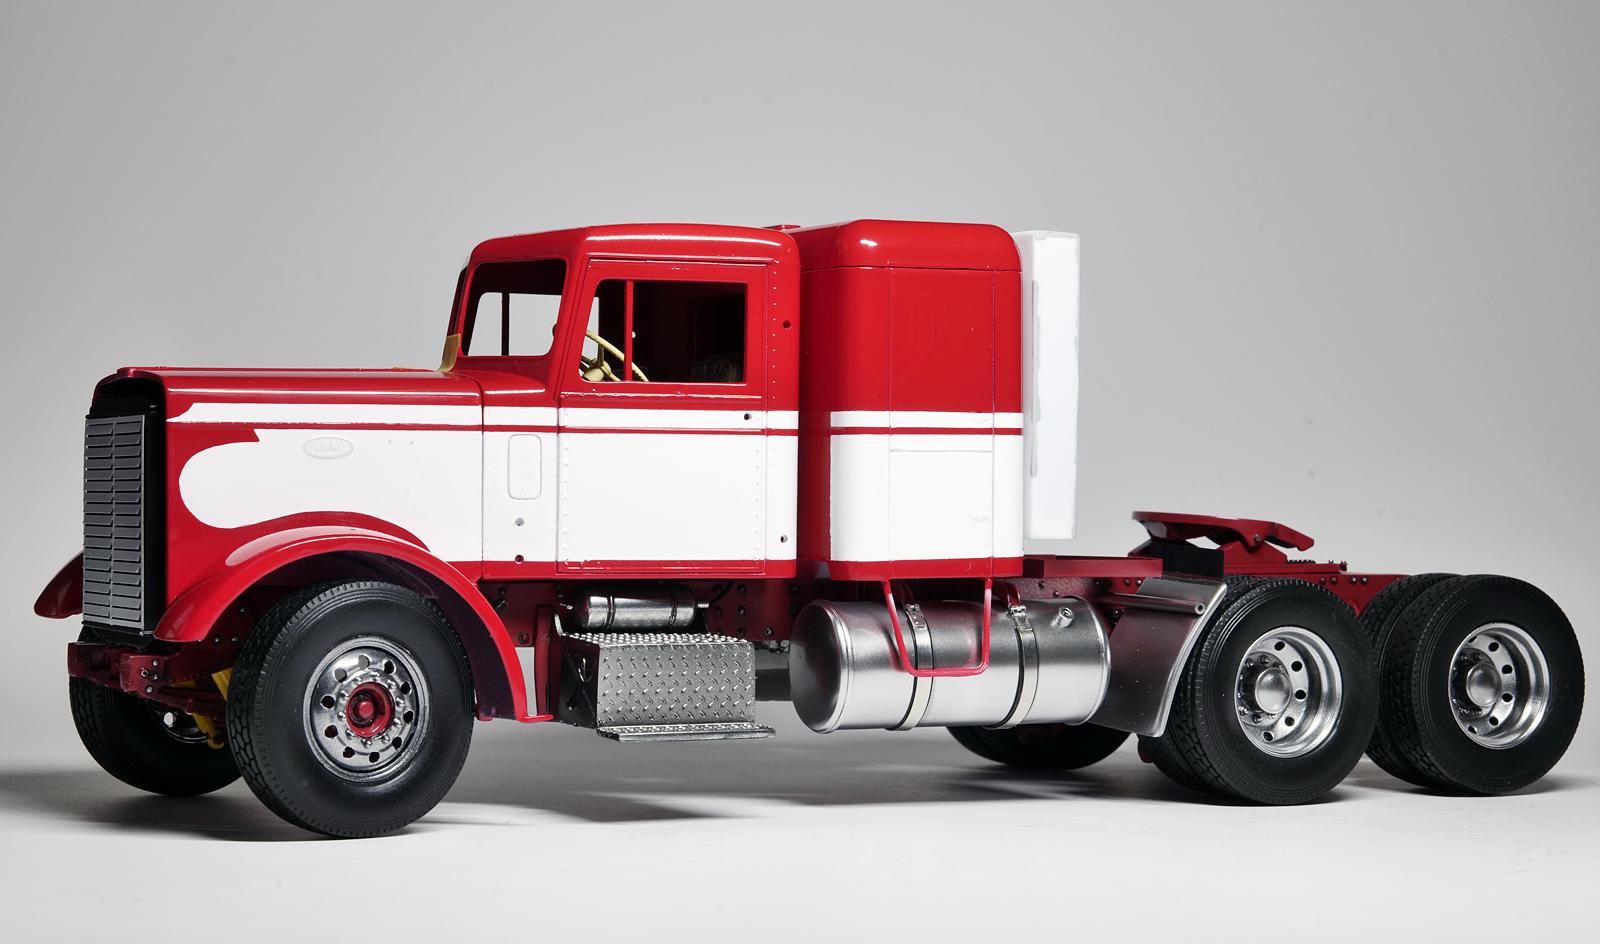
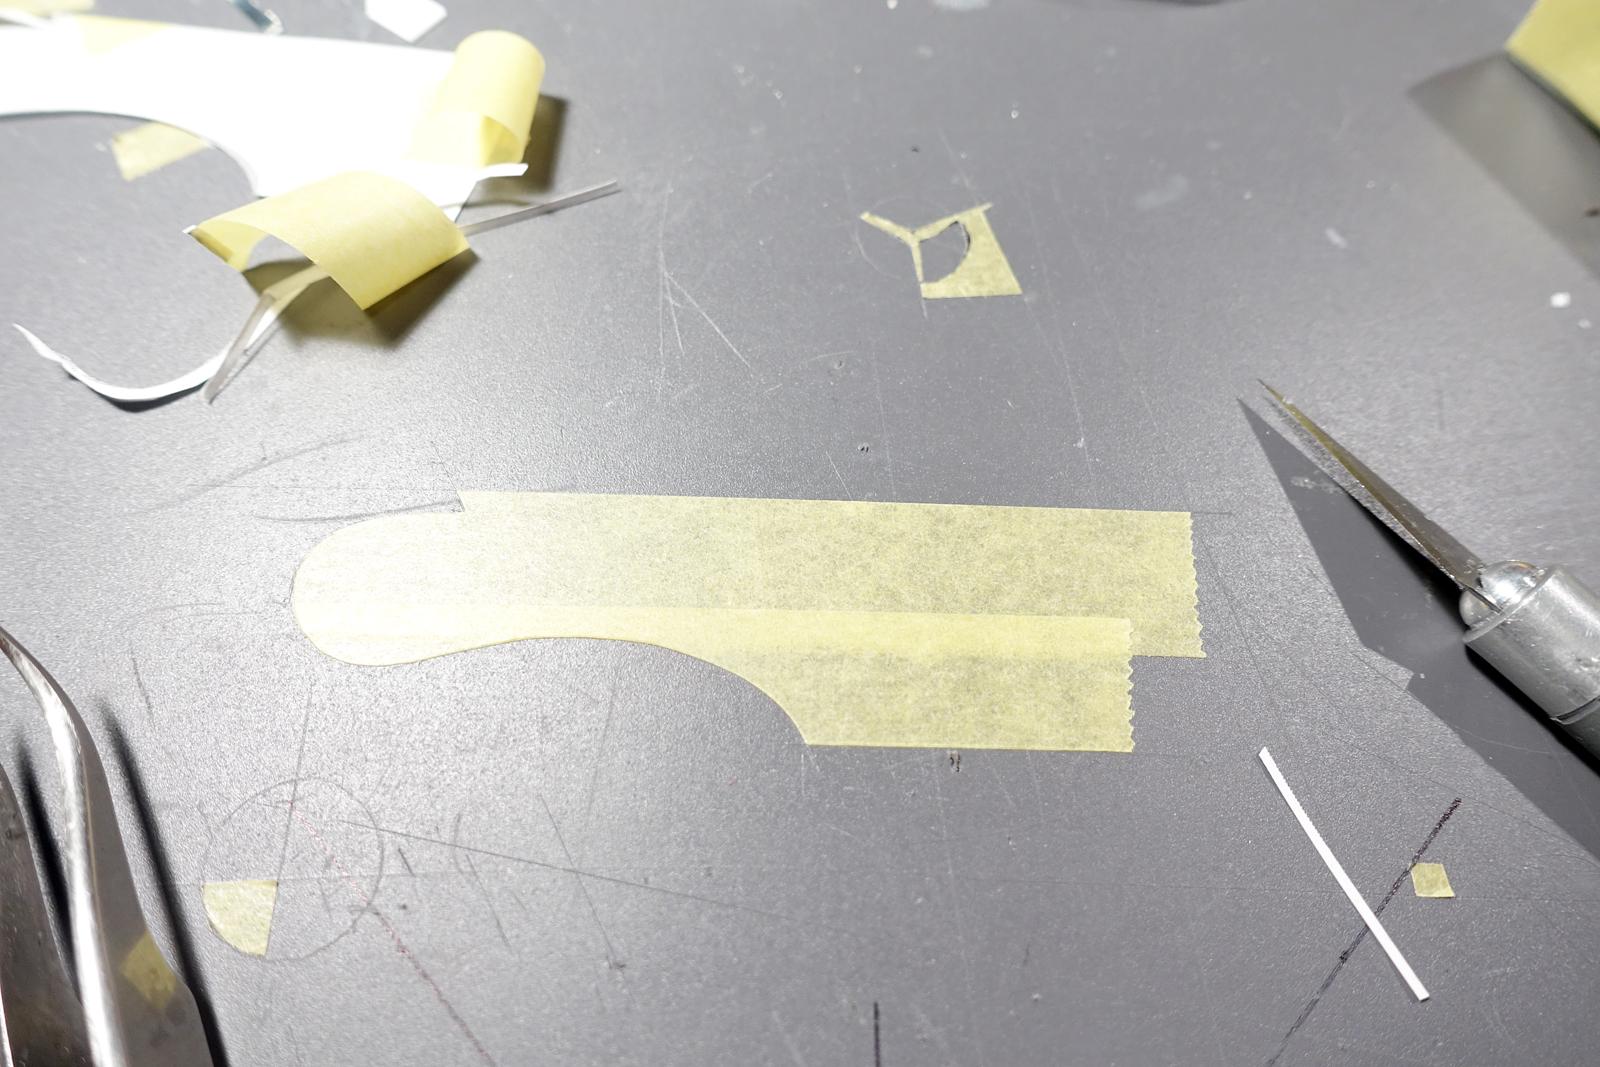
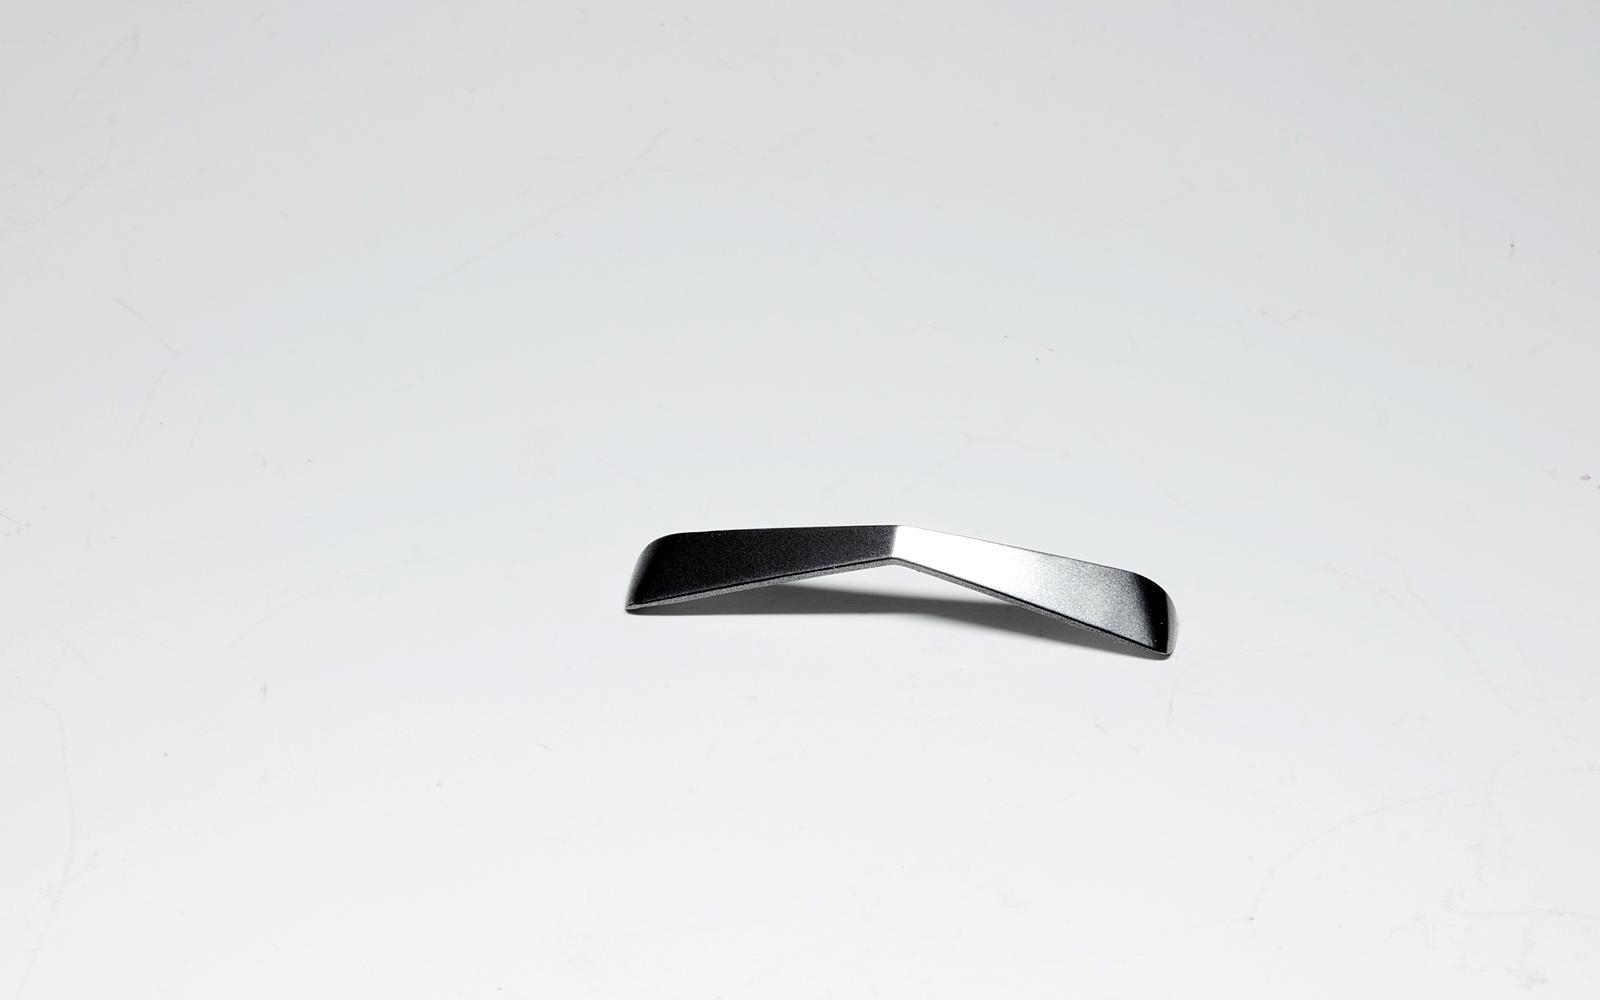
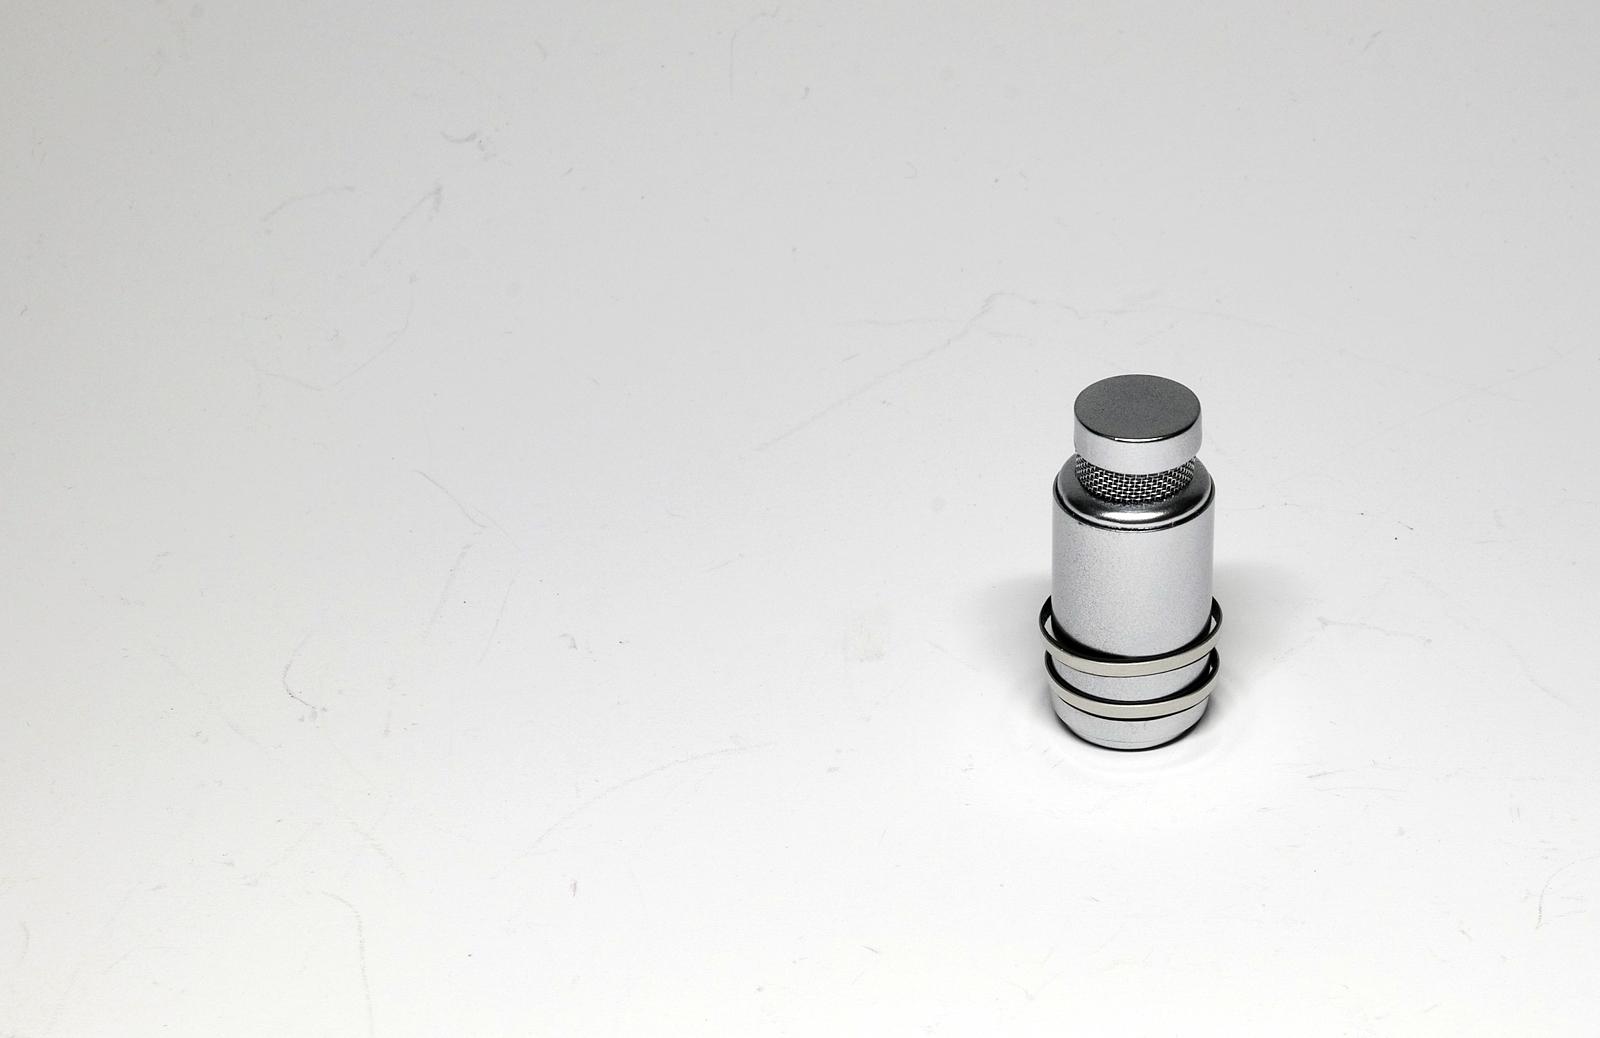
This is going to be one of the disappointing updates for me. Not satisfying with how I got here today especially with the paint job. It doesn't happen often for me, but it just did. I struggled to decide the main body color till the last minute and when I thought what I want and painted the body, I am not liking it the outcome. The body has received enough white paint coats and now I am ready here. Things were going well at this stage, my planned activities were happening as expected. Unfortunately, this is where good things stopped. The visor is painted. I wanted to be more shining, so may be I will have to re-do. The air canister is also ready. I trashed the one from the kit and made this with aluminum pipes. I wanted one with slightly bigger in size and longer hoping that it can increase the truck's presence. The problem is that it is just toooo heavy right now to attach using the kit's side mount piece. I also built the storage floor panel thinking this kind would allow to see through the bottom. Mesh will be added to the openings later. My rear mud guards are painted and decals have been applied. I am going with white color for the mud guards. These decals from AMT are quite thick, I realize they require decent time in decal solution soaking. I also added button details for the front grille cover trim. Micro Kristal Clear is used to attach them where I can clean up the glue residue with water without damaging the painted surface. This is the simple painting template design I came up with and now I am thinking that perhaps I should have further improve the curves... The curve doesn't "hug" the front fender nicely. I never thought about to be an issue till I painted the car two-tone. One of my several regrets. I must have measured the masking tapes so many times to align the line and such... But after the painting session, I always find issues that could have been avoidable. I gave total three layers of red paint and I regret that I went with "silk red" (name of the color) color here. I should have added some pearl finish to it... I also regret that the area painted in white doesn't wrap around the sleeper. Luckily, one exhaust stakes are mounted, the disconnected area will be hidden... Regretting more that I couldn't prep the surface better, there are some areas where I experienced paint blemish. I can't go back now, I am going to move forward and continue with the build. Next several days, I am going to do my best to clean all the paint spills and also refine the paint job (somehow). If that doesn't work out, then maybe it will go back to the dreadful lacquer bath and start over (I am ready to commit that also).
-
Western Star 4900 FA plow truck
cifenet replied to BK9300's topic in WIP: Model Trucks: Big Rigs and Heavy Equipment
Wow, all those small details make up big! And it is almost like wiring your home electrical junction boxes except your tool is your tweezers. Good work! -
First of all, I must say that the aftermarket aluminum wheels look super sweet. Yeah, those do look quite bigger in size, and they look good! At the end, as you said, some compromising effort is needed based on what we can get. I try not to get "too" involved with accurate as it can really make you to suffer through the building process (and nothing wrong with that, I know many of you enjoy that kind of effort). again, did I mention those tires/wheels do look nice?
-
Resto Rod Autocar
cifenet replied to Gary Chastain's topic in WIP: Model Trucks: Big Rigs and Heavy Equipment
This is the masterpiece being made here, Gary. Love the engine details and shining components throughout the truck. My kind of style! And those exhaust pipes coming out side look very sweet. -
KENWORTH K123 Cabover
cifenet replied to Brutalform's topic in WIP: Model Trucks: Big Rigs and Heavy Equipment
Very promising start and love your paint collections on the background. Nicely organized too! I see you washed your engine details with black wash, while they do bring out details, I think you could also remove some hard wash lines with cotton swab with enamel thinner to blend the effect (assuming the wash is done w/ enamel). I find that these truck kits do assembly quite well mainly if the frame is straight and aligned. From the photo, I think your frame looks very good! -
It is always exciting when starting a new build! To be honest, this truck is in my "ugliest truck list" and I always wondered what those designers were drinking at the drawing board. It is like 60s si-fi robot with missing teeth talking to you. Nonetheless, the photo-etched detail set looks very interesting, show us what you can do~
-
Western Star Classic heavy haul
cifenet replied to Biggu's topic in Model Trucks: Big Rigs and Heavy Equipment
Oh my. You have put your soul into it! Looks amazingly good now that you have shown the pics of whole truck. The massive front tires do add its mean business look of the truck as well! Some quality stuff going on, great job accomplishing this truck to be built, Jeff!