cifenet
-
Posts
856 -
Joined
-
Last visited
Content Type
Profiles
Forums
Events
Gallery
Everything posted by cifenet
-
 Thanks, Brian! Just had to upload again. Looks like either my ISP is blocking access or my home internet firewall is rejecting the access. 😕
 -
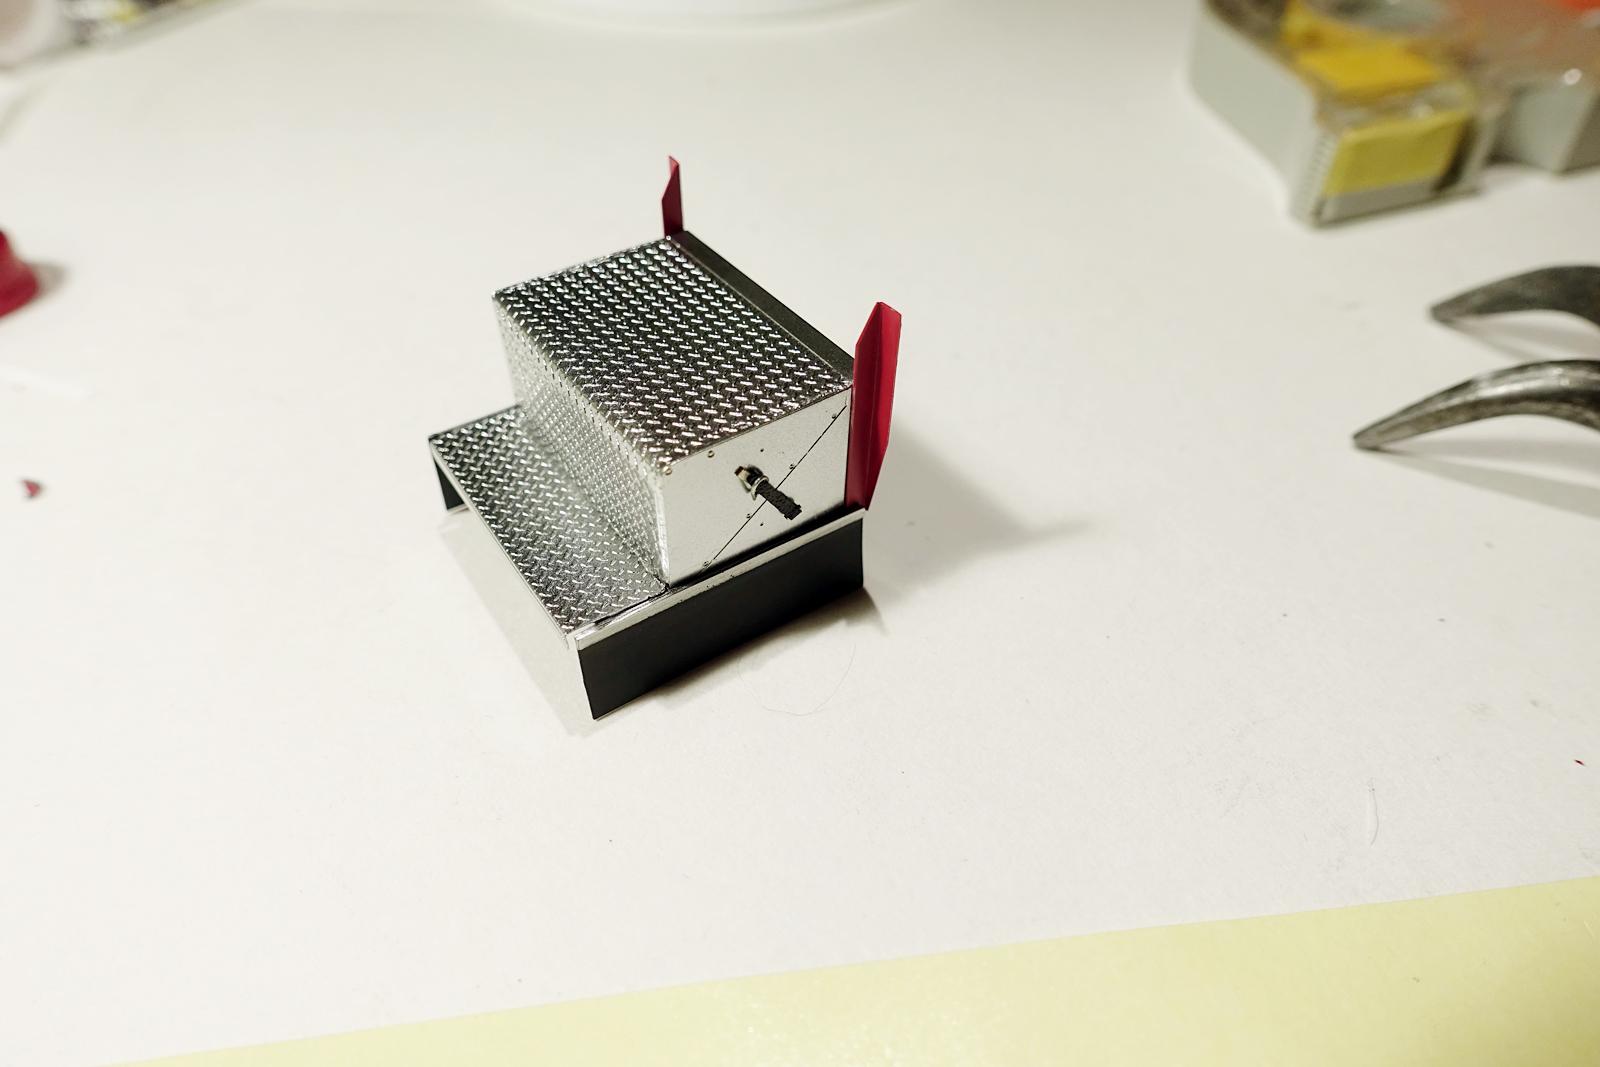
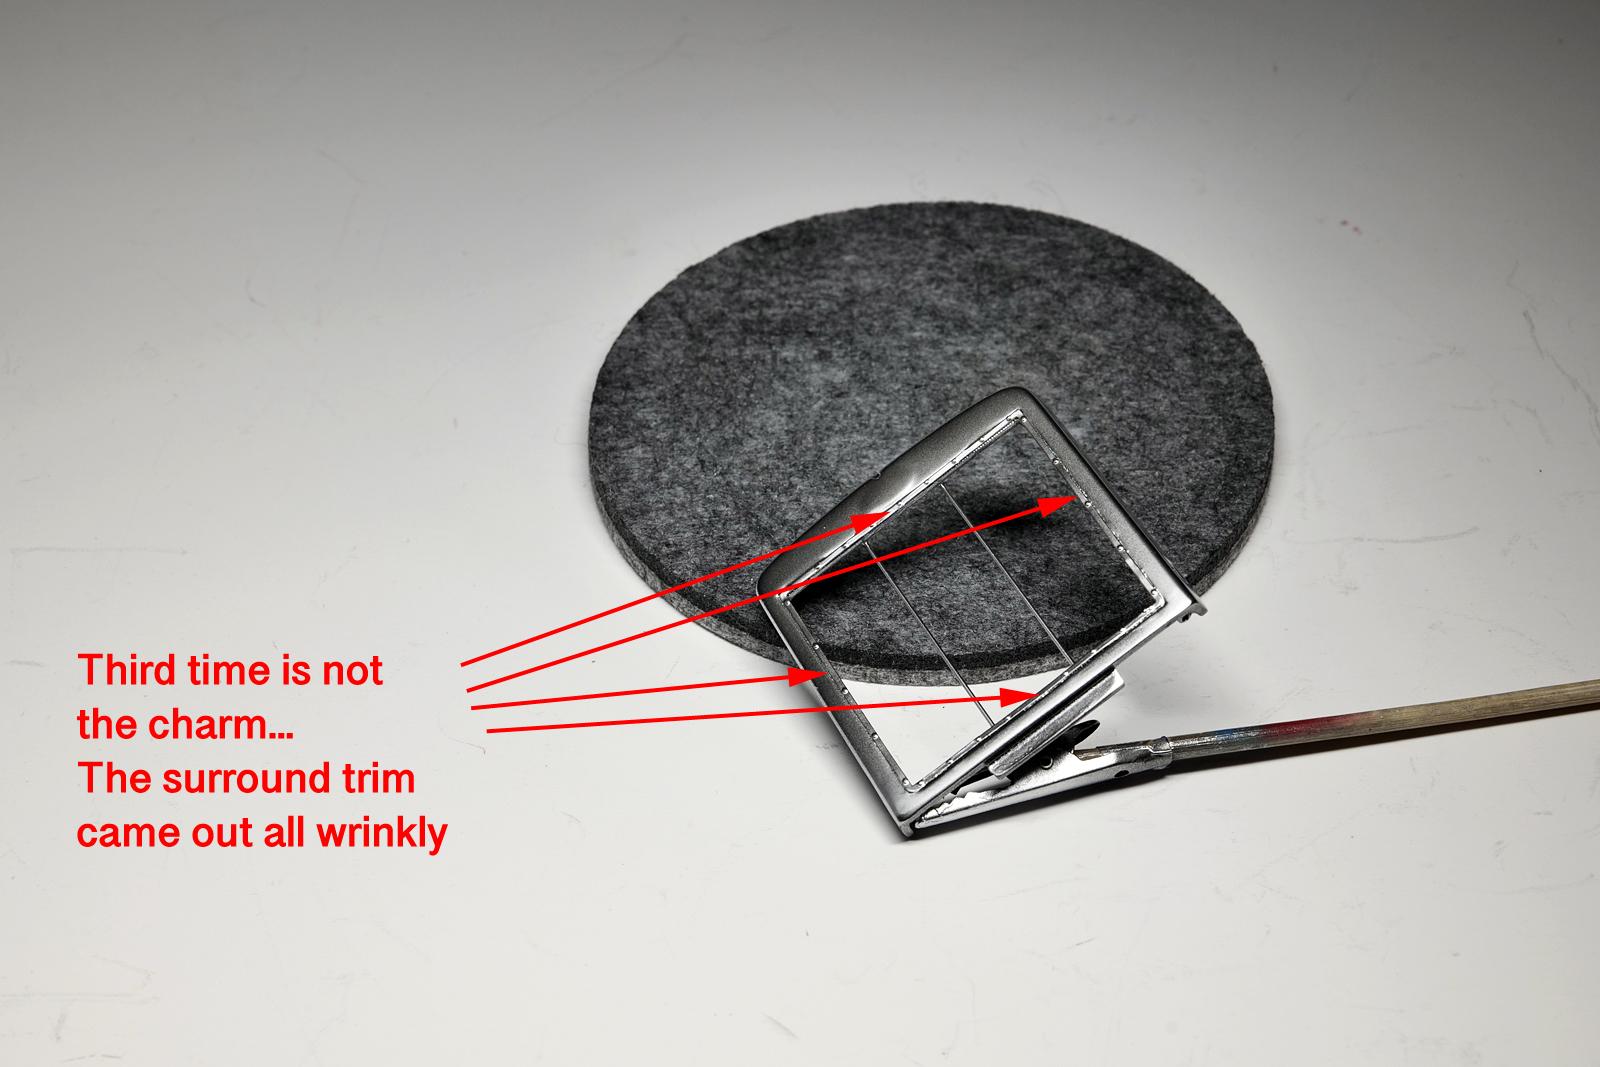
I quickly made latches to enhance the boring battery box look (thin metal wire and black strip tape). My front grille is complete and I test-fit the whole setup. I can till the hood and open also. No interference with the bumper. I painted the mirror mount with stainless finish also. Regarding the front grille, I am not 100% satisfied withe how the grilled turned out. Perhaps I shouldn't add that photo-etched surrounding trim, but this is at point of no return. Never thought this is going to create a problem at this stage, but it is giving me some headache. My front wheels are giving in and the middle frame is bending causing the rear wheels to lift. I am going to reinforce the front axle with additional plastic strips and add metal plates on the bottom frame rails in the middle to prevent more warping... Silly as it can get here, essentially I am adding more weight to the truck to fix the weight issue. Lastly, I am having problems uploading articles lately resulting me to either upload in small chunks or repeat the upload attempts.

-
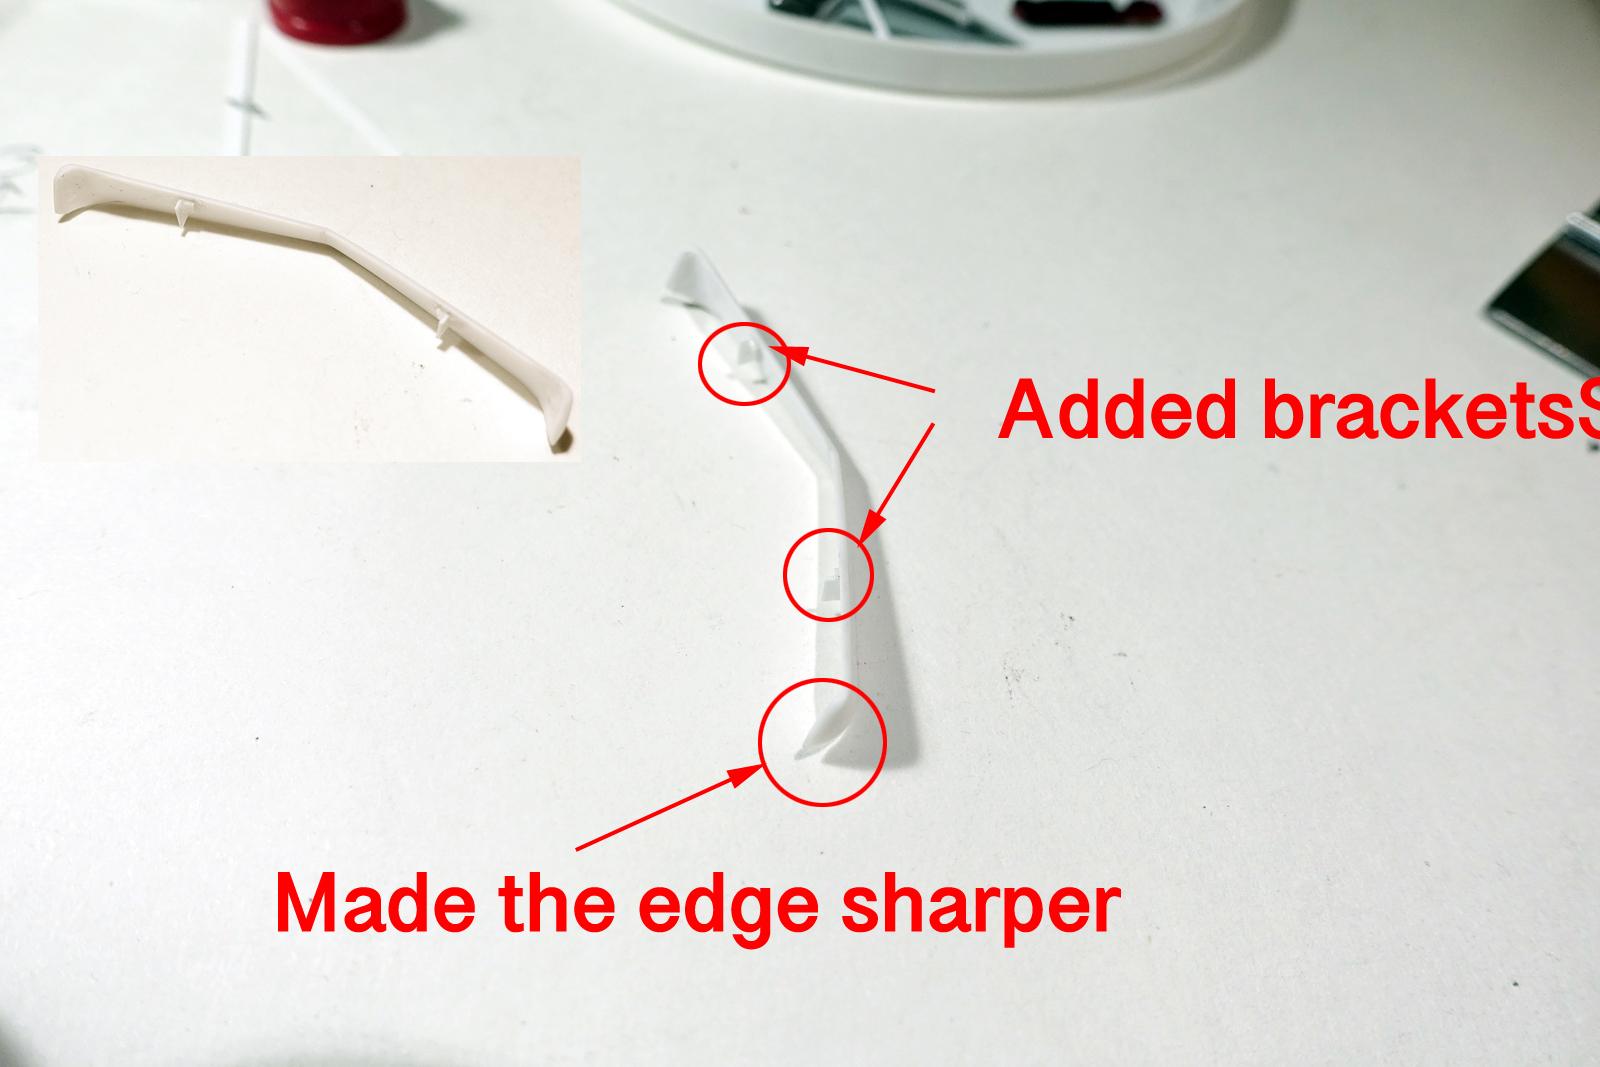
This is another random update before I move my work desk to another place (rooms are getting painted) and I will probably need take a short break. I try not to show my work desk for obvious reasons, but here is how messy and crazy it becomes... And this is why I am kept losing parts and tools, you can never find anything. Several times a day, I do try to clean up the work area (especially all the sand dust and plastic wastes), but it becomes messy again... Not an easy working condition for sure. If you have messier work desk, you have my respect! Spent time trying to figure out how I am going to mount the visor correctly. I can only mount the visor after body painting is done, hence I need to make sure I can "CA" glue it on the exact spot without making any mess. Thanks to the feedback/suggestions from this forum, this is how I improved the visor so I can mount via the inside brackets where no glue marking will show. There are so many different visors, but they seem to have a common feature where multiple brackets holding it in place. The brackets located inside will be glued and will line up the outside to the cab A pillars. I just want to avoid gluing anything on visor's edge... My next focus is the air canister and I got the length I wanted. I need to mount this (made of multiple metal pipes) securely and that is my current concern. This truck is getting heavier. I am going to weigh it on a scale to see how heavy it is. The A/C unit on the roof was painted with "faded white". Photo-etched screens were used and I painted the external screen white to show off mesh details.
-
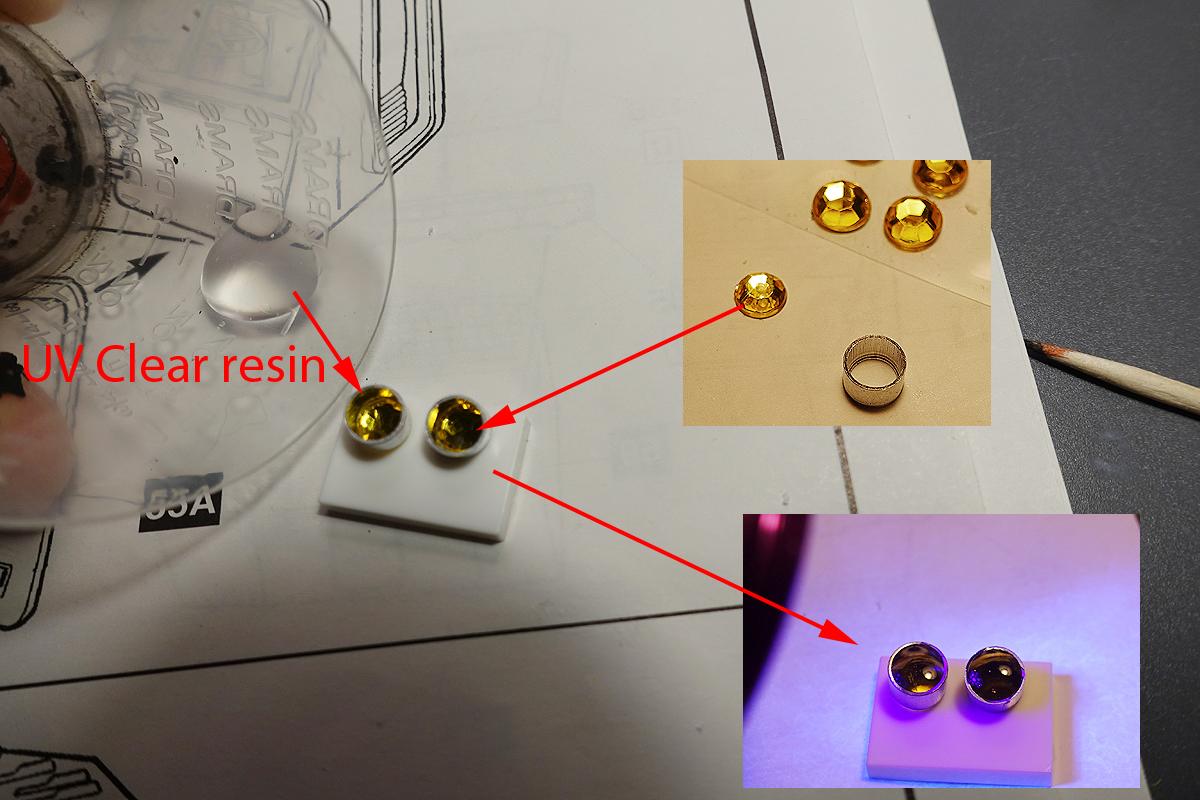
Your encouragement is both motivating and stimulating. Thanks again, Jeff! Hi Tommy, that is a good reference photo of the interior. Could have used something like. I noticed the kit's steering sitting quite high so I took some height off from the steering column, but looks like it can go lower. The only problem is, if I go lower, the driver's leg wouldn't go under the steering wheel. 😄 To be honest, I think the steering is somewhat oversized in the kit, but that is my feeling for every US truck kit I built so far (both Revell and AMT). Or maybe they are actually really big in real life? Hey Gary, this is what I picked up years ago. I think there are other colors also (blue, white, purple) where one side has diamond-like cut and the other side has flat spot.. They can be used for blinkers, driving lights, service lights, etc. Once you drop a couple of clear resin on top, it really turns these into smooth round circles, but I think you could probably get the same with clear gloss acrylic paint.
-
Western Star 4900 FA plow truck
cifenet replied to BK9300's topic in WIP: Model Trucks: Big Rigs and Heavy Equipment
The new floor looks so good. Good thinking to go with this route. And that flexible tube (from Wave?) which wraps around the stand is just the right detail here. -
Superb finish on the car and love the engine details!
-
Fantastic decal work, I know they are tricky, but you got it going nicely. Thanks for sharing the progress!
-
NuNu Hobby BMW M6 GT3 Rundstrecken Playstation
cifenet replied to Katsusauce's topic in WIP: Model Cars
Excellent progress and detail work! The carbon fiber application looks awesome as well. The body came out great too, keep it up! -
Clean work and it is one cool looking truck! I really like the grille being white and it definitely has that old design look. Good job!
-
What a fantastic build and it surely looks amazing! You got a great deal out of it too. I think just building the regular 359 itself requires some patience, I can't imagine what it would be by adding the wrecker part to it. Awesome truck, good work indeed! On a side note, Revell needs to sell this kit again till no one buys anymore.
-
A Tale of Two California Haulers
cifenet replied to RoninUtah's topic in Model Trucks: Big Rigs and Heavy Equipment
Great looking Petes! Even after 50+ years apart, they both are charming in its own way. The beautiful background works very well with the trucks also! -
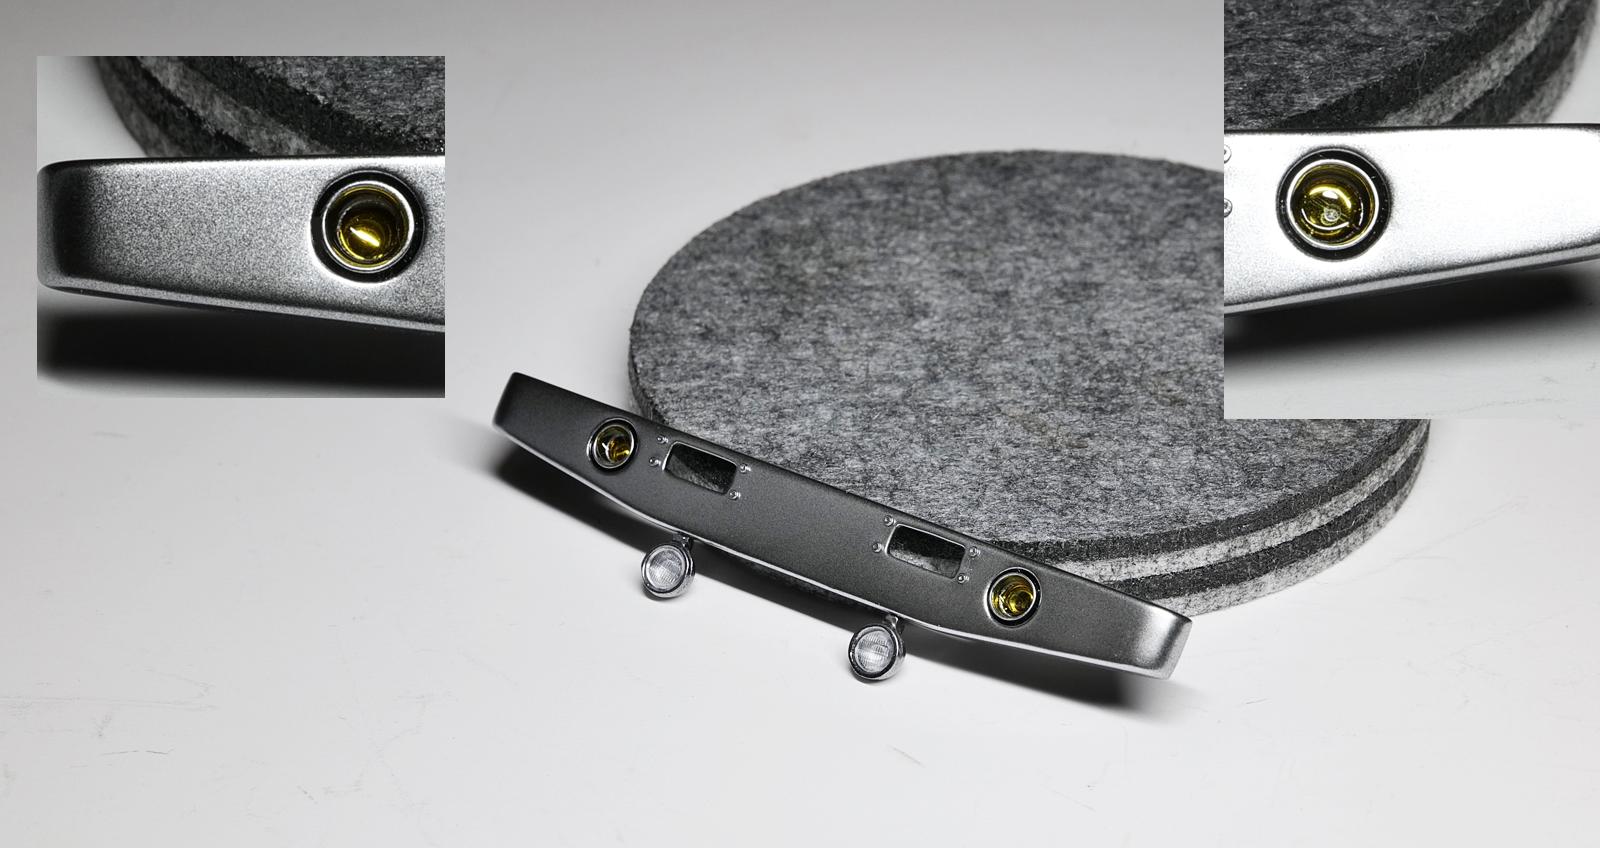
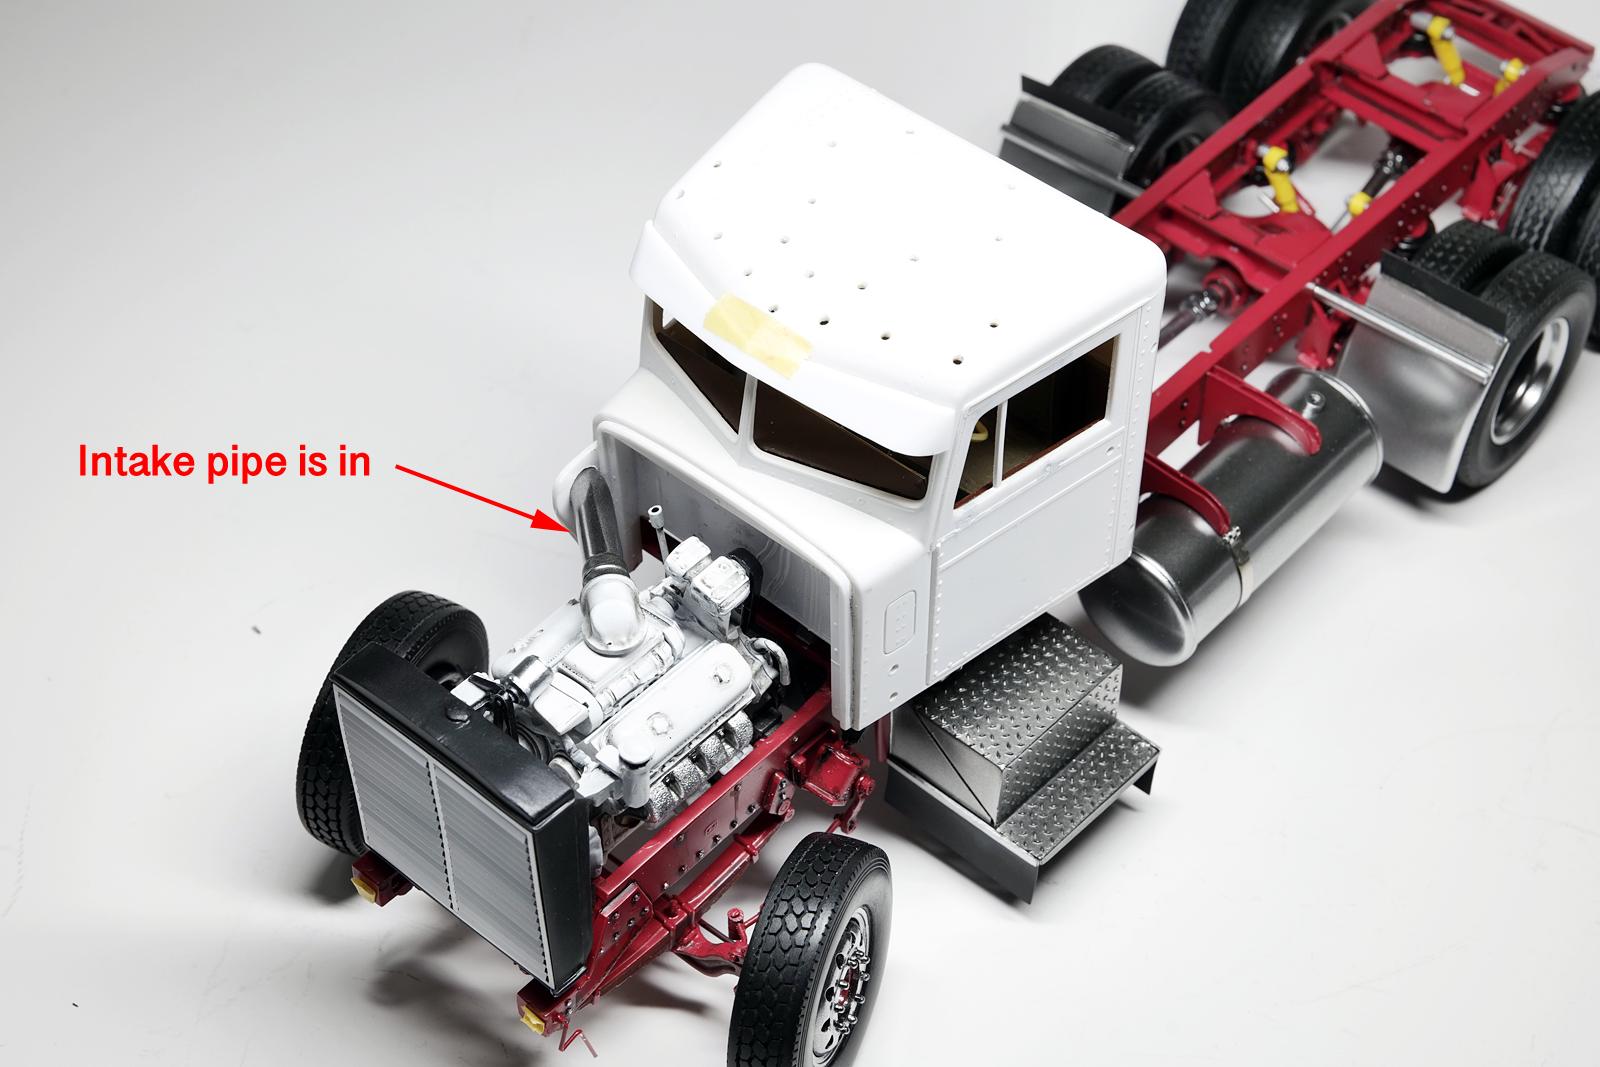
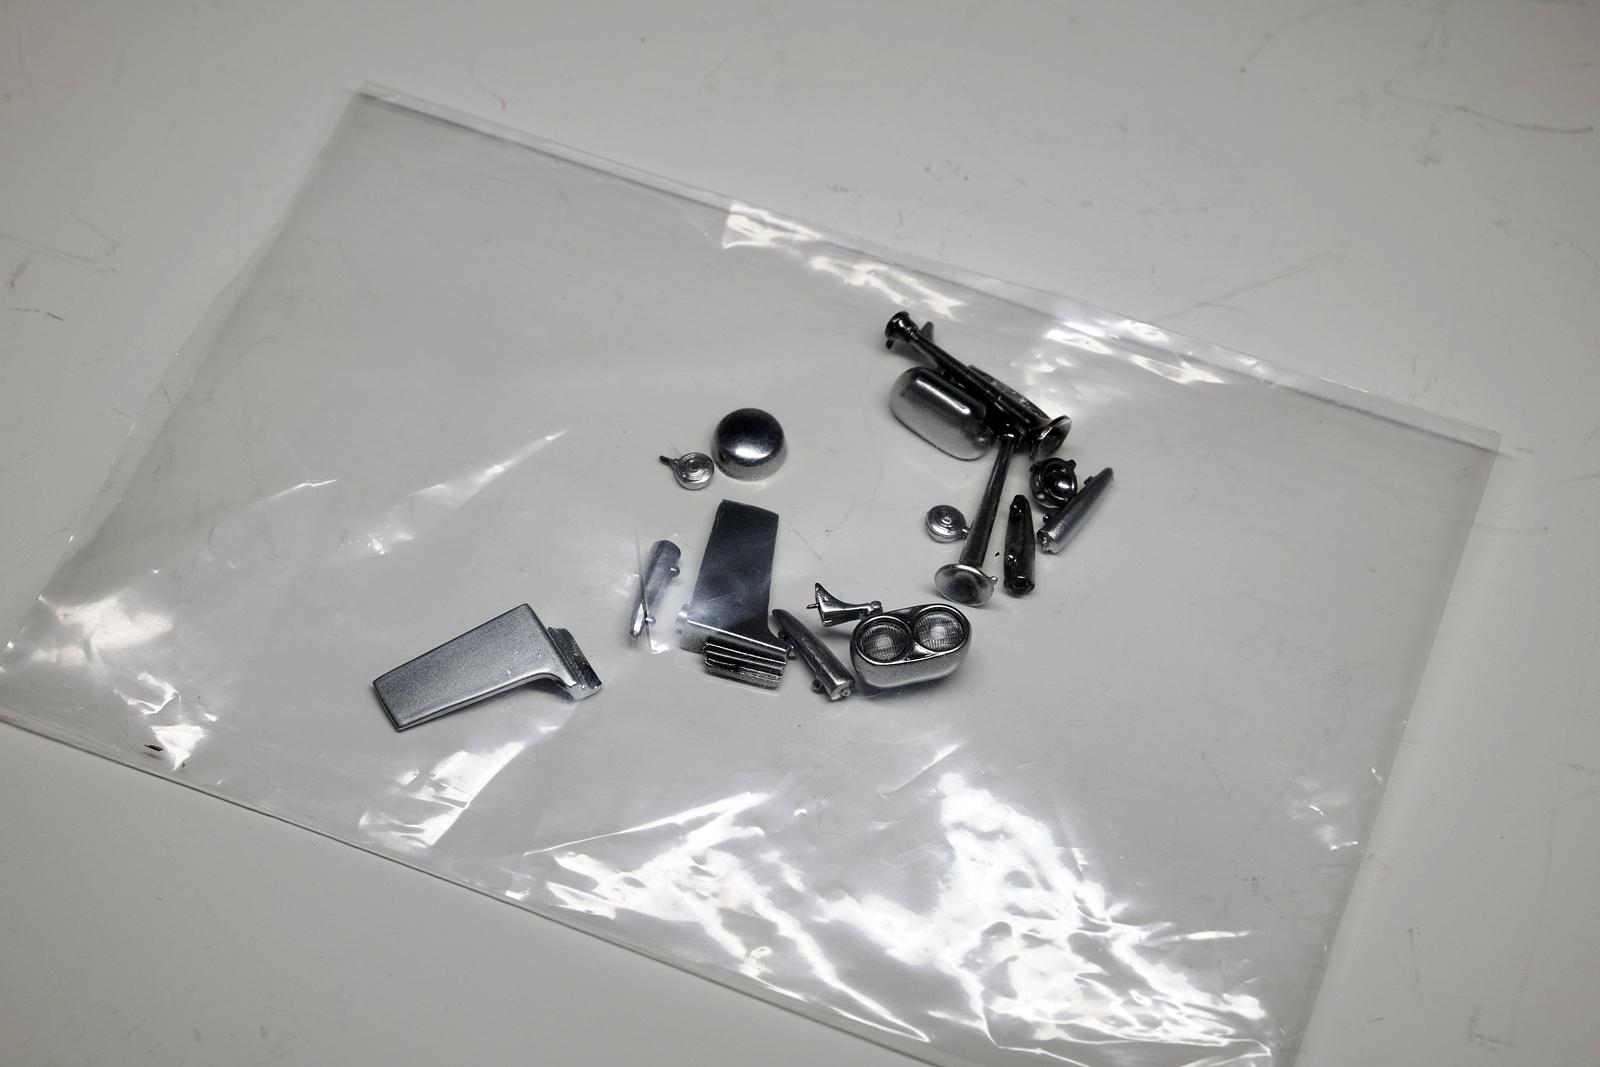
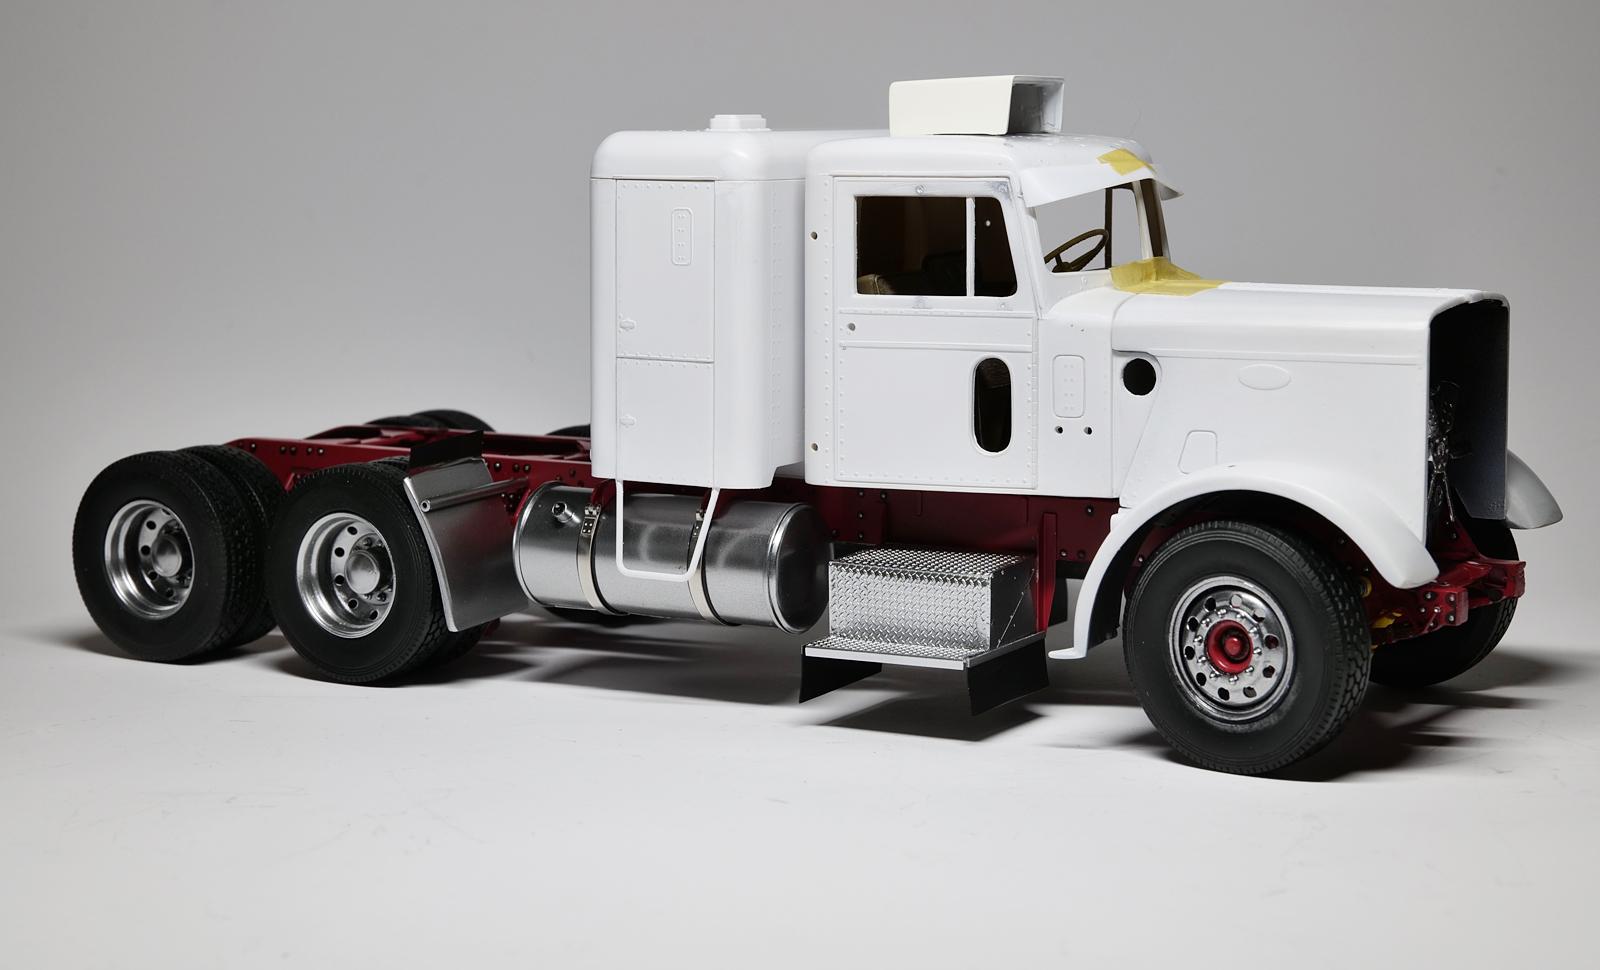
Ok, I decided not to repair the light position on the bumper based on the feedback from this forum. Lens covers were added as well as eight bolts to enhance the detail of the bumper. The yellow lights in the bumper are created using yellow beads and UV clear resin as pictured above. I find this method both fun and effective. Mud guard/battery box were added on each side. I decided to go simple, so they are just attached via glue (no fancy mounting bolts and such). My grille is still not done to my liking here. This time the finish came out too dark. Will rework. My intake pipe is add on top of the engine and this little piece took 4 separate painting sessions (four different colors were used). I thought this piece is important to stand out, so I spent more energy painting it. I am kept losing small parts while working on the truck. Very frustrating while trying to make progress as quickly as I can... I decided to use clear plastic bags for keeping ALL of the small parts and it seems to help. I know most of us use small storage bins, or boxes, etc. I think this is the one of the quickest methods so far. Put something in, and take something out, and I can do it quickly without opening a lid, or opening a box, etc. And I can see clearly what is in my bag shortening the search time. I think the white truck isn't bad here. Maybe I will paint the truck white. I am working on the air canister, but it is also made out of metal pipes... The truck is getting heavier and heavier, I am very worried about the front axle which may break! Should I let it go? I think I will.
-
Hey Jürgen, Yeah, you are right, I might be overreacting on something that isn't critical. I just went through whole exercise earlier on how everything must line up vertically and horizontally, and yet here I am with crooked parts... Thanks! Thanks for the encouragement, Steve. I sure don't want to sound like I am complaining about small things. Lately though, I have been doing lots of "fix on fix" where rework is getting somewhat tiresome. Thank you, Landon! I am following your W900 with interest and it is turning out to be one mean machine! Appreciated, stay safe and healthy, Gary!
-
Resto Rod Autocar
cifenet replied to Gary Chastain's topic in WIP: Model Trucks: Big Rigs and Heavy Equipment
You did fabulous work so far for sure! That Photo-etched gauges will definitely help adding the interior details too. -
Mack Superliner
cifenet replied to Jürgen M.'s topic in WIP: Model Trucks: Big Rigs and Heavy Equipment
Good progress, you got something special and unique going here. That tri-axle is looking fantastic~ -
Western Star 4900 FA plow truck
cifenet replied to BK9300's topic in WIP: Model Trucks: Big Rigs and Heavy Equipment
The cockpit looks super proper and well represented! Definitely worth the effort you are putting in to make it look good. -
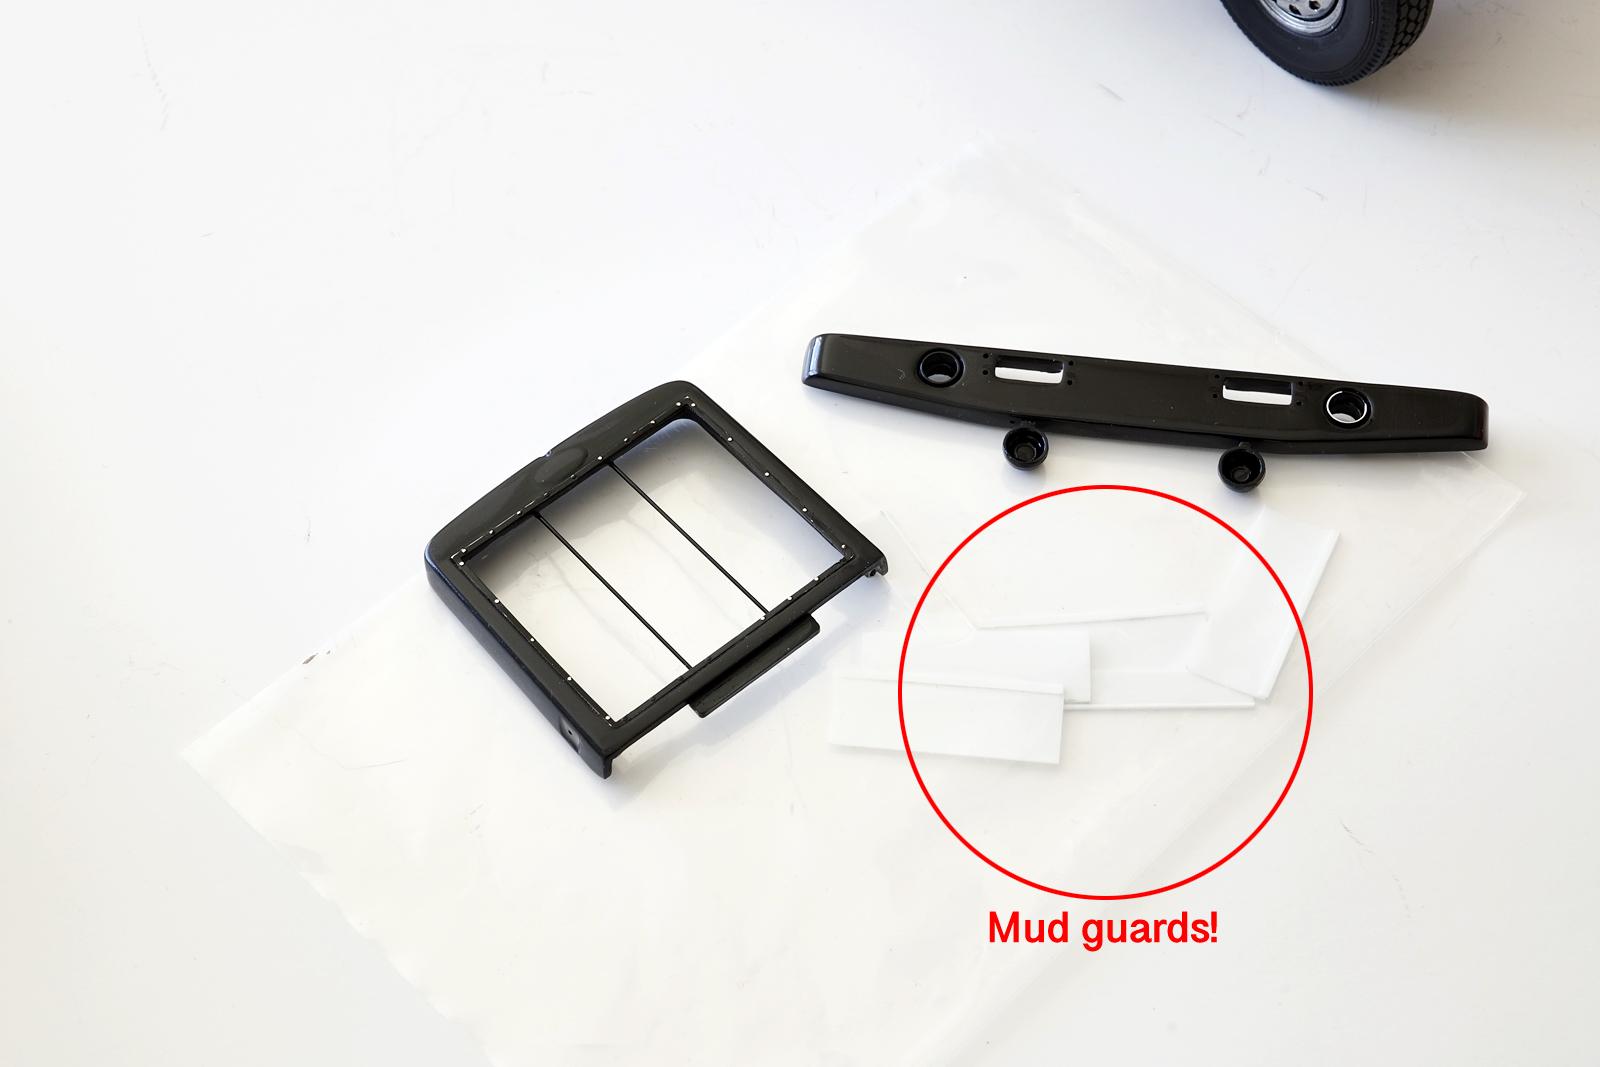
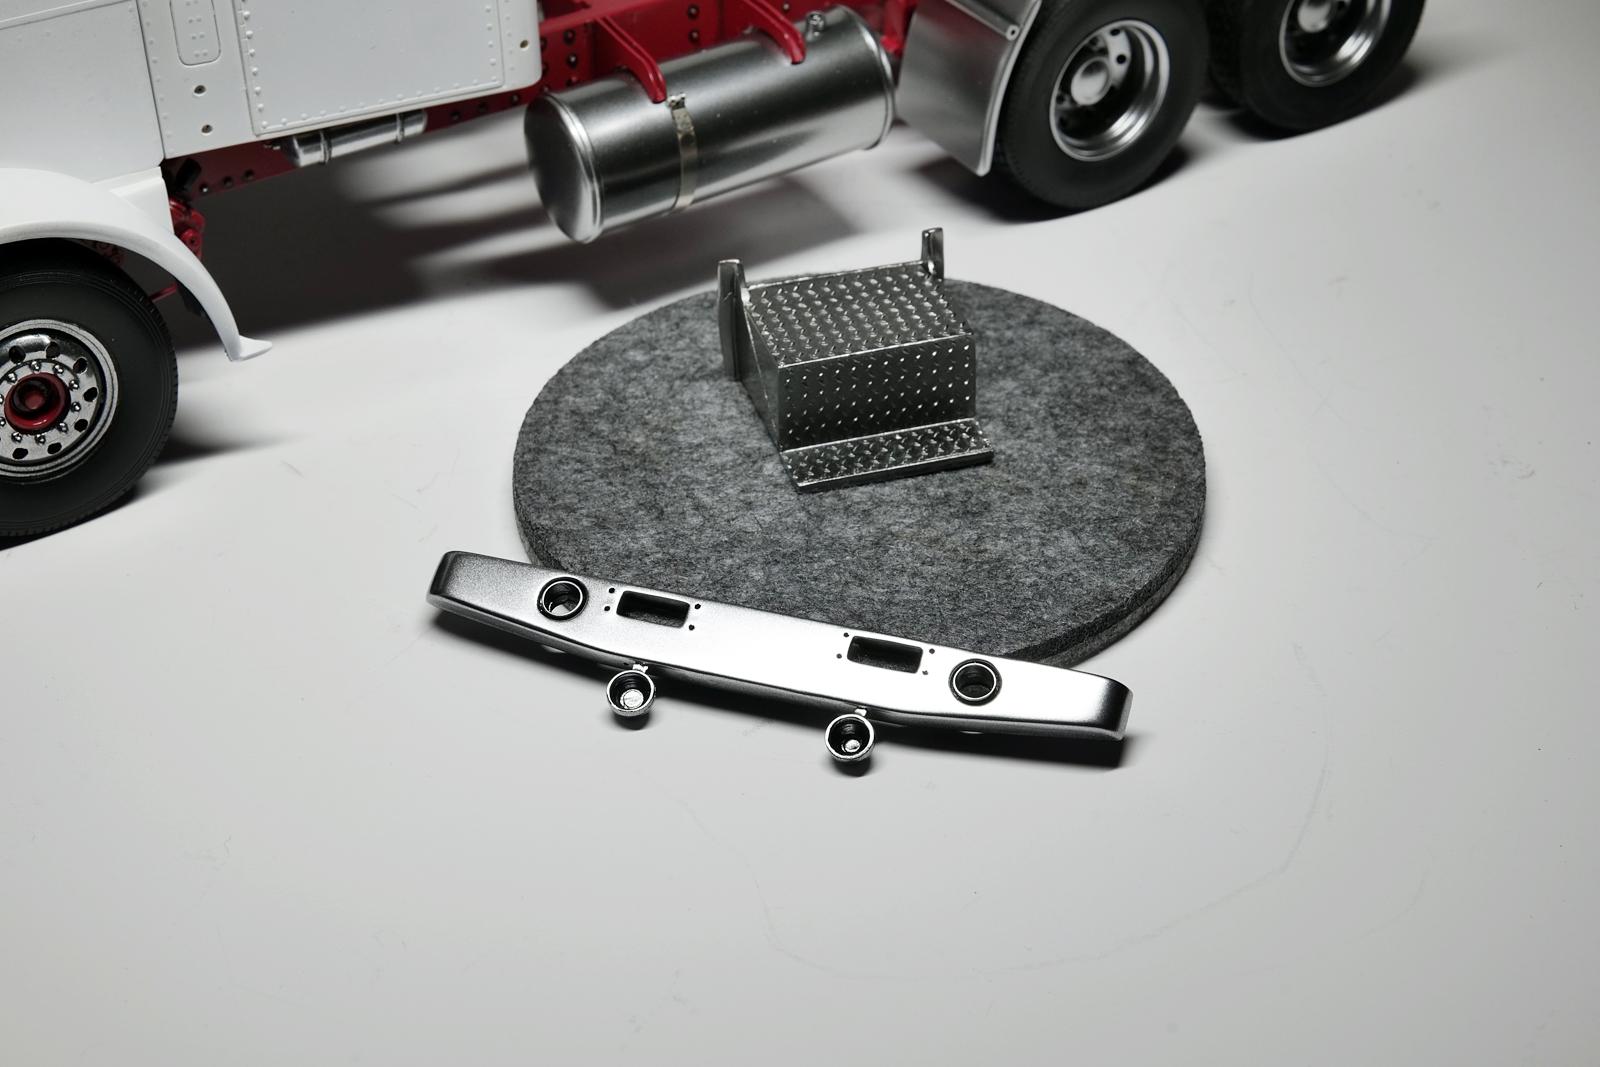
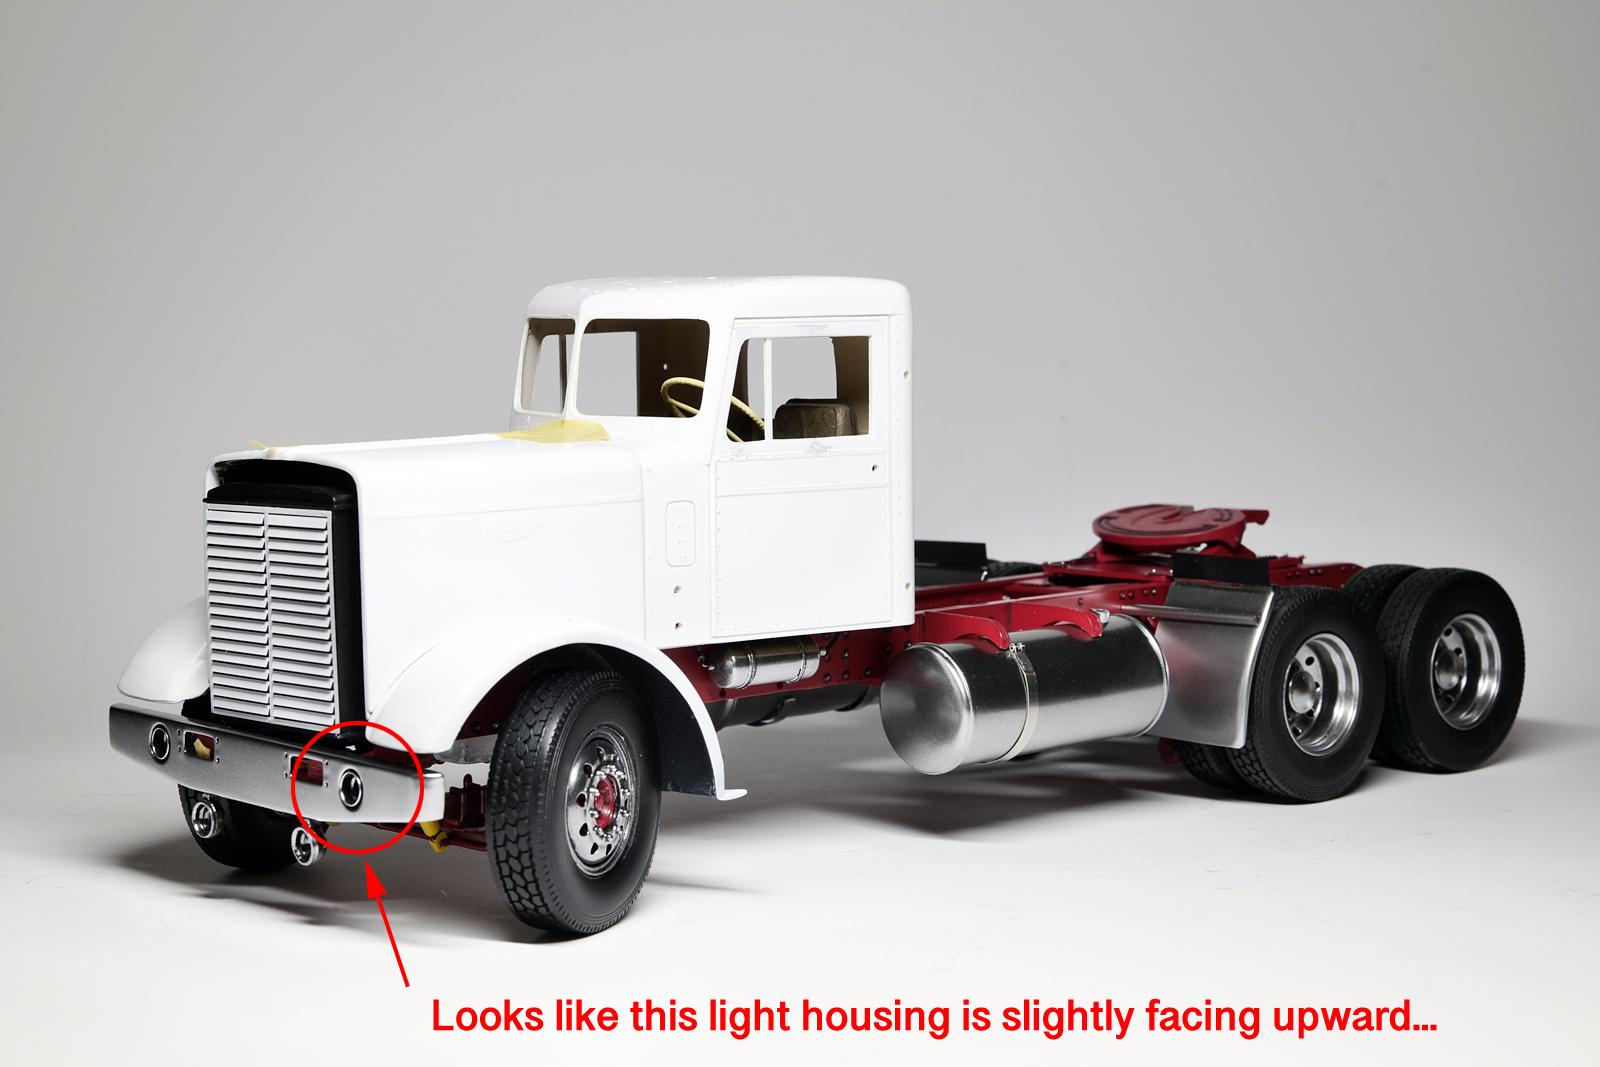
Found some time over the weekend to make little progress... This is my second attempt of building the grille. This time, I decided to attach everything before painting anything. I added my two vertical aluminum bar supports and also glued the photo-etched grille trim The grille trim actually had the vertical bars as well (three vertical bars), but I cut them off and used my aluminum tubing instead. This took multiple tries to get that trim piece to stay inside of that grille opening. And each try, I kept leaving visible glue residue... Applied a coat of black paint and then I polished the surface and will repeat the process till everything looks smooth. It is important have smooth base when painting metallic paints as top coat and I exclusively use black paint called "Ueno black" from Mr. Color which is considered a premium paint from Mr. Color. I must get the grille and the bumper right so some effort is being spent here to make them look "nice". As I mentioned in the earlier post, I want many mud guards throughout the truck, so I also made several of them using simple thin plastic sheet. Before it is too late, I had to confirm if all of the roof components are attaching correctly and properly. Not too bad, I thought. Also the kit didn't include fender guards for this truck (somewhat odd), I made them earlier using some plastic sheet and metal tubing. They are attached now. Mud guards I made were added on the top of the quarter fender and I used metal foil strips to hold them on top. Unfortunately, I find the foil strips to be distracting (too shiny with irregular reflections) here. I will keep them as is for a couple of days to see if I still like them or not. If not, I will replace the foil with clear glue to attach these top guards. The bumper has been painted and I also repainted the battery box to be more shiner. Found an issue with the bumper already and this type of problem really bothers me... Why didn't I see this before when I had so many chance to rework at it? Correcting will require some force to take the lamp housing out and gluing back. I hope I don't create more problems while doing that...
-
Jeff, again I appreciate you checking on this and providing helpful information. Right, the detail set is actually very useful and I enjoy using them on this truck. I just feel that I should be going through the pain of masking and painting each gauge and such. 😀 Regarding the deck plate, yes, I will try something with screen/metal mesh as the bottom which may also function as storage. Will need to do some thinking in that direction. Thanks again~
-
I think it is definitely different kind of fun when restoring something that was already built long time ago. I find the building experience both fun and difficult because sometimes the required parts are either in a bad shape or even missing... From the photo, looks like most of the parts are usable so that is a good thing. Interest to see how it will turn out!
-
Nice update, love the color and interior finish. Very classic indeed!
-
Kenworth 925 - Strato Models
cifenet replied to carsntrucks4you's topic in WIP: Model Trucks: Big Rigs and Heavy Equipment
That driver came out quite nice, good work. I can actually see his facial expression! -
Ol' School A Model
cifenet replied to freightshaker2's topic in WIP: Model Trucks: Big Rigs and Heavy Equipment
Did you wrap the bumper with foil? Came out quite nice. The exhaust pipe looks super cool, definitely will add the "mean/tough" look to the truck. -
Revell's Peterbilt 359: WIP
cifenet replied to David G.'s topic in WIP: Model Trucks: Big Rigs and Heavy Equipment
Beautiful metallic finish on the truck! -
Western Star 4900 FA plow truck
cifenet replied to BK9300's topic in WIP: Model Trucks: Big Rigs and Heavy Equipment
Gorgeous details and great choice to simulate the air line plugs! -
Resto Rod Autocar
cifenet replied to Gary Chastain's topic in WIP: Model Trucks: Big Rigs and Heavy Equipment
Looking smooth and clean!