cifenet
-
Posts
856 -
Joined
-
Last visited
Content Type
Profiles
Forums
Events
Gallery
Everything posted by cifenet
-

KW aerodyne cabover
cifenet replied to Bronzekeg's topic in Model Trucks: Big Rigs and Heavy Equipment
Too cool to look at! Fantastic work, I think the build itself must have been challenging, but you made it look perfect and easy for with this one. -
Super massive looking, I am thinking it is really big and heavy in person! Nice choice of color, and you did an excellent job making it look awesome!
-
1/43 1971 Peterbilt 359 Watkins Motor Lines
cifenet replied to Pete68's topic in Model Trucks: Big Rigs and Heavy Equipment
Nicely done! Being 1/43 scale, it has all the details compared to its comparable 1/25th scale 359! I think it even has a better stance! Good job! -
Fantastic details and quality build. Carbon fiber decals look great too. Well done, I really enjoyed seeing all the detail work here as well.
-
Great color and paint work. Good job!
- 770 replies
-
- 1
-

-
- stalled builds
- quick builds
- (and 2 more)
-
Retro Restoration
cifenet replied to cdntrucking's topic in WIP: Model Trucks: Big Rigs and Heavy Equipment
I think repairing/restoring project is different type of fun build by itself. The setup is surely impressive, you restored very nicely and also kept them to be! -
Western Star 4900 FA plow truck
cifenet replied to BK9300's topic in WIP: Model Trucks: Big Rigs and Heavy Equipment
Excellent work adding all the right details! All of the fabrication work and custom parts look extremely sharp and accurate. Bravo~ -
Great looking GTO! Nice work~
-
That is some difficult surgery and it came out really nice! Good work~
-
’72 Dodge Demon Drag Racer 1/25 scale
cifenet replied to AmericanMuscleFan's topic in WIP: Drag Racing Models
Just incredible! The fabrication work is amazing and that steering is looking sooooooo good right now. Thanks for sharing these activities. -
Fun build project and repairing activities are always intriguing to me. Keep up the good work!
-
Great start on this one, things started to look good already!
-
Thanks Brian for your interest! Been following your snow plow, now that is pure entertainment for modelers like us!
-
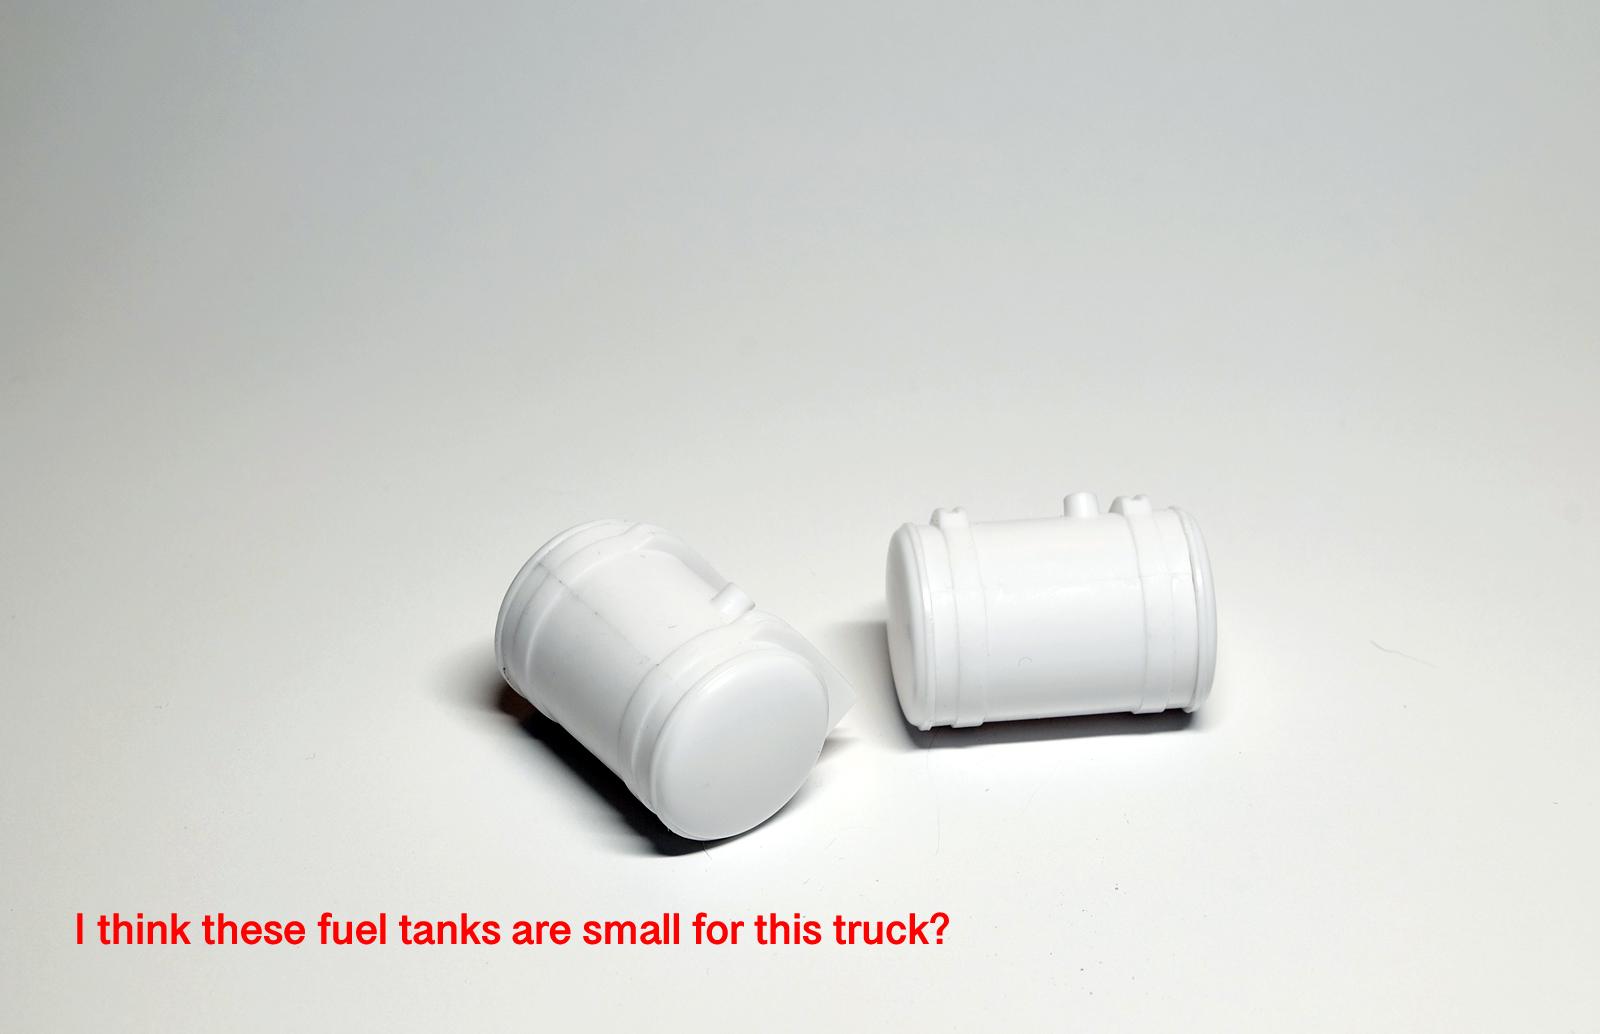
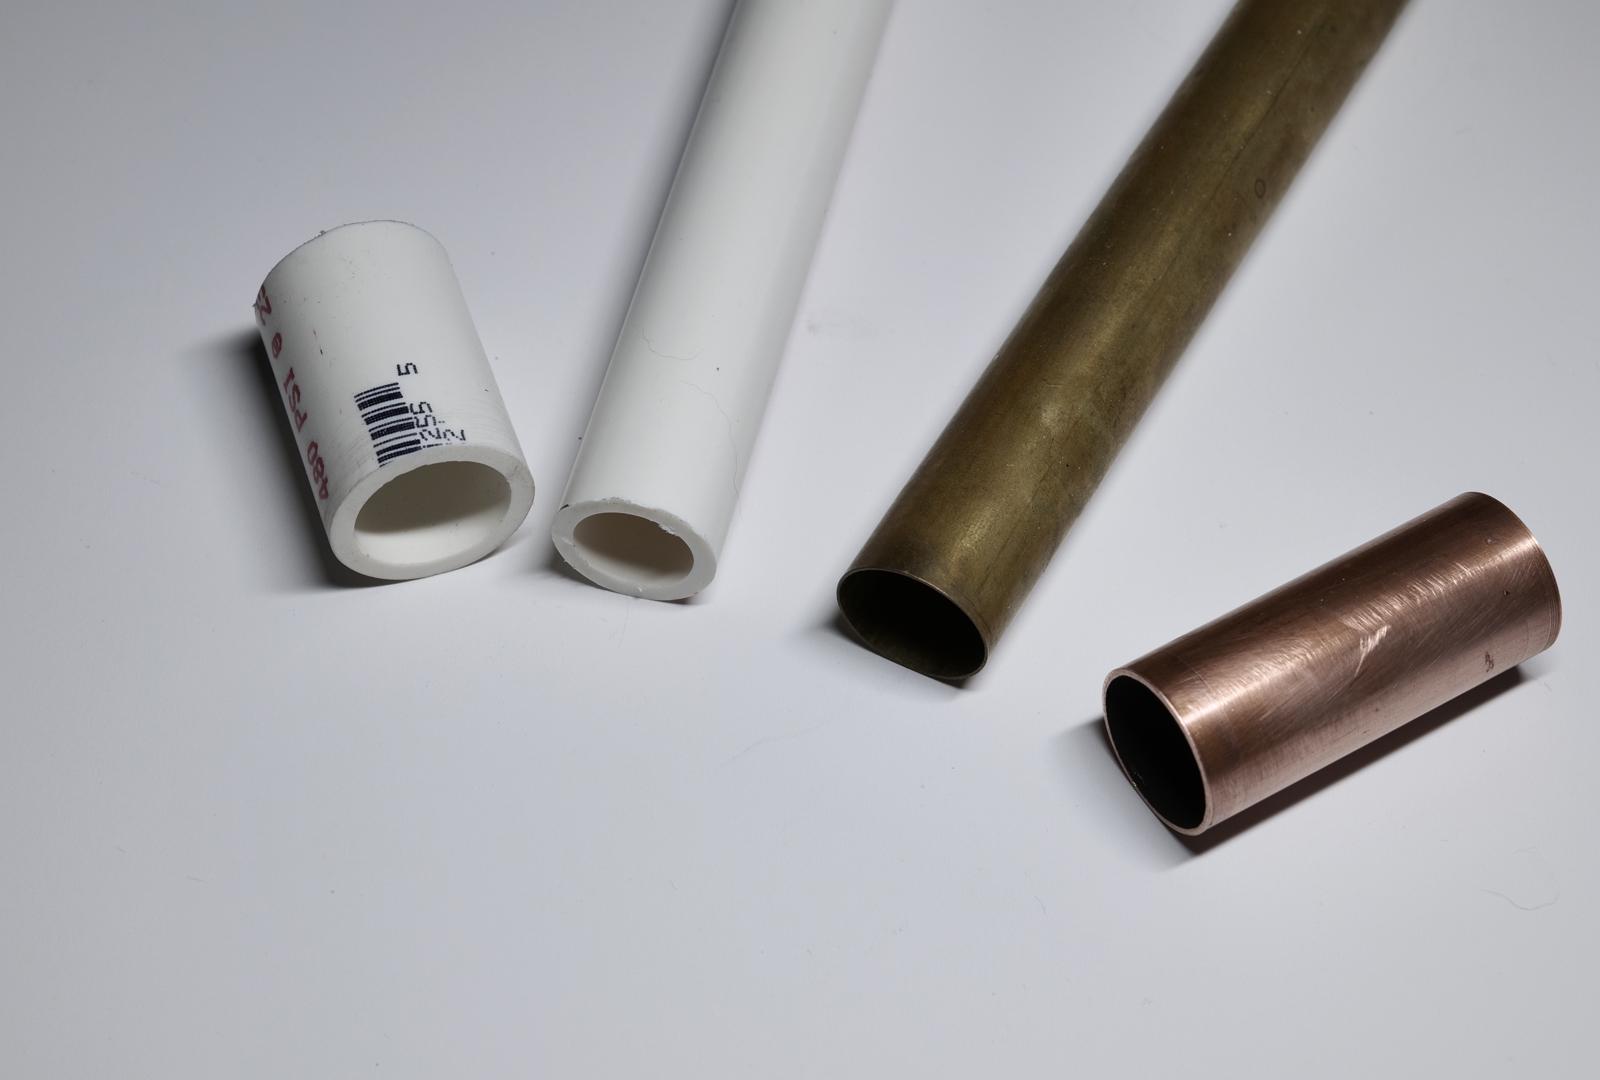
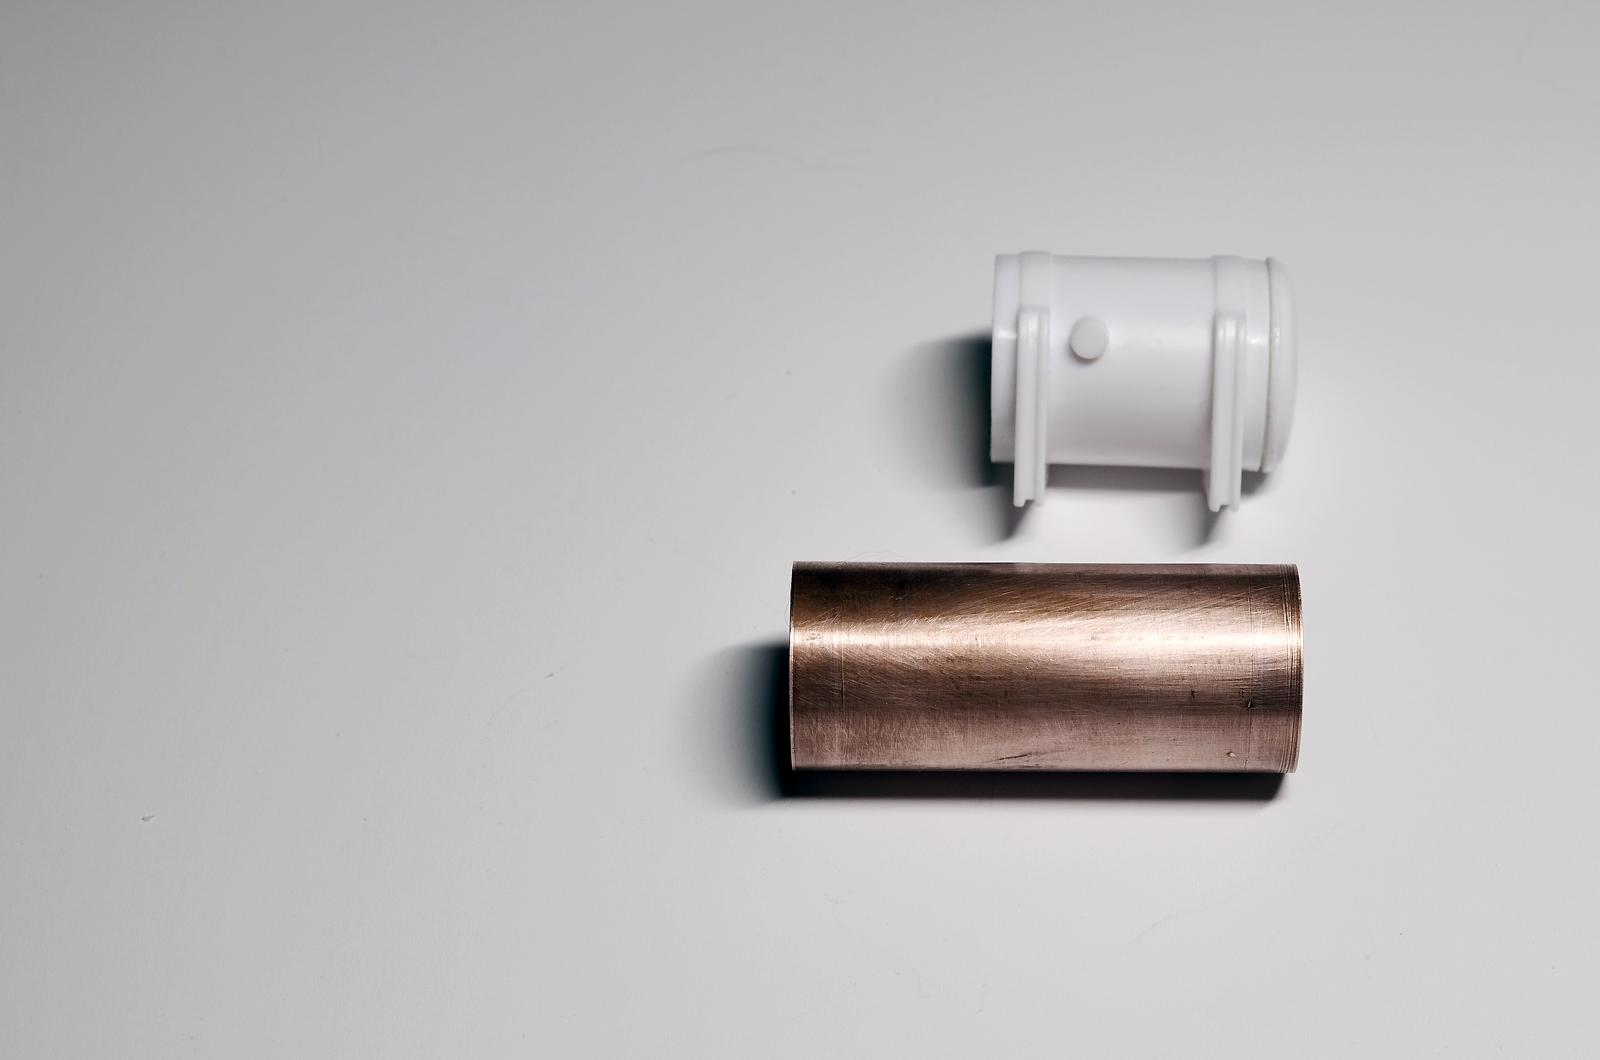
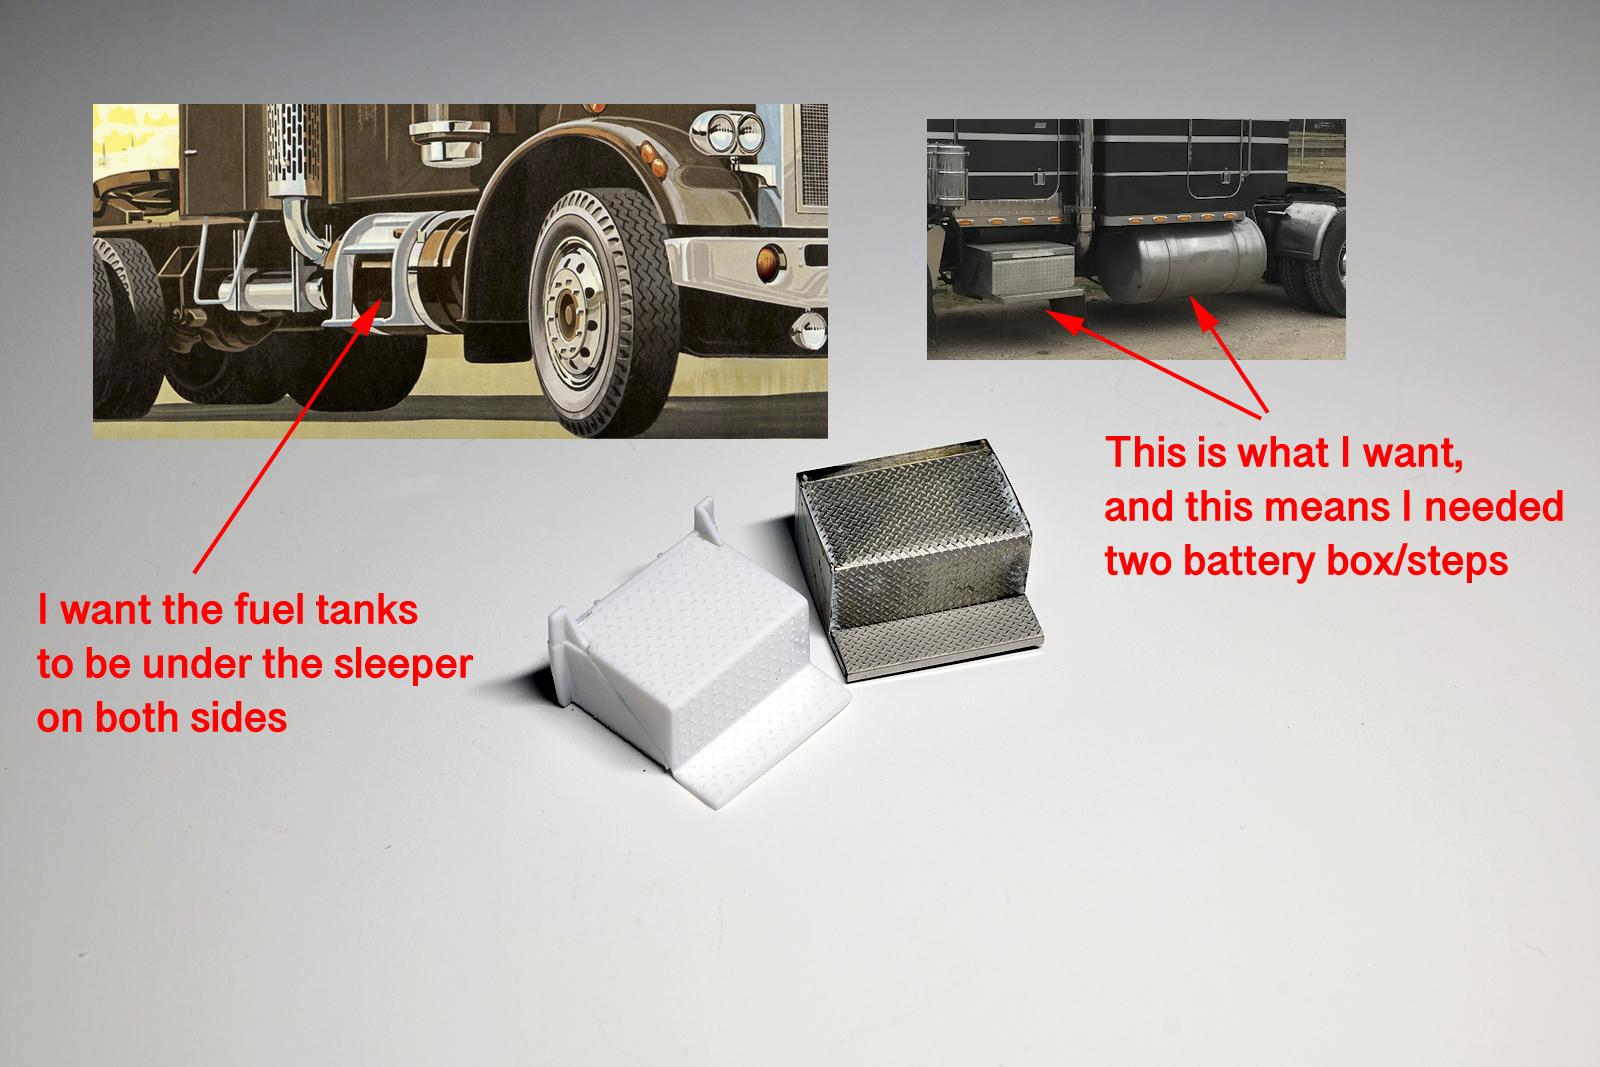
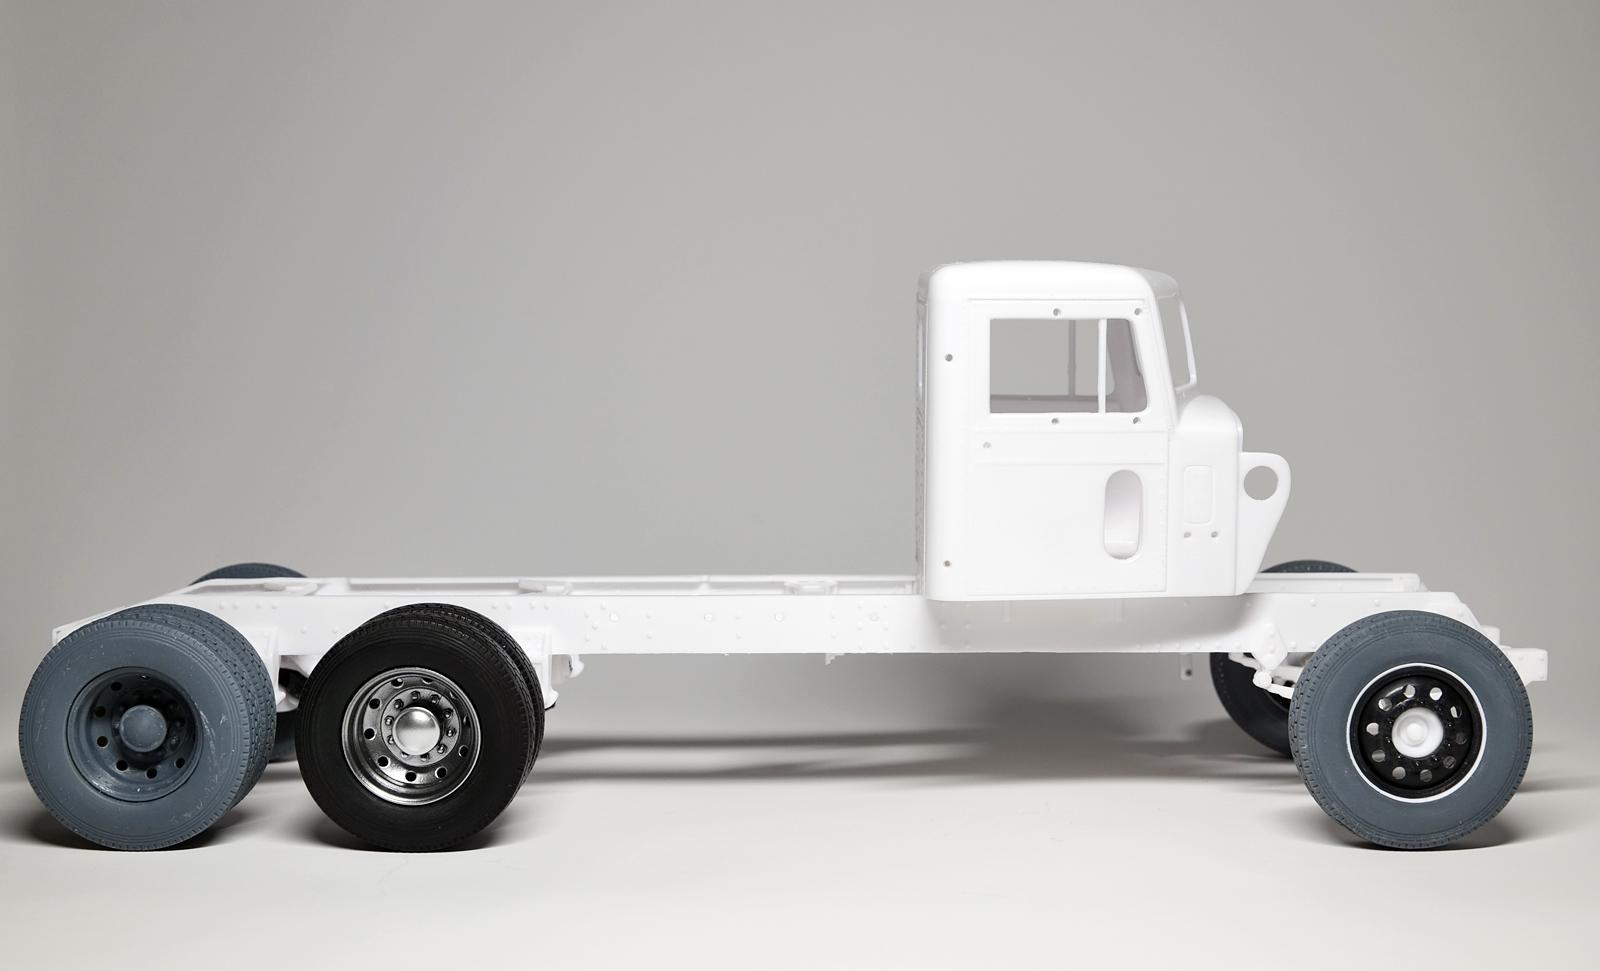
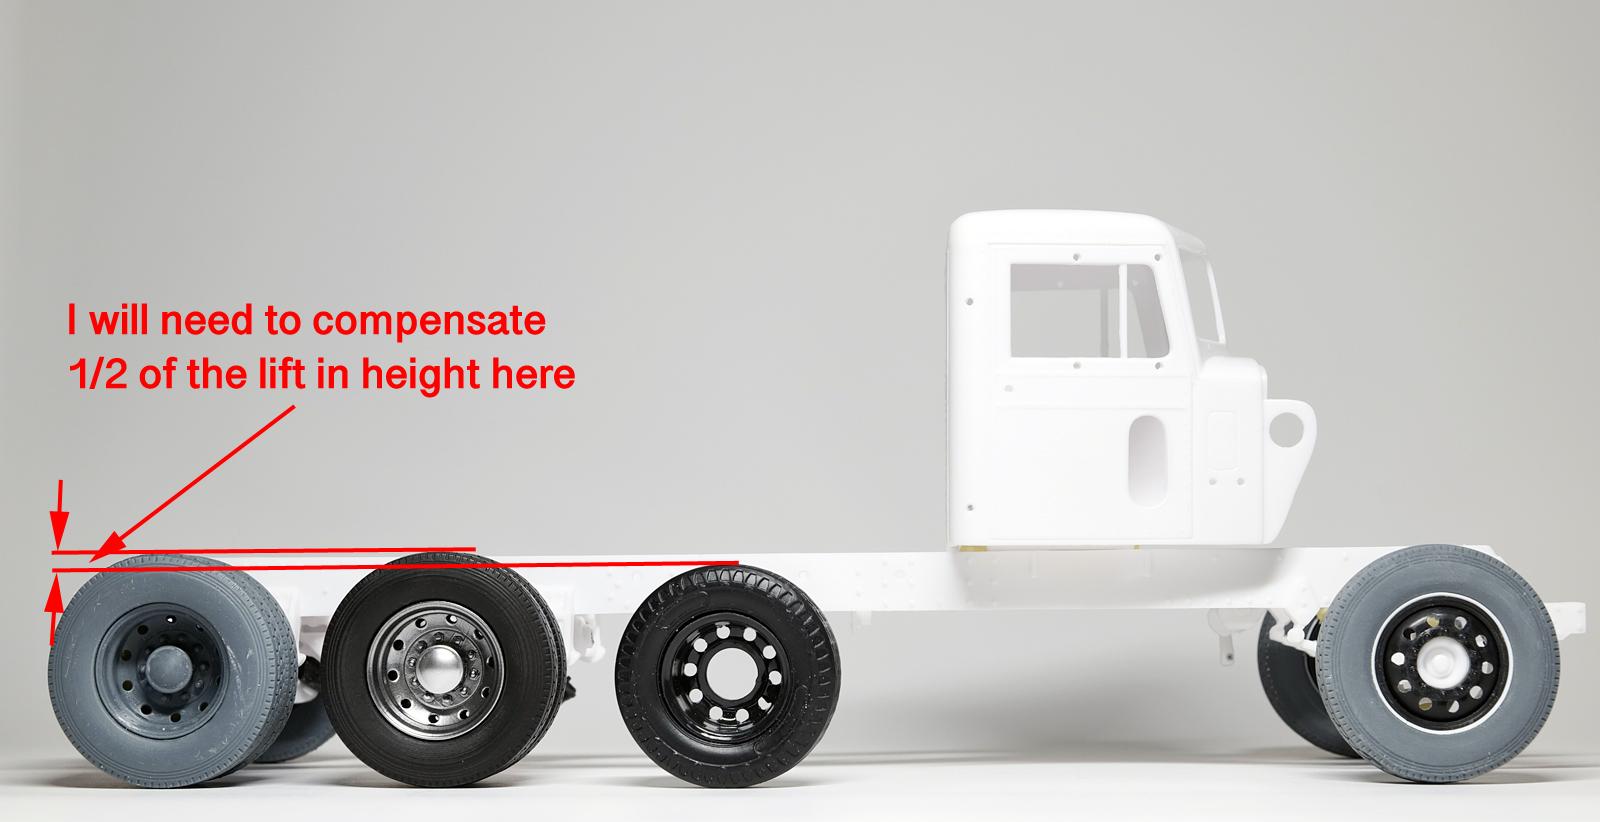
As indicated earlier, these "small" fuel tanks are my next topic to address and I also have done some solution seeking on them. I searched my entire house looking for "replace-able" tank cylinder shaped materials. Once I found several potential materials, I spent time with them to see how I would build the truck using them. Ultimately, I went with this copper pipe to build my new tanks and this is the size I would like to have. Lengthening it to be around 2 1/4" inches. Anything longer, it may interfere with rear wheels so I had to be careful. Another change I am pursuing is to position both fuel tanks (one each side) to be further behind, to be under the sleeper. The original configuration from the kit is to have the fuel tank positioned directly under the cab on the passenger side only. A climbing step is included (as shown above in the cover art) so the passenger can climb up into the cab. My setup will have two battery box/steps under the cab, and both tanks mounted under the sleeper (see upper right in the photo). I will add this P/E version of the batter box to accomplish just that. A minor fix needed- the truck is sitting higher than I anticipated due to the late additional of the bigger wheels. I will have to lower the stance by noted in the photo (1/2 of the size difference) and then I can move on to the actual assembly of the truck...

-
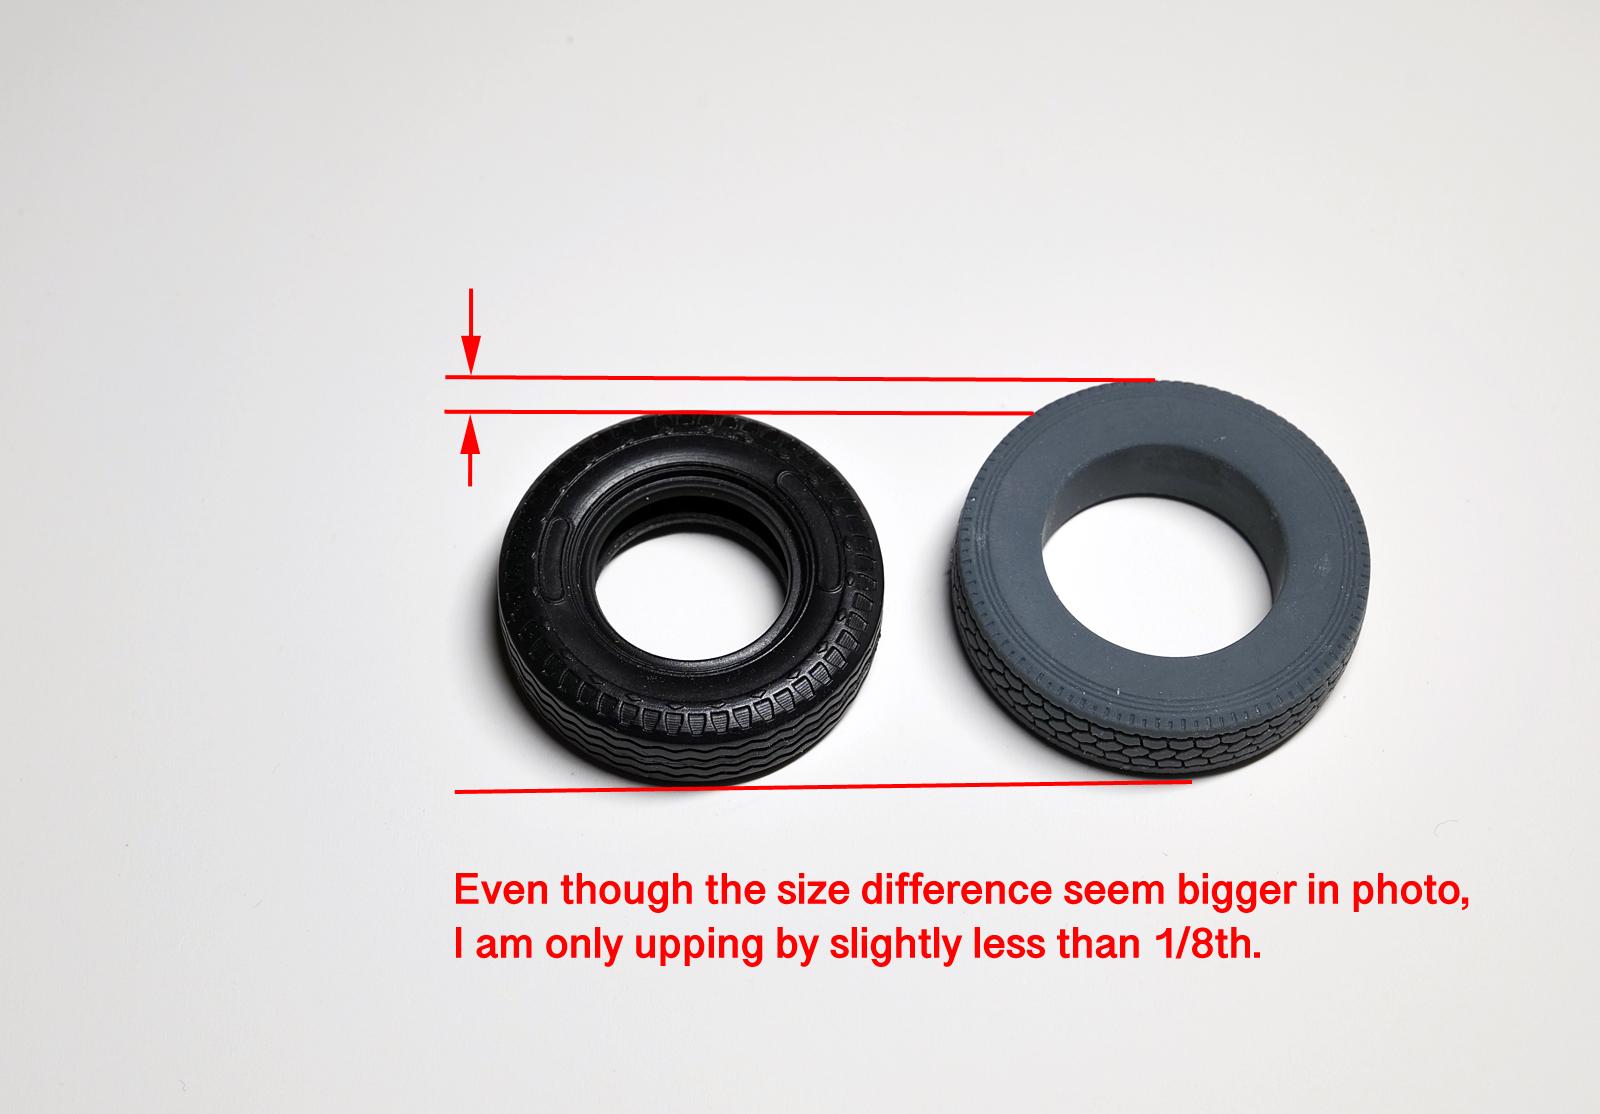
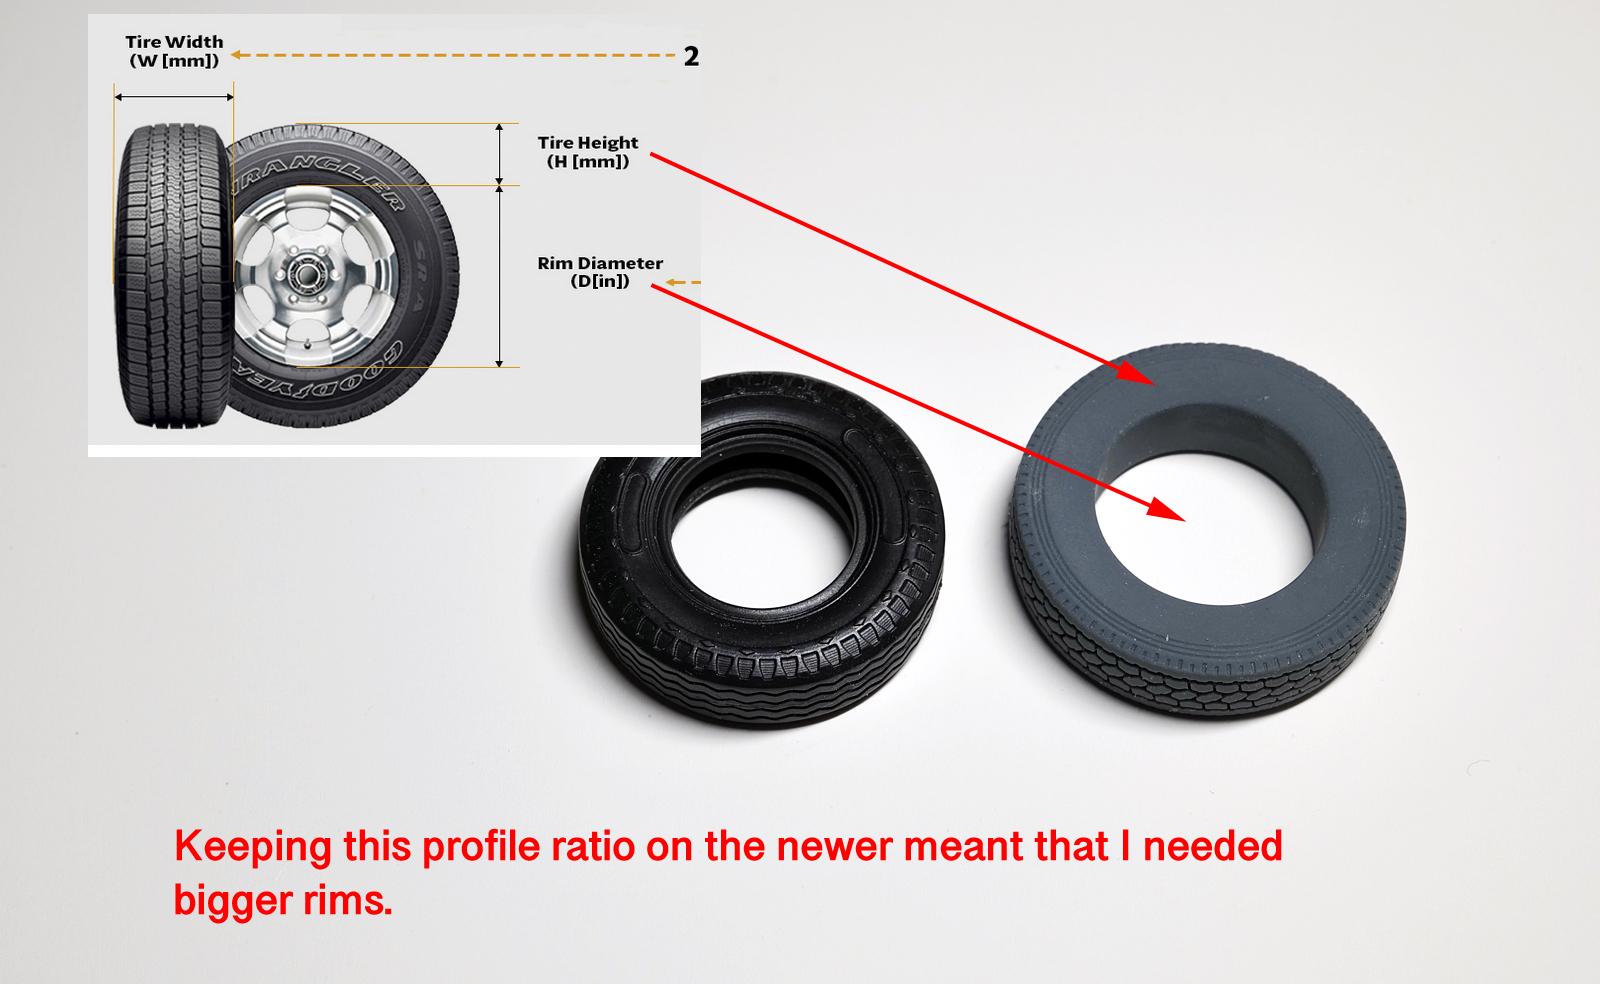
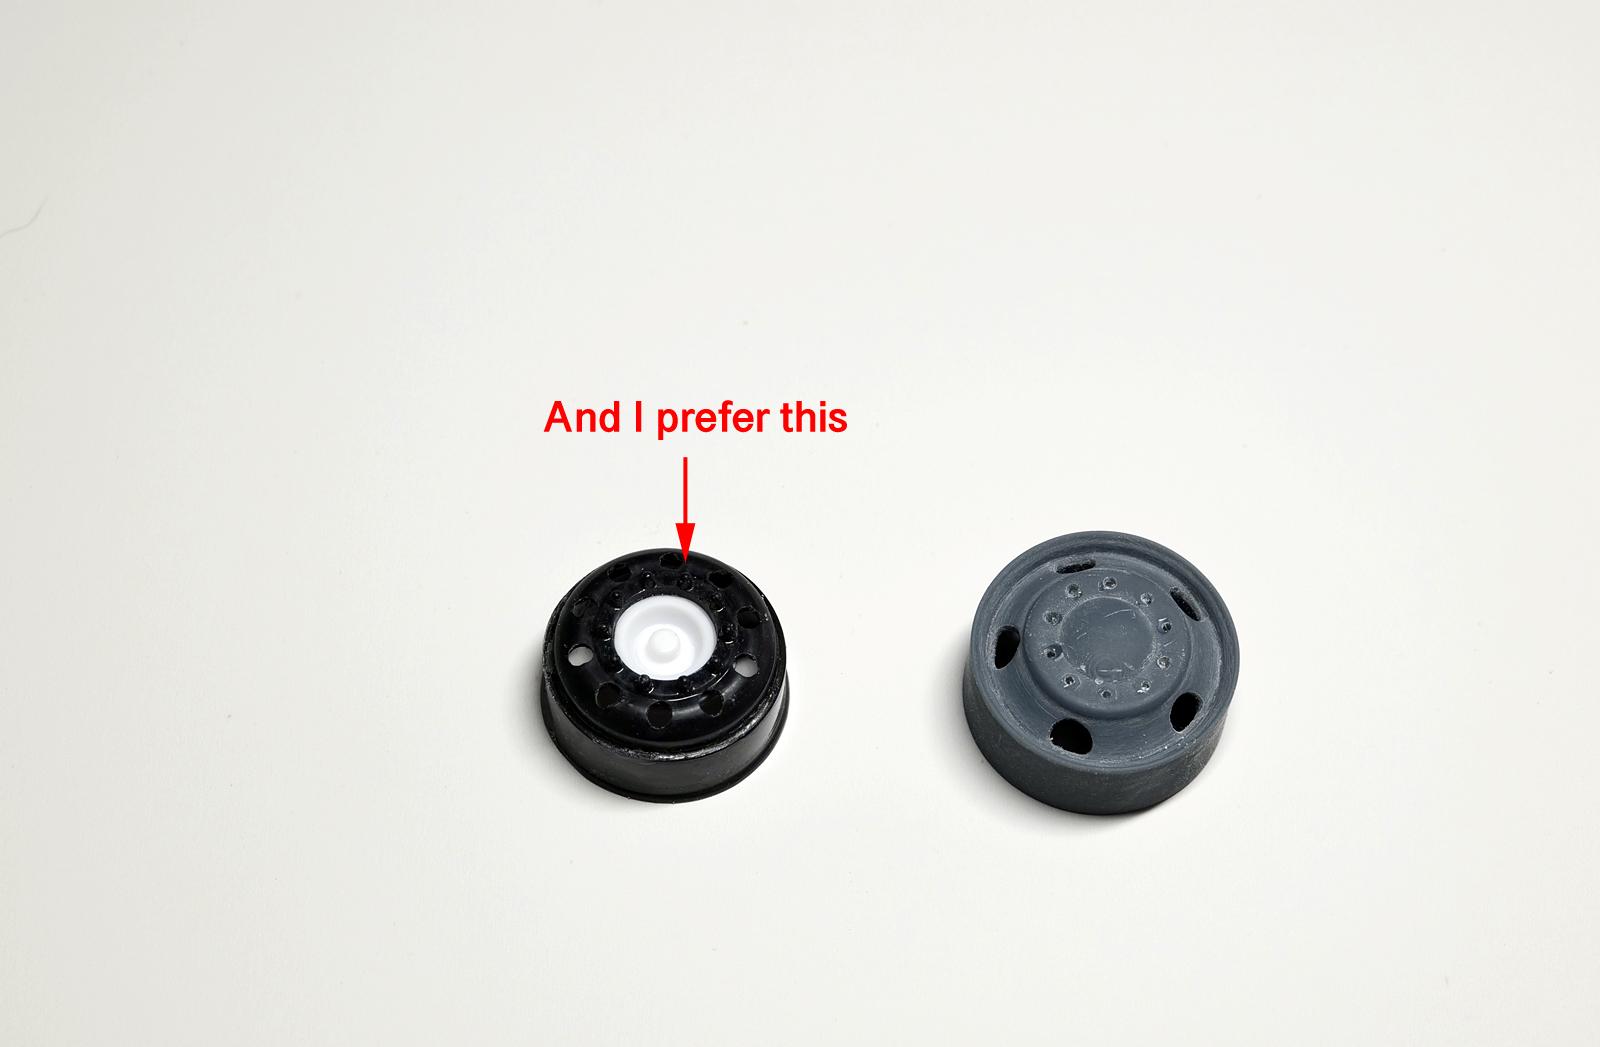
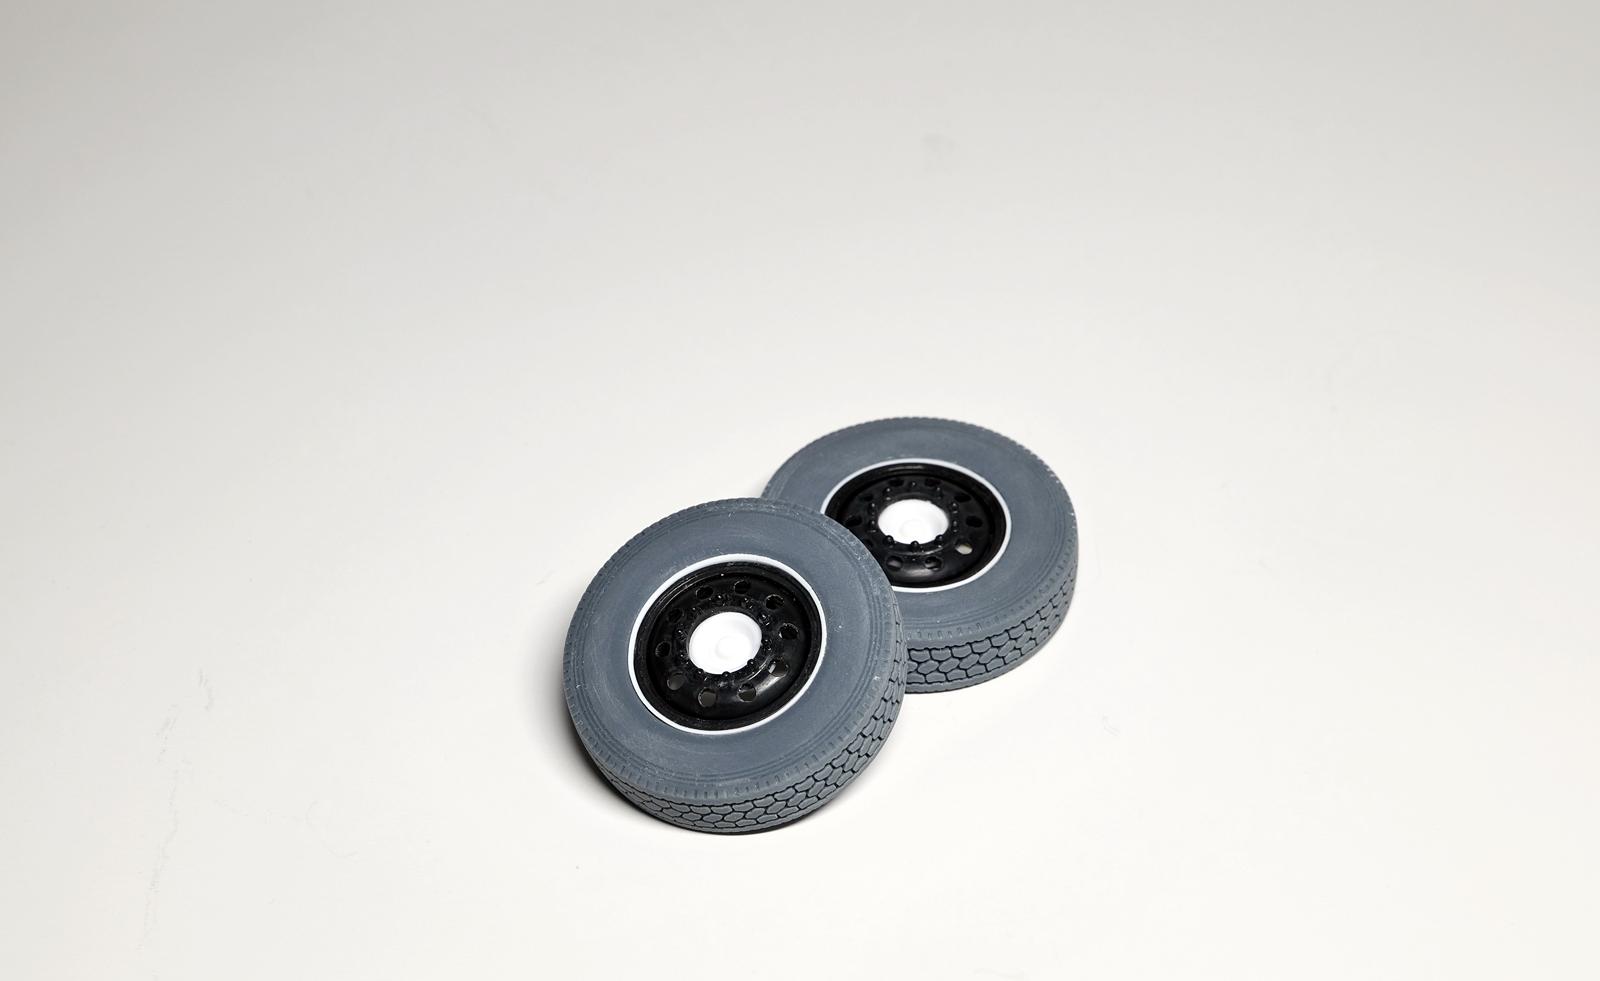
I am trying to figure out how I would address the CHALLENGE 5 dealing with the wheels being slightly small. Definitely not a deal breaker, but I began contemplating a suitable solution for it. I really wanted to use my 3D printed wheels on this truck just because I can make them wider and taller, making the wheel size proportionally pleasing to me. It really boils down to increasing 1/8th of an inch in size in height and stretching 1/16th wider. After some careful consideration, I decided not to use the 5 hole rimes that I originally planned for the truck, but to go with stock wheels provided by ATM in the kit. Believe or not, I thought about this problem for awhile and at the end, the AMT's front wheels looked much more pleasing to my liking. Going back to the tires, this is the exact size I felt "correct" to my eyes (shown here on the right side). I wanted to keep the tire height as shown and this means I needed bigger rims to fit them. Unfortunately, ATM's stock rims are too small for these resized tires. After trying multiple concepts/prototypes, I ended up extending the edge of the rim by adding a strip of styrene. I chose this method as this was the simplest and easiest for me to implement. Luckily, the rims fit very nicely and I am hoping no one would know what I did here once I complete the model.
-
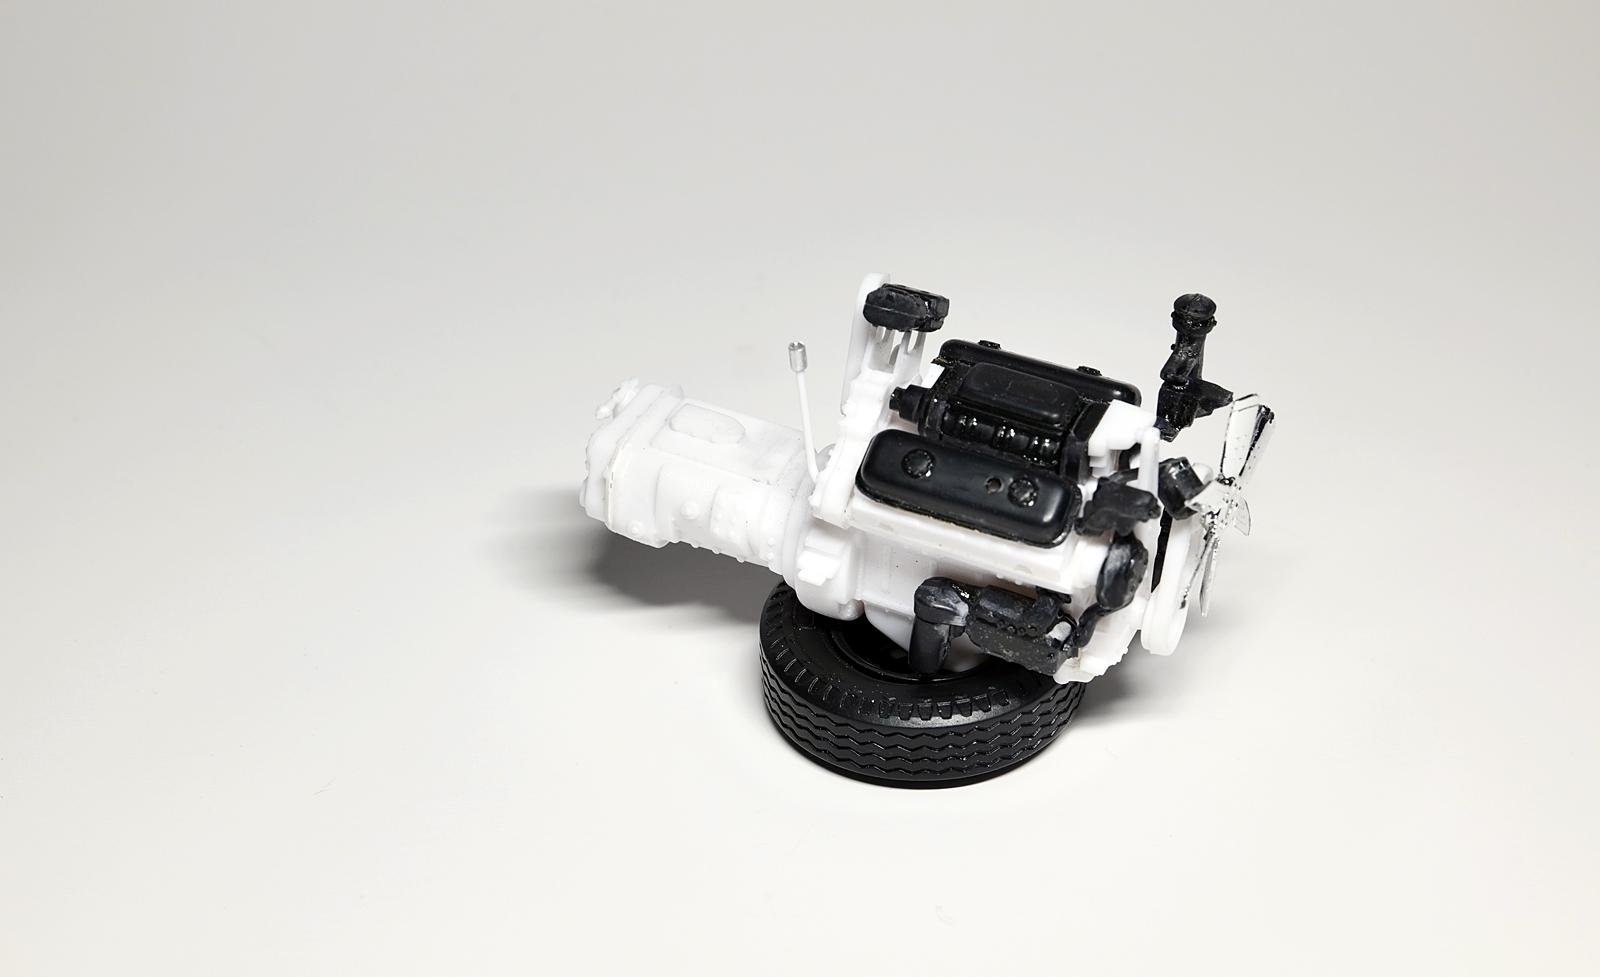
Thanks Steve, This is some good reading!! After reading this, I am starting to feel that I should not be too concerned with what color I chose here. Very good, Jim! I am leaning toward "green" now, but I still haven't commit on the color just yet. At the end, I don't know if this would be looking good in white considering the overall look/feel of the truck. Personally, I think green is more acceptable, but that is because probably I have seen more green examples of this engine.
-
Farm Floater Truck 1/24th scale
cifenet replied to Randy D's topic in WIP: Model Trucks: Big Rigs and Heavy Equipment
Wow, purely amazing! This is the definition of scale building! -
Revell's Peterbilt 359: WIP
cifenet replied to David G.'s topic in WIP: Model Trucks: Big Rigs and Heavy Equipment
Looking good so far, I think your test build stand of truck looks very proper! Love the color on the tanks too. -
Mack and heavy equipment project
cifenet replied to TrucksMT's topic in WIP: Model Trucks: Big Rigs and Heavy Equipment
The plumbing work is excellent! Love the intricate details you are adding here. Awesome build so dar, this is going to be fantastic! -
My 1st Big Rig "Blue Collar"
cifenet replied to James2's topic in WIP: Model Trucks: Big Rigs and Heavy Equipment
Incredible fabrication work! The cab looks very good and I like how you addressed the seam line and corrected the headlight position. The customization looks amazing also. Cannot wait to see this completed! -
FDNY Wrecker
cifenet replied to Scott Eriksen's topic in WIP: Model Trucks: Big Rigs and Heavy Equipment
Beautiful work on this, everything looks proper and superb. Great finish as well~ -
Thanks Steve, I was hoping to hear “yeah, green is ok” As I make progress there are additional places where some problem-solving effort is still required, but I think that makes building AMT kits so much memorable.
-
Very complex work you have done here. The engine bay looks like a photo from a spaceship with all the custom parts. Fantastic effort so far, definitely fun watching it!
-
KW 86 inch Aerodyne
cifenet replied to k100's topic in WIP: Model Trucks: Big Rigs and Heavy Equipment
I like the level of details and your skill to improve just about everything in this kit. I can already see this is going to be an awesome truck at the end. -
1962 Marmon-Herrington HDT
cifenet replied to Jürgen M.'s topic in WIP: Model Trucks: Big Rigs and Heavy Equipment
Beautiful 3D drawings and impressive building progress using them. keep it up, it definitely unique and intriguing work!