Duddly01
-
Posts
1,048 -
Joined
-
Last visited
Content Type
Profiles
Forums
Events
Gallery
Everything posted by Duddly01
-
Body, interior and chassis joined. Still some detailing to do. I am honestly not totally happy with this build but I think the family member whose car this is a replica of will like it well enough.

-
Thank you.
-
I have gotten more work on the corvette. On the downhill stretch now.
-
The painting on this model has fought me tooth and nail. I am crying uncle and going with what I have gotten. I am not happy with it but it wins. I al still going to wet sand and polish the 2k clear. I have determined there is something in how they made the metallic blue body bleeding through. I took it back to bare plastic, primed and it still crinkled. I used an automotive sealing primer on the hood and it acted better but not perfect.
-
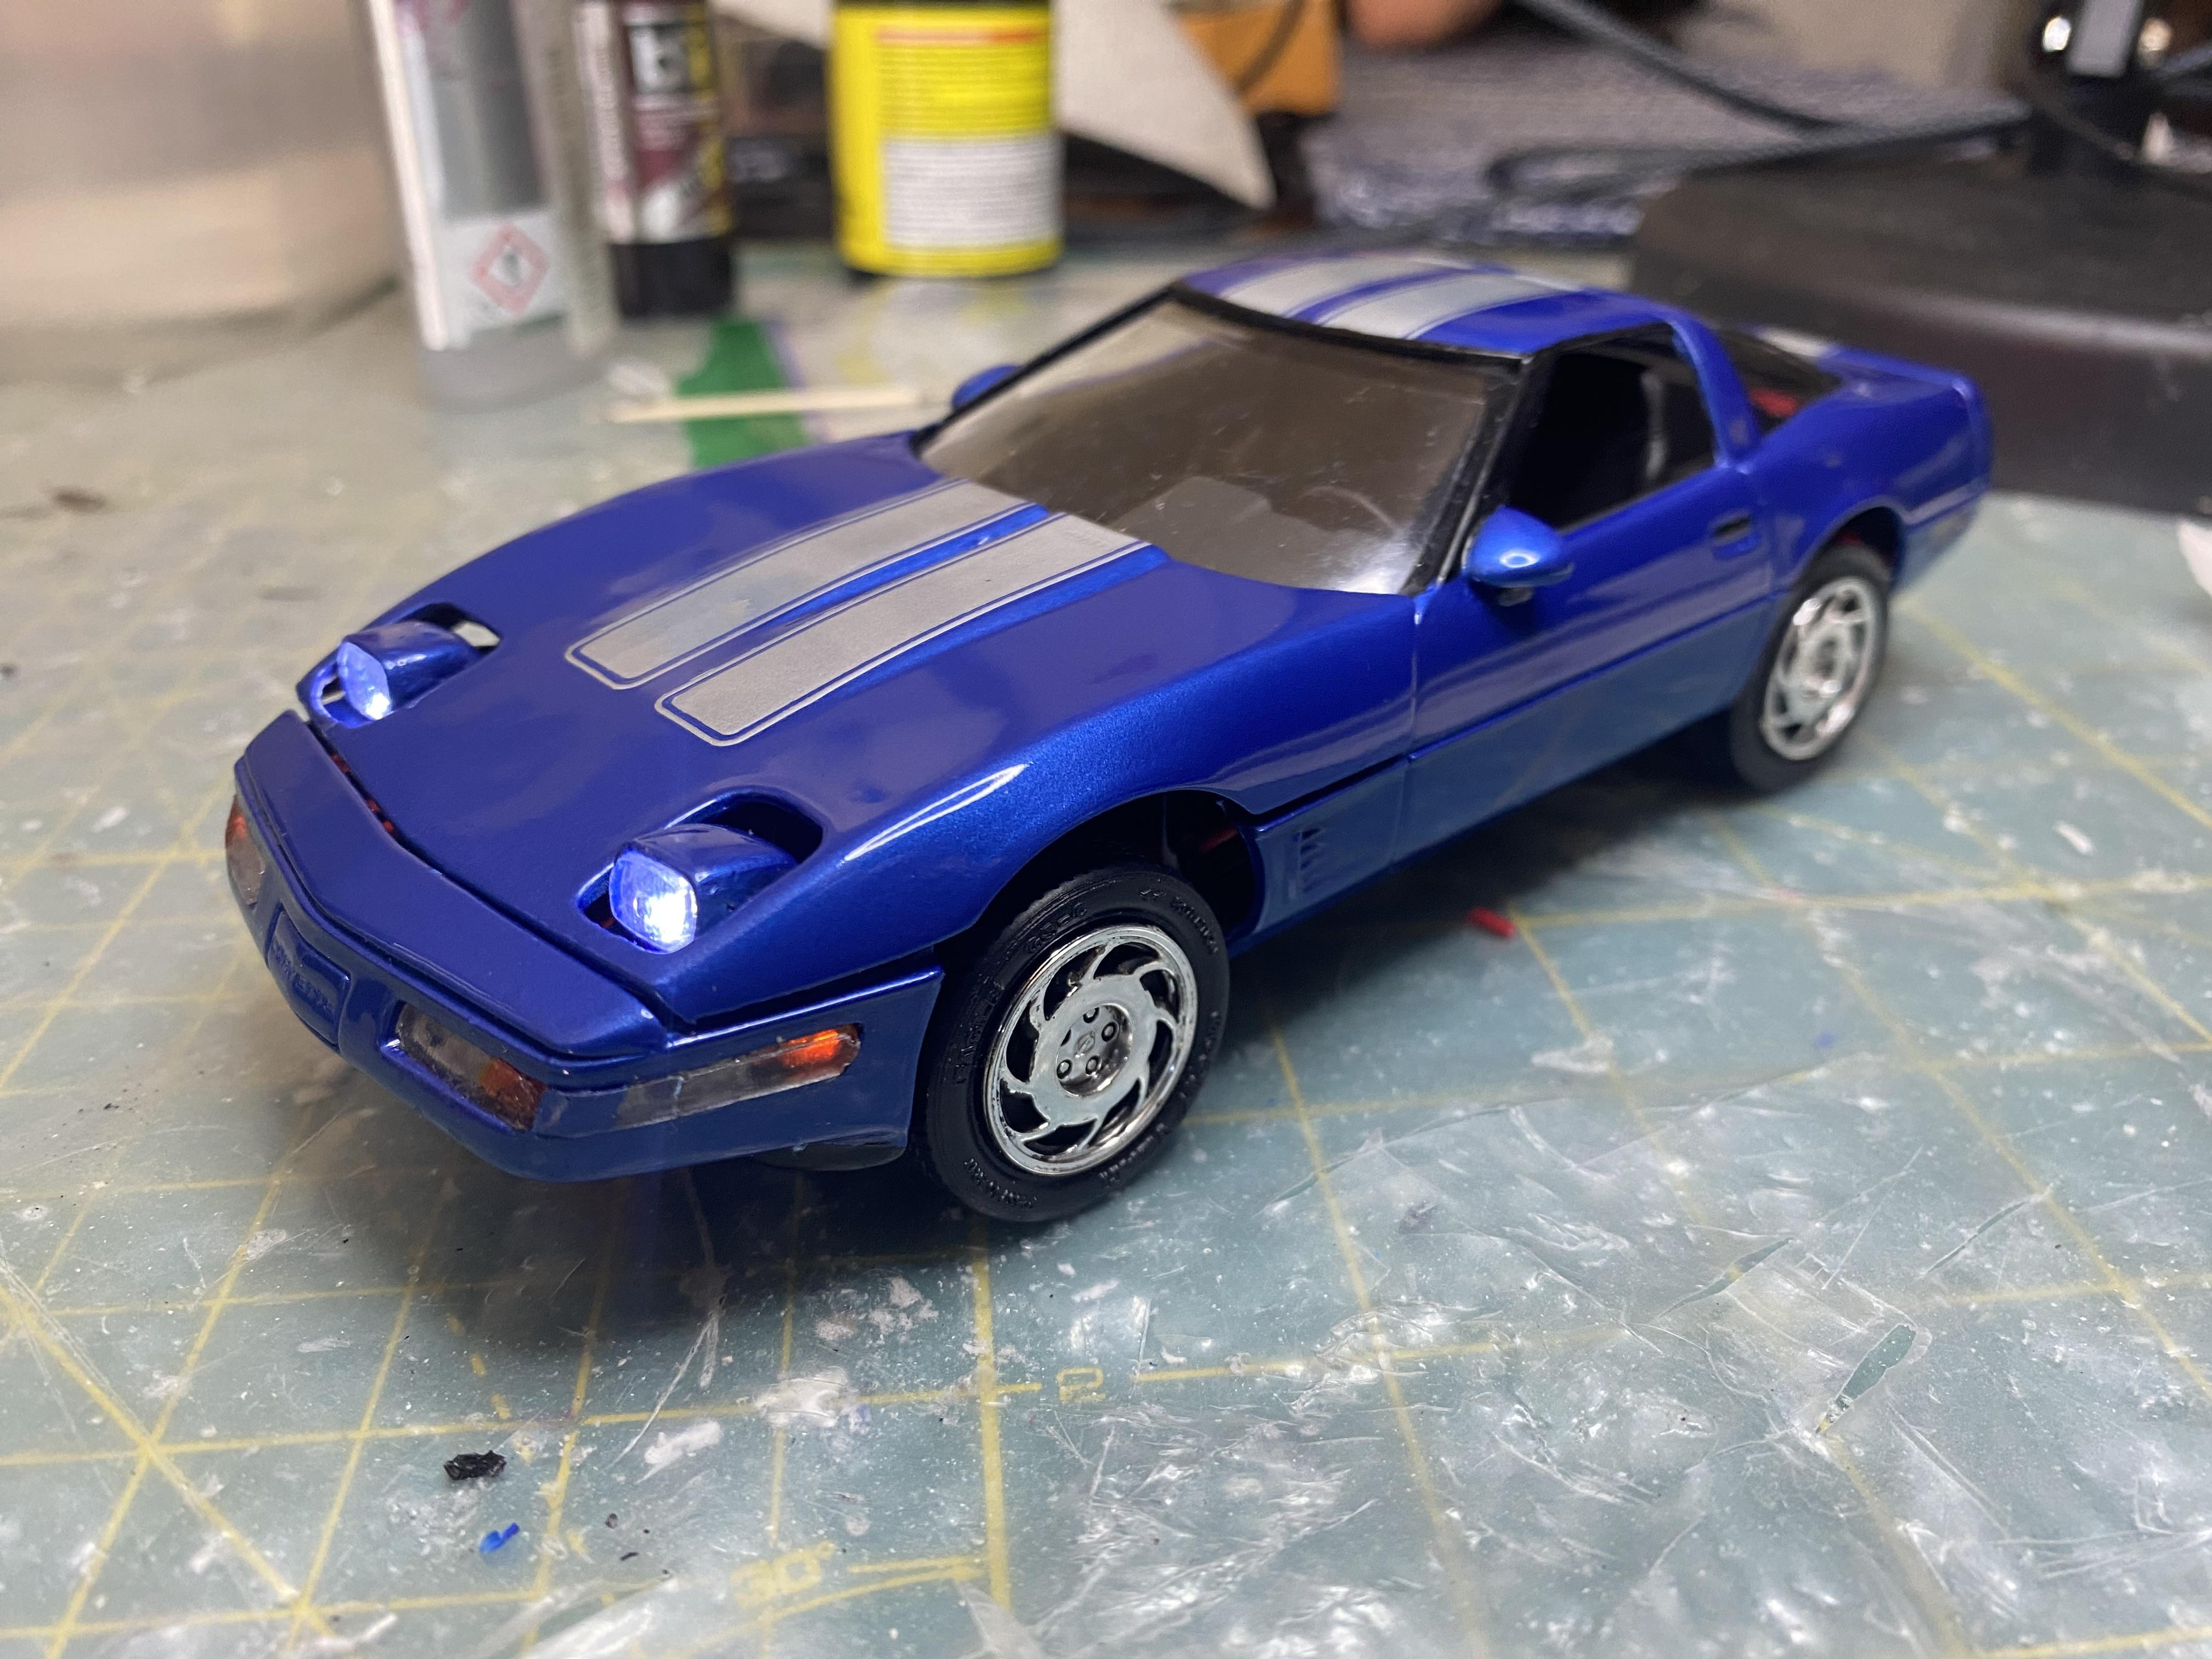
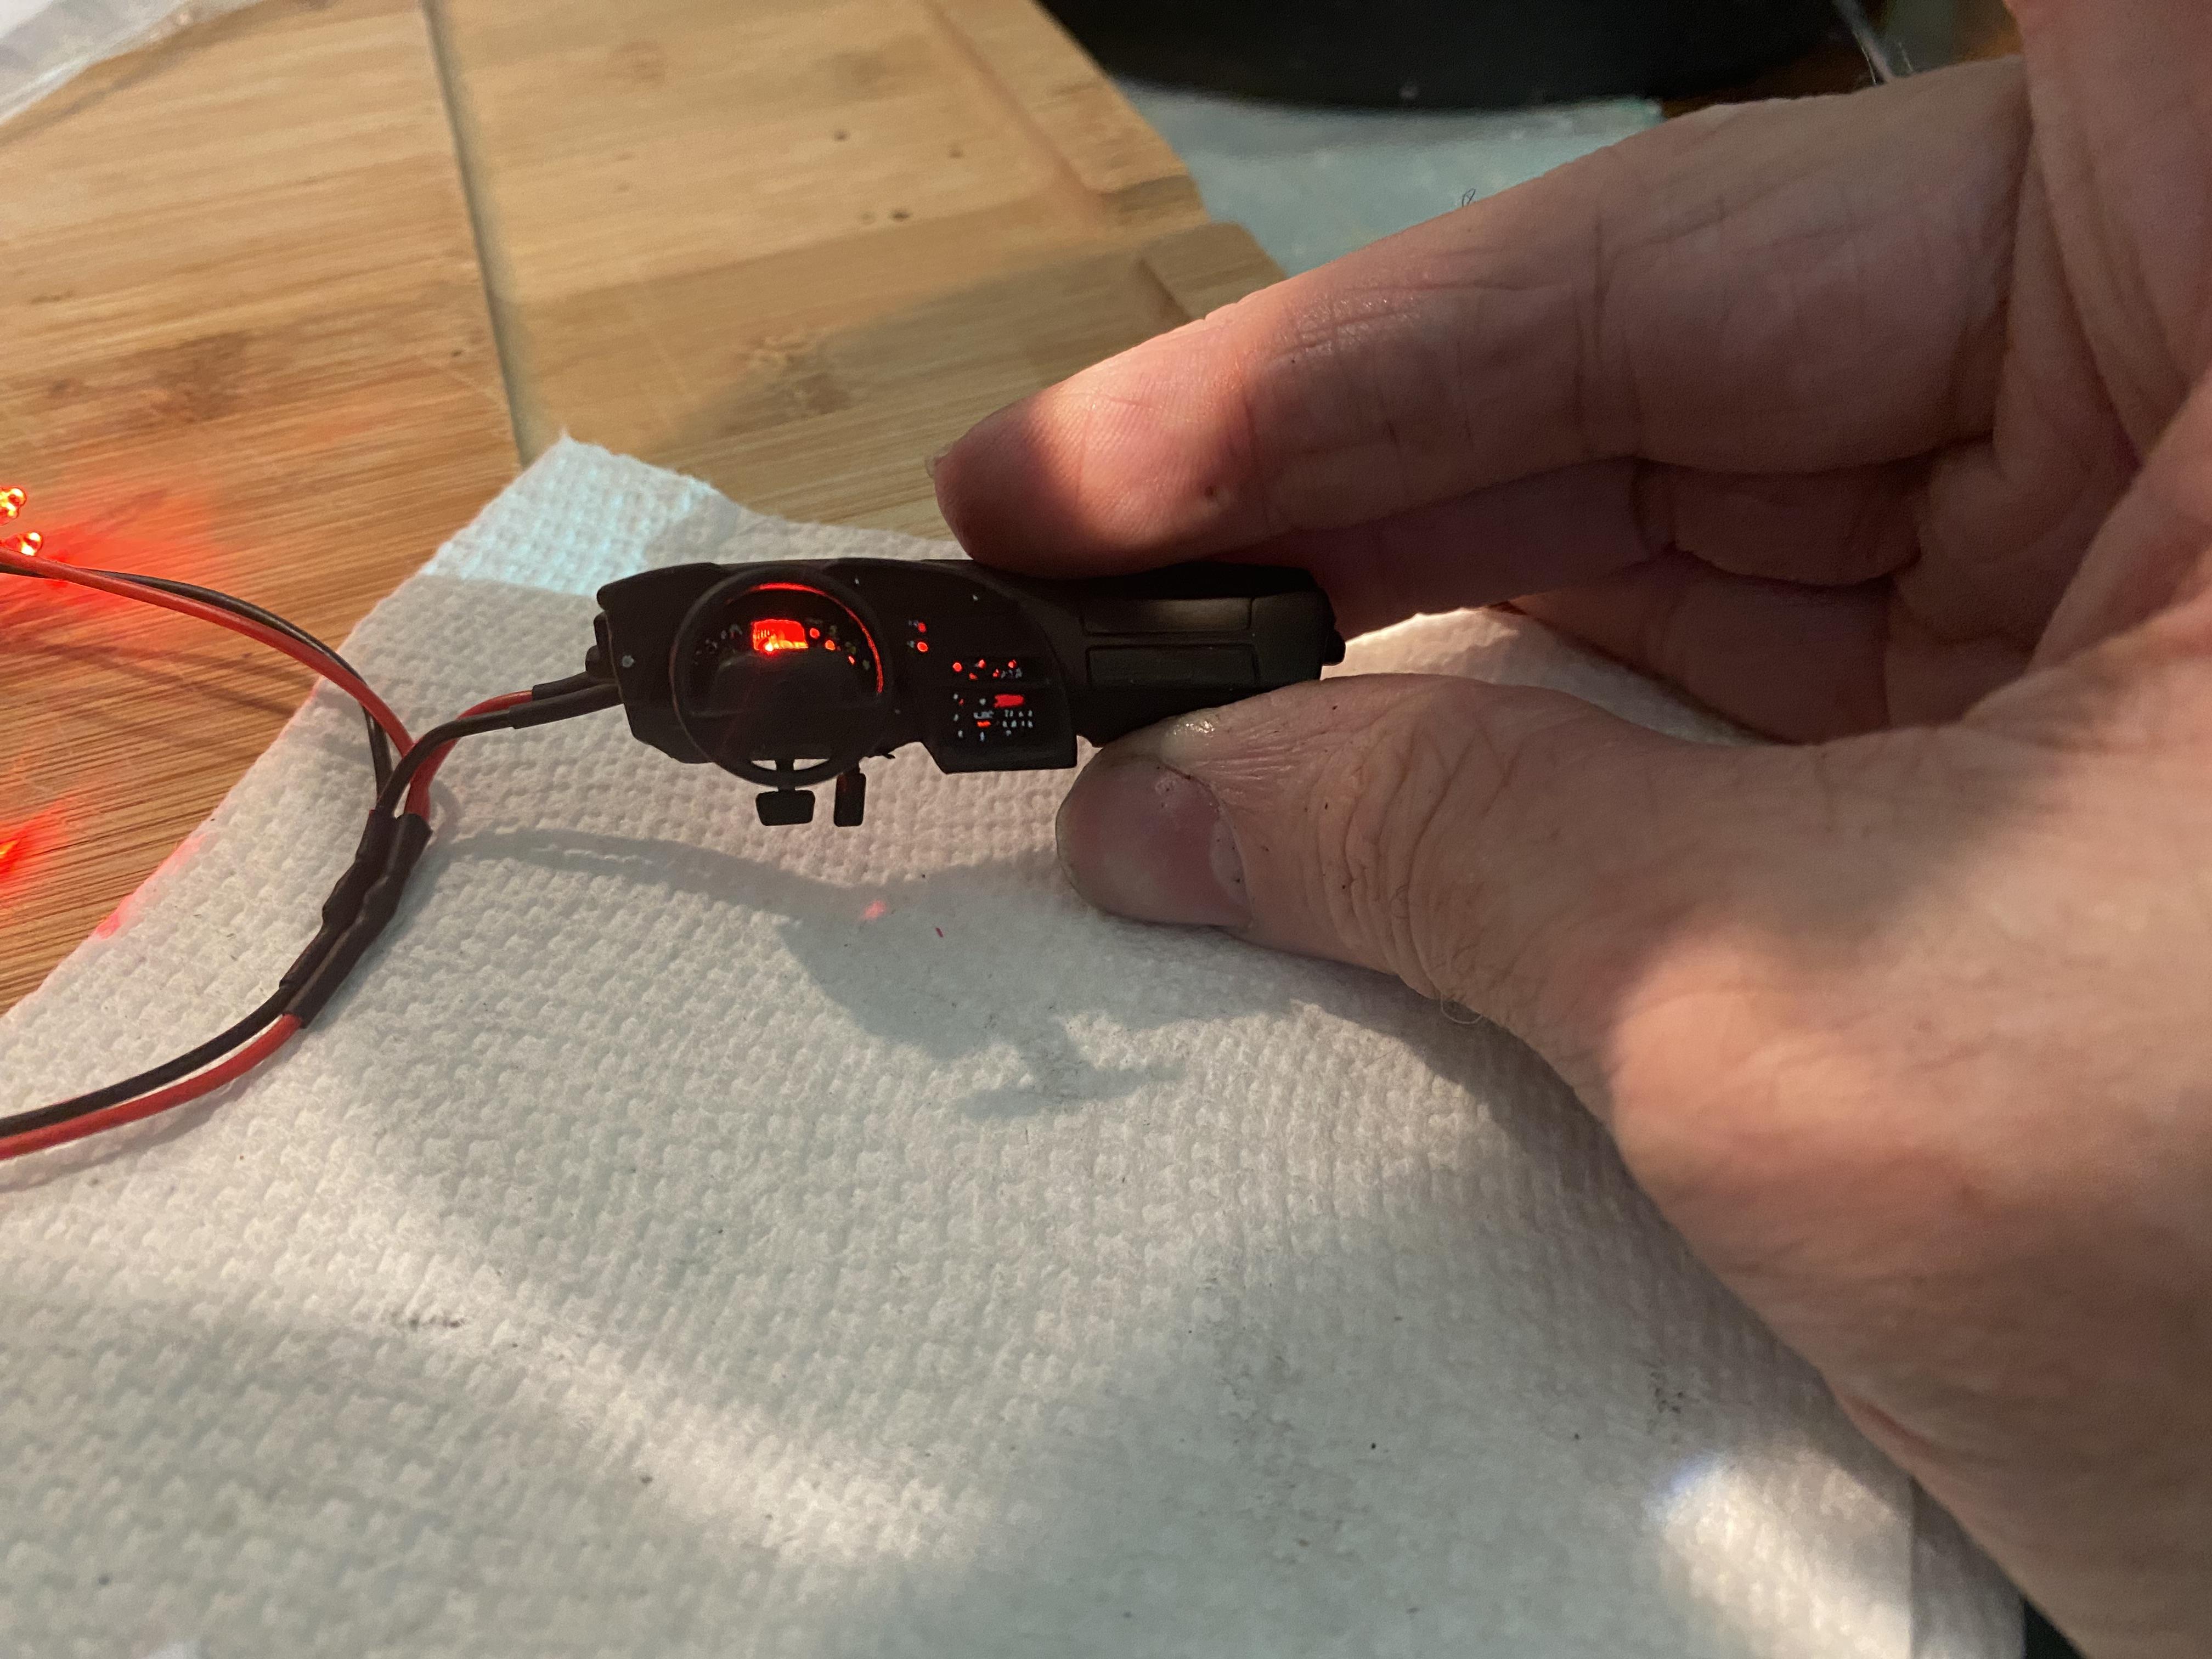
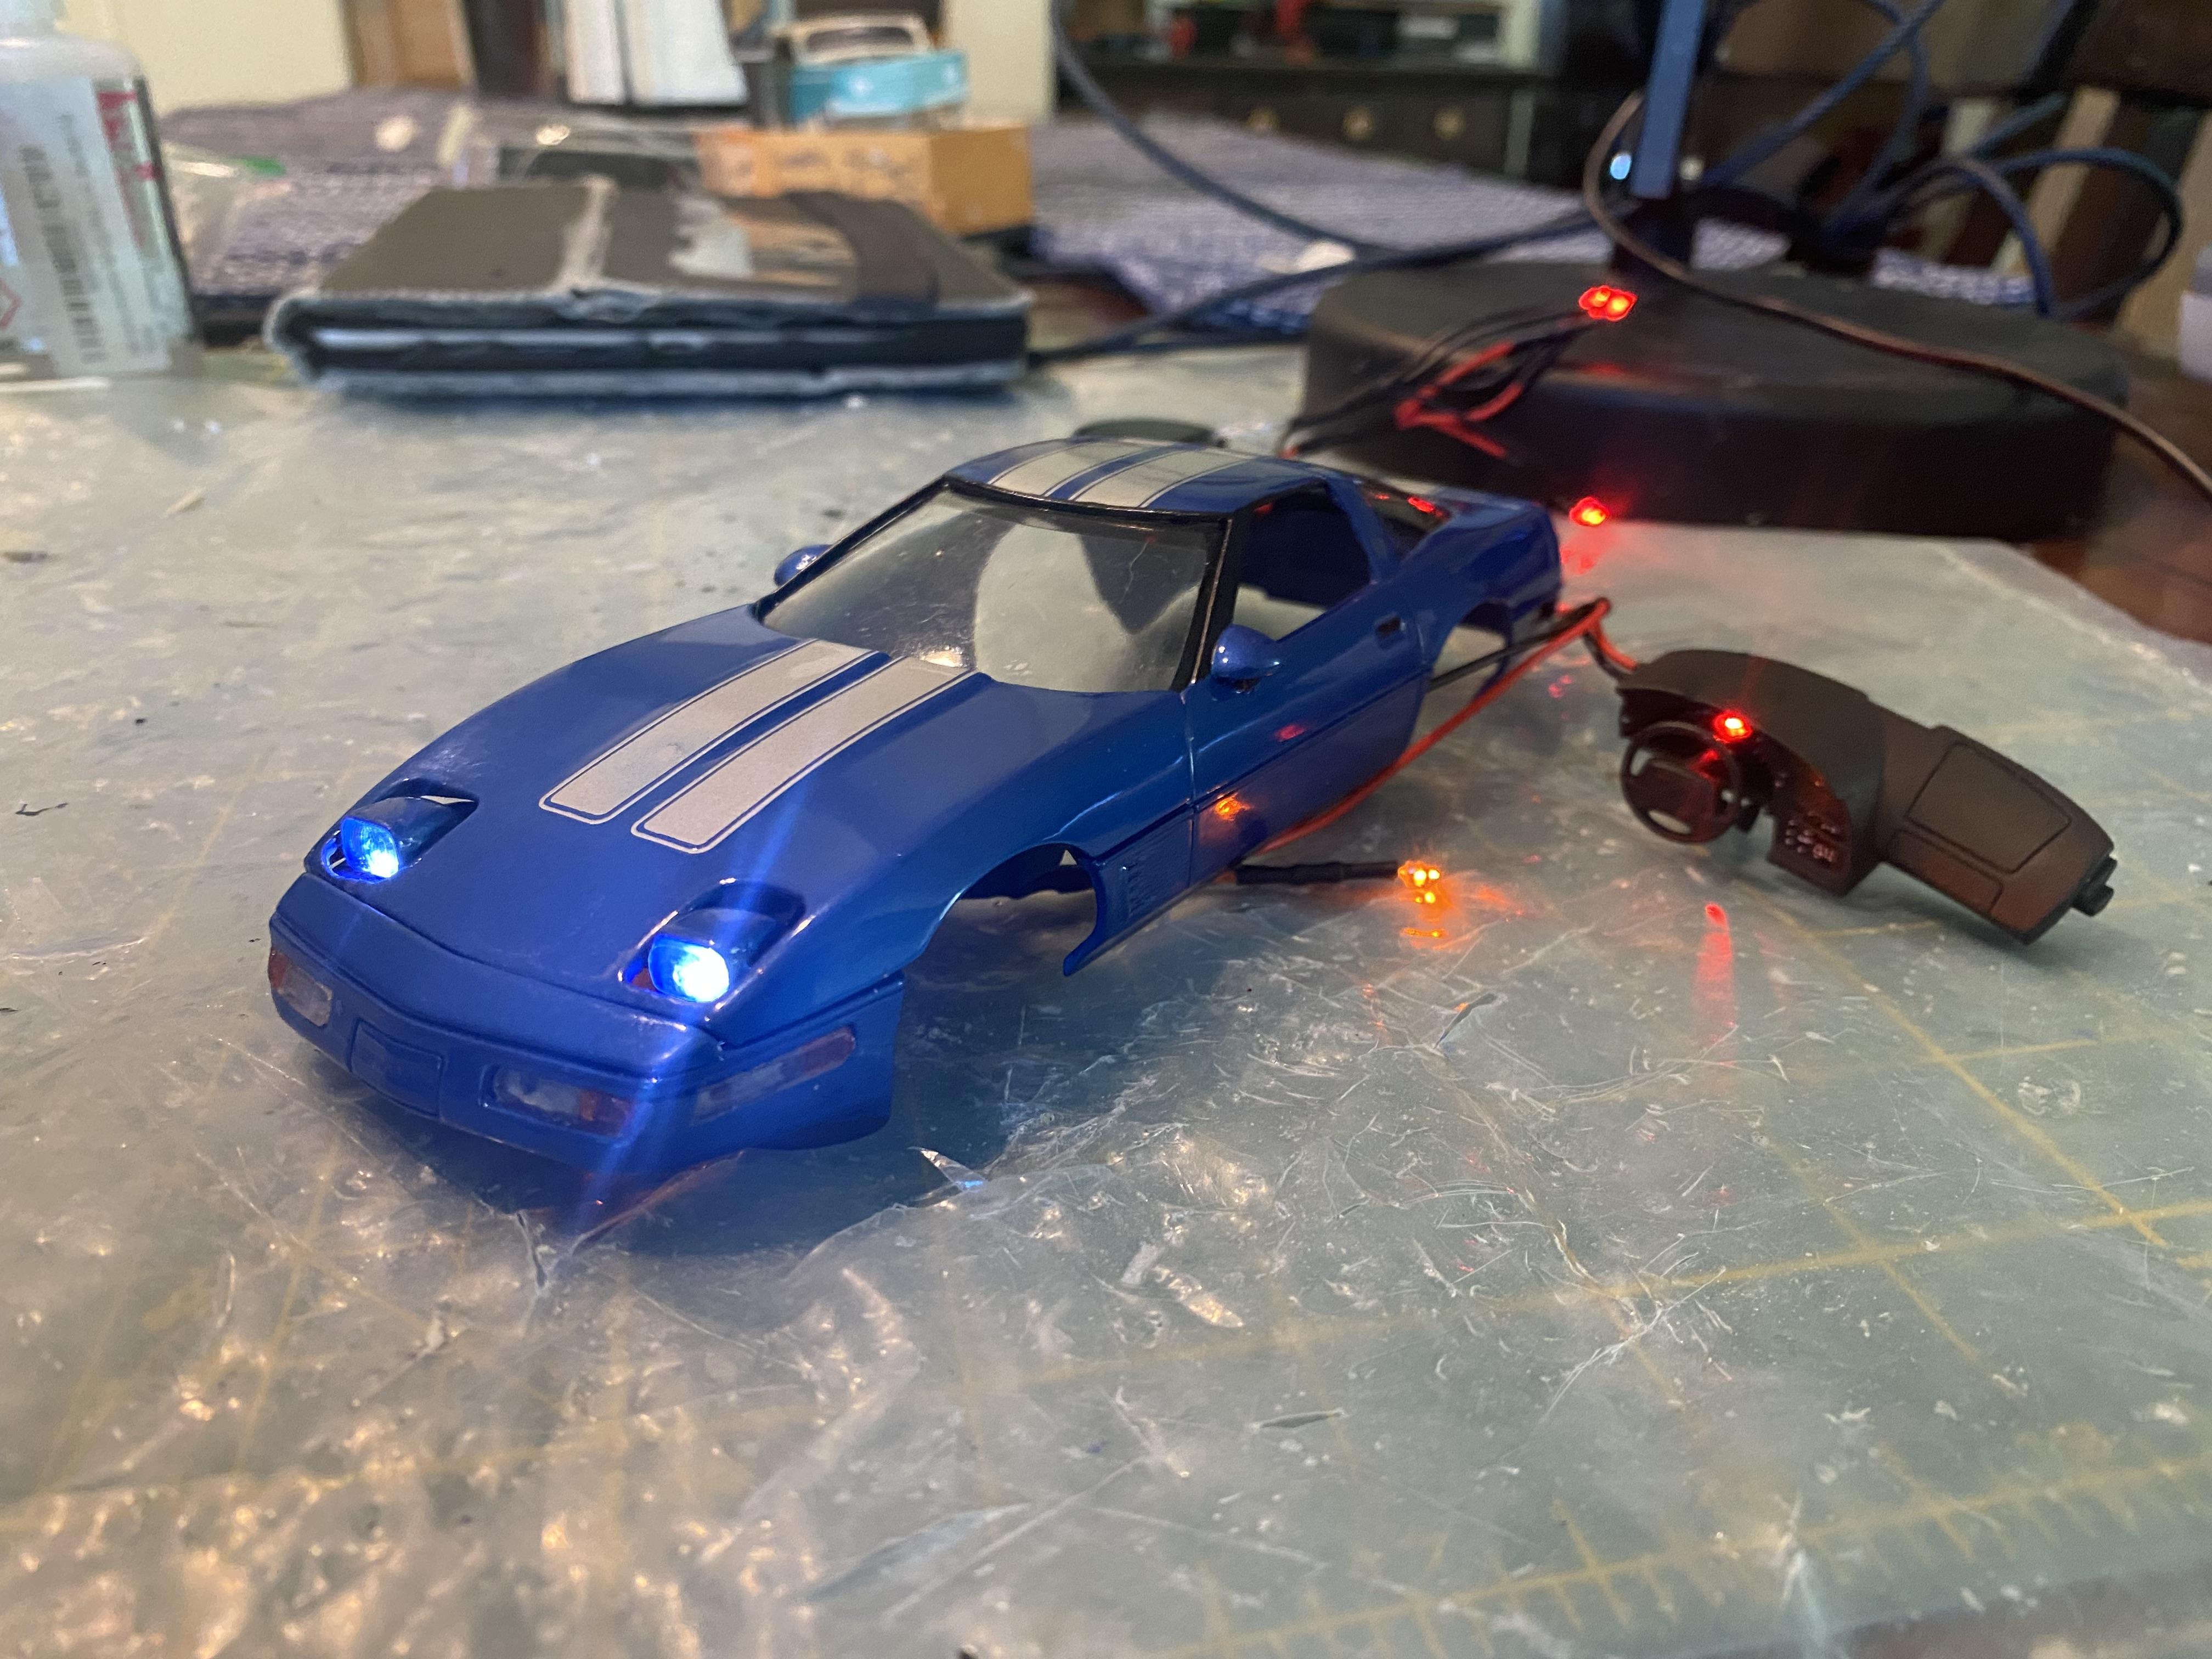
Thank you. The headlights can go up and down as wanted.
-
thank you. ?
-
Thank you.
-
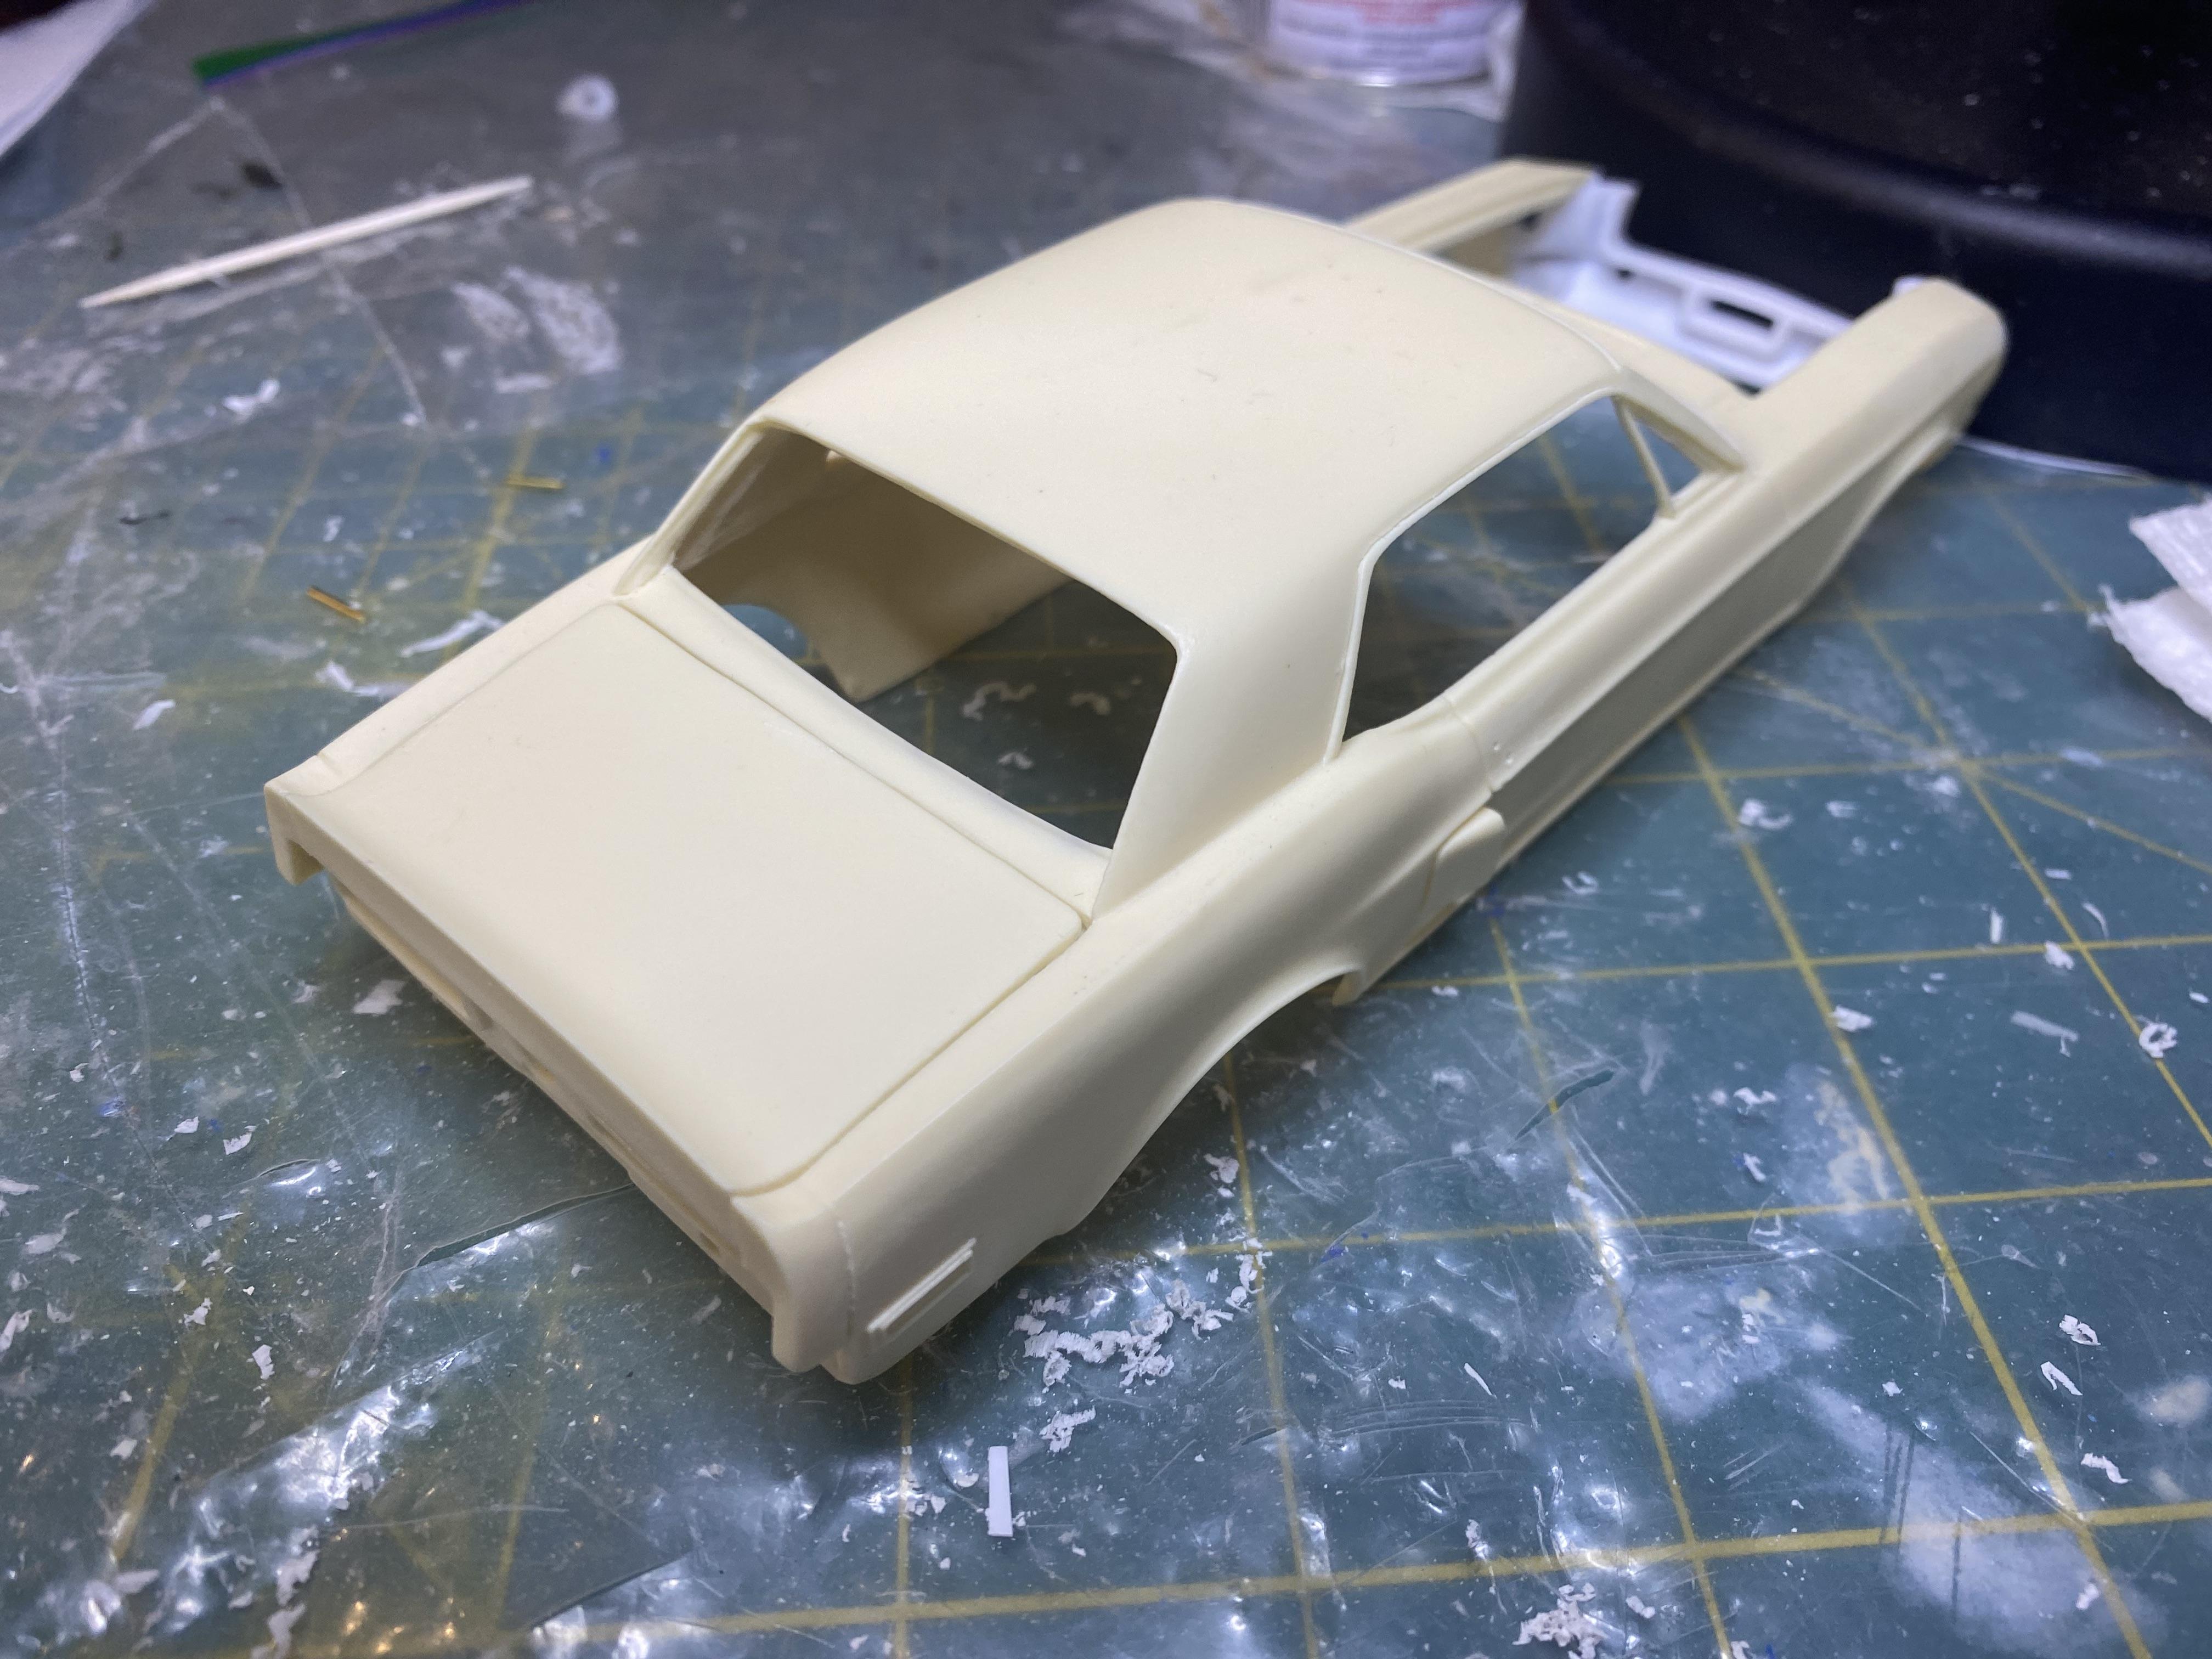
Thank you. It has been a lot of work to get the body to where it is but I think in the end it will turn out nice.
-
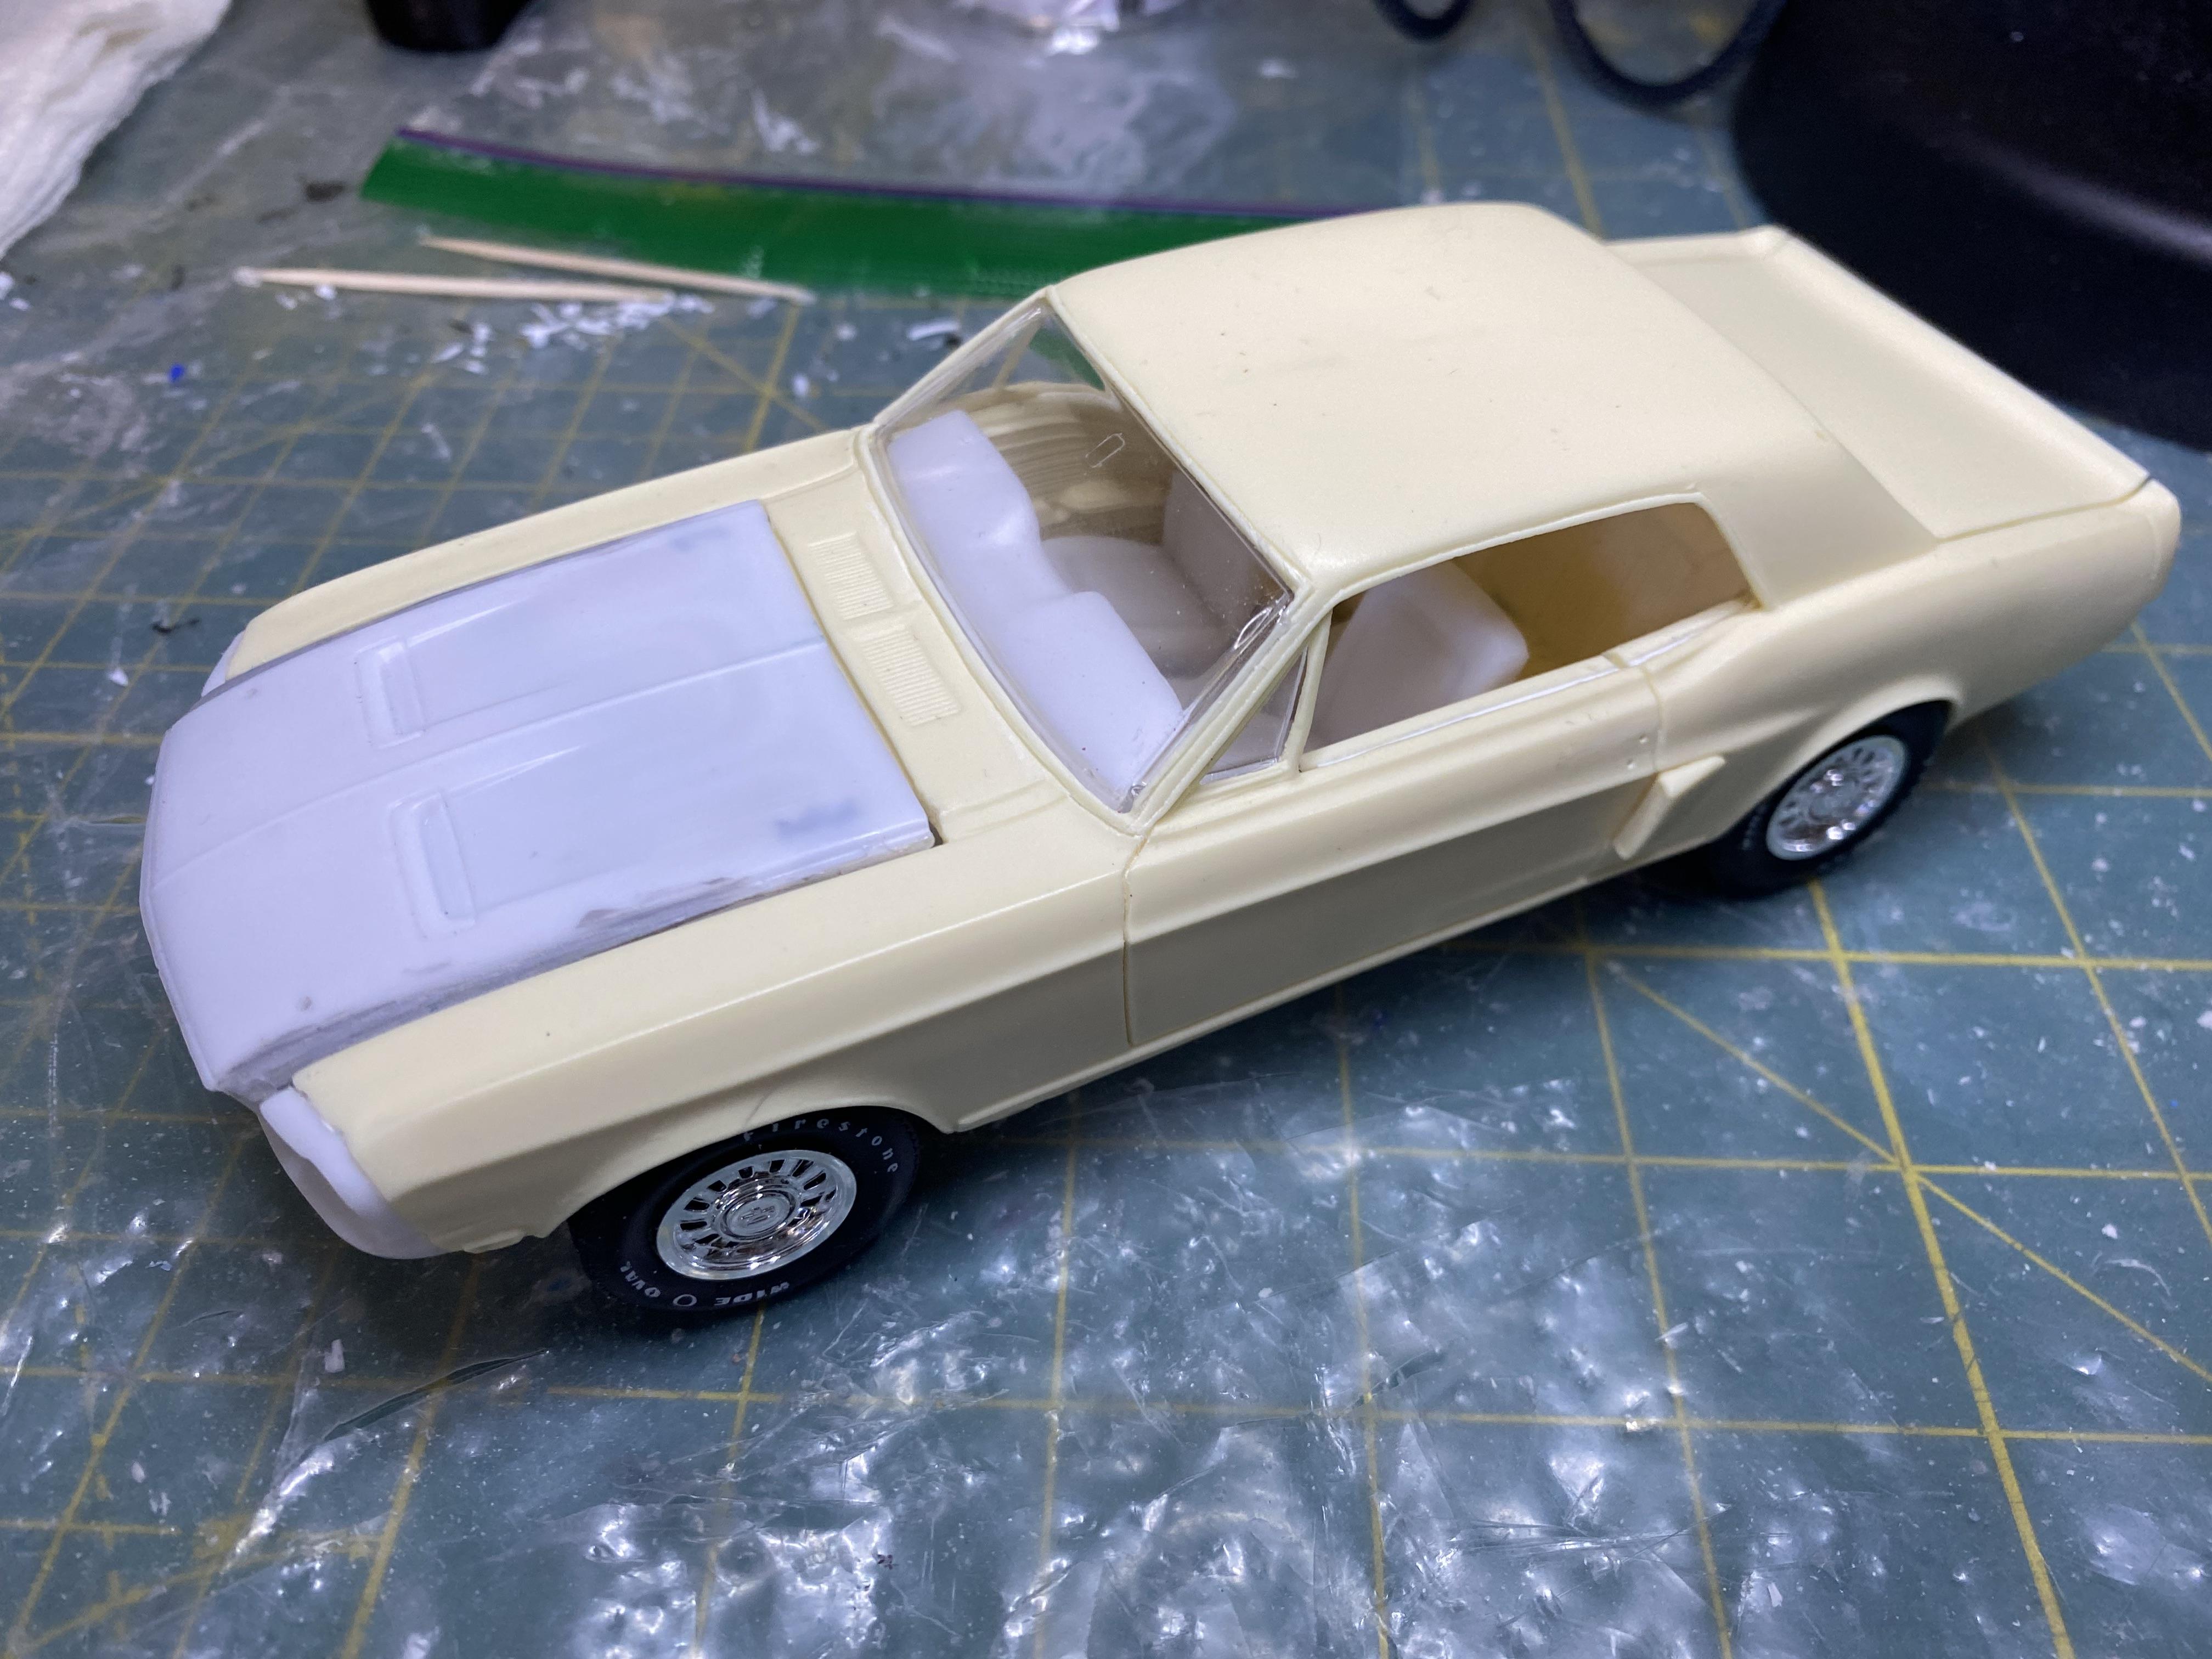
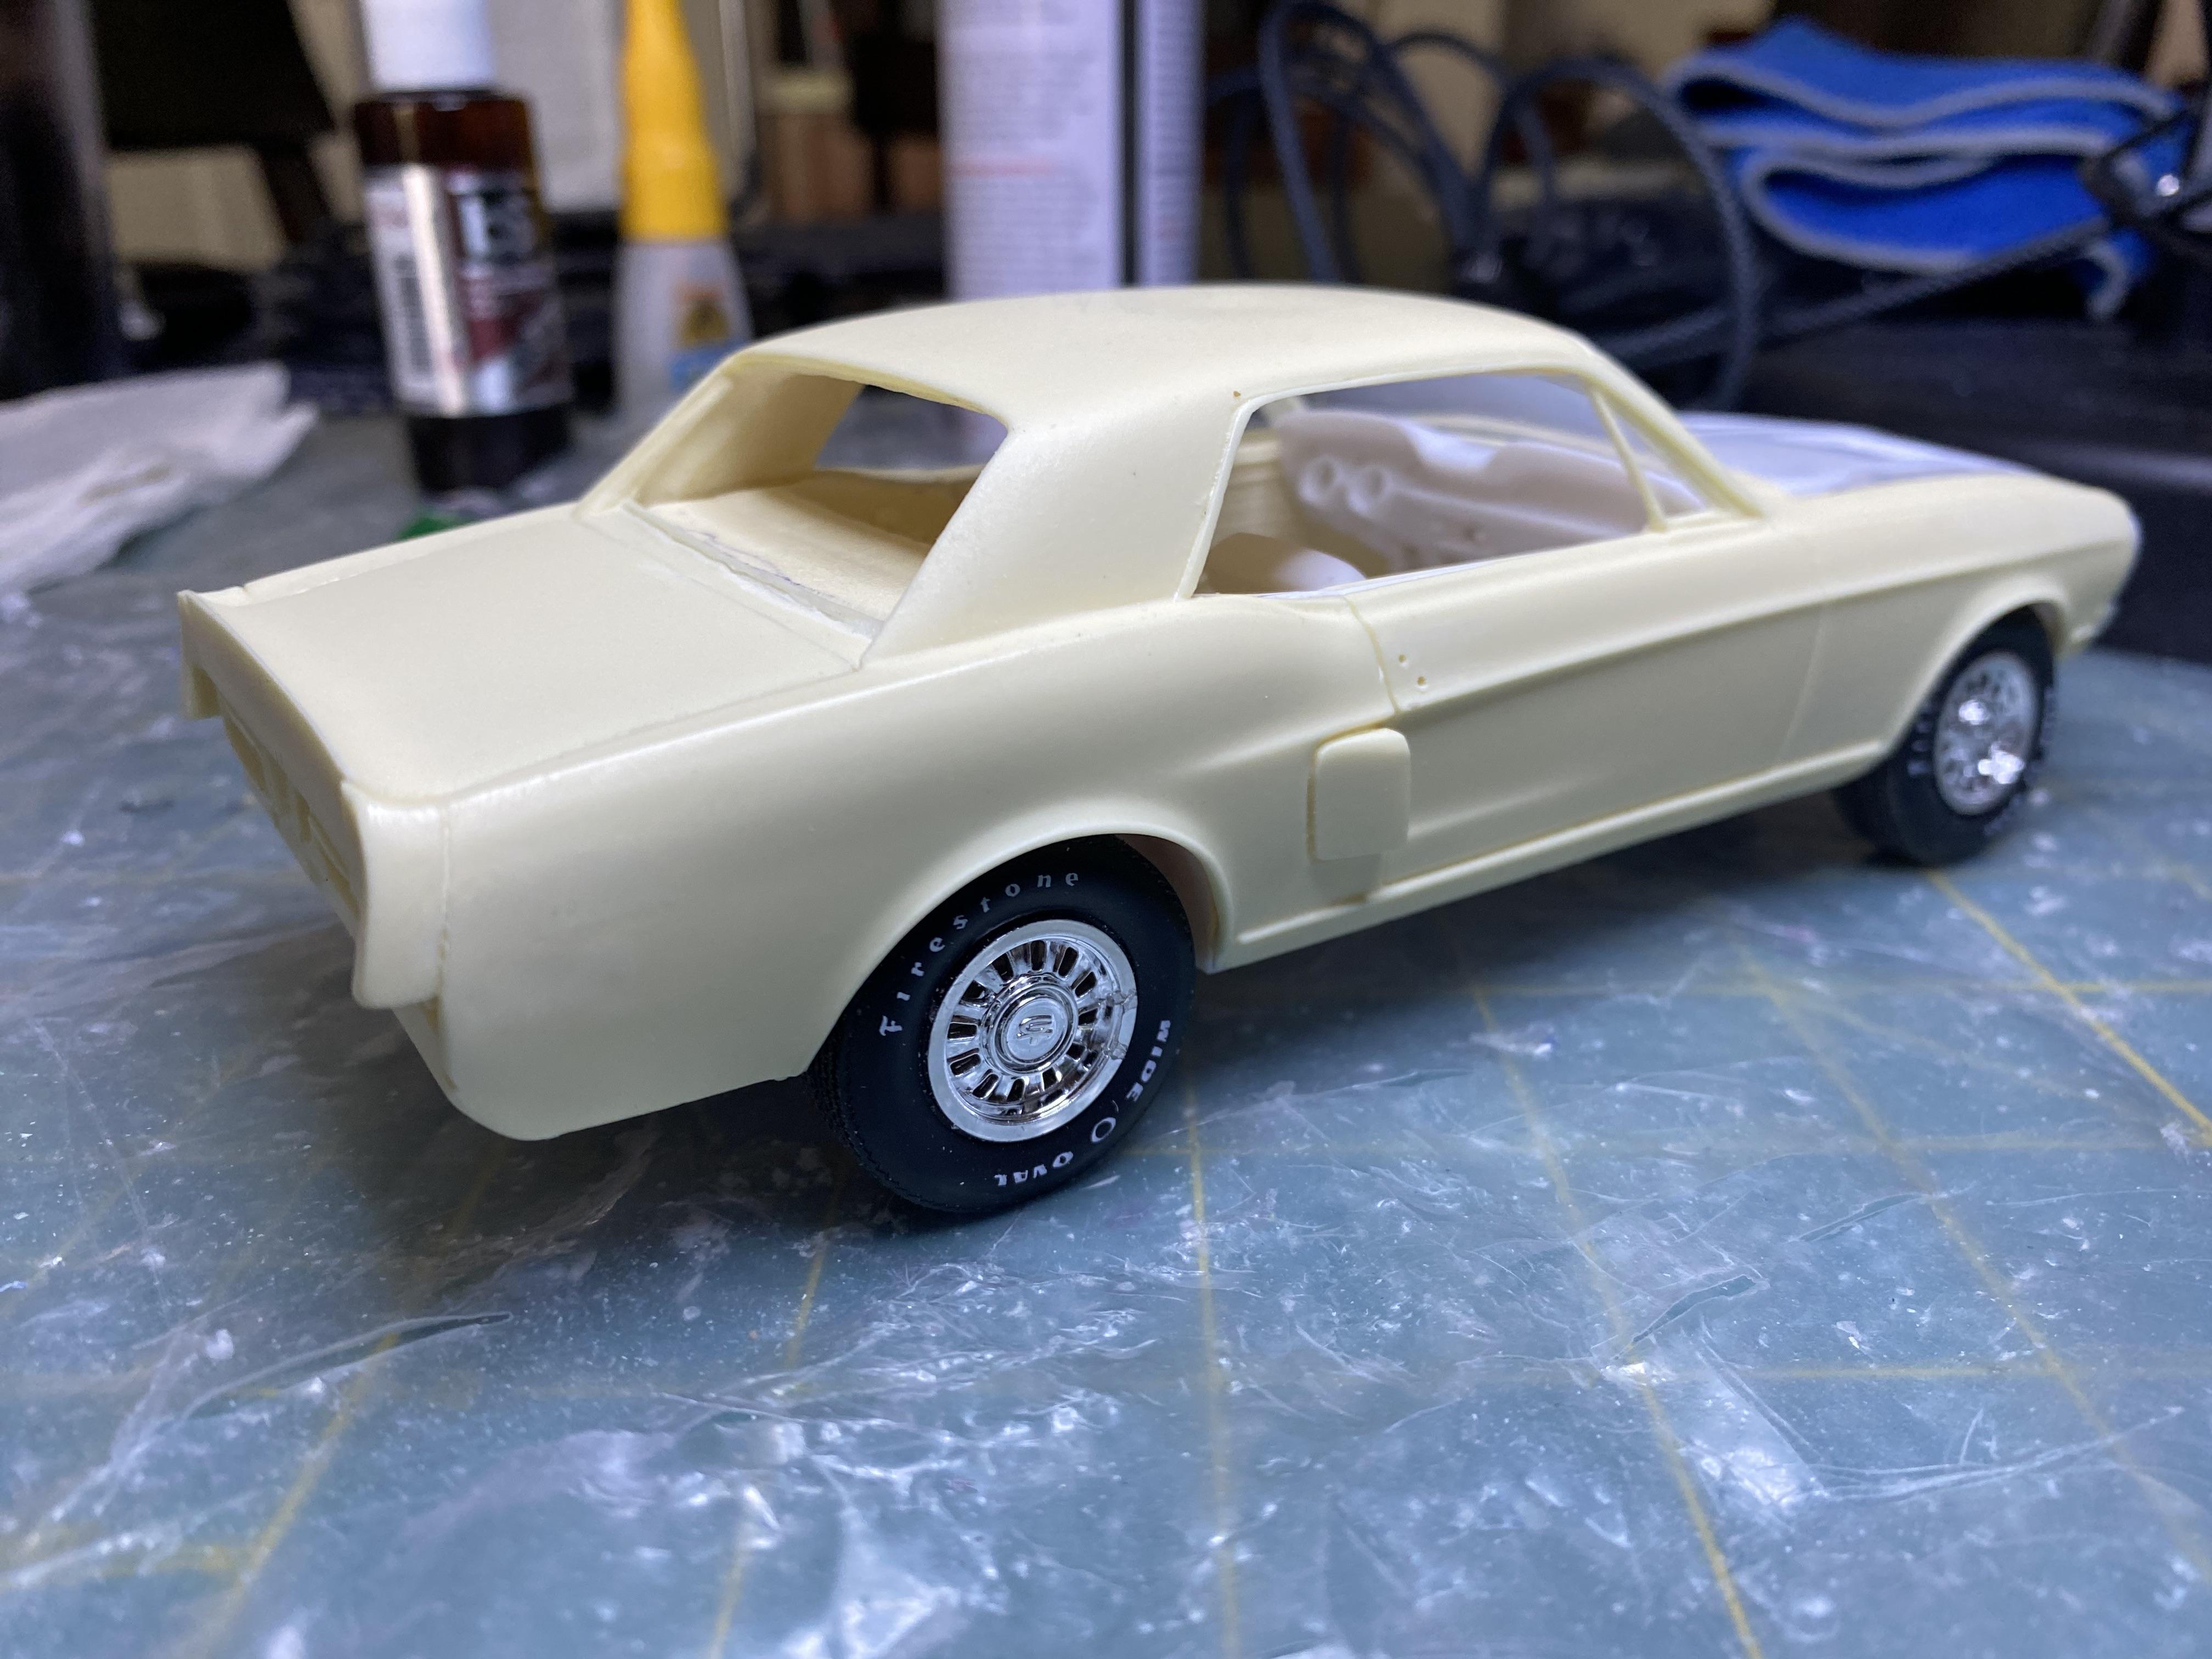
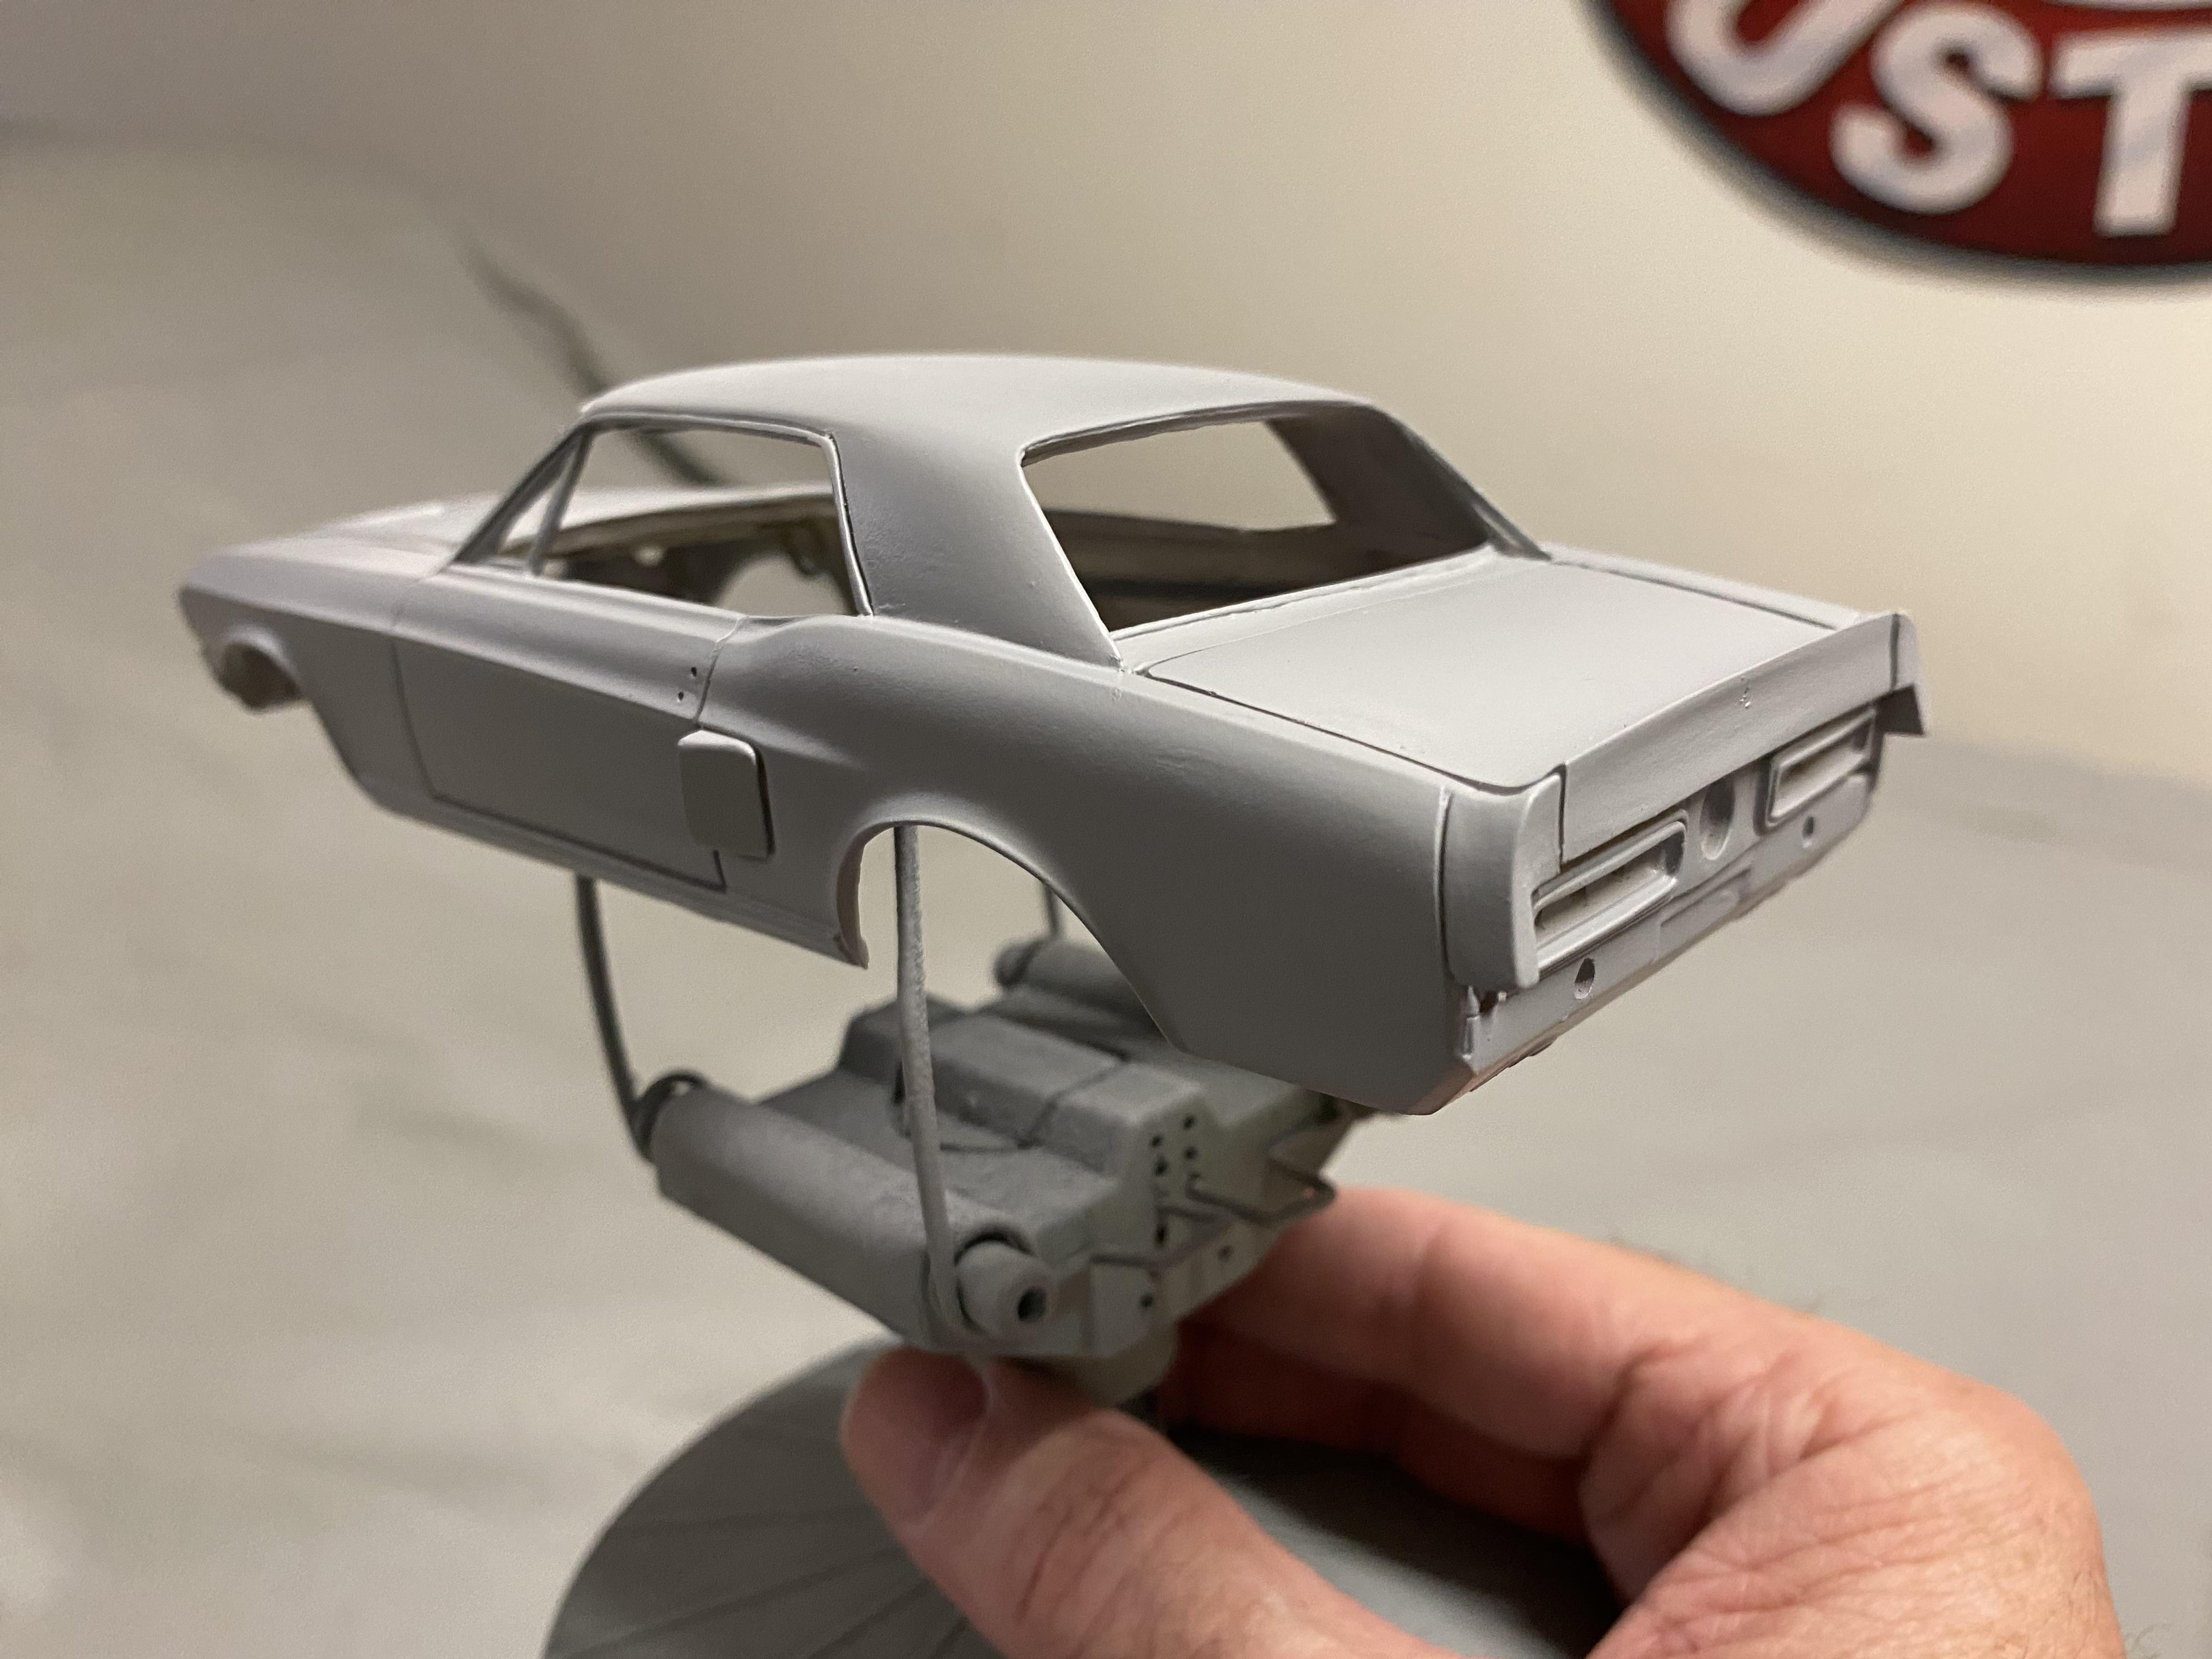
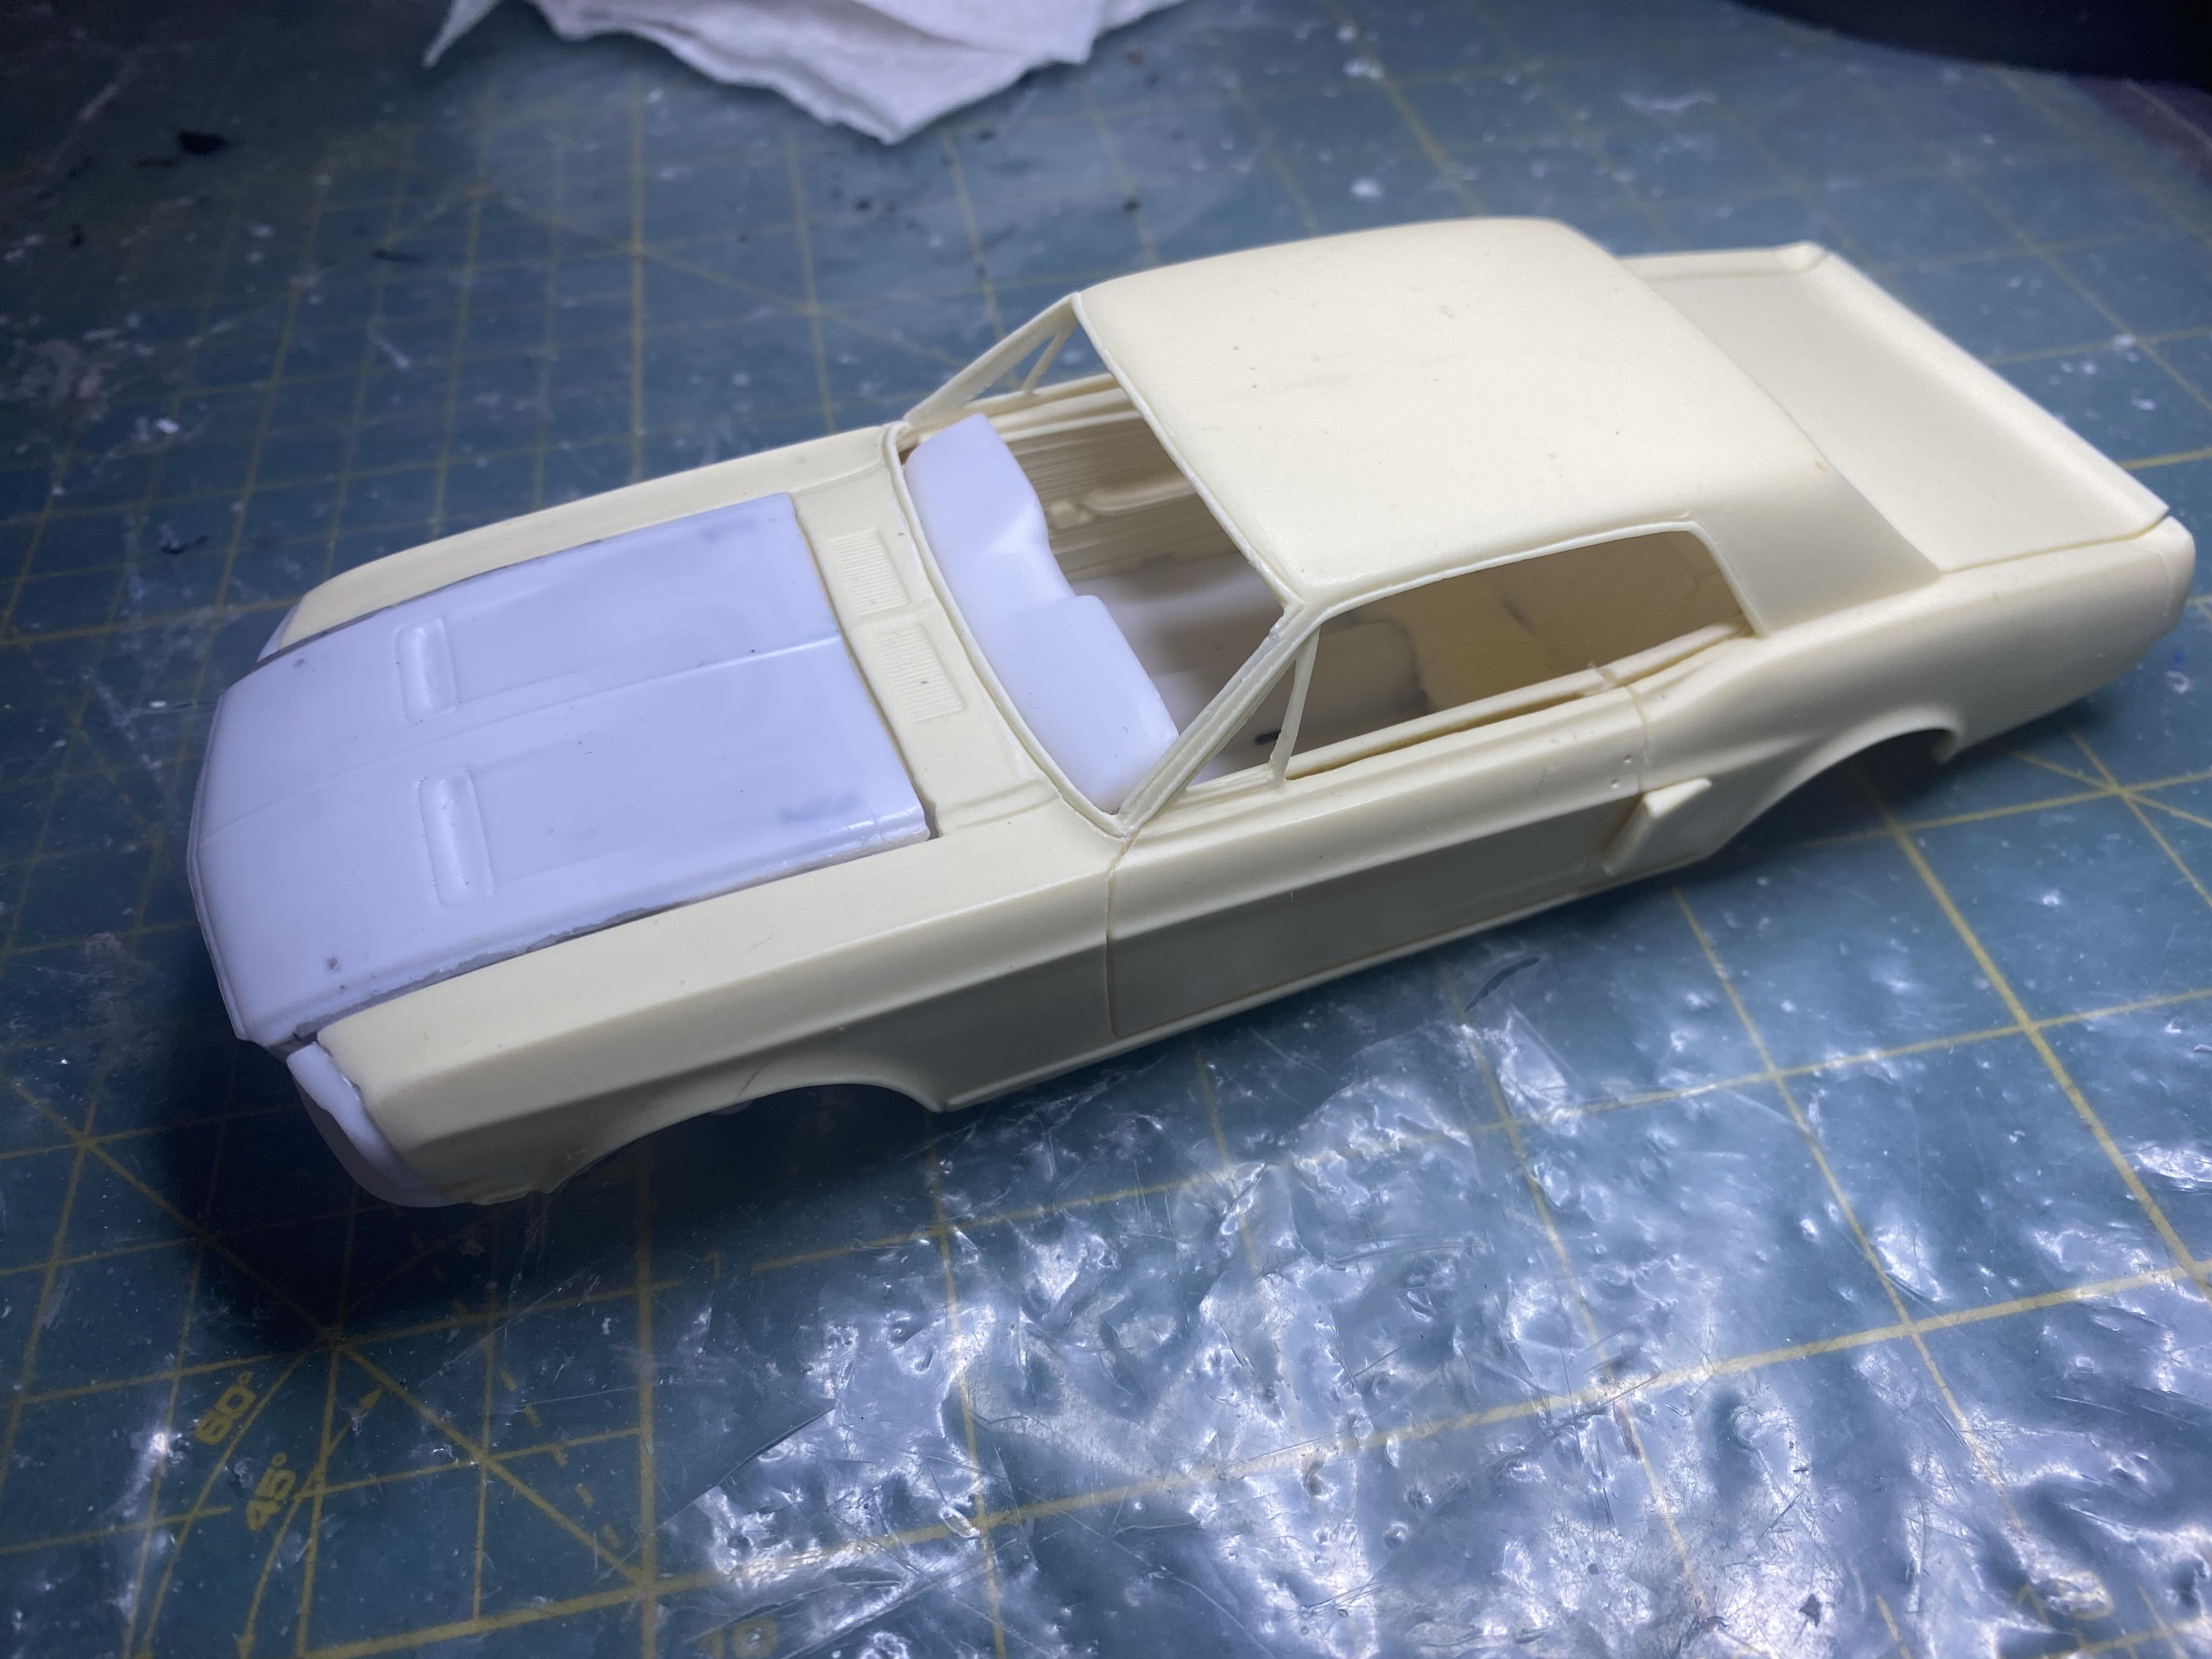
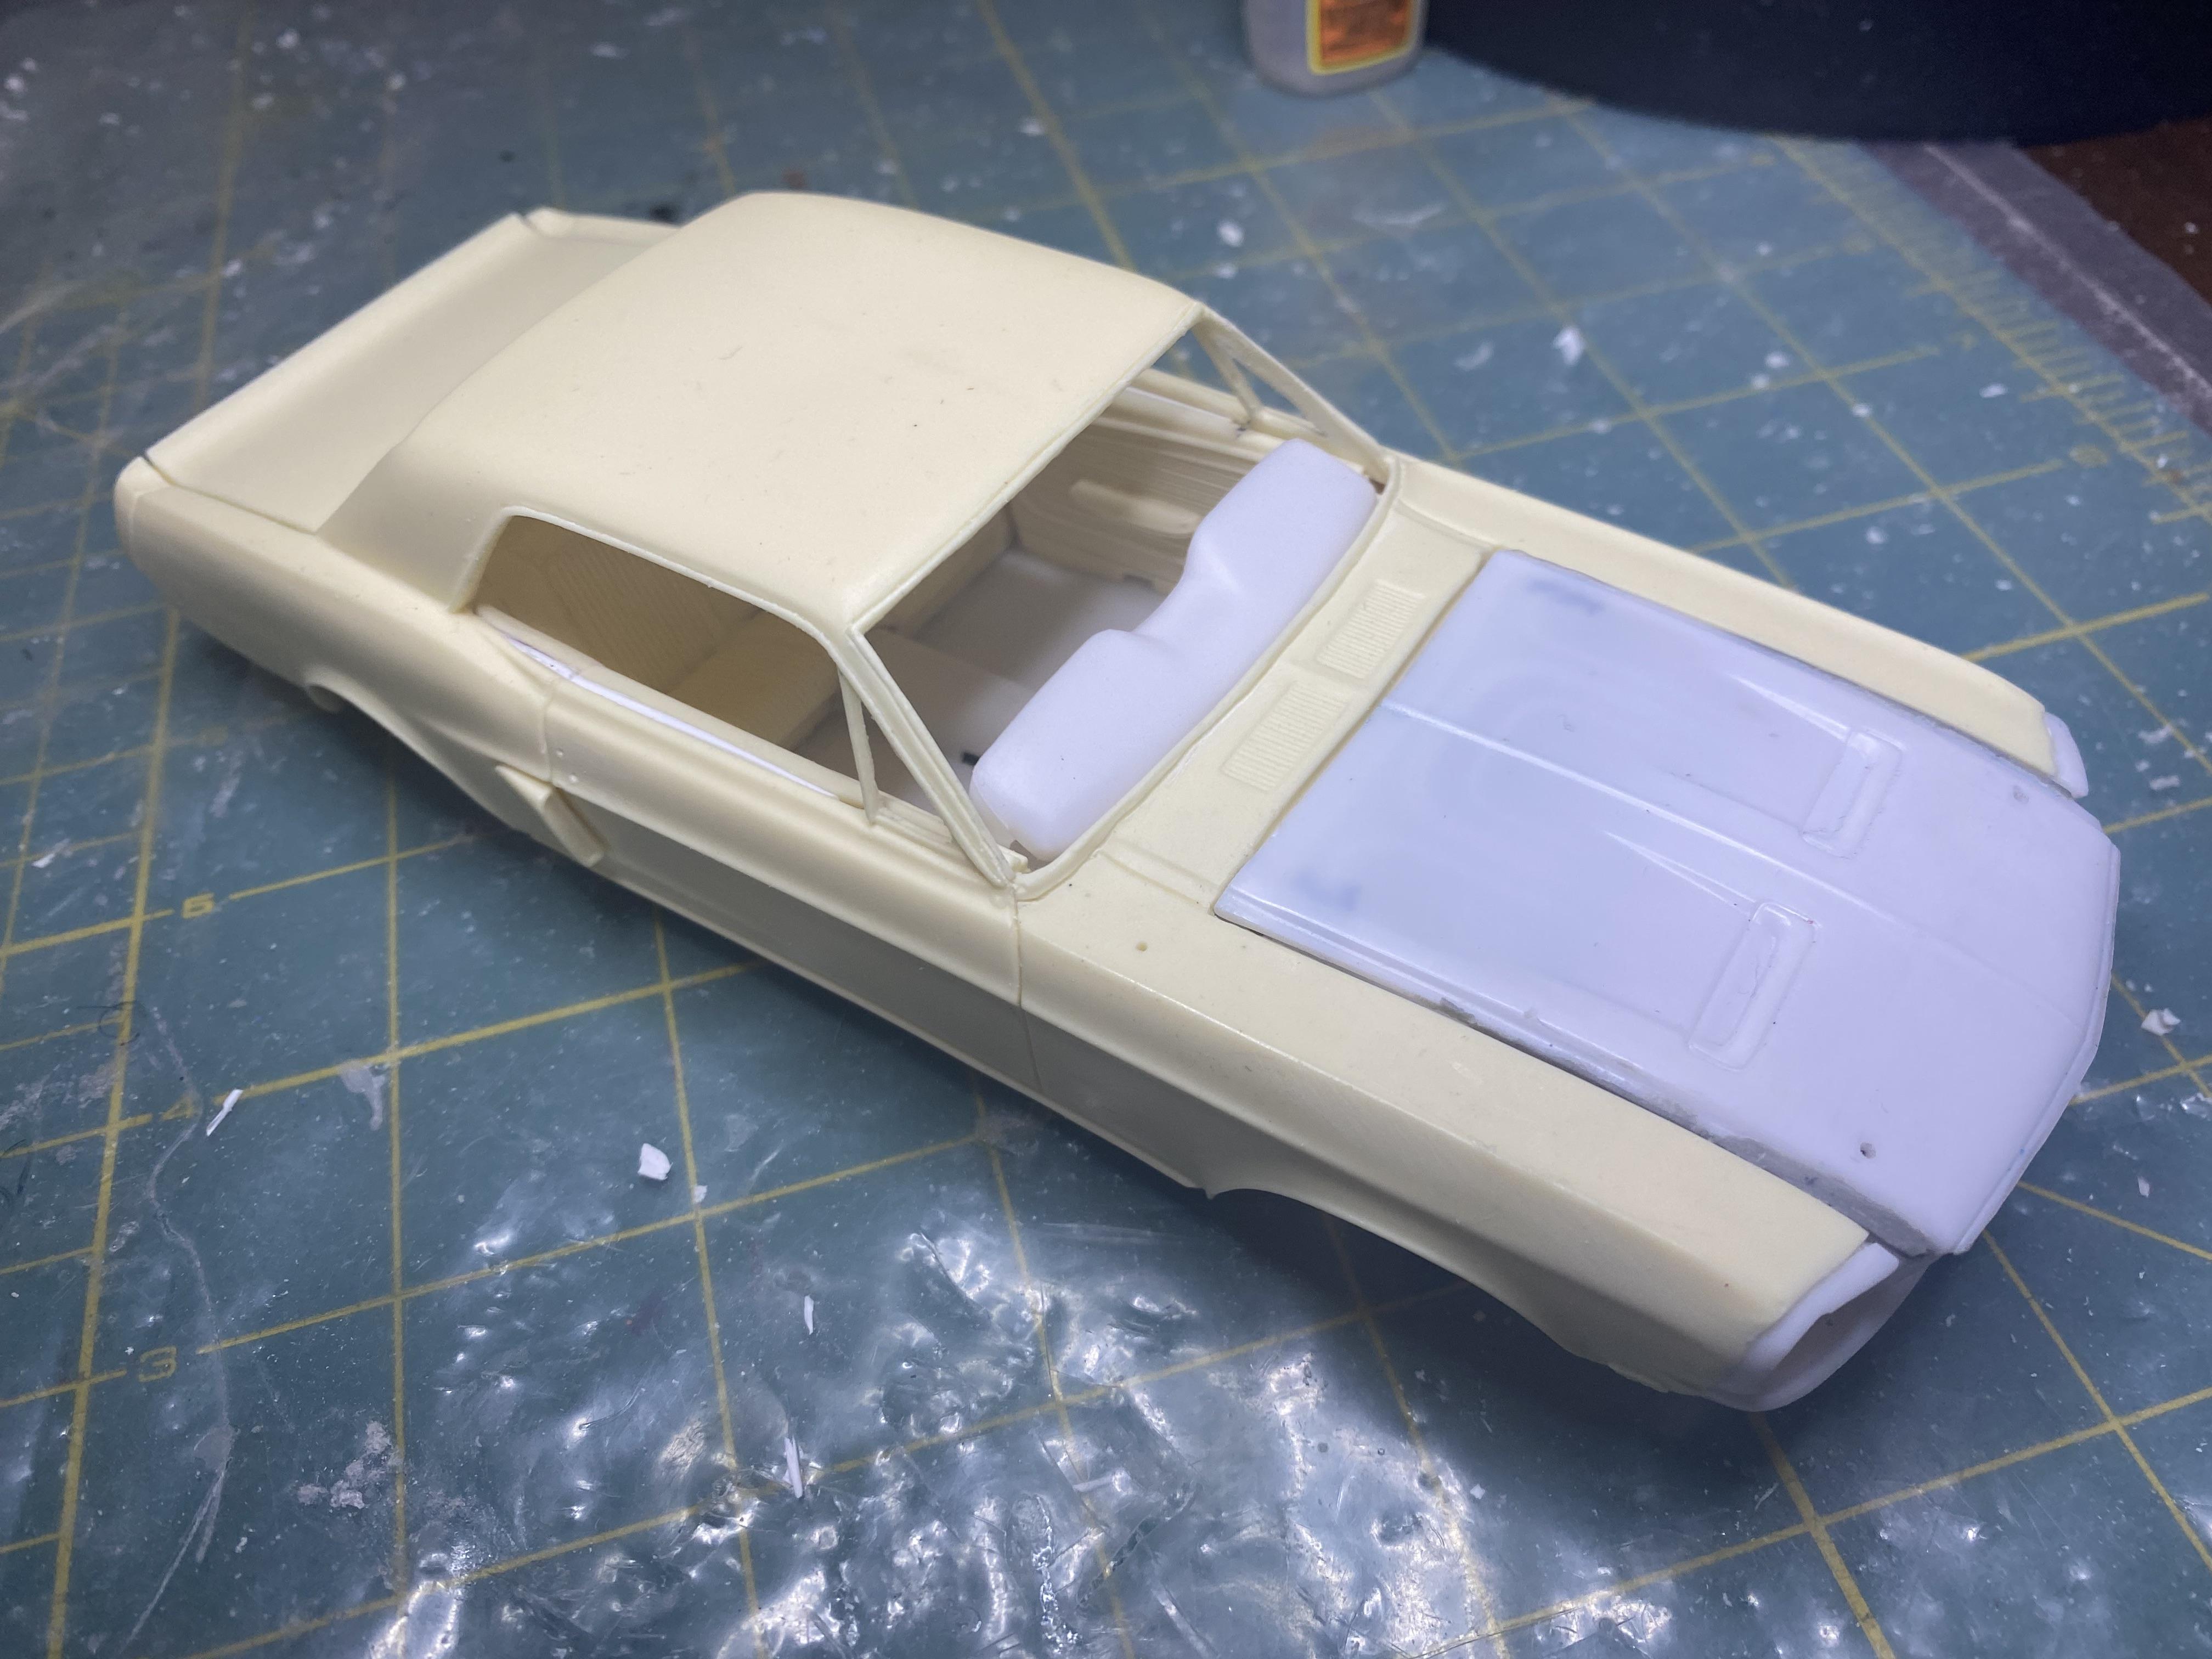
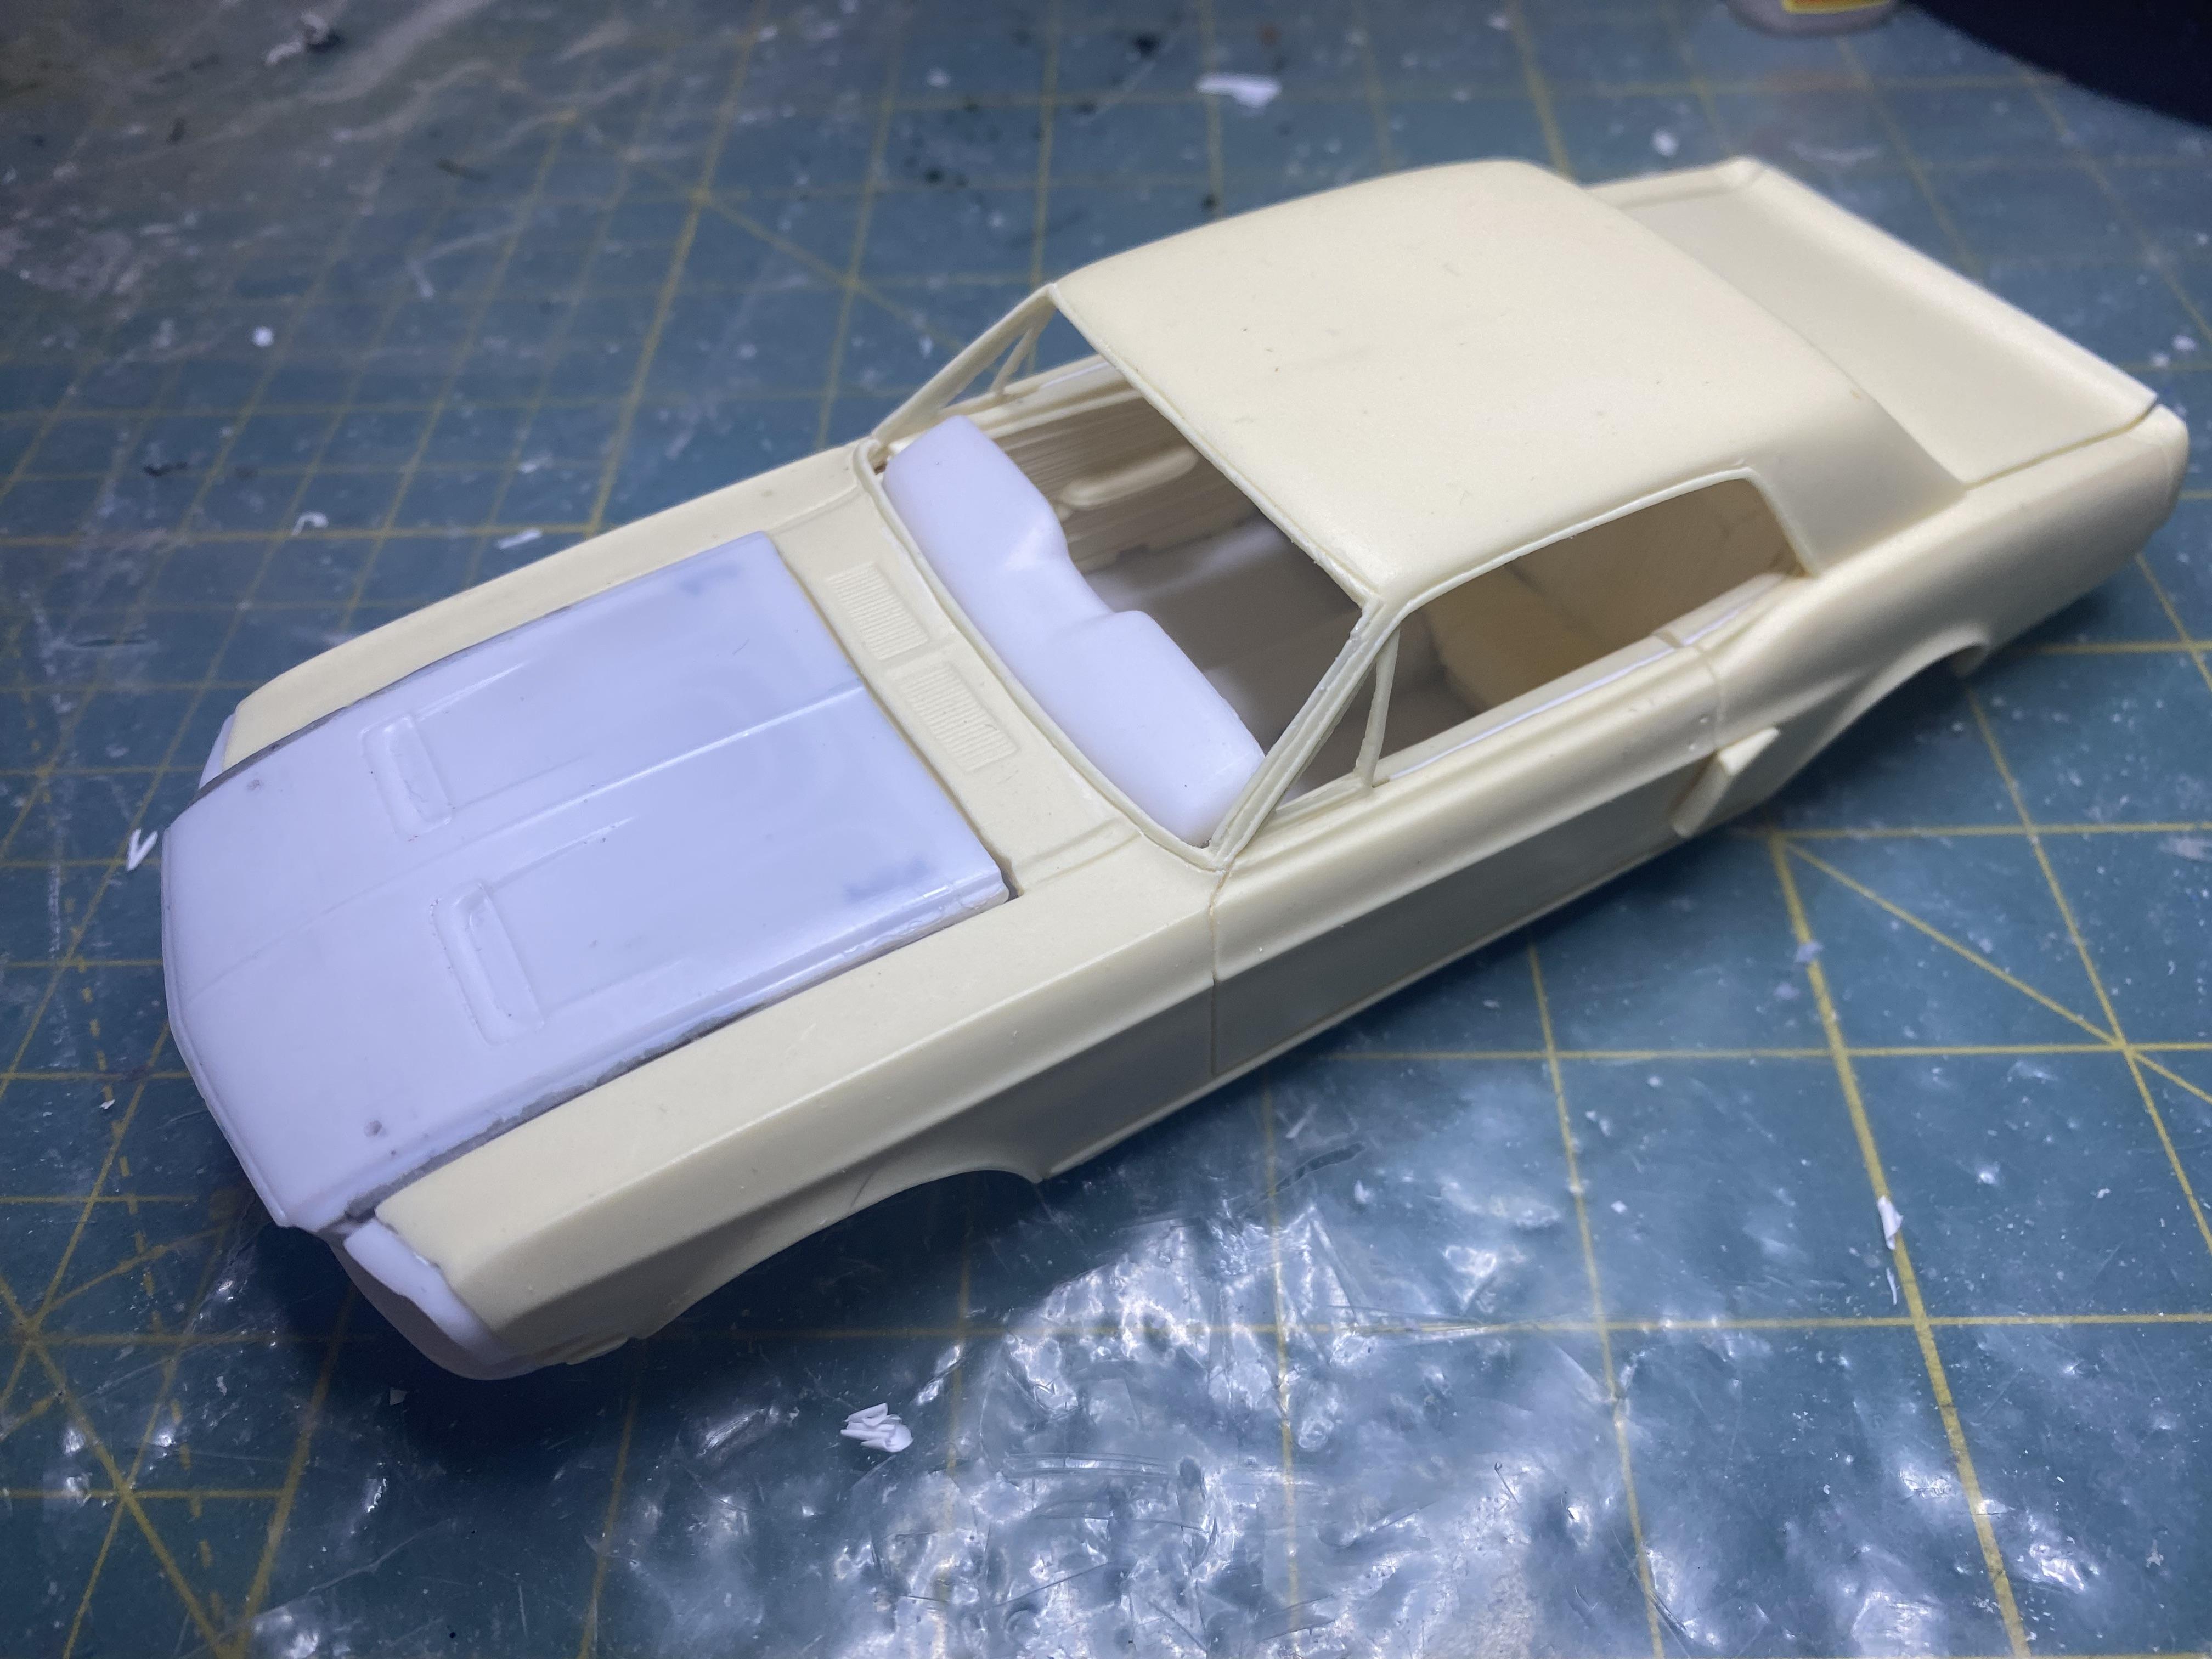
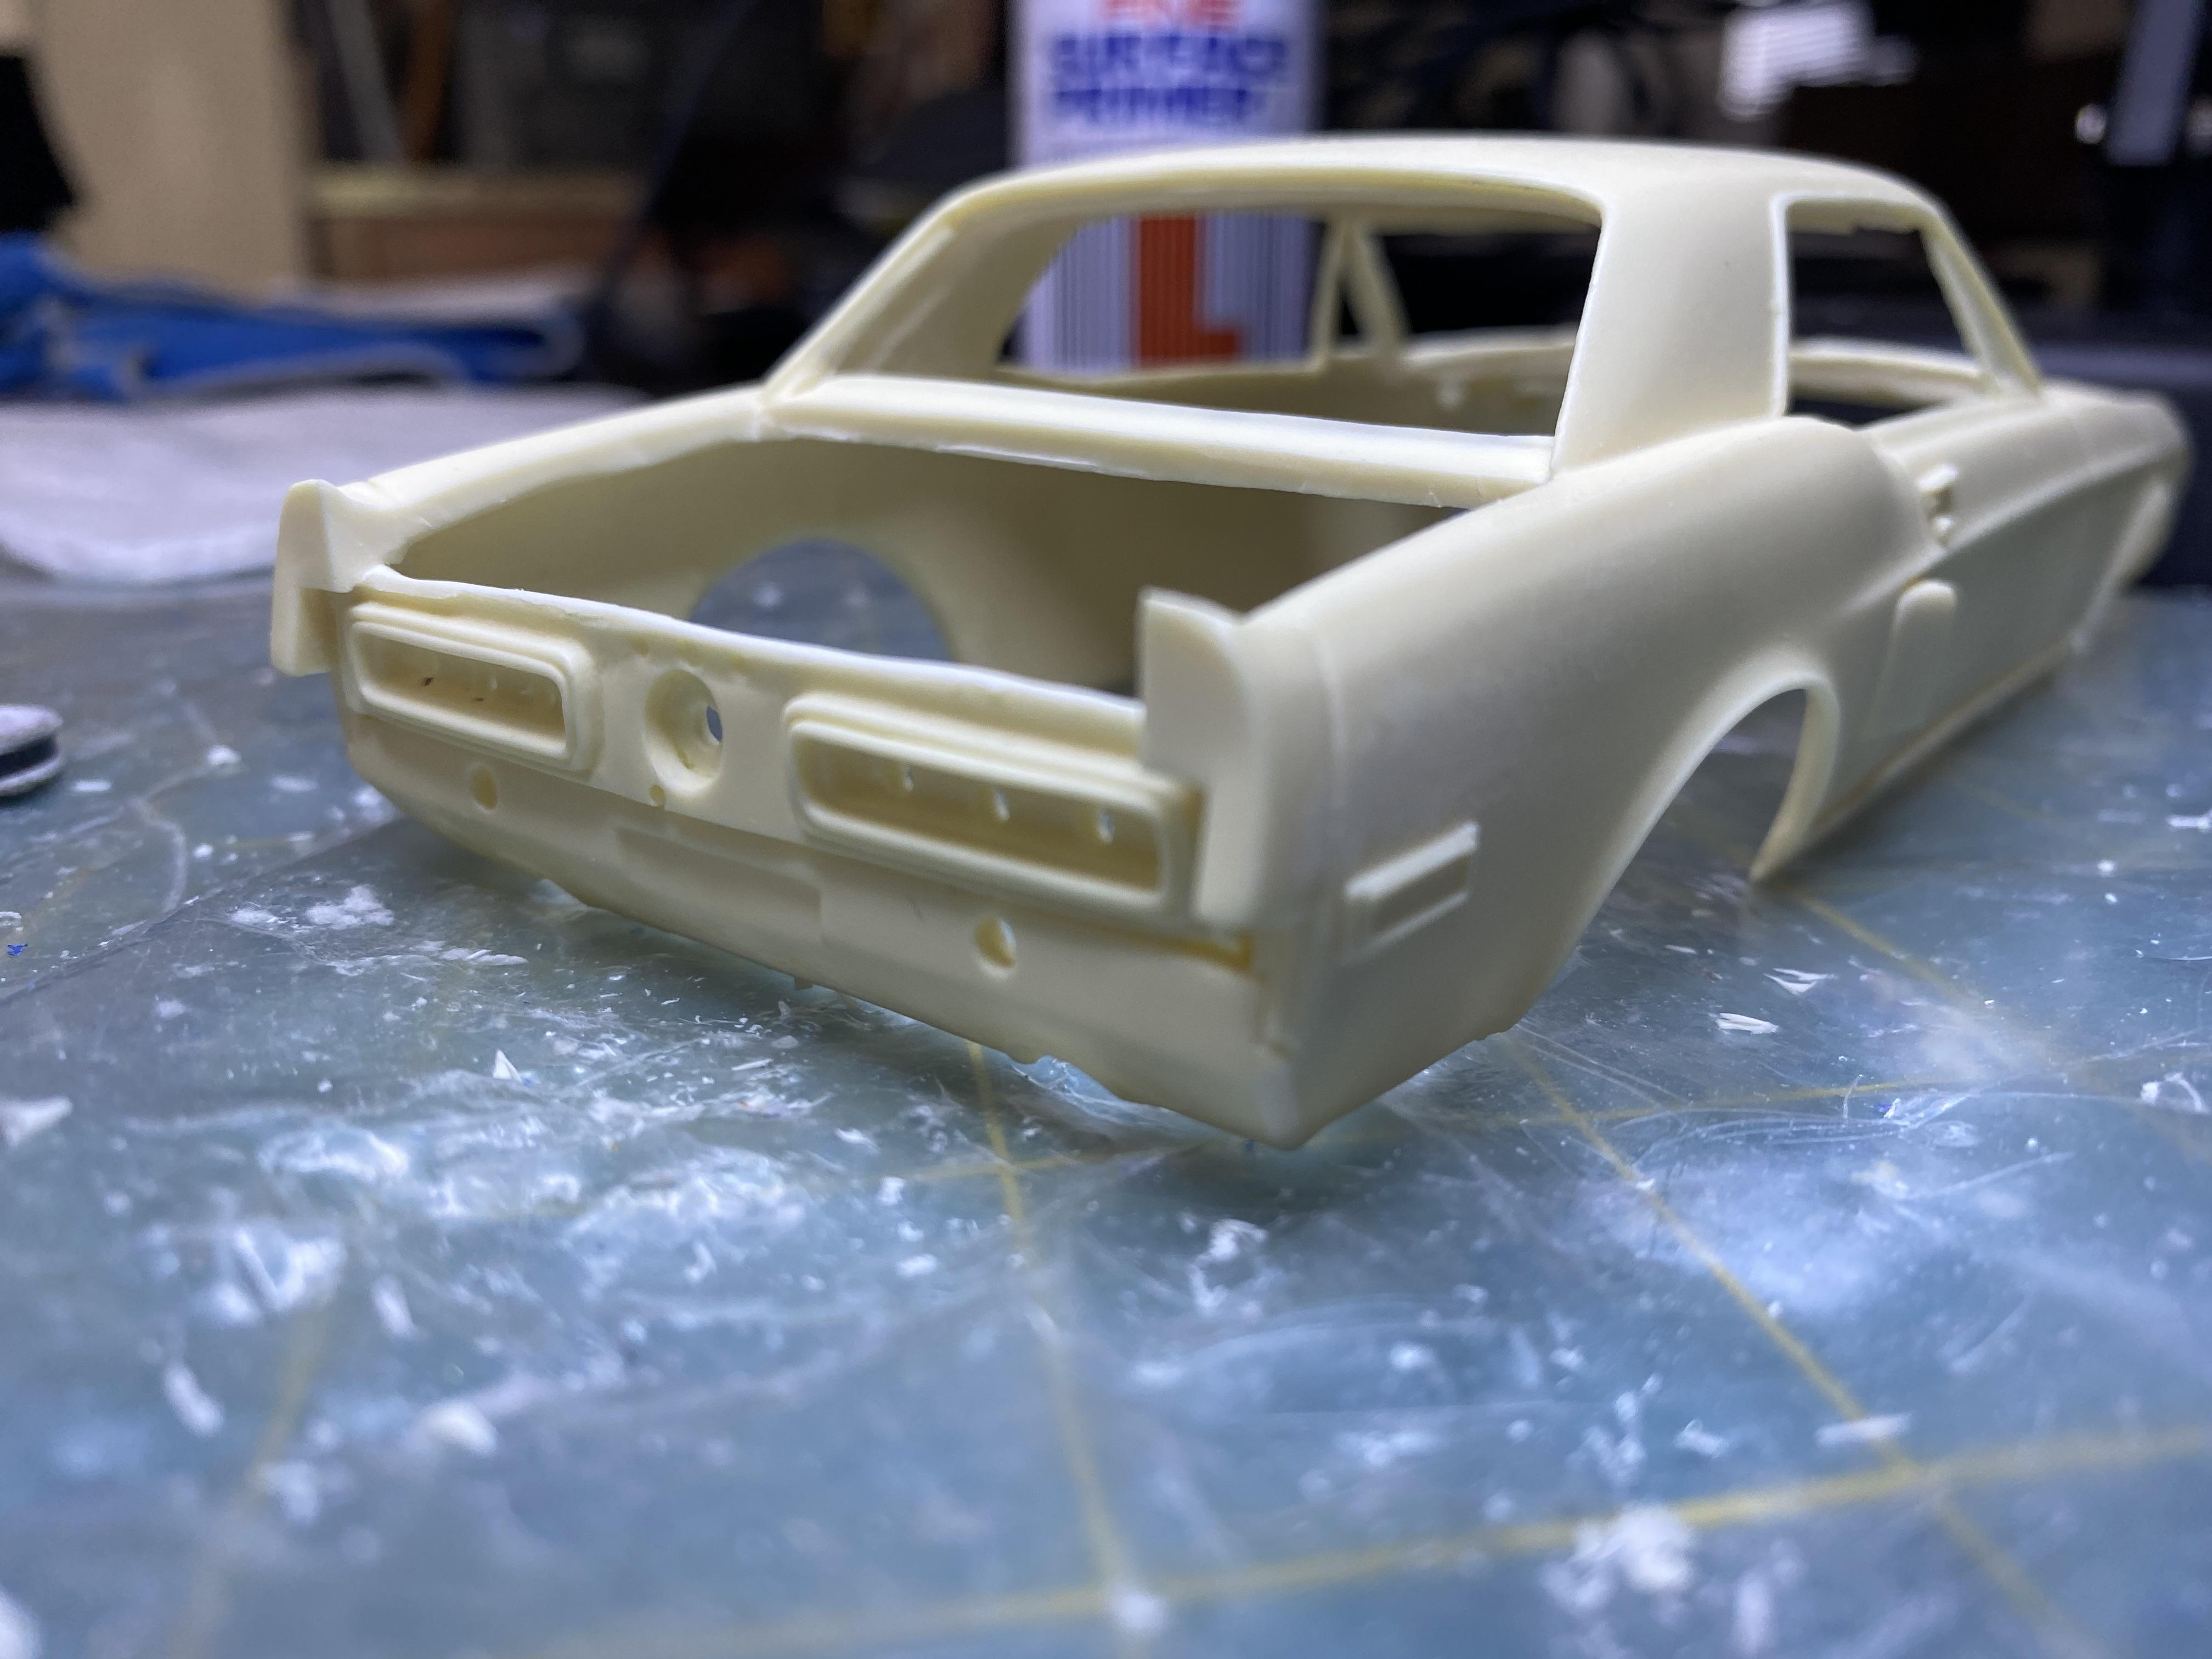
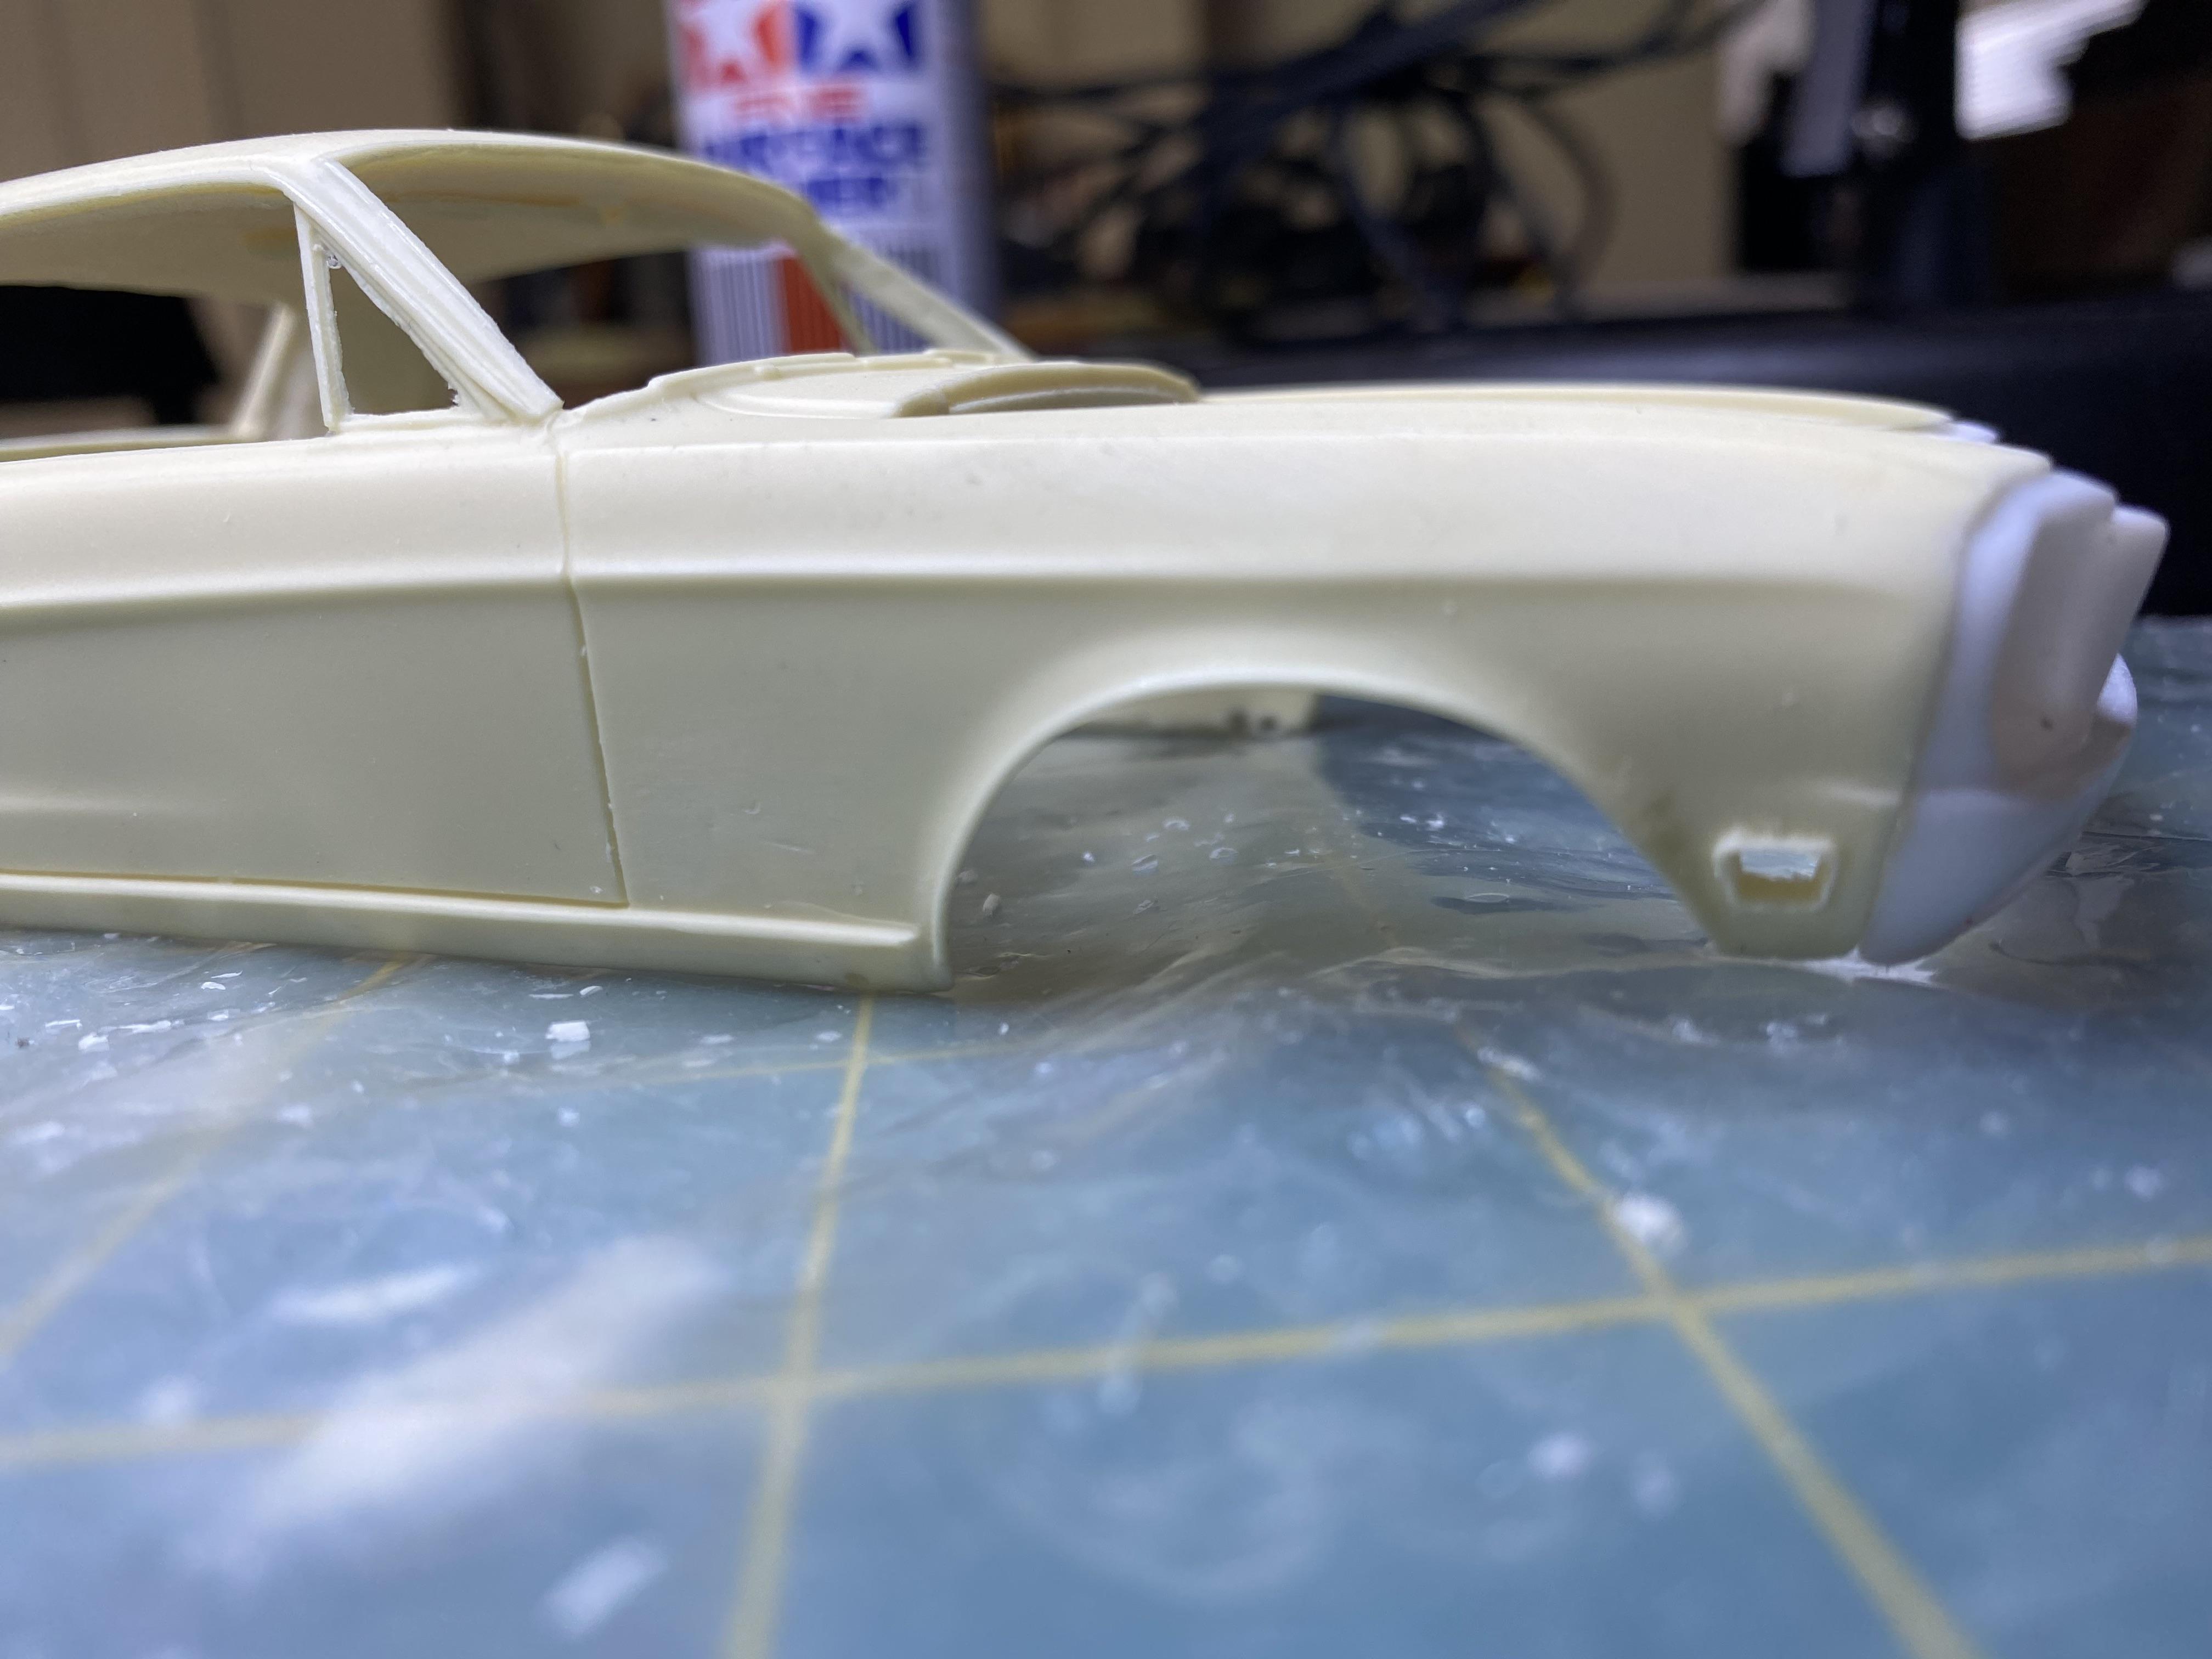
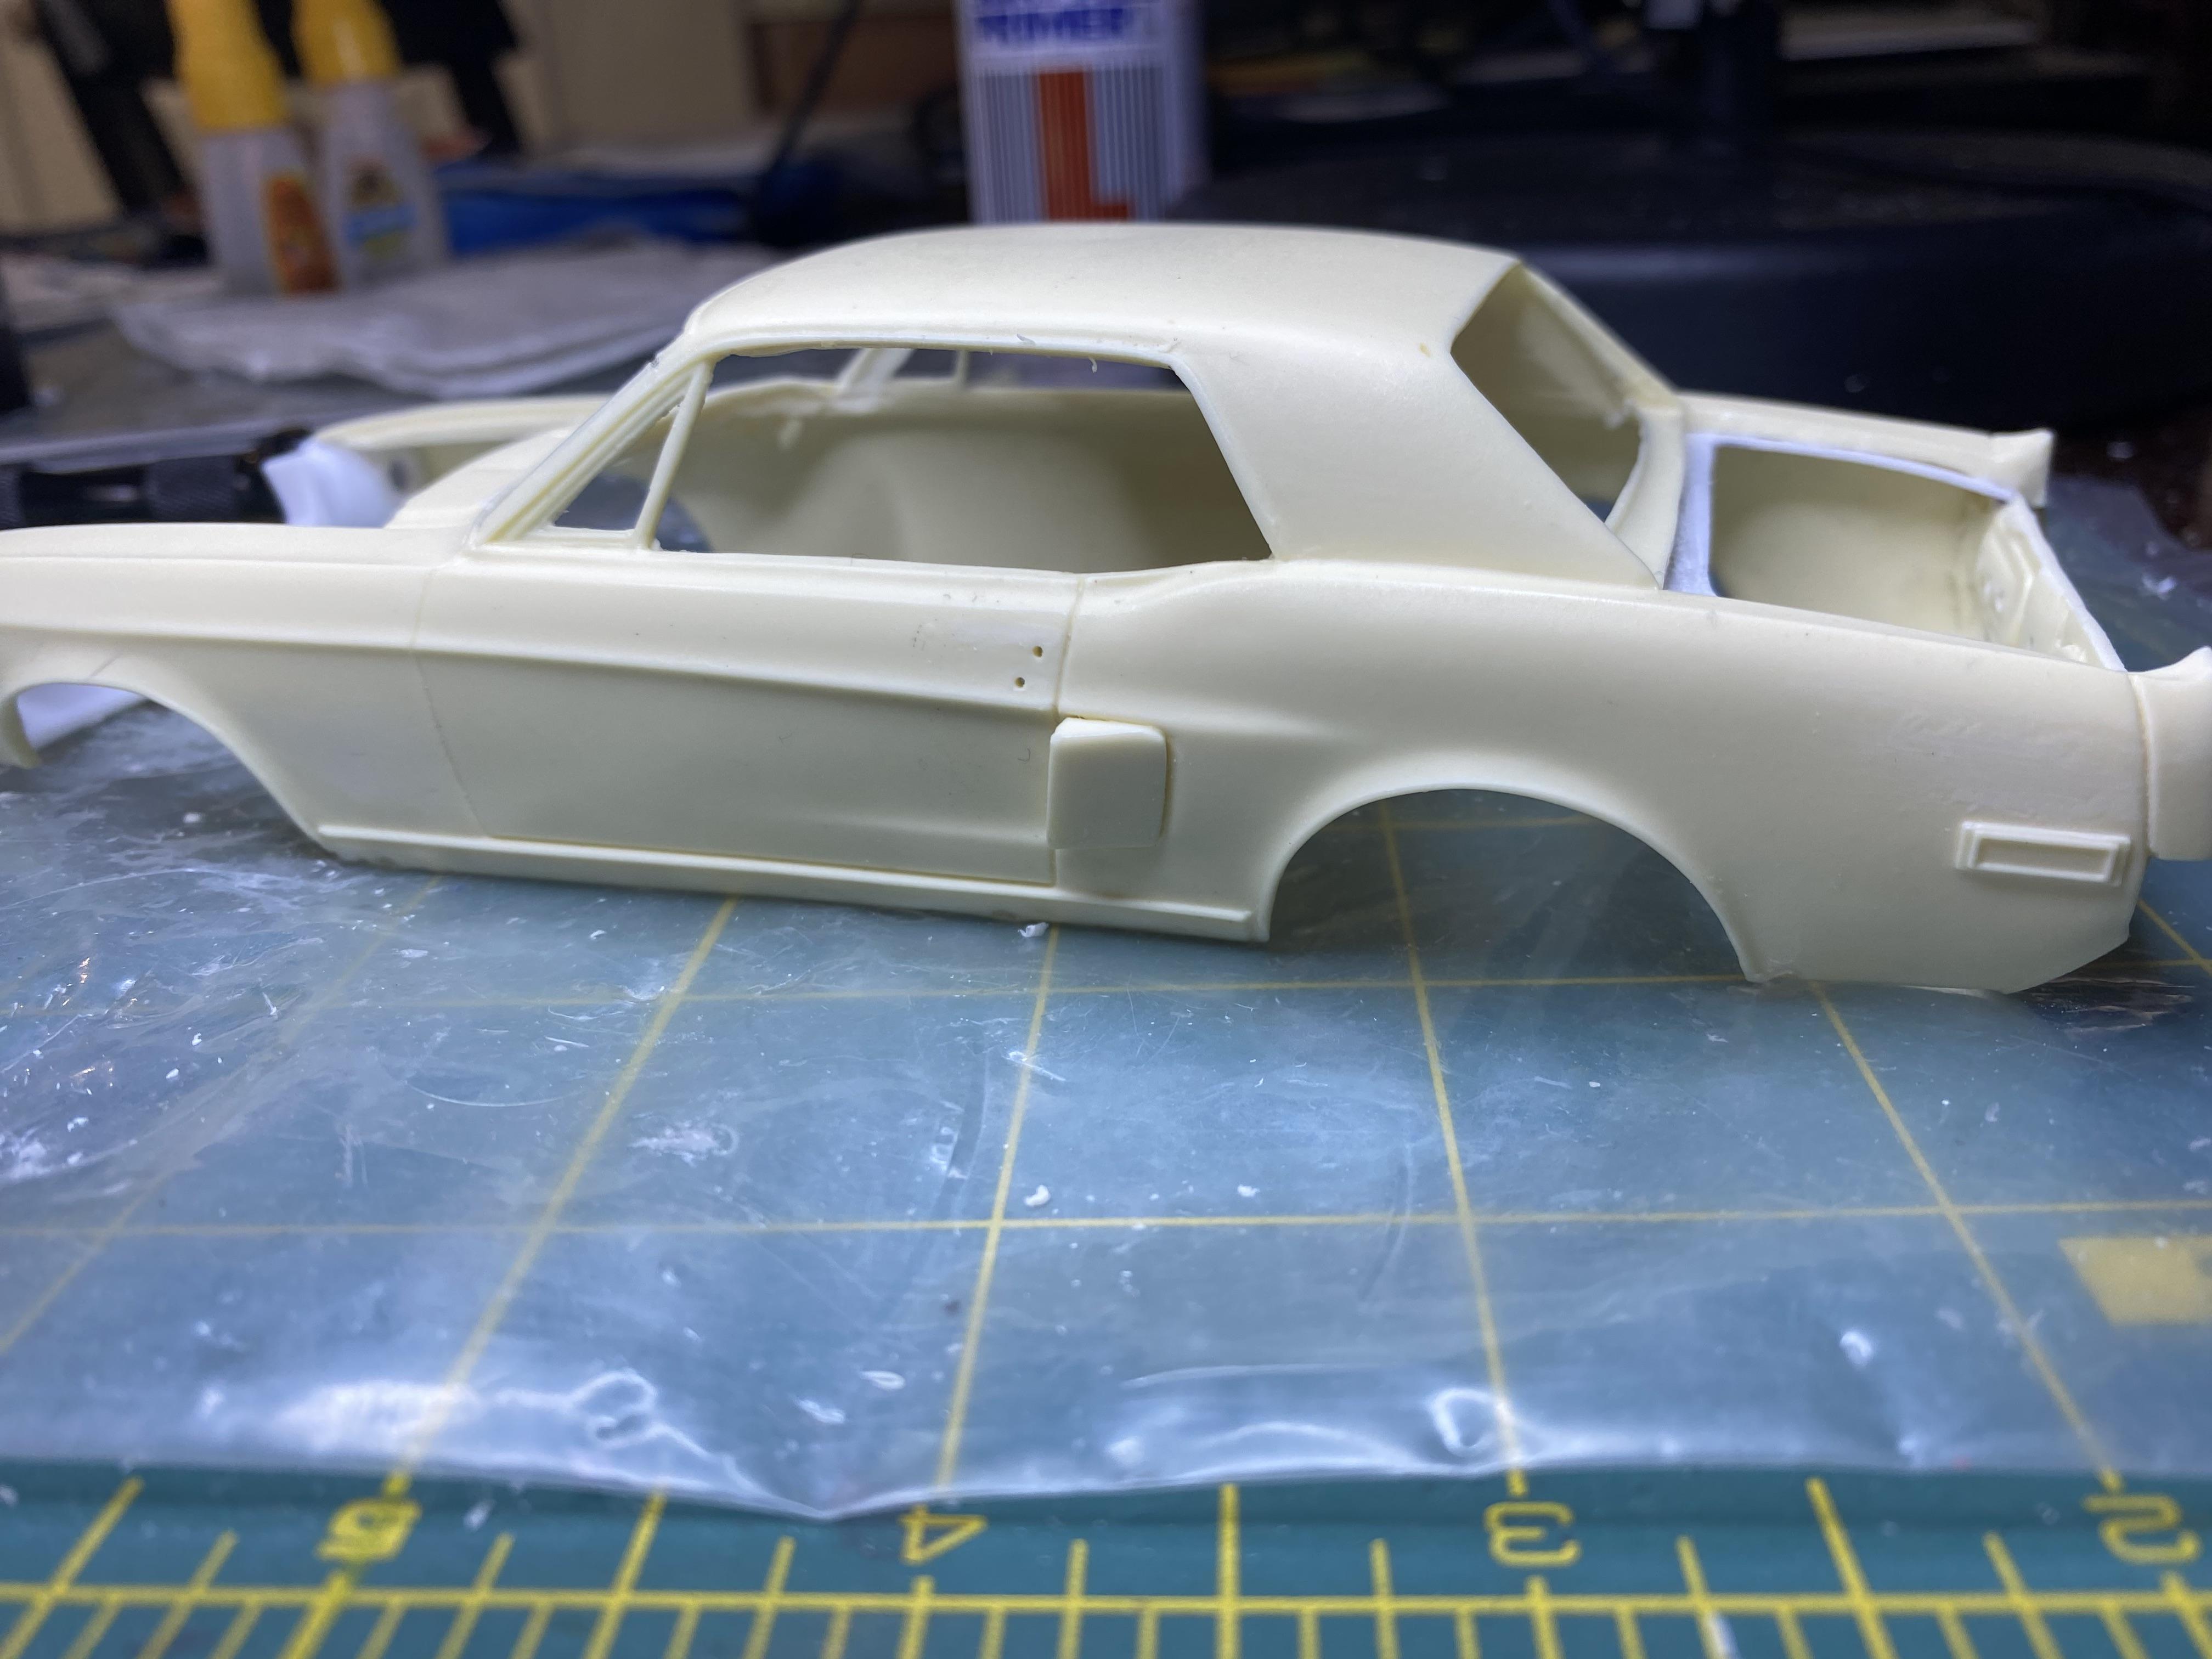
Decided to do a last mock up of the California special to make sure all of the parts from different sources fit ok. Had to do some work but everything went together better than expected after a lot of earlier work. I did have to shorten the driveshaft, change out the front wheel backs and modify the exhaust a bit. Created horns, cut open the radiator support and created radiator grill from photo-etch. Now in the second primer coat pass after a few smoothing and filling of some bad scratches and gaps.
-
Thanks, I think I am getting really close on fab and mod but I need to do a mock up before paint to make sure all the parts will fit together ok.
-
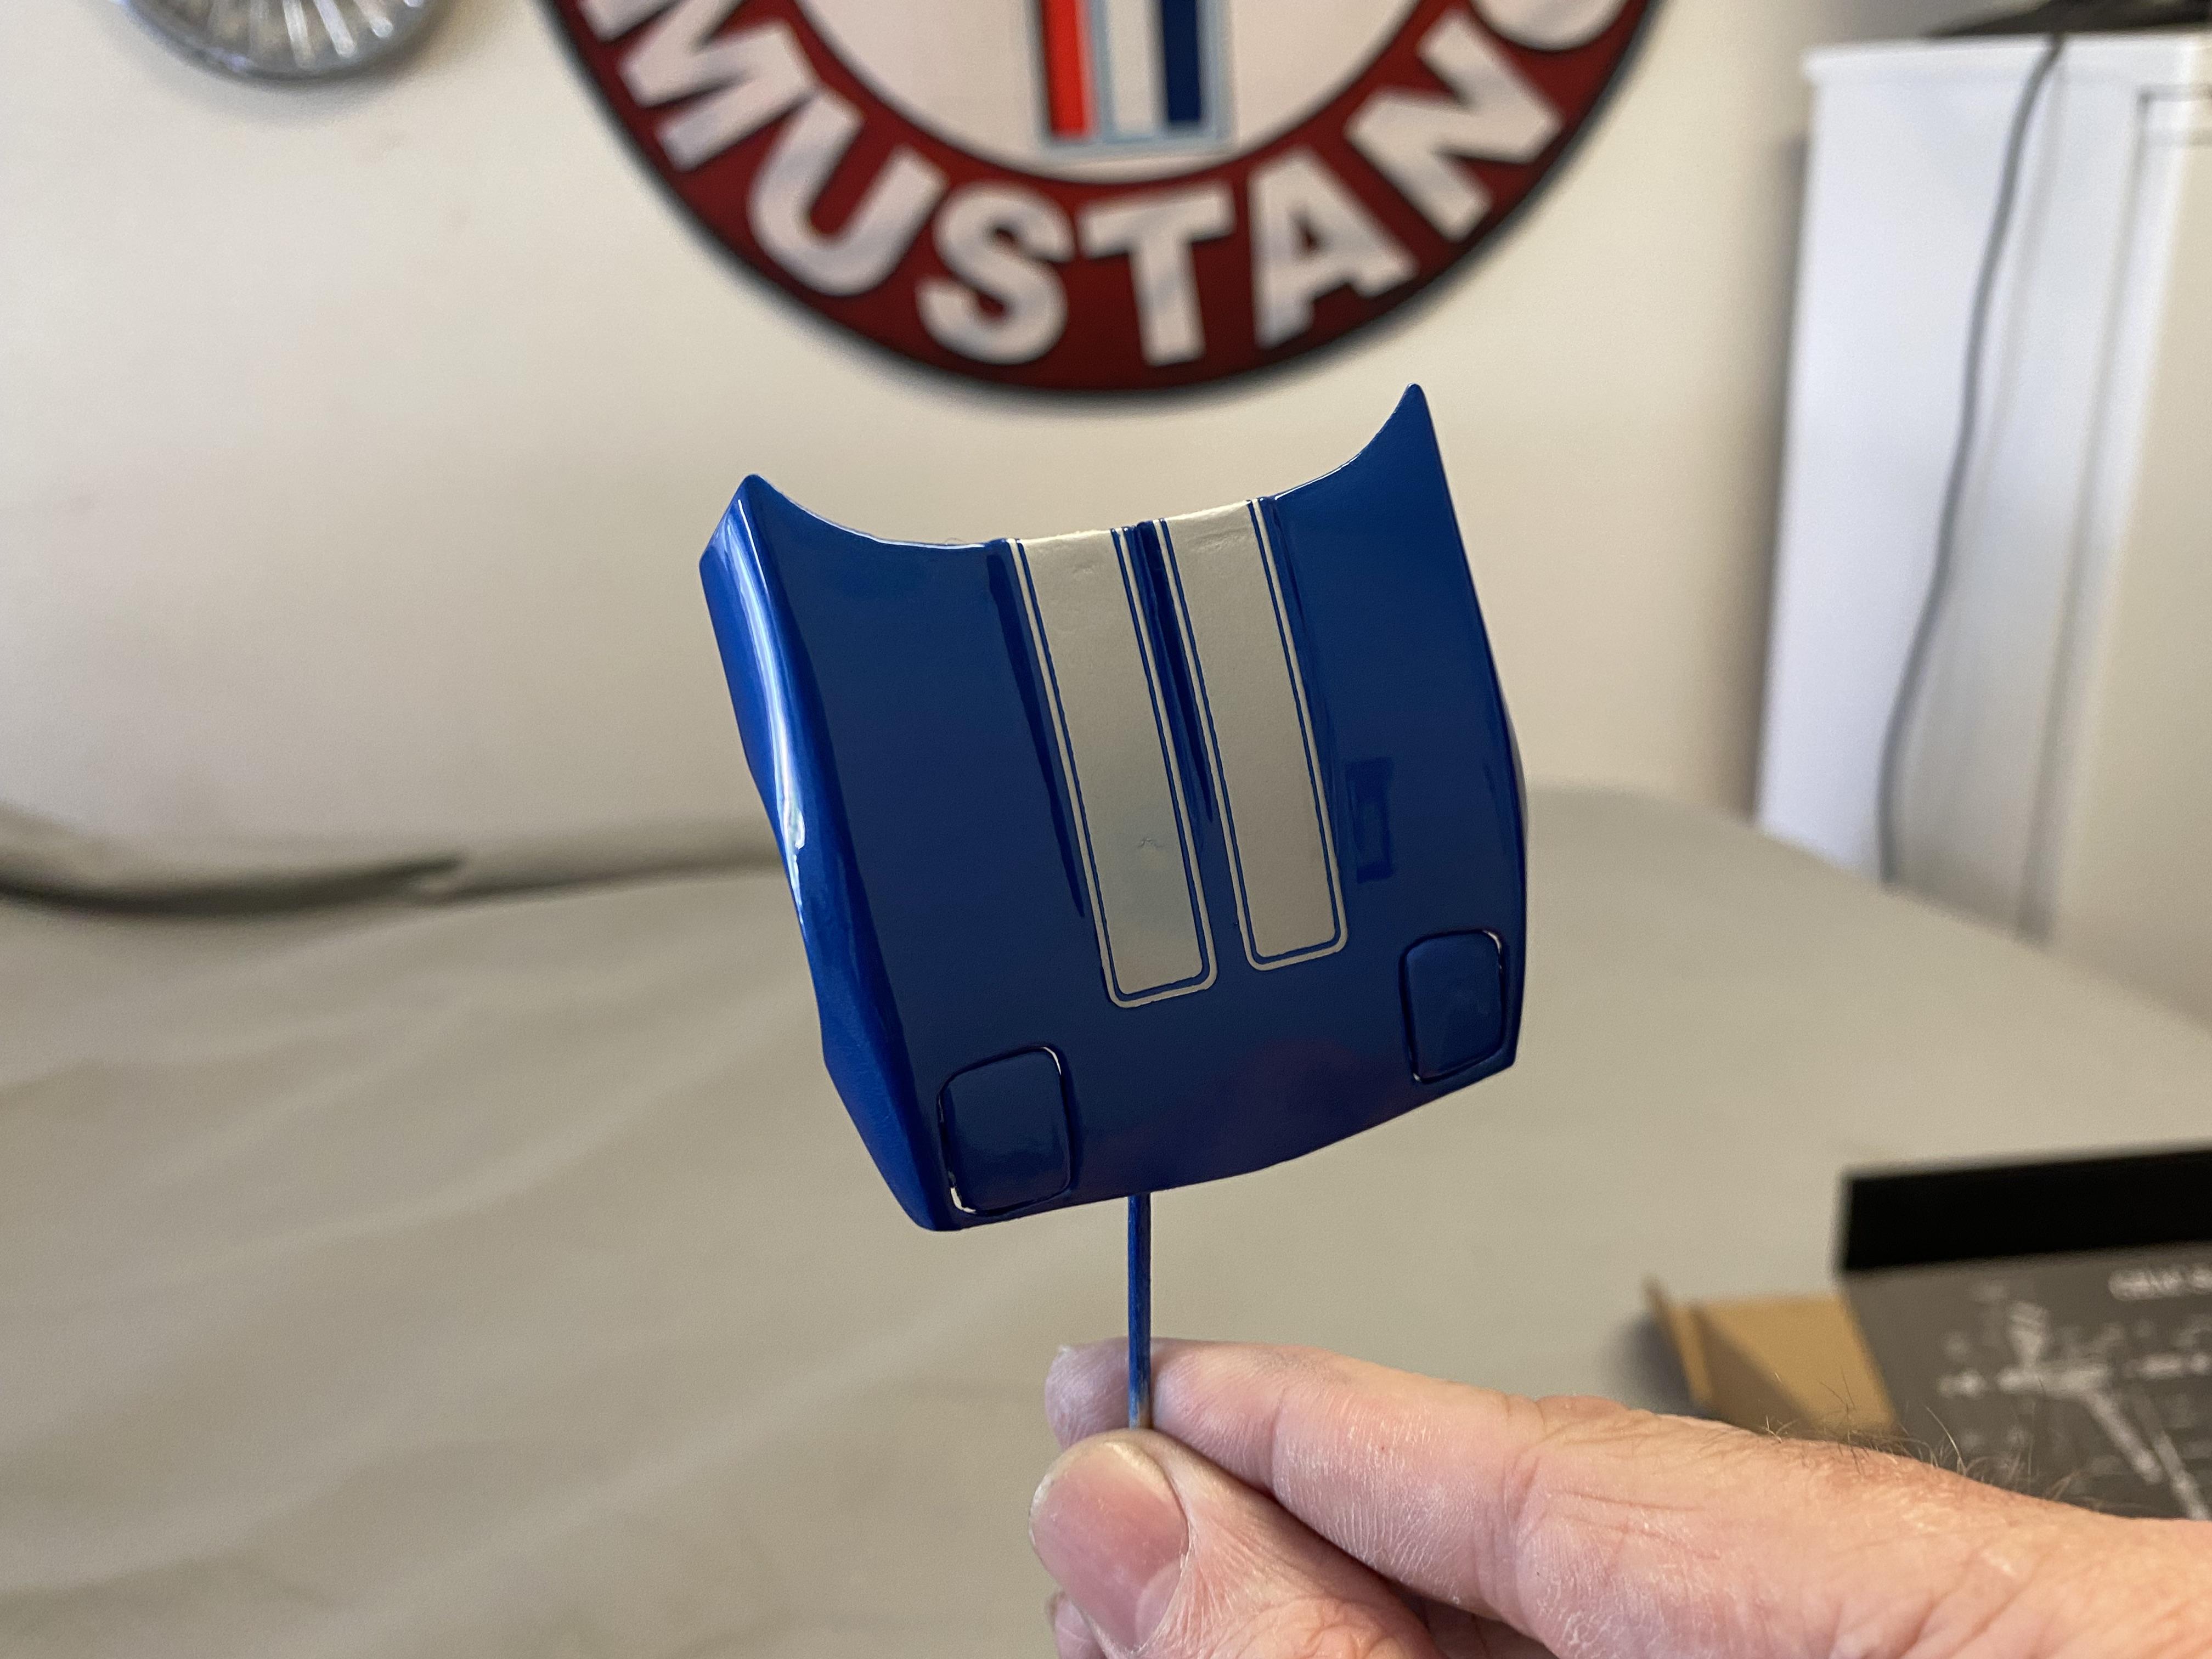
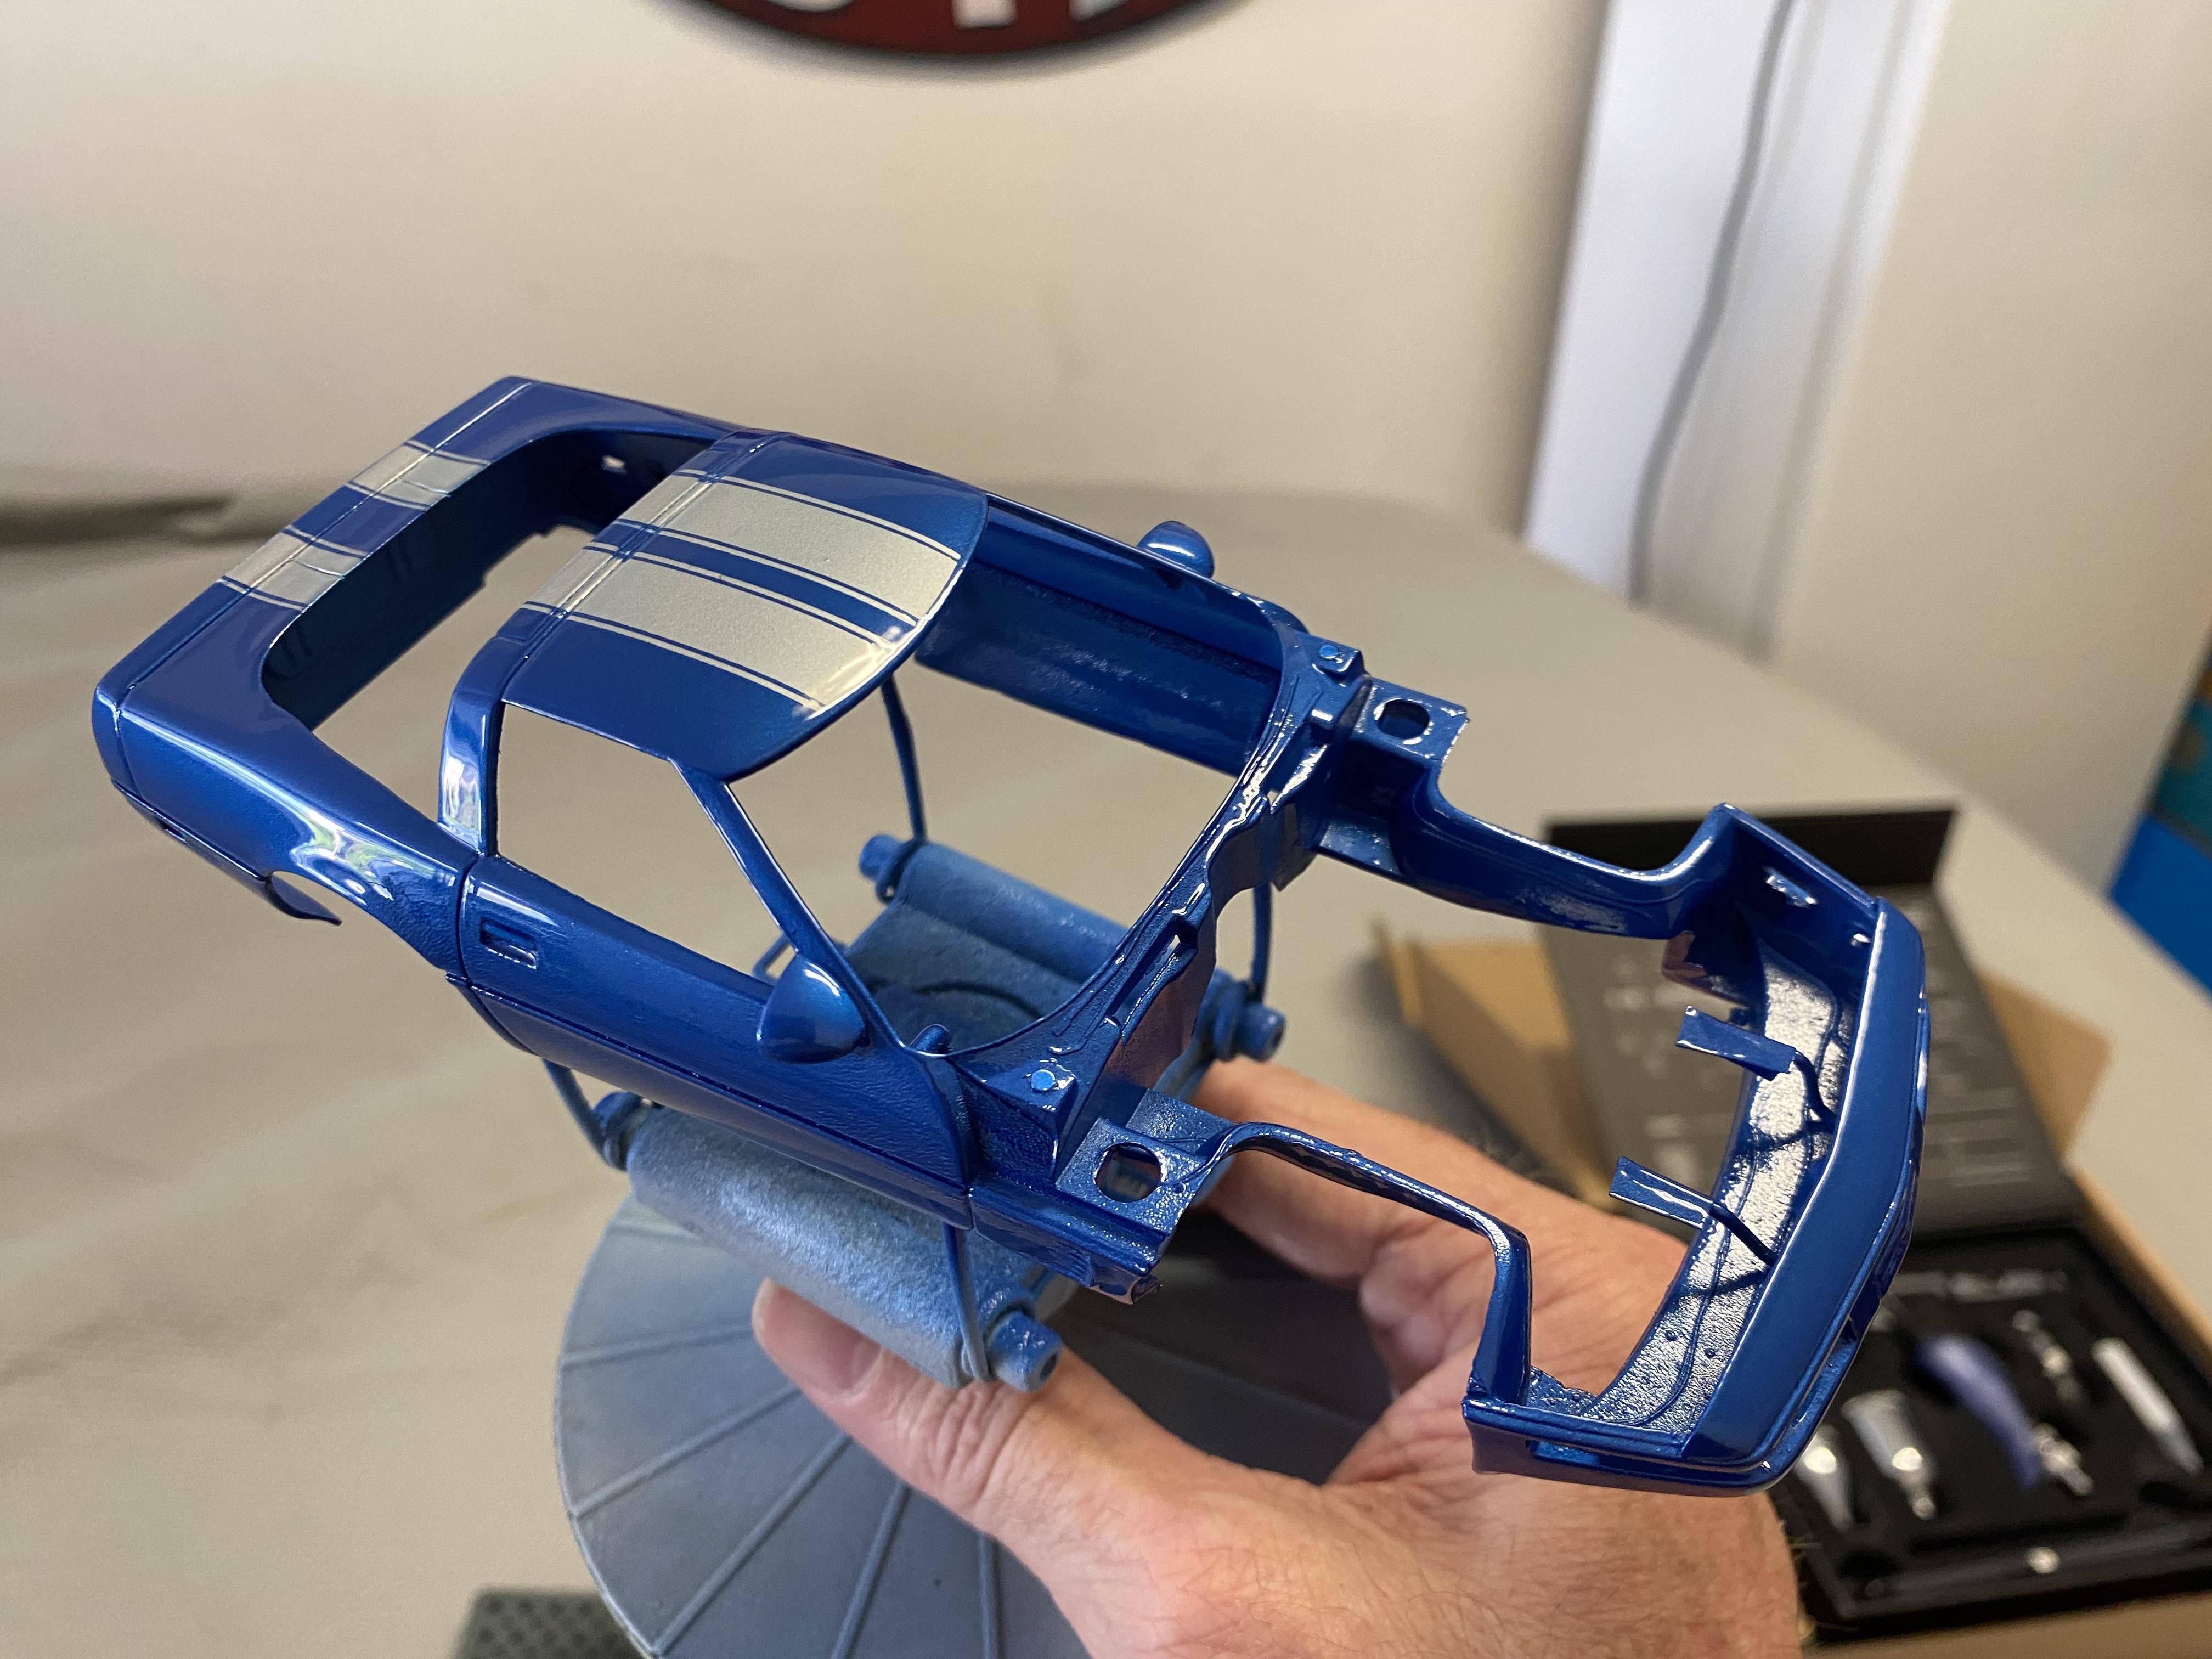
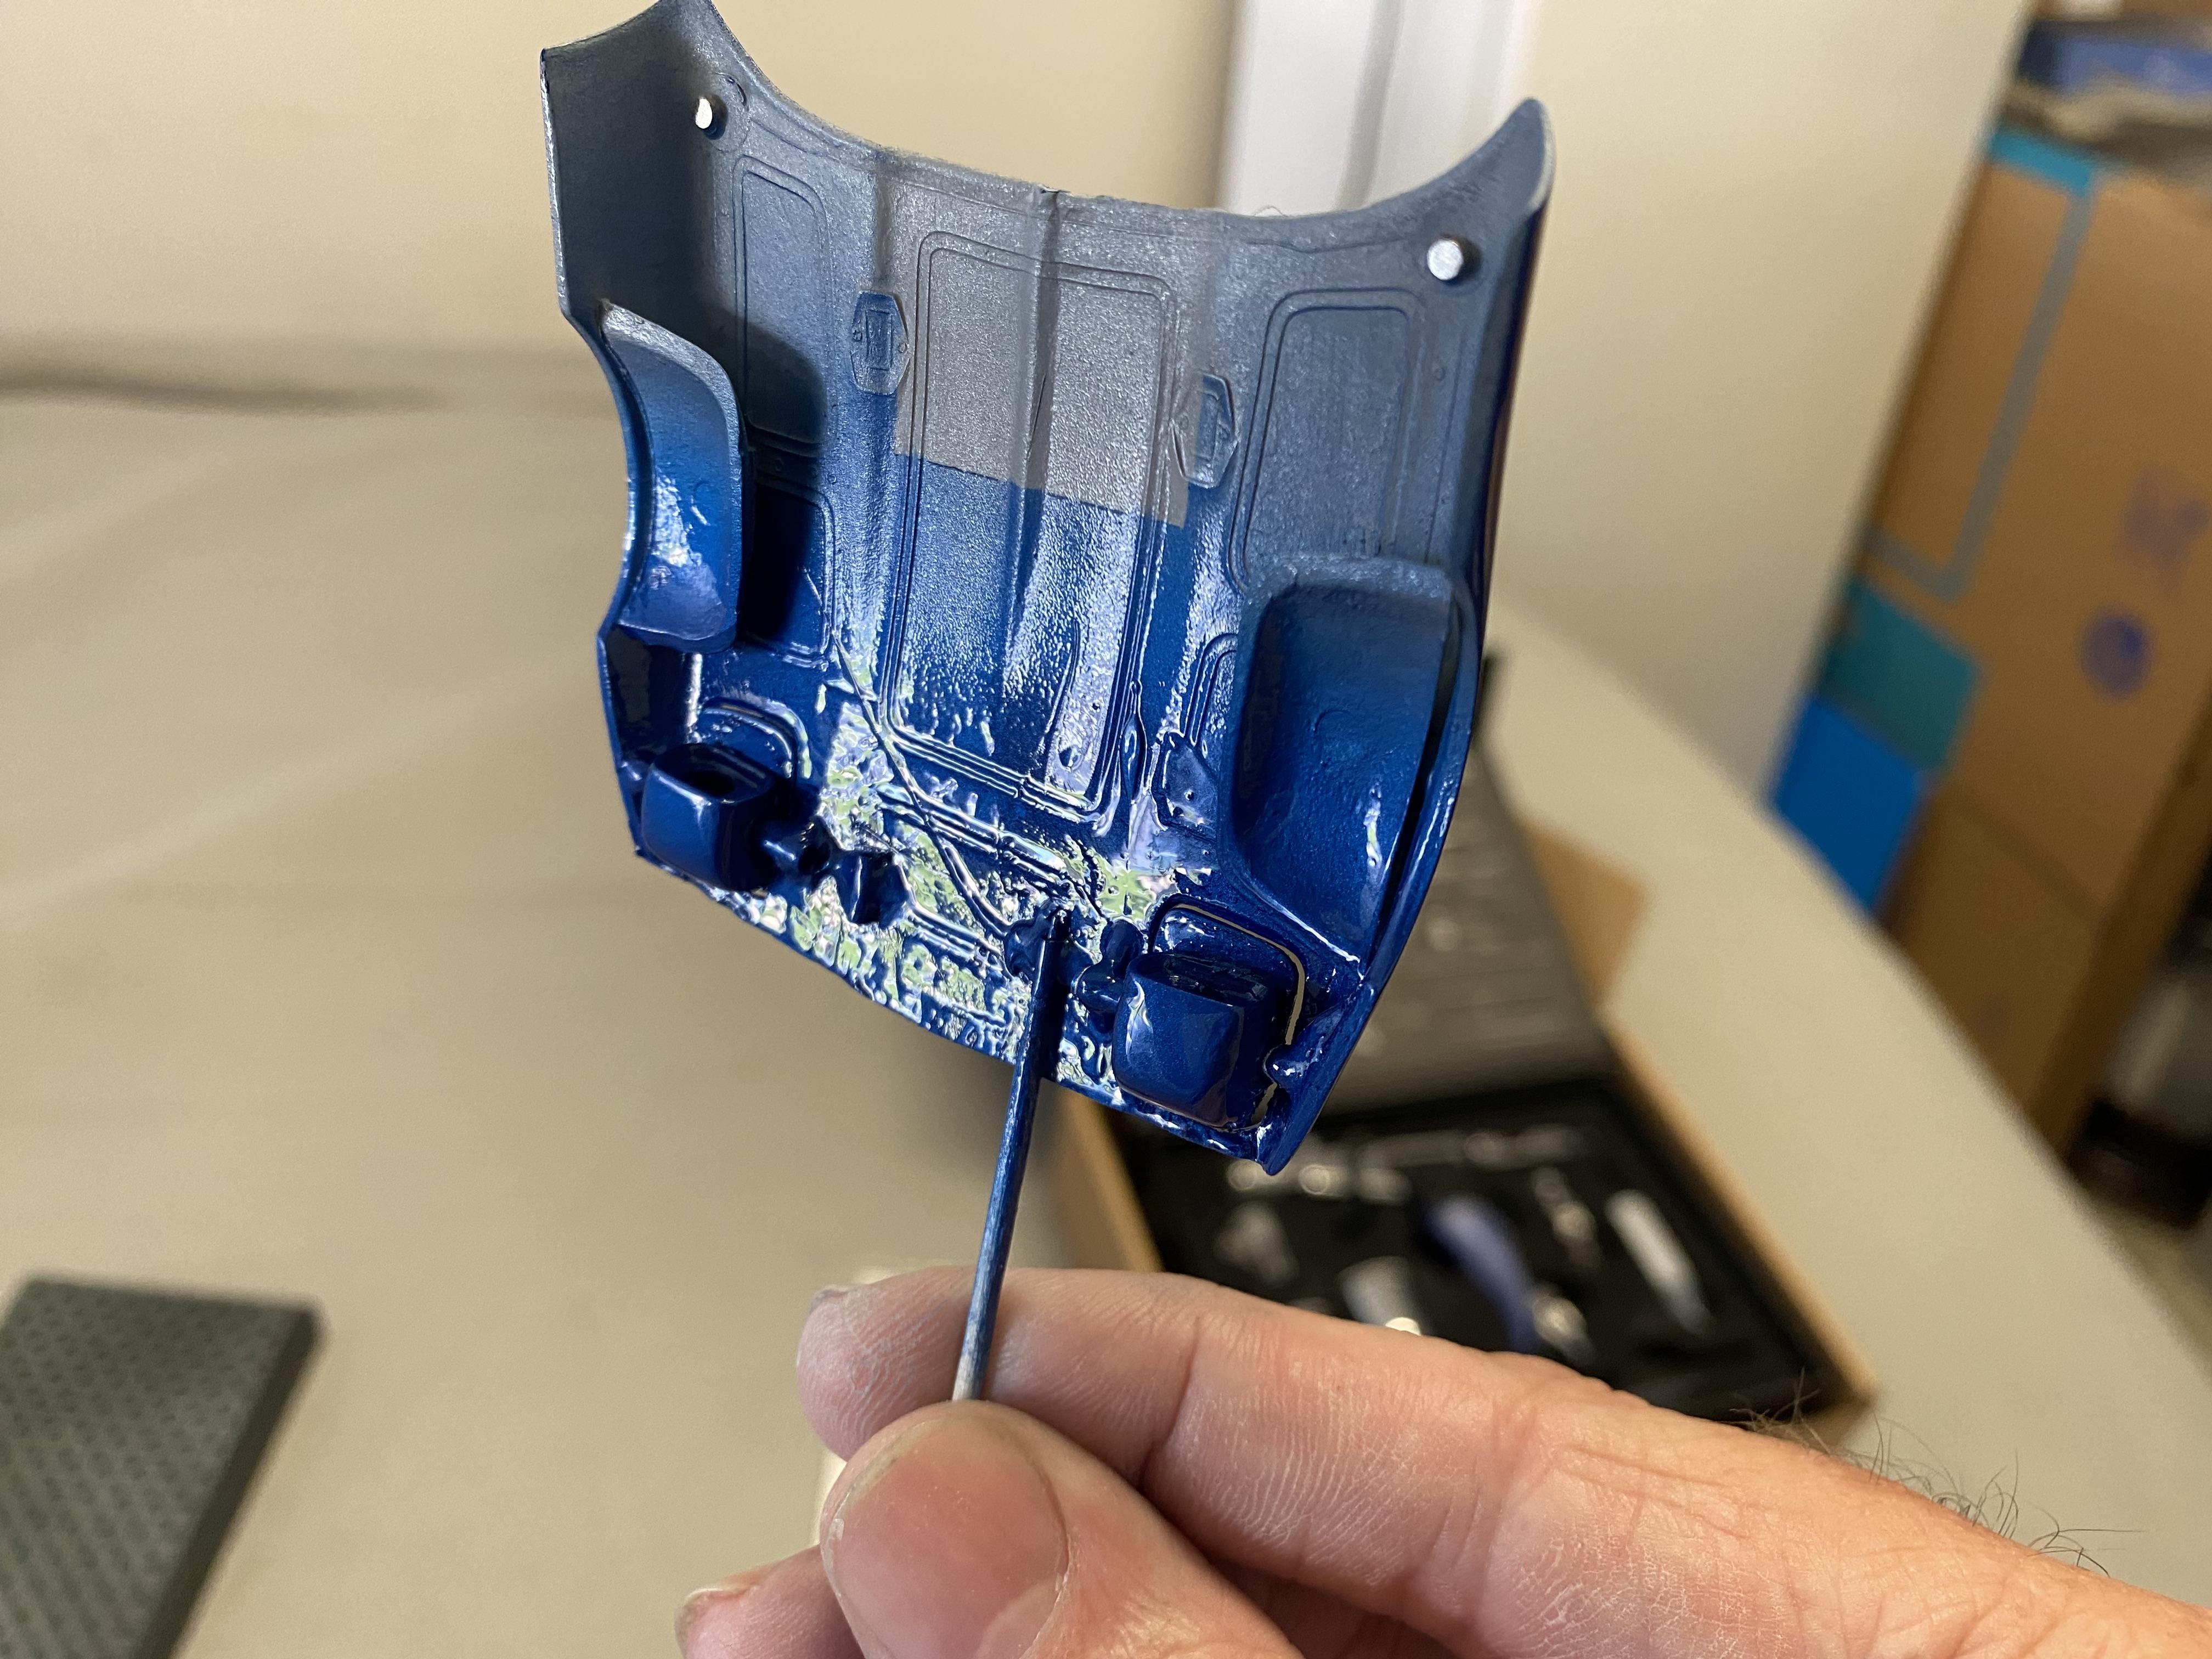
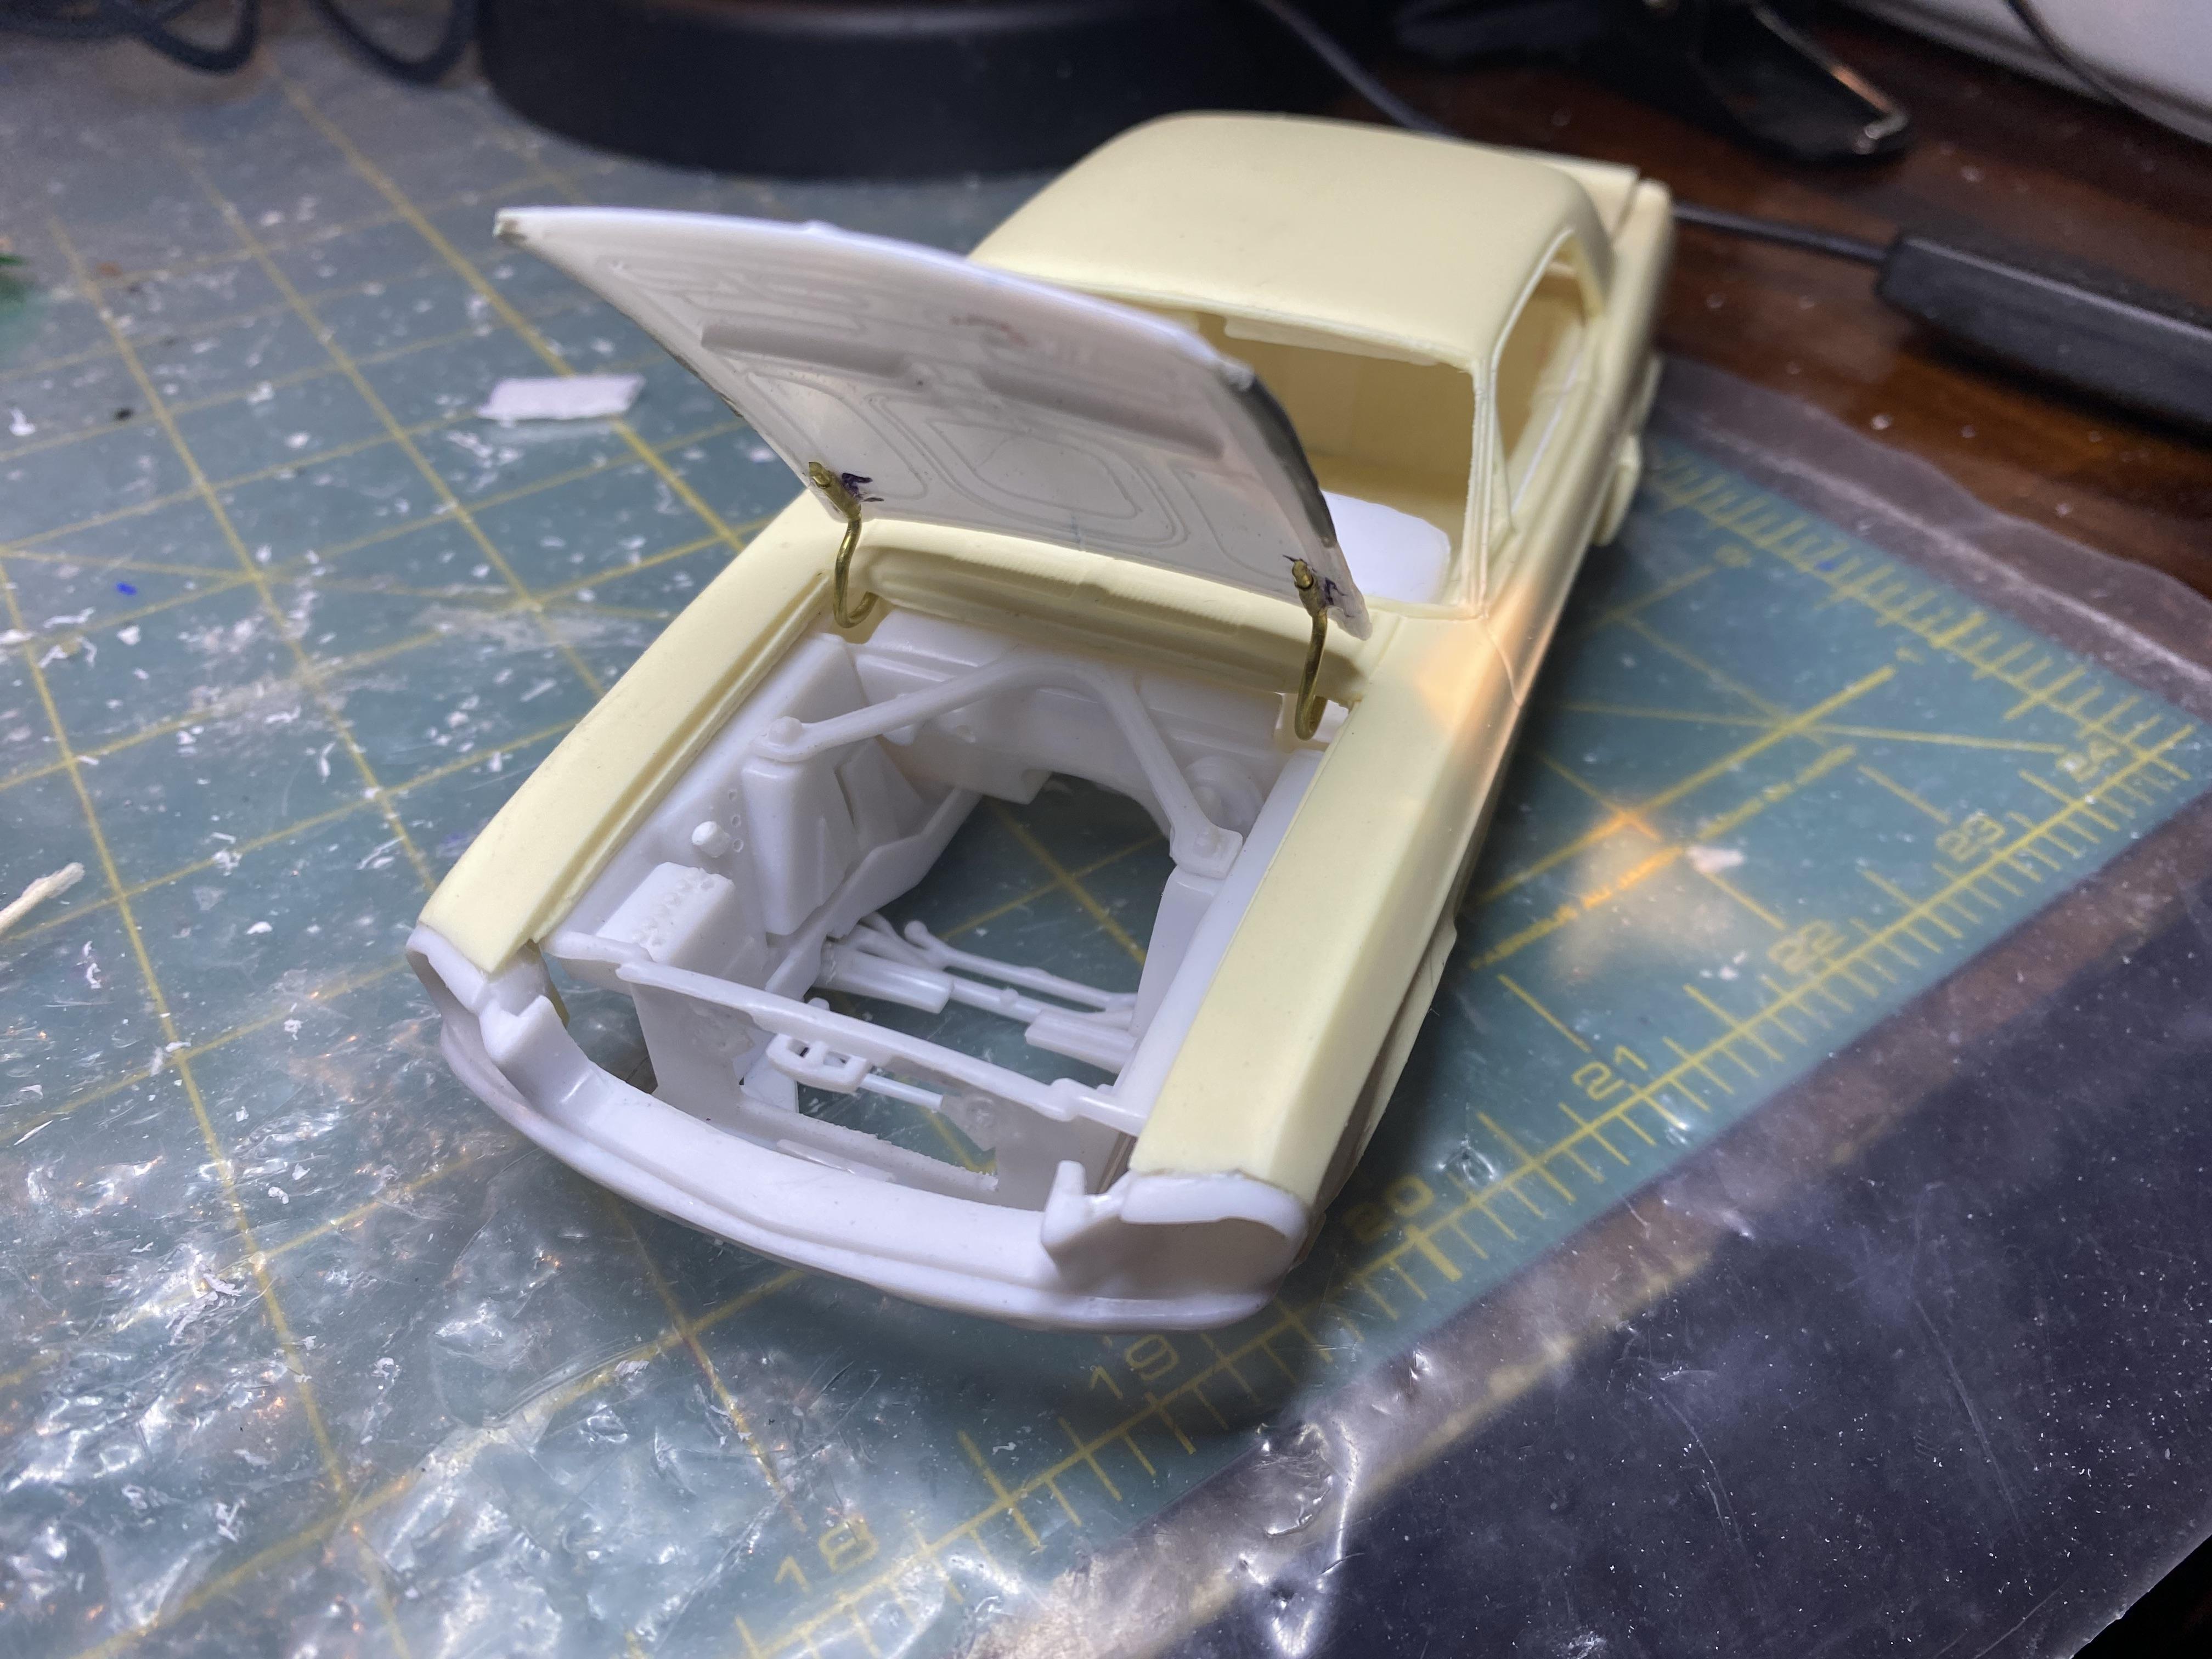
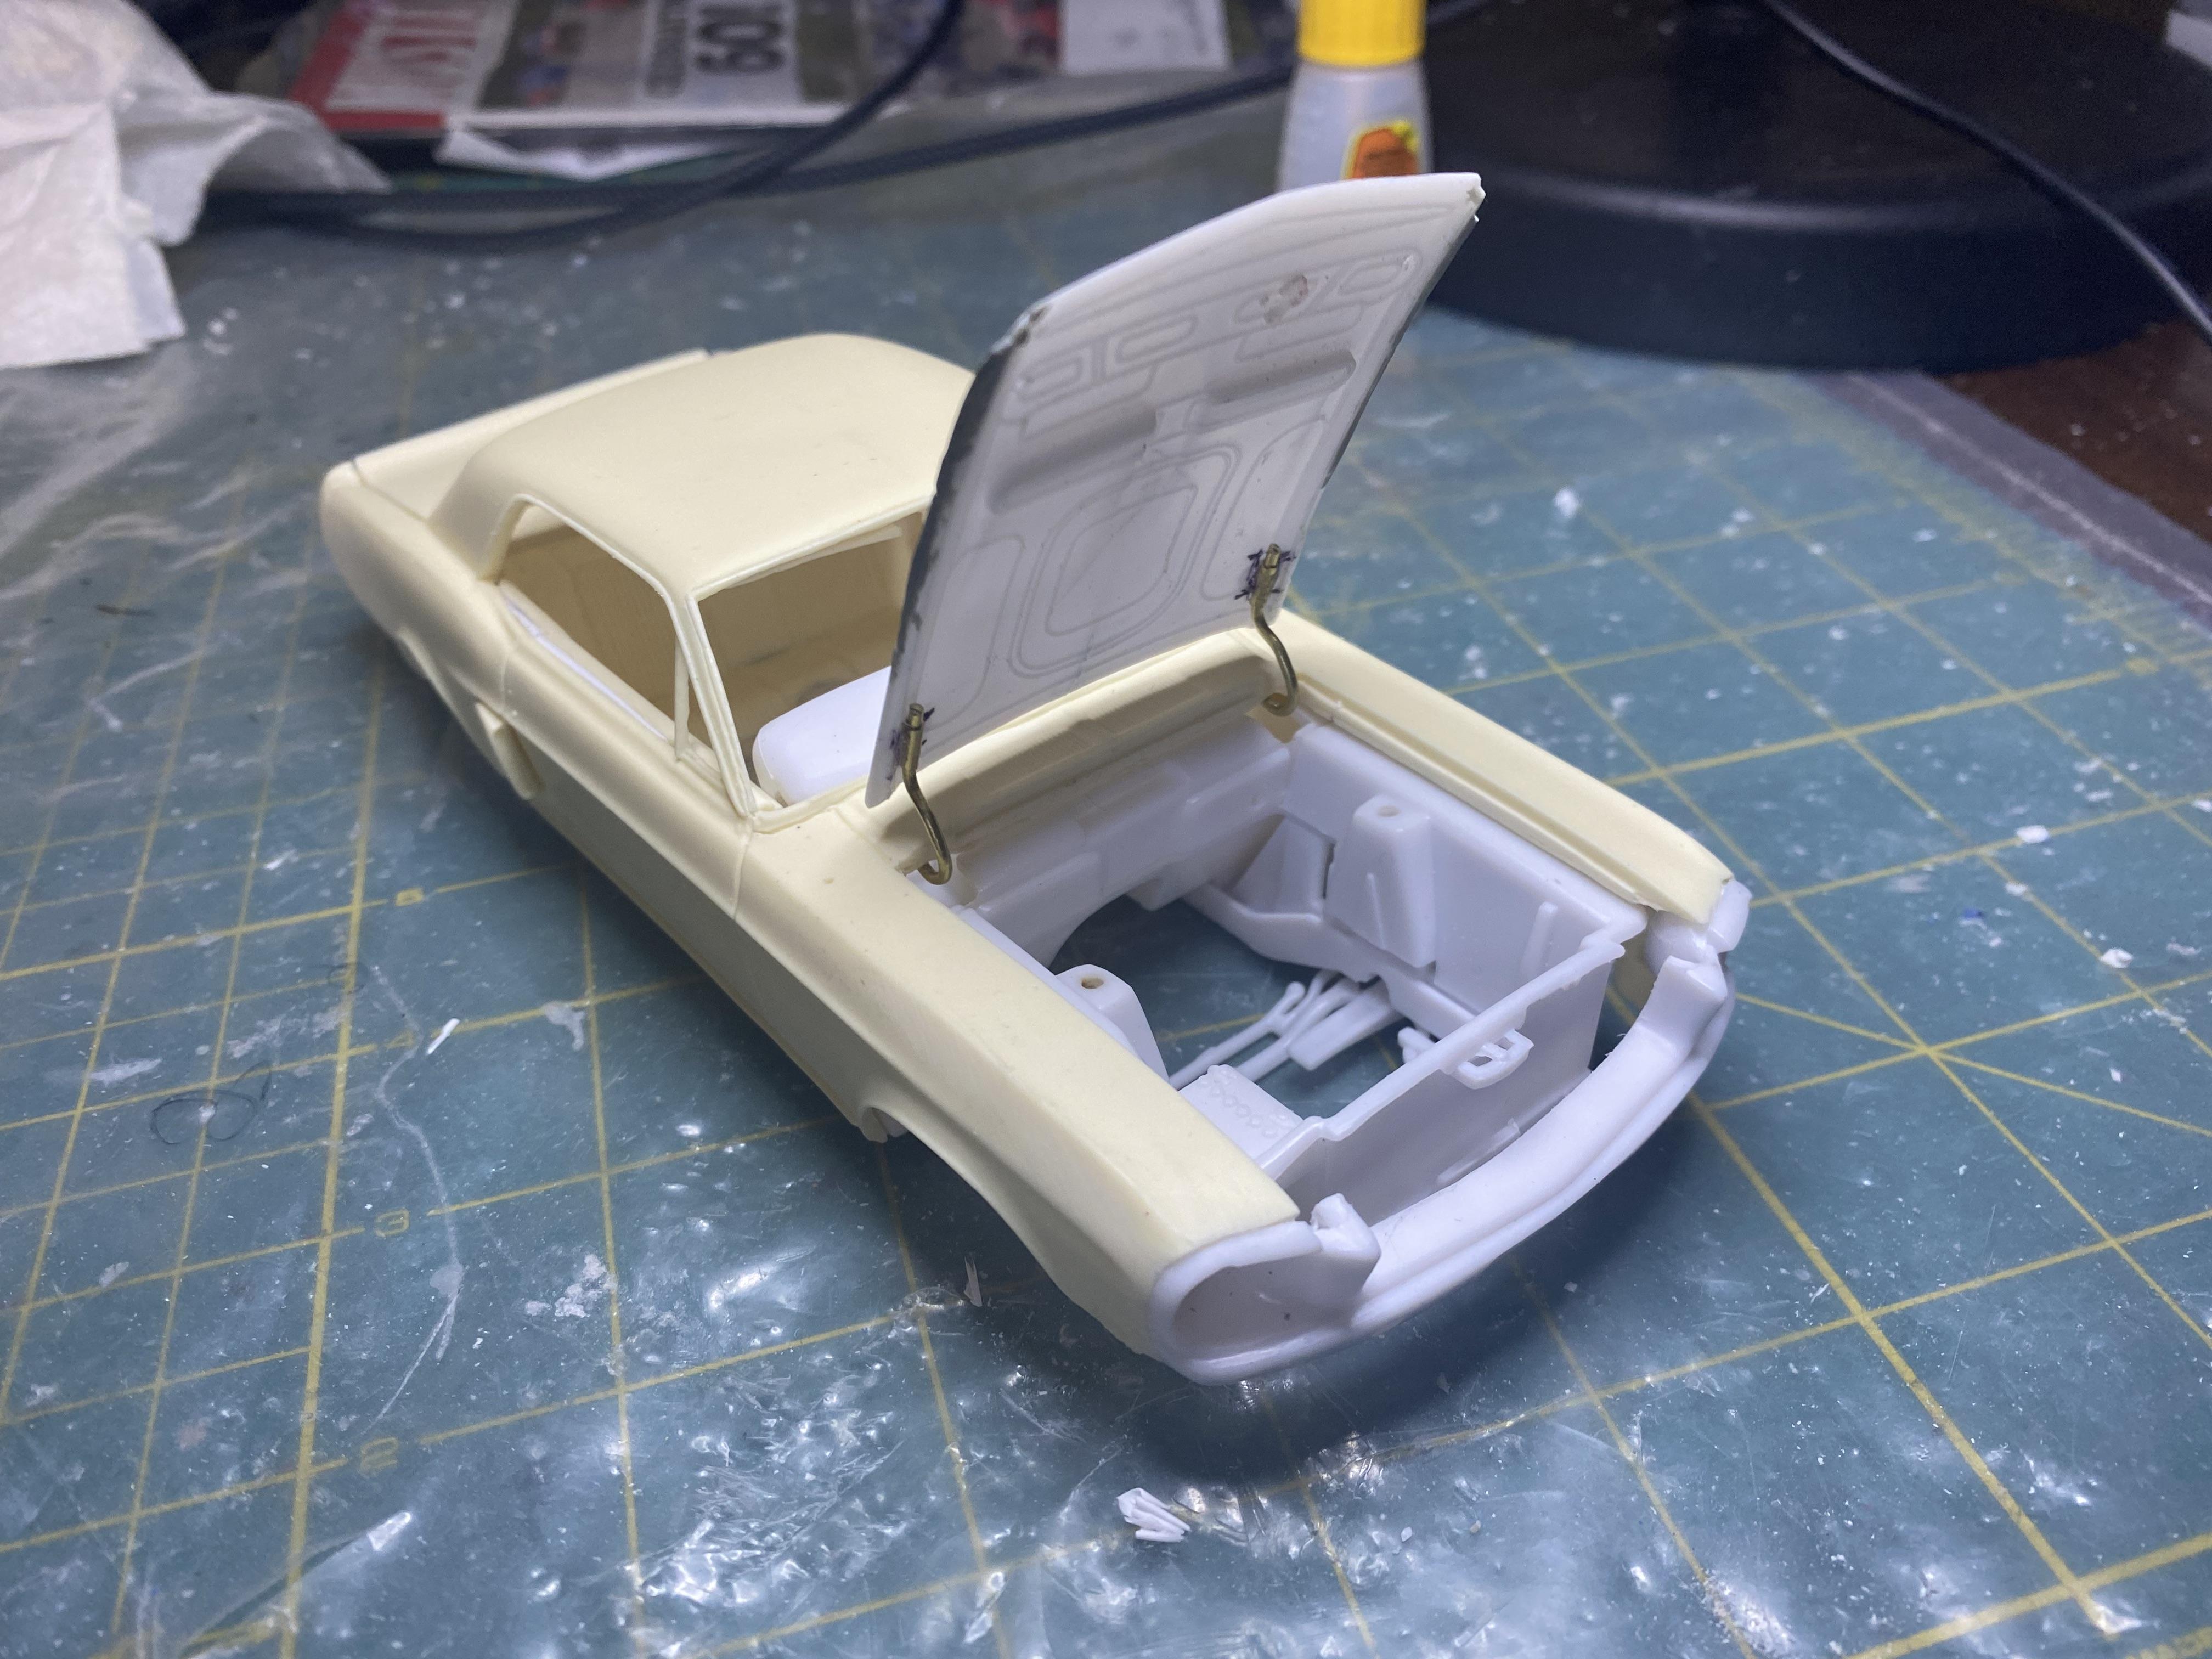
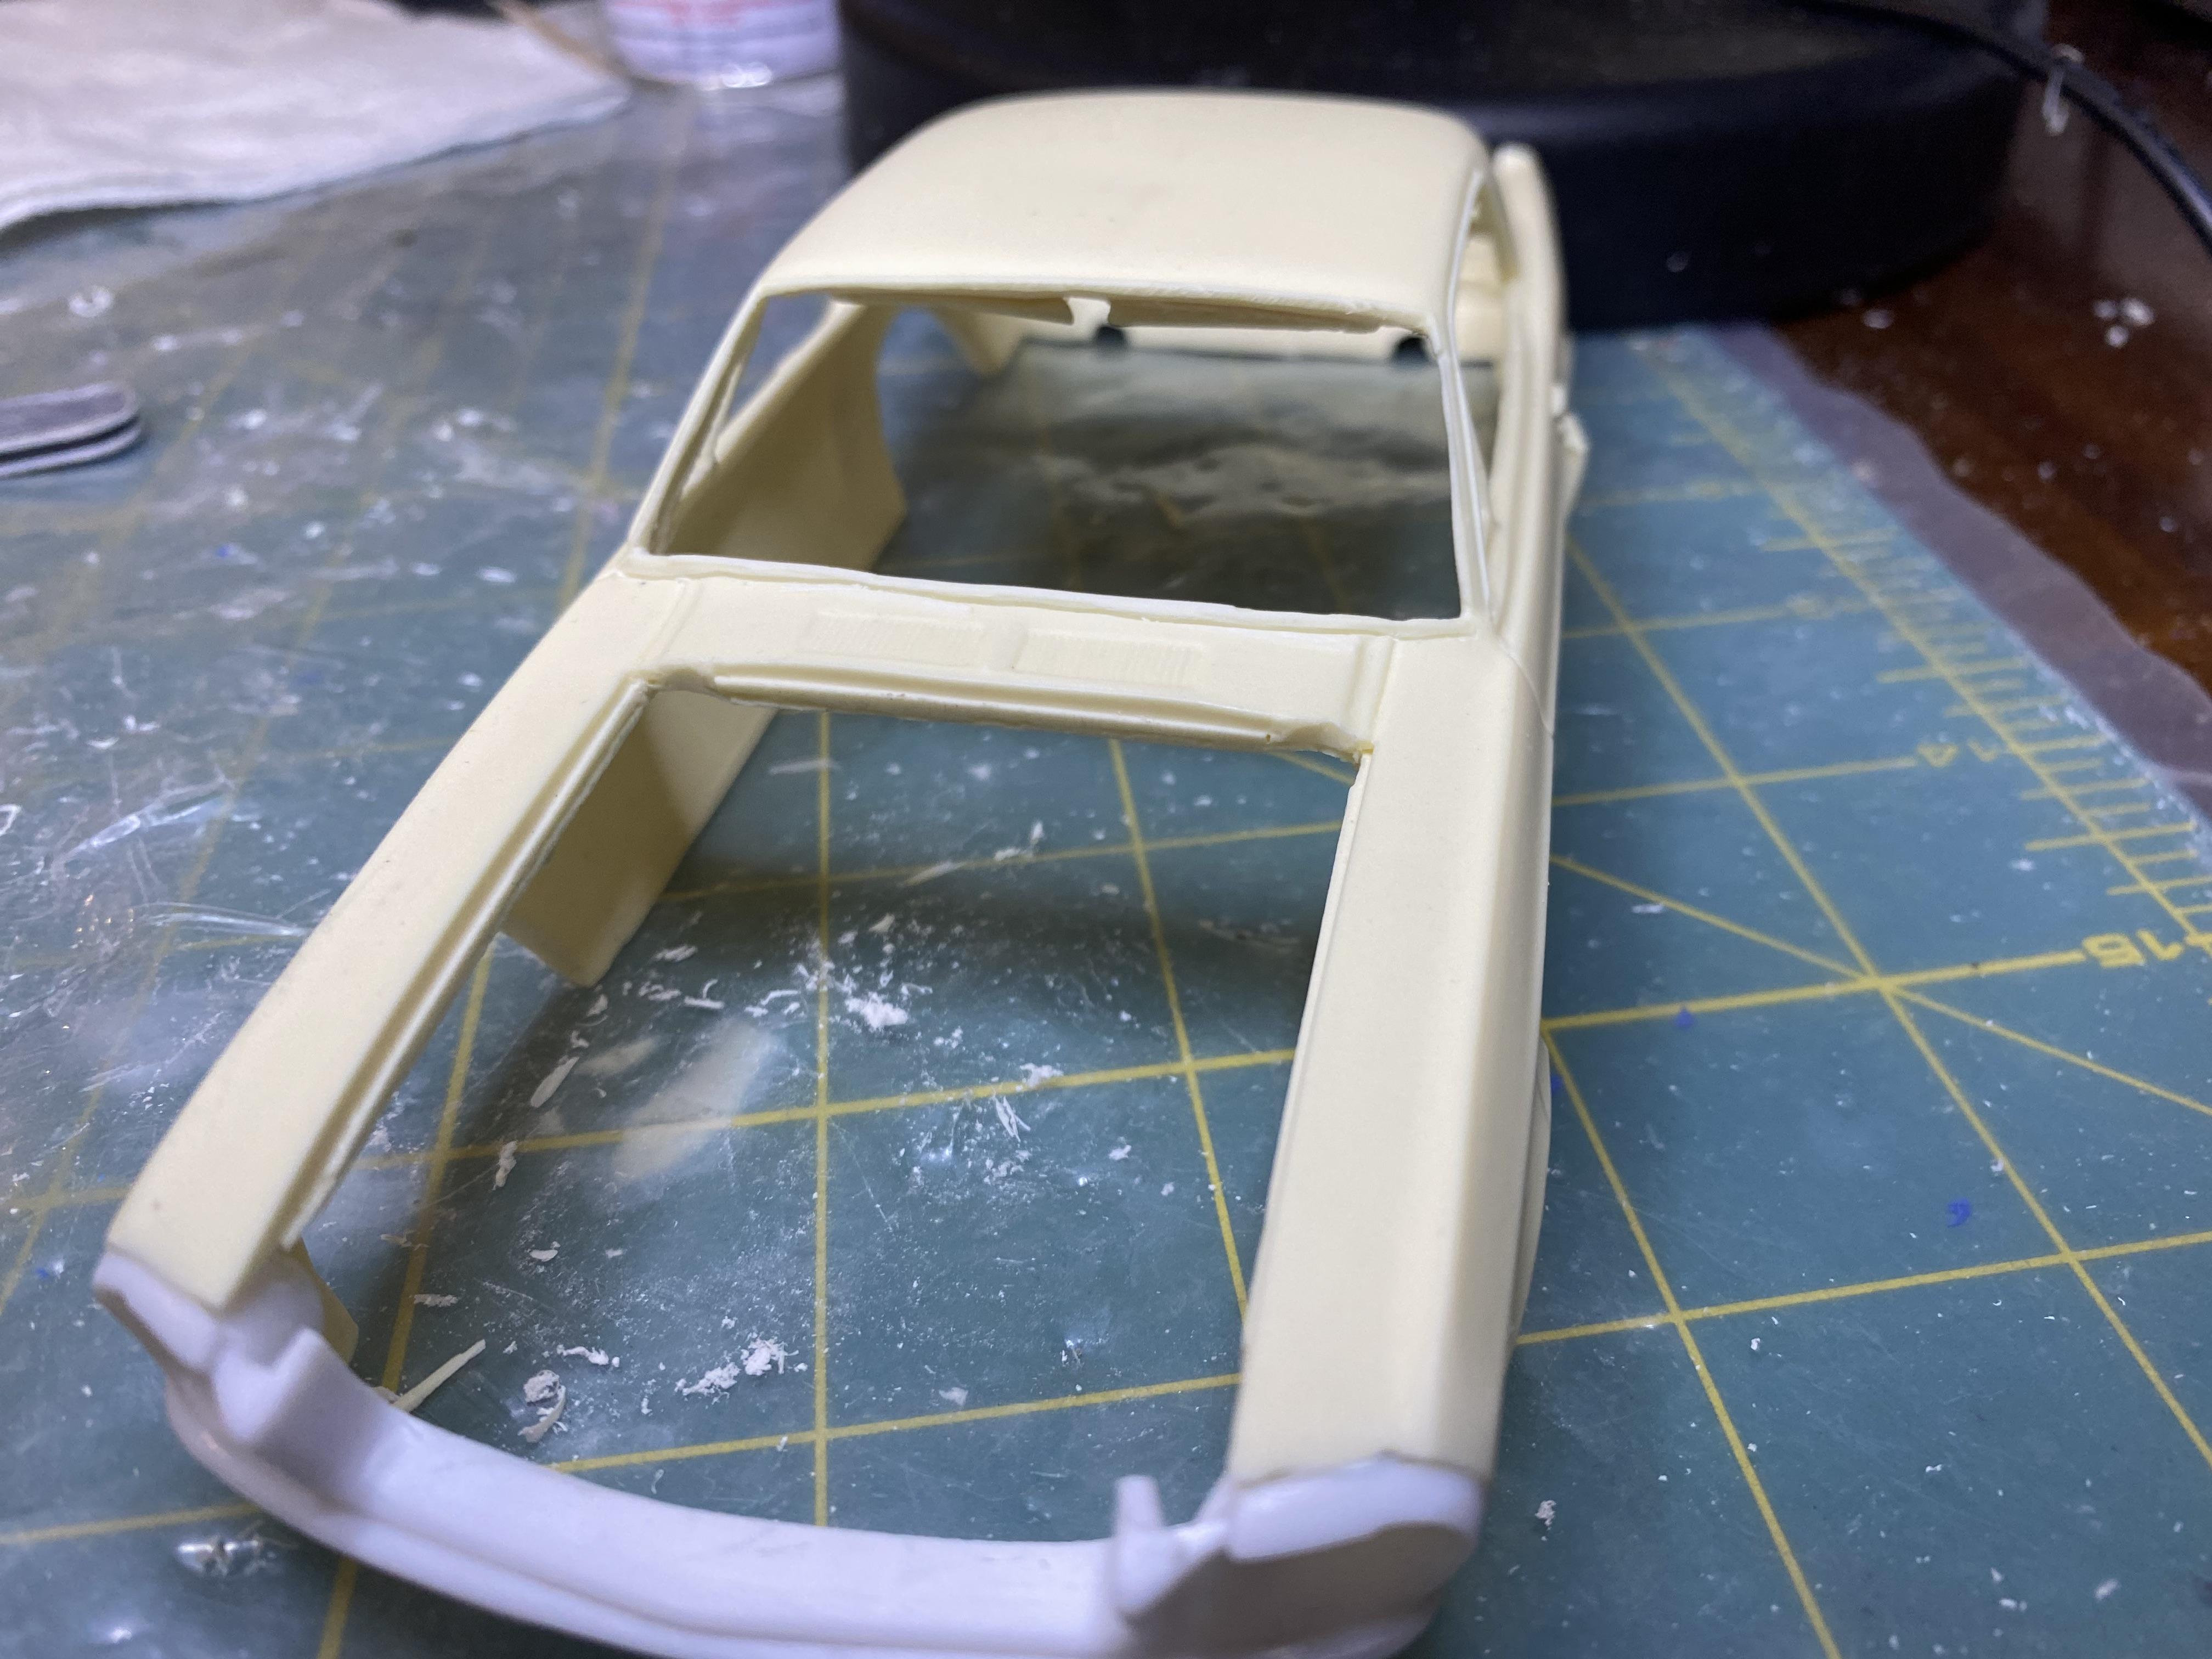
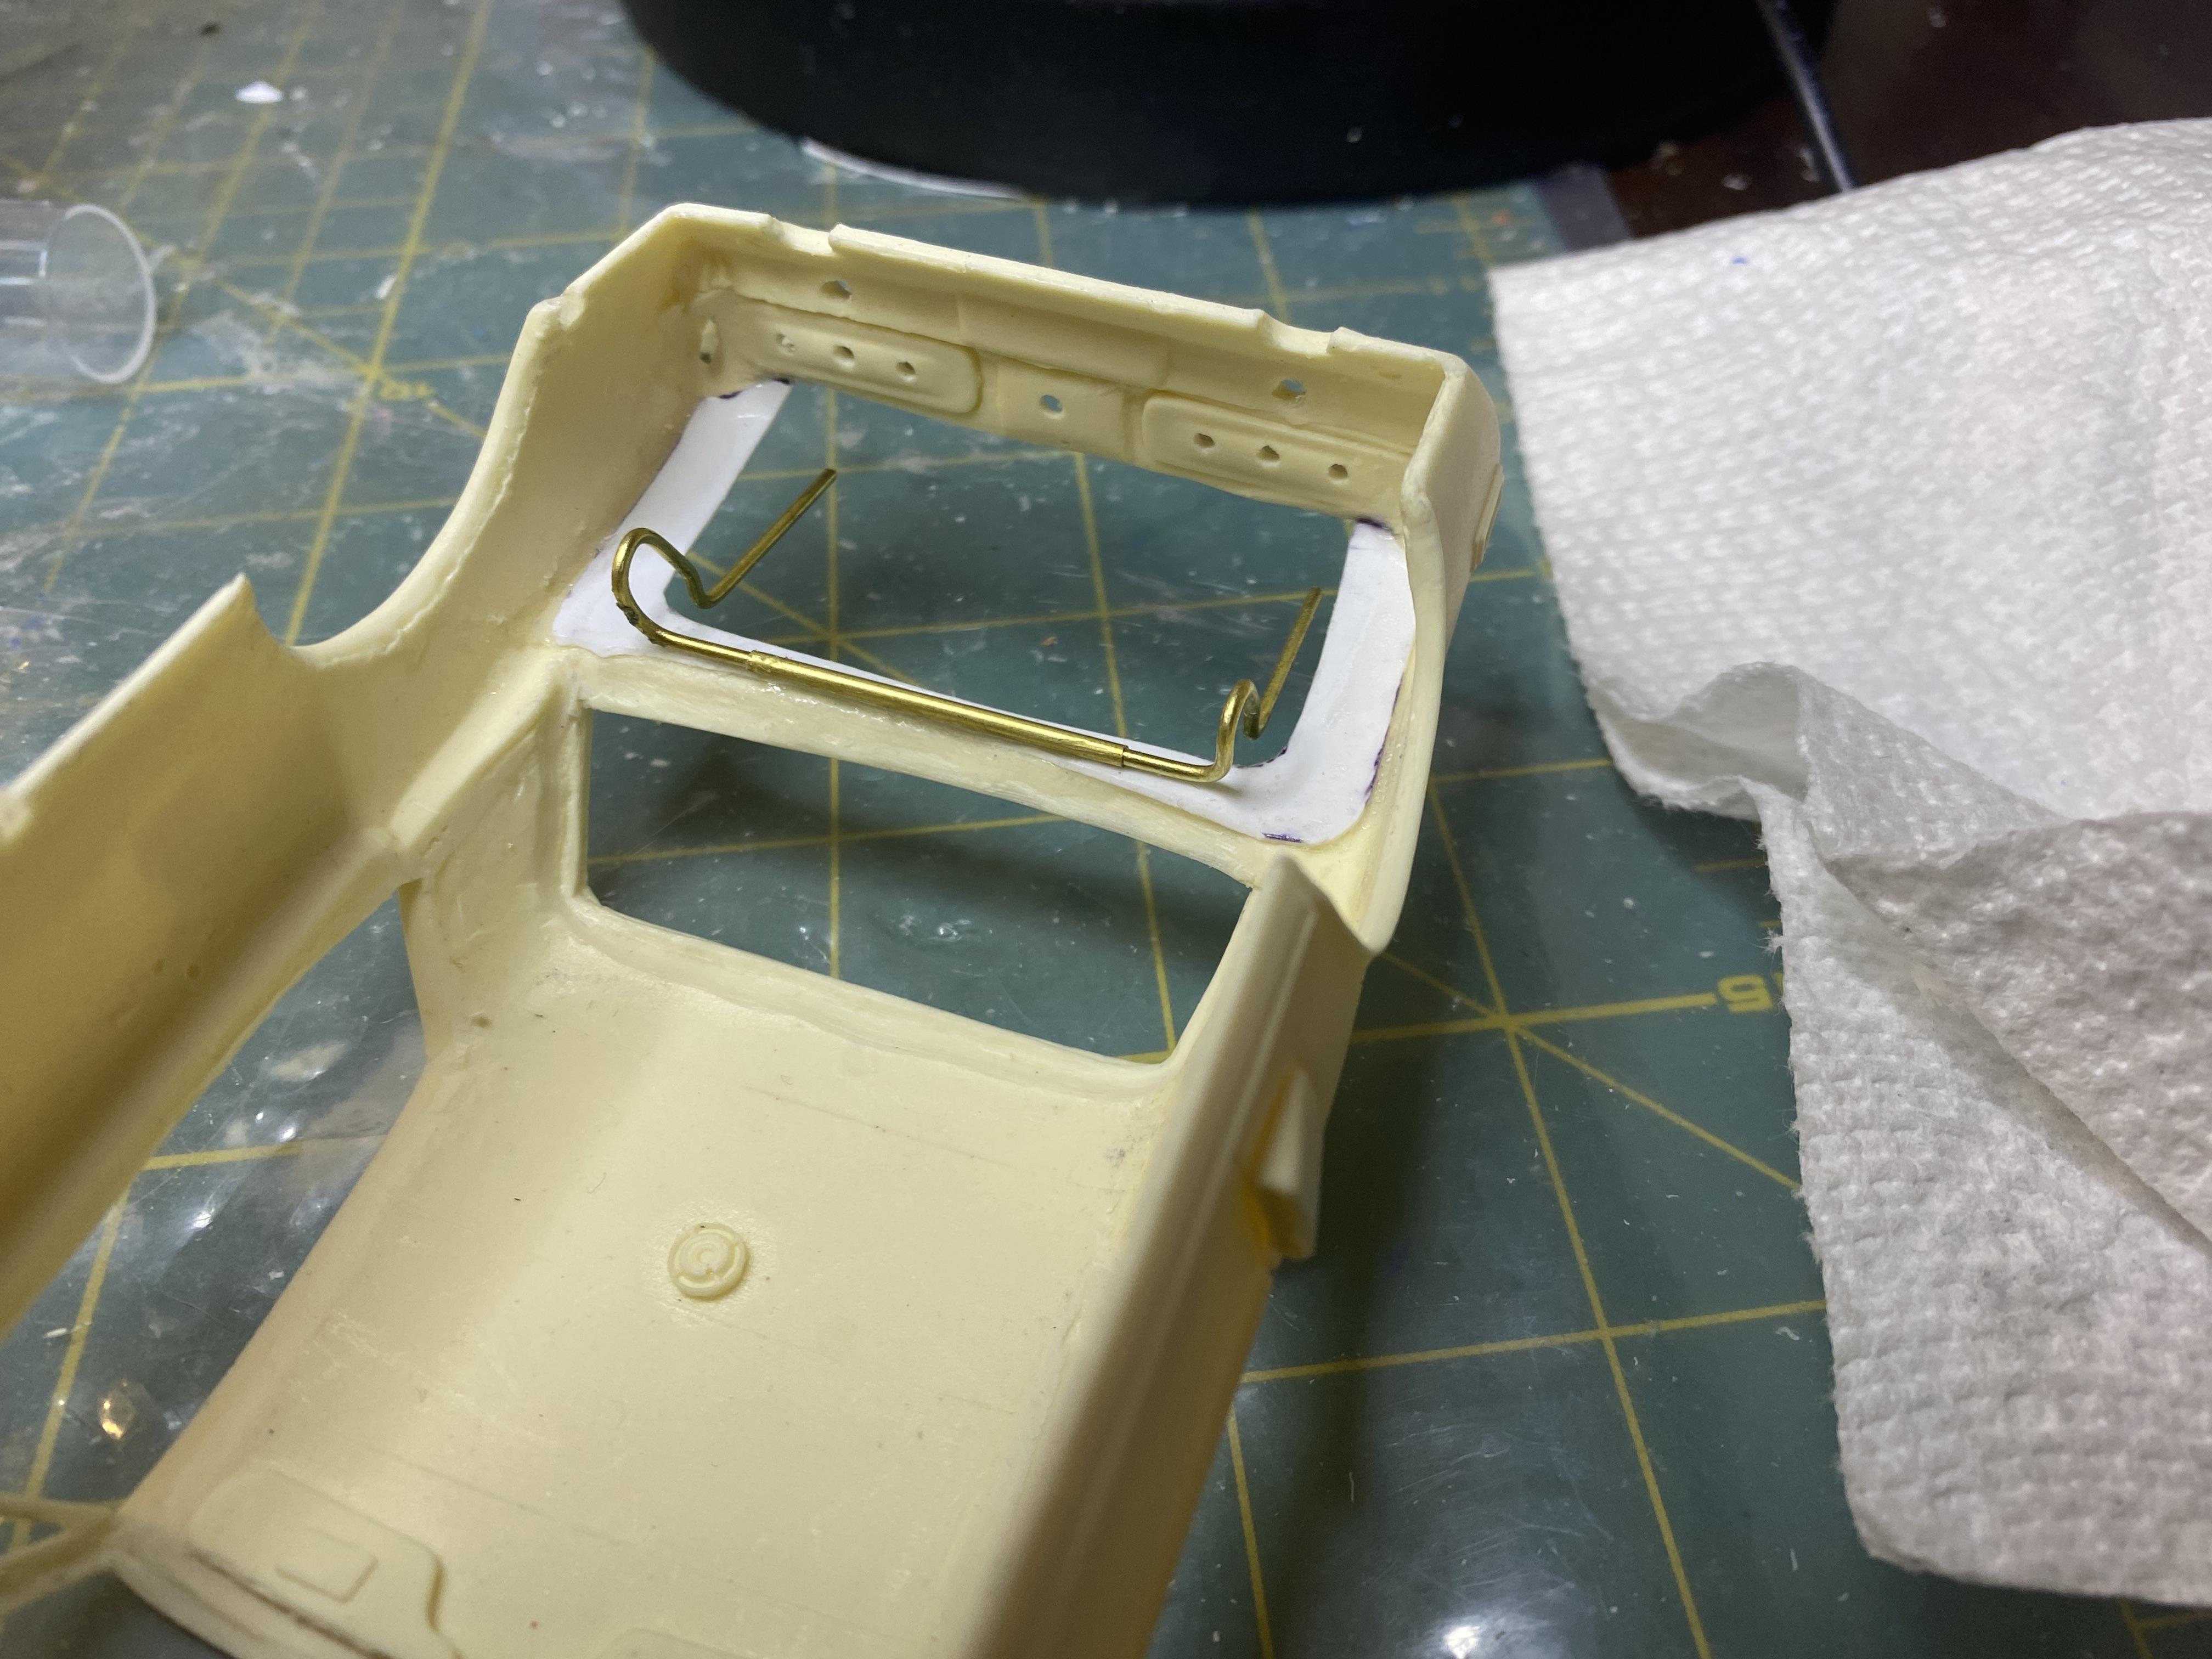
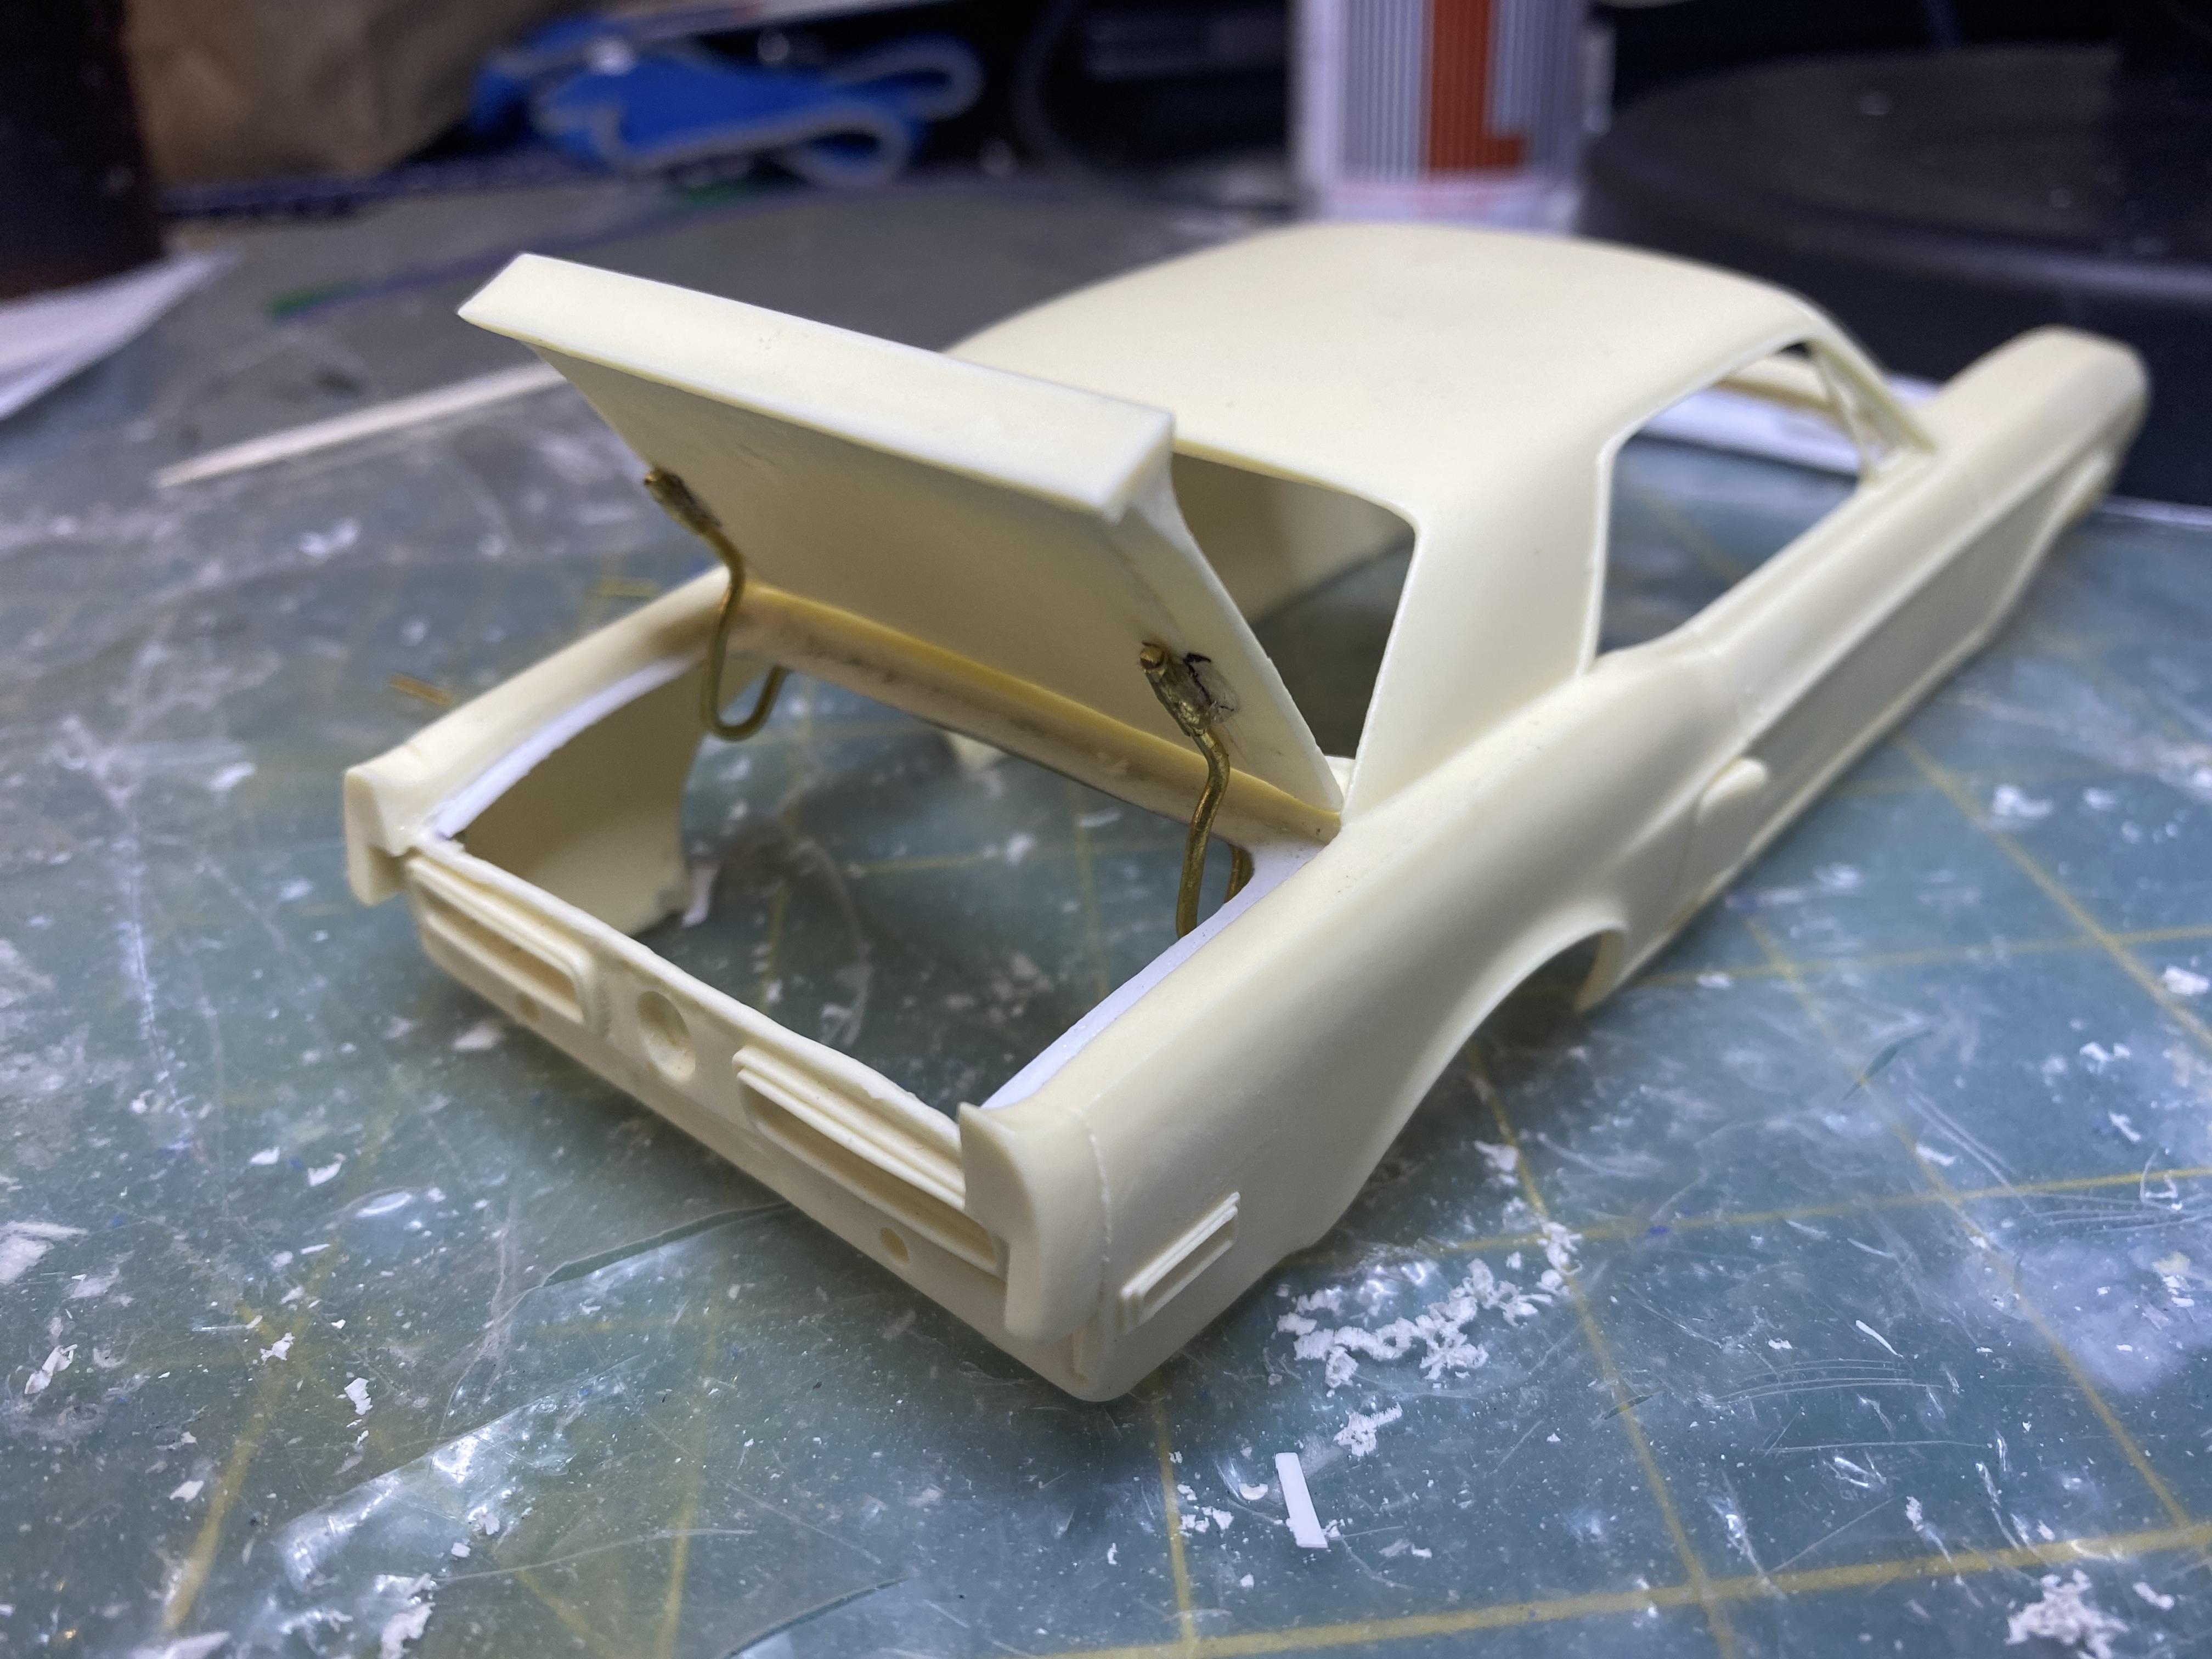
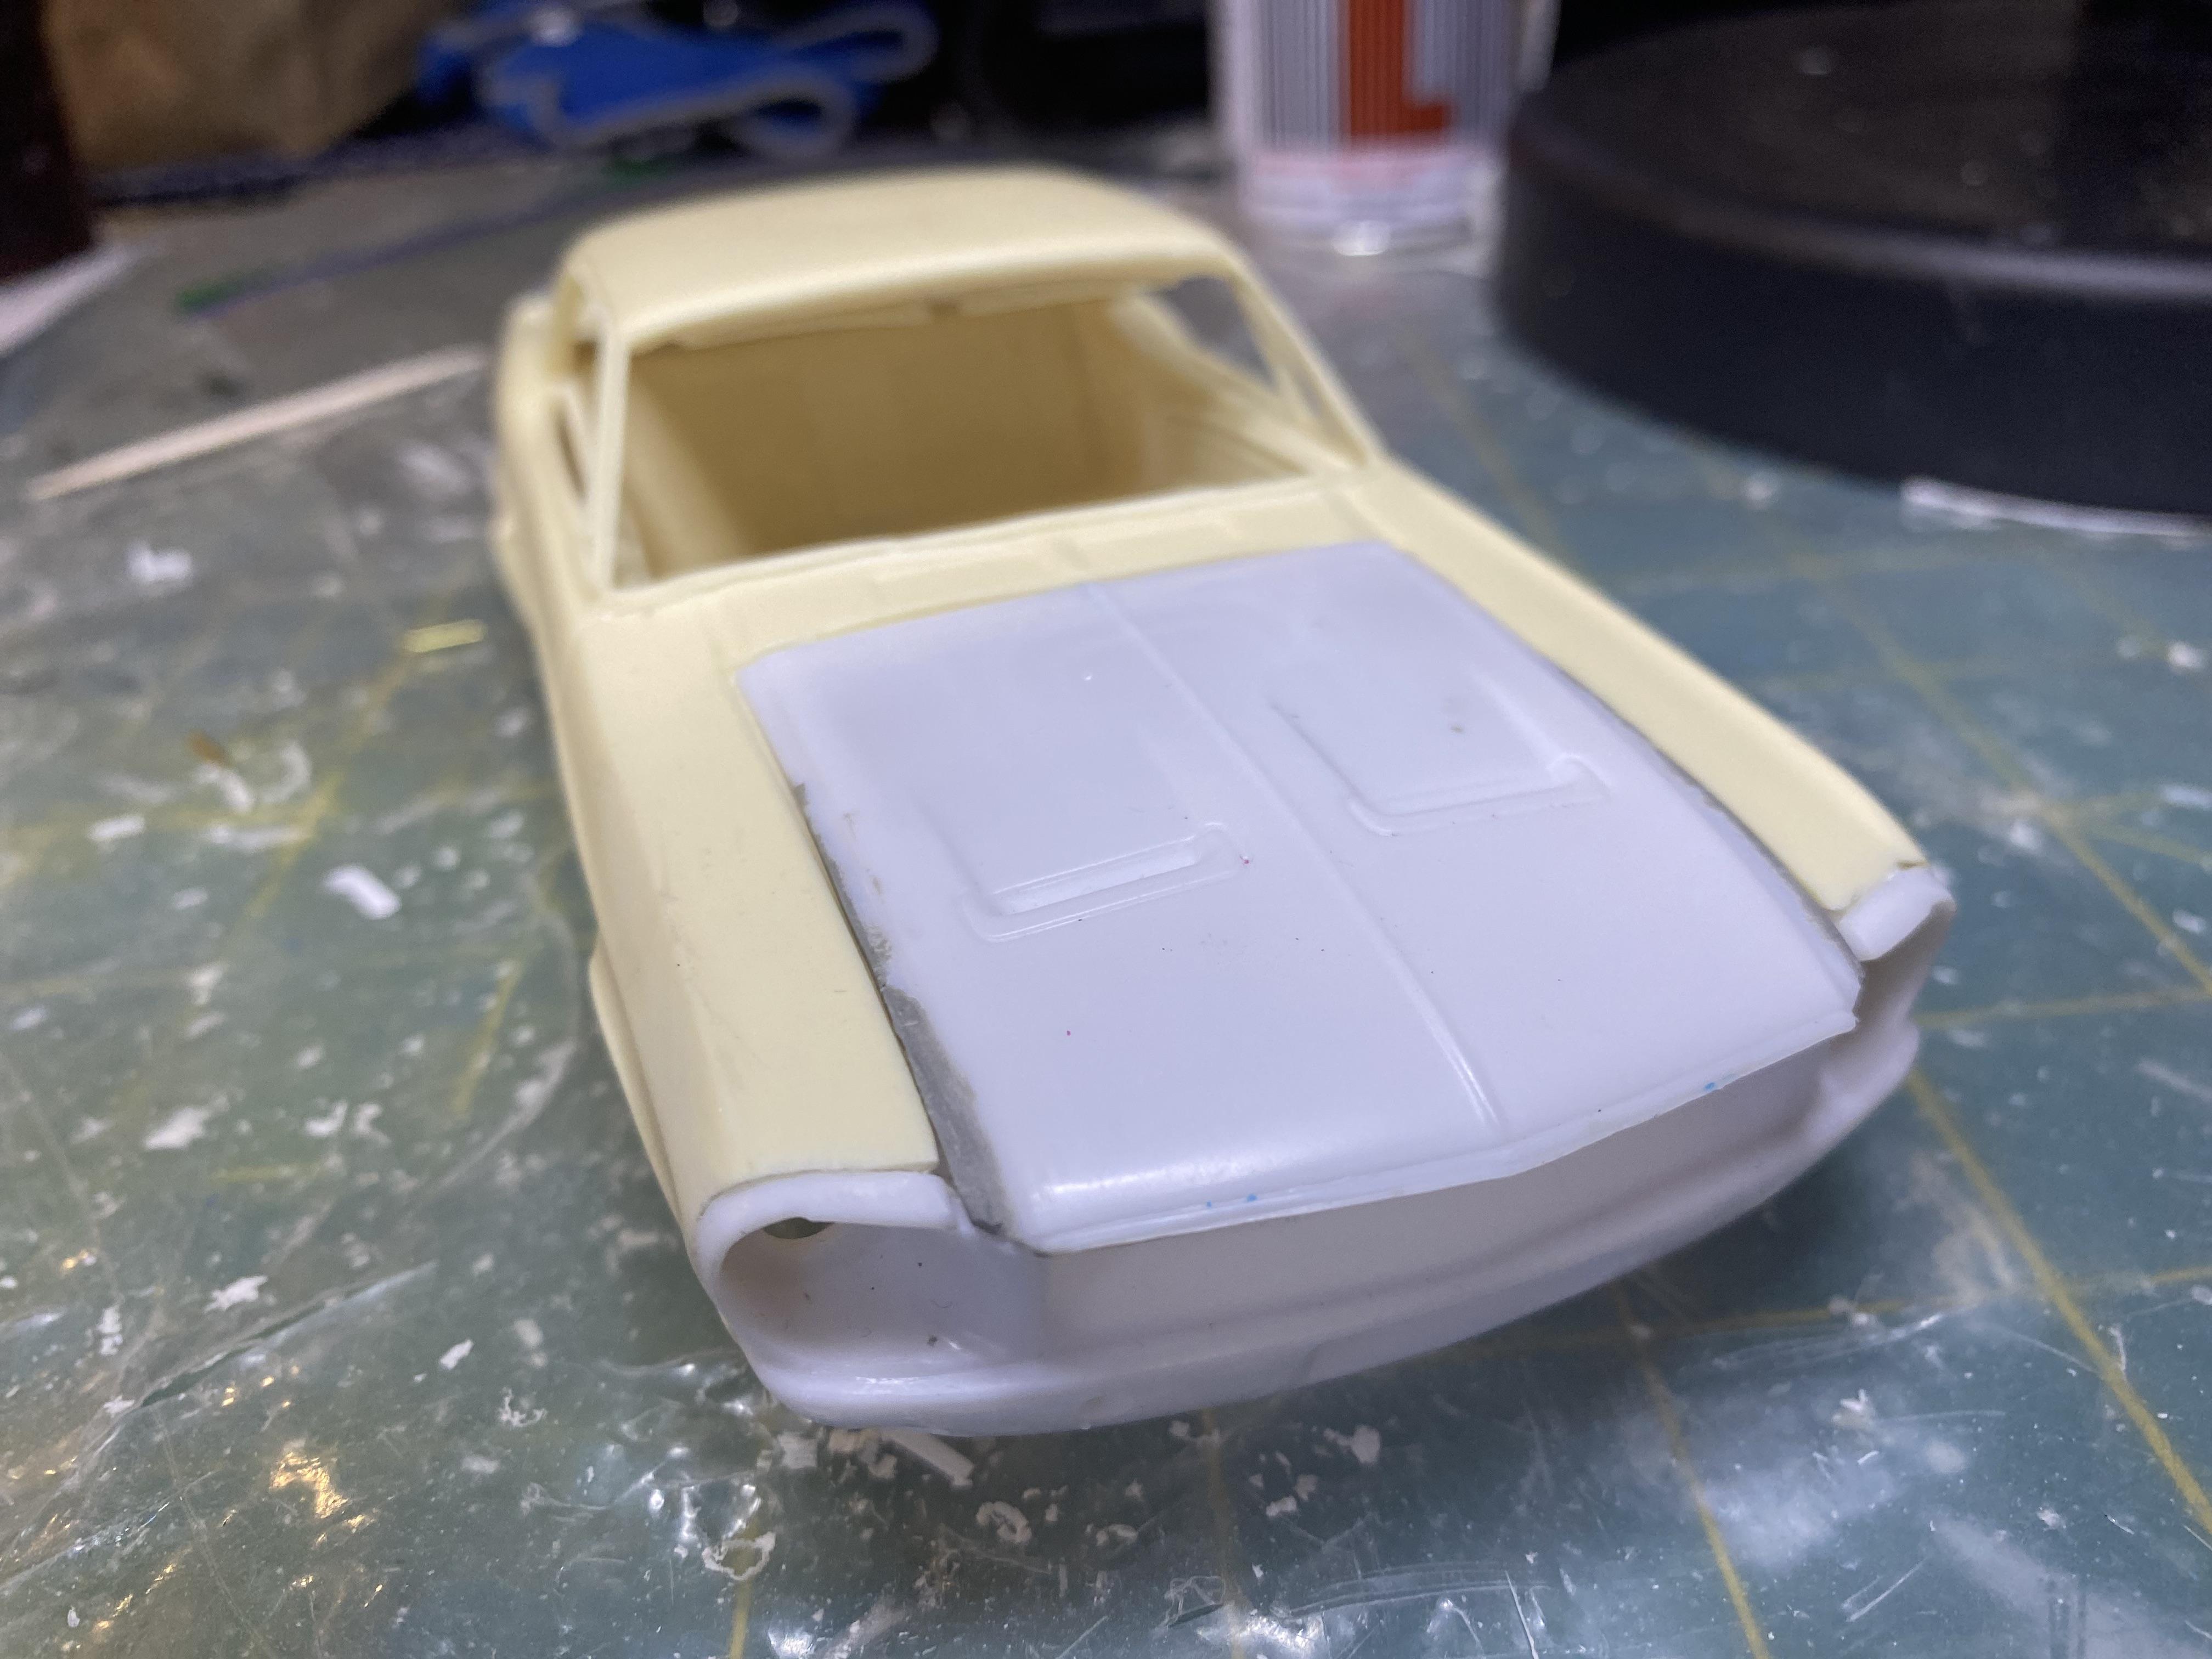
Created hood hinge, I didn’t like how flimsy the plastic one felt. I also make it where the trunk lid or hood can be removed. Added filler styrene for the interior to body gaps, drilled and modified parts for the engine compartment. Created the wiring harness and trunk floor. Still have quite a bit of fab work to do still.
-
No, I haven't. It wasn't an issue with the kit, it is actually a very nice kit. Just my choice in paints got me in the back side.
-
Sadly, I was at the point of painting the body silver, masked for the stripes and the blue reacted with the silver paint and bubbled like crazy. The body is now soaking and slowly stripping the paint. Lesson learned, don't spray splash paints lacquer over Duplicolor lacquer (decanted and airbrushed). They will react very poorly, even though they are both supposedly lacquer.
-
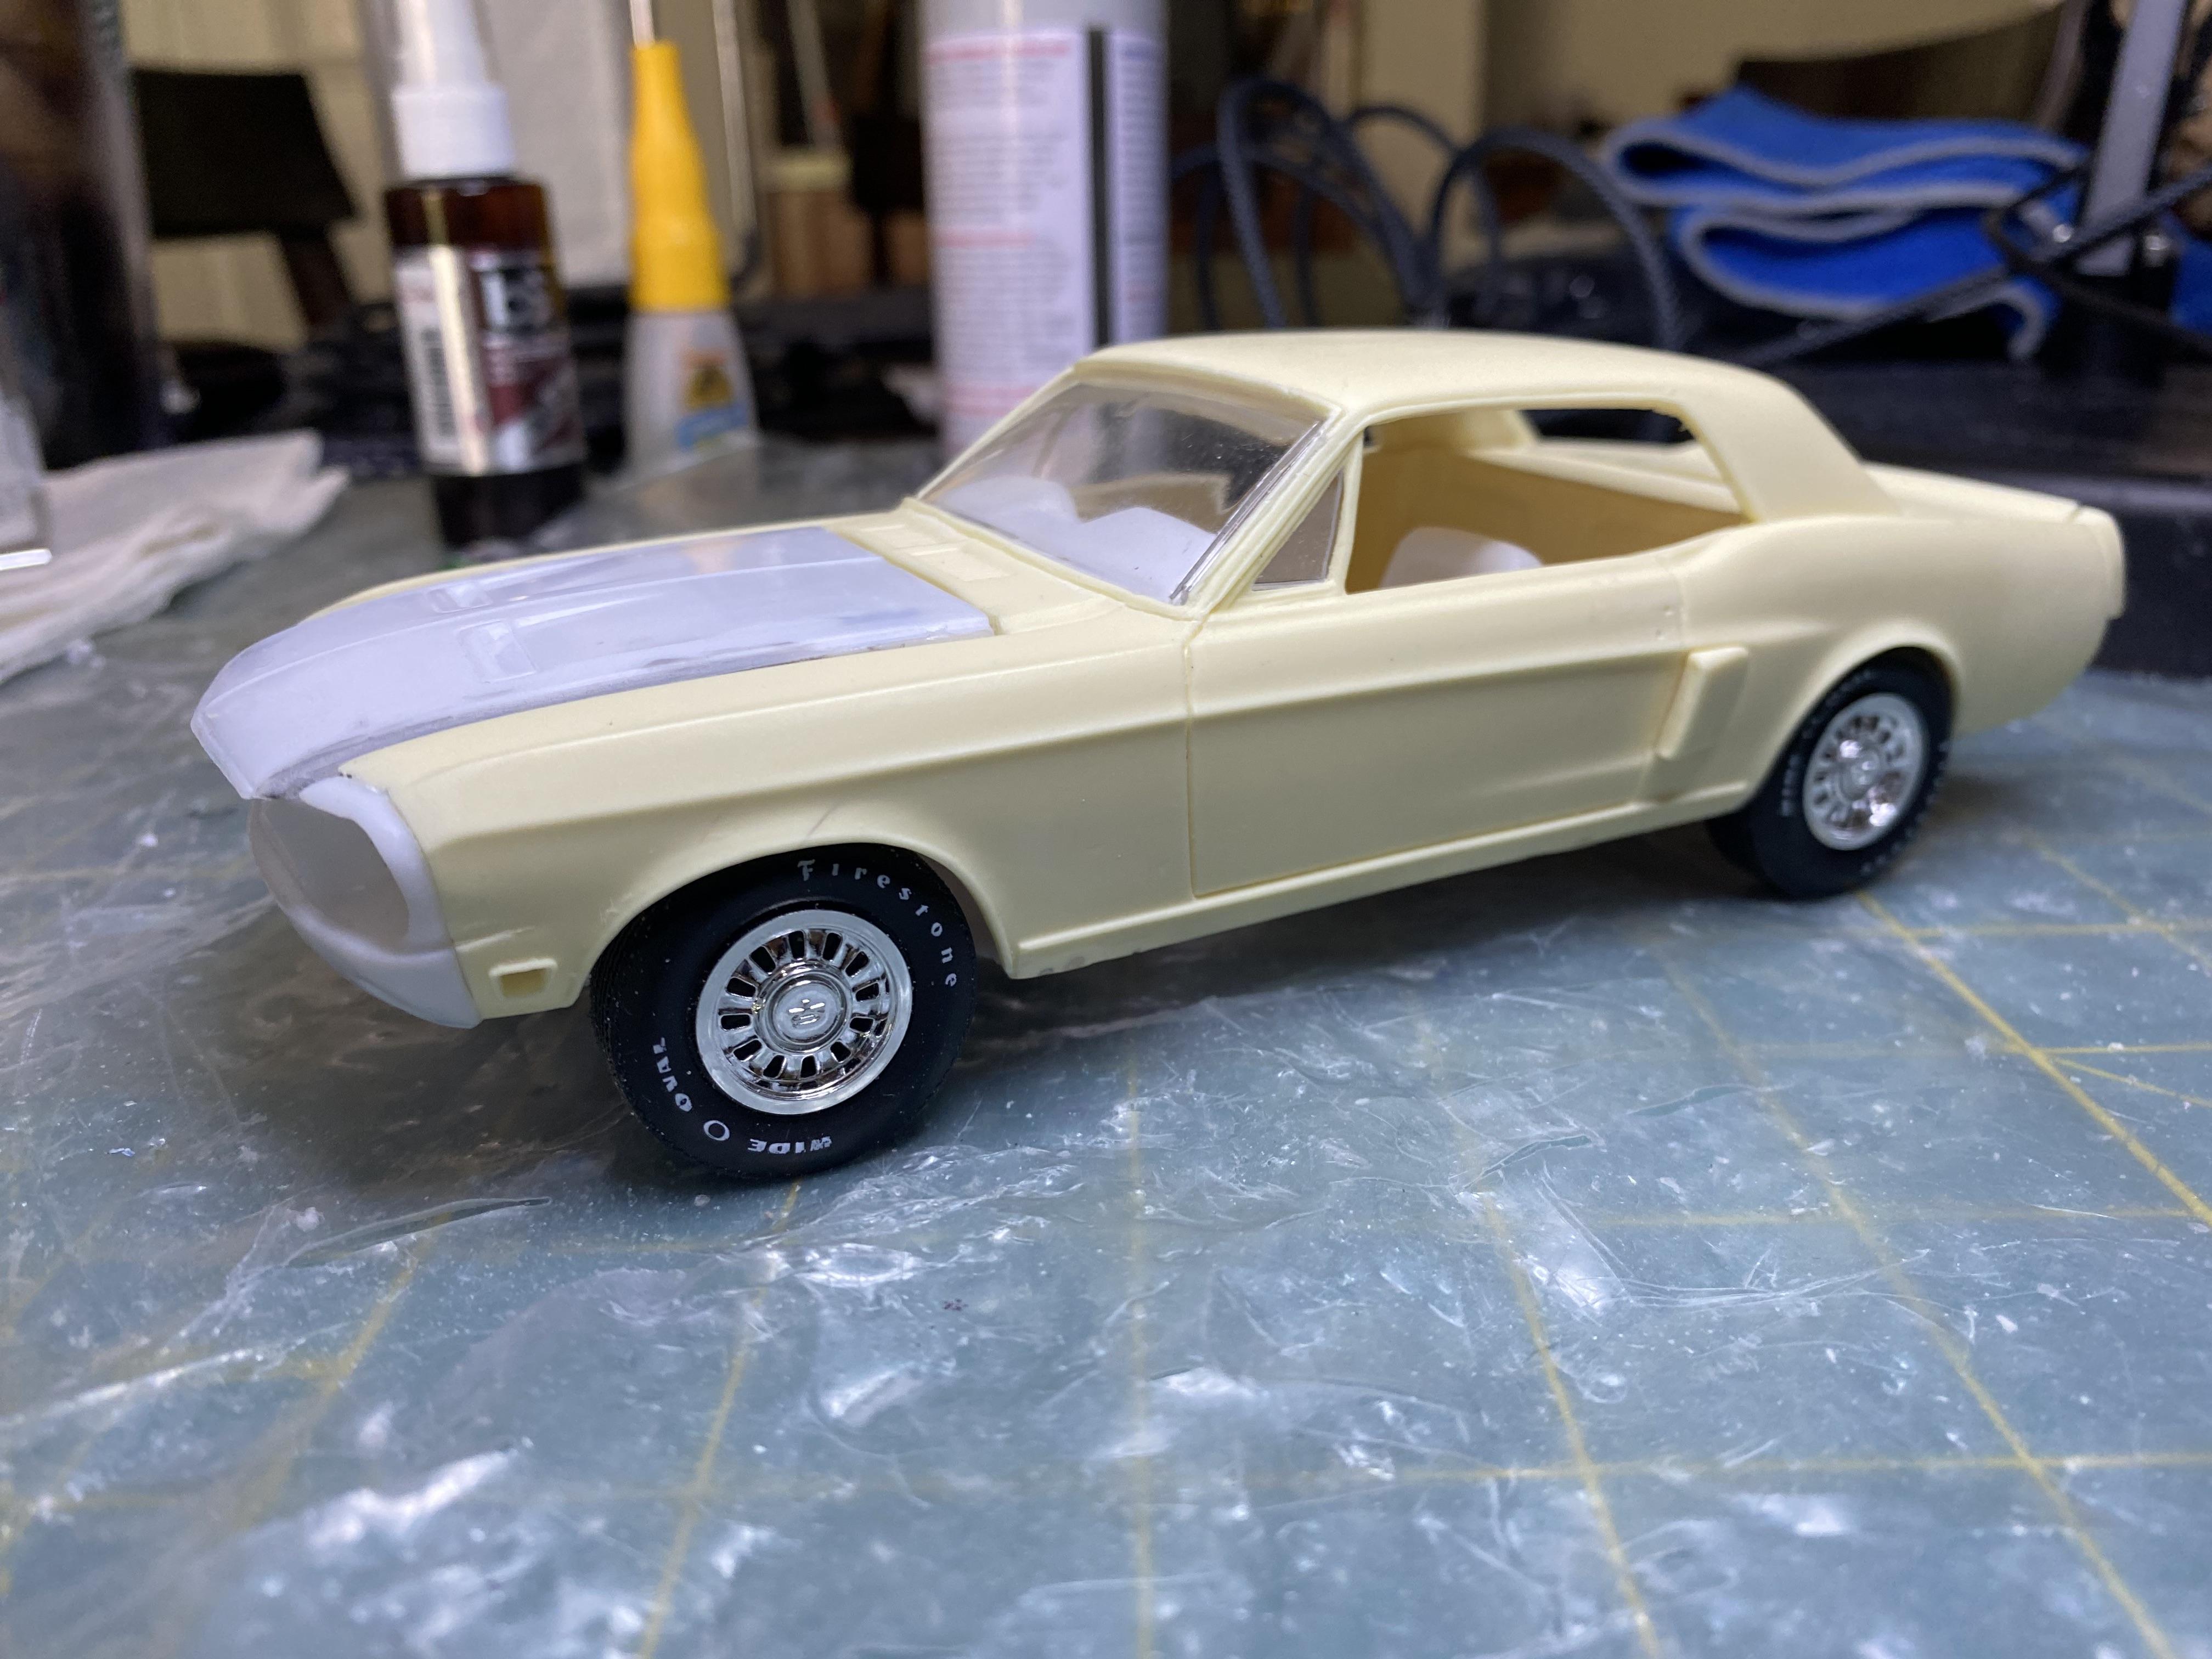
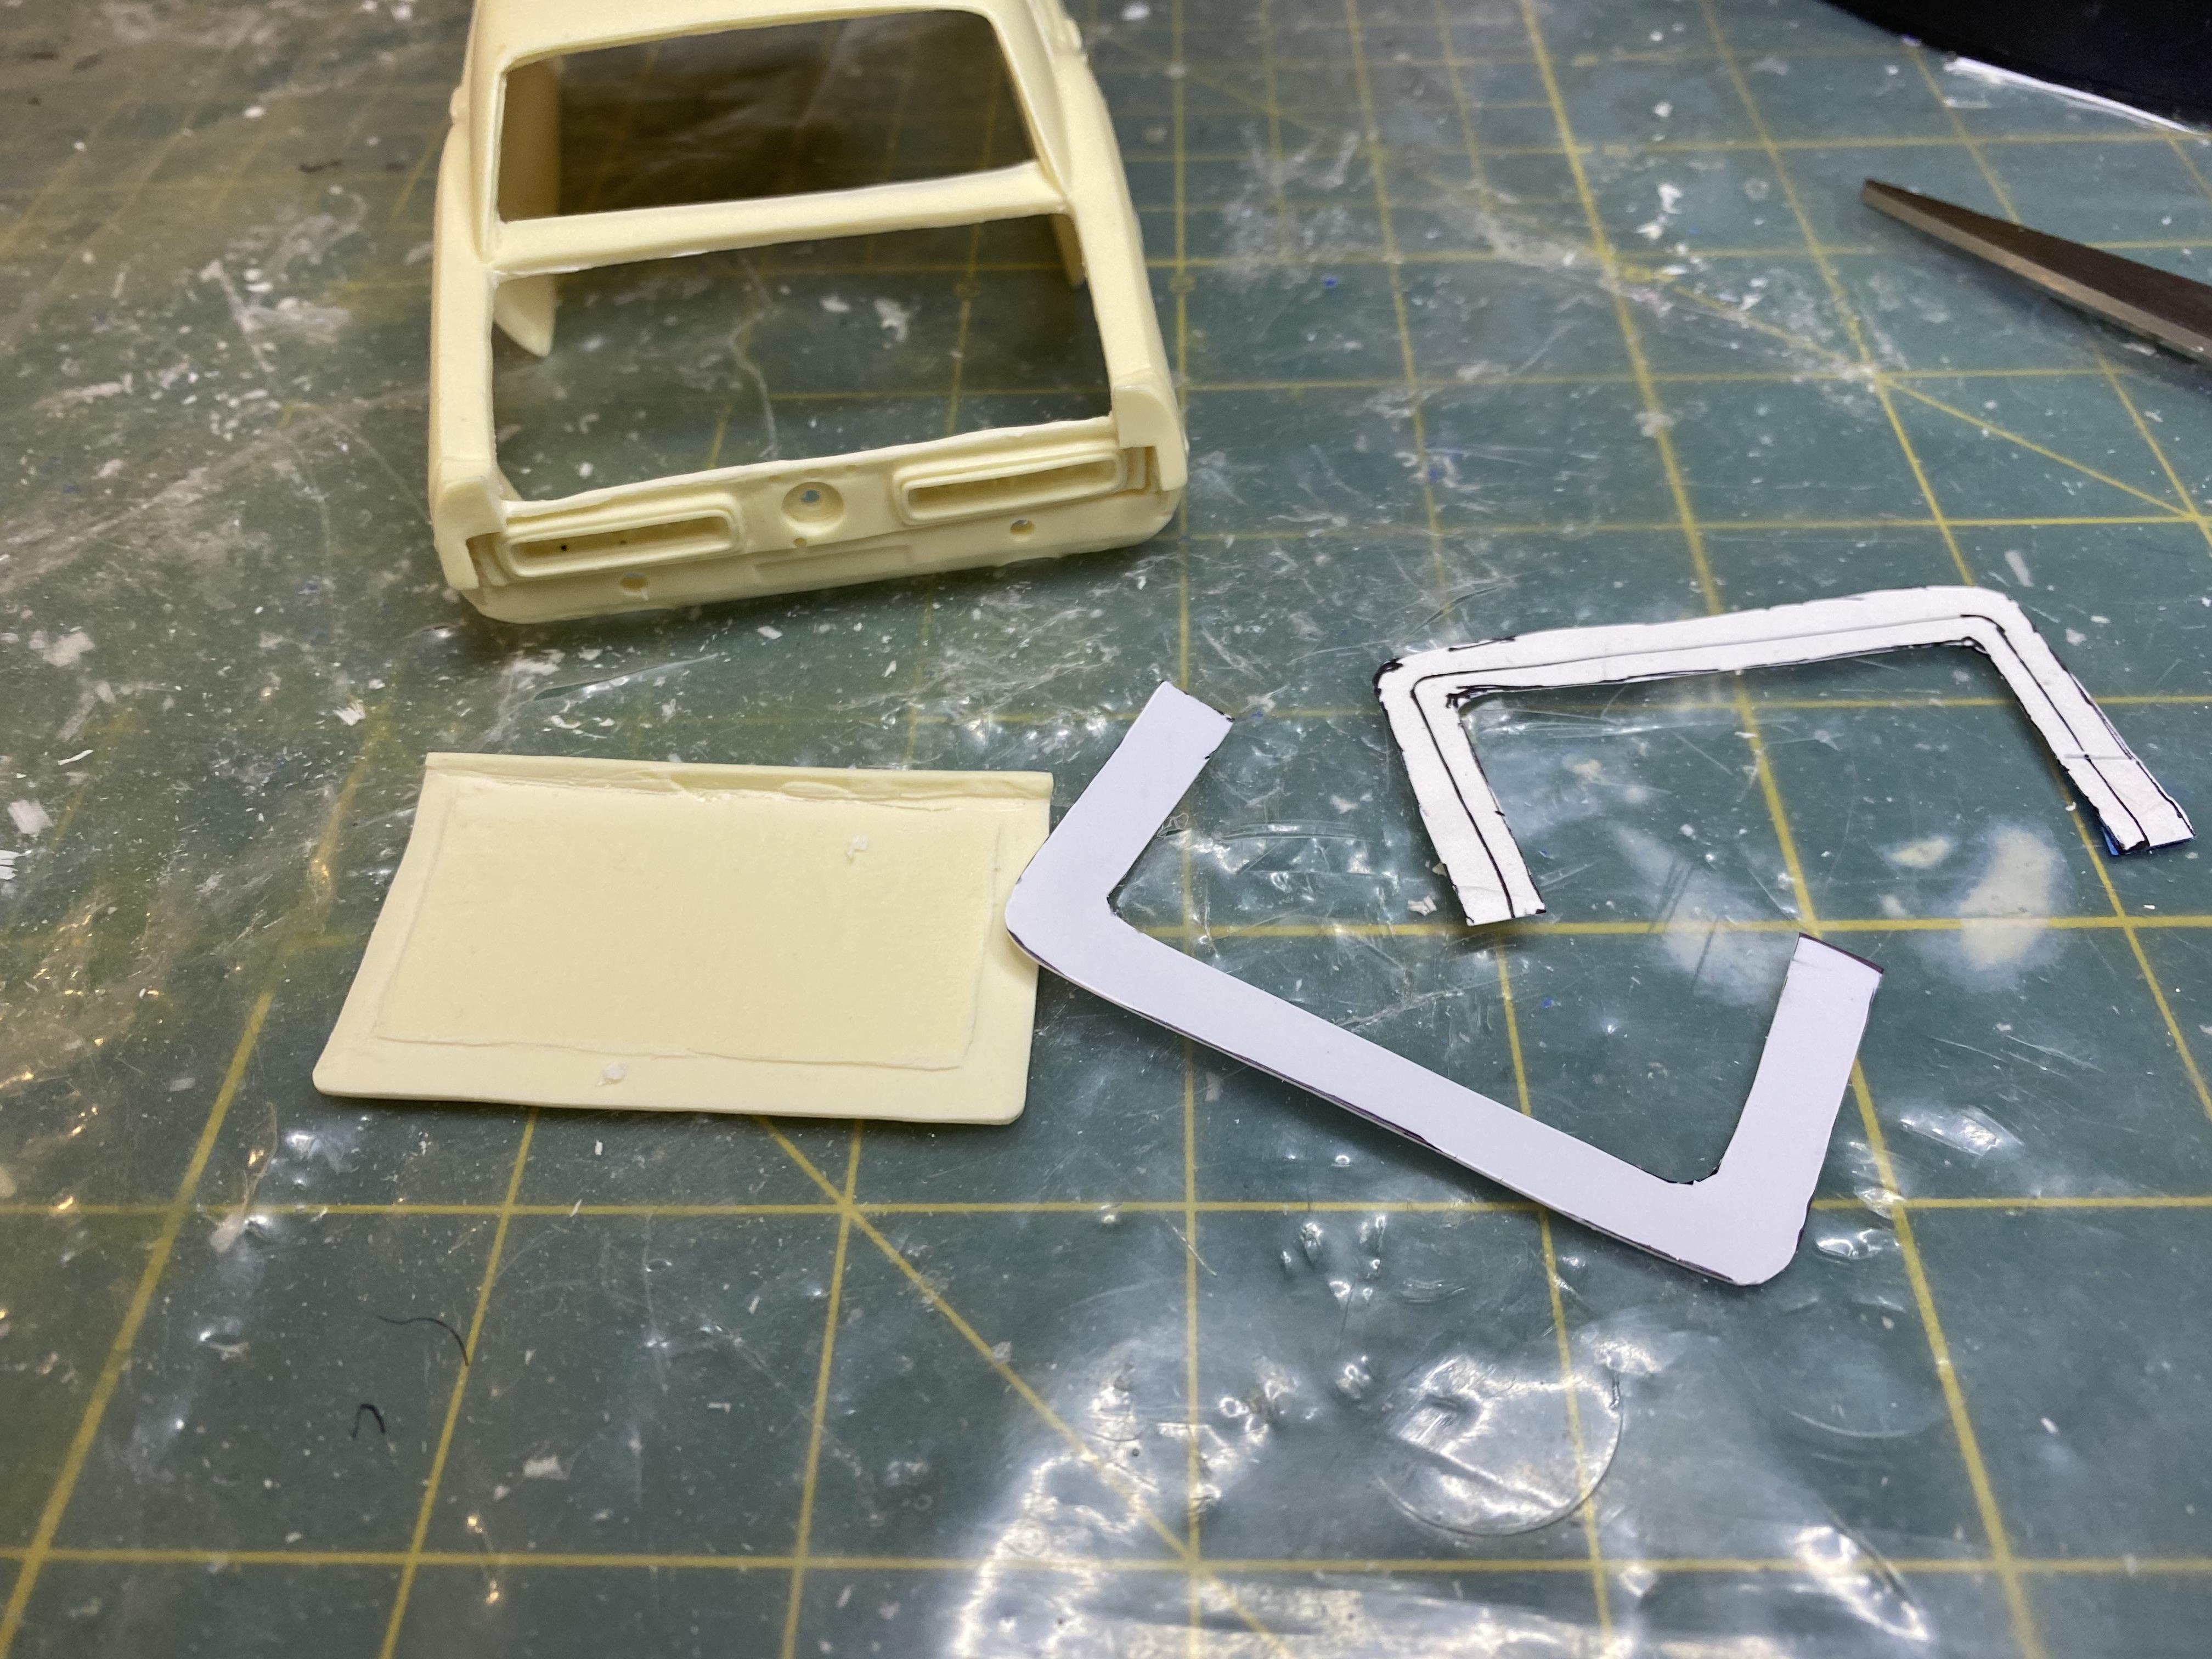
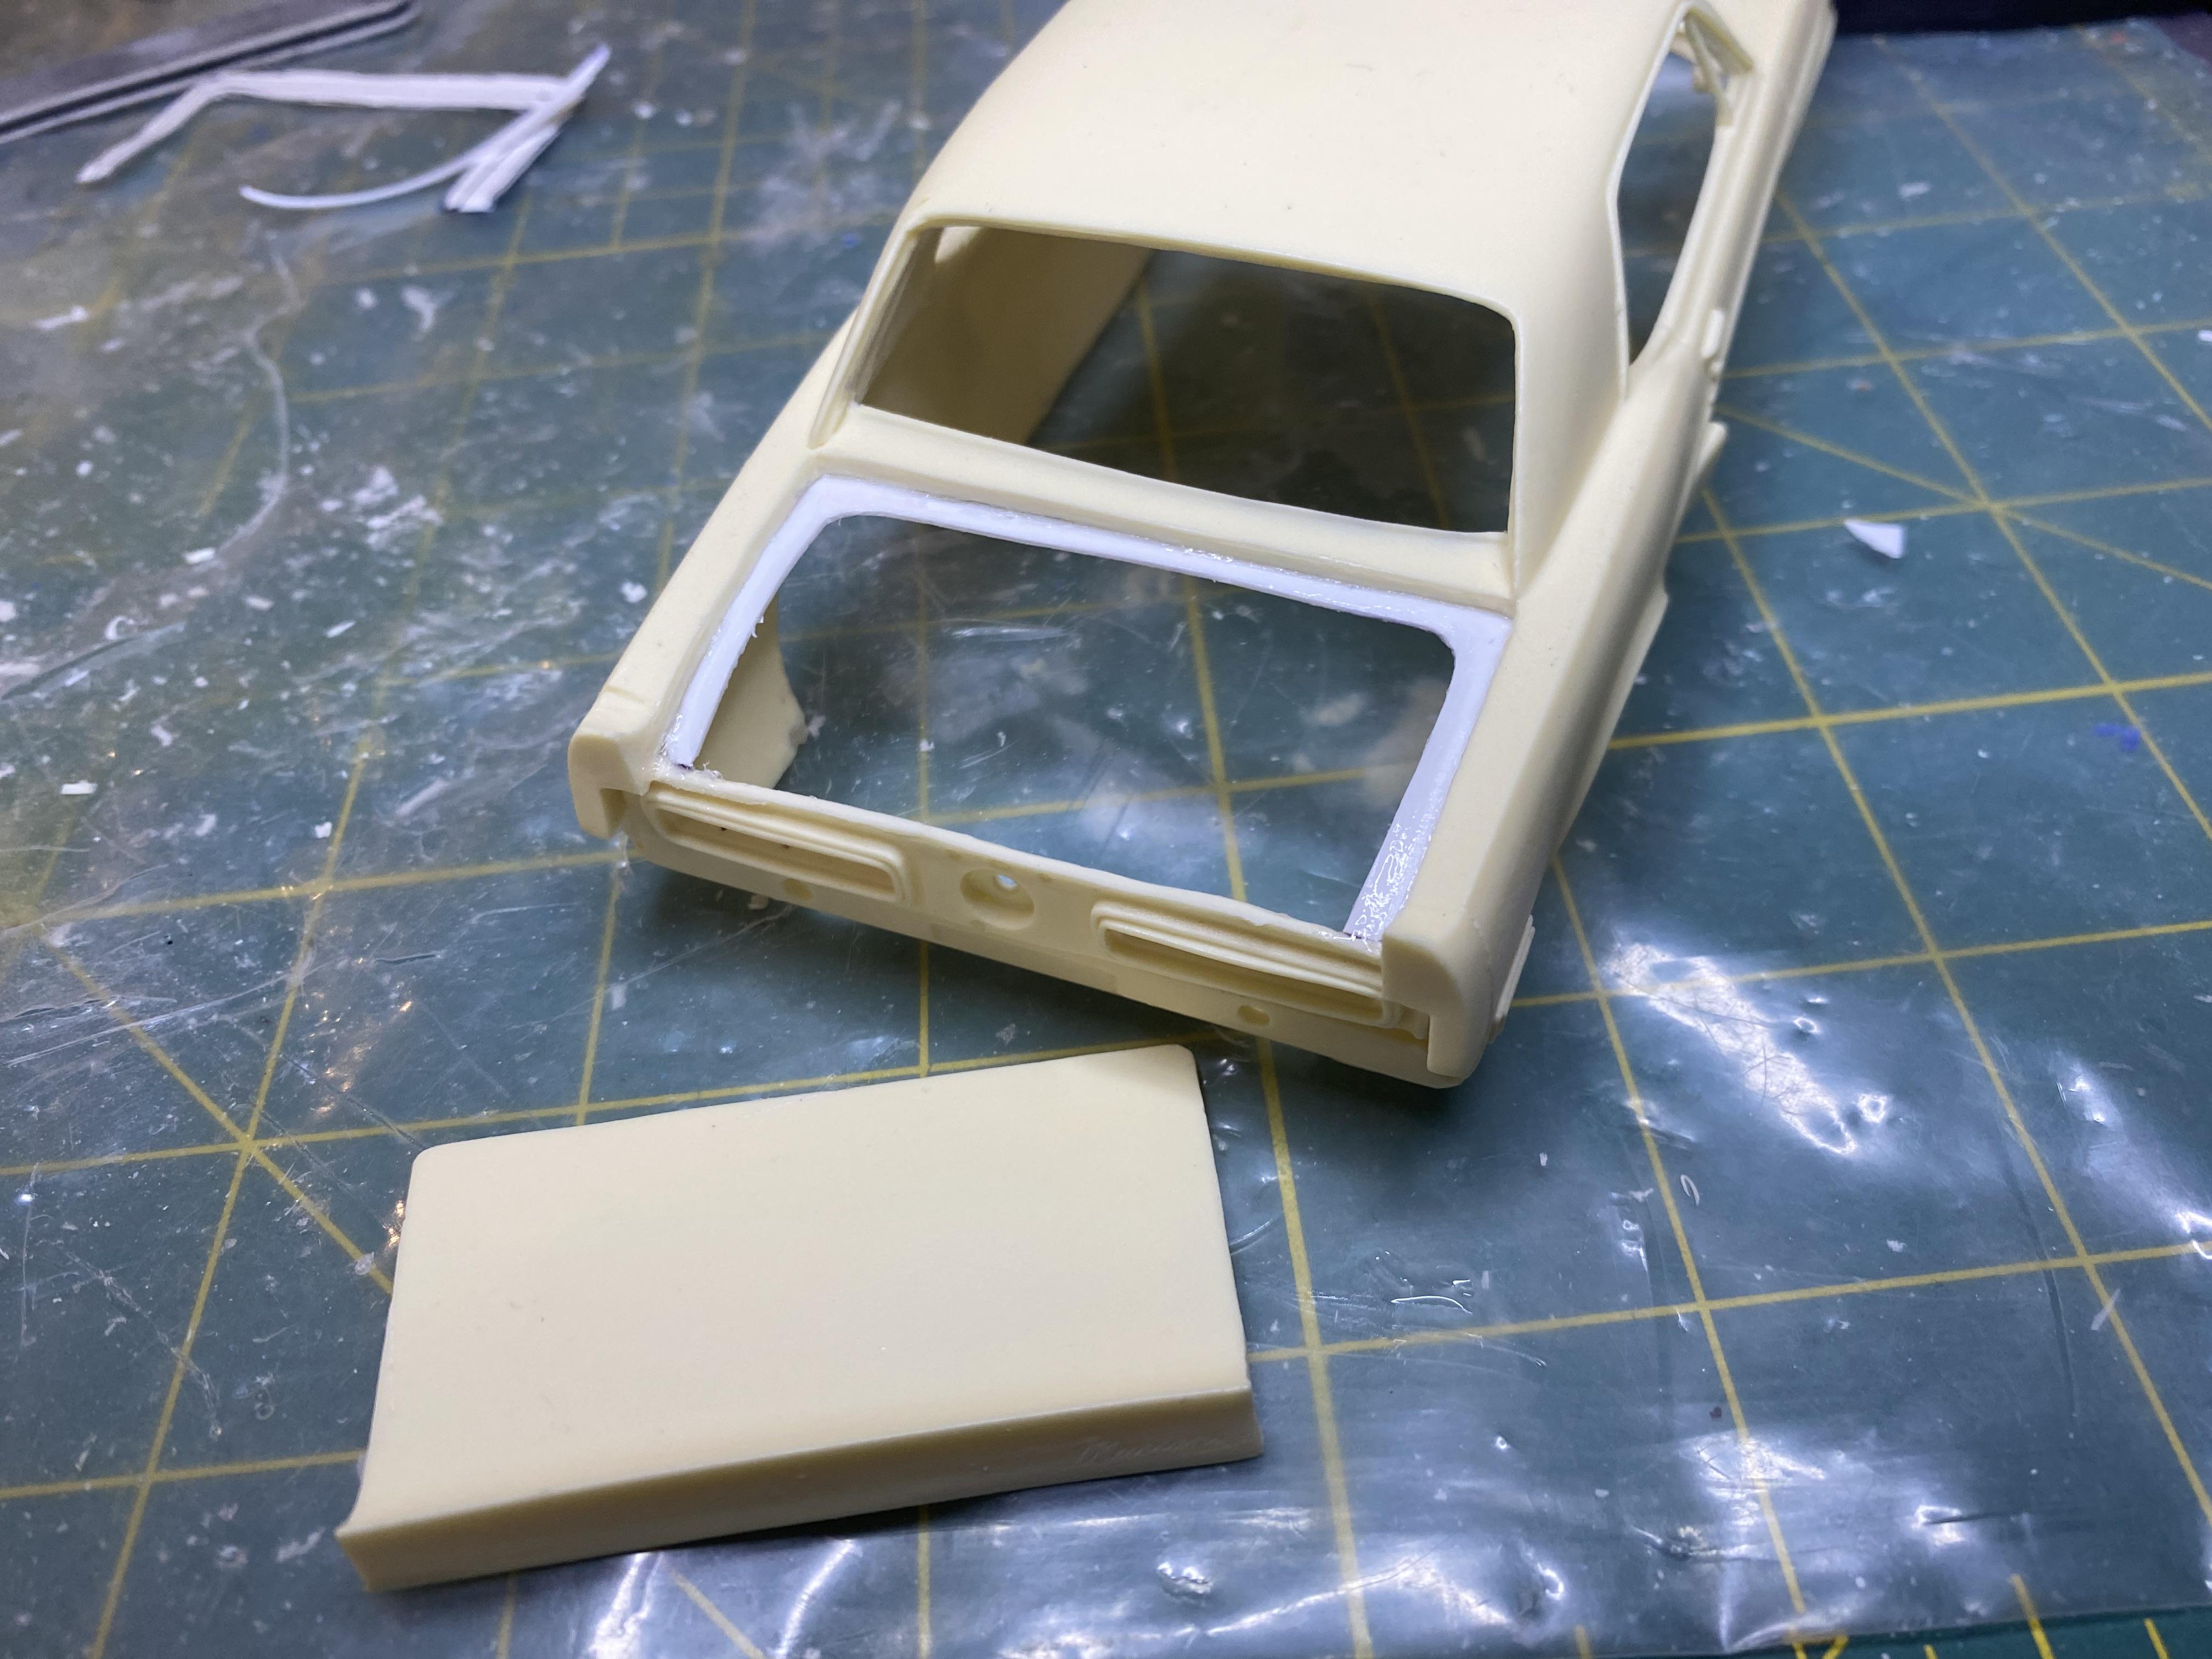
A little bit of work done on the California special. I cut open the trunk lid. Created the inner edge and hinge. Cut openings for the front marker lights and taillights. Removed the emblems, wipers door handles and locks. Started to etch the window and drip rails. So much work to still do. Stripped chrome off a few parts that shouldn’t be chrome. Need to dig out the old photos to find pictures of my old GT/CS. I am not sure which of the two possible rear reflectors mine had.
-
Yes, they most certainly did. I have seen a couple Cobra Jet GT/CS at MCA shows in the past. Quite rare though. Mine was a J-Code 302-4v so I will be using an Iceman Collections Small block for my build, not the big block that came in the 1968 GT kit.
-
Nice. Thanks. I used to have a Lime Gold GT/CS. This is going to be a replica of " The one that got away".
-
I would think so. Two 2032 cell batteries do okay with 9 LEDs, one could only handle 5.
-
I hope you mean that in a good way.
-
Thank you.
-
Me too, definitely going to have to make the air cleaner removable. Great detailed 3d print.
-
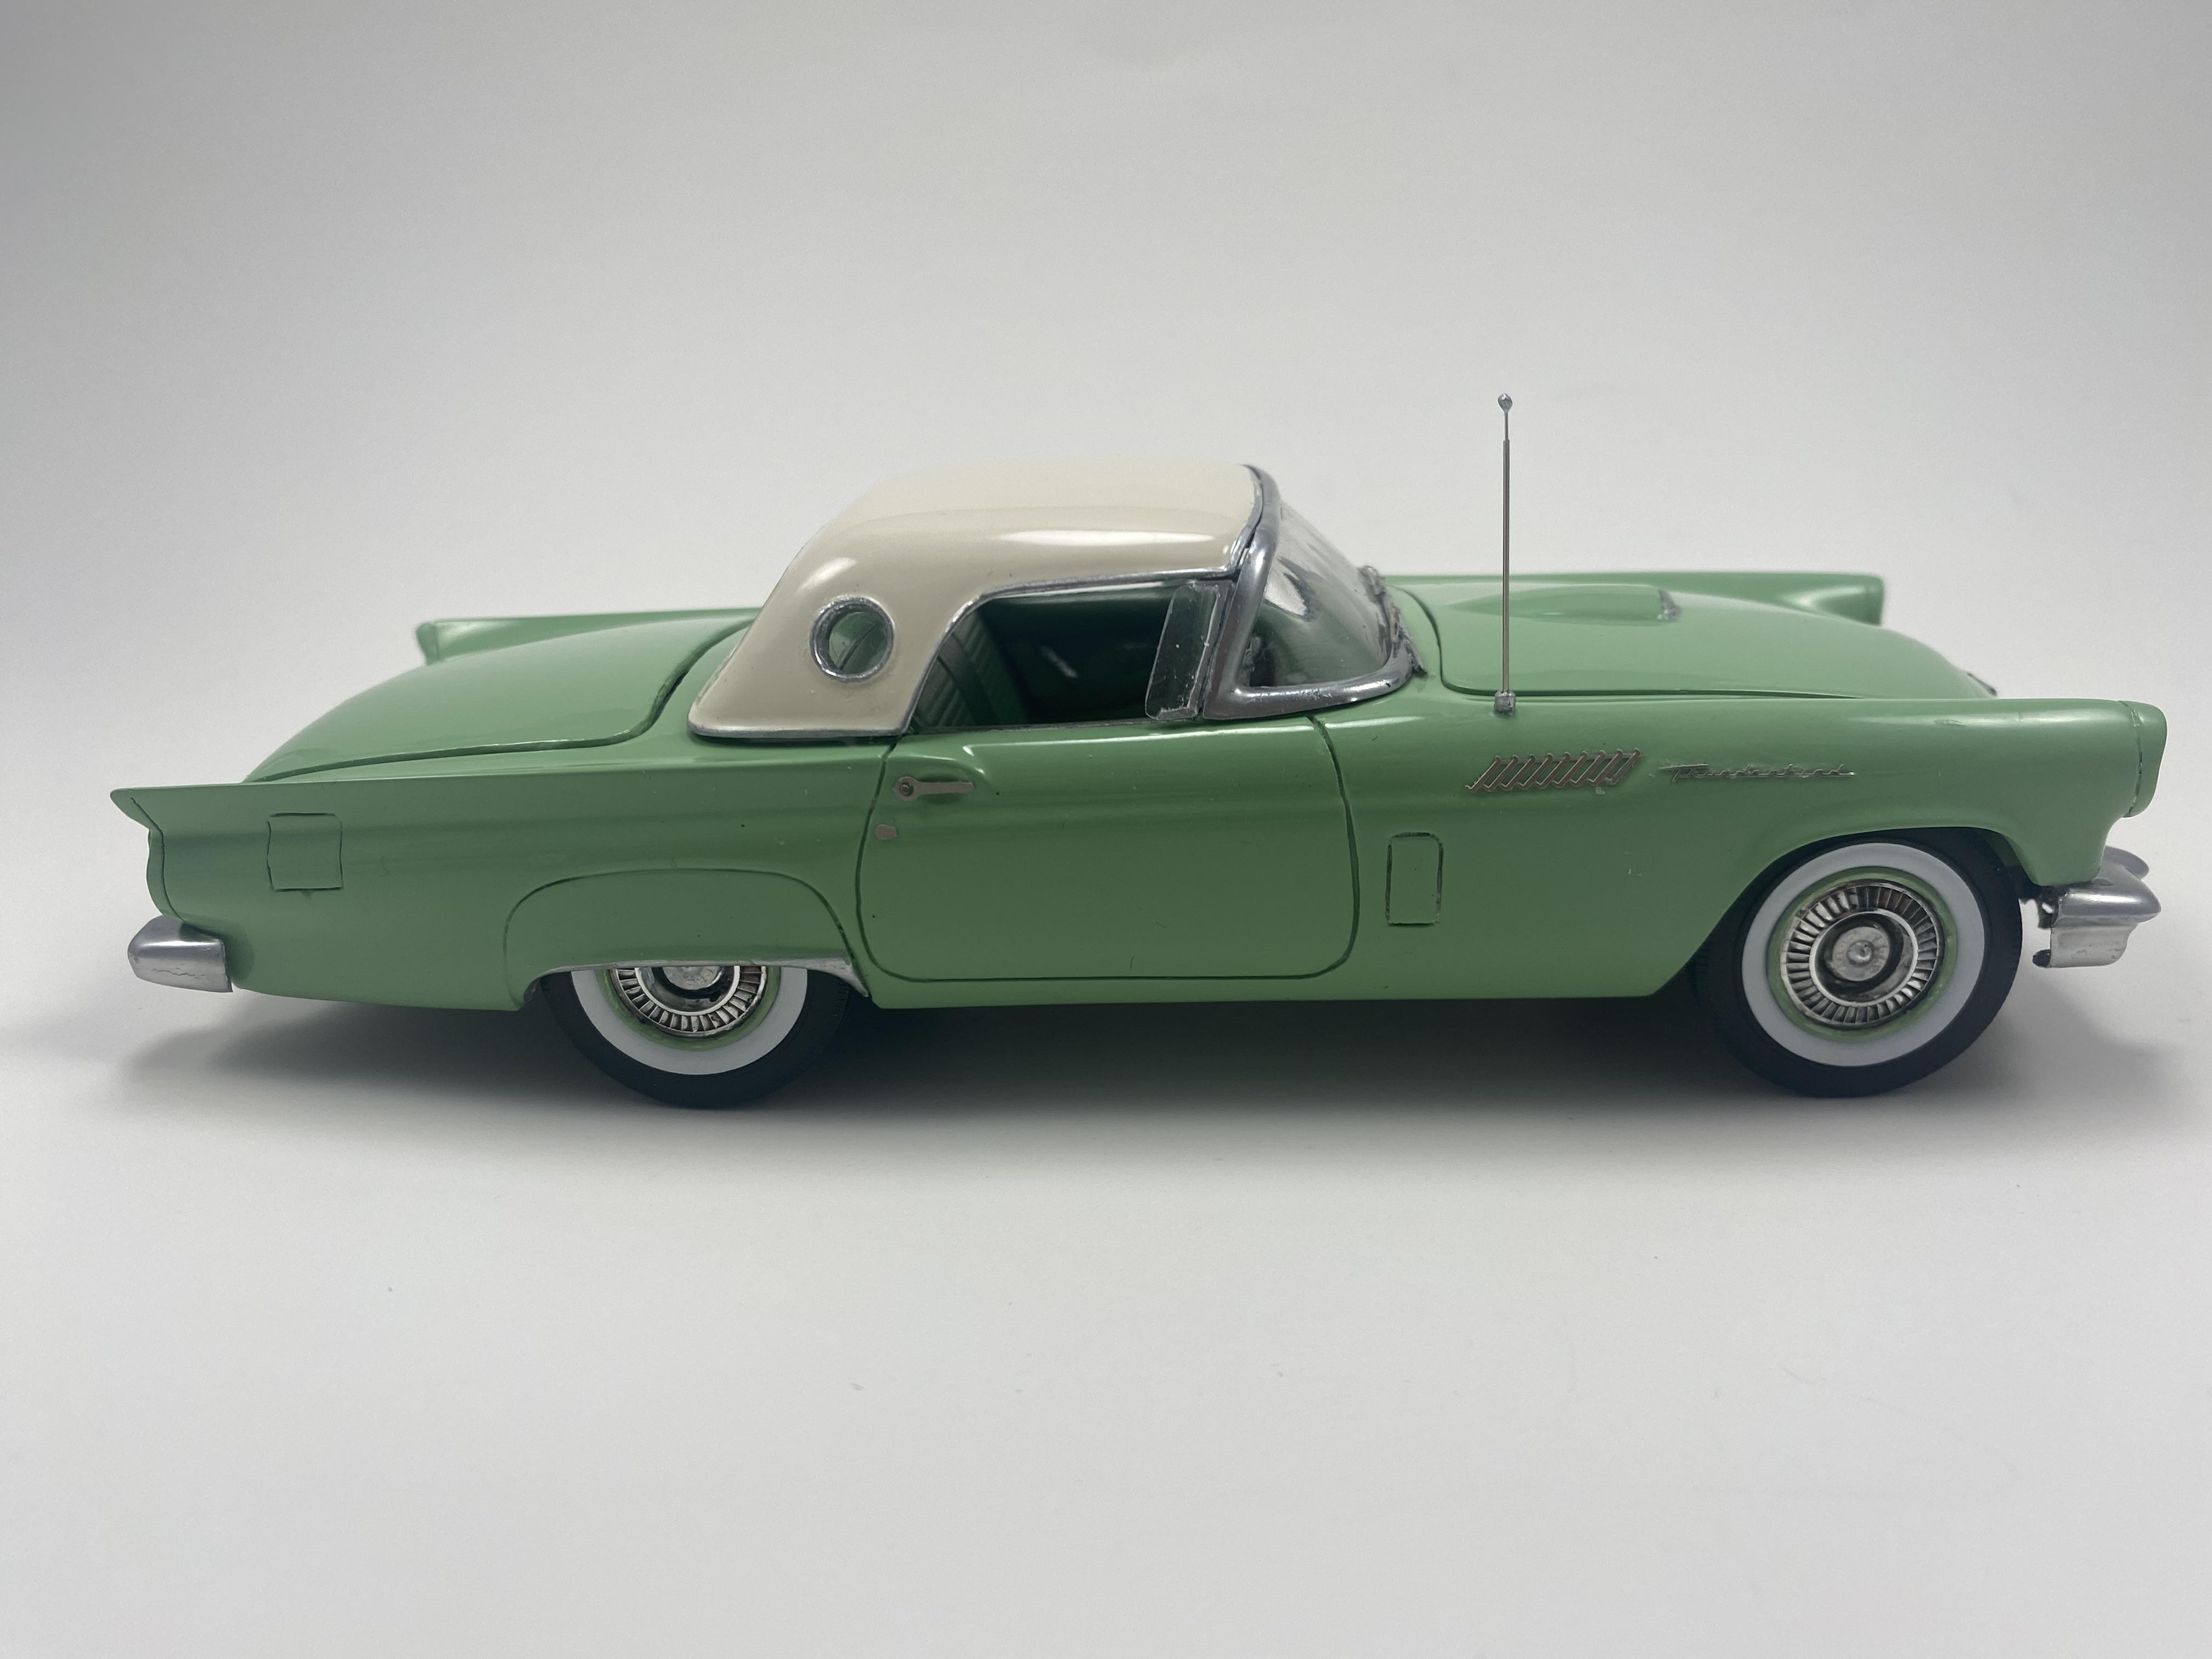
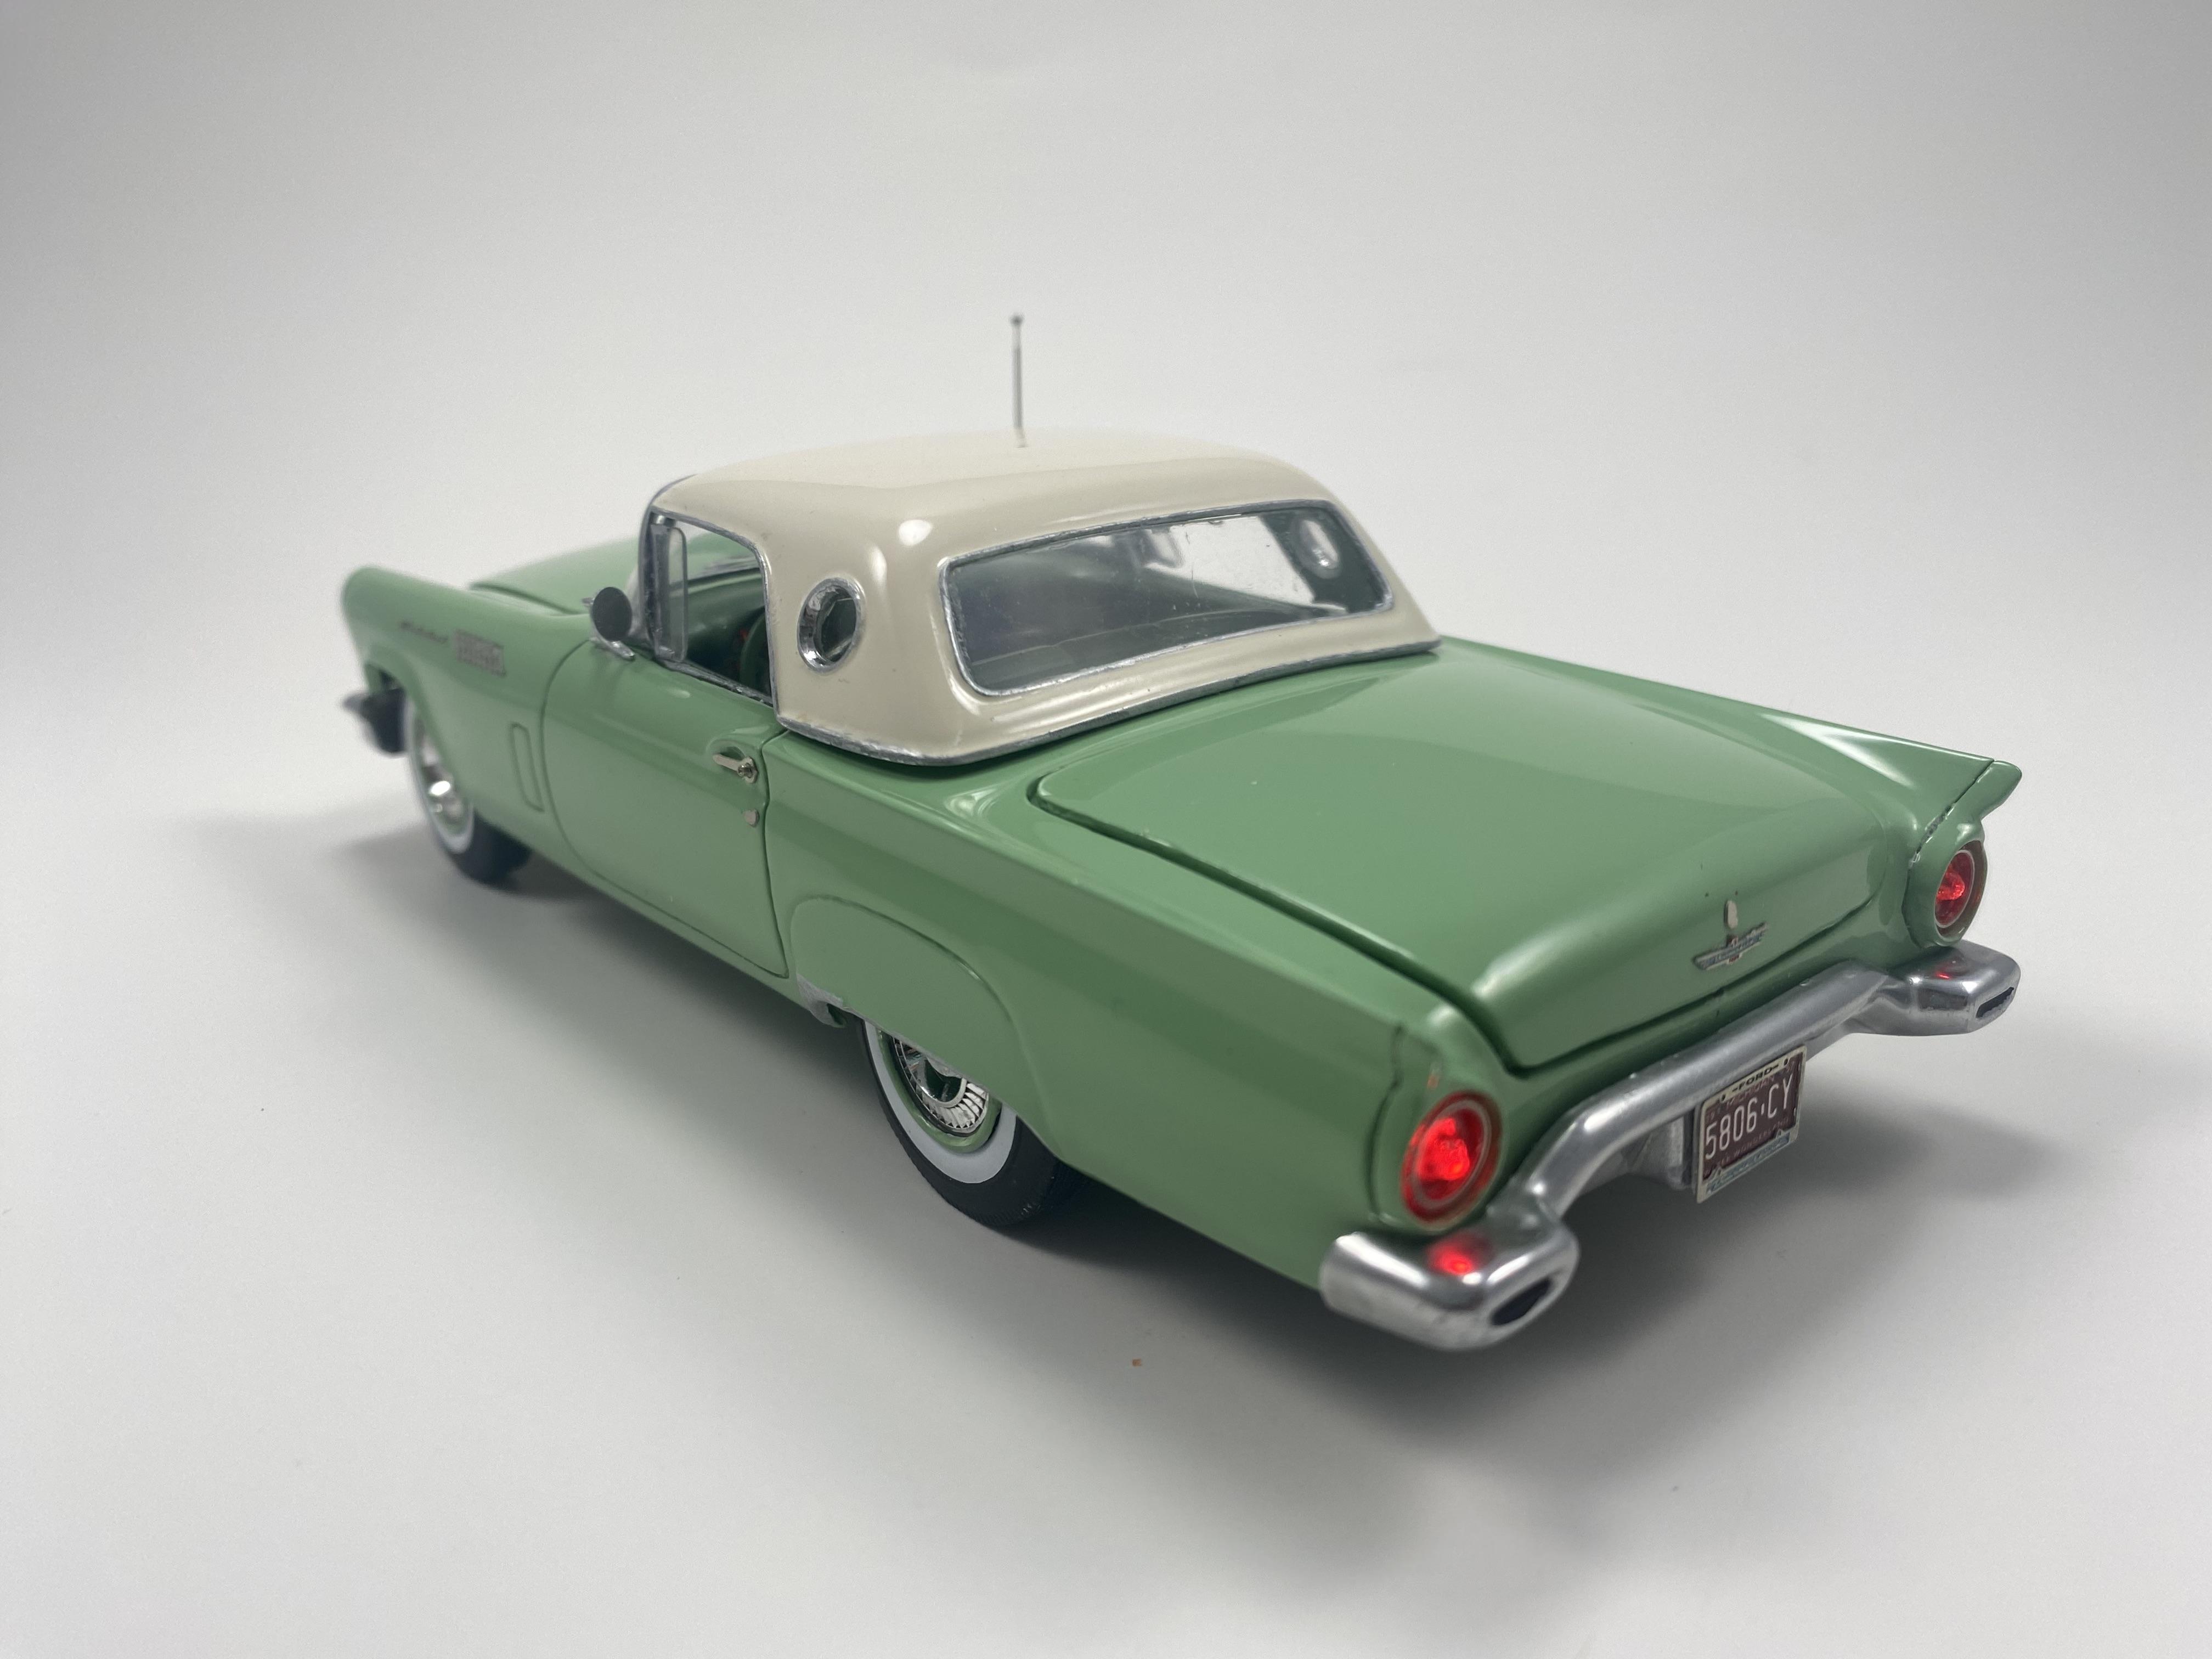
I actually did not like how much the chrome porthole trim stuck out, too thick and just didn’t look right so I sanded it down and reworked the porthole trim a bit.
-
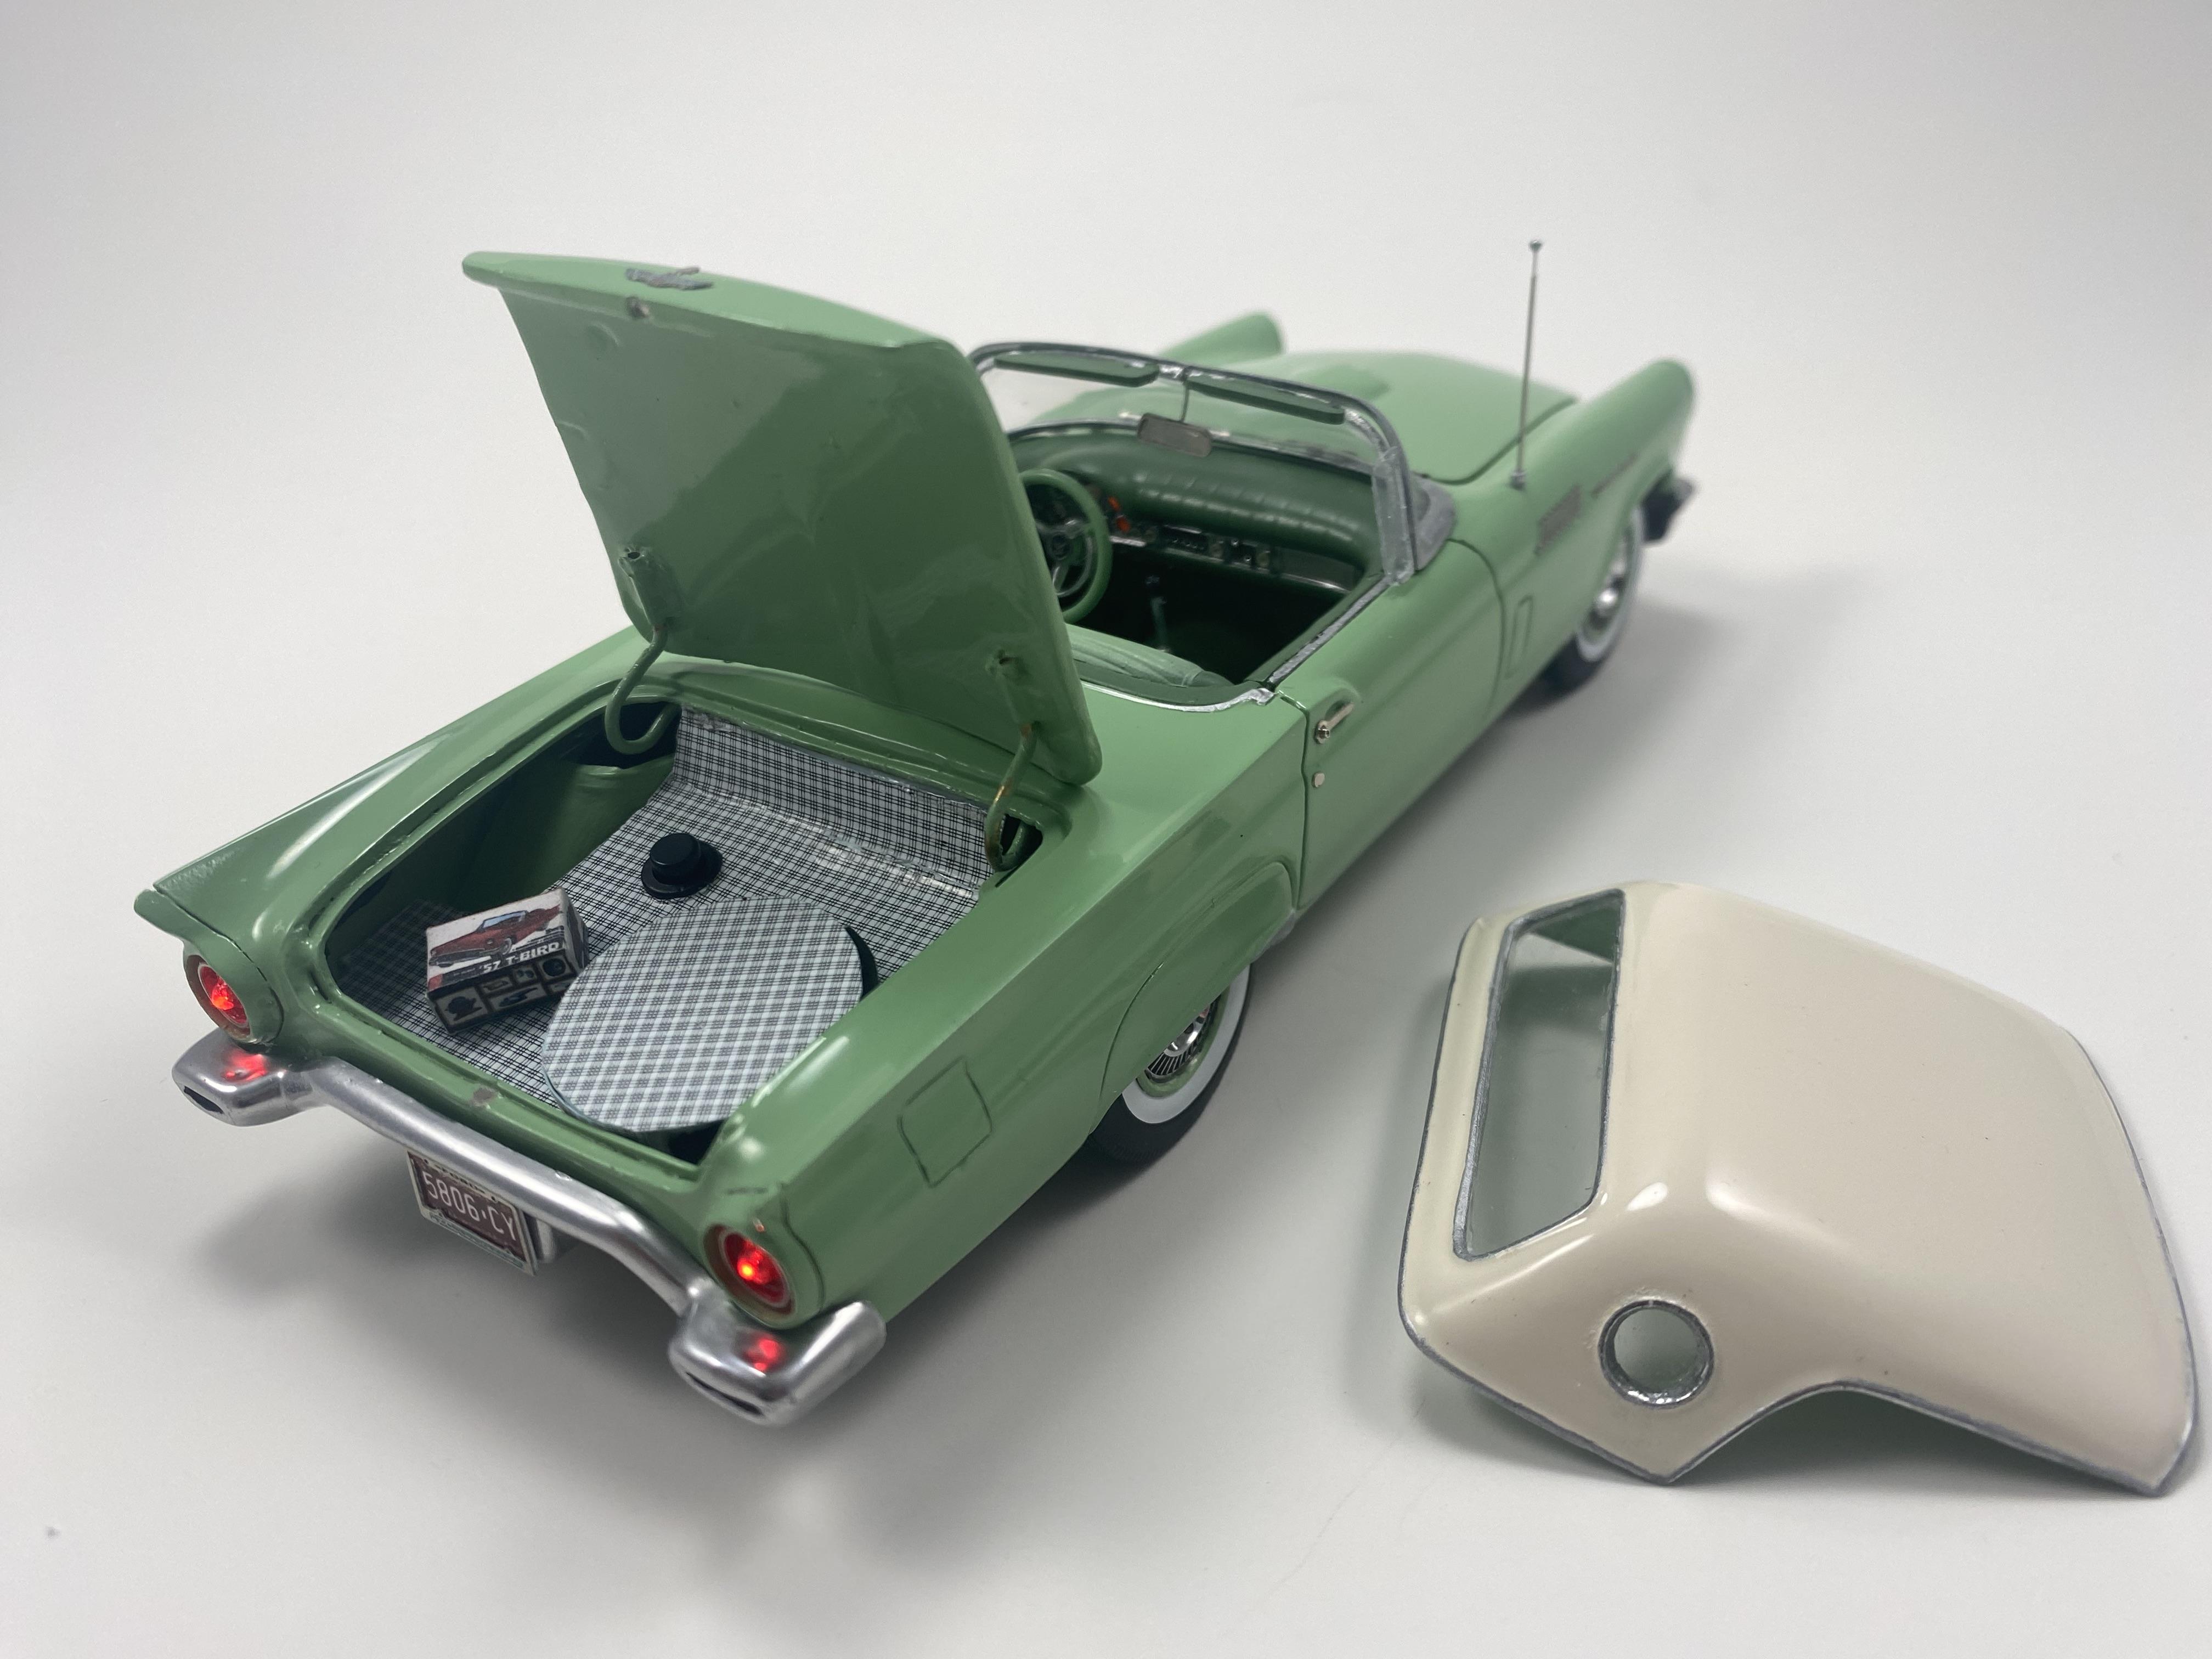
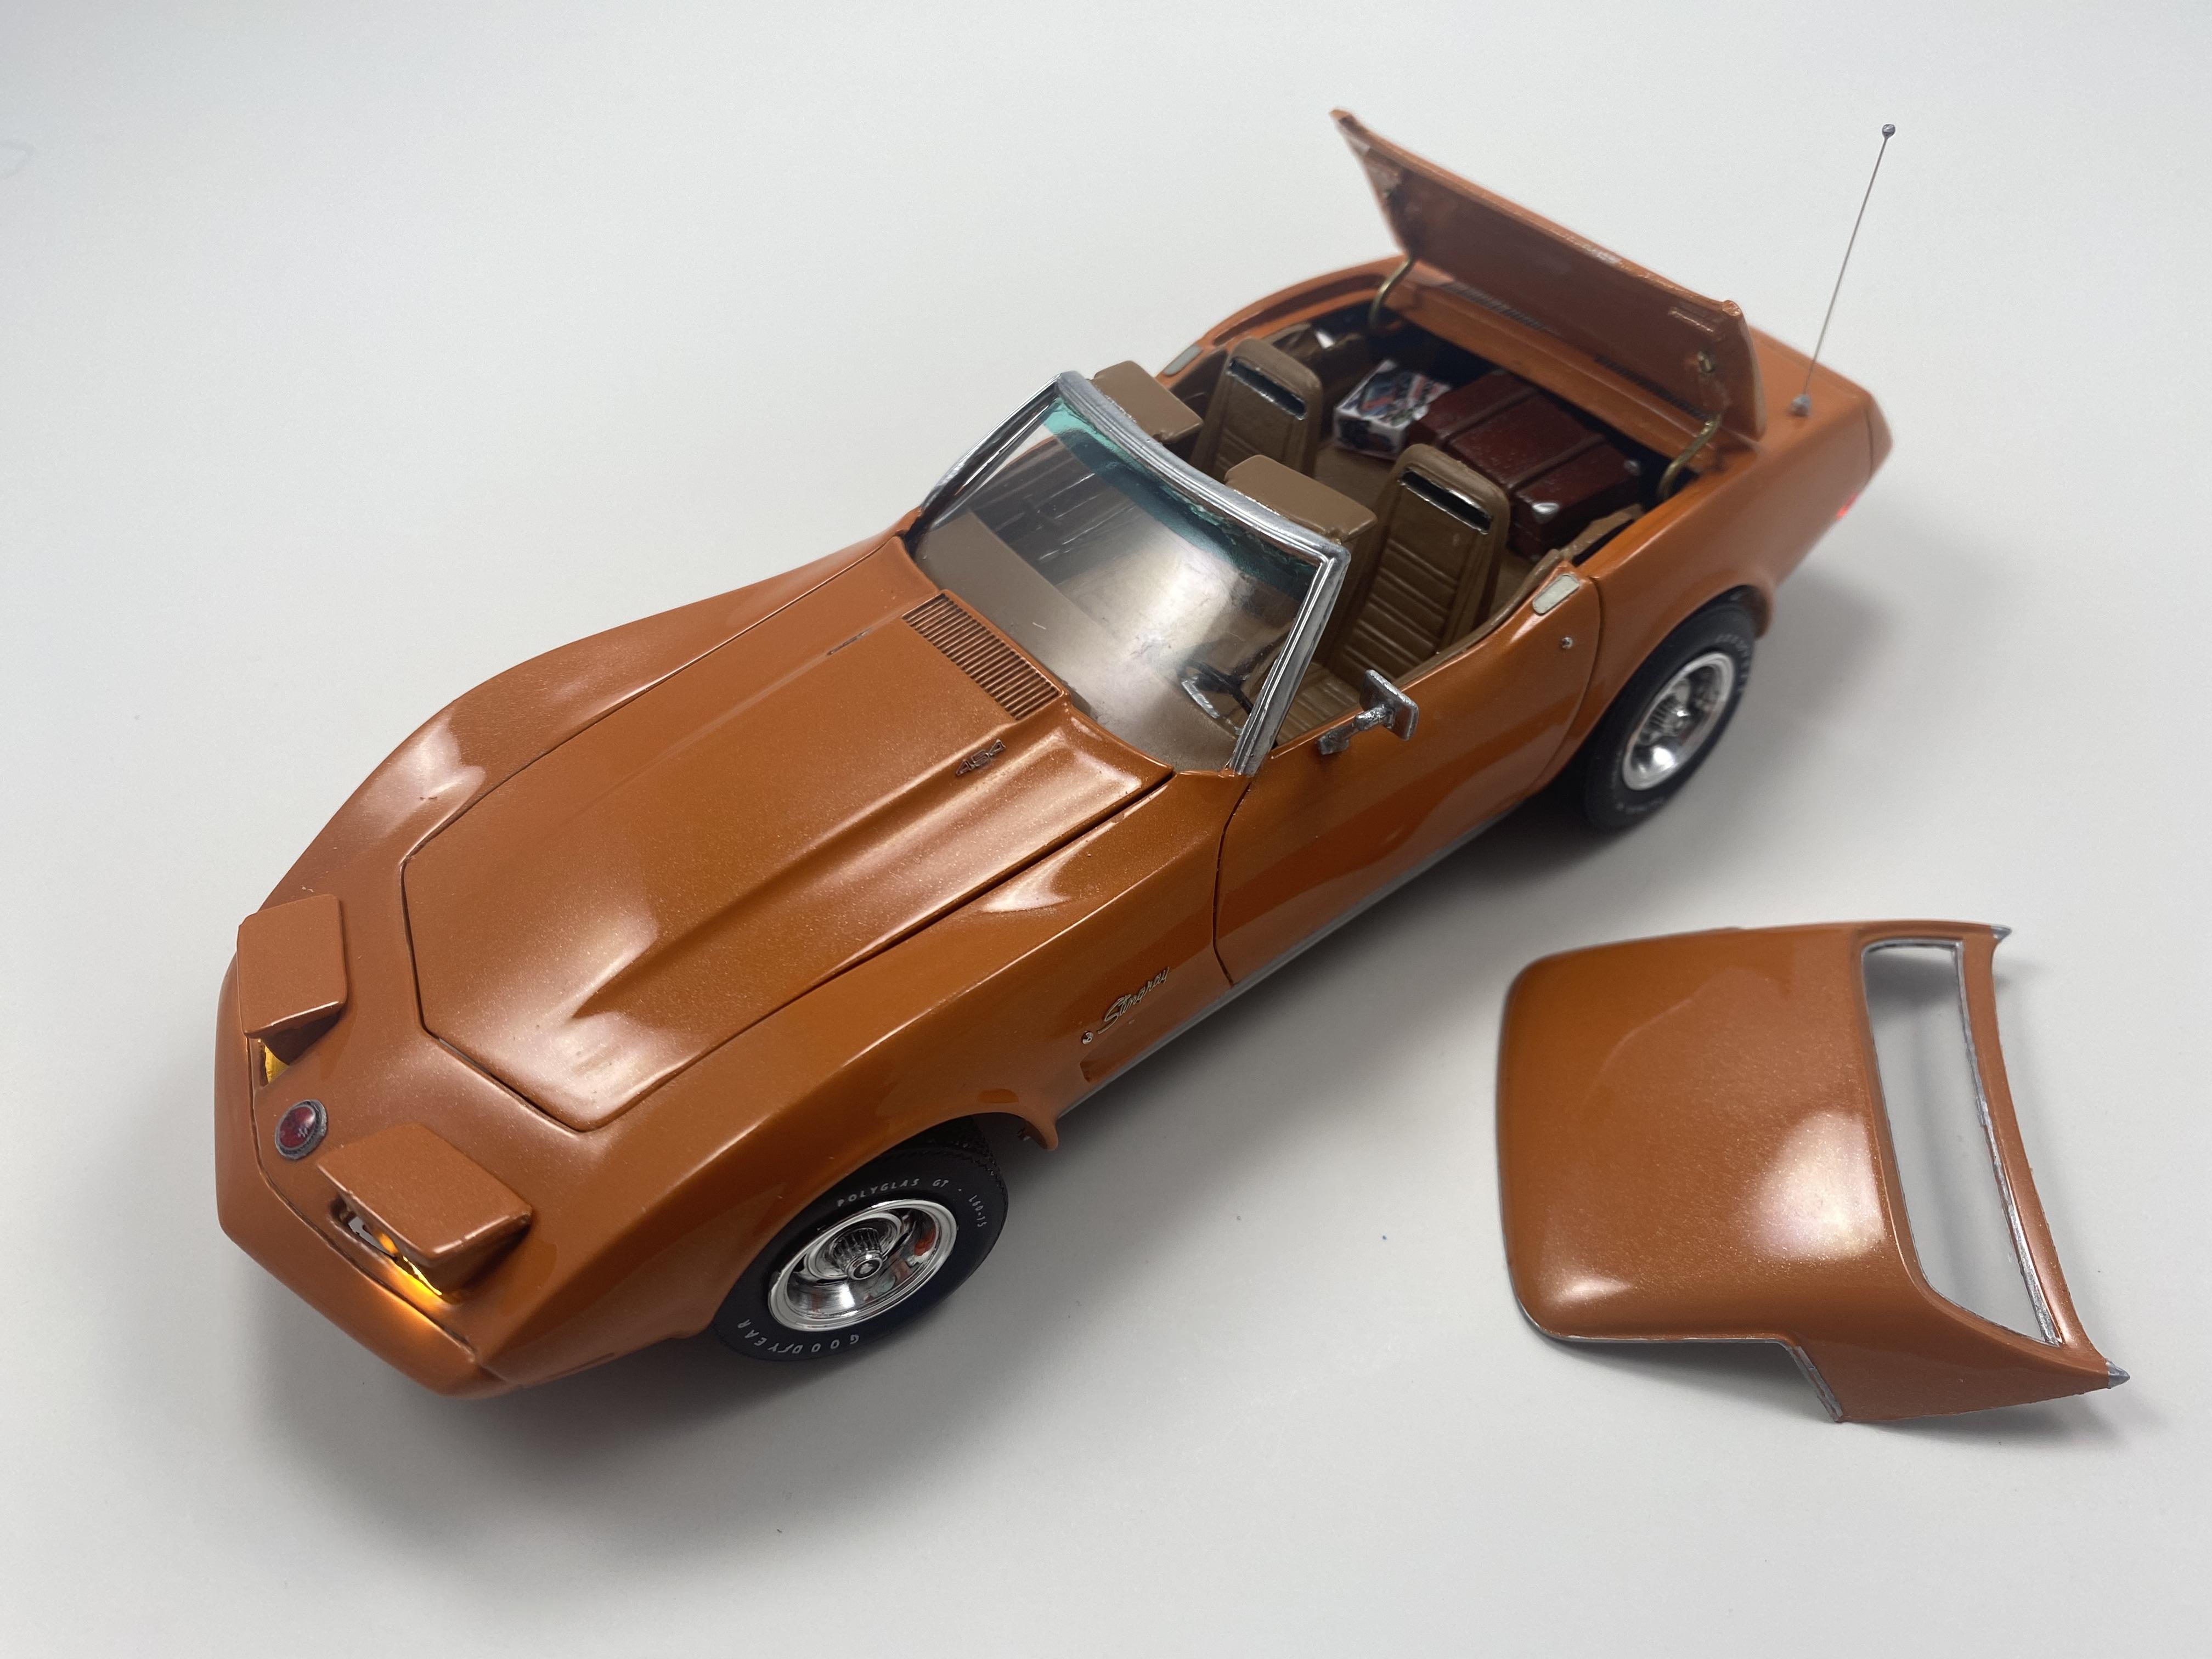
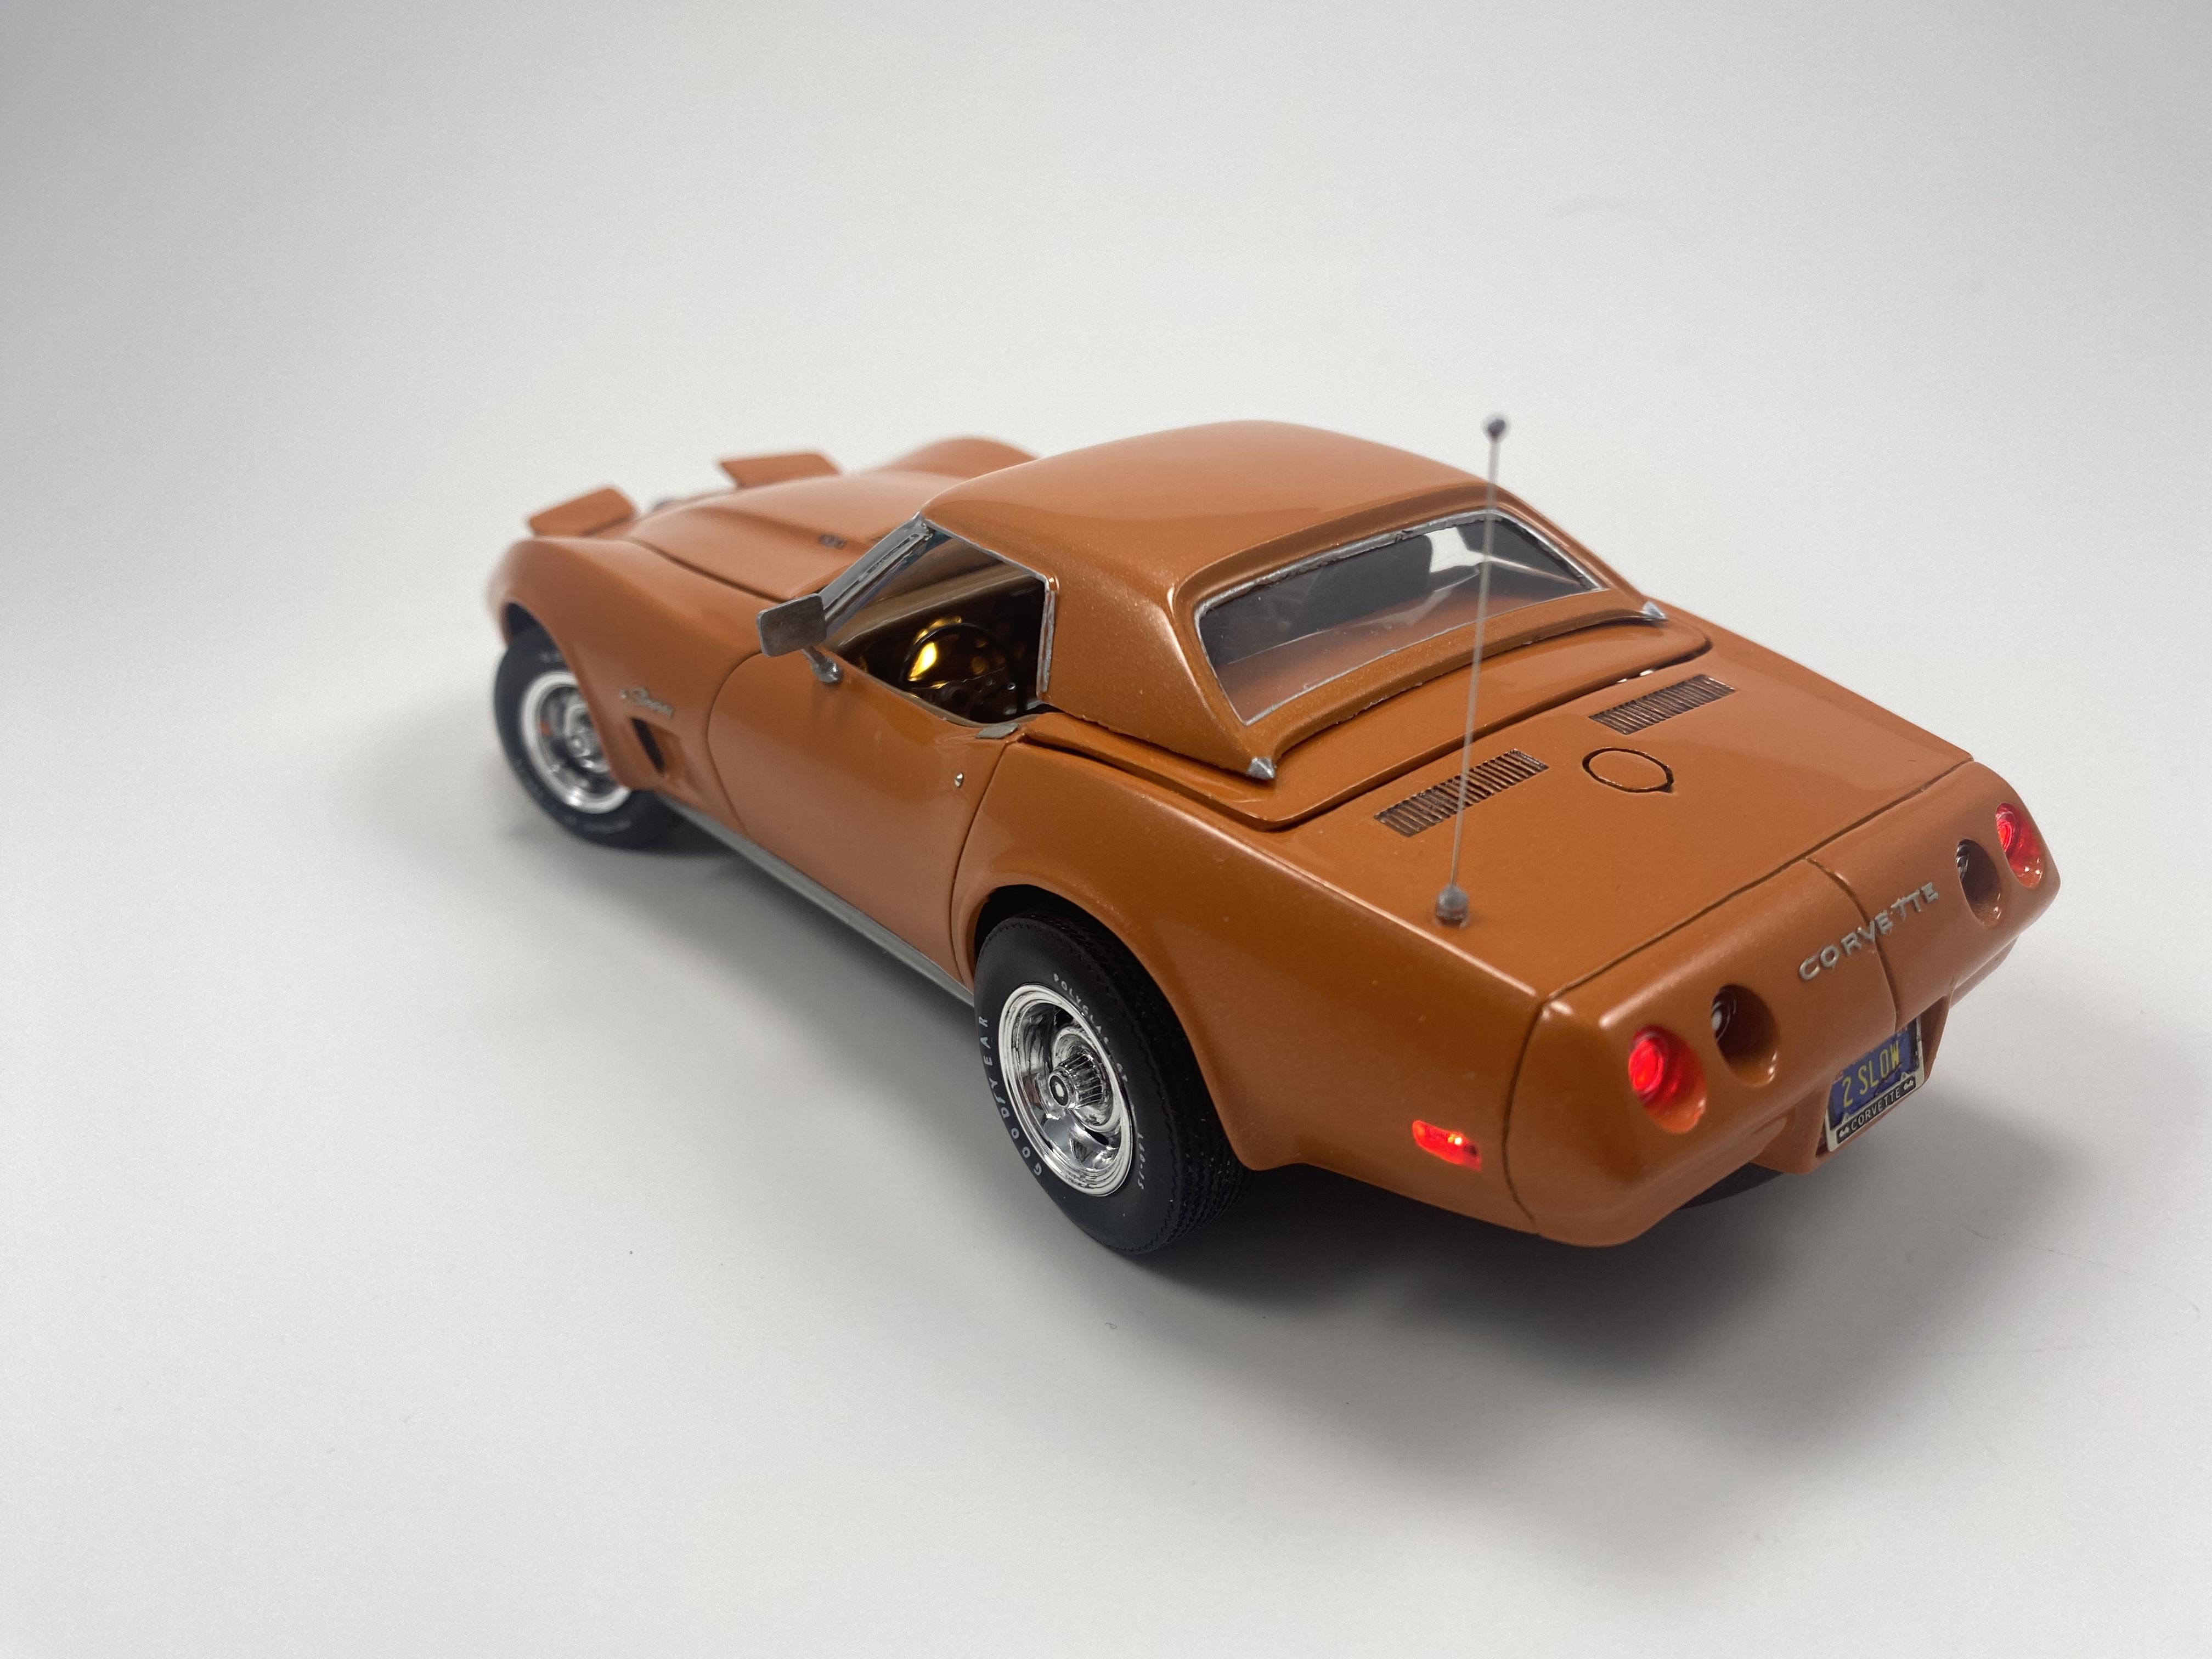
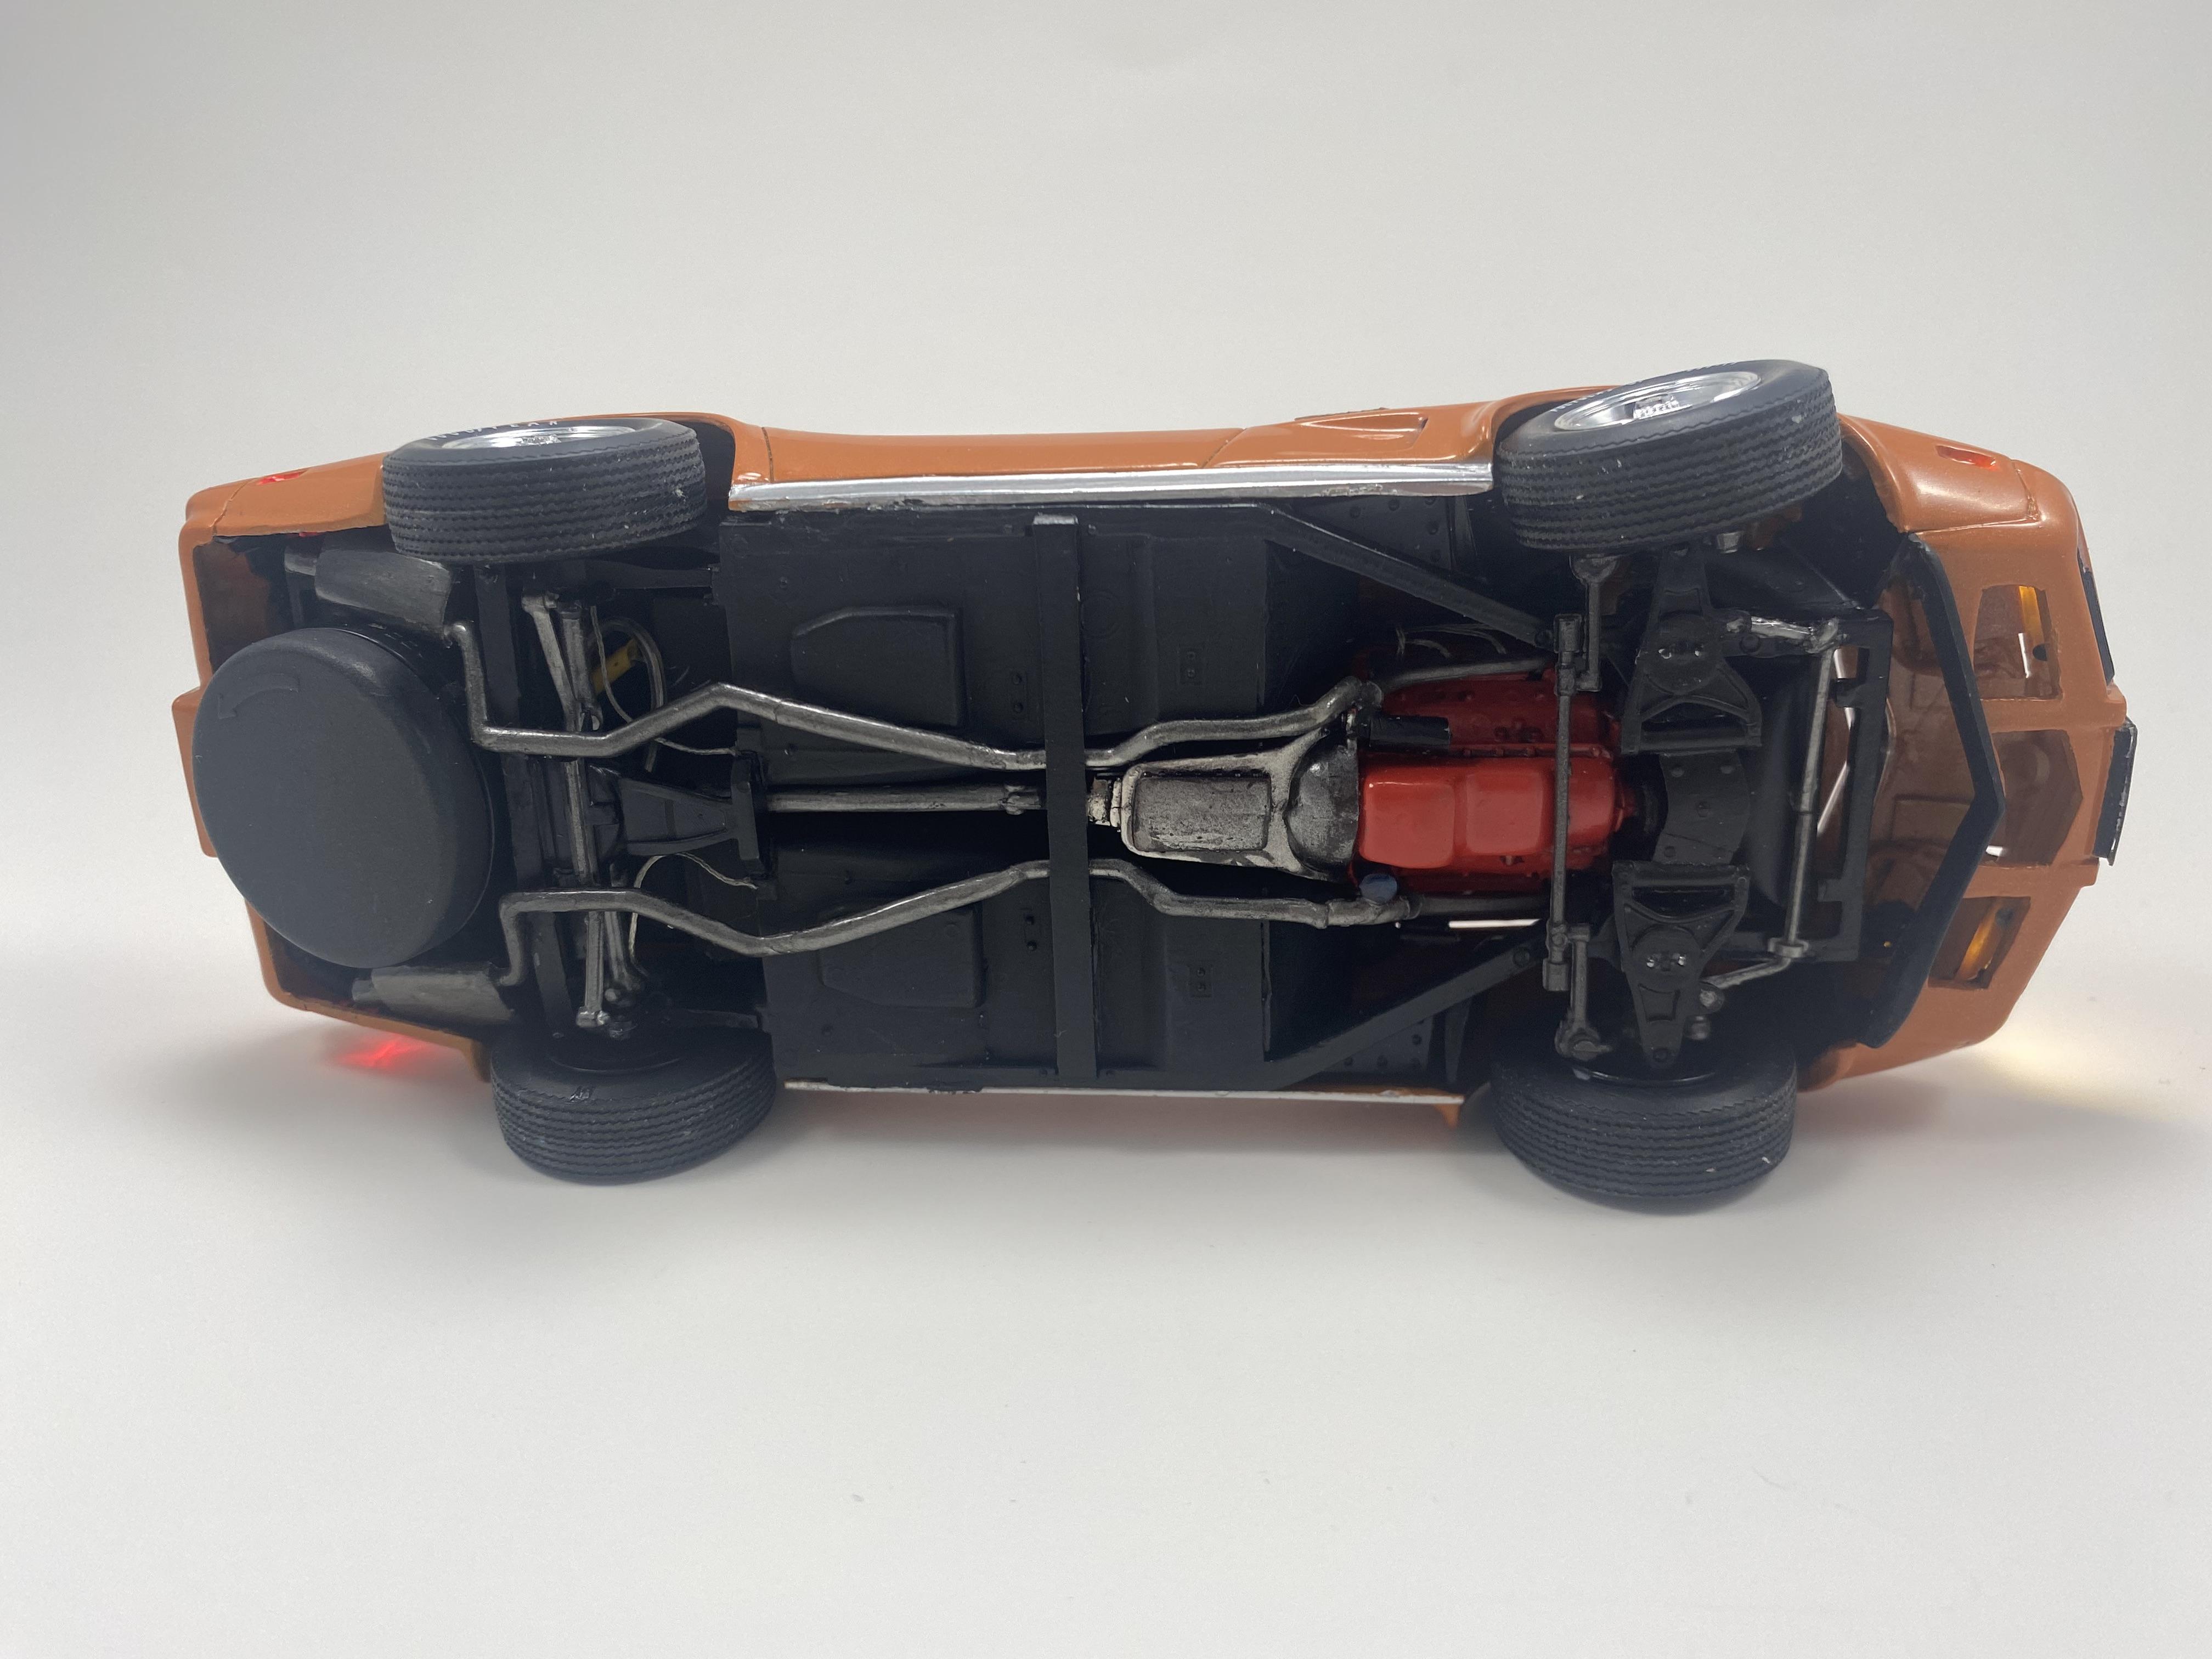
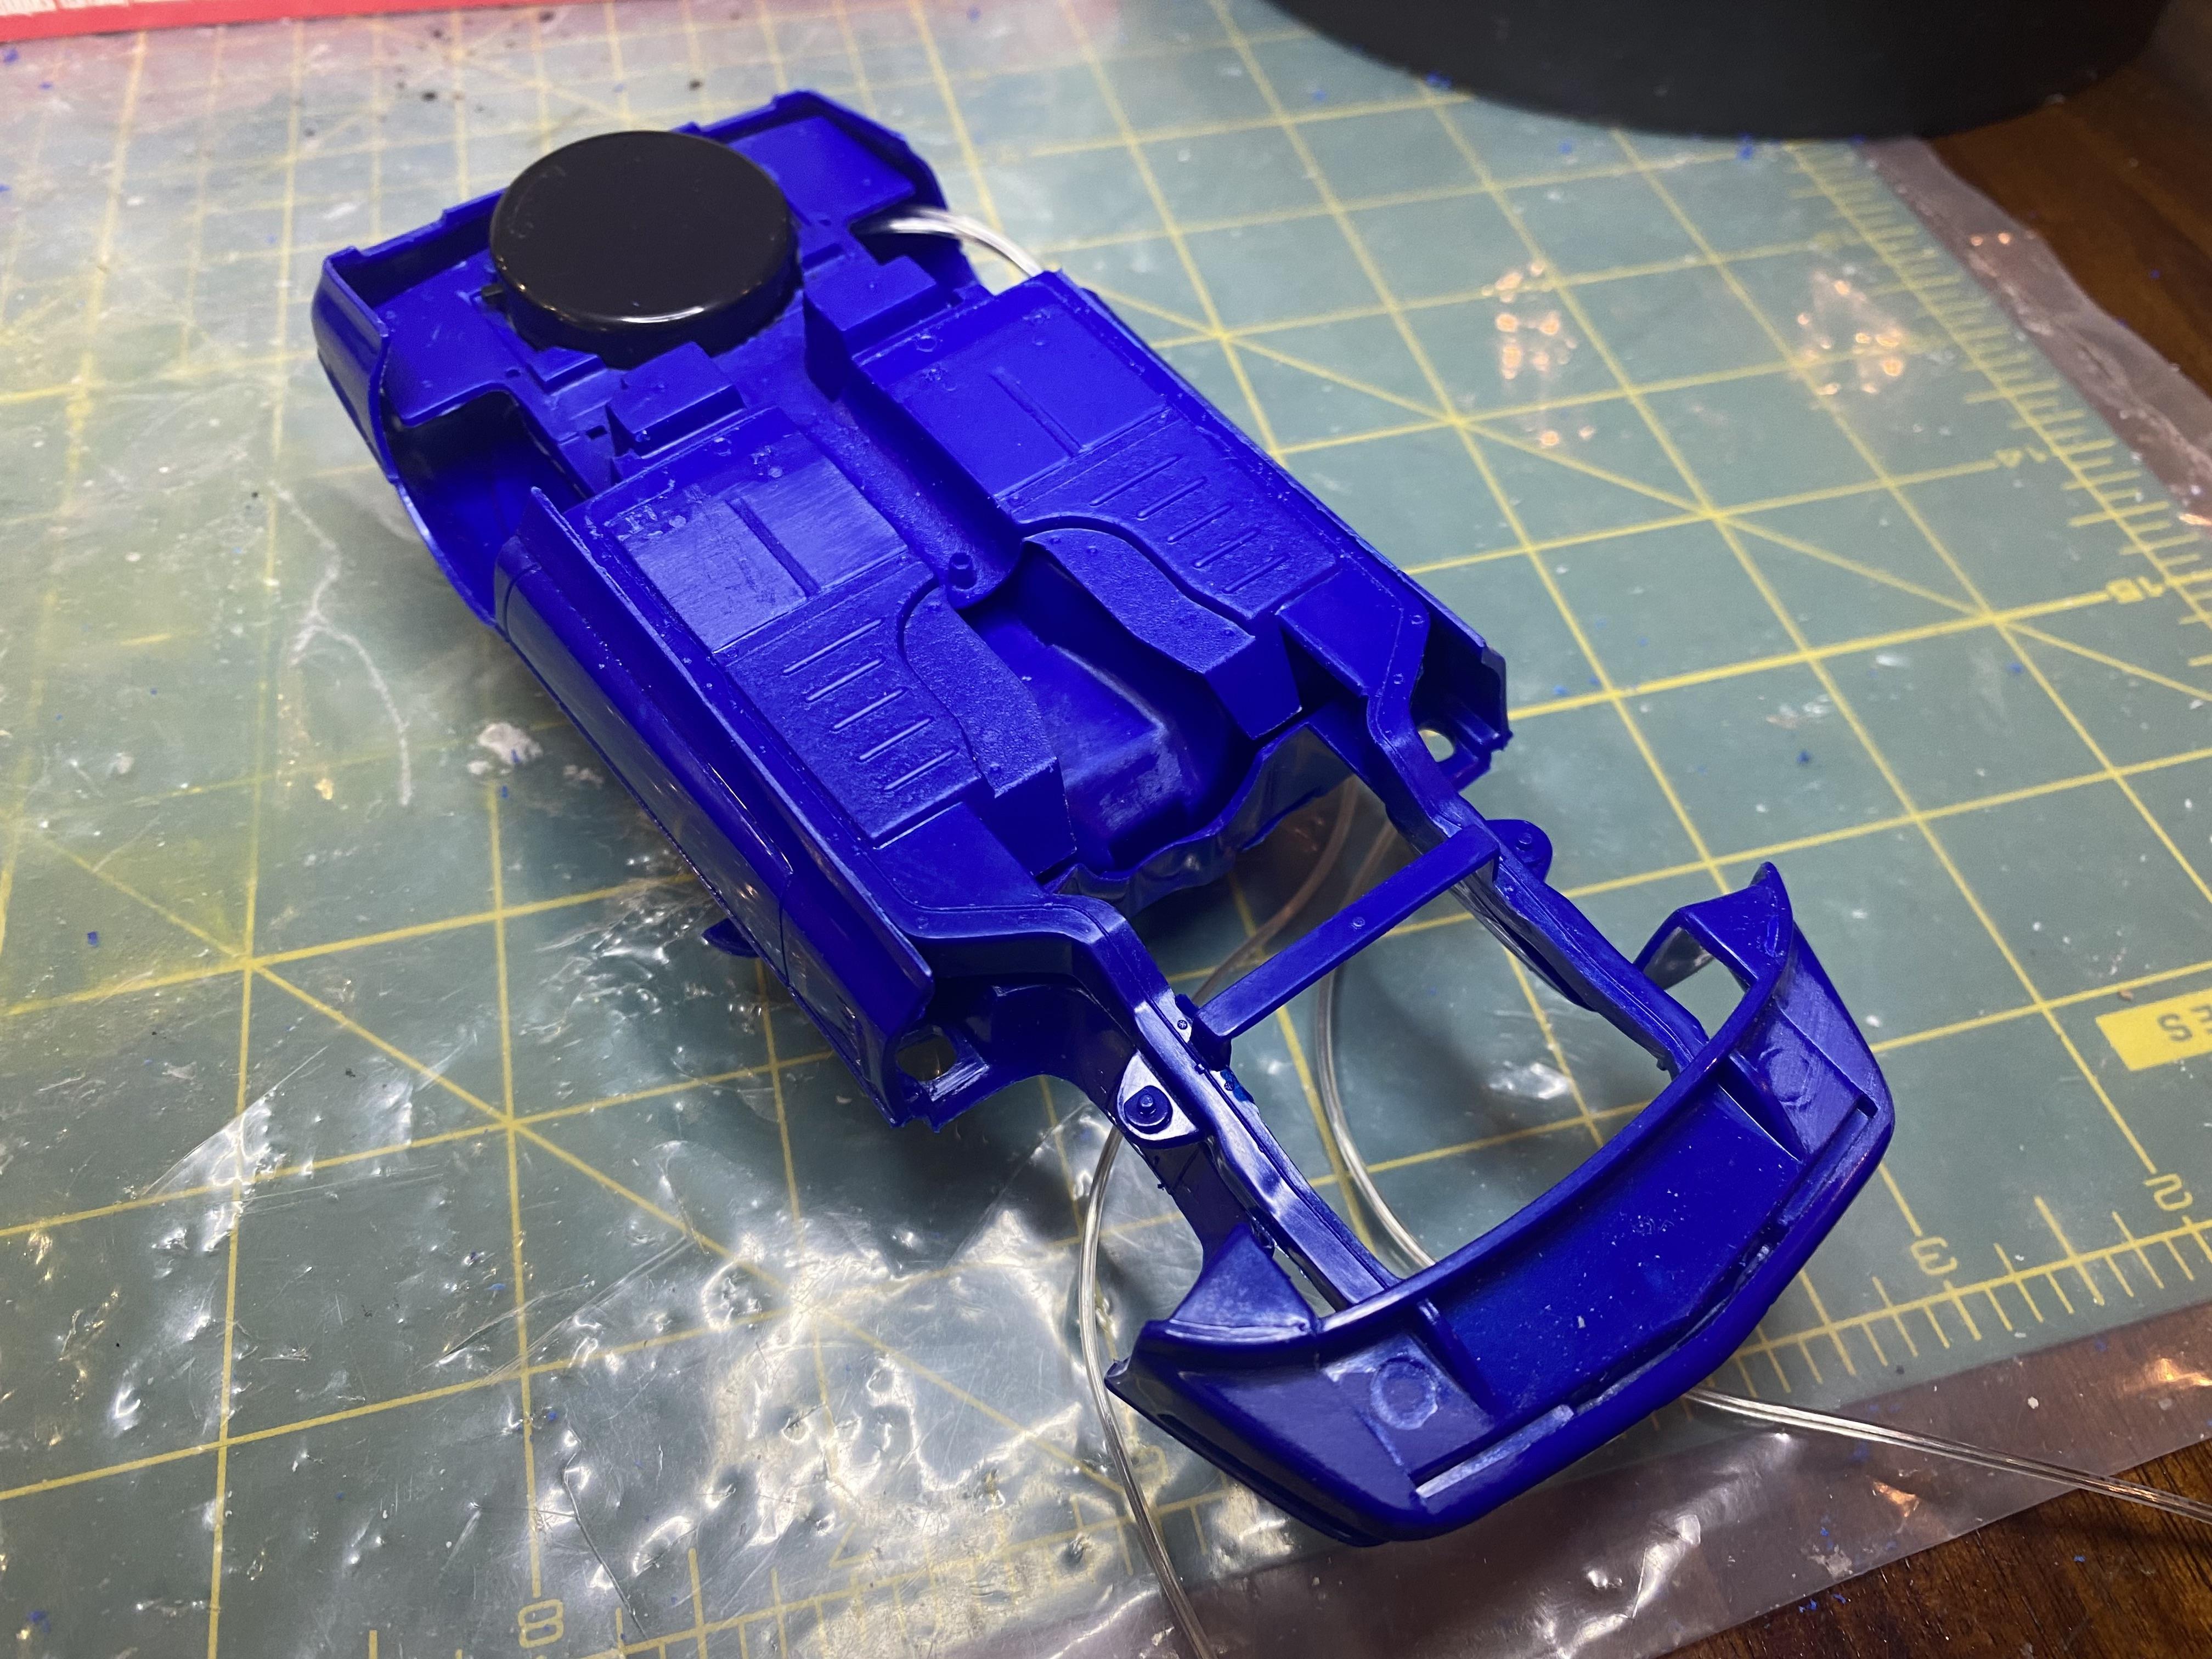
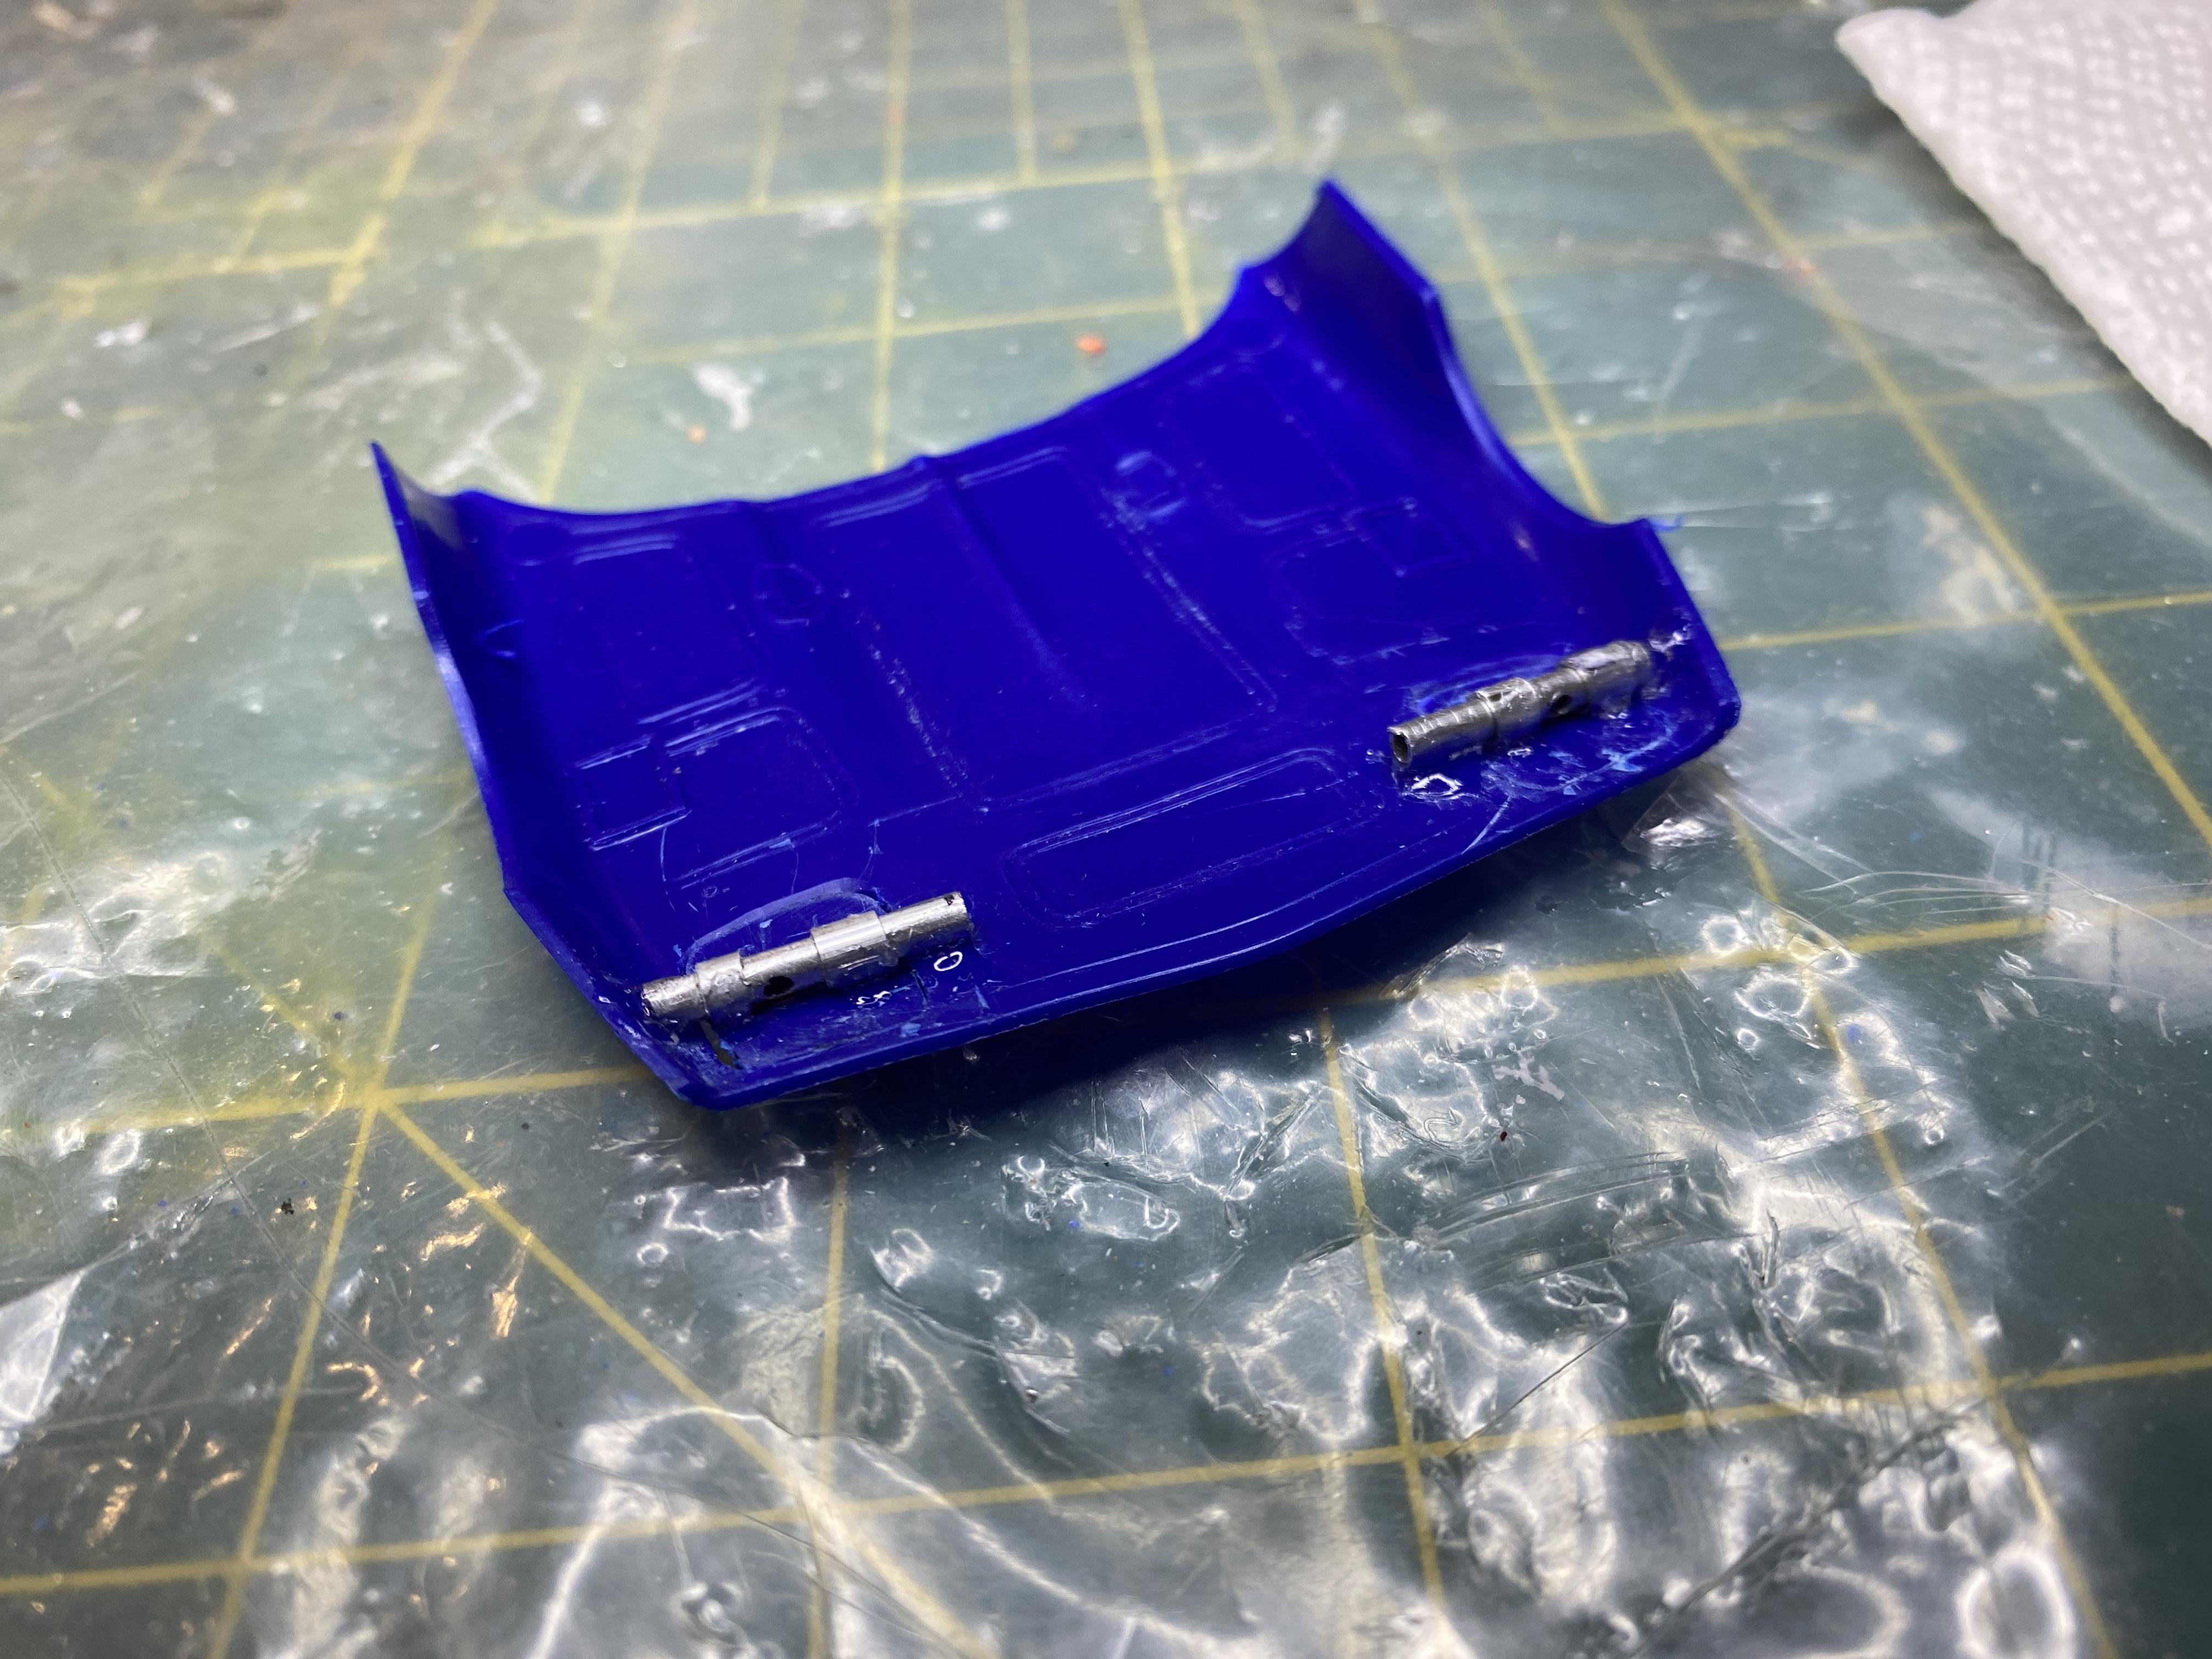
I learned a hard lesson at the SoCal Open model car show that A-23 12v batteries won’t even last 1/2 hour before dying. The extra side marker lights would not work with the 3v coin batteries I used on the Classic Mustangs and needed more power. Then single 3v coin batteries however lasted the entire show and never lost a bit of brightness. I have sense changed over the corvette to a 6v two coin battery holder and it last for hours. I did have to replace what would be the spare tire cover with the battery holder and with the A-23 batter removed from under the convertible top door I placed luggage and a scale copy of the kit box this was built from. I also sourced and modified a convertible hardtop from EBay. For some reason this kit came with no top whatsoever.
-
Thank you! Thank you!
-
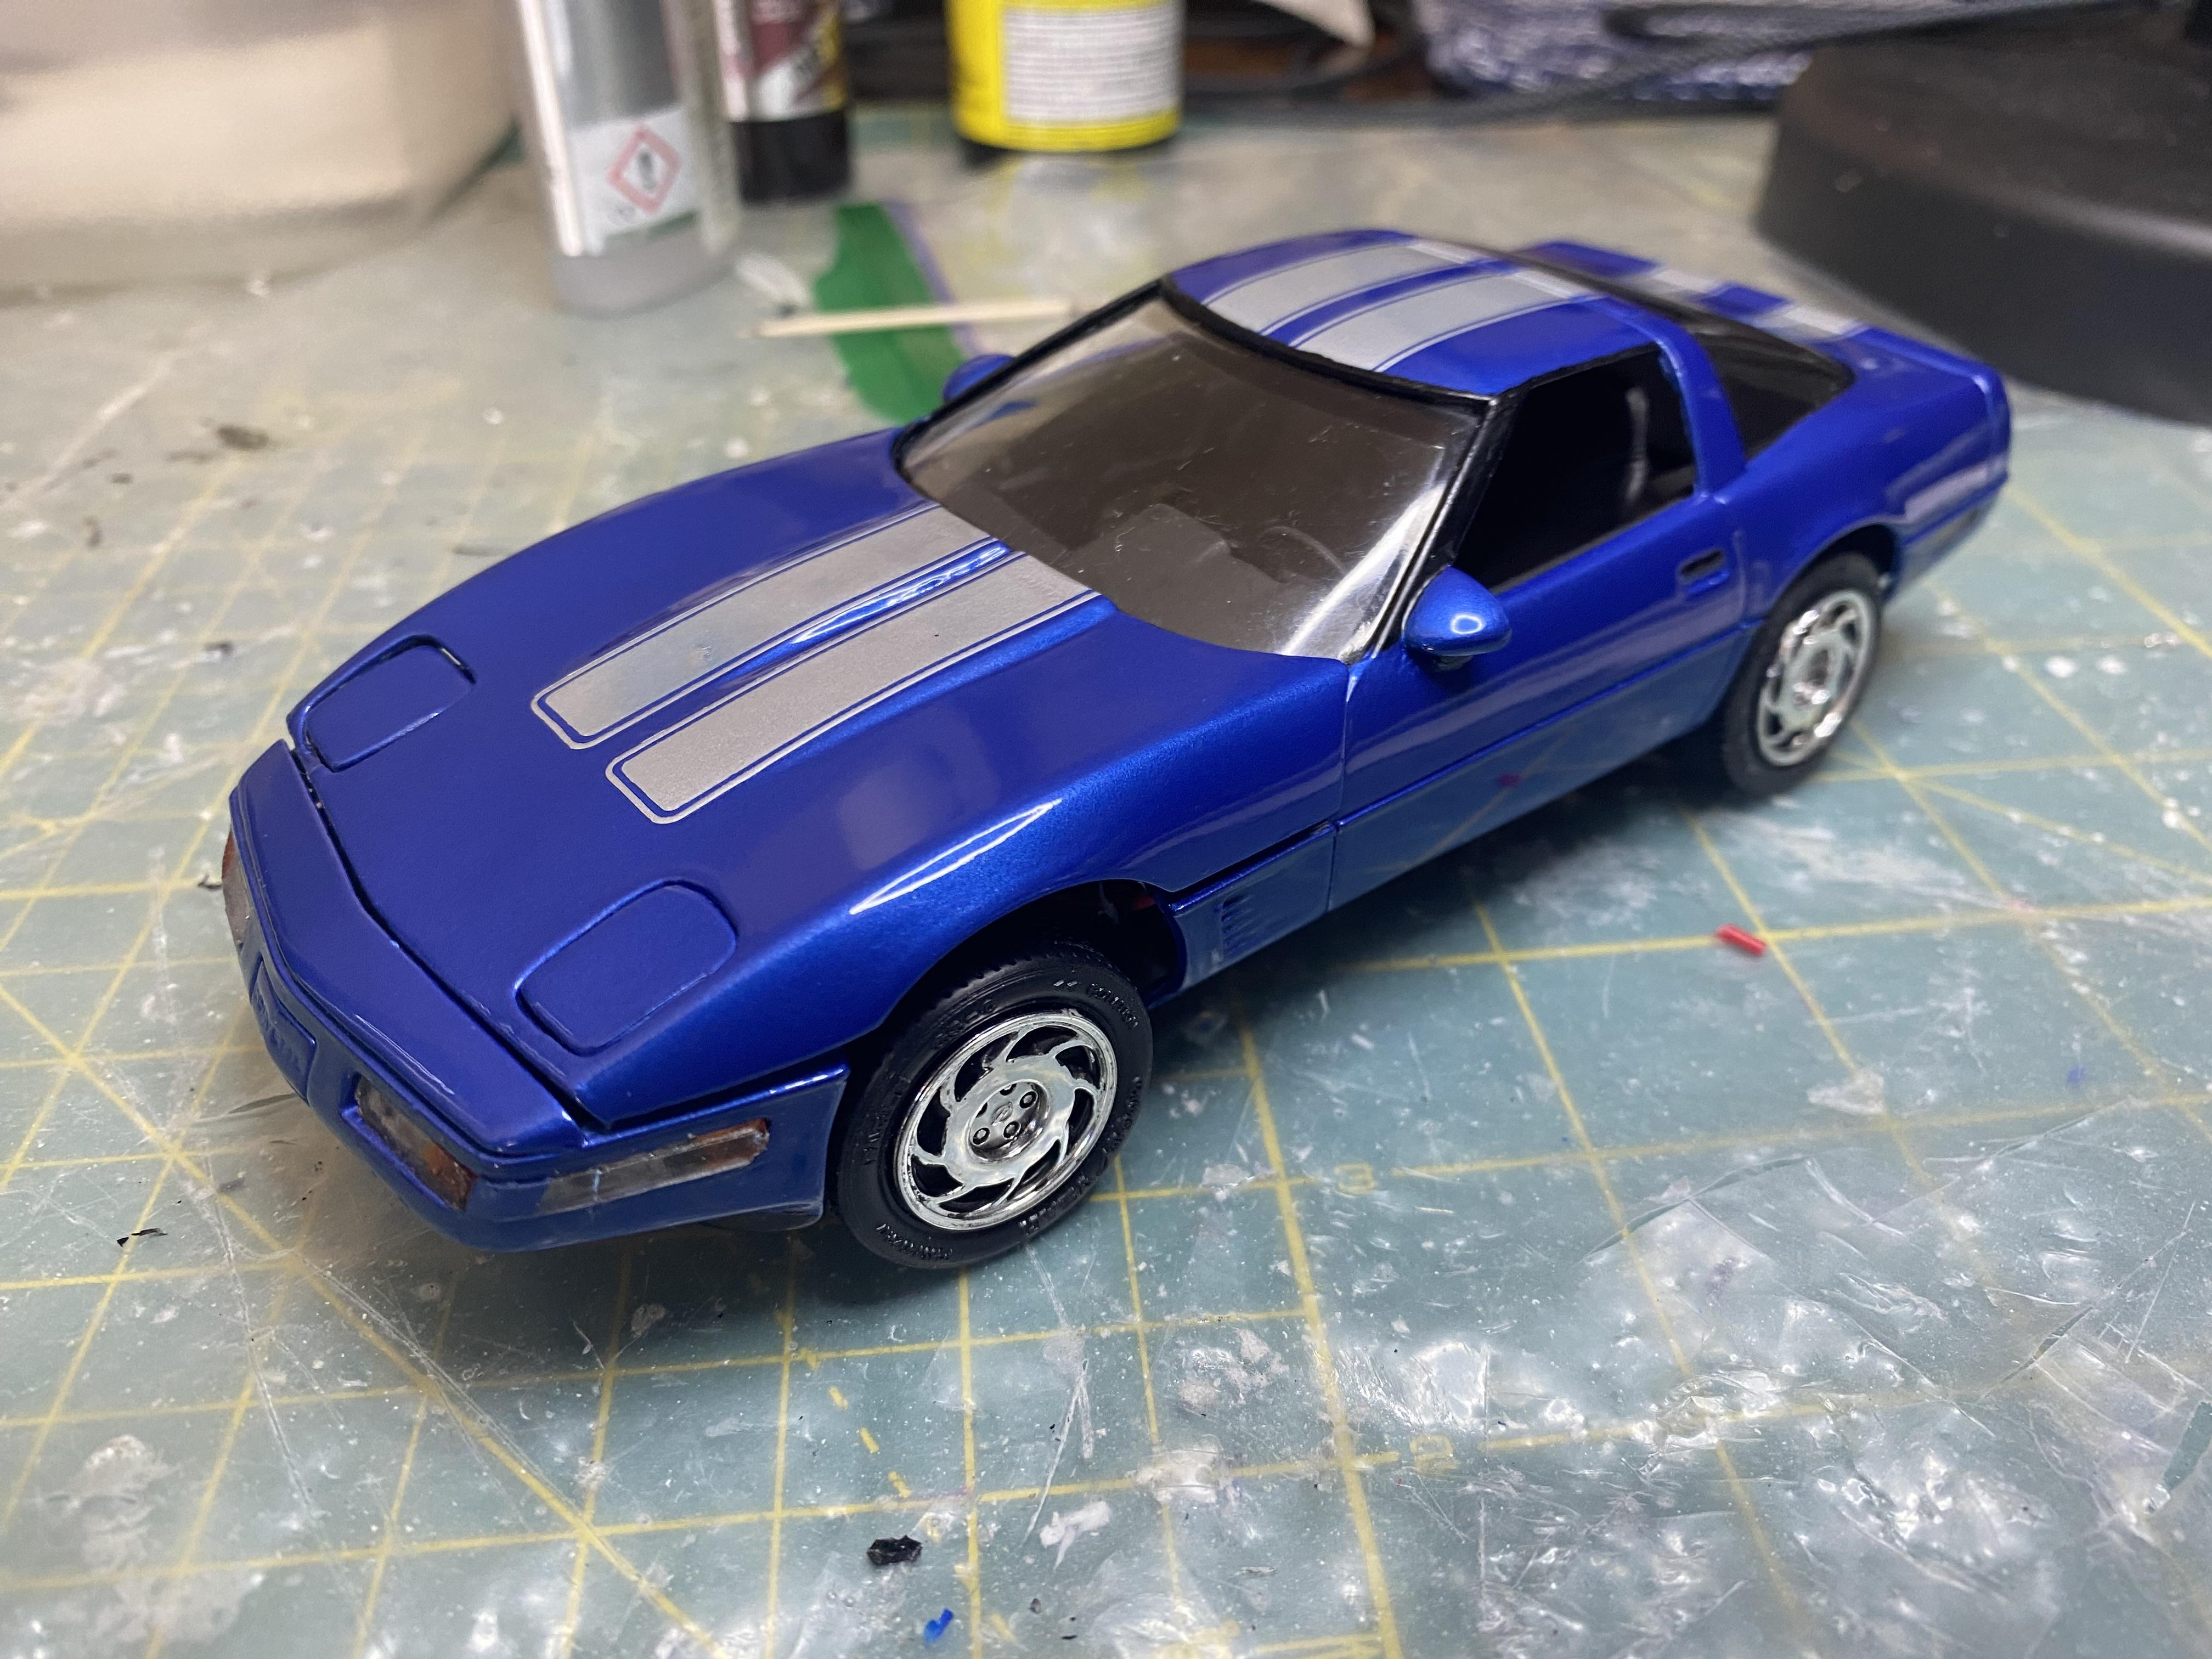
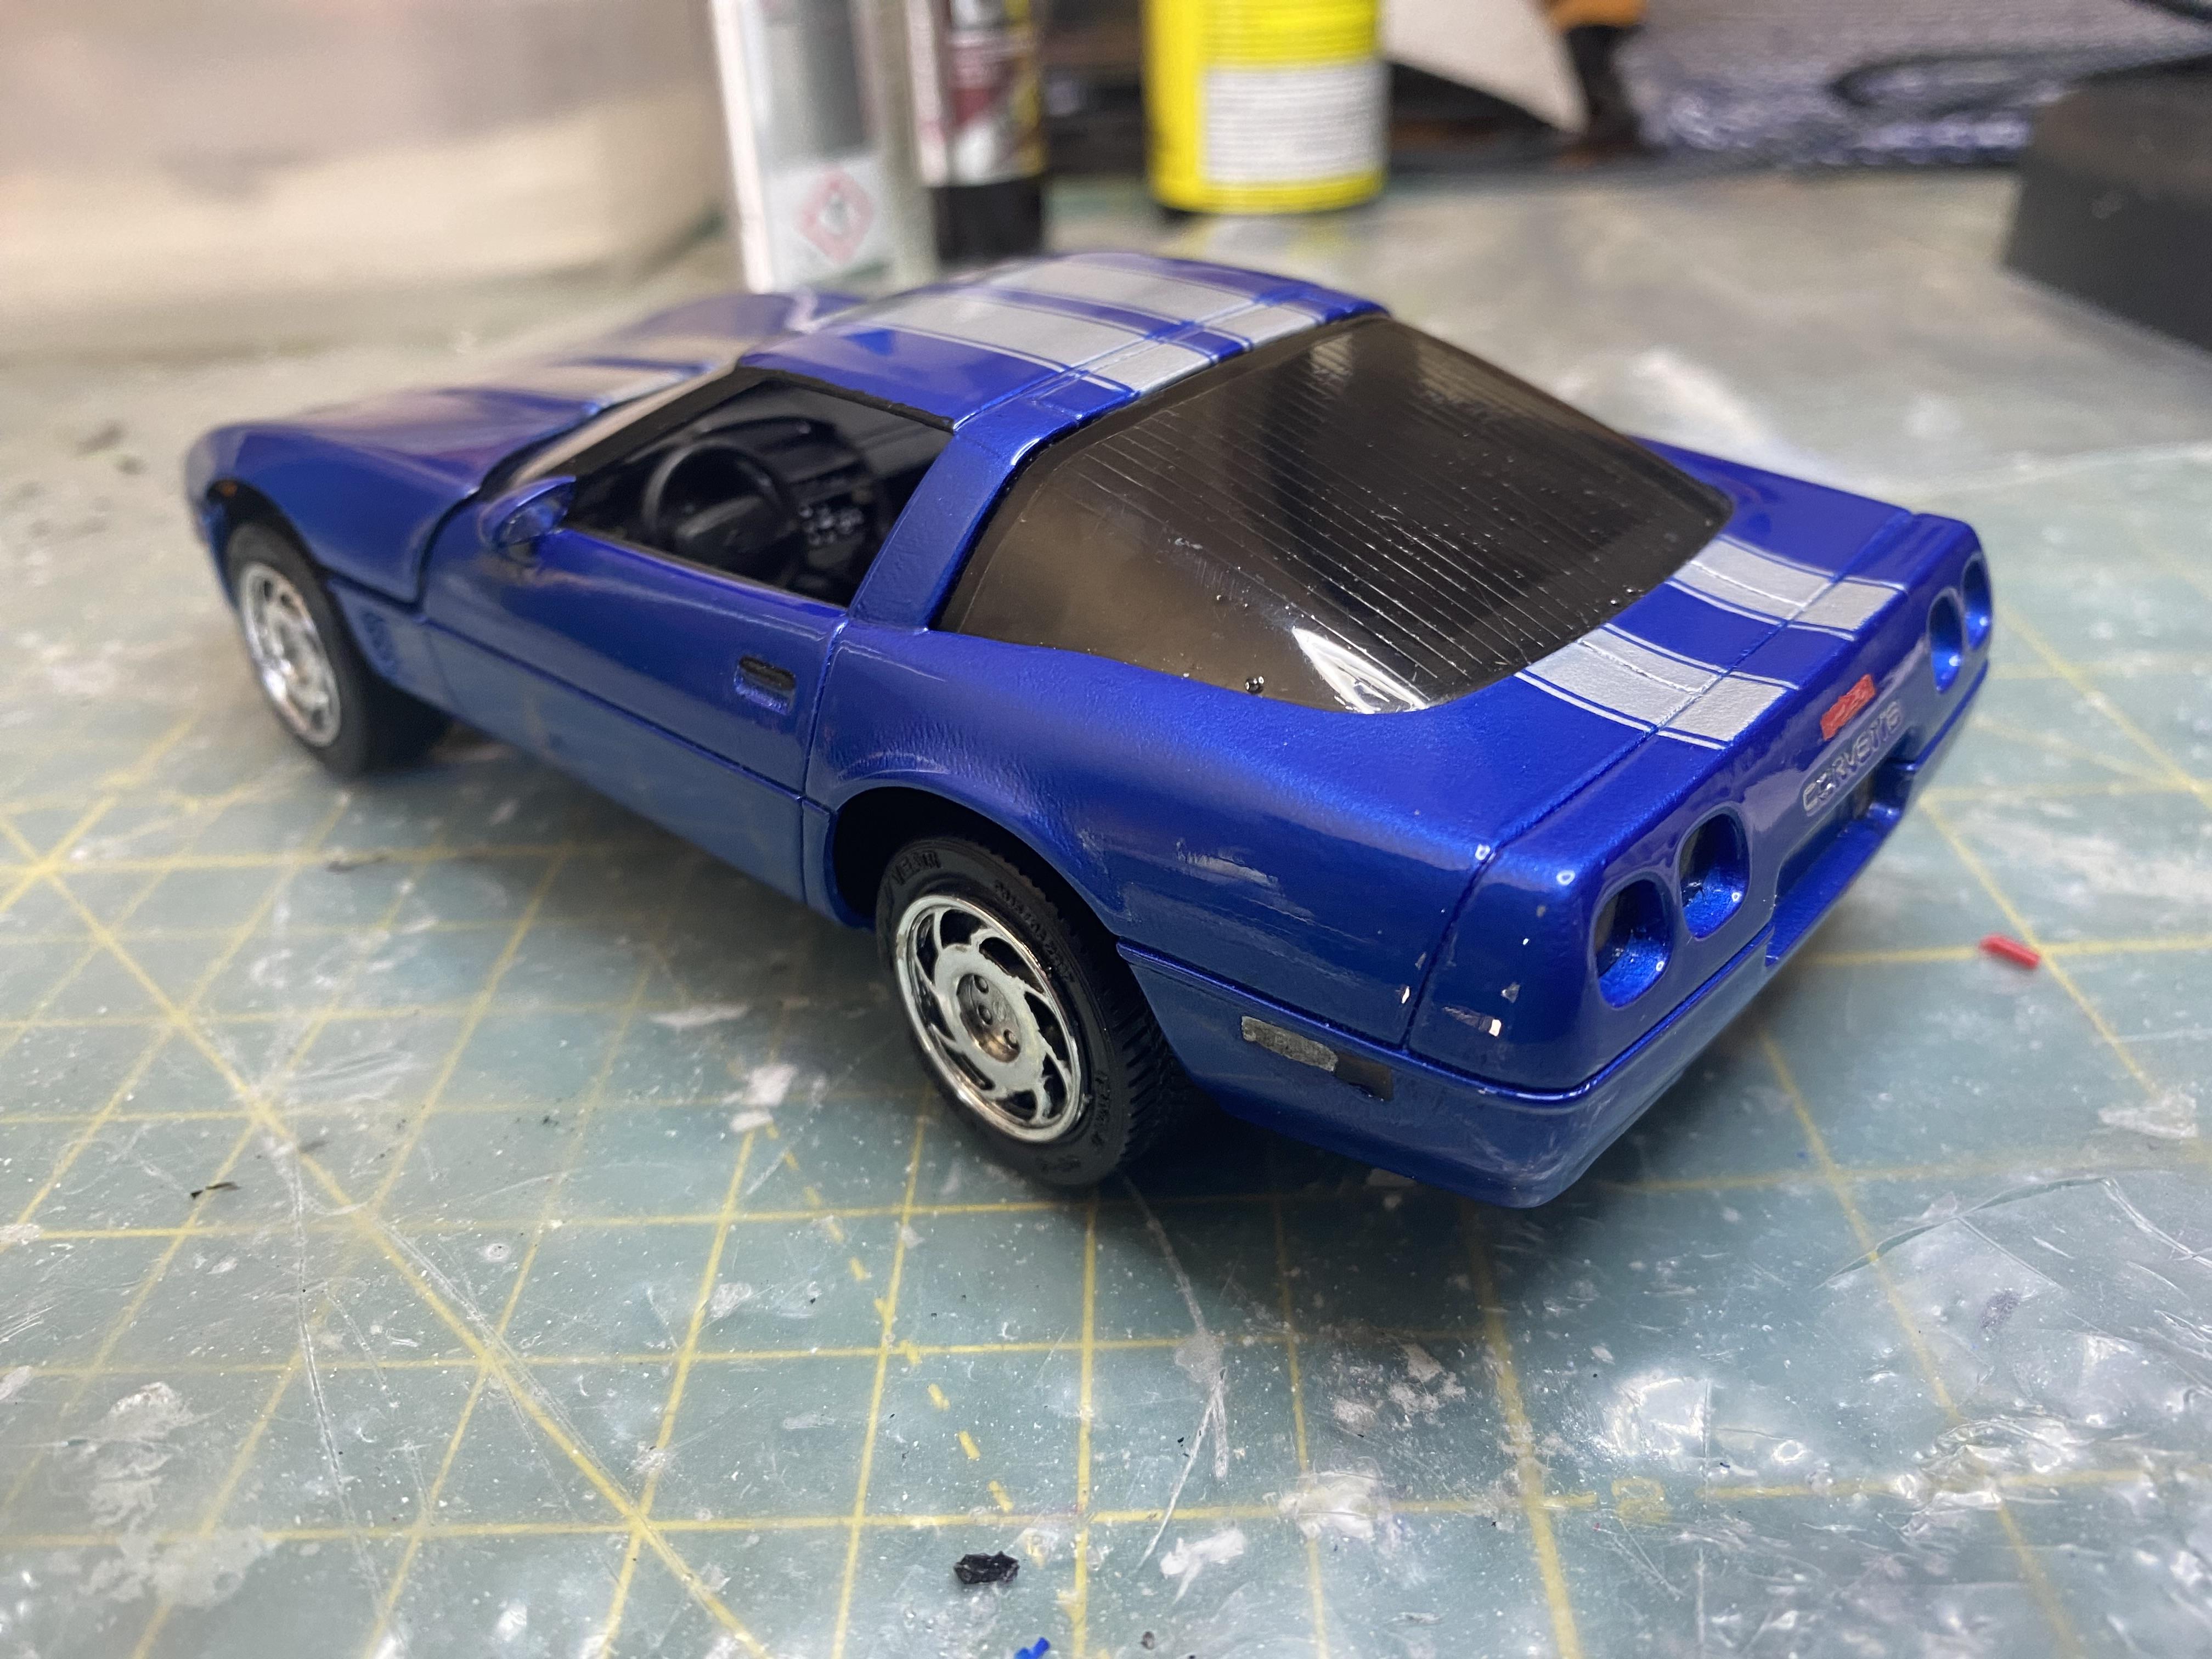
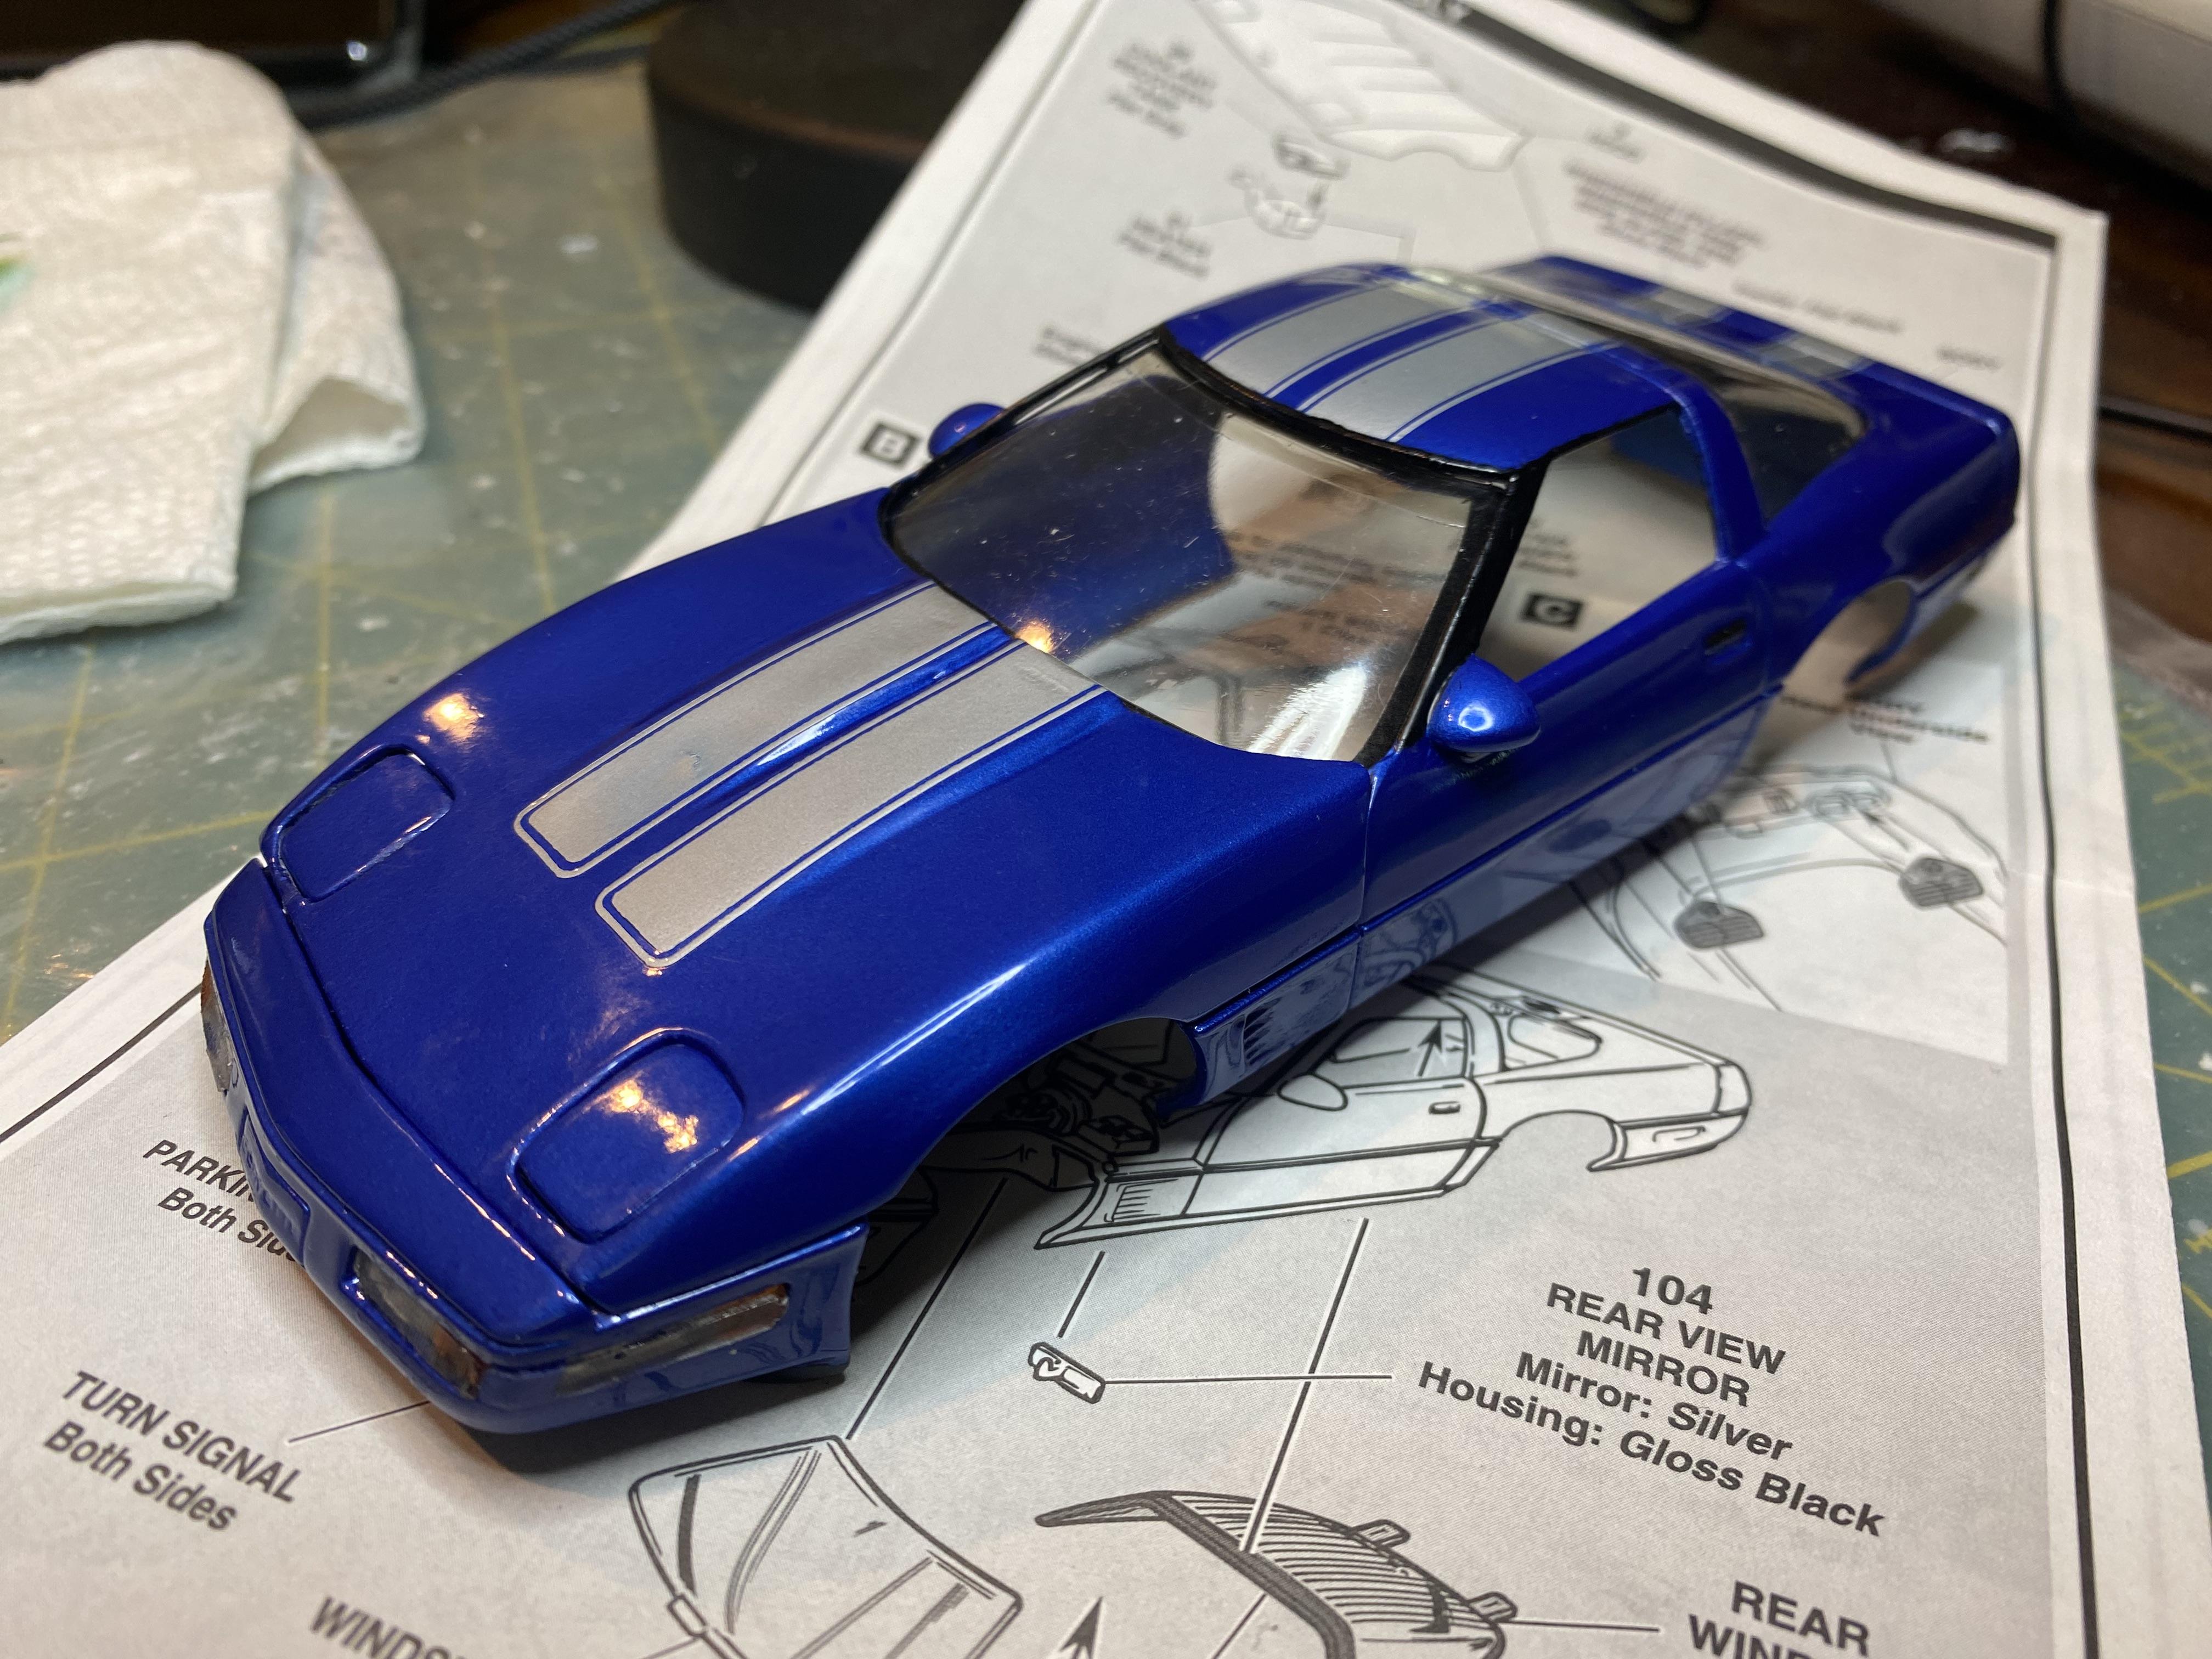
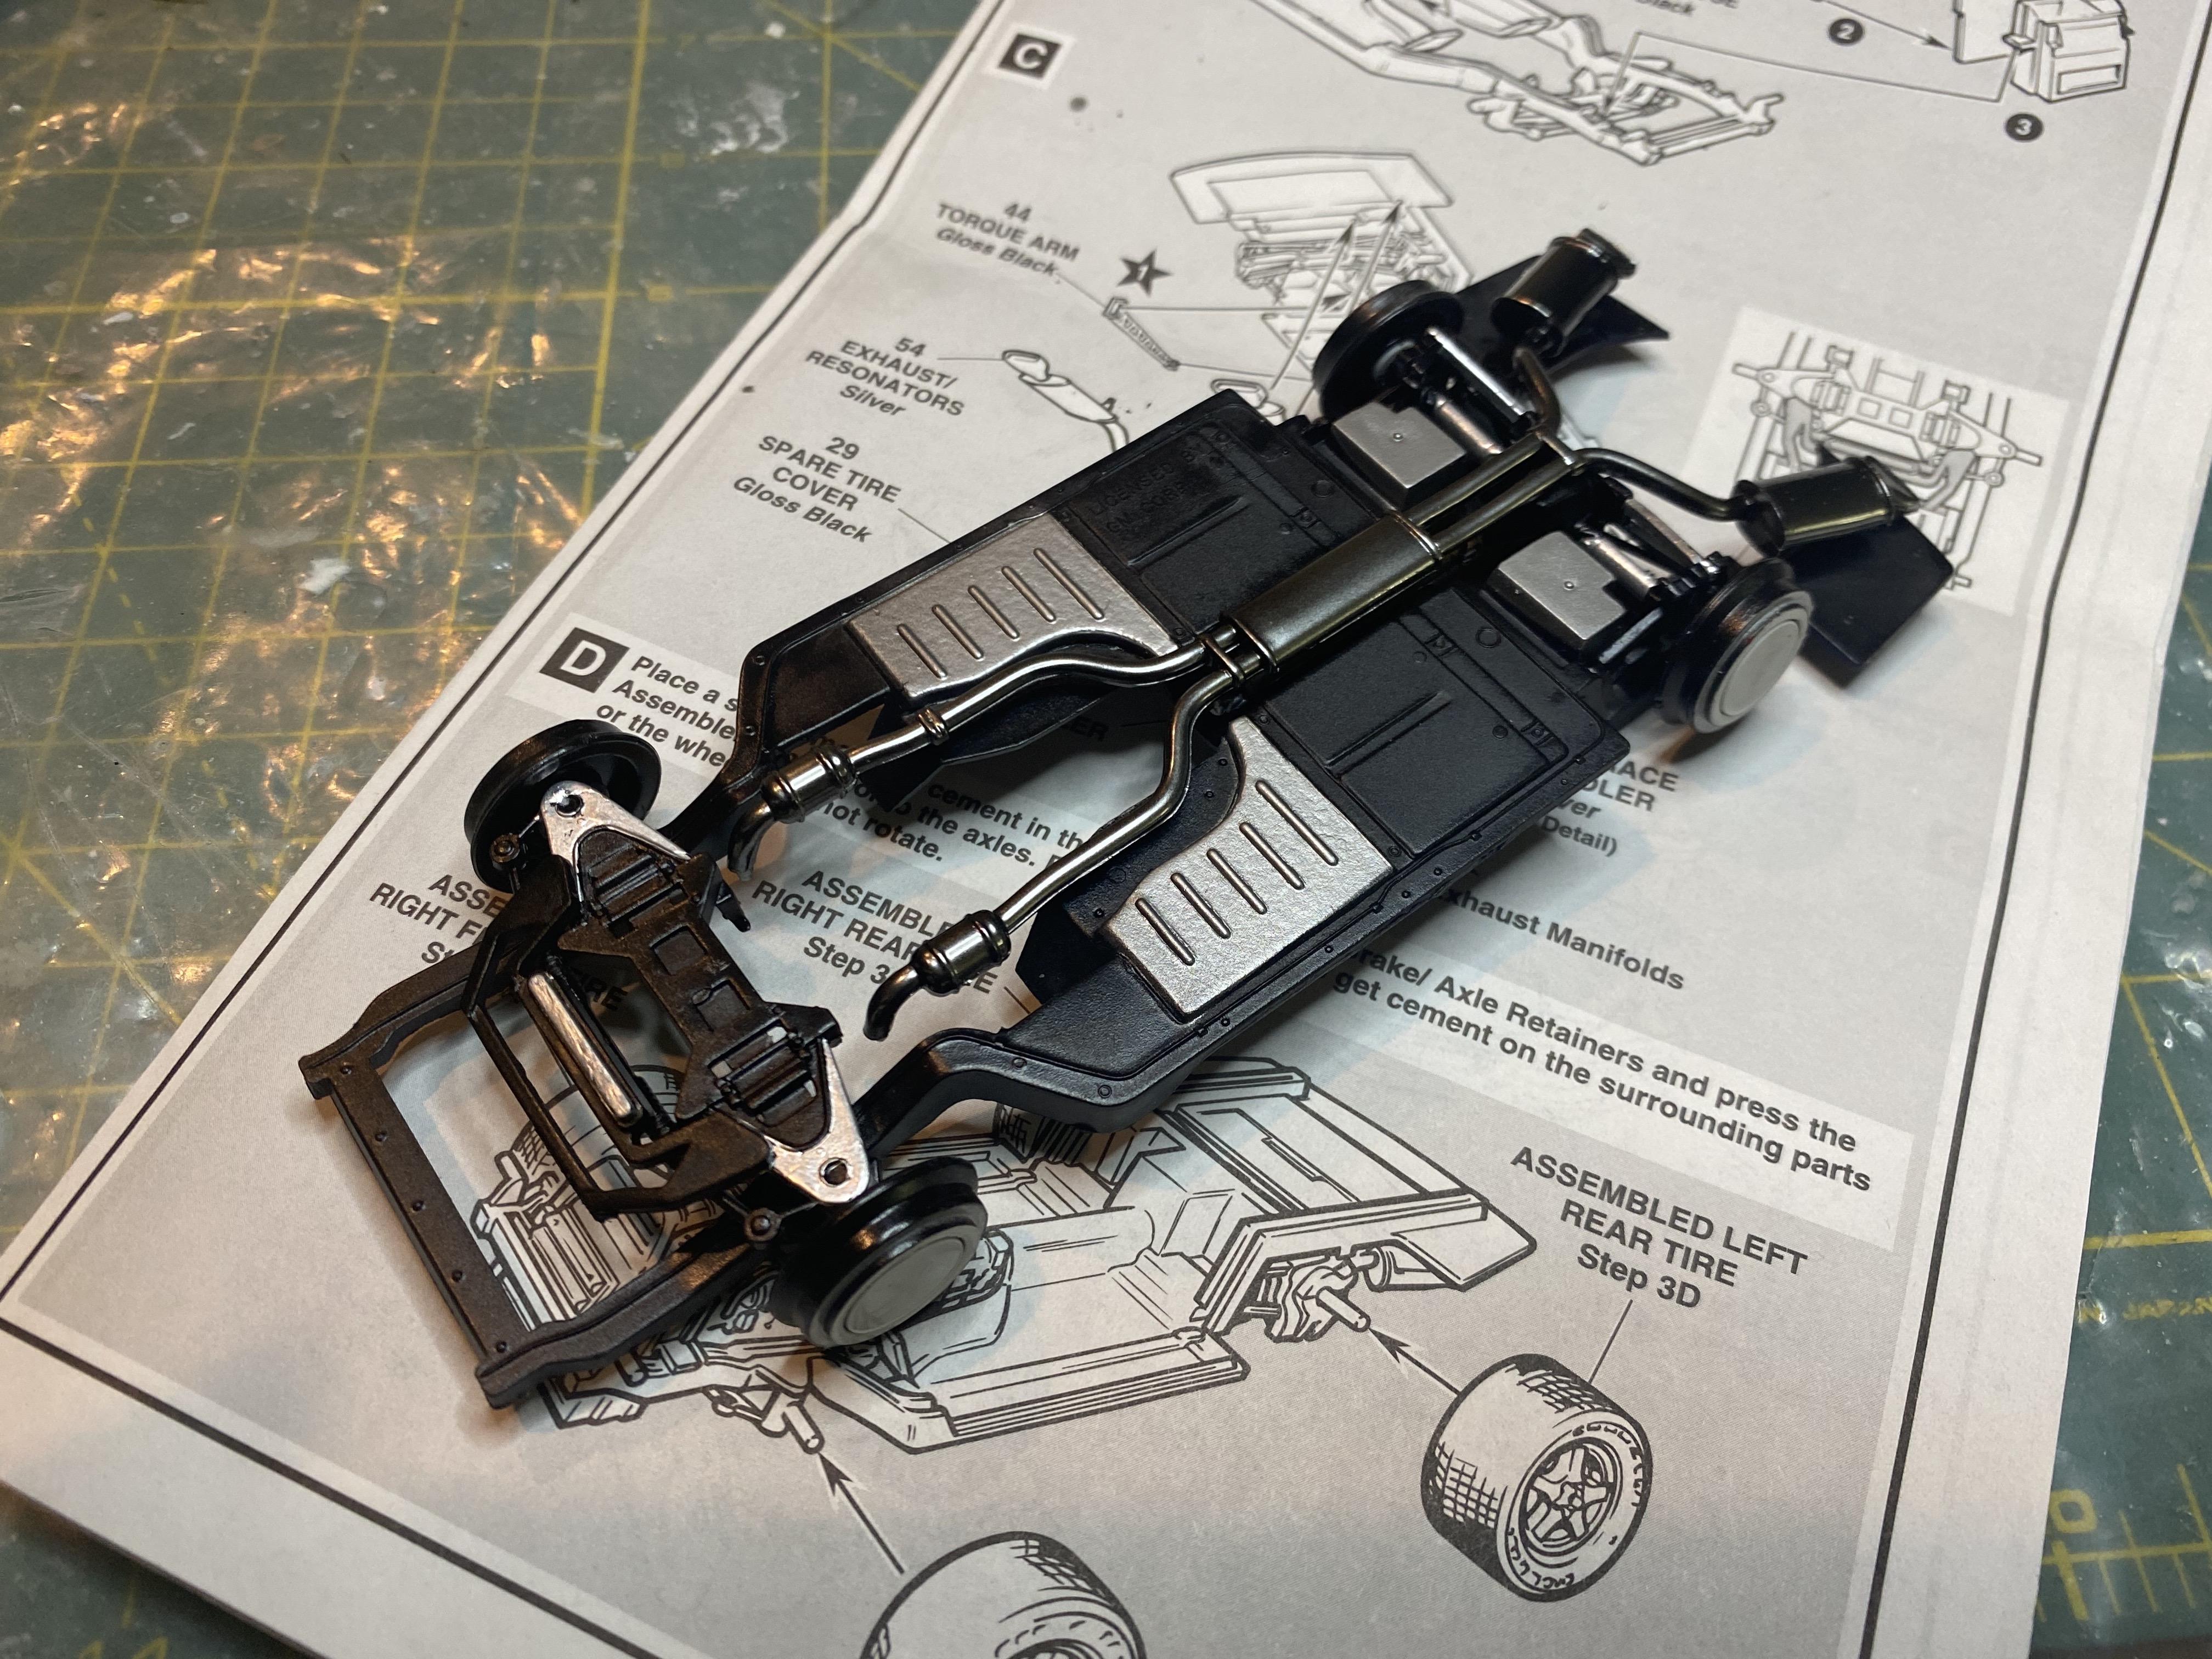
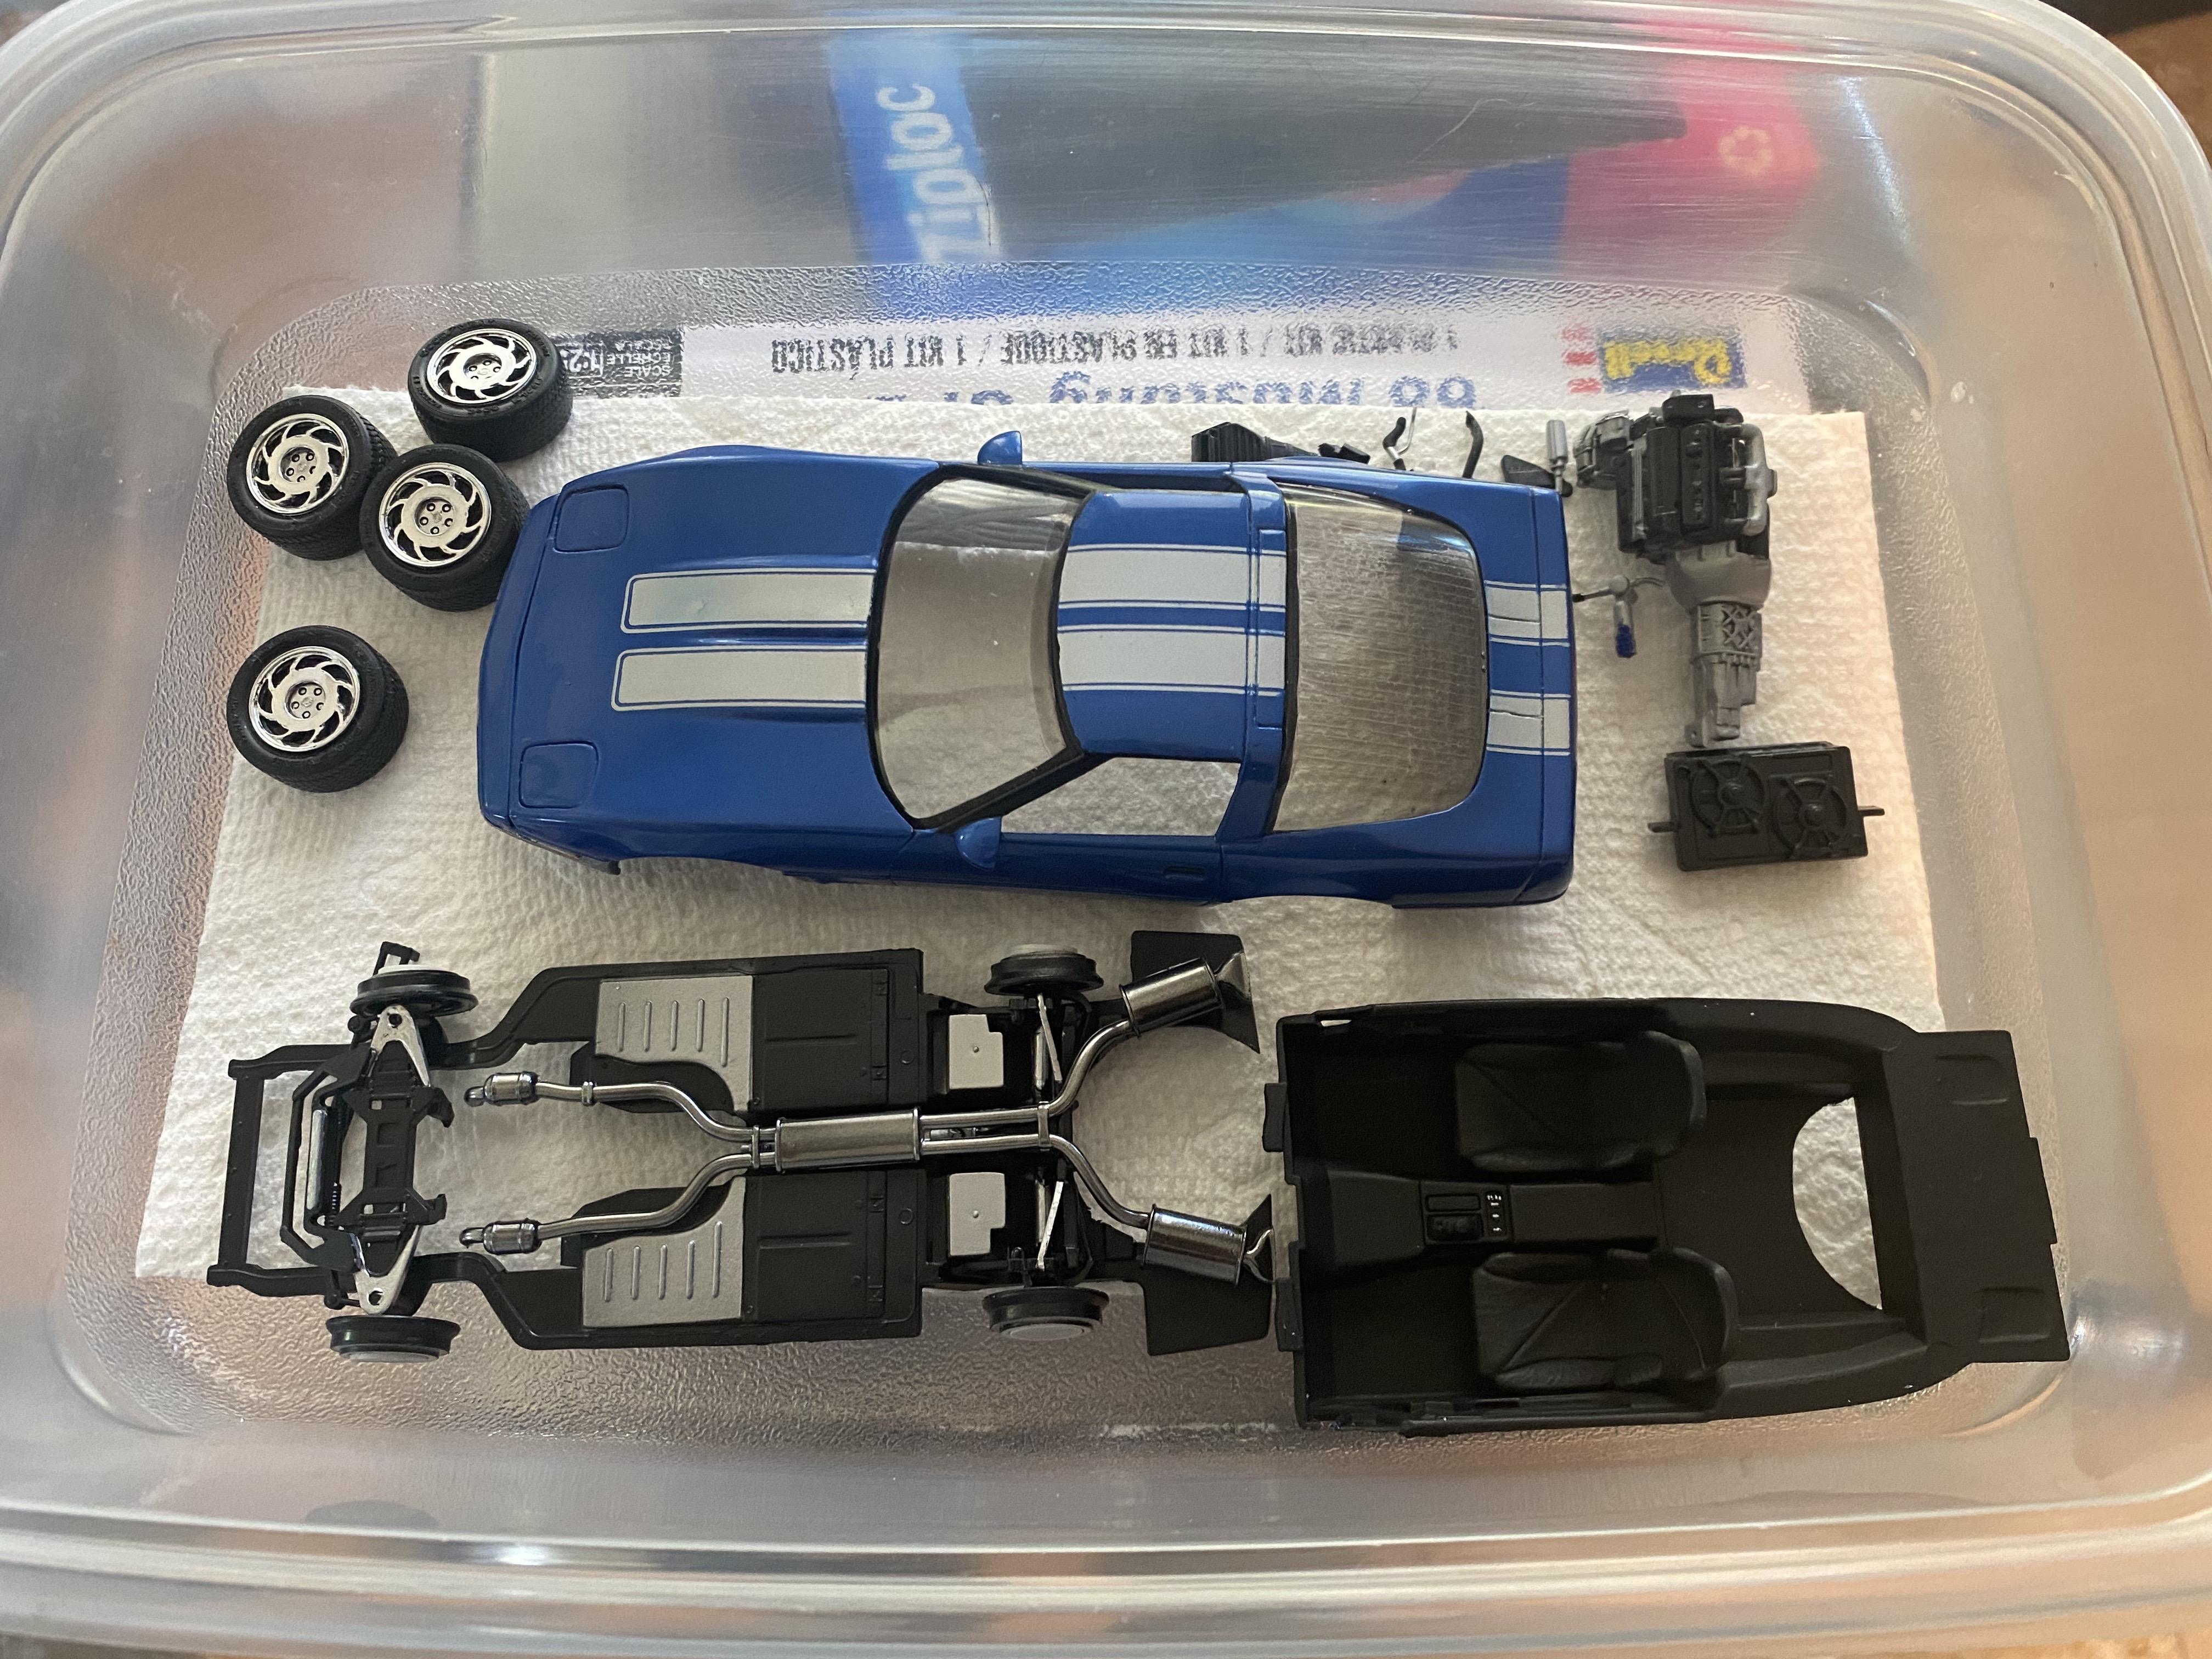
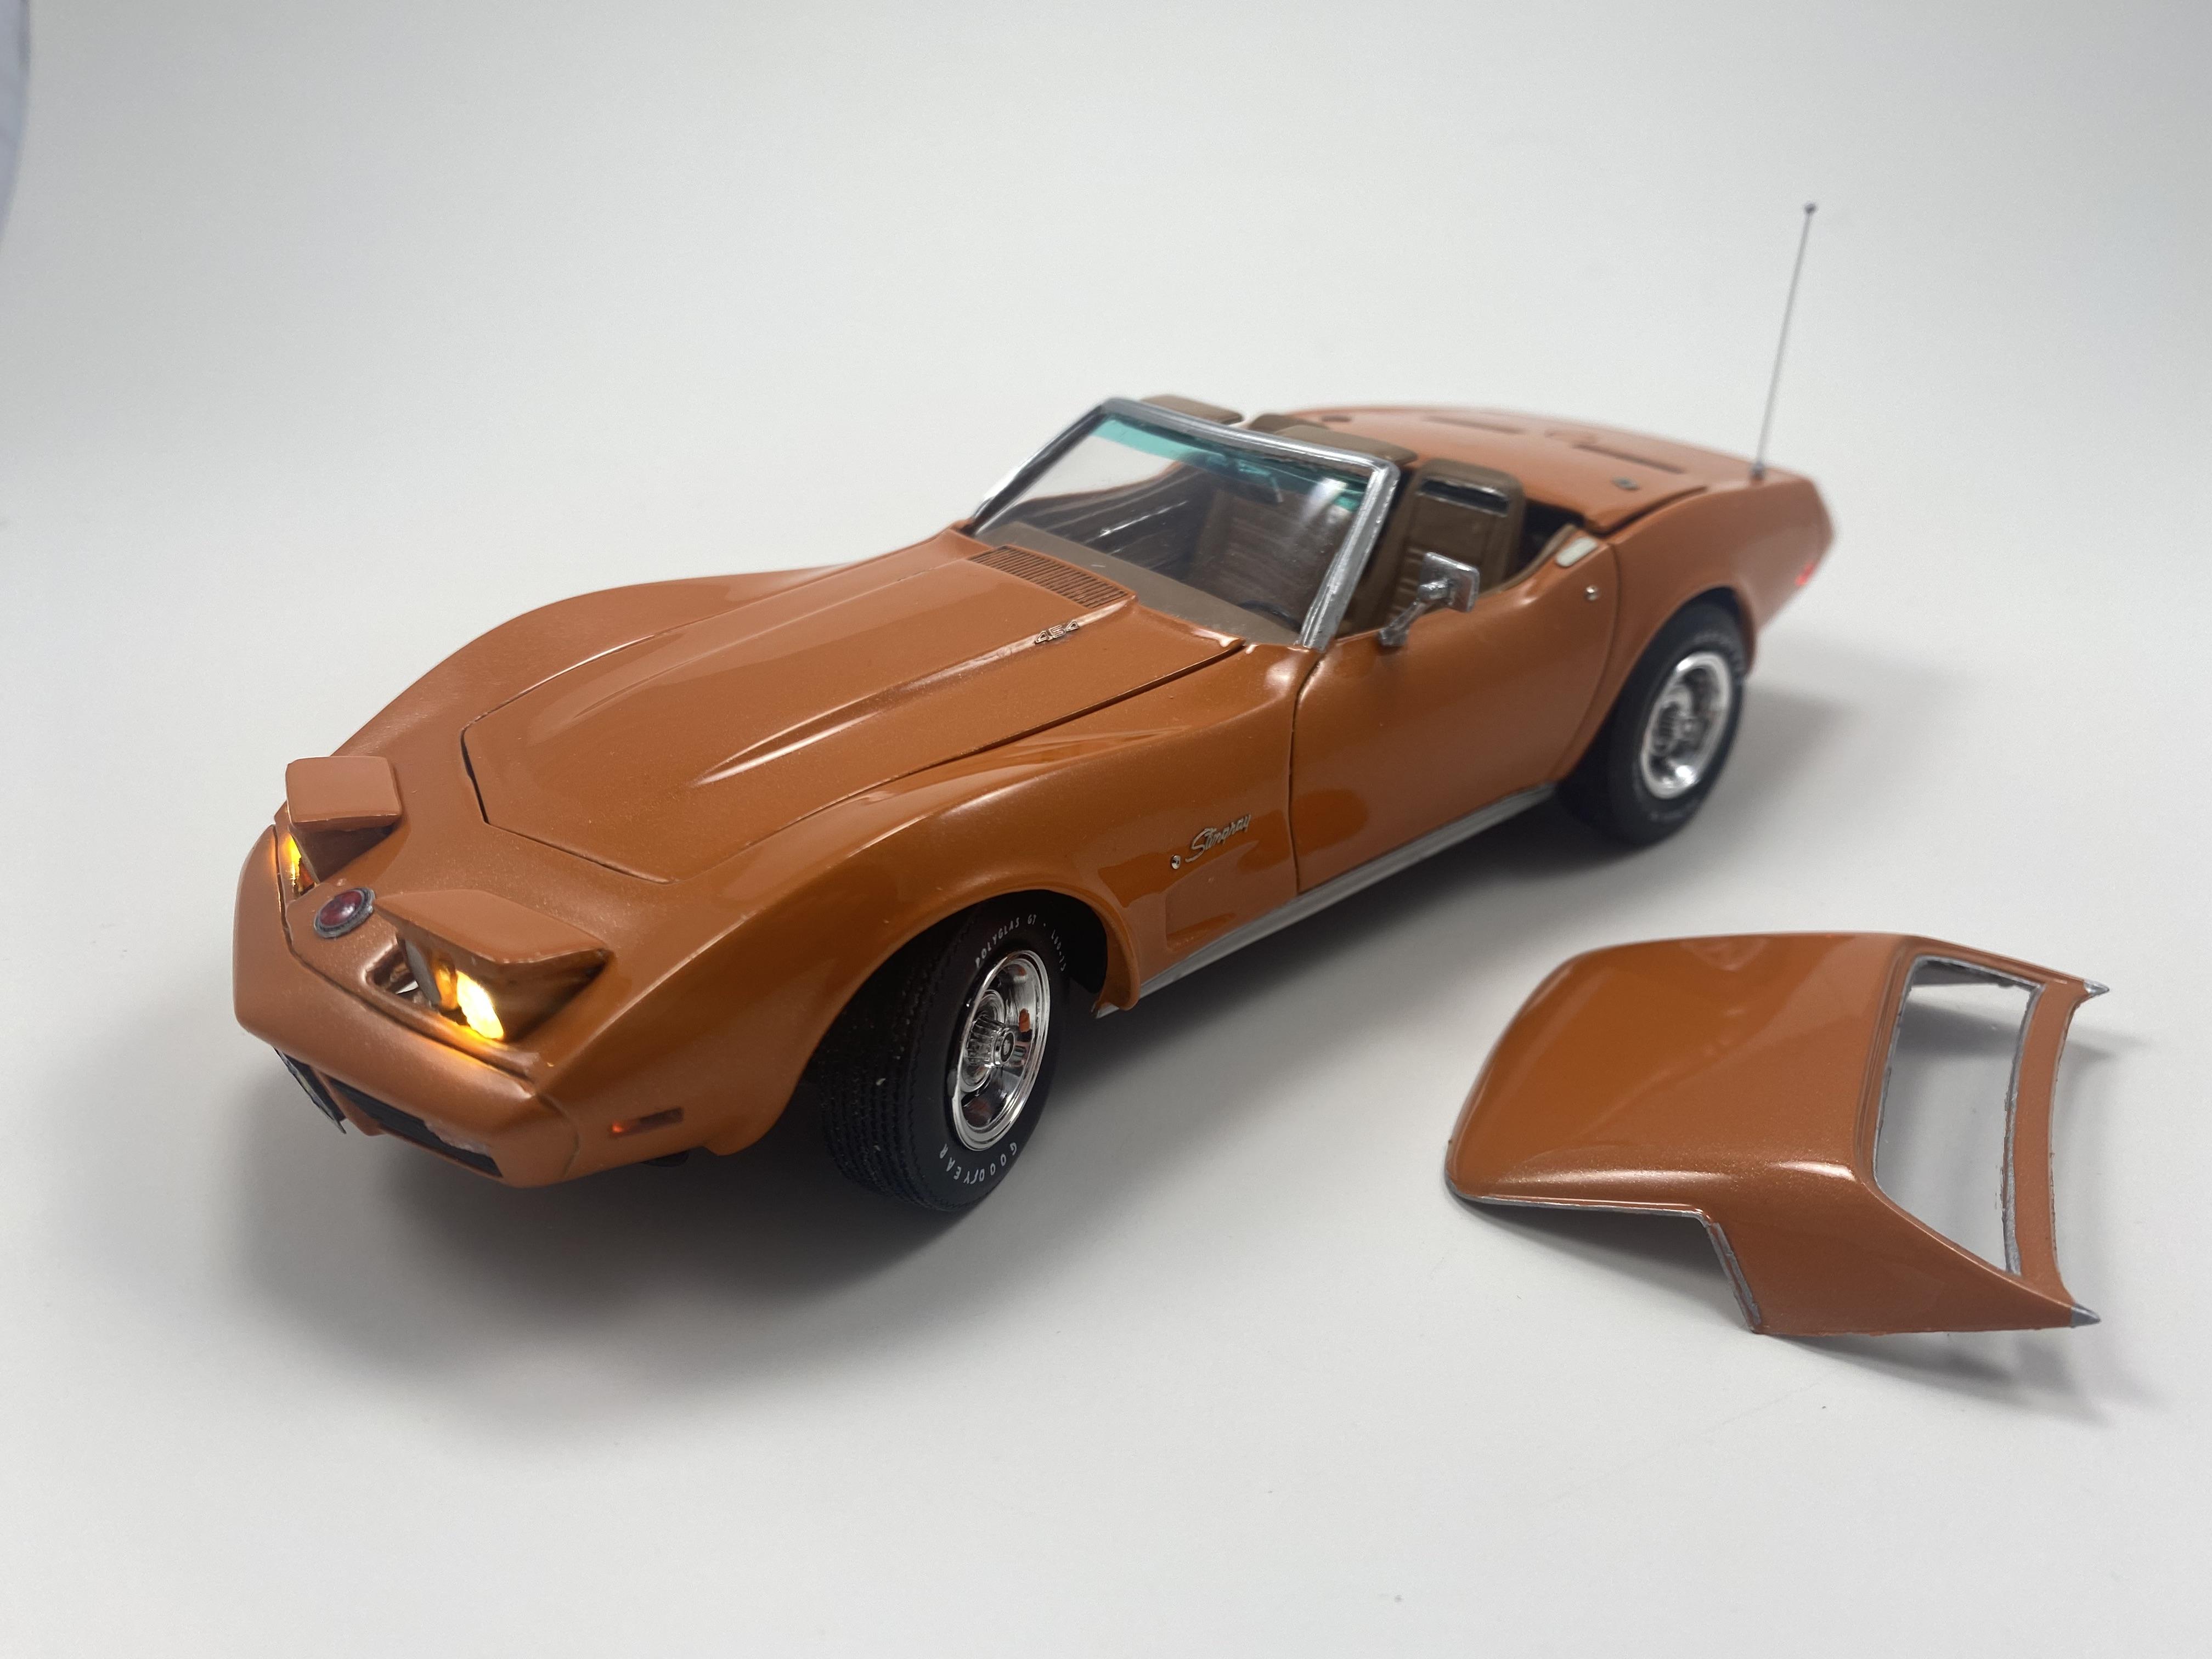
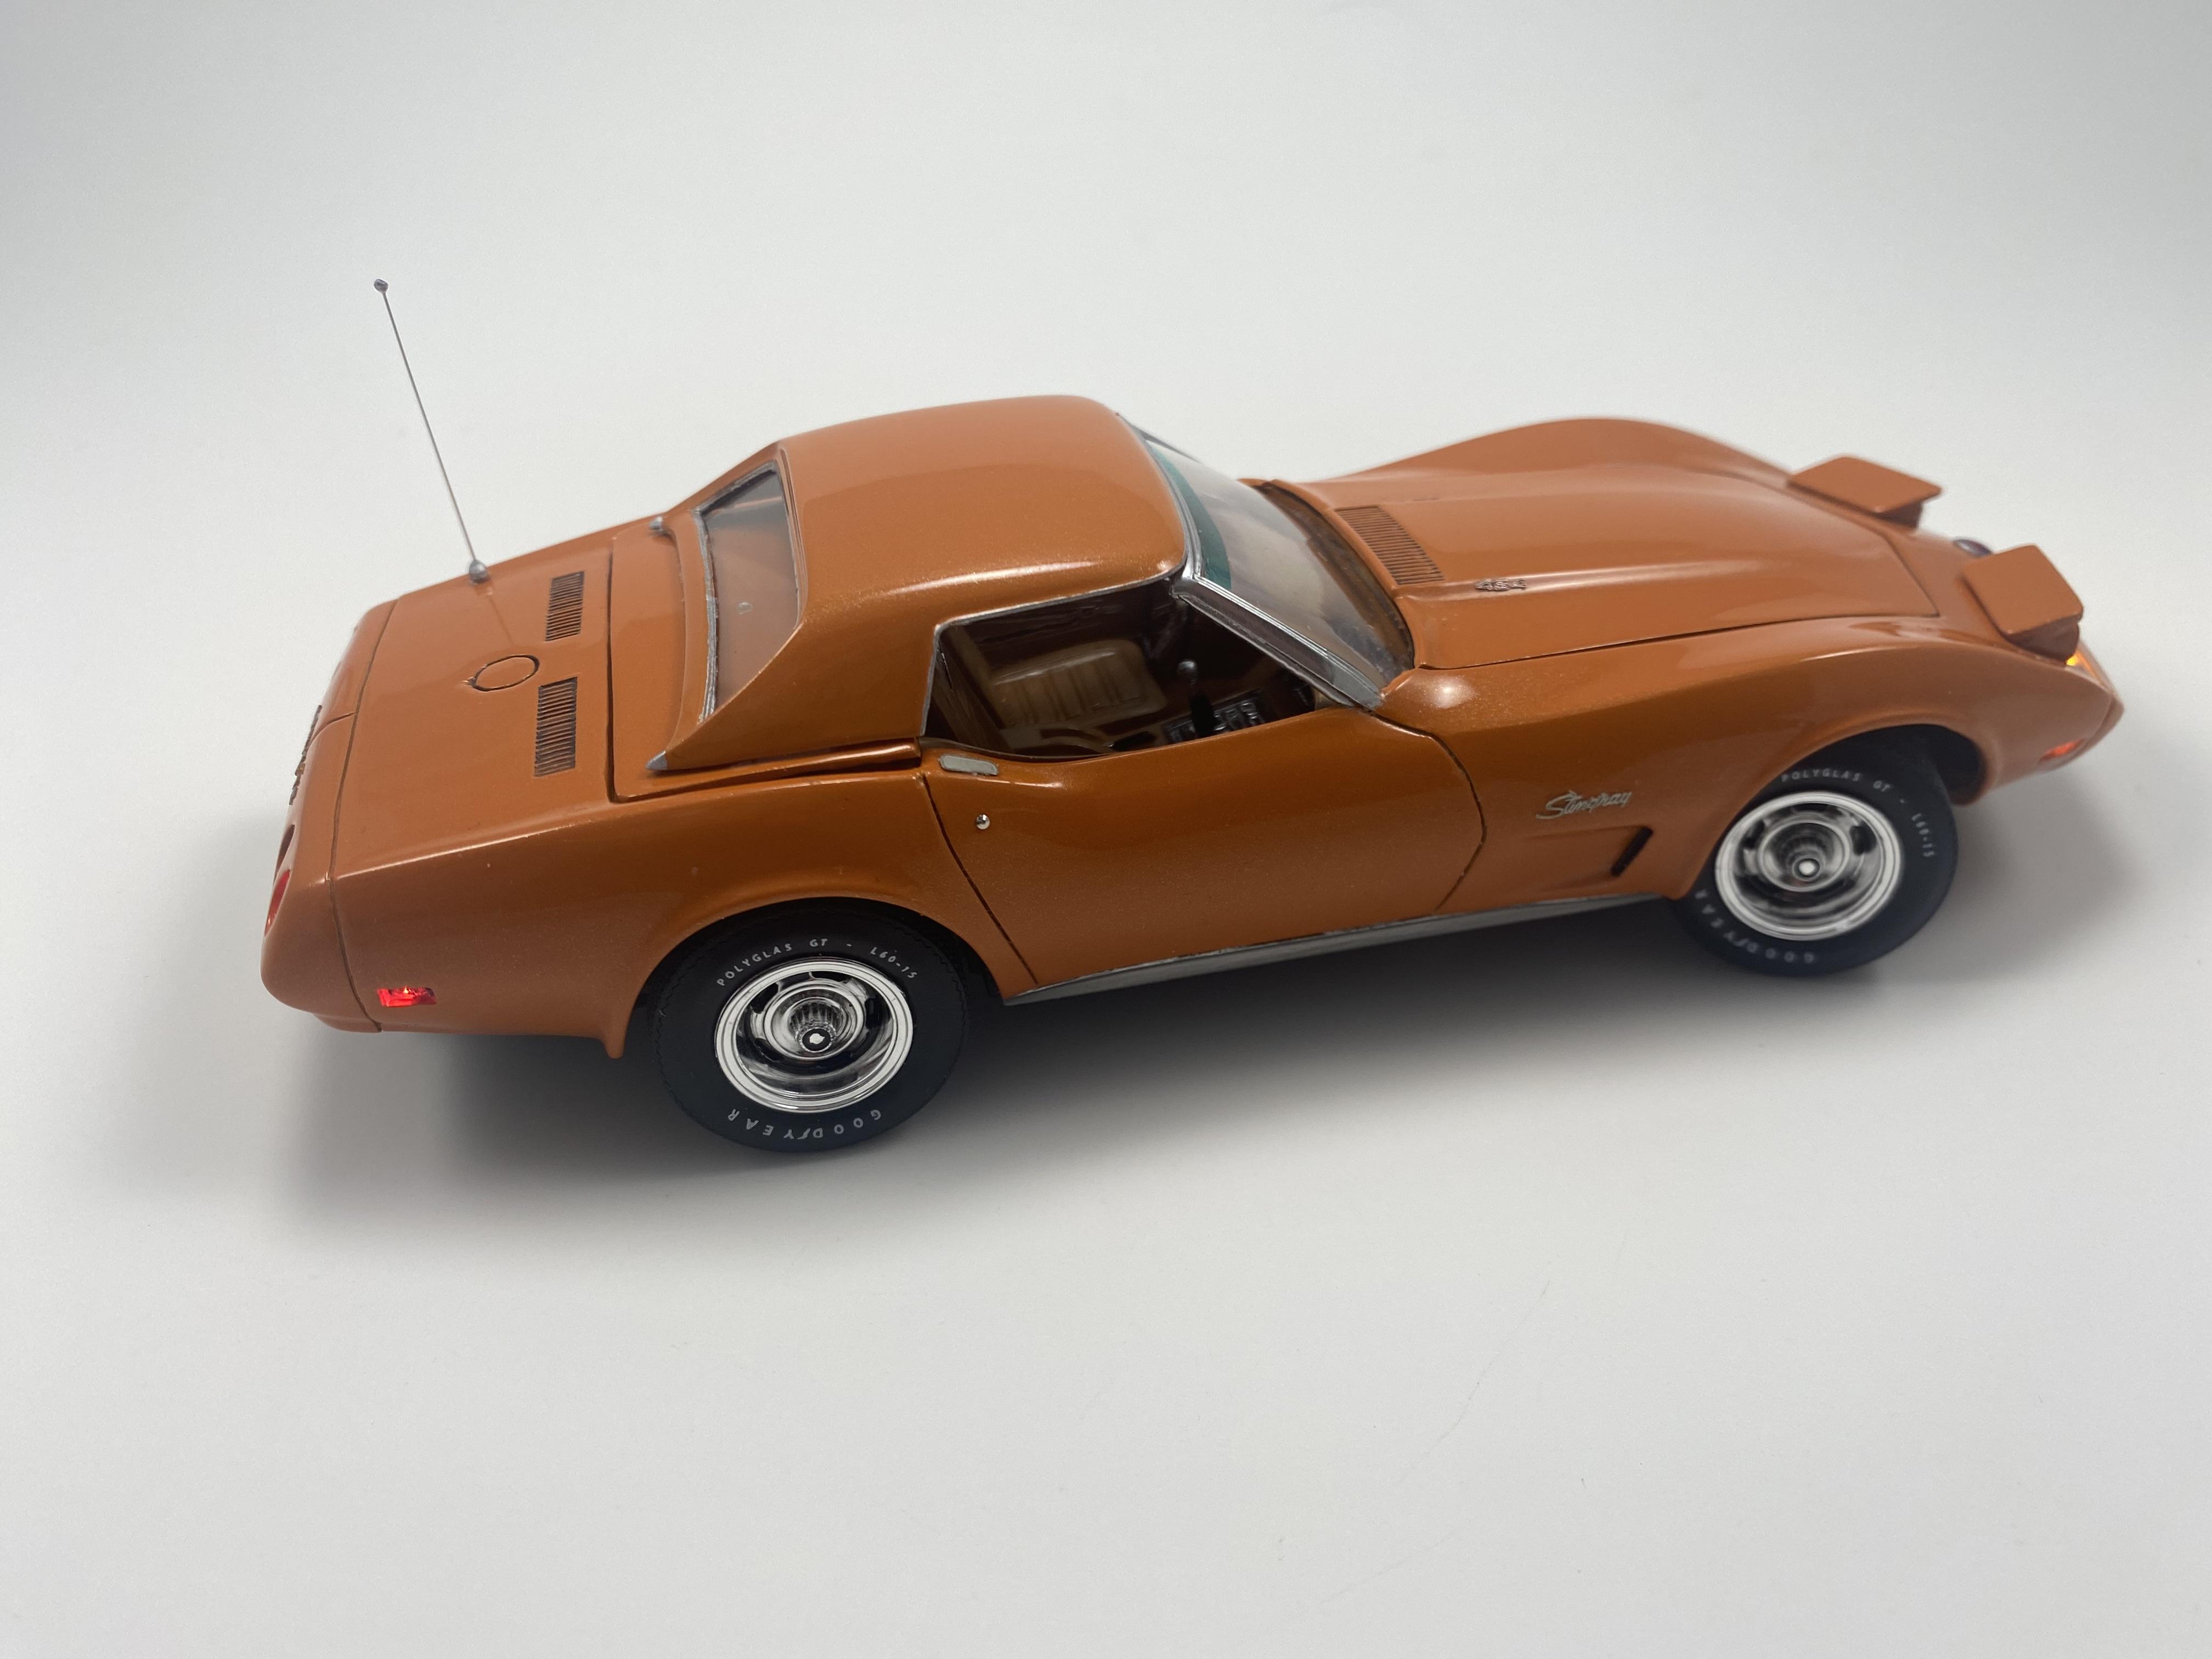
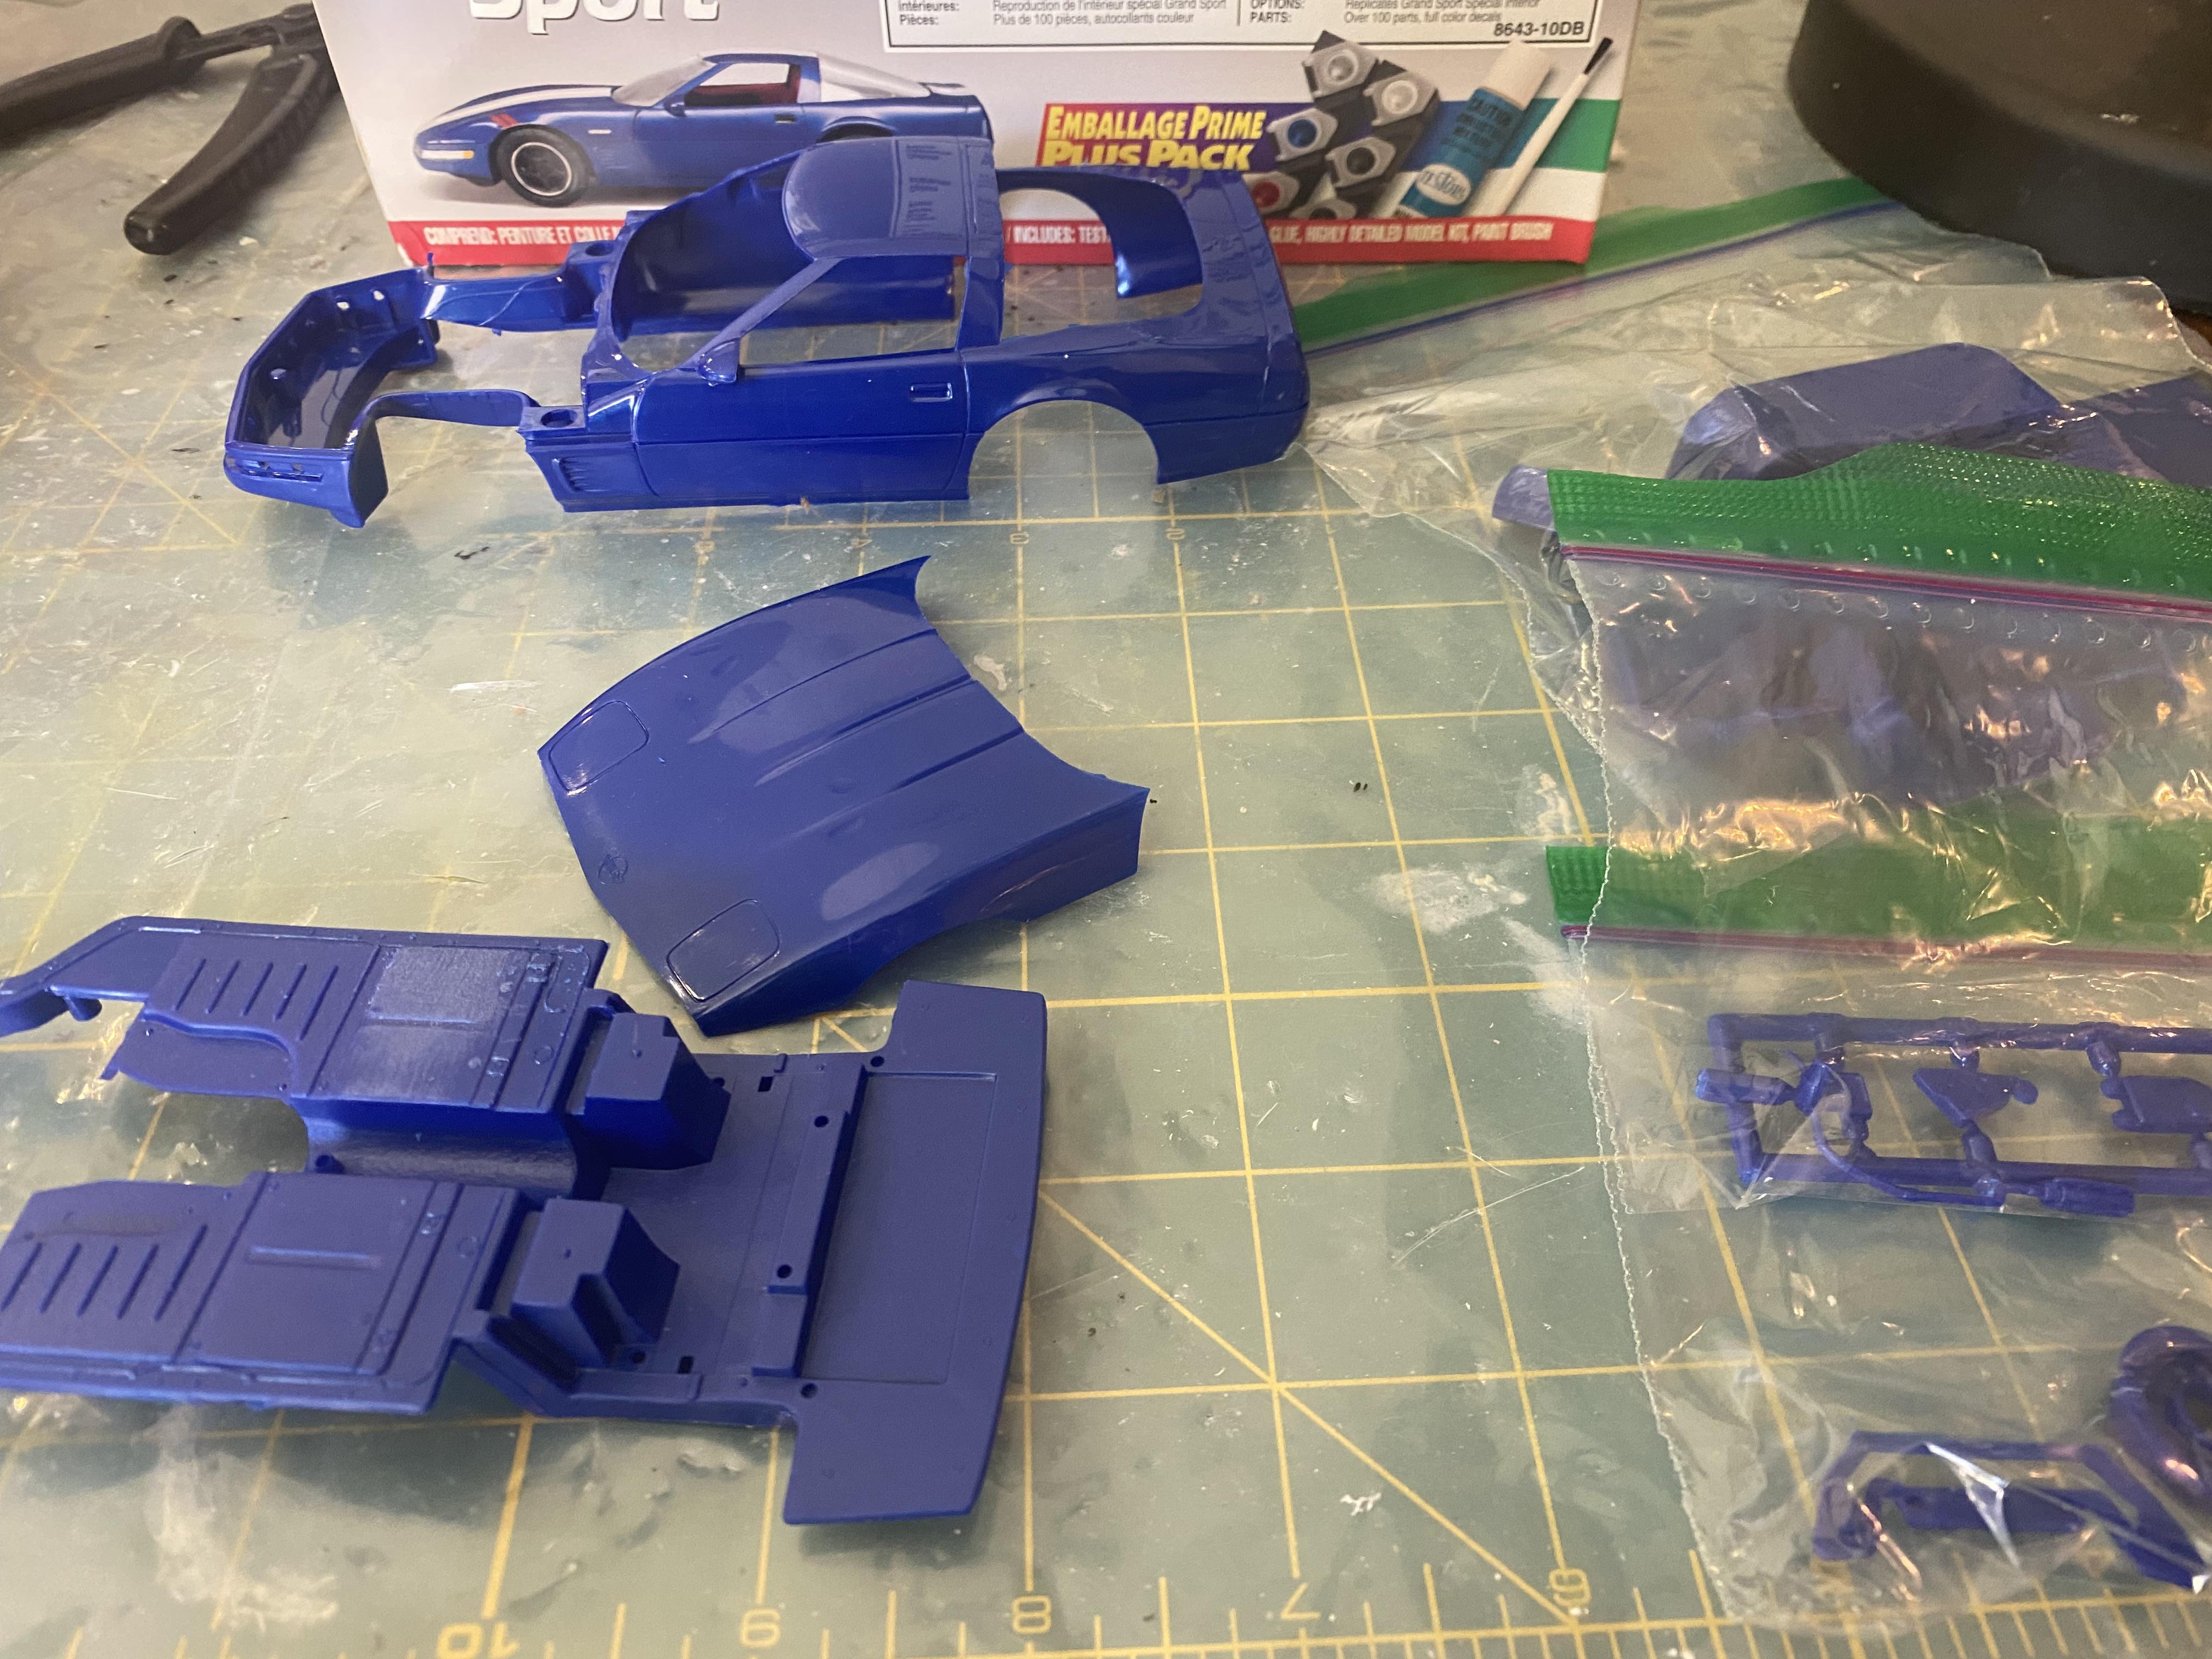
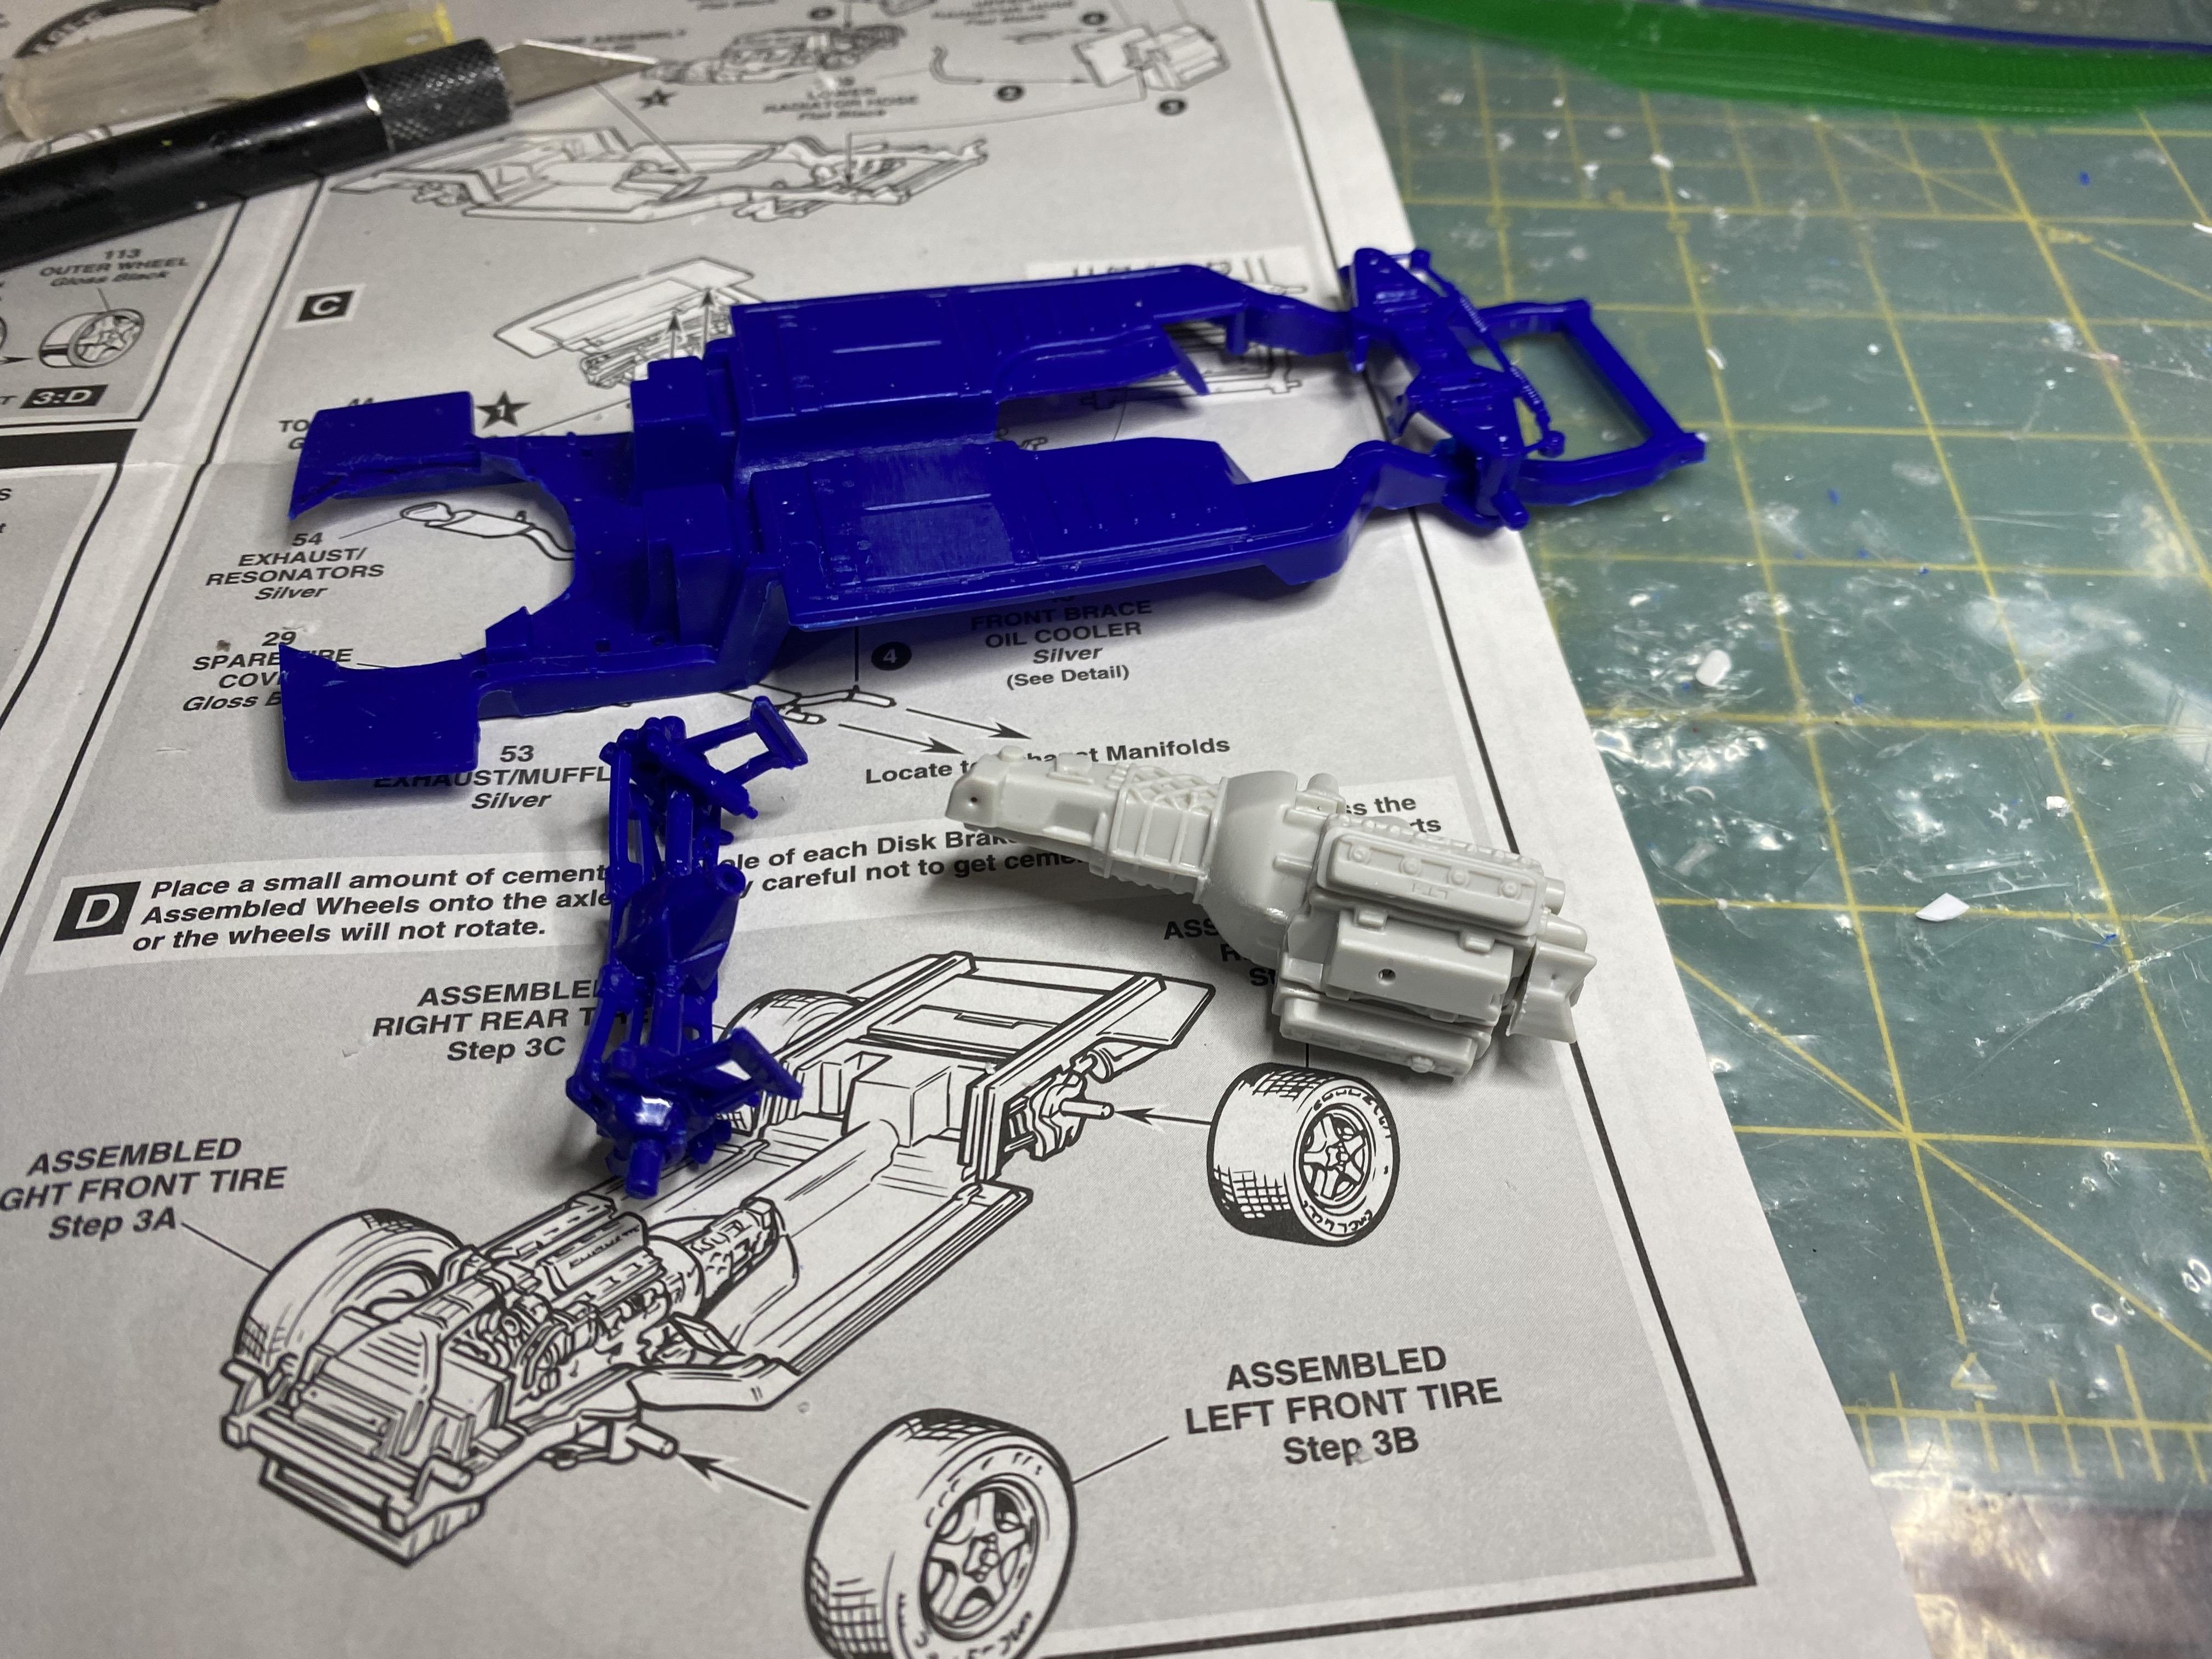
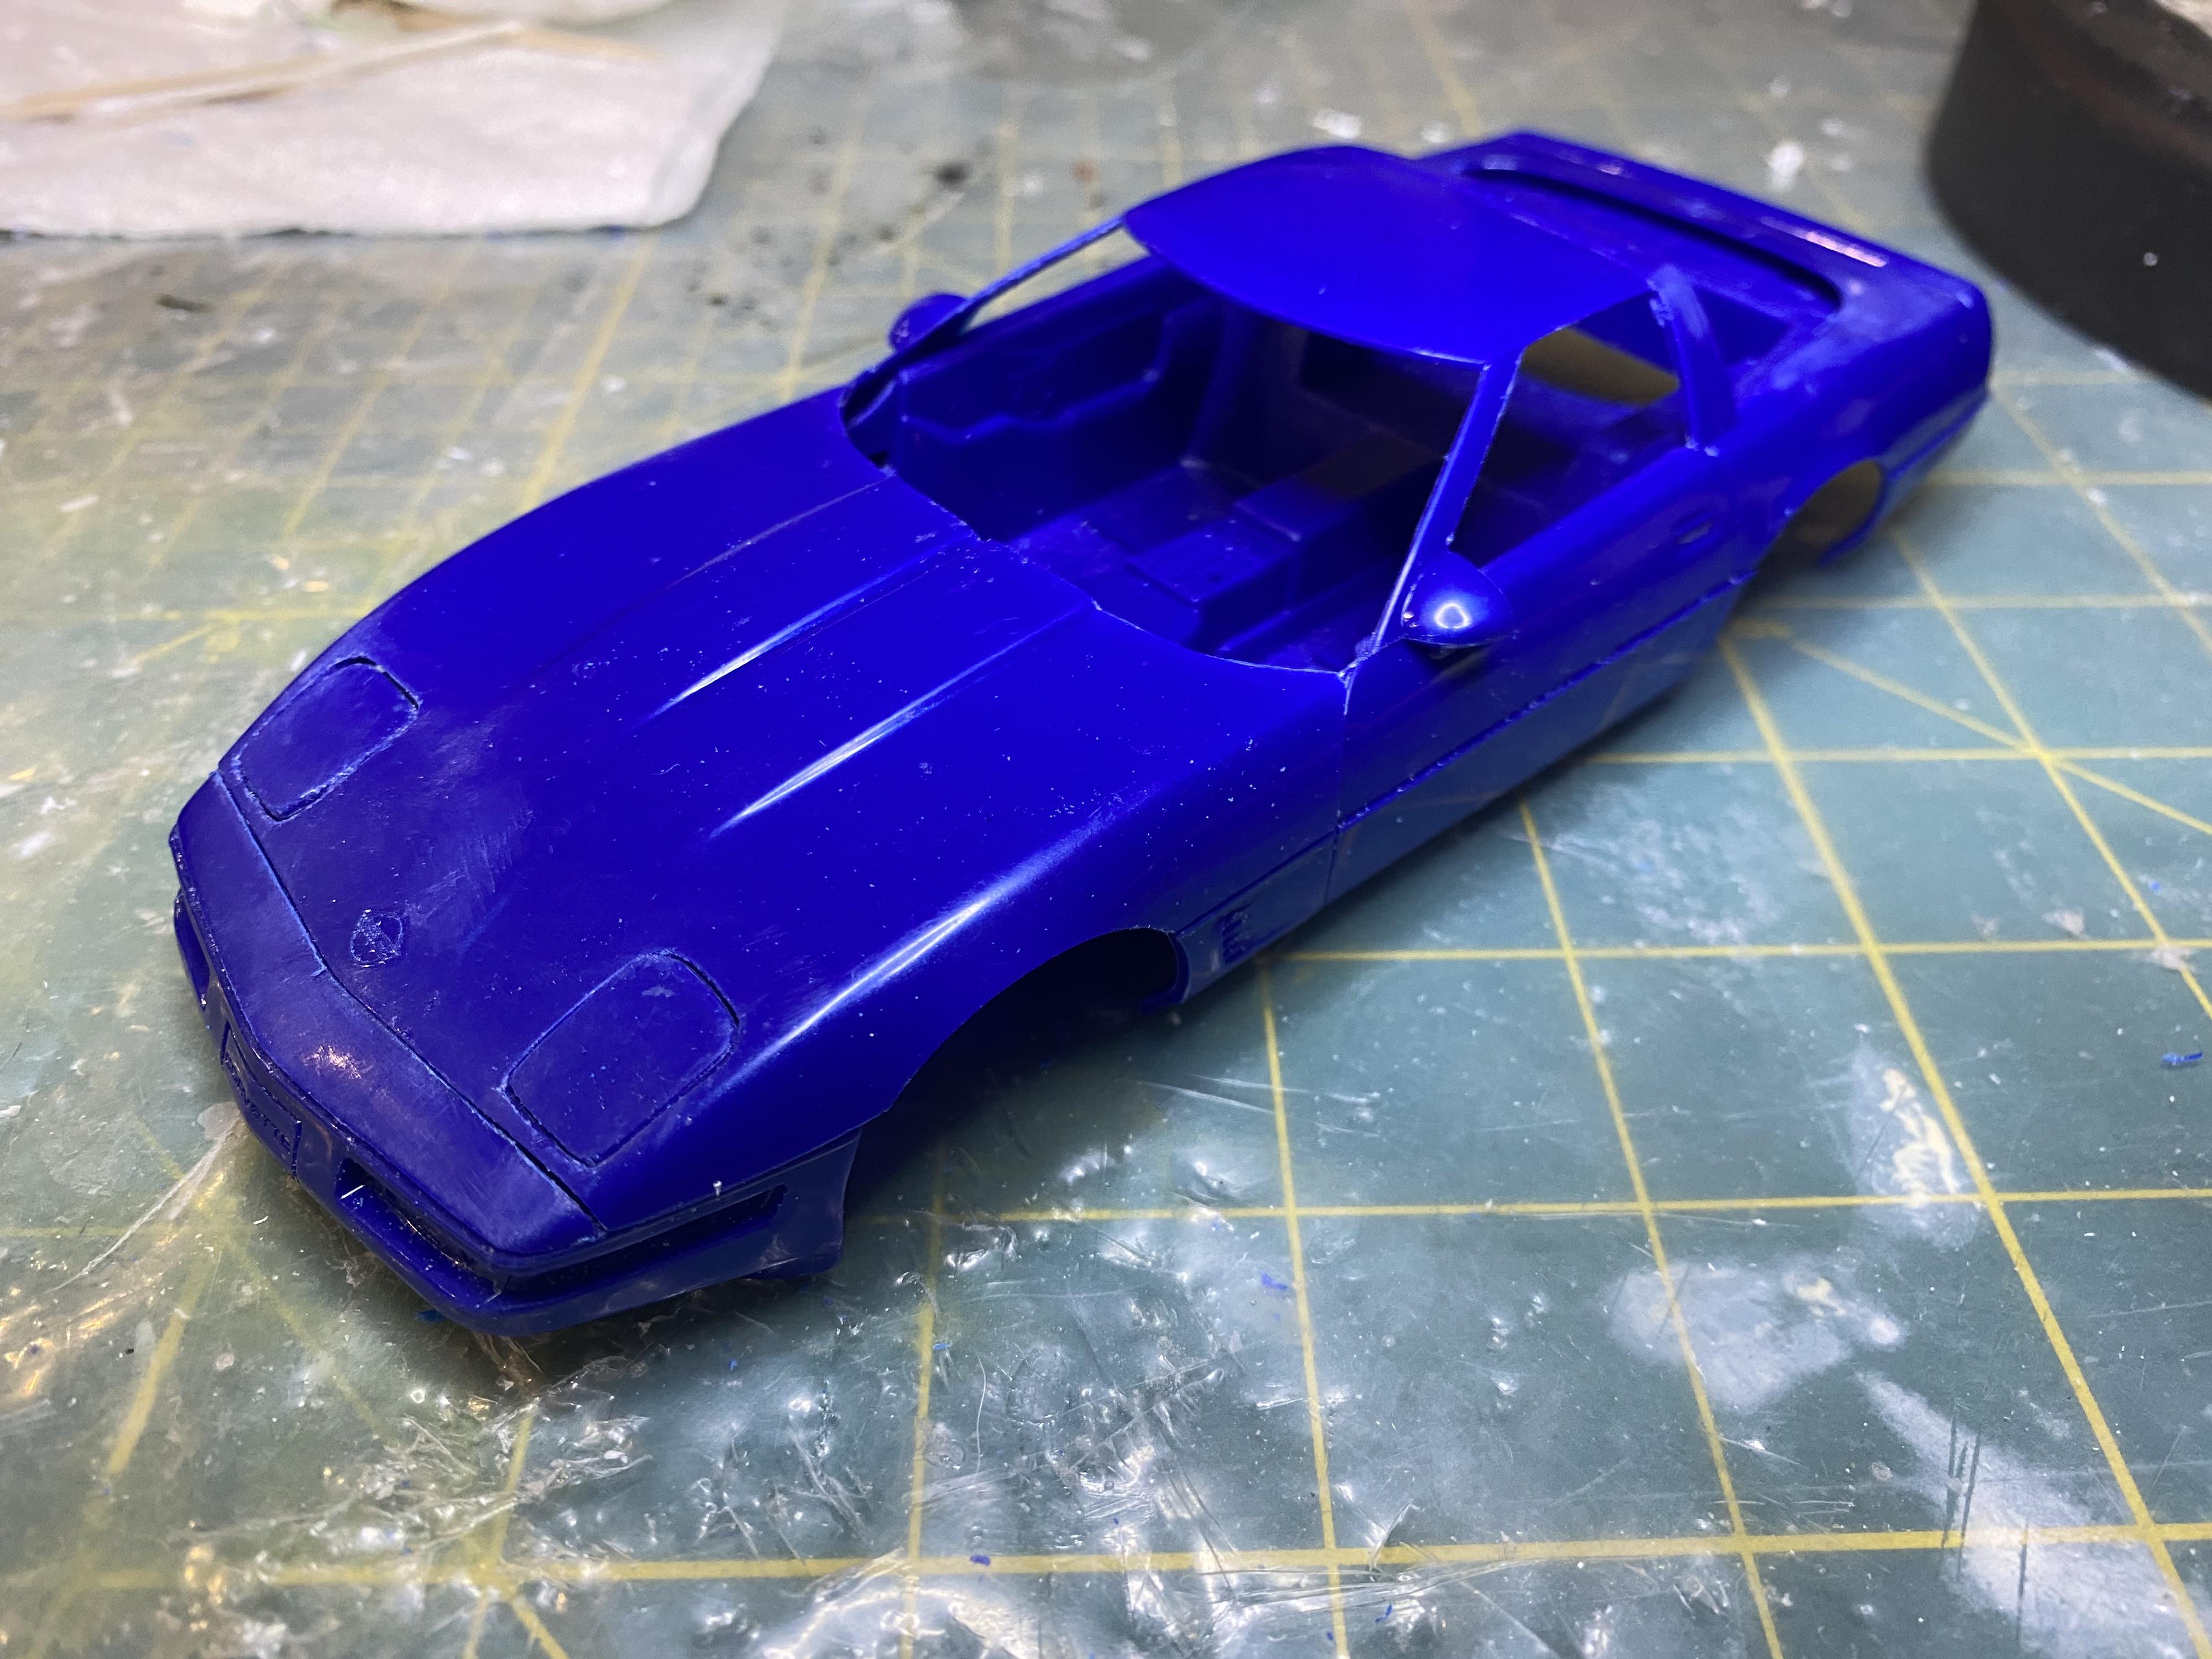
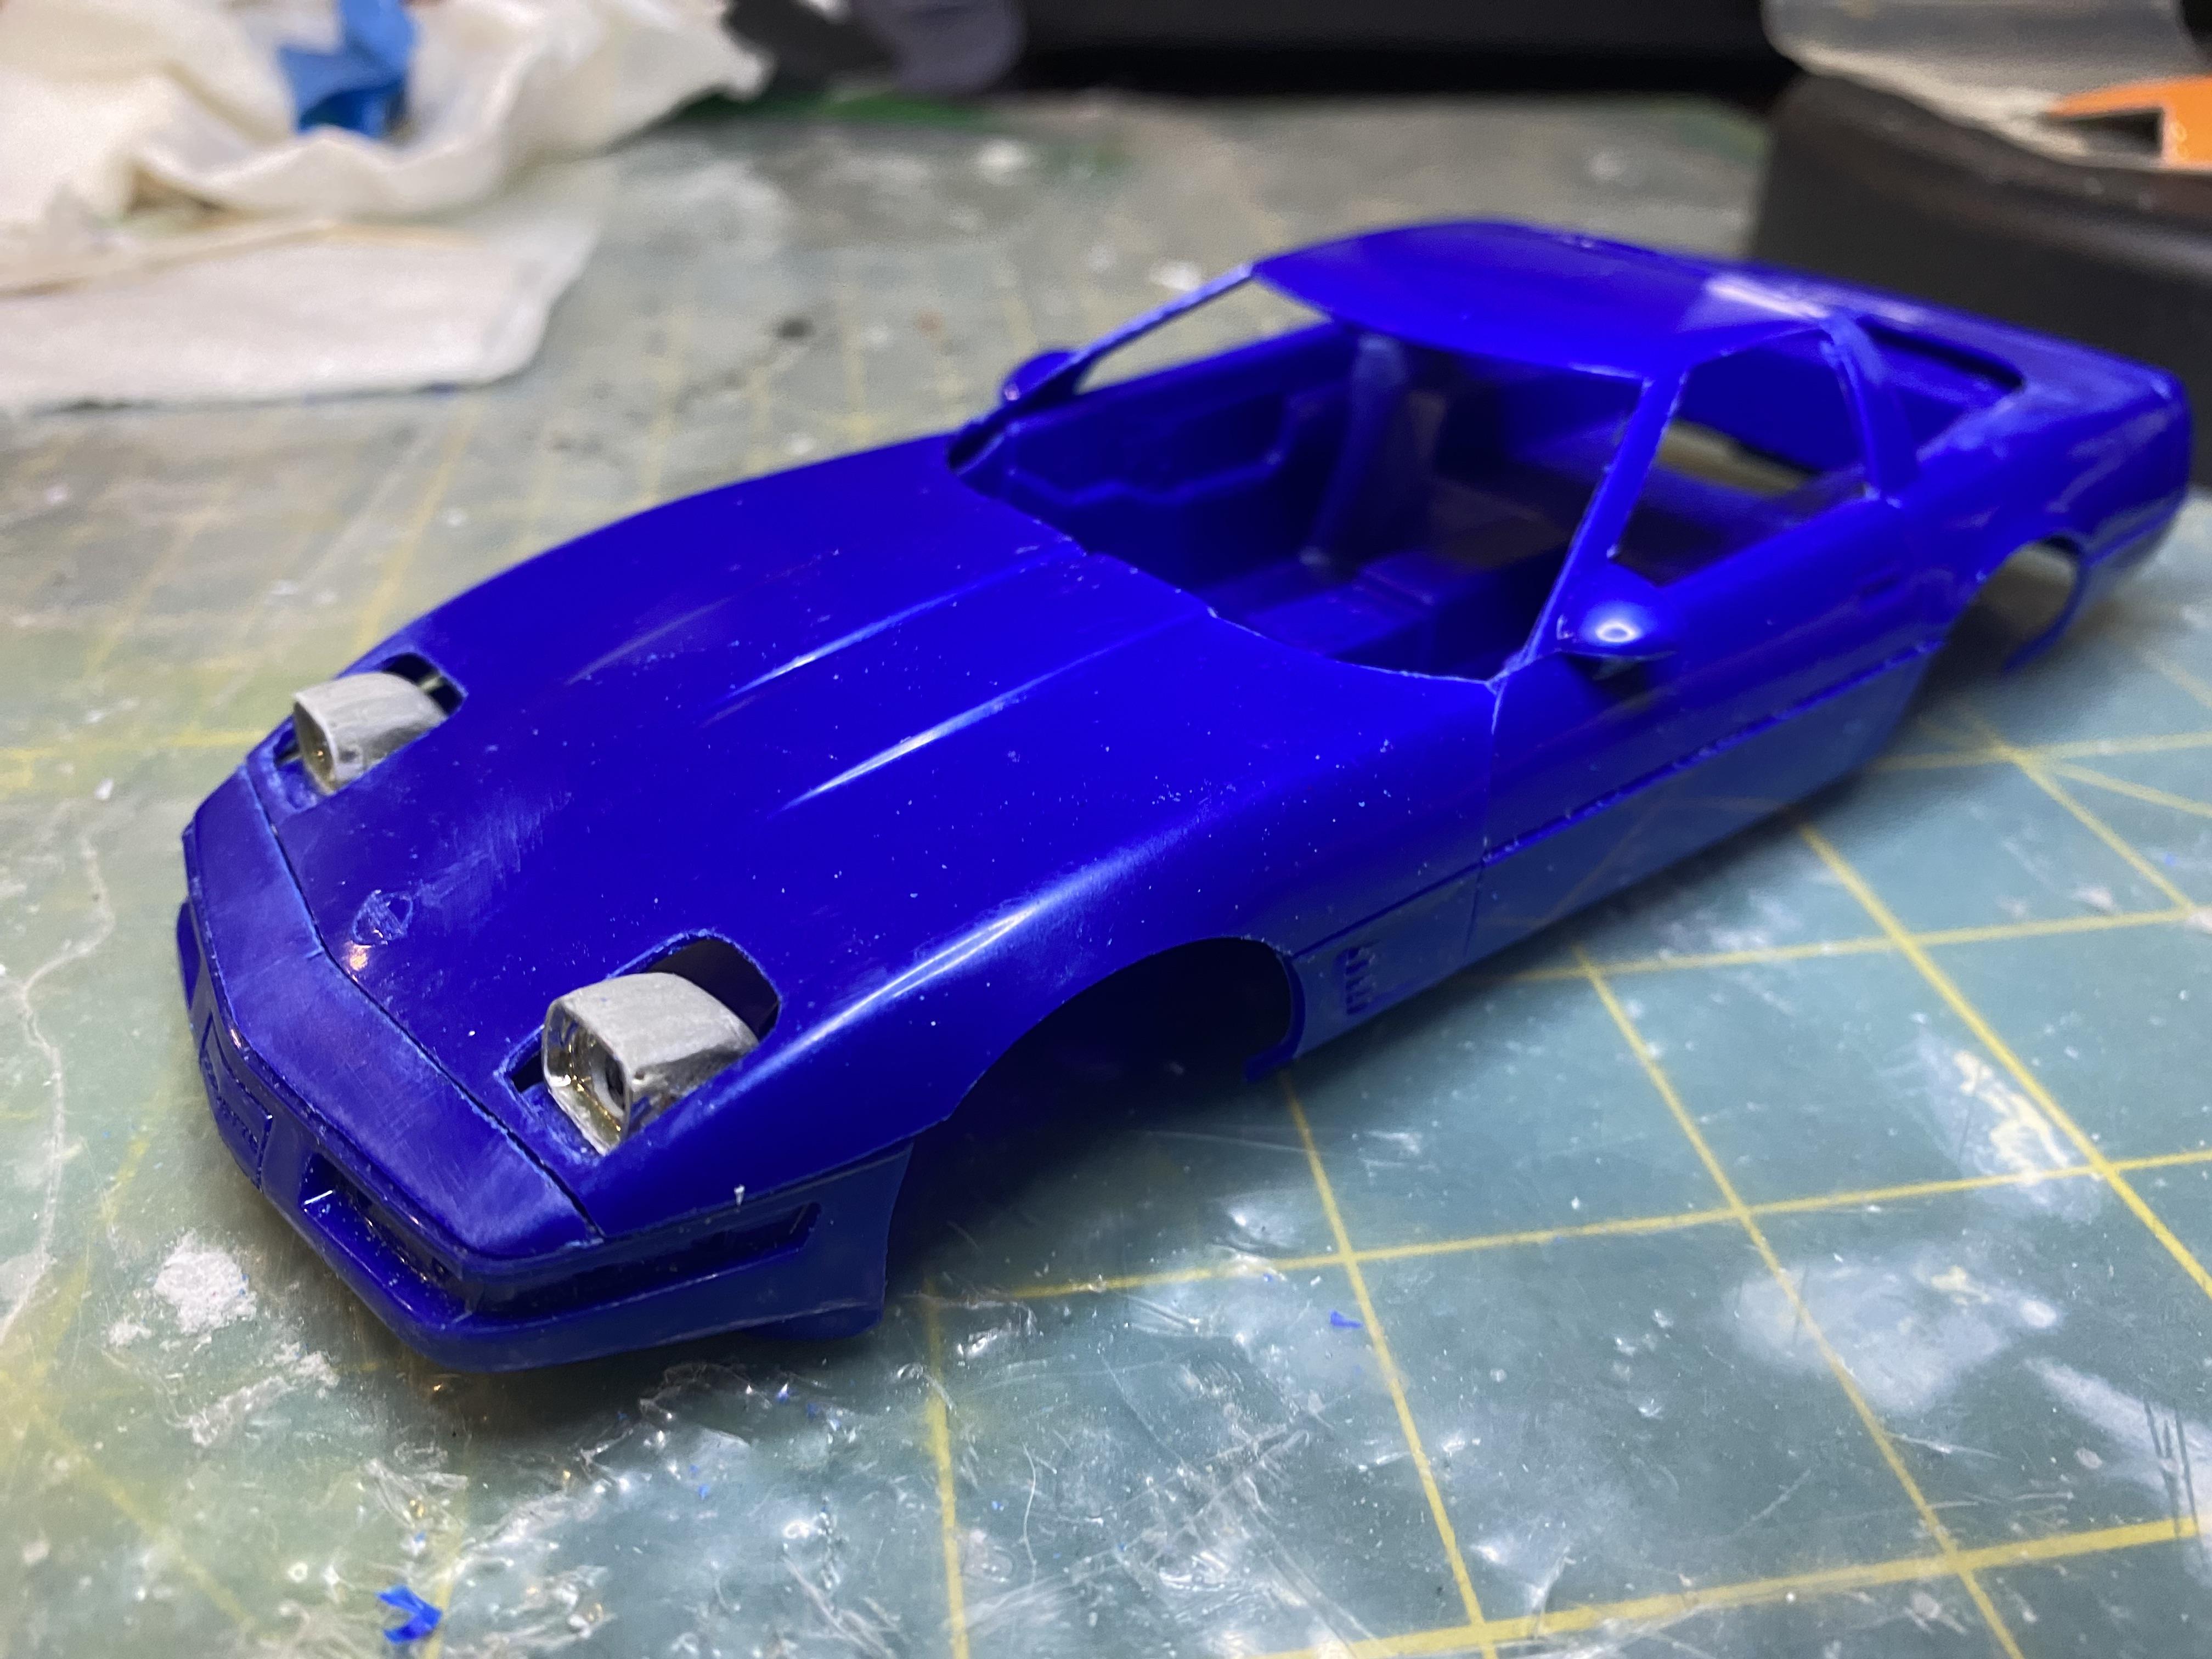
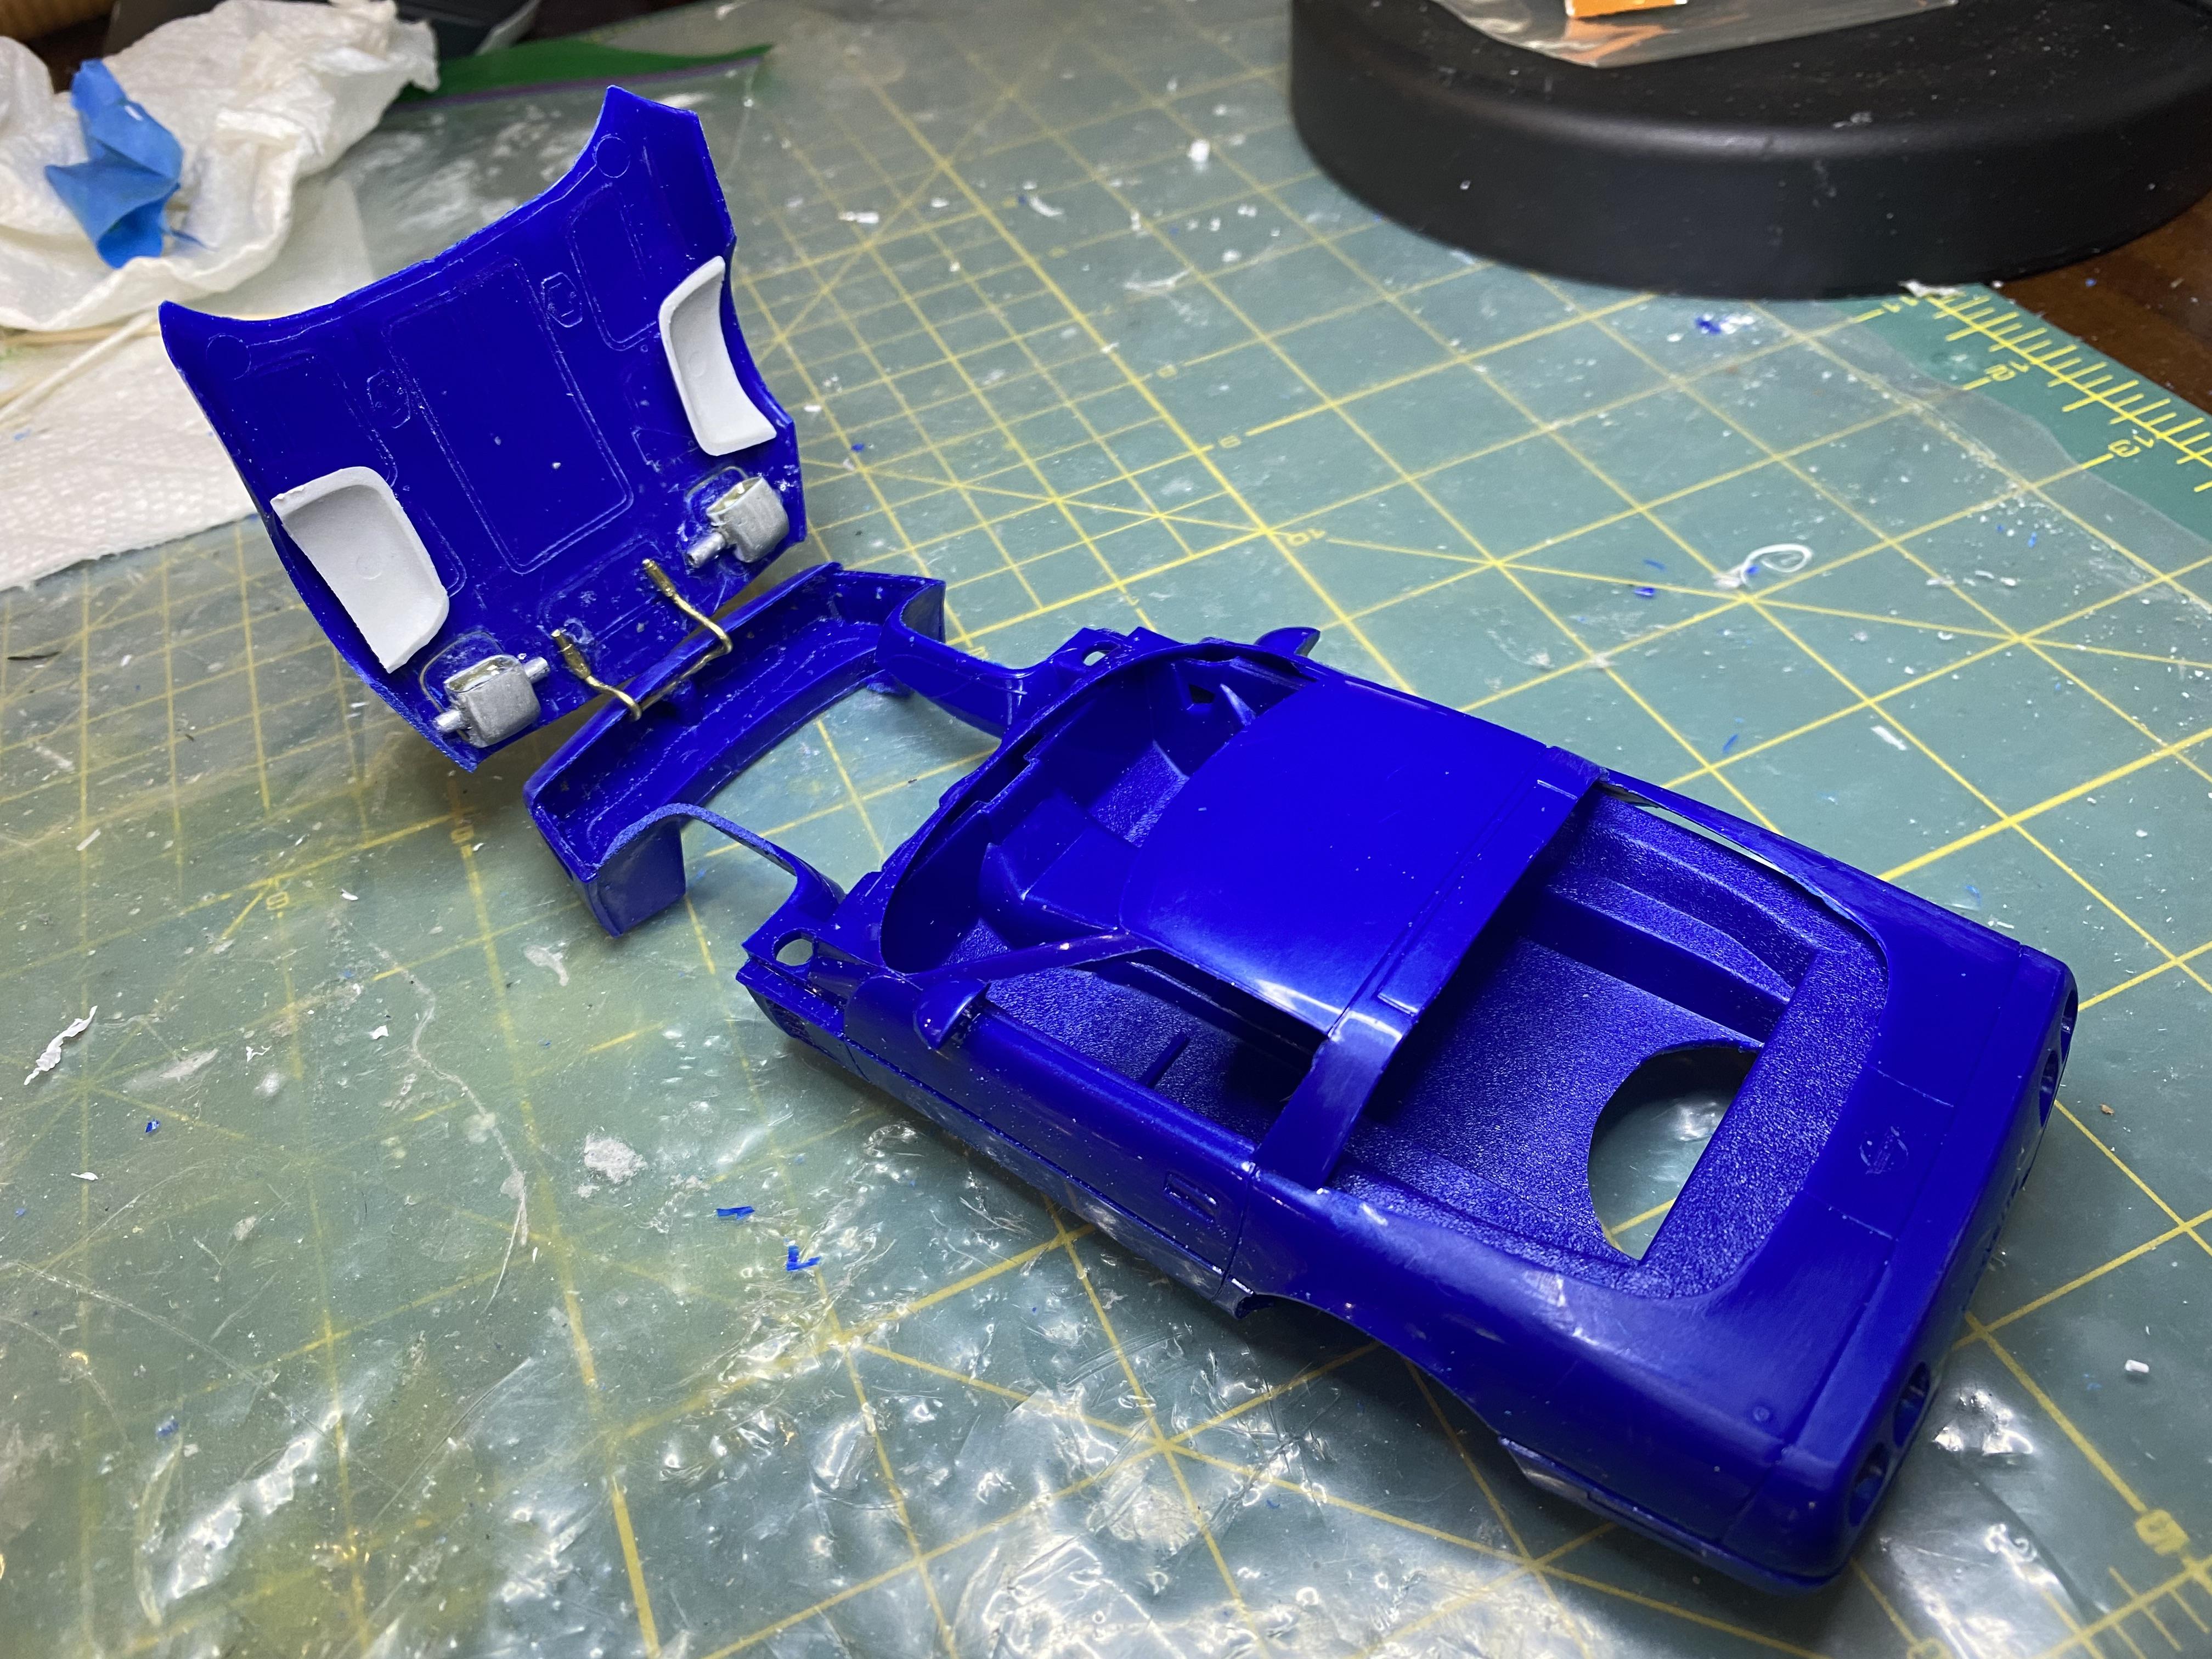
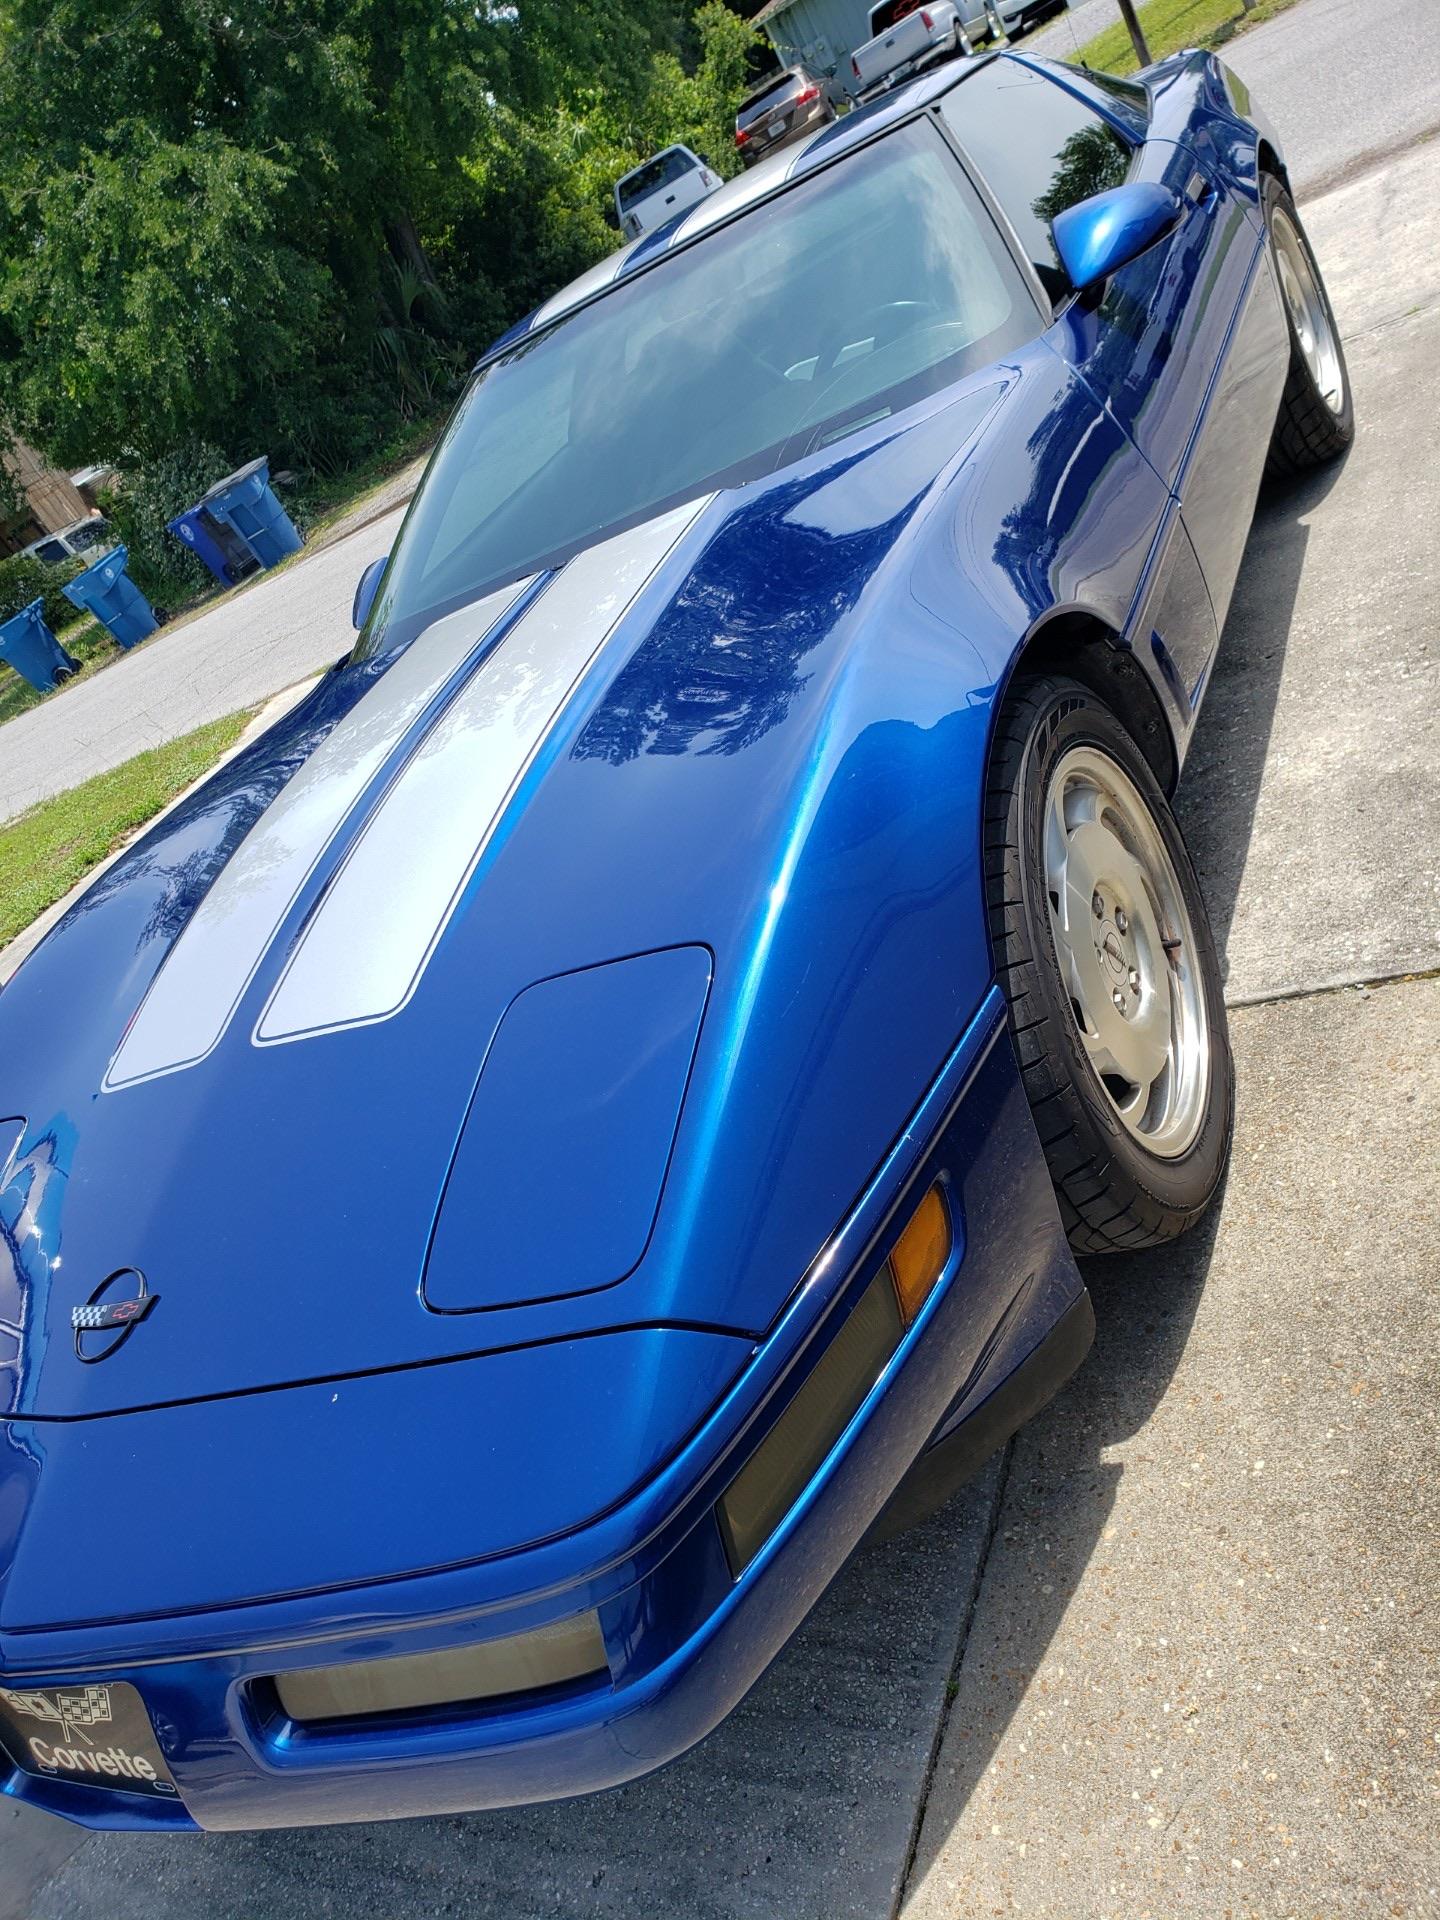
I am doing something I never do, and working on two kits at one time. I started working on a 1996 Corvette replica for a family member’s birthday with working lights, including headlight that can be opened/closed. The battery holder will replace the spare tire in the undercarriage. Most of the fabrication work done.
-
I scanned the box after splitting it and laying it flat. Then set each panel so I could fold it and glue to sides. I used a scanned version that came with the previous corvette to make flaps. Here is the image if interested.