Chris V
-
Posts
327 -
Joined
-
Last visited
Content Type
Profiles
Forums
Events
Gallery
Everything posted by Chris V
-

Fluted exhaust tips for MoPars?
Chris V replied to JollySipper's topic in Model Building Questions and Answers
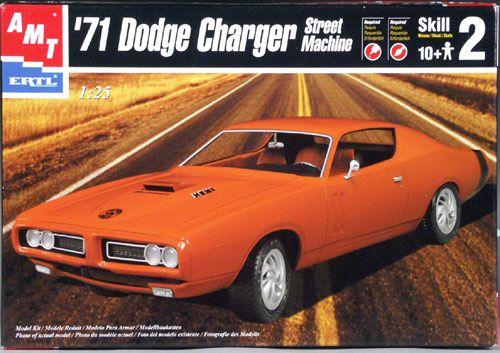
If you're looking for regular plastic parts, you can find the "Bazooka Tips" in the following issues of AMT's 1971 Dodge Charger R/T (All the other issues have different tailpipes): Harts Parts offers a set of unplated resin Bazooka tips, and Missing Link Resin Casters used to offer a set of plated, but I'm not sure if they're still available.
-
Favourite Rims
Chris V replied to Falcon Ranchero's topic in General Automotive Talk (Trucks and Cars)
I think the closest match you'll find in 1:25 scale is the wheels from AMT/Lindberg's 1966 Chevelle SS 396. -
Favourite Rims
Chris V replied to Falcon Ranchero's topic in General Automotive Talk (Trucks and Cars)
I think the closest match you'll find in 1:25 scale is the wheels from AMT/Lindberg's 1966 Chevelle SS 396. -
To the best of my knowledge, the paints are no longer manufactured under the Alclad II brand, but are still available from AK-Interactive as their "Extreme Metal" range of paints.
-
"Albion Alloys" is another well-renowned manufacturer of quality aluminum, brass and steel tubing for modeling.
-
Turning Gold Chrome to Regular Chrome ?
Chris V replied to Jon Haigwood's topic in Model Building Questions and Answers
As mentioned above, the "gold" plating is usually just a layer of clear yellow over regular kit chrome. In most instances the "gold" clearcoat can be dissolved/removed by soaking the parts in rubbing alcohol. I've seen this done with the recent Atlantis "Sidewinder" reissue of Monogram's old "Rattler" show rod. It literally took less than a minute to completely dissolve the gold clearcoat, effectively turning the parts regular chrome. I would suggest testing the rubbing alcohol on a bit of the gold sprue, using a very soft toothbrush to remove any residue, making sure to thoroughly rinse off the parts with lukewarm water. -
Despite the slightly cartoonish look, this is actually a very authentically detailed model of "Ohio George" Montgomery's famous 1933 Willys Gasser as raced in 1966/67. With some patience and attention to detail it can be built into a beautiful replica of the real car. Though generally frowned upon, the original two-piece tires in this kit were actually very nicely detailed, especially the pie crust slicks. In fact the tires have been one of the weakest parts of the subsequent reissues - until 2013 when Round2 released the restored premium "flatbox" issue featuring artwork from the Rodders Journal photo shoot. For those wishing to add further detail, I recommend getting a set of Goodyear frontrunners from Modelhaustires. Their T100-tires are based on Jo-Han's funnycar frontrunners and more accurate for Ohio George's car than the (ex. MPC) Denman frontrunners included in the latest reissue of the Willys. Drag City Casting used to offer a BEAUTIFUL Willys bodyshell and front clip with vastly improved bodywork detail, including reshaped hood vents and "dimples" to clear the valve covers and radiator. Maybe Ed will make these available again, once the reissue hits the shelves...
-
Diversion... 1/32 Scale '37 Chevy Gasser
Chris V replied to NitroMarty's topic in WIP: Drag Racing Models
Amazing project Marty! It’s rare to see 1:32-scale models get the attention they deserve, but knowing your work I’m certain that you’ll do it justice! On a side note: Would you by any chance happen to have a spare outer front wheel half from Monogram’s 1940 Willys in your stash of 1:32-parts? I recently inherited a built-up Willys from a fellow modeler who is sadly no longer among us. Since then I’ve been looking high and low for a front wheel to complete it… -
Looking For One Of These Tools
Chris V replied to oldcarfan's topic in Model Building Questions and Answers
Unless you have to cut very thick plastic profiles, I’d recommend getting a cutting station instead. Albeit significantly pricier, some cutting stations (like those from DSPIAE) have adjustable angle guides for precise and consistent cuts. -
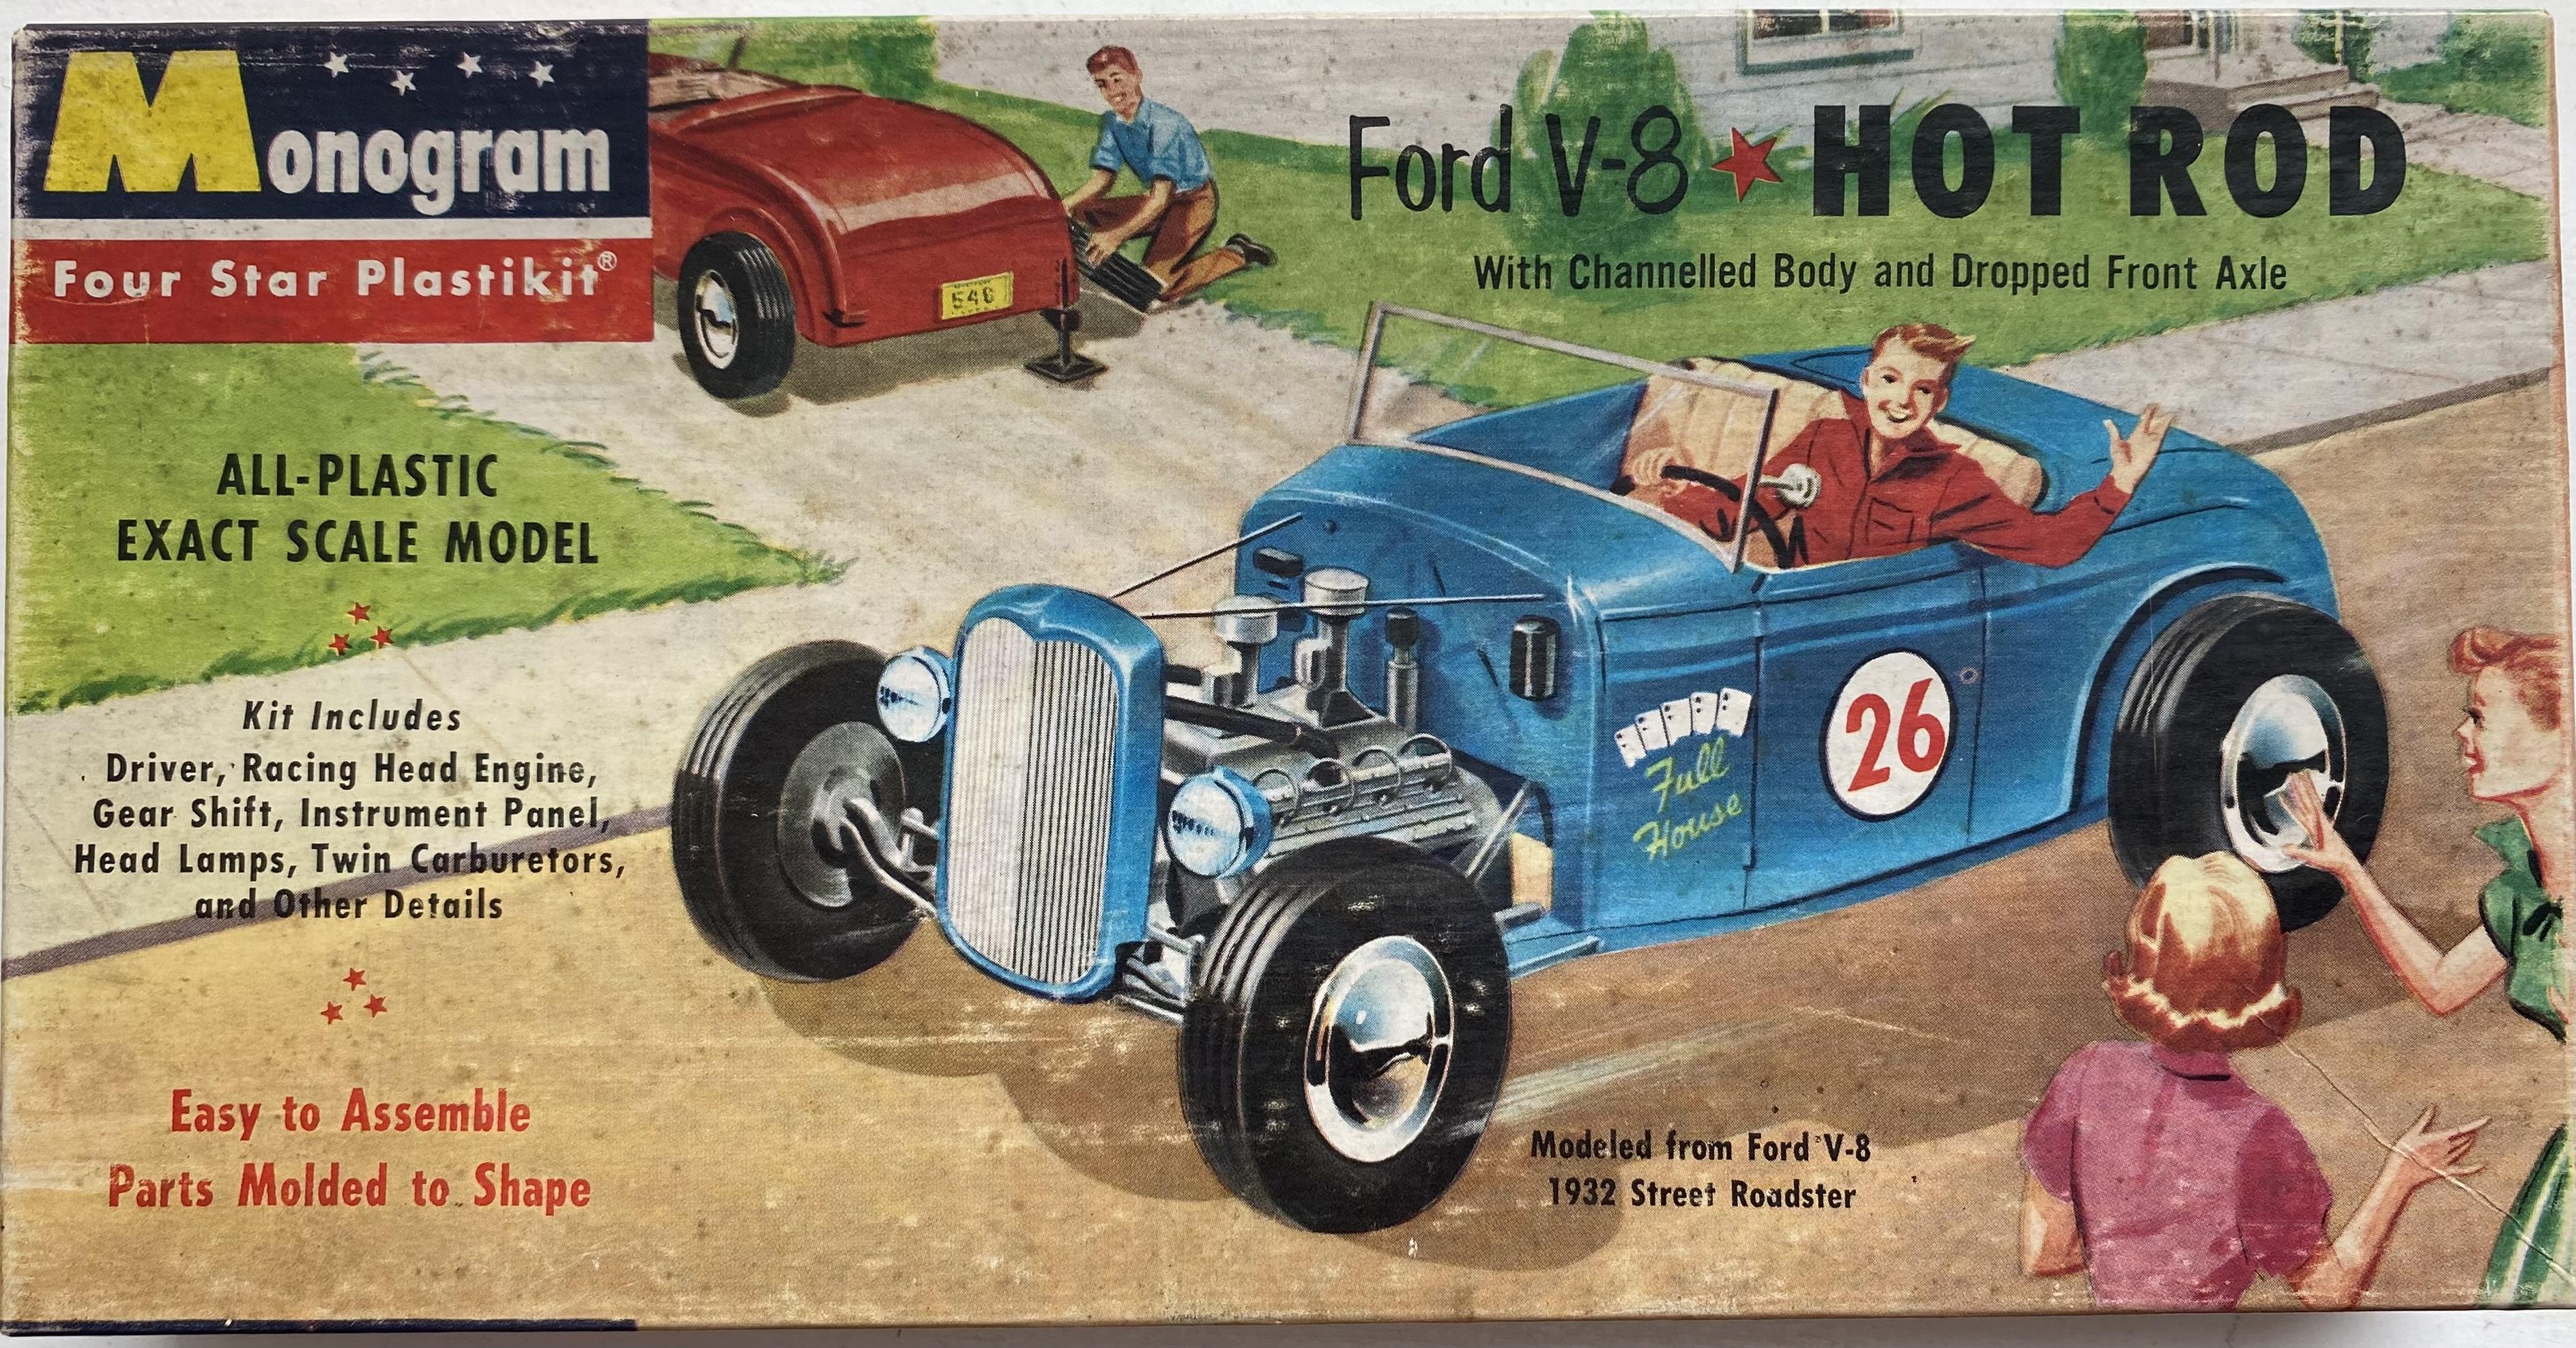
This is the oldest kit in my collection: The 1956 reissue of Monogram’s “Ford V-8 Hot Rod”, originally issued in 1954. The tooling was susequently altered into the “Drag Strip Hot Rod”
-
Outstanding piece of work! It's an amazingly subtle mix of modern and traditional hot rod styling elements.
-
This is a truth with some modification. The Trophy Series kits were designed with interchangeability in mind, but clearance issues are quite common when engine swapping them. However, this doesn't take away from the fact that these simple early sixties' kits are thoroughly enjoyable to build! On a related note, the Lincoln Y-block engine from AMT's Trophy Series "Customizing Boat Kit" can be adapted to fit the car models of the series using the transmission and bellhousing from the optional Ford FE-Series V8 in the 1934 Ford Pickup. @SteveG If you're looking for a relatively inexpensive way to revitalize some of AMT's vintage tooling, I would suggest tooling up a small (plated) parts tree with classic hot rod parts to fit the range of 1932 Fords. Utilizing the similar parts design and layout of the various AMT '32 Ford kits, a "universal upgrade kit" for the series could include the following parts: * Dropped "I-beam" front axle with split wishbones * Optional dropped tube axle with "Hairpins" * Dropped headlight bar * Optional '39 Ford "Teardrop" and '50 Pontiac taillights Given the popularity of these kits I imagine such a parts tree would do quite well as a standalone parts pack as well - perhaps in combination with a set of matching vintage "big'n little" bias ply tires for giving the models a proper hot rod rake...
-
Rulers for model scales
Chris V replied to junkyardjeff's topic in Model Building Questions and Answers
There's a multitude of different scale conversion rulers available. However a regular metric ruler is excellent for basic 1:25 scale work as 1 mm close to equals one scale inch (1 inch = 25.4 mm). In most cases the miniscule discrepancy will not be visible to the naked eye. -
Not in over my head, but I’m still working up the courage to start building the McLaren Can Am racers from Accurate Miniatures…
-
That’s not entirely true. If you look at the RoG 1:16 Porsche 356, the Coupé is an advanced snap kit whereas the Convertible is a highly detailed glue kit albeit based on the same tooling platform. However I think that the target demographic may be a key factor in why interoperability between snap- and glue kits isn’t more common: In the eyes of the average consumer (and many modelers alike) snap kits are considered “toys” and thus expected/required to have a certain sturdiness. Revell’s 1963 Corvettes is an excellent example as their thick castings may be somewhat prohibitive when it comes to scale accuracy. The amount of alternate tooling inserts required to run the kit as at fully detailed kit with the accuracy of their ‘67 Corvette may be so expensive that it’s hardly worth the investment compared to creating an all-new stand alone (glue) kit. Having said that, I would welcome an all new fully detailed ‘63 or ‘65 Corvette kit with open arms!
-
That's just gorgeous!!! Great use of the '55 Nomad suspension parts - It looks period perfect without the exaggerated stance of many modern day gassers.
-
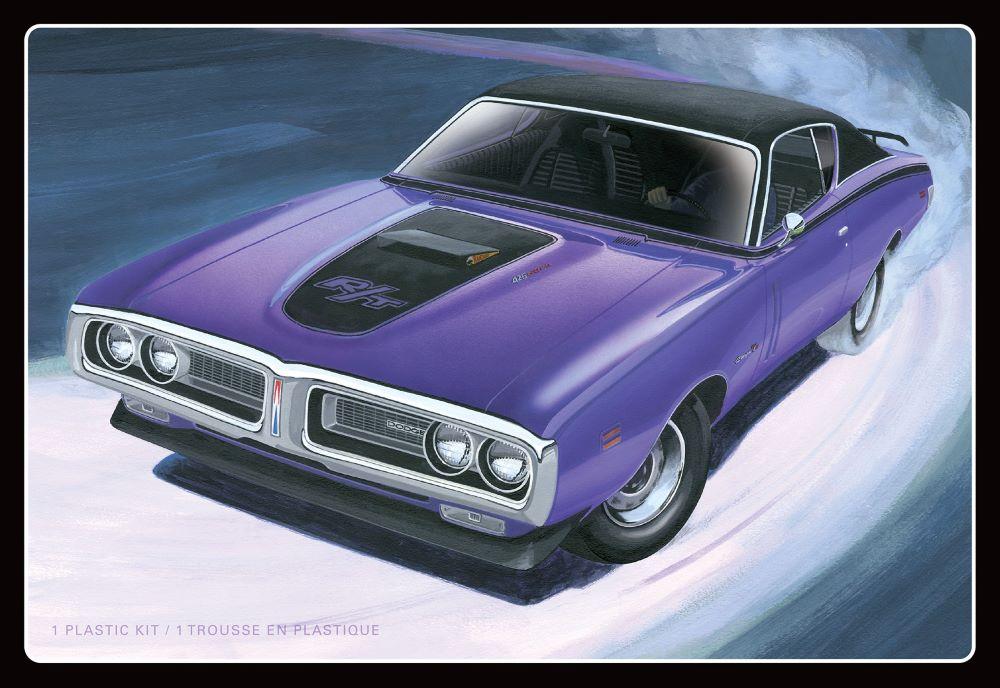
Judging by the slightly offset motor mounts, that chassis is definitely based on Revell's 1968/69 Dodge Charger R/T and 1969 Daytona Charger tooling. Revell's recently reissued 1970 Charger R/T and F&F "Dom's Charger" is very similar but not quite identical, however the suspension parts will likely fit. AMT's 1971 Charger is a different generation, and though the 1:1 parts were largely identical, the model parts will not fit your chassis without considerable modification.
-
The bodies in question are cast in regular polyurethane resin by a well known US caster/vendor. There’s absolutely nothing unusual about the color, feel, texture or smell of the resin. They are fairly simple conversions for commonly available kits, but (now) underscaled. Some years ago I bought some soft resin tires from another, smaller caster. Those tires shrunk considerably as well, but I attribute that to either the resin compound having exceeded its shelf life or the mixing ratio being off, as they gave off fumes that attacked plastic as well (they left a haze on nearby plastic parts and “melted” the wheels just like old Revell tires)m.
-
That would be the MPC 1966 Pontiac Bonneville Annual kits: 1966 Pontiac Bonneville HT 1966 Pontiac Bonneville Convertible
-
A bit of advice to supplement what the others have already said: To prevent the paint “bleeding” under the masking tape, give the masked-off model a light mist coat of clear along the edges of the tape - just enough to seal the edges without building up a heavy layer. Follow up with mist coats of color avoiding to apply a “wet” coat of paint. Tamiya’s Pearl White is a very transparent top coat best applied over a solid white base coat. To prevent chipping along the edges, the masking tape should be removed before the paint dries and cures - even if it means you have to mask off the area again.
-
You should be aware that it has a shelf-life of about 2-3 years. Beyond that it becomes less reactive and takes significantly longer to fully cure. Sometimes it helps a little to cut away the outer layer and only use the “core” of the older putty sticks.
-
For optimal adhesion you have 30-45 minutes to apply the putty once mixed, depending on the room temperature. Less is more, as the saying goes: It's better to apply conservatively and add more later on if required. One of the many great advantages of Milliput is the ability to accurately sculpt it into shape using moistened tools. Once the putty starts setting, you can gently(!) fine adjust the shape within the first hour or two after application.
-
As stated above, it's best used on bare plastic, and generally recommended to rough up the surface prior to application to key it for adhesion, as the putty doesn´t contain any solvents enabling it to chemically "bite" into the surface on its own.
-
I decided to post this topic in the Model Building Q&A-section rather than the aftermarket section of the forum, as it is more of a general question concerning the use of resin parts, namely larger parts like car bodies. Let me start by saying, that as an experienced modeler I am familiar with working with resin and have both built and modified several resin models. However I was recently tasked with sorting the collection from the estate of a fellow modeler, sadly no longer among us. Among his kits were a number of relatively recent resin bodies from a well known manufacturer. When I compared some of the more "conservative" conversions to the suggested donor-kits it became apparent that some bodies were considerably smaller: For instance, one resin body was roughly 2 mm (or approximately 2 scale inches) narrower by the cowl than the hood from the kit it was based on and intended for use with. Likewise I found a resin body that had been cut in half and only one of the halves painted. Comparing the two halves to each other, it was very clear that the painted half had shrunken to a point where it would no longer line up with the other half. In fact, if it hadn't been for the multiple corresponding irregular cut-marks, it would have been hard to tell that the two halves were even from the same body. Anyway I've previously heard of some Japanese model kits with factory supplied resin body kits, that became unbuildable after just a few years due to shrinkage. This experience makes me wonder how common shrinkage issues are, and whether they're a more common occurrence with some resin manufacturers than others? It would be a shame to put countless hours of work into modifying and detailing a model - only to see it distort over time...
-
Zero Paints Primer - what am I doing wrong?
Chris V replied to YellowHound's topic in Model Building Questions and Answers
I was actually concerned that the metallics/pearls would look uneven under clearcoat. I never lay the Zero Paints basecoats on "wet" as, I've experienced the solvents causing both 2K putties (Milliput) to shrink significantly, and perfectly finished seams, removed emblems and molding inlet stubs to ghost like crazy, - even though they had been "washed" with thin liquid cement and sanded to a smooth finish after several weeks of drying time.