johnyrotten
-
Posts
2,248 -
Joined
-
Last visited
Content Type
Profiles
Forums
Events
Gallery
Everything posted by johnyrotten
-
Createx makes nice products, I've been having lots of success with it. Certain colors are also on clearance at hobby lobby, so that's a plus. Their clear coats are pretty nice, and they have video tutorials on YouTube if you get in a pinch.
-
Awesome you were able to figure it out. Being an heirloom, I imagine you were dead set on figuring it out, from the research you did. That's the only reason i cautioned you on the attempt. Tricky little devices they are, I look at them like functional works of art. Again, great job👍👍
-

Proper Scale for Details
johnyrotten replied to mcs1056's topic in Model Building Questions and Answers
Great point. After all, we all do this because we enjoy it. 👍 -
Saw this this morning, he was awesome as Jim Morrison. Tombstone is one of my favorite movies ever. Not many actors today of his caliber.
-
Proper Scale for Details
johnyrotten replied to mcs1056's topic in Model Building Questions and Answers
Using metric dimensions makes it easier, but not fool proof. 3/8 is approximately 10mm for example. Common size for spark plug wires. There are many calculators online, and there's a ton of threads here on the forum about this. Everyone builds a little different, you got individual's that anything goes, all the way to perfect replica level builders. Old charging cords, electronics solder, heat shrink tubing, even paperclips can be used for various parts and pieces. The wire out of twist ties is a good example. Just a matter of imagination and hunting the stuff down. -
Consistency is the biggest thing I found with craft paints, and something for dry tip issues. I found a recipe for a diy thinner, ended up tweaking it a bit and have had good results since. Distilled water is a good idea, I've read all kinds different mixes and recipes. Most all of them include Distilled water. Ive had really good results with Deco-art paints and annita's.
-
Wise advice. Very small, intricate mechanisms are not the best place to learn. Chalk up the cost of the repair as tuition, if you would happen to damage it beyond repair your going to feel way worse.
-
Absolutely stunning build Steve. I've read through a few of Roger's build threads, he was an incredibly talented builder. Truly an artist. You definitely captured his style.
-
Anytime I'm asked that, I tell my wife know that I'm not the one wearing it. If i was, I'd have some questions to answer. She's used to my smart --- remarks, so its a quick laugh.
-
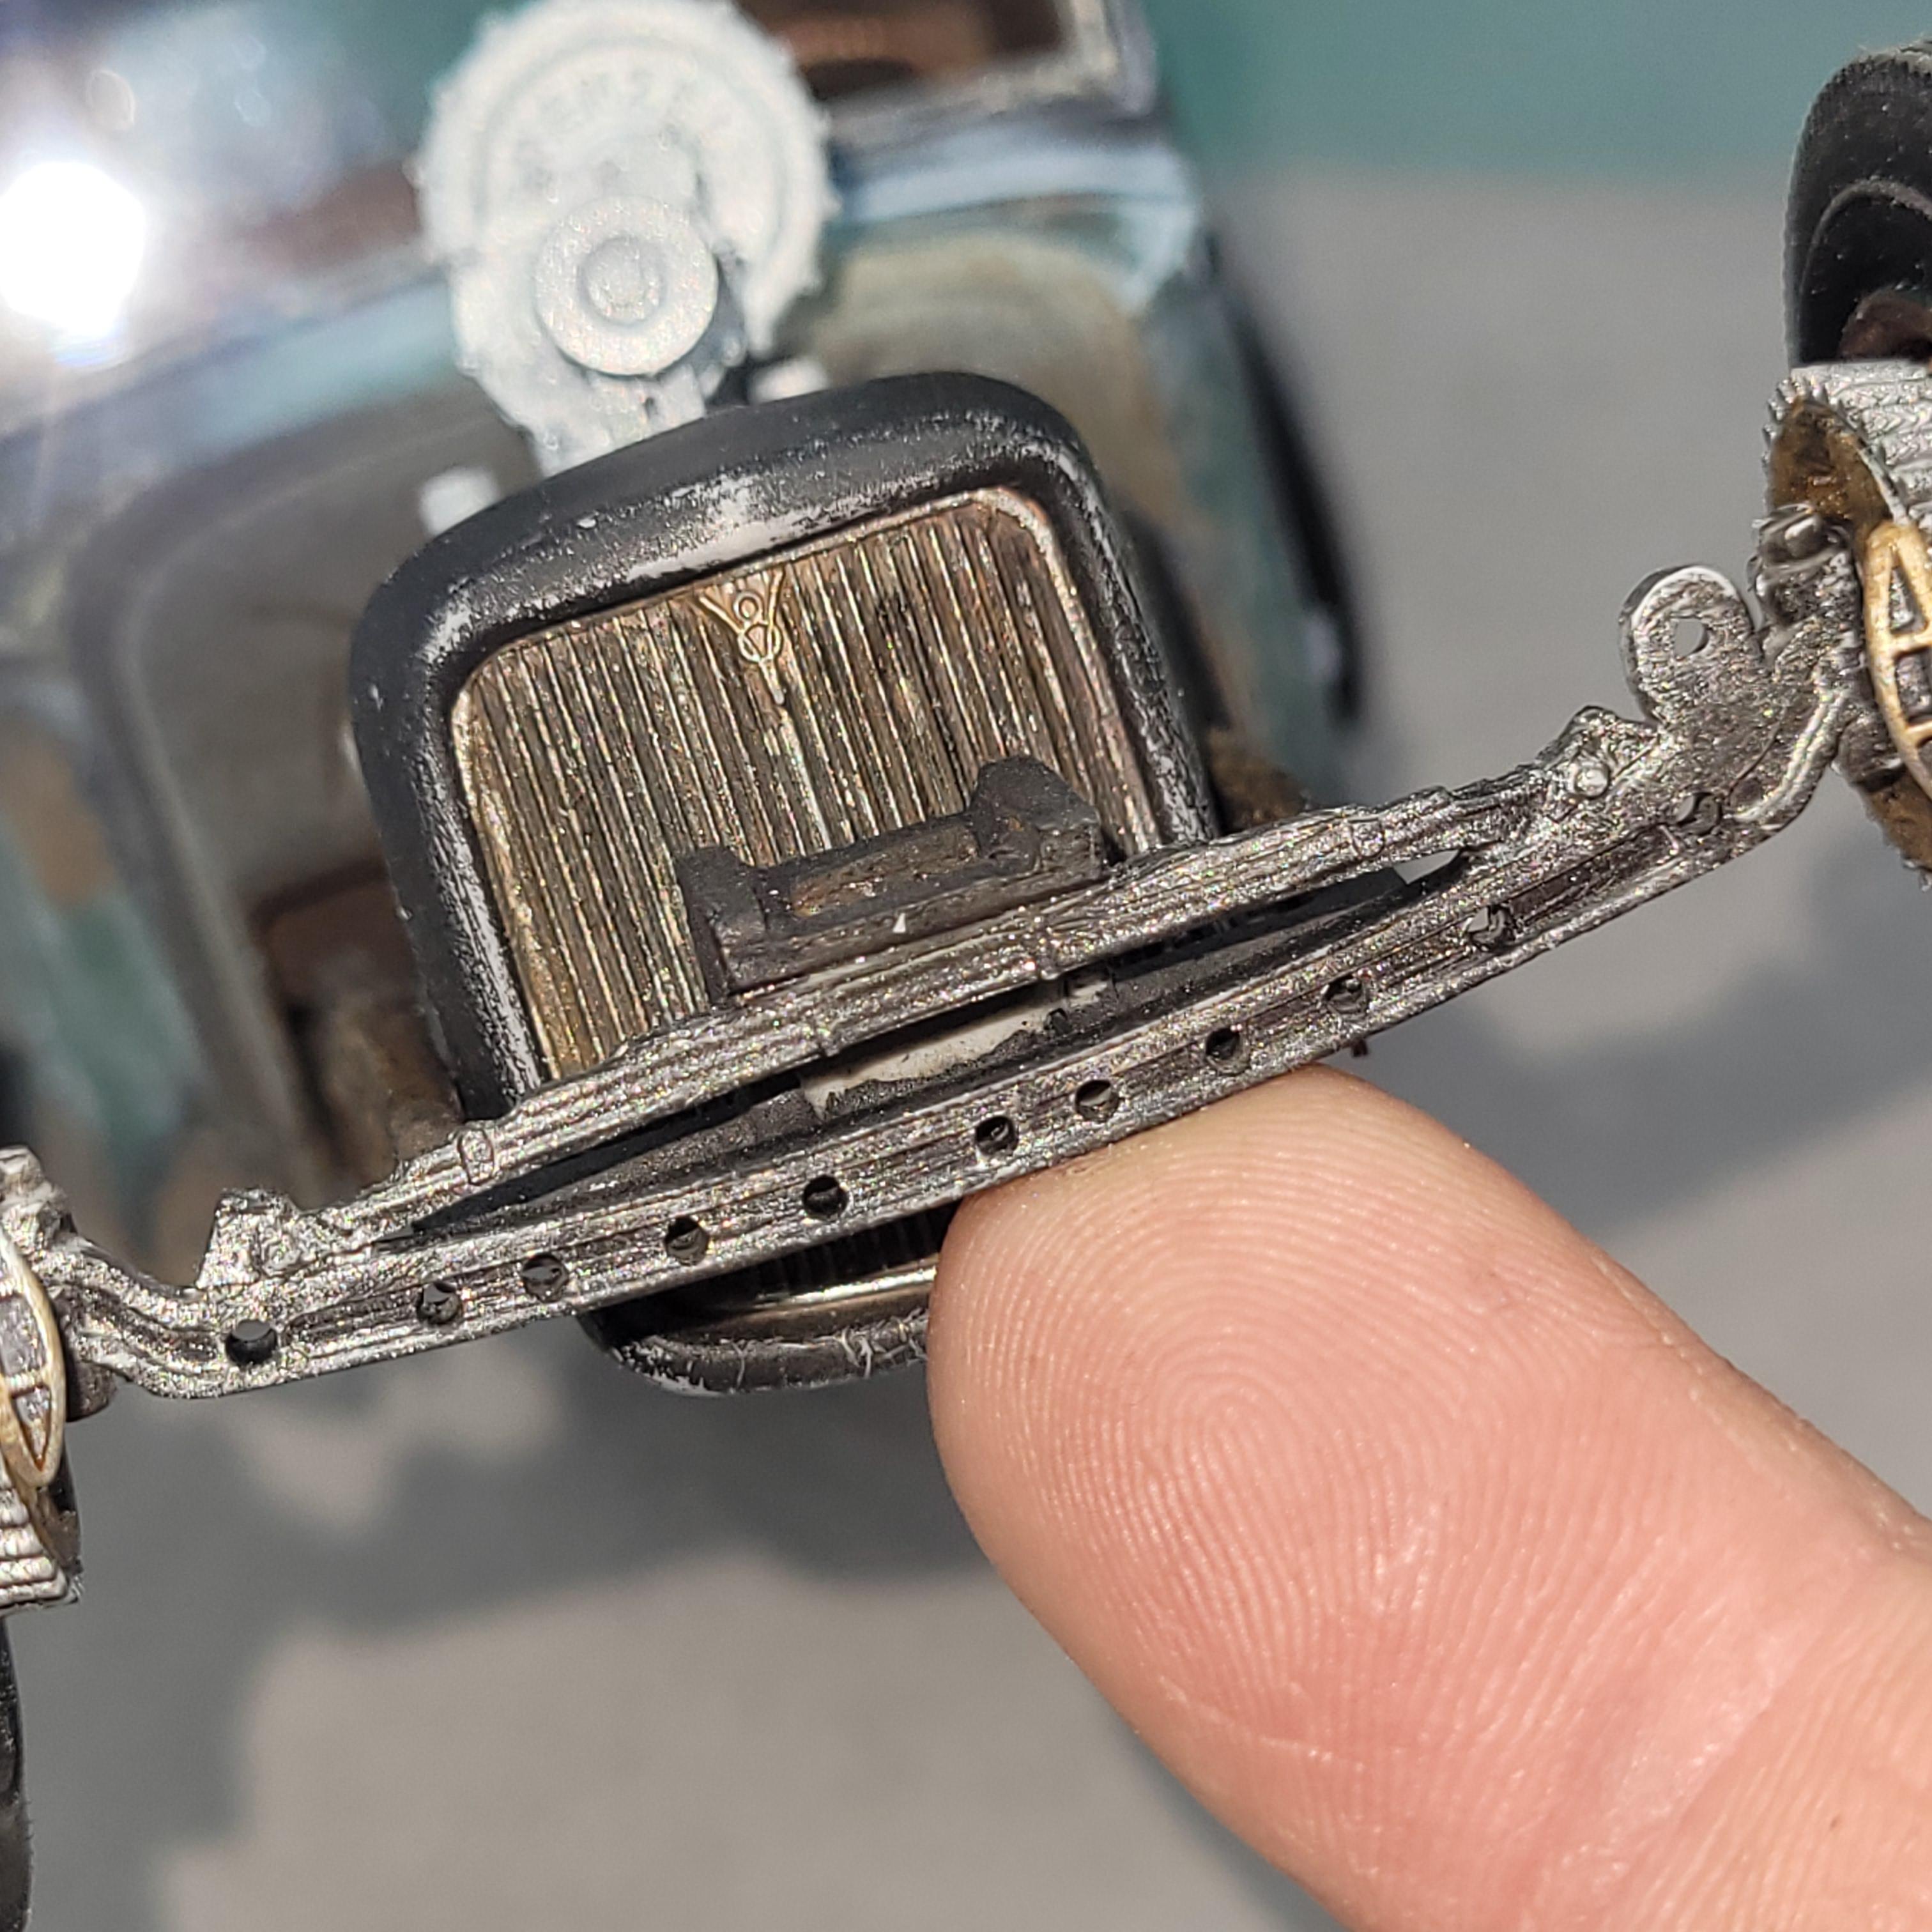
34 ford
johnyrotten replied to johnyrotten's topic in WIP: Model Trucks: Pickups, Vans, SUVs, Light Commercial
Lots of progress on the 34. Modified the kit radiator to. Better fill the grill shell and weathered that, and got it fitted to the chassis. It is not glued in the pictures and not sitting quite where it will when finished. The wheels and brake drums play nicely now, tried to get the fronts inset as much as possible. The kit tires got the weathering treatment as well, the hubcaps are getting the same. All the pics are just a mockup, trying to figure out how I want the exhaust. Thanks for checking this out.
-
WOW! just found this site! HELLO!
johnyrotten replied to TWR1962's topic in Welcome! Introduce Yourself
Welcome to the forum -
Welcome to the forum tom.
-
Spotlights are cool, I run an ancient brass military fireboat spotlight on my motorcycle. It's always a matter of finding that one perfect thing to set your build apart, I know that all too well. As for forgetting things, starting back in the hobby I made my junkyard in one of those divided organizers, time will tell if it works. Im trying to stay disciplined with it.
- 22 replies
-
- 1
-

-
- model t
- center door
- (and 1 more)
-
Suicide perch for the front axle. Nice little touch, I did similar on my 34. I really get a kick out of this build.
- 22 replies
-
- 1
-
-
- model t
- center door
- (and 1 more)
-
You should consider picking one or two up, case being the trade section here on the forum. Might be worth a shot of you trading for something your interested in. Just a thought
-
This will be something I'll pay attention to. 👍👍
-
Truth. Exactly why my gmc will be the newest vehicle I'll own going forward and the second I find a decent 60's through 80's whatever I'm jumping on it. No longer interested in modern over-complication and headaches.
-
I no longer have the car, at the time I already had my 05 gti as well, that was the "toy". The gli was just a daily, no mods for my daily drivers.
-
My last vw (2008 gli) had the awesome but awfully expensive bi-zenon auto leveling headlights. 110 dollars a bulb locally. And not the most accessible location unless you've got the arms of a school girl.
-
Nicely done Lenny. The Fordor was the way to go.
-
Nicely done Lenny. How much of a "beater" are you planning on making it?
-
Raised White letters on tires
johnyrotten replied to Valvefloat's topic in Tips, Tricks, and Tutorials
Good tip thanks for sharing. 👍 -
I use ca glue for metal to plastic bonds and resin pieces. Cheap harbor freight multi pack stuff. Works fine for what I need it to do. I've also used it with baking soda to make a rock hard filler. It works pretty well. that got me half a season of riding when the forks on my motorcycle were worn out.
-
Very clean looking amx. Nice choice with the wheel/tire combo. Great color as well.