OldNYJim
-
Posts
251 -
Joined
-
Last visited
Content Type
Profiles
Forums
Events
Gallery
Everything posted by OldNYJim
-
 Polished out some paint and got it pretty shiny...then wasn’t ultimately pleased with it and put it in the naughty-tank for another go around Ohh, and made some moulds to cast some little bits that I couldn’t justify buying multiple kits just to get multiples of...I’m still learning with mould making, and I’m not getting AMAZING results but I’m getting usable results anyway so I’ll take it!
-
Current Hot Rod / Street Rod trends
OldNYJim replied to OldNYJim's topic in General Automotive Talk (Trucks and Cars)
But remember when those “donks” were so popular that Revell did a whole series of them?! I never figured out why they didn’t call them Highriders...like lowriders, but high! -
Current Hot Rod / Street Rod trends
OldNYJim replied to OldNYJim's topic in General Automotive Talk (Trucks and Cars)
Absolutely - I didn't intend to belittle Chip's contribution to Boyd's success, and how much they advanced the look of hot rods and custom cars for a number of years. And it's great to see Chip still building amazing cars now - I'm just saying that his style is pretty much what he does (and does better than most)...I'm curious as to who the NEXT Chip Foose will be I guess -
Opinions needed... Help..
OldNYJim replied to Scott8950's topic in General Automotive Talk (Trucks and Cars)
Unless you’re looking to flip them for a profit, I’d pick the ones I actually liked I think. Sure, it’d be annoying to find you missed out on the ONE $1000000 model in the batch, but if they’re for building/restoring anyway I’d totally be inclined not to worry too much and just pick my favorites! -
Current Hot Rod / Street Rod trends
OldNYJim replied to OldNYJim's topic in General Automotive Talk (Trucks and Cars)
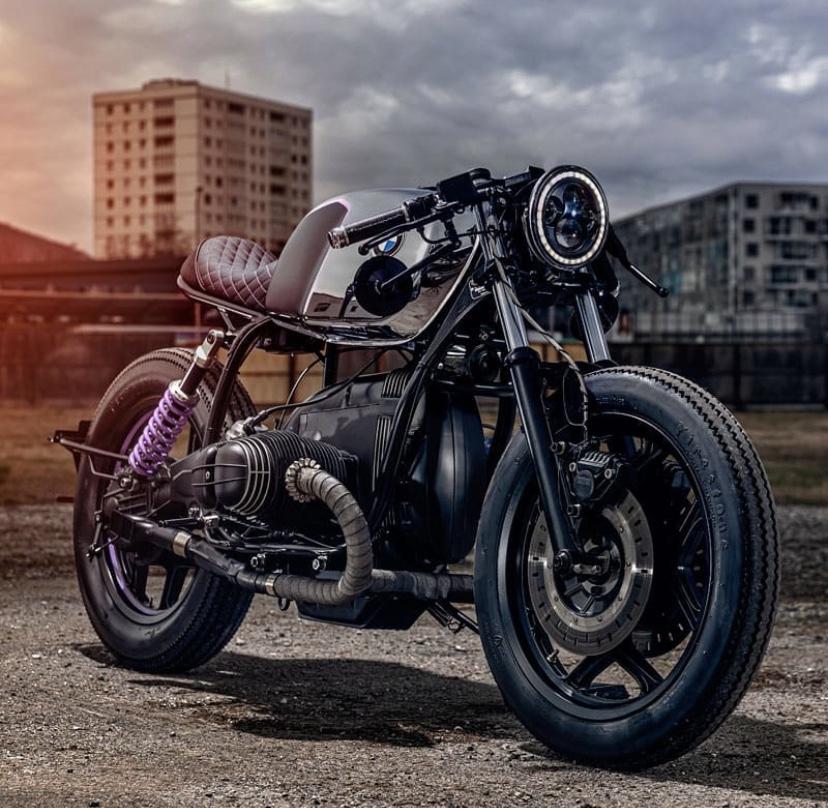
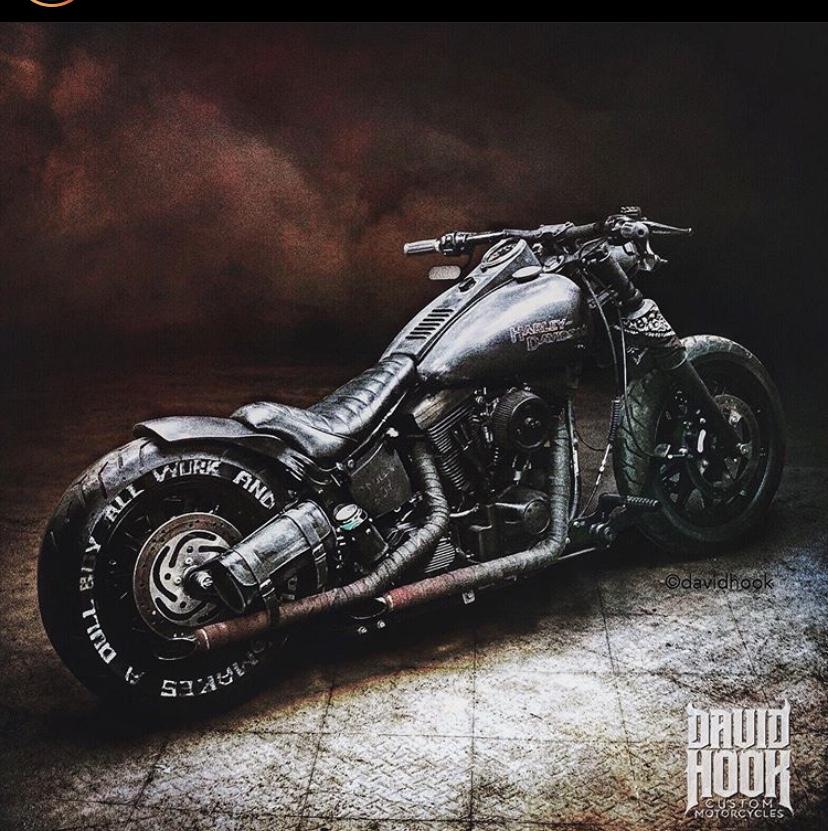
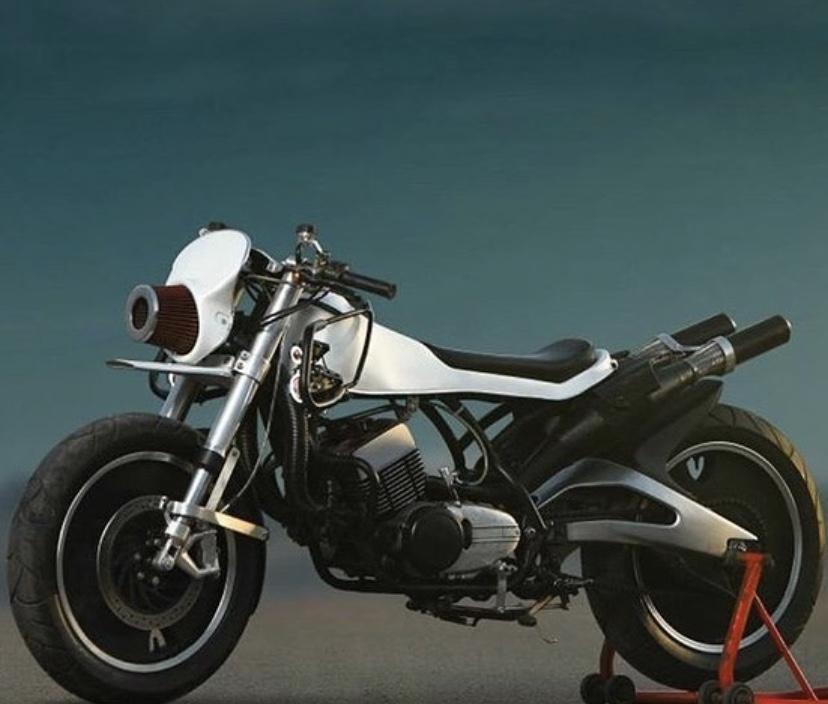
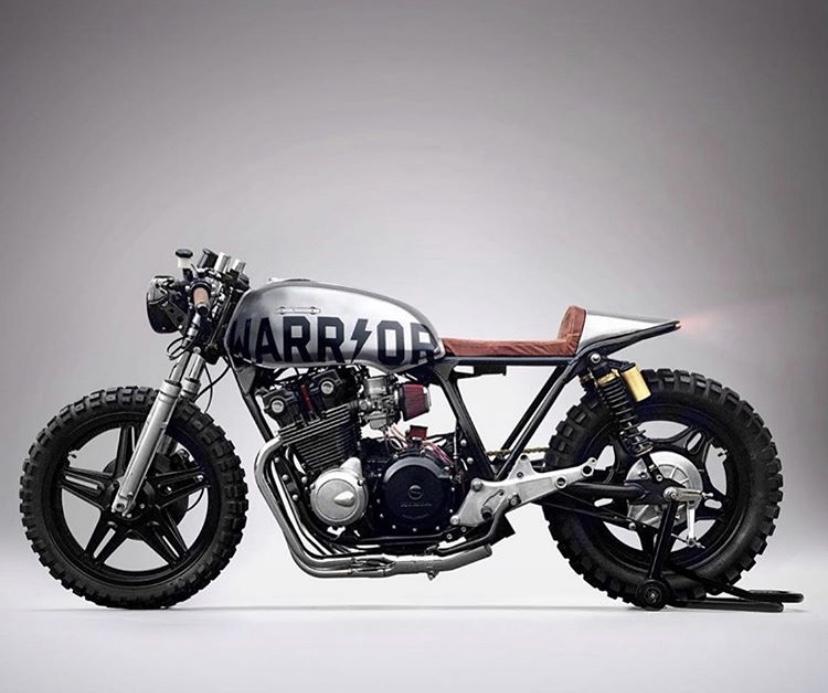
Yep, donks. There’s a couple that I see on the road occasionally near me. Impalas on 30 inch wheels with stock brakes peeking through - seems safe ?? I think @JollySipper is right with his ‘neo traditional’ observation - there seems to be a lot of builds in that style right now...hot rods that use the right parts and general look where they COULD have been built back in the day on paper...but probably wouldn’t have been. I’m noticing a similar trend in custom motorcycle builds a lot lately - tonnes of retro-influenced but definitely-modern bikes with some really cool ideas: I’m finding a lot of inspiration from bikes lately, thinking how I could use some of the ‘flavor’ of what they’re doing, but for automotive subjects instead. I’d definitely like to see some hot rodders takes on the bikes above, would definitely be fresh and interesting I think!
-
Oh wow! Nice start! That paint looks GREAT! I love the color!
-
Absolutely outstanding bodywork! Great job!
-
Beautiful Steve! Love the color!
-
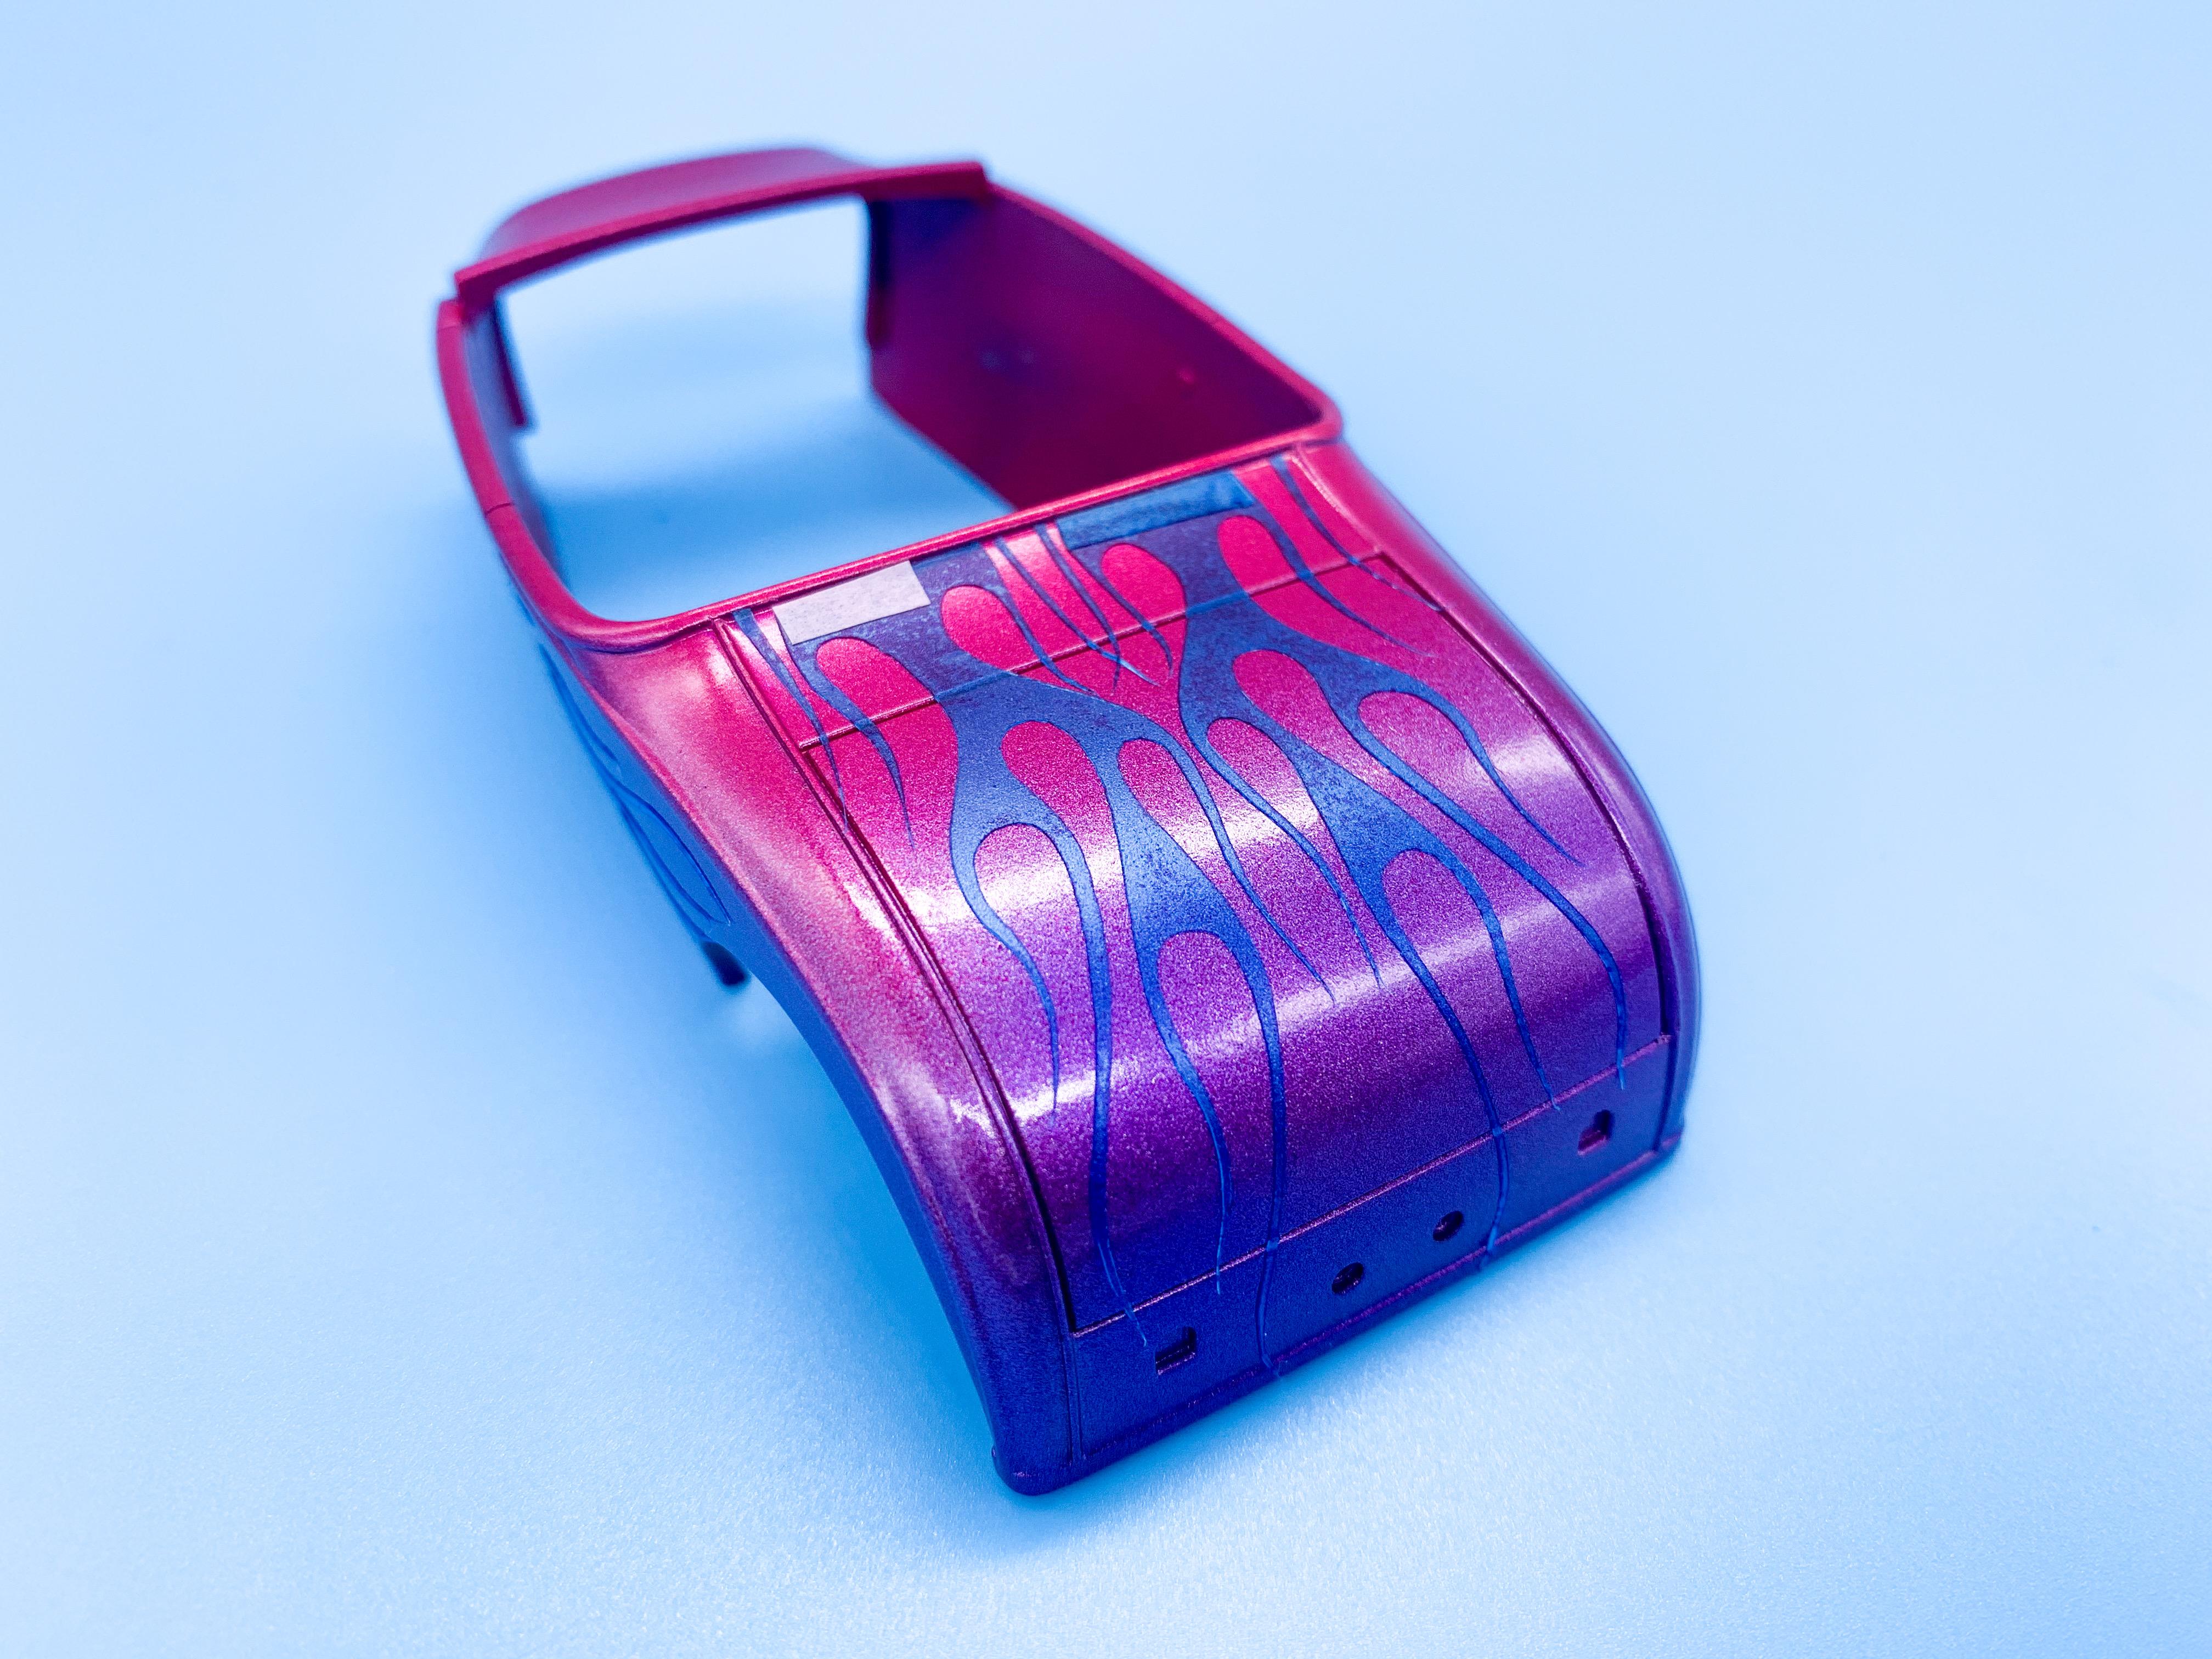
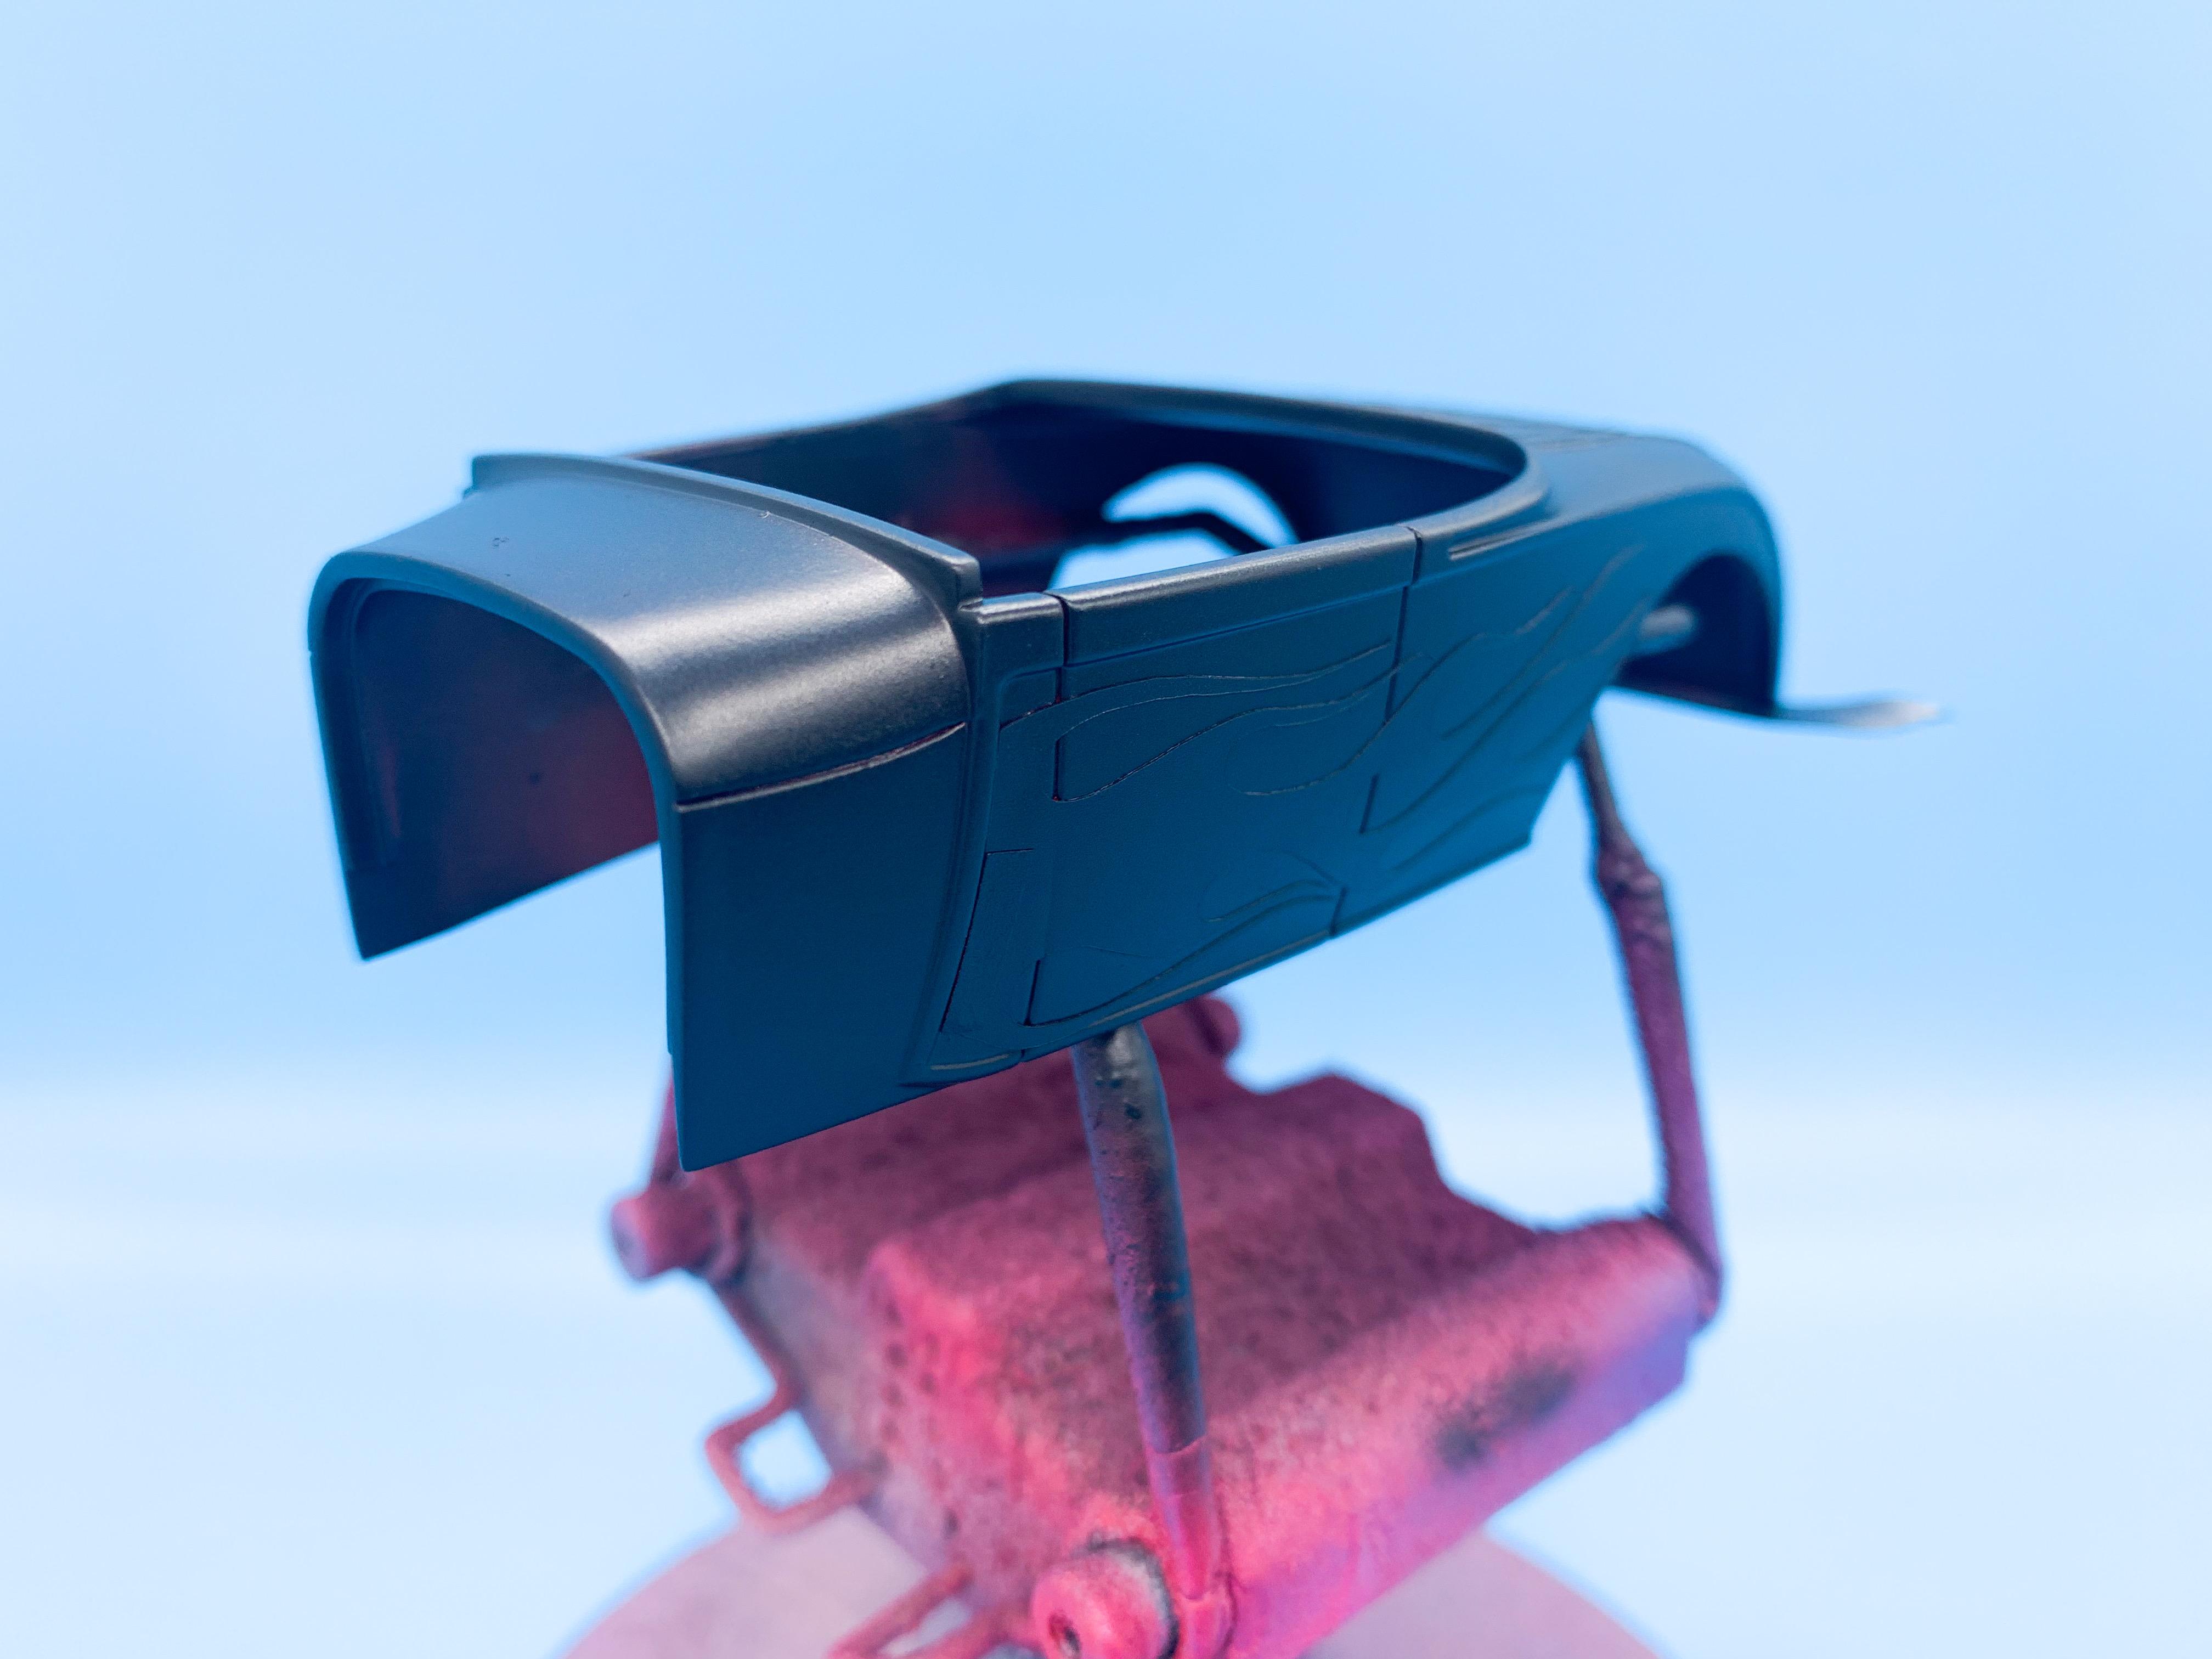
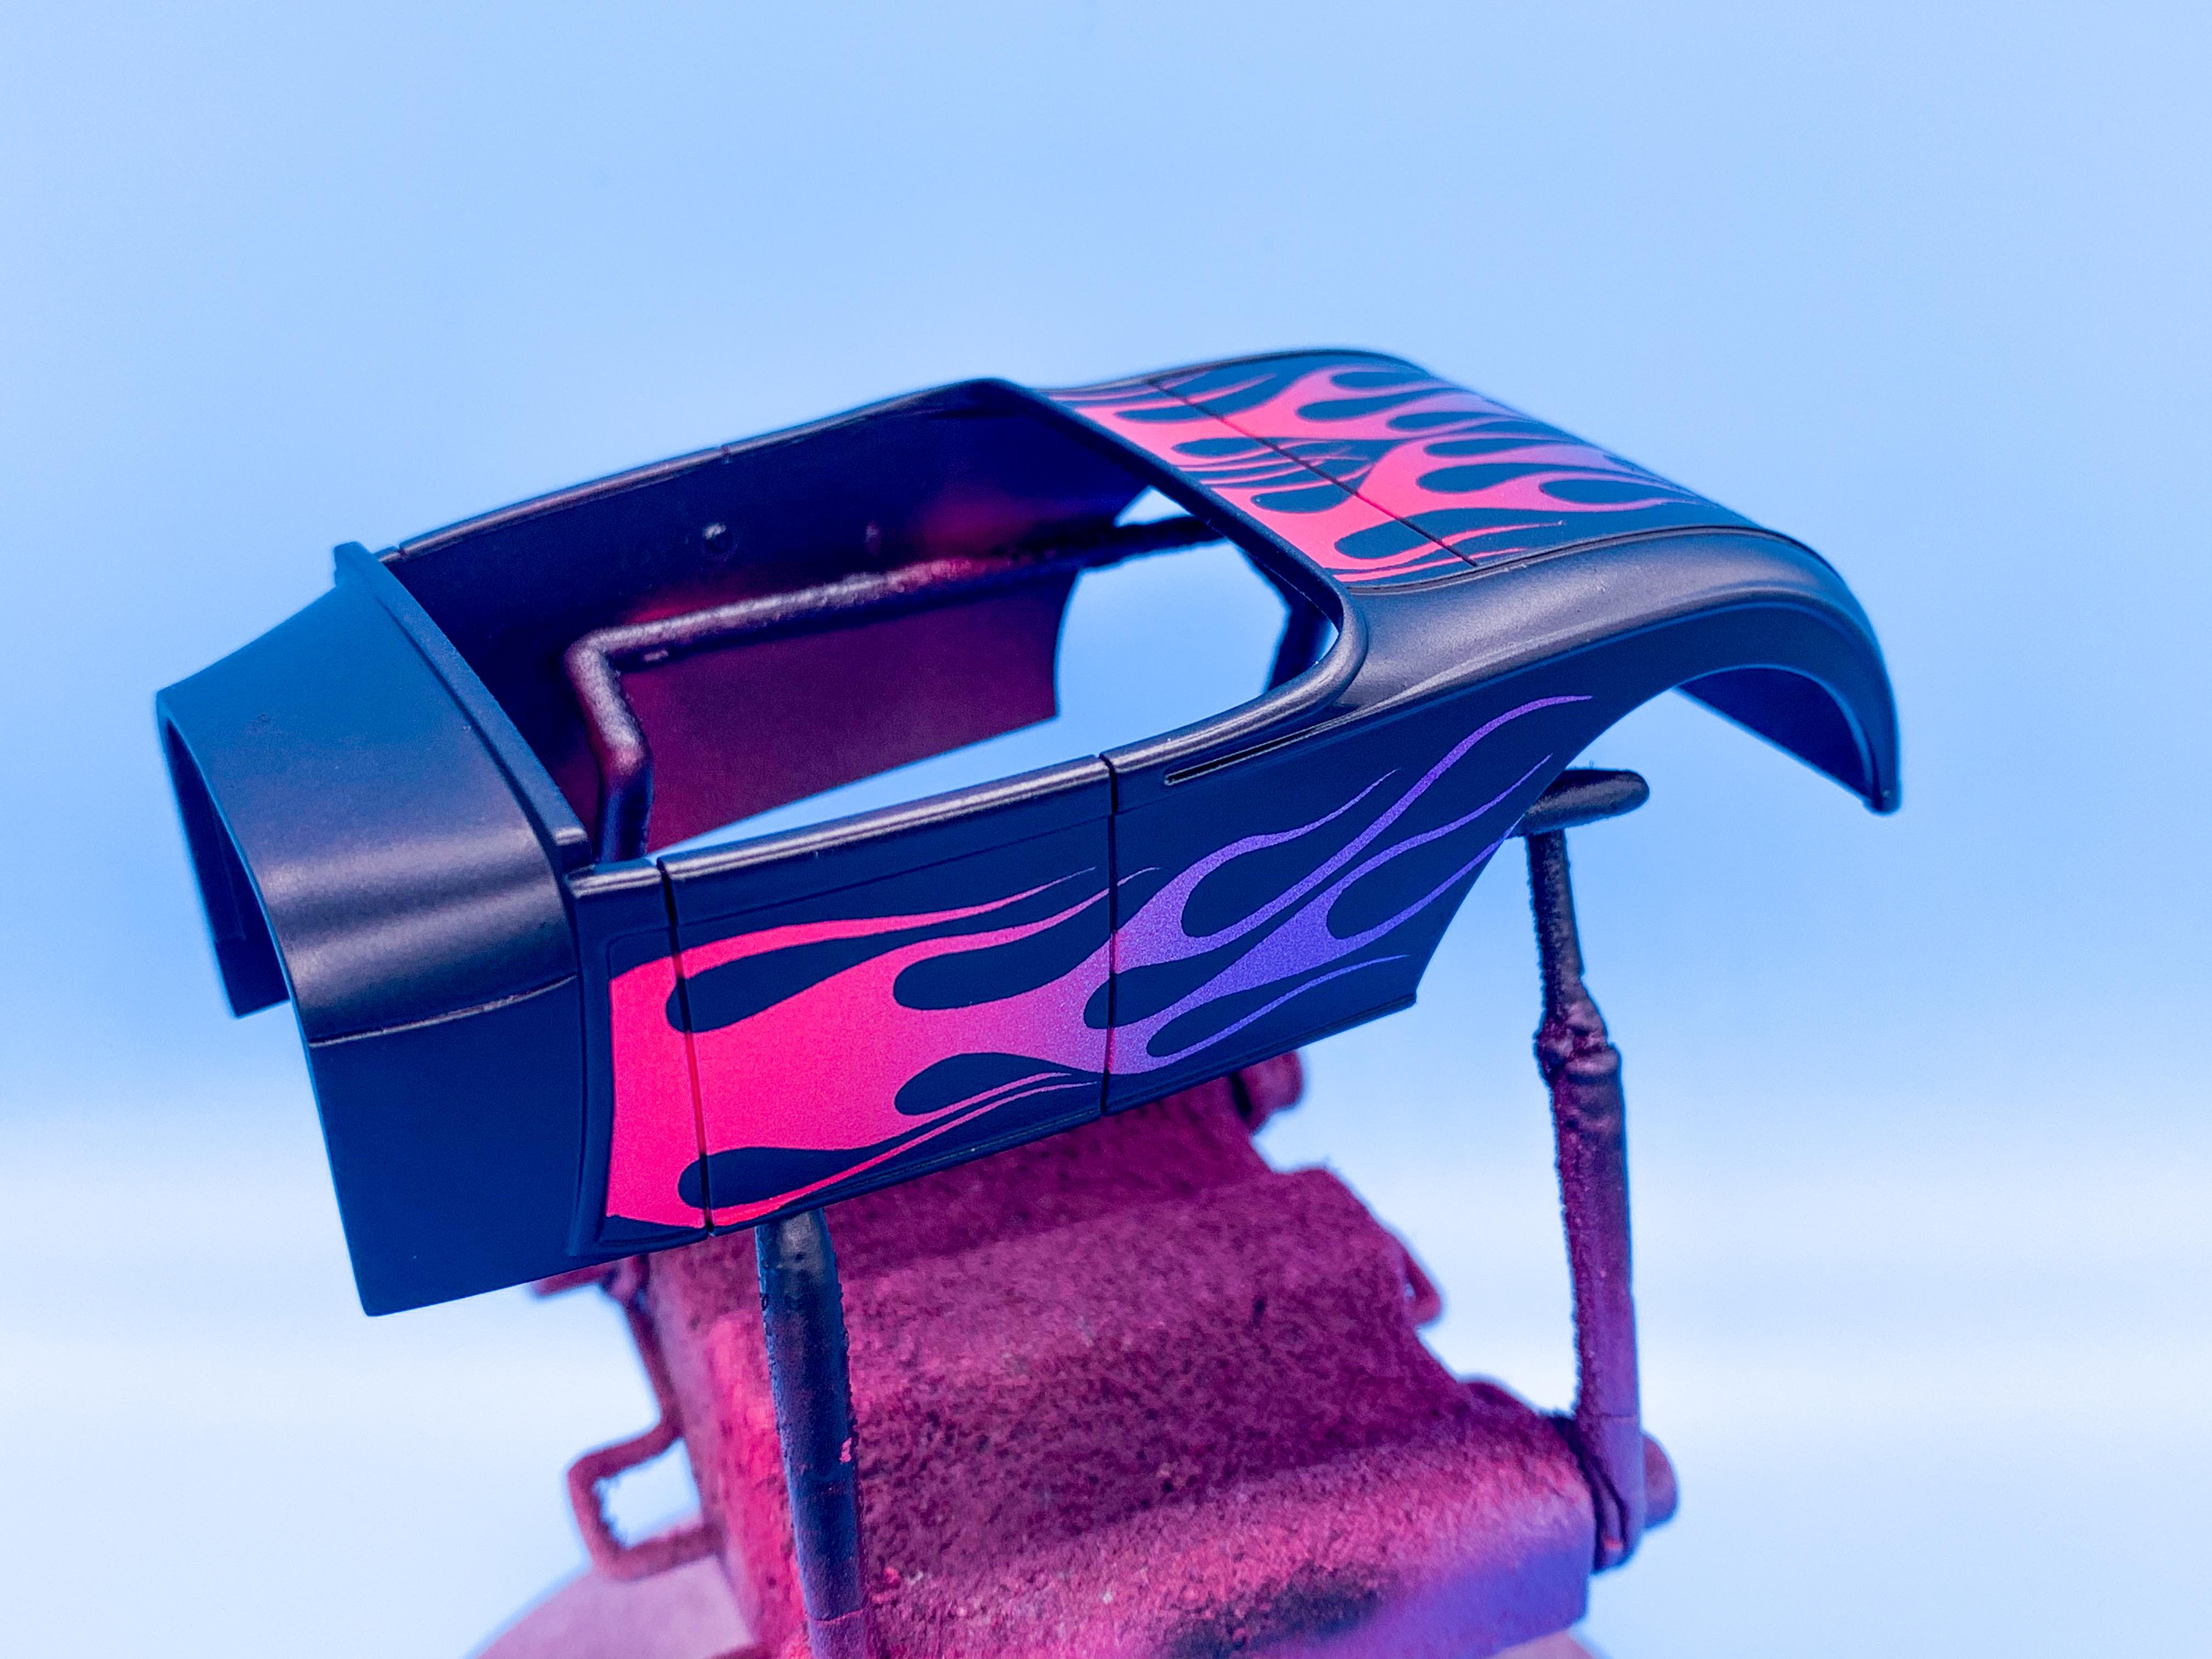
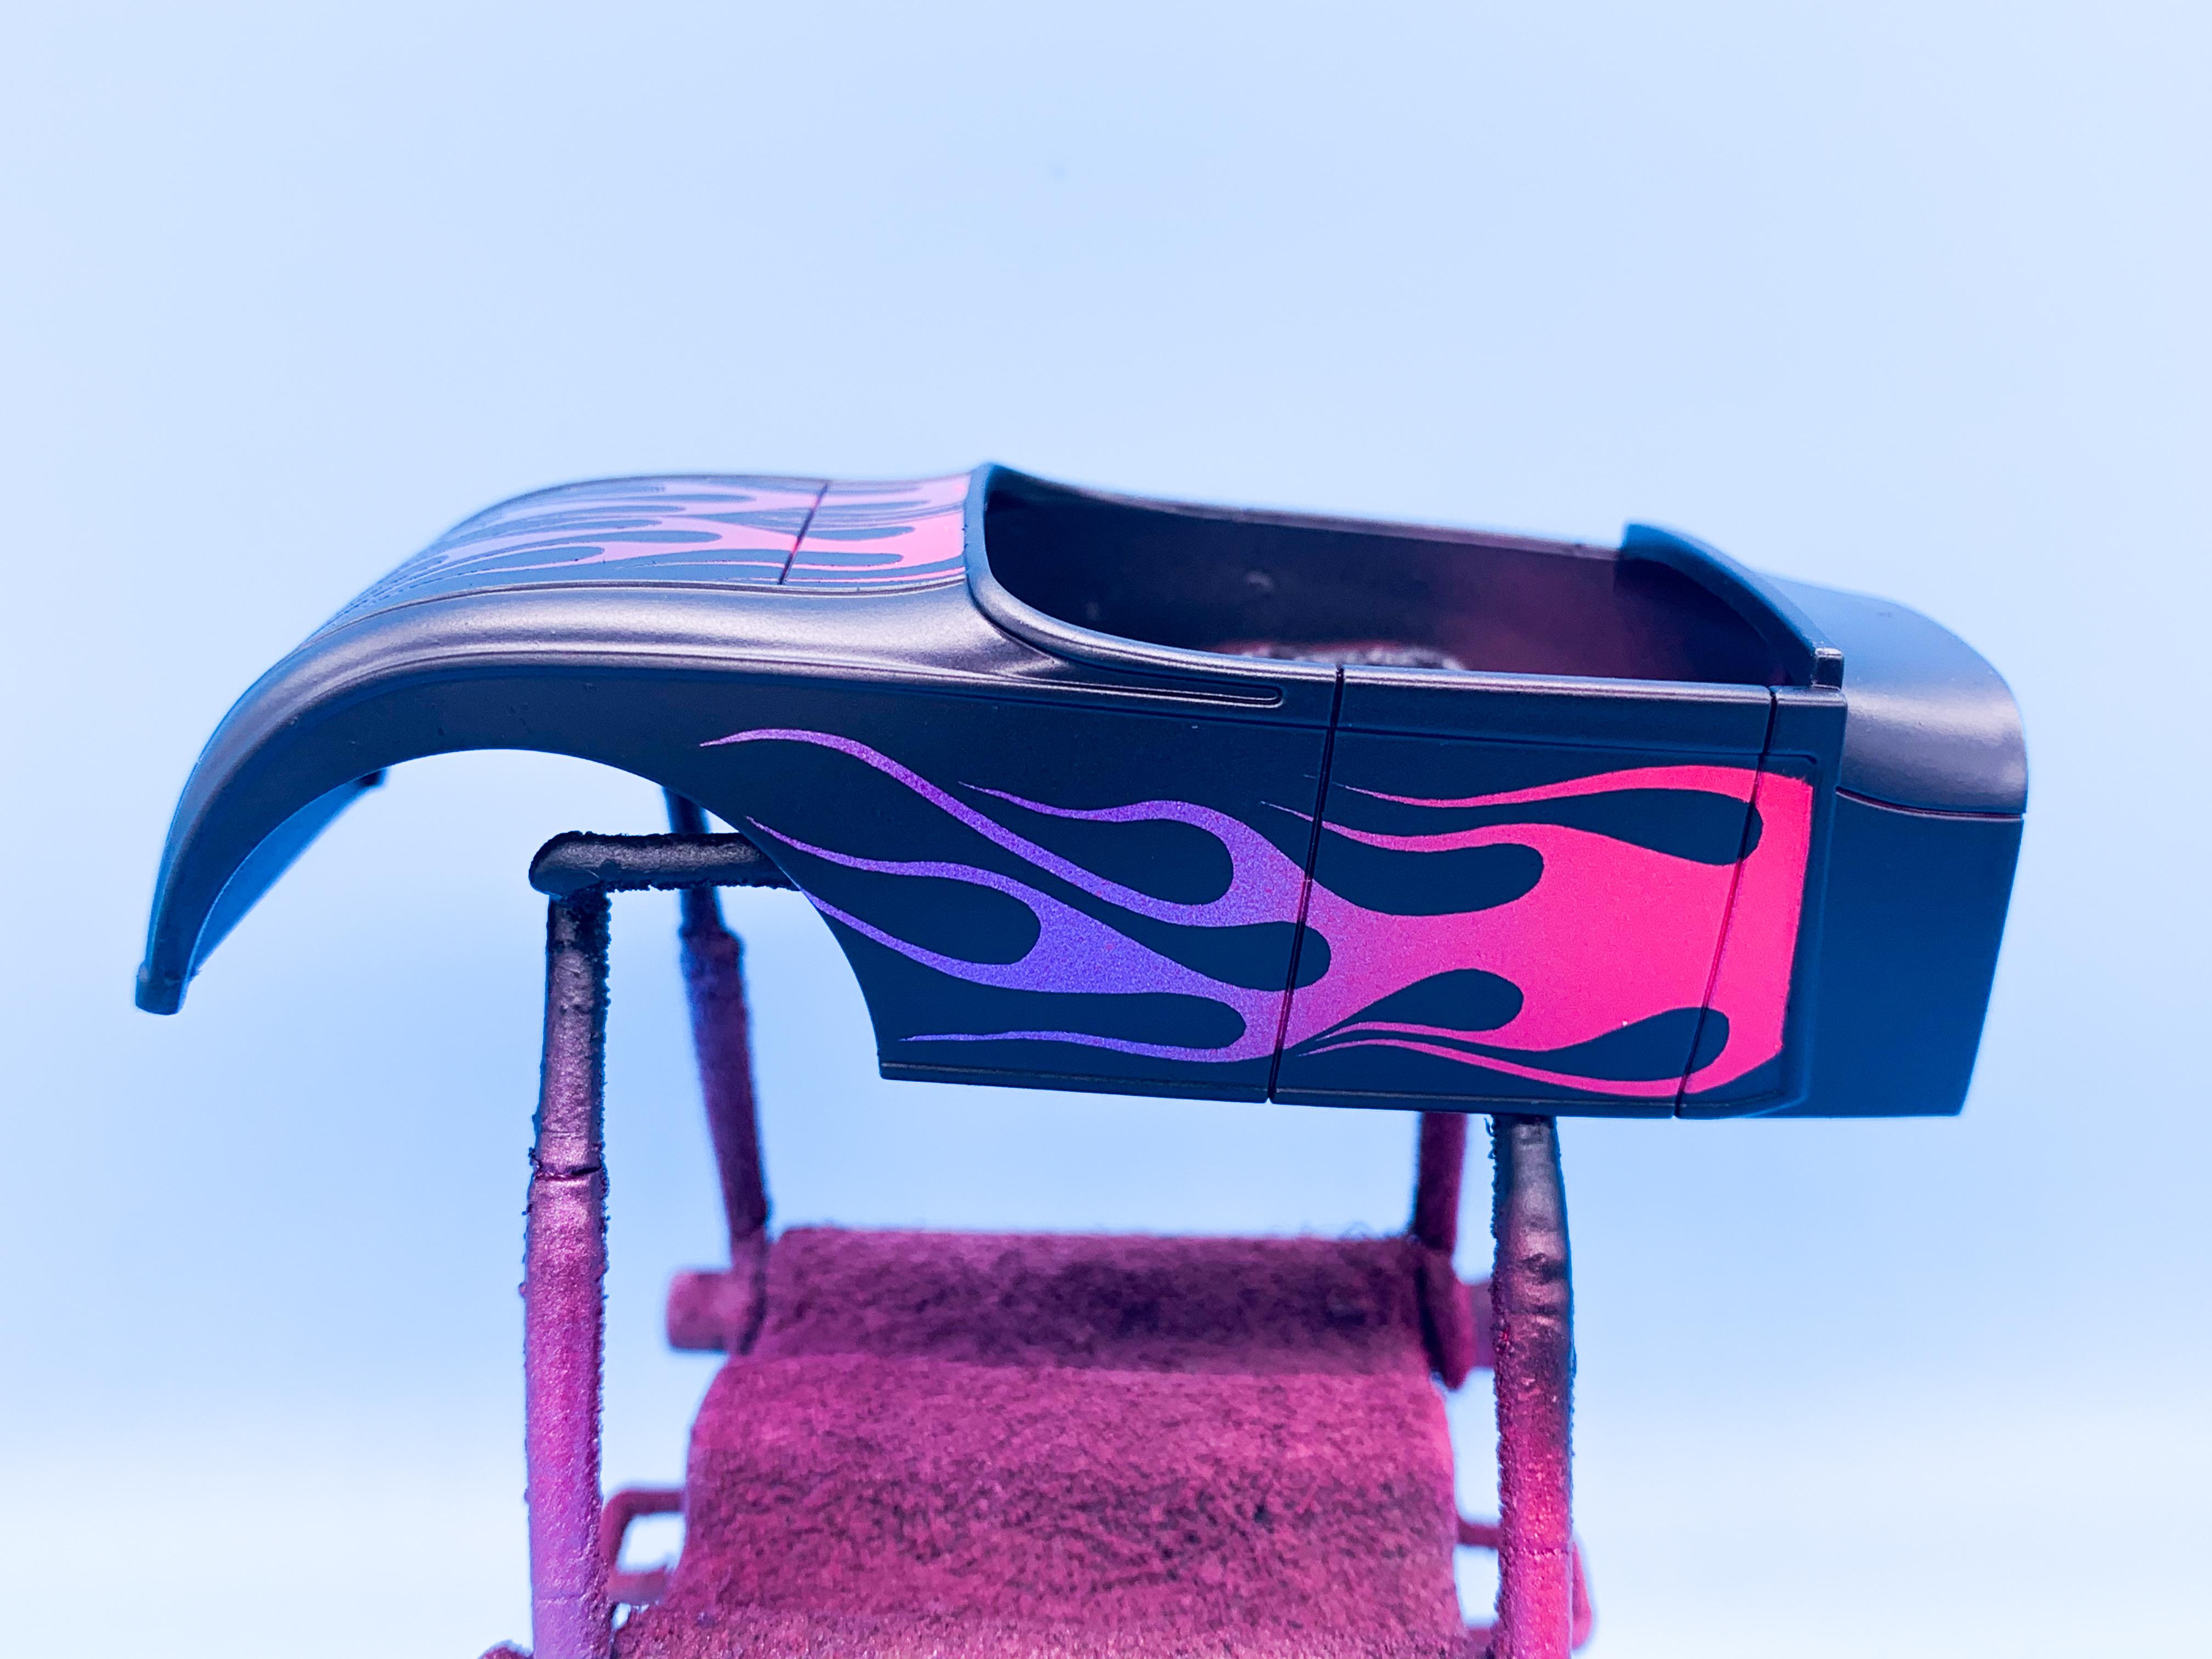
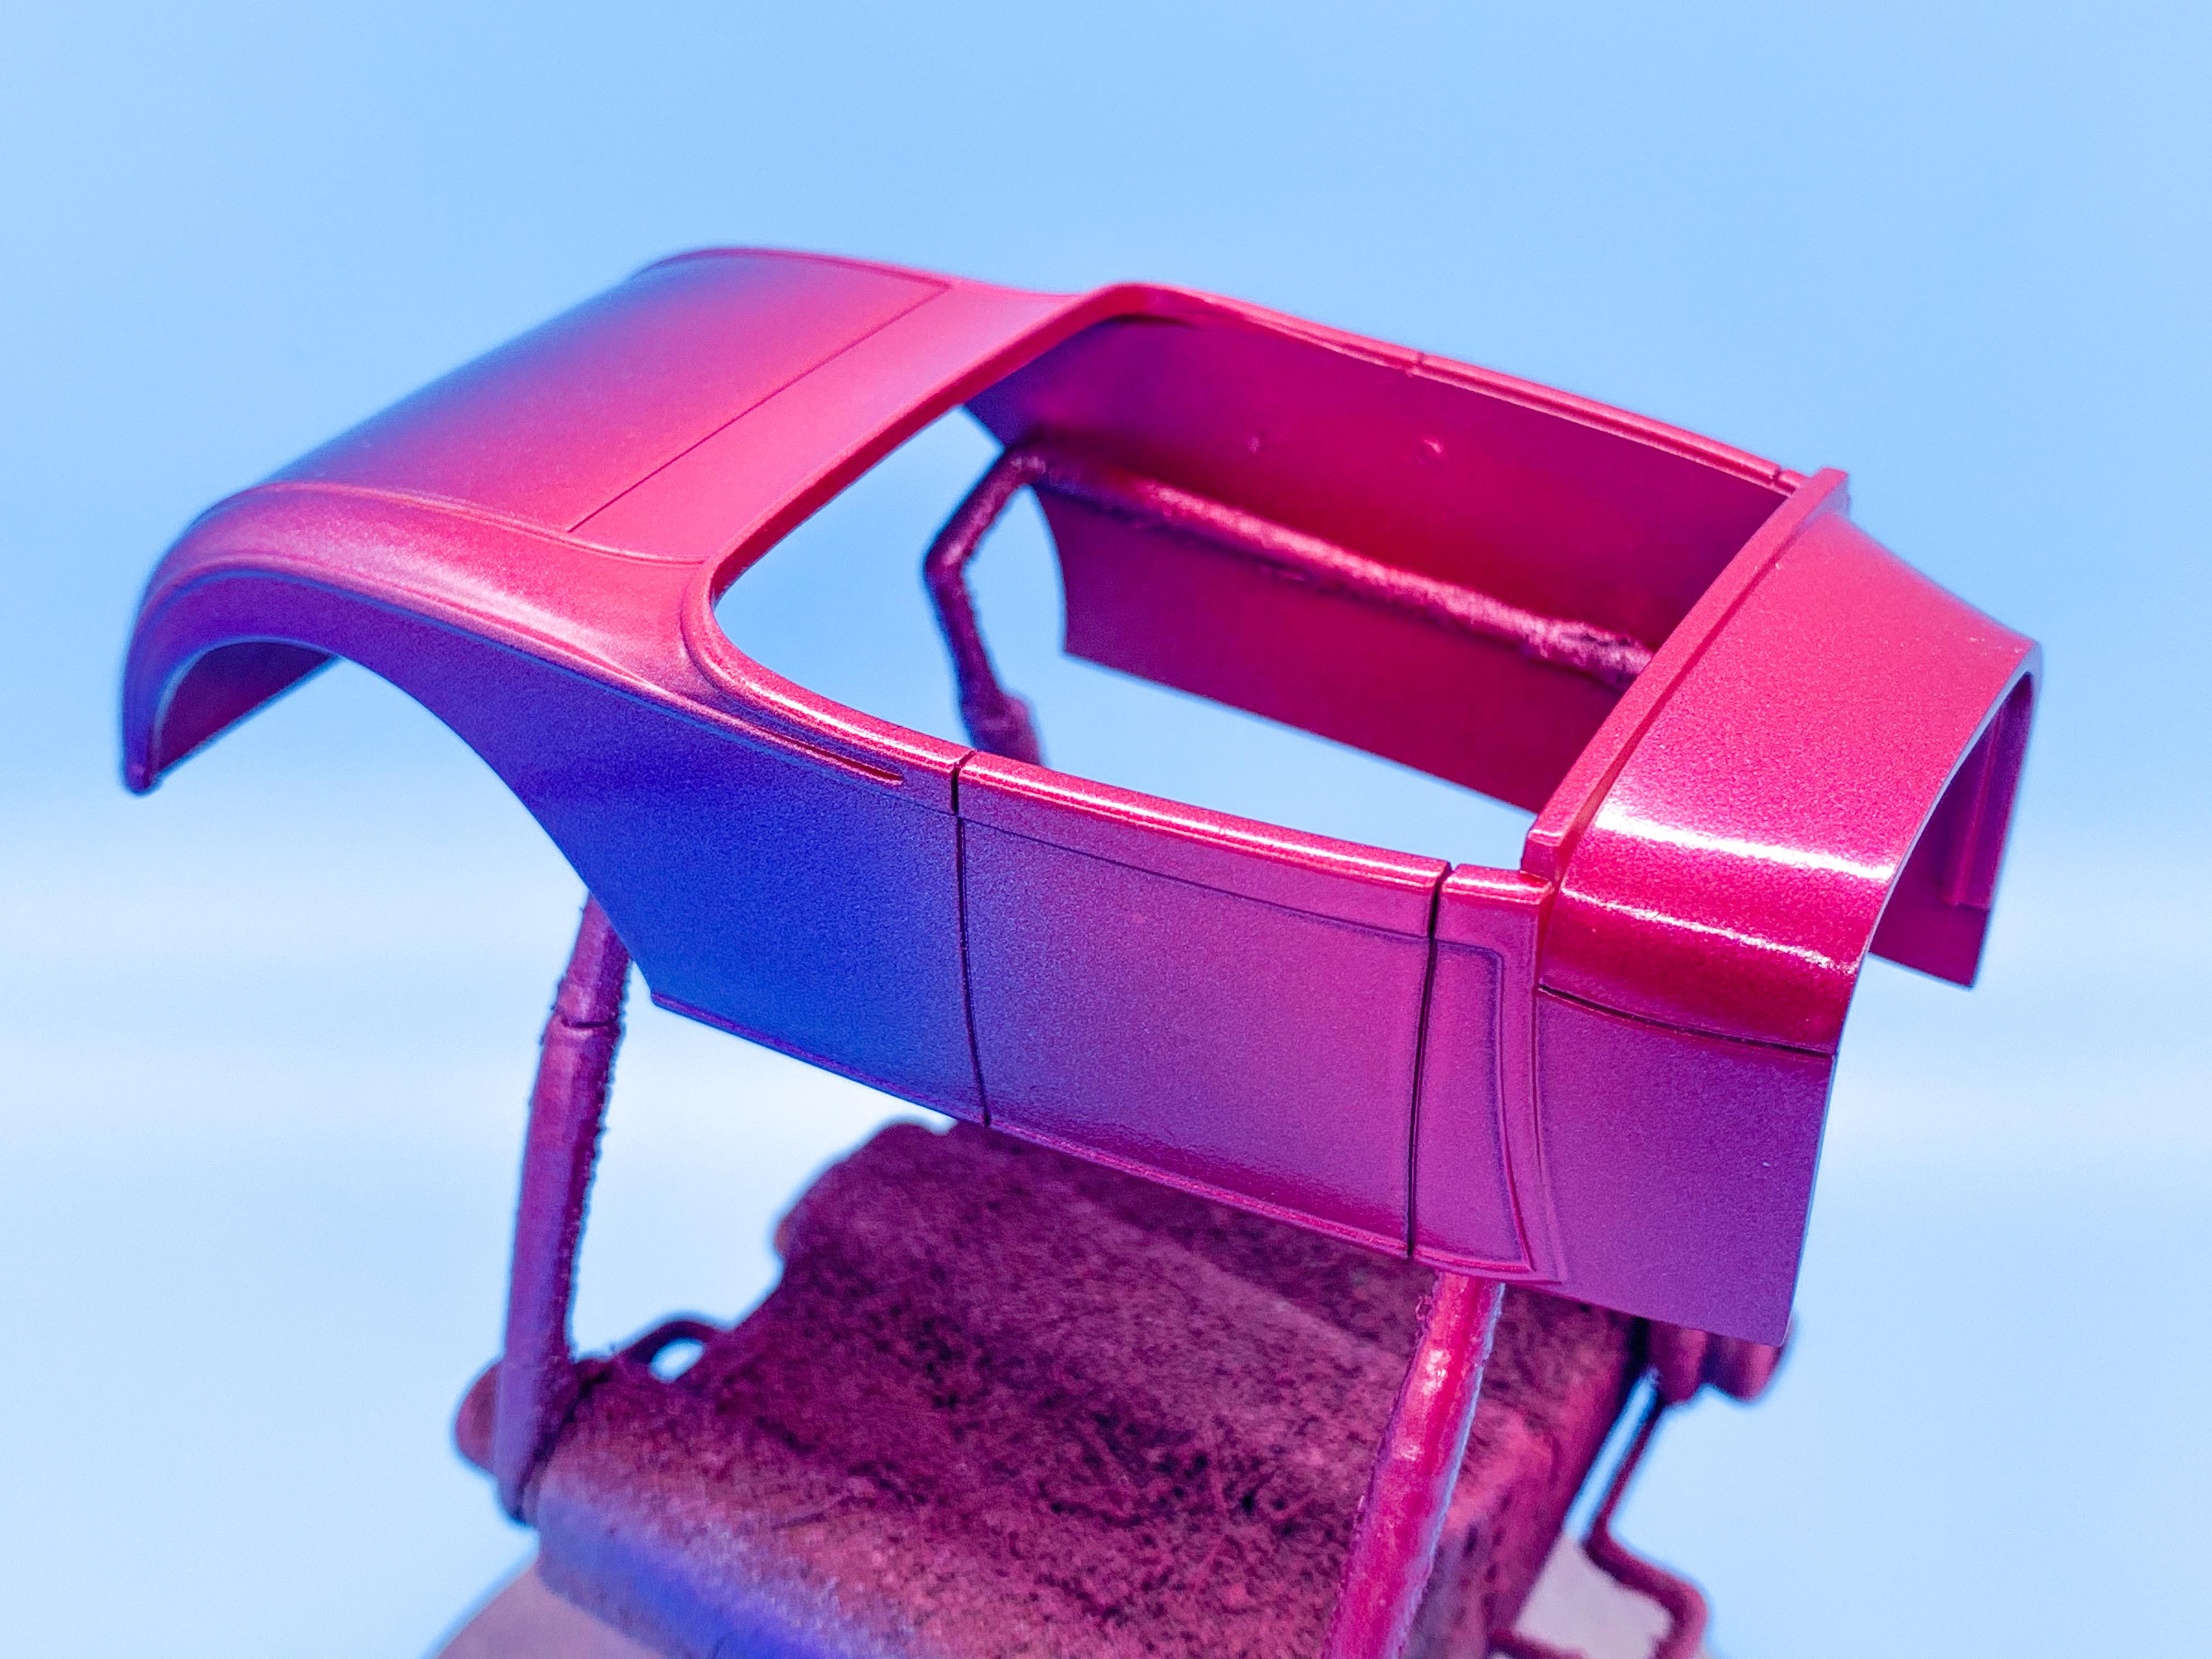
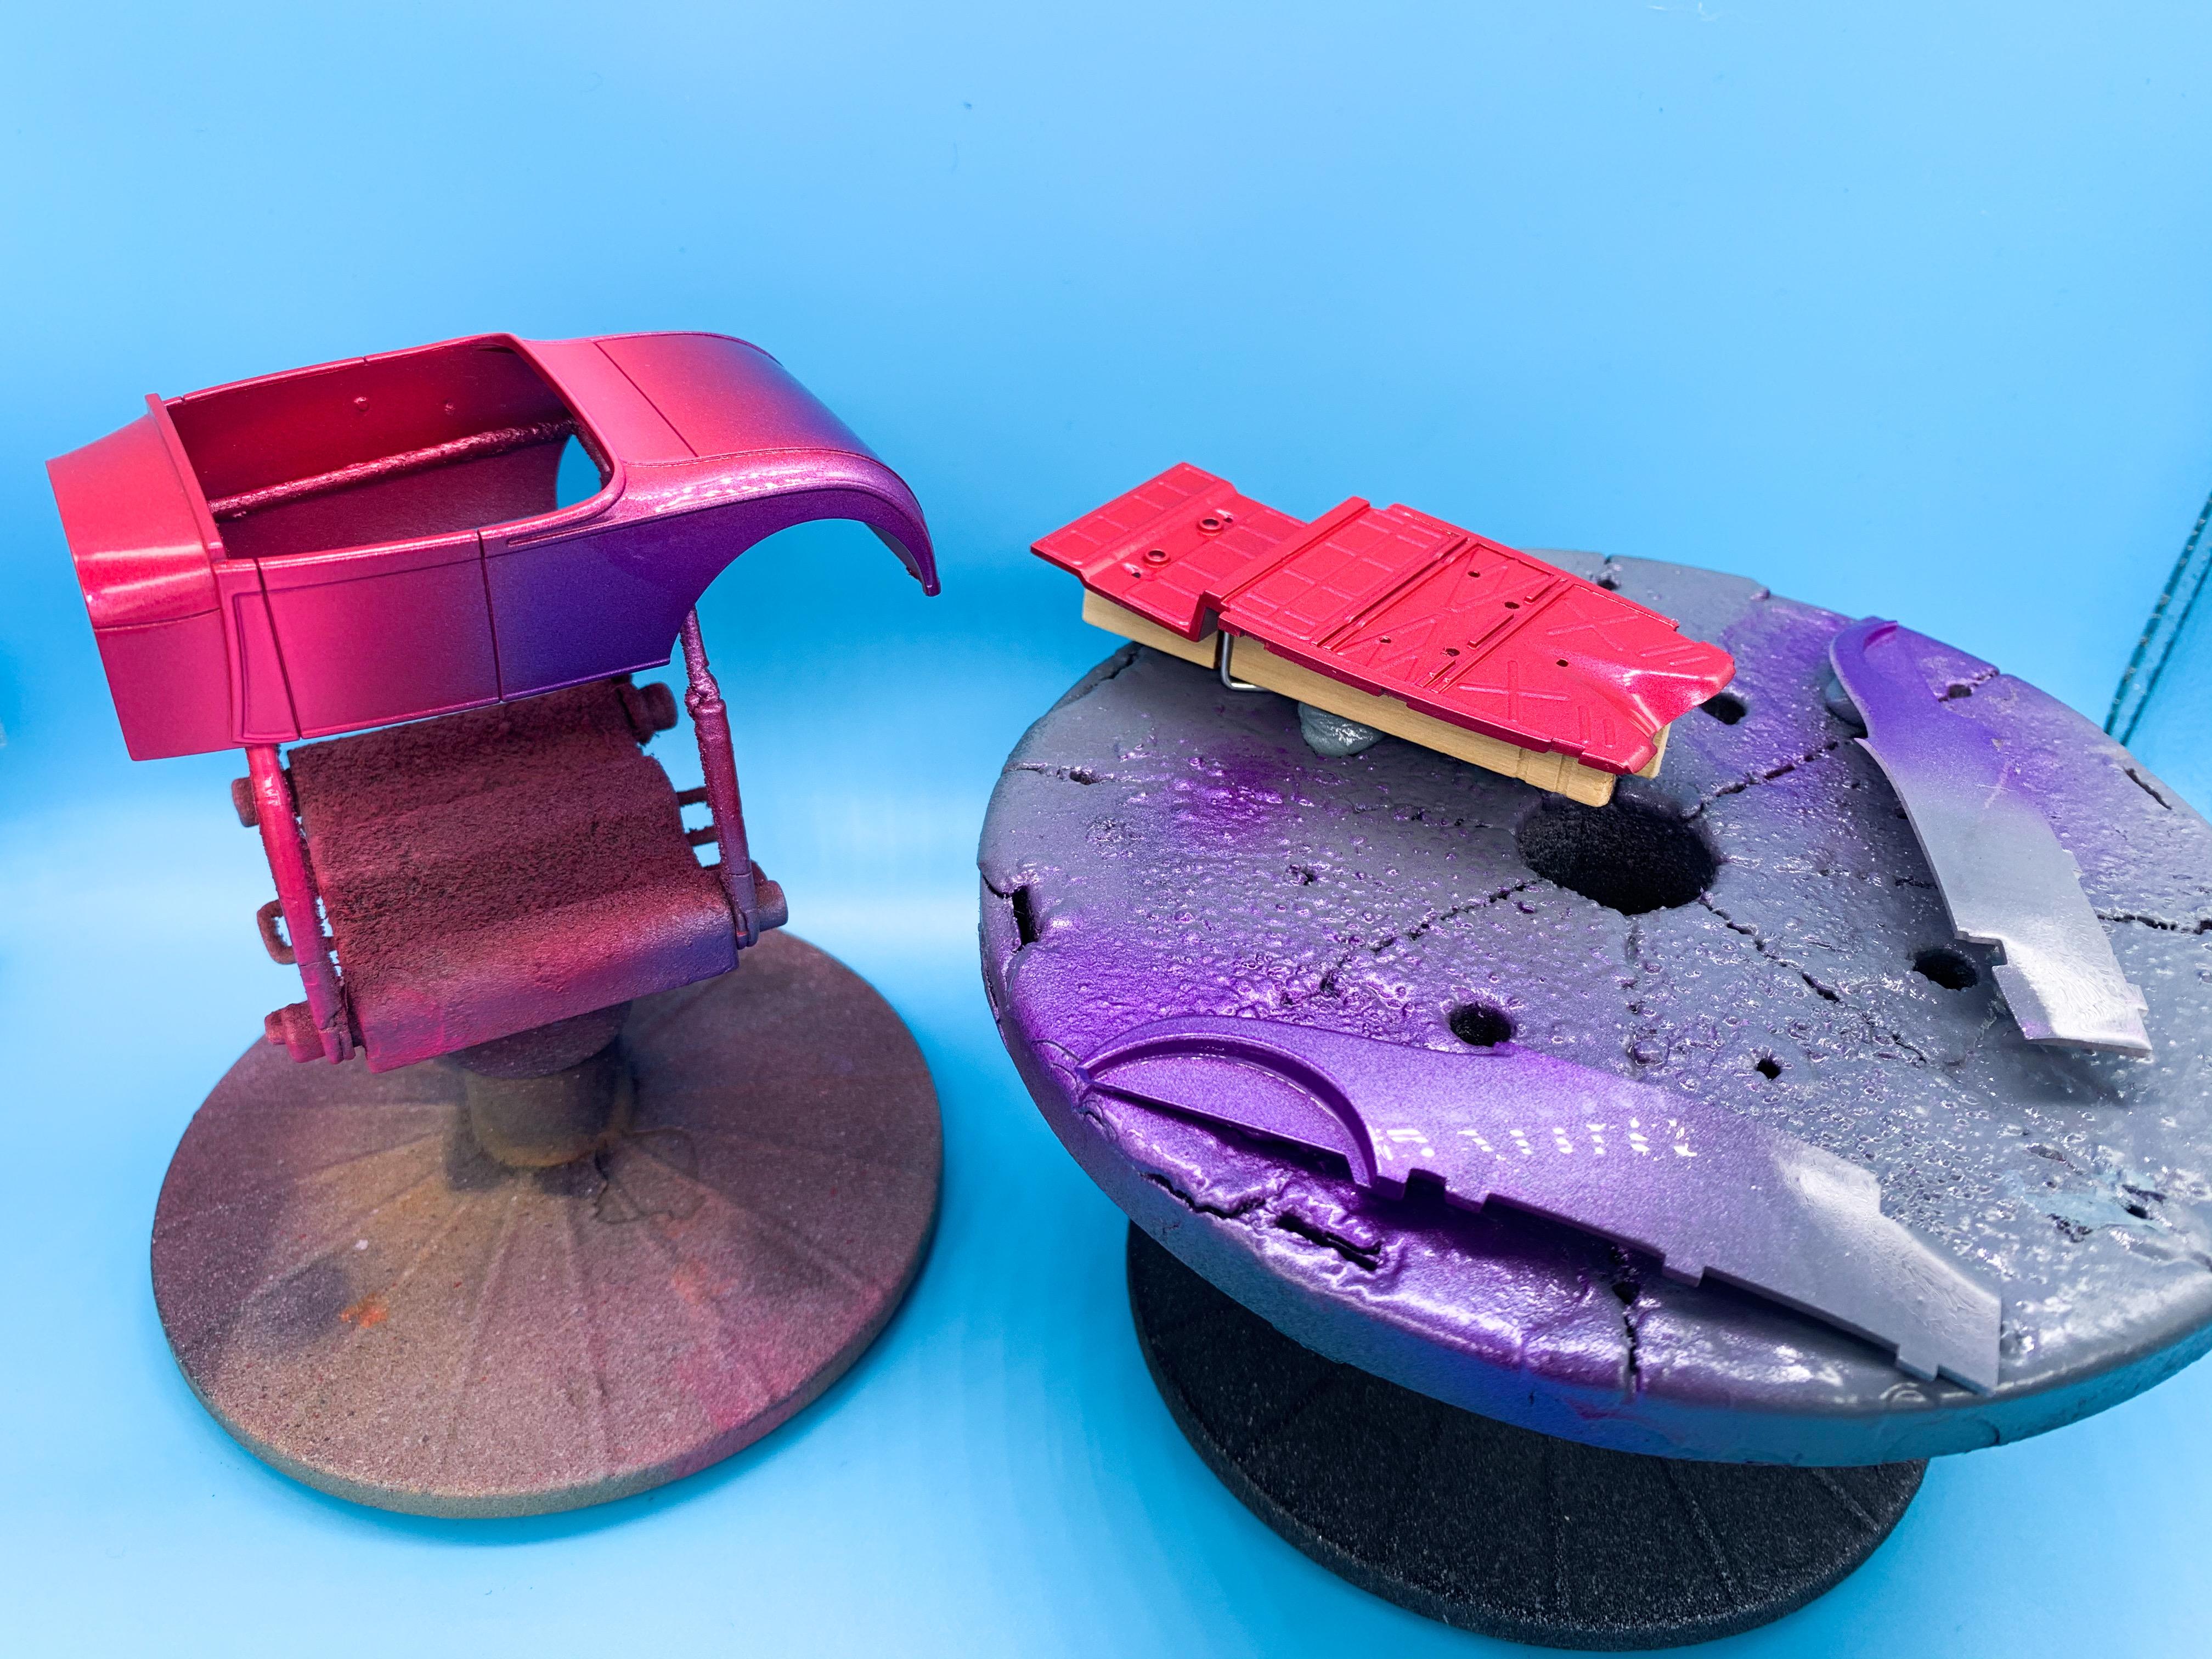
Thanks all! Hopefully the step-by-step was useful I forgot to post the inner fenders earlier - these will barely be visible on the finished car, but I gave them their own flames too just in case anyone were to ever peek behind the brakes to see if anything’s back there: This angle of the body really shows how much that red portion changes color with the Pearl overlay if you compare to the pink flip you can see in the previous set of pics - I love it! Beacuse I can’t help from rotating the paint stand round I figured I should get a coat of clear on there before I ruin something by playing with it...more soon!
-
I was really excited to do this next bit...the flames! Took three tries to get some flames I was happy with, but got there eventually - cut some masks on my Silhouette and laid them down over the paint I shot yesterday: And then shot black (and crossed my fingers that I didn’t ruin it somehow...) Then a half hour of careful de-masking later.... I need to seal them in some clear next to protect the black - the humidity’s REALLY high here this week so it’s not an ideal time to shoot the ‘real’ clear coats but I’ll put a barrier coat of Future over the whole thing to stop any damage in the meantime. More soon!
-
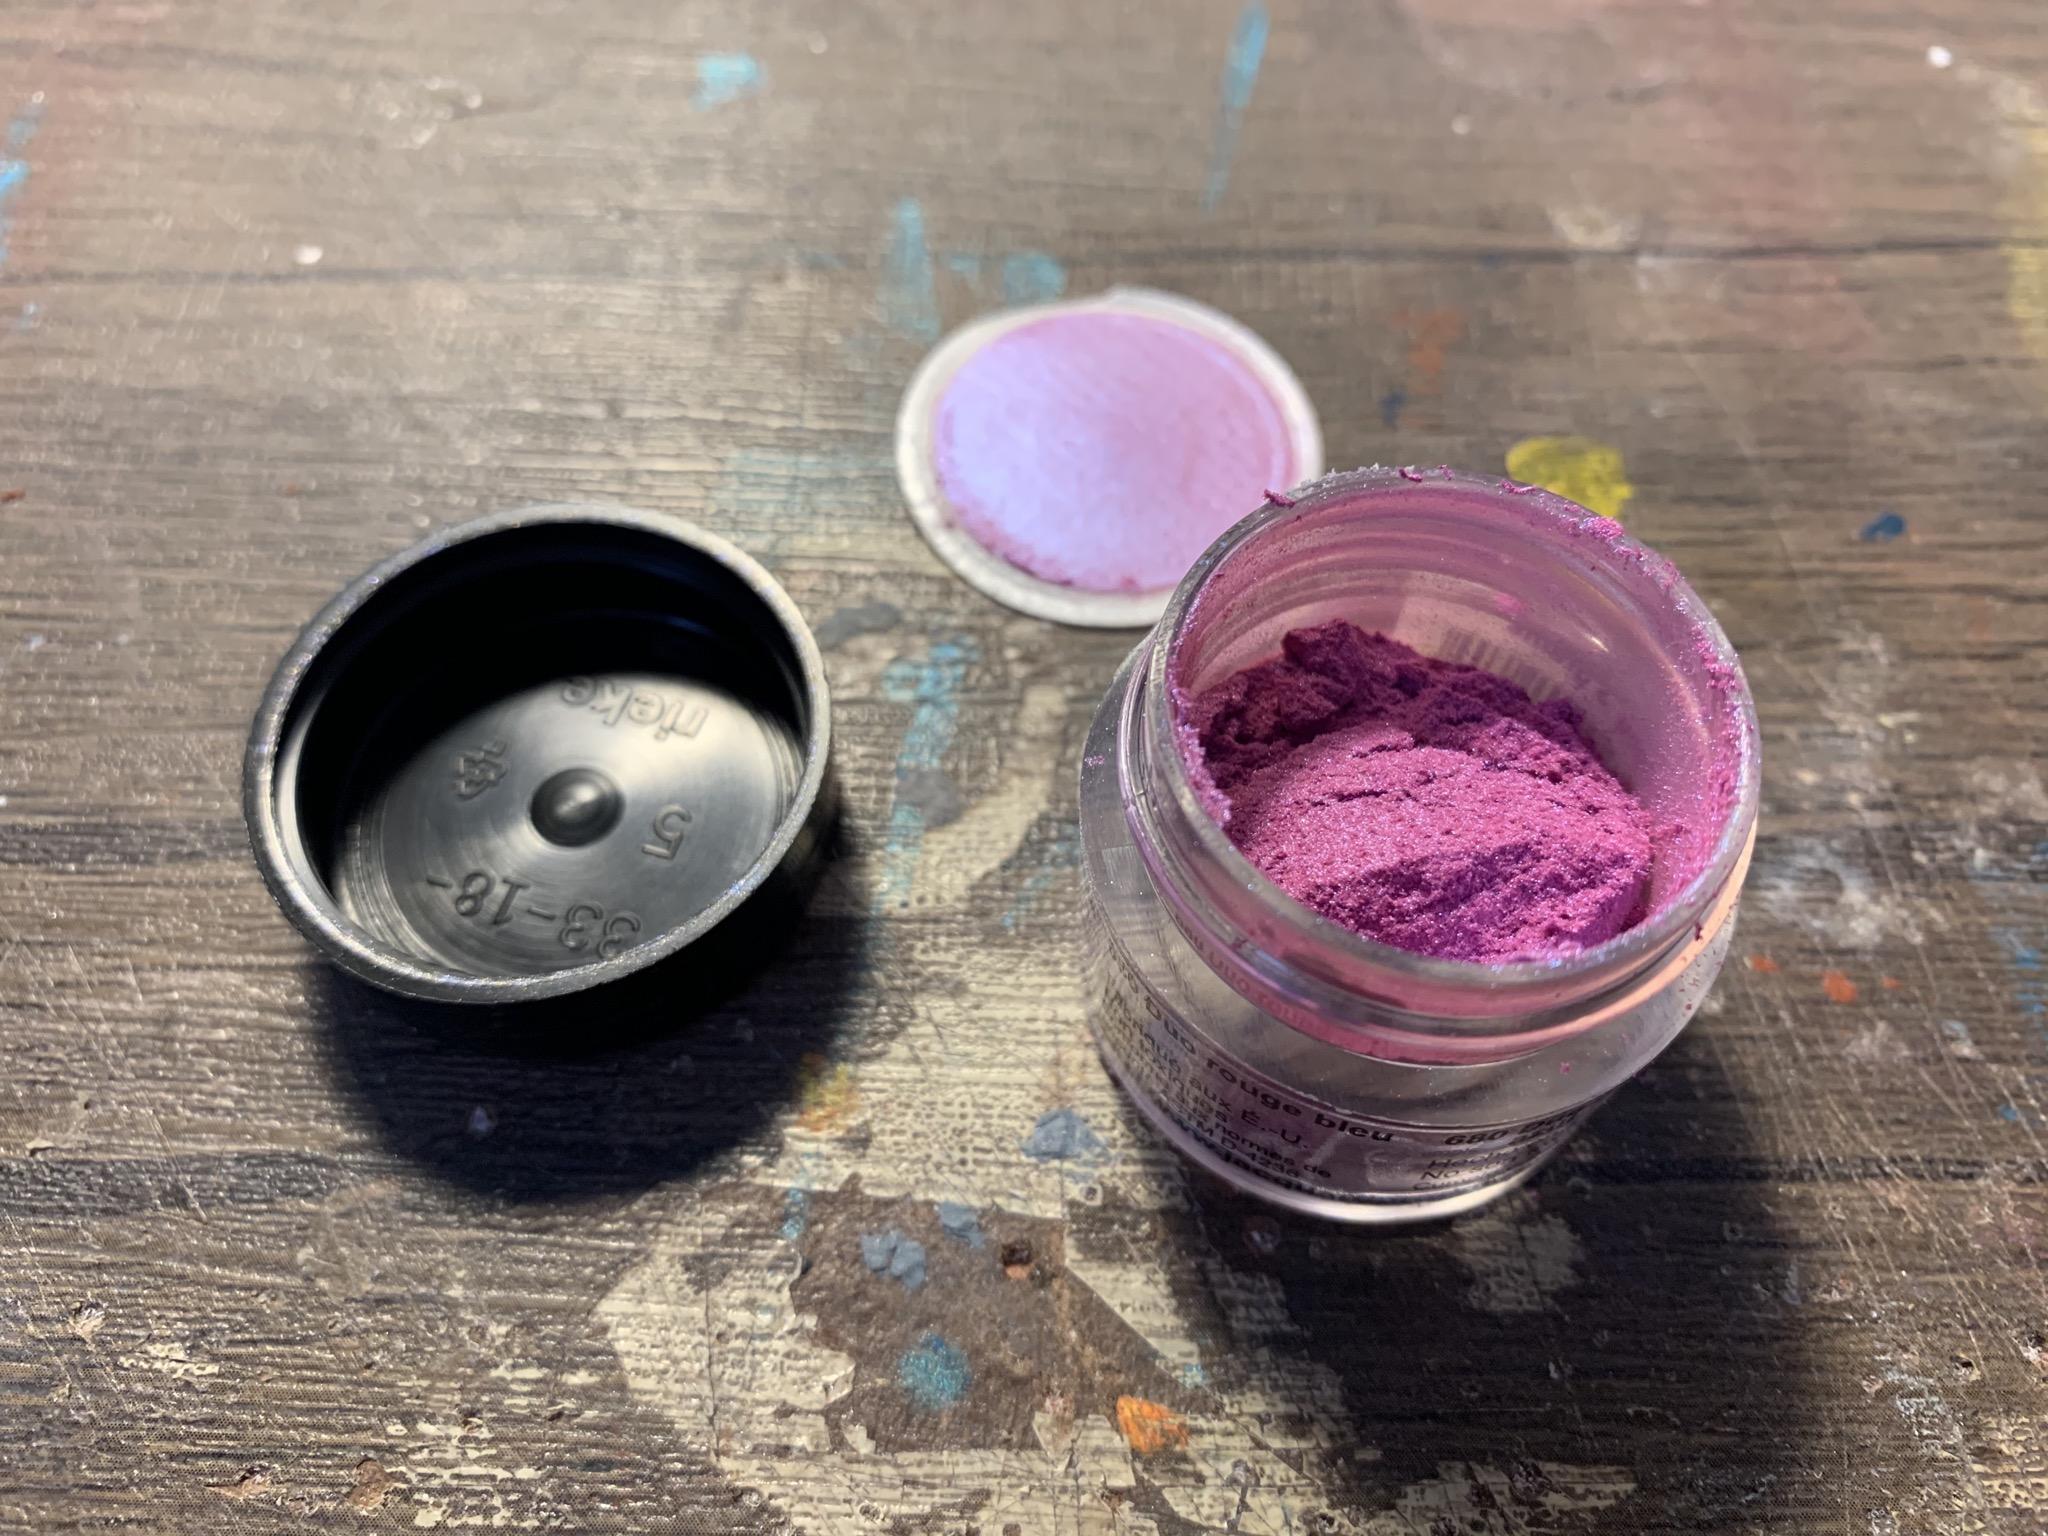
Thanks buddy! The thing that used to hold me up a lot on builds was waiting for the clear to set-up properly on the body before I can polish it out, so I’ve started the habit of doing the body first and then letting it sit for three weeks before doing the next part. The Testors gloss enamel I’ve started using dries to a touch in a day or two but you can’t get a REALLY nice shine unless you really let it set up right (or use a dehydrator, which I don’t have...) So, I get to do the fun bit first! I wanted to have this thing black with some pearl red-into-pearl-purple flames. Rather than paint it black and then try and layer enough paint up over that to get vibrant colors for the graphics, I’m going to do it backwards - bright colors first then mask the flames and hit the rest with black. Picked some colors out... First up, pearl red: Then the fade into pearl purple: Then a little thinned-down neon pink just to add a little fade to a lighter color at the ‘front’ of where the flames will go: I’ve been wanting to play with my new PearlEx set and this seemed like a good place to use it (like it’s not ridiculous enough already), so I mixed up a clear coat with their red-blue flip pearl and shot three coats of that, followed by a couple of coats of clear plus their bright pink powder. After letting that set up I shot it with a barrier coat of Future so I can mask over the top of it tomorrow and not have to worry about damaging the paint or pearl coats: Got some nice flip-flops going on there, especially coupled with the fades too - I like how from the angle in the pic above the first pearl coats are giving some red and blue highlights over the base colors, and then on the top surfaces the pink starts to come through. Of course, when I lay down the masks for the flames and shoot them almost all of that paint will be covered anyway and you’ll never see it again, but hopefully we’ll get some really cool color-flipping flames out of all this! More tomorrow!
-
Epic Ad Fail, eBay...
OldNYJim replied to Mike999's topic in General Automotive Talk (Trucks and Cars)
Epic post dude! ???? -
Boyd Coddington´s famous cars...
OldNYJim replied to Drago's topic in General Automotive Talk (Trucks and Cars)
Haha, as I posted that I thought “actually, they might well have been in the same room at one point!” Still, it made me chuckle to see that listing though - the OTHER famous Boyd! -
Outstanding news! Which project will be getting your attention? Always enjoy seeing your work Ace!
-
Current Hot Rod / Street Rod trends
OldNYJim replied to OldNYJim's topic in General Automotive Talk (Trucks and Cars)
Haha, the word that rhymes with ‘stick’ that begins with a ‘p’ is censored huh? Ok, “perk up it’s ears” then ?♂️? -
Current Hot Rod / Street Rod trends
OldNYJim replied to OldNYJim's topic in General Automotive Talk (Trucks and Cars)
Not following trends is the new trend! ?. I read something once that said something like “the internet lets anyone with an interest in the most obscure, weird, narrow subdivision of any possible subject or hobby find millions of other people just like them” I think that luxury that we have now makes it possible to build what you like without thinking “I don’t really have anyone to show this to who will GET it”. Not that I worried too much about that anyway, but it’s cool that even if I build the most hideously dated and unfashionable thing I can imagine someone will say “I LOVE it! I’m gonna build one just like it!” All that said, I wonder what the next big trend in hot rodding will be? Something will happen in 1:1 sometime and then, like rat rods and TRoGsters and street rods and custom vans and whatever else before them will make the modelling community BLAH_BLAH_BLAH_BLAH up it’s ears and start to build stuff to replicate the cool full-sized stuff that has gripped their imagination. -
That’s SUPER helpful, thanks buddy! Exactly what I needed! I really appreciate you taking the effort to help me out there! Huh! Interesting!! I ordered a kit today knowing that they’ll work for what I’m looking for, and I knew I could cast the wheels once I modified them to my liking but I’ve never cast tires before...good to know that I might be able to raid my spares stash if I need to, or just get the Flintstone ones and save myself the trouble! Appreciate the info!!
-
Current Hot Rod / Street Rod trends
OldNYJim replied to OldNYJim's topic in General Automotive Talk (Trucks and Cars)
Man, I’m gonna have the coolest streetrod from 2004 with this babies ???
-
Current Hot Rod / Street Rod trends
OldNYJim replied to OldNYJim's topic in General Automotive Talk (Trucks and Cars)
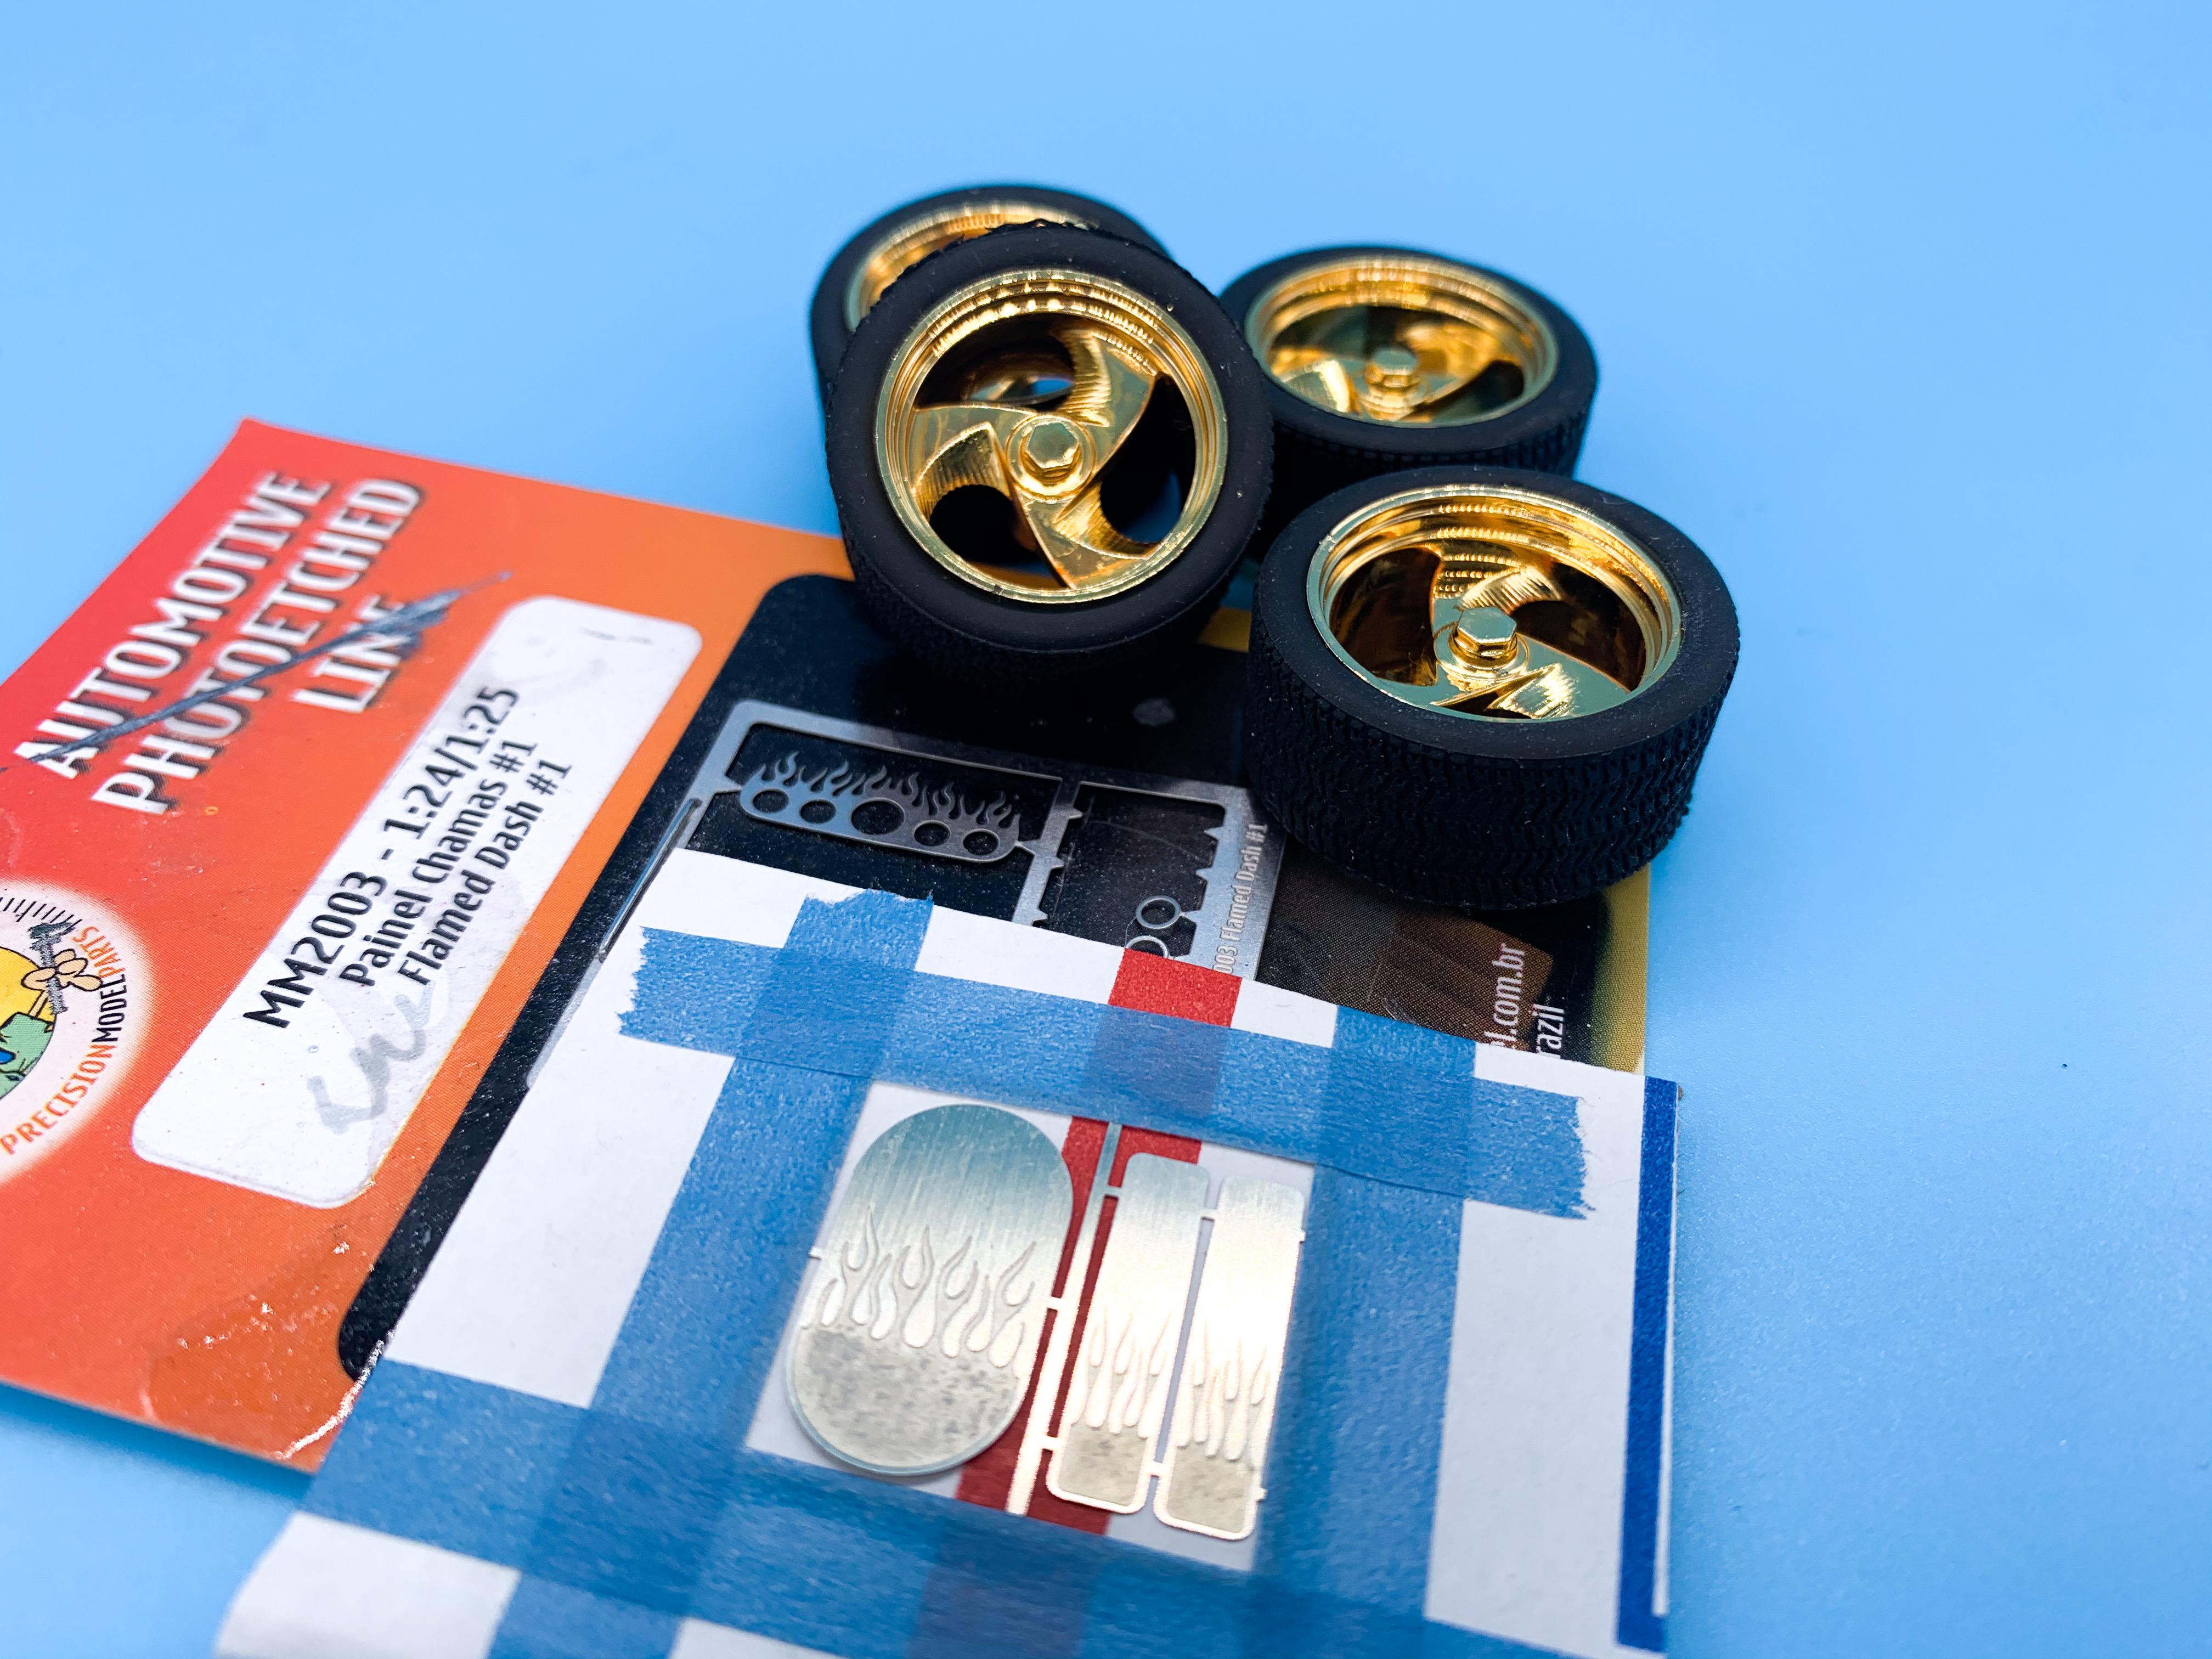
I love following the GNRS coverage every year - so much beautiful craftsmanship! I guess you’re right - if you’re competing for arguably the biggest prize in hot rodding then you’re at the cutting edge! Lots of muted colors the last couple of years, I’ve noticed - and the traditional builds are just as perfectly-period-correct as you’d expect. I’m sure the pastel and billet will come around again soon enough - I listen to the radio and hear a bunch of stuff that sounds like the 80s and 80s ‘cool’ seems to be back in right now...so I guess in a few years we’ll be in the nineties again! ?. I should build a pastel green street rod and be EARLY with a trend for a change ?? Funny thing that prompted this query - I’ve got some photoetched flamed dash parts and flamed valve covers and flamed air intakes here, plus a bunch of 3 spoke wheels and other out-of-fashion stuff that I’ve been saving for YEARS (possibly decades) to use on a ‘modern’ build...and now I’m finally thinking of using them on the project I had in mind I think it’ll end up being retro ?. -
So, I’ll be the first to admit I don’t have my finger on the pulse too much when it comes to whatever the very latest and greatest trend is in, well, anything really...but I was thinking today that there hasn’t been a particular trend in hot rodding that has really taken off and captured people’s imagination (that I’ve noticed) for a few years now. The whole rat rod thing was obviously HUGE for a number of years, and probably still is, then The Race of Gentlemen thing seemed like it blew up and there were a lot of ‘TRoG’ builds popping up everywhere, in real AND scale. Street Rod wise, I’ve always been more of a traditional hot rod kinda guy but once Boyd passed away I can only think of Foose as someone who’s super well-known and and seemingly doing cool stuff, but his stuff isn’t super different (in my opinion) to what people have been doing for a number of years design wise. So, my own ignorance revealed, what big stuff am I missing out on that’s happening right now? I wanna catch up on the cutting edge here ?
-
As always, super helpful and knowledgable Bill - thank you! I’d like to do a more modern take (slightly anyway, in terms of wheels and paint) on this kit but didn’t want to inadvertently do the equivalent of an all-billet street rod with a stock Flathead in ? I really appreciate the info - thank you so much!
-
Question that someone might know the answer to - is the Small Block Chevy included in the kit based on a particular era or version at all? I’d like to do a little research and see what I can do to build these better than just box-stock but there’s SO MANY variants of the SBC it’s hard to know what to use as a reference. Any ideas on year/version/specific parts that are in the kit?
-
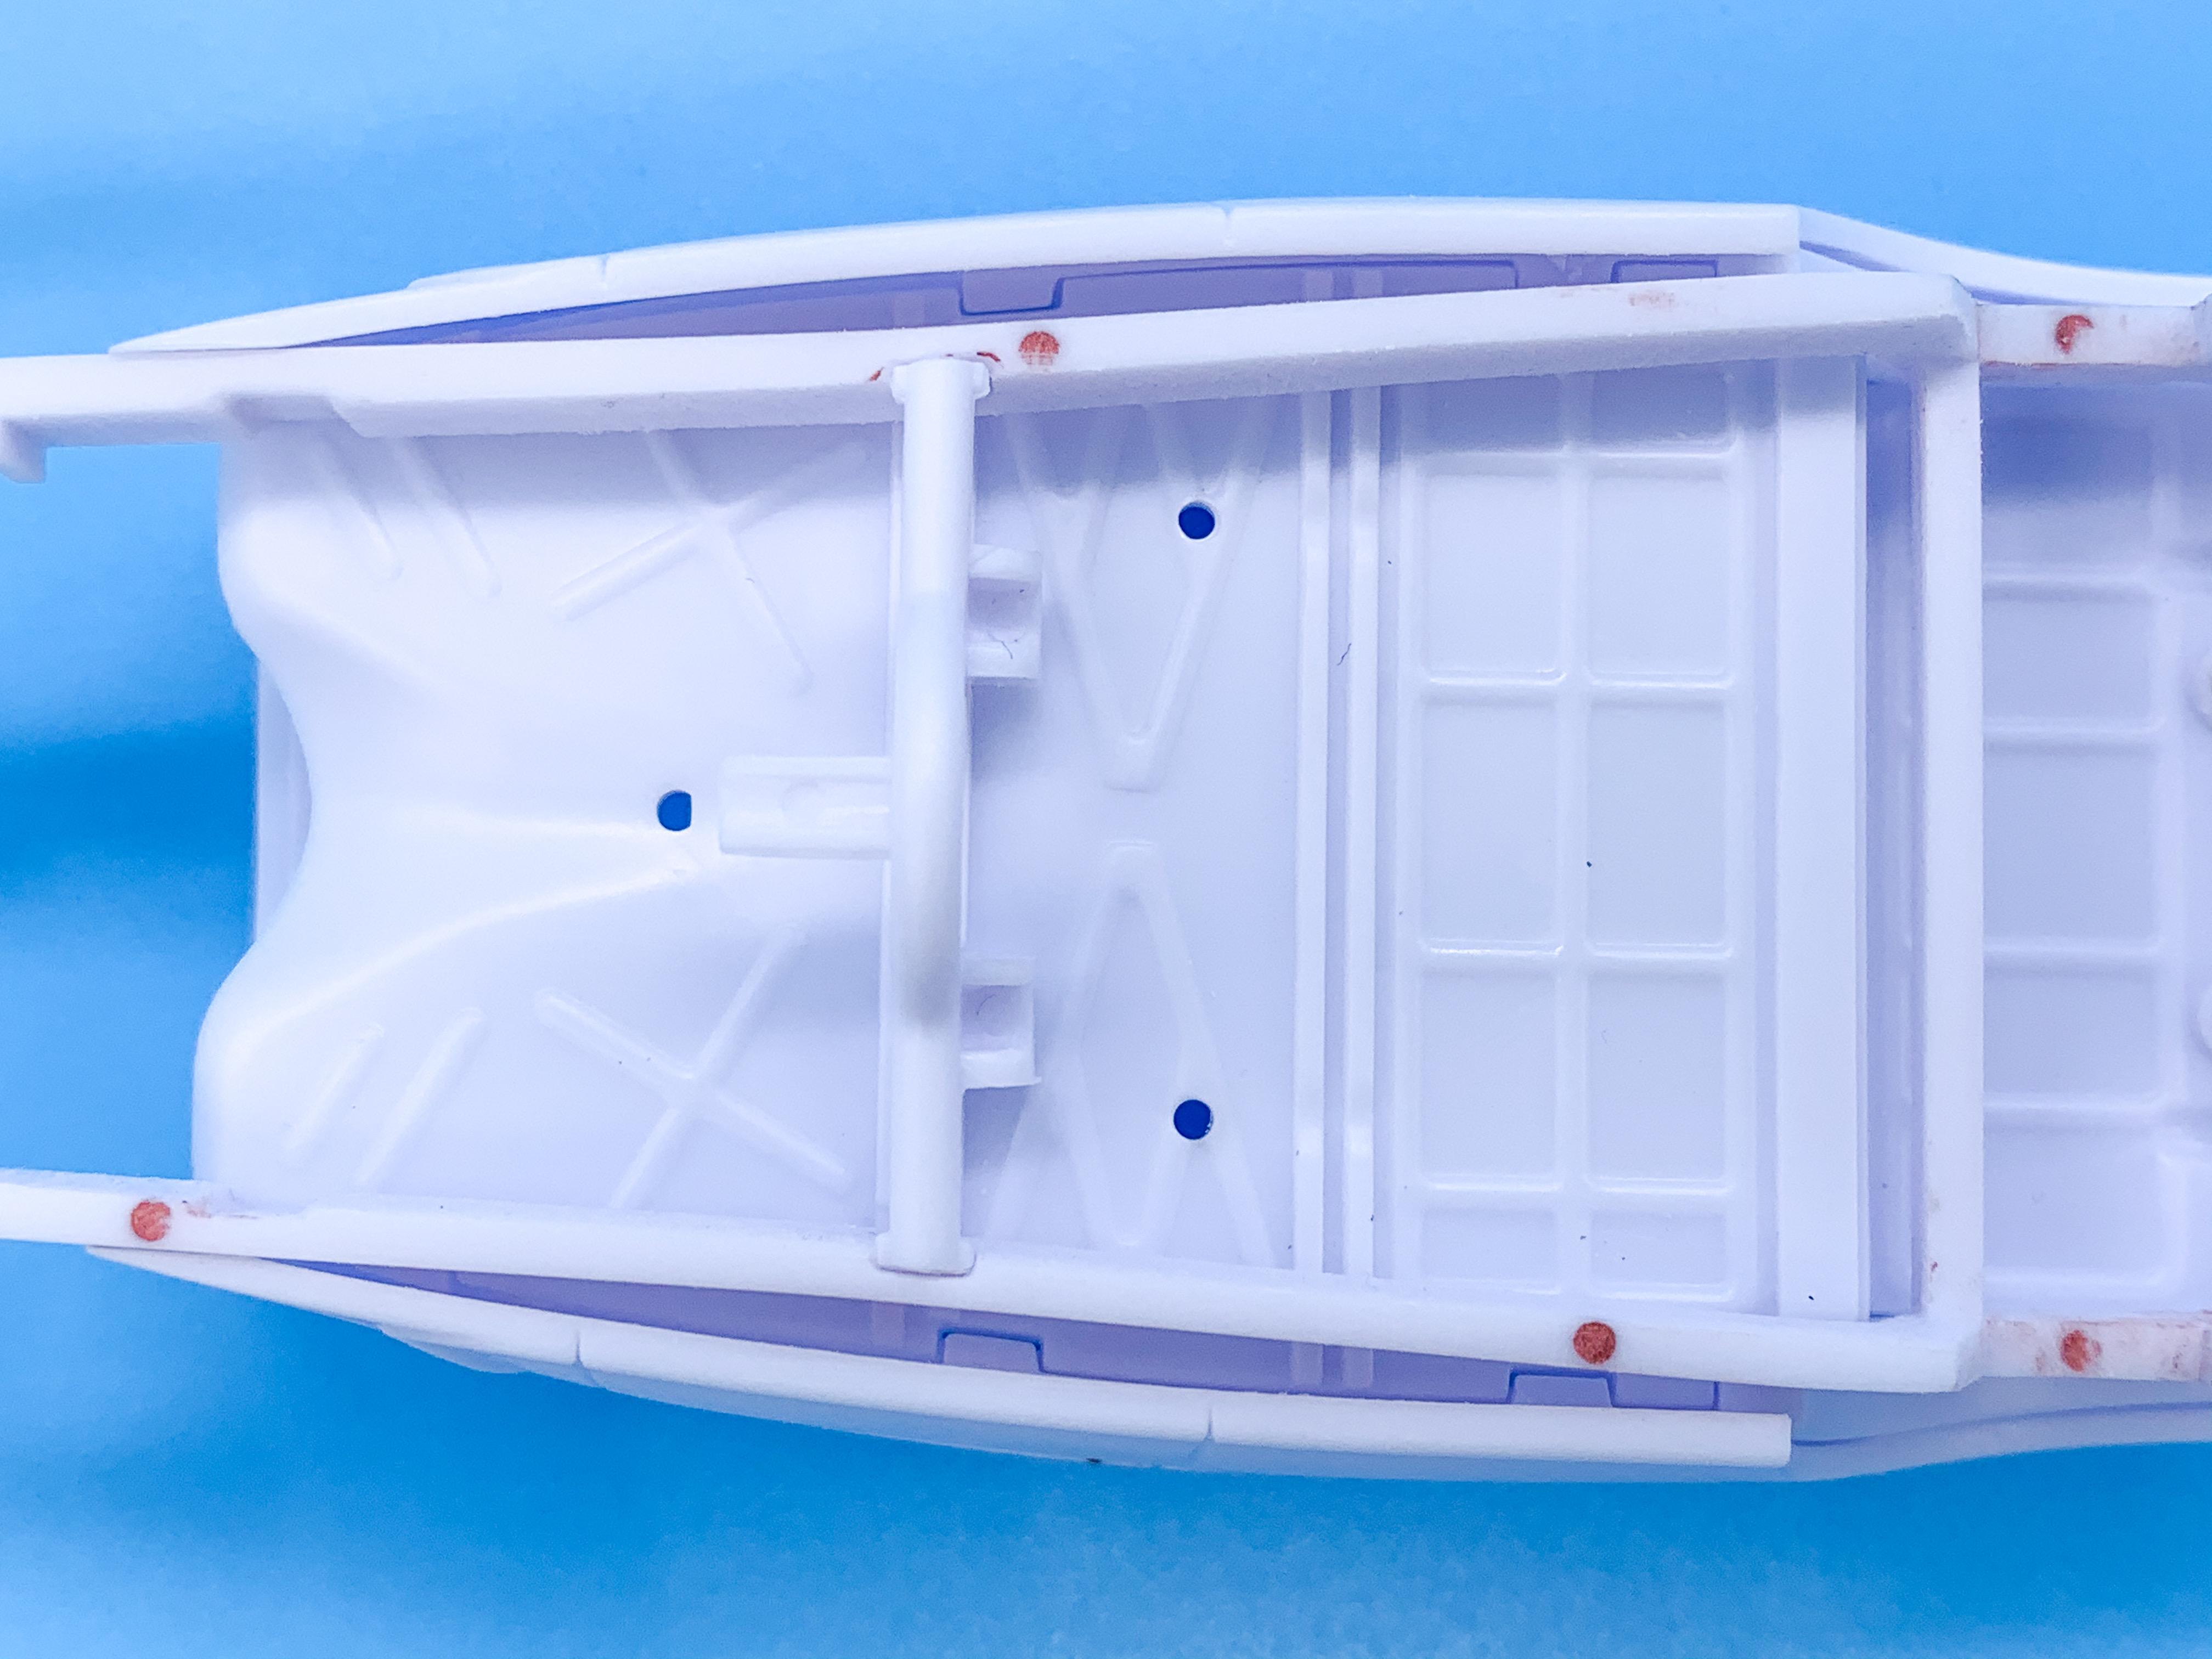
...because this site really needs ANOTHER Revell Model A build right now ? I’ve got a box stock version of one of these just about ready for polishing and assembly, soon as the paint dries anyway, so I pulled another one out of the stack to get going on. I’d like to still MOSTLY use the parts that come with it, but I’ve got a change of wheels in mind and I’d like to do some little mods and tweaks to improve on the end results a little. First up, a little filler on those frame rails to smooth them out: Something I’d like to address on this build is hiding the tabs that are visible on the underside when the kit’s finished: I still wanted to retain the way that the interior assembles to the floor so I smoothed out the ribs that extend past the outside of the frame rails there and cut a couple of little filler pieces to cover those tabs but still allow the kit to assemble like normal: Everything still assembles as it should but at least you can’t see those gaps and tabs if you peek underneath the body. Whilst I’m smoothing out holes, I filled the door handle mounts on the body, and as I won’t be running the full exhaust system I smoothed out the recesses on the rear panel that allow the pipes to snuggle up to the body: On a related note, has anyone noticed a couple of rough spots on the body of this kit? There’s two rough circles of uneven surface that showed up last time I built one of these - I thought it was maybe something I’d done the first time but I can see them on this one too. Nothing major, but a little thing to watch out for. I think I got them handled on this one, but I’ll see how the primer levels out once it dries: Ive got a particular idea for a flamed paint job that I’d like to try on this one - I’d like traditional black main color but with a more modern look to the flames with some pearls and metallics. I got a set of Pearl Ex powders and I’d really like to get a pearl flip-flop with one of the colors that I liked from the set: More soon, soon as I’ve done more!
-
Thanks buddy!
-
Anyone have an Alumacoupe kit to hand who could tell me the wheel diameter (I think the front and rear are both a scale 16”) and the front and rear tire diameters? Did a search but didn’t find what I was looking for...wanted an idea of the sizes to see if they’ll work for a project before buying a kit just to see what they are... Thank you!