OldNYJim
-
Posts
251 -
Joined
-
Last visited
Content Type
Profiles
Forums
Events
Gallery
Everything posted by OldNYJim
-

Autoworld.com Free Car kit!!!!!
OldNYJim replied to ranma's topic in General Automotive Talk (Trucks and Cars)
Just managed to order one from this offer a couple of days back - I’d been checking the link posted previously when I remembered to, to see if they were running the promotion again. Right now the page has gone again, but looks like they might be intermittently making this offer available again. Or I got lucky! Worth a click now and then if you want a free kit! -
I like that frame - did that stay the same between the two versions, does anyone know?
-
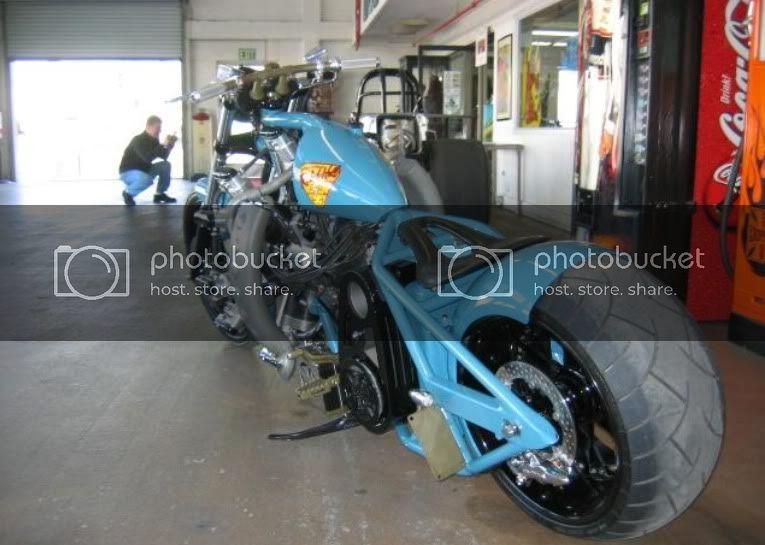
A cool detail from the 1:1 radial bike that I always liked - check the considerately designed recess in the seat: (excuse the watermark - couldn’t find any good pics that Photobucket hadn’t ruined): Apparently the reason for that feature is if you’re brave enough to ride the bike and really open it up, you’d NEED that recess in the seat, if you get my drift ? ⚾️⚾️ Looking great so far Curt! Really enjoying this one!

-
Nice! Thank you! I do like the look of those green ‘n’ blacks - would be cool to have one on my shelf!
-
Great news Dave!
-
I like that idea! Are decals available for both of those? Ive been wanting to do a New York cab but a Camry doesn’t excite me too much
-
Deja vu all over again! Back in clearcoat! Commencing countdown (a second time) until polishing day...
-
Apart from the front wheel, forks, tank, bars, body, rear wheels, tires, engine and frame they got pretty close! Oh, and the lights ?? I wanted to make a replica of the Mail Box with the kit but I think that’ll be a complete scratchbuild project further down the line - and my build of this kit will just be a cool trike!
-
Nice scratchbuilding! I like the front spring mount and the floor! Good job!
-
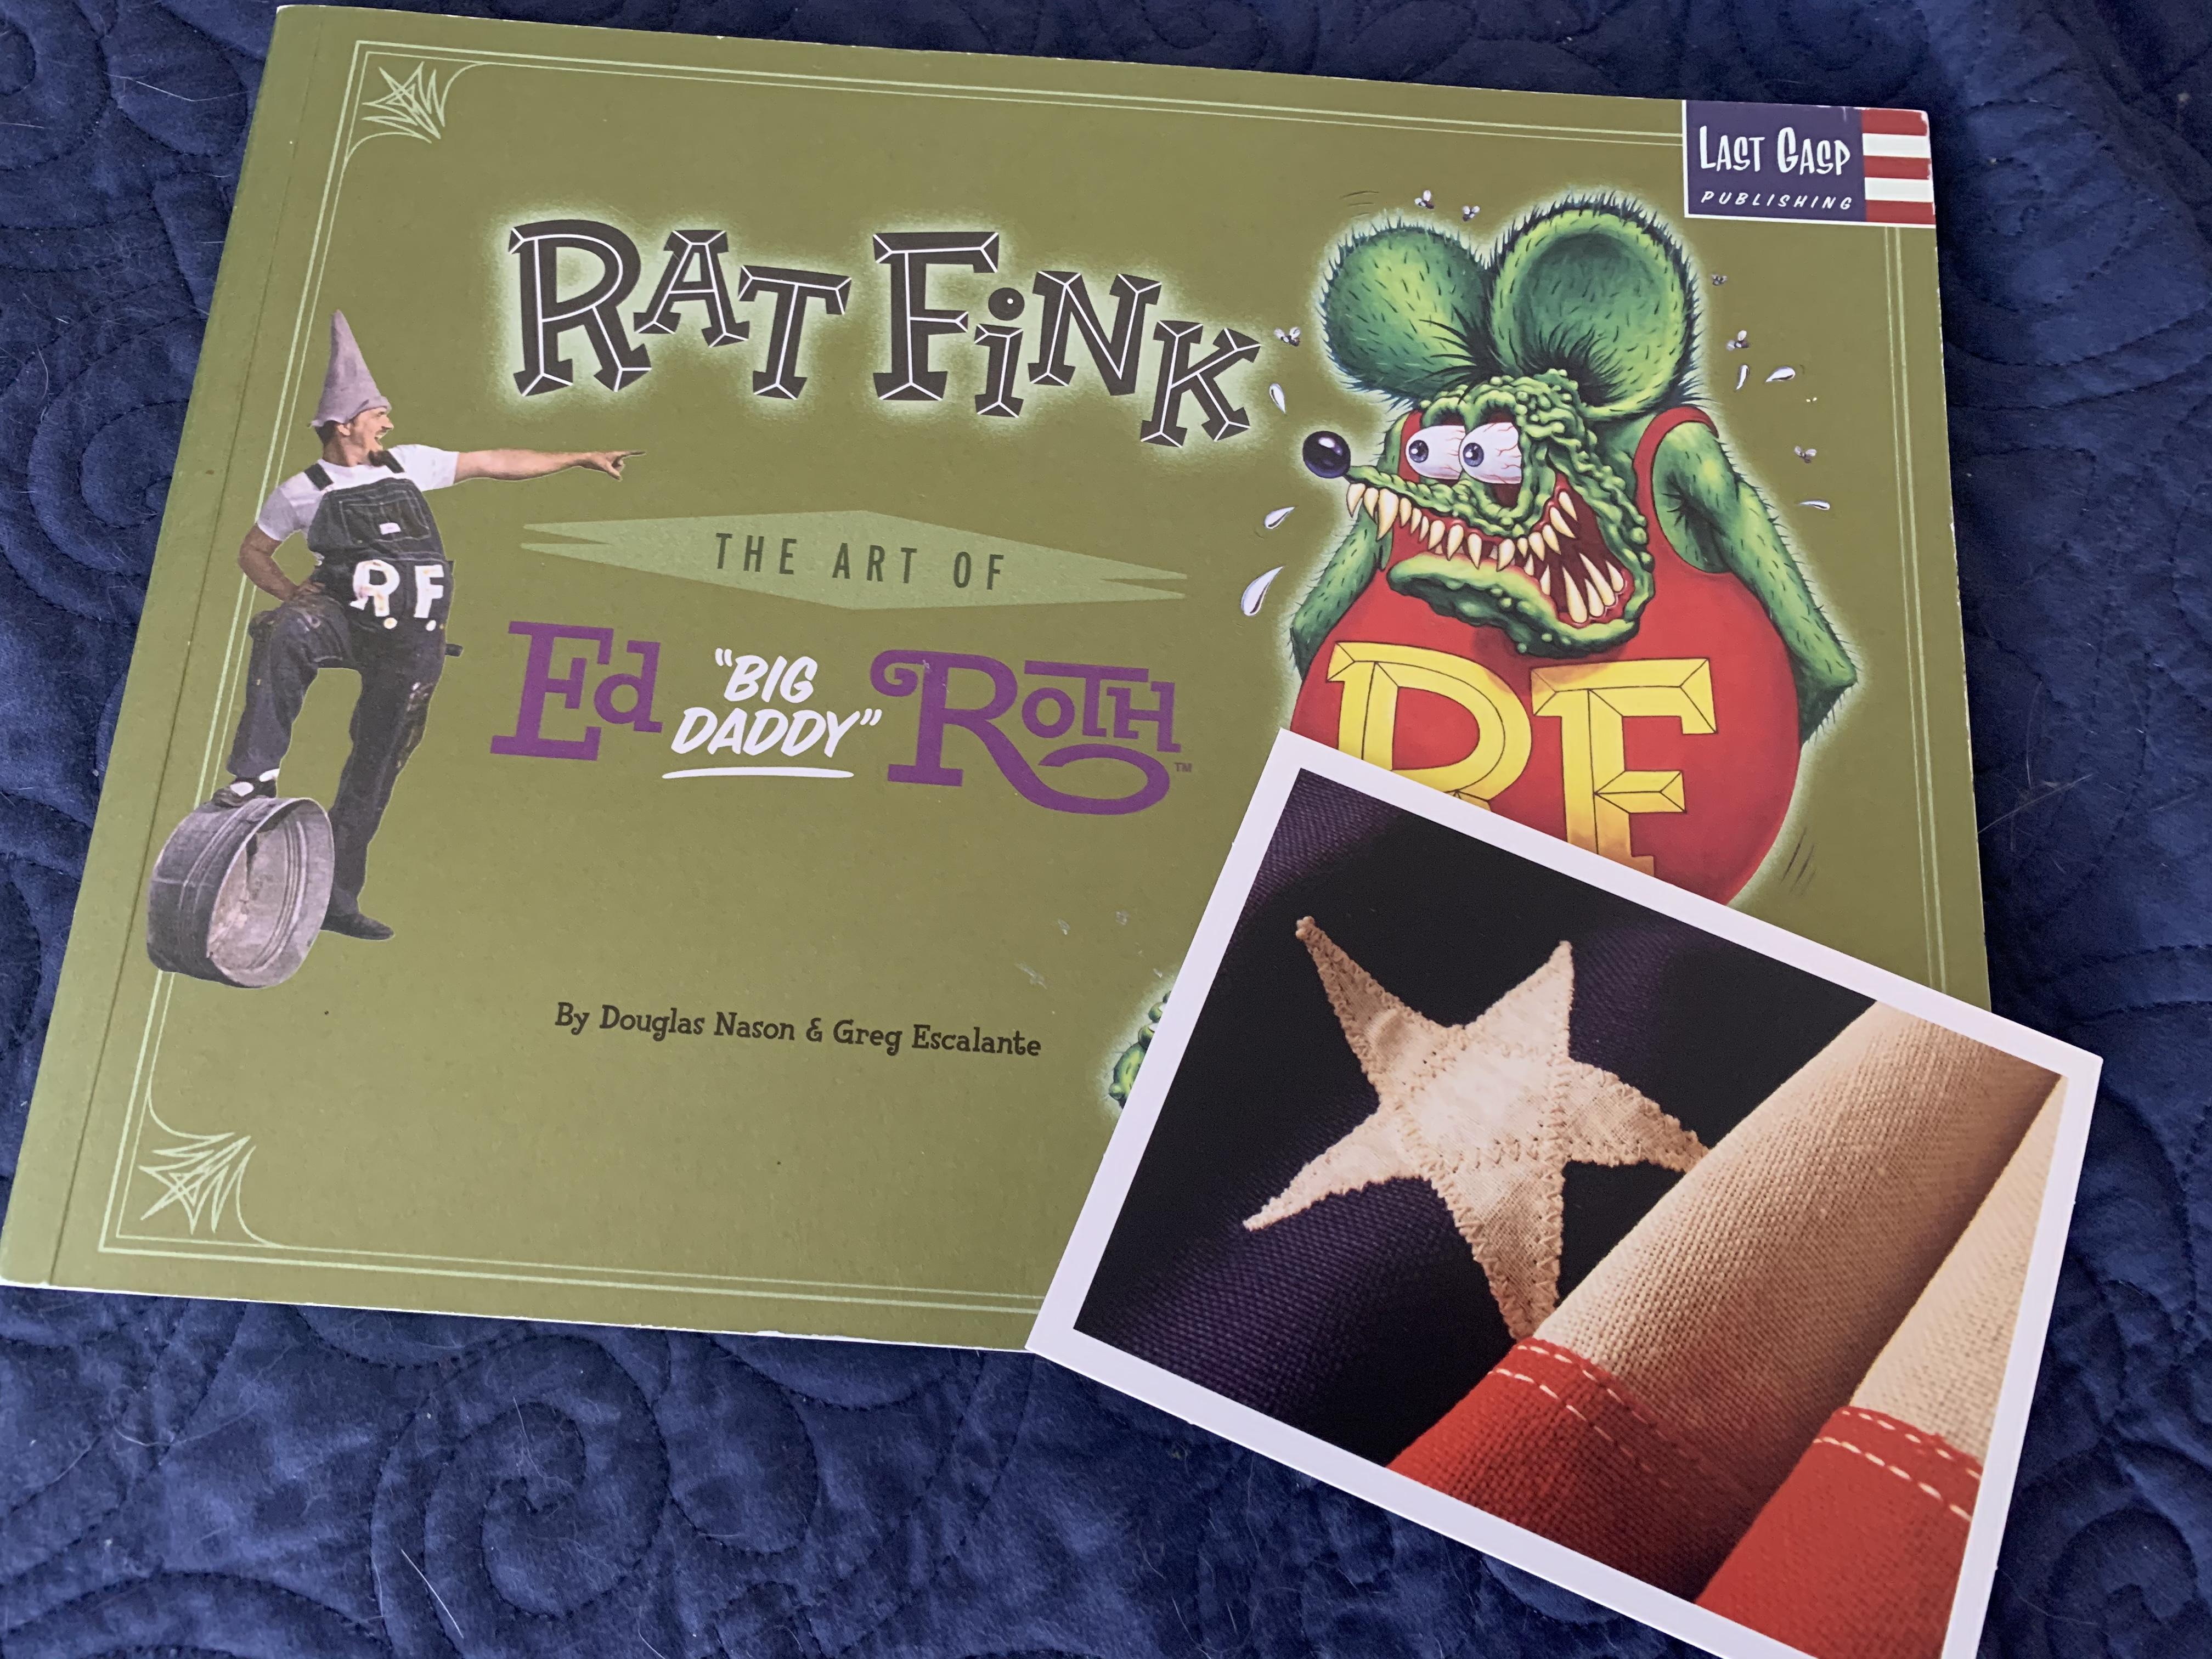
The MPC Mail Box chopper that I ordered weeks ago arrived - ironically my Mail Box chopper got stuck in USPS sorting office hell for over a month but appeared eventually. On the decal sheet - “We’re faster than email” ? And a follower on my Instagram sent me a message after I did a post at the weekend about seeing the cool Indian Larry Ed Roth tribute bike in my neighborhood... ...and said “I have something you might like - what’s your address?”. This arrived today - a beautiful compilation of Ed Roth builds, art, stories and more. And a tonne of reference photos for future model builds! I was really touched - people can be so awesome!
-
One of my favorite threads on here ever. I’d love to see that battery, and whatever other models it’s attached to!
-
What a great story! That “urgh, let’s just get this over with so I can do the next thing” voice on my shoulder is the one that pops up after I’ve spent too long on a project and redone the same part too many times (usually a part no one will ever see anyway, and perfectly ‘ok’, but not amazing). Getting better at fighting that voice is making me do better work - it’s got me in the past and when I look at some of my older builds it’s those little things that only I notice that bother me about them all.
-
I was playing with some stuff from my parts box today - looks like the 32 frame from this kit lines up REALLY nicely with the fenders and body etc. from the line of Deuces that Revell did. I know they SHOULD, if they’re both based on 32 parts of a variation of them, but that’s not always the case. Opens up some interesting kitbashing opportunities if the frame from the 29 kit will practically slide right under any of the 32 parts! Of course, the range of 32 kits come with perfectly good frames anyway, but that doesn’t stop me thinking “oh cool! Haven’t seen anyone do THAT yet!”
-
Any car’s a sports car if you try hard enough! ??
-
I like that box art though! Looks cool in pink!
-
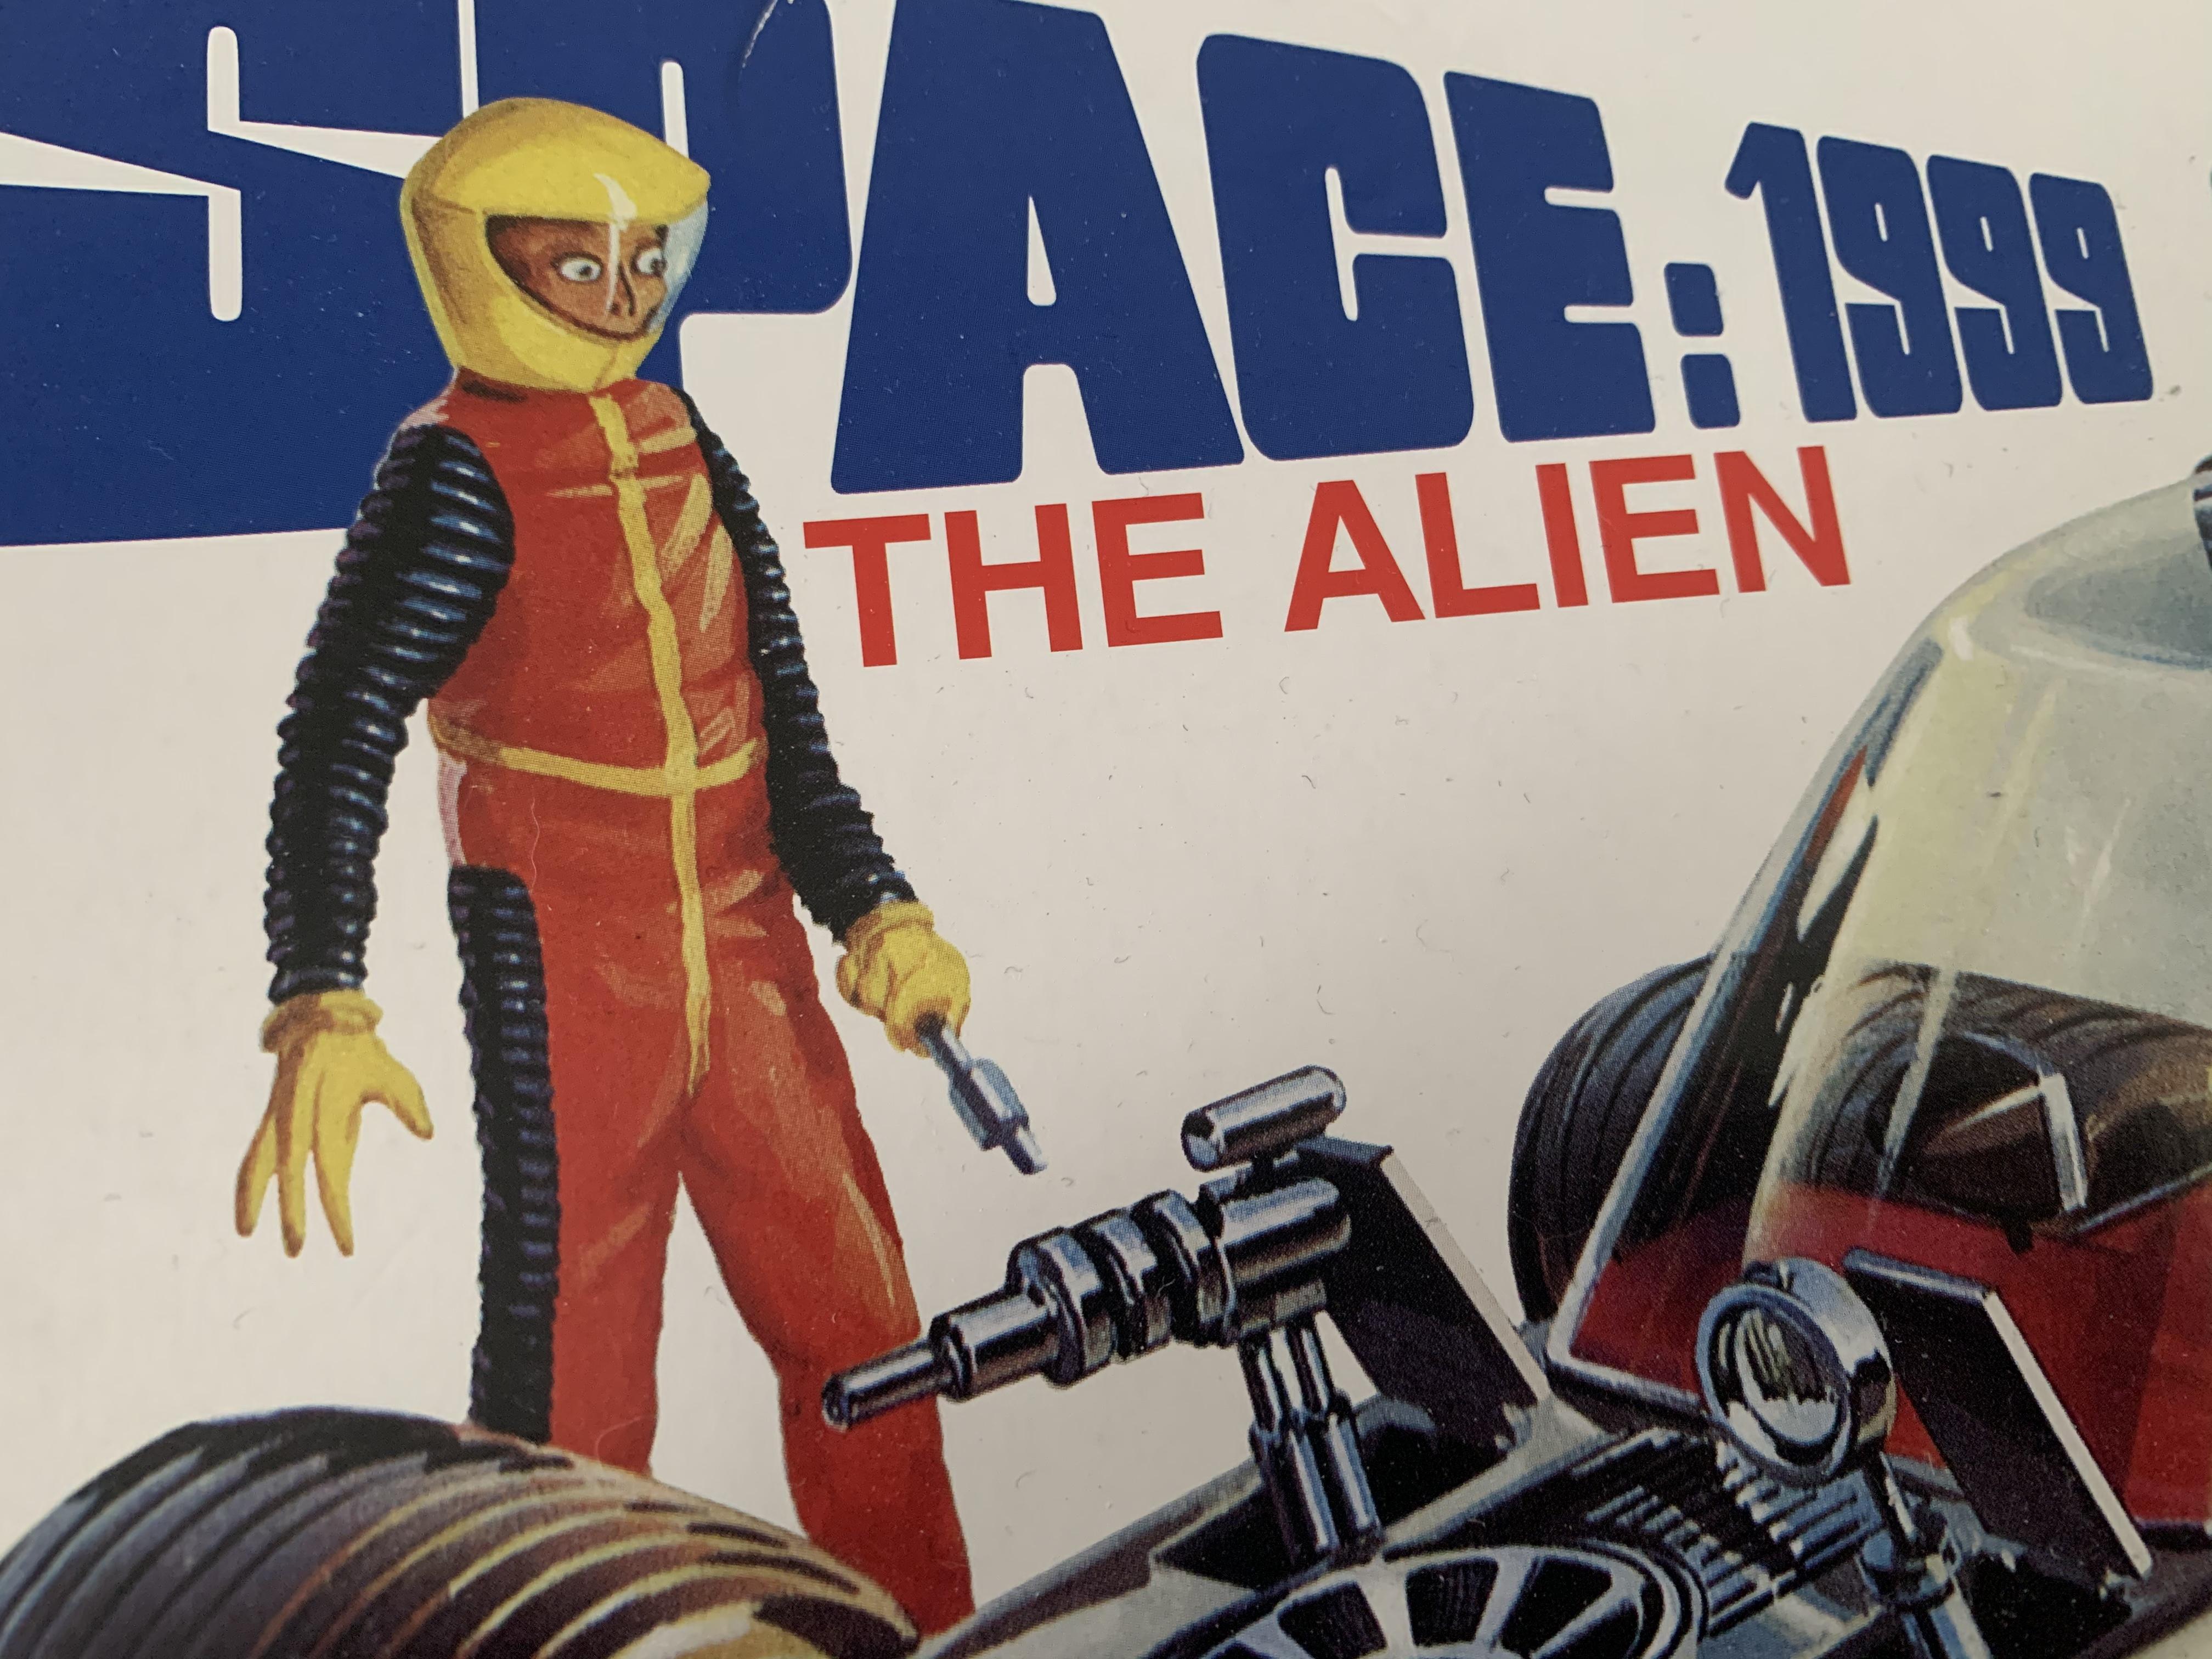
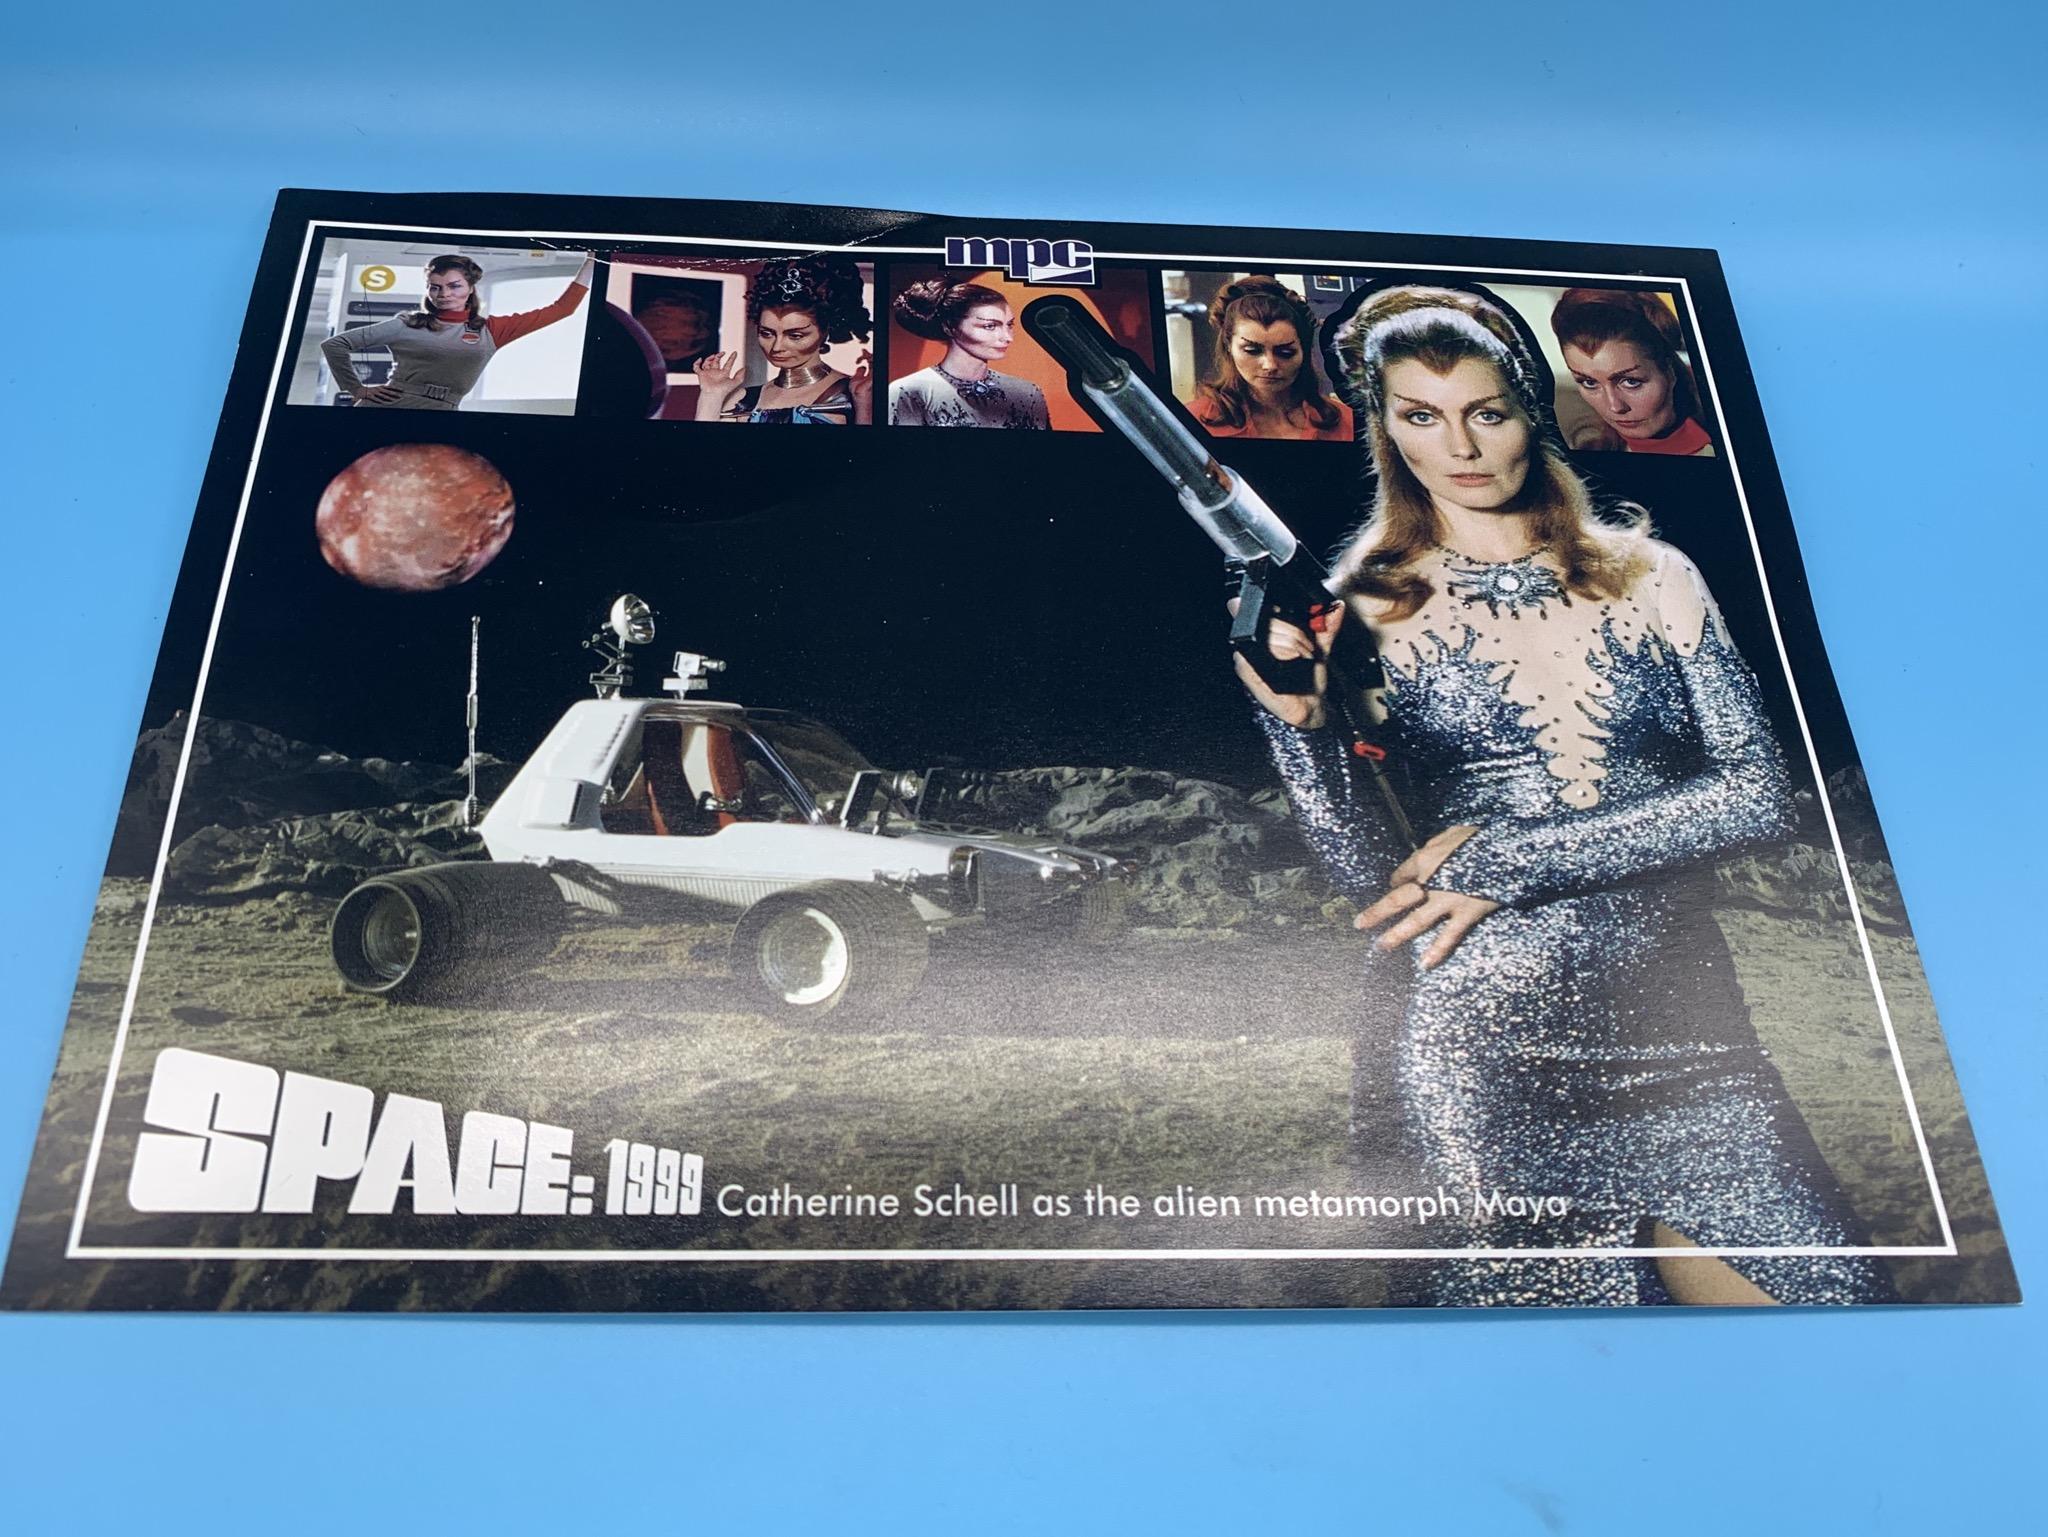
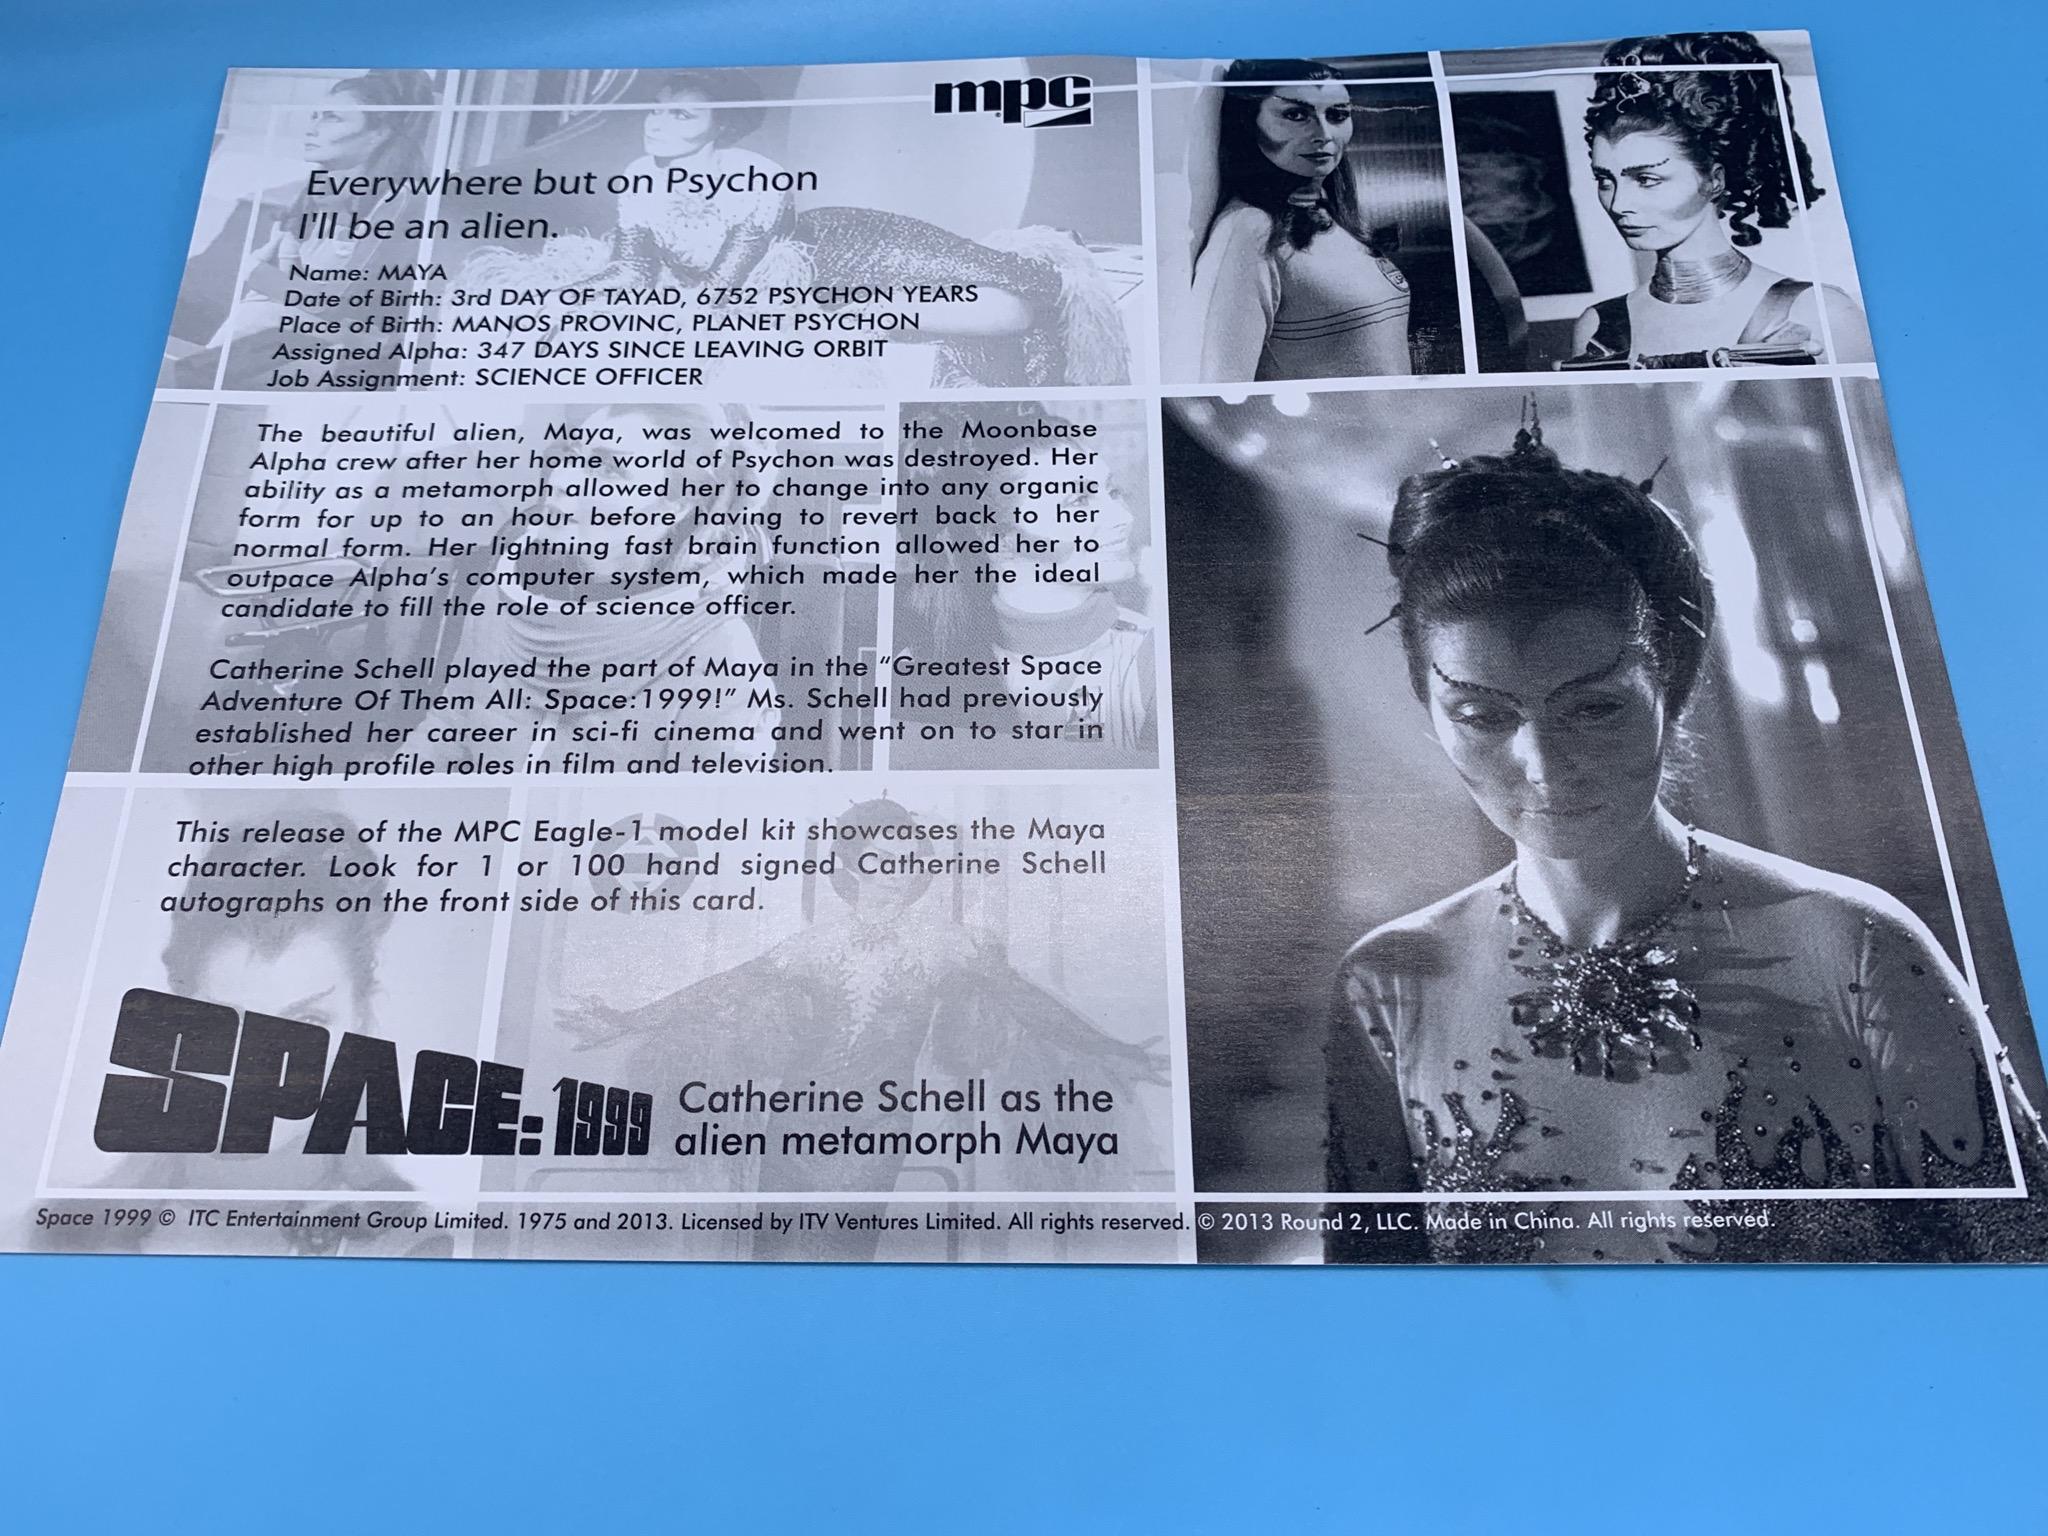
I would love to see them! Yes please! Don’t go to any specific effort, but I’m always interested in seeing rare old model parts! I’m embarrassed to say I had never actually heard of the show aside from it being mentioned on the box for this kit so I too must’ve missed that particular phenomenon! I suspect the alien figure is surprised that the show producers have dressed him as a futuristic Ronald McDonald: He looks equally surprised in the plastic too though in fairness: I’m thinking he’ll be candy pearl green when I’m done maybe, or something a bit more visually pleasing than the McDonalds livery he’s in on the box. I wonder what he’s holding? Some kind of space weapon? Flashlight? Diagnostic tool to see why this thing is misfiring on idle? Who knows ?♂️ I DID get the mini print, but alas it was not signed: I know slightly more about Catherine Schell than I did previously now at least! No progress on this one yet today because I didn’t even eat my breakfast baconeggncheese yet this morning, but I did find this cool paint at Target when I was doing my early morning grocery run - I wonder if I can incorporate some of that flake and sparkle somehow into the paintjob? I don’t want it to look like a little girl’s unicorn toy, but I wonder if I can do something cool with this somehow? More soon!
-
What a gorgeous color! Nice job with the 2K too - I’ve REALLY gotta try that myself! Does it self-level to that nice sheen naturally, or do you just have a good spraying technique where it doesn’t go on lumpy (like lacquer often does) in the first place? Always impressed by your paint!
-
Nice weathering job on that body Ron! Looks GREAT! I really like it!
-
MFH Porsche 917-43 hippie
OldNYJim replied to Chris Smith's topic in WIP: Other Racing: Road Racing, Land Speed Racers
Absolutely stunning work. All those wires! ?. You did a great job of making those wires and lines look orderly and not a mess (which I’m sure it could easily have become). Brilliant! -
64 Dodge D100 Pickup Pro Street
OldNYJim replied to AmericanMuscleFan's topic in WIP: Drag Racing Models
You’re an impressive builder Francis! Breathtaking craftsmanship (and I use that word intentionally!) -
I remember one of the movie studios threatening legal action after he said he’d done the Back to the Future Delorean, KITT, the Monkeemobile as you mentioned and the General Lee too. Oh, and the Ghostbusters hearse! ?
-
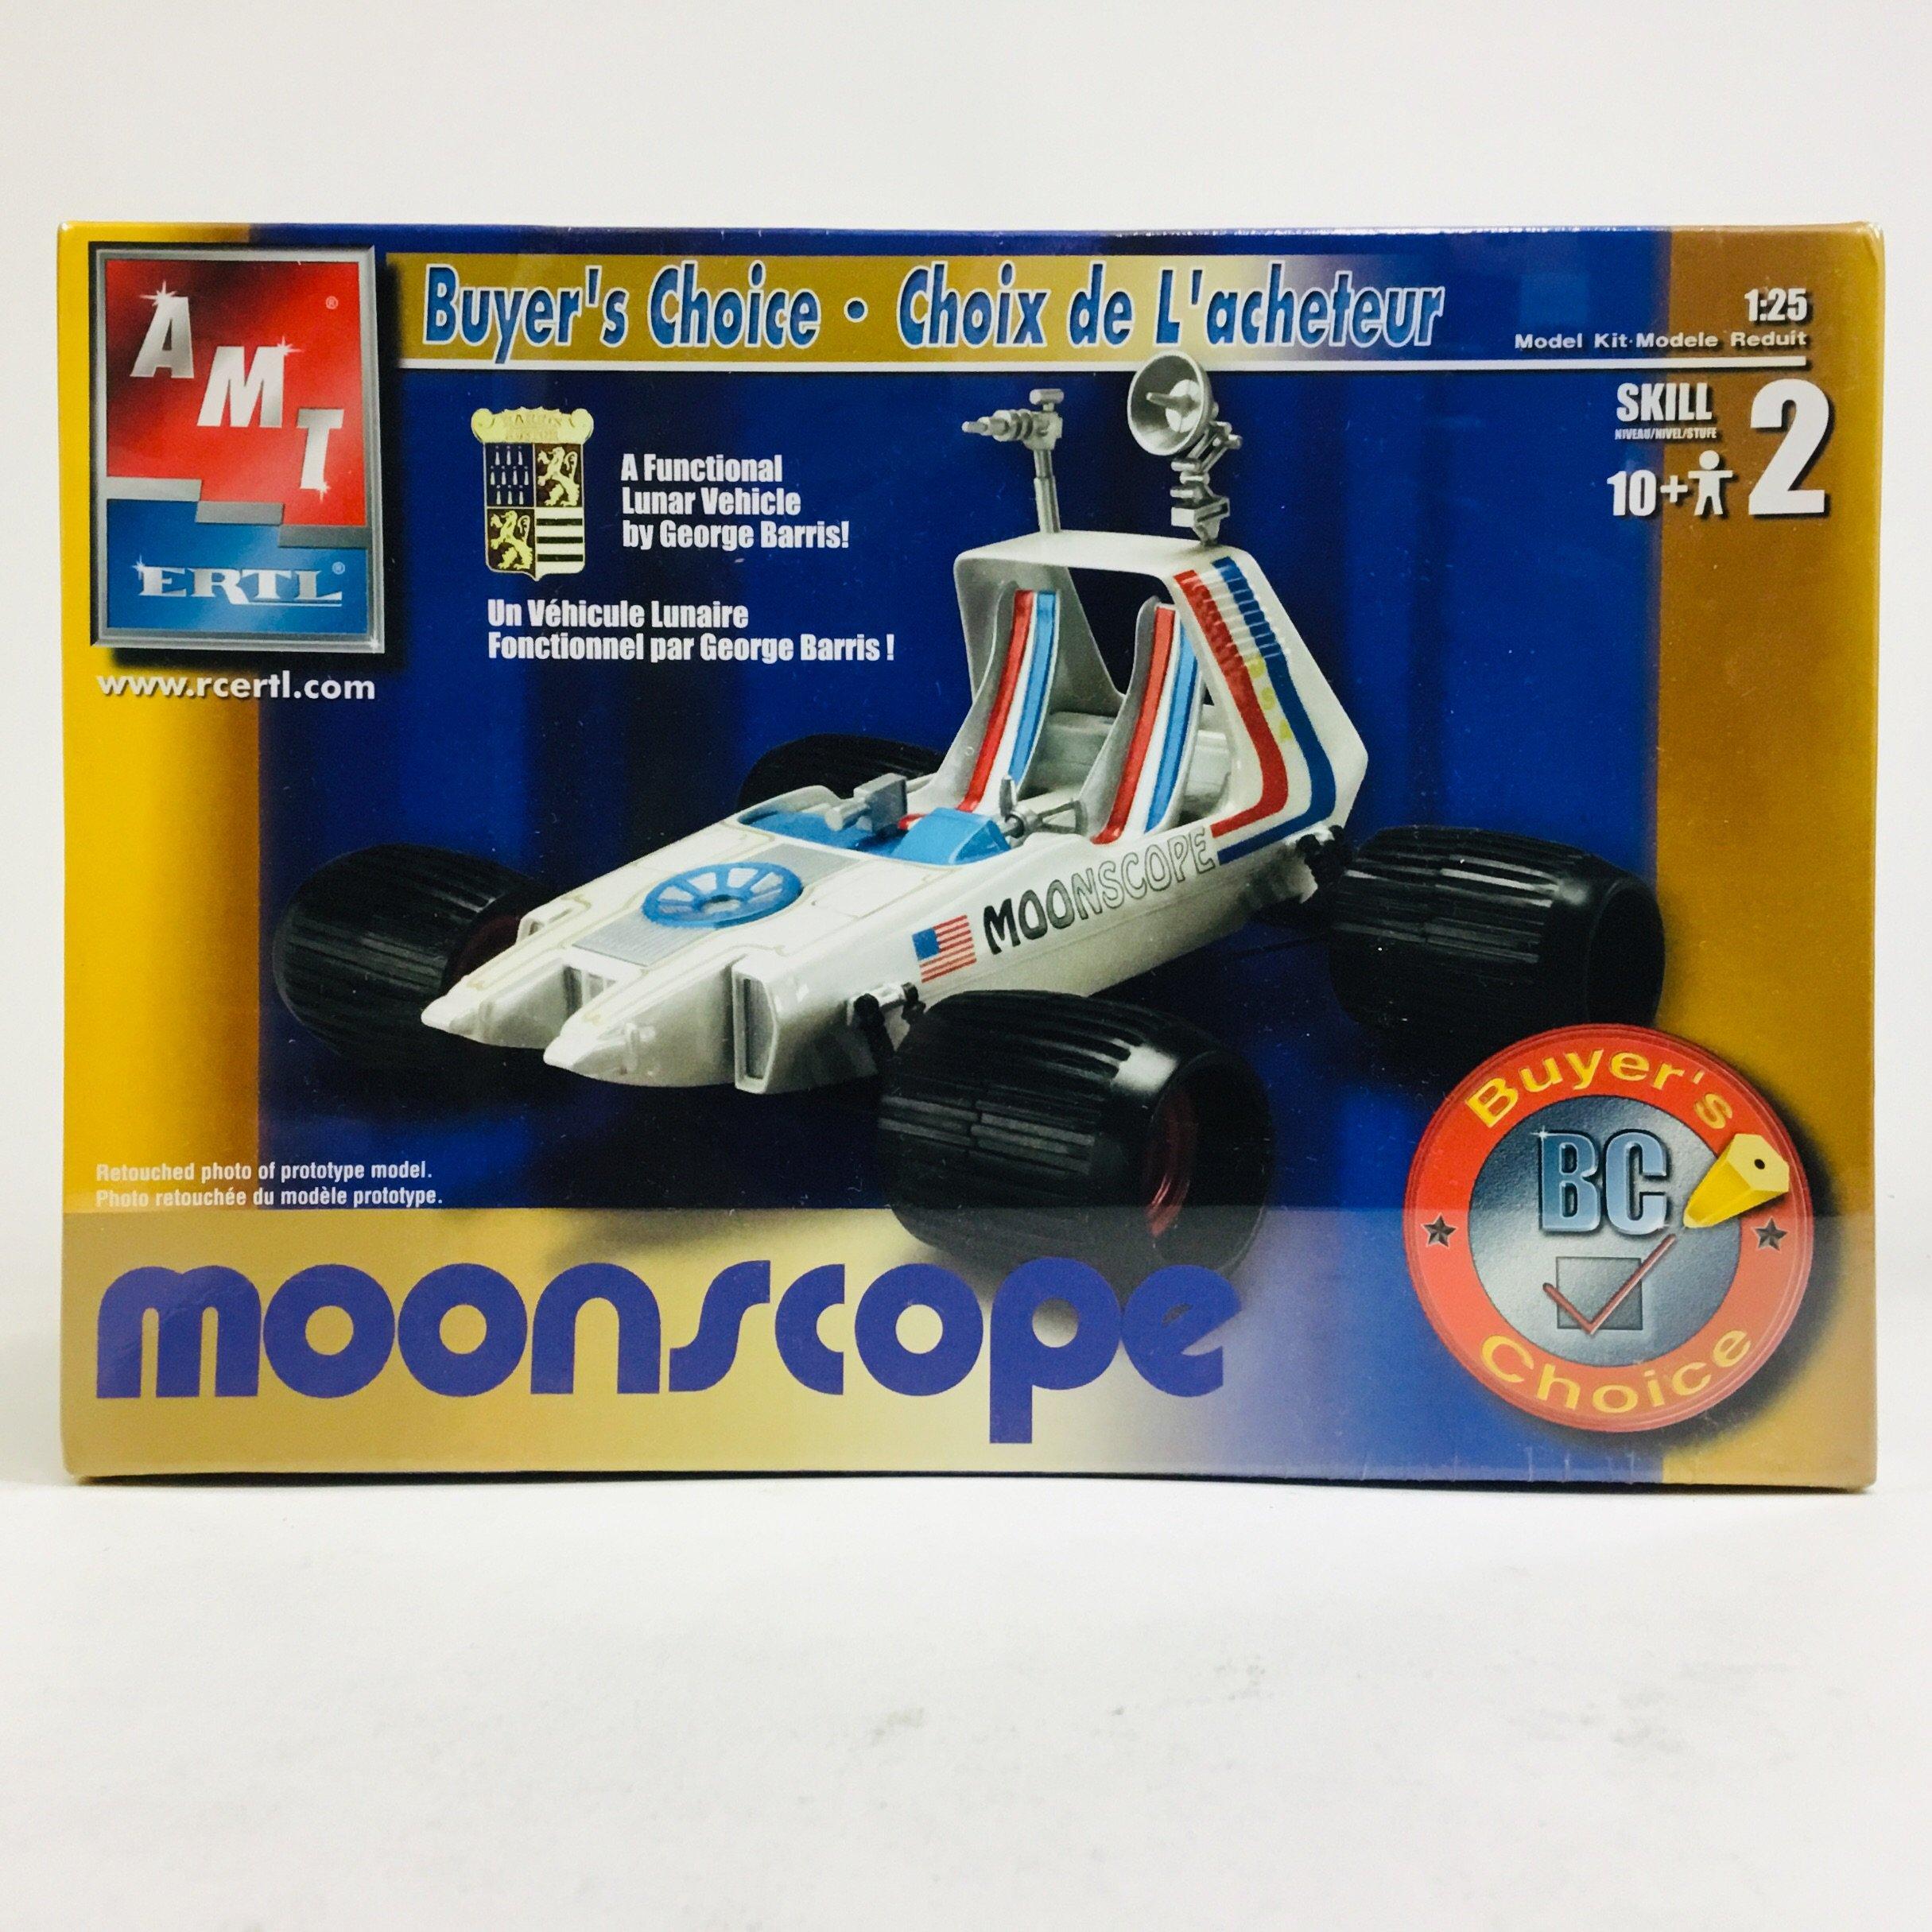
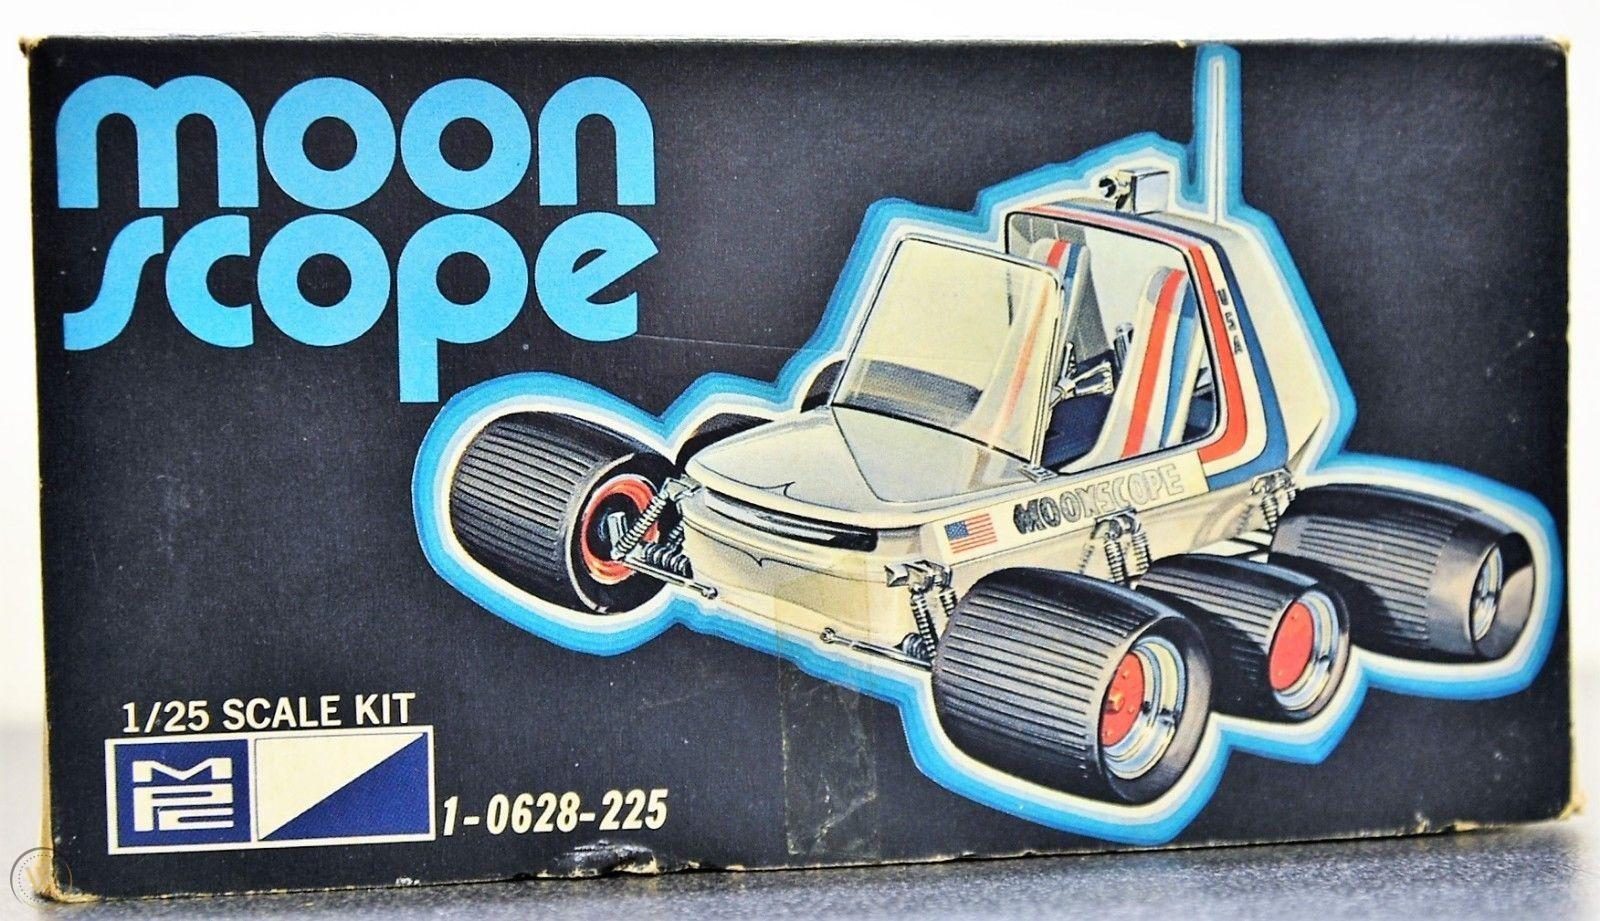
I think you’re right. Which leads me to wonder, did Barris have ANYTHING to do with the re-design of this kit? His name was on the box for one of the older releases of it: But it’s clearly not too close to the actual 1:1 he designed (which was also a kit): If they DID mess with the tooling to get out of paying him royalties then it’s odd that he allowed his name to be on the AMT box further down the line I guess - but also maybe he figured he might as well get paid for SOMETHING even if it wasn’t the design he had a hand in. All of this is most irrelevant anyway seeing as I don’t have that original kit and I’m not even going to ATTEMPT to make a replica of the Moonscope out of what I have here, but curious minds are curious ?
-
Bummer! Someone on here had a set that we were going to trade, but I haven’t been able to get into my storage locker in the city since the lockdown to dig out the kit I was going to trade...sorry @STYRENE-SURFER! I didn’t forget... Ira Dahm did a bunch of cool builds based on this kit - I’ve been wanting to make the whole series myself! Figure I should build the kit stock-ish first though - but he had some cool alternative versions that were in one of the 70s magazines: http://iradahm.com/AMS1.html http://iradahm.com/AMS2.html http://iradahm.com/AMS3.html http://iradahm.com/AMS4.html
-
What did you see on the road today?
OldNYJim replied to Harry P.'s topic in General Automotive Talk (Trucks and Cars)
As Al Roker would say - this is what happened in our neck of the woods this afternoon: Had a big storm flash over that only lasted about five minutes - and then I heard a huge bang and car alarms going off right outside. Turns out that 5 minute storm was enough to drop a tree onto a couple of cars - no one hurt, luckily! BIG weather change to the pics I posted in the post above, yesterday!
-
Thanks everyone! I started polishing out the body for this one at the weekend having let it sit for it’s prescribed 3 weeks and I don’t know why but I just had a FEELING that I might burn through the clear. I don’t know why, I gave it the same number of costs as I usually do and I don’t normally have trouble, but I got nervous. So, after the first round of sanding I stopped and I’m going to shoot another coat on there and let it sit a little longer. Again, I have NO IDEA why my brain is saying “you’re gonna burnnn thrrrruuu that” but I’d rather give it one more coat to be safe and not screw it all up. Of course the humidity is through the roof again now so I need to be patient, but better than ruining it and having to go back to square one again. In the meanwhile, shot a bunch of Alclad, so I’ve got a frame and engine to keep me busy for now anyway... More soon!