OldNYJim
-
Posts
252 -
Joined
-
Last visited
Content Type
Profiles
Forums
Events
Gallery
Everything posted by OldNYJim
-
 My wife ordered a ceramic plant pot from Amazon this week...they put it in a padded envelope. Now we have a fun 3D ceramic jigsaw to play with whilst we wait for the replacement to arrive! ?
 -
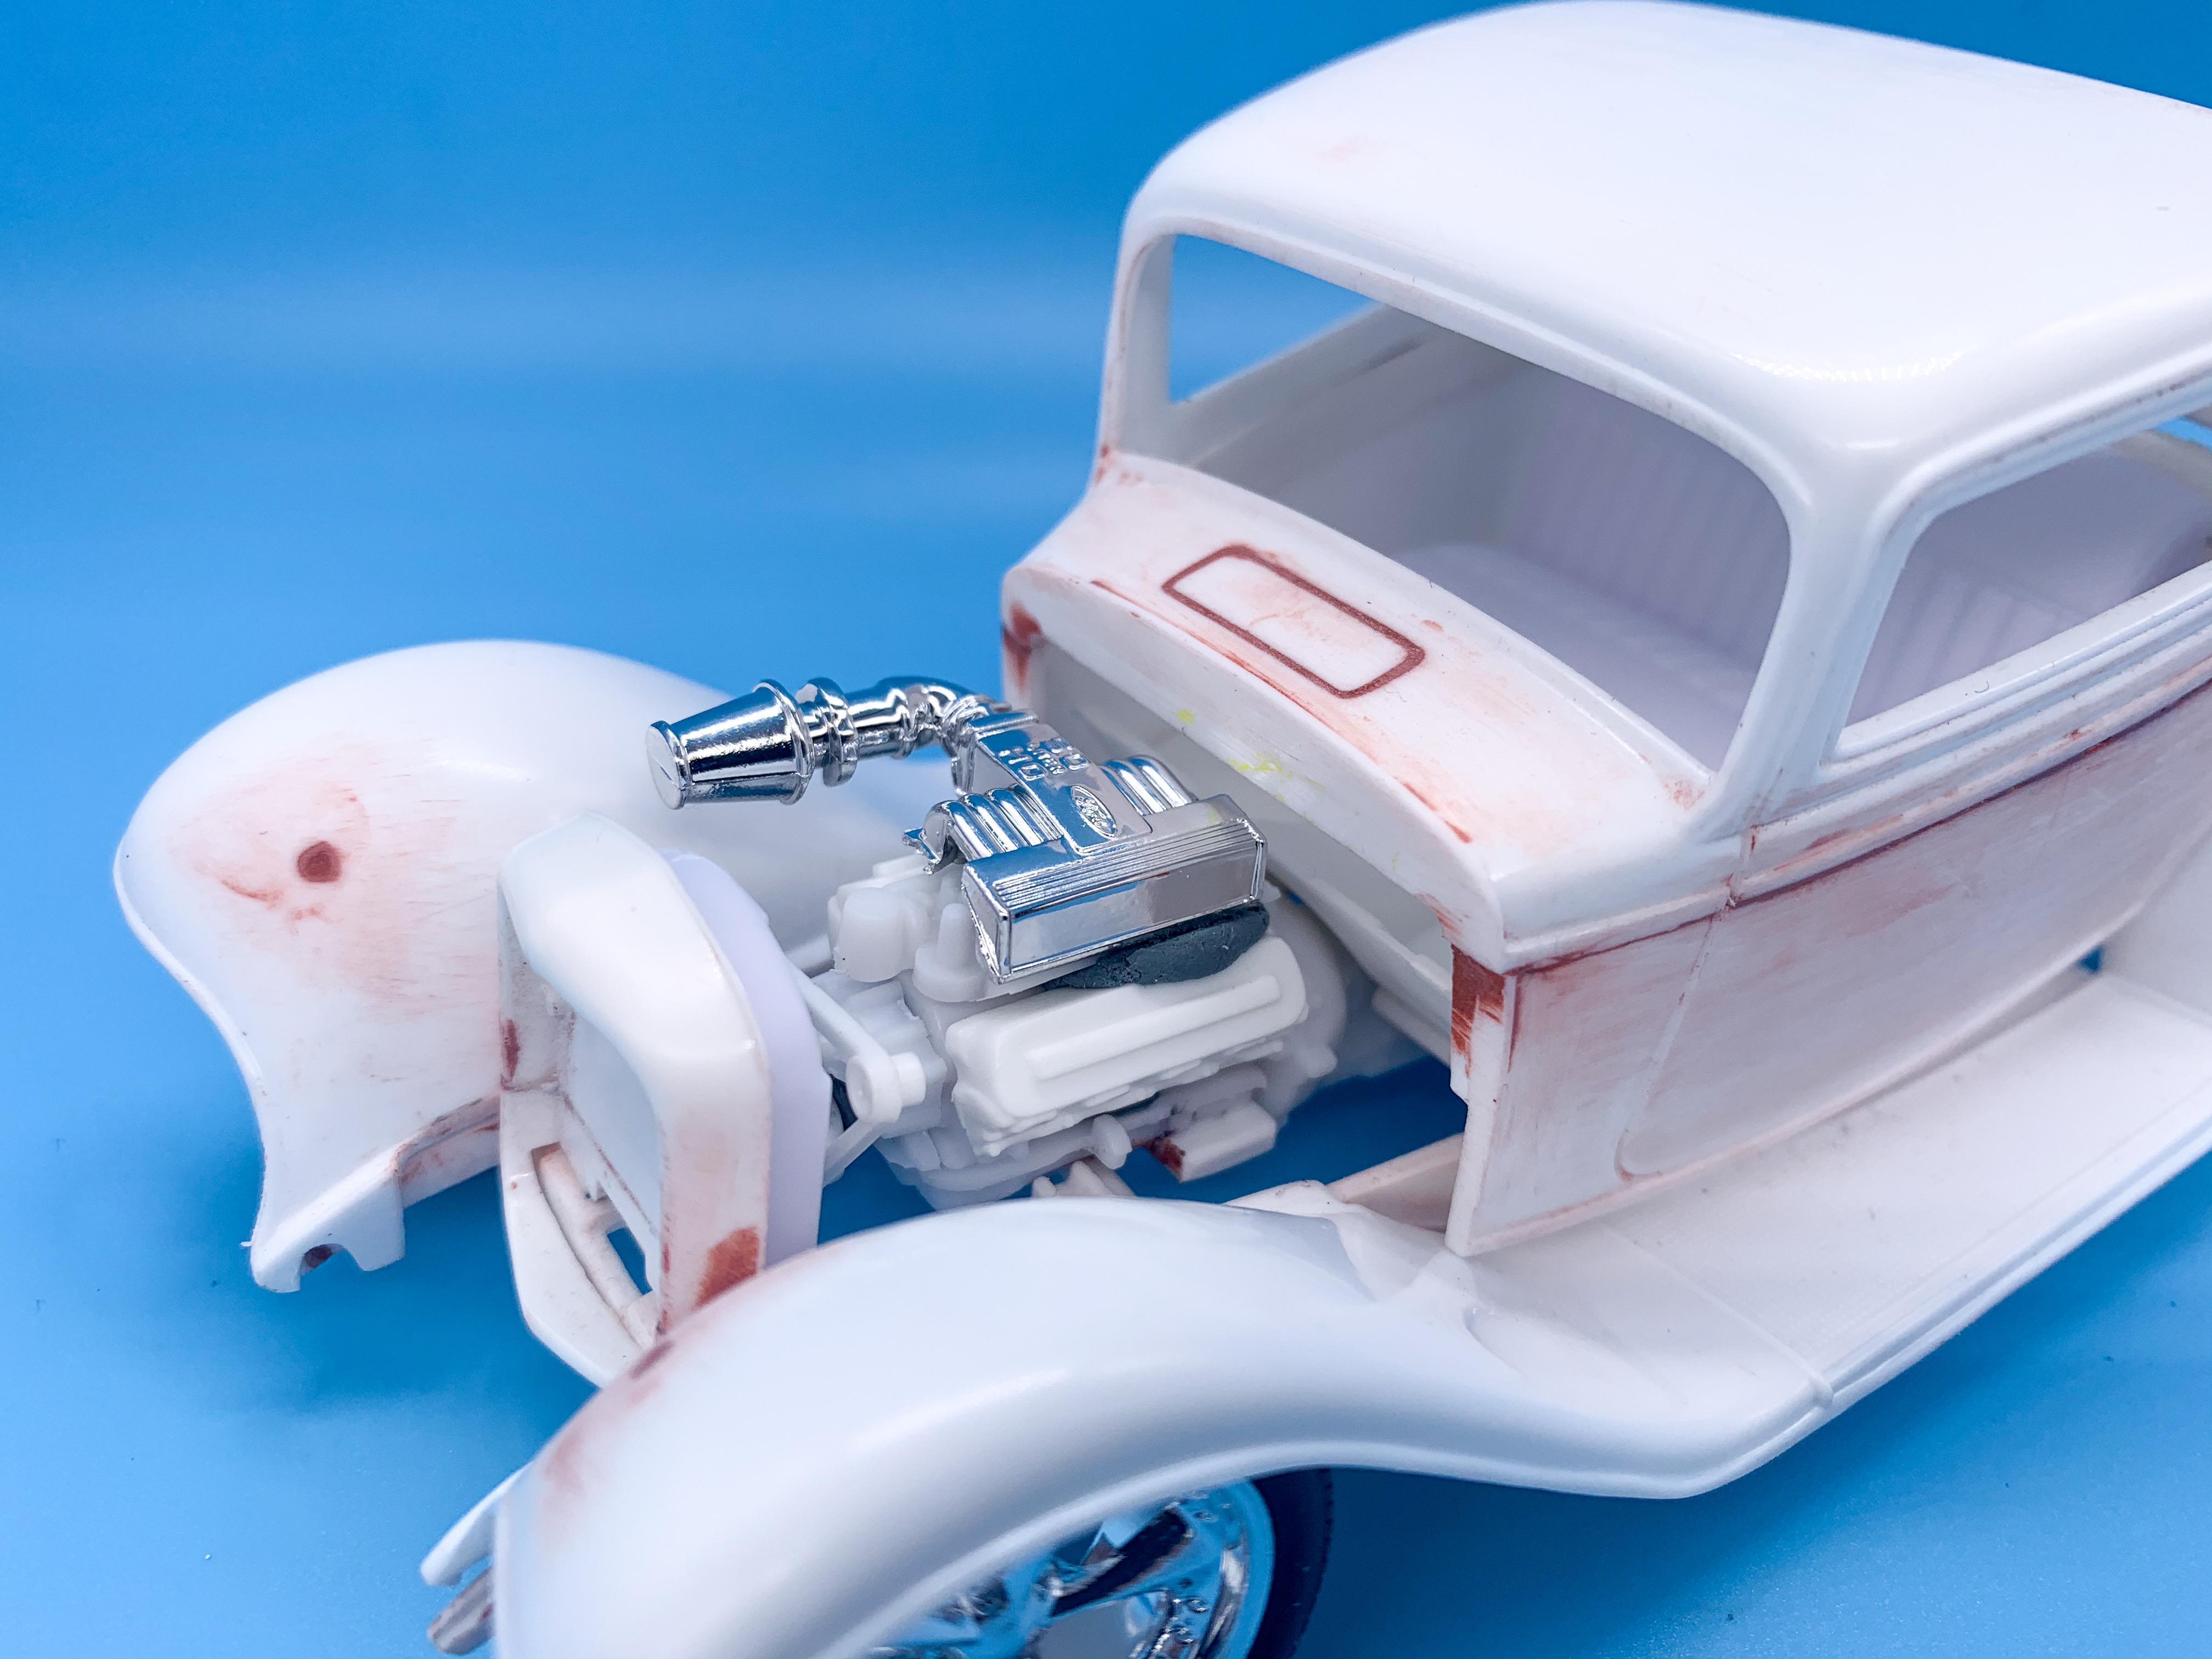
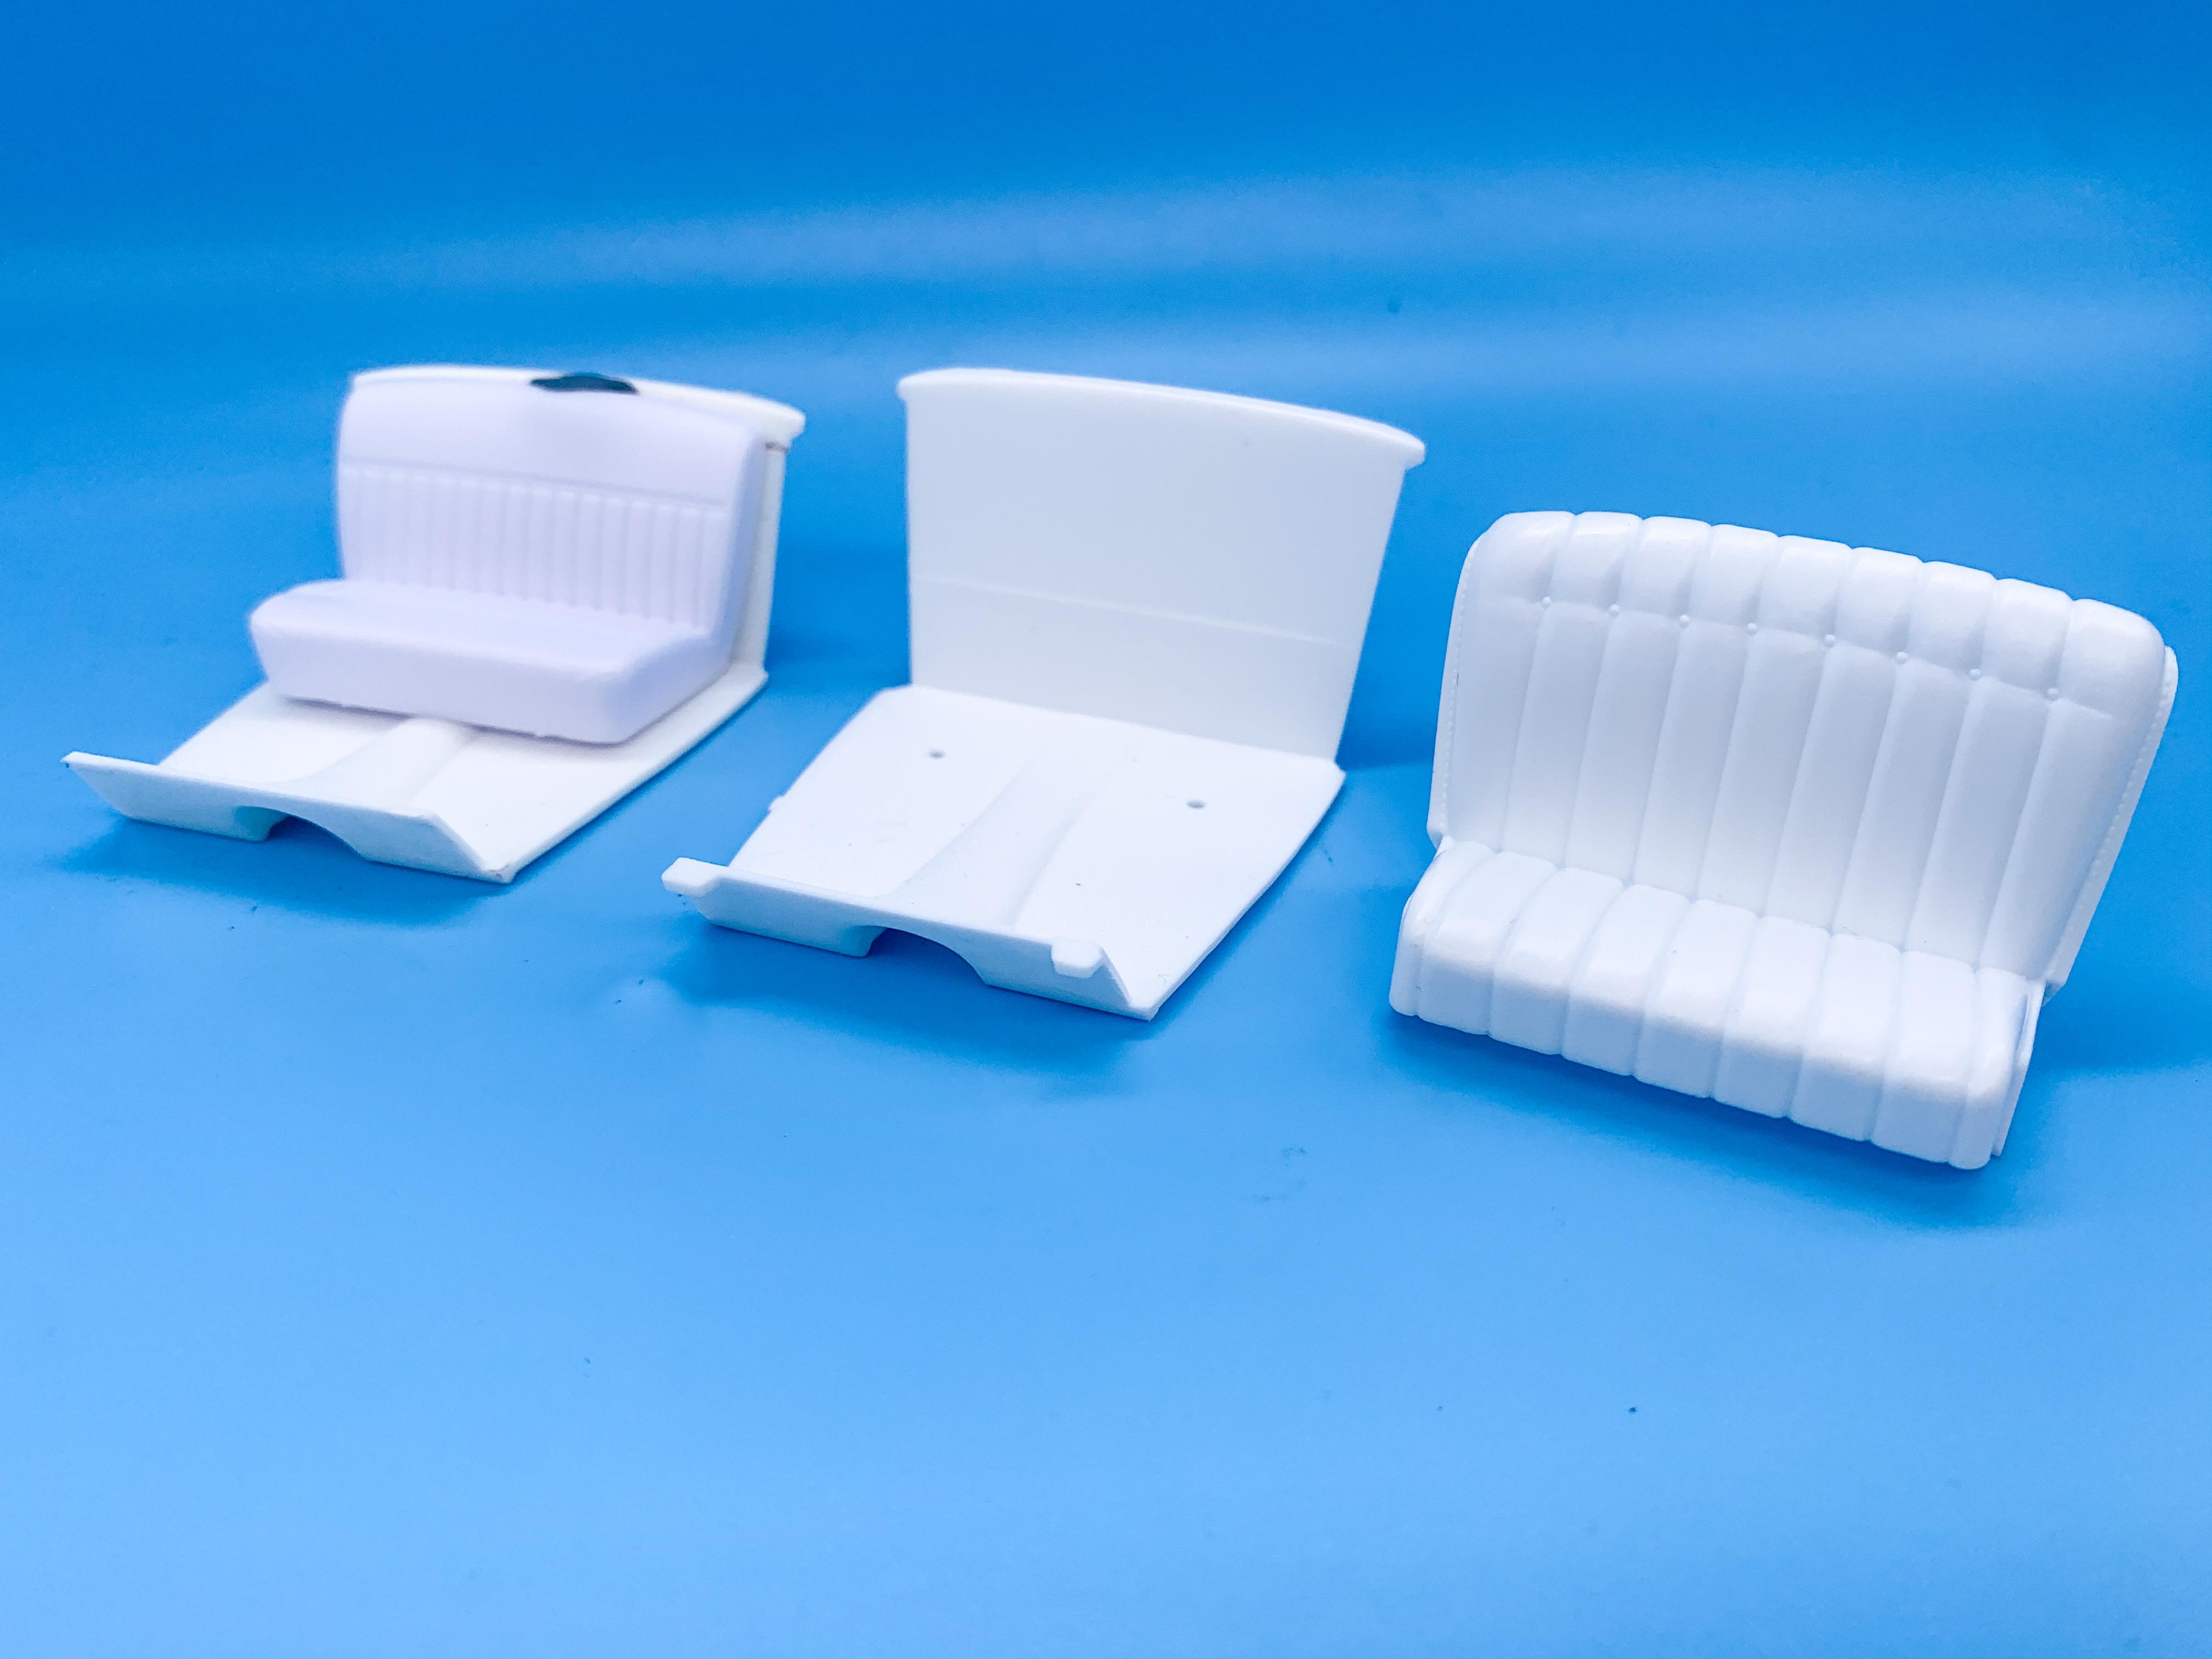
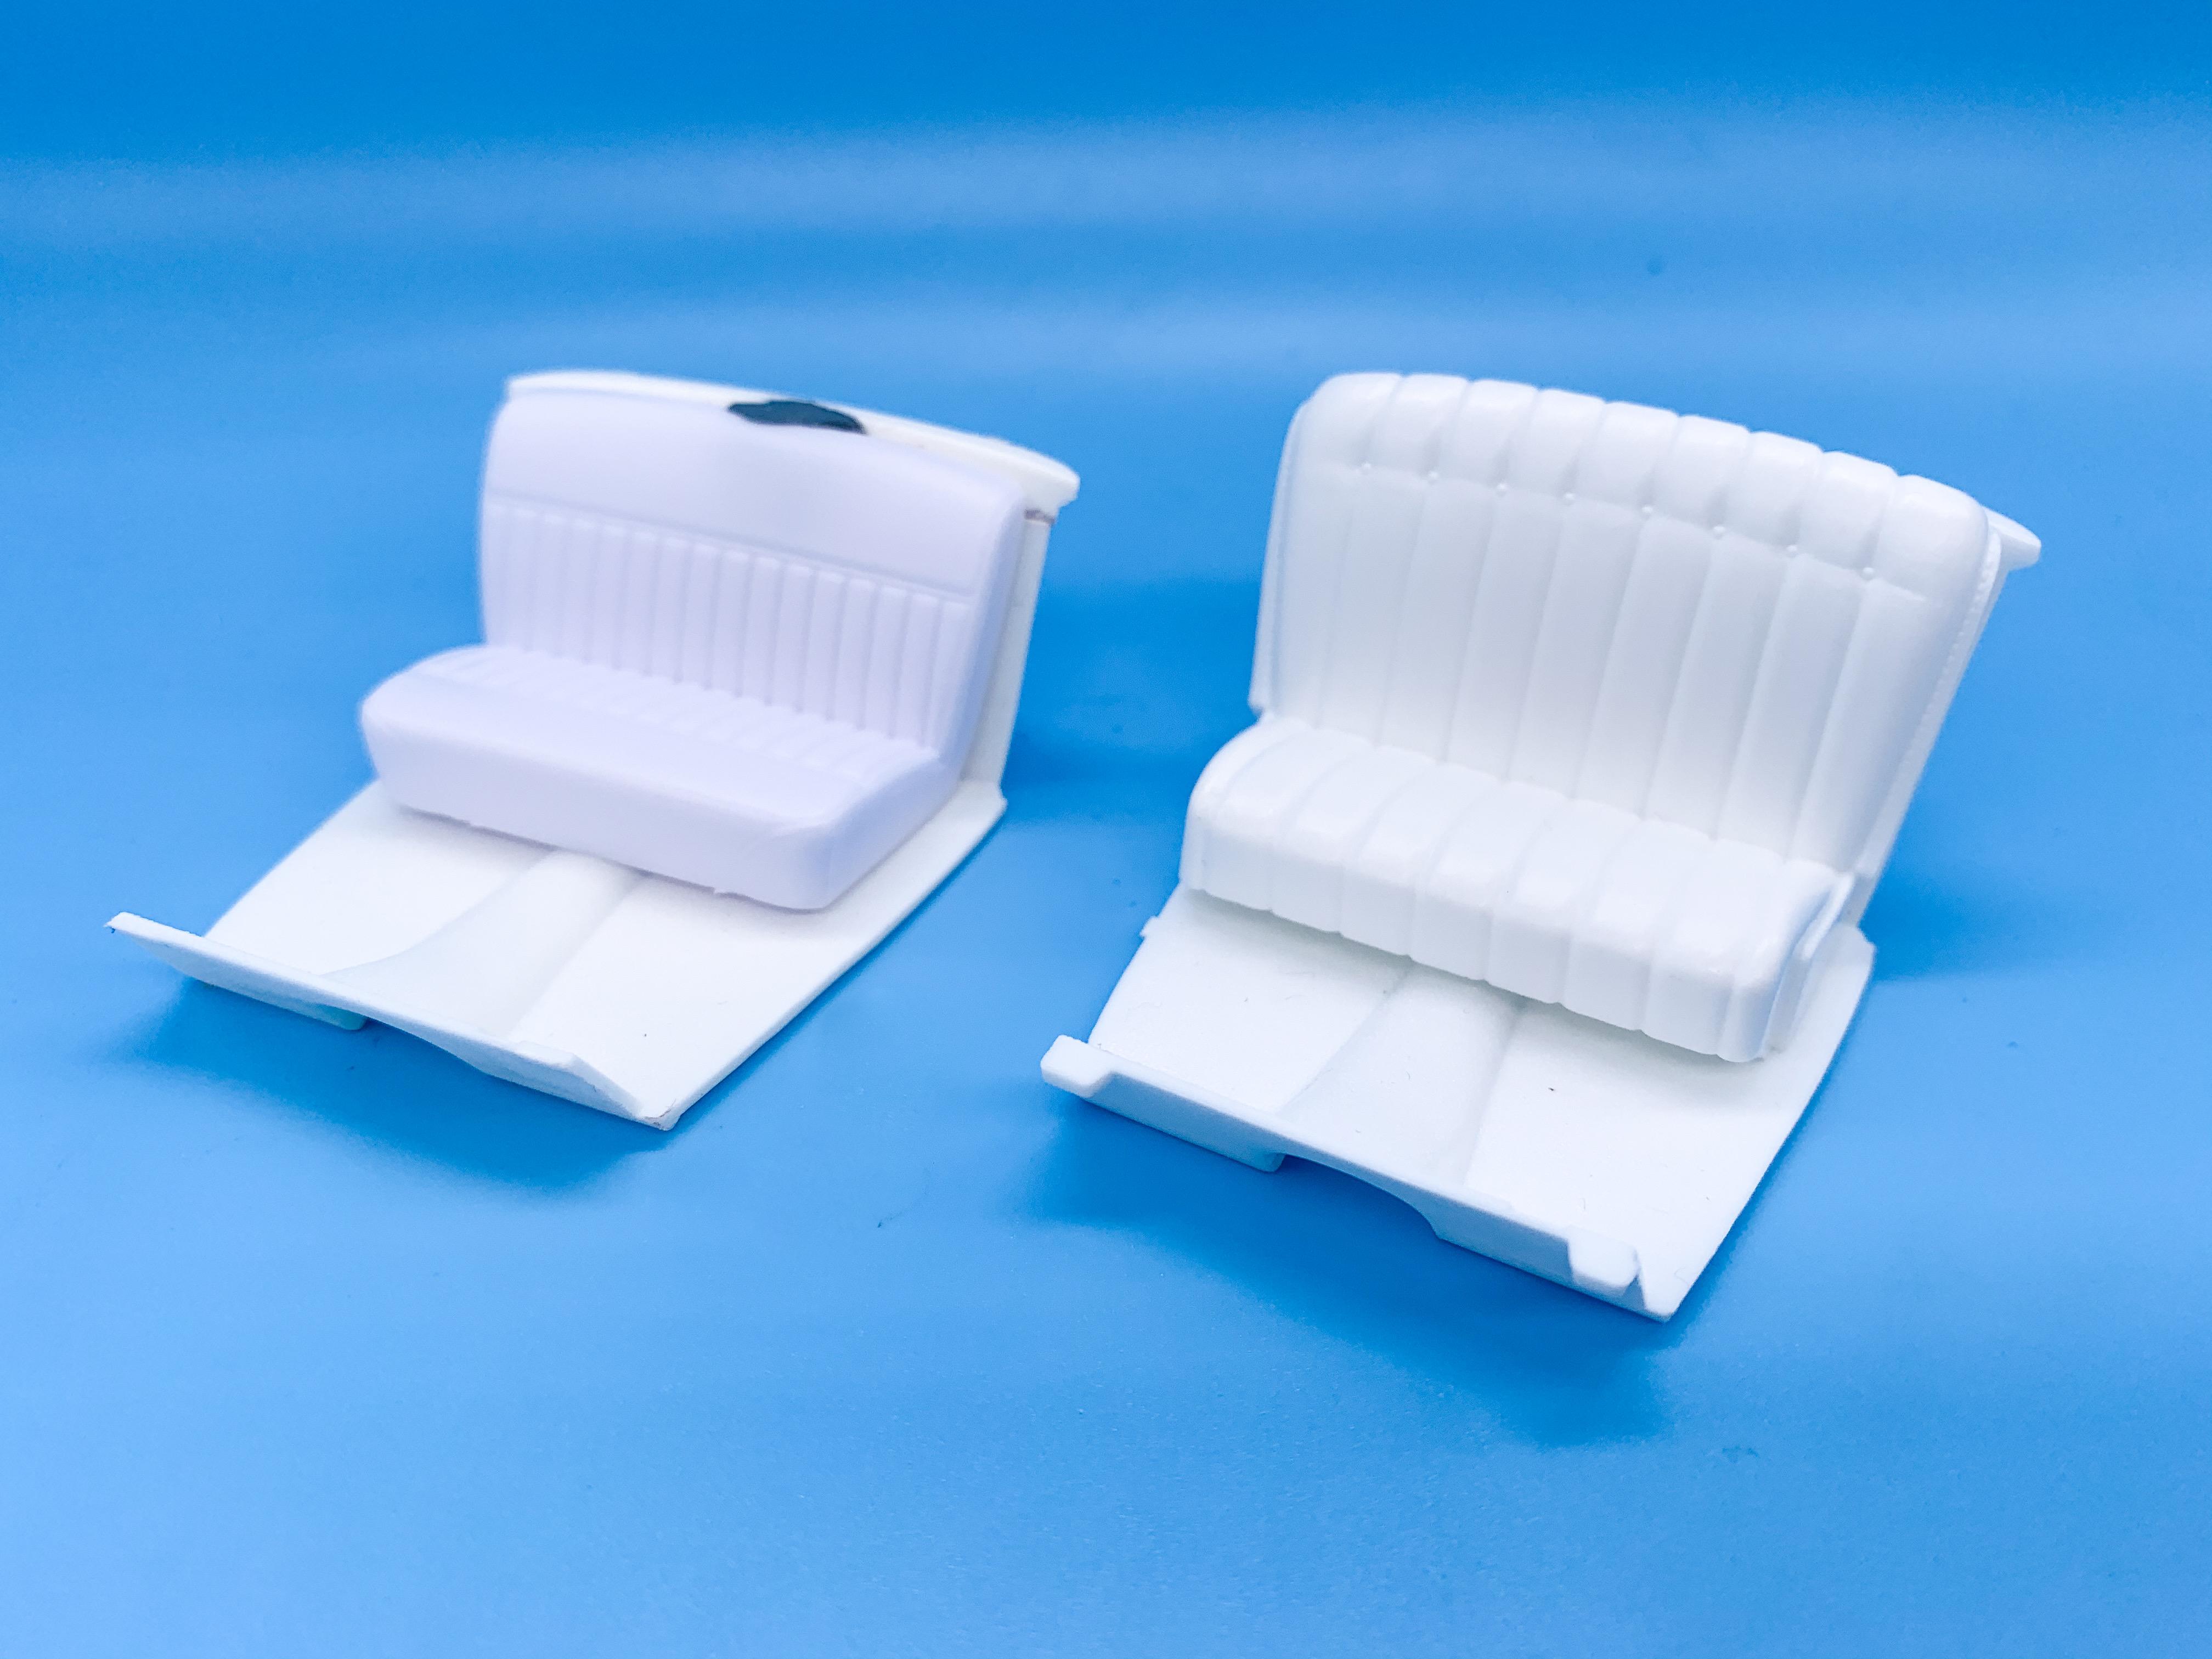
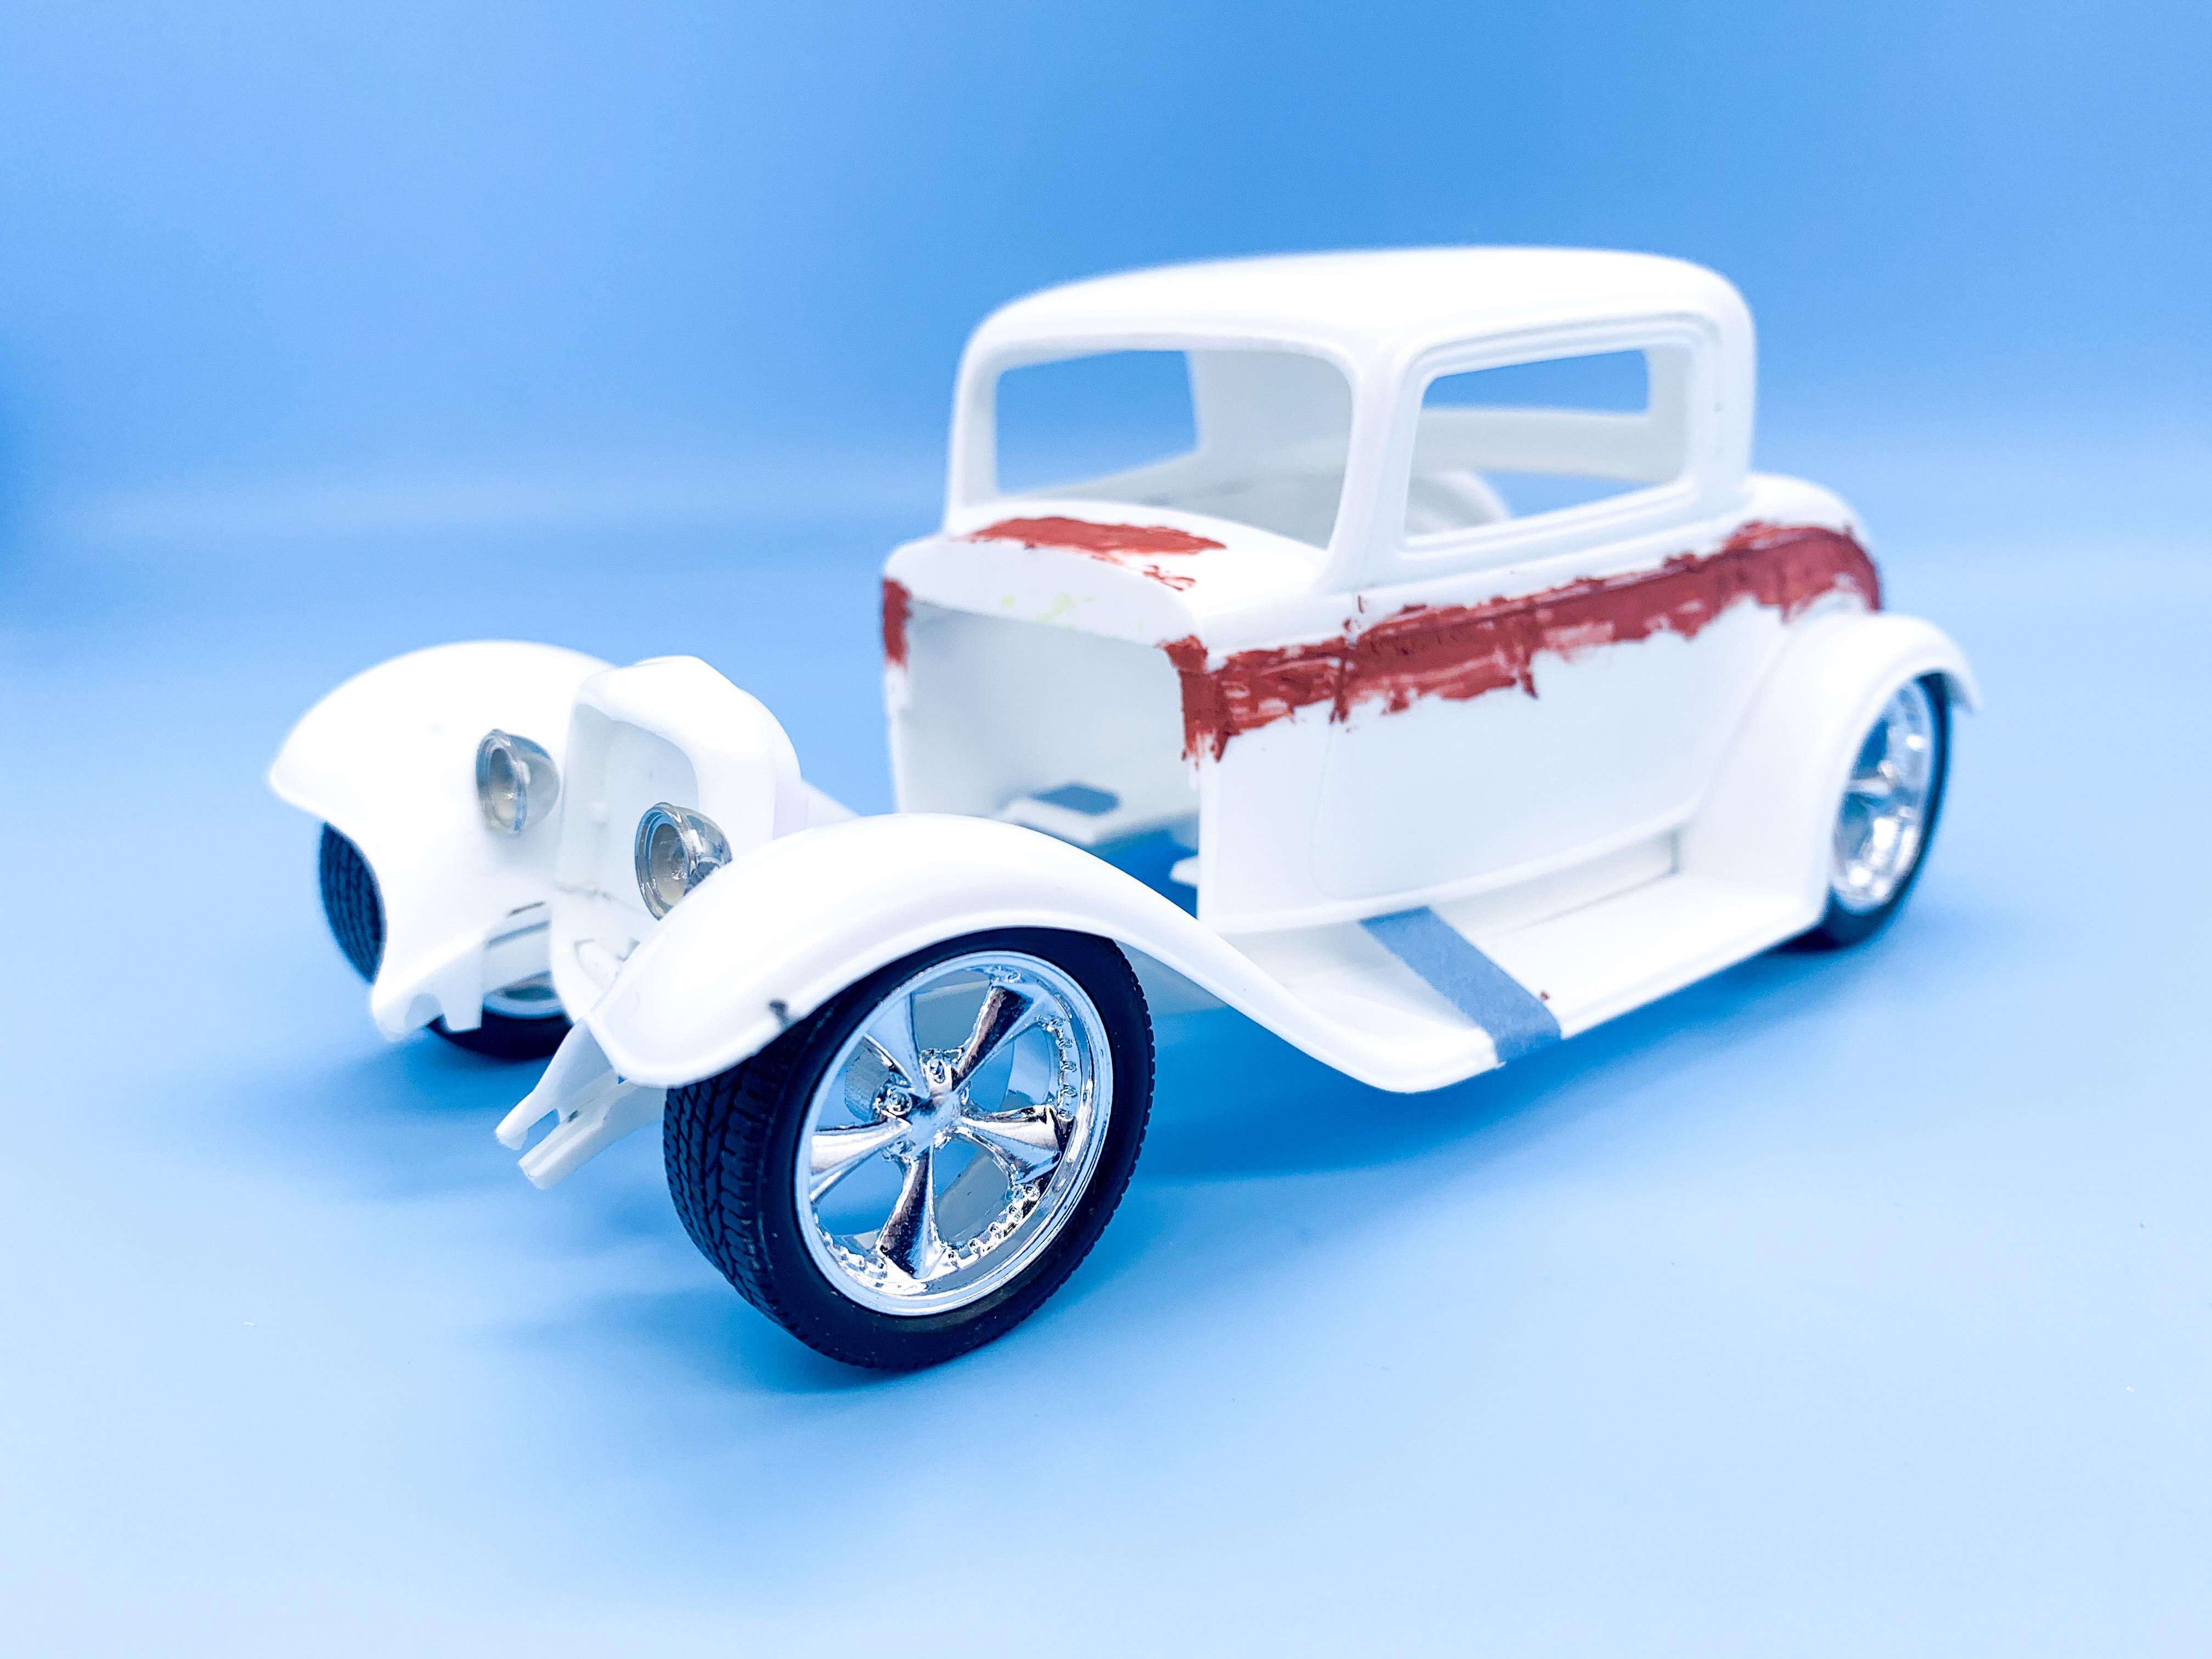
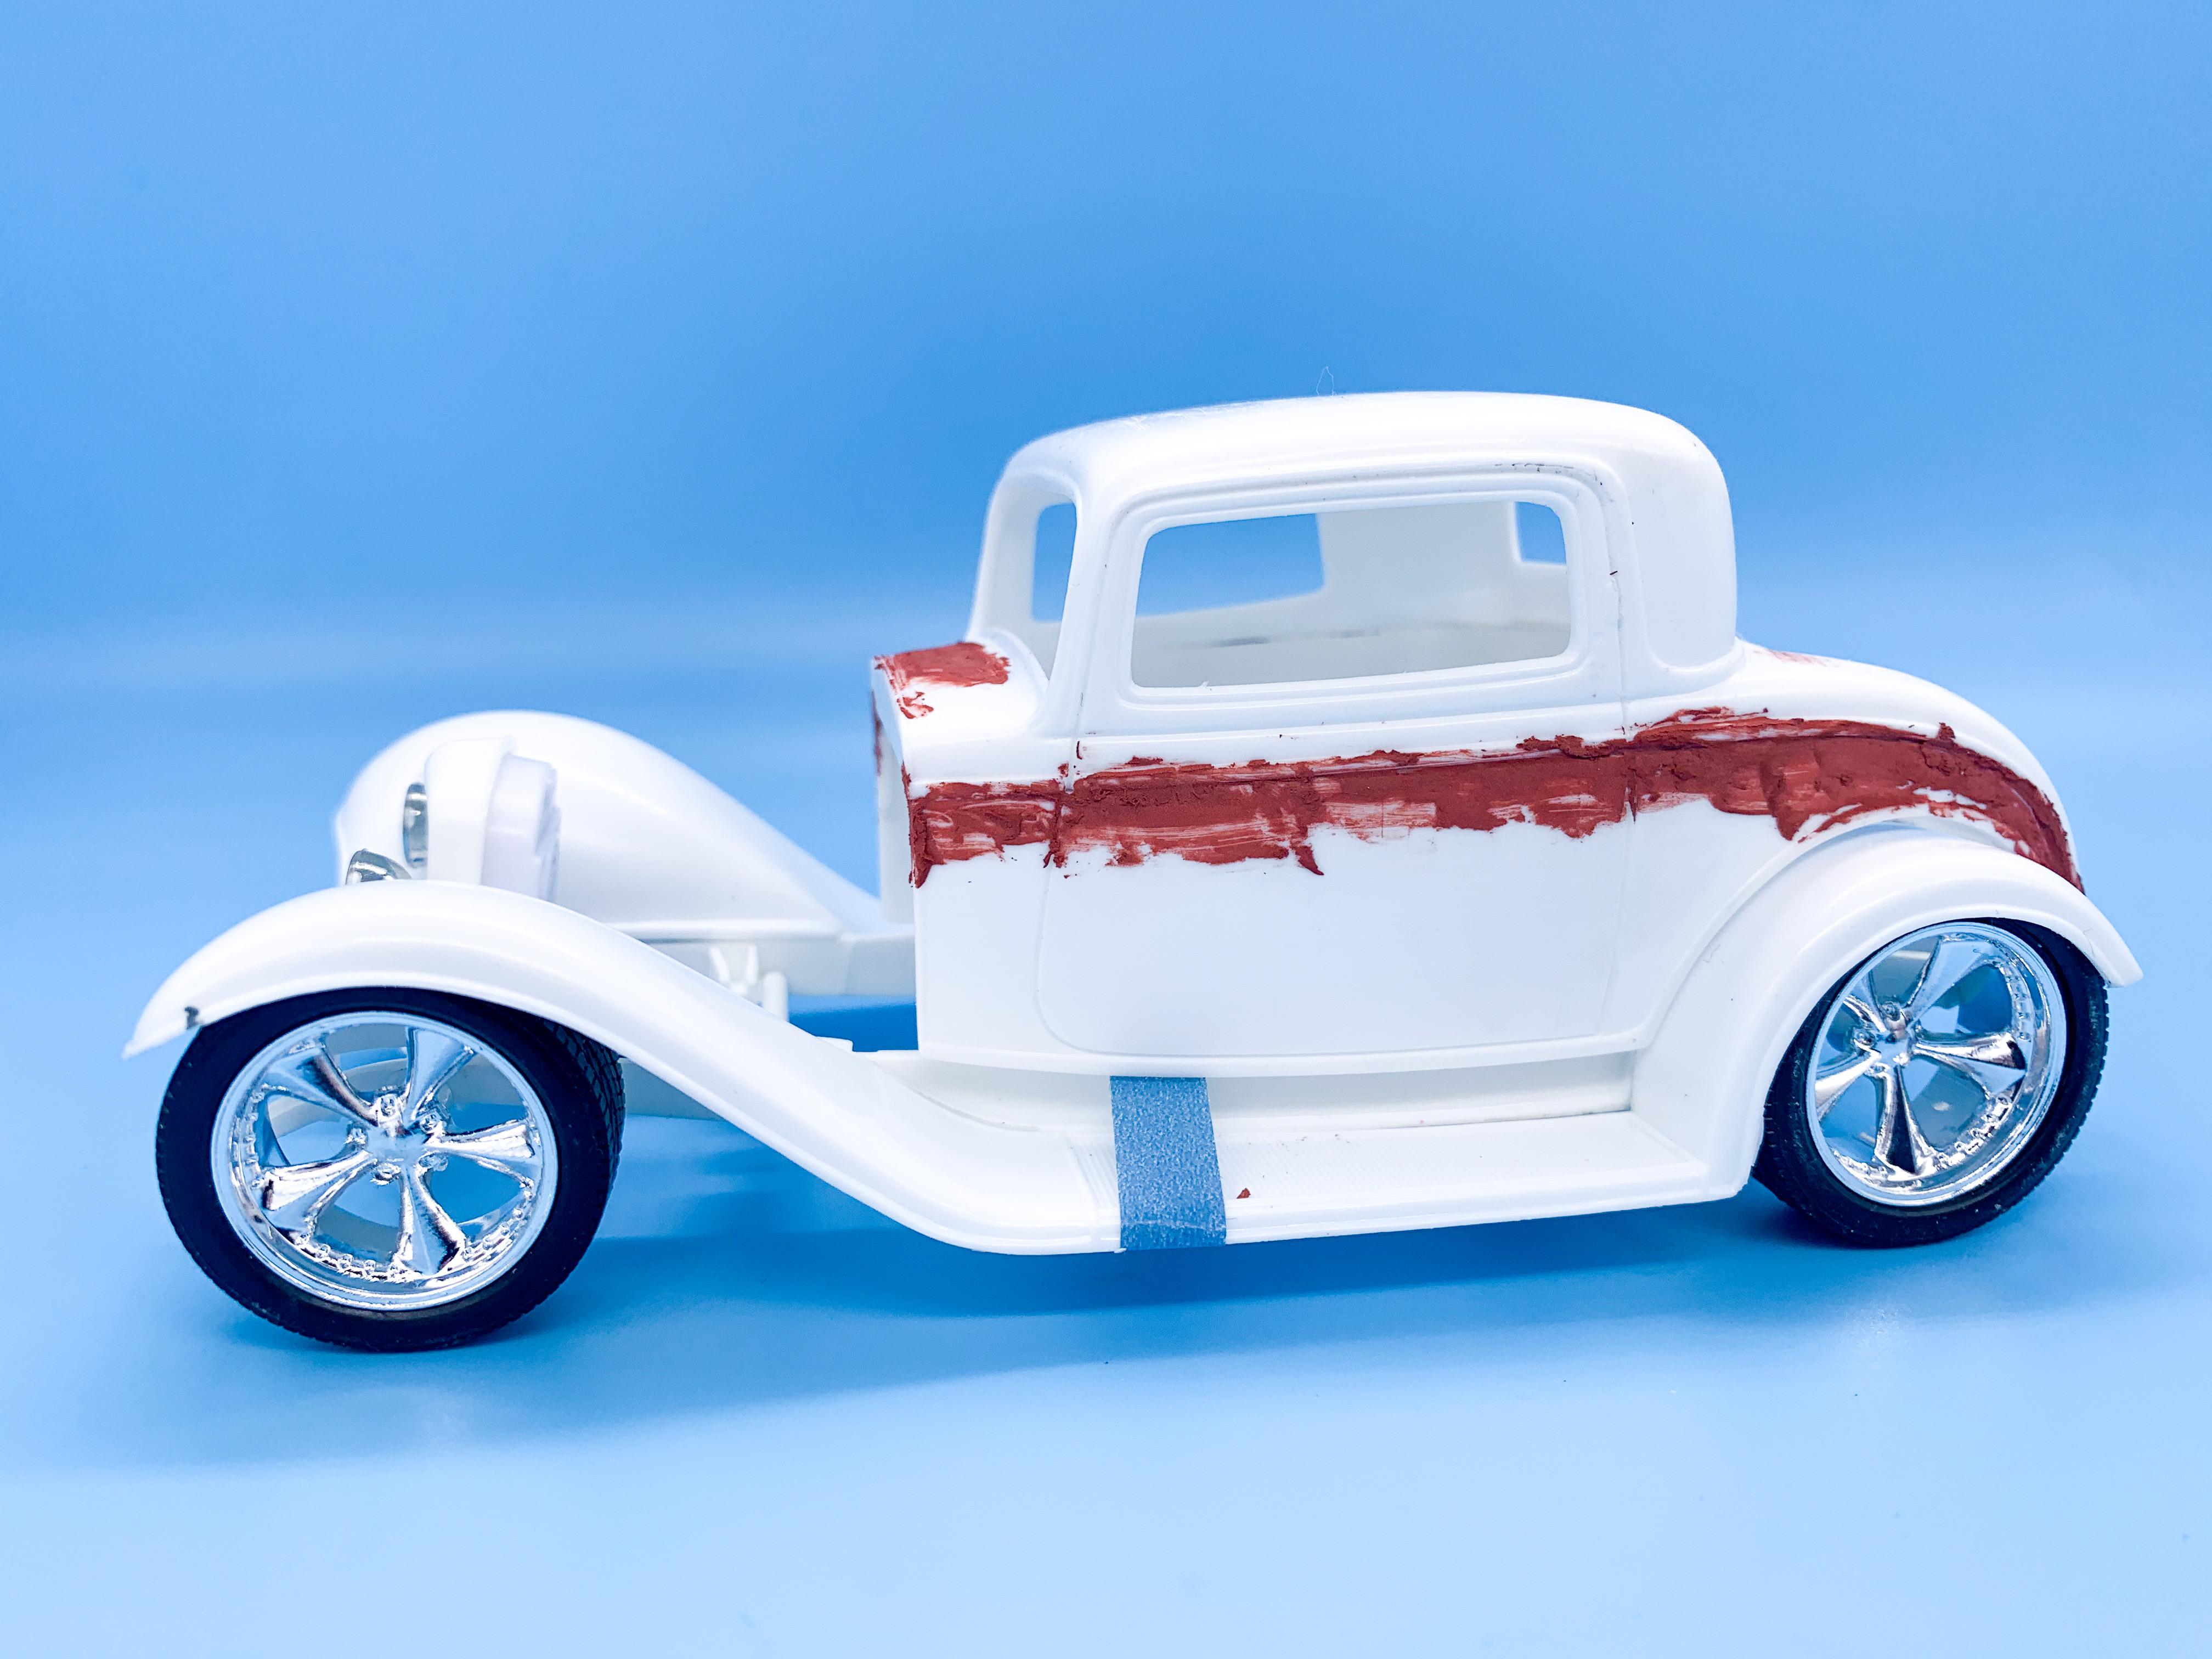
Thank you sir! I did think about a little chop too, but I’m managing to resist so far...just... That’s REALLY helpful, thank you! I didn’t know about the sleeves - really interested to see those! They look GREAT under that Willy’s! A little more of the boring type of progress on this the last couple of days - getting some clean-up done, including fixing all the usual stuff you need to fix on these frames: Looks a mess with all that Bondo ?. Got the devil horns fitted to the rear inner fenders pretty nicely after some fettling (they’re actually better than they look in this pic, but I didn’t have enough hands to hold them in place AND take the picture) I spent some time thinking about engine options and most what I have here is too traditional for this build...then it occurred to me I’ve never actually built one of the kit SBFs and that would probably be a good choice. Not original, and I kinda wish I had something more exciting - but it’ll work great, the optional fuel injection setup is cool and I have at least ten of them looking for a home ?? Im trying to get all the mock-up and fab done in one go for this one, especially where I’ve changed a decent amount of this thing, so next job was the interior tub which I needed to section down (after left, before right): That shorter seat is from the Revell 29 and looks a little less Grandpa’s Armchair than the kit one so I think I’ll go with that... And finally, another quick mock-up for my own motivational purposes...more soon!

-
Boss Mustang Funny Car Kit
OldNYJim replied to Immortal Chips's topic in Model Building Questions and Answers
Last unbuilt kit to sell on eBay sold for $77 - but it included a Kylo Ren figure of some sort, so you’d need to subtract whatever he’s worth. A built-up sold for $13, and an empty box sold for $15...so somewhere between $13 and $77! ?
-
Supermodified
OldNYJim replied to Brianl's topic in WIP: Other Racing: Road Racing, Land Speed Racers
Wow, those Hoosiers must be pretty soft - you can see where they picked up the diamond plate pattern from the trailer! Really enjoyed watching this build come together — stunning building skill on an interesting subject! I wanna make one too! -
Seeing more progress on one of your builds is like a new episode of a favorite show, Steve. Great work!
-
Nice work as always Donn I saw on one of the groups that you have a new DVD coming out - what’s this one about?
-
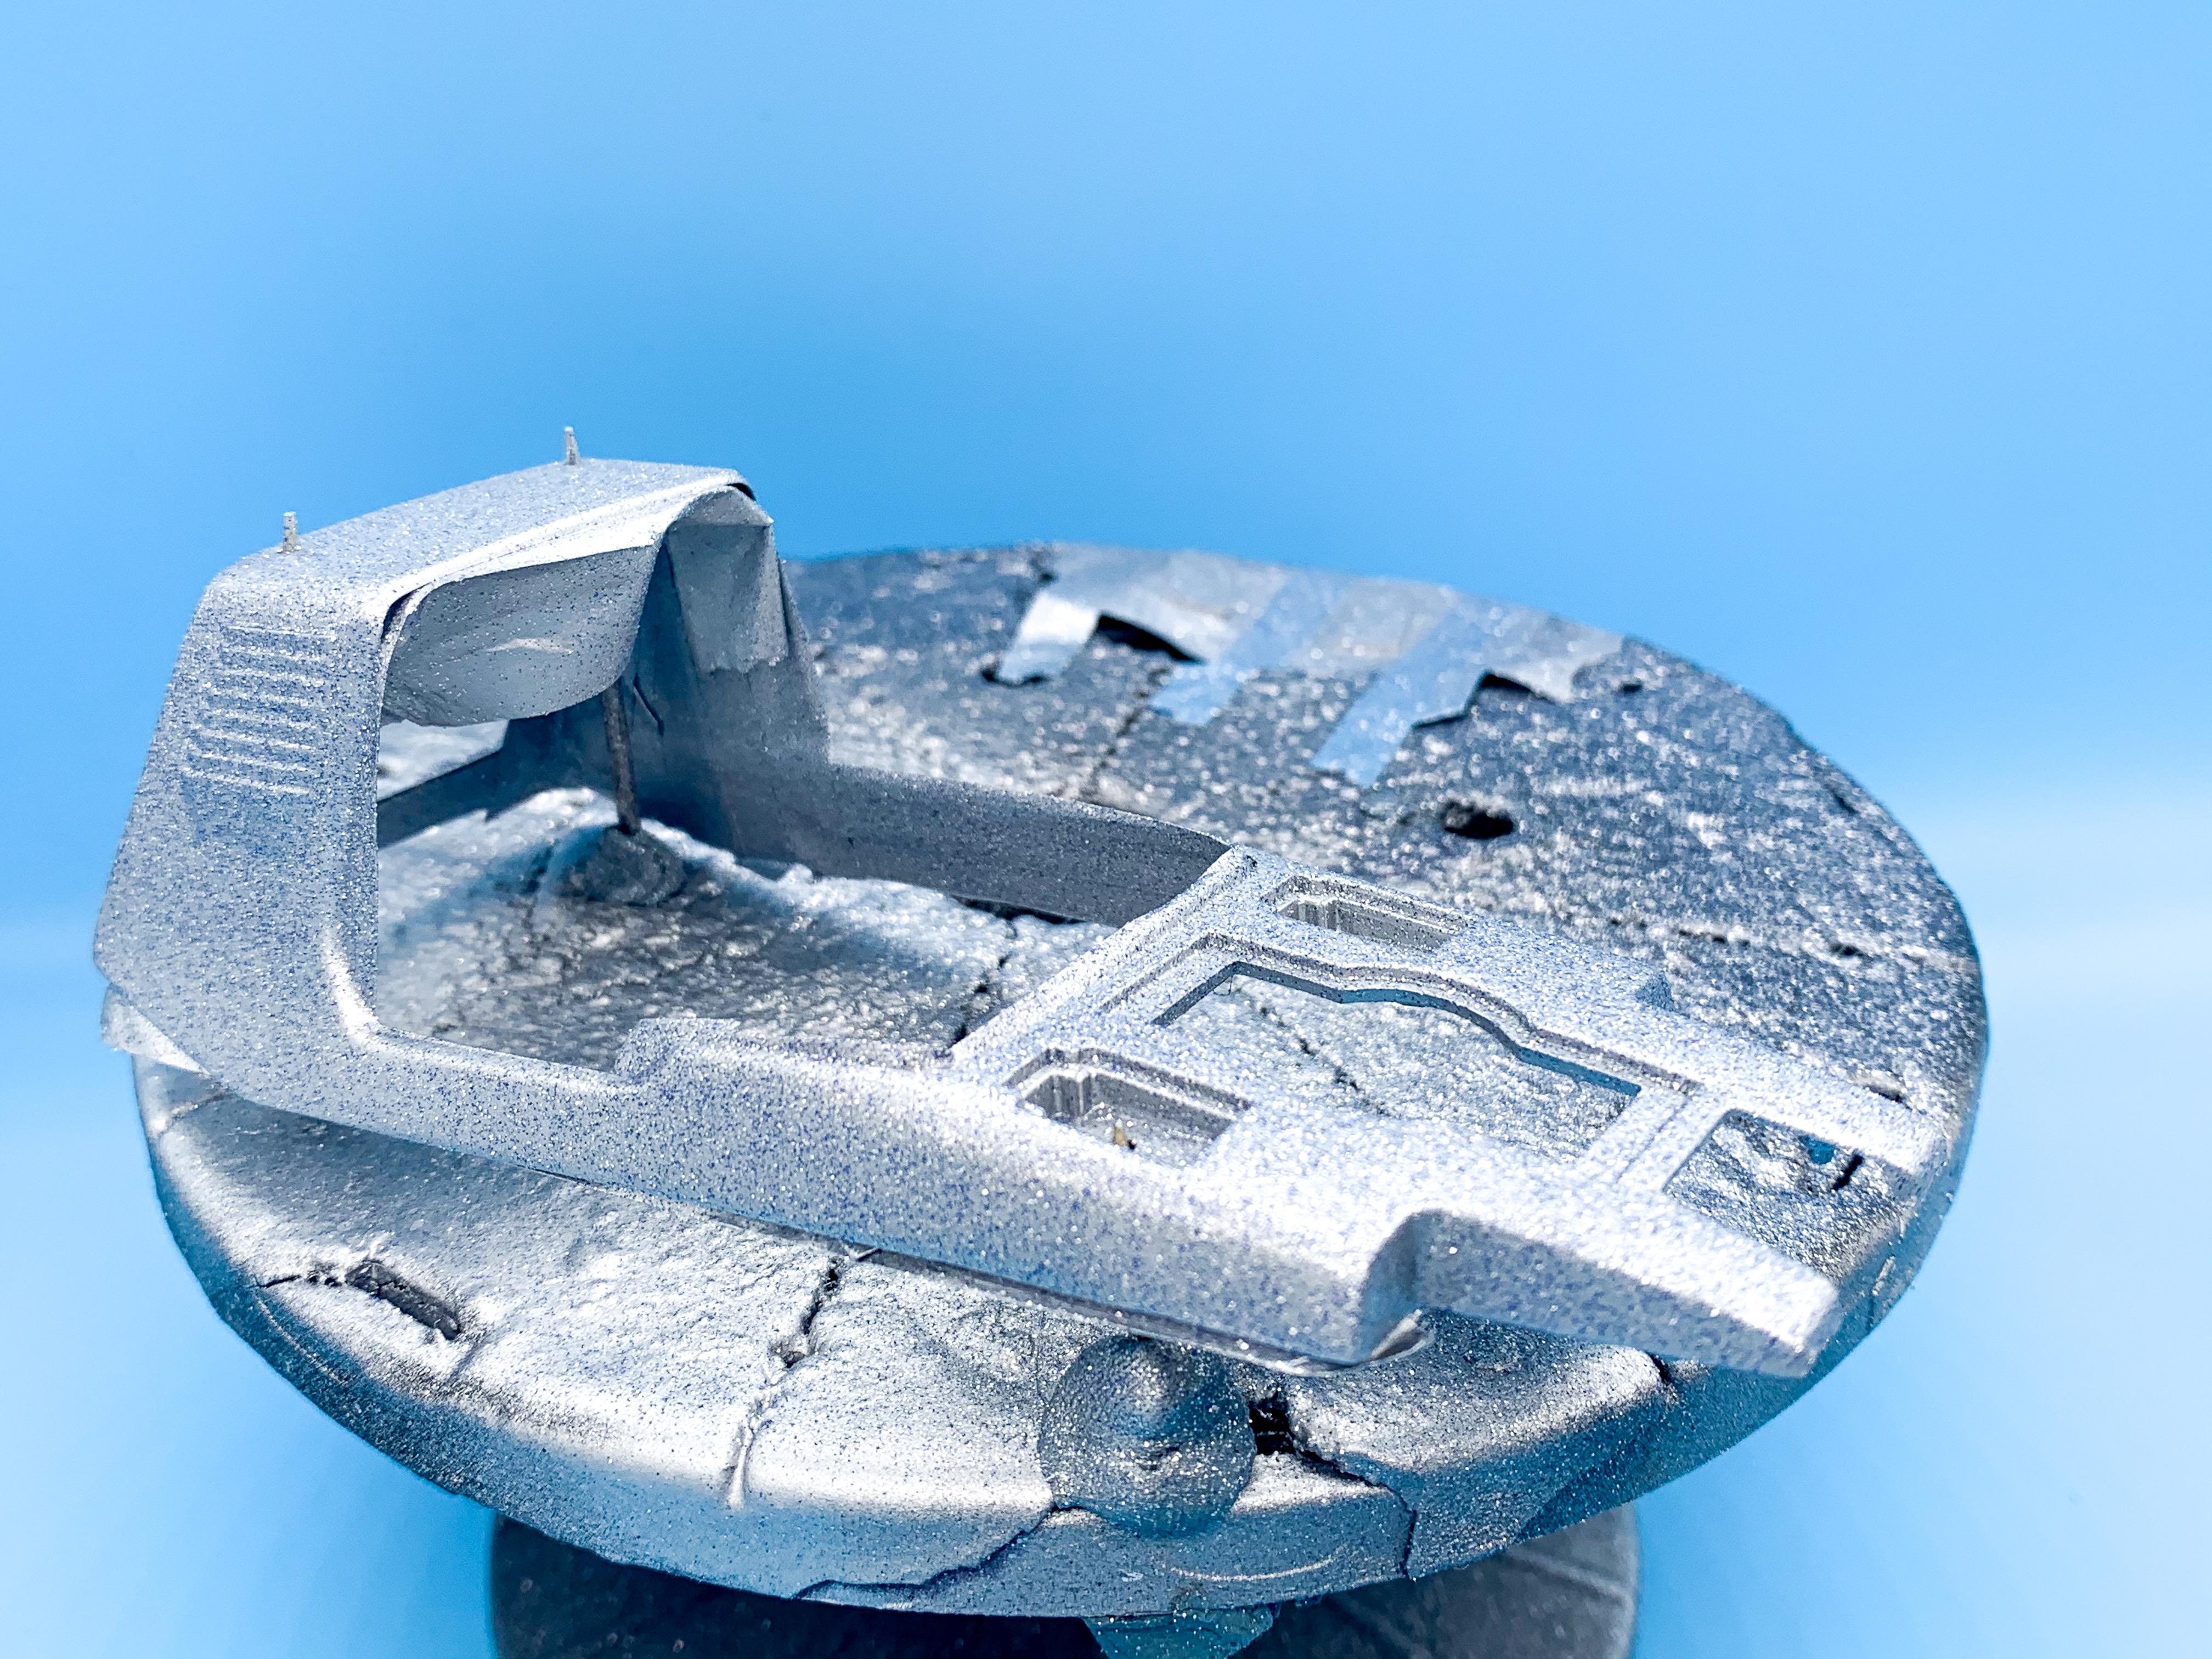
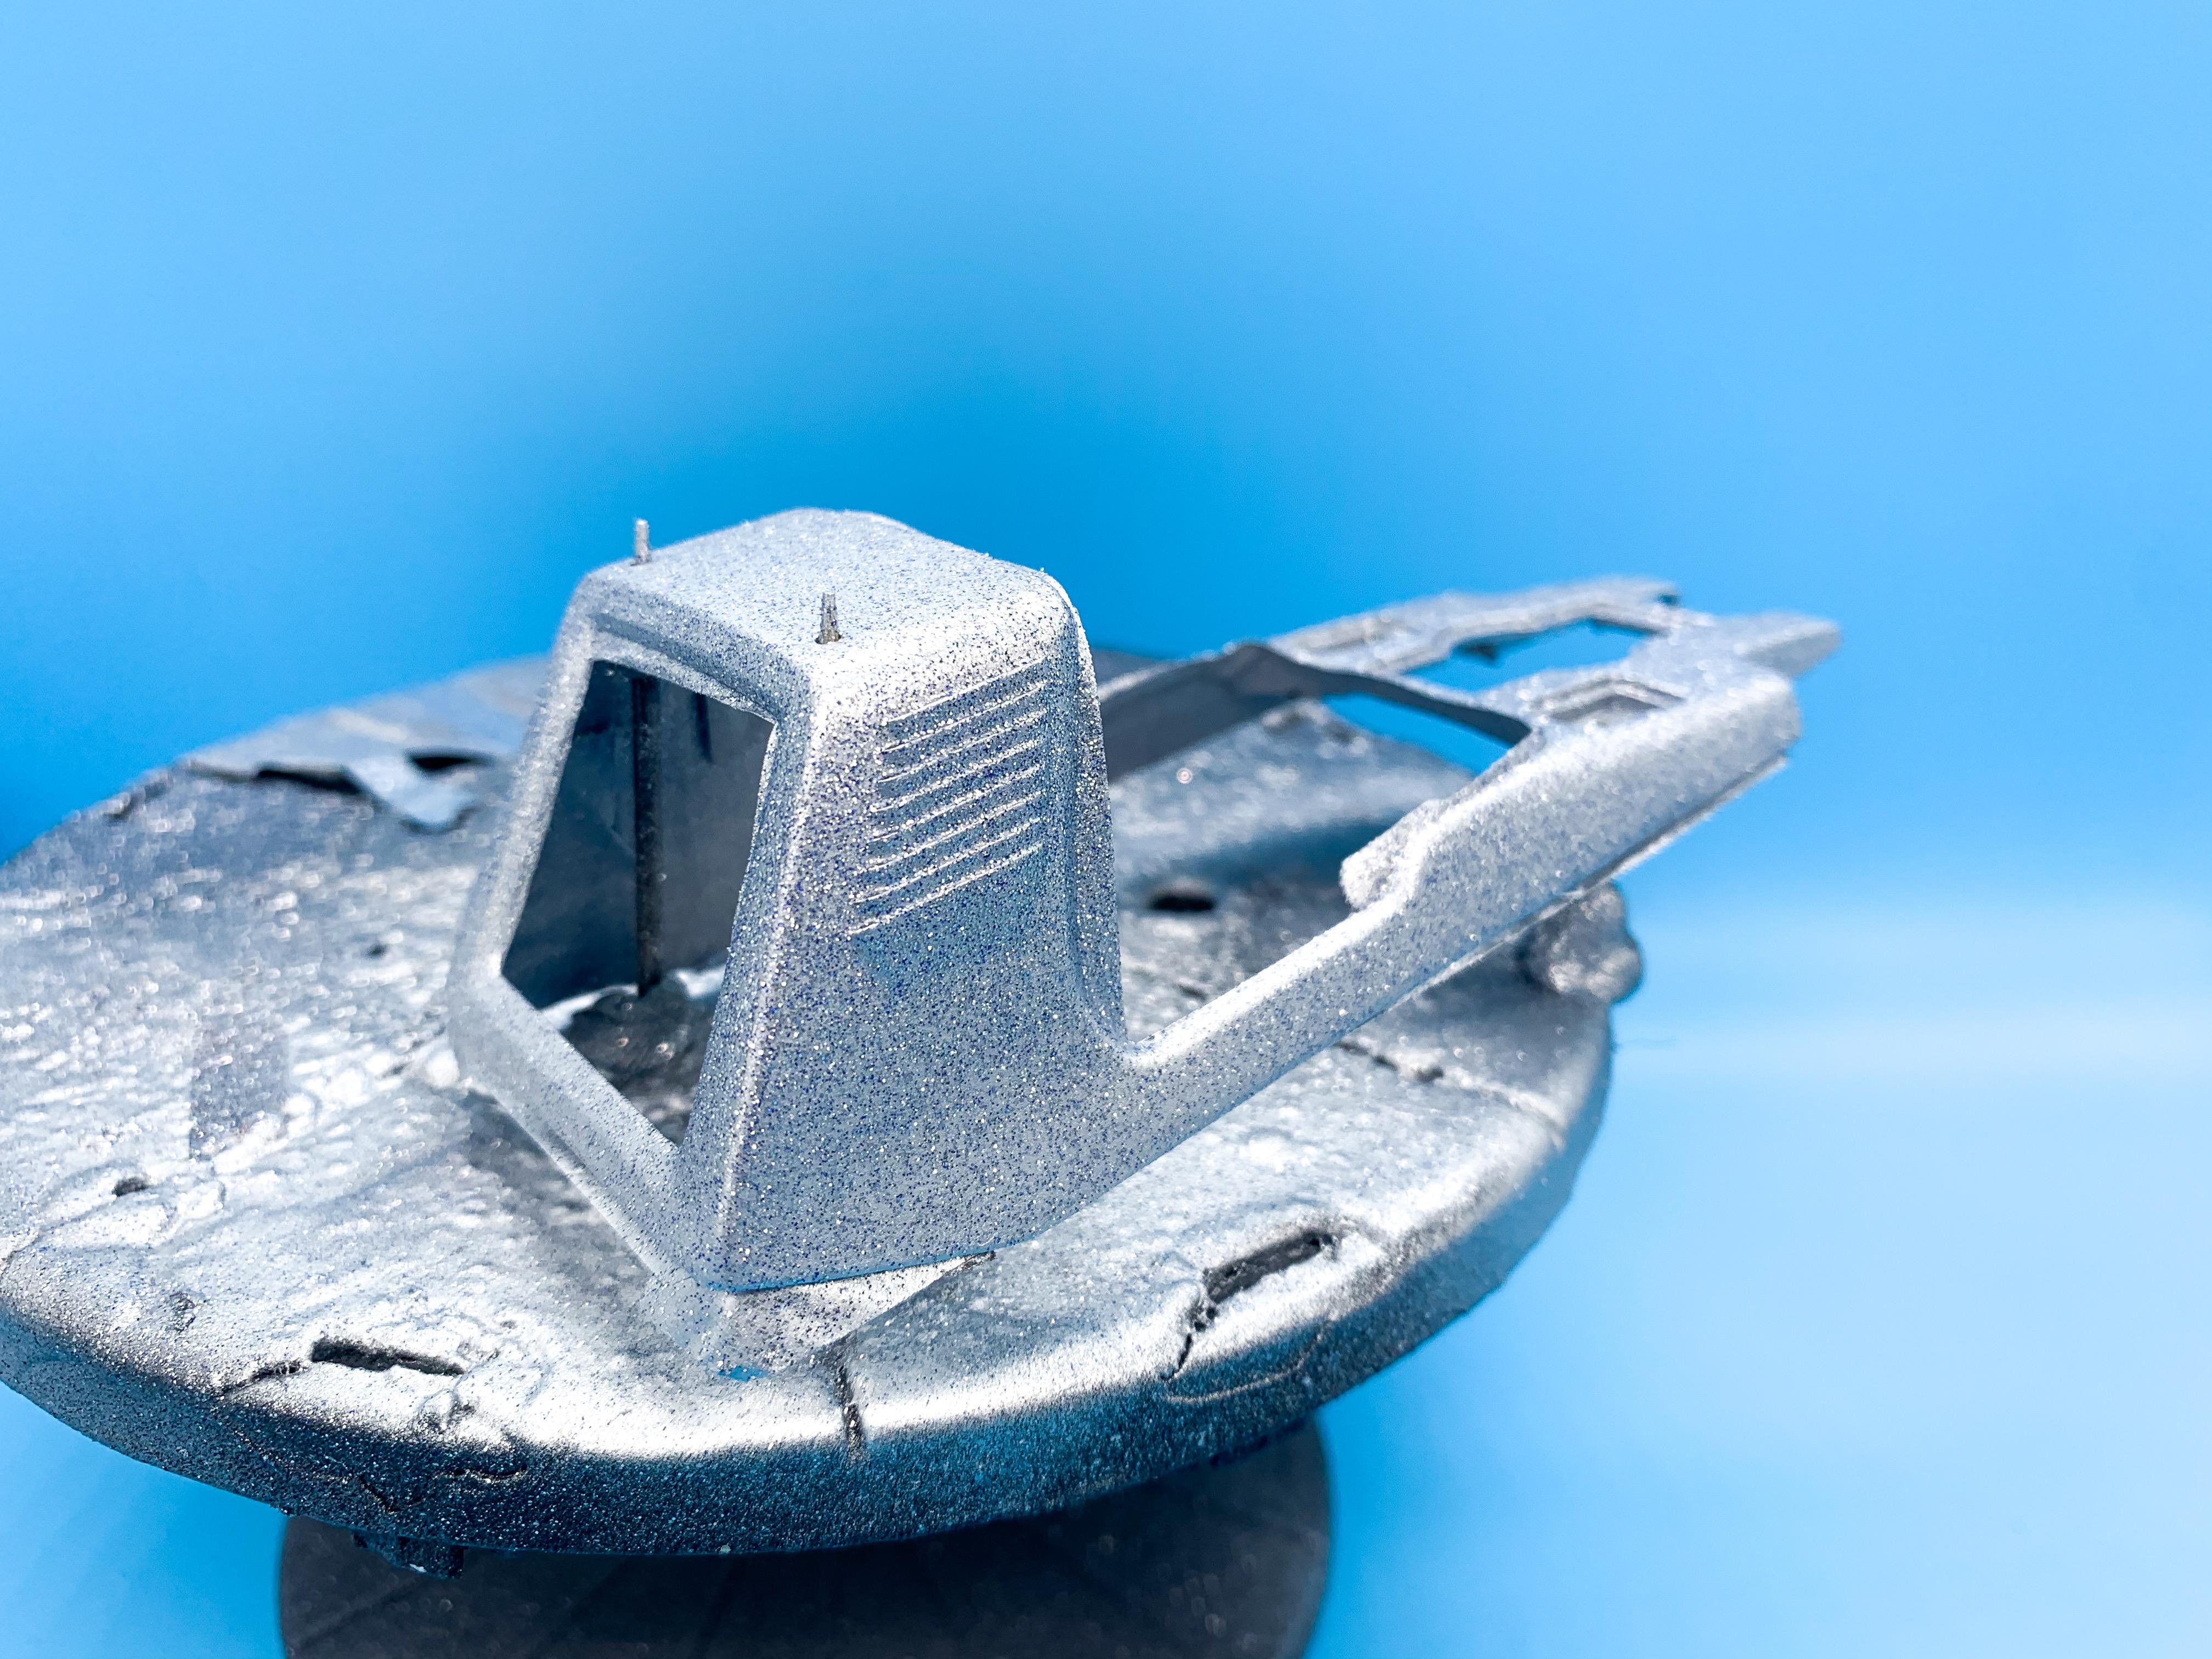
I’m not allowed to use crayons in case I eat them ?♂️? This is SO cool man!! I LOVE it! Thank you for sharing! I love these crazy old builds! 3D Scale Parts does a set too; Had a delay on this build whilst I waited for a chance to pick up some paint - Michael’s reopened here but then they didn’t have what I wanted so I picked some up on Amazon instead - I wanted to try a metalflake silver kind of look for this one, for my own amusement: Now, I KNOW this isn’t a scale flake, but the alien isn’t to scale either and neither is the moon base that comes in the box...just having some fun with this one. Three coats over a silver base: And some clear, to bury the flake: Some Testors clear really helped level this out! IMG_5144.MP4 And a shot in the sunlight...more soon, soon as I’ve done more! IMG_5148.MOV
-
I think you’re right...unfortunately it’s the Model Master ones I just got good at painting with ??
-
The ‘other’ mag is stopping publication
OldNYJim replied to cruz's topic in General Automotive Talk (Trucks and Cars)
Why would you renew a subscription to a magazine that doesn’t exist? -
If you’re interested in making models of aircraft, tanks and fantasy stuff like dragons, sure! Ill be interested to see how they incorporate the automotive stuff into FSM, but I can’t see it being more than 3 or 4 pages worth per issue
-
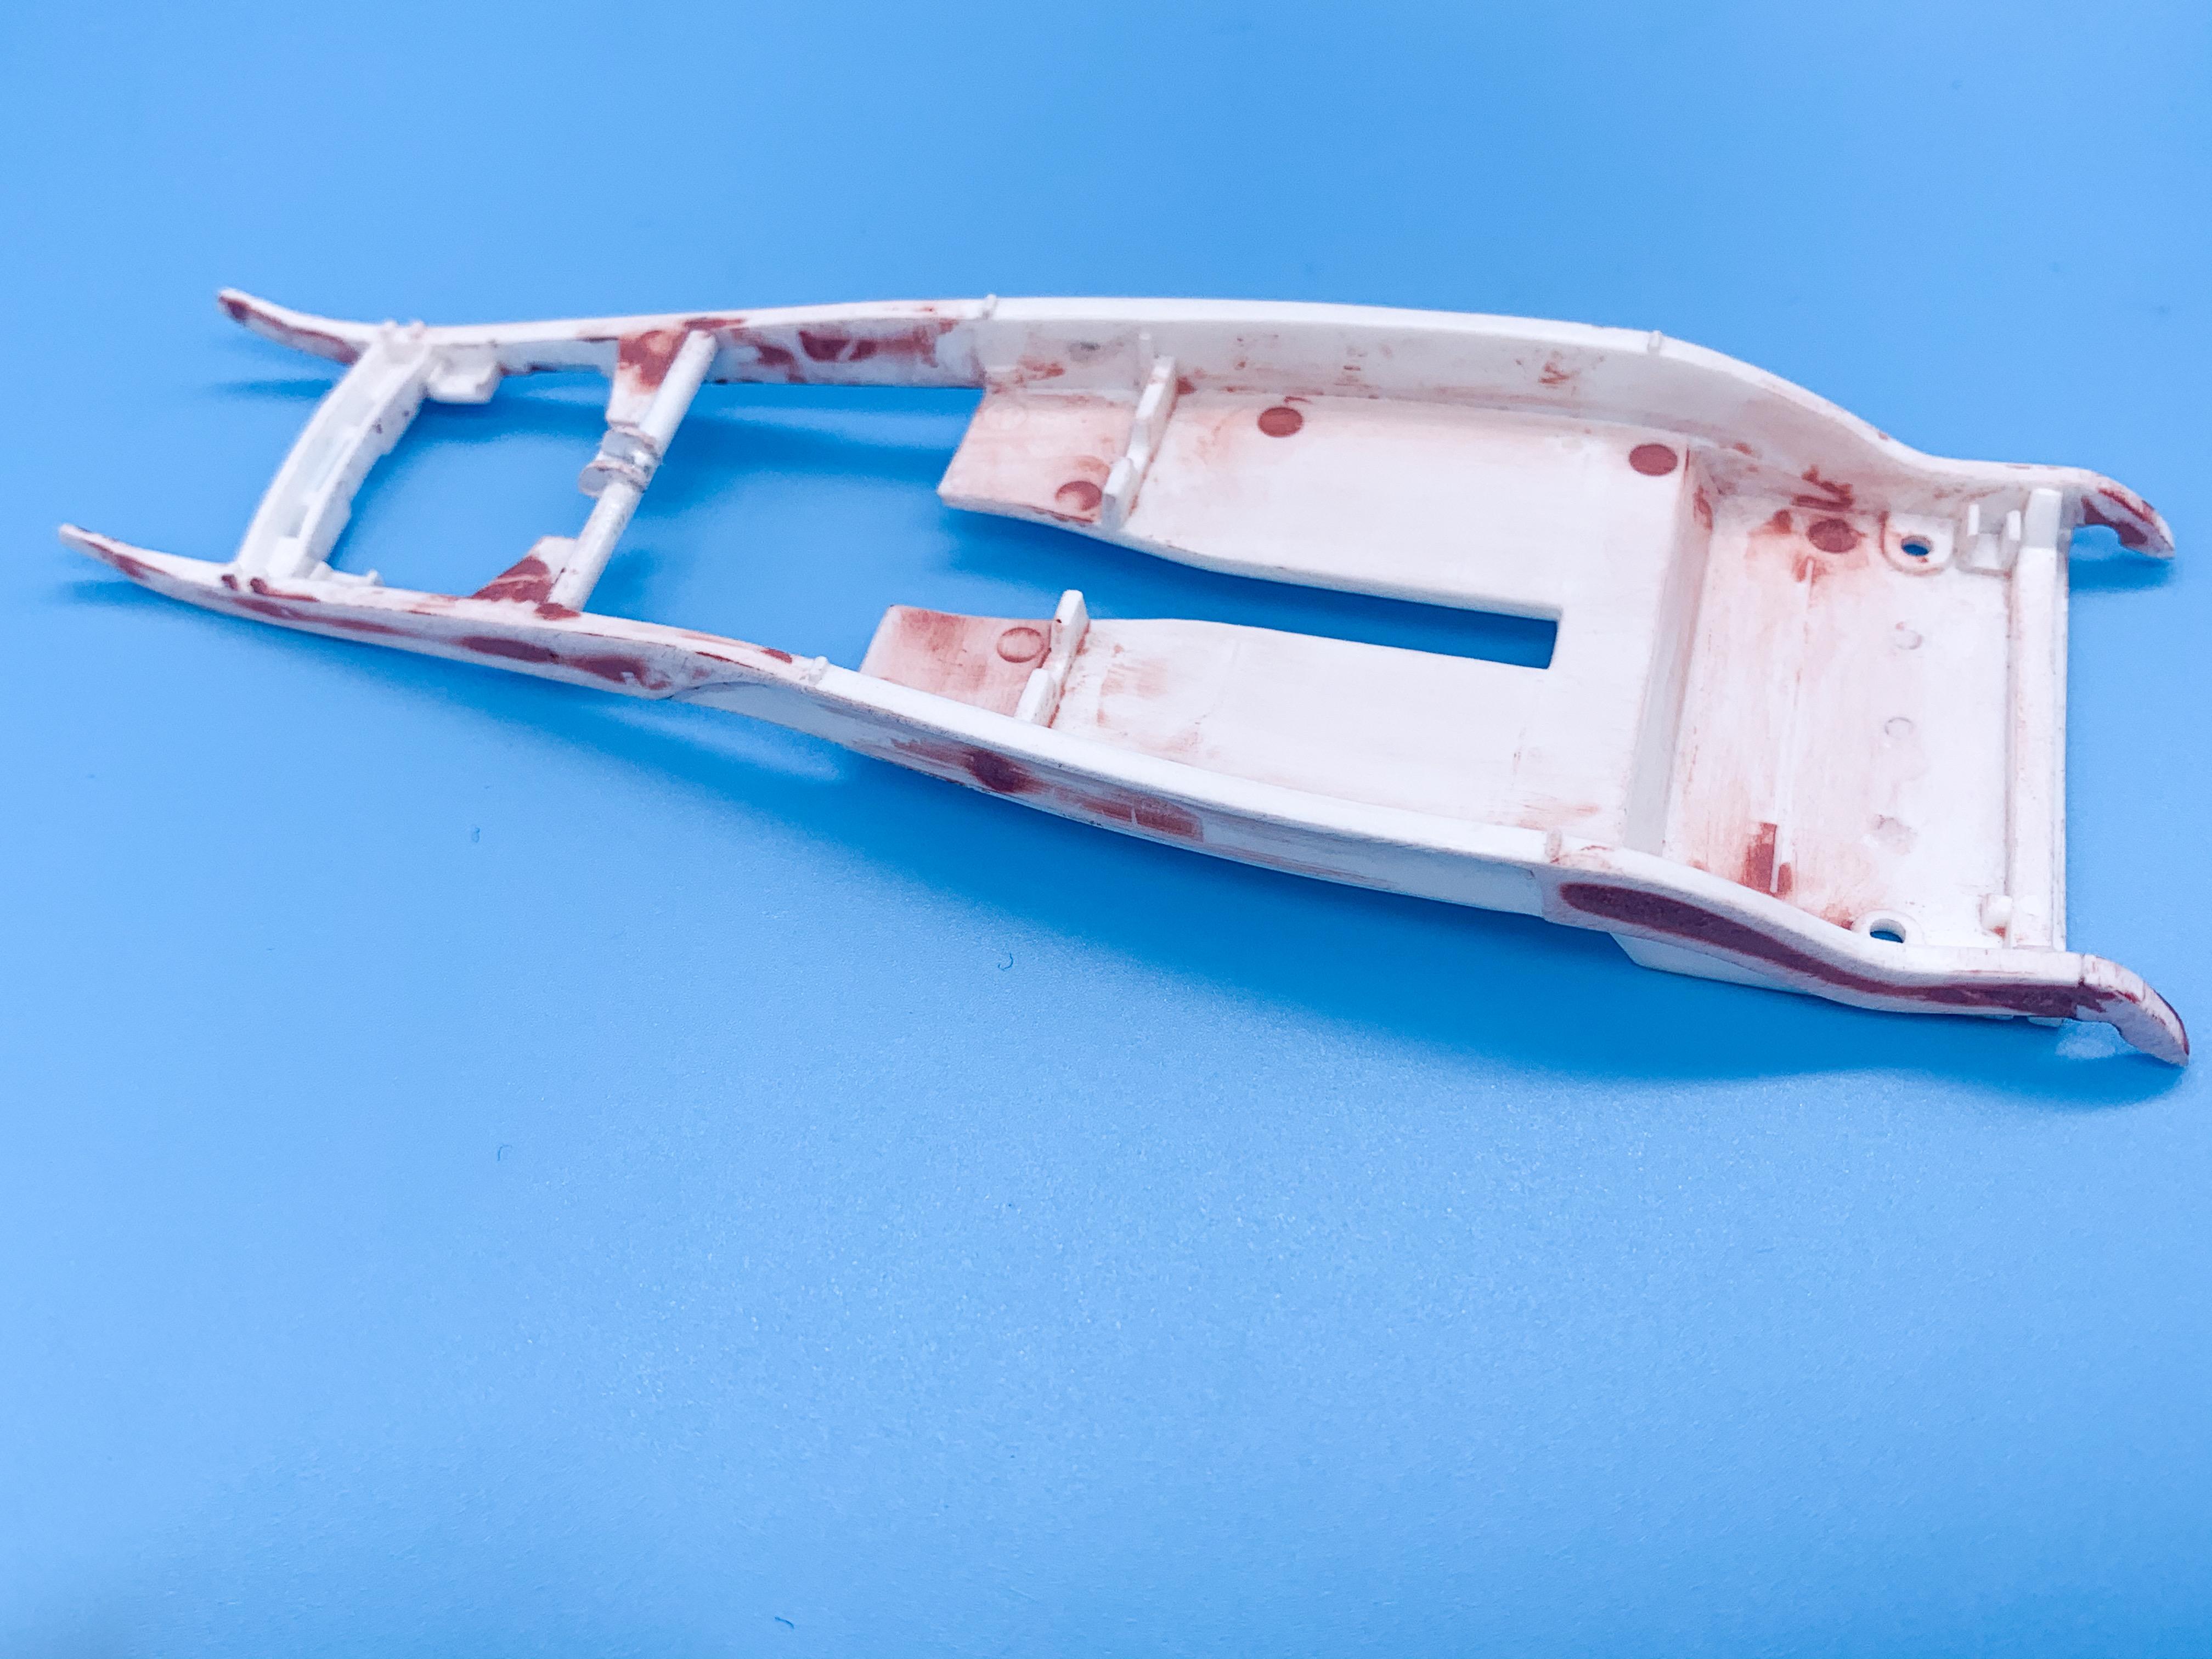
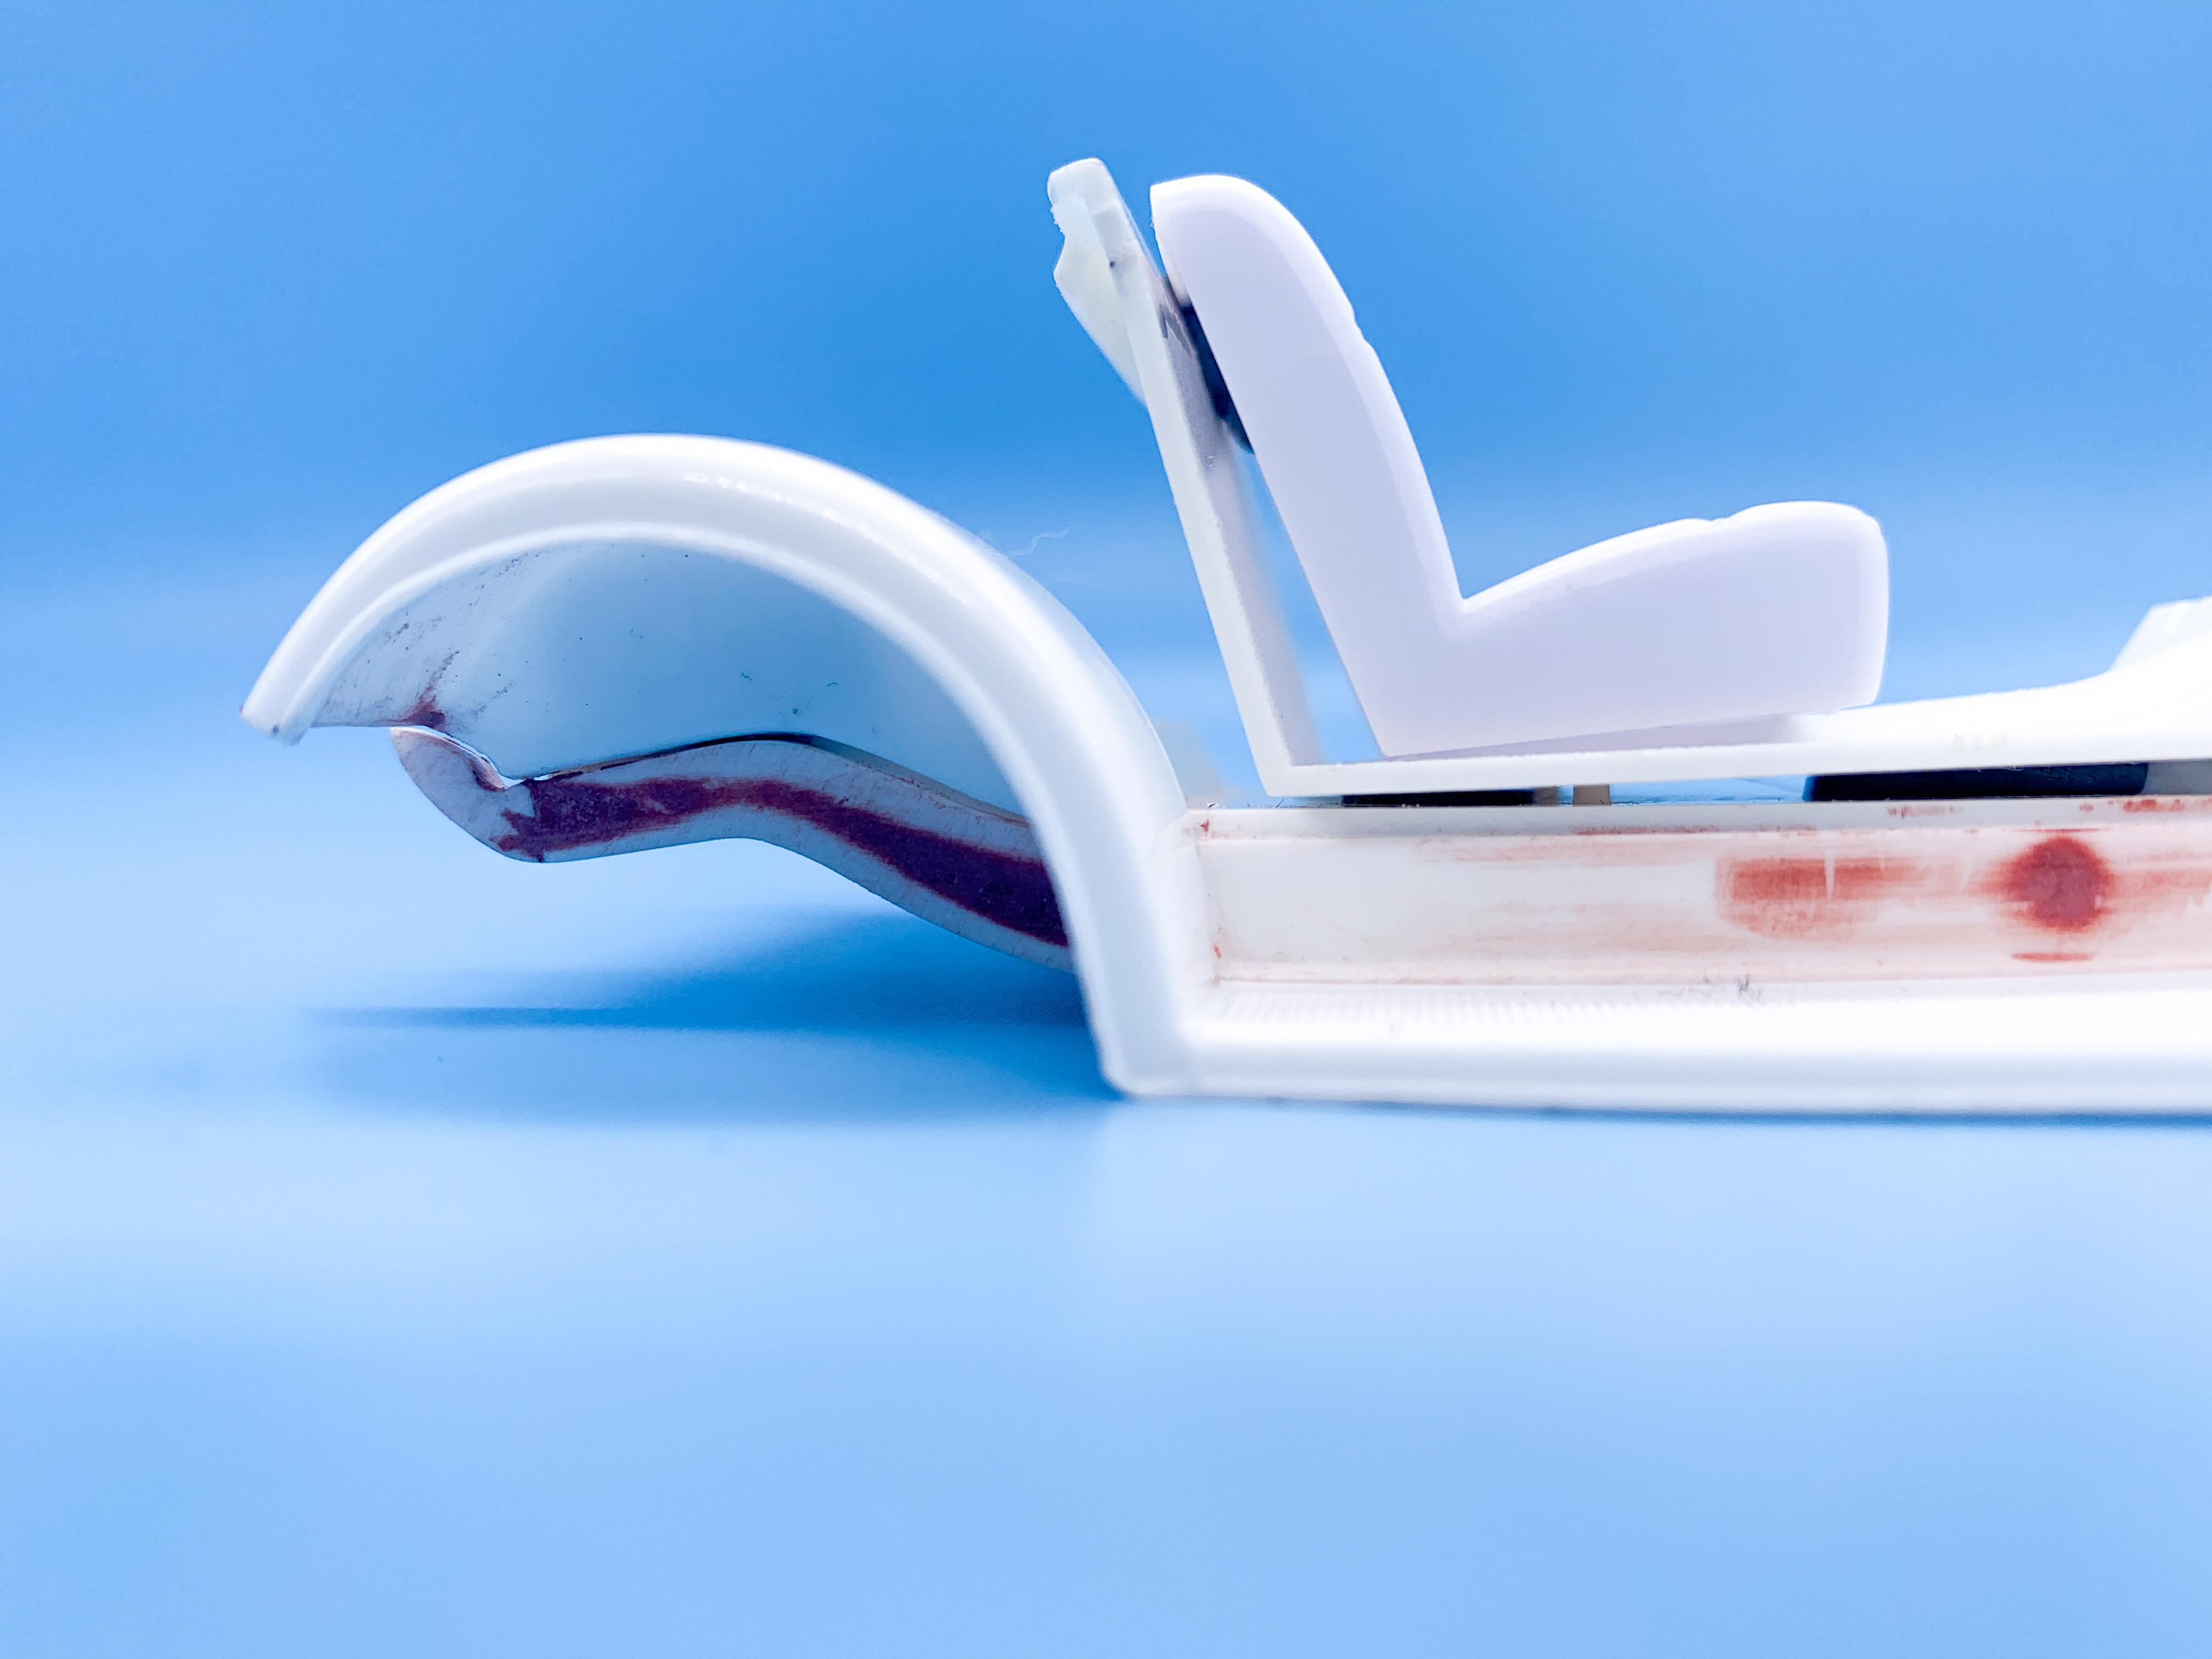
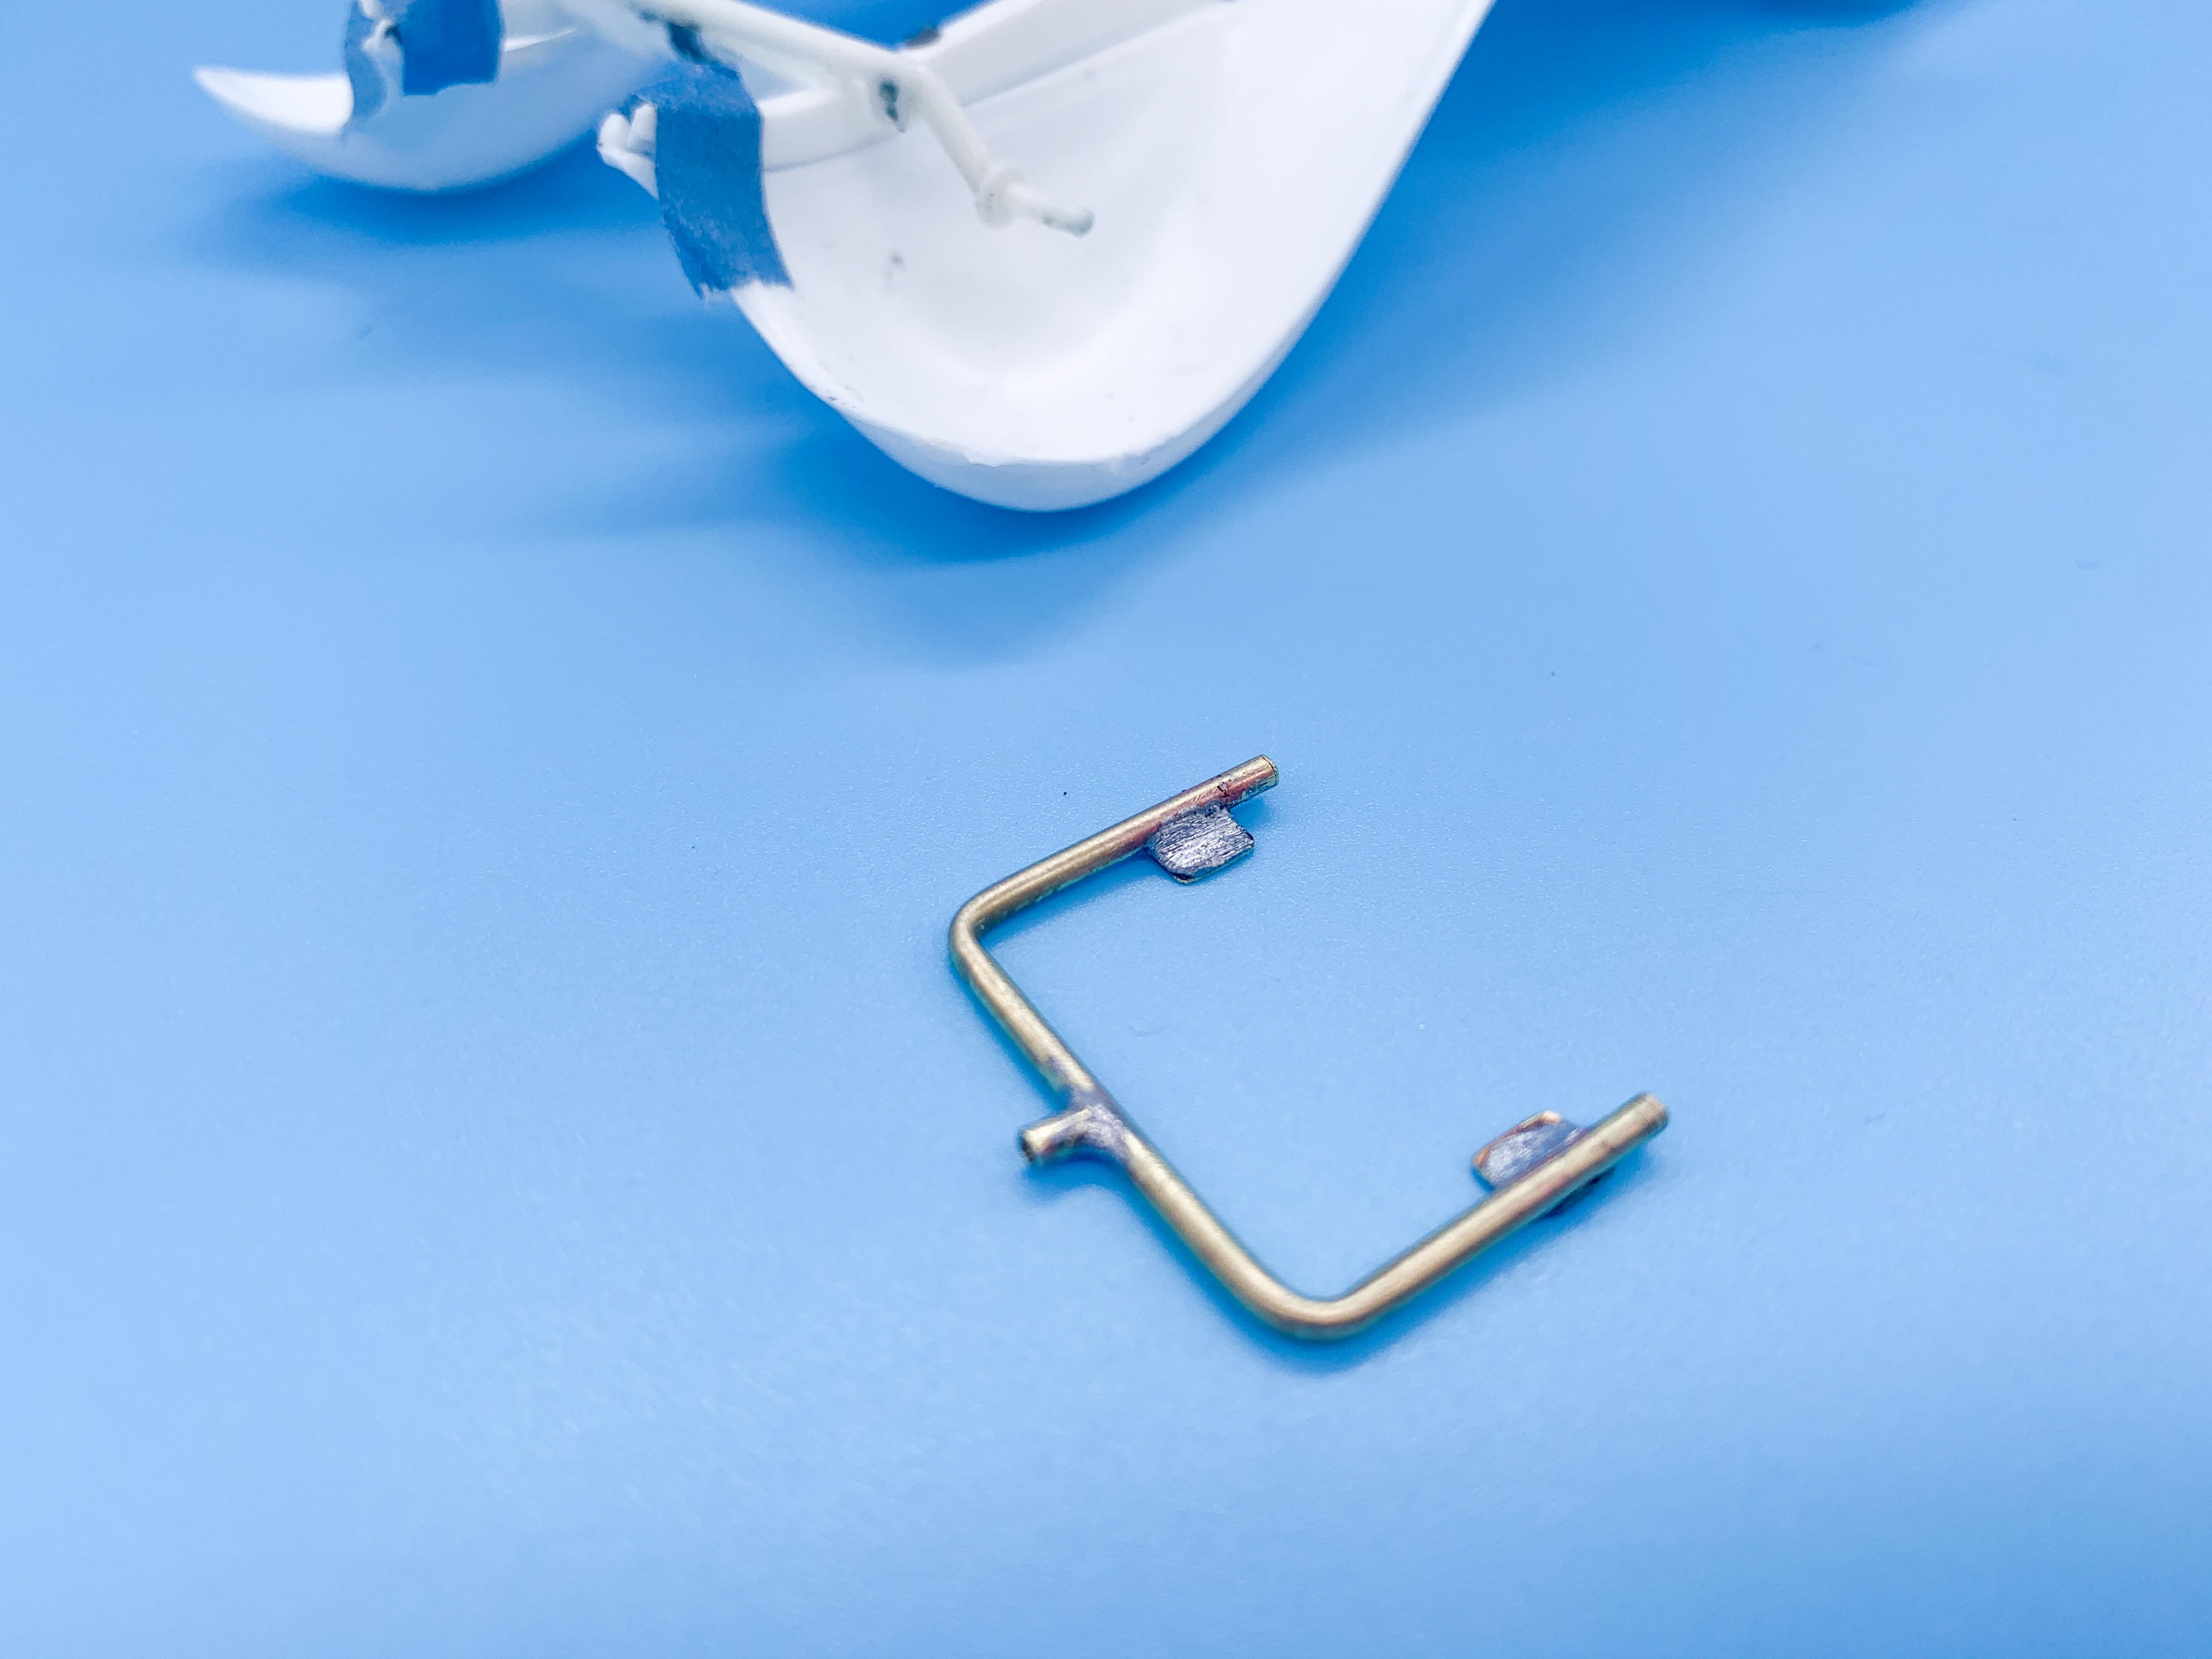
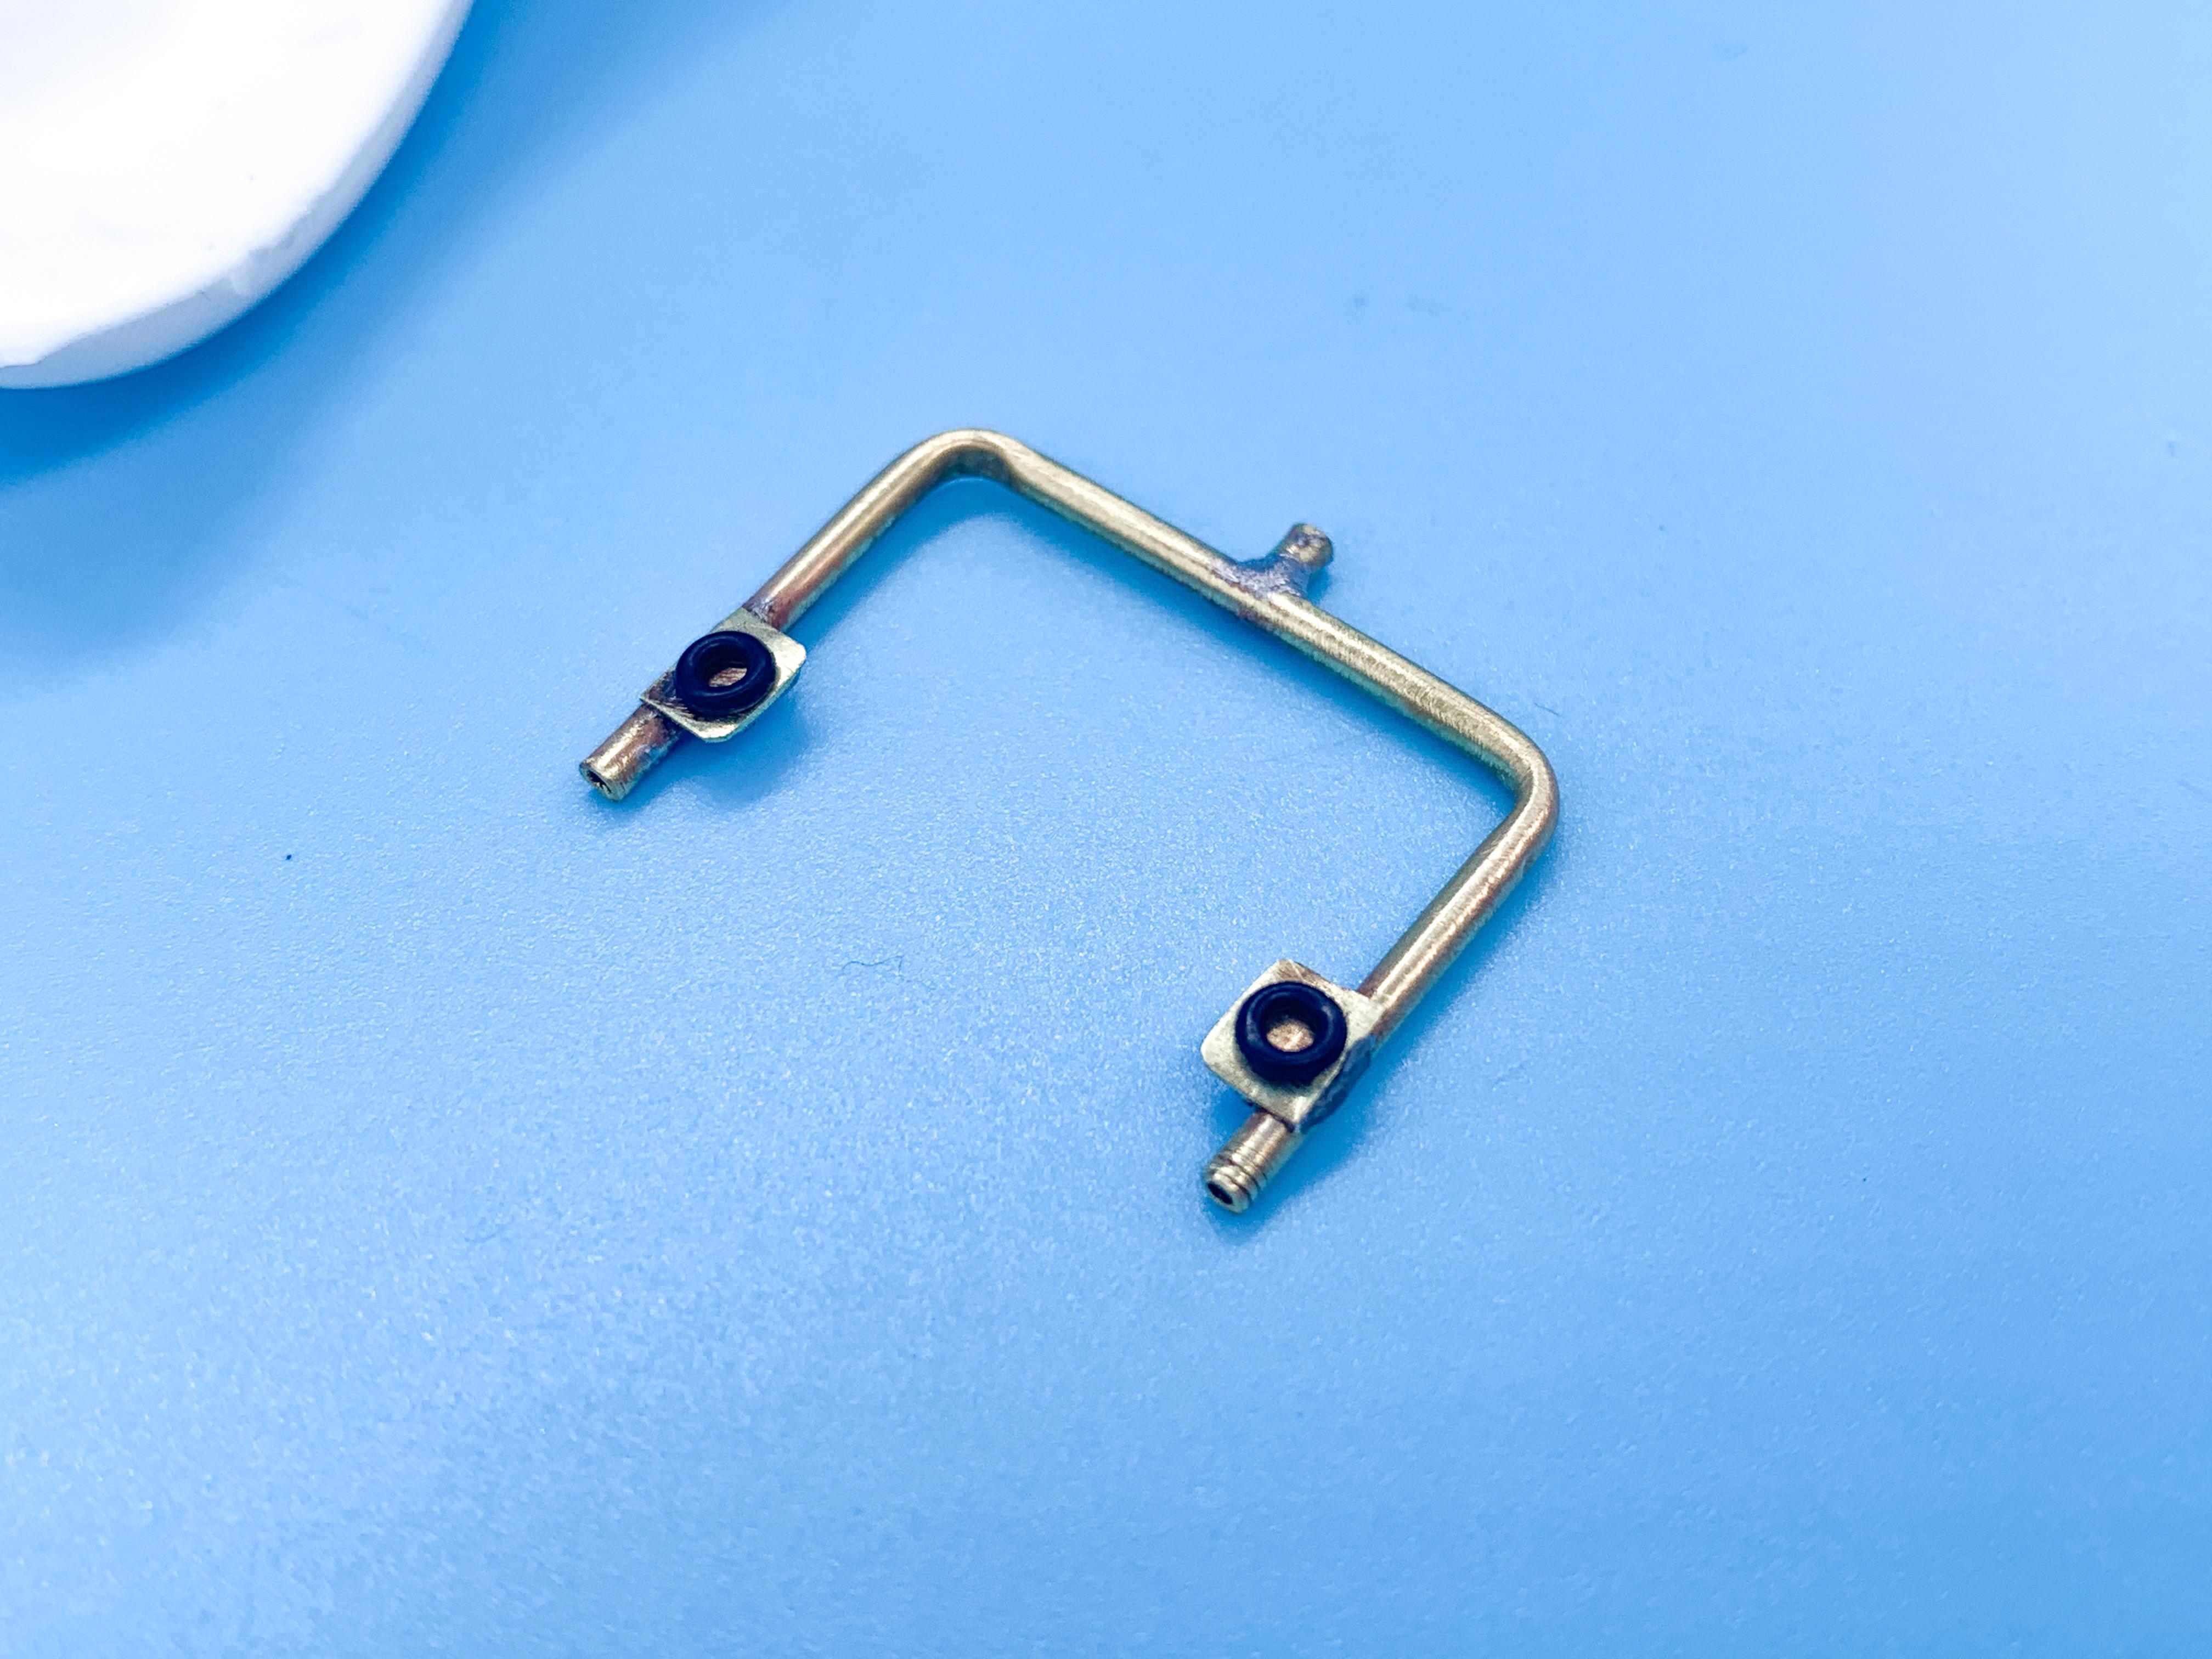
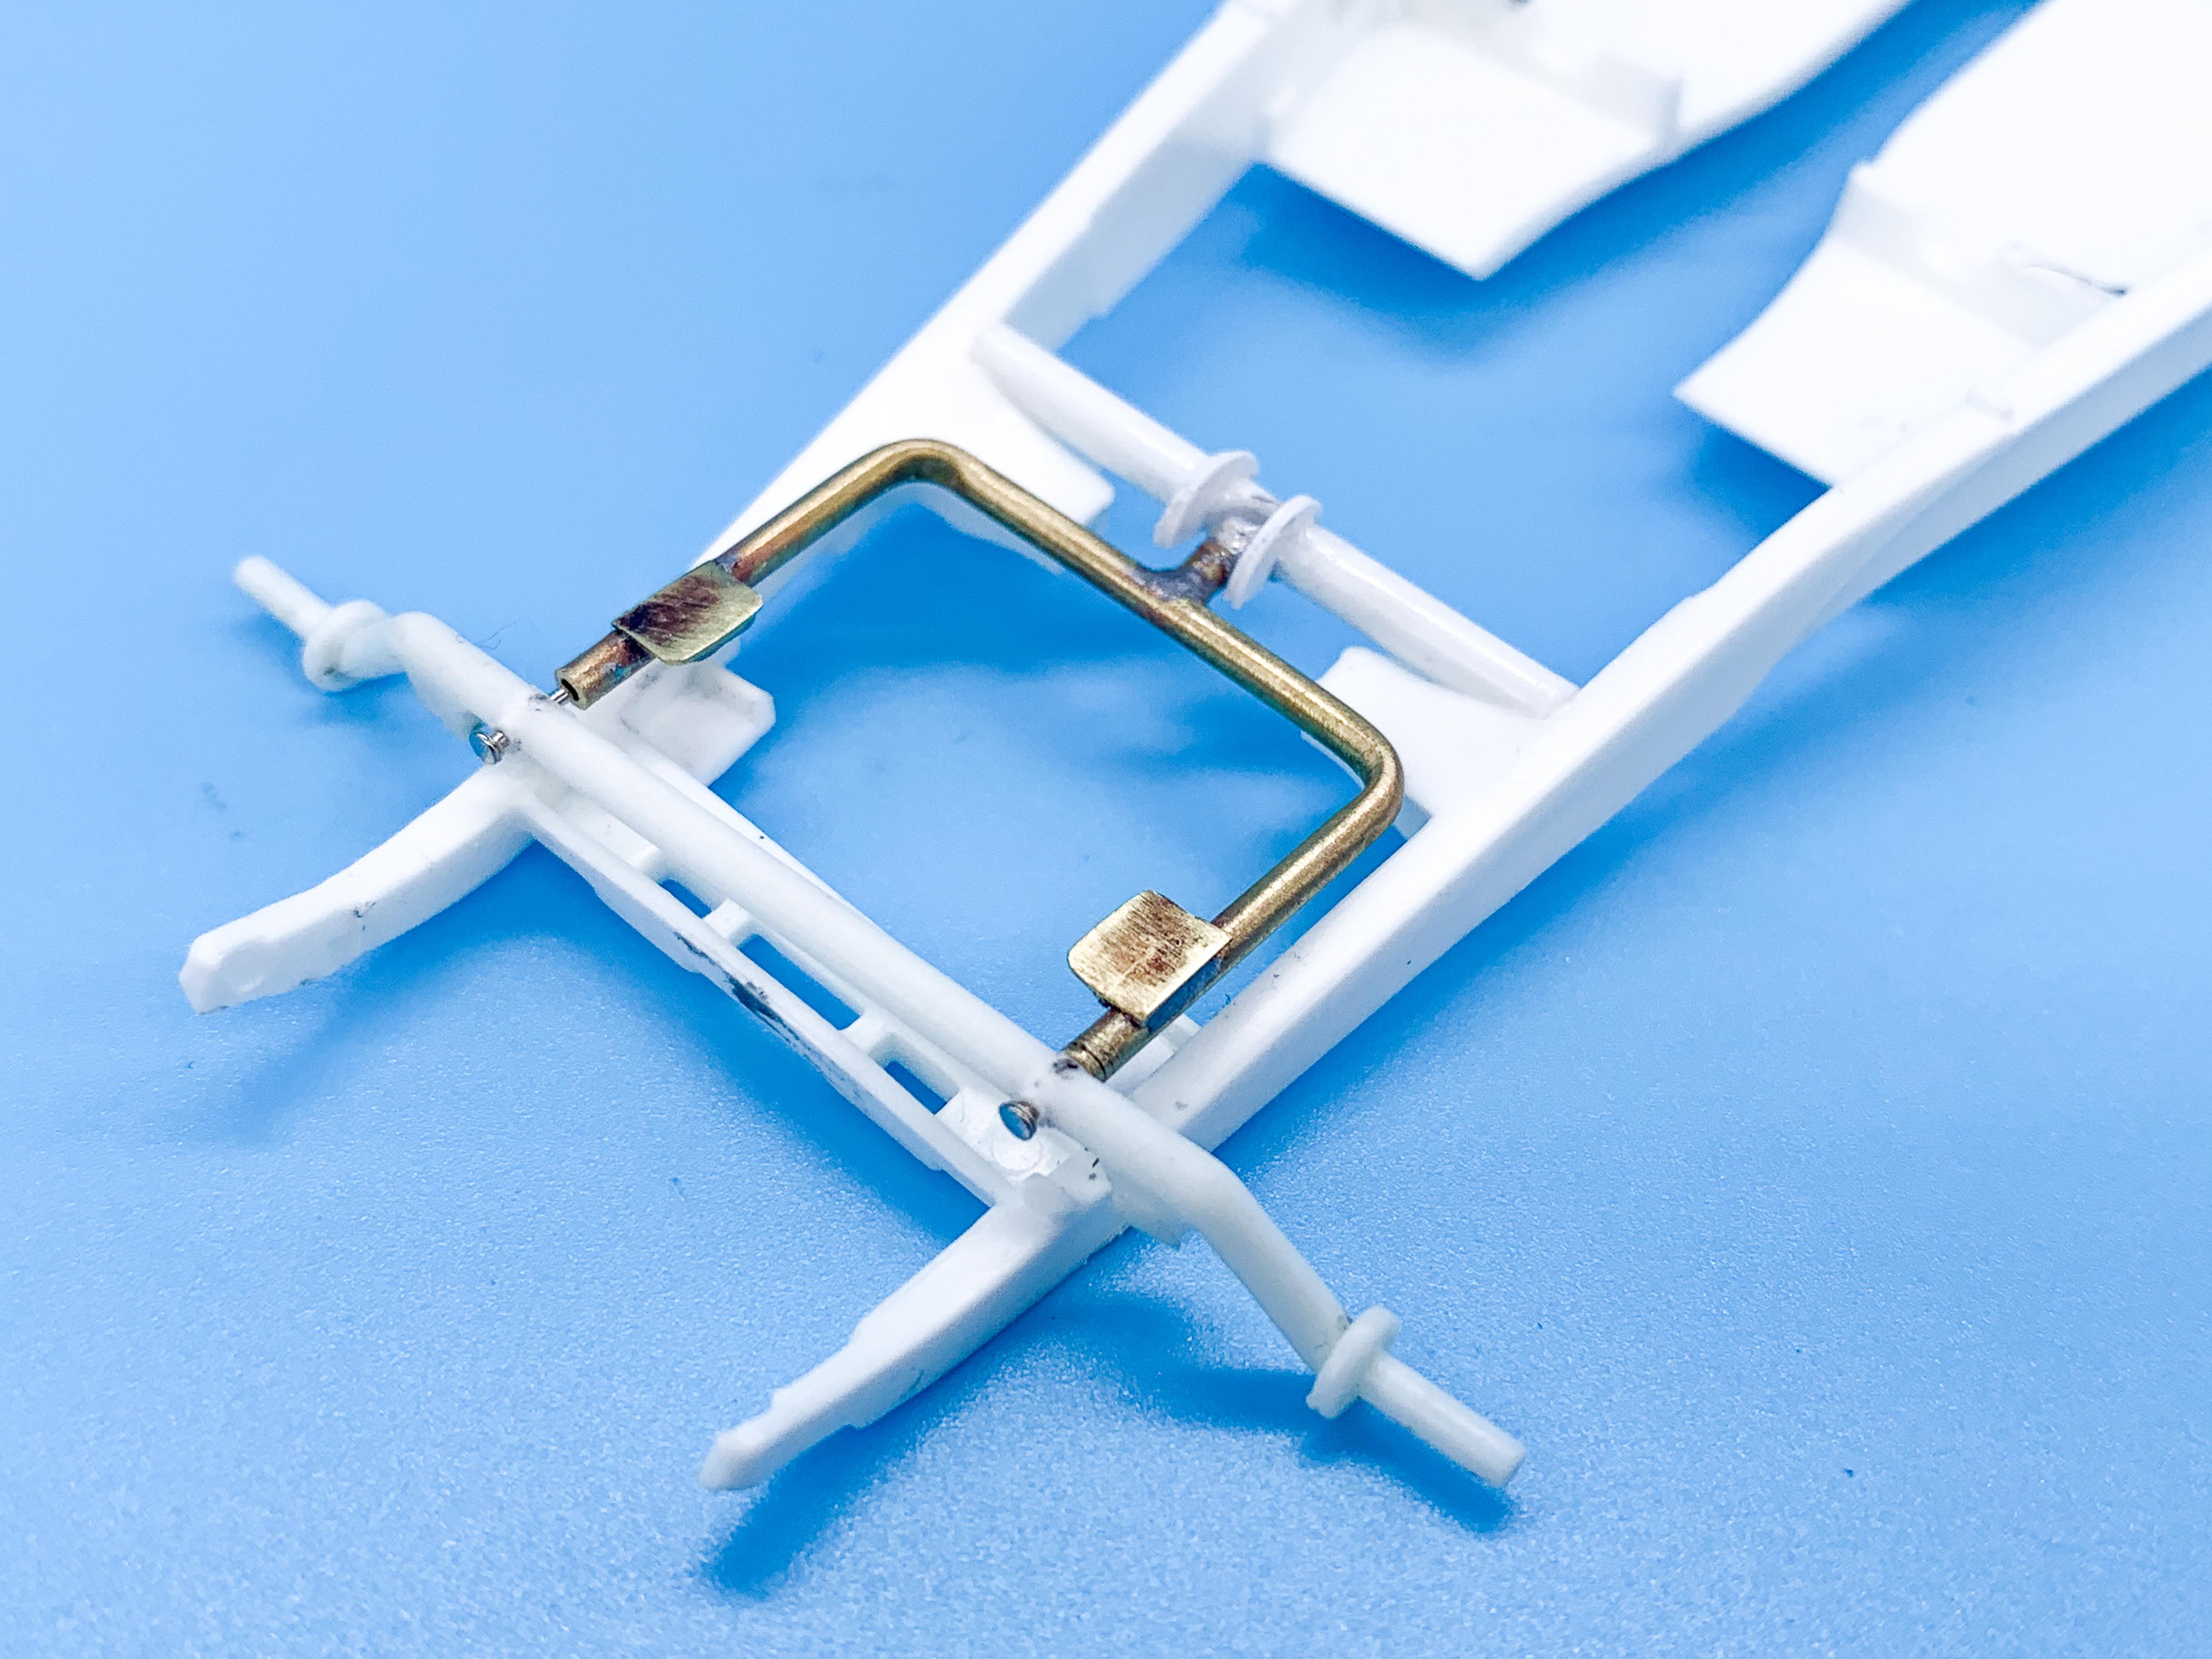
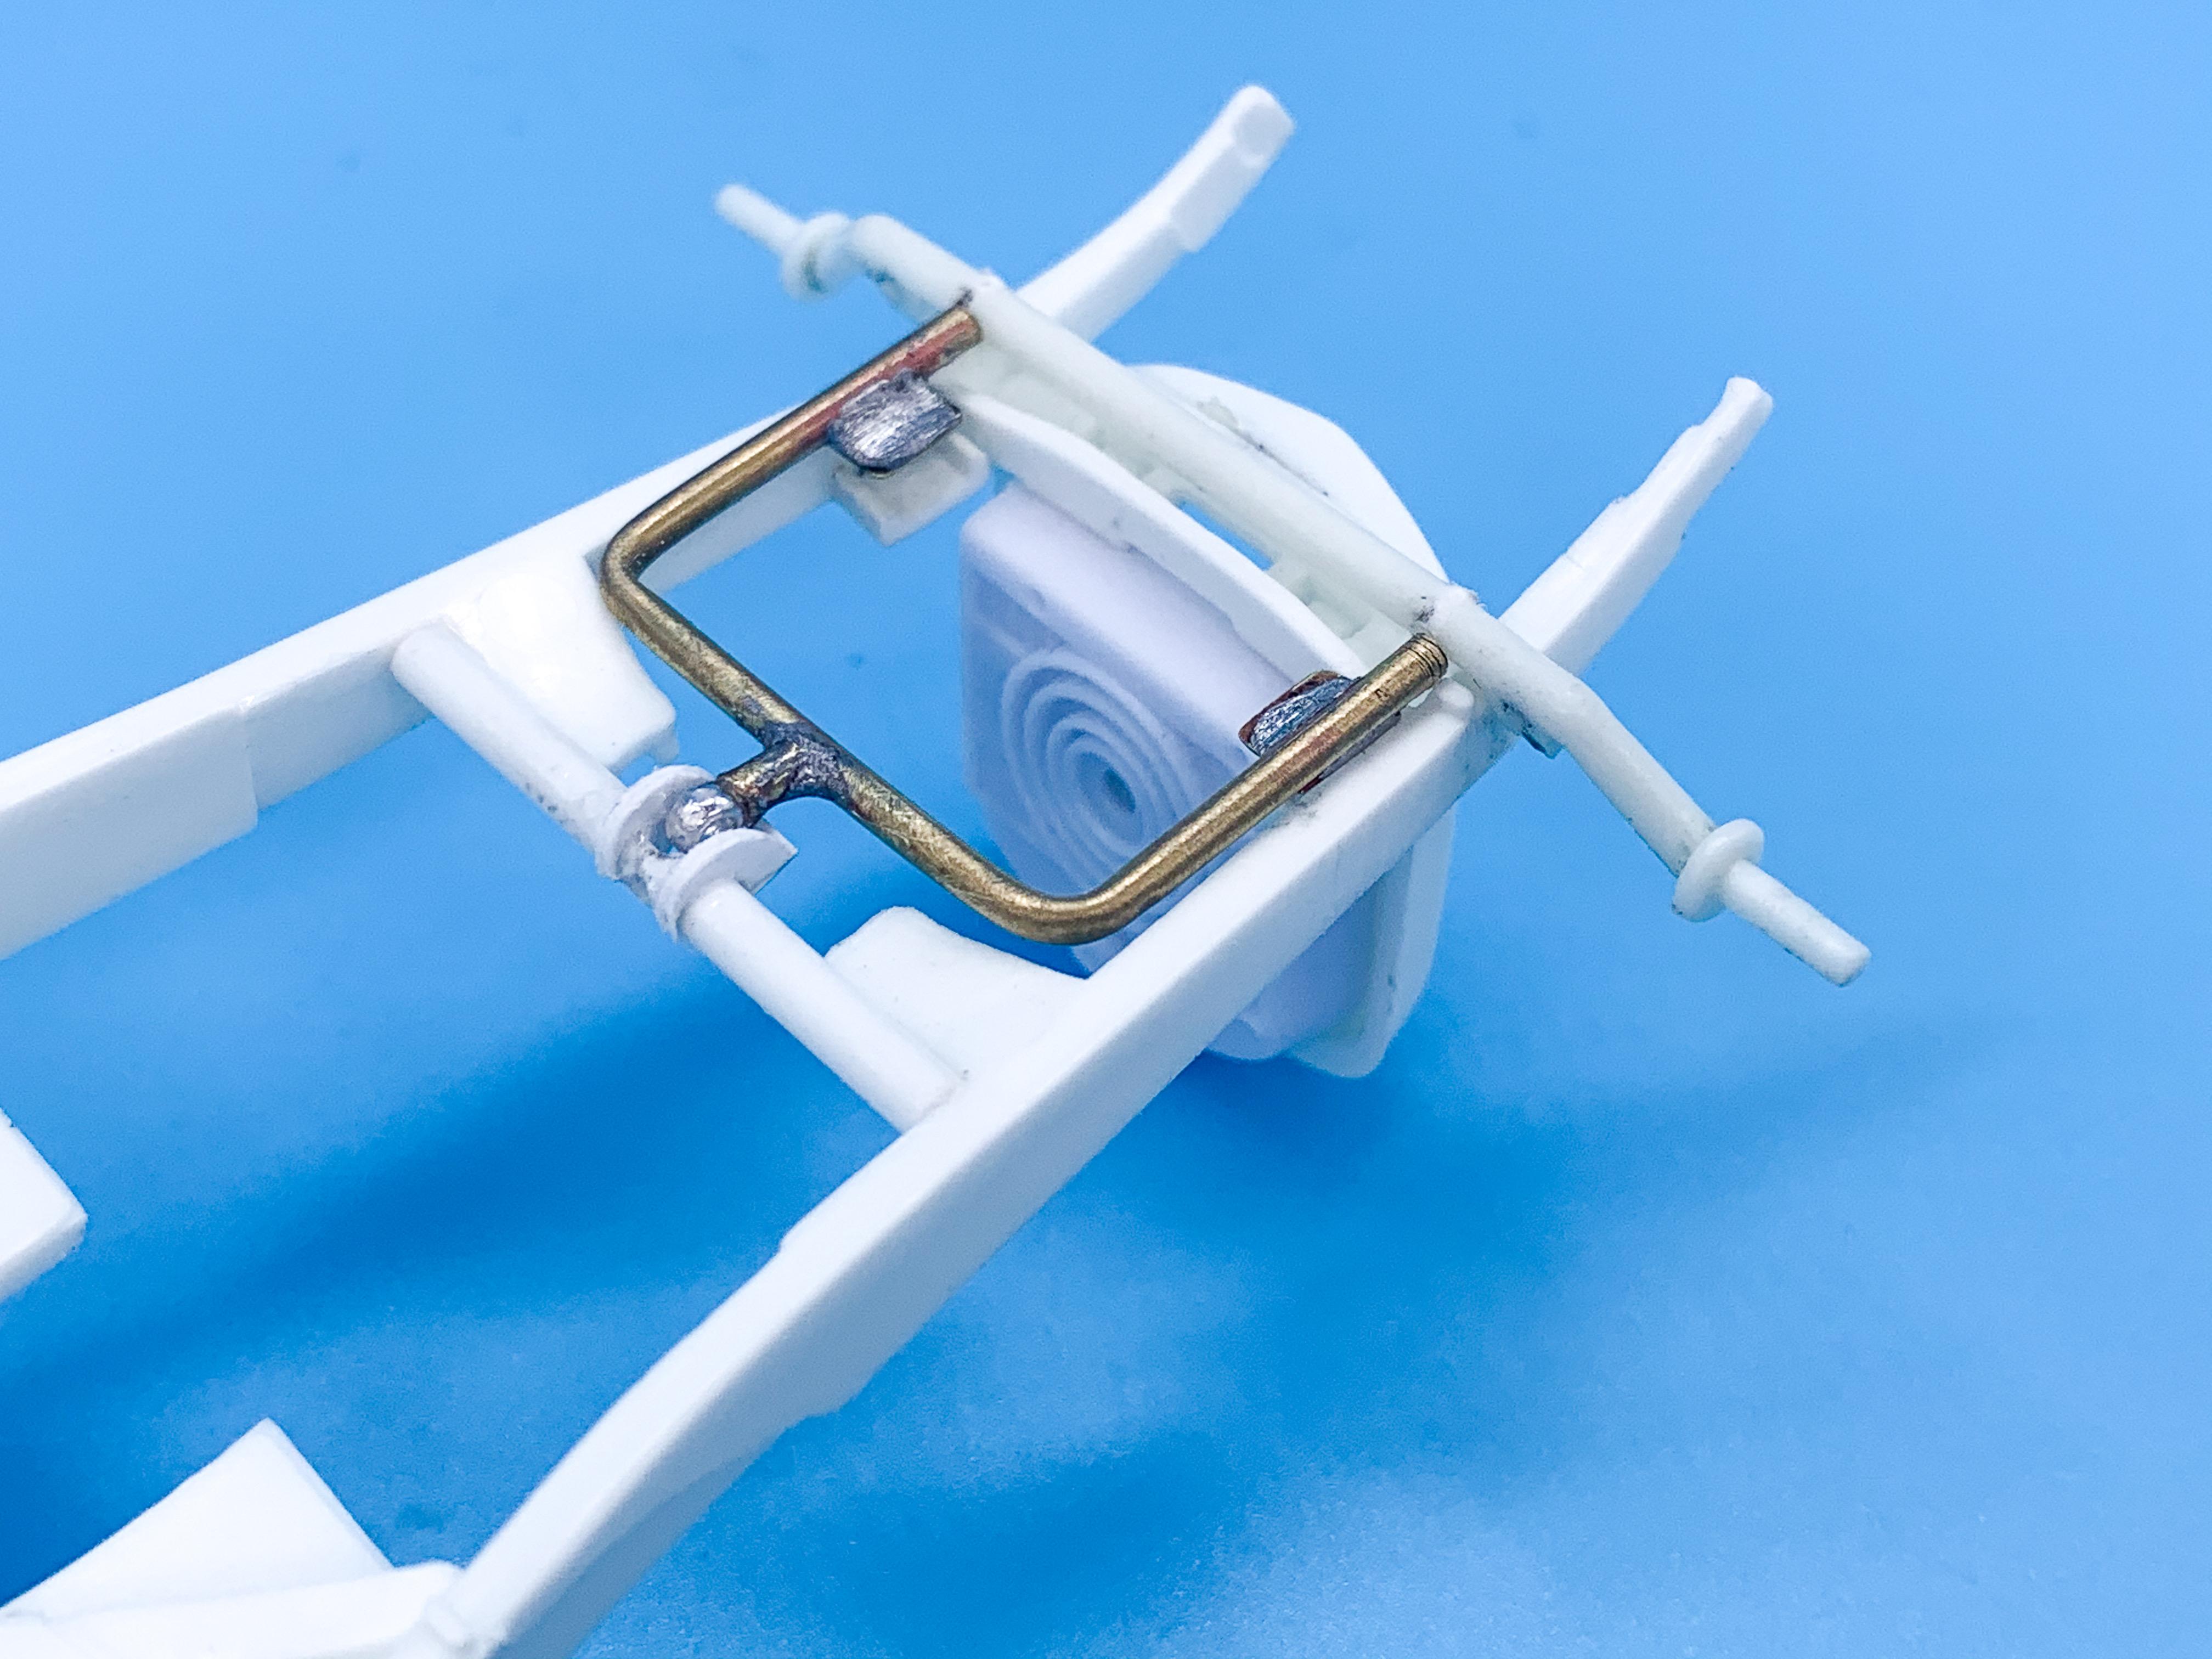
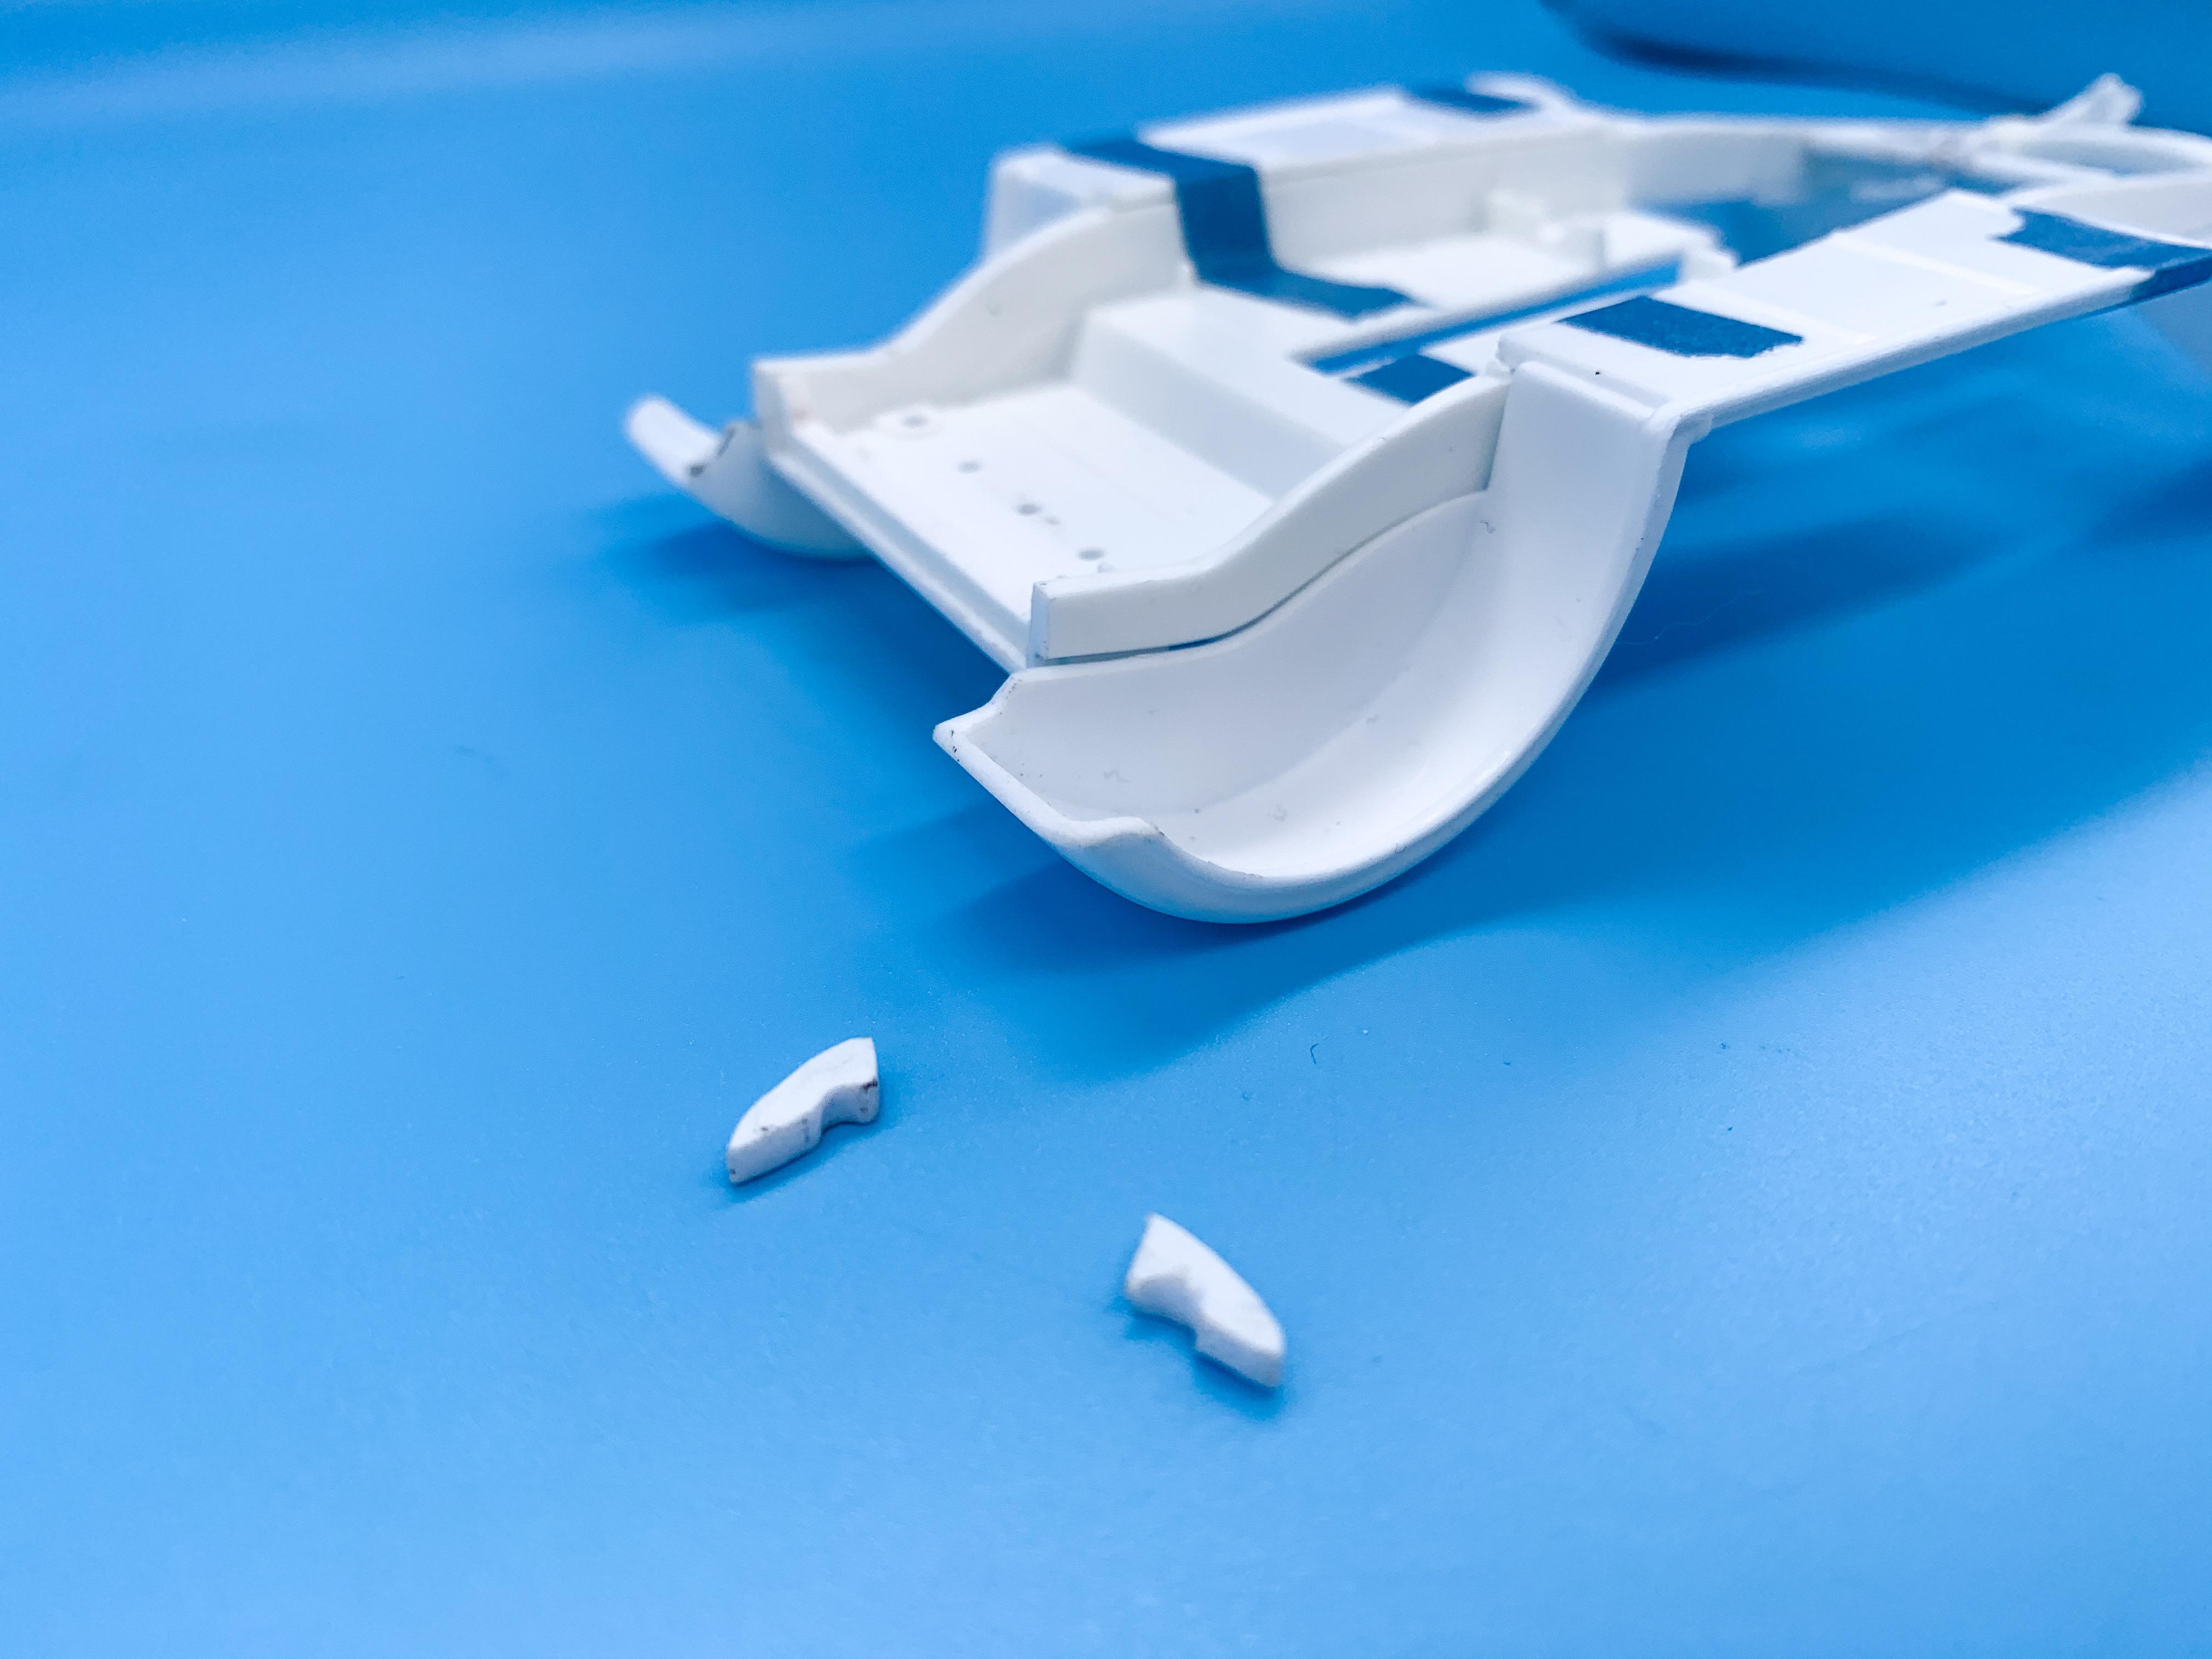
I’d be interested to see what size they are, if that’s not too much trouble - thank you! Do the wheels match these Foose wheels pretty well so I could mix and match maybe? Where I bobbed the back of the rear fenders to put that curve you mean? Just drew a round edge with a circle template and sanded to that edge to get them even and sanded to the line - nothing too complex! I’ve got some more ideas for those fenders that I’d like to try still - more on that soon! Thanks Matt! A little more on this in the last couple of days - did some research and found this production air-suspended frame (actually for a Model A, but close enough for what I’m doing): And used their design as a jumping off point for my own suspension setup. I made the frame with brass, soldered together: And added some bracketry and mounts to the stock frame to attach it in such a way that it’s nicely hidden from the side and front - mostly anyway - for a nice clean look: That’s most of the complex stuff done on the frame for now, aside from some detail work. Speaking of which, I chopped off the rear fuel tank which left me with this ugly back end on the frame: I had the idea to have the rear of the frame kick upwards to meet the rear edge of the fender, so I made some little “devil horns” as I’m calling them now like this: And they’re on the frame now drying ready for some shaping and smoothing tomorrow once the glue sets up; Finally, went hunting for the smallest headlights in my stash that would work with the sectioned grill I’m using - turns out after 2 hours of measuring and comparing that the smallest I had were the kit ones ?. I think I’ll mount them something like this: Oh, and as you can see I slapped a load of Bondo on the edges where I sectioned it just to make sure the join is as clean and flawless as can be before I get to priming...more soon!
-
The ‘other’ mag is stopping publication
OldNYJim replied to cruz's topic in General Automotive Talk (Trucks and Cars)
I just got an email to that effect about my print subscription - they’ll be sending me FSM instead. -
The ‘other’ mag is stopping publication
OldNYJim replied to cruz's topic in General Automotive Talk (Trucks and Cars)
Yeah, that’s a real shame. I know we’re on the competition’s site here, and I apologize to Gregg and the mods if posting this here is inappropriate, but I was sad to hear this too. I’ll miss Ken Hamilton’s Tips and Tech column and Tim Boyd’s always-excellent articles in particular but all in all it’s a huge loss for the hobby I think. Very sad indeed -
The ‘other’ mag is stopping publication
OldNYJim replied to cruz's topic in General Automotive Talk (Trucks and Cars)
https://scaleautomag.com/off-the-shelf/hobby-faq/2020/07/discontinuing-scale-auto-magazine -
This stuff isn’t a good as Tamiya tape - it’s a little less tacky so it won’t make for a nice crisp edge as well. BUT, you can mask a nice edge with the Tamiya tape and use this stuff for some of the less-critical areas where you just need to cover a larger area and don’t want to waste a bunch of the more expensive tape. I read on here once that this tape is made by the same company as the people who make Tamiya’s tape: https://www.amazon.com/dp/B07JD5SCM7/ref=cm_sw_r_cp_api_i_xPVdFbFVJT2C0 I picked some up, and it really does work just as well as Tamiya’s stuff! Just the right amount of tacky, makes a nice edge - works perfect! Ohhh, GREAT idea - I’m always looking for boxes and packaging to make molds with! Good thinking!!!
-
Totally understandable Tom, and the responsible thing to do! Good call - disappointing of course, but definitely the best thing to do. So, planning for next year - are there going to be new themes announced in addition to the existing ones that will roll over? I’m ready to start another NNL build here! ?
-
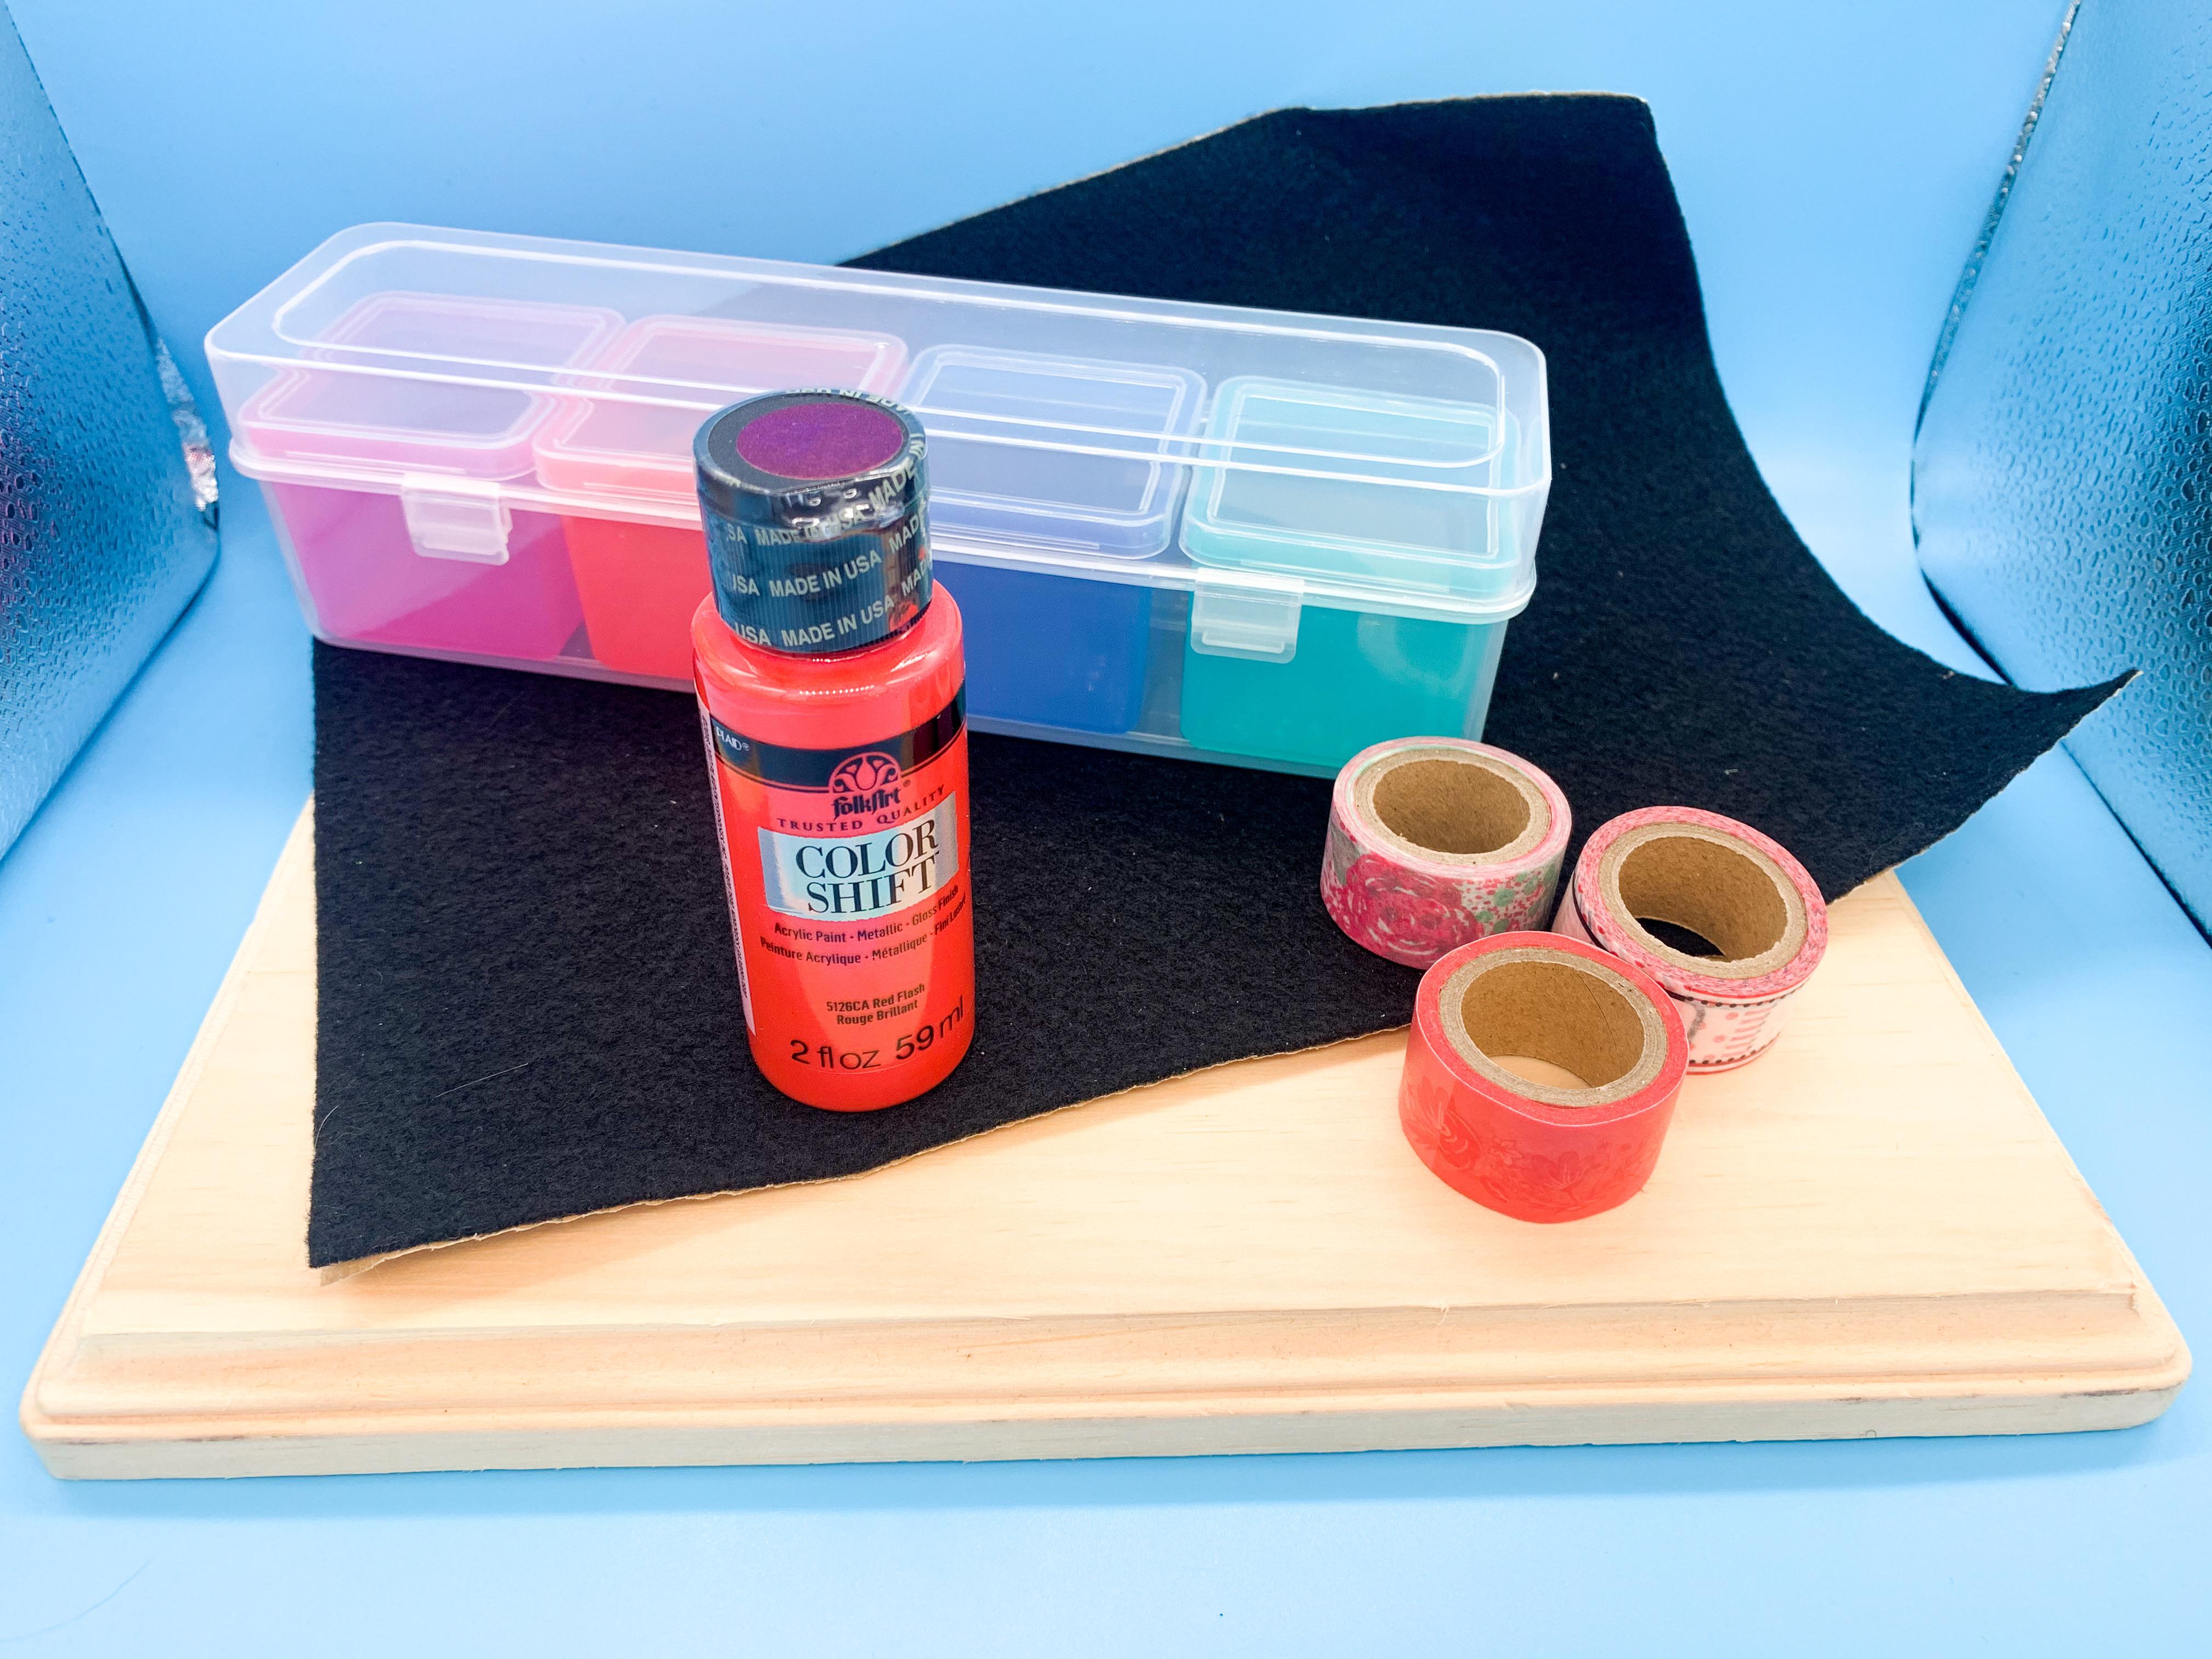
Never manage to make it out of Michael’s with my wallet intact - but didn’t go crazy today. Our local one has had a restock of the kit aisle, but nothing new or interesting. Picked up a few useful little bits tho - Washi tape was three for a buck so I picked up some of those for masking, some of their cheapo felt sheet (which looks like it could maybe make a decent scale carpet maybe), a little organizer box for a buck and a wooden sign blank for a shop sign to hang somewhere around my work area: Oh, and that colorshift paint caught my eye - looks like it flips from red to pink to purple with a little blue in between so I’m sure I’ll find something fun to paint with that
-
Thanks buddy! You’re right! Fronts are 21: Rears are 22: A little work on the rear axle today - ordered some little o-rings to represent airbags, but in the meantime I scratchbuilt some trailing arms, resin cast a Quickchange center section and some other little bits: And a check with it in the frame: I need some different colored styrene so this stuff is easier to see ??. Once I get the o-rings I can make sure it all fits how it oughta and clean these parts up and get them ready for paint. Need to figure out the front end next - more soon!
-
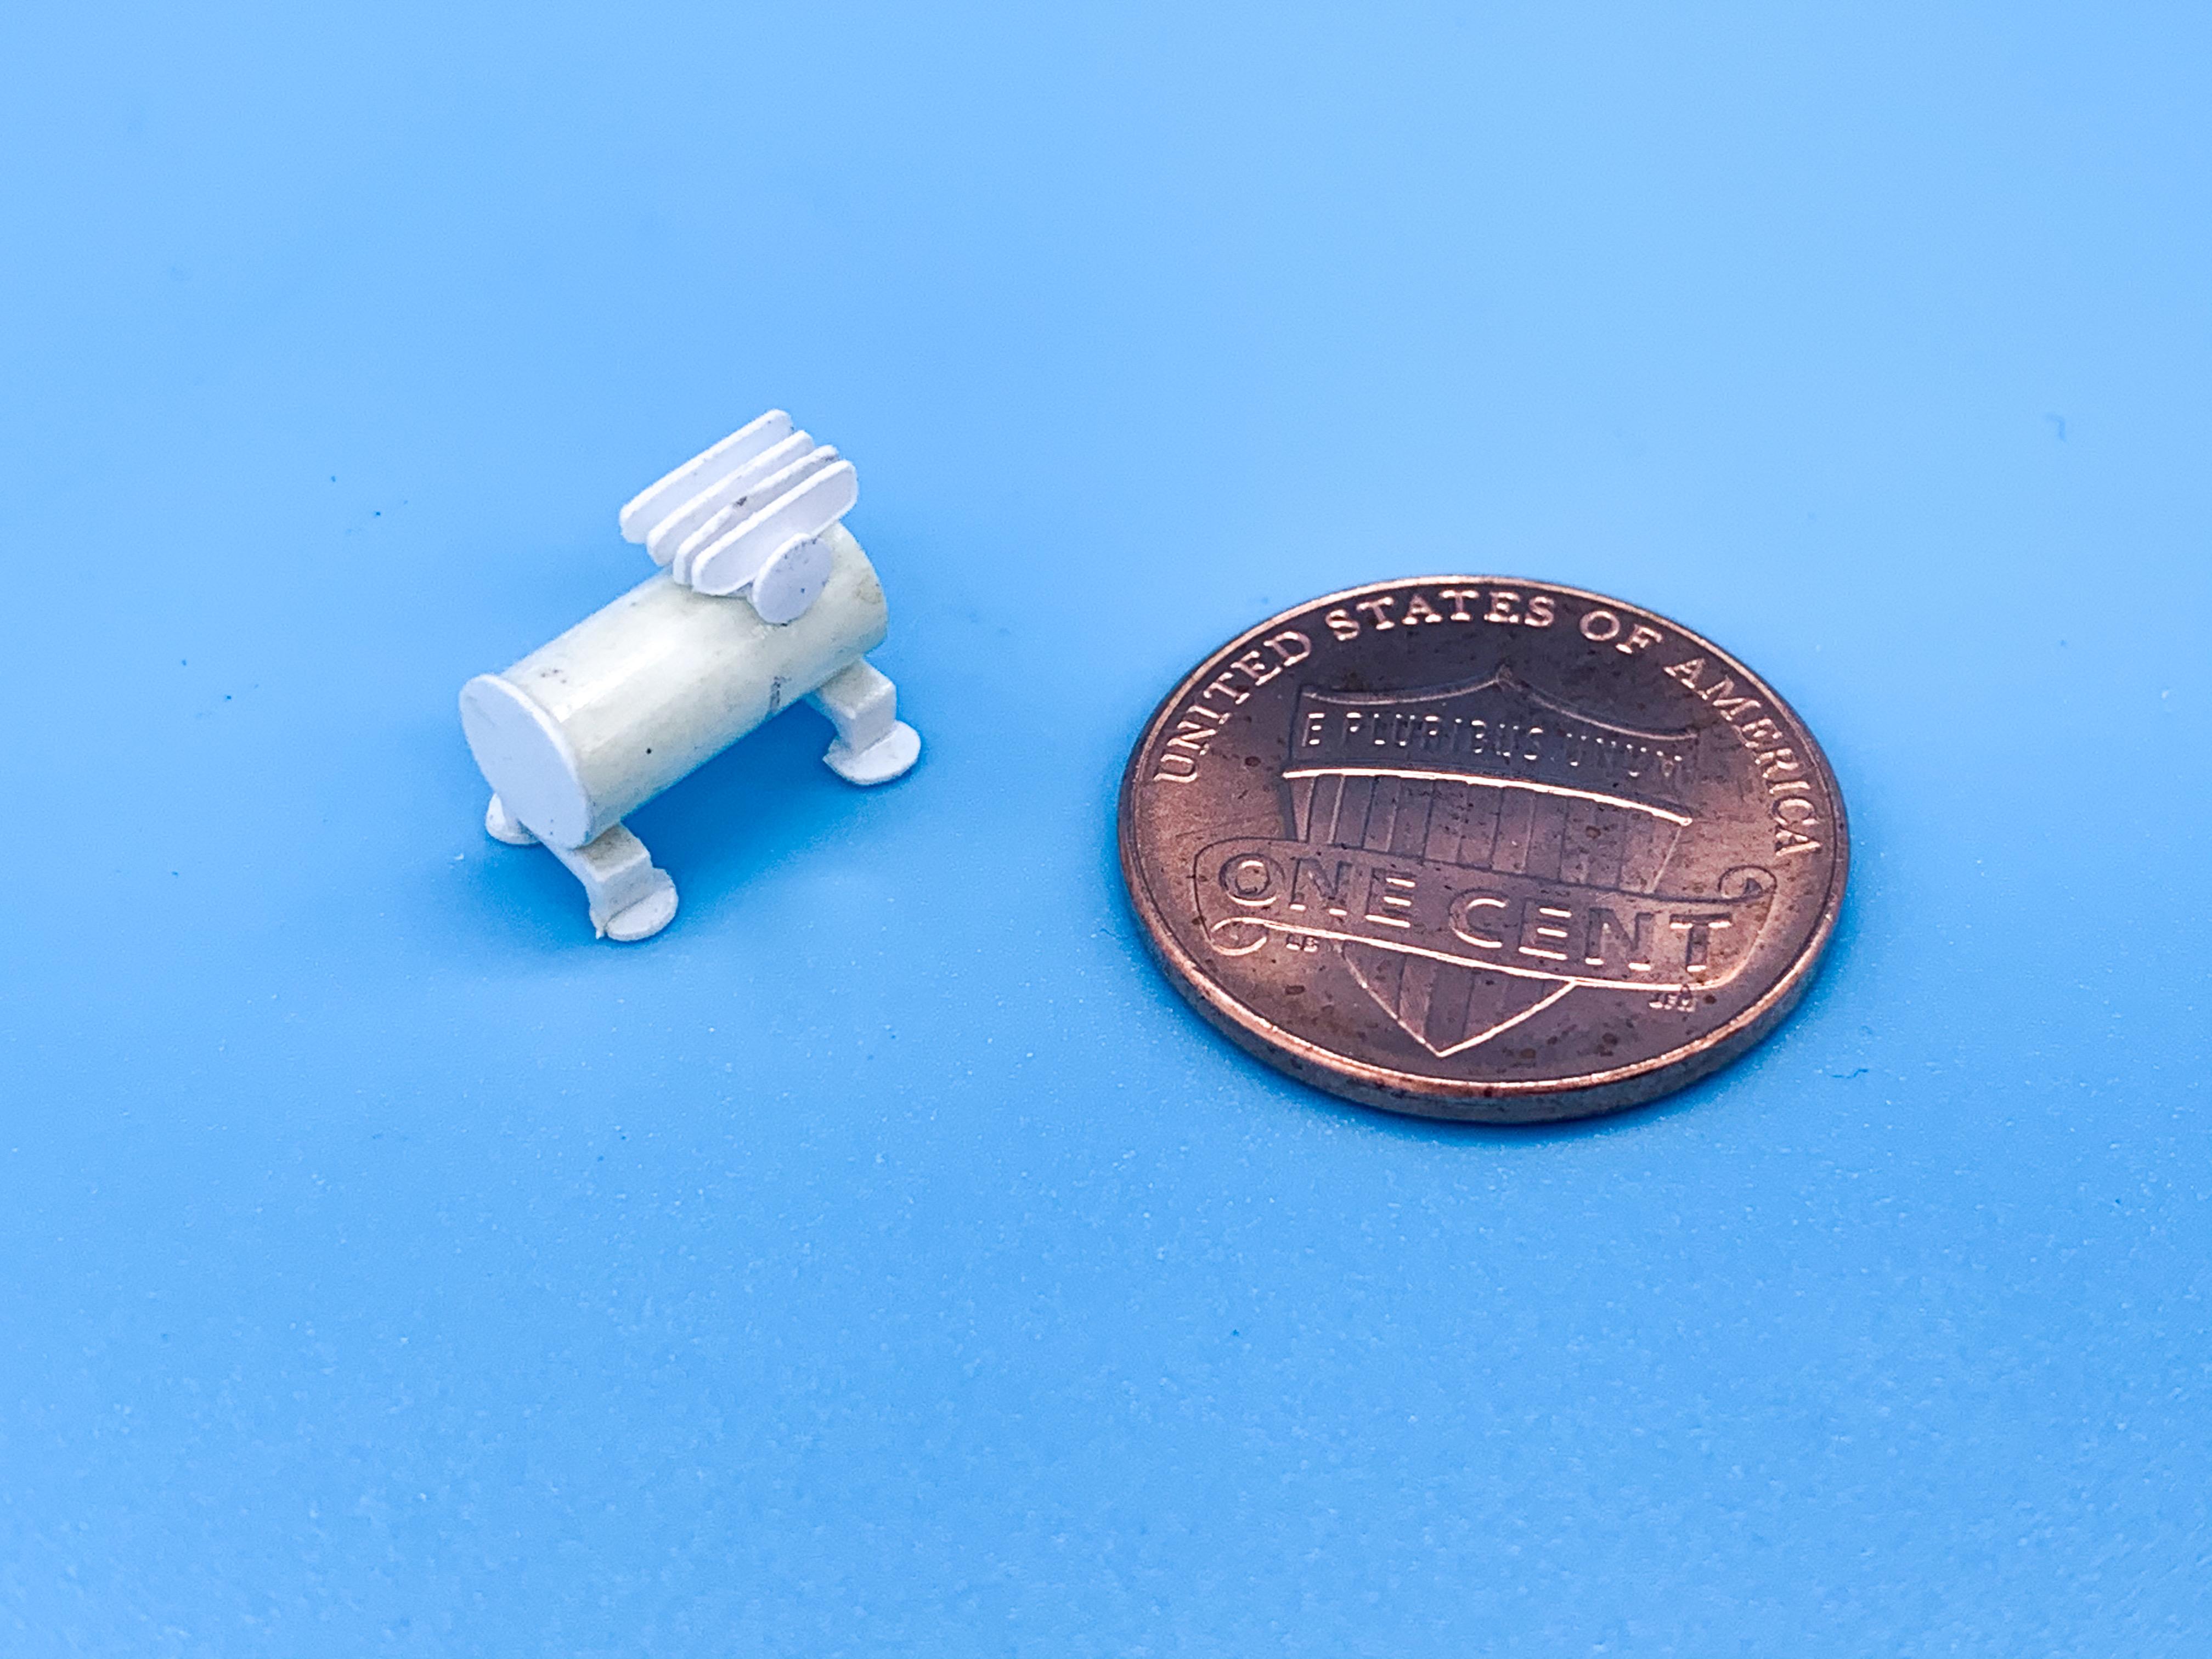
Actually, I LOST some space for the engine now that the body sits down a little more at the front - haven’t totally decided on an engine yet but I haven’t got space for any extra cylinders without some MAJOR work - I need to dig through my stash and see what I’ve got! I do like the idea of a V12 tho, even if not for this project, for another one down the line... Thanks buddy! I did look at the Pegasus wheels - I’ve got a few here I think. These Foose wheels are meant to be 19 in the front and 20 in the rear, although I didn’t measure to check yet...I should do that, because they do seem larger than that. I’m enjoying the challenge of stuffing all that wheel in there anyway ? A little more today...made the compressor for the air suspension: I’ll add some hoses and some more detail once it’s painted. Then I made a little tub so the trunk would actually have some trunk in it now that I’ve made it openable... And a mock-up with the body to make sure it fits ok: Started some work on the rear suspension but got sidetracked learning about airbags so didn’t get very far on that...more soon! Thanks for all the nice comments!
-
Atlantis Models has bought another lot of tooling/molds.....
OldNYJim replied to Dave Van's topic in Car Kit News & Reviews
A good detective would probably be able to match those numbers on the tooling to old kit part numbers and figure out what they might have there ??♂️ Where’s McNally when we need him? -
A Trabant kinda looks like a Mini, if a Mini wasn’t cute
-
For anyone like me who will miss Testor’s enamels (which I just got good at using ?) it looks like MCW will the filling the gap there anyway: The examples Donn posted in this vid look good!
-
T & T Productions Ala Kart ?
OldNYJim replied to Jon Haigwood's topic in Model Building Questions and Answers
Huh, interesting - I had no idea Ala Kart kits were rare enough at one point where they got resin cast! -
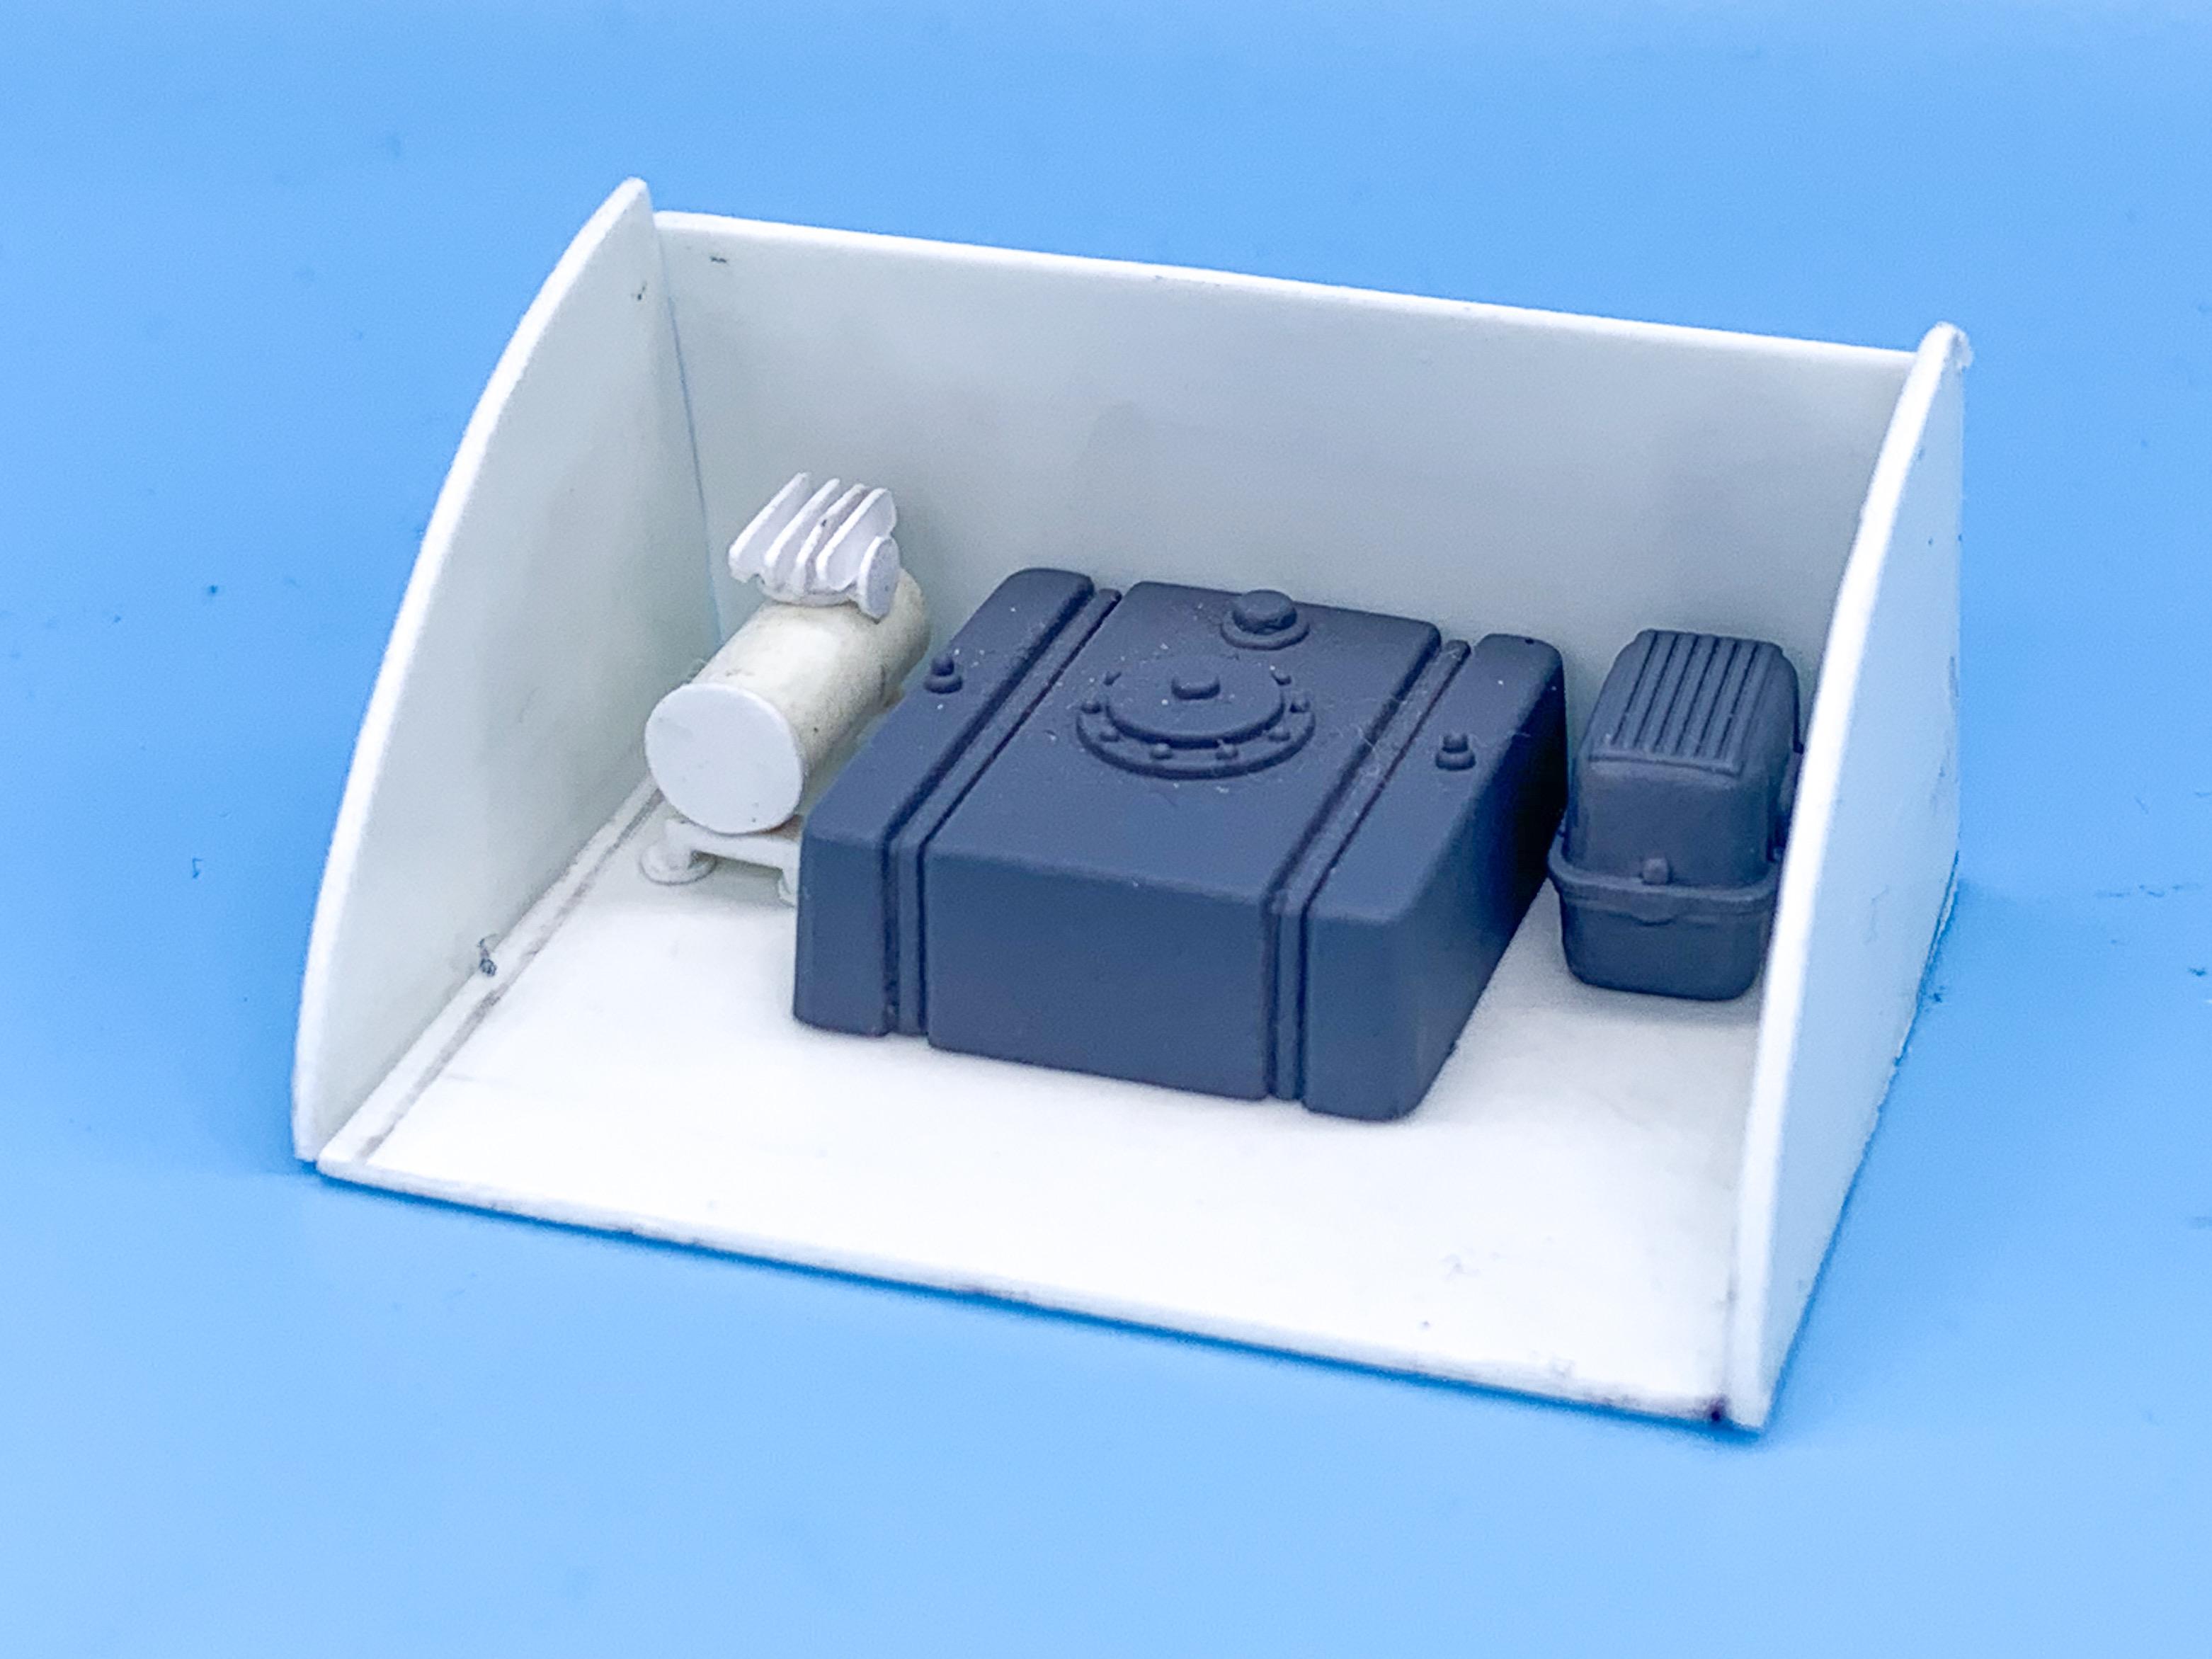
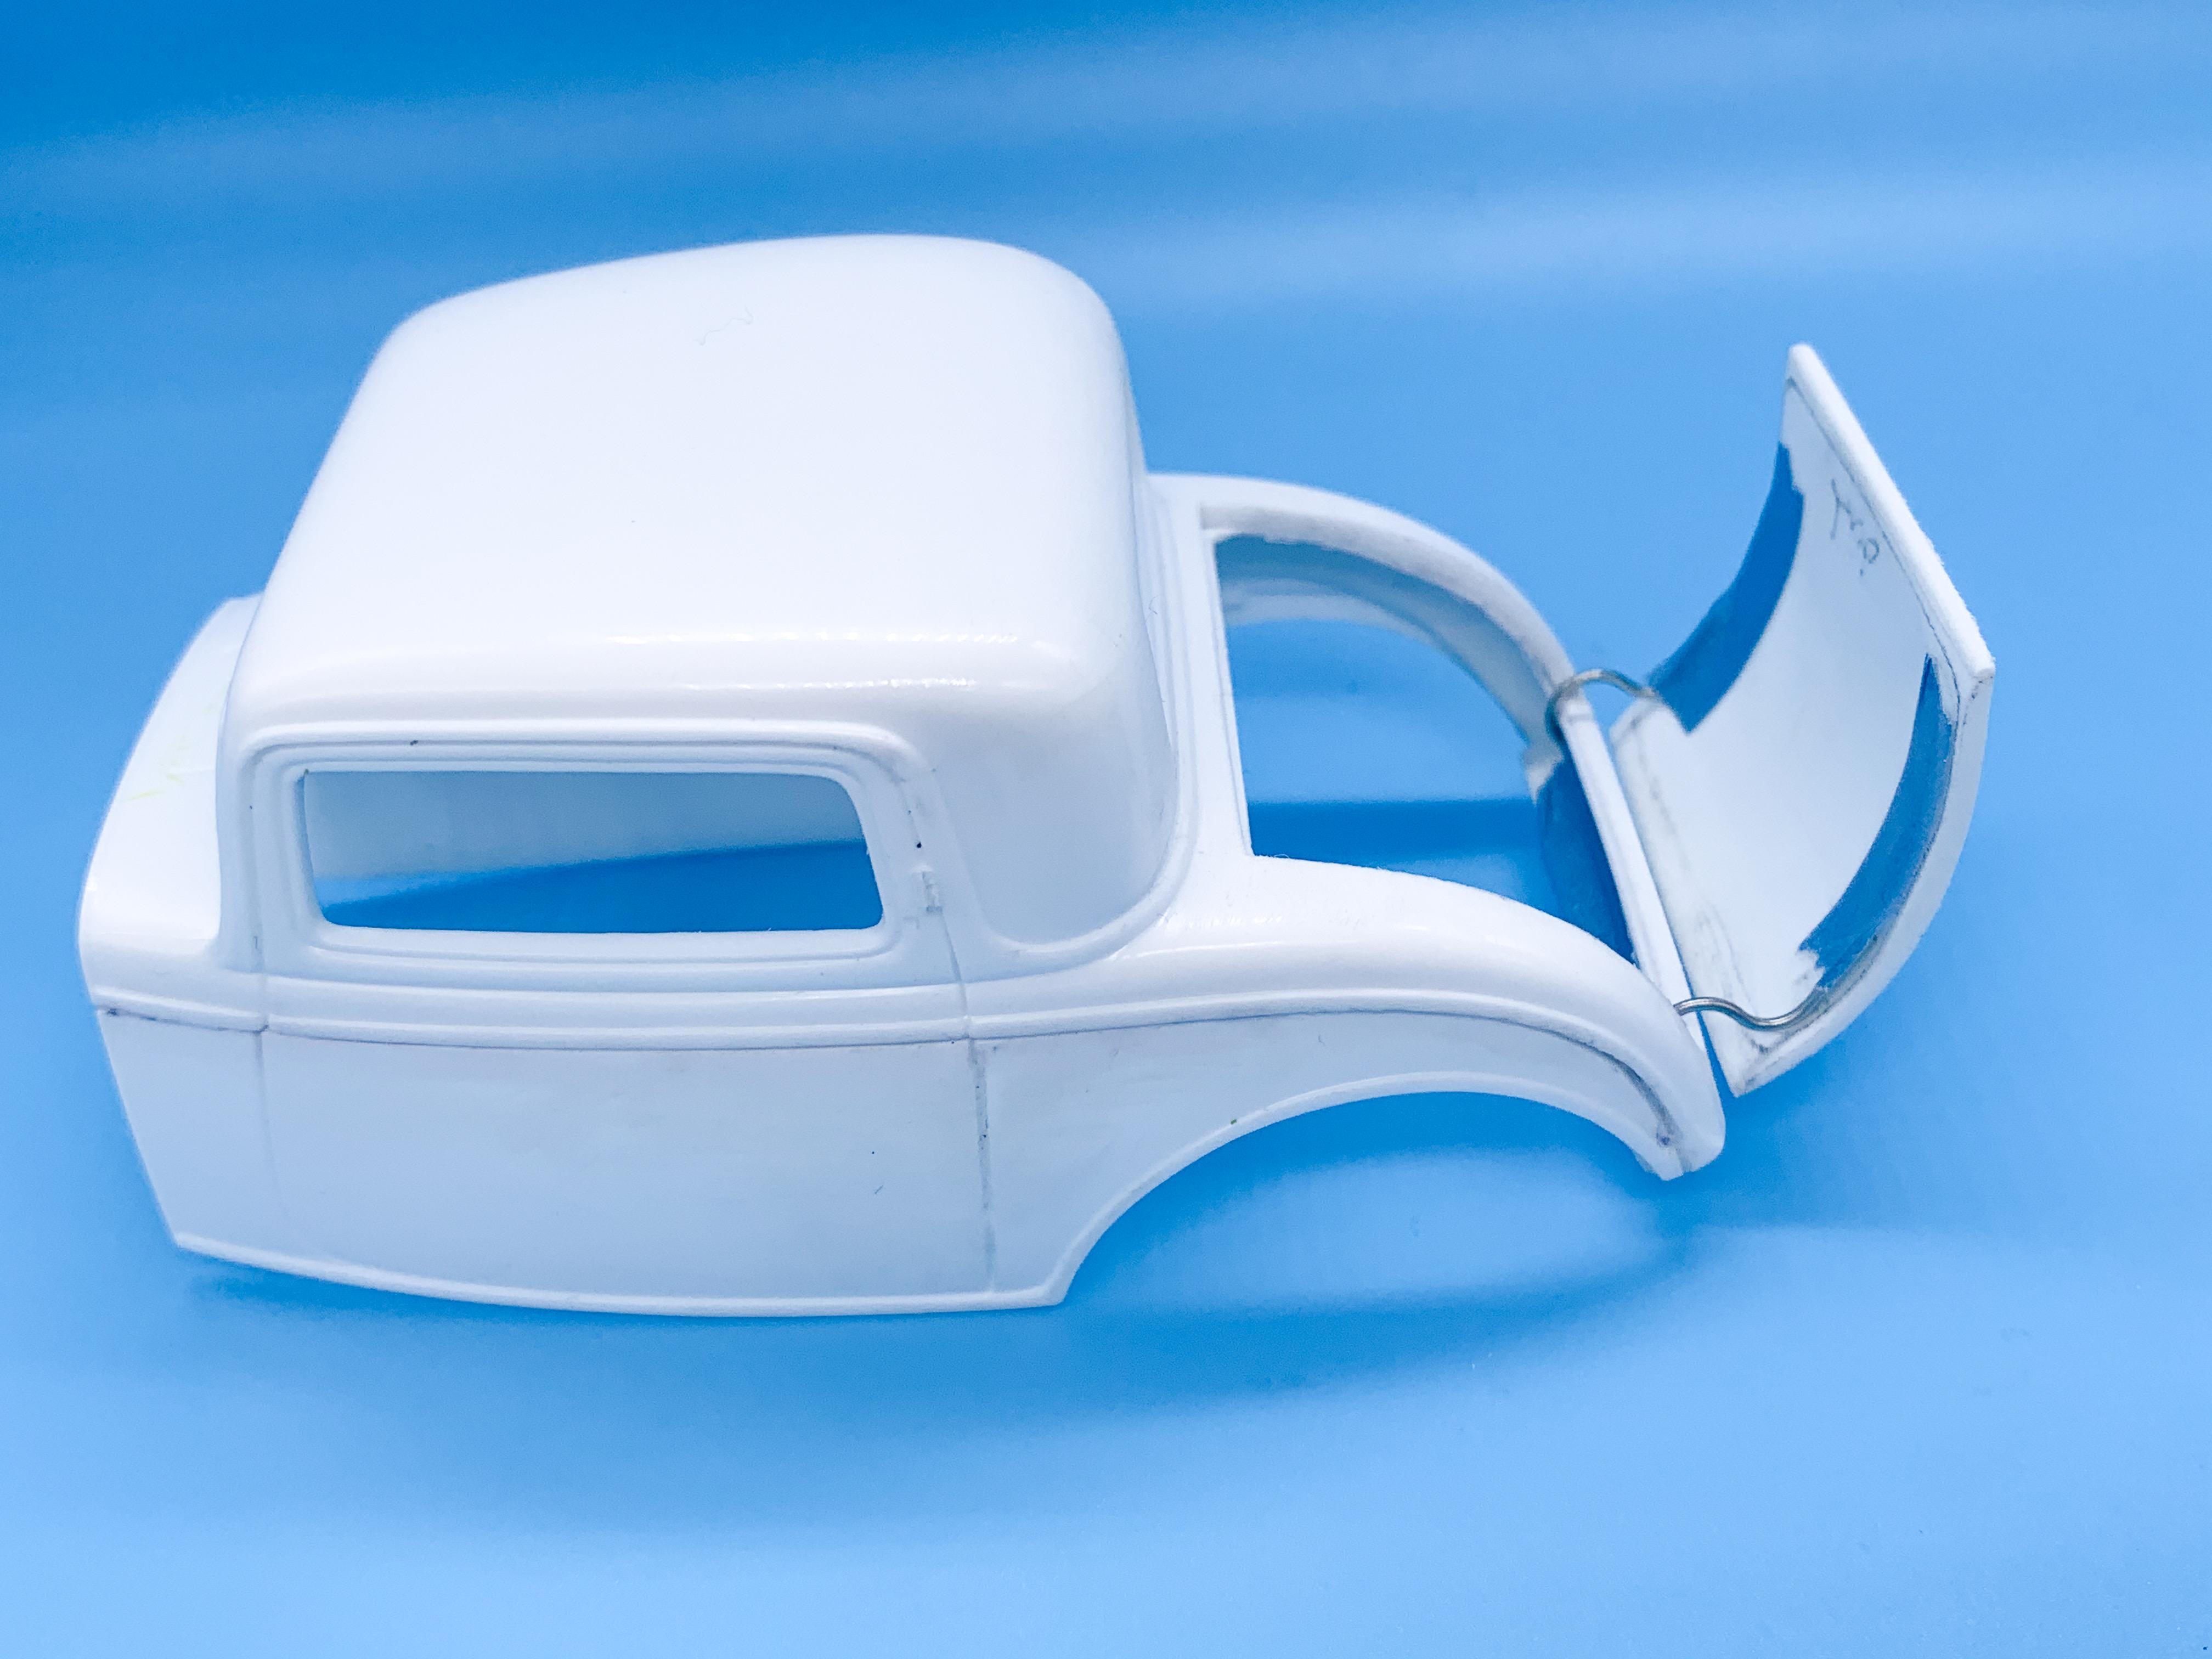
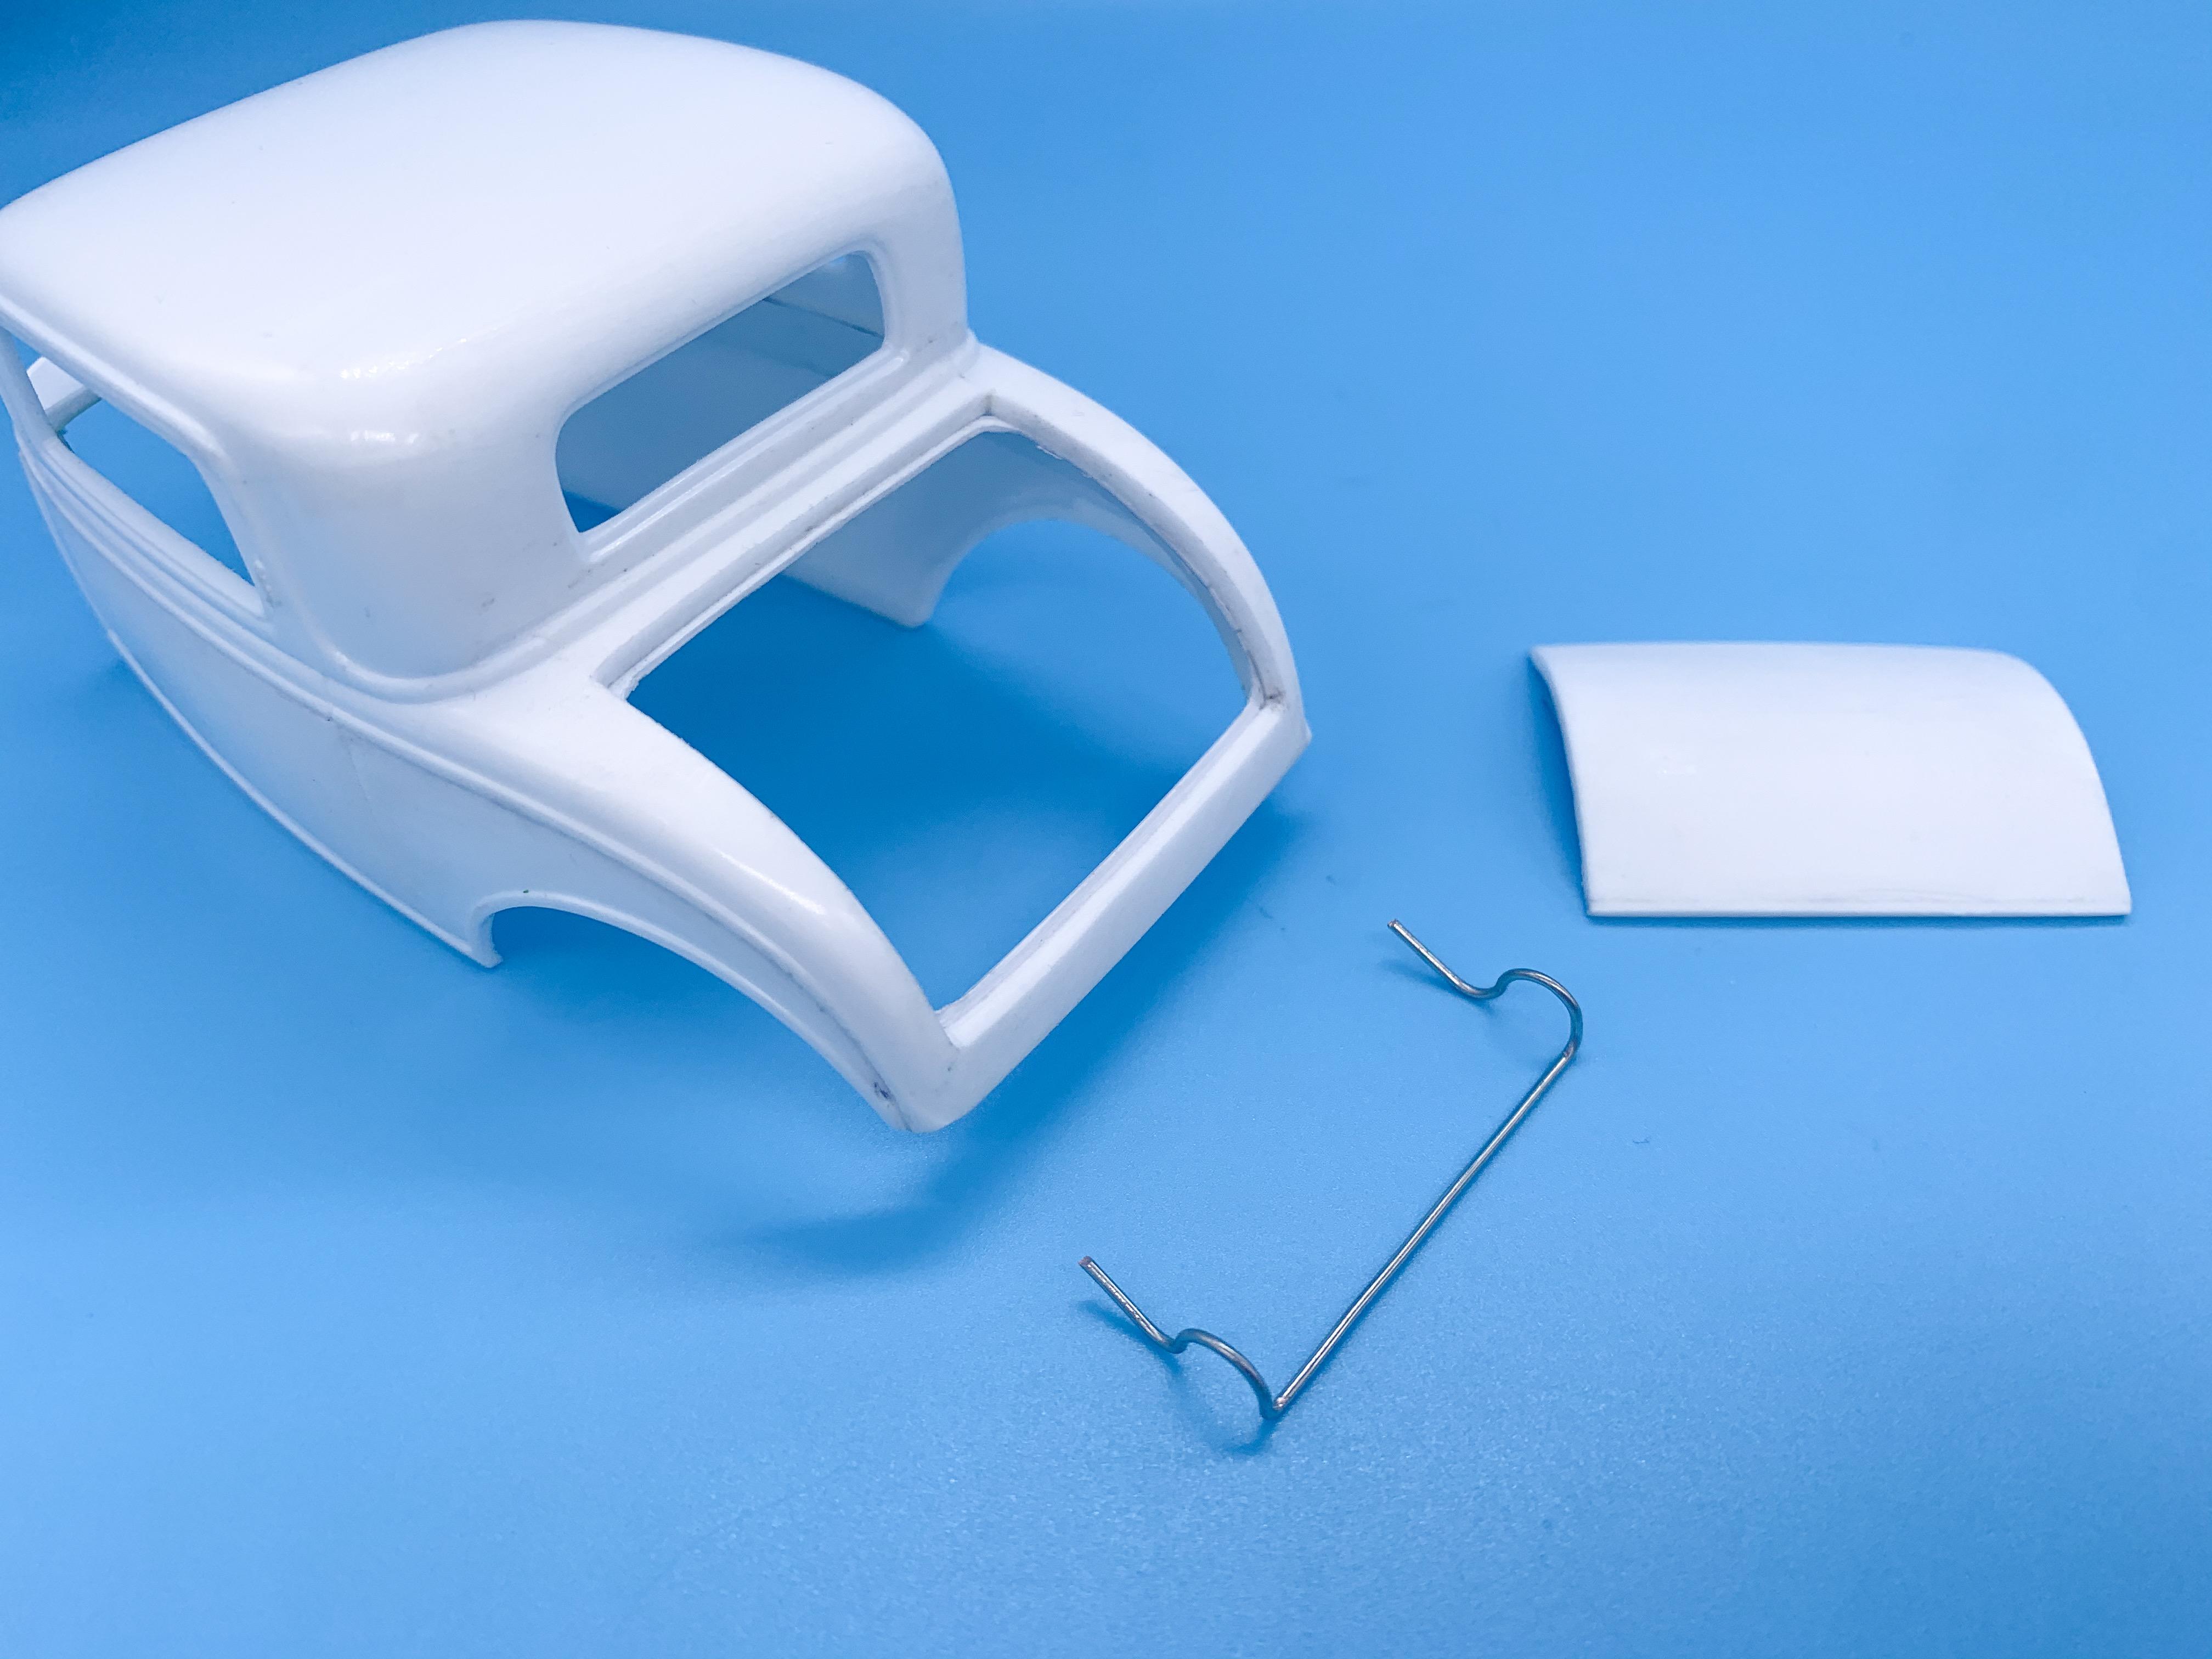
Haha! I’m going to SUSPEND those feelings for this one ???. I’ll try anyway... Id really like to do one of those too, before too long, yes! I seem to have accidentally accumulated eight Revell 32 kits, so I thought I should build a few of those and not buy any more Deuces of any description for a couple of weeks at least ? Thanks buddy!! I was just messing with some parts for another of these today, thinking a little stretch would be cool, yes! I want to keep messing with these Revell Deuces and kinda keep getting further and further from the kit a step at a time - SO MANY ideas of things I wanna try! Chopping the bottom off the body never even occurred to me ????. Never let it be said that my brain ever comes up with the easy way to do things ?. Yeah, sticking with the 3 window configuration for this one I think - but making a ‘coupster’ out of one of these is on my to-do list here too. Thanks for all the nice comments everybody! Somehow, today’s progress is pretty minimal considering I worked on this thing from 10am to 7pm...I guess I must charge hourly rather than for the whole job ? Scribed out the trunklid: I’ve been wanting to learn about hinging, so I’m dipping a toe in the water here by just doing the trunk on this one so I can put a fuel cell, battery and air compressor back there for my own amusement - I’m not going to tackle the doors on this one because I’d rather not dig my own grave too soon ? Added some jambs top and bottom of the opening to support the lid: And after shimming the lid top and bottom to replace the material I’d removed whilst scribing it out I think I’ve got an ok fit to keep tweaking until I’m happy: I wanted the hinge at the bottom of the trunk so it opens buggy-seat style, and after 4 hours (!) of making a bunch of hinges I think I’ve got one that will work ok: And, incredibly that’s how I spent the entire day today ?. Not much progress but didn’t go backwards any at least. I feel like these steps in a build are like when an artist sketches out the whole scene before bringing out his paint - kinda rough everything in close-enough to get the overall look how you want and refine from there. More sketching tomorrow! ?
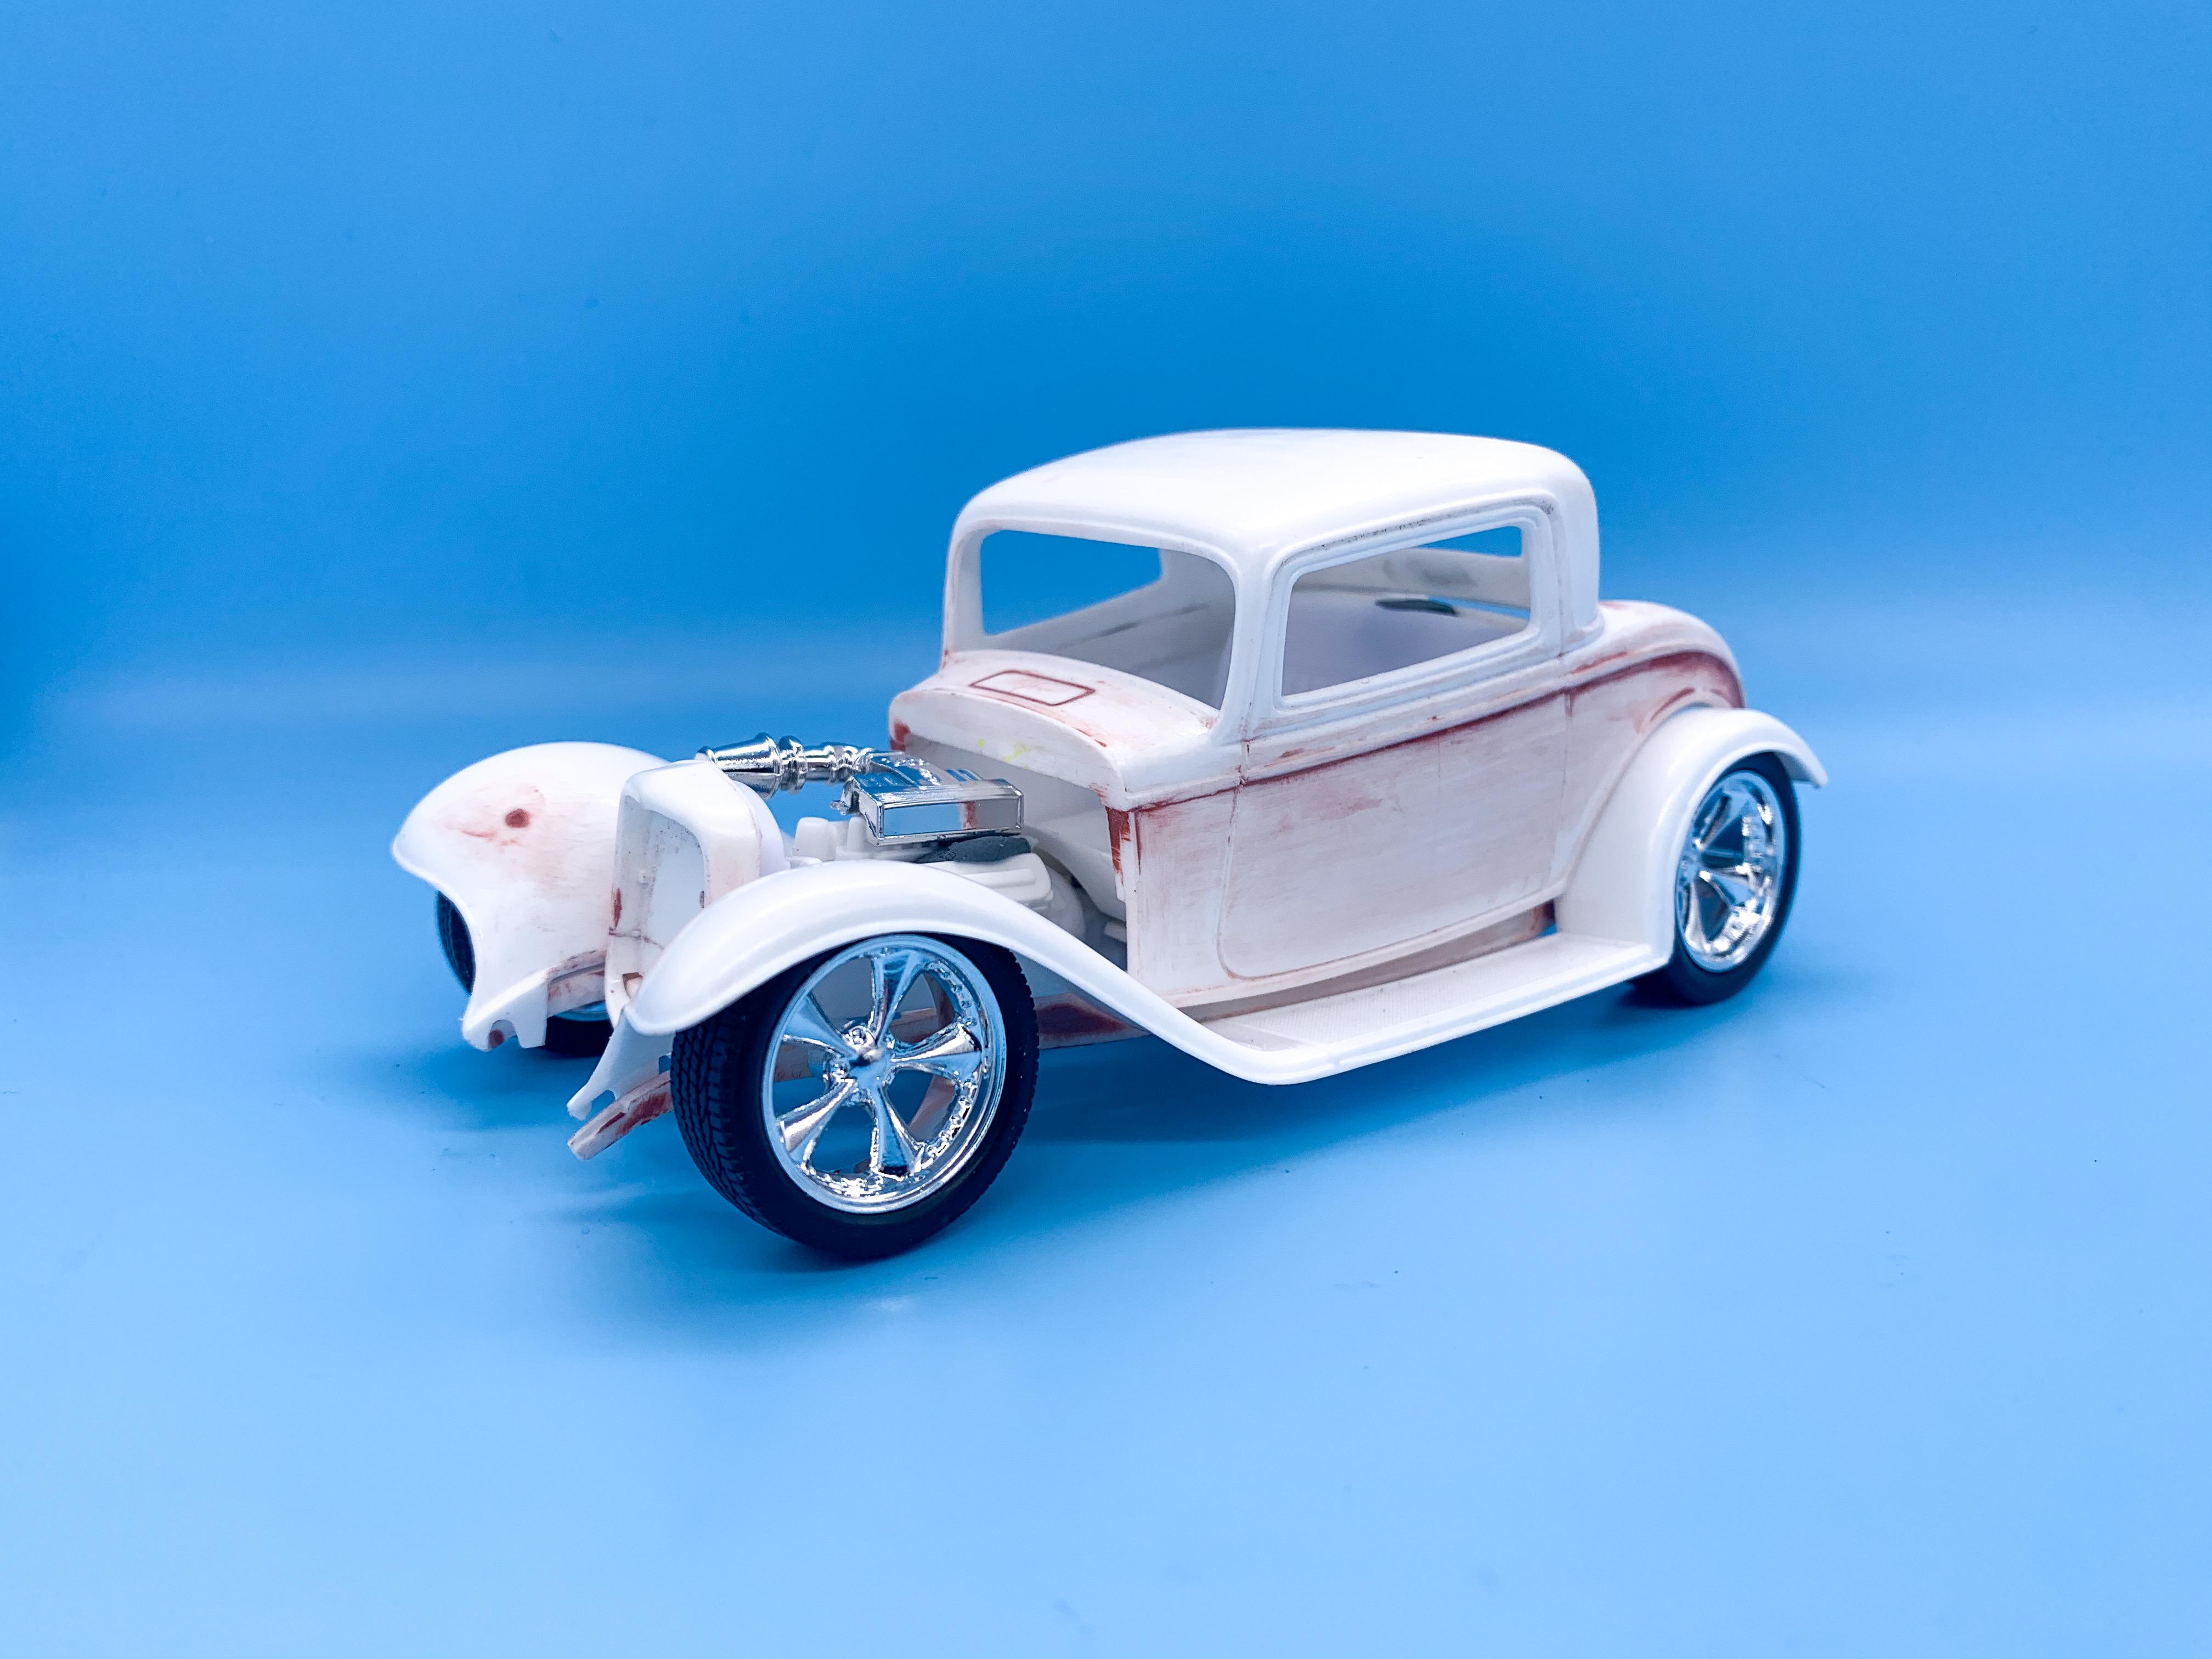
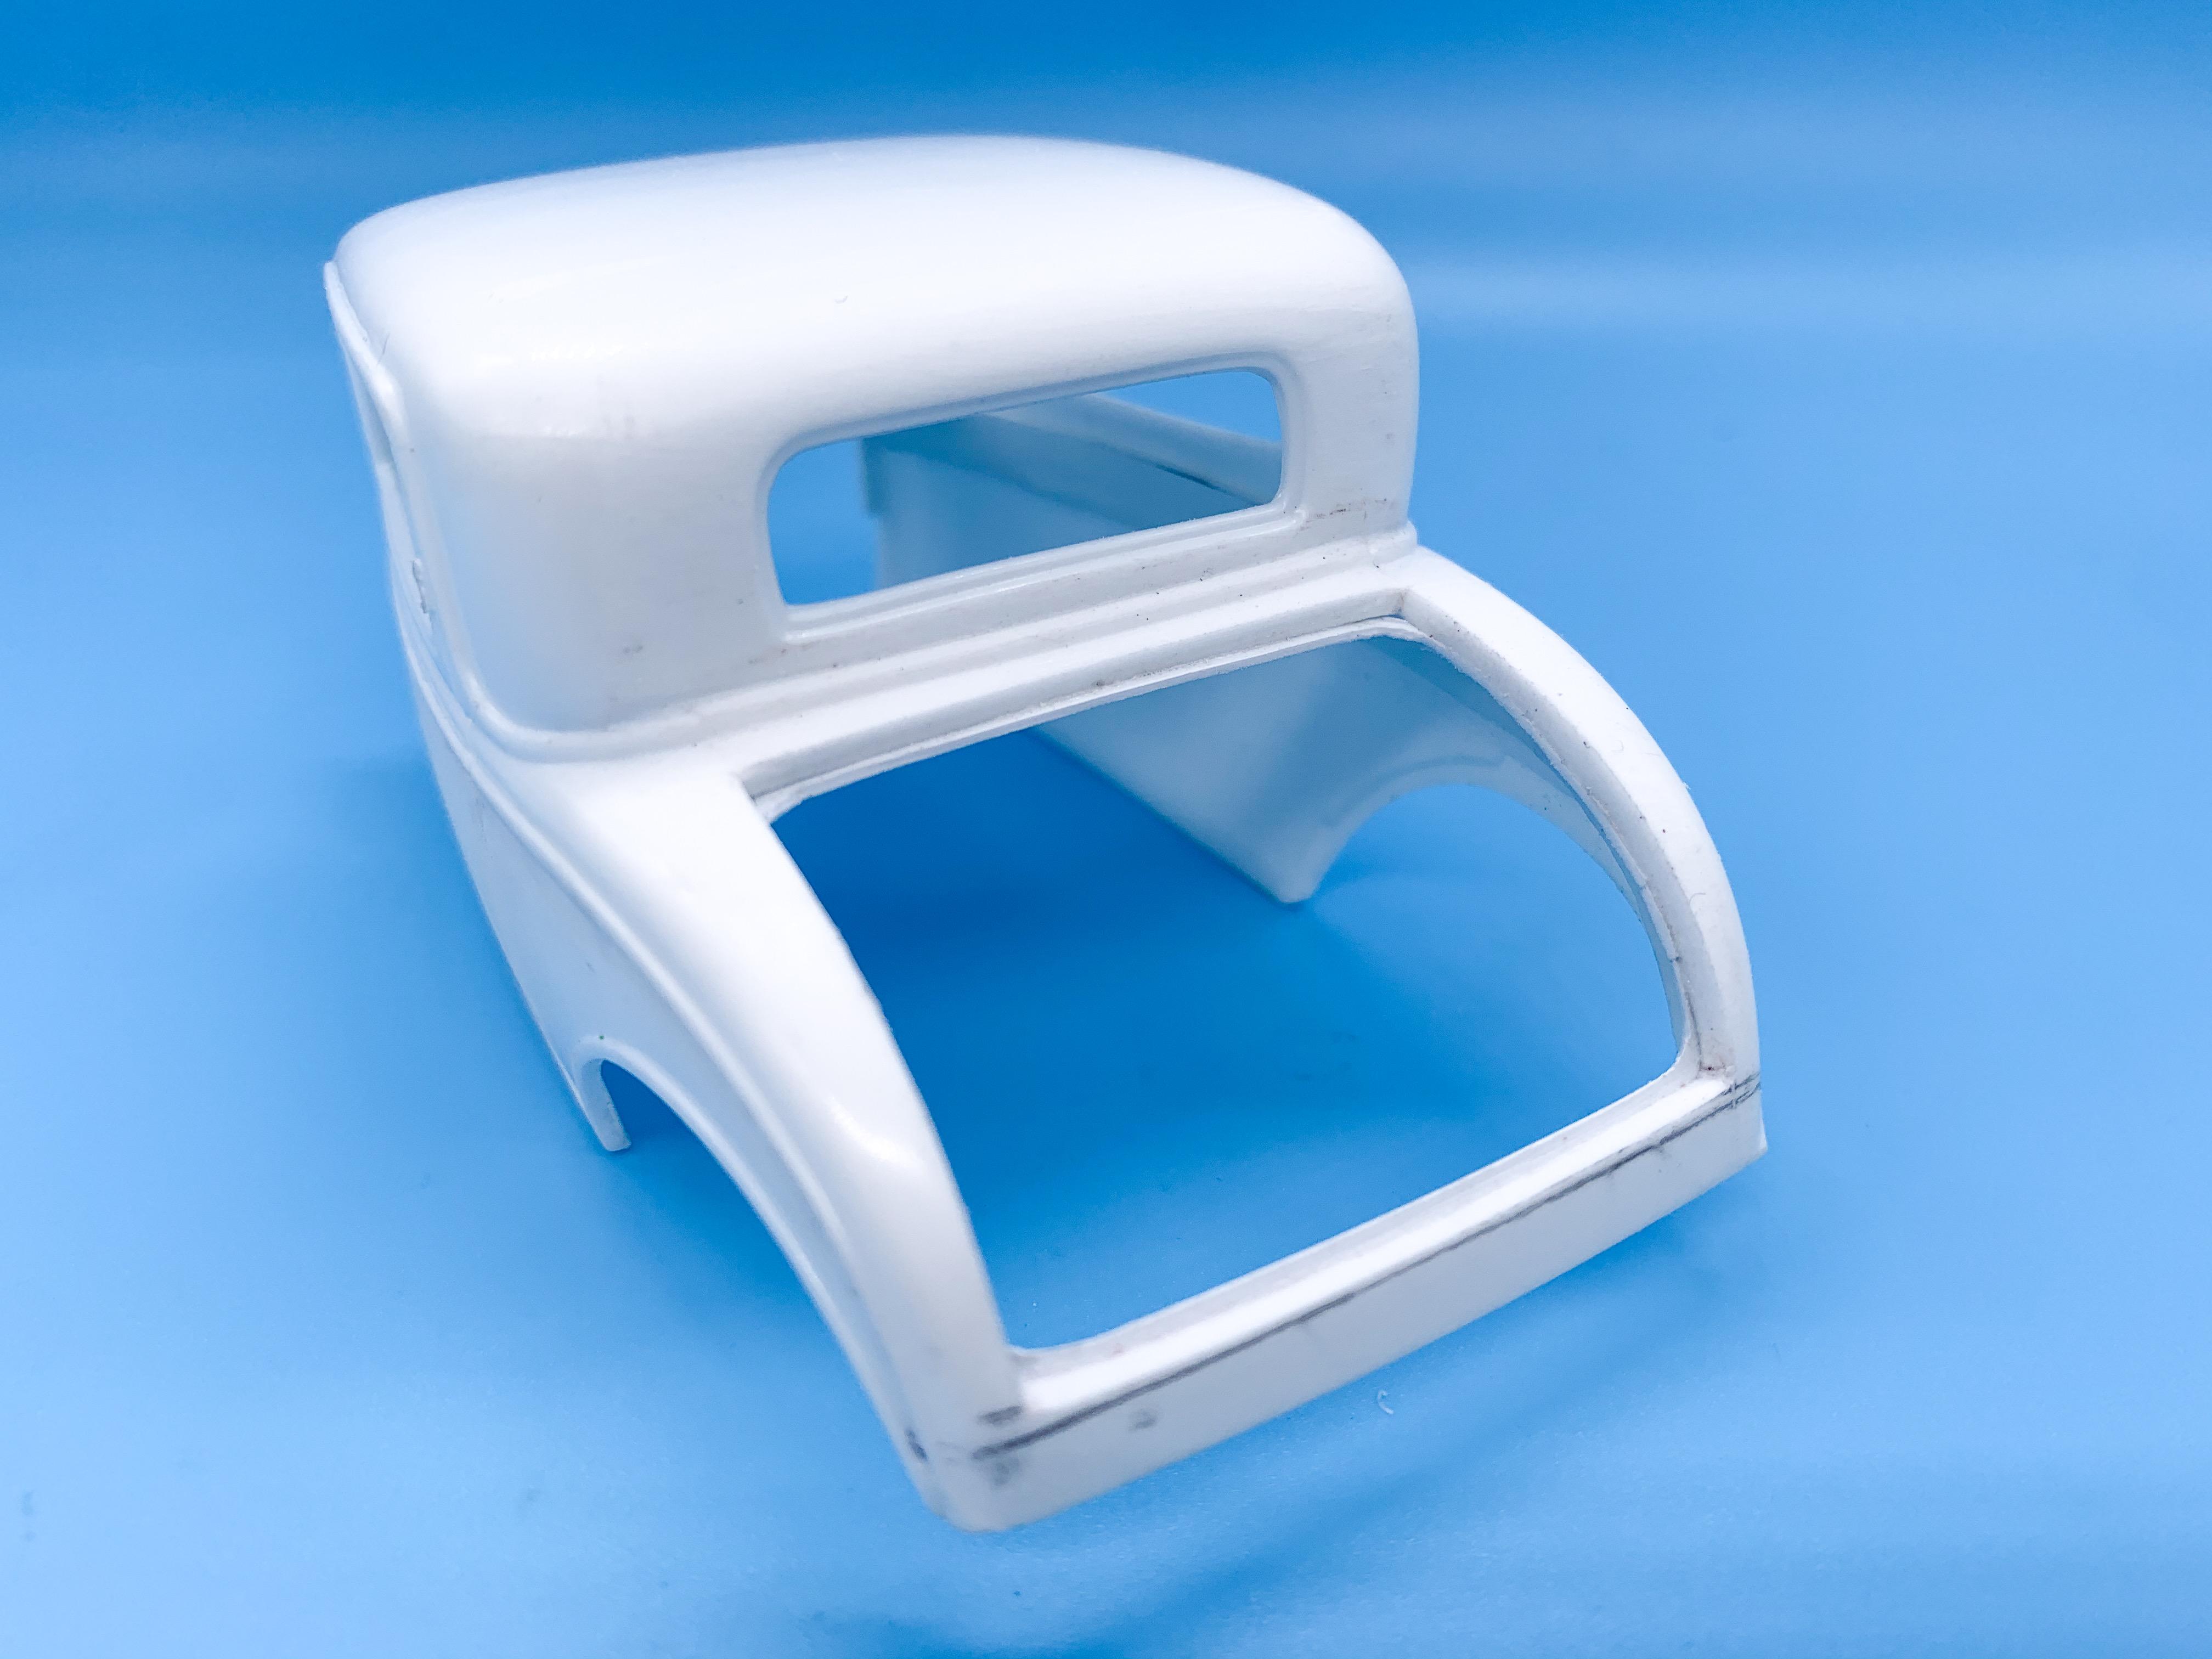
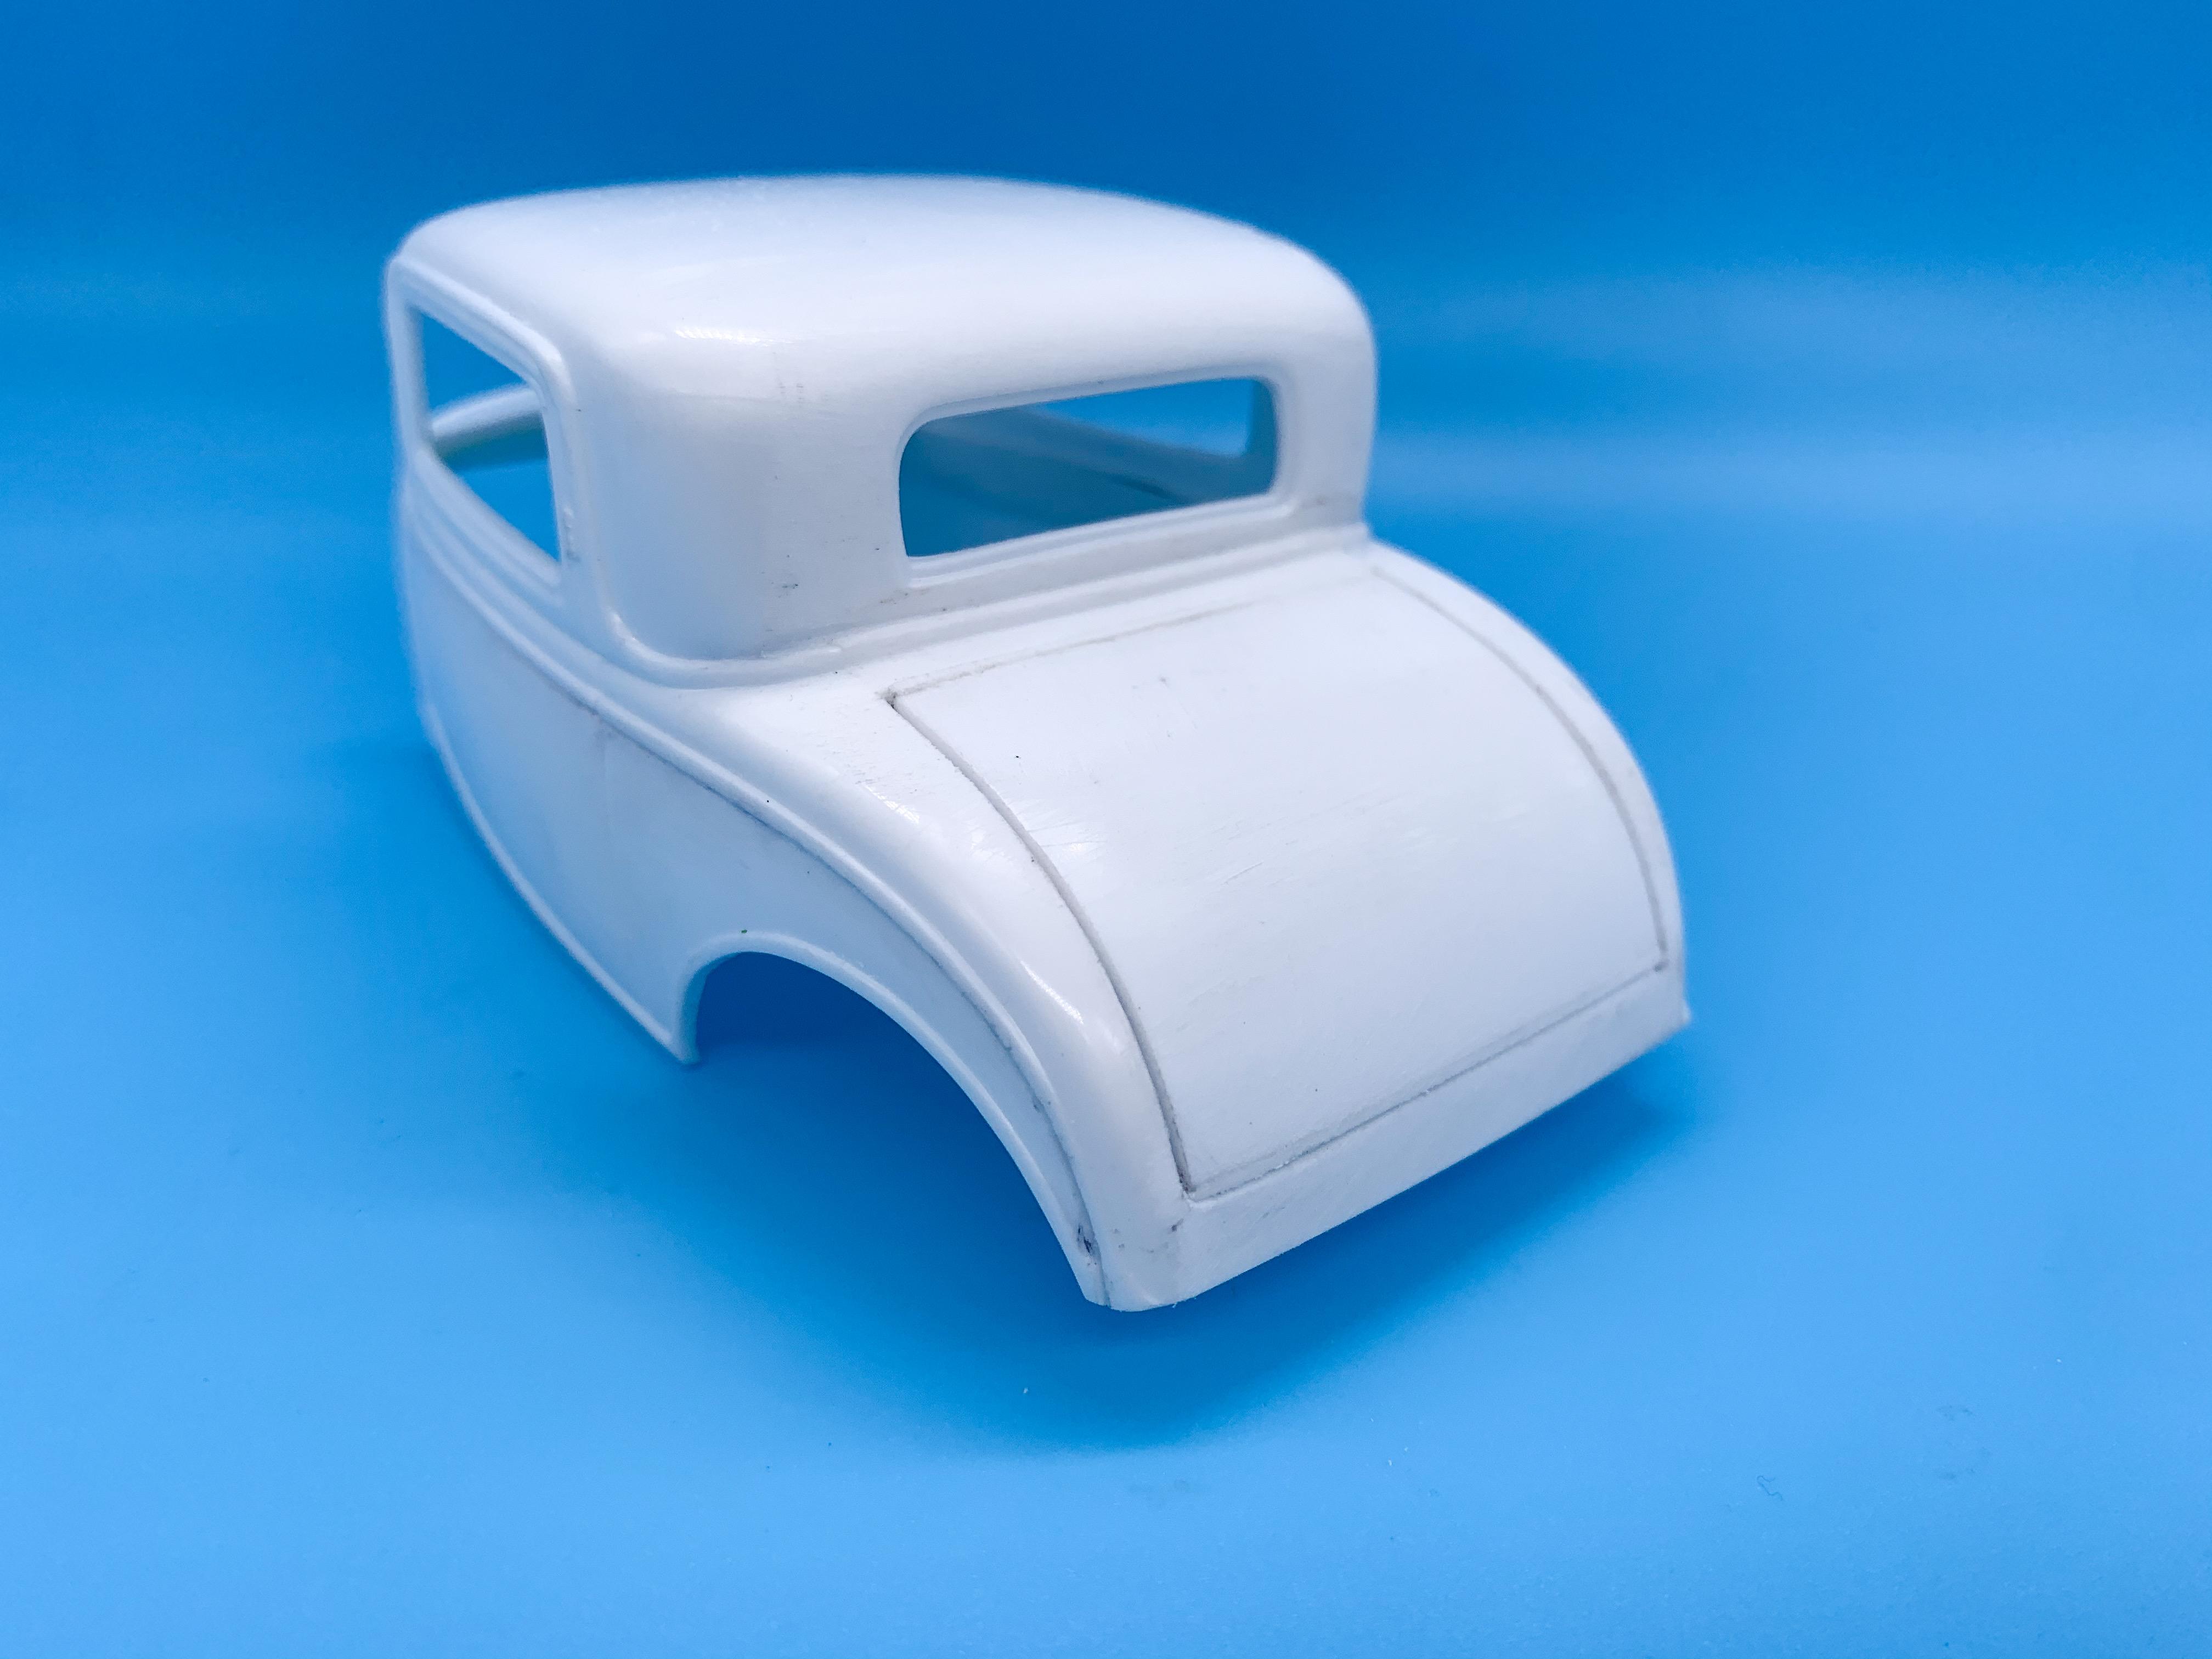
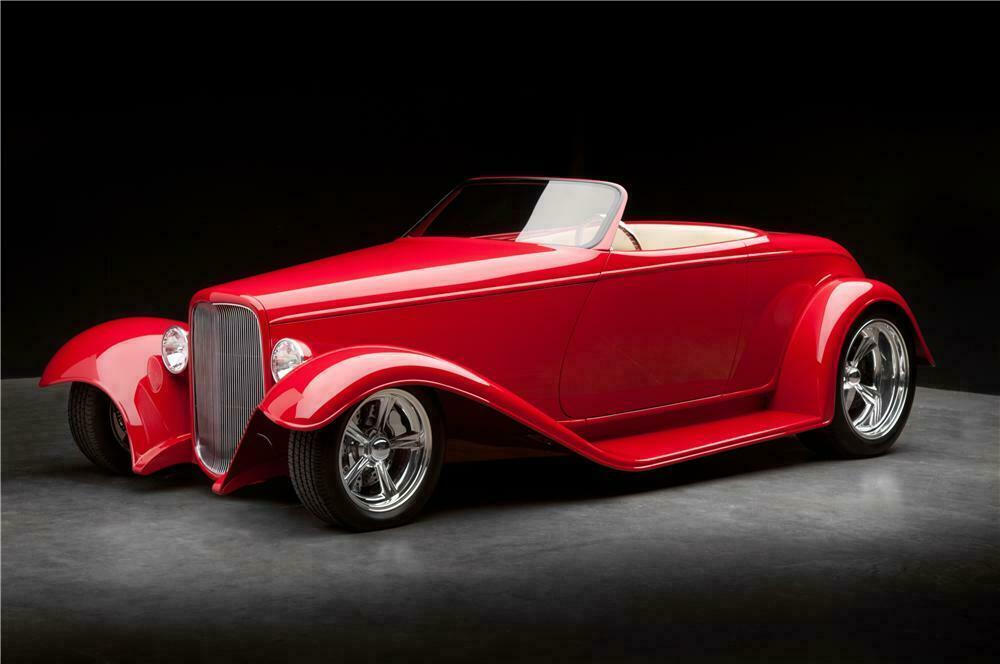
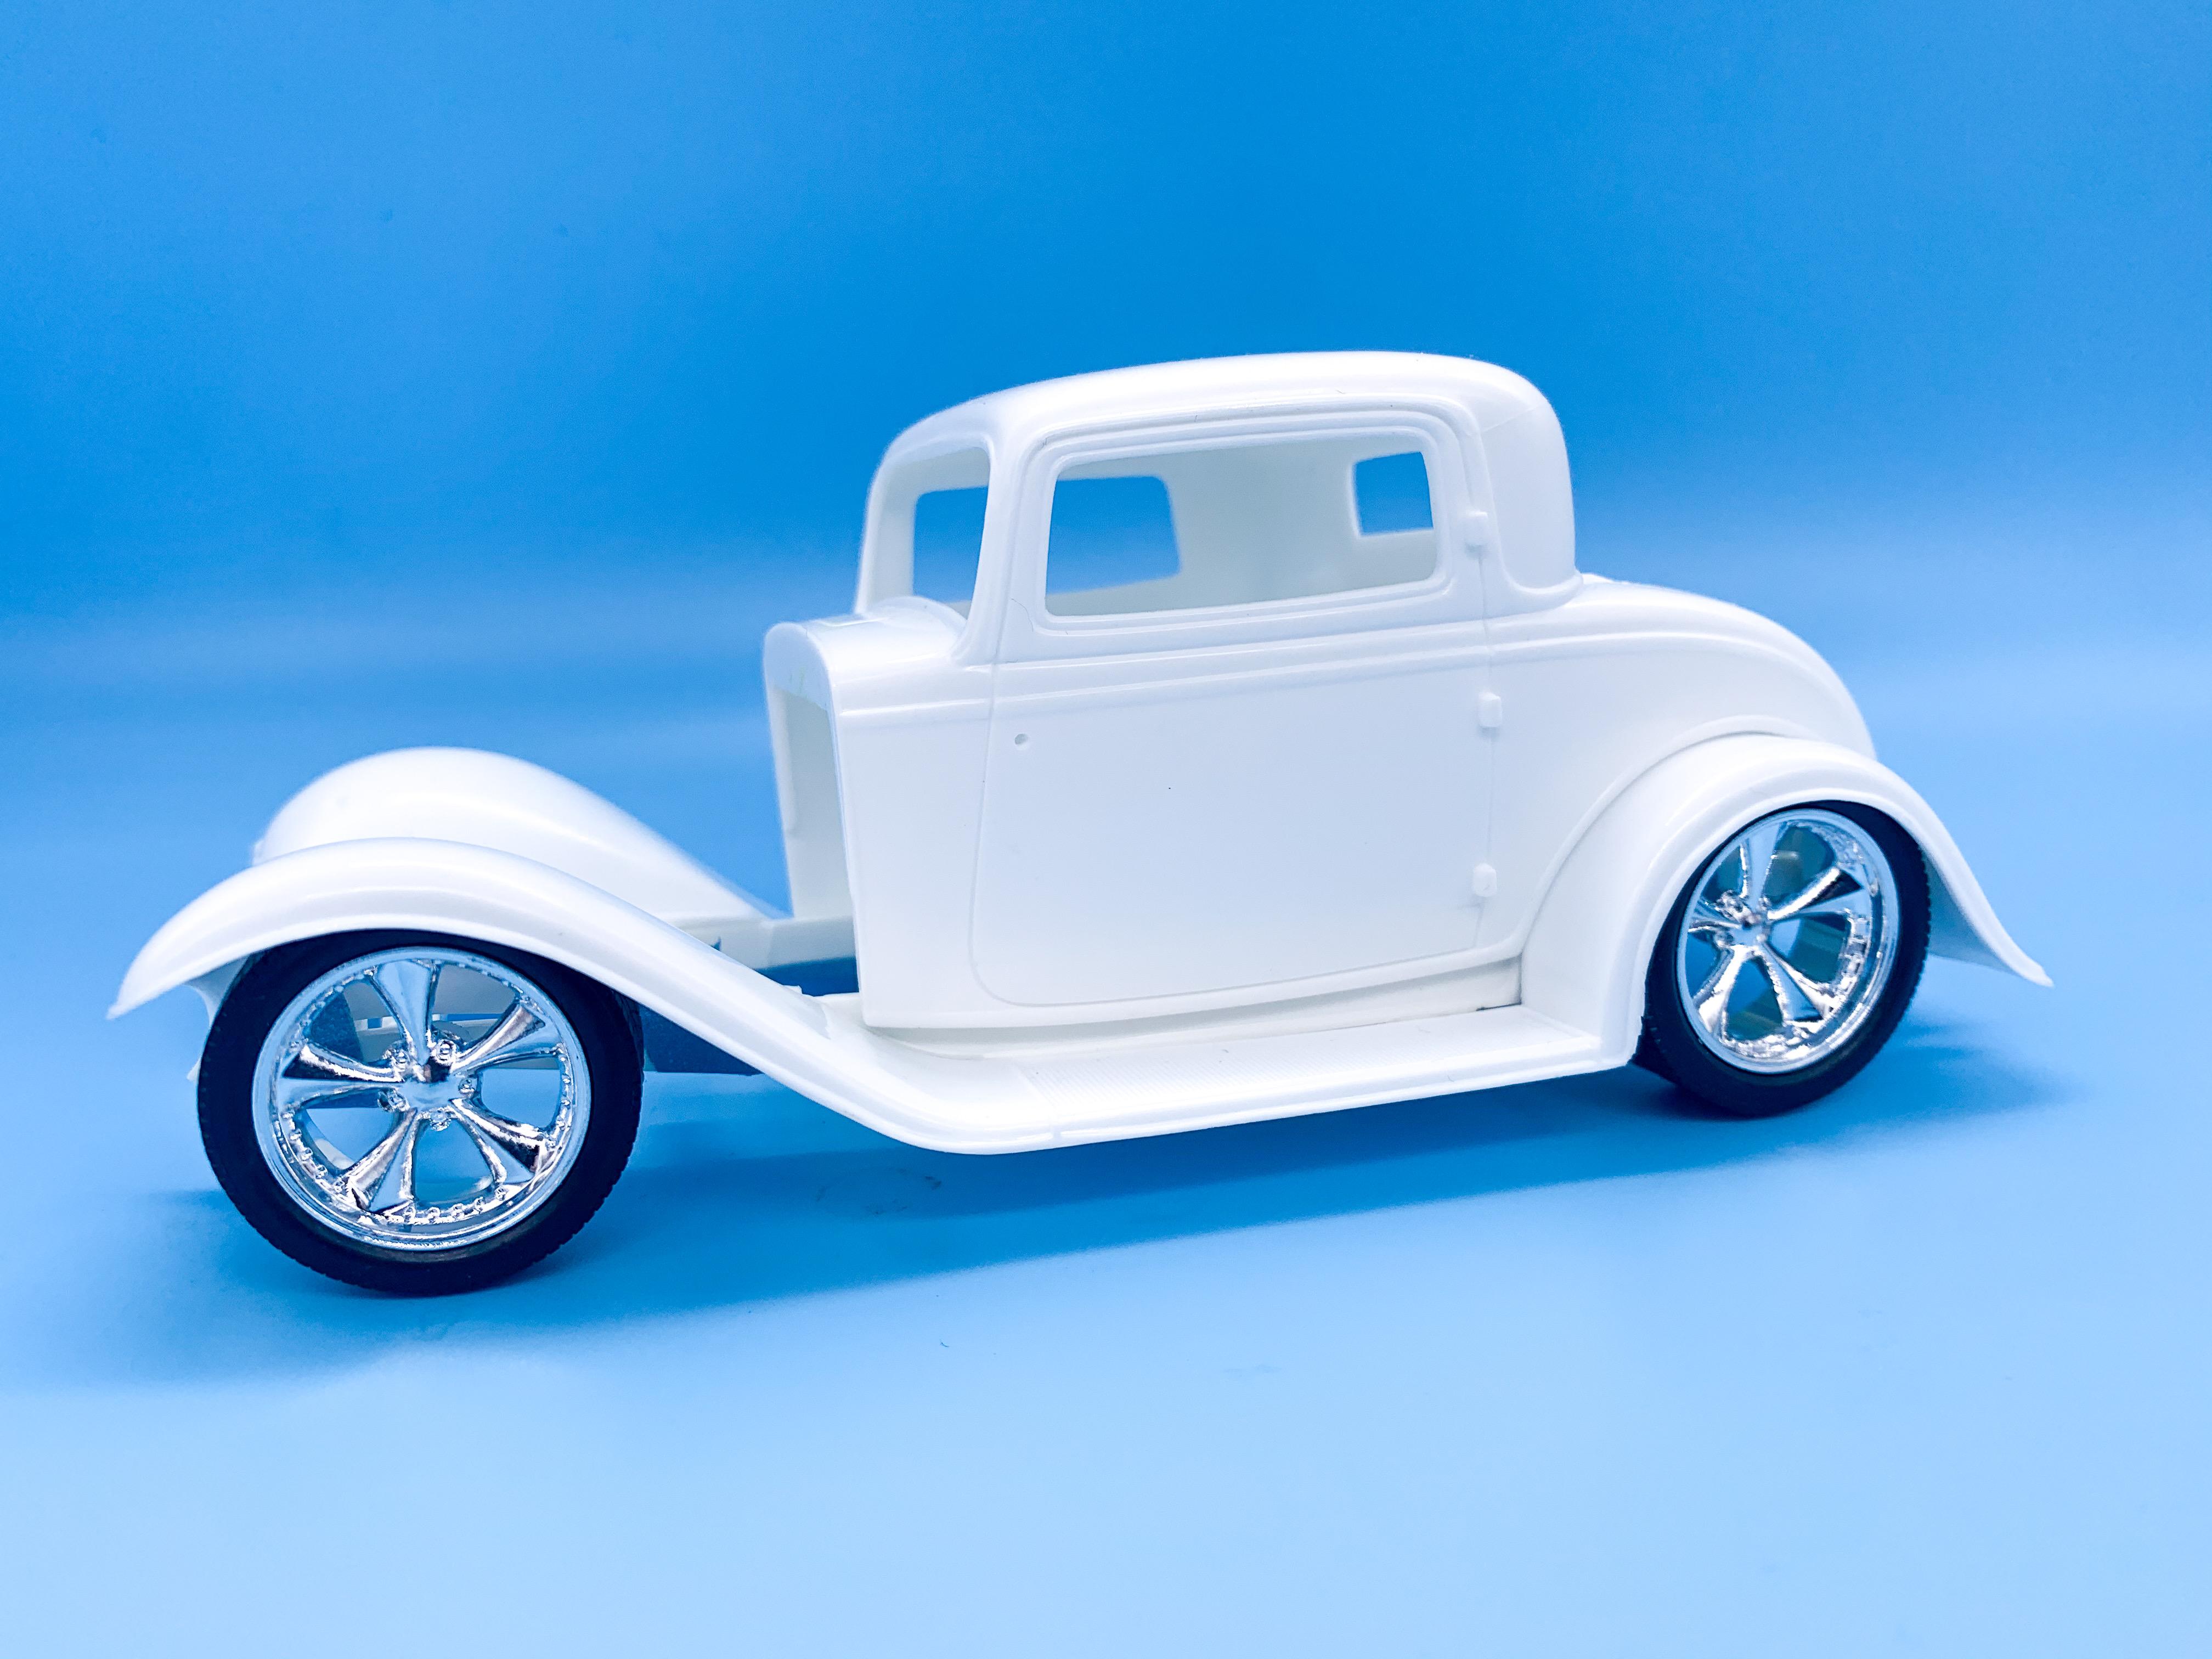
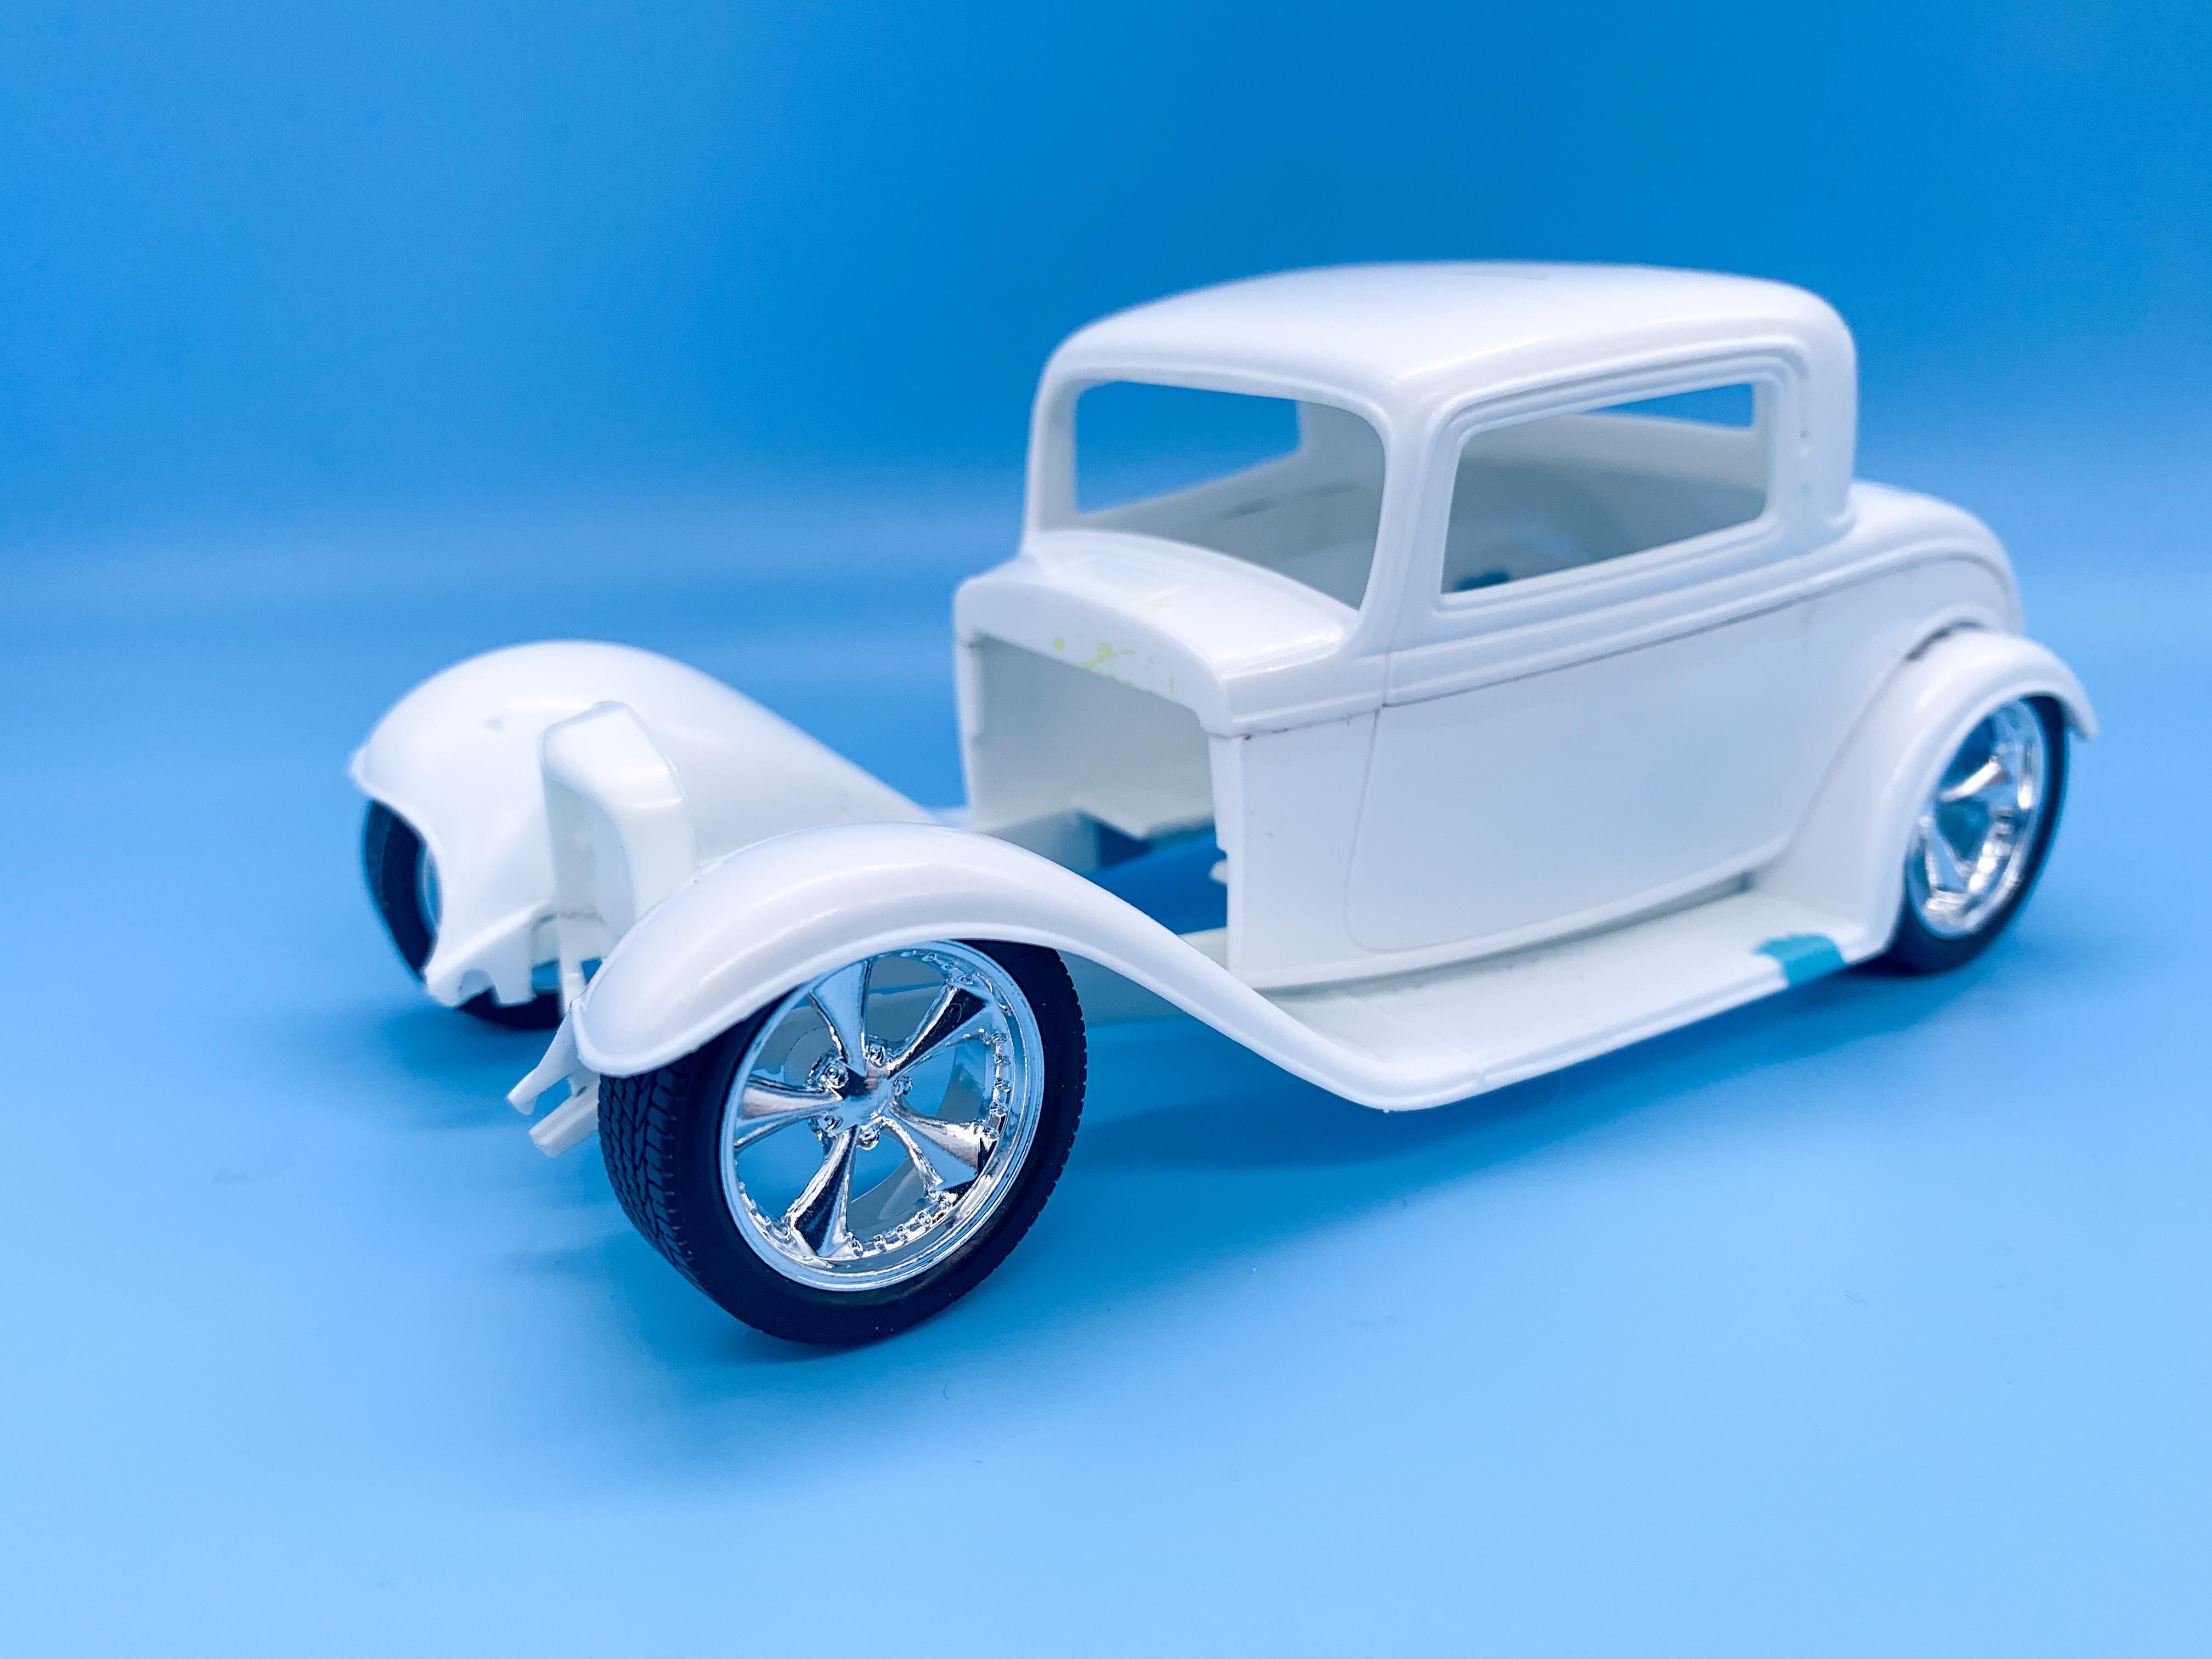
-
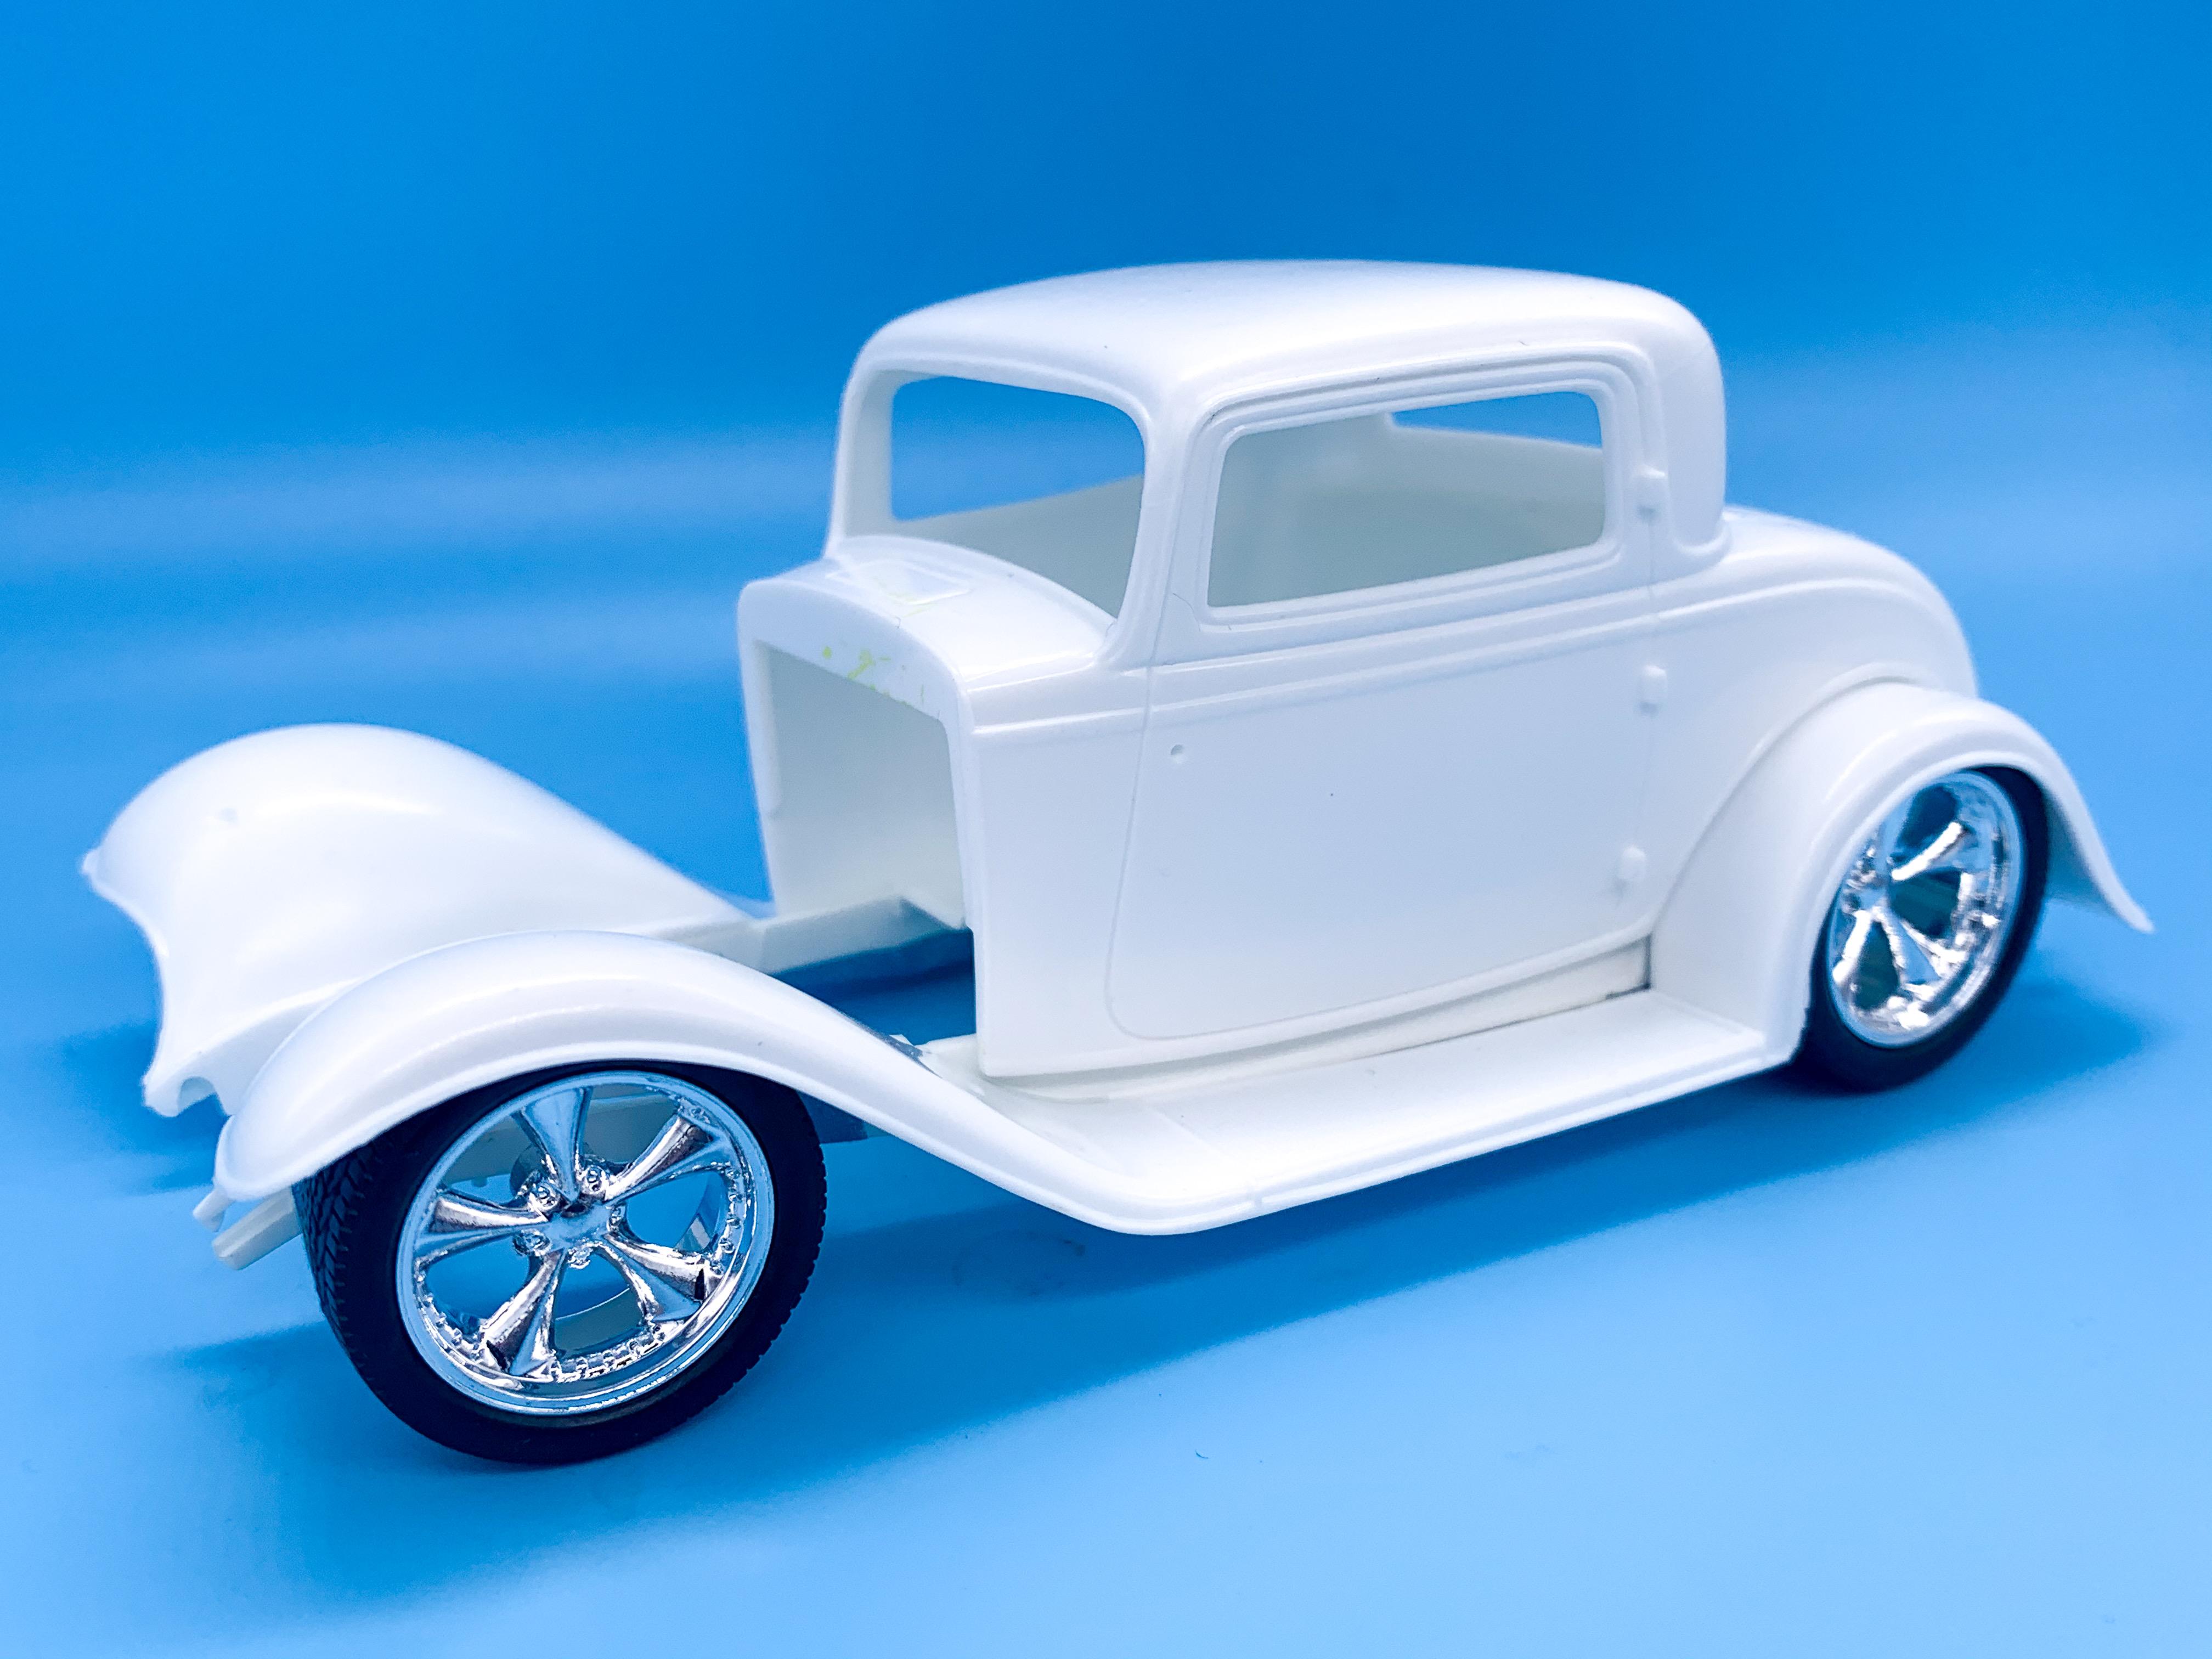
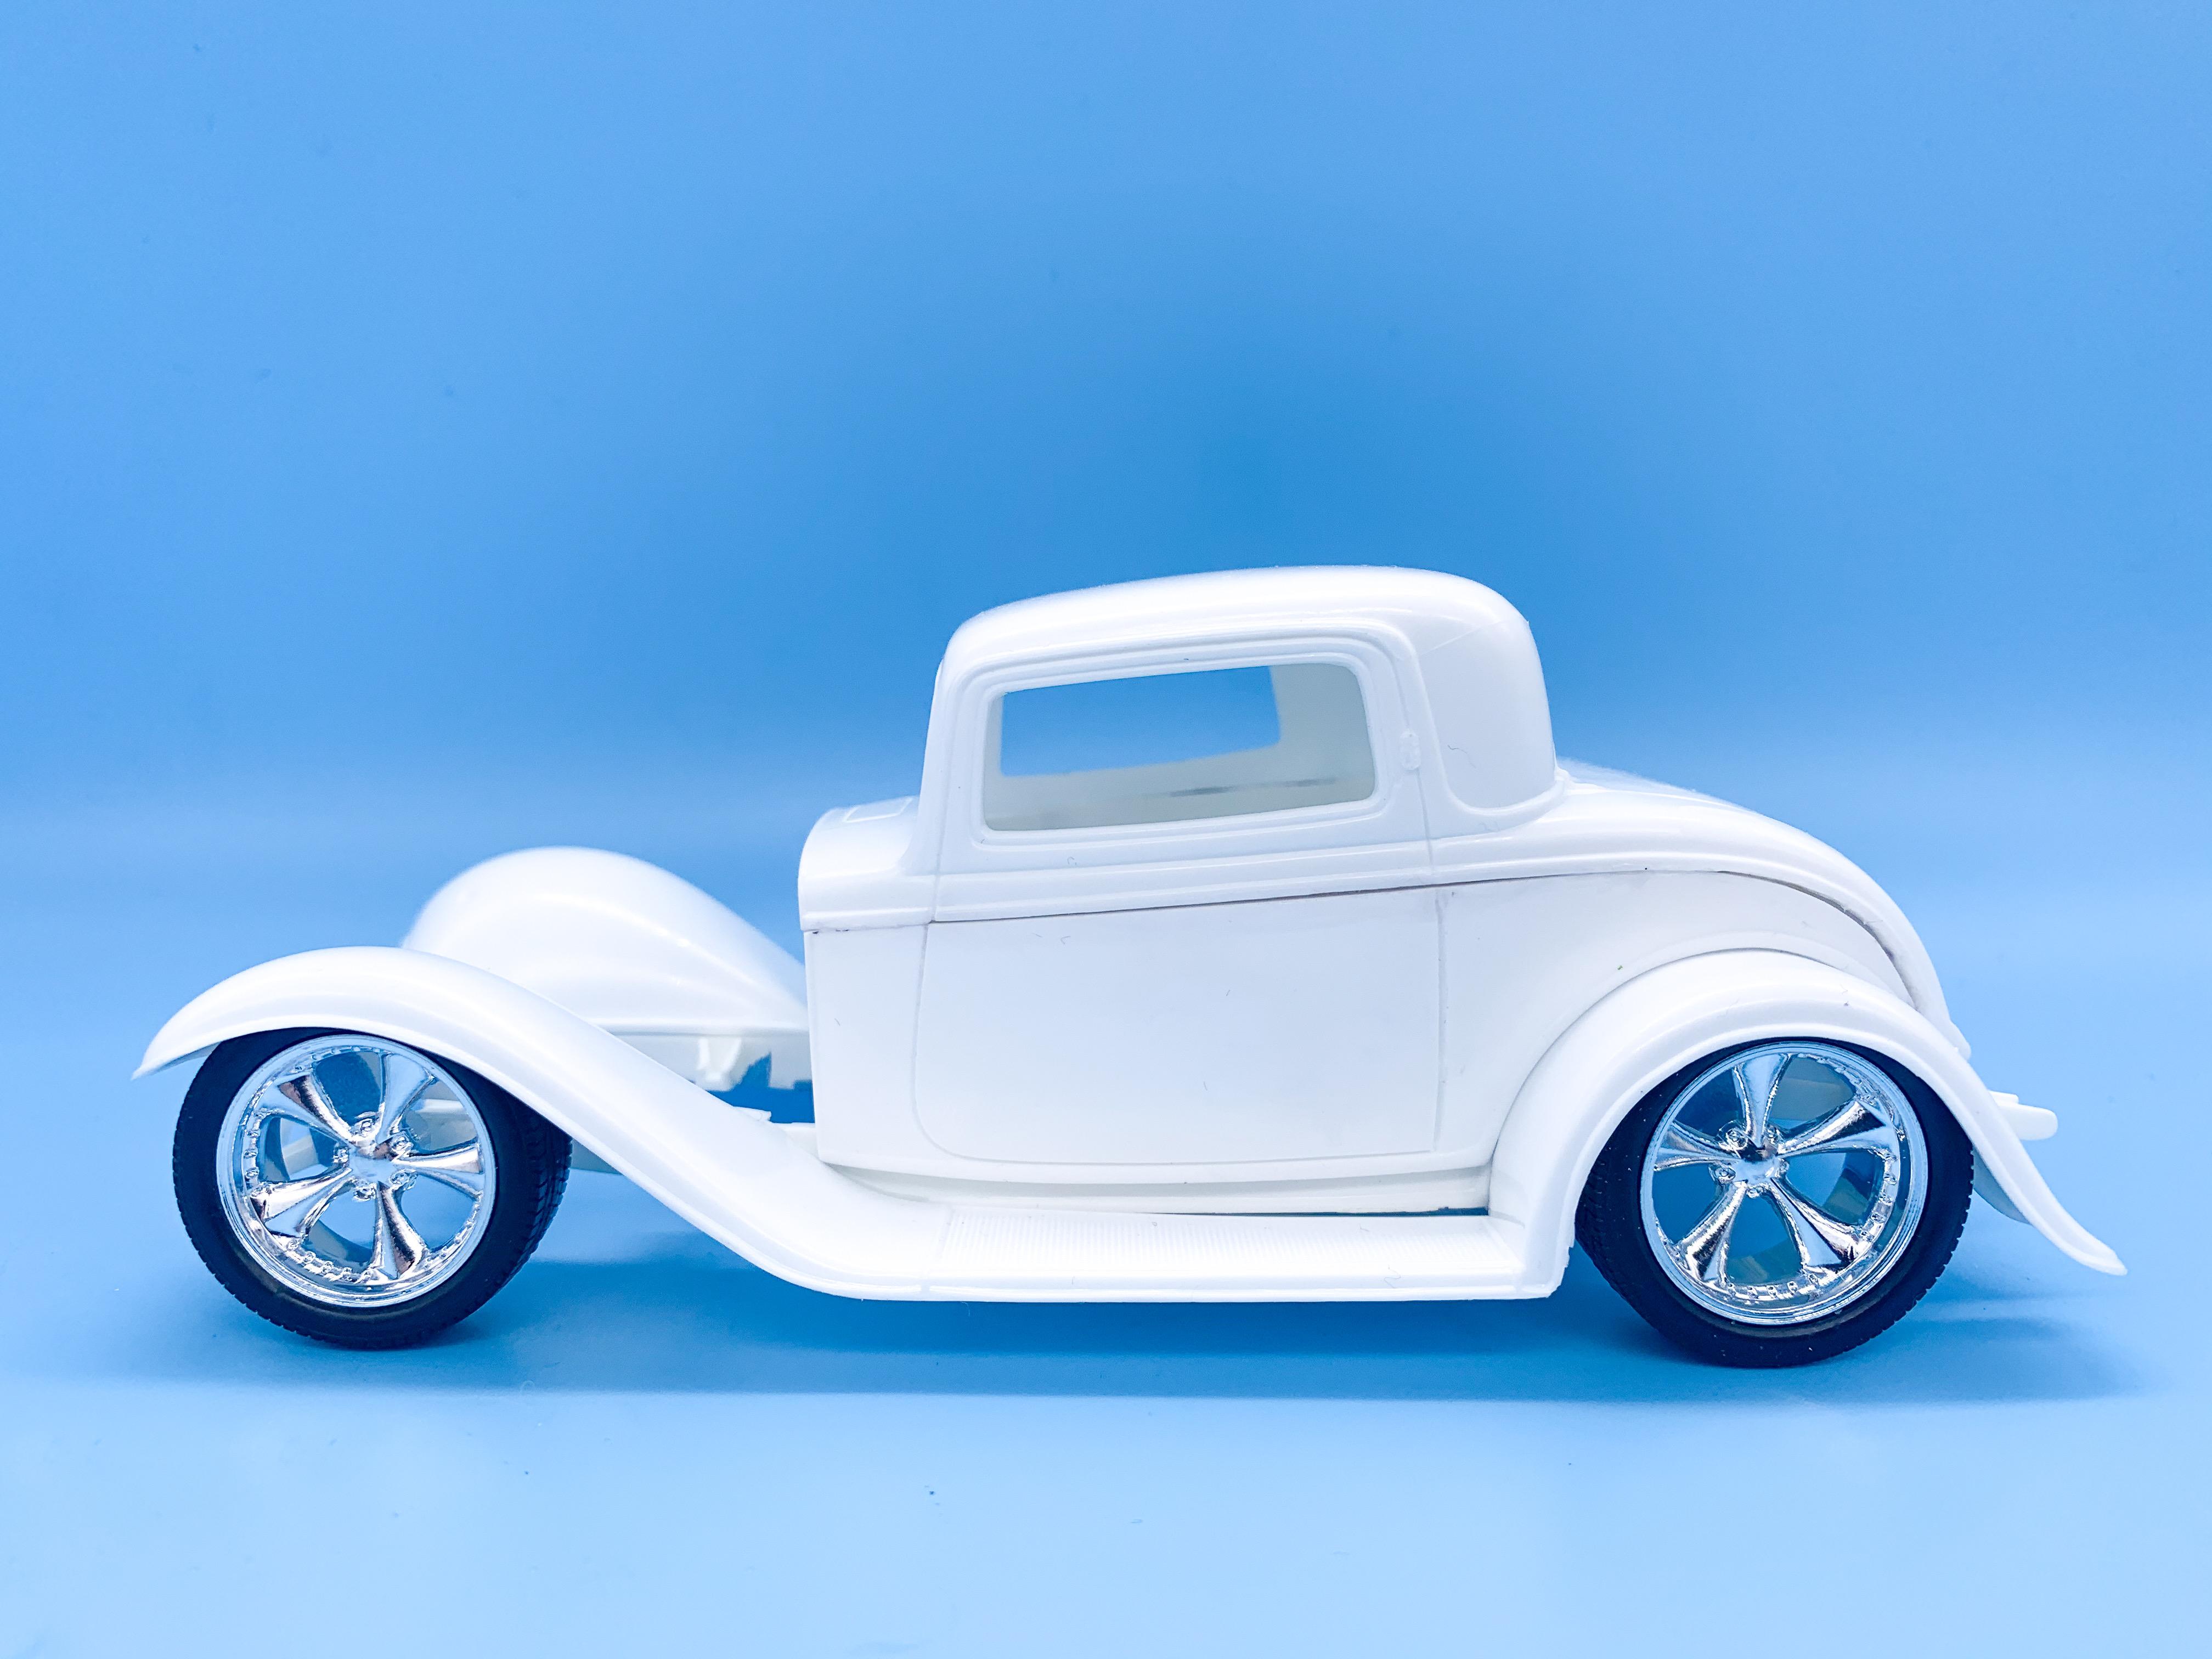
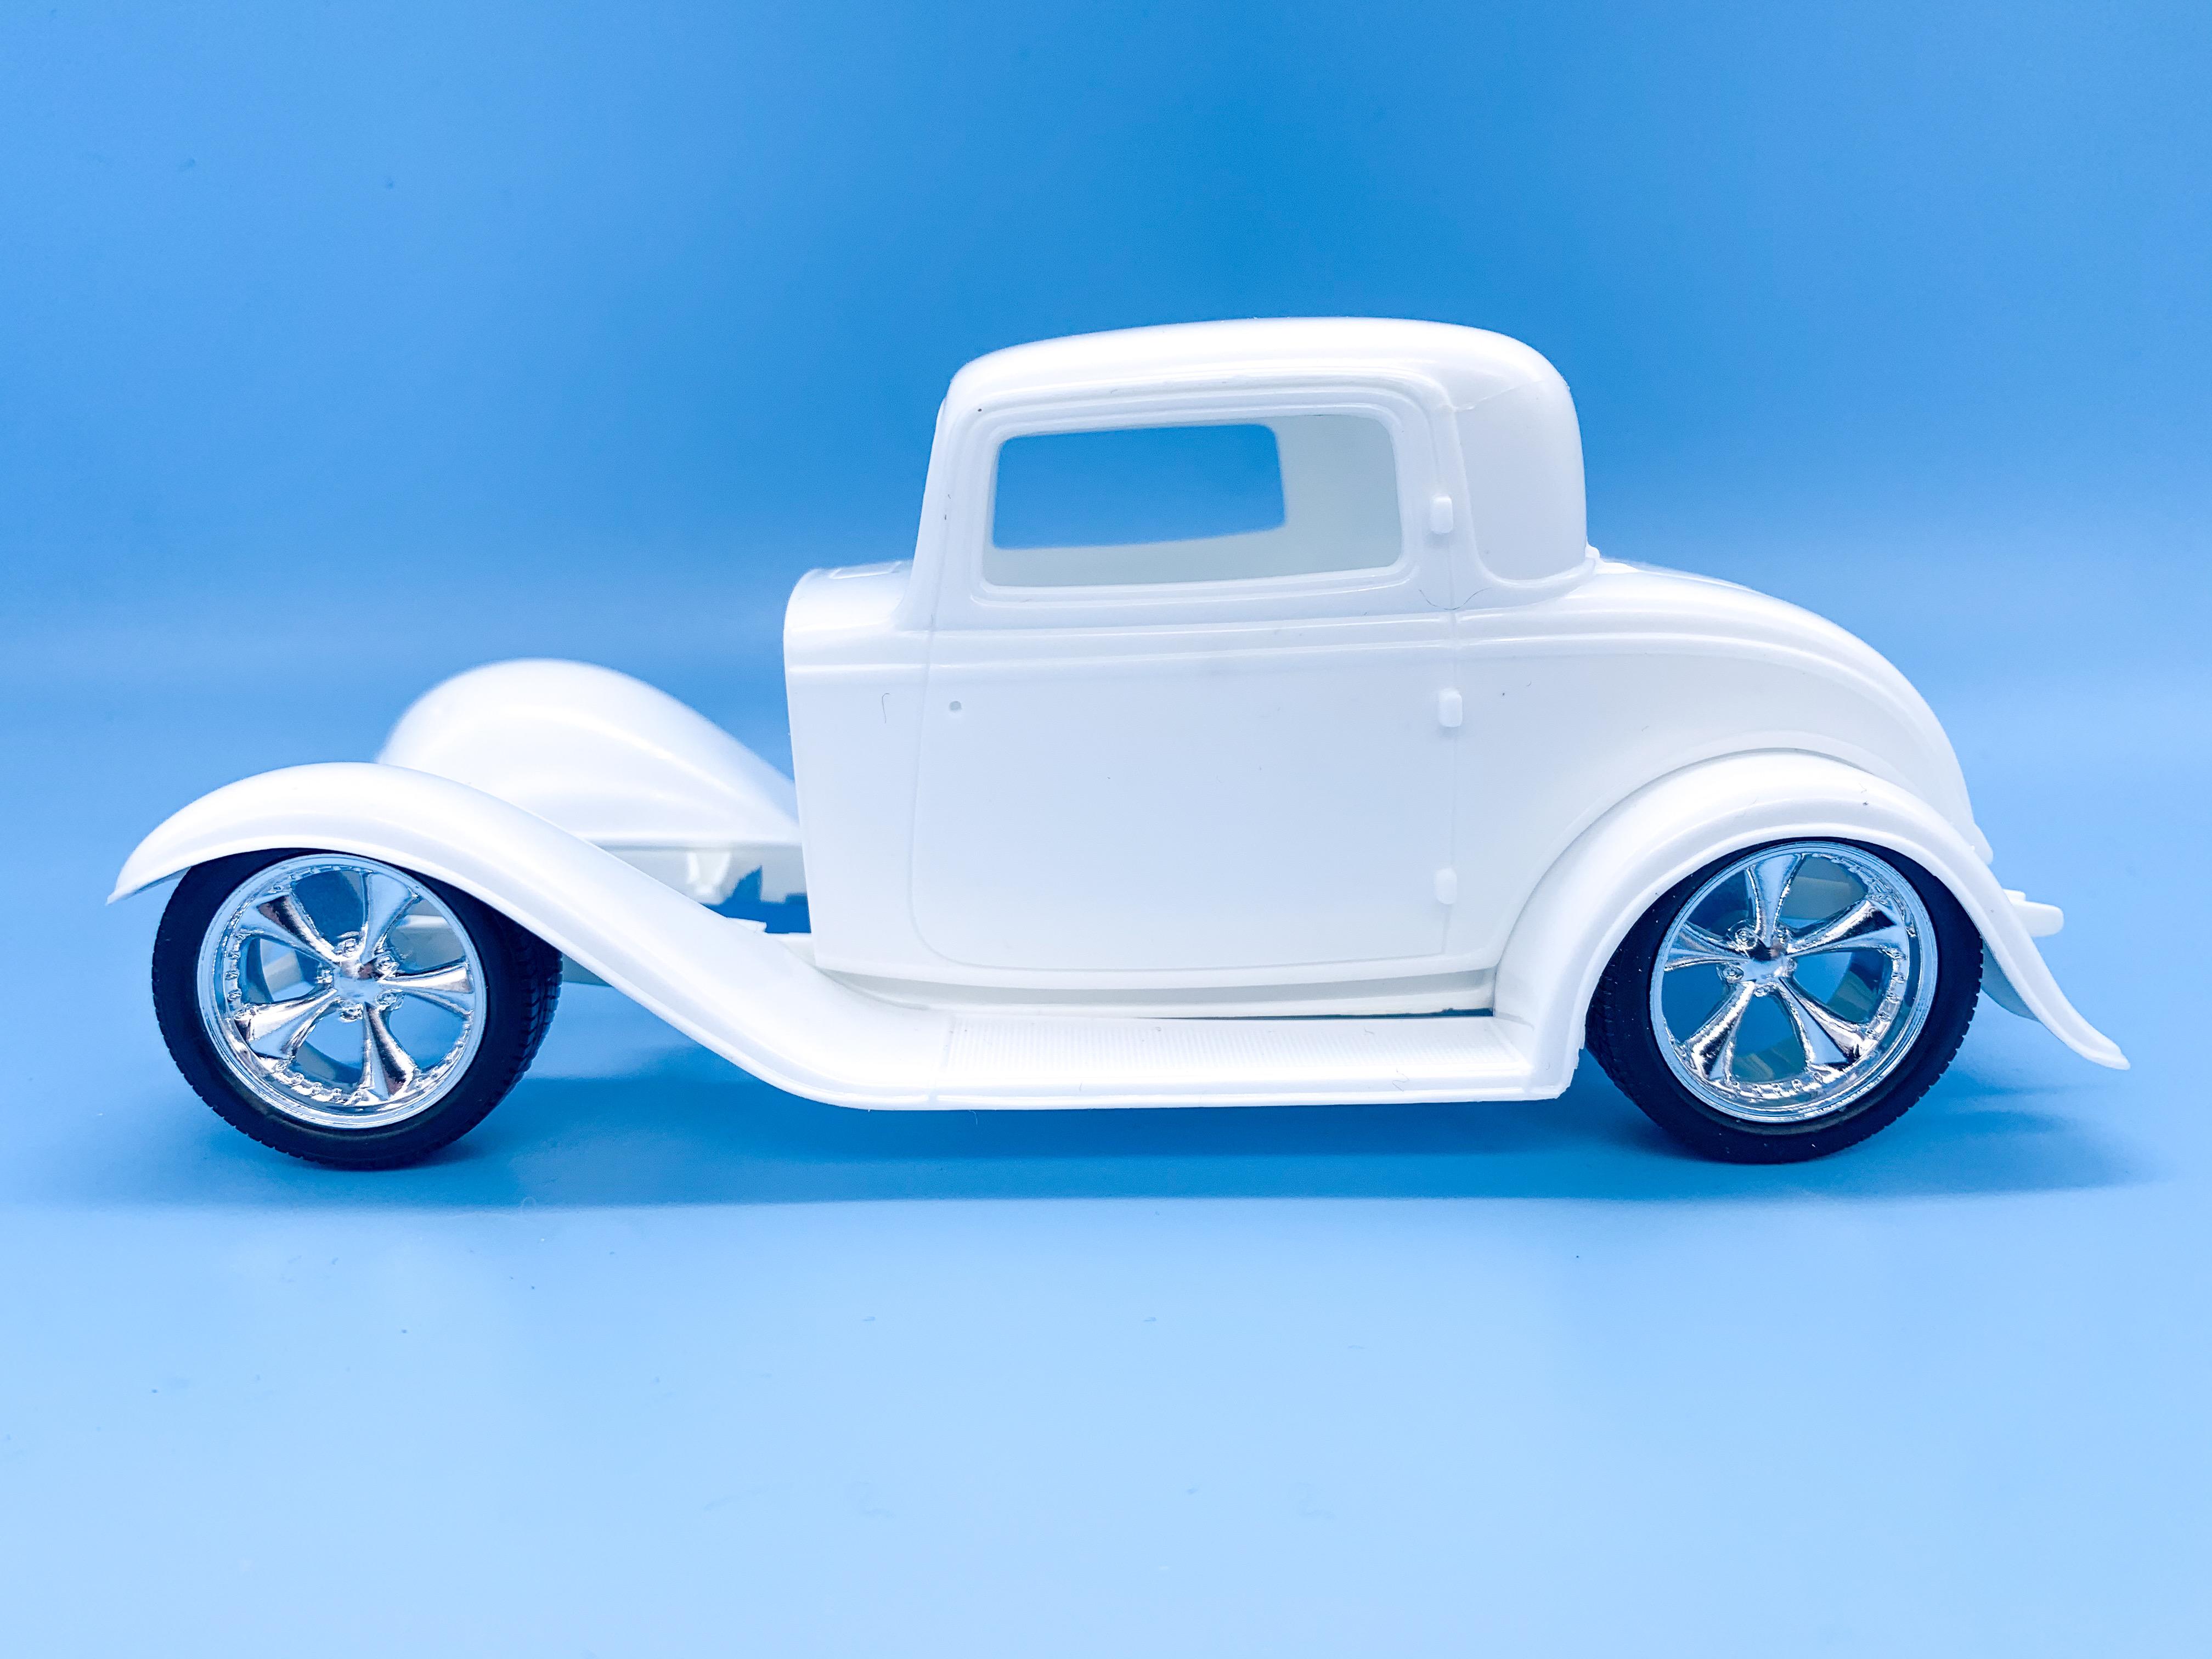
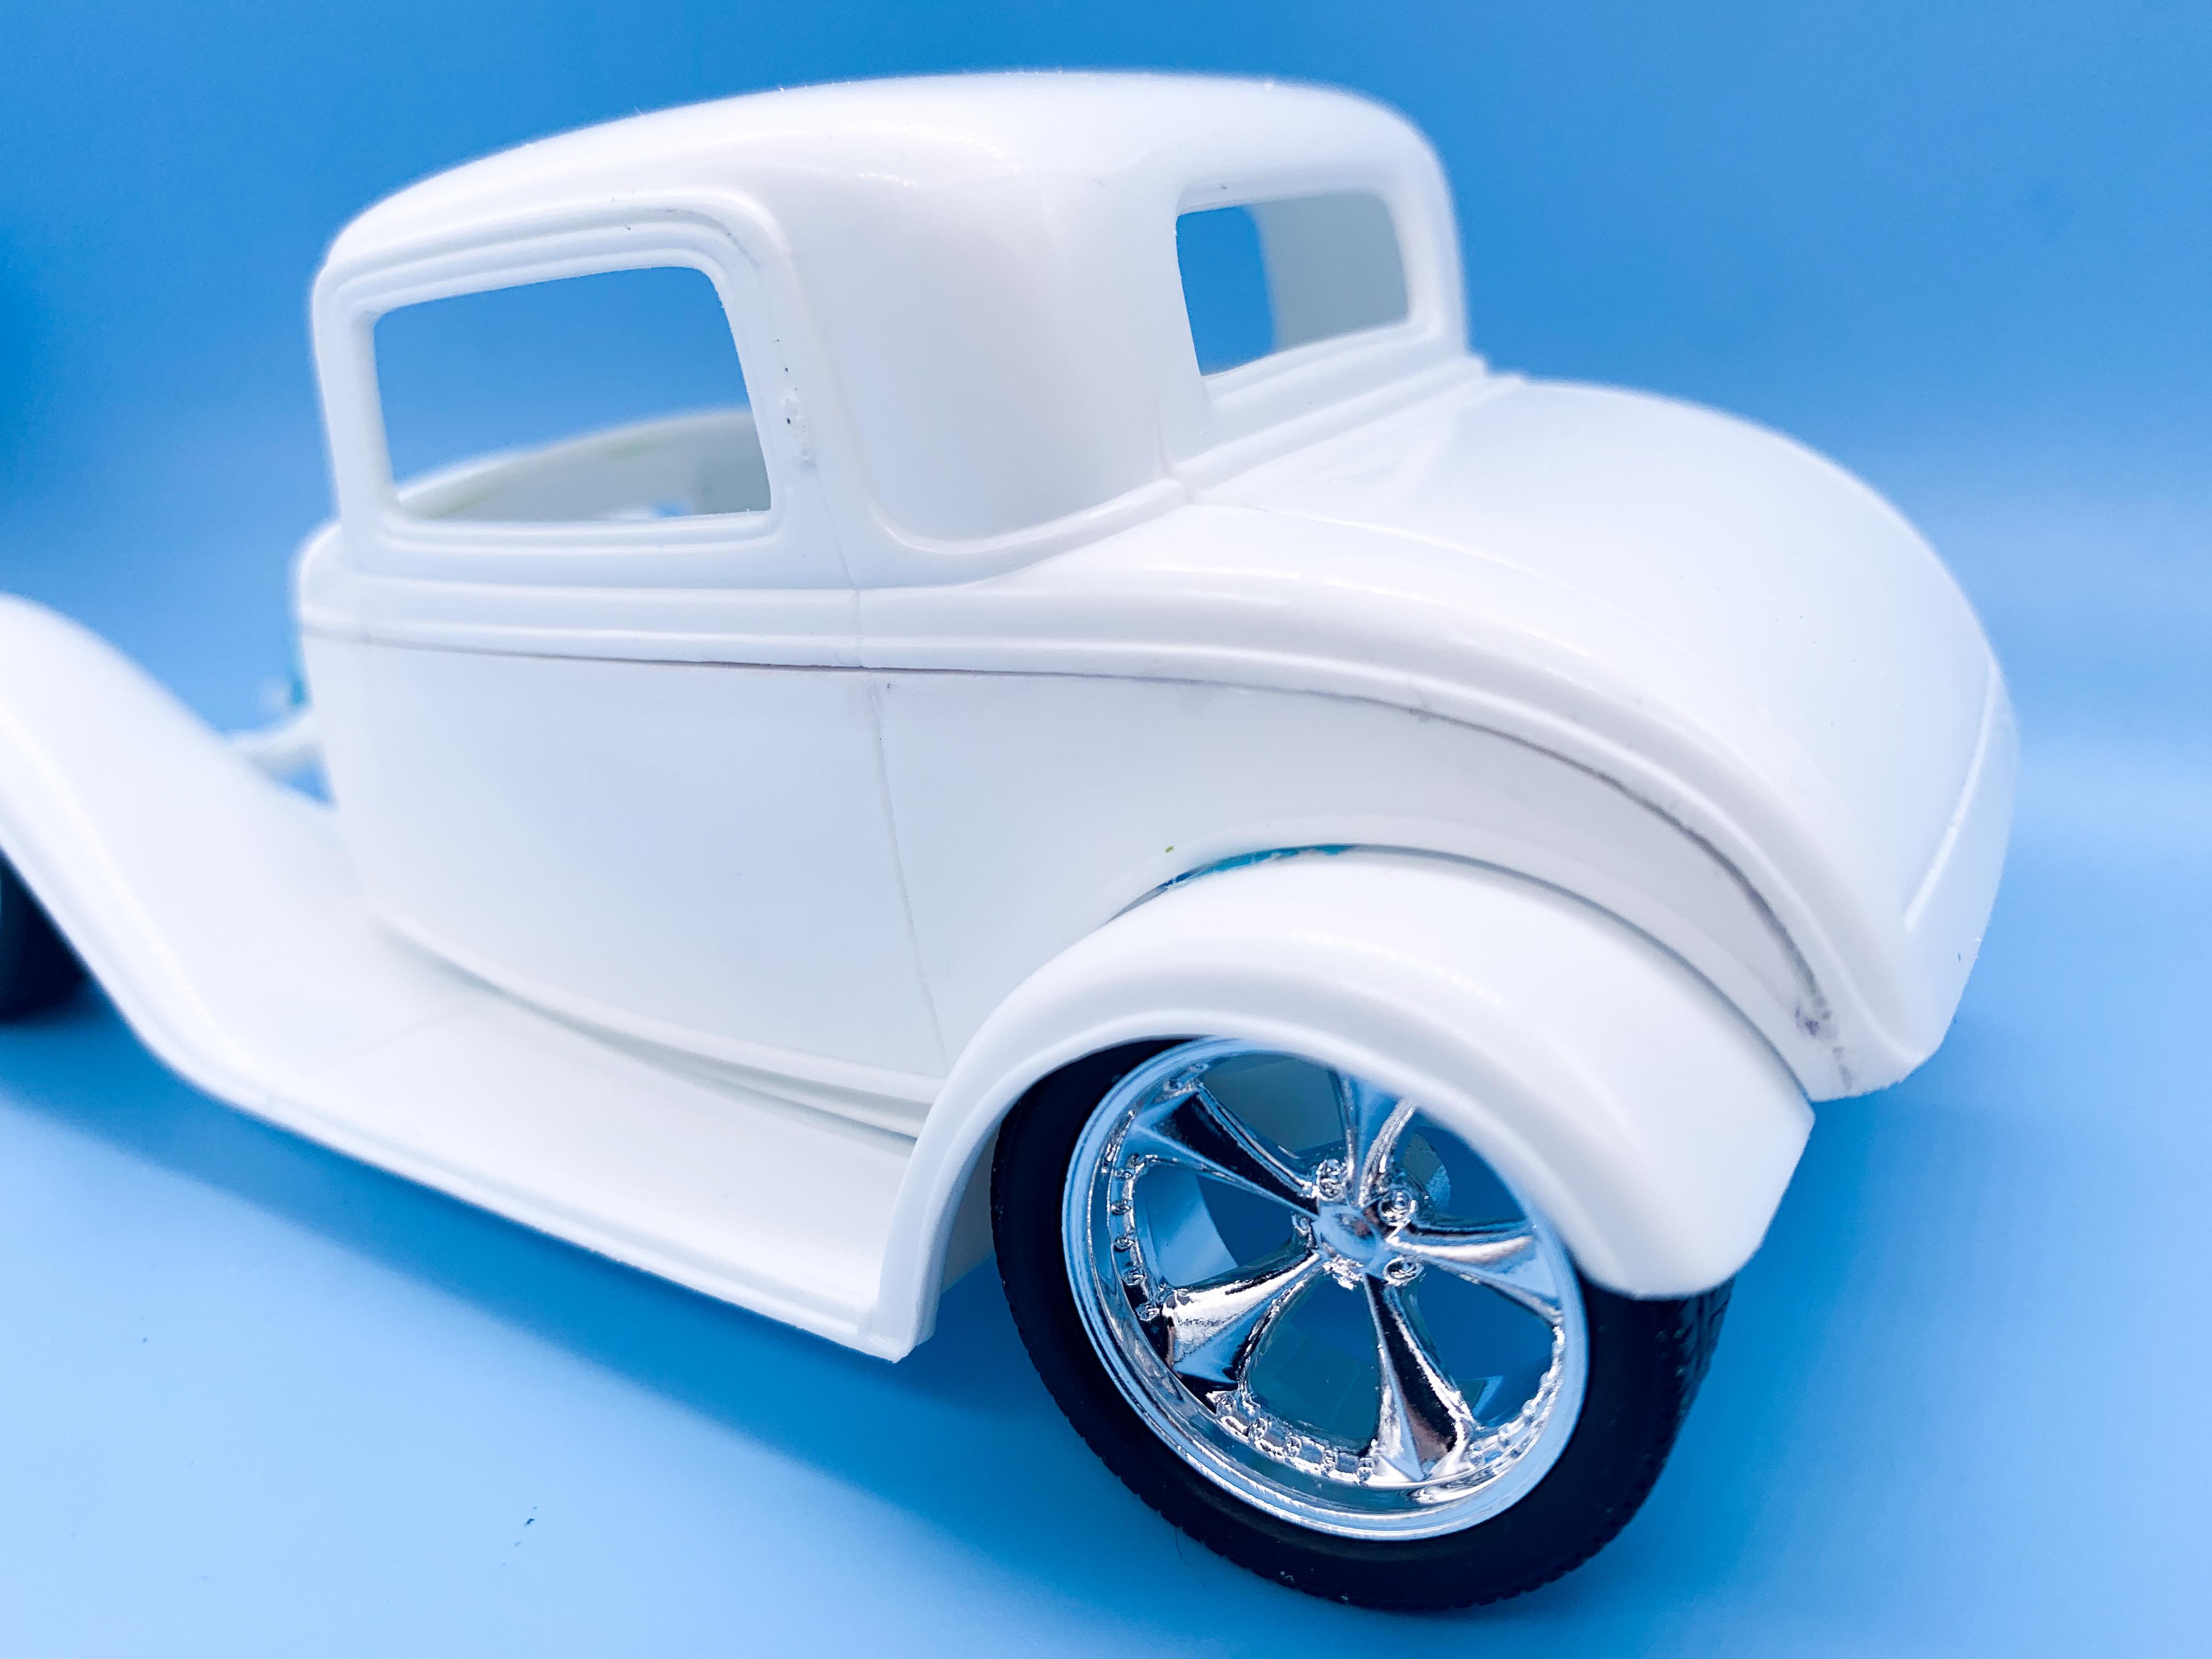
I’ve been daydreaming about this build for a couple of months now but had a few projects on the bench already...but today I shot the last piece on the 29 Ford I’m working on and I need to wait for all the paint to set up before polish and assembly so I allowed myself to get working on this one finally. My (loose) plan is a sectioned Revell 32 Ford with the nice Foose wheels and tires from the F100 truck kit - nice and smooth looking but not FULL streetrod with everything covered up and hidden...just a nice clean modern hotrod. Oh, and now I’ve managed to find some Boyd Red paint thanks to a member on here it’s gonna be that gorgeous rich red that I really like but have never used before; First mock-up with the wheels: I like how they fill the arches - and there’s technically enough space for them to work ok with regards clearance and being functional on an actual car if said car had air suspension and could raise up a few inches and then drop down again to how it sits in these pics. That always feels like a cop-out to me and that I’m somehow cheating if I use it...but I do want it to have those big wheels AND sit low like it is here when it’s done so I guess I’ll need to get over that issue in my own head if I want to build this thing ?♂️?. Air suspension is actually really trick, and I like the theory of it - I just feel like I’m cheating and have resisted the urge to build such a setup before... Anyhoo, I haven’t done a sectioned body before but I wanted to take some of the slab-sidedness and ‘weight’ out of the looks of the body and give it a little wedge. Sliced the sides out: Marked out a rough 2 inch wedge to remove: And some cutting and careful sanding so they matched each other perfectly went from this: ...to this: I like it! Before reattaching the pieces I added some strips of styrene inside the body to give me a much larger surface to glue to...I won’t want this thing splitting further down the line when I polish it or something: And a side-by-side before and after: I realise that I did all this work when I could’ve just used the AMT Deuce body and been done with it - but where’s the fun in that? ?? Next up, and I’m kinda jumping around this thing at first to get a very loose mock-up of how I imagined this in my head, I removed the rear of the frame and the gas tank to clean up the rear end from this... To this; And last but not least for today’s cutting and hacking I sliced the middle out of the kit grill to bring it down in line with the cowl: More soon, soon as I’ve done more!