OldNYJim
-
Posts
250 -
Joined
-
Last visited
Content Type
Profiles
Forums
Events
Gallery
Everything posted by OldNYJim
-

Atlantis Models has bought another lot of tooling/molds.....
OldNYJim replied to Dave Van's topic in Car Kit News & Reviews
I'm not an expert on these Revell / Monogram funny cars, but do they share parts with the 57 chevy funny car that Atlantis already reissued? | They'd be relatively easy kits to release if they do - new bodies packaged with the funny car tooling they have already with the Chevy kit... -
Best place to buy quality “hobby” paints?
OldNYJim replied to atomicholiday's topic in Model Building Questions and Answers
You’re not wrong about Red Caboose. ? We lived a few mins walk from Jan’s for a coupla years and I used to stop in there pretty regularly. Sad that it’s gone, but not surprising I guess… -
Looks great!! Thanks for sharing the process (I’m trying to get good at polishing Createx myself…)
-
Best place to buy quality “hobby” paints?
OldNYJim replied to atomicholiday's topic in Model Building Questions and Answers
BUT BUT BUT - Rudy's in Queens, and the Red Caboose and Jan's on the Upper East Side!!!! -
Looks great - I too love the color! Did you polish out that Createx clear? Looks GREAT!
-
Anyhoo… No Ding a Lings for us (unless some of those remaining parts are still on the trees somewhere? I can scratchbuild a rectangular box myself to finish it…) but I’ve been meaning to build a couple of Little Red Wagon variations too for a while so I can see me picking up a few of these… I think you’re doing a fine job Round 2! Keep those hits coming!
-
Looks like you got a reply on your other identical thread…this is the work in progress section, where people post works in progress as opposed to finished builds. I don’t think you offended anyone ?♂️
-
70s Era Asphalt Modified
OldNYJim replied to OldNYJim's topic in WIP: Stock Cars (NASCAR, Super Stock, Late Model, etc.)
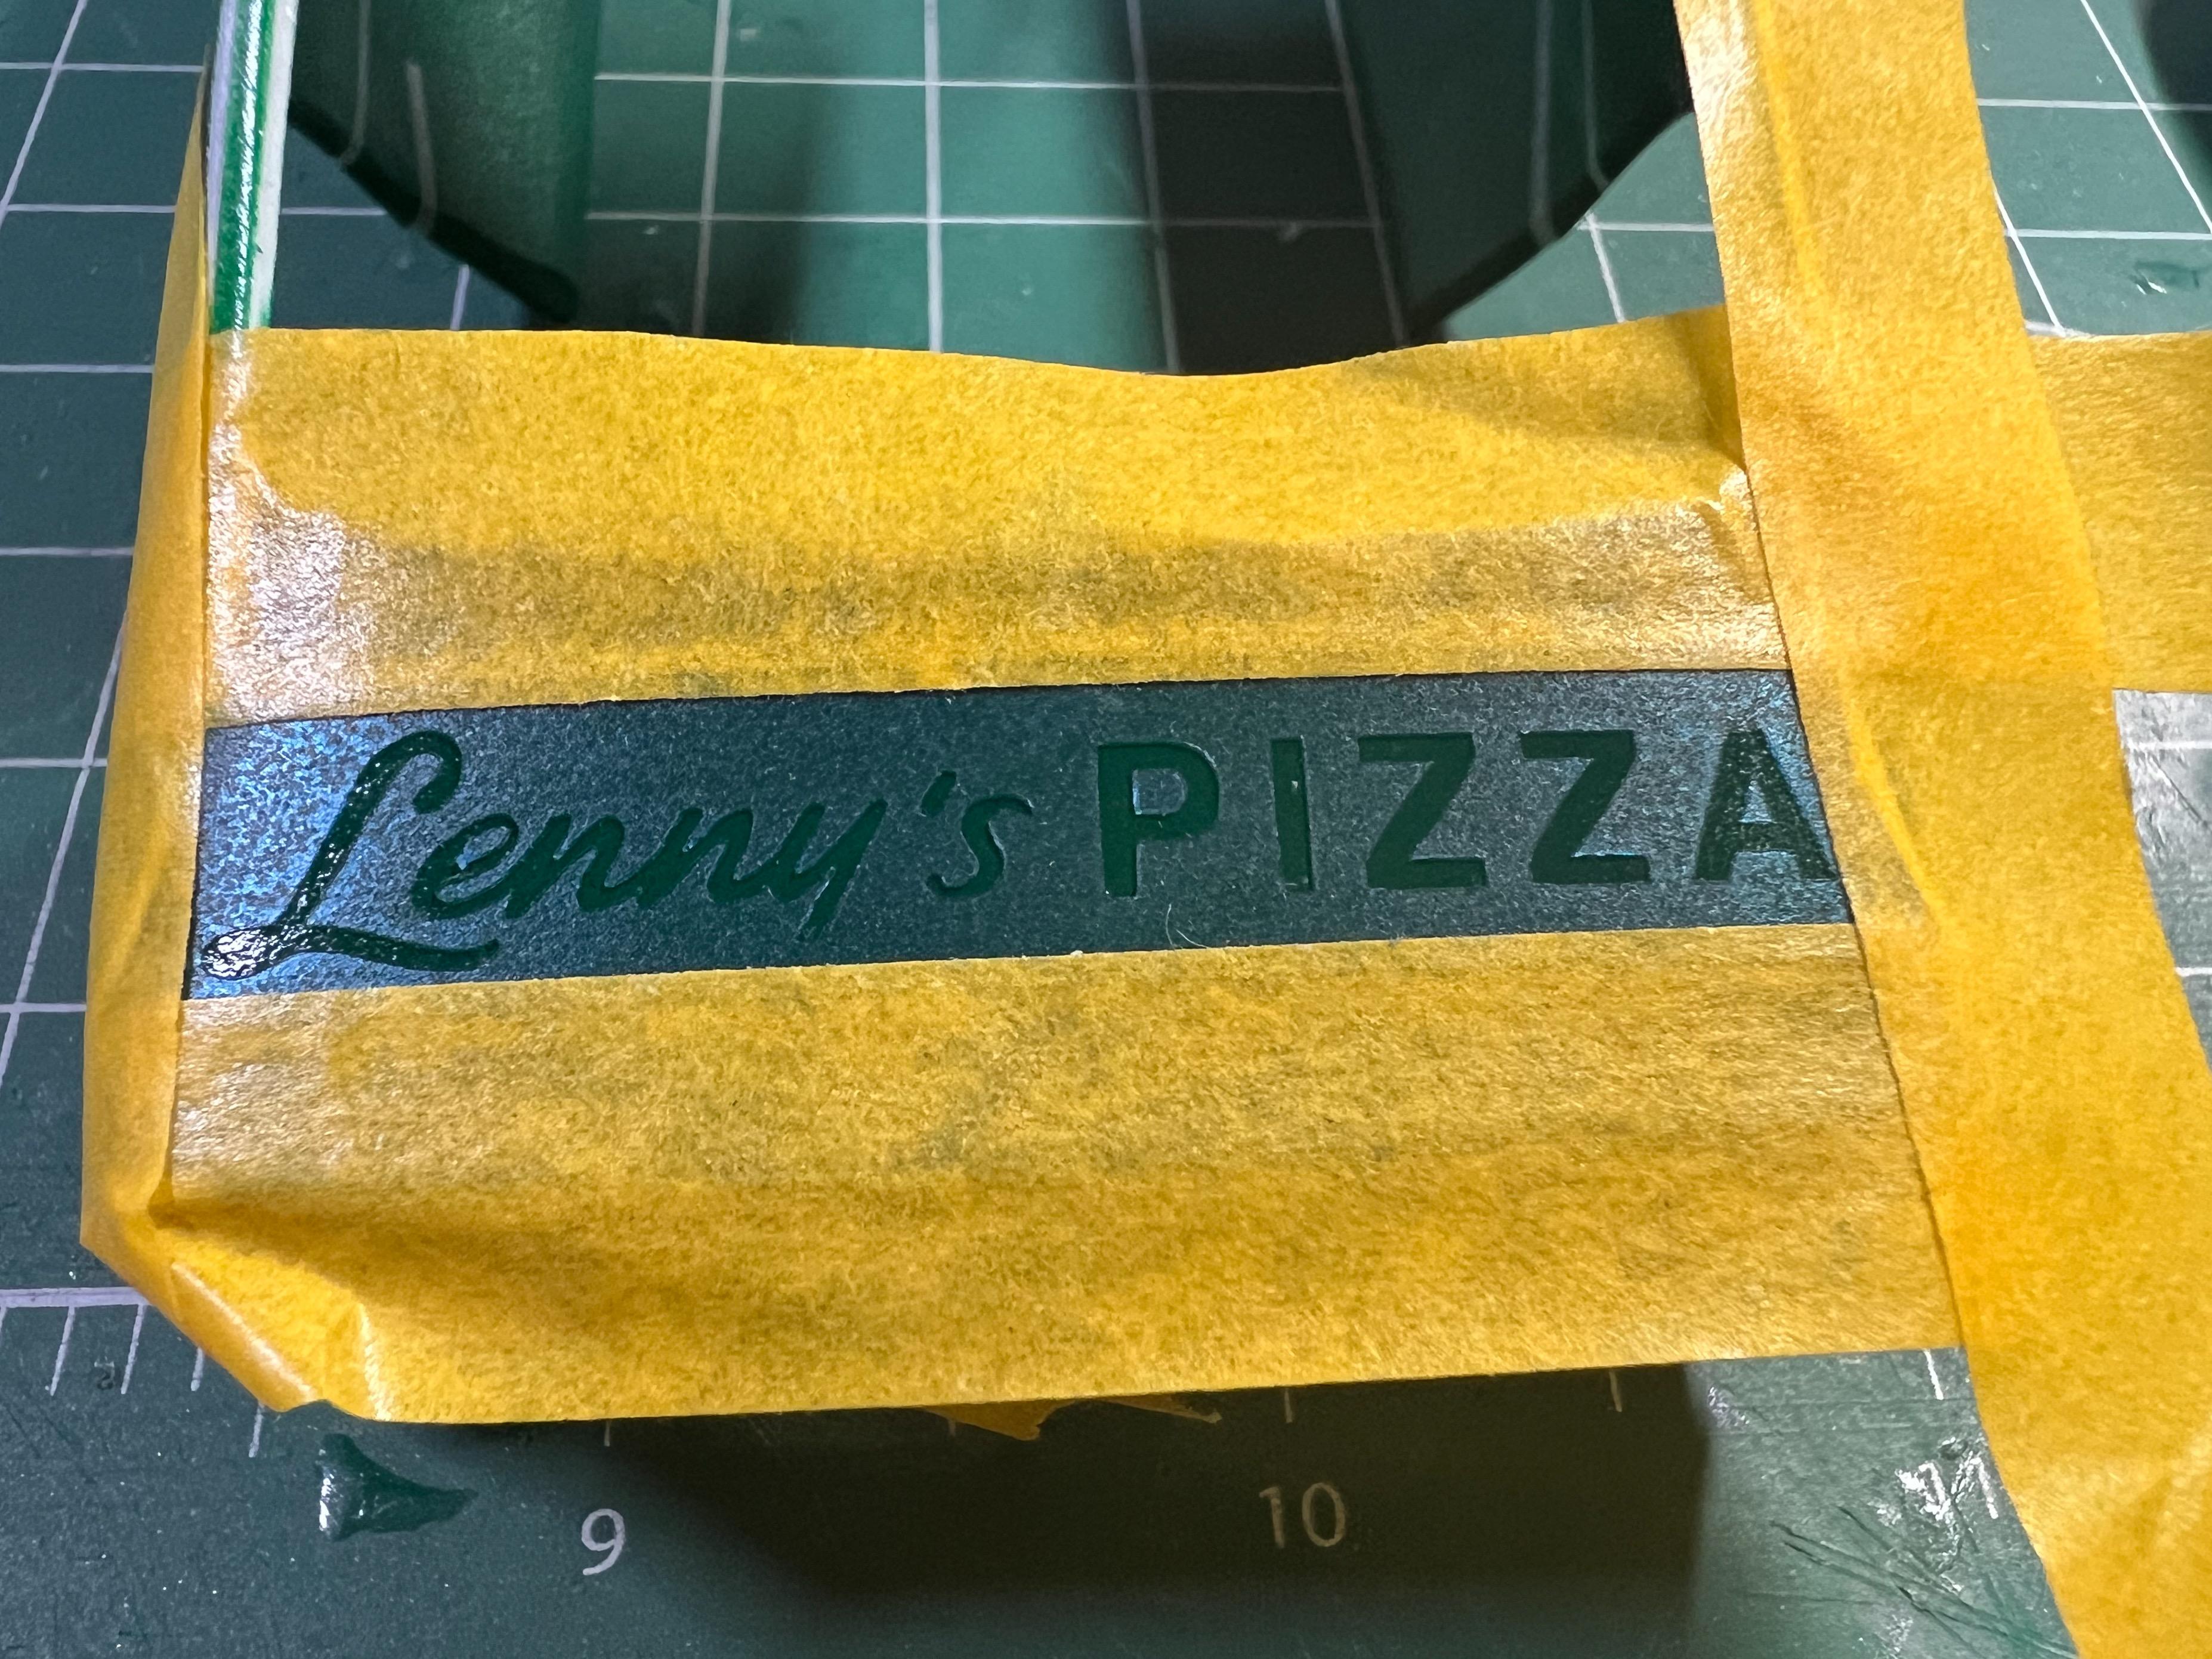
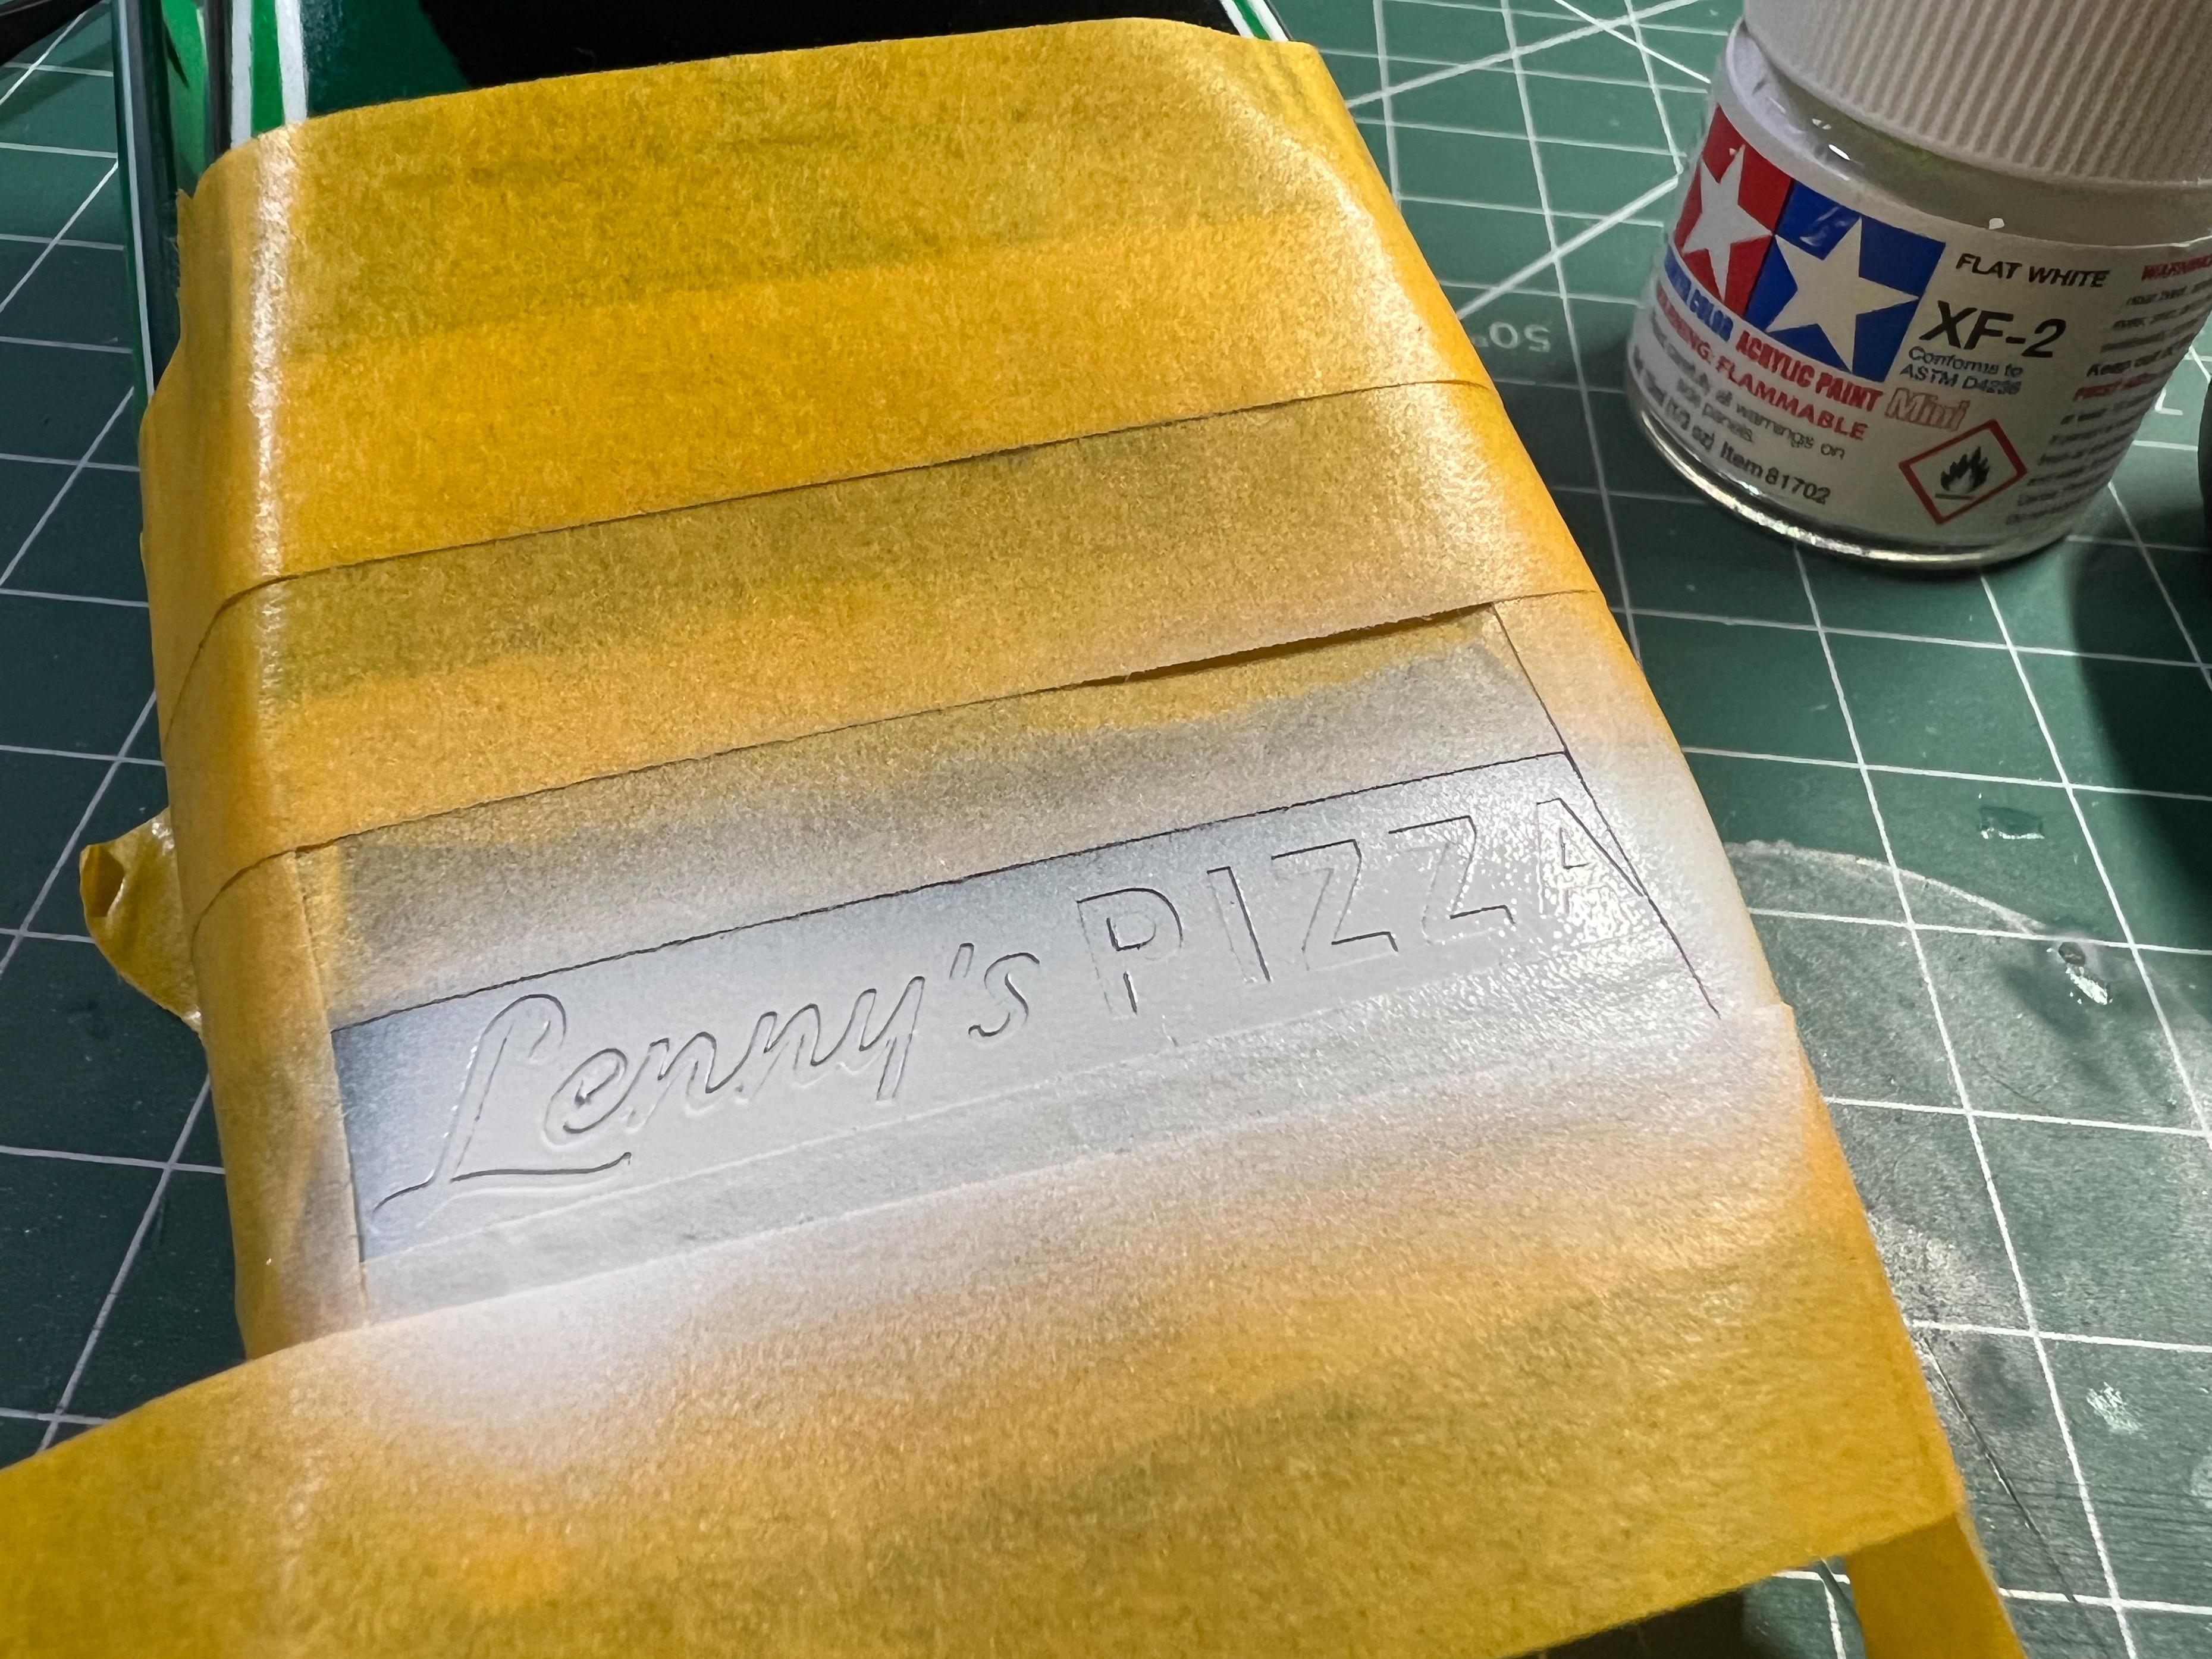
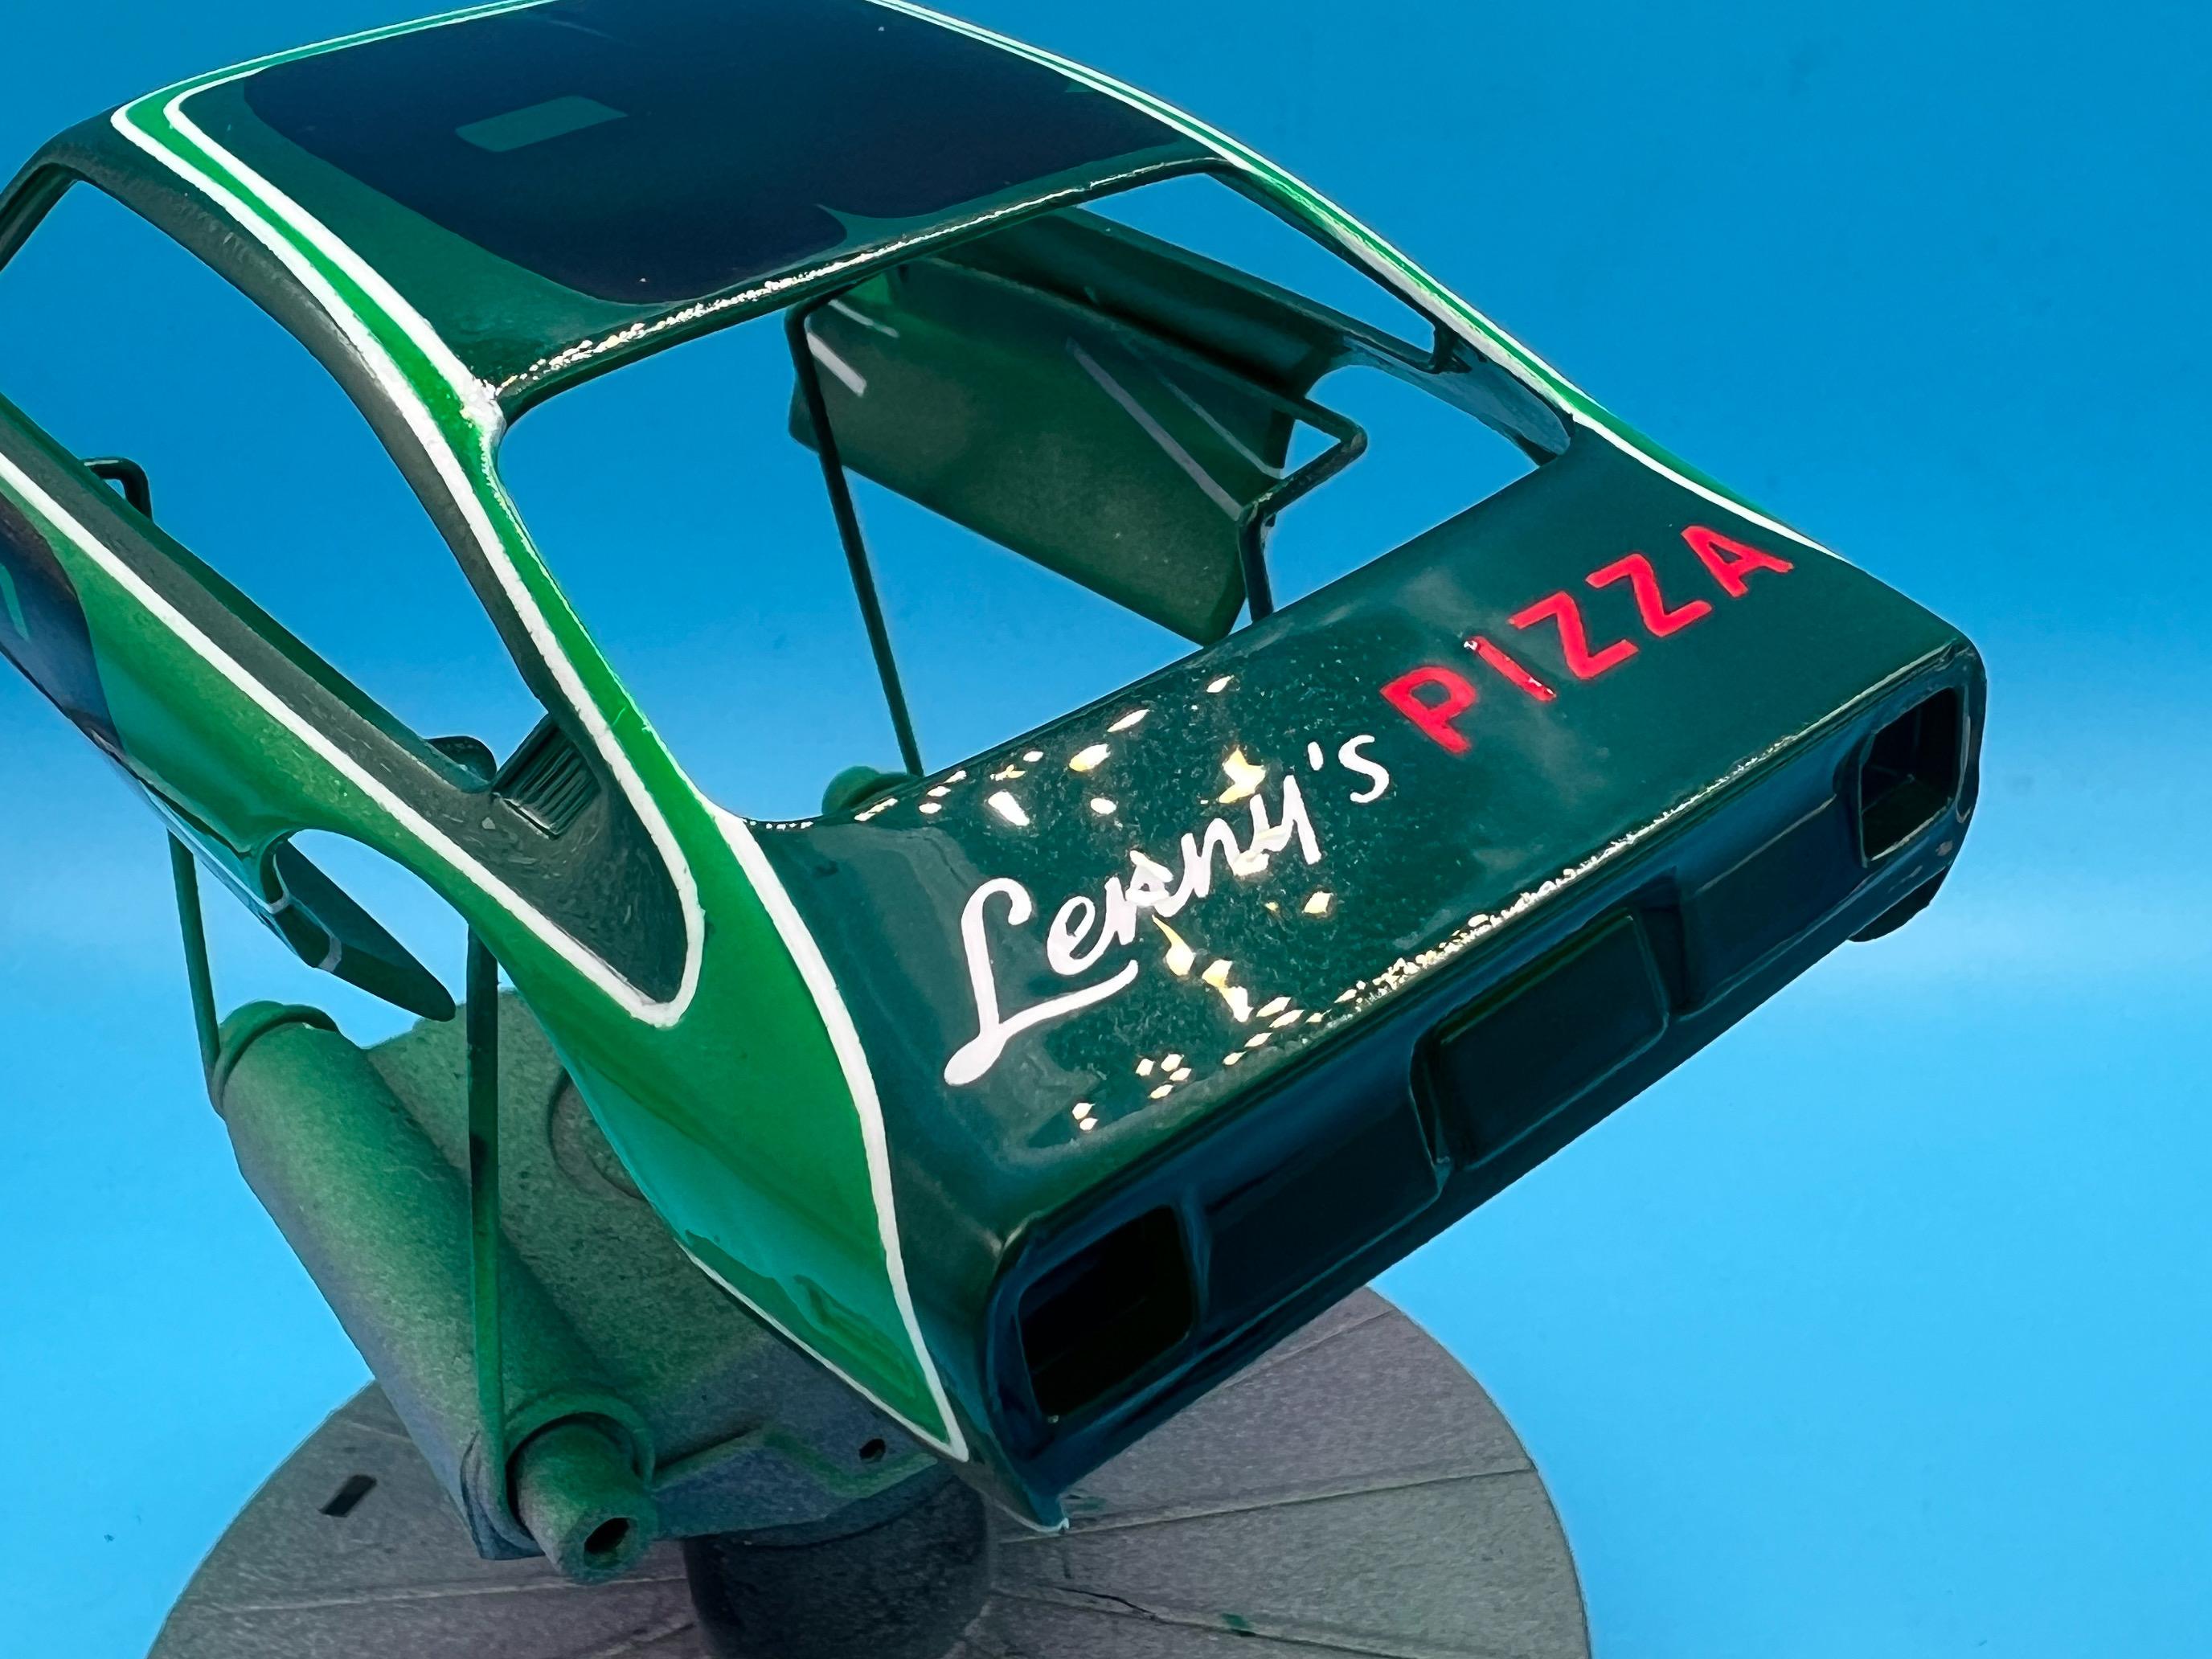
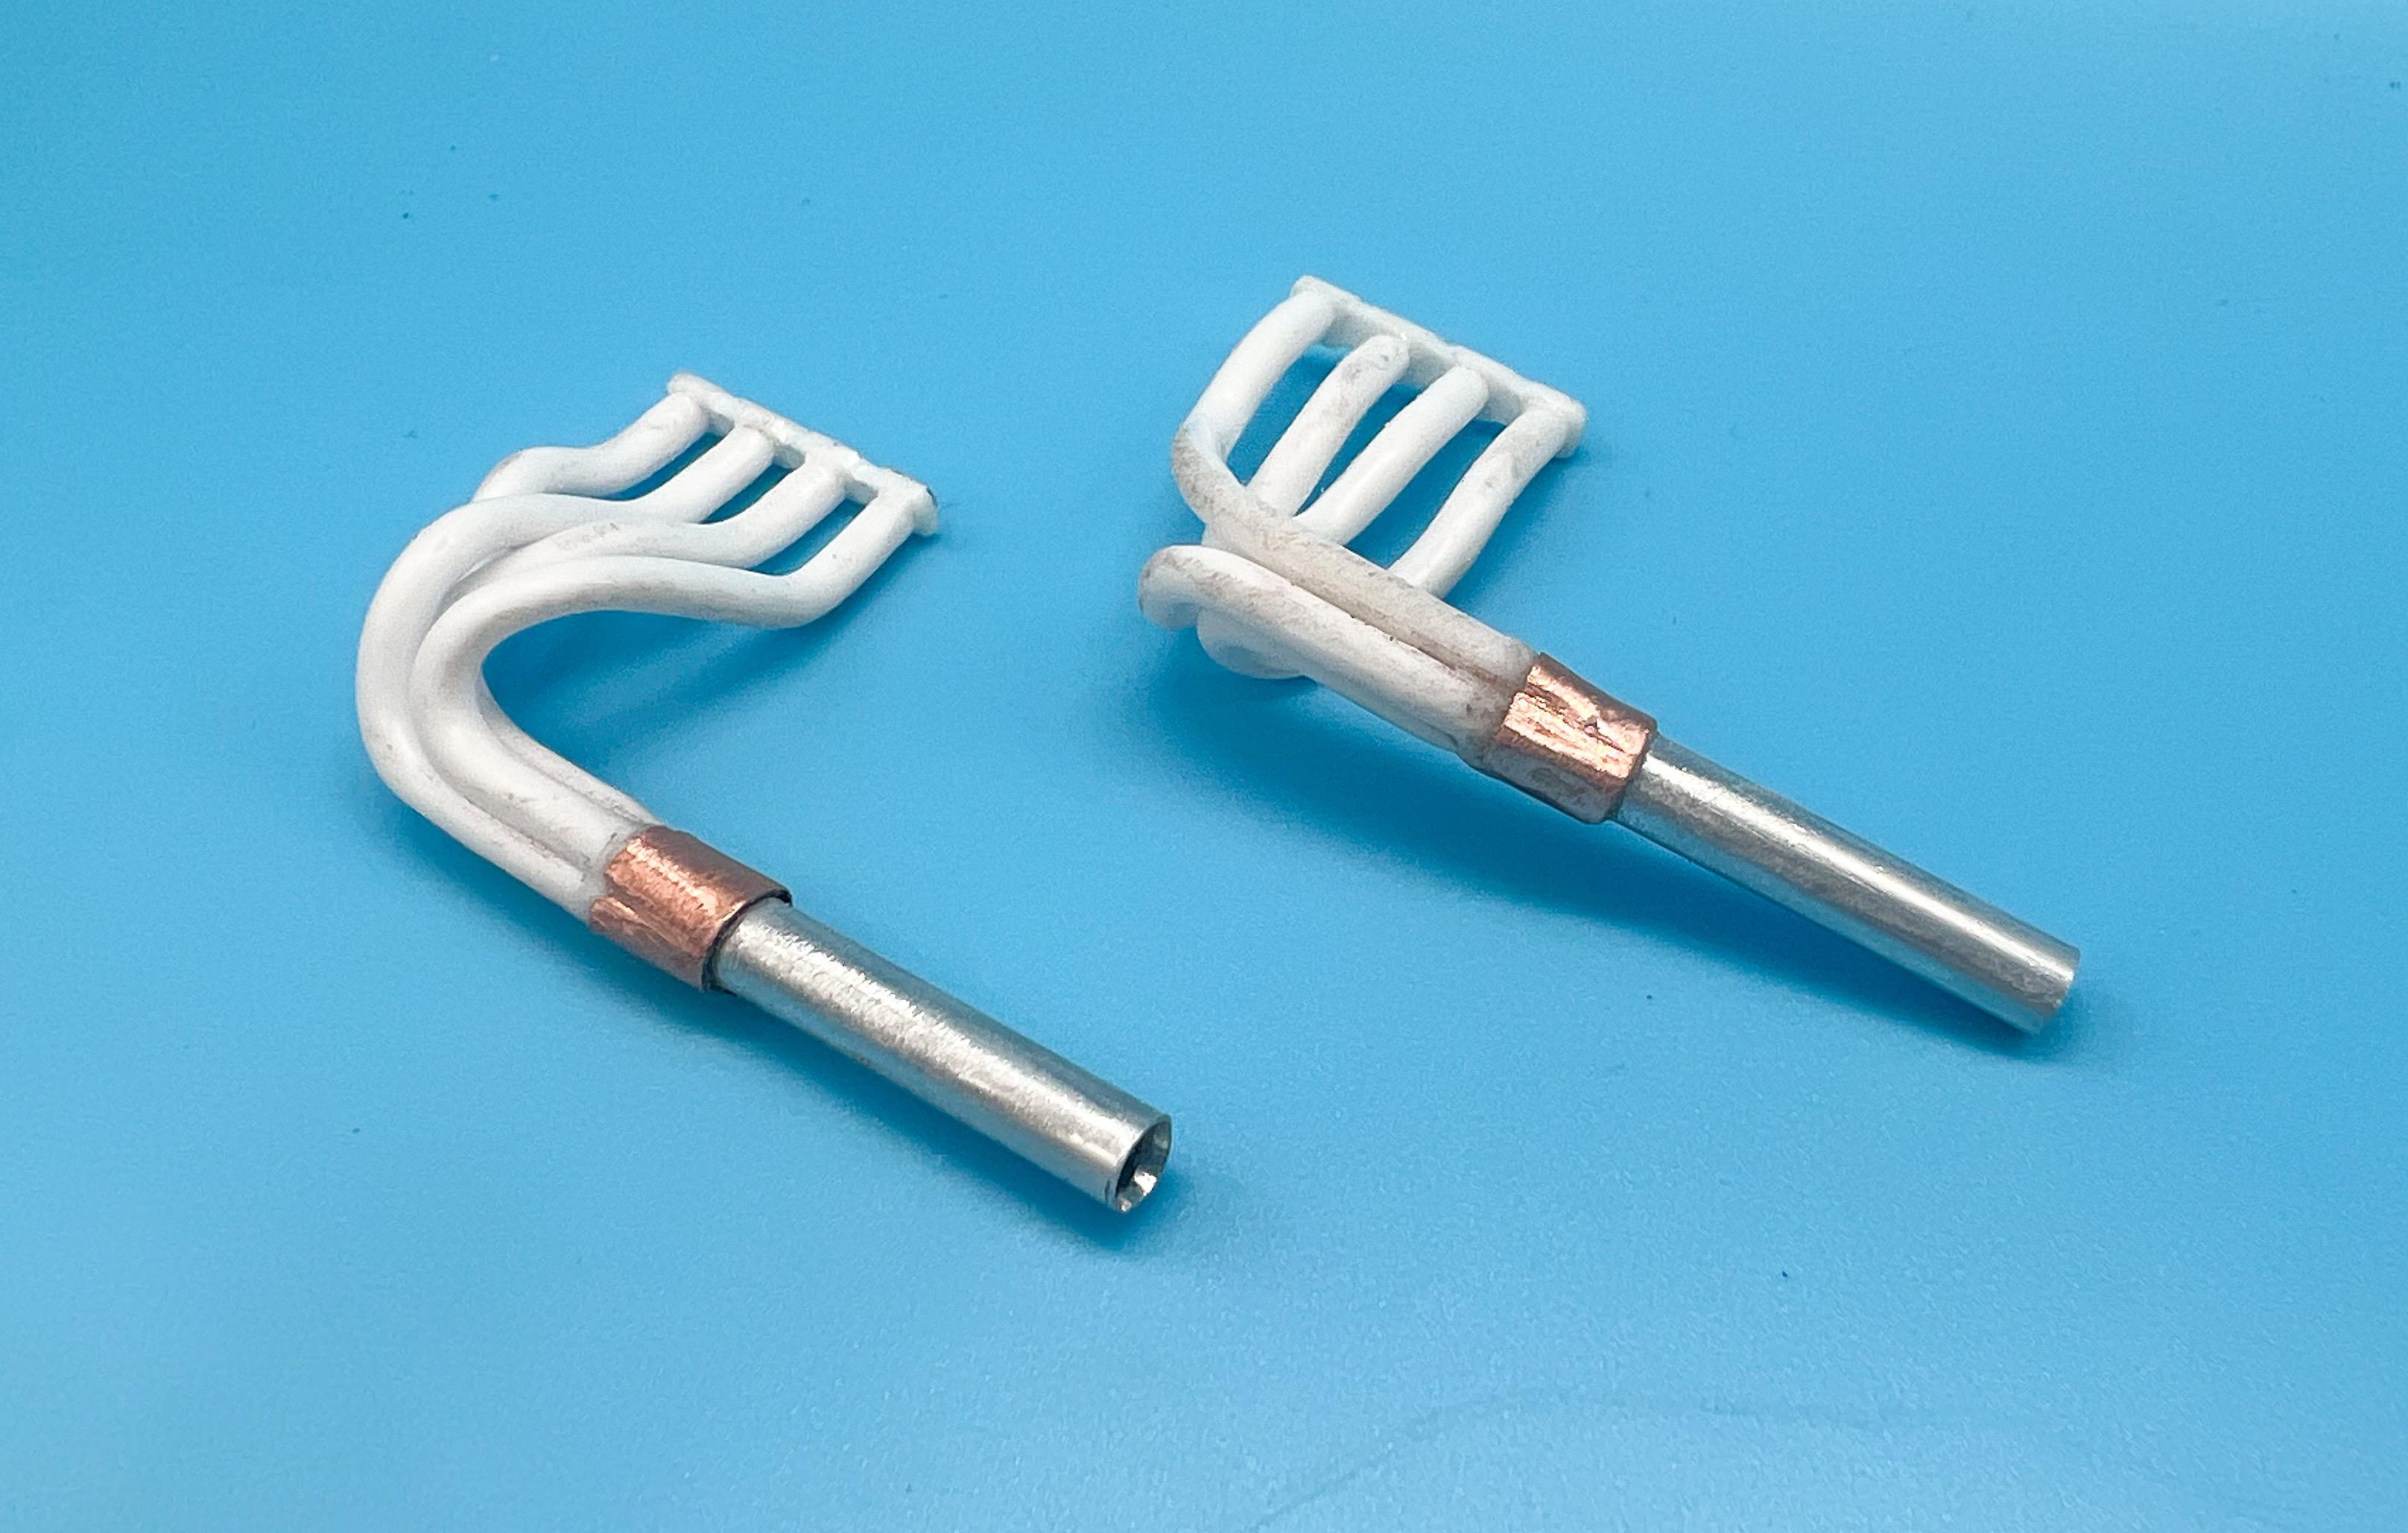
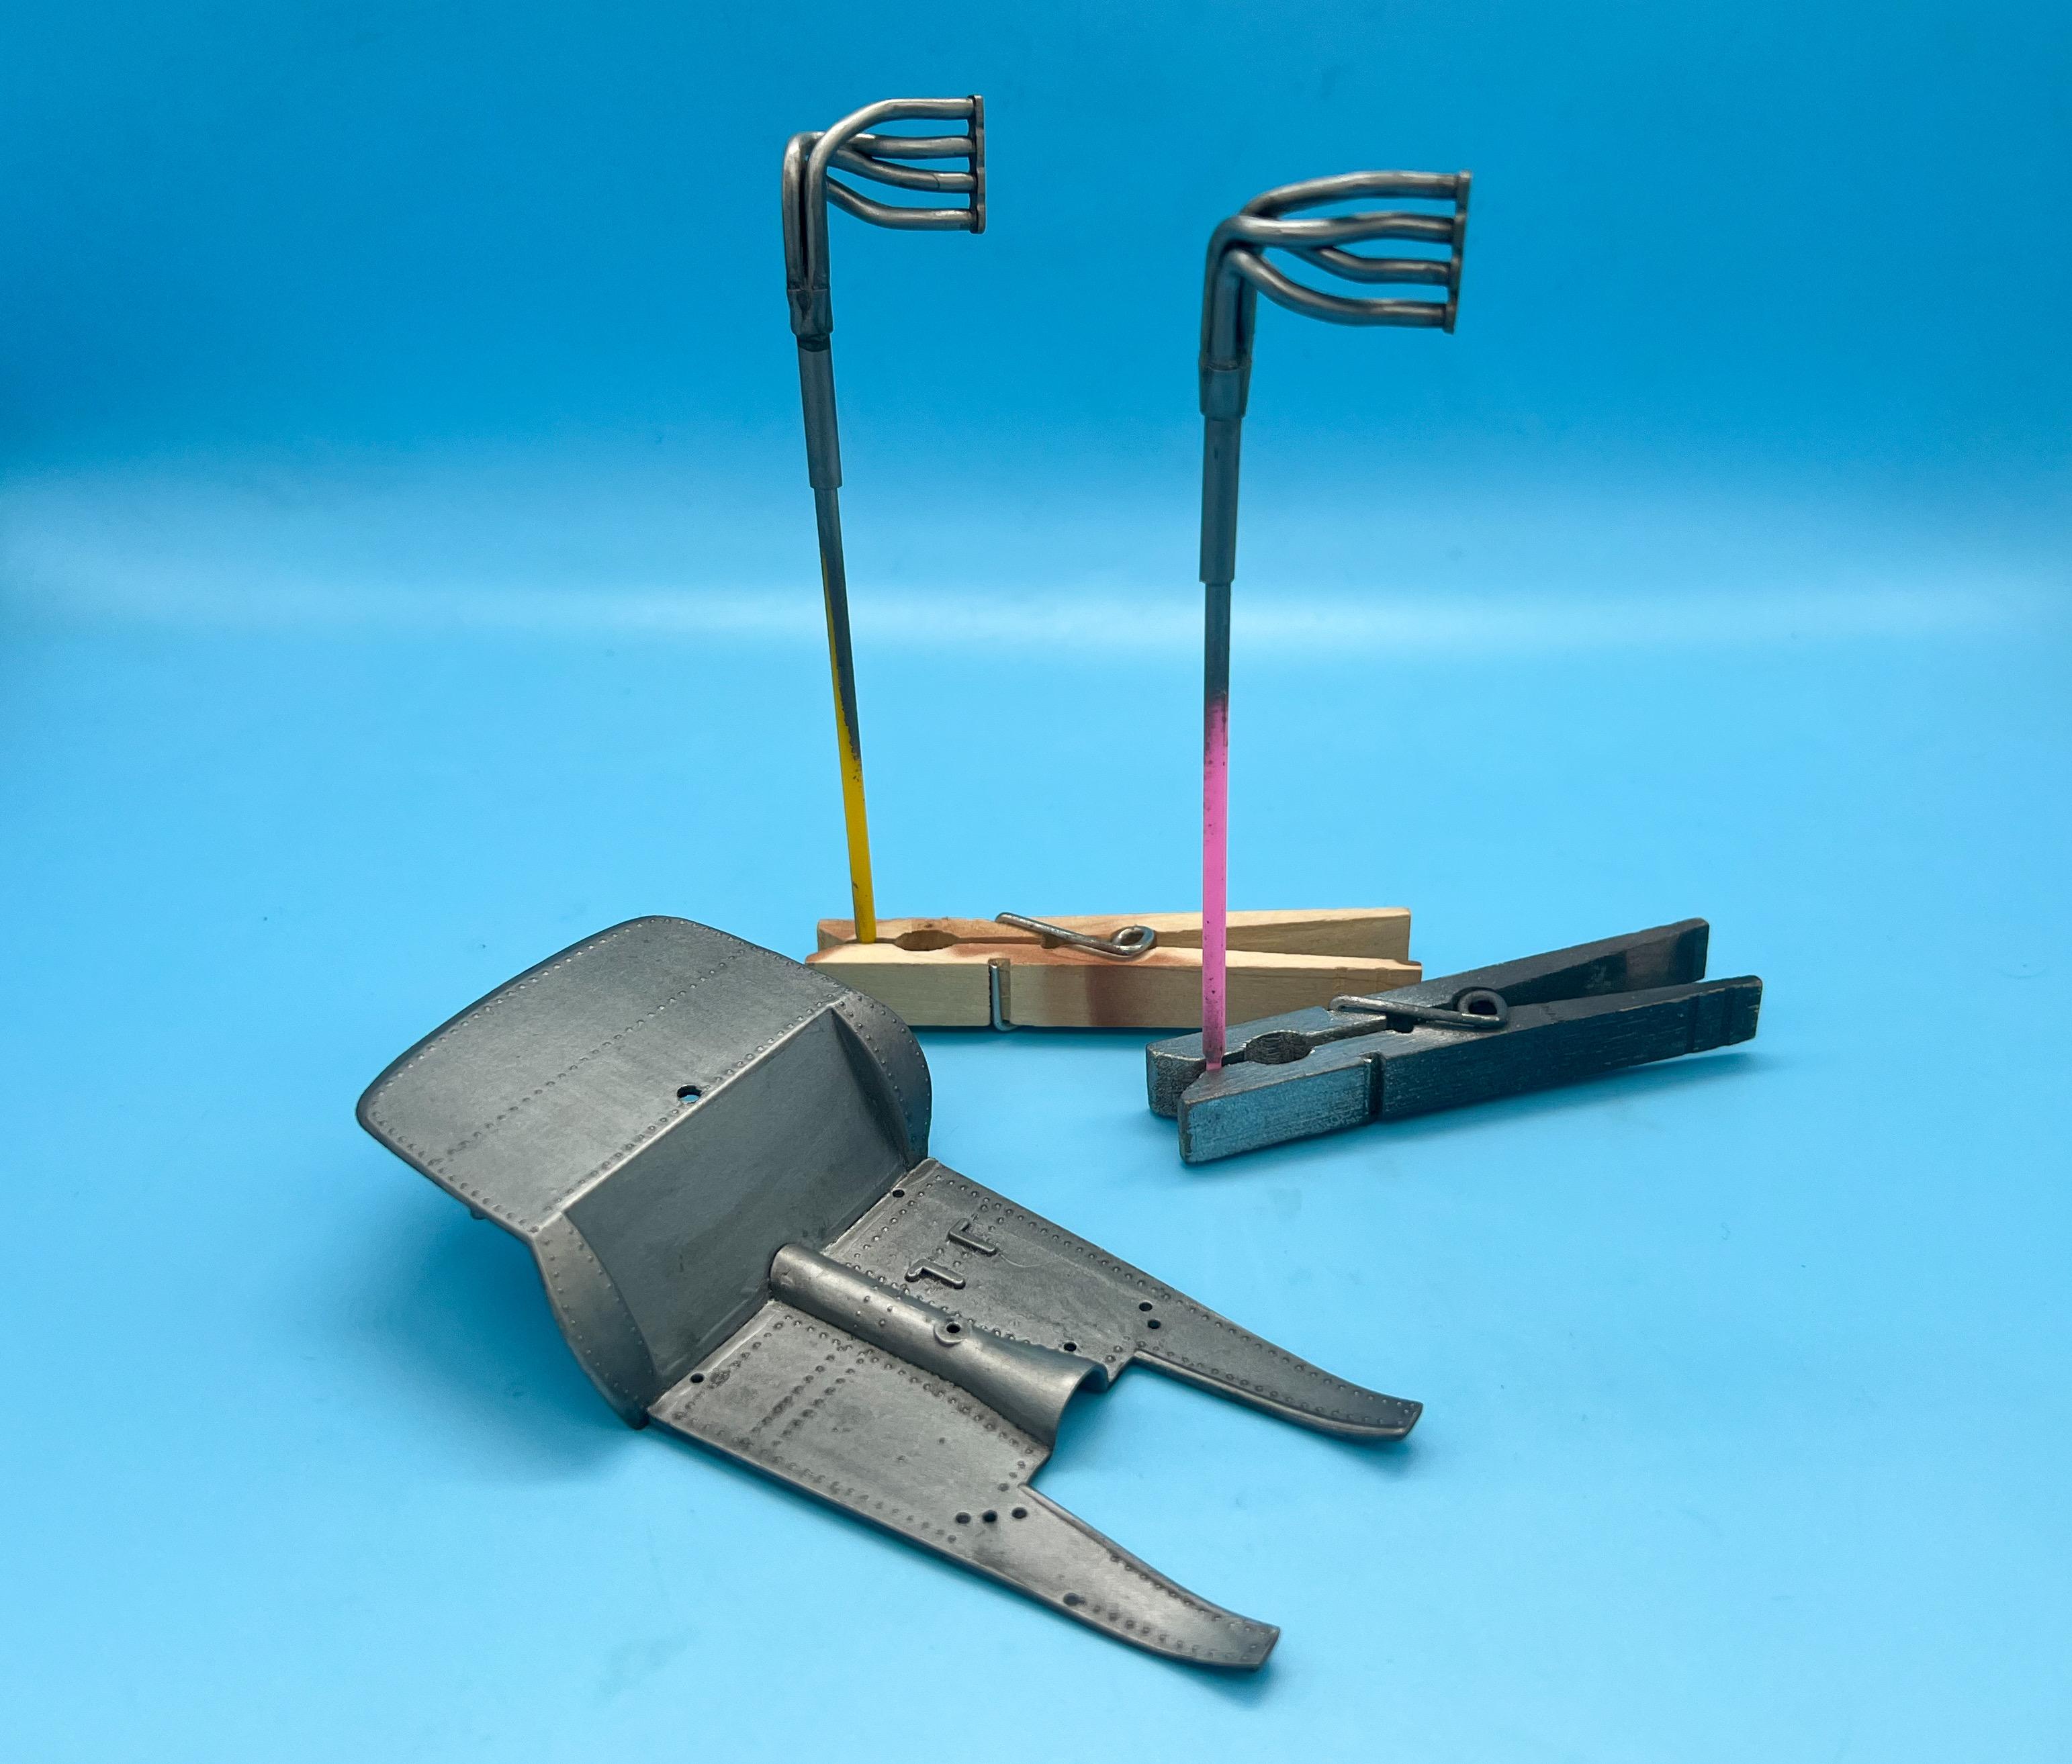
Agreed! It’s fun figuring out who a good sponsor would be, then working out the logos and seeing it all come to life! Speaking of logos…the logo I wanted wasn’t available as a digital file, so I made that this week and soon as I got a chance cut some masks… Shot some Tamiya matte white, my current favorite opaque white paint… Then some red (yes, I use Post It’s for masking sometimes ?) And that’s the last piece of the paintwork puzzle on this one… My other project this week has been the headers - the kit pieces aren’t the best and I wanted actual hollow exhausts, so I sliced up the kit parts and added some pins so I could securely mount the tubes and not worry about them snapping off at some point: Used some thin copper to finish up the collectors: And shot them with some Vallejo metal finishes and a couple of different color washes: Also made a start on painting the floor too, whilst I had the metalizers in the airbrush: Will add some dry-brushing to that floor to add some realism and pick out the rivet detail before I start adding all the other stuff…seat, battery, fire extinguiser, roll cage etc etc etc. Slow progress, but I’m having a busy week and grabbing a little bench time when I can here…more soon, soon as I’ve done more!
-
GREAT news - thanks for the confirmation Steve! Exciting!
-
MPC-988 1/25 George Barris Granny's Hot Rod $35.99 TBA
OldNYJim replied to ss2000's topic in Car Kit News & Reviews
How did you like the Volo museum? It's not super far from me, but far enough that I didn't make it there quite yet. I should get there this summer! -
MPC-988 1/25 George Barris Granny's Hot Rod $35.99 TBA
OldNYJim replied to ss2000's topic in Car Kit News & Reviews
That's the one! I love that build! That's been in the back of my head as a 'must build' for a while...I should get to that one sooner rather than later Thanks for the refresher, Tim! -
Ahhhh, I see the illustration of it it on the instruction sheet posted above - thank you! Now I REALLY want a Ding a Ling! ?
-
MPC-988 1/25 George Barris Granny's Hot Rod $35.99 TBA
OldNYJim replied to ss2000's topic in Car Kit News & Reviews
I'd like a few of these if only for the cool early-twenties Oldmobile body - can make me some Oldsmobile T-Buckets! I forget exactly when, but I seem to remember @tim boyd built a cool little hot rod in Scale Auto using the body from one of these. I seem to recall it was blue, and had some kind of cool blower setup on it...anyone remember that one? -
This seems like a dangerous question to ask...but what IS a Ding-a-Ling? I'm scared to google Ding A Lings (especially at work...)
-
Awww awesome! Nice work Round 2! I'll be in for at least a coupla three!
-
These are crazy crazy cool - makes me wanna build a couple of my own! WAY cool builds!!! Thanks for sharing!
-
I had no idea that museum existed - and it’s not far from me! Looks interesting…thanks for the heads up! (sorry for the thread hijack)
-
I didn’t technically GET these today - but any VW fans might be interested in this deal on Amazon…1:24 Revell ‘68 Beetle kits for $12 and change each… https://a.co/d/fcsJIJ8 I ordered a few, knowing at some point I’ll find a use for them… No affiliation with the seller, just sharing a good deal I found…
- 38,882 replies
-
- 4
-

-
- johan
- glue bombs
- (and 1 more)
-
Who doesn't love a mock-up? Let's see yours!
OldNYJim replied to Belairconvertable's topic in WIP: Model Cars
Something I’ve been (very) casually working on for a few weeks:
-
70s Era Asphalt Modified
OldNYJim replied to OldNYJim's topic in WIP: Stock Cars (NASCAR, Super Stock, Late Model, etc.)
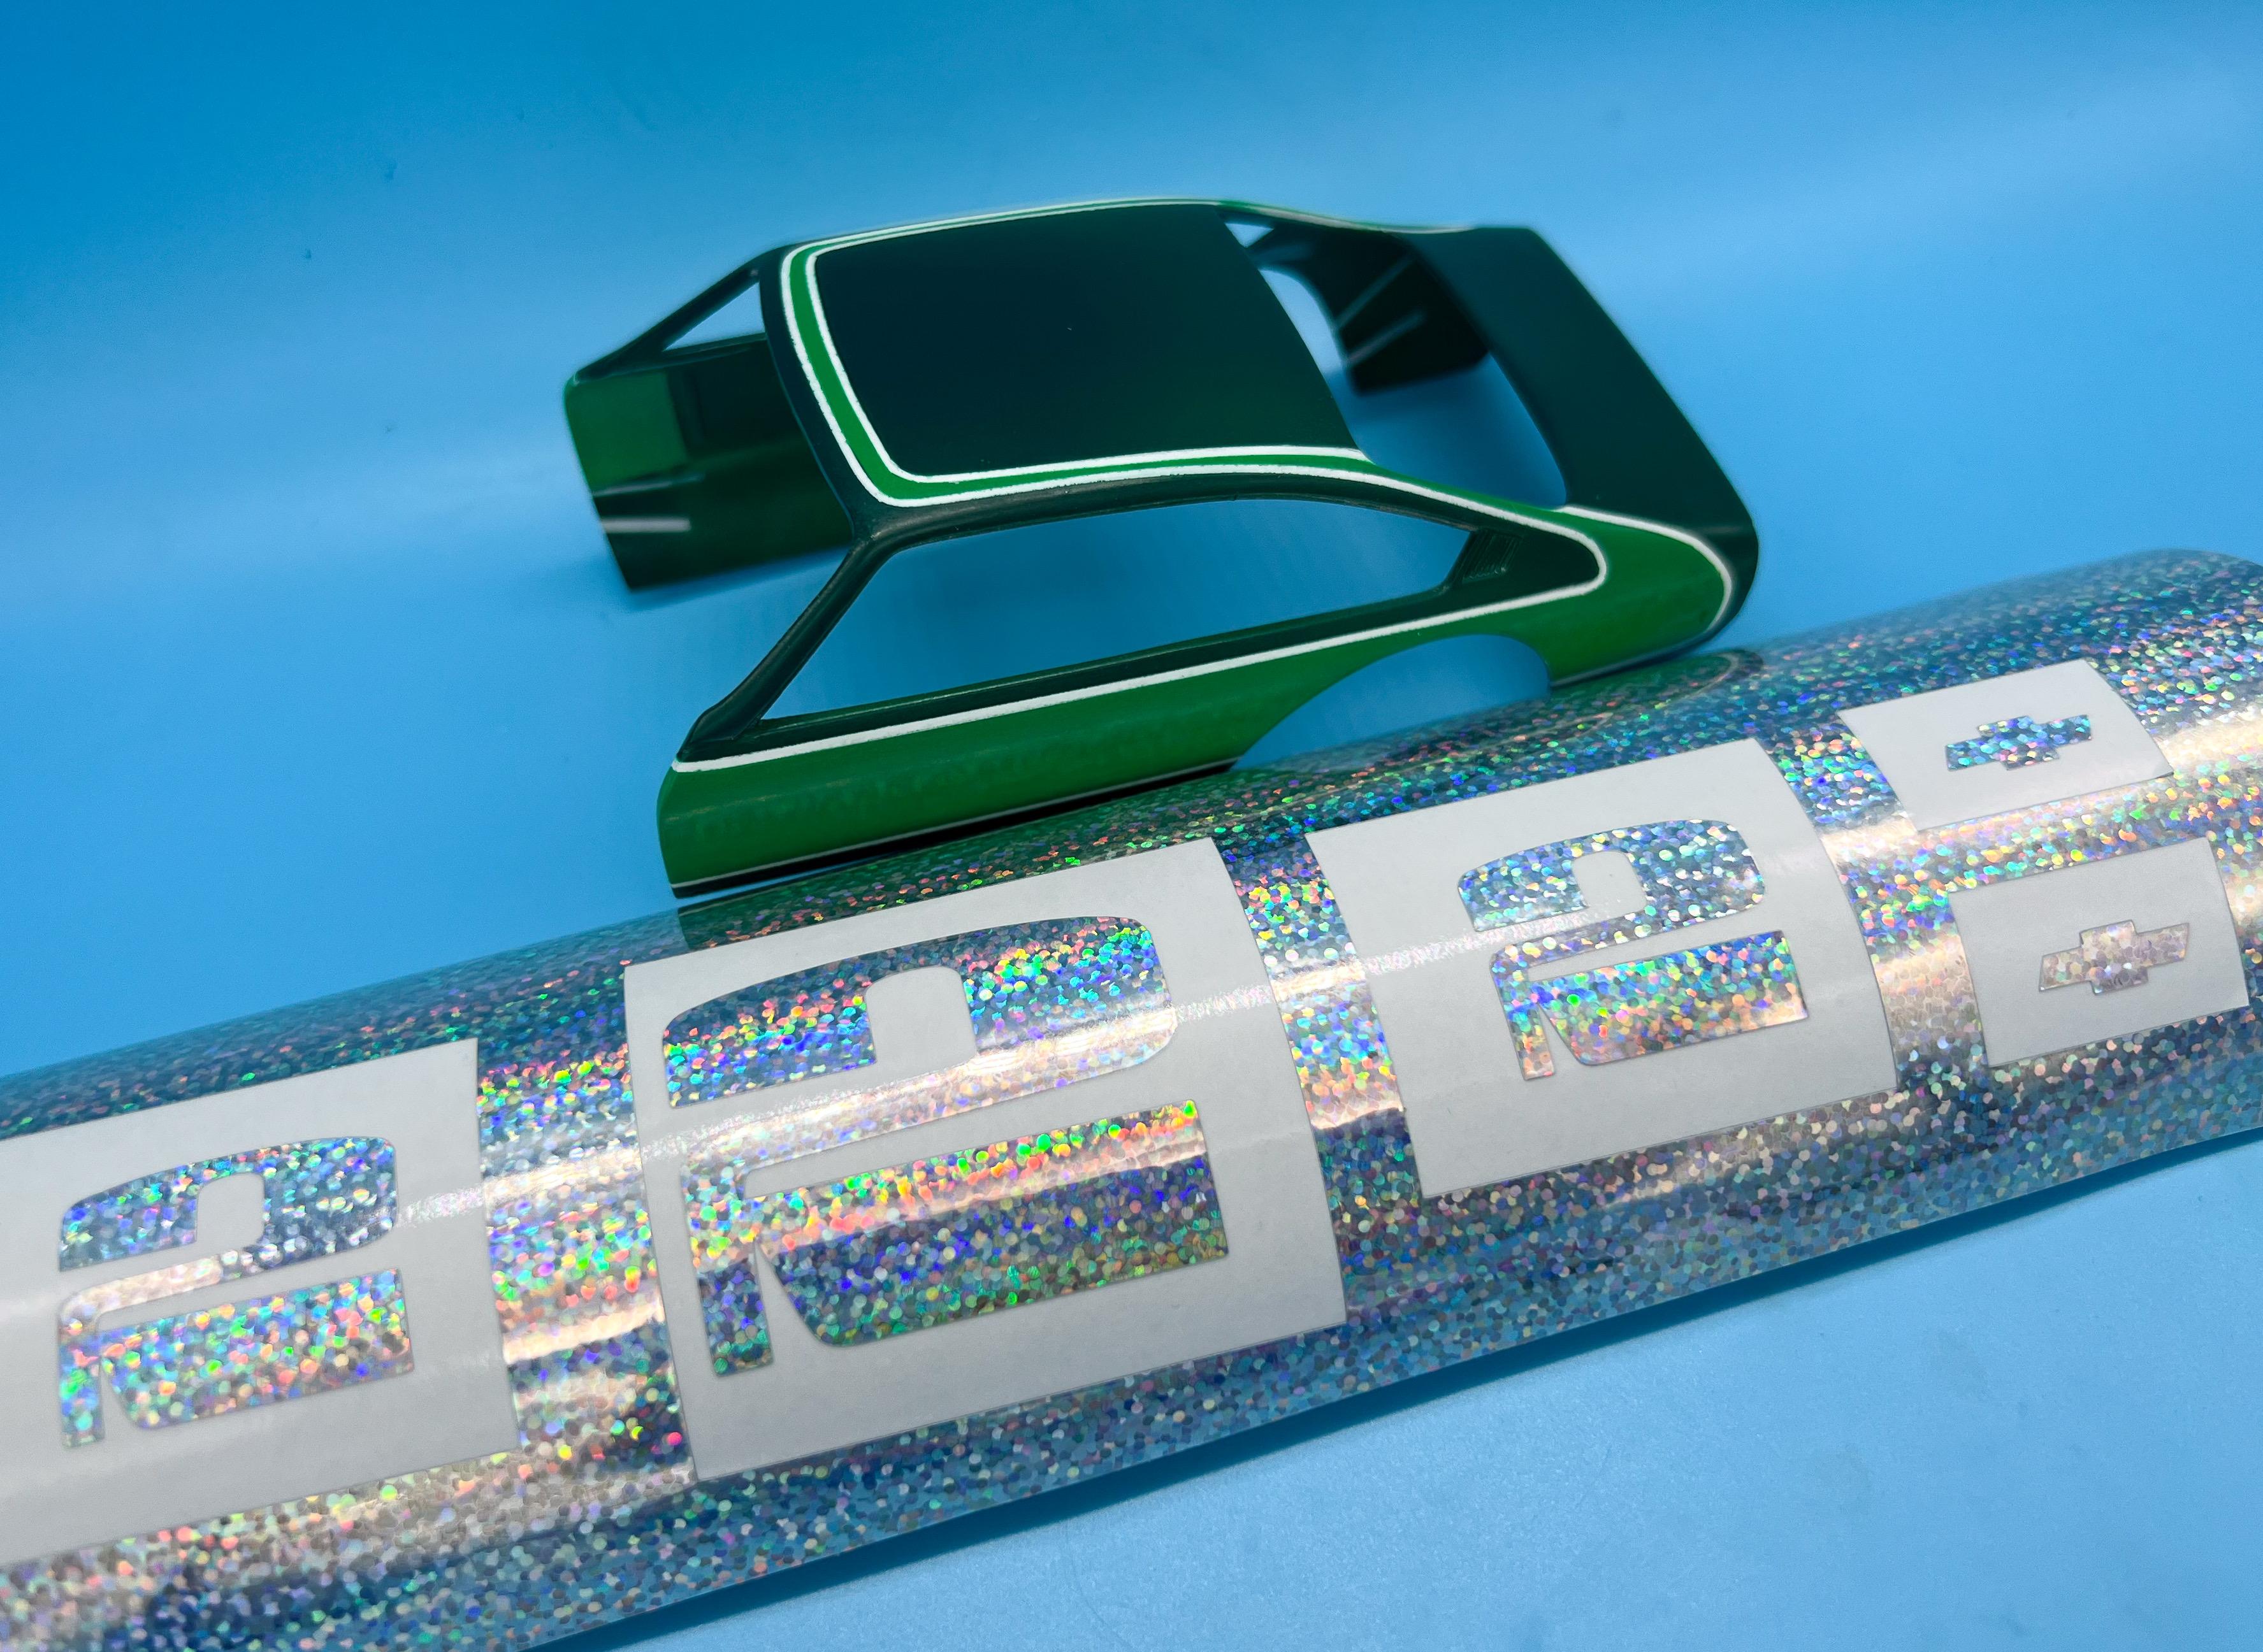
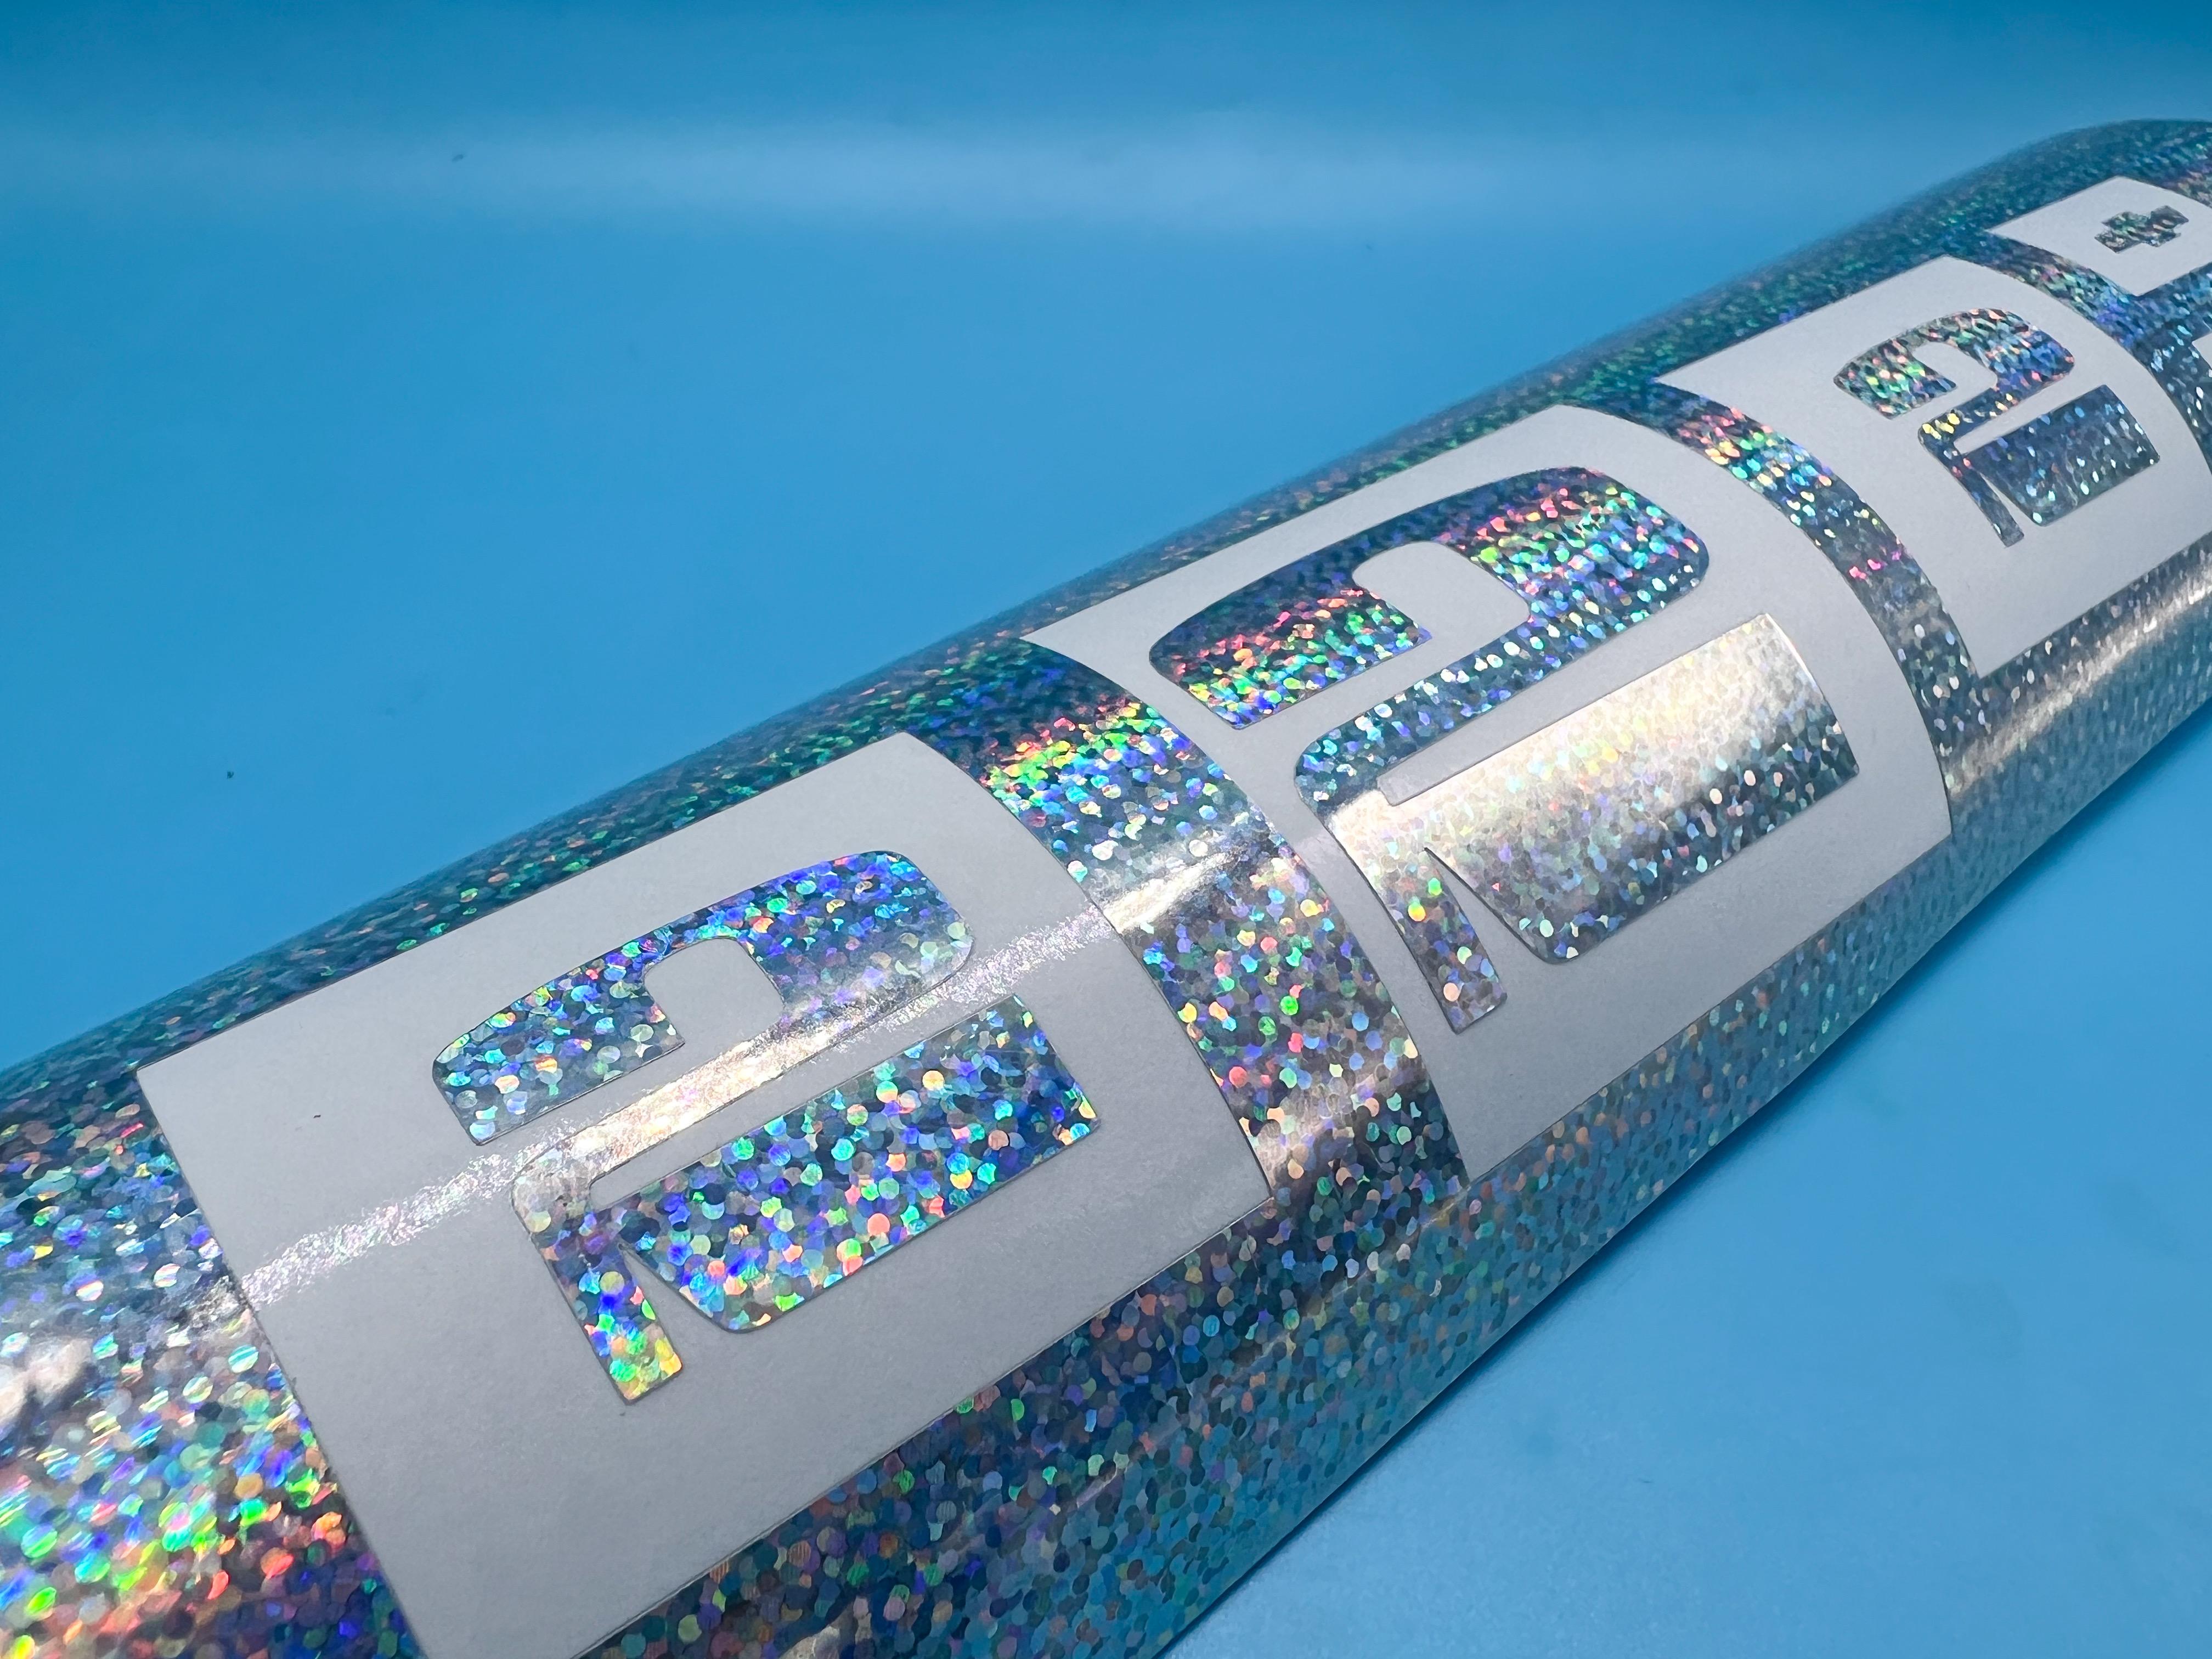
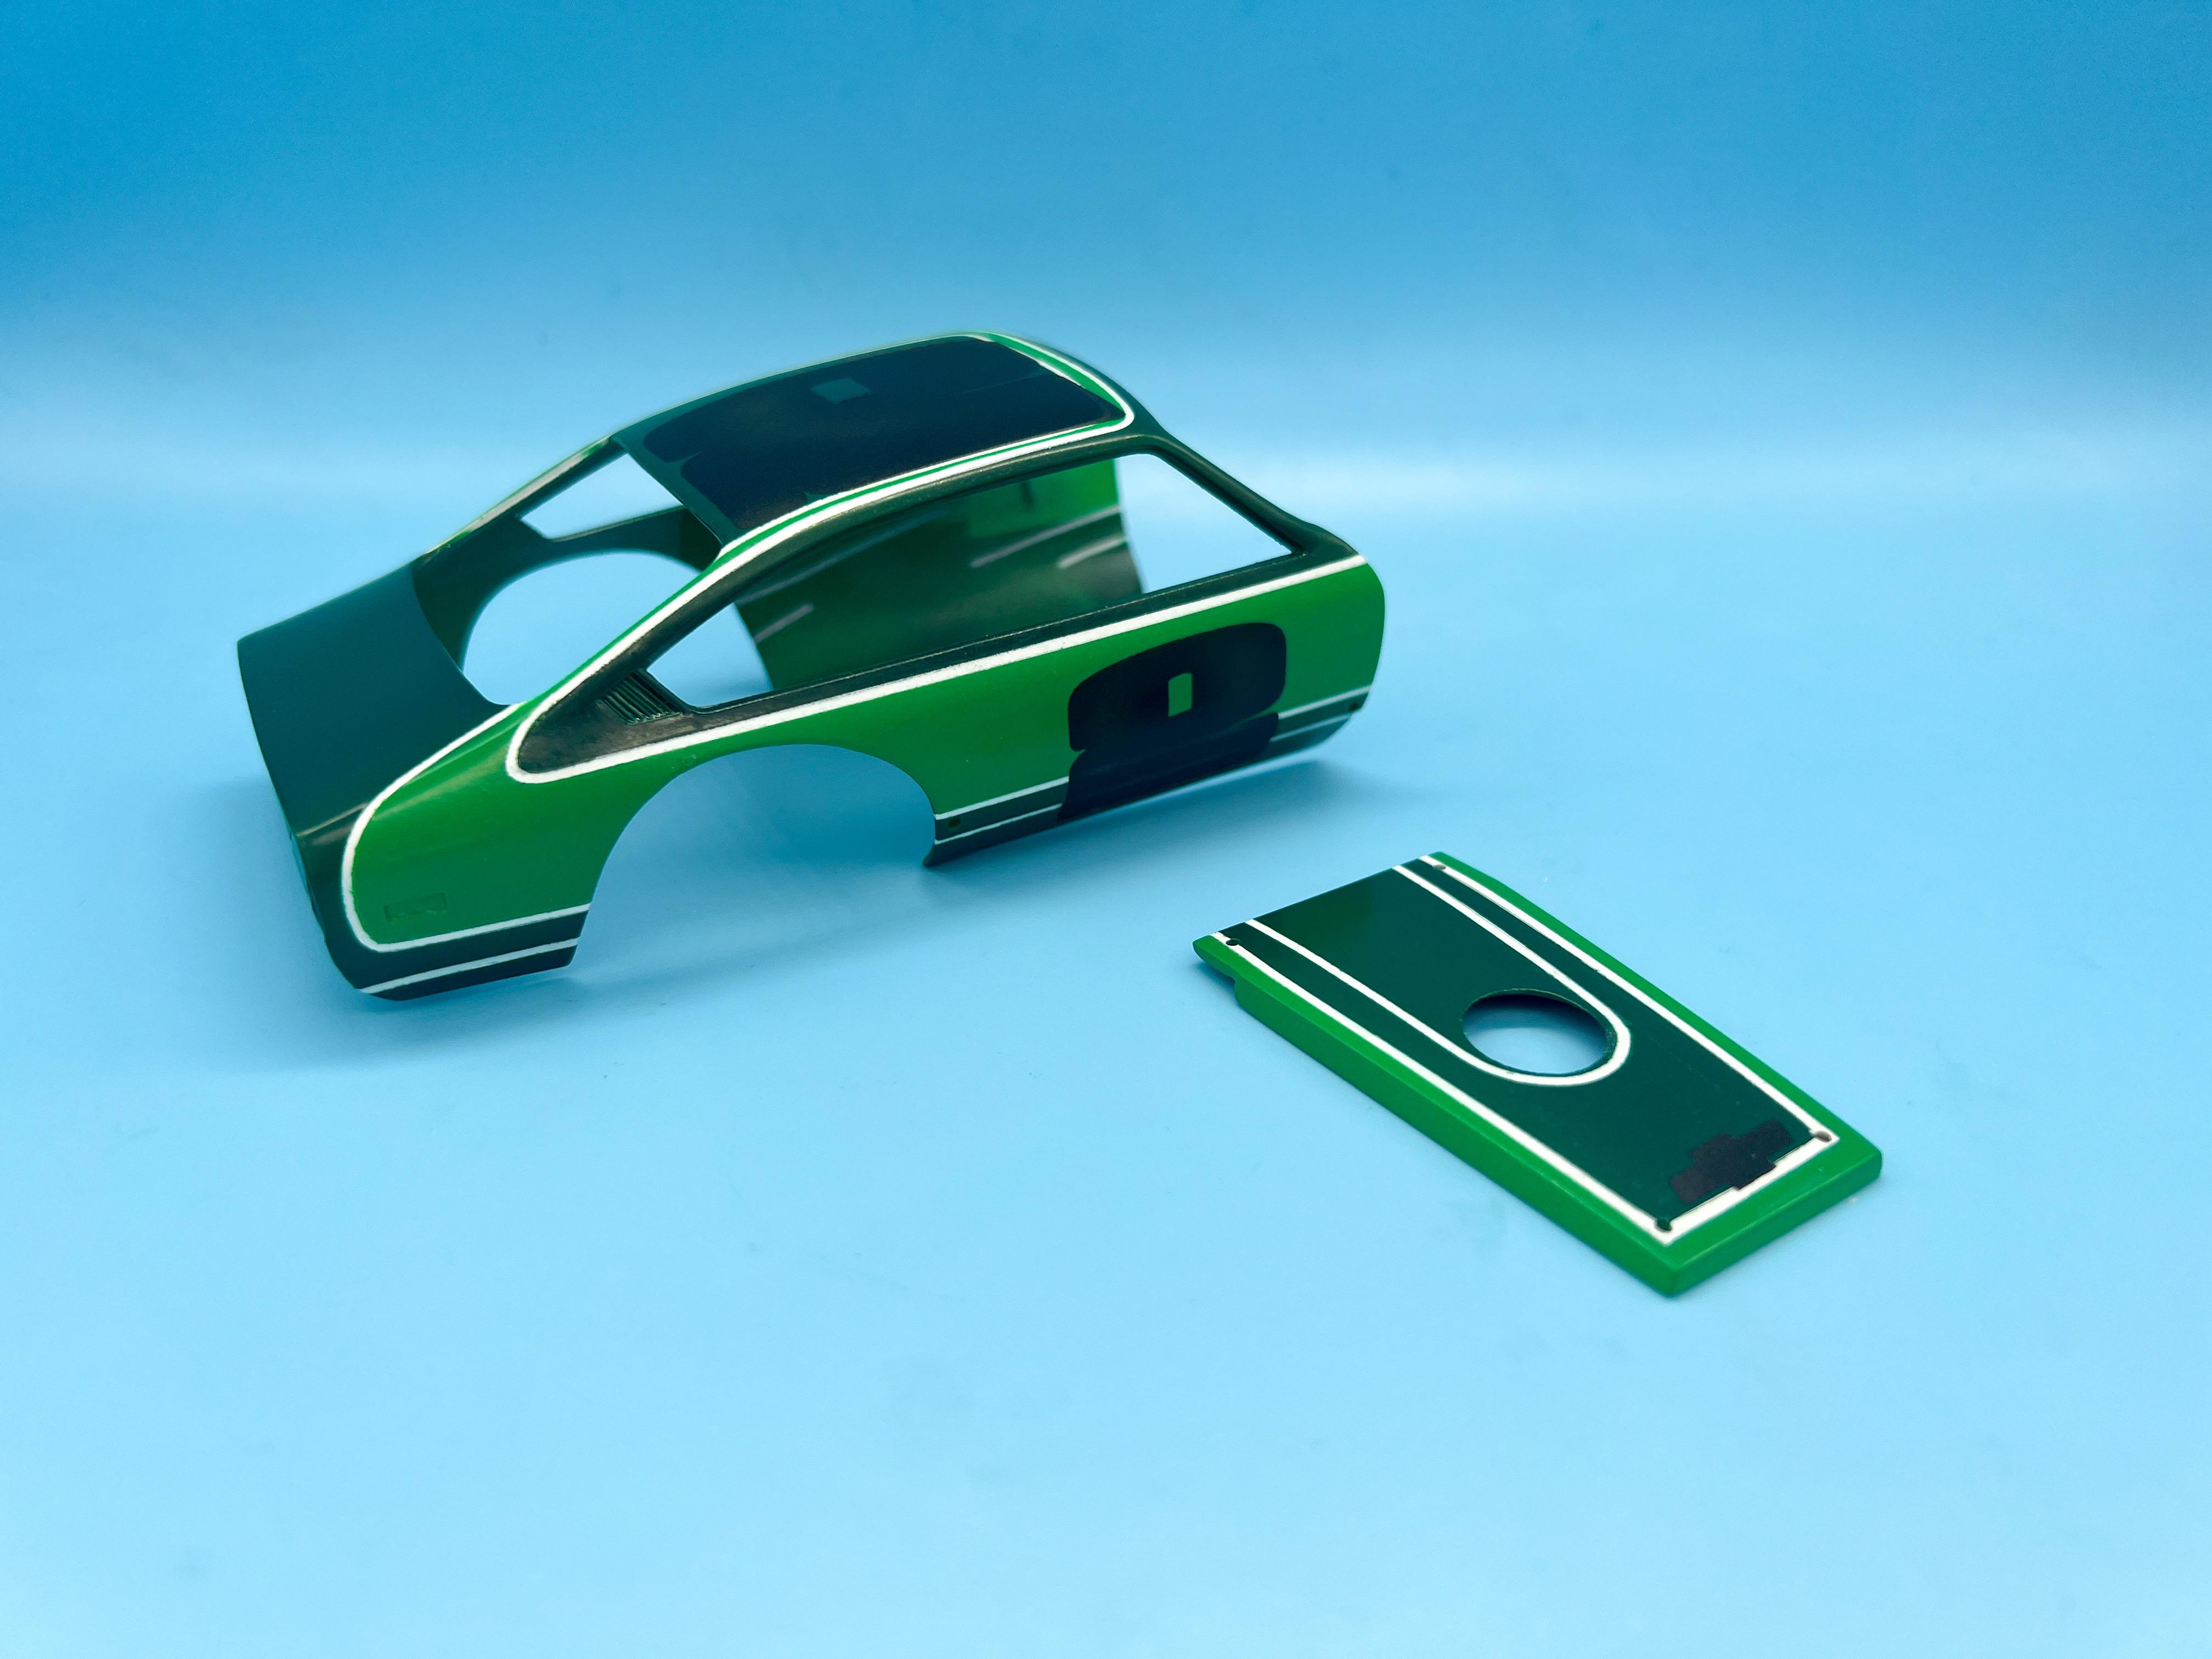
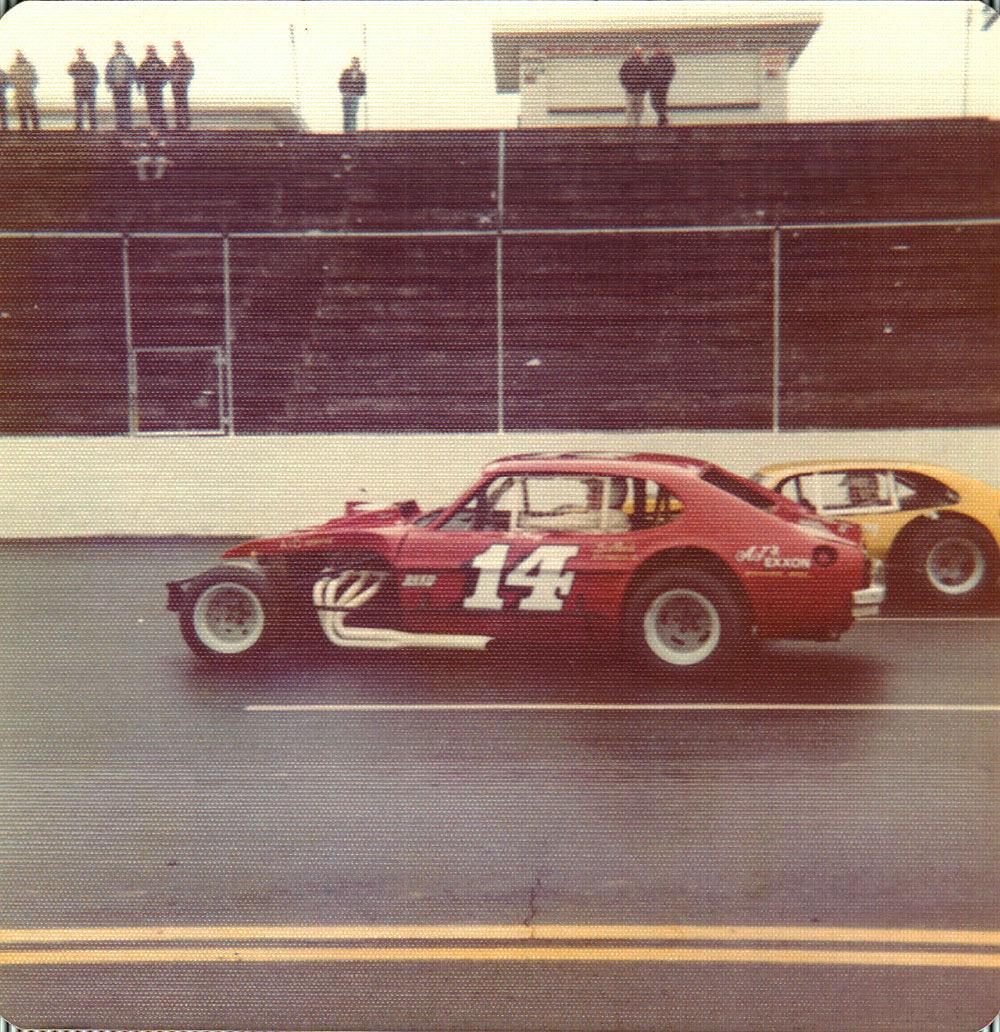
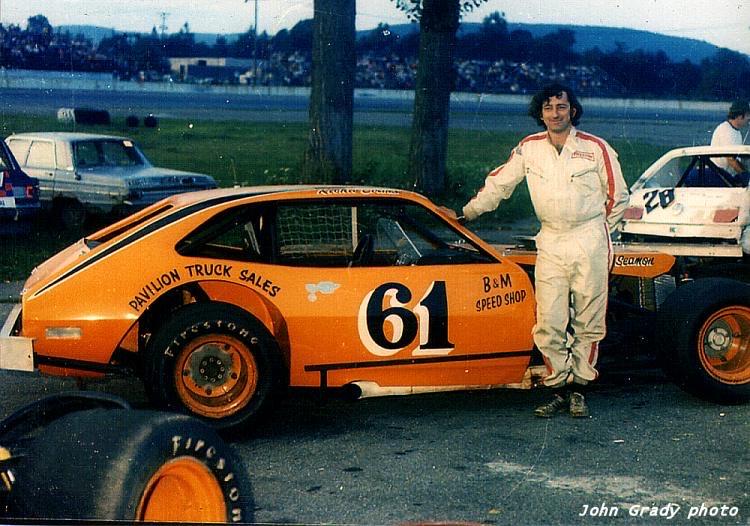
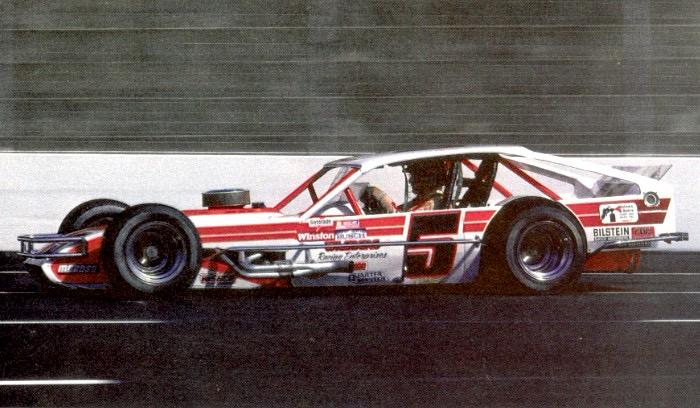
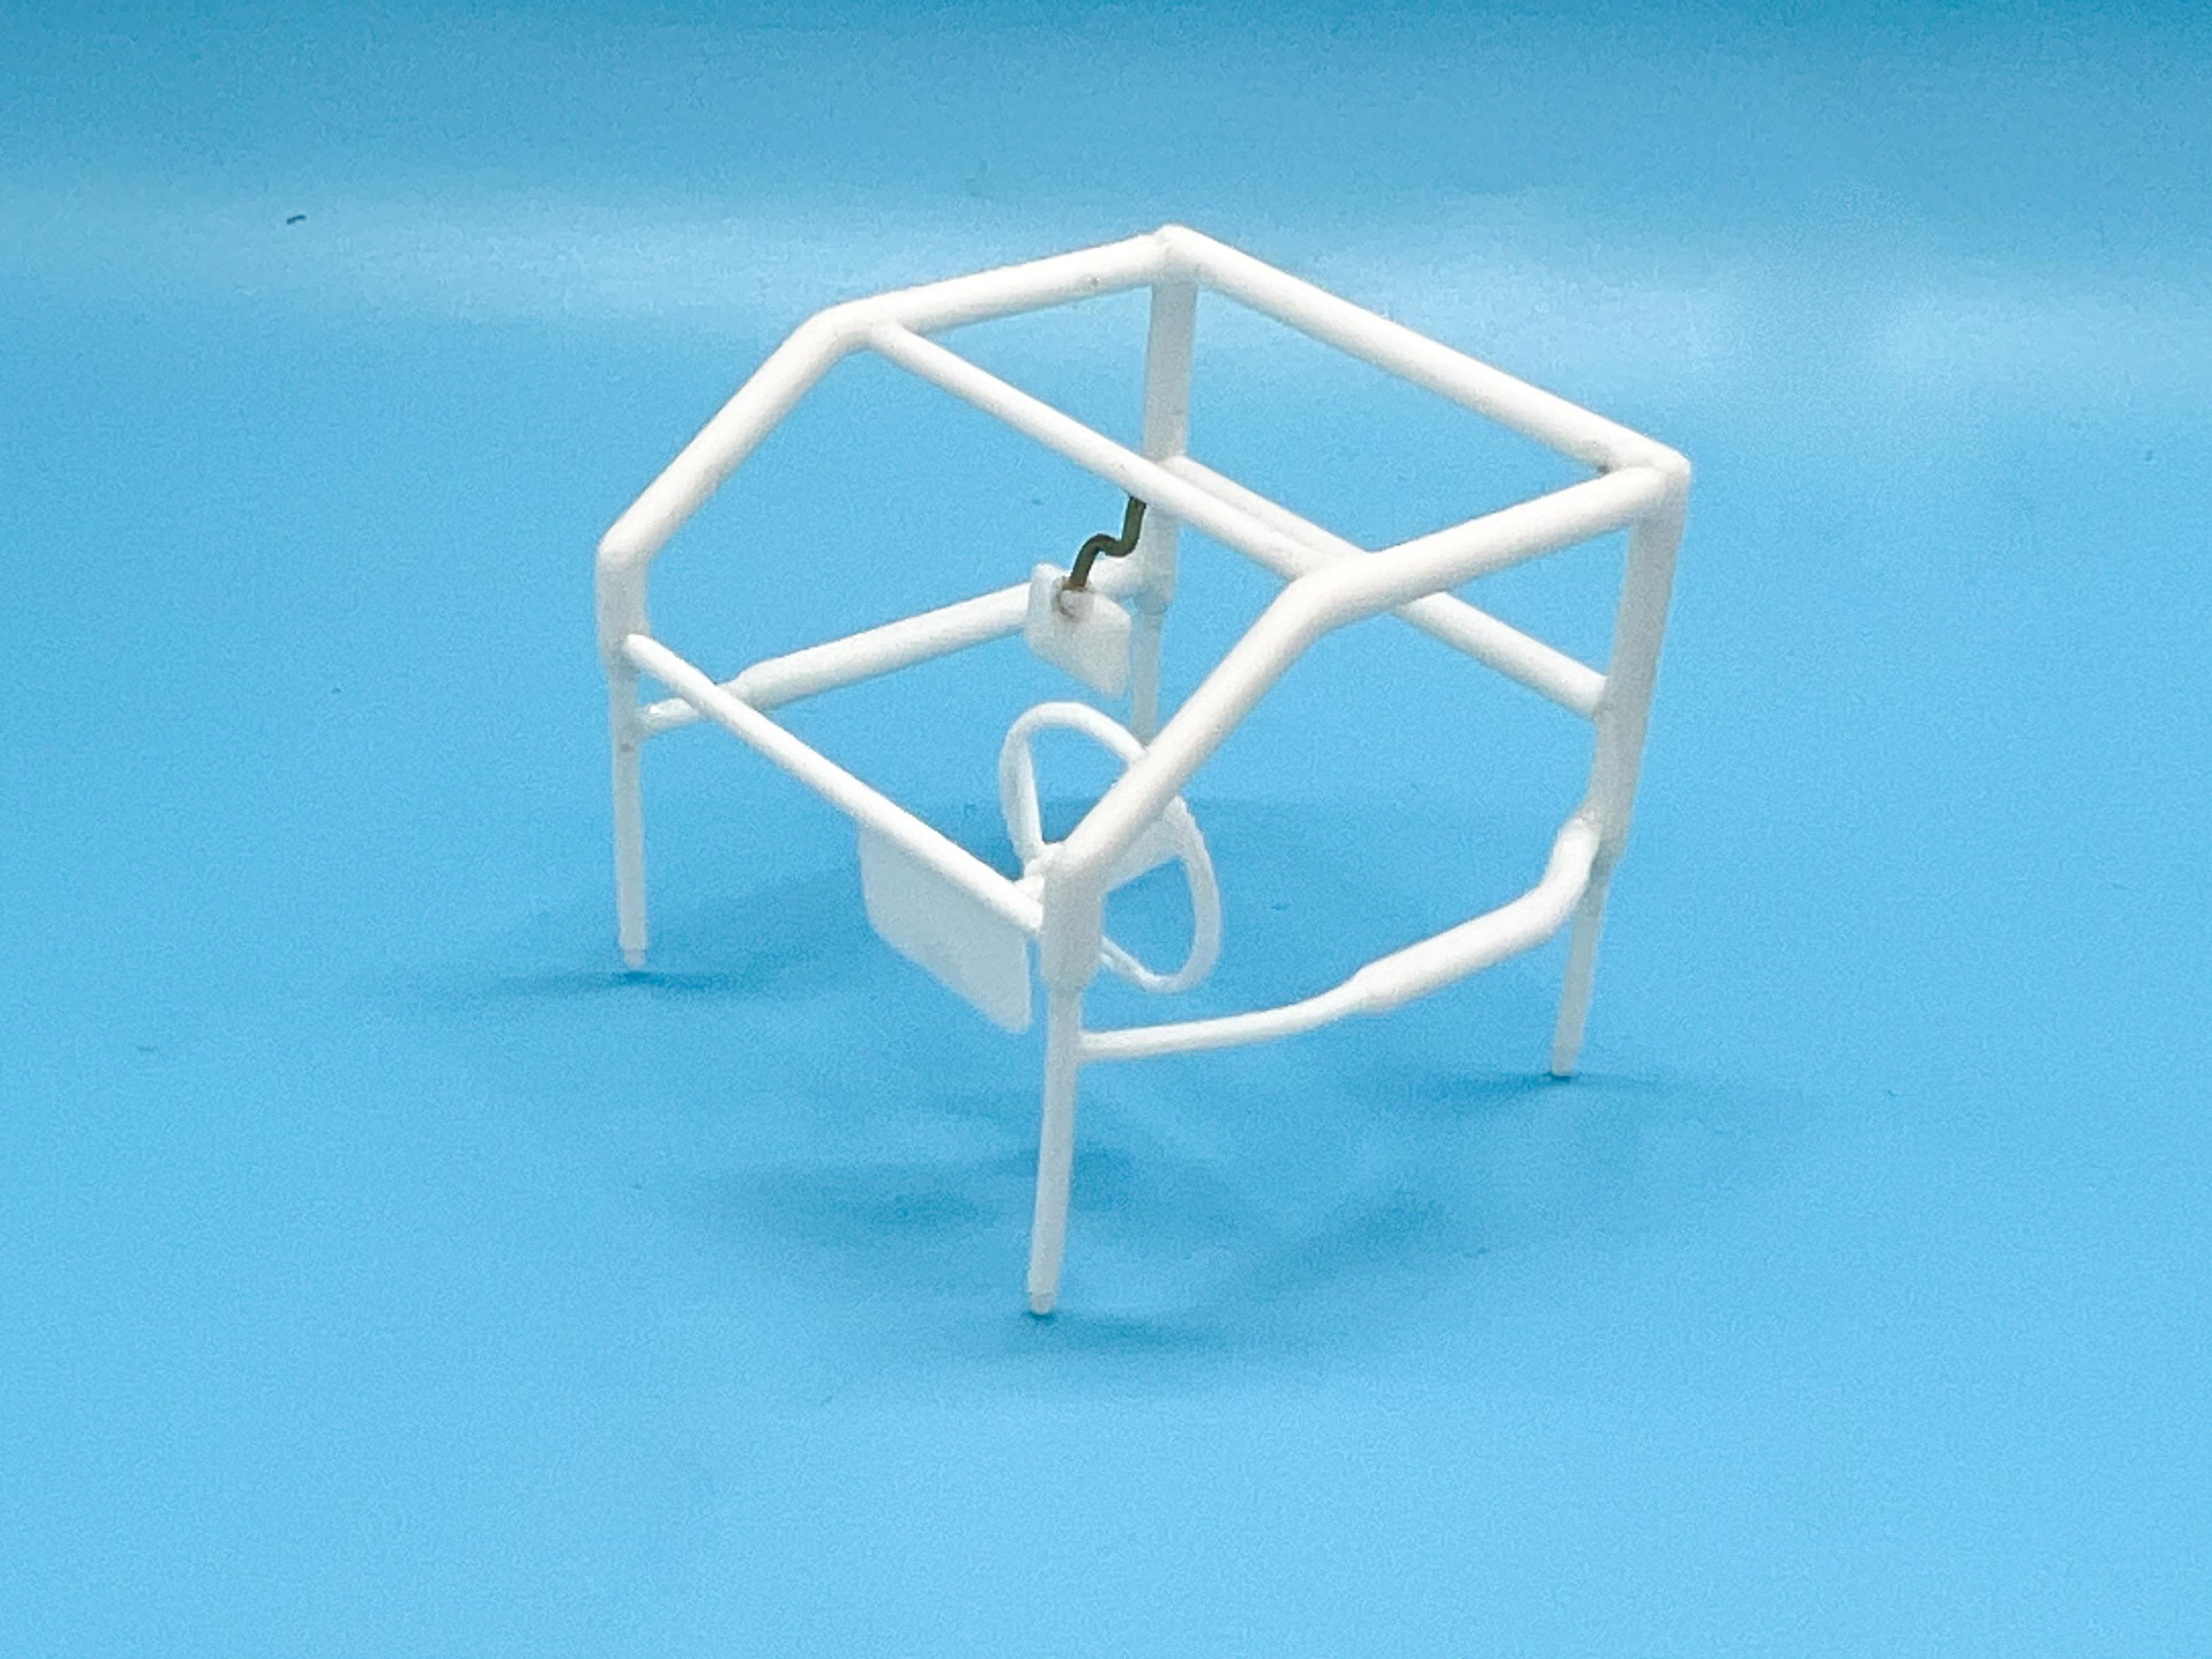
I’ve always struggled with getting realistic metal finishes, and still do…but I’m starting to figure out some tricks. Thank you!! Some more progress today. Took a shot at polishing out that Createx acrylic clear, and it was OKKKKKK, kinda, but not mindblowing. Luckily, I have more stages of paint to go anyway, so no harm no foul. I found some cool pics when I was researching this build of 70s late models with some cool chrome vinyl (I think?) and holographic vinyl numbers so I’m stealing that idea for this one too. Designed and cut out some numbers: To make them actually look thought-out and finished though, I’ll be laying down a painted black shadow behind them, so that was the next job… Now, I won’t get to see the finished effect until right at the end of the paint process because clearing over that vinyl somewhat ruins the effect of it, so I’ll need to be patient… Meantime, added some decals, and the state identifiers on the side with some old (possibly era correct) Letraset dry transfers: Letraset has a very thin clear backer that shows up at this stage, but it disappears with just a mist of clear over top so don’t be alarmed if you ever use this stuff… Meanwhile, shot some paint on the rear brake drums and attached the front disks and calipers to each other, and made a start on some brake lines: And that’s about the progress for today. These cars didn’t typically run a bunch of sponsor decals - compare a 70s era car… …to the busier look of typical 80s Modified… …and you’ll see that these earlier cars were relatively light on sponsors and decals, but I do have one more thing I wanna get painting on there before laying down some clear…more on that tomorrow, hopefully! Thanks for looking, more soon!
-
I used to think NYC drivers were dangerous and aggressive…but now I drive around Chicago semi-regularly. I also hate tailgaters - no one here in rural Indiana seems to realize my Mustang will definitely stop sooner than your old rusted out 90s Chevy truck if I have to brake suddenly for some reason, and if you sit 3ft off my back bumper with your lights on you’ll be blinding me into the bargain. There should be stronger penalties for driving dangerously close to the car in front - I consider that MUCH more worthy of a ticket than speeding a little on a clear empty road
-
Ferrari 330 GTC + 575 M Superamerica Resto-rod
OldNYJim replied to 89AKurt's topic in WIP: Model Cars
I love seeing your work Kurt - your steering wheel particularly caught my eye! Nice job, keep going!!! -
Who doesn't love a mock-up? Let's see yours!
OldNYJim replied to Belairconvertable's topic in WIP: Model Cars
If that was my build, I’d drop the nose to where the top of the wheel arch just meets the top of the wheel, like it does at the rear. But…it’s not my build, so as you were! ? -
That color is great, and that 30+ year old design looks fresh as a daisy with some new wheels! Nice work!
-
70s Era Asphalt Modified
OldNYJim replied to OldNYJim's topic in WIP: Stock Cars (NASCAR, Super Stock, Late Model, etc.)
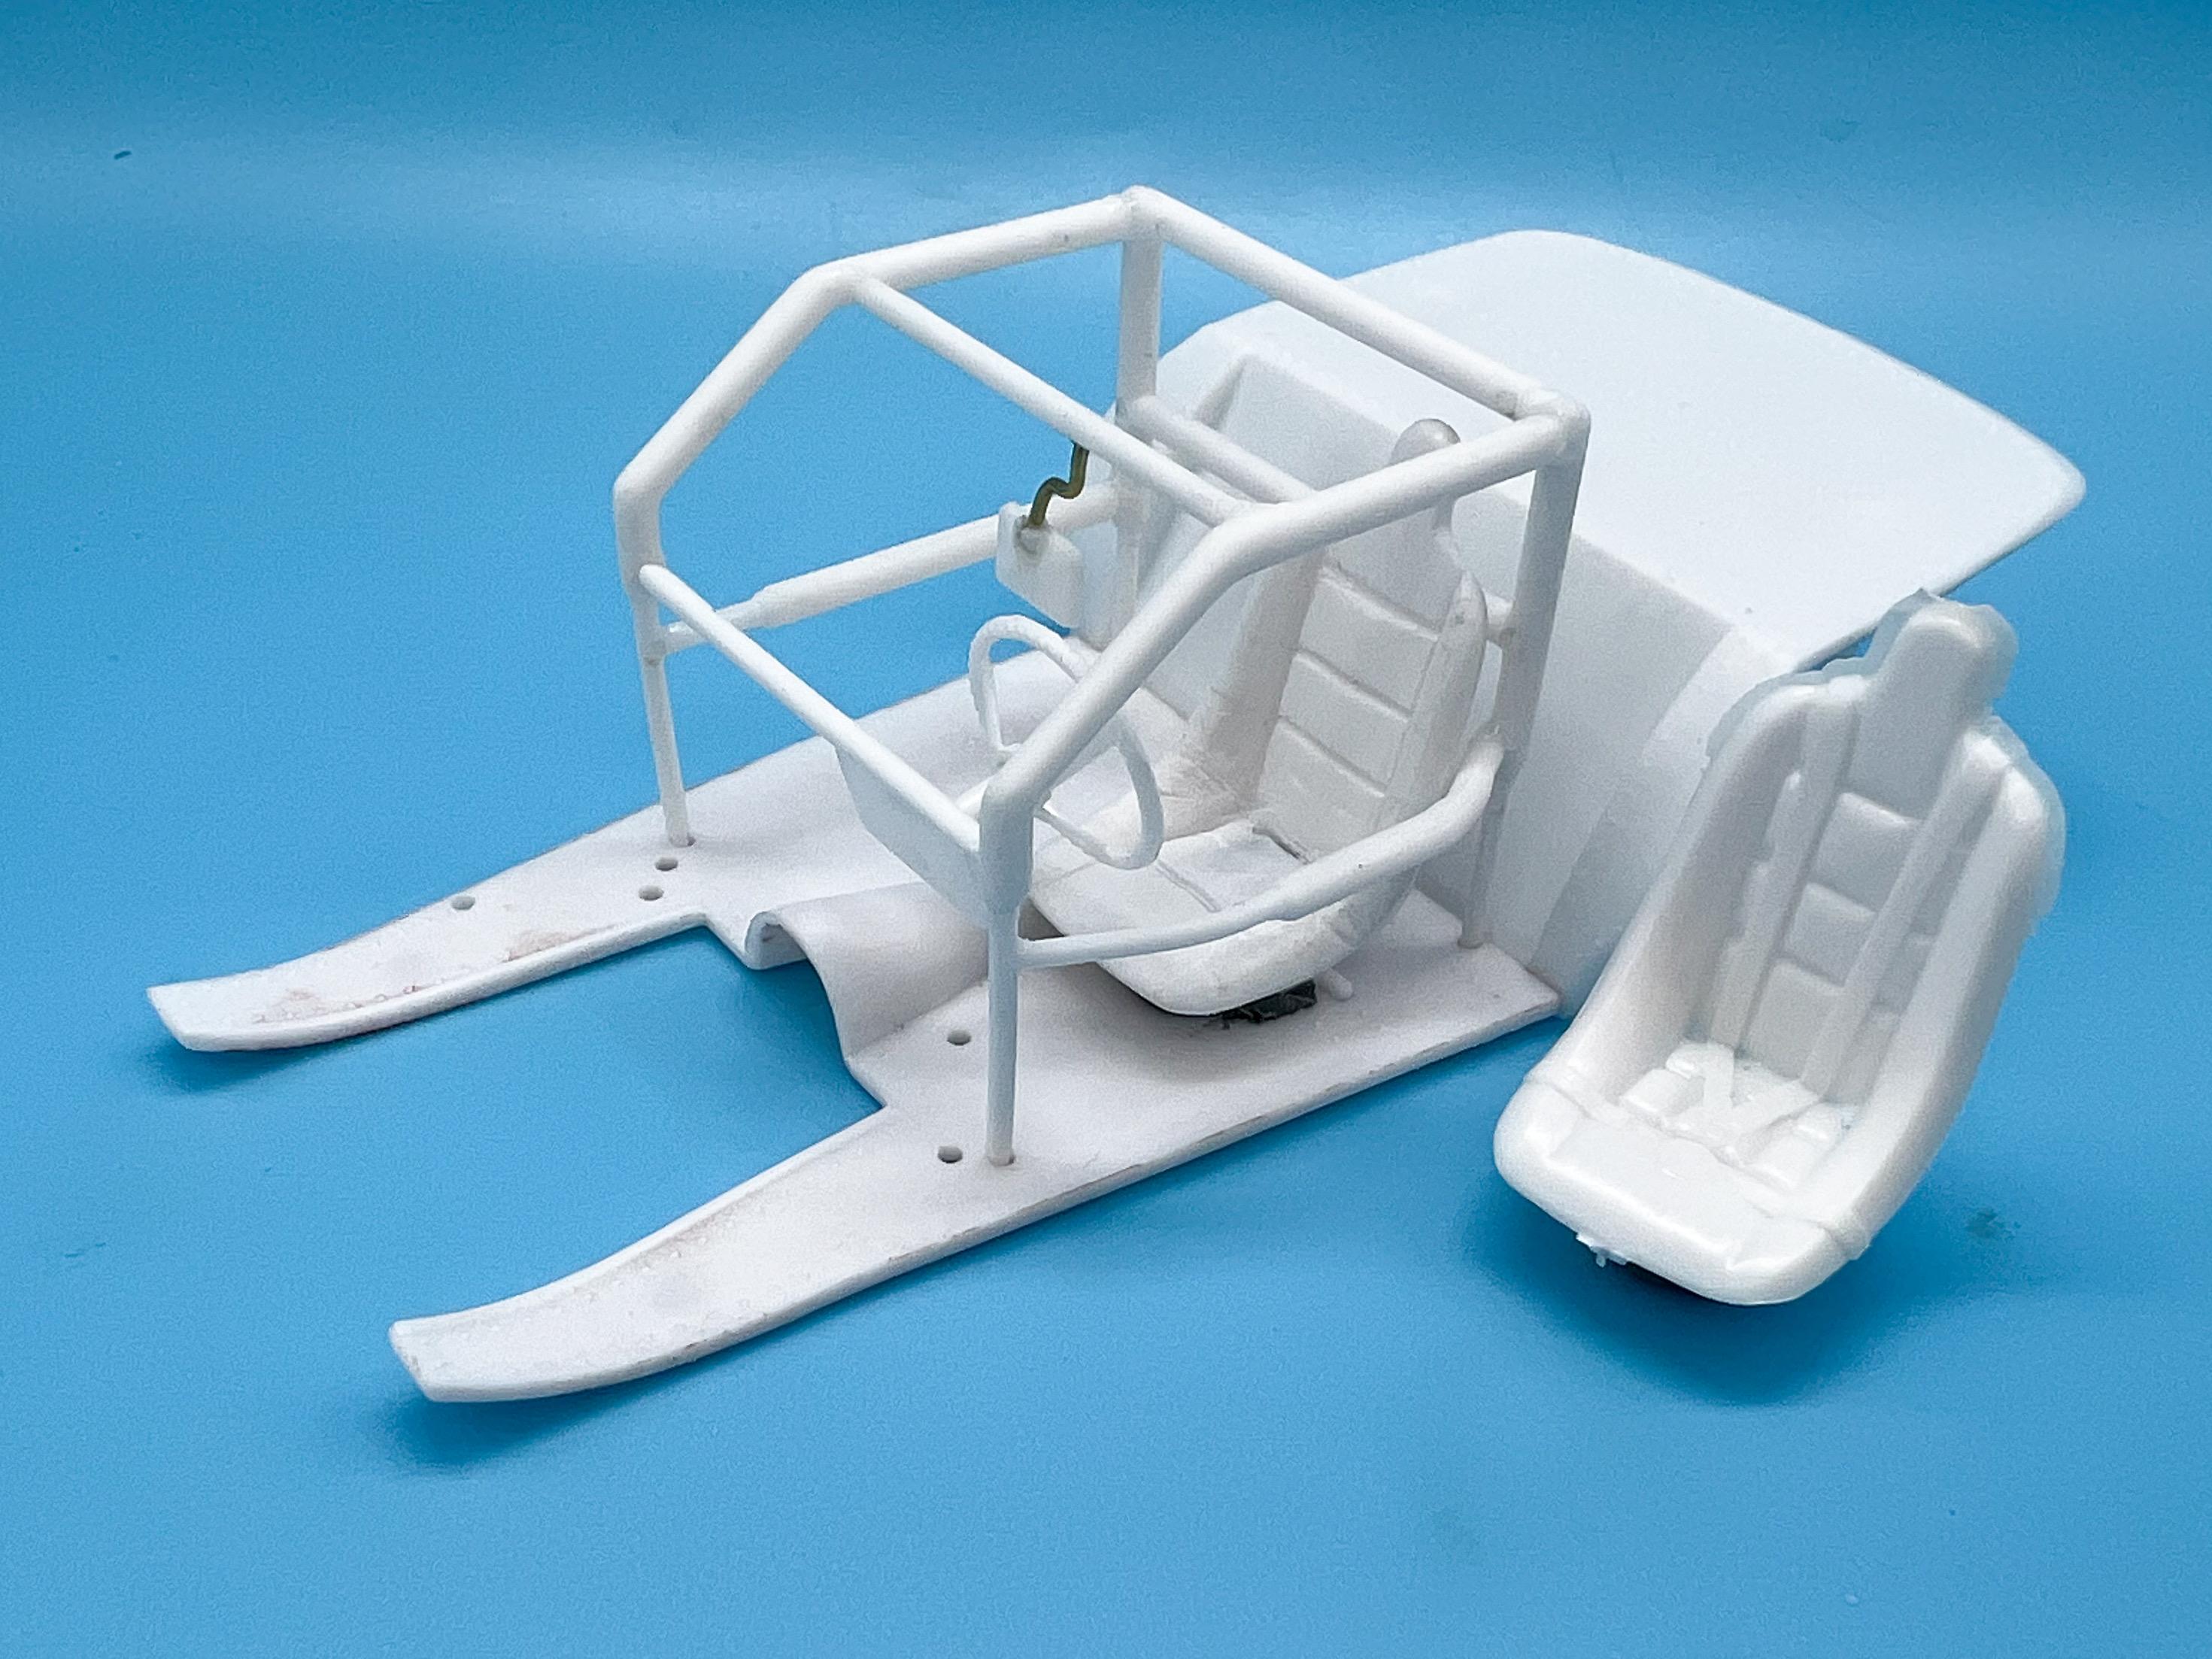
Thank you! Beautiful work! Thank you for sharing! I love all these oval racing stories! Thank you for sharing!!! A few random little updates… Cleaned up the rollcage ready for assembly. I was all set to remake it from styrene rod rather than clean up all those awkward lines, then decided it would be character building to do it the harder way… Using the floorpan as a jig is a good idea when assembling these, and drilling out the mounting holes so it fits together nice. Still in progress here, but close to being done: I’ve been wanting to practice polishing out acrylic clear, and figured this would be a good one to try it on, plus I wanted to try the new Createx Super Gloss, which they compare to an acrylic version of a 2k clear. It has pretty particular recommendations for achieving the effect, but seeing as this one doesn’t NEED to be super glossy it won’t be the worst thing if my practice doesn’t work out. It did indeed lay down pretty shiny right out of the airbrush: They recommend three coats, 15 mins apart, and it worked pretty well - it leveled out that lumpiness in the pic above nicely by the time it had sat overnight: I’m provisionally impressed - we’ll see how it buffs up though after it’s sat for a couple of days… Next job, remove the molded-in seatbelts from the kit seat so I can add my own later. An original part sitting to the right, for comparison: Shot some primer on that today and used a little filler and it looks surprisingly good considering all the grinding I did on it ? Made an aluminum trunk floor, which the fuel tank will mount underneath: And got the rear axle installed, as you can see and started adding some detail there too (but plenty left to add still…) Next jobs will be that catchcan we were discussing above, plumbing and installing brakes and I’ve got some more painting to do on the body once I’ve got it polished out. Oh, and start painting some interior stuff. Plenty to do still! Thanks for looking - more soon, soon as I’ve done more!