my66s55
-
Posts
1,395 -
Joined
-
Last visited
Content Type
Profiles
Forums
Events
Gallery
Everything posted by my66s55
-

3D printing quality
my66s55 replied to 59 Buick's topic in General Automotive Talk (Trucks and Cars)
Thank you -
3D printing quality
my66s55 replied to 59 Buick's topic in General Automotive Talk (Trucks and Cars)
Nice try, a Dale Carnegie quote. I'm not interested in winning friends and influencing people, just informing the members on this forum of b.s. This show, to me, is backed by Stratasys who is trying to milk every dime they can from their fdm technology. I am a 70 yr old small business accountant who has had my own practice here in Florida for the last 25 years. I am well educated and totally aware of the influence and development of the open source community on desktop 3d printing since early 2010. For the vast majority, if not all the members of this forum, this show is a waste of time and money. that is,f there is an fee to enter. Like it or not, you made the post. I'm only informing from my knowledge. -
The F&F versions are a definite as I have drawing of both the 135 and 165 which give me all the views needed to create the files needed to 3d print the parts. If you haven't yet, I suggest you check out my w.i.p posts at http://www.modelcarsmag.com/forums/topic/101922-1935-lasalle-convertible-coupe-3d-printed-at-home-july-28/ and http://www.modelcarsmag.com/forums/topic/104304-59-plymouth-vert-with-some-3d-printedparts-august-11/. You will better understand my confidence when I state that it's going to happen.
-
3D printing quality
my66s55 replied to 59 Buick's topic in General Automotive Talk (Trucks and Cars)
Condescension? I don't think so. My strong opinion of the lack of real knowledge of 3d printing on this forum is more like it. I am doing my best to try to show members on this forum exactly what it takes to do what they may envision and the real progress in 3d printing. Adobe and Autodesk? Cad software with a pretty good price. Google them. Tells you all about them. You can even get on the Adobe cloud. Ask Harry what a great deal that is. The only thing Autodesk has different to offer is that it has the ability to hollow out a cad file if you don't care to print it solid. I downloaded a trial version and fount it totally in unsatisfactory for what I wanted. Netfabb will do the same thing plus find and fix errors in your file. Netfabb has a free version which helps find errors. Blender cad type software also has tools to help find errors in your files and its free and very well supported. If you can't find an an existing error in a file, you can sent it to Netfabb's cloud and they will fix it free. -
3D printing quality
my66s55 replied to 59 Buick's topic in General Automotive Talk (Trucks and Cars)
The big name that stands out is Stratasys. They are the legal copyright holders of fdm trade name and developers of fdm printing technology. On careful examination of the others exhibitors, many are linked to the filament printing 3d printing tech. One of the exceptions is Autodesk which has to do with design and manipulation of 3d files. To get a full exhibit, one should be drawn to the newer technology of the Maker Fares. These are large exhibits held in cities worldwide and present the latest and greatest offered in today's 3d printing world. There a number of desktop 3d printers available that will do what we, as modelers require. Check out this Solus sla dlp printer soon to be released. http://www.buildyourownsla.com/forum/viewtopic.php?f=17&t=2146&start=20. read pages 3 and 4. Remember, this is only one example. Stay away from fdm filament printers unless you have a LARGE print body like 1:12 and are prepared to do a lot of finish work to make it presentable. I can do some jaw dropping 1:25 and smaller prints on my machine, but the Solus is your glimpse into what my be on your desk to in the future. -
3D printing quality
my66s55 replied to 59 Buick's topic in General Automotive Talk (Trucks and Cars)
When you educate yourself enough and learn what is the reality in what is really happening in the advancement of 3d printing,you will be able to decide what is real and what is b.s. This show to me is B. S. simply by the exhibitors listed. -
What to do when frustration strikes?
my66s55 replied to b-body fan's topic in General Automotive Talk (Trucks and Cars)
I go and hide under my desk in a fetal position and suck my thumb. Yeah right. If at first you don't succeed, try, try again. -
3D printing quality
my66s55 replied to 59 Buick's topic in General Automotive Talk (Trucks and Cars)
It was meant as an example, Frank. By the way, congrads on the Form 1 purchase. I had the impression about a year ago that you were leaning toward making a purchase. Nice choice. -
3D printing quality
my66s55 replied to 59 Buick's topic in General Automotive Talk (Trucks and Cars)
I tend to believe things will things will be a little different. A cottage industry much like resin casting will evolve. Printable part files will be available for purchase. It's already started. I have 2 Delaheye 135 Heller kits. I want to print out a F&F coach works body for the 135 & 165 roadster. I could create the files, or I could purchase the files already done from here: http://www.cgtrader.com/3d-models/car/antique/delahaye-135m-figoni-and-falaschi-convertible-1937 and http://www.cgtrader.com/3d-models/car/antique/delahaye-t165-1939. I have already checked and they fit my needs and save my a lot of time. -
That's one fine looking Delahaye, Matt. I have 2 in my stash, but they will be the basis for the F&F 135 and 165 roadsters. It's great news if they are reproducing these as I also want to do the 135 coupe. Again, great looking model.
-
Stupid people? Daffy has the answer.

-
3D printing quality
my66s55 replied to 59 Buick's topic in General Automotive Talk (Trucks and Cars)
Before you can even consider purchasing a 3d printer, you have to consider a few things. The big thing is the stl. files to print. Where are they going to come from? If they don't exist, do you have the ability to create them? If not, do you want to take the time to learn how to create them? The list goes on. I explain in this w.i.p. here http://www.modelcarsmag.com/forums/topic/101922-1935-lasalle-convertible-coupe-3d-printed-at-home-july-28/ some of what it takes to print model parts with a 3d printer. You will see the difference between printing with a fdm filament printer and a high detail sla dlp printer. This model is being printed in 1:18. I explain why in the w.i.p. If you want to see 1:24 scale parts, go to this w.i.p. http://www.modelcarsmag.com/forums/topic/104304-59-plymouth-vert-with-some-3d-printedparts-august-11/. -
3D printing quality
my66s55 replied to 59 Buick's topic in General Automotive Talk (Trucks and Cars)
Get me the files and I'll print them. Just for fun, to see how my printer would do with a figure, I printed out a nude female standing erect on spiked high heal shoes. A little under 3 hours later she emerged from the resin vat with perfect detail and was an exact replica of the stl. file I used to print her. She is 48 mm in height with the heals on, which should be about 5' something in bare feet at 1:35. Unfortunately, do to the rulse of this forum, I can't post a picture. I printed her at 100 micron layer height. She would have come out even better if I could have printed at 50 micron, but I didn't want to wait 6 plus hours just to see how she would come out. -
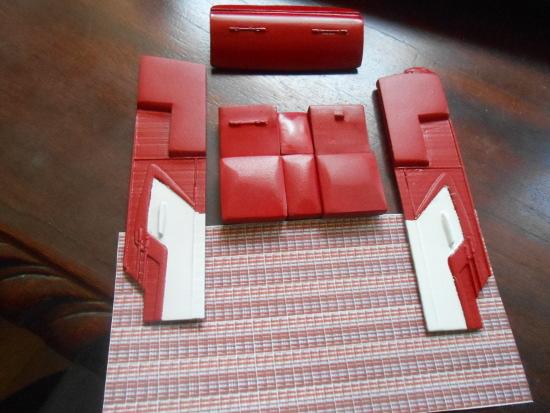
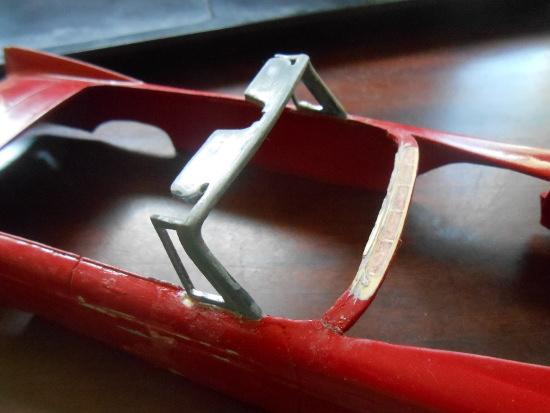
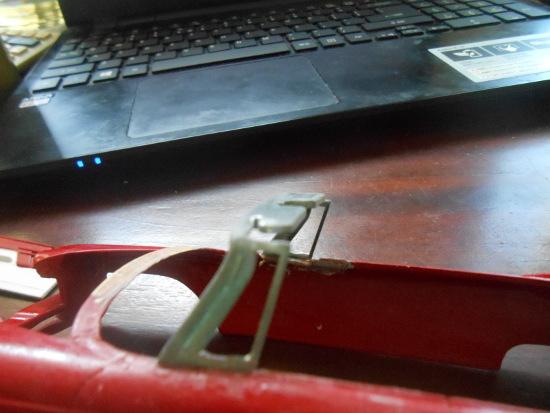
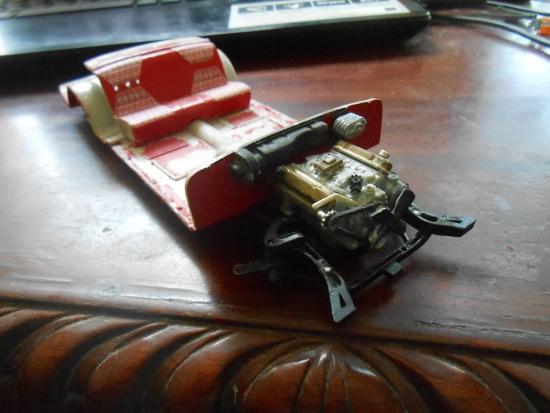
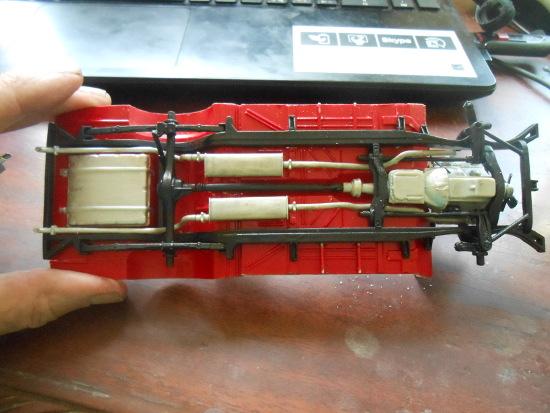
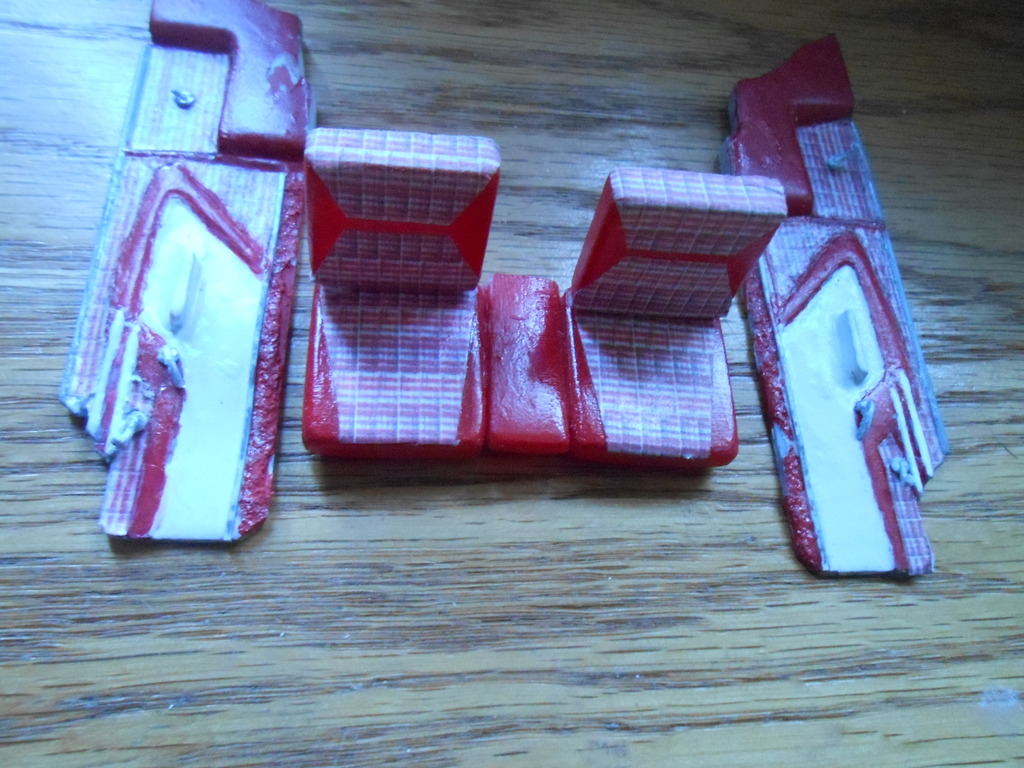
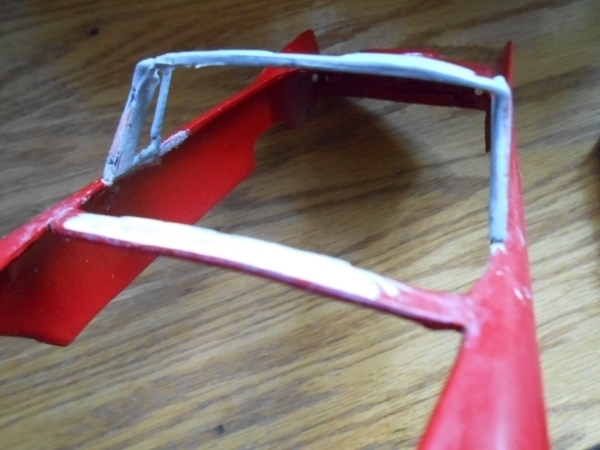
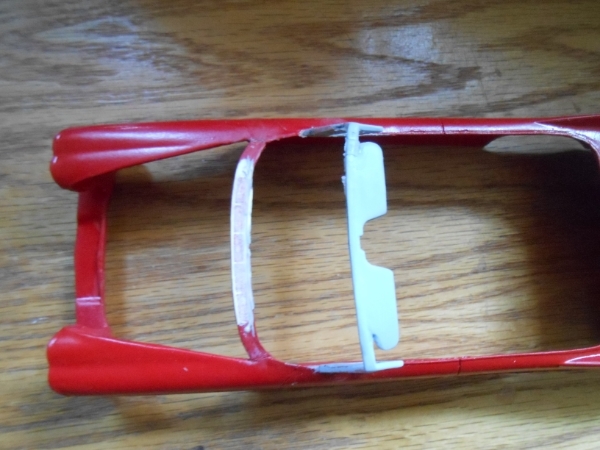
Some updates to show where I am on this build. The seats and side panels are ready to have the upholstery pattern applied. The back of the back seat needed to be printed to reflect the straps in the back of the seat. It will replace the one from the 58. The interior floor chassis, engine, etc have been done for years. The newest windshield frame printout is glued in place and a shot of silver paint applied. I'm really happy with the current results.
-
LMAO. No wonder I kept crashing with Flight simulator. And here I was blaming it on the joy stick. Thanks for the laugh, you made my day.
-
We're not doing anything wrong. There is a website problem that needs fixing. There are all sorts of ways to fudge our way through getting photos on here, but they're not the correct way. I'm sure the moderators are working on the problem & will have things up & running again in short order. I can post photos on every other site on the planet the "normal" way from photobucket, I'm confident we'll all be able to do the same here soon. Steve Exactly, Steve
-
You can right click copy and paste from Photobucket as long as you open the picture first and not try from the library's files.
-
1935 LaSalle convertible coupe - 3d printed at home Aug. 30
my66s55 replied to my66s55's topic in WIP: Model Cars
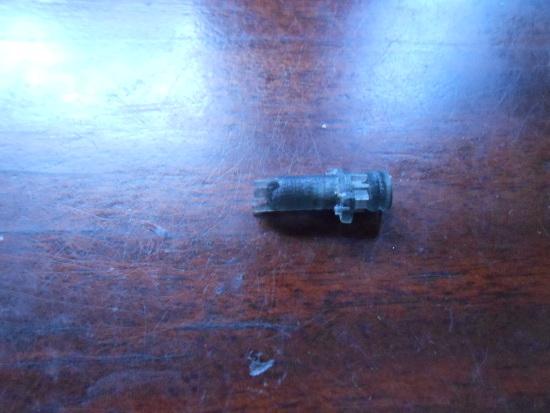
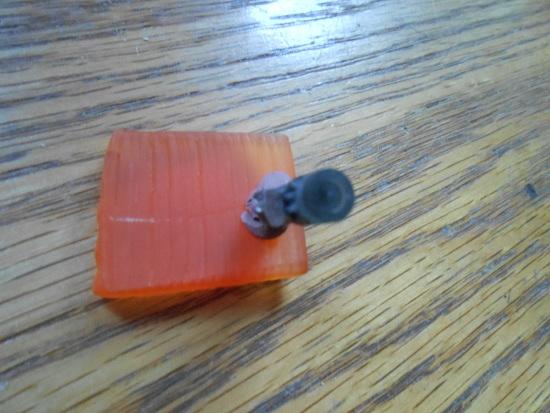
Got the generator done, but it's been raining all day so it's not sun cured yet. It's printed in 2 pieces that can be printed at the same time. Some of the supports are still attached on the one end. I have to wait until the sun cure to make it hard enough to trim any closer. You can see the fan fins on the end were the pulley attaches. Just another example of the kind of print that can be expected from these machines.
-
I'm thinking the non photo loading from a third source, i.e. Photobucket, Fotki etc, might be a result of the new full editor posting fix. The editor may not have the ability to post a picture from a url. Only direct links from your files on computer.
-
1935 LaSalle convertible coupe - 3d printed at home Aug. 30
my66s55 replied to my66s55's topic in WIP: Model Cars
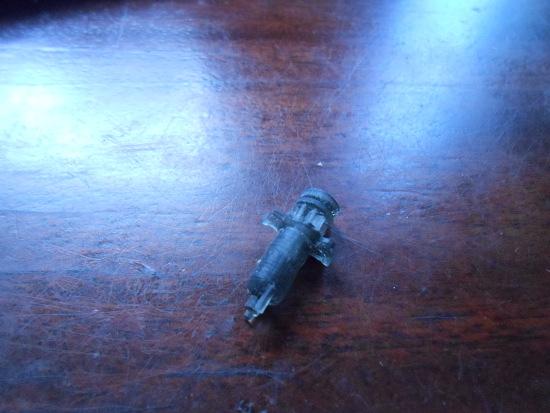
Here's the pulley.
-
Yes Steve, I found this way of doing the interior seats and door panels to be the most realistic way to present the interior. Besides, I'm at a disadvantage when it comes to doing small detail work in that I only have useful sight in my left eye. This means that I don't have depth perception. To get an idea of what I mean, place a small object onto a flat surface, close your right eye and try to pick it up. Anyway, the interior pieces on my Photobucket are the old ones printed on my fdm filament printer in my icon. The other 2 pictures here are their replacement parts printed on my high res dlp printer. The seat back on the left is the front and has the strap with buckles. The one on the left is the back and has the ash try. If you look closely at the strap's on the door panels, you can see see the buckles. It's also a much crisper print with well defined lines.
-
And more: Did you see all of them, Bill?
-
This is another project I started years ago and shelved because of lack of scratch building skills. For a quick intro, it is the 1959 Plymouth Sport Fury Modelhause kit I purchase about 12 years ago. The only parts I'm using from that kit are the body, hubcaps, dash, front bumper with headlights, rear bumper and tail lights. The rolling chassis as well as under the hood parts, interior floor and back seat are from the AMT 58 Belvedere kit. One thing that I'm really good at is breaking windshield frames. This was one of them. I attempted to make a resin cast copy, but my resin skills aren't good enough. The thought came to me a couple of weeks ago that I could possibly draw one up and print it out on my high res 3d printer. I did it and printed it out at 100 mu layer thickness. It was't too bad, but still needed some touch up work. And then, of coarse, I broke it doing that. I glued it and put it on the car anyway. This is my first attempt at posting from Photobucket on the this new forum update. I hope it works. I sure do miss that post preview. It didn't work . Here are the links to my Photobucket Pic's. I wasn't real happy with the results. I decided to lower the layer thickness in halfto um. This meant that the print time went to Time longer. hours and minutes later I have this. Now I'm happy.
-
3D printing growing as we speak
my66s55 replied to bbowser's topic in General Automotive Talk (Trucks and Cars)
That doesn't say much about the type of printer. It could be an fdm filament style printer or possibly a dlp stereolithographic top down kit. For that you would need a dlp projector unless you know how to modify a cheap suitable one. That will cost you in the $600 to $700 range. My dlp projector ran me $607, but I didn't have to do any mods to it. http://www.computerworld.com/article/2865762/xyzprinting-unveils-349-3d-printer-hi-res-machine.html I know nothing about them, so this is what I read The article title is a little misleading. It starts out talking about their new stereolithographic machine for $1500 and then add at the bottom about the filament machine for $349. By the way, if you read the article in bbowser's post, the writer tested the machine and said the quality was not as good as the more expensive Form 1. The reason became clear in the article you posted. The cheaper printer has an xy axis resolution of 300 um. A good printer will have an xy resolution of 100 um or less. Now you know a little bit of information about 3d printers. -
3D printing growing as we speak
my66s55 replied to bbowser's topic in General Automotive Talk (Trucks and Cars)
That doesn't say much about the type of printer. It could be an fdm filament style printer or possibly a dlp stereolithographic top down kit. For that you would need a dlp projector unless you know how to modify a cheap suitable one. That will cost you in the $600 to $700 range. My dlp projector ran me $607, but I didn't have to do any mods to it.