
my66s55
-
Posts
1,395 -
Joined
-
Last visited
Content Type
Profiles
Forums
Events
Gallery
Everything posted by my66s55
-

What's "Traditional" ?
my66s55 replied to Greg Myers's topic in General Automotive Talk (Trucks and Cars)
Is there really any real definition to tradition in this respect? To me, at 70 years of age, tradition can take on an entirely different meaning to those of a differing age. I believe that trying to put what's traditional to you onto someone else who is of a different age, era,is not correct. -
Ford has made 3-D printable files available
my66s55 replied to wisdonm's topic in General Automotive Talk (Trucks and Cars)
Very interesting JB. The general population has "grown" over the past 15 or so years that it has affected the amount of baggage allowed on airplanes. People are obese. Diabetes is epidemic . But, those whole wish to prevail and extend their life. Will. -
Ford has made 3-D printable files available
my66s55 replied to wisdonm's topic in General Automotive Talk (Trucks and Cars)
As far a med tech applies, your are talking a whole different ballgame. As far as dental tech, jewelry tech and many others, I'm right on cue. You are just talking to the wrong guy. -
Ford has made 3-D printable files available
my66s55 replied to wisdonm's topic in General Automotive Talk (Trucks and Cars)
I totally disagree with you. It wasn't industry that brought you all these fdm printers. -
Ford has made 3-D printable files available
my66s55 replied to wisdonm's topic in General Automotive Talk (Trucks and Cars)
Why do you hold me in such high esteem. Do you really feel that other modelers, not all, couldn't achieve what I have? Not all can achieve it, but some can, and will with the proper encouragement, believe, I can show you a guy on the dlp/sla forum who built a printer for $10.00. You want the link, I'll give it to you. You sit and wait for industry That's not what drives this. It is the open source community. The files to build one of these printers is available to anyone. You just need to know were to find them. I'm not a rocket scientist. I am a 70 year old man wfho keeps up with tech advances. I am an accountant by profession and you can actually check that by googling my name and putting public accountant behind it. -
Ford has made 3-D printable files available
my66s55 replied to wisdonm's topic in General Automotive Talk (Trucks and Cars)
Your problem is that you are watching the industrial development. Wake up. The development of this tech is not thru industry,, it's thru the open source community. Until you realize this, your'll be a step behind. Where do you think I got the info to make and refine my printer? From industry? Think again. Industry is a step behind and as long as you follow them, you'll be the same. -
Ford has made 3-D printable files available
my66s55 replied to wisdonm's topic in General Automotive Talk (Trucks and Cars)
You are mostly correct Tom. Imagine this. You have posed the question on a previous thread about the the 59 Plymouth Fury,.Accually it's the sport fury. Can you use the 1958 parts from the AMT Plymouth to create a more detailed build. The answer is yes. I have on my work bench, the correct side panels, seats and seat pattern for the 59 Plymouth using all the body, bumpers and dash from a 59 to create a complete 59 Sport Fury convertible. complete with engine, etc -
What's "Traditional" ?
my66s55 replied to Greg Myers's topic in General Automotive Talk (Trucks and Cars)
I love it. Bwah ha,ha, ha, ha, into infinititum. or how ever they spell it. -
Ford has made 3-D printable files available
my66s55 replied to wisdonm's topic in General Automotive Talk (Trucks and Cars)
So true Rob. Those are the ones I hope to reach out to. -
What's "Traditional" ?
my66s55 replied to Greg Myers's topic in General Automotive Talk (Trucks and Cars)
Take your definition and stuff it were the sun d\on't shine. get my drift. -
What's "Traditional" ?
my66s55 replied to Greg Myers's topic in General Automotive Talk (Trucks and Cars)
If that's what floats your boat, go for it. After all,it's your model isn't it? Who else to please but you? -
Ford has made 3-D printable files available
my66s55 replied to wisdonm's topic in General Automotive Talk (Trucks and Cars)
Dave,I believe you are exactly right here.The more model car builders are involved, the more it will grow. Forget the model companies. This hobby can grow and evolve through the involvement of those willing to accept and utilize the future. -
What's "Traditional" ?
my66s55 replied to Greg Myers's topic in General Automotive Talk (Trucks and Cars)
Who cares whats traditional. it's what you want now in your build. What turns you on, floats your boat, makes you happy. -
1935 LaSalle convertible coupe - 3d printed at home Aug. 30
my66s55 replied to my66s55's topic in WIP: Model Cars
I saw the post David and gave my response. Here is my post in reference to my response. 1:18 scale vs 25 or smaller. Observe, believe, understand. -
Ford has made 3-D printable files available
my66s55 replied to wisdonm's topic in General Automotive Talk (Trucks and Cars)
Oooh. My head hurts. Those of you who are not following my 1935 LaSalle wip, should be. I'm not going to go into a lot of detailed corrections of the miss information in this post. Watch for my next post. 1:24th scale body in detail? Try less than 1:24th scale front suspension parts in great detail. Psst. I've done the same 1:18th scale body in 1: 24th or 1:25th with no problem. I'm not going to address any other statements as I don't have enough time. Take it from me. I've been there, done that and doing that. All at home. -
1935 LaSalle convertible coupe - 3d printed at home Aug. 30
my66s55 replied to my66s55's topic in WIP: Model Cars
It will turn out just fine. hopefully, others will see that and understand that this is not rocket science. It is the future now and available to those who want to grasp it and utilize it. -
1935 LaSalle convertible coupe - 3d printed at home Aug. 30
my66s55 replied to my66s55's topic in WIP: Model Cars
Eric, I applaud you and you efforts. This technology could make all of you model dreams, wants come true. I don't have time, and Though I really like the Duesies, much of your work could be completed easily and in a timely manor. You know, if I could spell, I would enjoy posting more. -
1935 LaSalle convertible coupe - 3d printed at home Aug. 30
my66s55 replied to my66s55's topic in WIP: Model Cars
I wish I knew where you were coming from. You've lost me. -
1935 LaSalle convertible coupe - 3d printed at home Aug. 30
my66s55 replied to my66s55's topic in WIP: Model Cars
Thank You Bruce -
1935 LaSalle convertible coupe - 3d printed at home Aug. 30
my66s55 replied to my66s55's topic in WIP: Model Cars
Sorry Charles, I don't. I'm still learning plus it takes all of my time and effort for my projects. Here are the rear axel,printed some time last year on the fdm machine and surface finished and the pig, recently printed out on the high def dlp machine. -
Why not? Real
-
Or on the light side, maybe Hairy Canary.
-
So Harry, have you done a Harry Houdini yet?
-
1935 LaSalle convertible coupe - 3d printed at home Aug. 30
my66s55 replied to my66s55's topic in WIP: Model Cars
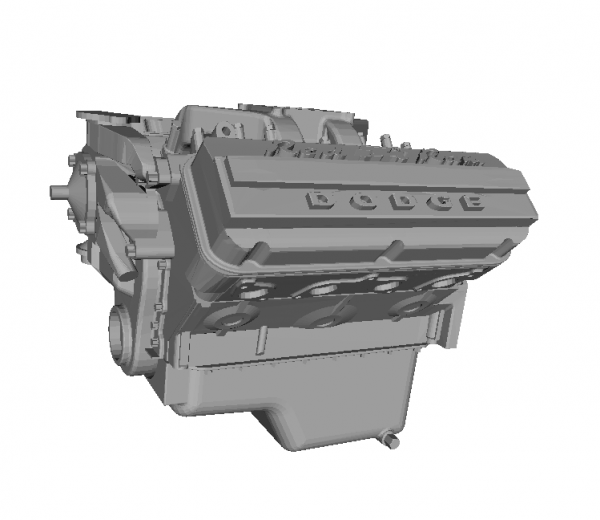
I'm working on finishing up the engine parts and had good progress over the weekend. These parts were printed on the high res dlp printer. I am extremely pleased with the engine head. It has bolt heads, goose neck and spark plugs. The second photo has the air cleaner, front of the engine bracket with timing chain cover and bolt heads and the water pump. I'm not happy with the water pump as it appears that I need to do a bit more work on the drawing. Again, these are exactly as they come off the printer with only a light dusting of primer. I want people to understand just how well parts can be printed at home. -
1935 LaSalle convertible coupe - 3d printed at home Aug. 30
my66s55 replied to my66s55's topic in WIP: Model Cars
These 2 and most of the prints from here on will be printed on my high resolution dlp printer that I finished building this last Christmas. Many of the pieces have not been drawn yet. I did this Stromberg 2 barrel downdraft carb this week. The exhaust and intake manifolds had been drawn and printed out individually and smoothed last summer. It's much easier to join them in an stl. file and print them out like this. These are exactly as they came off the printer and have a thin coat of primer to make them more visible. It appears as though I have left over cured resin trash in the print vat that showed up on the manifolds print. I need to strain it. The carb is a little less than 1/2 inch high.