my66s55
-
Posts
1,395 -
Joined
-
Last visited
Content Type
Profiles
Forums
Events
Gallery
Everything posted by my66s55
-
I think this is a model.
-
I'll go with model.
-
Ken, I print with high impact polystyrene aka hips. Same thing used for scratch building. Prints nicer than pla, sands better and easily glues with ca glue or even welds with mec. I use 1.75 filimant as I bought an E3D solid mental hot end at the begining of the year and thats what it uses. This one change plus switching to hipps improved my prints about 50 %. My heated bed is 220mm on the x axis and 320mm on the y. That's about 8.25 x 12.5 inches. Printing with hips is similar to printing with abs. Hot end needs to be 225 to 230 degrees C and the heated bed a steady 110 degrees C. I have found that using Bondo spot and glazing putty works great for filling low spots and grooves. Than I finish off using build primer and then a black guide coat before wet sanding with 400 wet or dry paper. Just like preparing a real car for paint. I don't get deep groove as I print with a .2 layer height for larger pieces and .1 for smaller.
-
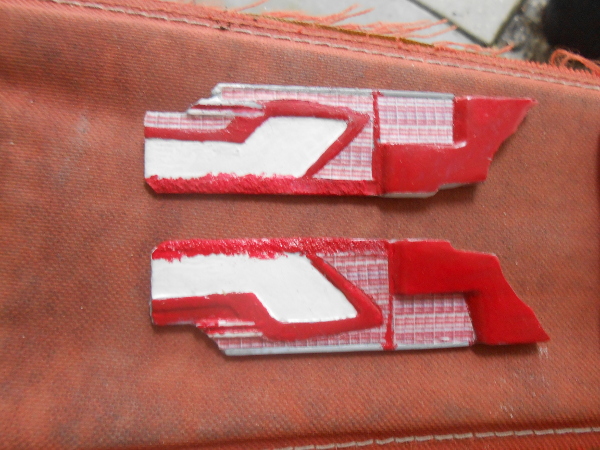
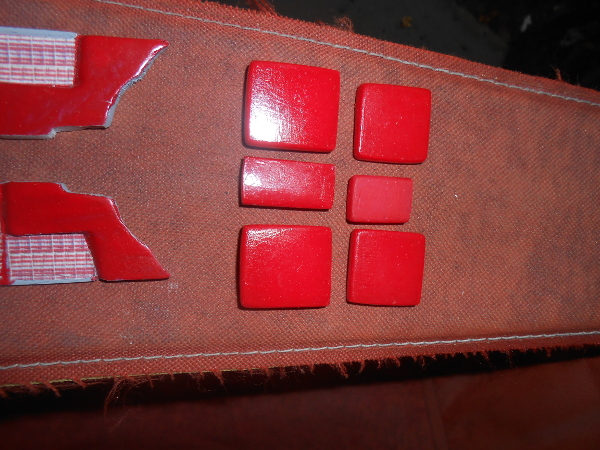
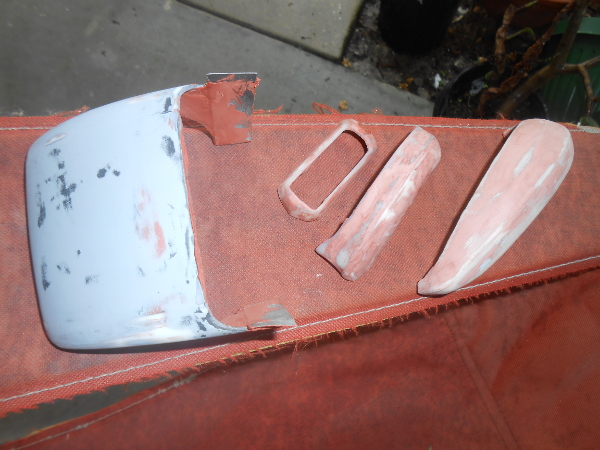
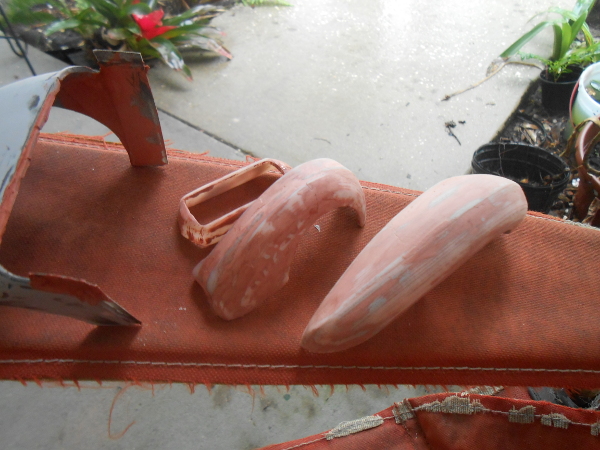
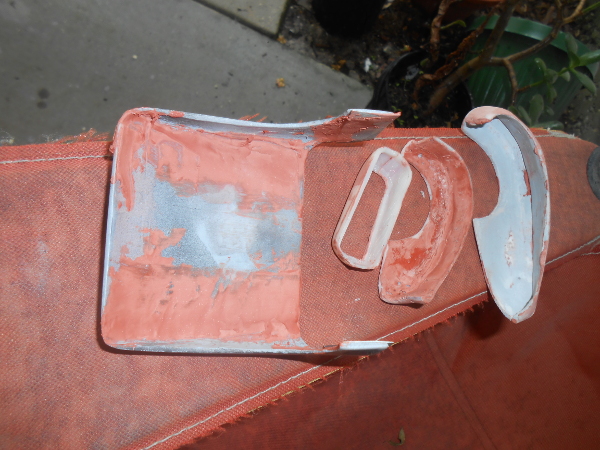
And lastly, the interior side panels and front seat pieces for my 59 Plymouth Sport Fury vert. These are 1:24. I have to do some cleanup and repainting on them yet, but you get the idea. Semetrical. The key word for me is semetrical. All in all, the prints need some kind of finish work to them. Some alot, some little. The big thing for me is that I can produce a model, or models or parts that I would have a tough time scratch building. None of this can be done without being able to create a printable 3d file. The key word here is printable. Not all 3d files are printable. That's learning curve 1. Learning curve 2 is learning how to operate your printer. Learning curve 3 is learning how to print the best part. This, many times, involves going back to the 3d file and modifying it. So again, It all starts with being able to create the printable 3d file.

-
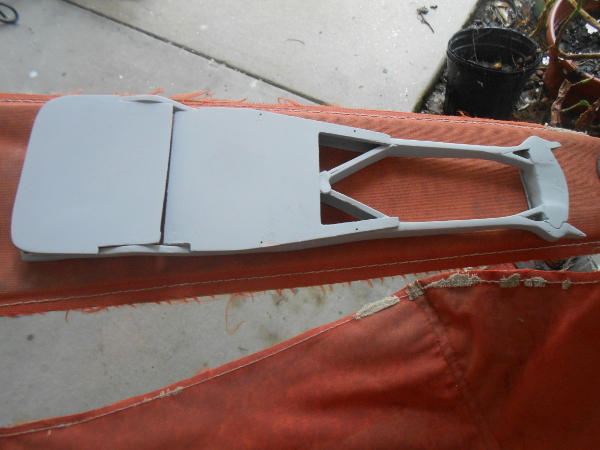
Here are more prints in process. The rear body section was made from 5 prints, the front and rear fenders and grill from 2 pieces in each. Then you have to sand and grind out the support with a motor tool. Again, notice how both sides of the grill frame and the body are semetrical.
-
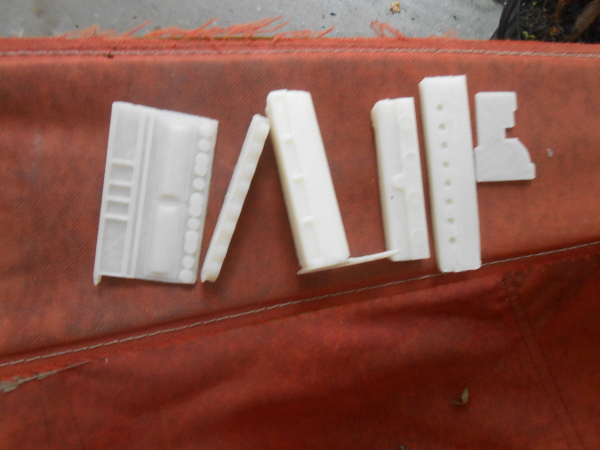
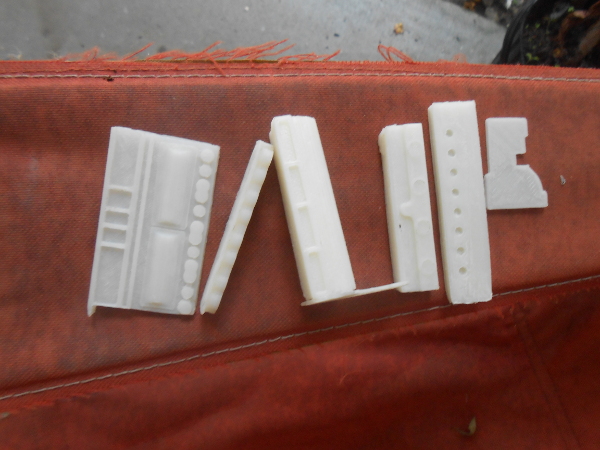
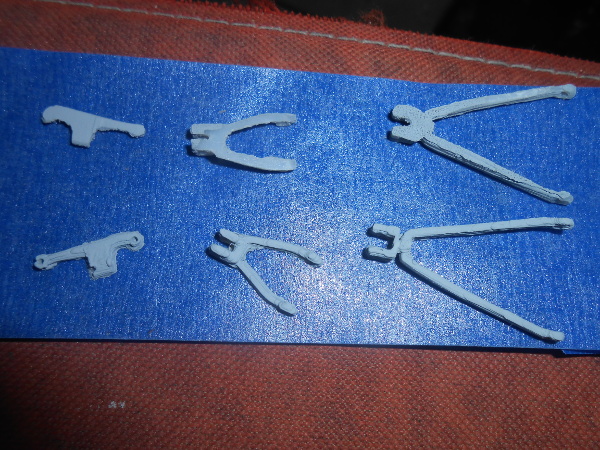
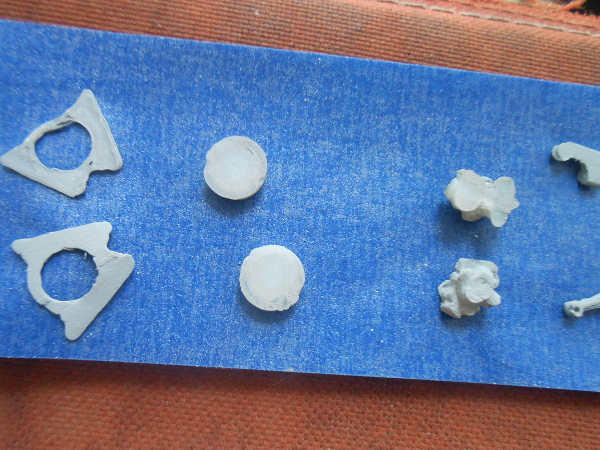
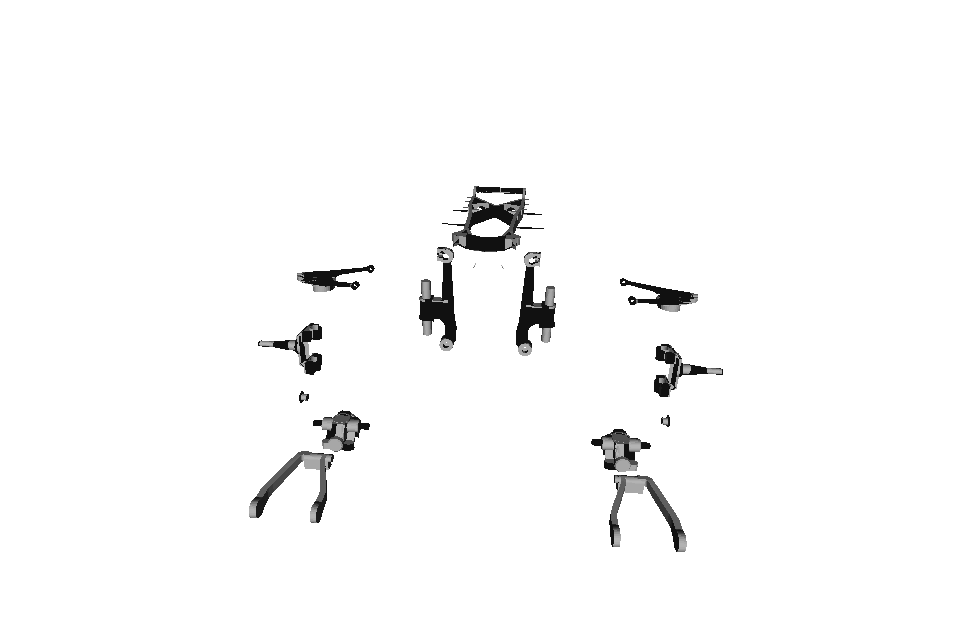
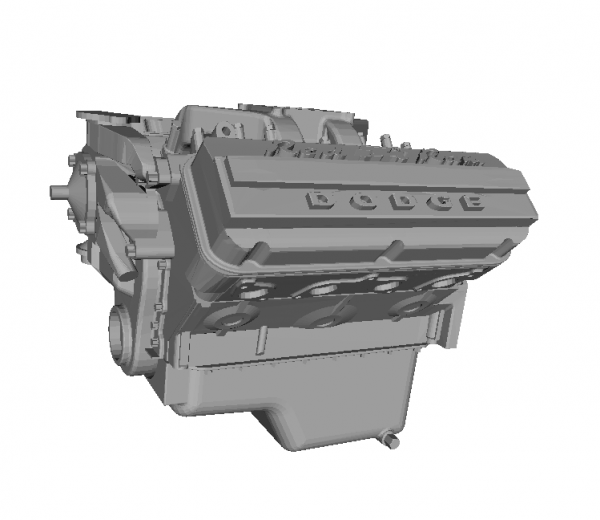
Parts I just printed today. The streight 8 engine block block for the 1934-36 LaSalle. These are exactly as they came from the printer. Notice that the one side had to be made into three prints as the orientation for the best print was not the same for all three. Notice the detail. I suppose I should tell you that these are all 1:18 and anything smaller would result in some peices being unprintable. I had to change the thickness on some of the arms of the suspension pieces as they were too thin and broke easily.
-
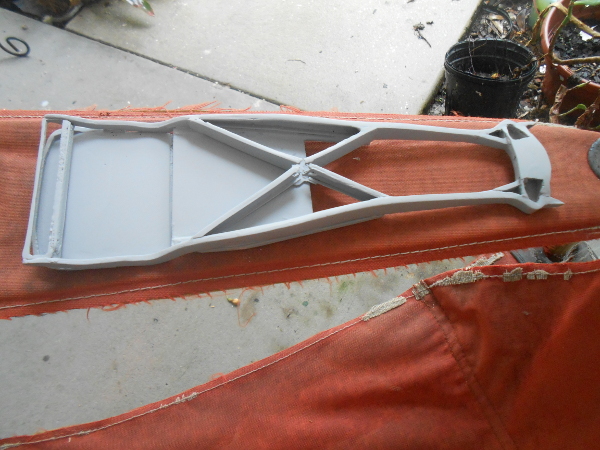
The frame and front suspension pieces. Still some work to be done. There is built up build primer on some of the suspension pieces. The prints are cleaner that they appear. Notice how everything is semetical. 9 separete pieces for the frame itself, not counting suspension pieces. The front suspension will be functional and ant glued together.
-
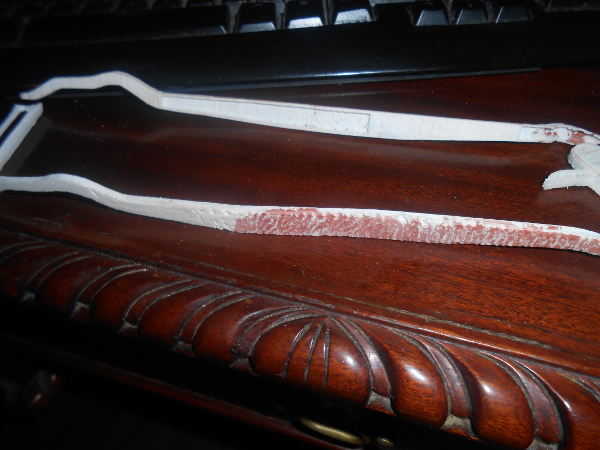
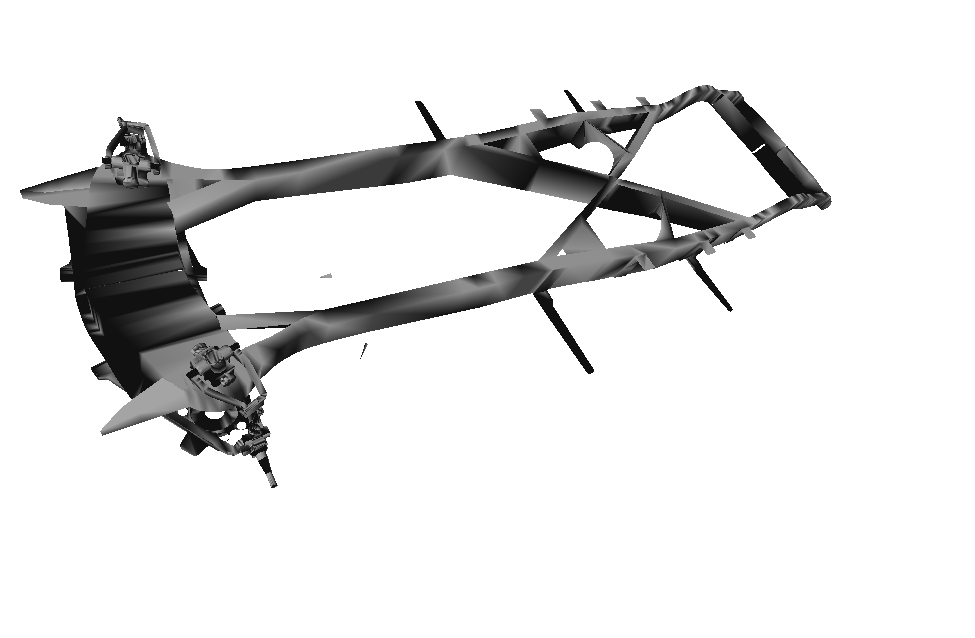
I spent a good part of today preparing for this post. Mike, I checked out you engine on Grabcad on I am in complete awe. It is truely amazing. Youasked about resolution so I am going to post up pictures of some of my work. Ken, I am in agreement with most of what you said except having an acceptable material to print with. I started using hips this January and thus have a print that accepts paint, prints nicely, sands easily, etc. Mark, you crack me up. Your posts tell it like it is. The last post in Jordon's thread left me in stitches. Jonathon, I use Blender too. Tom, 3d printer are alot different than lathes. There is and tutorials everywhere. Remember, they are an open source product. So who am I to make all these statments? I am a 69 year young man with. A degree in business, major in accounting. In otherwords, I'm an accountant. I have no education or training in anything reguarding 3d drawing or printing. I say this because I want people to understand that anyone with the mindset can accomplish what I have in the last 1 1/2 years. I taught myself to use Blender. I build my own printer. I taught myself to use the printer and fix it when it messes up. Be aware that they all mess up. Even the 2k ones and you better be able to correct the problem. I'm trying to keep this simple and not get side tracked. Onward to the examples. The frame in my stl posted above. You have to learn orientation for the best print. I tried printing the frame rails and rear cross members as one print. Disaster. Support in all the hard to remove places and the print was plain garbage. Back to the drawing board. Printed the rails seperate layin on their side. The result is the frame on my desk.
-
Very nicely done. I think you may find this sight interesting, if you don't already know about it. https://grabcad.com/home I have to create stl files in order to print out model car parts. Here is a frame I drew up, printed out and mostly assembled.
-
Actually, I like the version of Ike and Tina Turner. I have it in my collection. But then, I'm of that era.
-
yea, but what's worse is that there are people who would beleive the realtor.
-
Big Mama Thorton Hound Dod - covered done by Elvis -http://www.youtube.com/watch?v=wxoGvBQtjpM
-
Gary Moore - The Sky is Fallin first cut on this vid
-
Gary Moore-Blues for Jimi
-

Where do you go for research pics
my66s55 replied to Psychographic's topic in General Automotive Talk (Trucks and Cars)
Hemming is a source I like to use. Here's a 1954 http://www.hemmings.com/classifieds/dealer/chevrolet/corvette/1586085.html There's even underside shots. -
I went with real this time.
-
Hands down, Smooth On. Used it for years. Tried others, not the same. Also, there's a distributor in Orlando.
-
Have you ever noticed ?
my66s55 replied to Teddy J. Tannehill's topic in General Automotive Talk (Trucks and Cars)
nope. never noticed. -
Air bubbles in Alumilite resin
my66s55 replied to Austin T's topic in Model Building Questions and Answers
I have held off answering this until I tested this answer myself. I had just visited my local Smooth On distributer at the time this question was asked. While there, I asked why the Smooth Cast resin that advertises no bubbles, was coming out with bubbles big time. He explained it to me thusly. Pour parts A and B into your separate containers. Instead of mixing them right away, let them sit for 5 to 10 minutes to gas out. Remove any visable bubble and combine slowly into the mixing container. stir gently as to not creat any new bubbles. Pour into mold gently. My results, perfect casting with no bubbles. -
3D printing growing as we speak
my66s55 replied to bbowser's topic in General Automotive Talk (Trucks and Cars)
There will be leaps and bounds in the developement of decktop 3d printers over the next few short years. DLP printers started showing up in the open source community over the last couple years and also, the B 9 creator printer was introduced. These have incredible detail, but rather small printing footprint. DLP hasn't really taken off and I believe that many were waiting for the patents to expire on some of the laser printers. These patents started expiring this month. Marlin, which is one of the open source firmware that runs the ramps electronics for FFF printers, just announced that they have incorperated the ability to print with a laser with the firmware. Once the open source community starts developing laser technology, thing will really develope. For those that don'tknow, it was the open source community that developed the FFF or FDM printer. Makerbot came out of the reprap project. These printers that people post on this forum are only someones design of the same printer with maybe some improvement, but that is what it's all about. Taking something and improving it. The reason these printers, FFF & FDM are coming down in price is because:1-The electronics are about 1/3 the cost they were a year ago 2- the design is cheaper to build 3- Better technolgy is developed. Using the vcr analogy, the cheap printers are the vcr, the DLP printer is the cd and the laser printer, just over the horizon, is the dvd. -
3D printing growing as we speak
my66s55 replied to bbowser's topic in General Automotive Talk (Trucks and Cars)
I never indicated that it was. I mearly stated that flexible pla has been around for awhile. -
3D printing growing as we speak
my66s55 replied to bbowser's topic in General Automotive Talk (Trucks and Cars)
Selection_015.bmpI print with hips. I just bought two new spools at $33.00 each. It's a little different from pla or abs. The main reason it has appeared is to be used as the support for abs. This is one of the benefits of a dual head printer. One prints in abs, the subject, the other the support in hips. There is a natural product made with oranges that disolves the hips, but not the abs. I print hips at 225 degrees C at the hot end and 110 degrees C on the heat bed. It gives me a nice print, but can warp easily. Attached are 2 interior side panels for a 59 Plymouth Sport Fury I printed in hips. -
3D printing growing as we speak
my66s55 replied to bbowser's topic in General Automotive Talk (Trucks and Cars)
Flexable pla has been around for a while. It's just difficult to print. I could print with this, but it is a problem for some so I stay away. -
I'm going to say real this time.
-
3D printing growing as we speak
my66s55 replied to bbowser's topic in General Automotive Talk (Trucks and Cars)
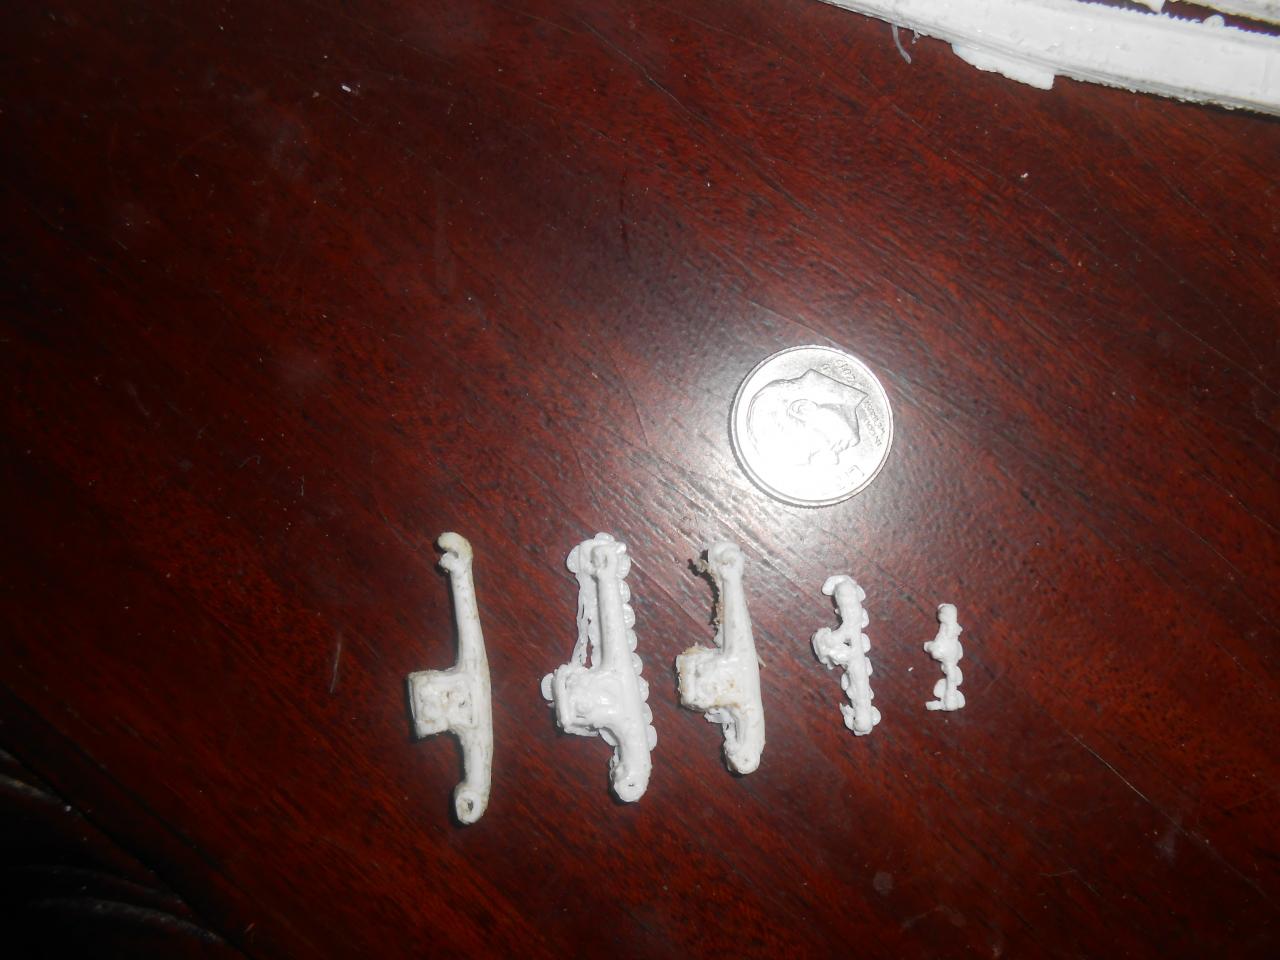
I haven't printed a body yet. Here is a pic of a front suspension piece I've done. The largest is 29 mm and the smallest is 10 mm and both have the same level of detail. Only the largest has had the support material cleaned up. Filament is not $50 a pound. I pay $37.95 shipped from a good U.S. manufacturer for a spool. Spool are standard 1 kilo or 2.3+ pounds. Oh, the 10 mm piece is 1:25th.