
jjsipes
-
Posts
1,671 -
Joined
-
Last visited
Content Type
Profiles
Forums
Events
Gallery
Everything posted by jjsipes
-
Love these cars. Great looking build. Thanks for sharing
-
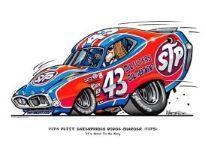
1965 Sox & Martin Belvedere Super Stock
jjsipes replied to jjsipes's topic in WIP: Drag Racing Models
The colors I used were Testors White lacquer, Scale Finishes Blue Fire Metallic, and Testors Italian Red lacquer. -
Here is something I have been messing with while I have a few minutes down time at work. Didn't like the way Monogram had molded the front end of the Cuda and how it looked once flued to the body. It left a horizontal seem in the fender which is not on the real cars. Putted, sanded the character line in and scribed the panel line where it is on the real car. Looks better I think. The wheel lip didnt align for nothing so I had to build that as well.
-
Anything new on these in resin Modelhaus is no longer taking orders?
-
I've got one of these bodies as well, shipped as anectra when I placed an order for 3 other bodies. Don't know why it was shipped but I've had it for years now. Never really thought about building it because of the cargo area. Will be following. Looks great so far
-
Thanks guys for the replies. I plan on using the flathead with triple dueces that the kit comes with for the engine. As far as the tuc n roll inserts, I don't recall which Evergreen StripStyrene it was but it was a large sheet of Metal Siding that I found that looked like it might work. Cut out the stock upholestry and glued in pieces on the trim panels and seat inserts. Not happy with paint coverage in the interior, this kit started as being molded in orange not covering well, even after priming and painting silver. This Dark Blue Metallic does have a purple look to in it the light.
-
Here's 2 more pics.
-
Here's a little something I dug out of my stash. Painted last summer with Tamiya Dark Blue Metallic. Cleaned up the floor pans since it had the exhaust molded to it. Interior will be a cream color to match the Revell 1932 Ford wheels with caps and rings. I cut both the interior tub and bench seat and inserted plastic to replicate tuc n roll.
-
Looking good. Keep it up
-
Would love to get a couple myself
-
Got some more work to do the wood trim but getting the door panels close to being completed. I think I might use these on the Green Charger for something different.
-
Got some interior work done. Got the white painted, carpet black with embossing powder, got the green painted and the carpet dark green with embossing powder.
-
I liked the kit. Can't really say how it builds uout of the box, since I cut mine up. I have a couple more that I started cutting up as well but haven't finished. If I had a gripe about the kit, it would be the lack of depth in the grille.
-
The Hemi Orange one will have the 440 kit engine but the Green one I got a resin air grabber hood and buckets resin parts from Harts Parts so Ibwill try and scavenge up some Hemi parts for it.
-
Looks great. Love these little Darts
-
Got the 2nd body ready for paint. Primed with Tamiya Gray Primer, then painted it Tamiya Silver Leaf for a blocker, taped up the body and painted the vinyl top with Testors 2 step vinyl top system. I was hoping to get the vinyl top a little darker than the main body, reason for black vinyl top base, when I sprayed the whole body with Scale Finishes Sherwood Green. This is what I got. Not really what I was looking for but not to bad I guess.
-
Got it cleared and then taped up to spray vinyl top. Used Testors White 2 step vinyl top paints. Just untaped and have tape marks in the clear after allowing it to dry for a couple days. Hope it will polish out. I used the gray body for the Hemi Orange with White Vinyl Top and will use the Orange molded body for the Sherwood Green Charger. I have that one primed, painted silver for a blocker of the Orange plastic.
-
Painting has been started. Started with the Hemi Orange first.
-
Got a couple of 71 Chargers started. Need to get some good weather to do some priming. First one will be Triple Green with Sherwood Green paint , green vinyl top, green interior. Need to come up with some green for the vinyl top and interior yet. Got the Sherwwod Green from Scale Finishes. The second one I was planning on Hemi Orange with a White vinyl top and white interior but, am wondered with bleed through of the orange plastic. Worried about bleed through with the Orange plastic though. Why mold a model in Orange or Red? Was surprised to the Orange plastic is actually a metallic (Dirty Donny kit). Used .040" half round plastic to replicate the vinyl top trim on both.
-
Thank you Dave. Iook forward to buying many more of these kits and anything else Moebius brings out.
-
This is what I was planning for the intake setup for the engine but, it didn't fit under the hood. So I found a chromed intake and air cleaner in the AMT 55 Bel Air so, I decided to use them instead. Here is the carpeting using Embossing Powder colored Sapphire from Michaels.
-
Looking like a cool idea. Have a similar project going.
-
Getting the engine together for this thanks to Replicas in miniature of md. Will post picture tomorrow when I get more completed. Redid the carpet using embossing powder instead of flocking, looks much better. Need to get this completed next.
-
I just pulled my unbuilt Johan Sox 71 Cuda and it doesn't have the fender gills. So that would need to be added for a replica stock somehow. Then the billboards will become an issue as they are sized for the Revell 1/24 Cuda.
-
Thats what I was thinking as I want to build a stock 440 six pack car. I knew the Revell 71 was from the 80's or early 90's and was 1/24 scale but I just couldn't get over the differences in them. I have build a few Revell 71's but after building the new 70 the old 71 looks outta place.