

Ryan S.
-
Posts
922 -
Joined
-
Last visited
Content Type
Profiles
Forums
Events
Gallery
Everything posted by Ryan S.
-
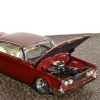
Here's a little update on where I'm at. Spent a lot of today sanding, sanding sanding. You can see that the sides are all smoothed out. After all that, I've had to put another coat of the putty on it. This will set up tonight and I'll get back to sanding tomorrow and the plan is to hopefully get a light coat of primer on it after, so I can see where else will need some attention. I've started working the hood to get it to fit. Not easy. It's real rough still which is why it's sitting a little wonky. I just threw these wheels on it for mock up, they won't be what I'll end up using. I've started a few of the small sub assemblies, mostly the engine. Nothing has paint yet, so I'll spare the shots for now. I plan on getting primer on all the other parts and starting some painting soon as well. I plan on putting a lot of time in on this one this week so hopefully we'll get some good progress! Thanks for watching!
-
Wow, sweet ride! Nice color choice. The curb feelers are a nice touch too!
-
Revell '40 Ford Coupe Hot Rodded 60's style - Completed
Ryan S. replied to Bernard Kron's topic in WIP: Model Cars
Love it! That blue is gorgeous! -
This is looking sweet. Nice paint scheme and graphics. The flames are a nice touch on this one. That interior looks great. I especially like the center console. Looking forward to seeing this one done!
-
1999 Ford SVT Lightning
Ryan S. replied to camaro73's topic in WIP: Model Trucks: Pickups, Vans, SUVs, Light Commercial
Looking good from here. That red paint is screaming! -
Thanks James. I don't know about being a trend setter, but if I inspire anyone to undertake some styrene surgery then that's ok by me! To answer your question, no I haven't thought about going retro with it. I think I like the more modern, sleek street machine look for this one. Not that one with a classic station wagon wood panel look wouldn't be interesting, just not my cup of tea for this build. I'm keeping busy on this one with a lot of sanding and continuing body work. I'll post some pictures when there's something significant to show. I think I'm going to keep the rear stock. It makes things a lot easier. There would be too much filling and modification so I'm going to skip it. I think. That's where I'm at for now at least . Thanks for looking, I hope to have some progress and primer shots soon. Once the body is done I can then concentrate on getting the chassis to fit right. I've got some wheels for this in the mail and once I get those I can figure out any suspension mods that will need to be done to fit then. Lots to do...whew!
-
Lets do a 1964 1/2-1973 Mustang CBP to go with the others!
Ryan S. replied to Olskoolrodder's topic in Community Builds
If this stays an open ended build I'll jump in eventually with the same '70 Boss 429. I've got big plans for it though and have to work through some of the other projects I've got before I add one more. But I'll be watching as this develops, for the inspiration. -
Beautiful model. Very well done. Great color choice and stance. I'm cool with the wheels, to me they don't look out of place.
-
Custom Chevelle Finished Moved to under glass
Ryan S. replied to customsrus's topic in WIP: Model Cars
Beautiful paint job. How did you do the masking for the checkers? Did you cut the squares while the tape was on the body? -
Looking great Cruz. That interior looks real good with the brown. Nice to see something kind of different.
-
I've just got to go model on this one too.
-
Wow great job making the concept a reality. Great color combo.
-
Nice job on this one Doc. Came out great. I love the different colors. The base looks really good too. How cool would it be to see a similar themed hearse to put that sarcophagus into! Yowza!
-
Holy cow this is cool!
-
1949 Mercury Project - Update April 27 2012
Ryan S. replied to Luis Ayala's topic in WIP: Model Cars
I looked through your build photos, you've got a lot of nice stuff going on here. I'll be watching. Can I ask why you separated the front fenders from the body? -
The Arizona seat looks great so far and gives this just the character it needs. Good stuff!
-
Thanks for the advice Cliff! I definitely don't like the plain side wall on the Revell tires. I'm going to do some imagineering before cutting up any of the back parts.
-
Here's a couple of Magnums I found on line that I like the look of. The more I see them the more I like the look of the blacked out rim with a chrome ring. I might go for something like this:
-
Thanks you guys. Totally ok to say! I'm not sold on this wheel and tire combo either. I don't think I have anything else in the bin that would work on this one though. I'm going to keep an eye on ebay and look through a couple of the retail sites to see if anything catches my eye. The rims on there now are 21mm in diameter. Anyone know what that scales out to in inches?
-
This is coming along nicely. The section looks good and your welding technique is inspiring. I'm keeping an eye on this one!
-
Thanks for hanging in there with me on this one, thus far and thanks for all the replies! One last eye-candy update for today: Here's how the back would look stock. What I'm contemplating is doing something like this and integrating the single piece tail light into the rear and maybe adapting the Challenger rear bumper like I did in the front. It would add a lot of extra work here, but might look cool. I'm afraid though, that if I do go this route and it doesn't look good I'll have messed up the project. Decisions, decisions...feel free to let me know your thoughts. Here's a shot of the Chally bumper. If anything, maybe I'll integrate the bottom part in, and leave the tail lights stock. Thanks for looking!
-
So I've been tediously working on smoothing the front out. I decided to start out with some sprue glue for the beginning filling since plastic and plastic work best together. If I need too, once the major stuff has been done and I've primered, I'll fill in any small things with a dab of 2 part Bondo. In these pictures the front bumper is pretty much finished smooth, aside from maybe a little final sanding. I've still got to figure out how to best integrate that bottom lip. If anyone has a suggestion I'm open ears (or, eyes as it were). After I took these pix, I had to add a small strip of plastic to the top of the passenger side fender where it was dipping down a little at the joint. Once that gets cured up I'll sand most of it away to restore the curve on the fender top. Some of the filled spots are still a little soft so I'm going to wait until tonight or tomorrow to continue sanding.
-
Here I'm trying to get an idea of the shape that the hood needs to be trimmed to. I started laying tape along the hood opening. Then I ran an Exacto blade around the edge. I then just transfered the cut out tape onto an index card. I've laid the hood over the shape that it will need to be. I'll have to add on at the cowl for sure to get the length right. I've set this part aside for now though. I figure I should finish the body work as it might have an impact on the final shape the hood will need to be. More to follow!
-
Thanks for the comments everyone! I've been doing some more sanding and I got the last piece of the front back in place. I made up a batch of sprue-glue by mixing Tenax and some bits of sprue plastic from the kit. I'll use it as filler either tonight or tomorrow and then let that set up so I can sand it down. I'll see if I can get some pix tomorrow to satisfy your craving for eye candy. I noticed that the Magnum body has a lot of sink marks in it, especially the rear window pillars. I'm also trying to imagine how this would look if I integrated the Challenger rear bumper and body-width tail light into the rear gate. I would have to fill in the holes for the Magnum tail lights and shape the quarter panels to look right. Not sure if I'll go this route or not.
-
Looking good so far. I love the colors! Do/ did you have any problems with the tail adding weight to the rear and the car wanting to wheel-stand?