Reeves Racing
-
Posts
833 -
Joined
-
Last visited
Content Type
Profiles
Forums
Events
Gallery
Everything posted by Reeves Racing
-
Thanks Gene, I started out with the Revell kit and used Plastruct sheets, rod and tubing to make the flares and roll cage and suspension mods. The wheels and tires and parts of the front suspension are from the Tamiya Porsche 911 GT2 kit.
-
Thanks guys. I worked hard on this one.
-
All done

-
Shelby Cobra 427 '66 Sebring - 4/21 Finished
Reeves Racing replied to afx's topic in WIP: Model Cars
I have seen it Shay, you're right, amazing. There are a couple completely from scratch builds that are very educational and interesting too. -
Art-deco off the hook. Great idea and execution on the dash.
-
Shelby Cobra 427 '66 Sebring - 4/21 Finished
Reeves Racing replied to afx's topic in WIP: Model Cars
I really like your posts JC. I have learned a lot from reading and looking at your posts. The pictures are super high quality and you do a good job of showing step by step progress without 9 pictures of the same thing. Thanks so much. Great work here on this build as usual. -
Henry J Twin Turbo - Didn't see that coming..........
Reeves Racing replied to Codi's topic in WIP: Drag Racing Models
I was thinking the same thing. Some of you guys are so skilled your in the same class as Mr. Faberge. -
Thanks Dave, I hope you do. I would like to see someone else's interpretation of this car. Ed, I haven't heard of the Grey Ghost. I love road race cars, my shelves are full of them. That's a good idea. I kind of have a plan to take Revell's new 68 Camaro and puff the fenders on it like this and use the wheels and tires from the Hot Wheels Camaro kit.
-
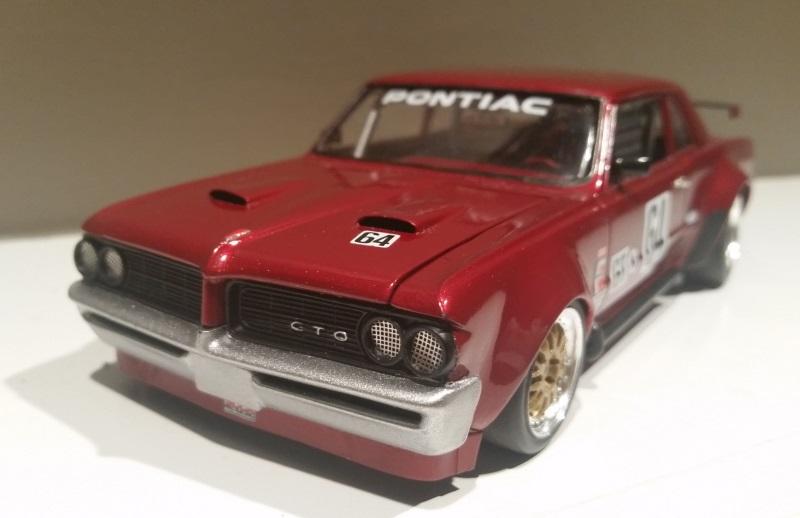
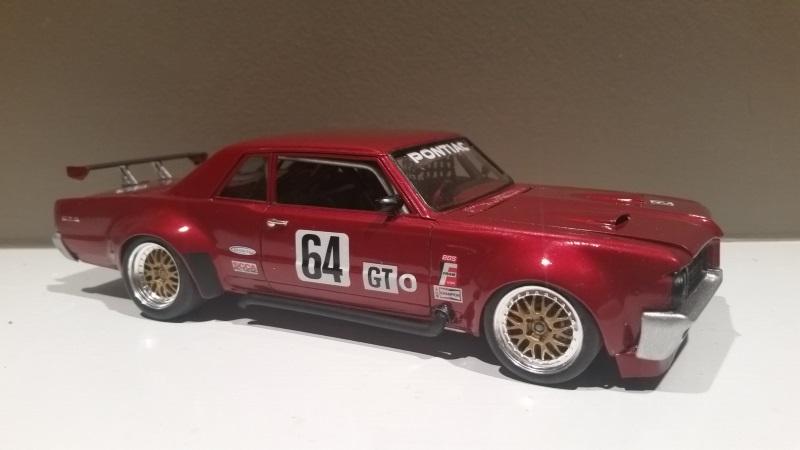
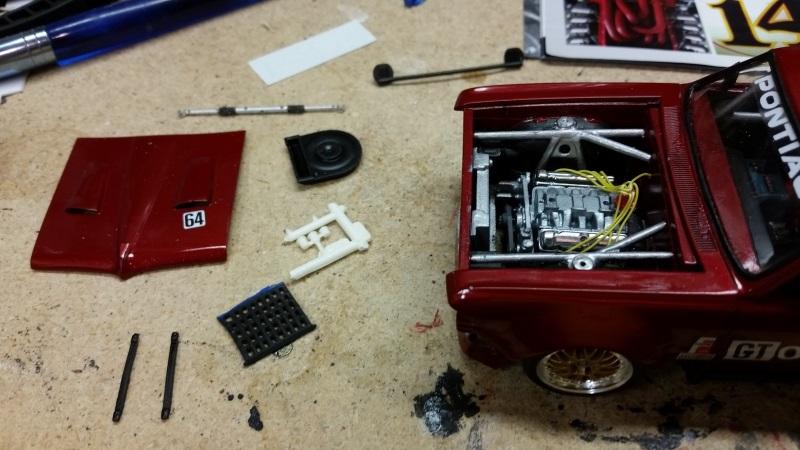
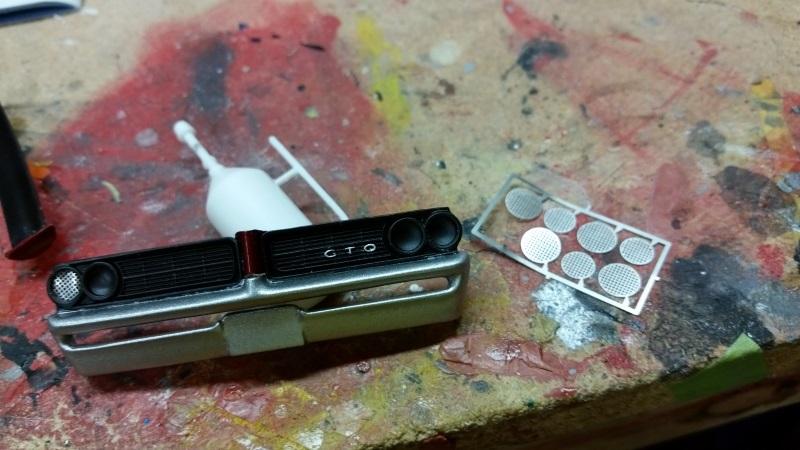
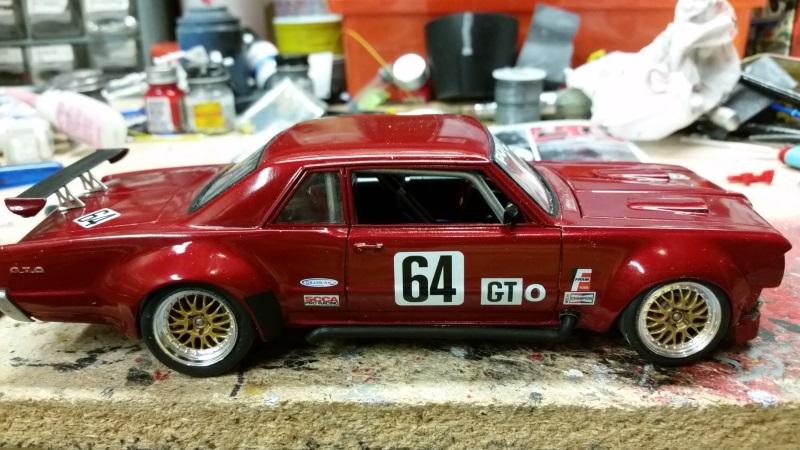
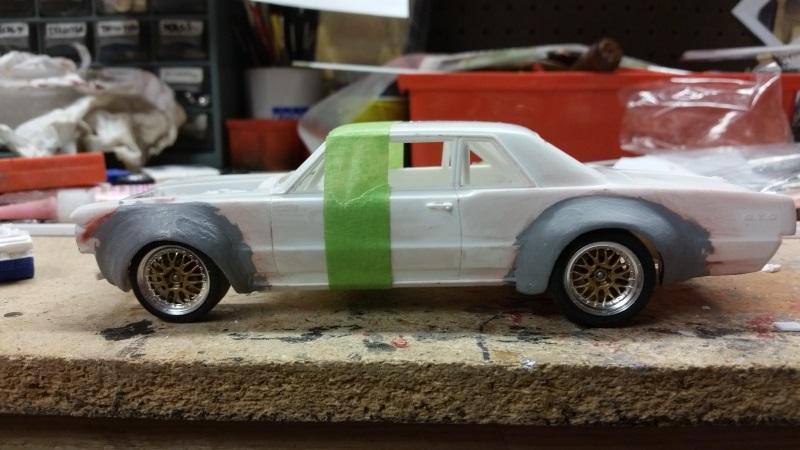
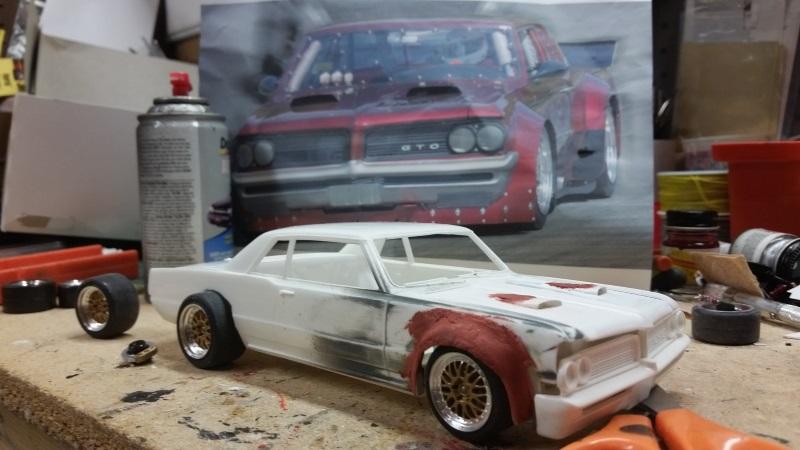
Thanks for all the encouragement guys! I worked on it a little last night. I just have a few odds and ends to detail and glue on. Then some touch up and a final polish. The front end is pretty much complete. Since I mostly use Eye Ball Engineering the lower a arms are not installed symmetrically so that the front wheels are right in the openings. Oh well... I have lost the carburetors from the GTO kit so I am going to have make some or at least the front one and then some spacers to hold up the air cleaner box. I want to make some ducting under the hood that directs the air from the scoops to the rectangle in the top of the air cleaner box. We'll see how much of a pain that turns out to be. I think I will have this wrapped up this weekend. Again thanks so much for all the nice comments. I know there are many builders on here that could do this subject more justice than me, but for my skill level this is one the best builds I have done and I am really happy with the way it turned out.
-
Great design. It seems almost a shame to cover any of the frame up. Great work.
-
El Ponchomino (Update 10/4 - finished)
Reeves Racing replied to RancheroSteve's topic in WIP: Model Cars
Great project. Nice work too, very crisp and clean. -
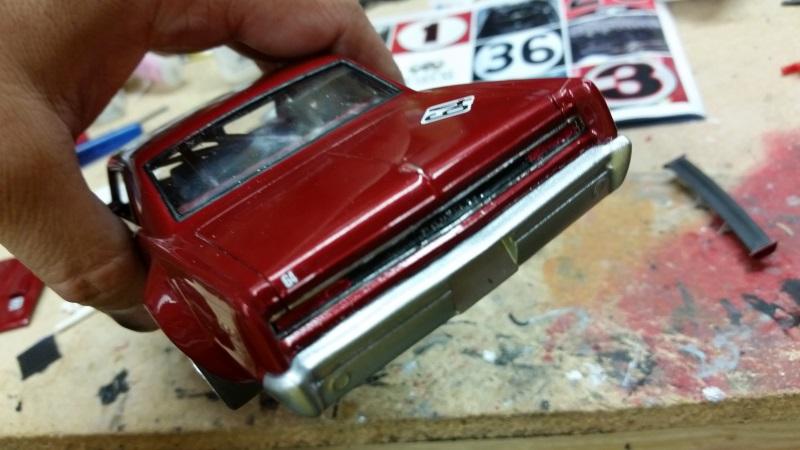
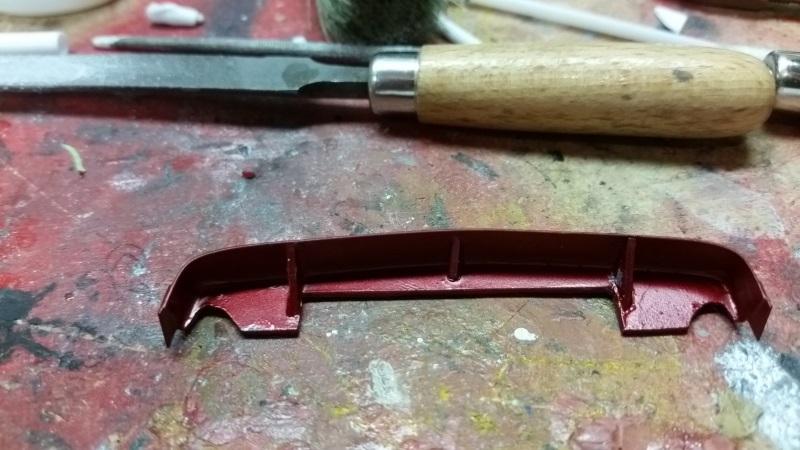
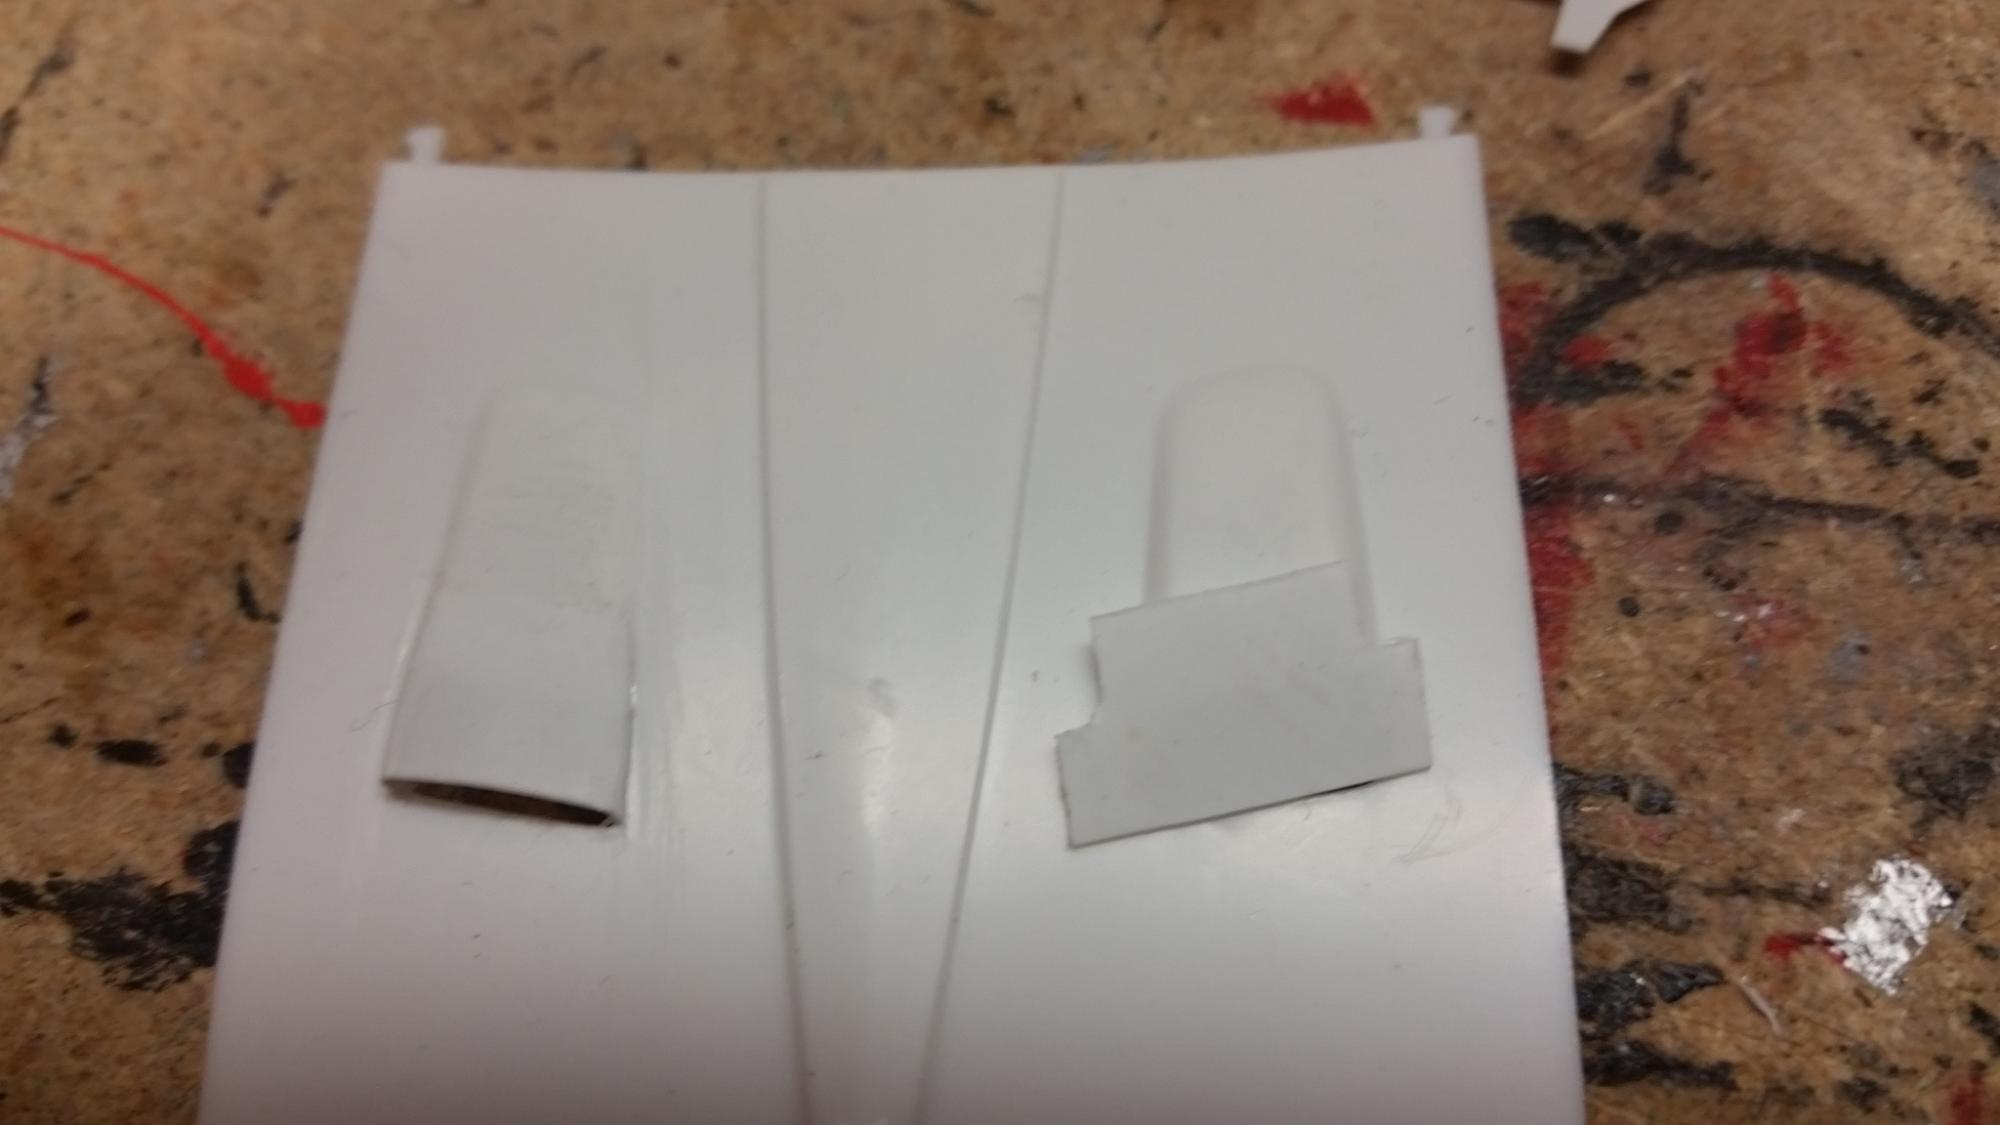
This is where I am now. I scratched together a few more pieces, headers, side pipes the distributor. I am using some parts box decals but it looks like I robbed a piece of one of them on a previous build. Time for some touch up. I made the front air dam from sheet stock. I mocked it up one last time before final detail painting and assembly.
-
Next up was spraying the body.
-
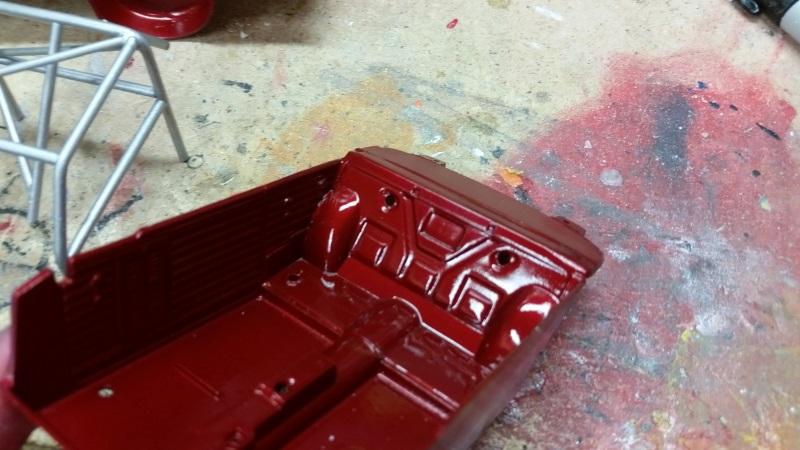
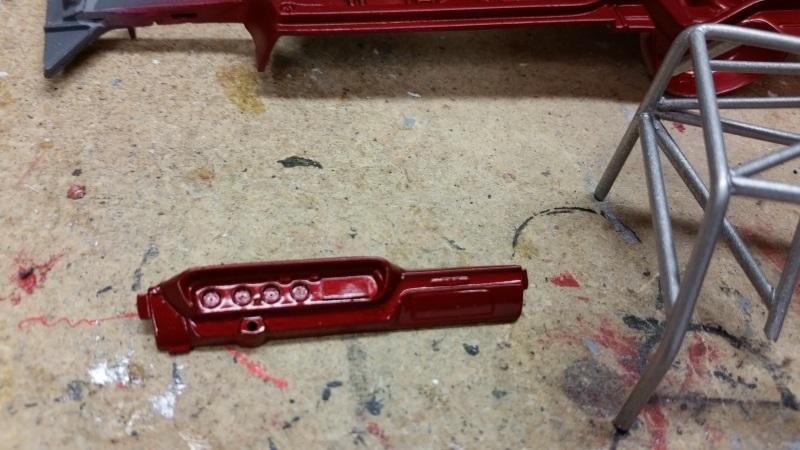
I used some touch of paint from my wife's car "inferno red crystal pearlcoat" I sprayed the first colors on most of the parts. Then masked and sprayed the second colors
-
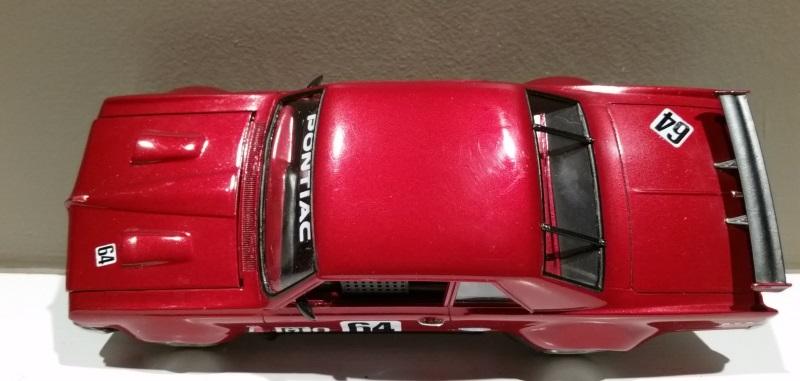
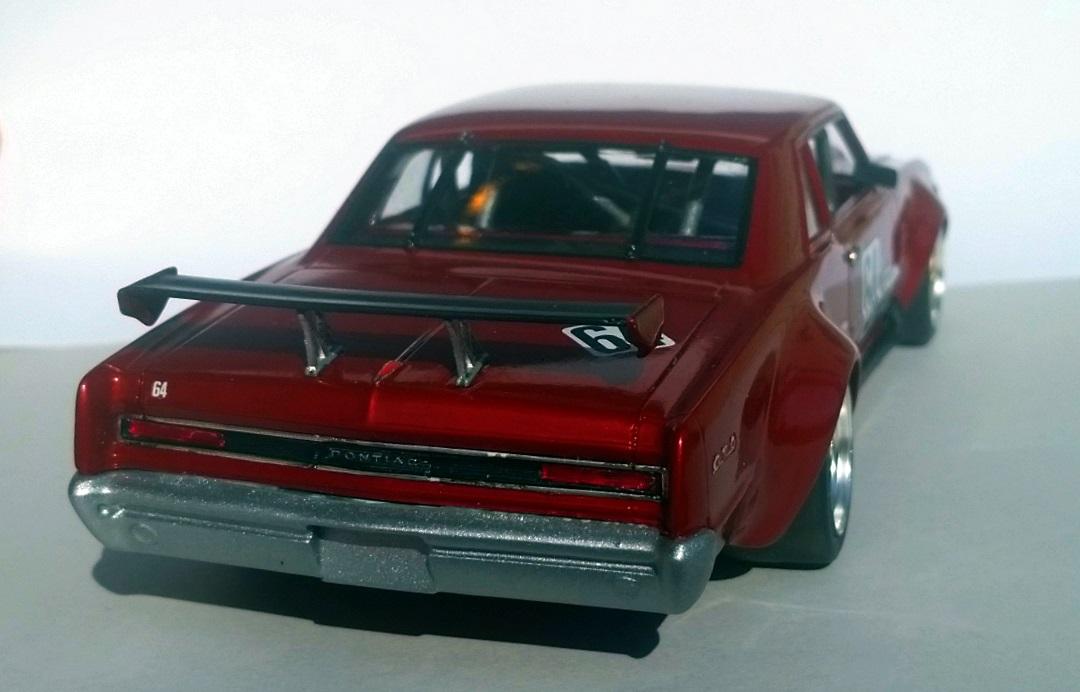
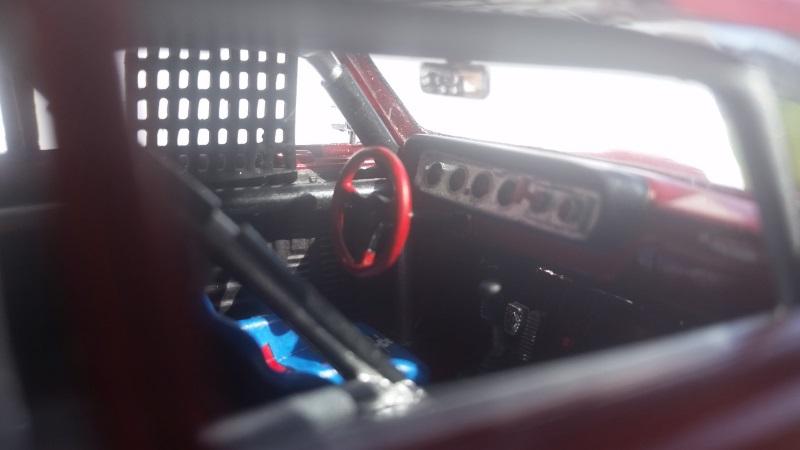
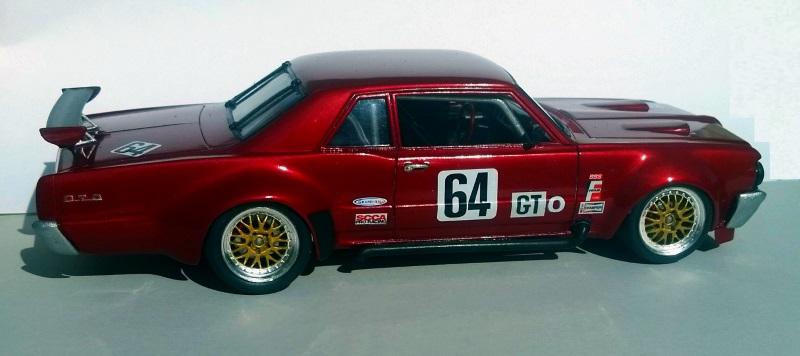
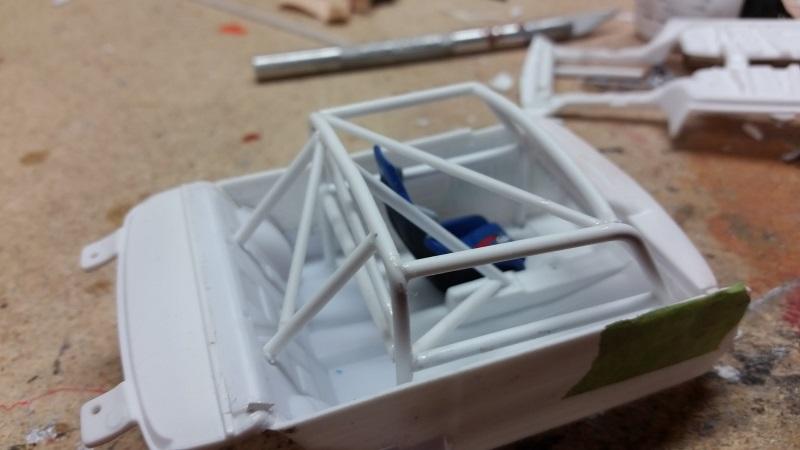
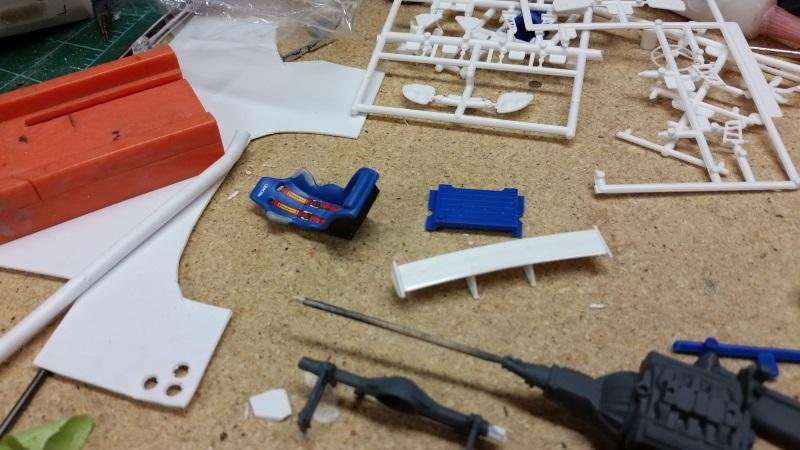
I used more rod to make a roll cage and some of the Porsche interior parts to give it more of a race car look. I decided to use a wing on the back from a parts pack instead of the flat spoiler the real car has. I primed everything.
-
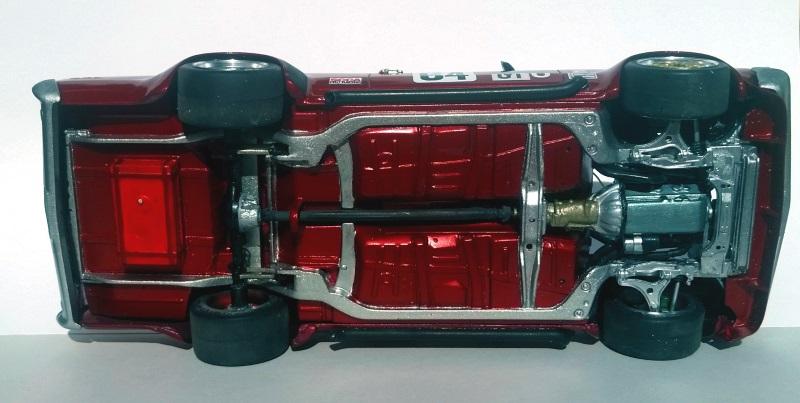
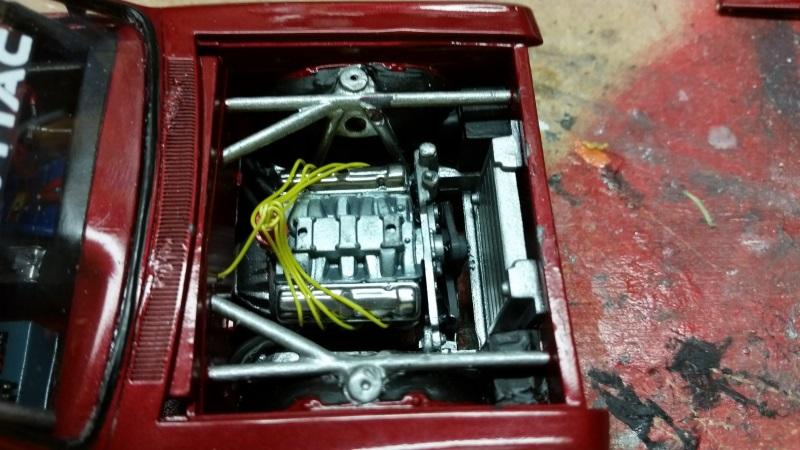
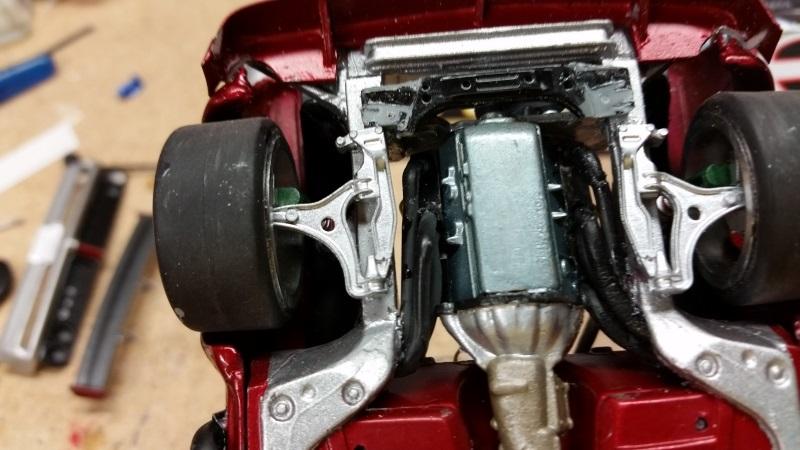
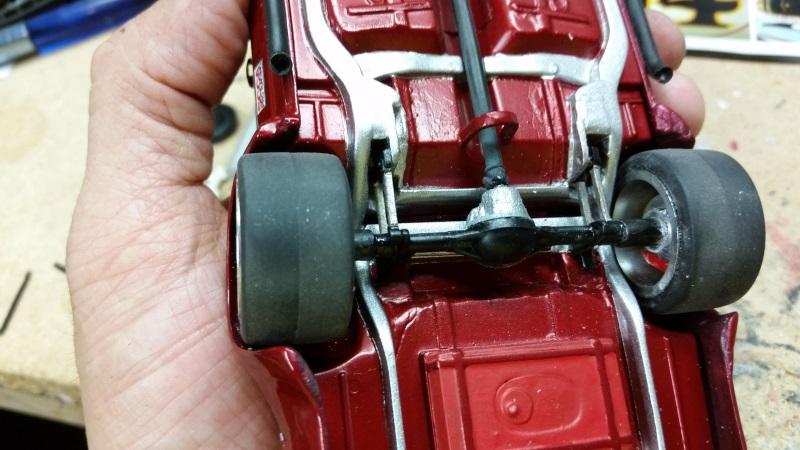
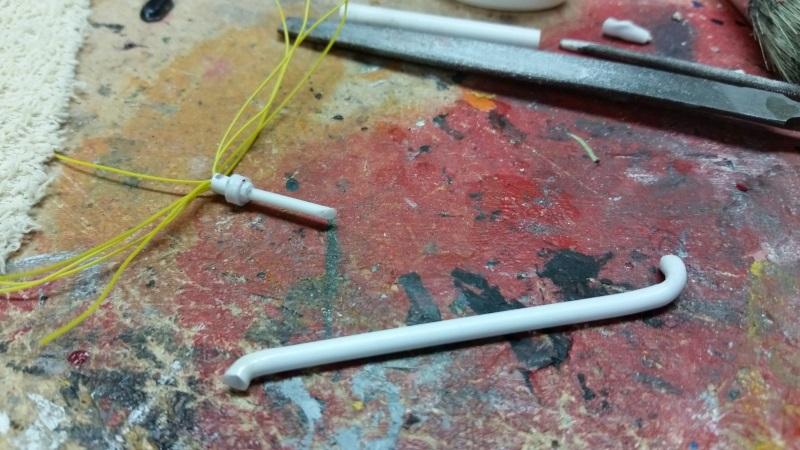
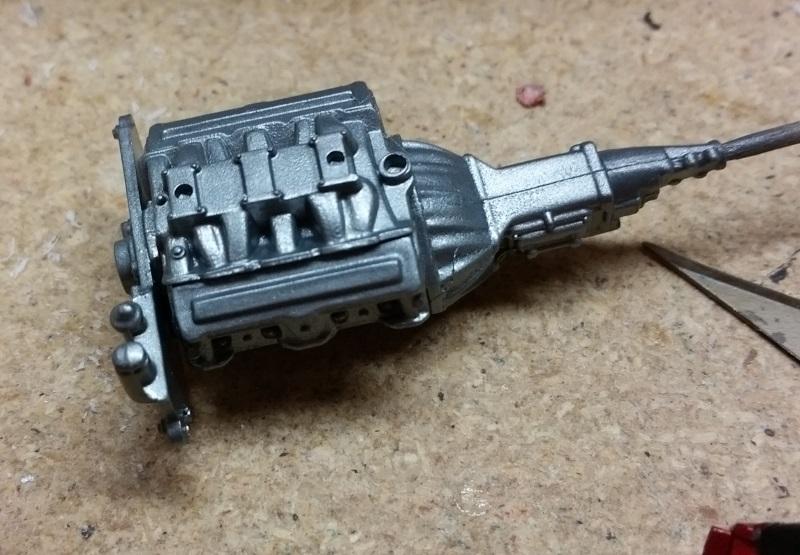
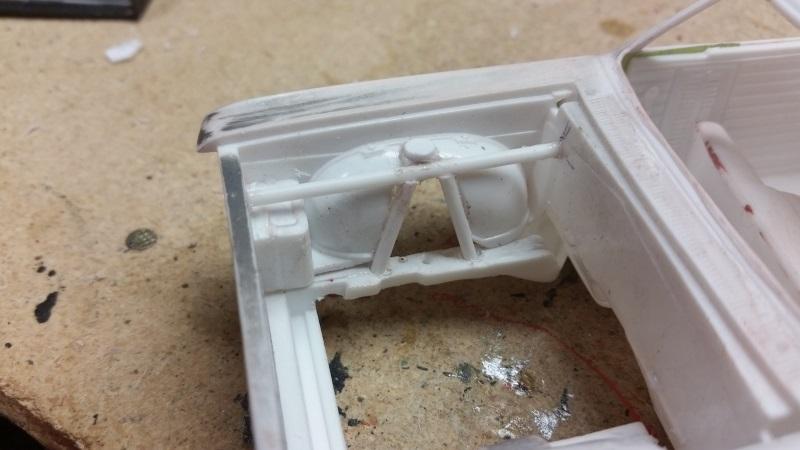
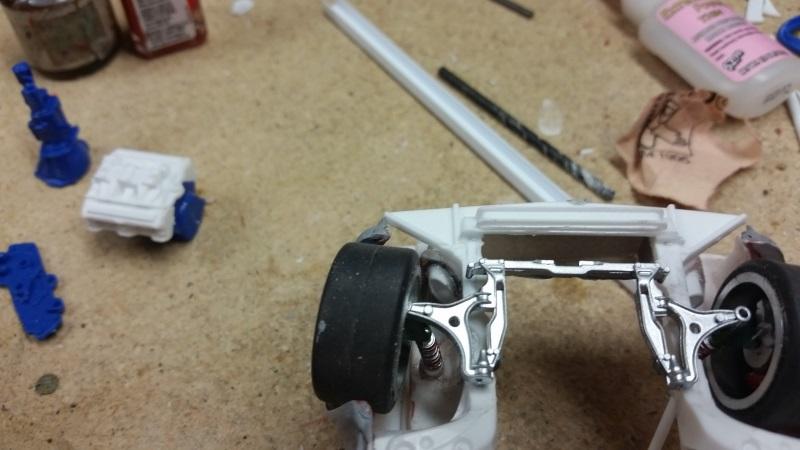
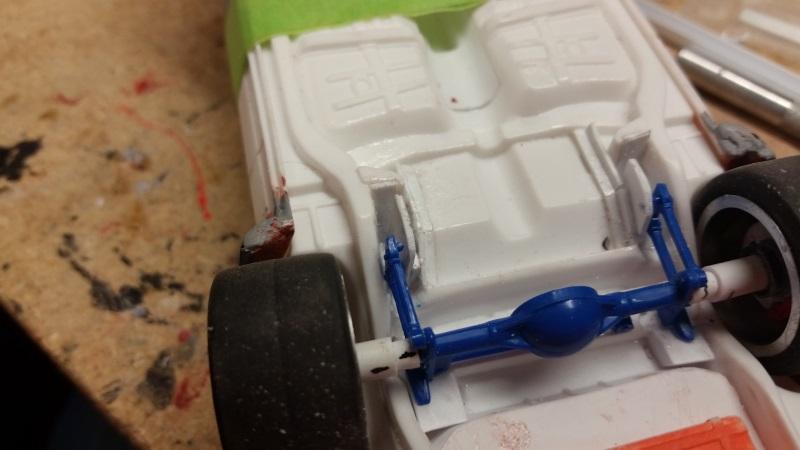
I used the rear suspension from the SCCA Camaro kit and the engine (with the Pontiac heads and manifold for grins) I needed make space for the 4 link from the Camaro kit. I used rod and tube stock to make a super structure for the front suspension.
-
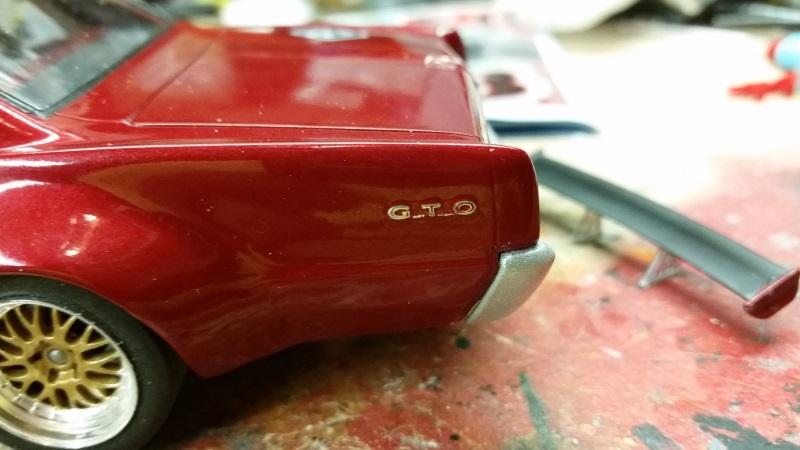
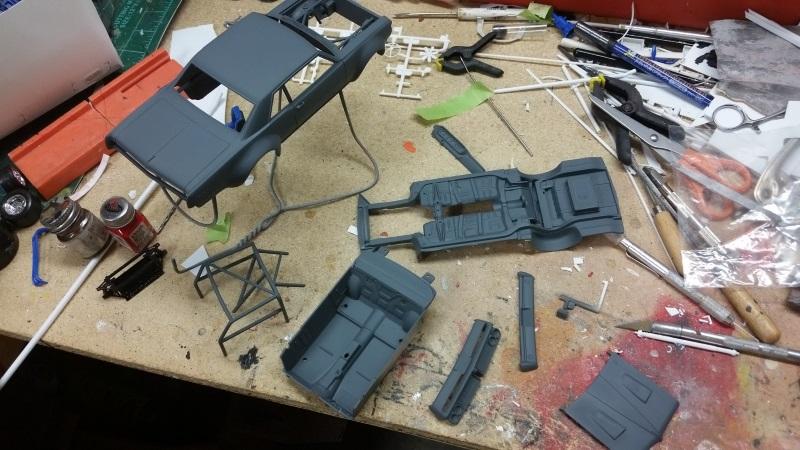
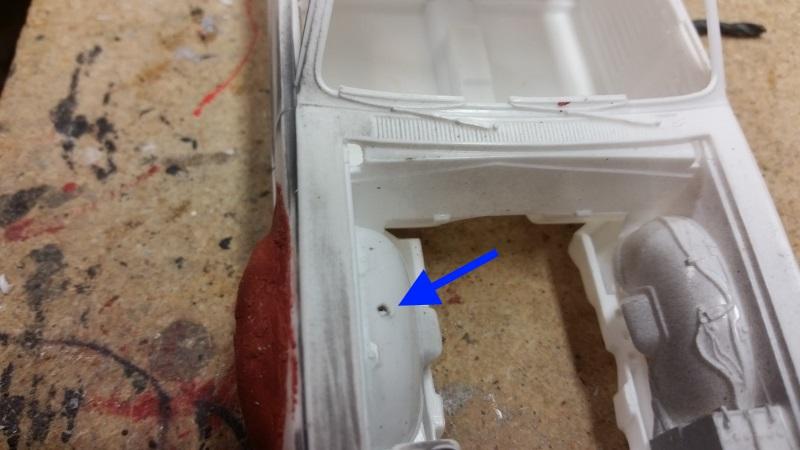
I cut the stock gas tank out and put in a flat piece of sheet stock and a racing tank from the parts box. I used the back of the Revell 69 Nova interior tub to graft into the GTO tub in place of the rear seat.
-
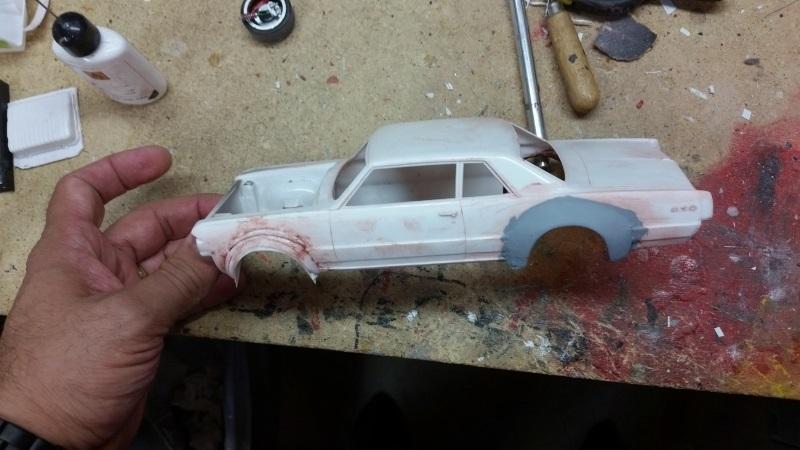
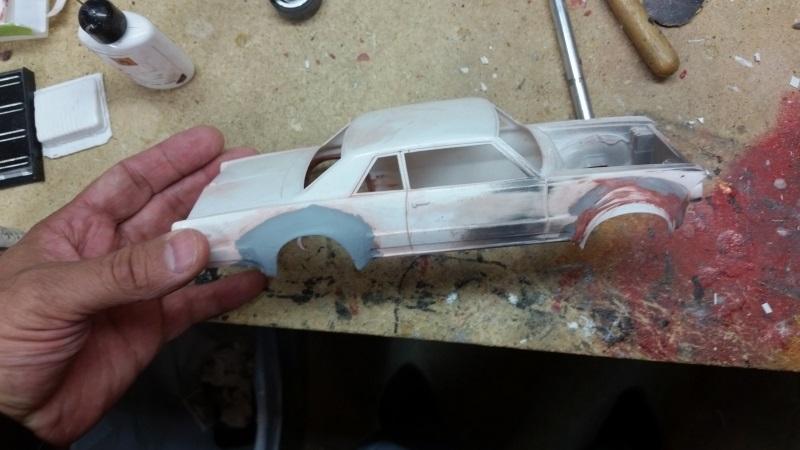
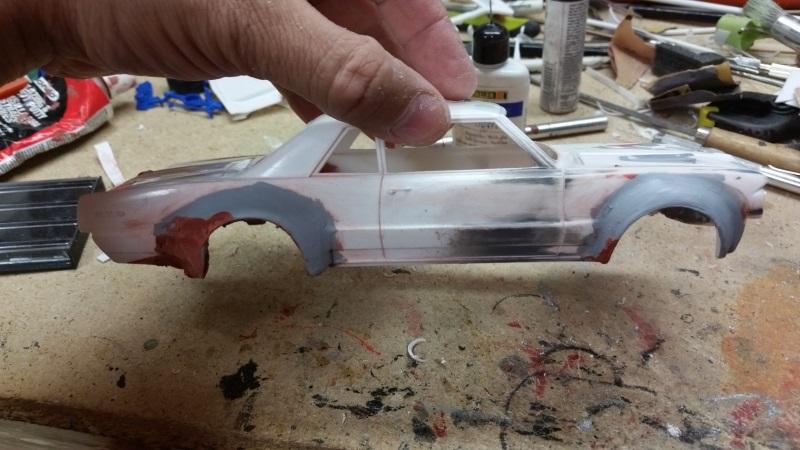
The wheel arches on the front were not looking like I wanted but kept adding layers of sheet styrene and sanding and filling and sanding...
-
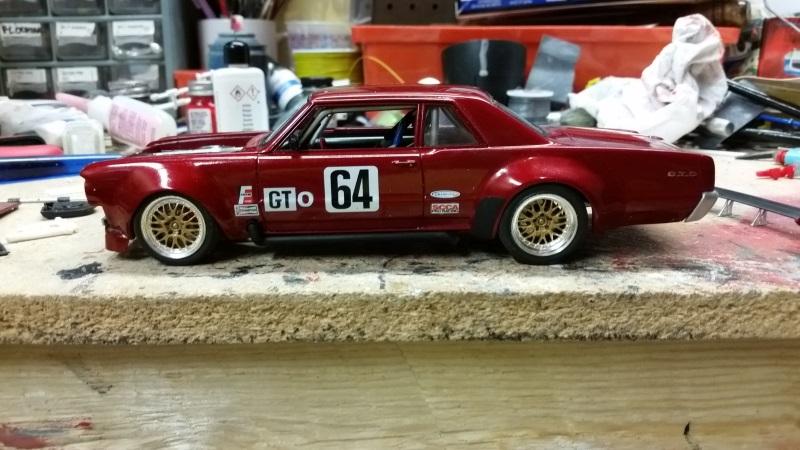
Since I have started it up again I am not going to use the wheels and tires from the Camaro kit anymore. I am using the wheels and tires and part of the front suspension from the Tamiya GT2 Porsche kit. Here are a few pictures of my progress. I made some extensions to the hood scoops and started making the fender flares and laying out the suspension.
-
I started this build many years ago after being inspired by a picture of the real car. I started trying to make one of the front fender flares and realized that I didn't have the skill to even try something like this. After finding modeling sites like this one and watching others build and scratch make parts, I have learned a few things and decided to get it out and have another go at it. I have completed a lot of the build and waited to post anything until I had a good idea it was going to turn out like I wanted. I didn't try to make an exact copy of the real car just one that looks similar and has some of the coolness of the real car. Here the two kits I started with to blend into the picture of the real car.
-
Either way it looks great Brian. I opened my Greenwood kit up last night, I want to do the same thing you did and make head lights instead of using the decal that looks like head lights. I bought the BFG Fred Caddy decal set for mine. Now I know what I may be up against when I go to fit the covers on my build.
-
Looks great. That looks like a two barrel carb so you need to convert it to single exhaust LOL. Great color.
-
Great job molding the heat extractor into the hood. Nice work all around.
-
Okay, I have the Greenwood kit but haven't opened it up yet. The Owens Corning kit didn't have them IIRC. I thought the flatter part of the clear cover went to the front and the tear drop part went to the back. Thanks for the clarification.
-
Very nicely done. Where did you source the clear headlight covers and are they installed correctly?