David G.
-
Posts
11,326 -
Joined
-
Last visited
Content Type
Profiles
Forums
Events
Gallery
Everything posted by David G.
-
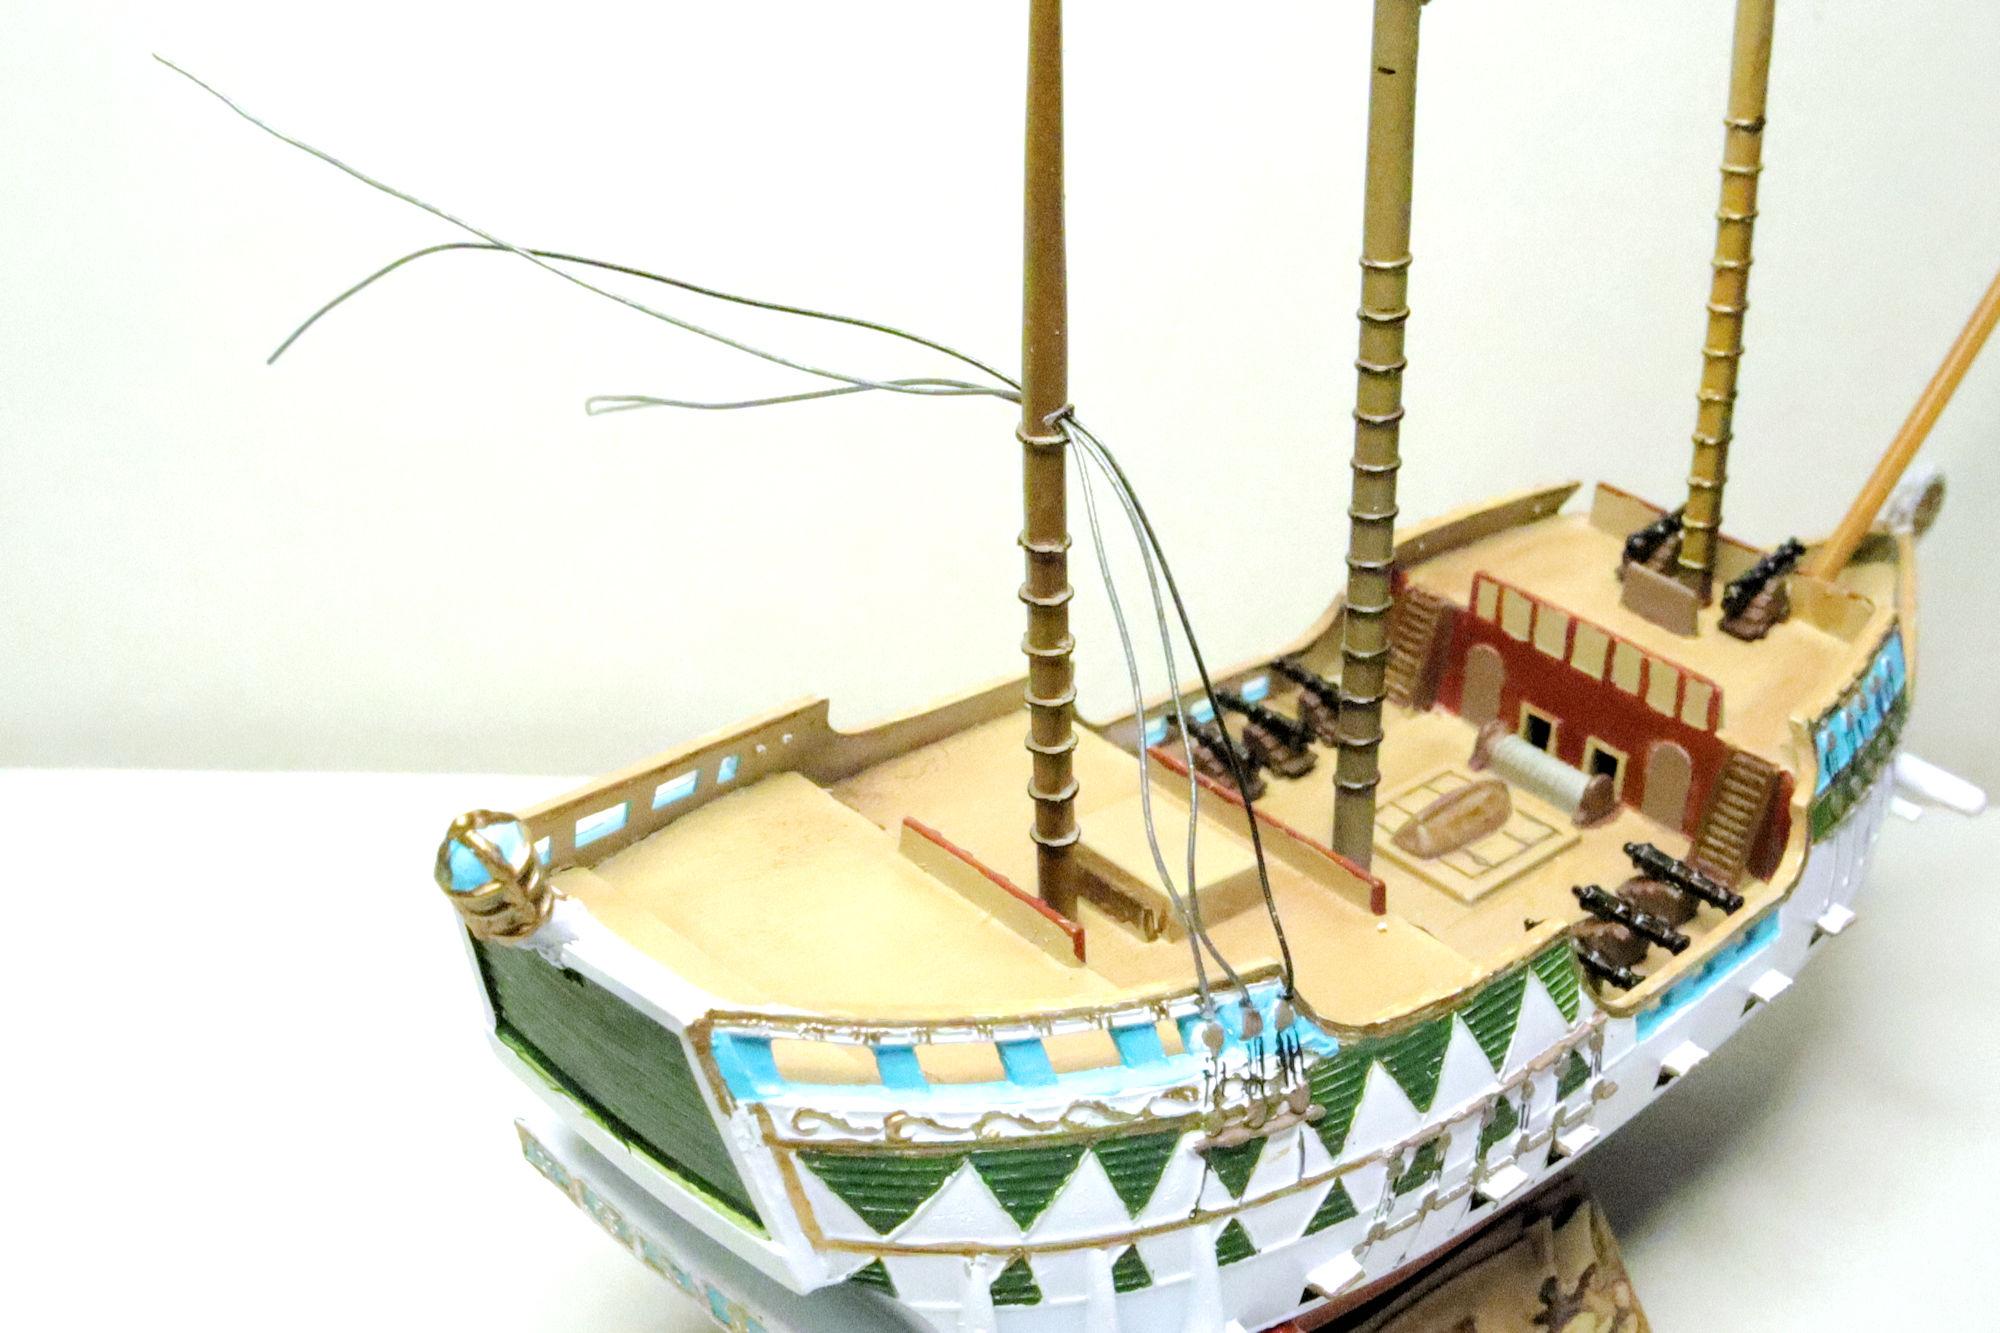
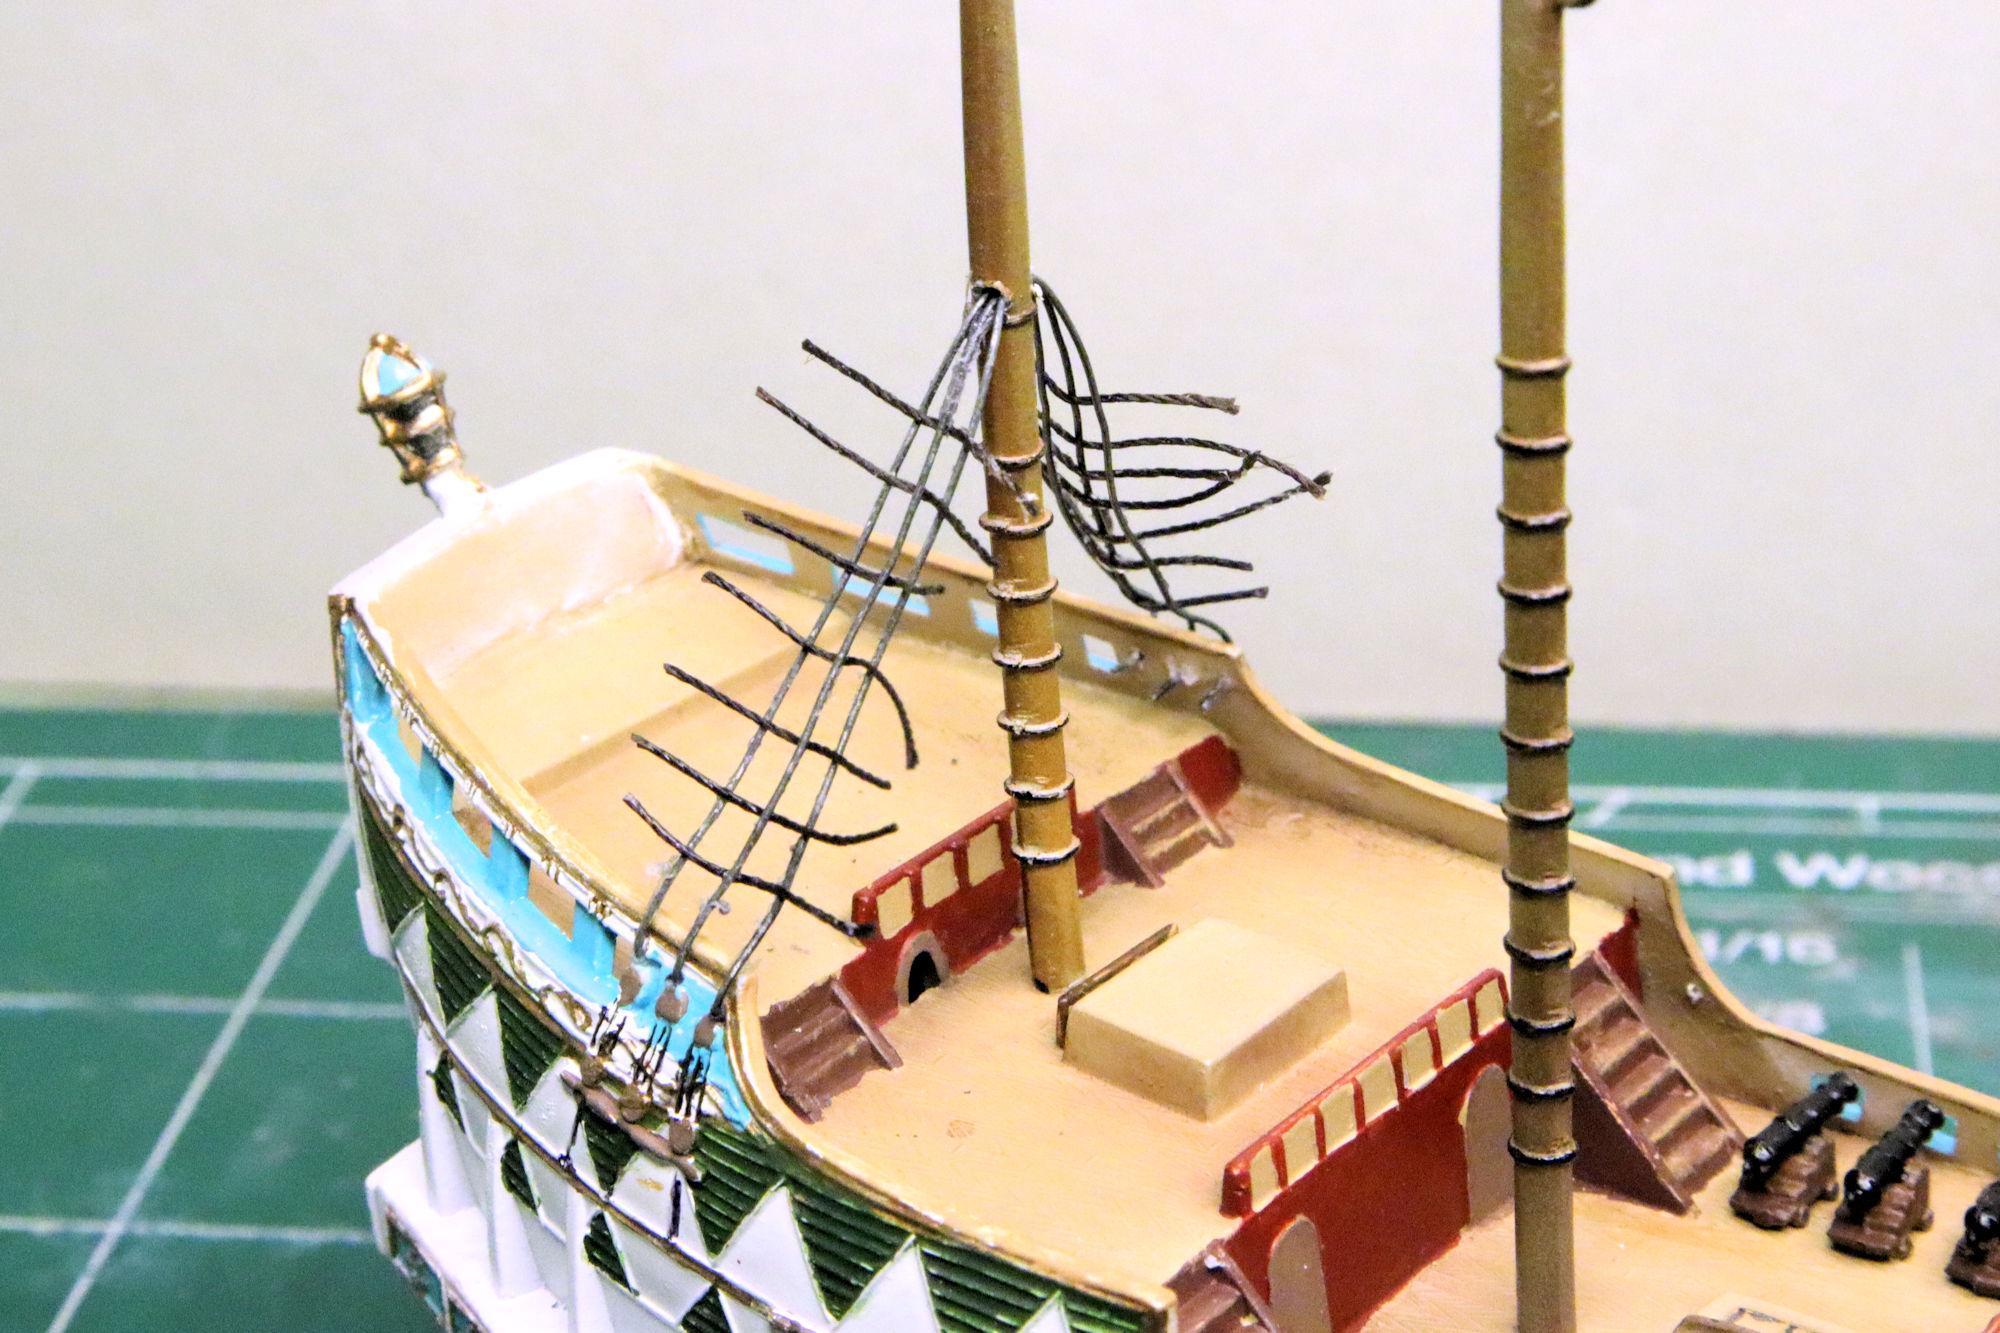
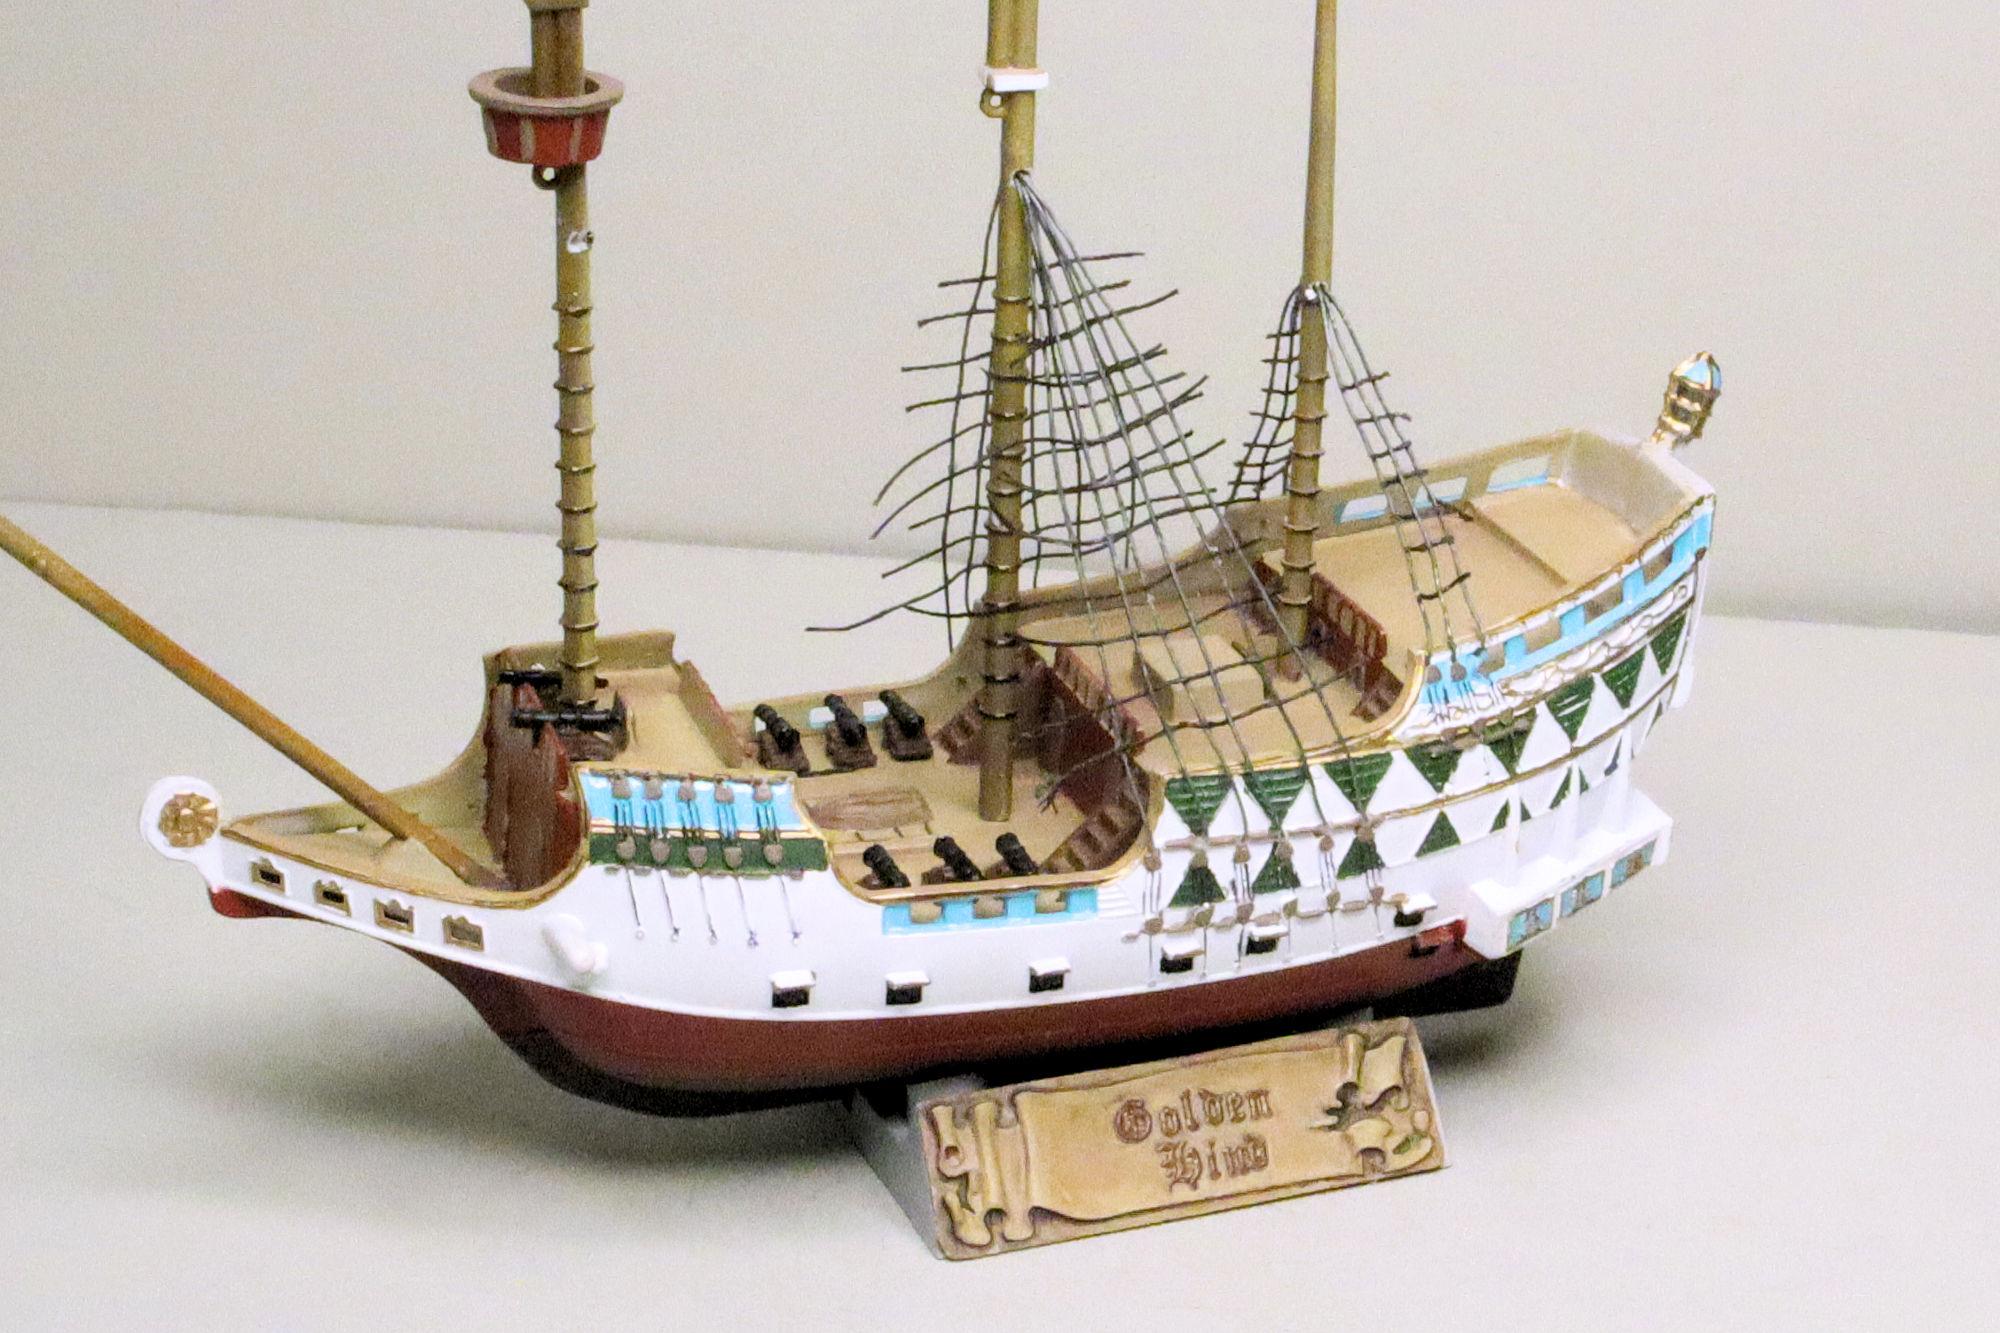
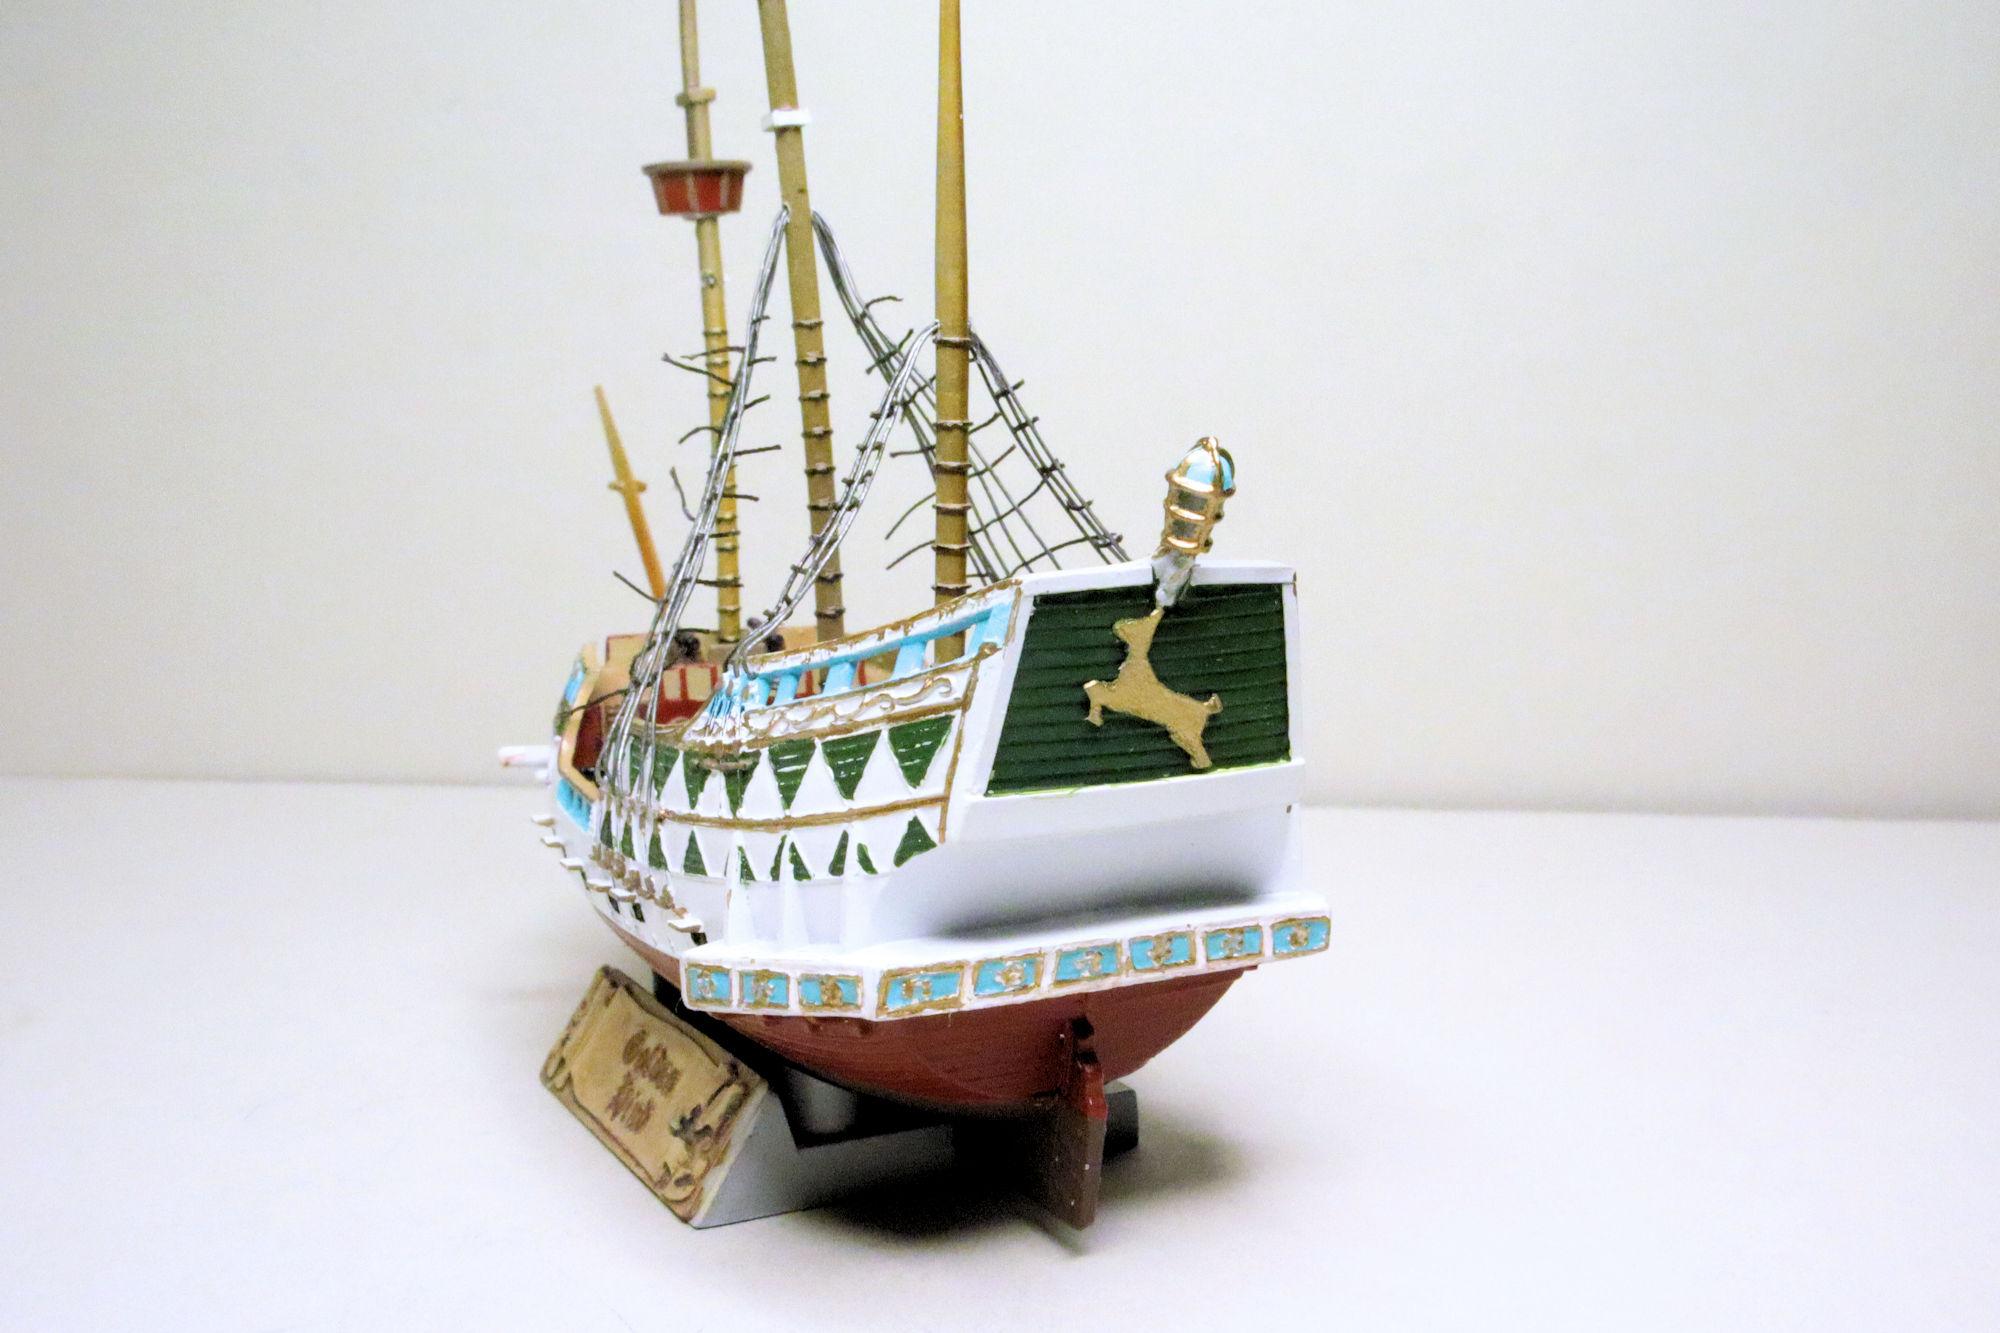
 Hello Everybody! I've been on kind of an obsessive bent with this build. Well I guess nearly every build I do gets me to that stage at some point. But it's been very slow-going on this one as I scale the learning curve that it's one is throwing at me. With the masts securely glued in place and the cannons mounted to the deck, the next step is the ratlines. I found some old steel bead wire I plan to use for the runners. After drilling holes above the blocks and one in the mast it was time to start running the wire. The cross lines are black thread soaked in diluted PVA. Once this mess dries, I'll trim the loose ends and paint the whole thing black. The aft set is nearly done and almost ready to be painted. The set amidships has six lines. Unsurprisingly, with twice the lines it's showing itself as more than twice the challenge. But I was able to get it strung and it's now awaiting a trim. The fore section only has five lines so getting the six-line set in place should teach me all I need to know to tackle that one. I also made a golden hind for the stern just to dress the space up a little. I cut the silhouette from some photo paper and painted it gold. I'm sure my methods of building the ratlines are grossly incorrect and all the model shipbuilders are cringing in horror but I justify my actions based on the lack of detail and accuracy of the base model! Seriously though, thanks for taking the time to follow along and please feel free to post ant comments you may have. David G.
-
Rolls-Royce No Chemicals, No Paint, No Harmful Glues
David G. replied to Anglia105E's topic in WIP: Model Cars
I have to say, I've never seen a Sharpie leak... ever. 😮 Have you tried using a black Sharpie to go over the silver spillage? One pen's ink should act as a solvent for another's. At the very least, painting the black ink over the silver would dilute the silver and/or replace it with the black. You may even get the black pen to act as a sponge-mop drawing the silver ink up onto the nib of the black pen. I would try it with a rolling motion turning the pen as I go using it as one would a cotton swab. It would likely ruin the black pen, but if it saves the model... Having the spare car bodies is most fortunate, but I would also weigh the time and effort against what it would take to get one of the spare bodies to a similar state as this one is now. In either case, best of luck. David G. -
Thank you Alan, that's good to know. I just didn't want the lines to be the first thing noticed on the model. Thank you very much Michael. David G.
-
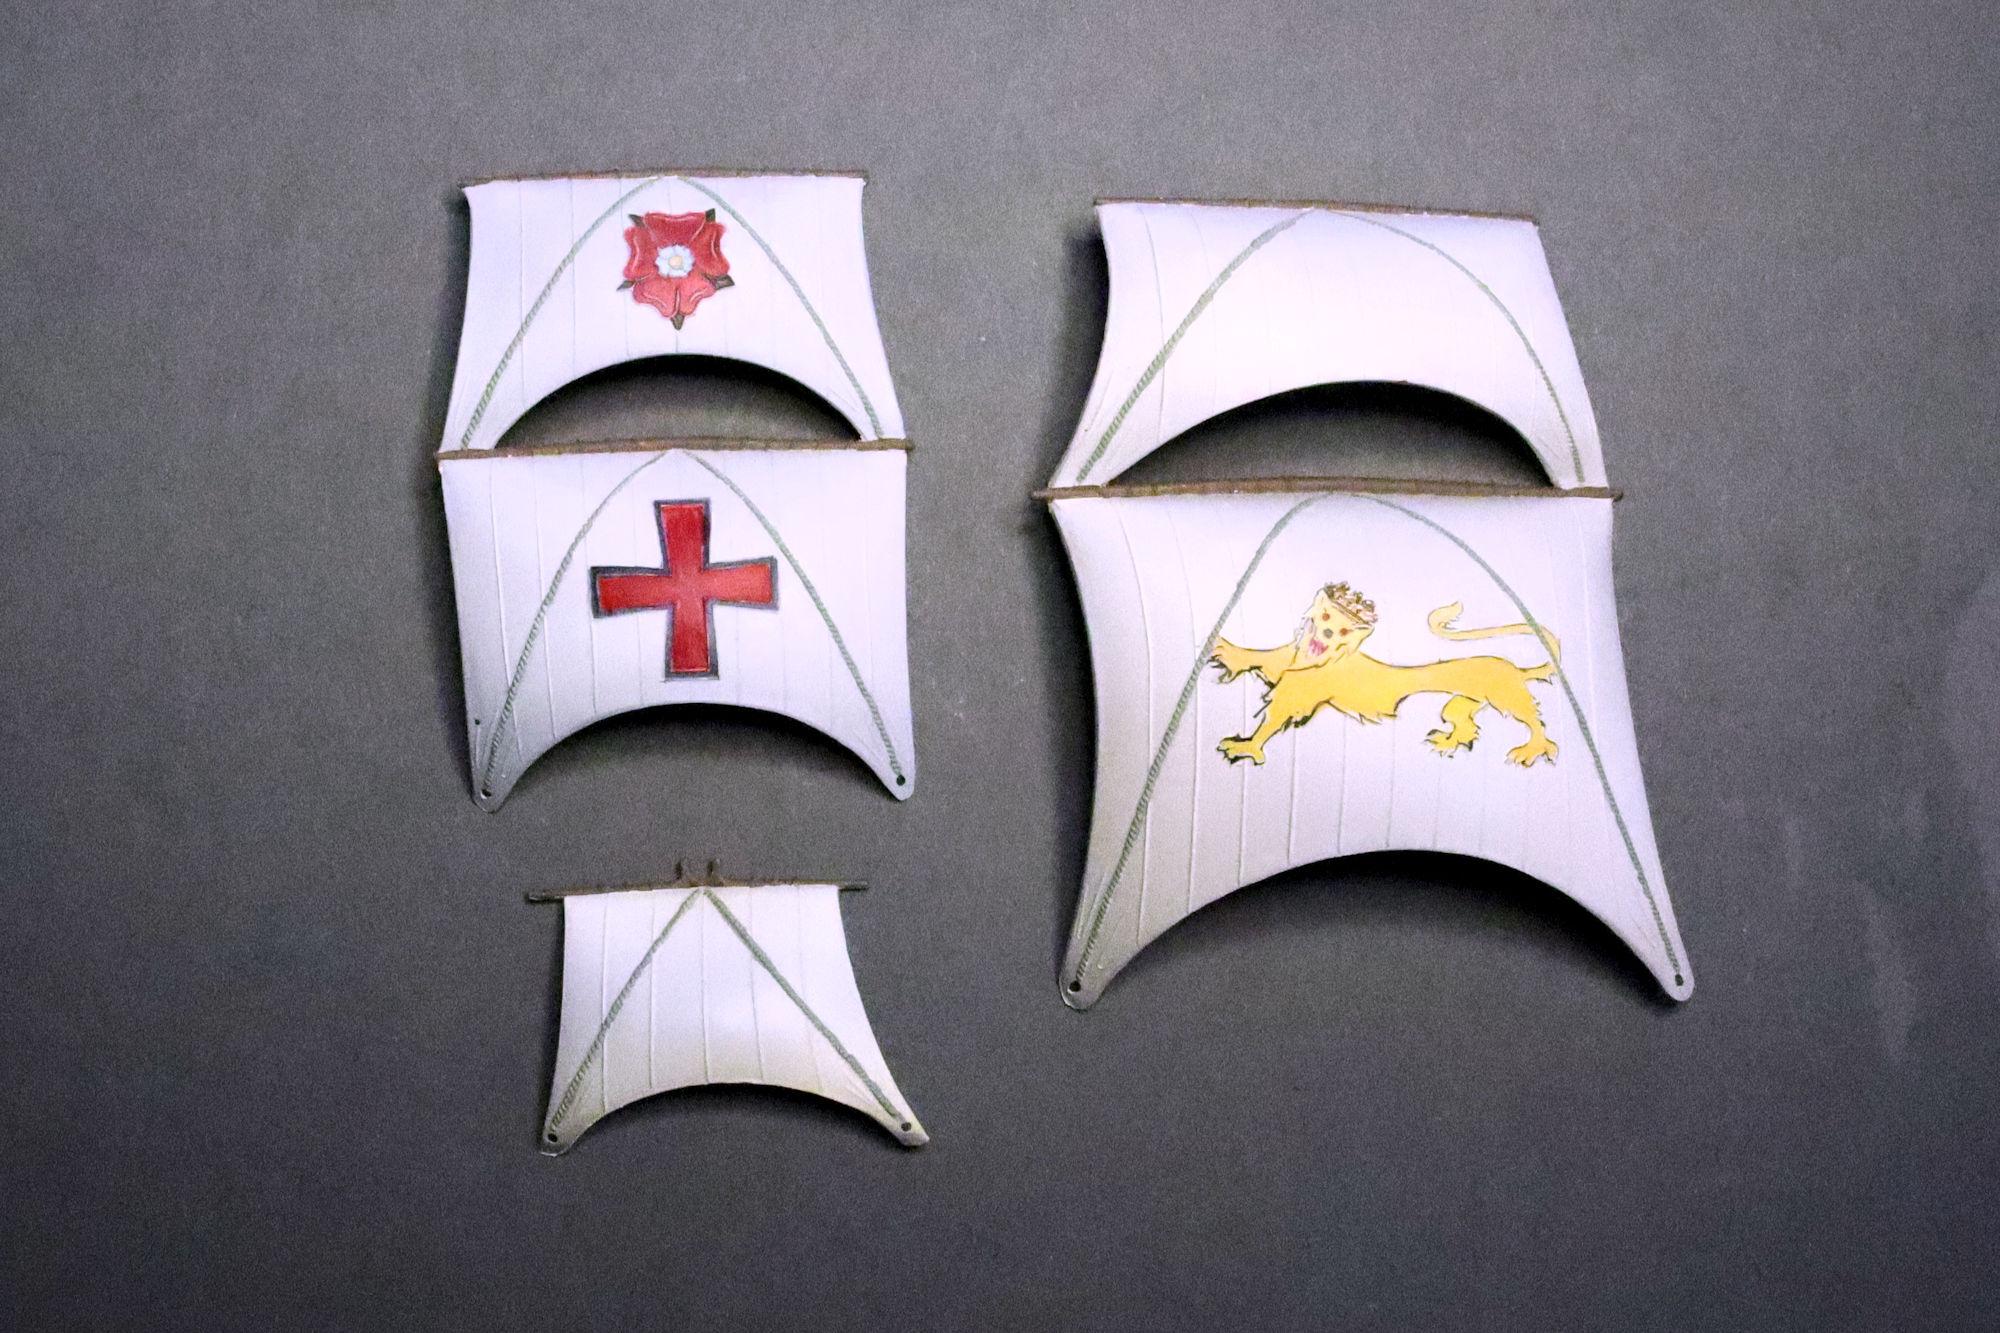
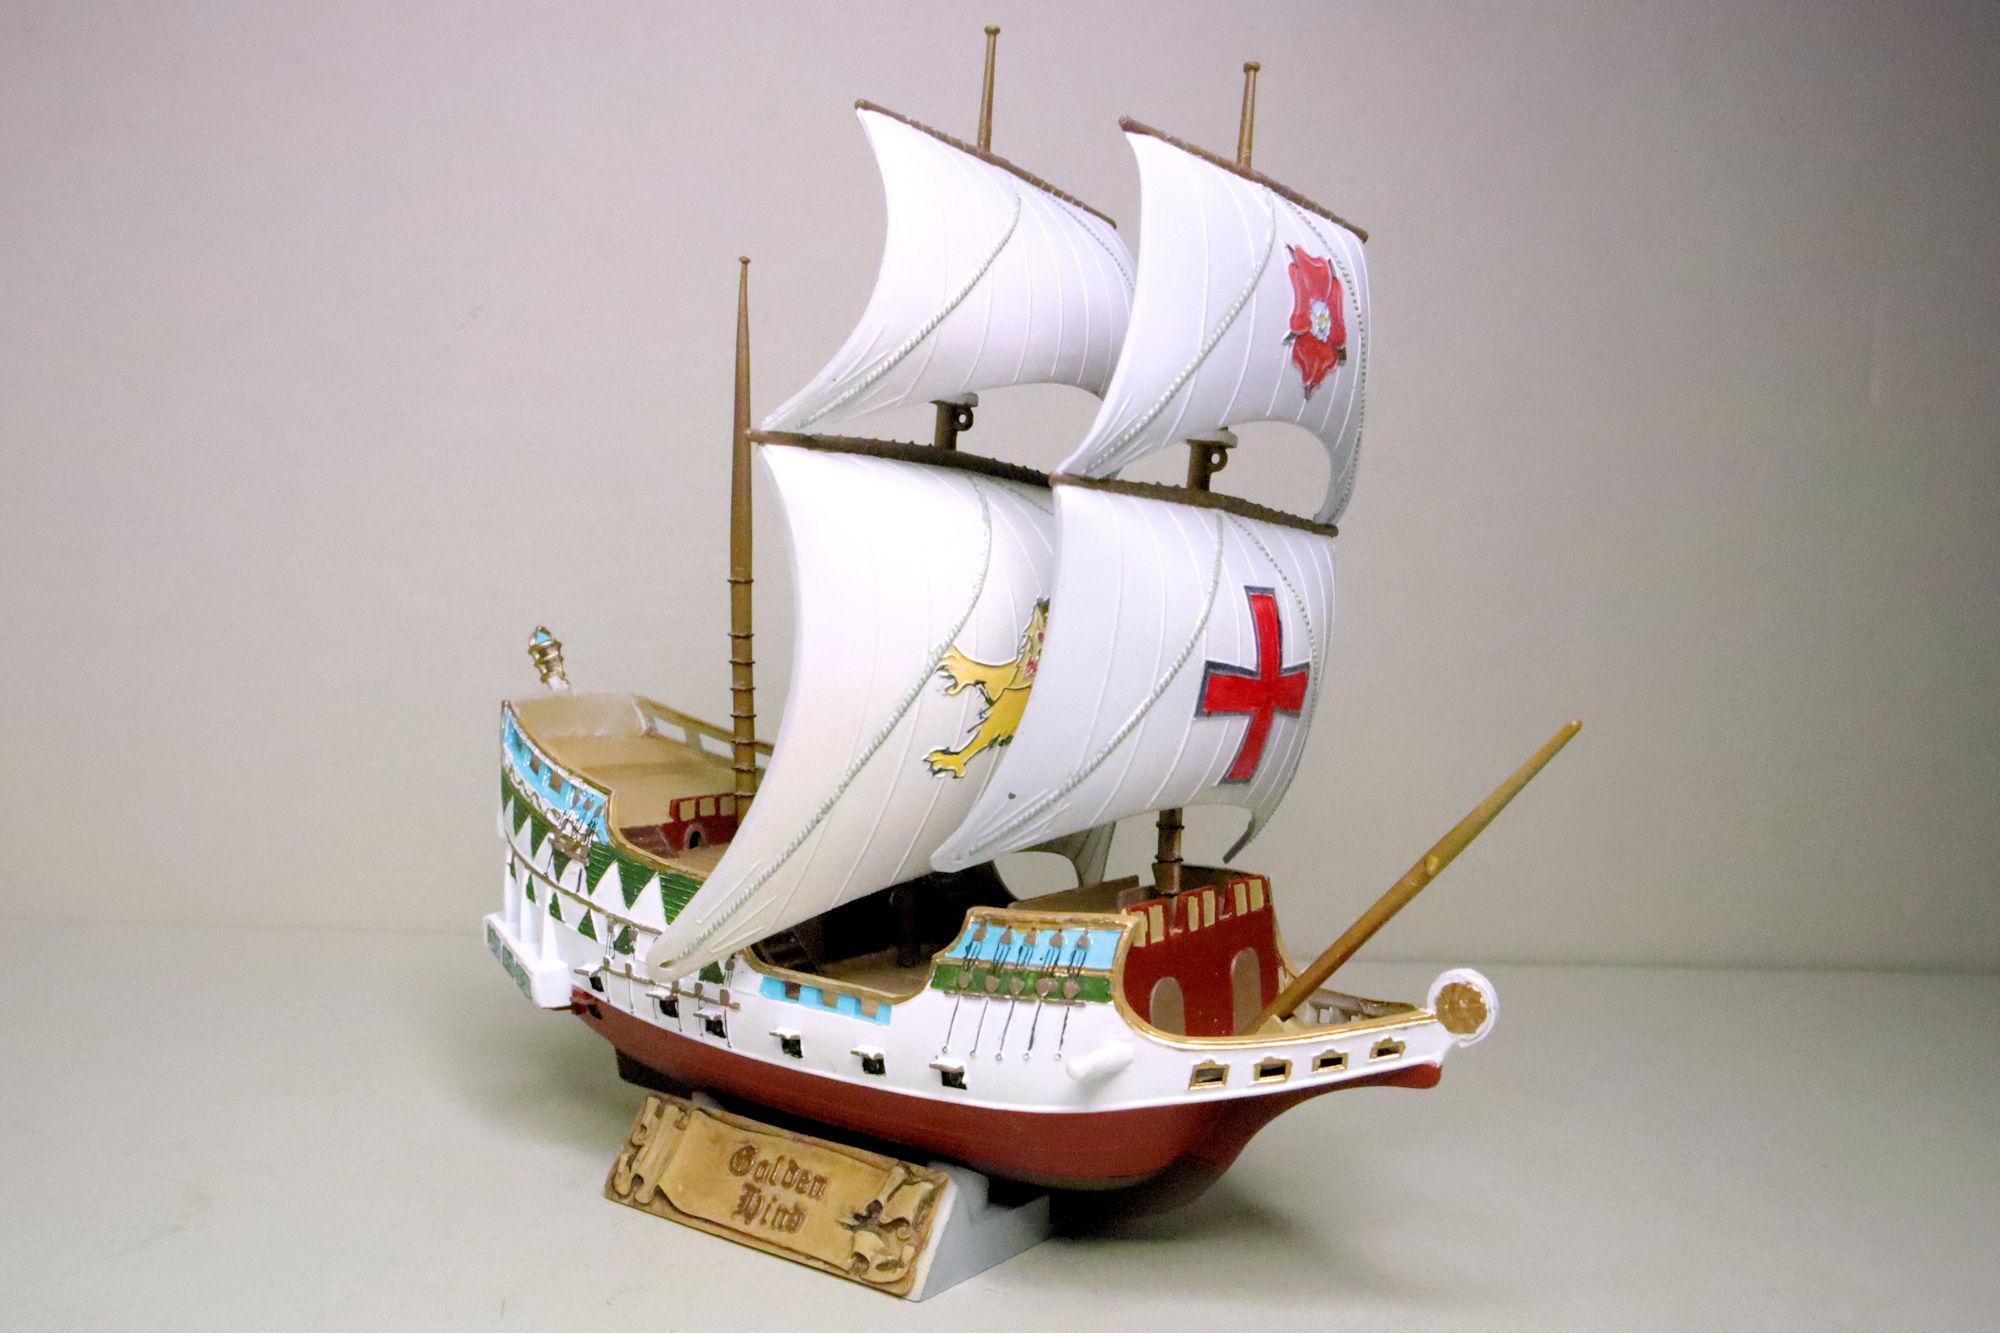
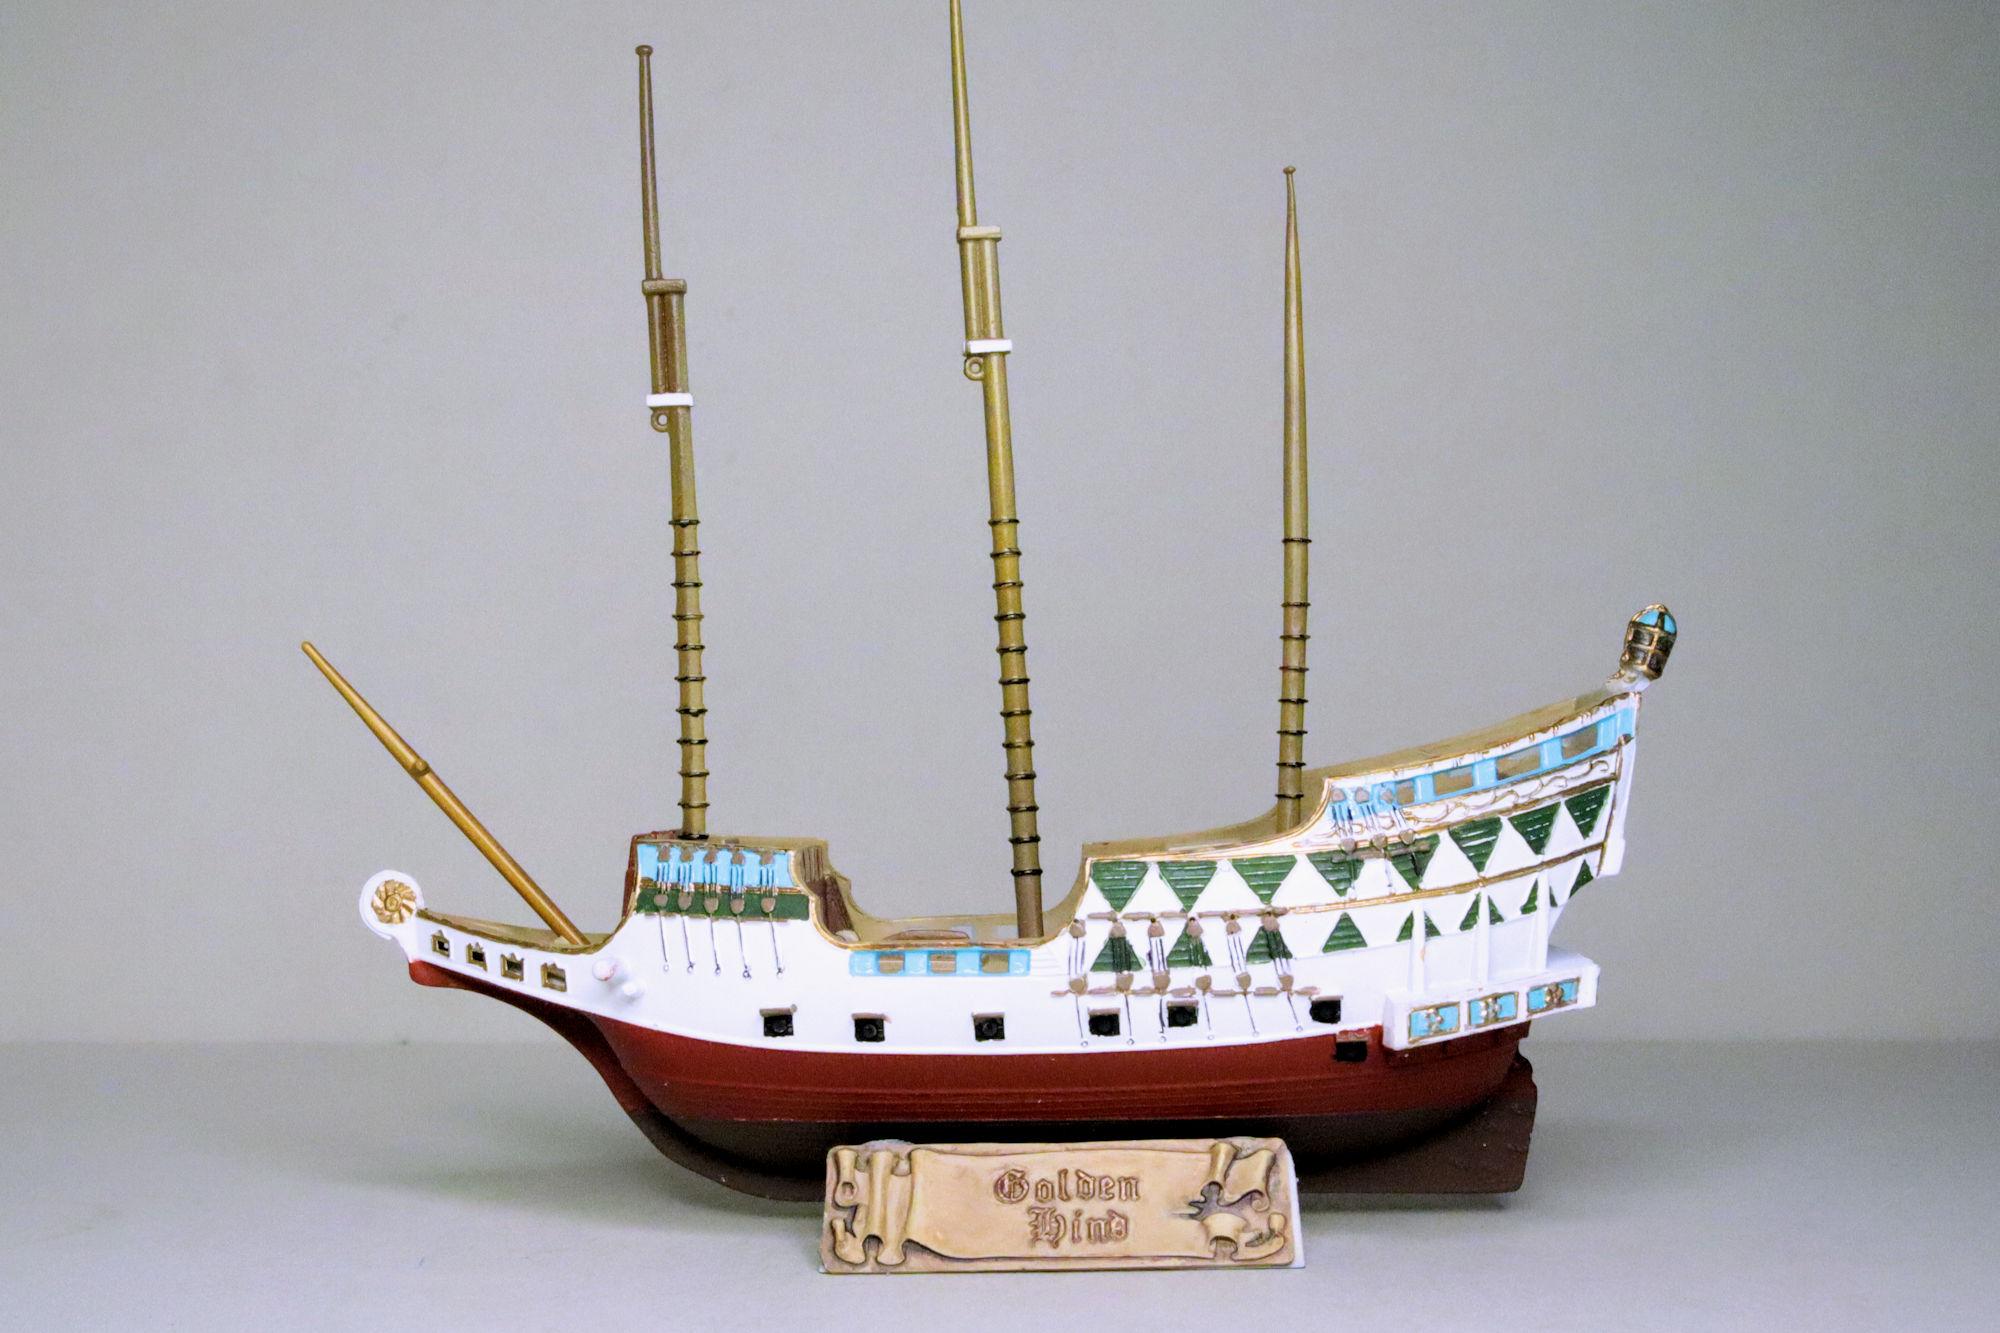
Hello Everybody! I painted the crown on the lion and the lines on the sails. The lines are a little too dark for me so I'll probably lighten them up during the cleanup. This of course calls for a celebratory test-fit! I've lightened the ropes a bit too. As always, thanks for taking the time to look and please feel free to post any comments. David G.
-
Thank you Alan. =D-
-
Thank you very much Daniel! David G.
-
Nice work, love all the detail painting. David G.
-
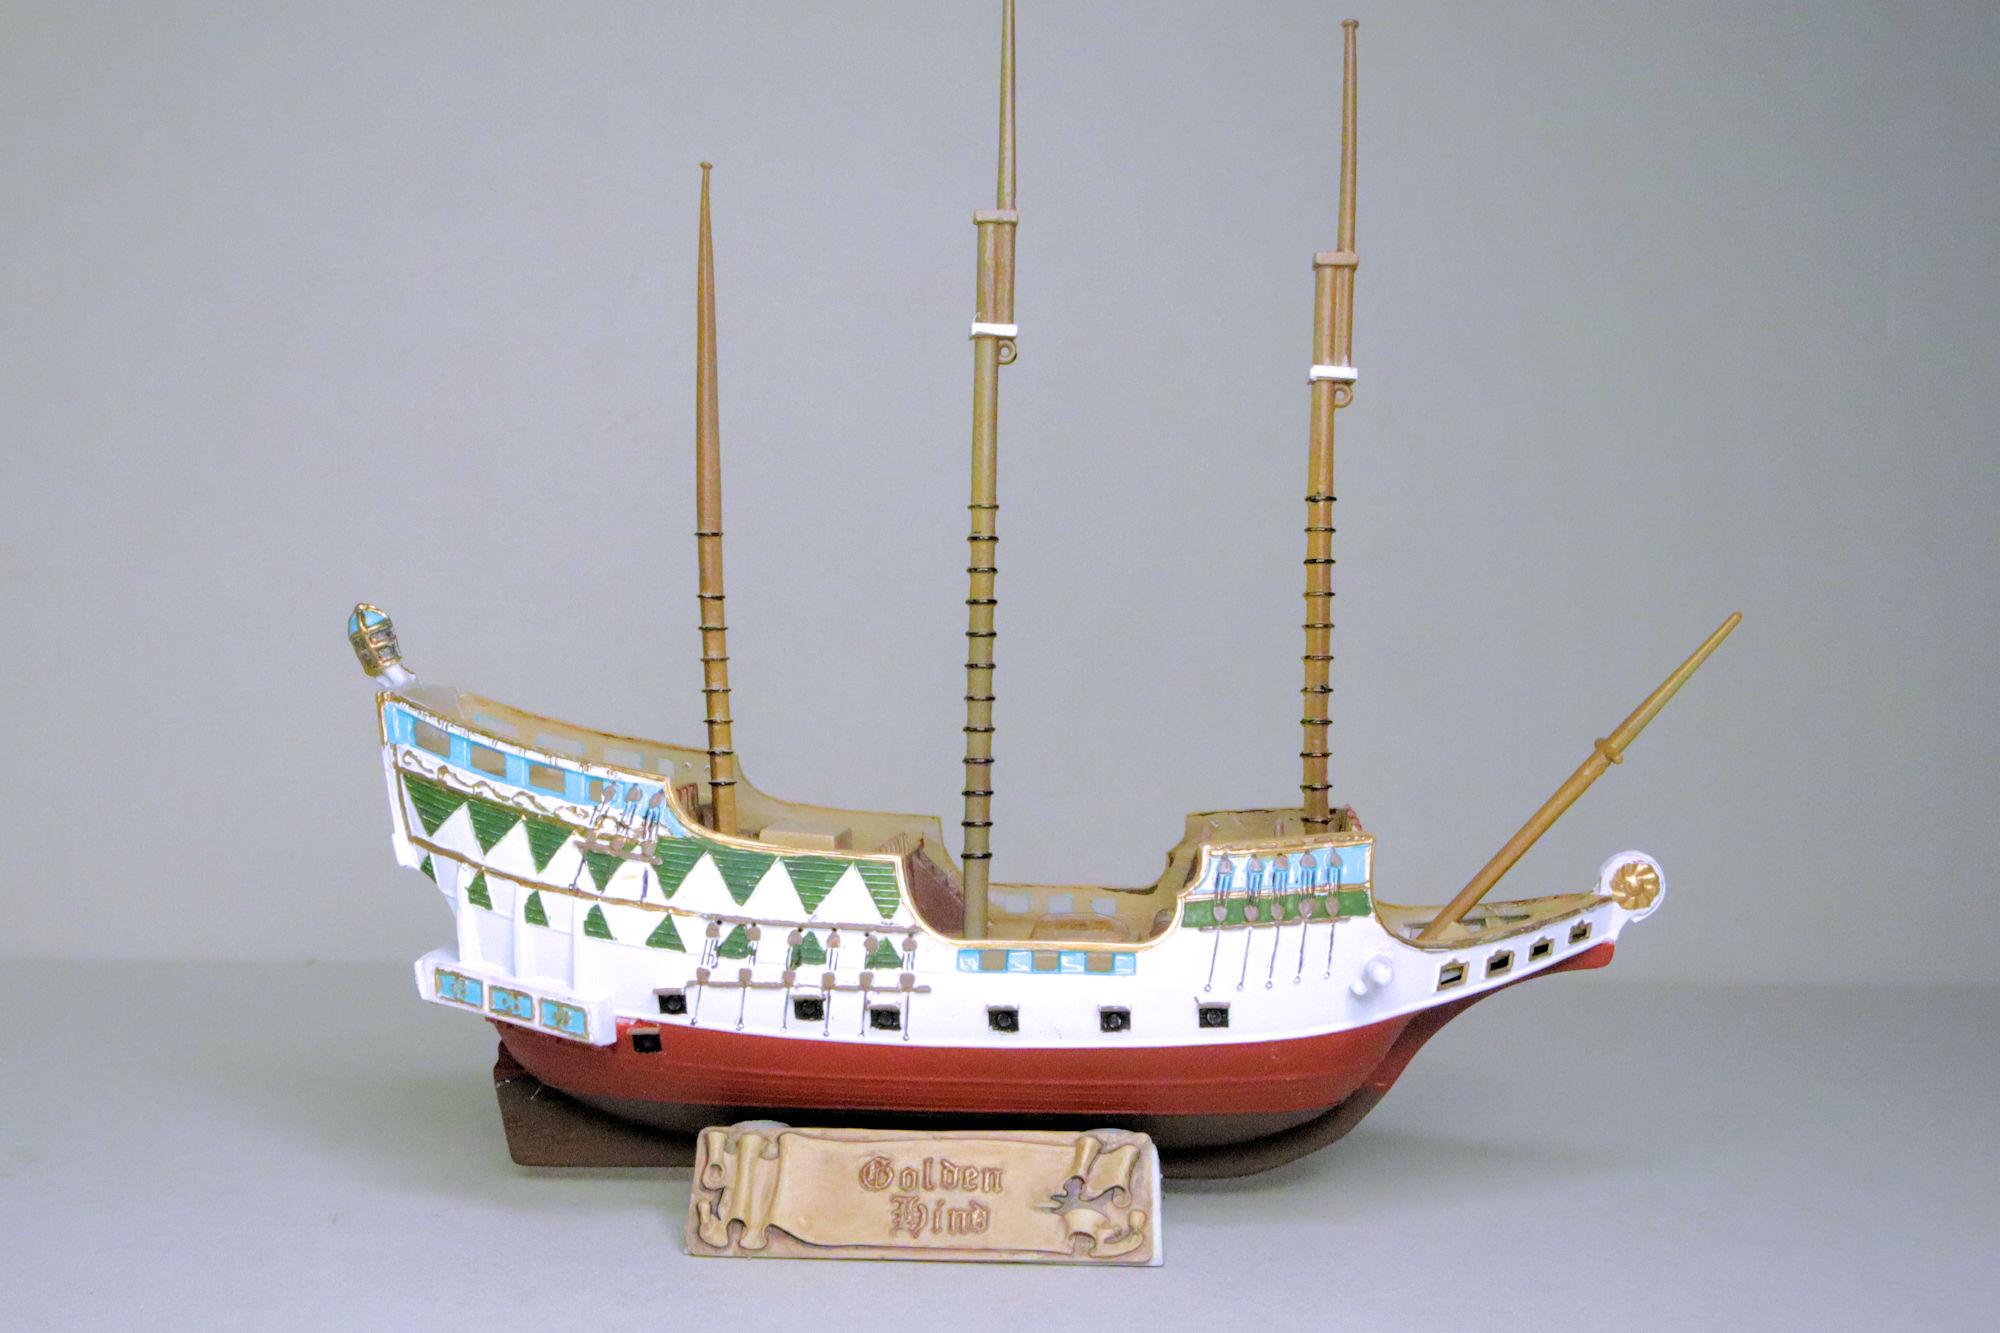
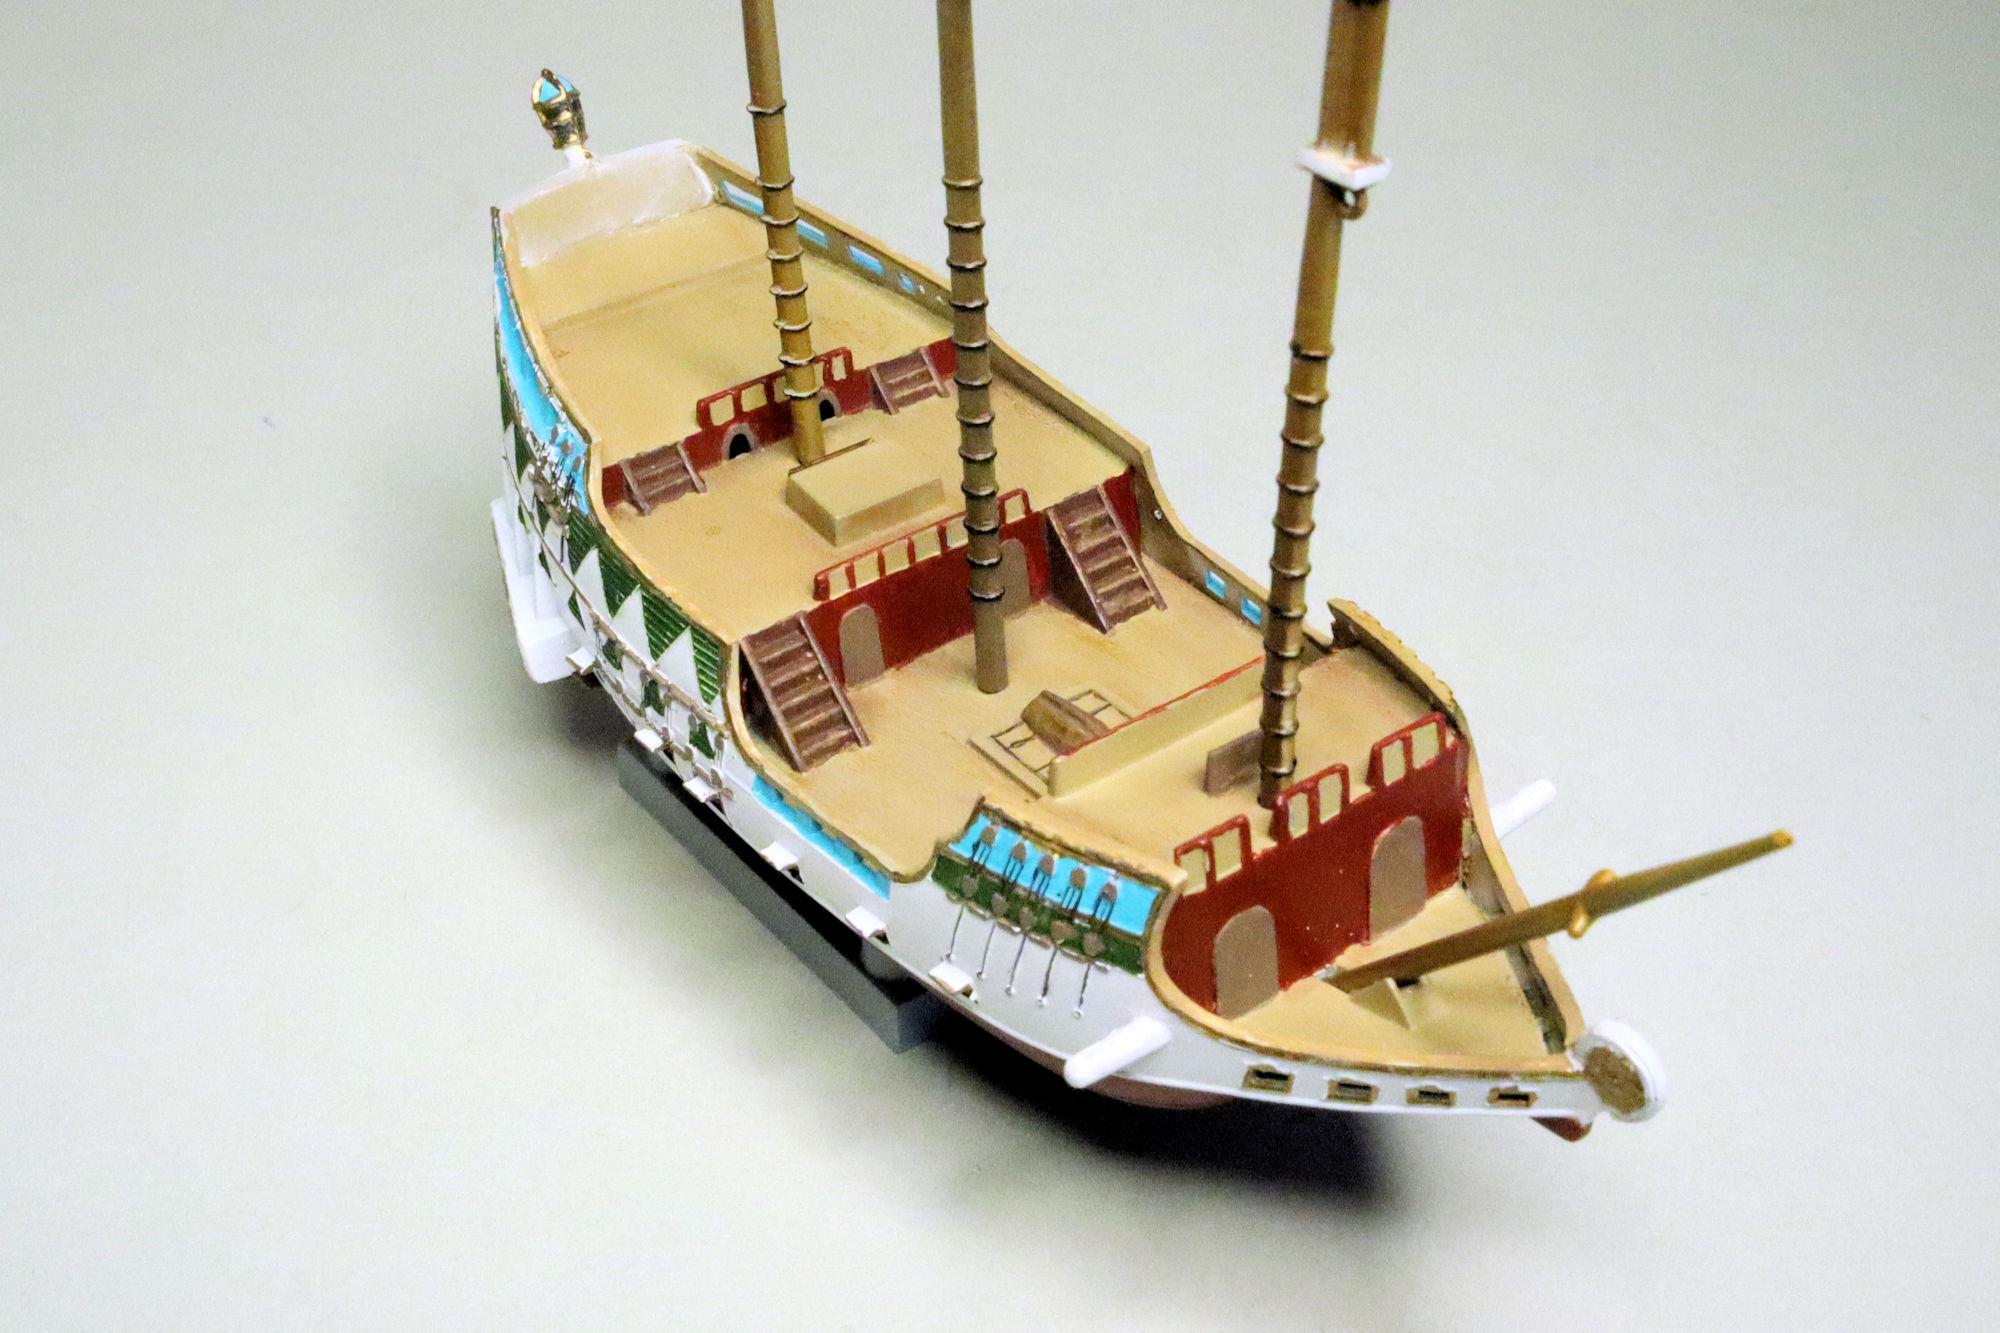
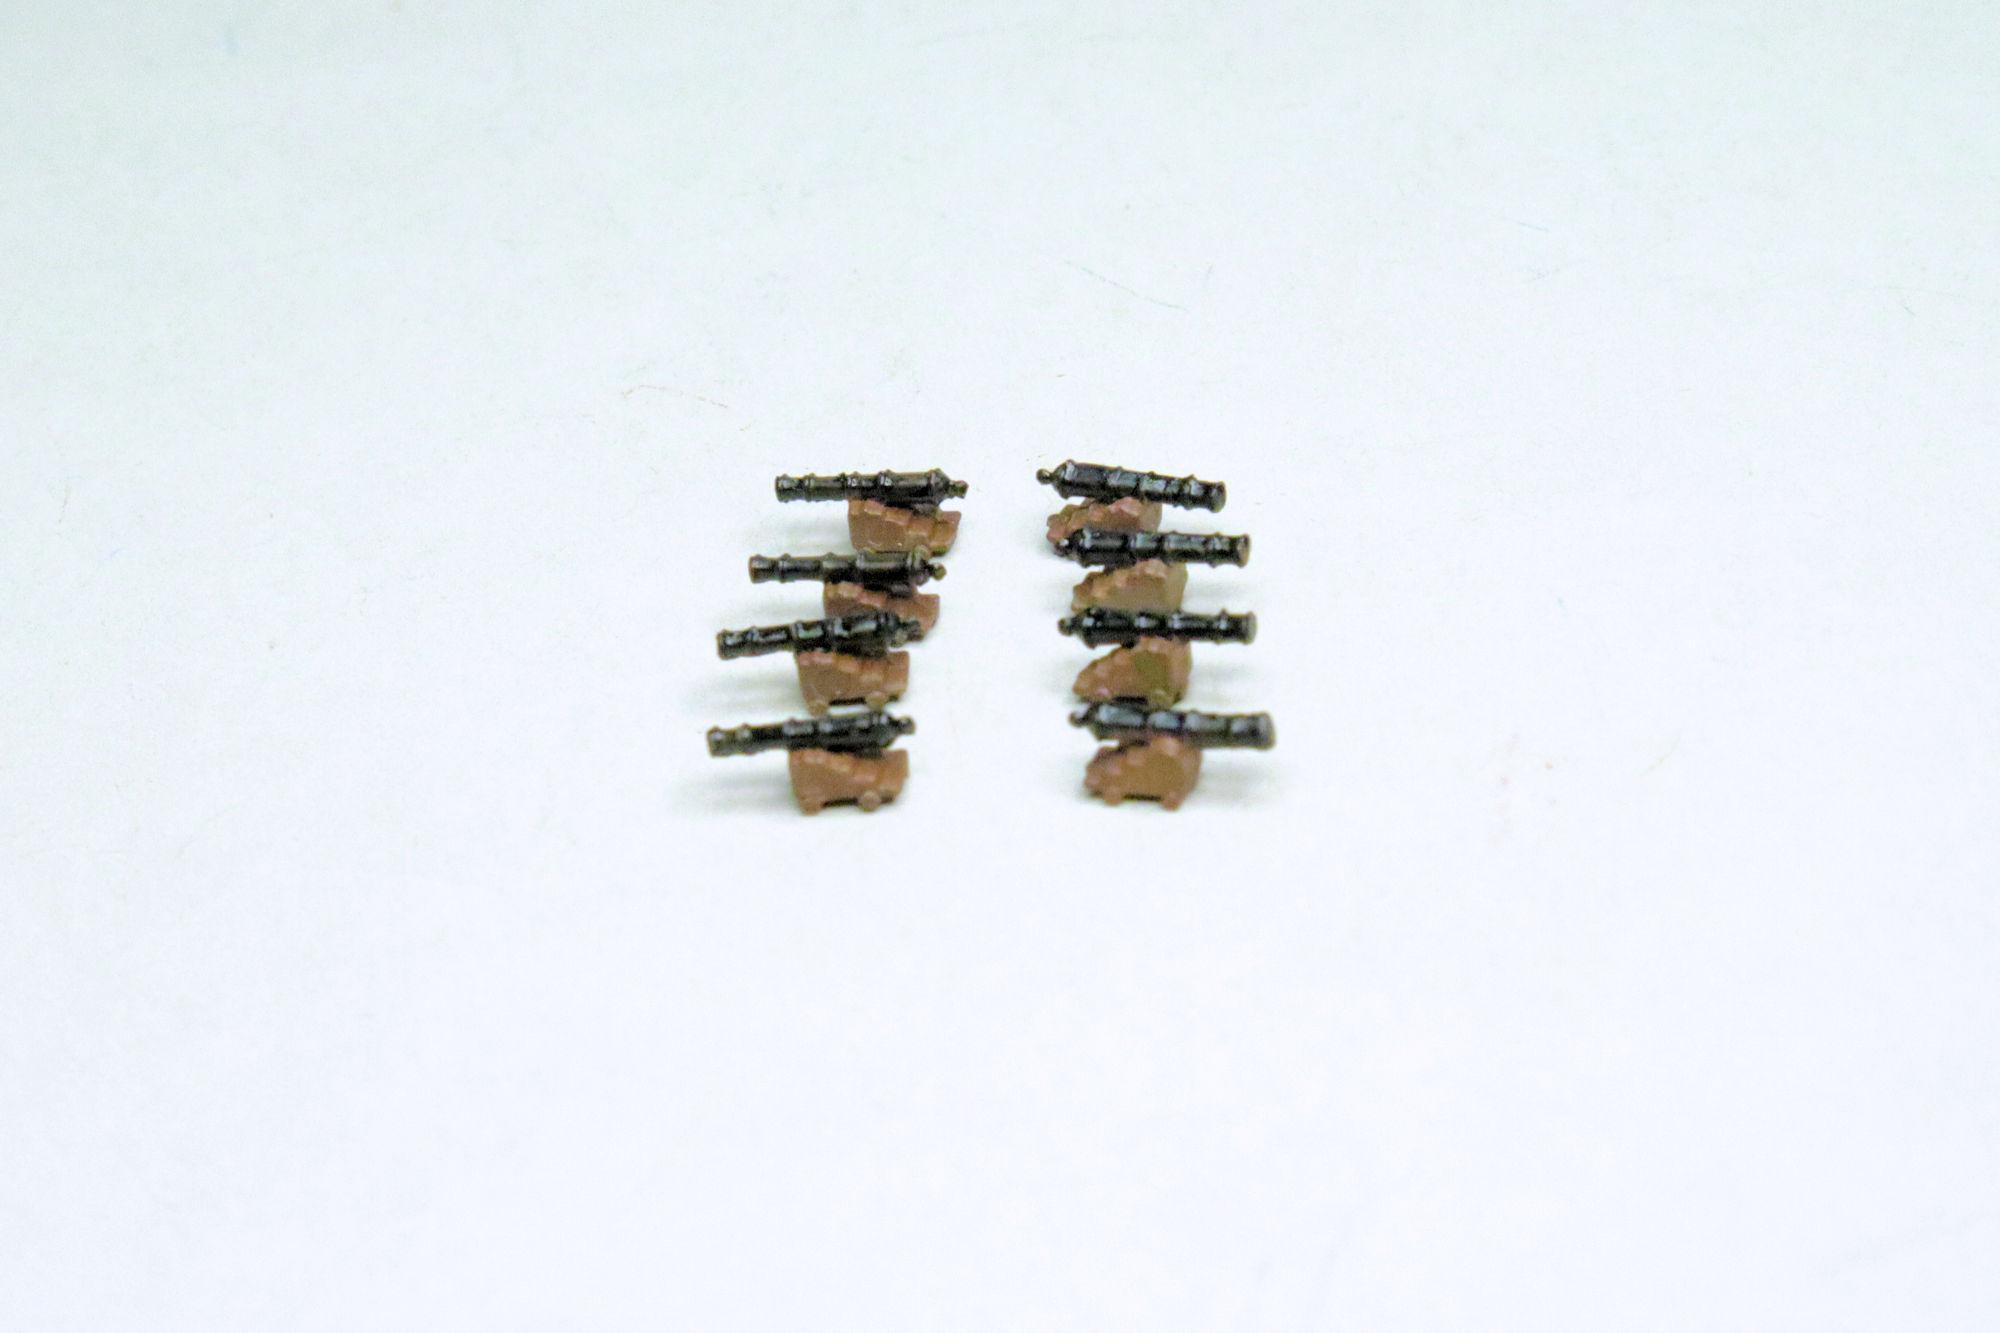
Hello Everybody! It's taken me about twelve hours spaced over a number of build sessions but the detail painting is done! Oh yeah, I finished the name plaque too. I still have a little more painting to do on the sails but the hull is finished. Using pastels I also did a little light weathering on the decks but they're finished too. Except for the deck cannons. There are eight cannon for the deck, each about 7mm long. I'll mount these right before I start on the rigging. As always, thanks for taking the time to look and please feel free to post any comments you may have. David G.
-
Thank you James2, I will endeavor not to disappoint. Thank you Bill. I've learned so much from this community, it's nice being able to give a little back when I can. Thank you Michael, always one of my favorites too. David G.
-
Hello Everybody! Here's the final set of photos for this build. The gravel guards are black BMF. The foil was a little too shiny so I sprayed it with some Tamiya flat clear before I applied it. Right front 3/4 view. Here's the cover shot! Last but not least, my traditional Display Case photo. Thank you all for your kind comments and support. David G.
-
Thank you Carl. =D-
-
That's a good start. I'm interested to see how it turns out. David G.
-
Very cool! I think I have this one in my stash. David G.
-
Always happy to help. =D-
-
Rolls-Royce No Chemicals, No Paint, No Harmful Glues
David G. replied to Anglia105E's topic in WIP: Model Cars
David, I'm quite impressed by your determination and all the clever alternatives you've been coming up with. They seem to work so well that it almost makes one wonder why there are so many VOC products used when there seem to be so many suitable alternatives. David G. -
1955 Ford Panel Truck
David G. replied to Zippi's topic in WIP: Model Trucks: Pickups, Vans, SUVs, Light Commercial
Bob, good call on the Titanium Silver for the wheels. They remind me of the old polished magnesium wheels. Great carb setup on the engine too. David G. -
Hi Carl. For this one I started with a base coat of Tamiya TS-46 Light Sand. Next I lightly drew some random lines on the paint with a brown Sharpie. Then I used an alcohol wash to soften and smear the pen lines. After that I brushed on some very thinned streaks and patches of Tamiya Red-Brown, NATO Brown. Each color thinned to the point of being more of a wash than paint but still opaque enough to provide noticeable coverage. Then came a very dry dry-brush of Flat Earth and Flat Flesh, for just a whisper of highlighting. Finally, some thinned flat black applied here and there with a liner brush to add a little detail. When I was satisfied with how it all looked I let it dry for a while then sprayed a light coat of Tamiya PS-43 Translucent Orange followed by a coat of Tamiya Clear. The lighter panel is Tamiya Light Sand with a thinned random brushing of Flat Flesh followed by Translucent Orange and clear. To sum it up, I just start with a light colored base. I follow that with washes and dry-brushing building from dark to light then adding darker line details . Then I spray on translucent orange, yellow or red depending on how I want it to look. When I'm happy with that I spray it with either a flat or gloss clear depending on whether I want a varnished or natural look. It may sound like a lot of work but it took me less than an hour to do both panels front and back. Thanks for asking! Thank you Greg. I am rather happy with how it turned out. Thank you Ulf. Ya know, I never really did get into the whole lowered stance trend. Maybe growing up in the Seventies working on gassers and raked street machines has something to do with that. Thank you Elliot. I agree, some things just never seem to go out of style. David G.
-
Thank you Dan. Thank you Harry, it is a good looking design. =D-
-
Link-Belt HC-218 Truck Crane
David G. replied to redneckrigger's topic in WIP: Model Trucks: Big Rigs and Heavy Equipment
This will be amazing when it's completed! David G. -
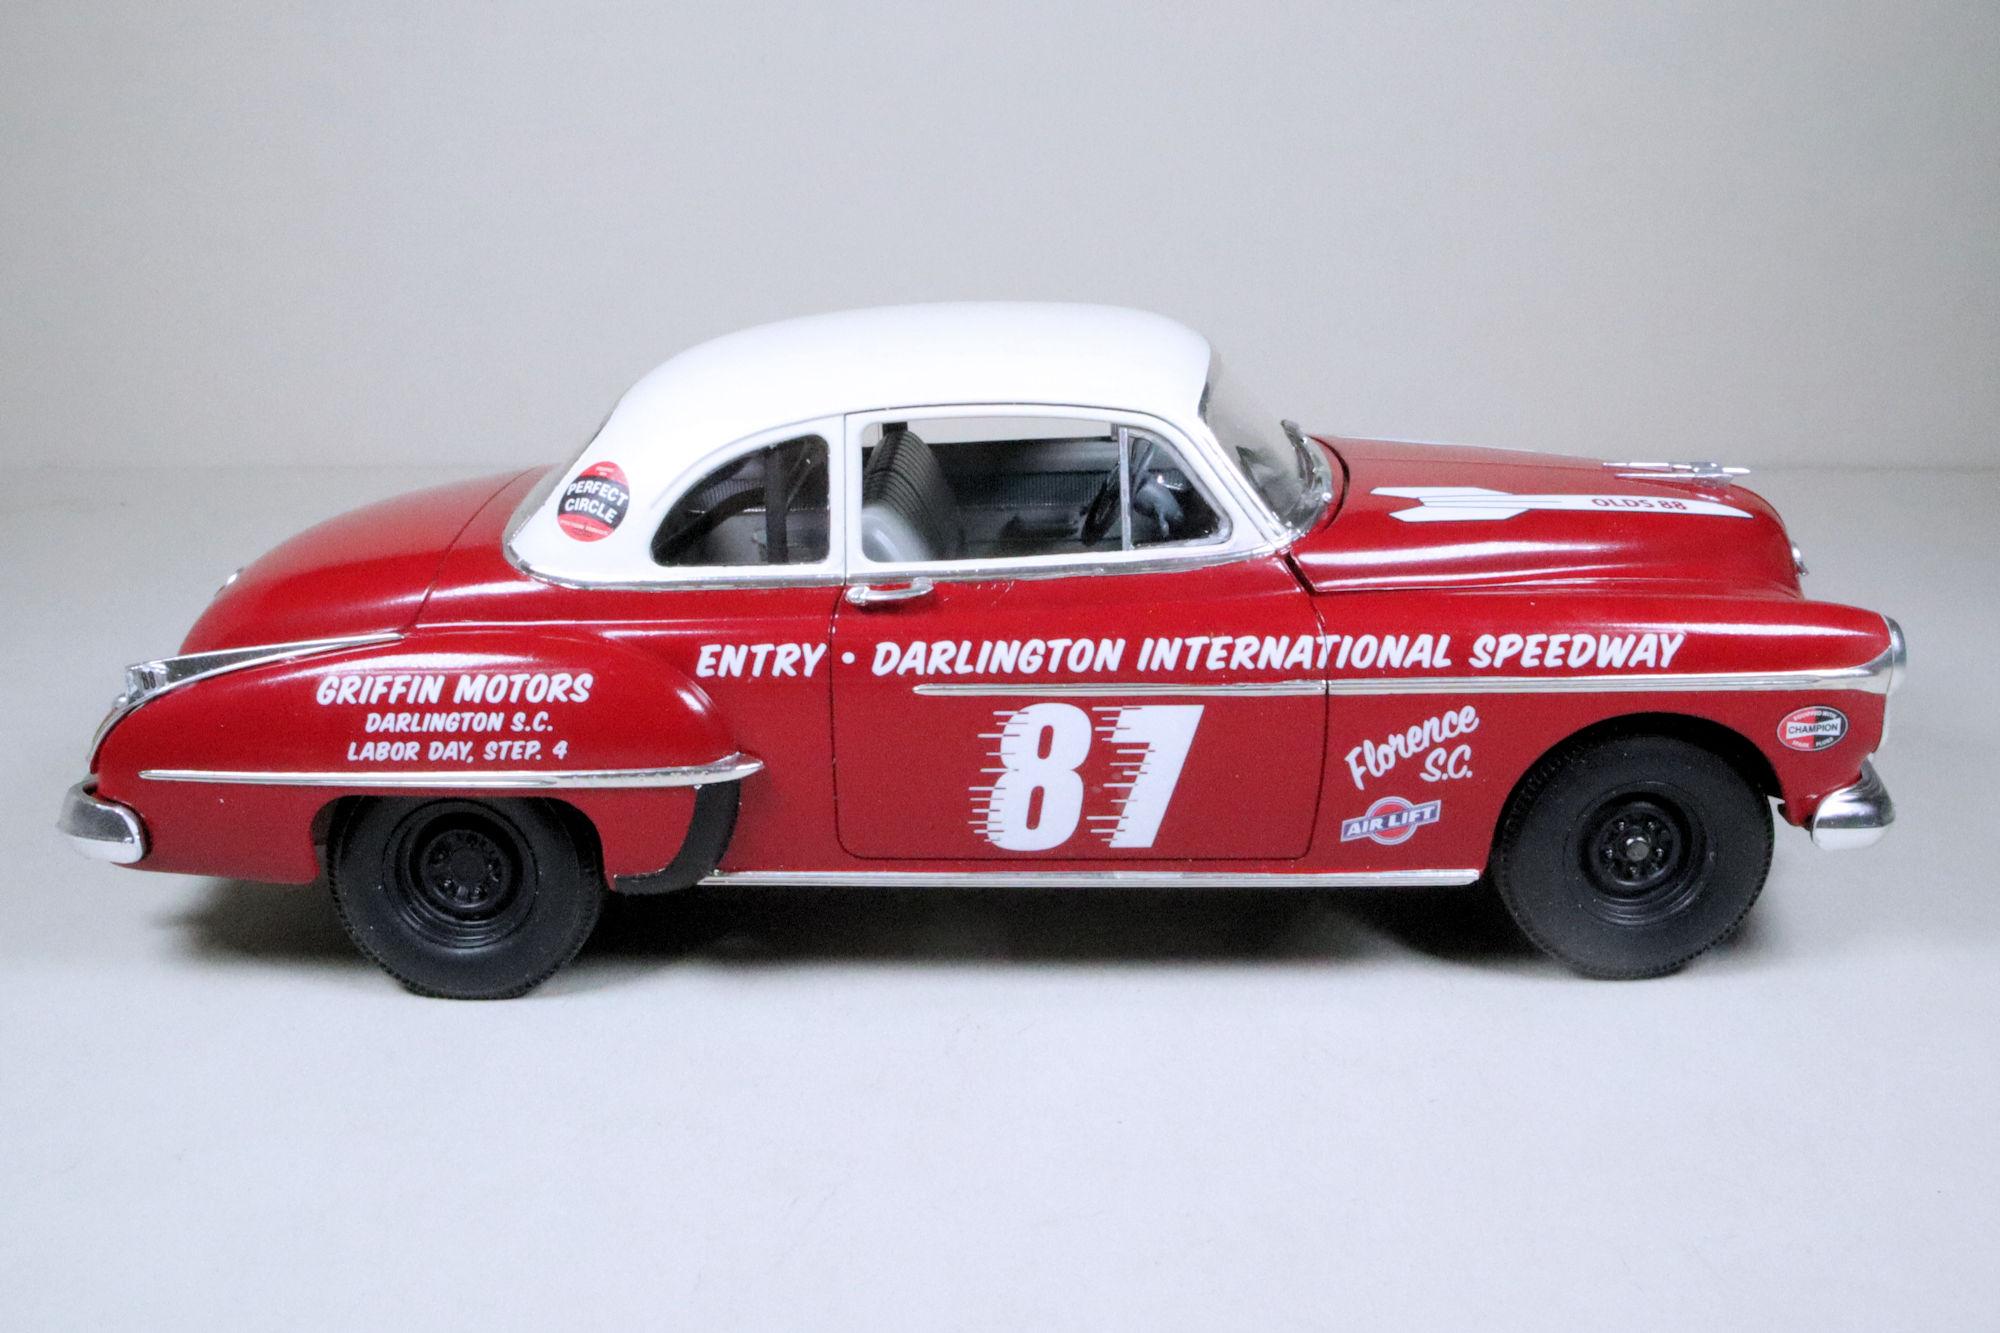
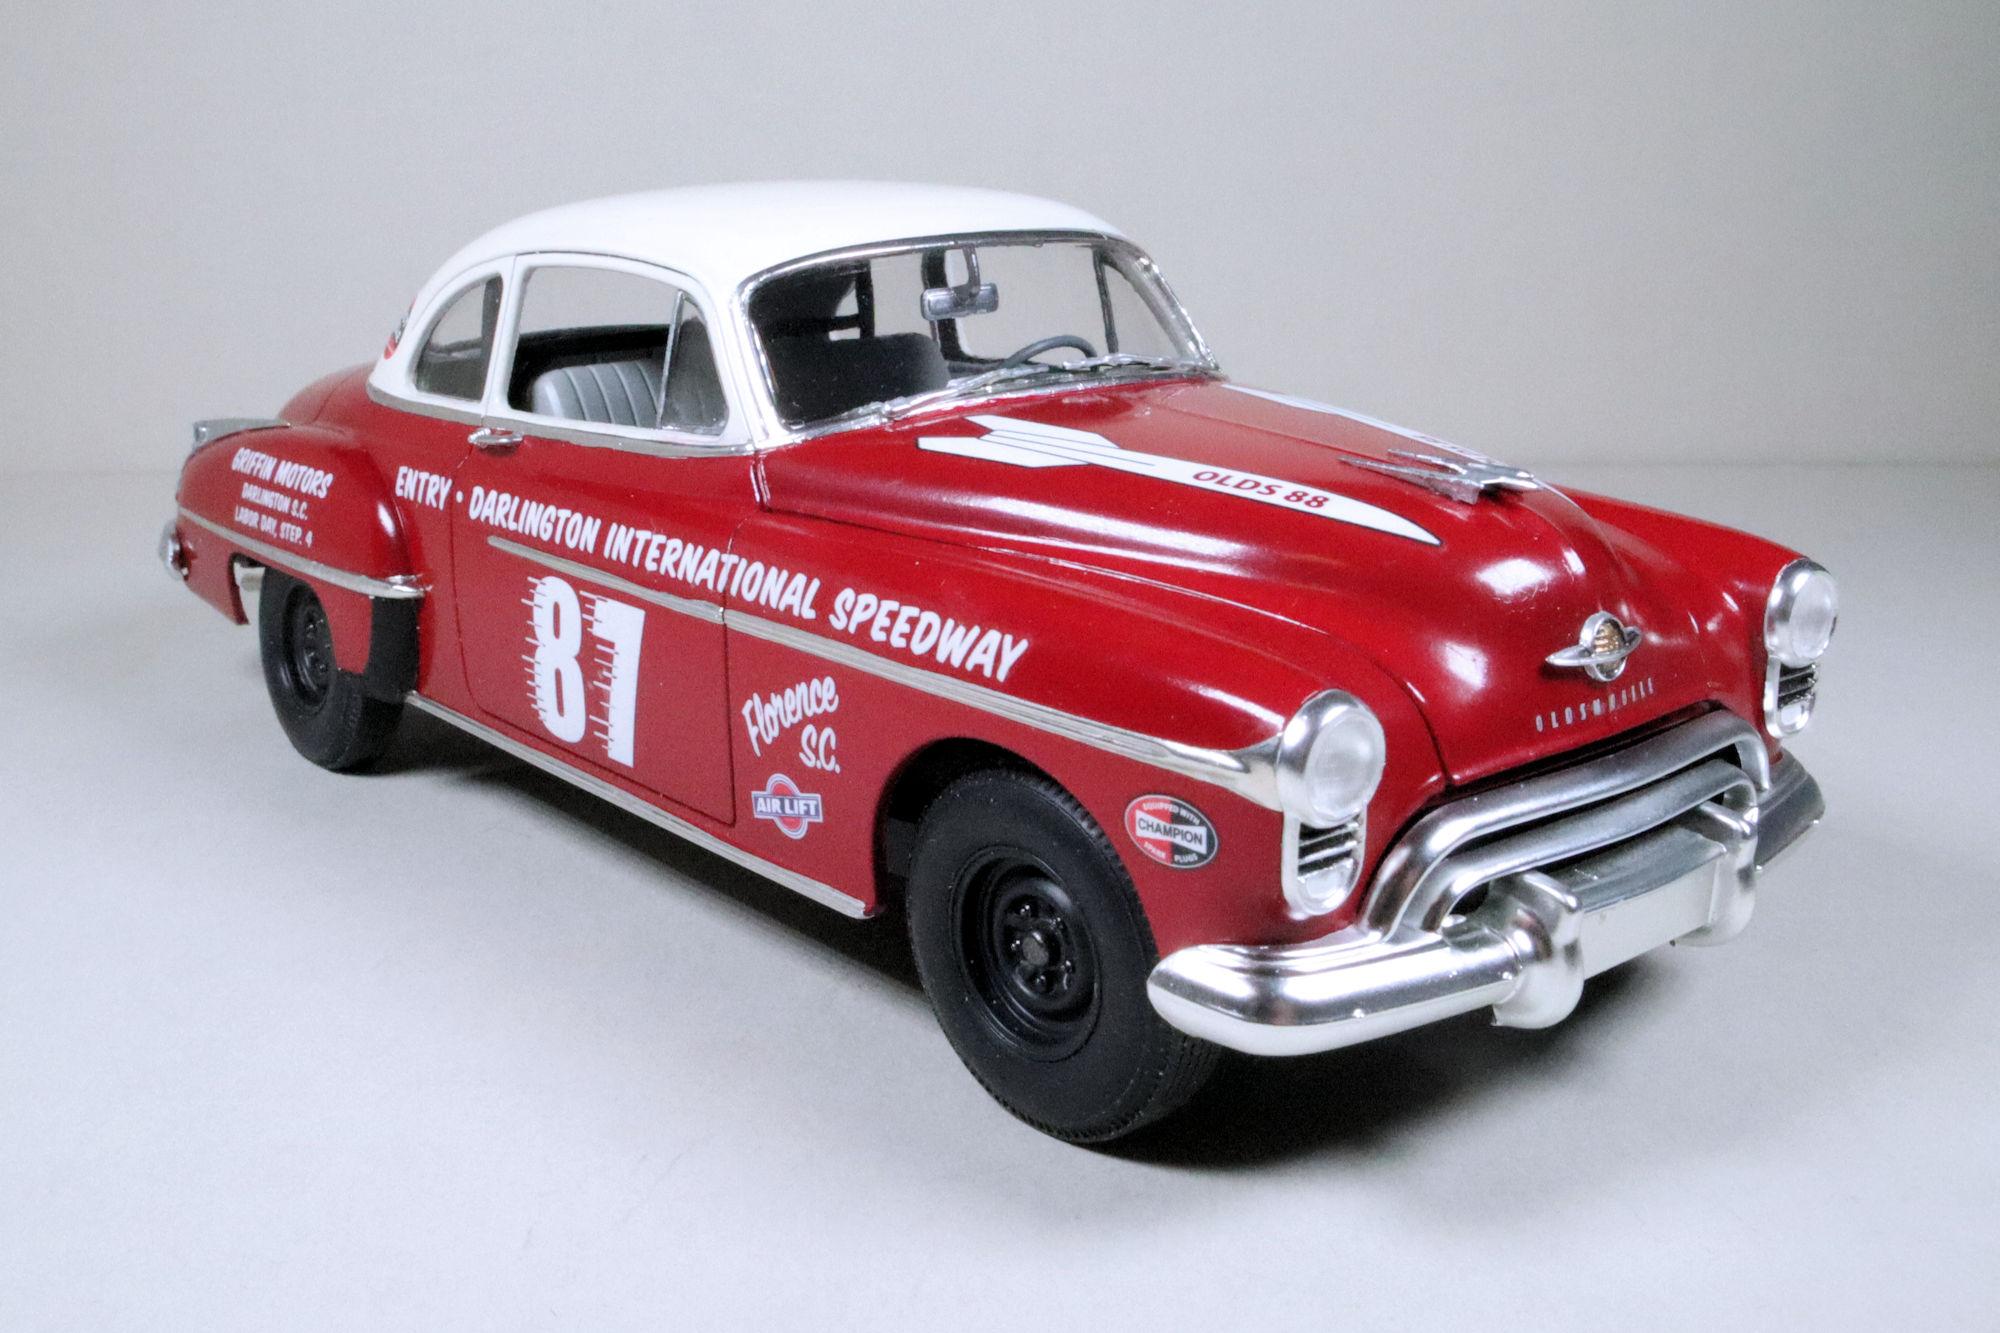
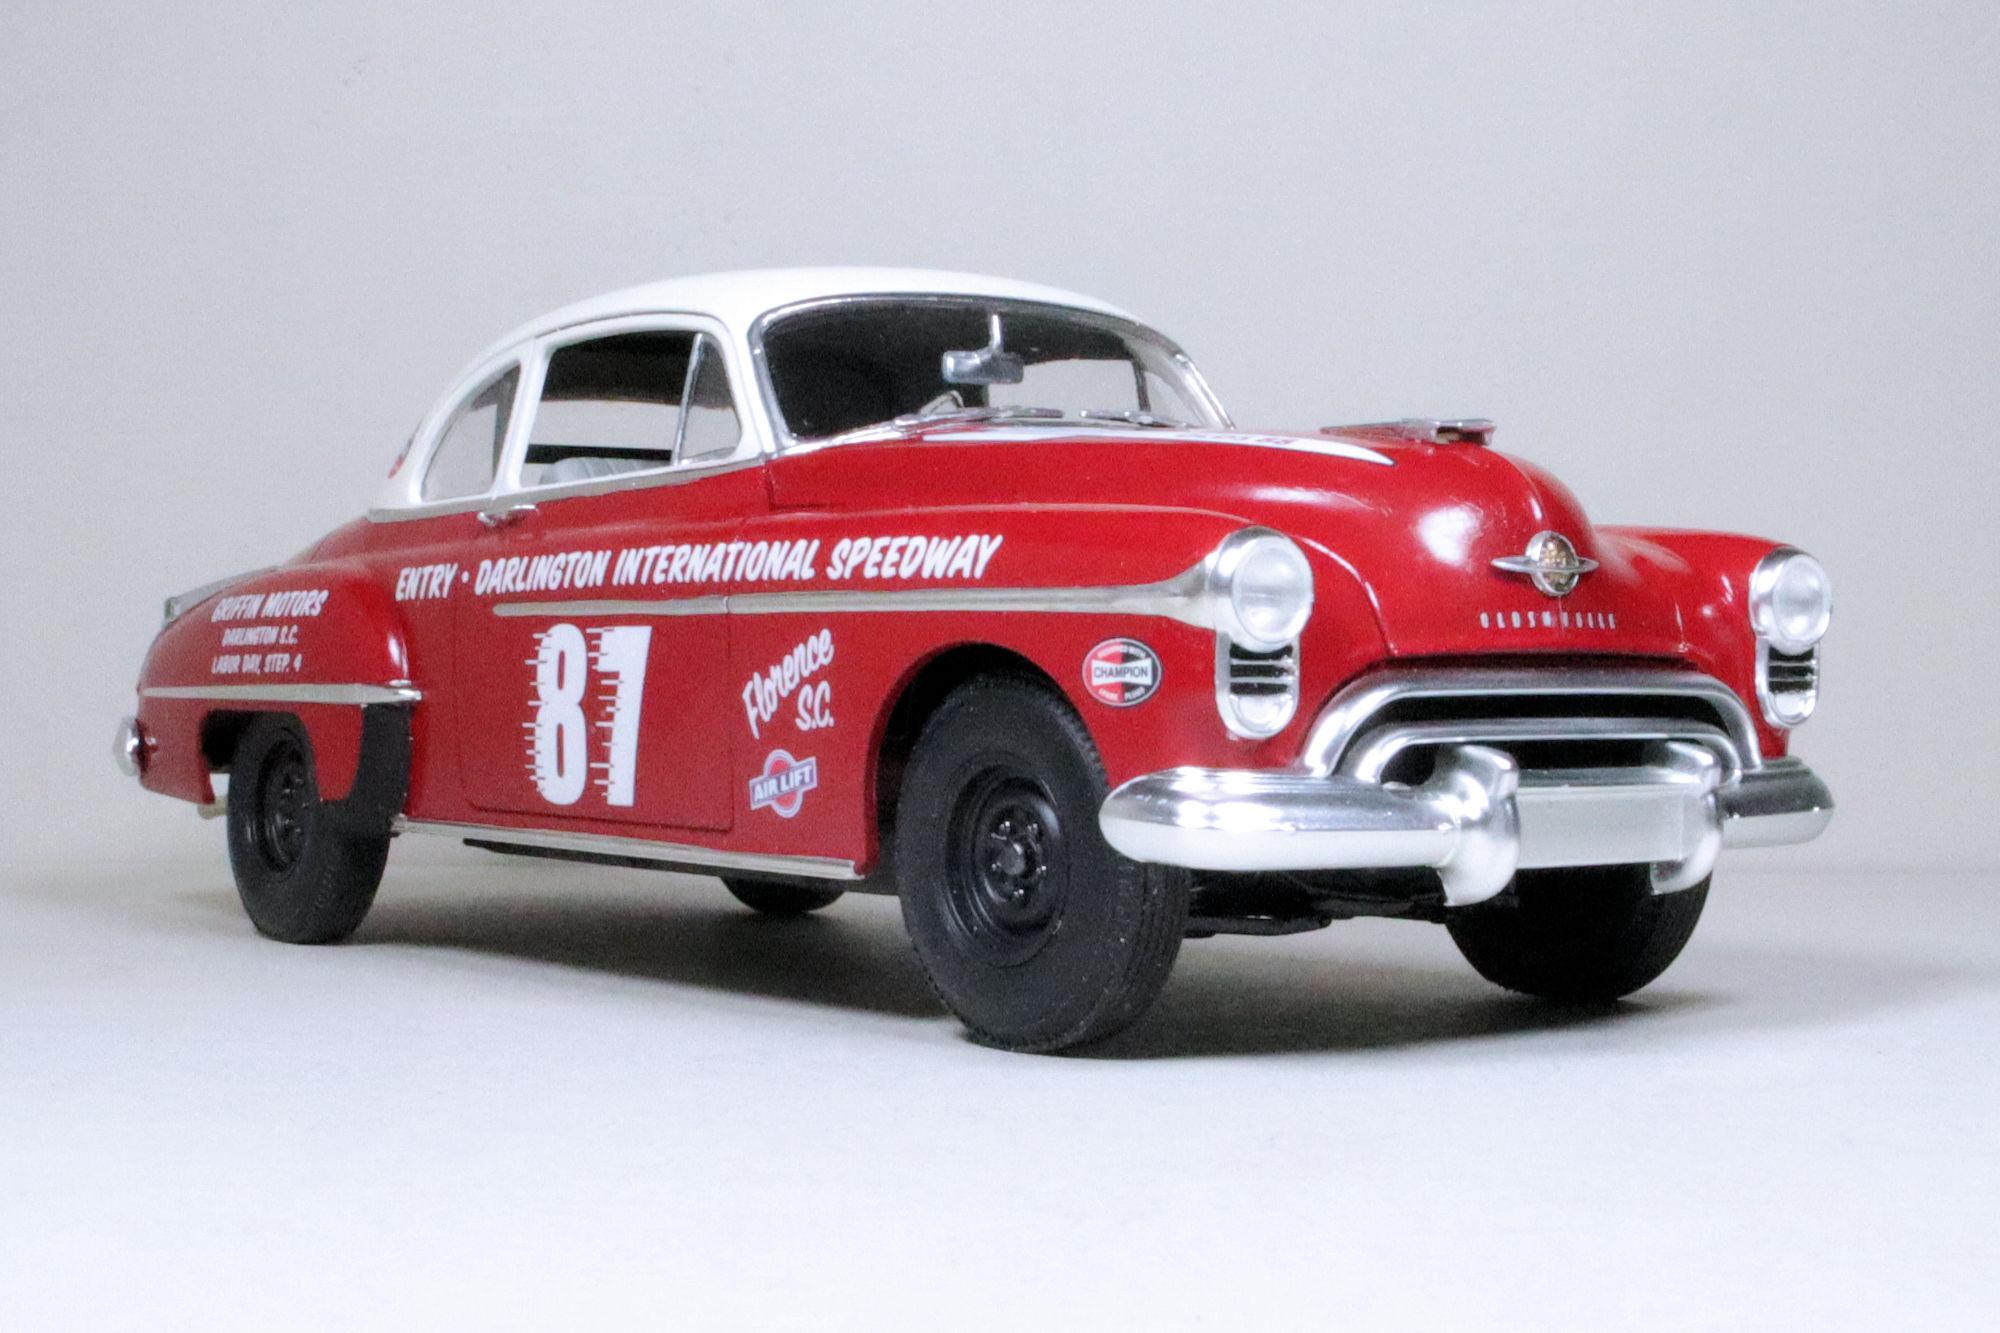
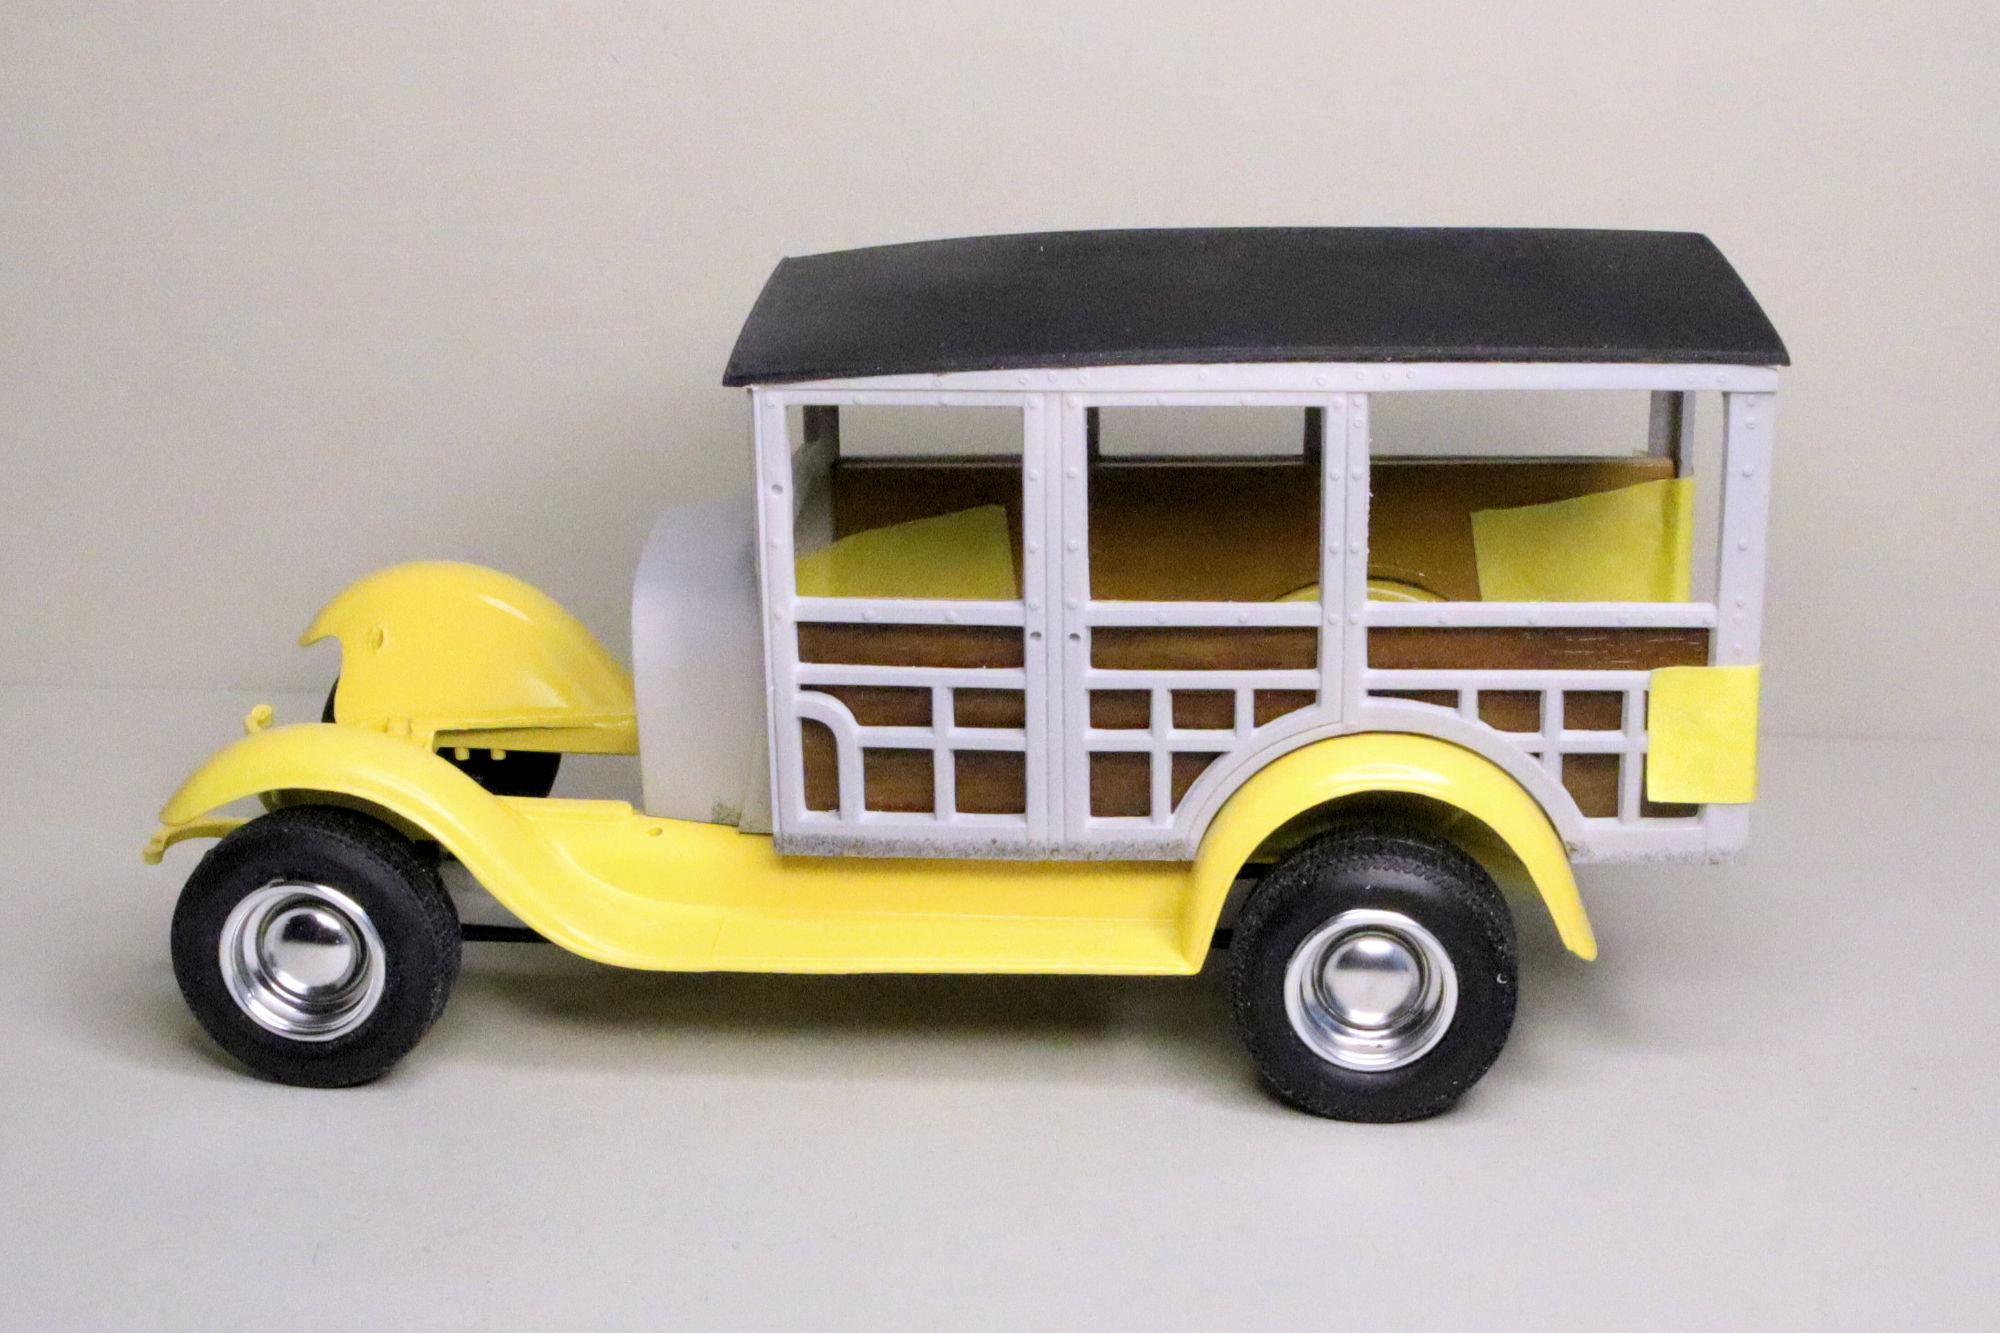
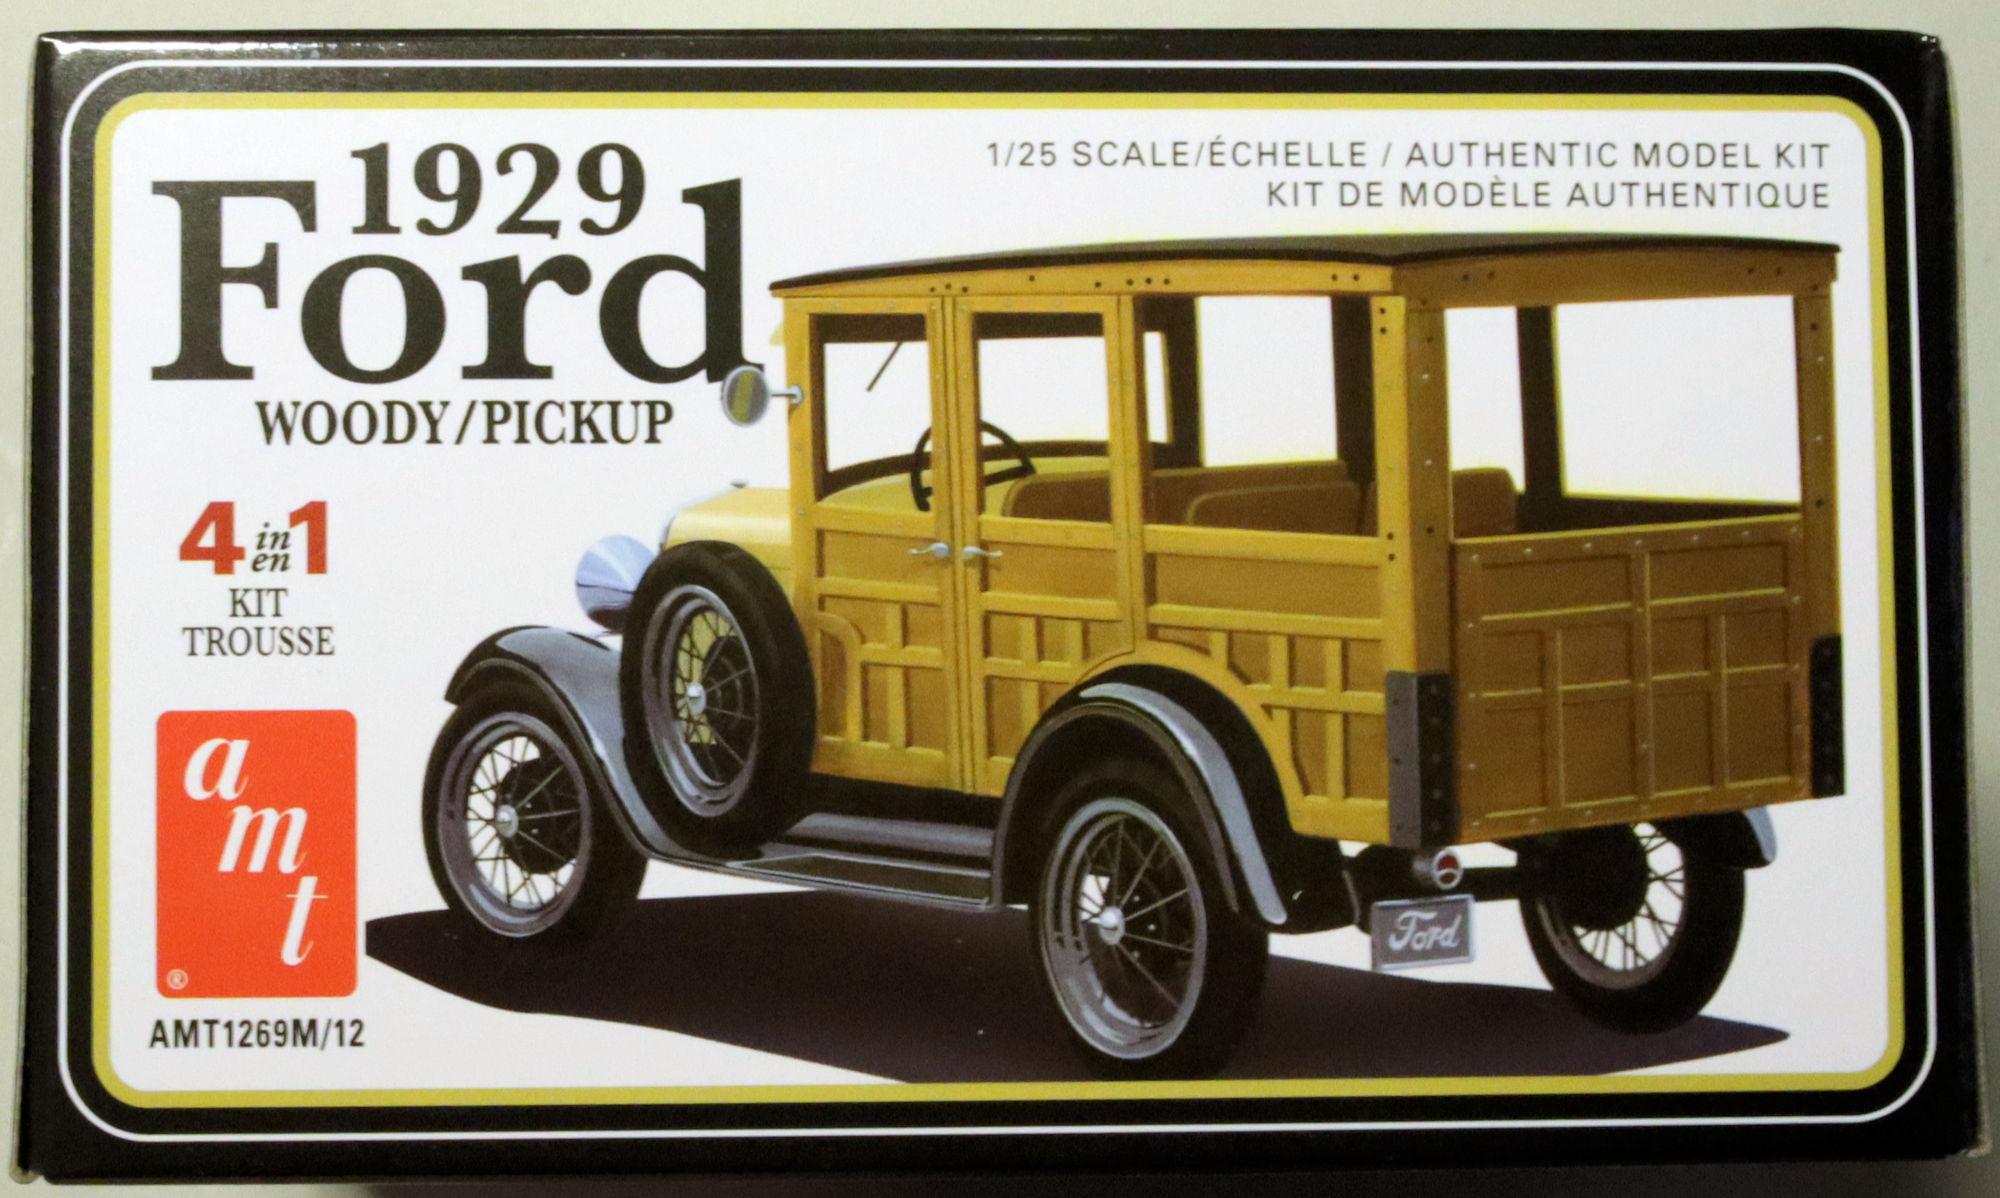
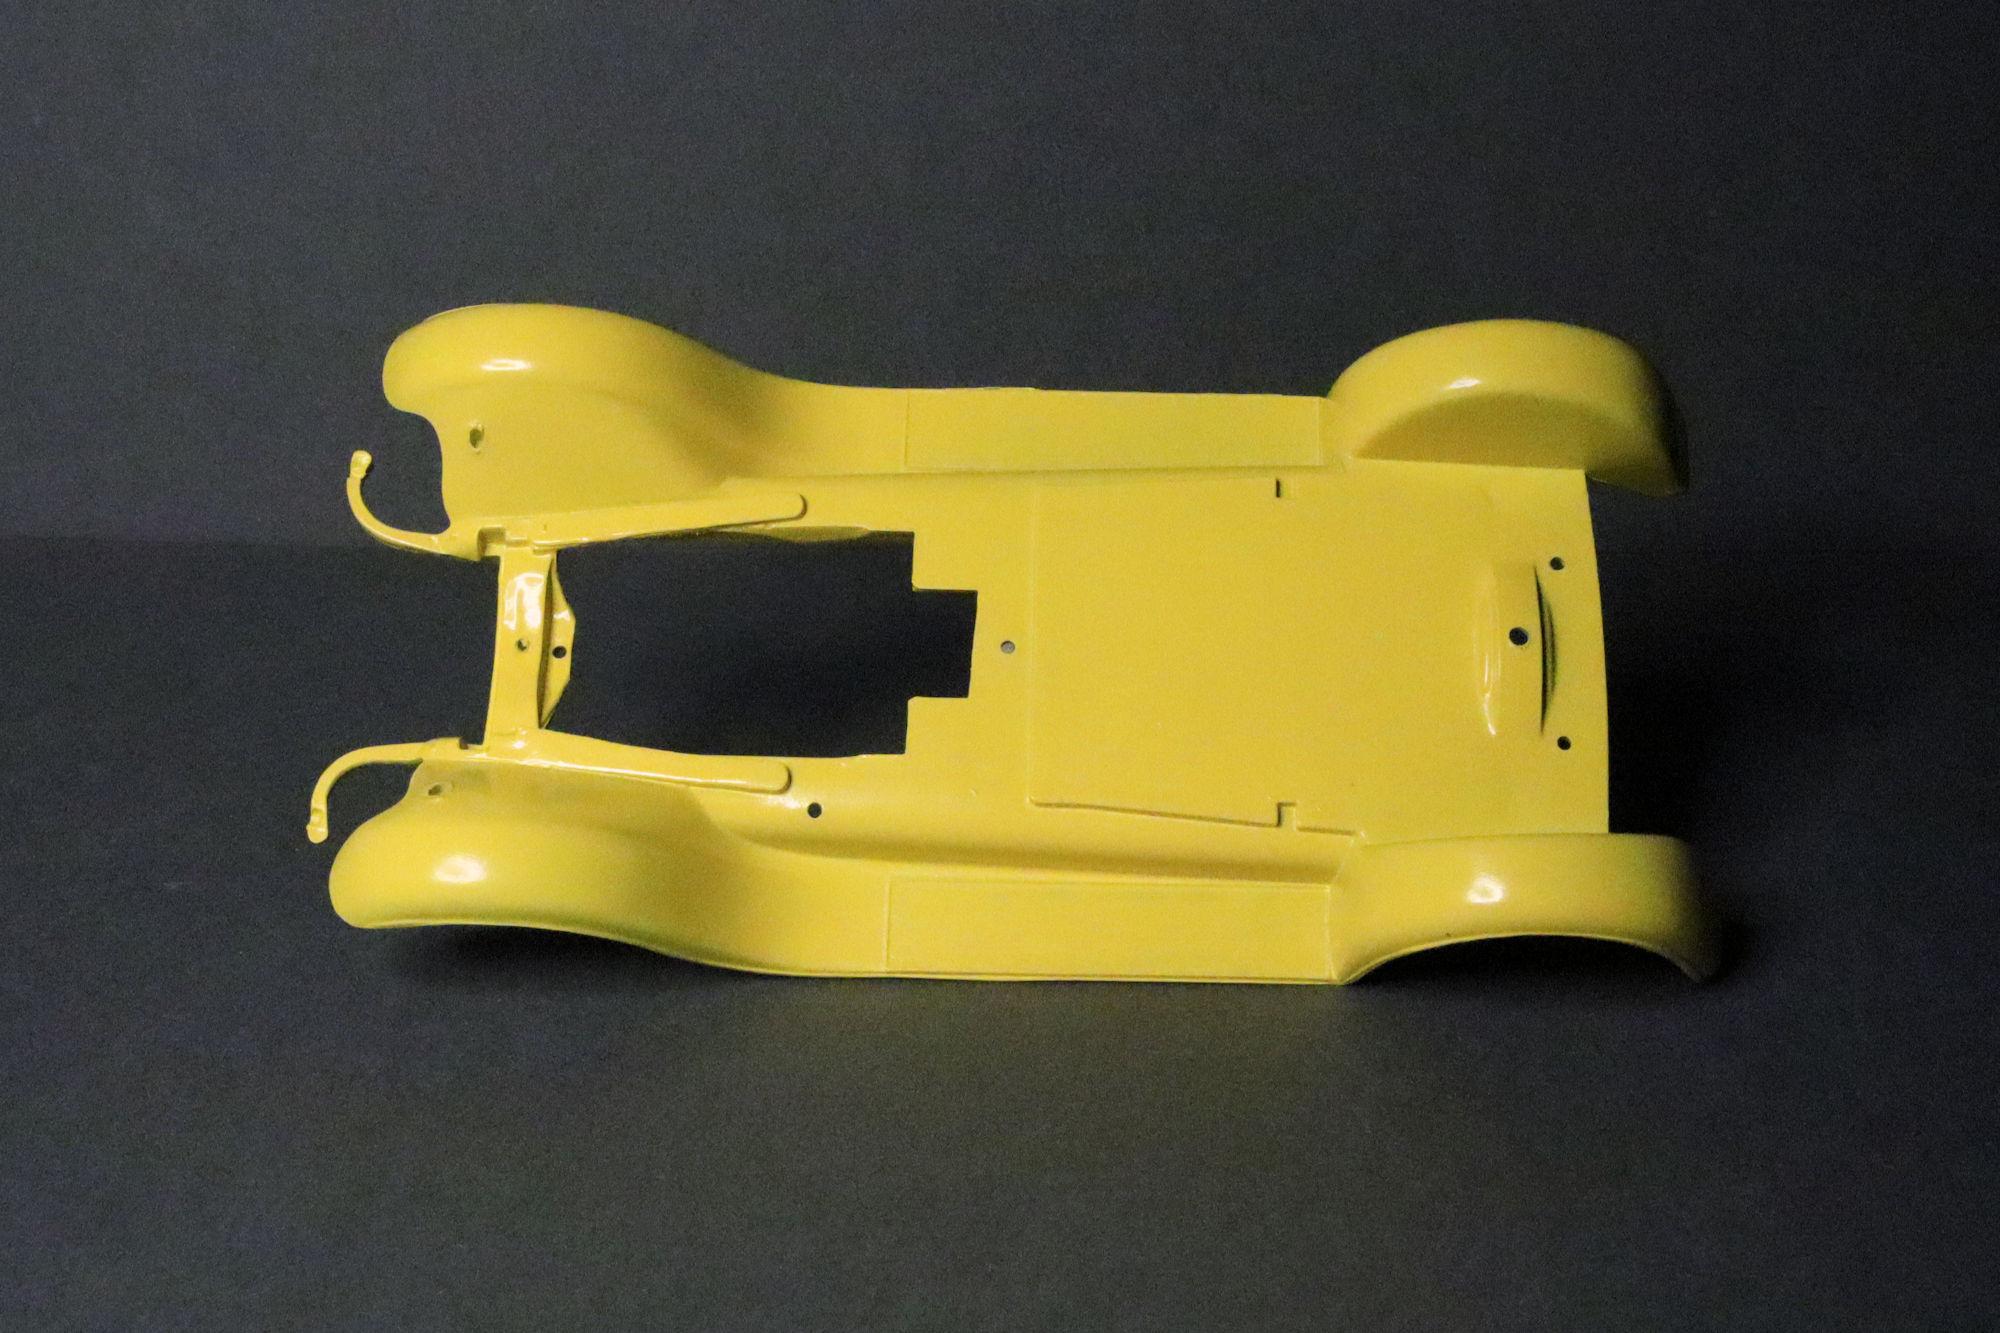
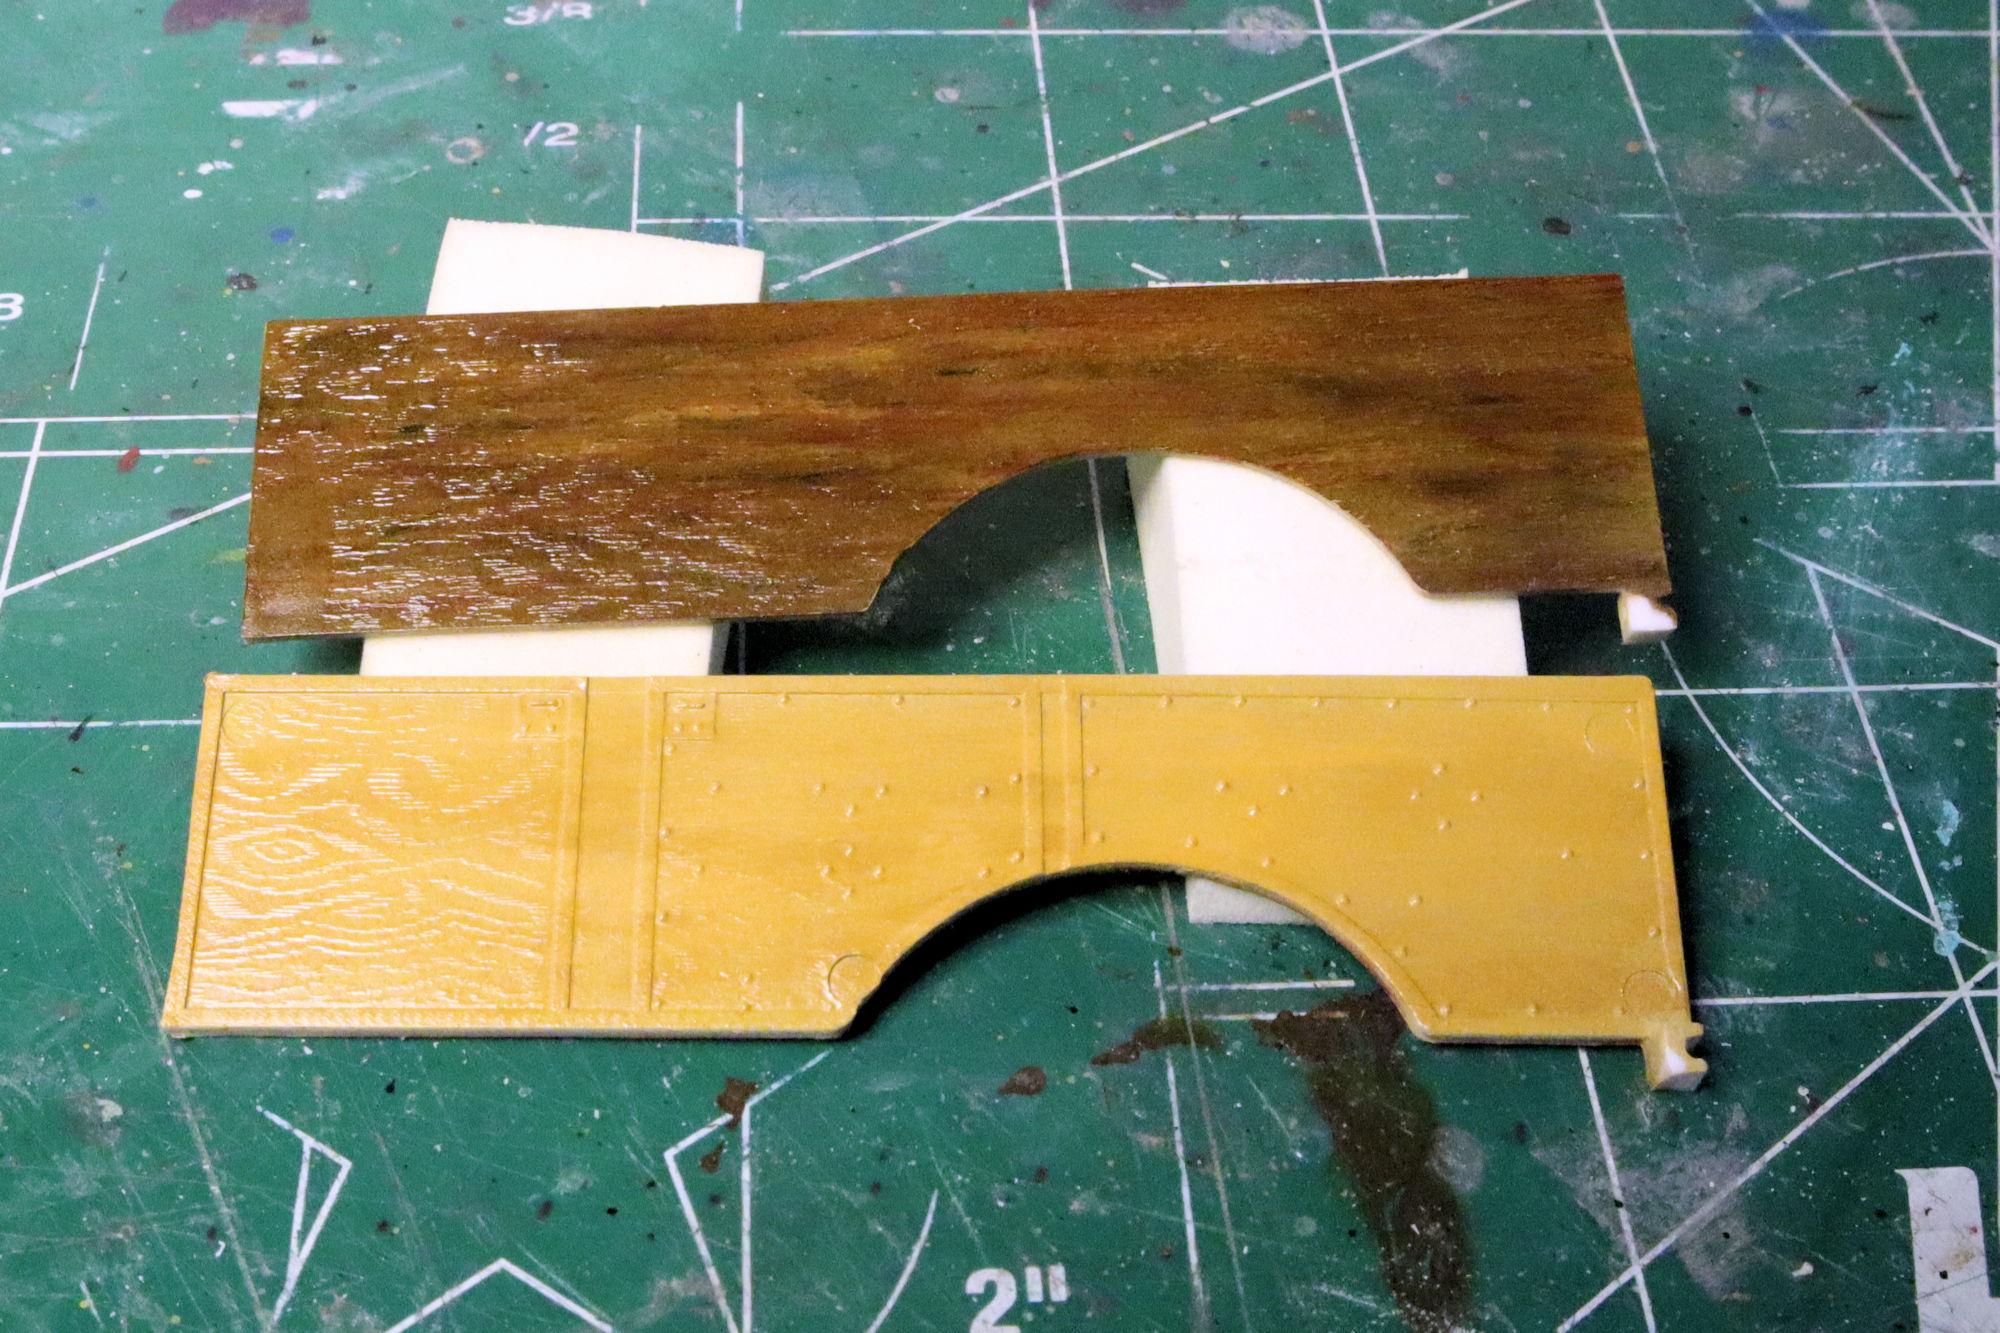
Hello Everybody! Now that my '50 Oldsmobile Club Coupe is finished, it's time to start another build! This is AMT's 1929 Ford Woody/Pickup kit. According to the box it can be built one of four ways. A wagon or a pickup, with custom or stock options for each. I've decided to build the Woody wagon as a mild-custom hot rod. The first thing I wanted to do was get the right stance and profile. So I assembled the axles and did a mockup with a number of different wheel sets. I did find a good set of wheels and tires in the parts box. They have kind of a Western Smoothie look which is much better than the Keystone Cliche' Classics or stock spokes in the kit. I will of course dress them up a little. Inspired by the box art and some online photos I decided on a sunny yellow for the base color. I painted the wood panel inserts using my woodgrain technique. The wood body framing will be similar to the inside of the panels. The test-fit mockup is looking pretty good. That's it for this round. As always, thanks for taking the time to look and please feel free to post any comments, questions or critiques you may wish to share. David G.
-
Indeed. Life is a team sport not a competition. I only compete against myself, trying to be better than I was. =D-
-
Thank you Jim, it is a good kit and has a lot of potential for customization. Thank you Bob. Please feel free to share it with him. My Facebook profile is called Model Cars, Mostly, there's a link in my signature. I have most of my builds posted there. Thank you Mike. It is a dang good kit, especially for Revell Thank you John. Given the similar body designs it wouldn't be difficult to tool-up the brand variants. Like what Moebius did with the Ford pickup and Hudson Hornet. Thank you very much David. The decals came in the kit, they're not completely accurate but they do look good. Thank you David, I'm glad to know that you like it. Thank you kindly Larry. Thank you Brian. Thank you Mike, I appreciate it. Thanks again, David G.
-
Rolls-Royce No Chemicals, No Paint, No Harmful Glues
David G. replied to Anglia105E's topic in WIP: Model Cars
I would say cut it in if you can. In for a penny... y' know. One thing I've done when cutting replacement glass is to stick a piece of masking tape to the original, trim the tape to size, remove it and stick it to the replacement material as a template. That way the tape carries the third dimensional curvature of the original over to the two dimensional replacement. David G. -
The paint looks great! That's a good color for these cars, I painted mine gold. David G.
-
Thank you kindly David. That makes four for the year... so far. =D-