David G.
-
Posts
11,314 -
Joined
-
Last visited
Content Type
Profiles
Forums
Events
Gallery
Everything posted by David G.
-

HOBOY! HOT NEWS! 1974 Dodge Monaco Police Cars Coming!!!!
David G. replied to Danno's topic in Diecast Corner
I just ordered one this morning David G. -
Nice work so far. David G.
-
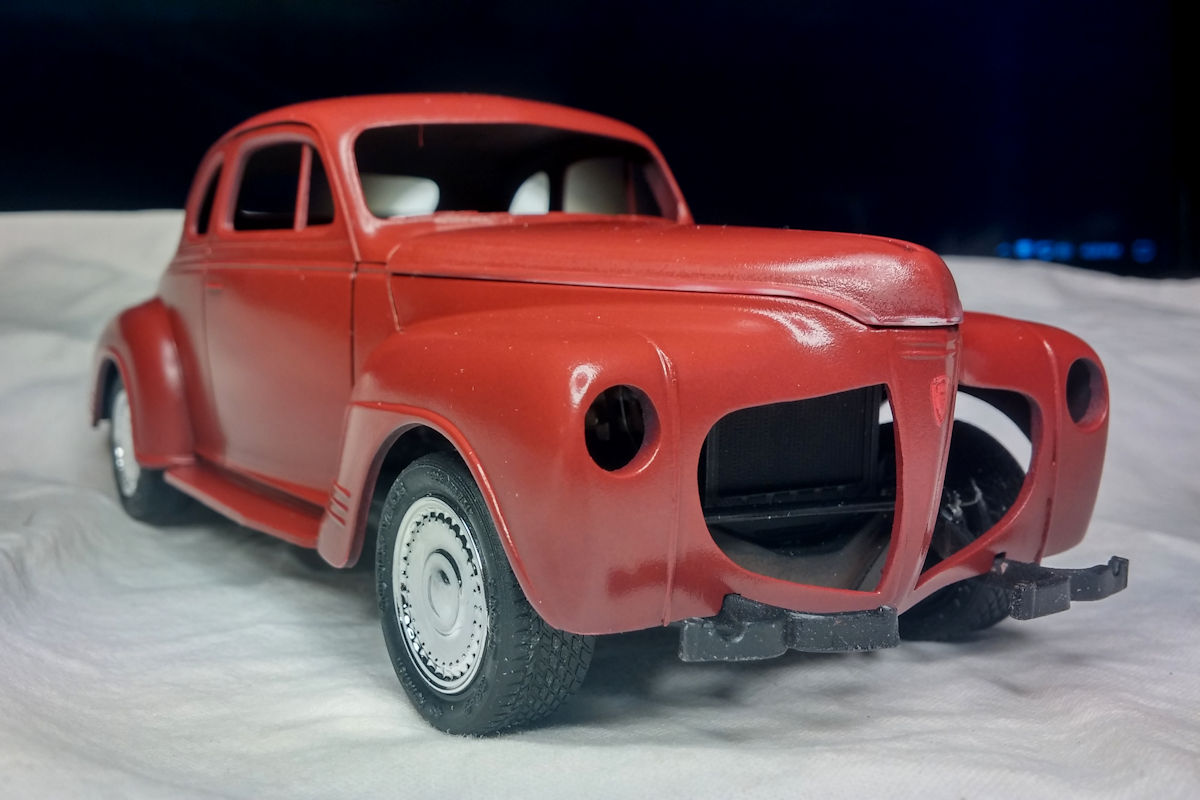
Finally, some color! The color looks a little warm in this photo, but the panel blending shows nicely. This shot shows the color a little closer to its actual appearance. I really like this color on this car. That's all for now folks. Thanks for looking and please feel free to comment. David G.

-
OK Here's the Bus I built a few years ago. This kit had no interior side panels or trim. Though it's difficult to see here, I created side panels and carved arm rests from bits of styrene. Thanks for looking! David G.
-
Thanks Bruce. David G.
-
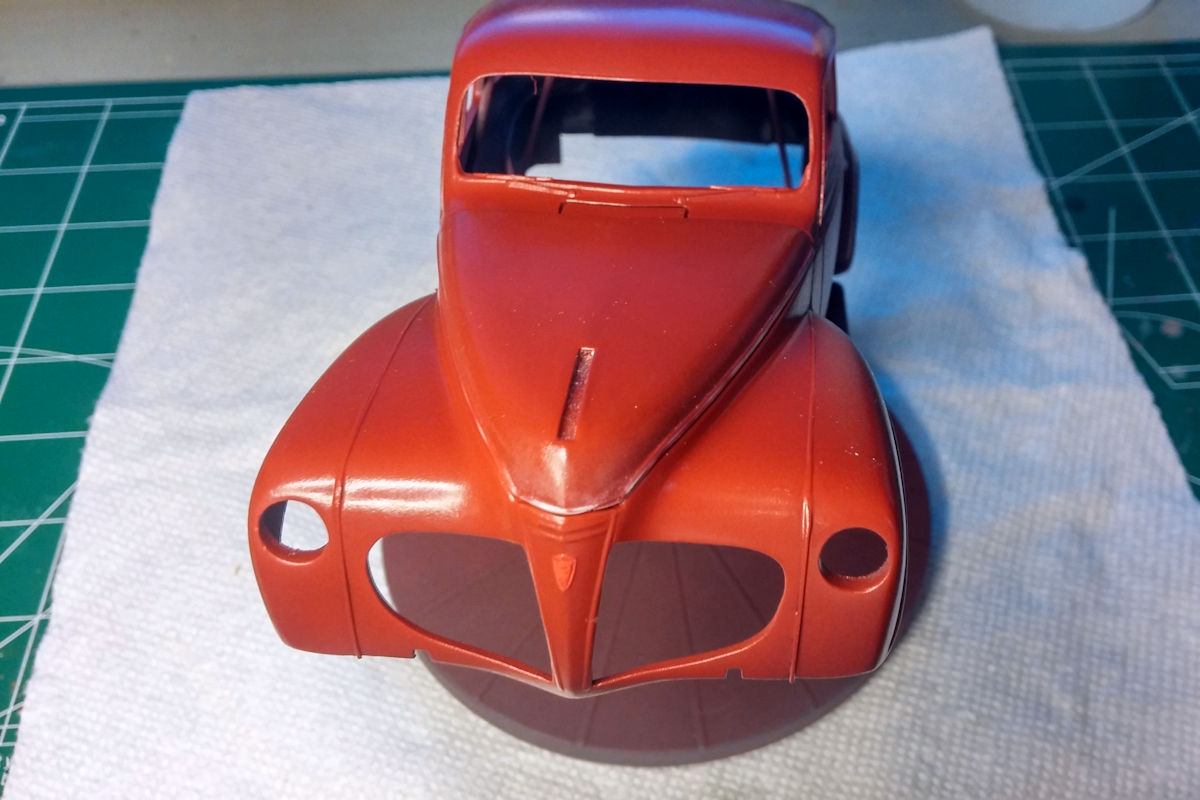
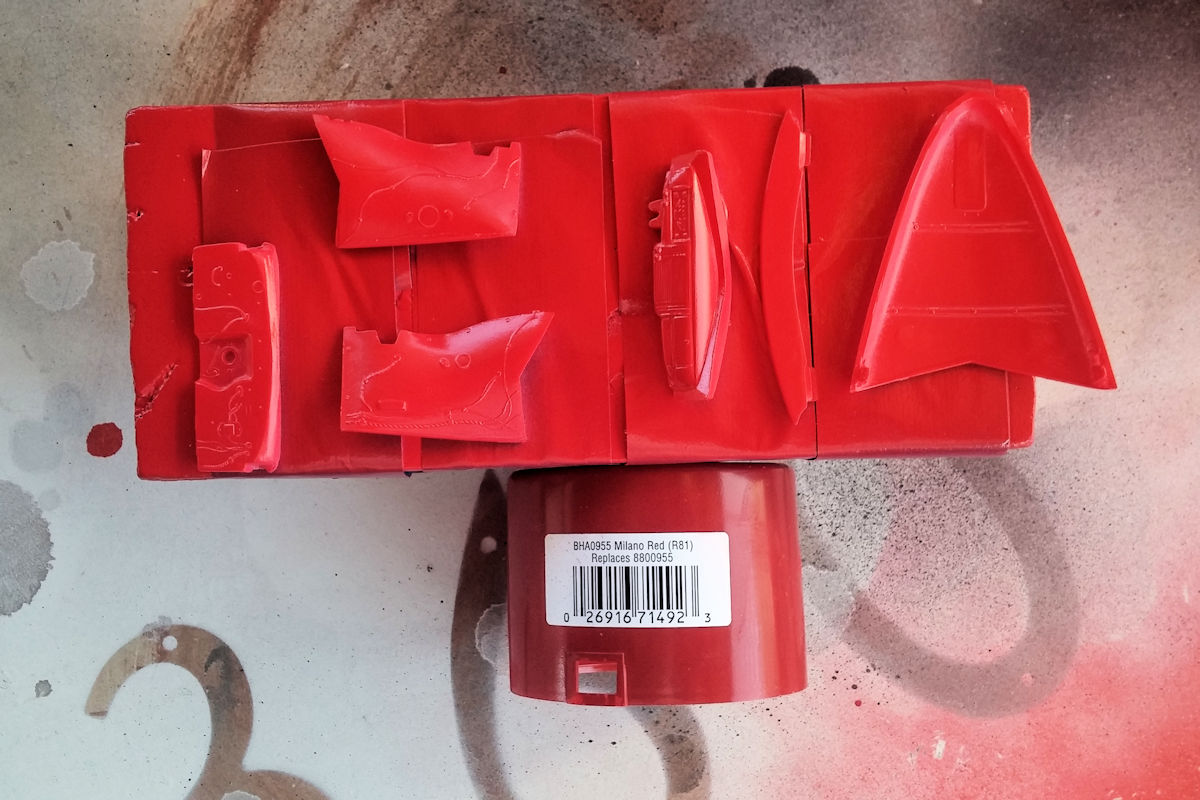
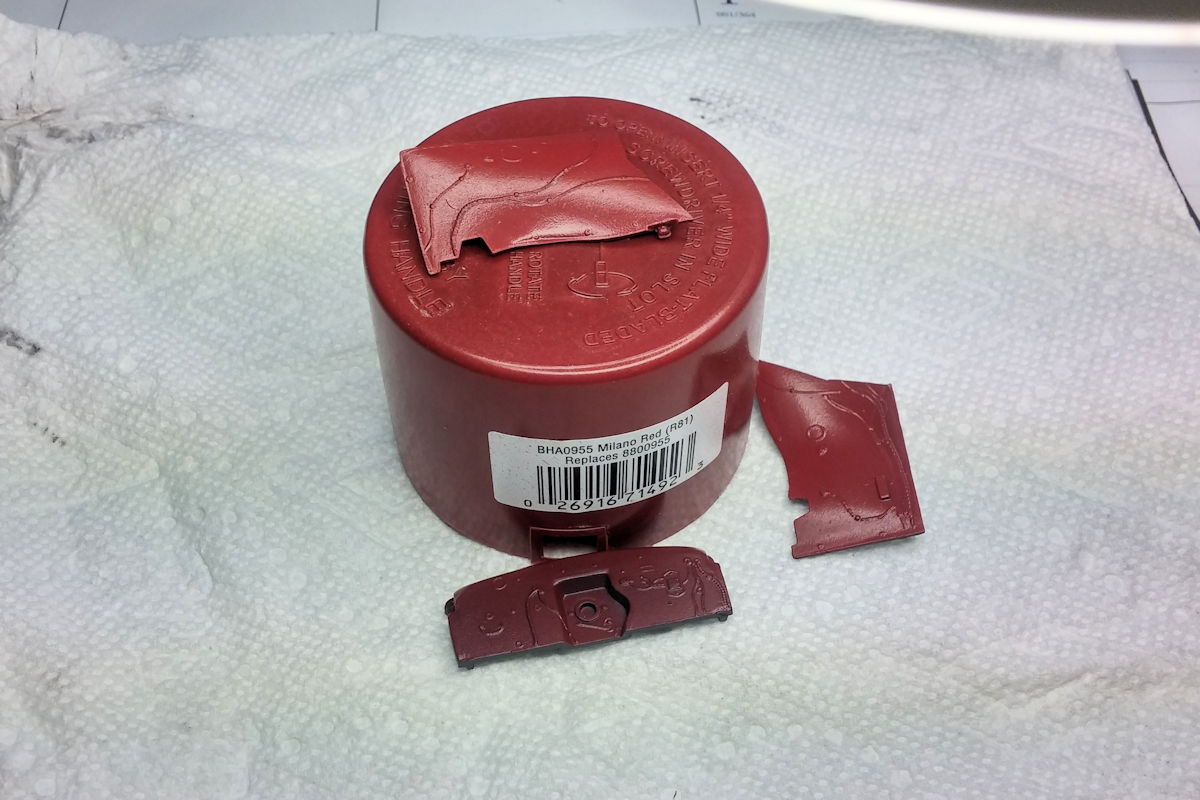
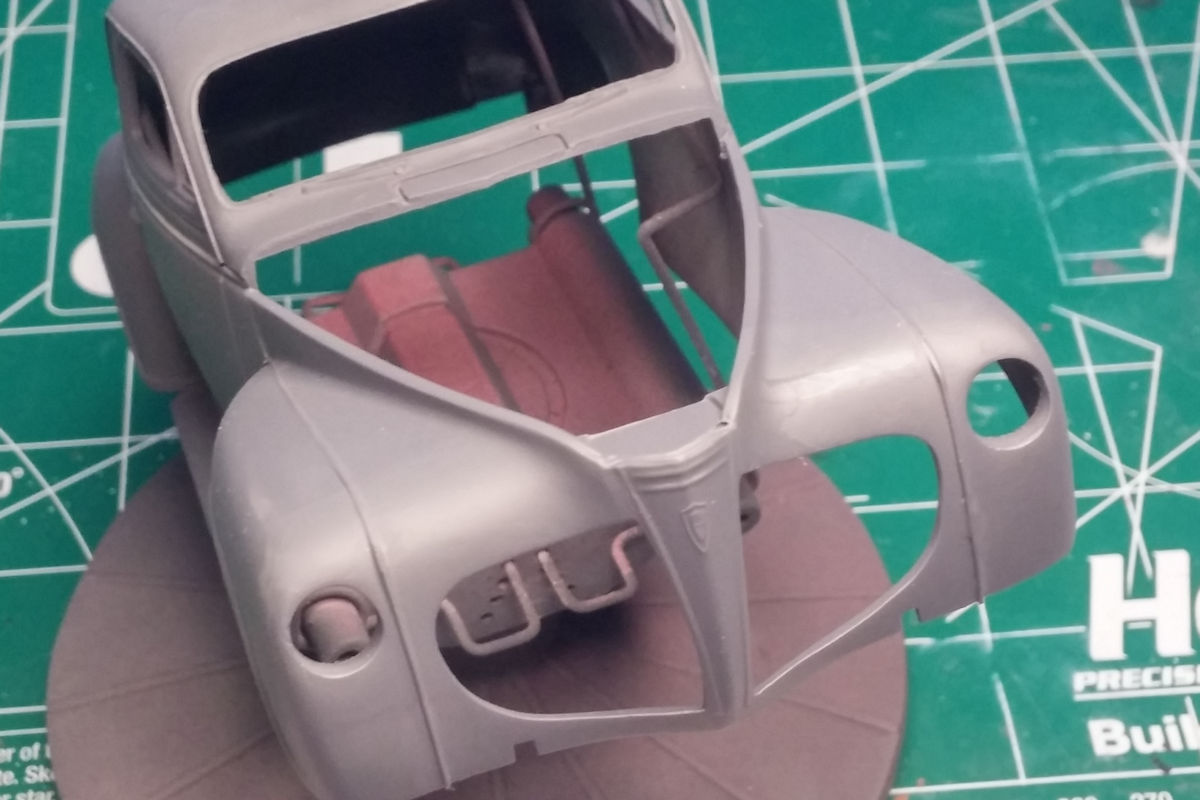
I have a few more photos processed- here they are! I've pre-foiled the badges on the nose and trunk lid. After each coat of paint, I carefully remove the paint from the foil with a toothpick dipped in lacquer thinner. I've darkened the panel lines with thinned black acrylic paint. The dark gray primer almost has me tempted to change the color to black from the dark red I planned. I think we're ready for some color! While I was waiting for primer and putty to dry, I decided to prep and paint some of the secondary body items. The color I bought was Duplicolor Milano Red. If one goes by the appearance of the cap, it's a nice dark red. Using white primer beneath it seems to punch up the color a bit too much for my liking. So it's on to the spoon test. The piece on the top of the cap shows the noticeable variance between the intended shade and the way it actually came out. The three spoons show the effect different primers under the paint. The leftmost spoon has the white primer that I initially used. The middle spoon uses a red oxide primer and the spoon on the right uses a dark gray primer. I think the dark gray gives the closest match to the intended shade. It looks like the dark gray primer was the way to go. That's about as close a match as I could hope for. Hopefully, I'll get the time to post some more soon. As always, thanks for taking the time to look and feel free to comment. David G.
-
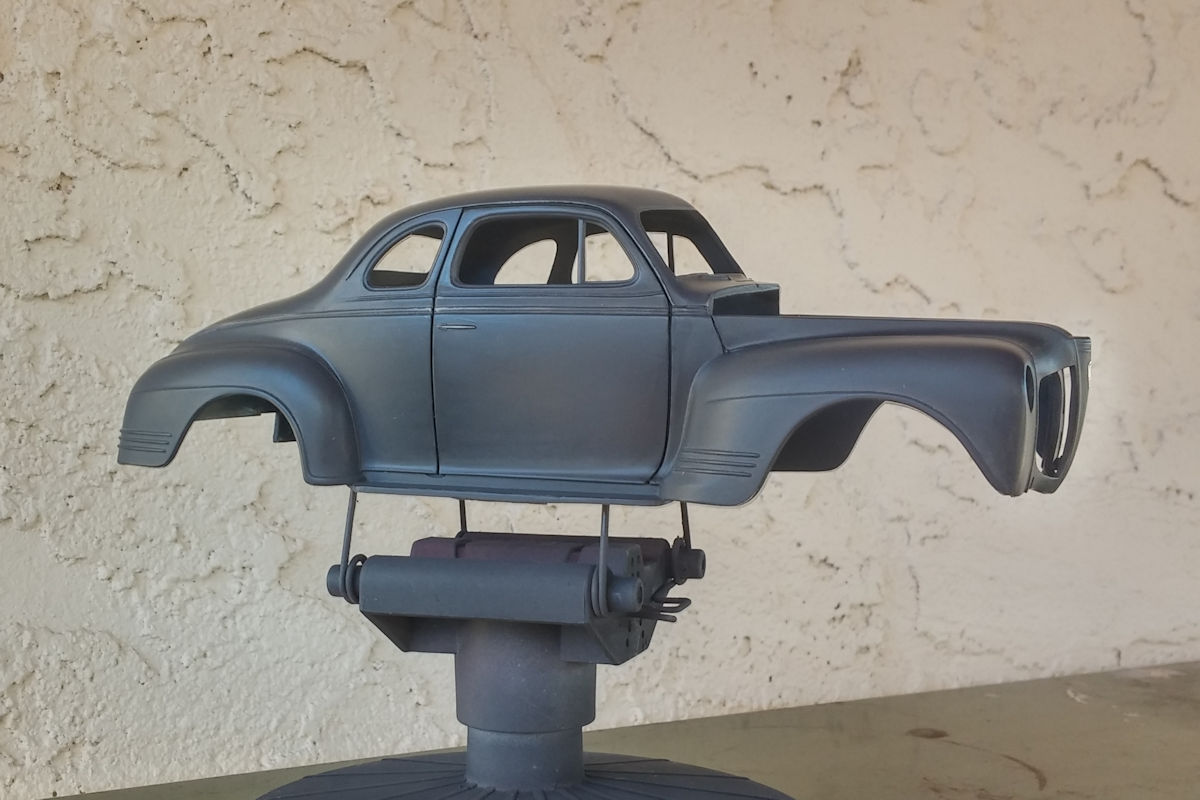
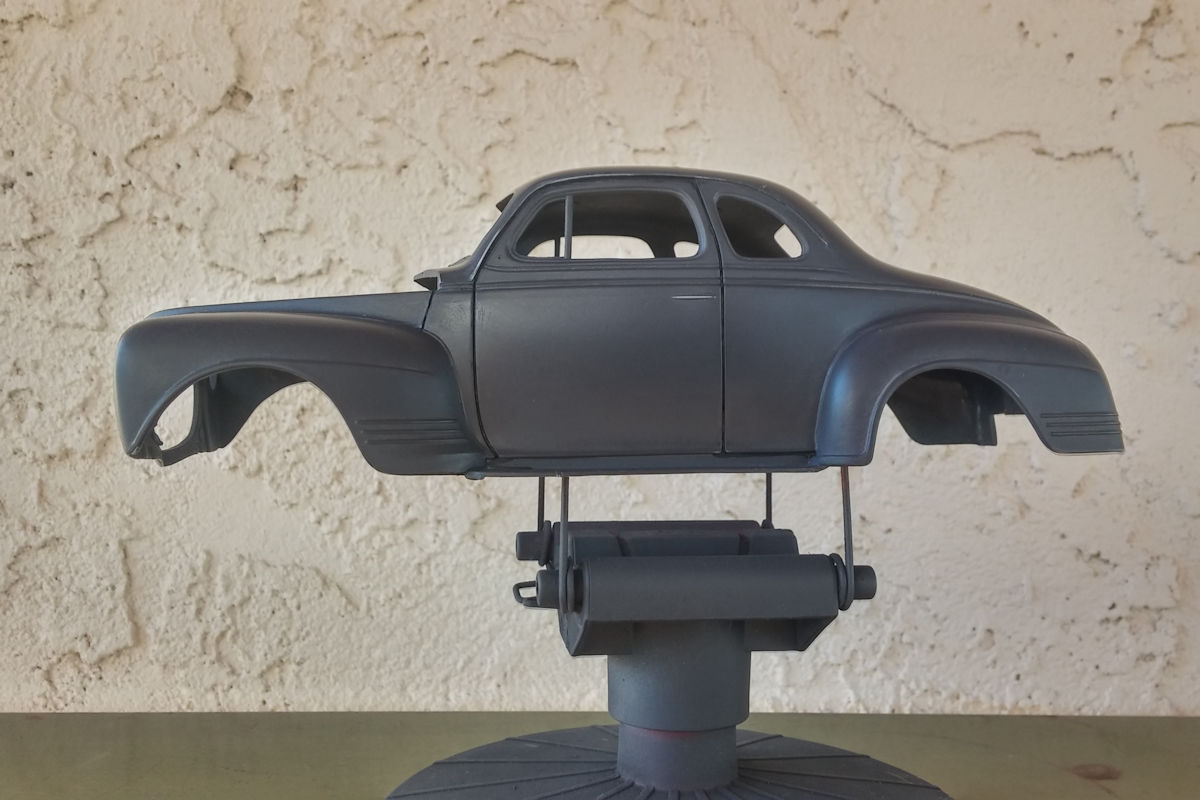
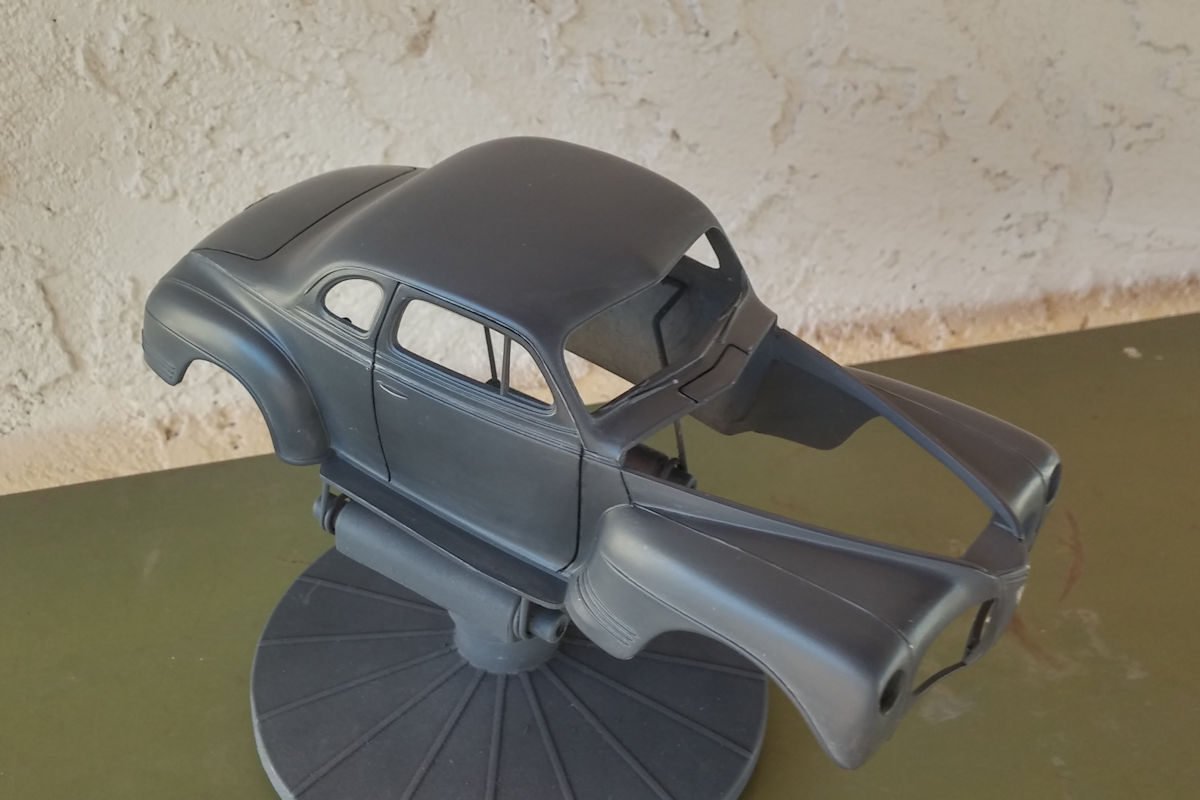
OK, I found some time for a quick update. When I opened this kit and saw the manner in which AMT decided to mold the front panel of this kit as a separate piece, I was a little disheartened. I knew I could blend the panel seams without much difficulty, but correcting the disjointed the fender welts was going to be a challenge. To my eyes, the way the fender welts followed the waterfall sweep of the fenders as they merged into the body line framing the butterfly grille was a significant design feature of the car. Not getting this right would greatly detract from the finished kit. It's not perfect, but it's better than what the kit gave me. As always, thanks for looking and feel free to comment. David G.
-
Looks good so far. David G.
-
Nicely done! Your work shows what this kit could be with a bit of effort. David G.
-
'37 ford panel delivery
David G. replied to paolo76's topic in WIP: Model Trucks: Pickups, Vans, SUVs, Light Commercial
Nicely done Paolo, the rust effects are very convincing. David G. -
Fantastic paint and foil work, looks great! David G.
-
I always enjoy watching your builds Harry, you always seem to know just how much extra detail to add. That wheel rig is sheer genius! David G.
-
Nicely done! David G.
-
Looks good, excellent paintwork. David G.
-
Ford LNT 8000 Snow Plow
David G. replied to Ack! Ack-ack!'s topic in Model Trucks: Big Rigs and Heavy Equipment
Nicely done! David G. -
'80 Dodge Ramcharger
David G. replied to crazyjim's topic in Model Trucks: Pickups, Vans, SUVs, Light Commercial
Nicely done, paint looks great! David G. -
'37 ford panel delivery
David G. replied to paolo76's topic in WIP: Model Trucks: Pickups, Vans, SUVs, Light Commercial
Excellent progress, looks great! David G. -
Nicely done! David G.
-
Another Revell chopper - rake and extended springer
David G. replied to gowjobs's topic in WIP: Model Cars
Love the color! David G. -
Excellent Paintwork! David G.
-
'37 ford panel delivery
David G. replied to paolo76's topic in WIP: Model Trucks: Pickups, Vans, SUVs, Light Commercial
Excellent progress! David G. -
Thank you Travis. David G.
-
'37 ford panel delivery
David G. replied to paolo76's topic in WIP: Model Trucks: Pickups, Vans, SUVs, Light Commercial
Excellent work Paolo. Thank you for sharing this. It's a very good tutorial. David G. -
Fantastic work, everything is spot-on! David G.
-
Excellent Work! David G.