David G.
-
Posts
11,314 -
Joined
-
Last visited
Content Type
Profiles
Forums
Events
Gallery
Everything posted by David G.
-
Excellent work on both of them, but the color of the convertible is perfect. David G.
-
Wow! Excellent modifications. David G.
-
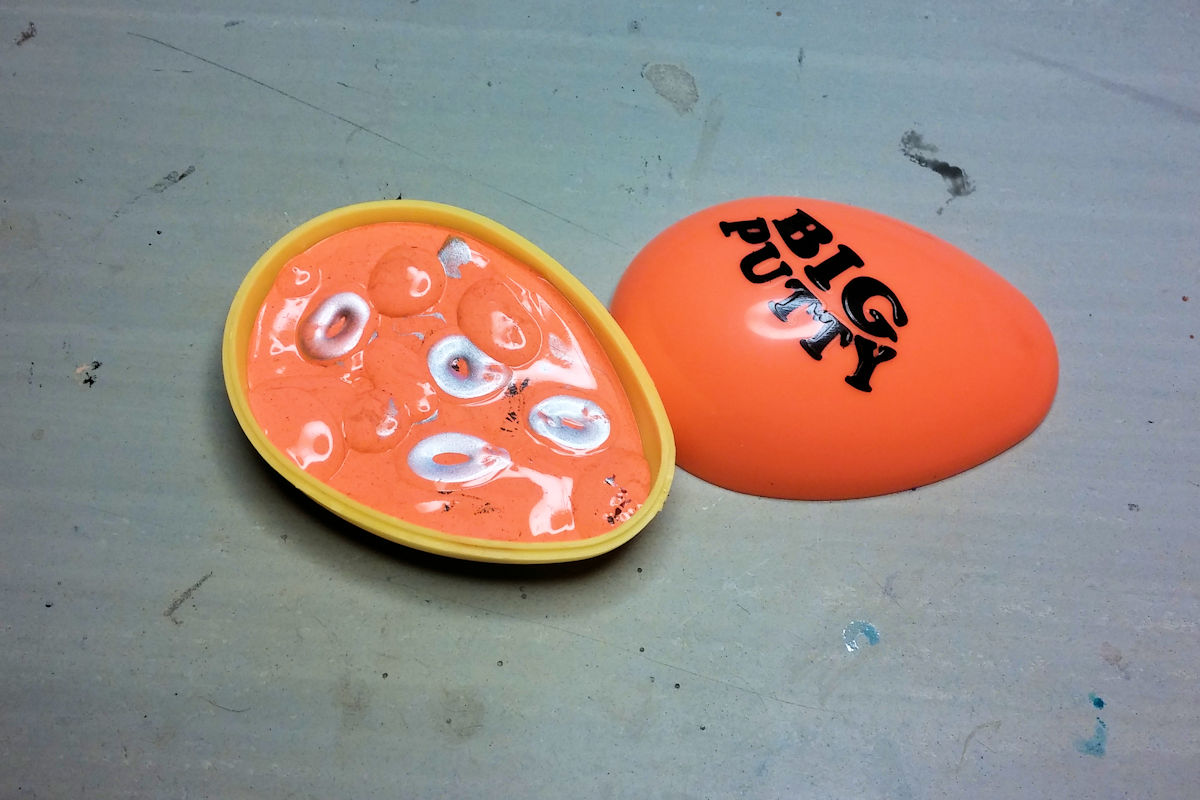
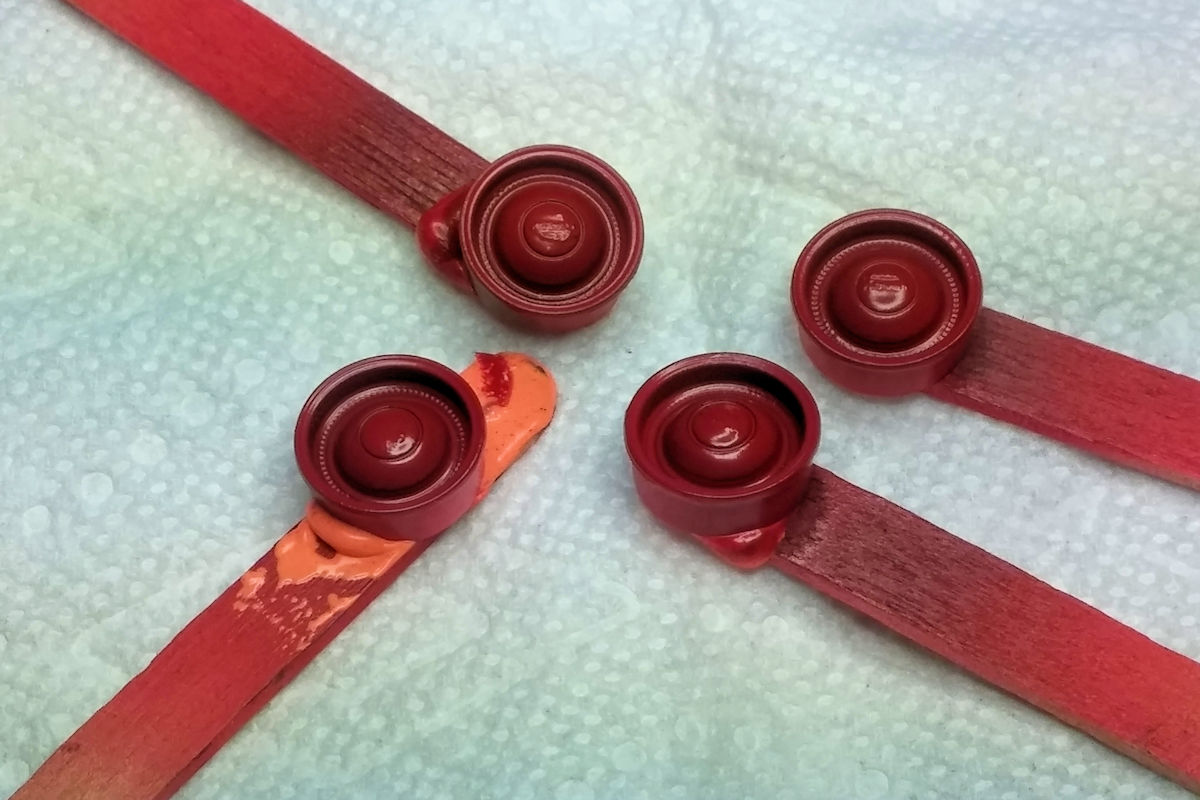
No, don't heat it. I used little bits that I rolled into tiny ropes then coiled around inside the wheel and pressed down to cover the areas to be masked. I checked the fit, then pulled the putty out to add or remove a little bit then tried it again until it was where I wanted it to be. The reason I placed them in the fridge is because the putty will slump within a few minutes at room temperature. I needed to get my airbrush and paint station set up and I didn't want the putty to slump or move in the time it took to do that. Yes, I do reuse the putty. I suppose over time the paint contamination will ruin it, but for now it doesn't seem to do any harm. Here's my putty, you can see the rings I made to mask the wheels. You can get an idea of the "slumping" that I was concerned about. David G.

-

VW Beetle`66 "North Dakota Hippie Coalition"
David G. replied to Janne Herajärvi's topic in Model Cars
Nicely done! David G. -
Your work is more amazing each time I see it. David G.
-
'66 Chevy 4x4
David G. replied to dieseldawg142's topic in Model Trucks: Pickups, Vans, SUVs, Light Commercial
Nicely done! David G. -
Most Impressive! It could pass for 1:1. David G.
-
Thank you Chris. It's a good feeling when the things that one spends the most effort on are the things that get noticed. I picked up the Silly Putty tip on this forum and I'm glad to pass it on. David G.
-
Thank you Bill. After seeing some of the work you've done, I value your comments. David G.
-
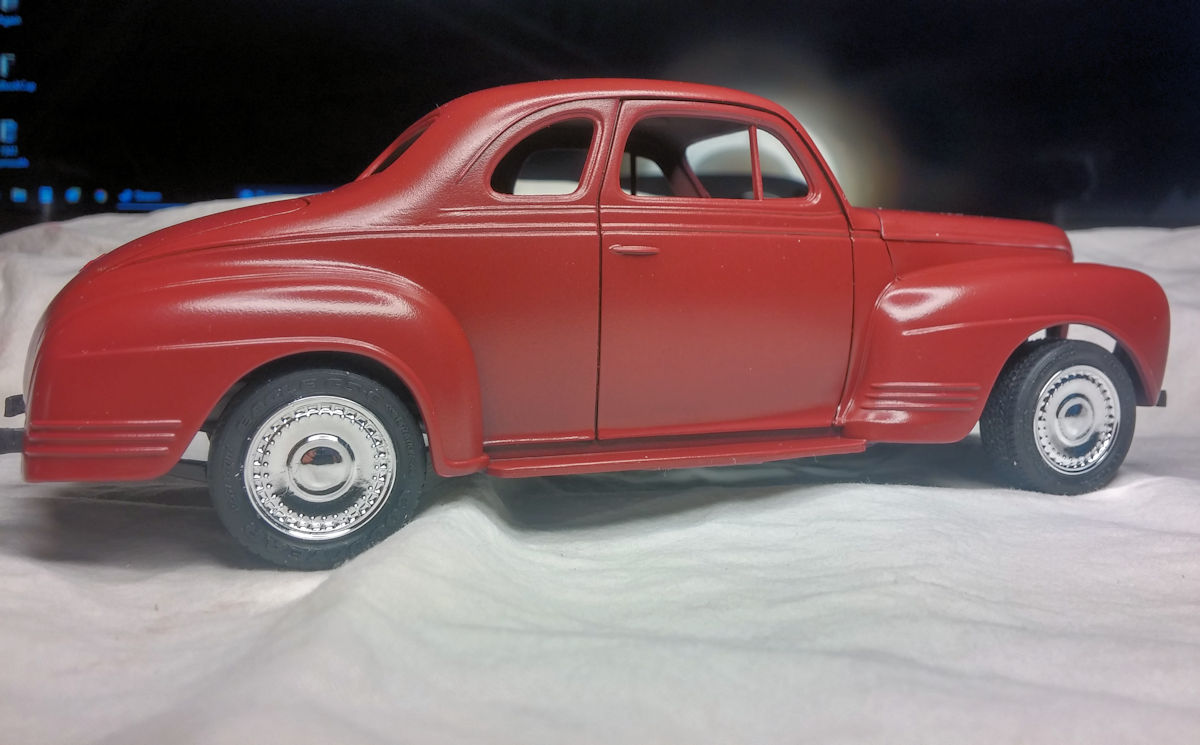
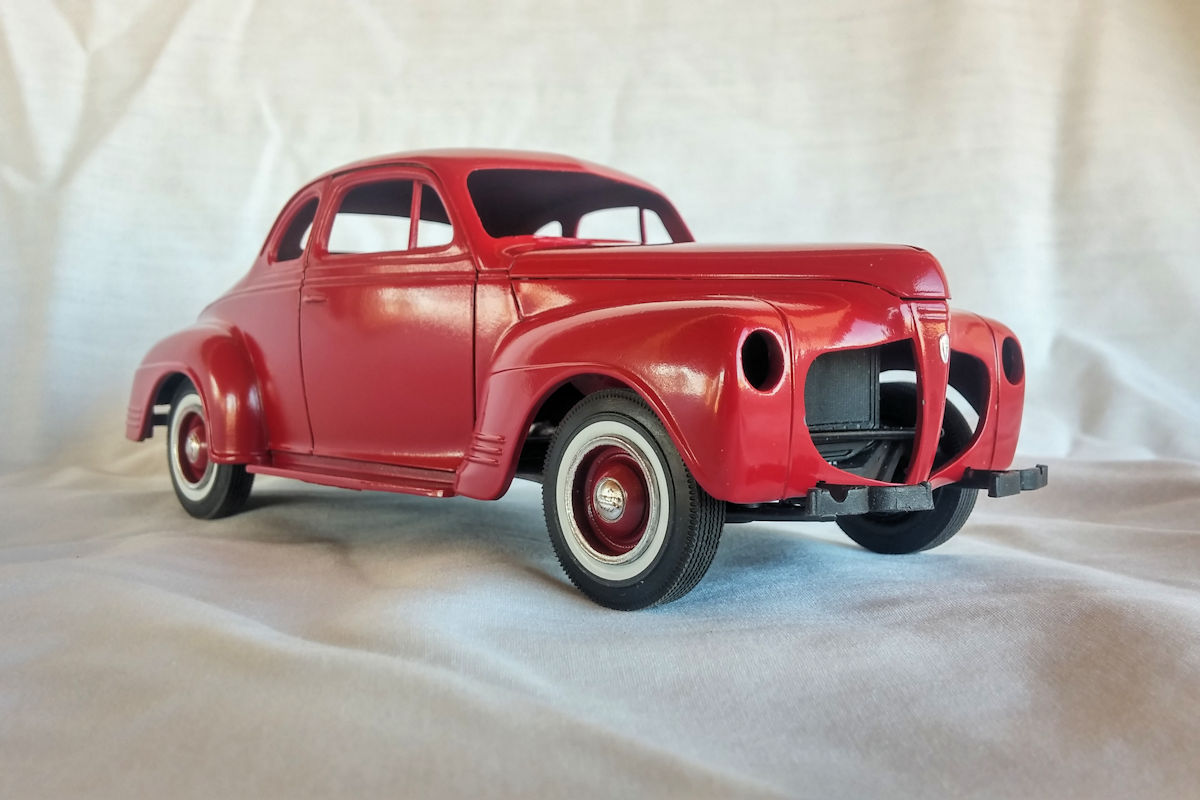
Thank you Matija, I'm glad you like the color. I haven't tried the Alclad clear coat yet- I've heard that it can dull the brightness somewhat. I'm interested in trying Spaz Styx chrome paint, I've heard good things about it. I used the stock ride height. The stock wheels are probably about two scale inches taller than the custom wheels and at the stock setting, they seem to fill the wheel wells nicely. Thanks again, David G.
-
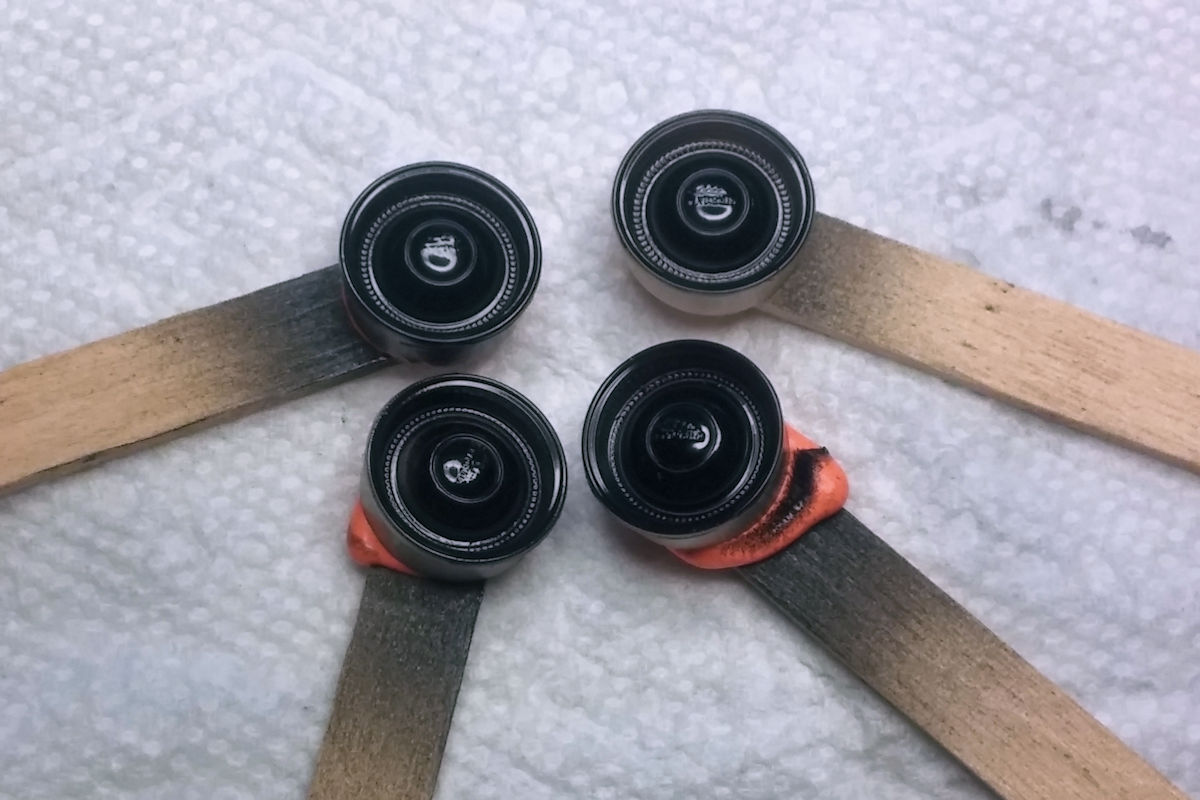
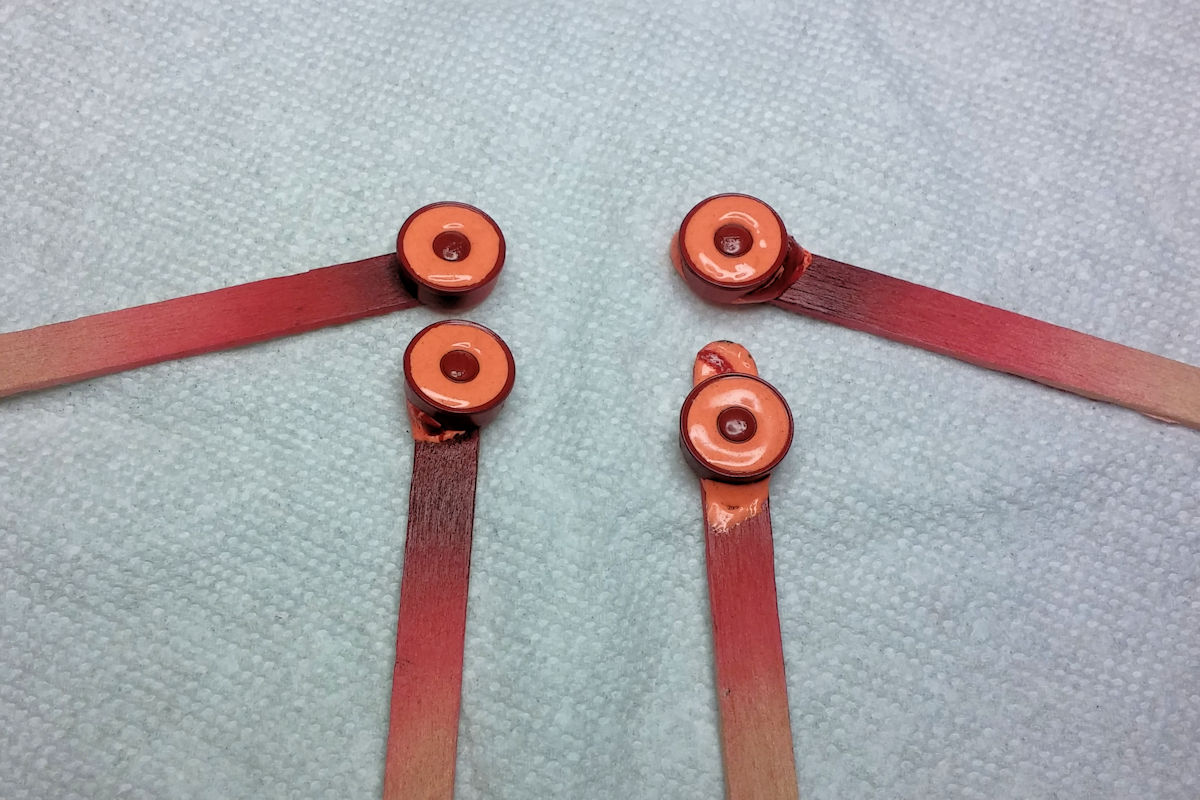
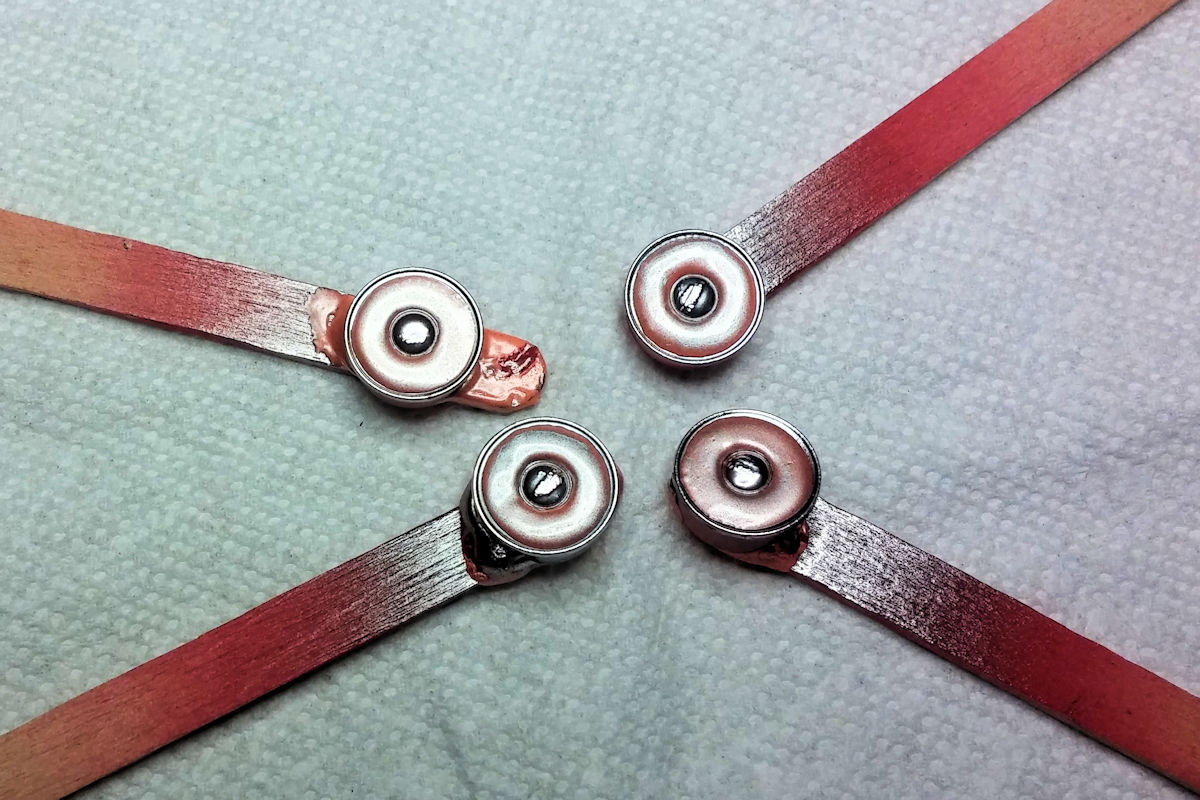
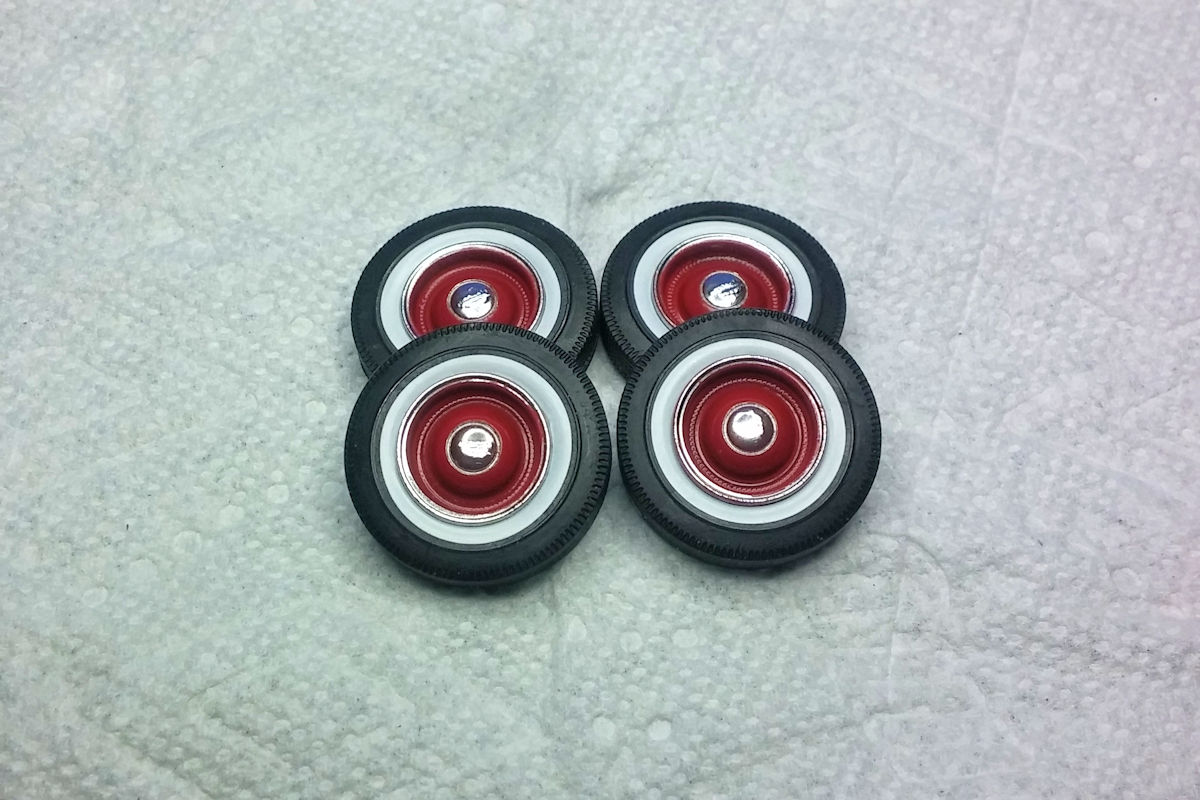
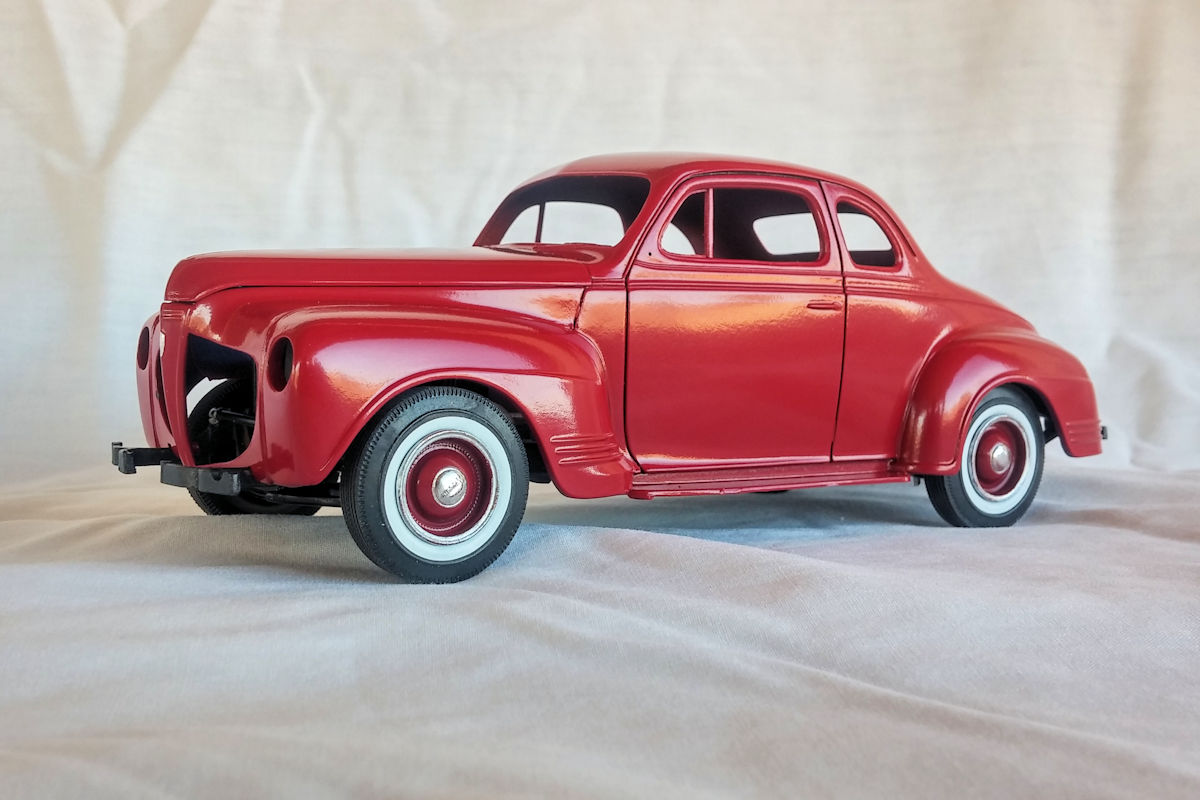
While I was waiting for the paint to cure so I can polish it out, I got some work done on the wheels. Perhaps you remember these... things... these "custom" wheels. Blech. Well no more of those. I've stripped the kit "chrome" coating and sprayed the wheels with gloss black enamel in preparation for spraying with Alclad "chrome" paint. After thinking things through, I decided it would be easier to paint the red to match the body color before the Alclad. Masking for the chrome areas with Silly Putty. Once I had the putty where I wanted it, I placed the masked wheels in the fridge for a few hours to firm up the putty. After a re-check to make sure nothing moved, Alclad paint was then applied. I had to make a few minor touch-ups around the rim areas. Just the little bit of handling it took to remove them from the sticks and test fit them with the wheels was enough to begin rubbing the paint off in some areas. I think this car looks much better with the factory wheels than the custom wheels that I put on earlier as a place keeper. I don't think I'll need to adjust the ride height, but I'll check again before final assembly. As always, thanks for taking the time to look and please feel free to comment. David G.
-
Wow! Excellent Diorama, very life-like. David G.
-
Very Cool! David G.
-
Excellent weathering! There's something satisfyingly solid about the appearance. The car seems to have "weight". David G.
-
Great choice of color and use of decals, everything works well together. I could easily imagine this little car zipping around New York City sometime in 1989. David G.
-
Peterbilt 359 "Pennsylvania Hauler"
David G. replied to Casey429's topic in Model Trucks: Big Rigs and Heavy Equipment
Nicely done! David G. -
1966 Сhevy Fleetside Pickup
David G. replied to yura1961's topic in Model Trucks: Pickups, Vans, SUVs, Light Commercial
Wow! That looks fantastic, great color choice. David G. -
Nicely done! David G.
-
That came out really nice. I've always liked Gassers. I have yet to build one, but I've always liked their rawness. David G.
-
Wow! You started this quite some time ago, didn't you? Nice to see it finished. Well done, cool video too. Thanks for posting it. David G.
-
Nice custom work! David G.
-
Nicely done! And you don't even need a driver figure for the action pose as Herbie frequently went off on his own excursions. David G.
-
1969 Torino Fastback - Almost finished (plus some commentary) - 04/20/17
David G. replied to Igor's topic in WIP: Model Cars
What you've done so far looks good. David G. -
1971 Pinto Wagon Street Freak Showcar - Done!! 4-18
David G. replied to Impalow's topic in WIP: Model Cars
Fantastic work so far. Since you asked, I would skip the foil trim on the chassis. Seems like it takes away more than it adds, if that makes sense. David G. -
Just the badge. Too much foil can have an effect the way the paint looks. David G.