David G.
-
Posts
11,326 -
Joined
-
Last visited
Content Type
Profiles
Forums
Events
Gallery
Everything posted by David G.
-
Thank you David. How did you do the tint on the Pontiac if I may ask? Thank you, I felt that the partition was necessary as well. And yes. Being just shy of 21' in length, this thing is a monster in real life! Thank you Jim. It's nearly done now, I'm at the "buttons & bows" stage and should have it wrapped up soon. Thanks again, David G.
-

1:16 Gunze Sangyo 1937 Rolls-Royce Phantom III Sports Saloon
David G. replied to Anglia105E's topic in WIP: Model Cars
Yeah, for the figure one probably wants to avoid purple, blue and green. At least in certain combinations! Cheers! David G.
-
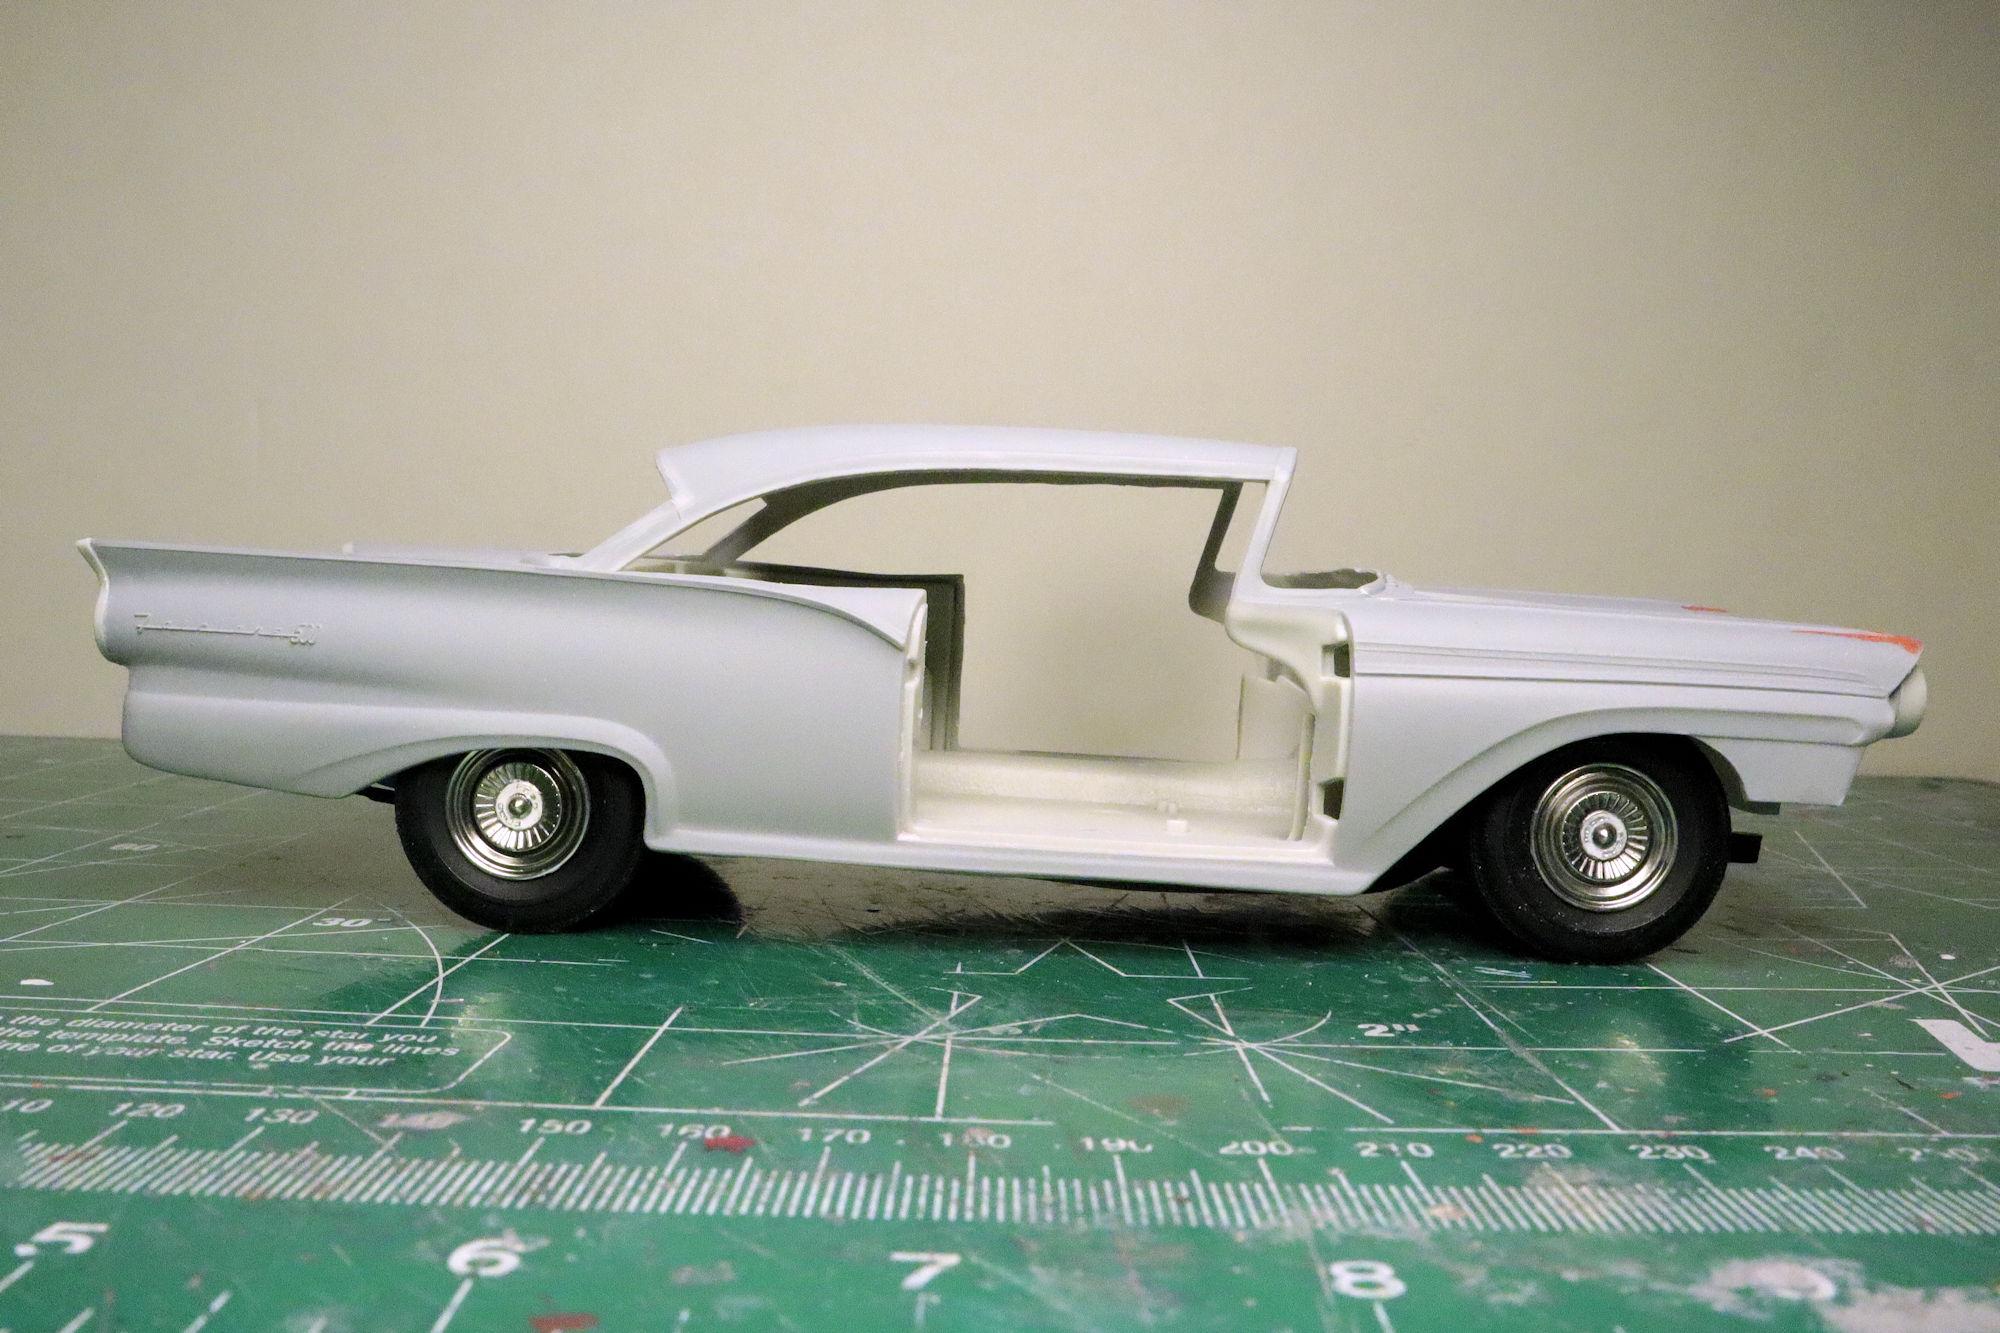
Hello Everybody! Not wanting to leave well enough alone I decided on one more addition to the interior. While not technically the interior, I do consider the window glass as such. Many of the photos I found during my research showed a blue tint band across the top edge of the windshield. With such a big fishbowl of a windshield that tint would be a practical necessity. So I decided to add one to my build. To achieve this I used some Pledge Floor Care (as my decade old bottle is labeled) with a few drops of blue food coloring. I brushed the mixture on the inside top edge of the windshield and propped it up at an angle that would allow the acrylic tint to remain in the proper location while it dried over night. Though not perfect, it's one of the better tint jobs I've done. As always, thanks for taking the time to look and please feel free to comment. David G.
-
Thanks for your vote of confidence Jim. I didn't mean to denigrate anyone's chosen building style. For me it takes much less time, effort and planning to build something like this: Than it does like this: The Chevy took more than twice the time to build than did the Ford. For me, the Ford was a much easier build. Which is why I think of shiny builds as easier builds. Just an opinion based on my own experience. That Ranch Wagon you posted earlier looks great BTW! Thanks Carl. That's likely to change as the interior comes together. David G.
-
1:16 Gunze Sangyo 1937 Rolls-Royce Phantom III Sports Saloon
David G. replied to Anglia105E's topic in WIP: Model Cars
Excellent detail work on the engine and dash panel David. The ol' gaffer is coming along quite well too. I like the colors you're using for his outfit. David G. -
The chassis is coming along quite nicely! I like the suspension details and red wheels. David G.
-
T-Bucket (the pickup kind)
David G. replied to OldNYJim's topic in WIP: Model Trucks: Pickups, Vans, SUVs, Light Commercial
You're off to a grand start Jim! I'm looking forward to seeing where you go with this one. David G. -
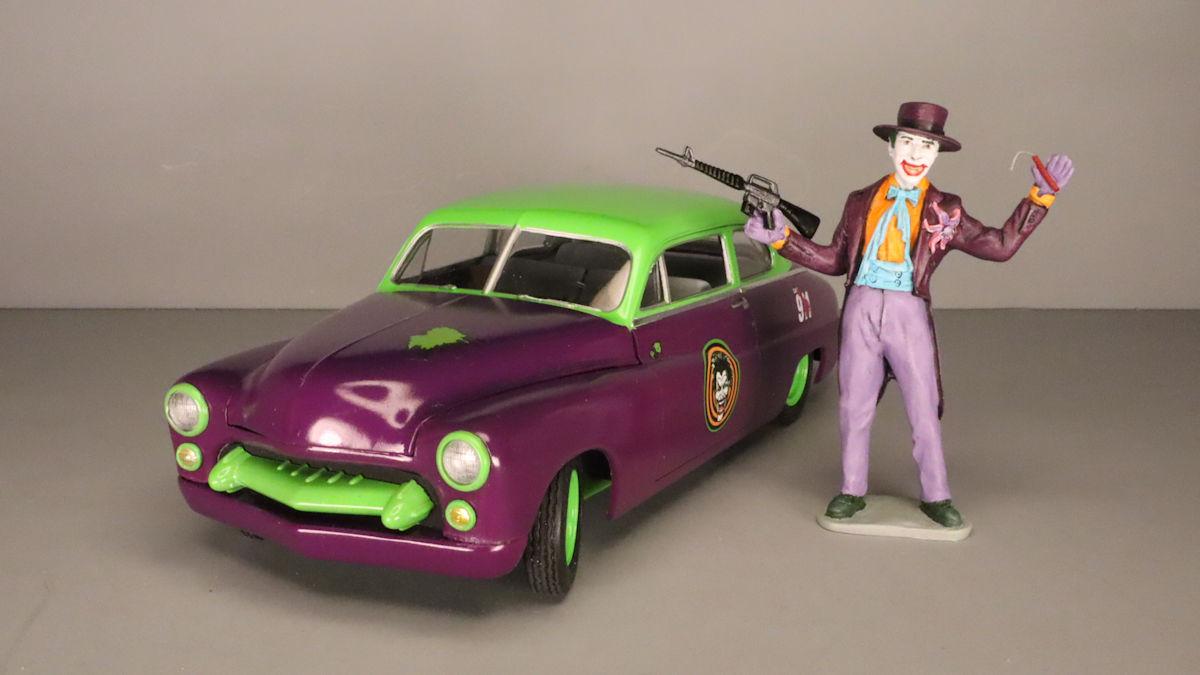
MPC Godzilla Jeep
David G. replied to athlon's topic in All The Rest: Motorcycles, Aviation, Military, Sci-Fi, Figures
Good color combination and detailing, nice build! I have a different version of this kit. I built mine as a battlefield ambulance. Cheers! David G.
-
Fixing a Boo-Boo!
David G. replied to StevenGuthmiller's topic in General Automotive Talk (Trucks and Cars)
Such a good bit of luck in what could have been a disastrous situation! I'm glad it worked out well for you Steve. David G. -
1960 CHEVY Apache
David G. replied to yura1961's topic in Model Trucks: Pickups, Vans, SUVs, Light Commercial
A clean, tight and solid build with excellent details. Great photos too. David G. -
An excellent looking build! David G.
-
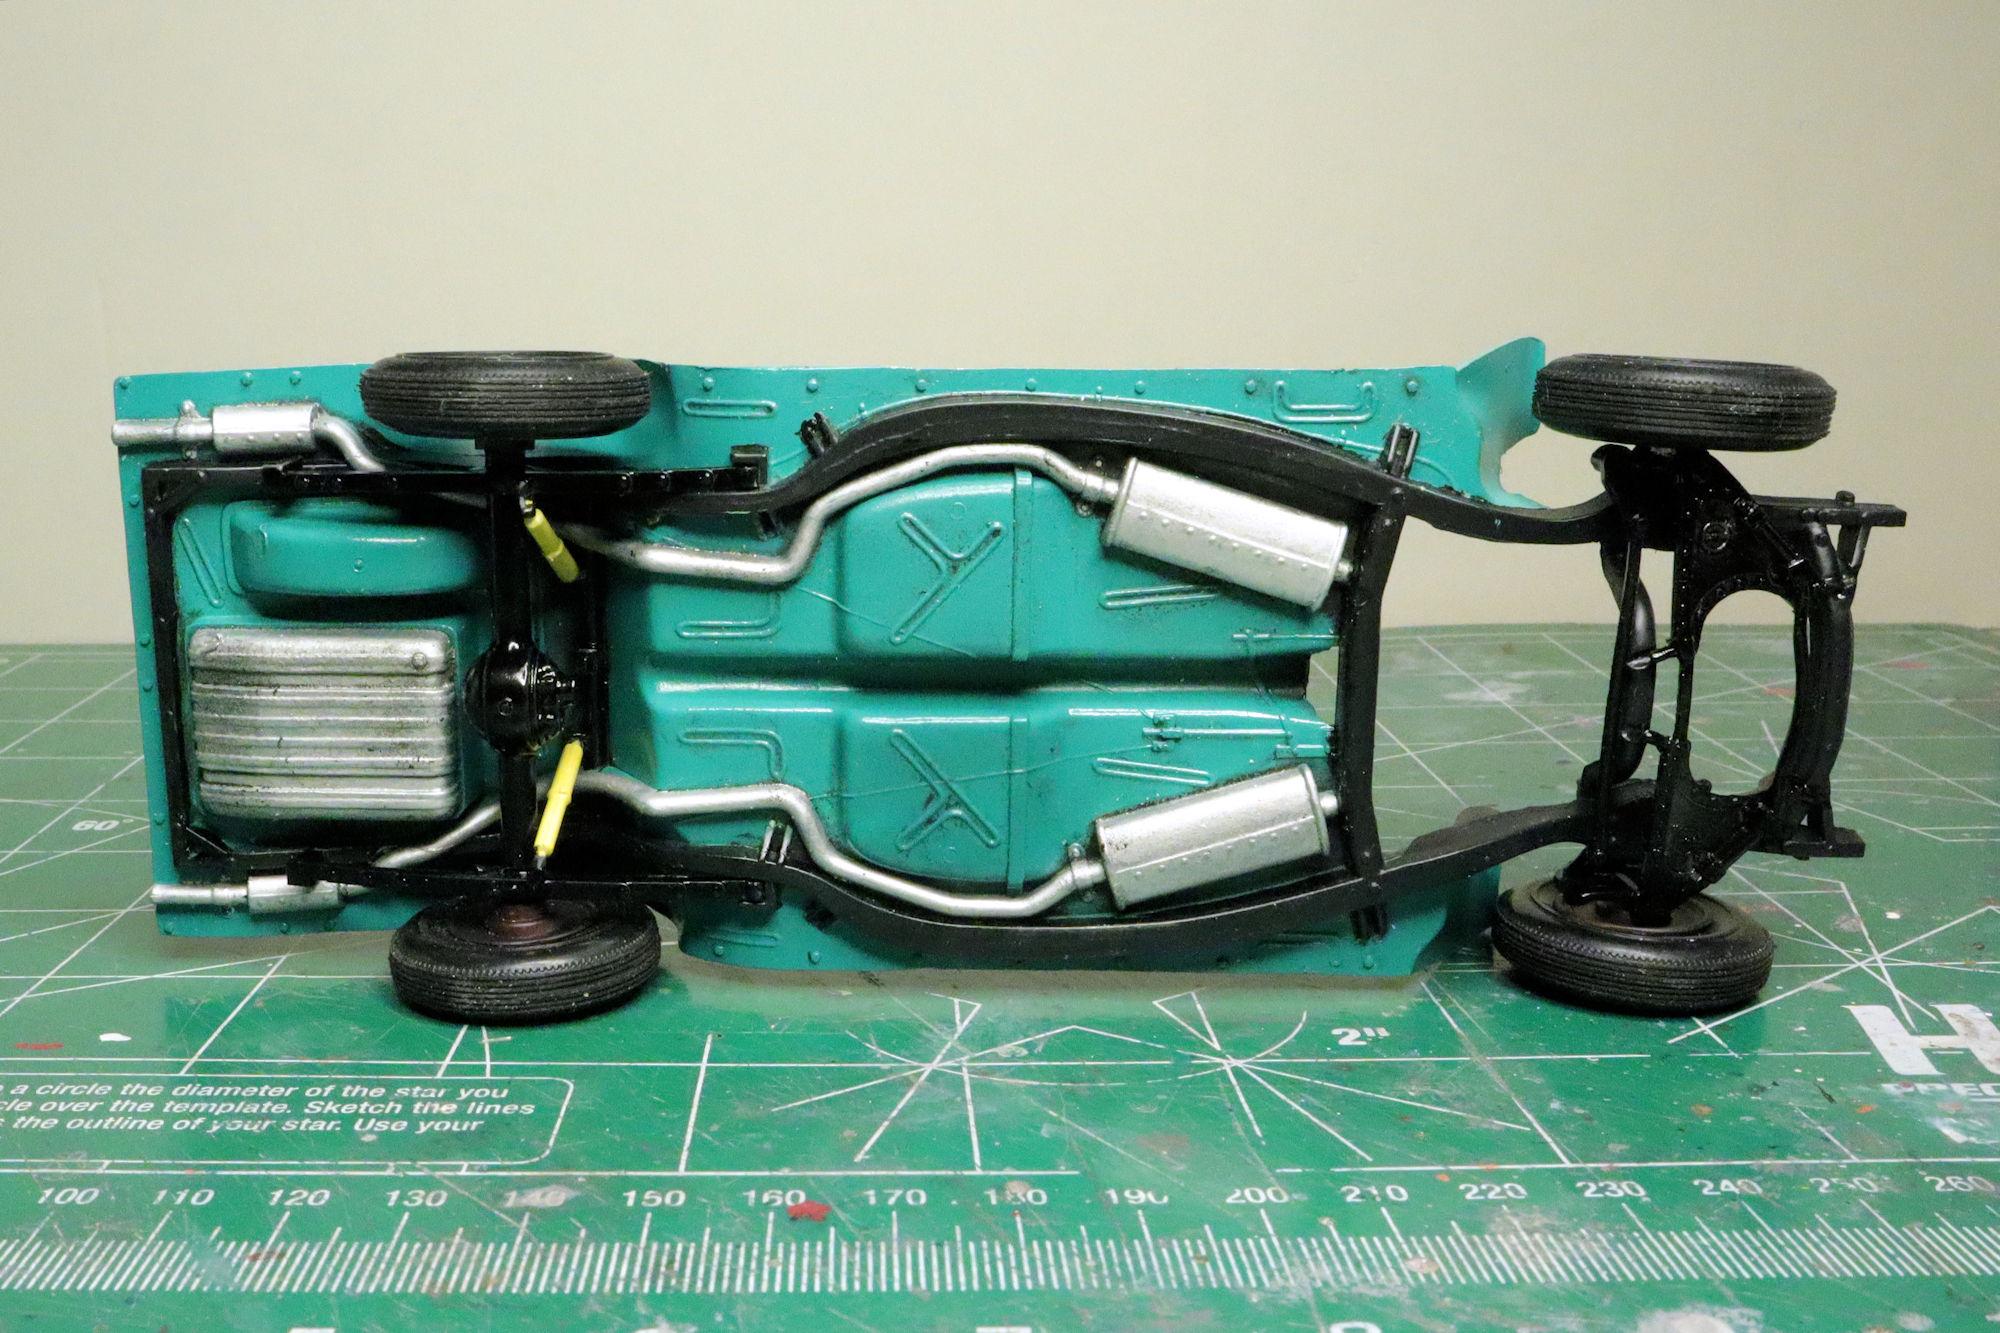
Nice chassis detail, the paint and decals look great. David G.
-
Nicely done, love the color! David G.
-
Thanks Randy! Thank you Donald. Thanks Bill. I'm not sure if the rake is going to stay like it is. It seems to me that this may change once the interior is completed and the doors are installed. Thanks for your comment Ace. I'm just a car guy, I like them each for different reasons. I'm amazed at the difference in body styles between the two makes for the same model year. Ford had overhauled their general body design to what would be the predominant style of the Sixties and Seventies while Chevy was still updating their designs from the Forties and Fifties. I think you're correct Len. I'm guessing that Ford had a fair number of municipal, state and federal government contracts. It seems to me that a lot of the police and other government cars of the period were Fords like this one. Thanks Jim, I'm glad you like the wheels. I have several build sessions invested in them and it's nice to know that the time spent was worthwhile. Custom and Resto-Mod in progress and barn finds are always options that I consider when building a kit like this one Jim, but all of that takes planning and extra time and effort. People who always build "shiny" have a much easier job of it. I've built both ways and decided to take the easier route on this one. I do have another partial kit and a couple of glue bombs of this kit I can work with, I may end up doing a "before and after" set. I'm not sure that the rake will stay the way it is. I think that the lack of a dashboard is allowing the body to settle a little lower in the front than it should. I'll know more as the build progresses. Thank you all for taking the time to share your thoughts and opinions with me, I always enjoy reading them and responding. David G.
-
The result looks great Greg! David G.
-
Nice progress on this one Jim. David G.
-
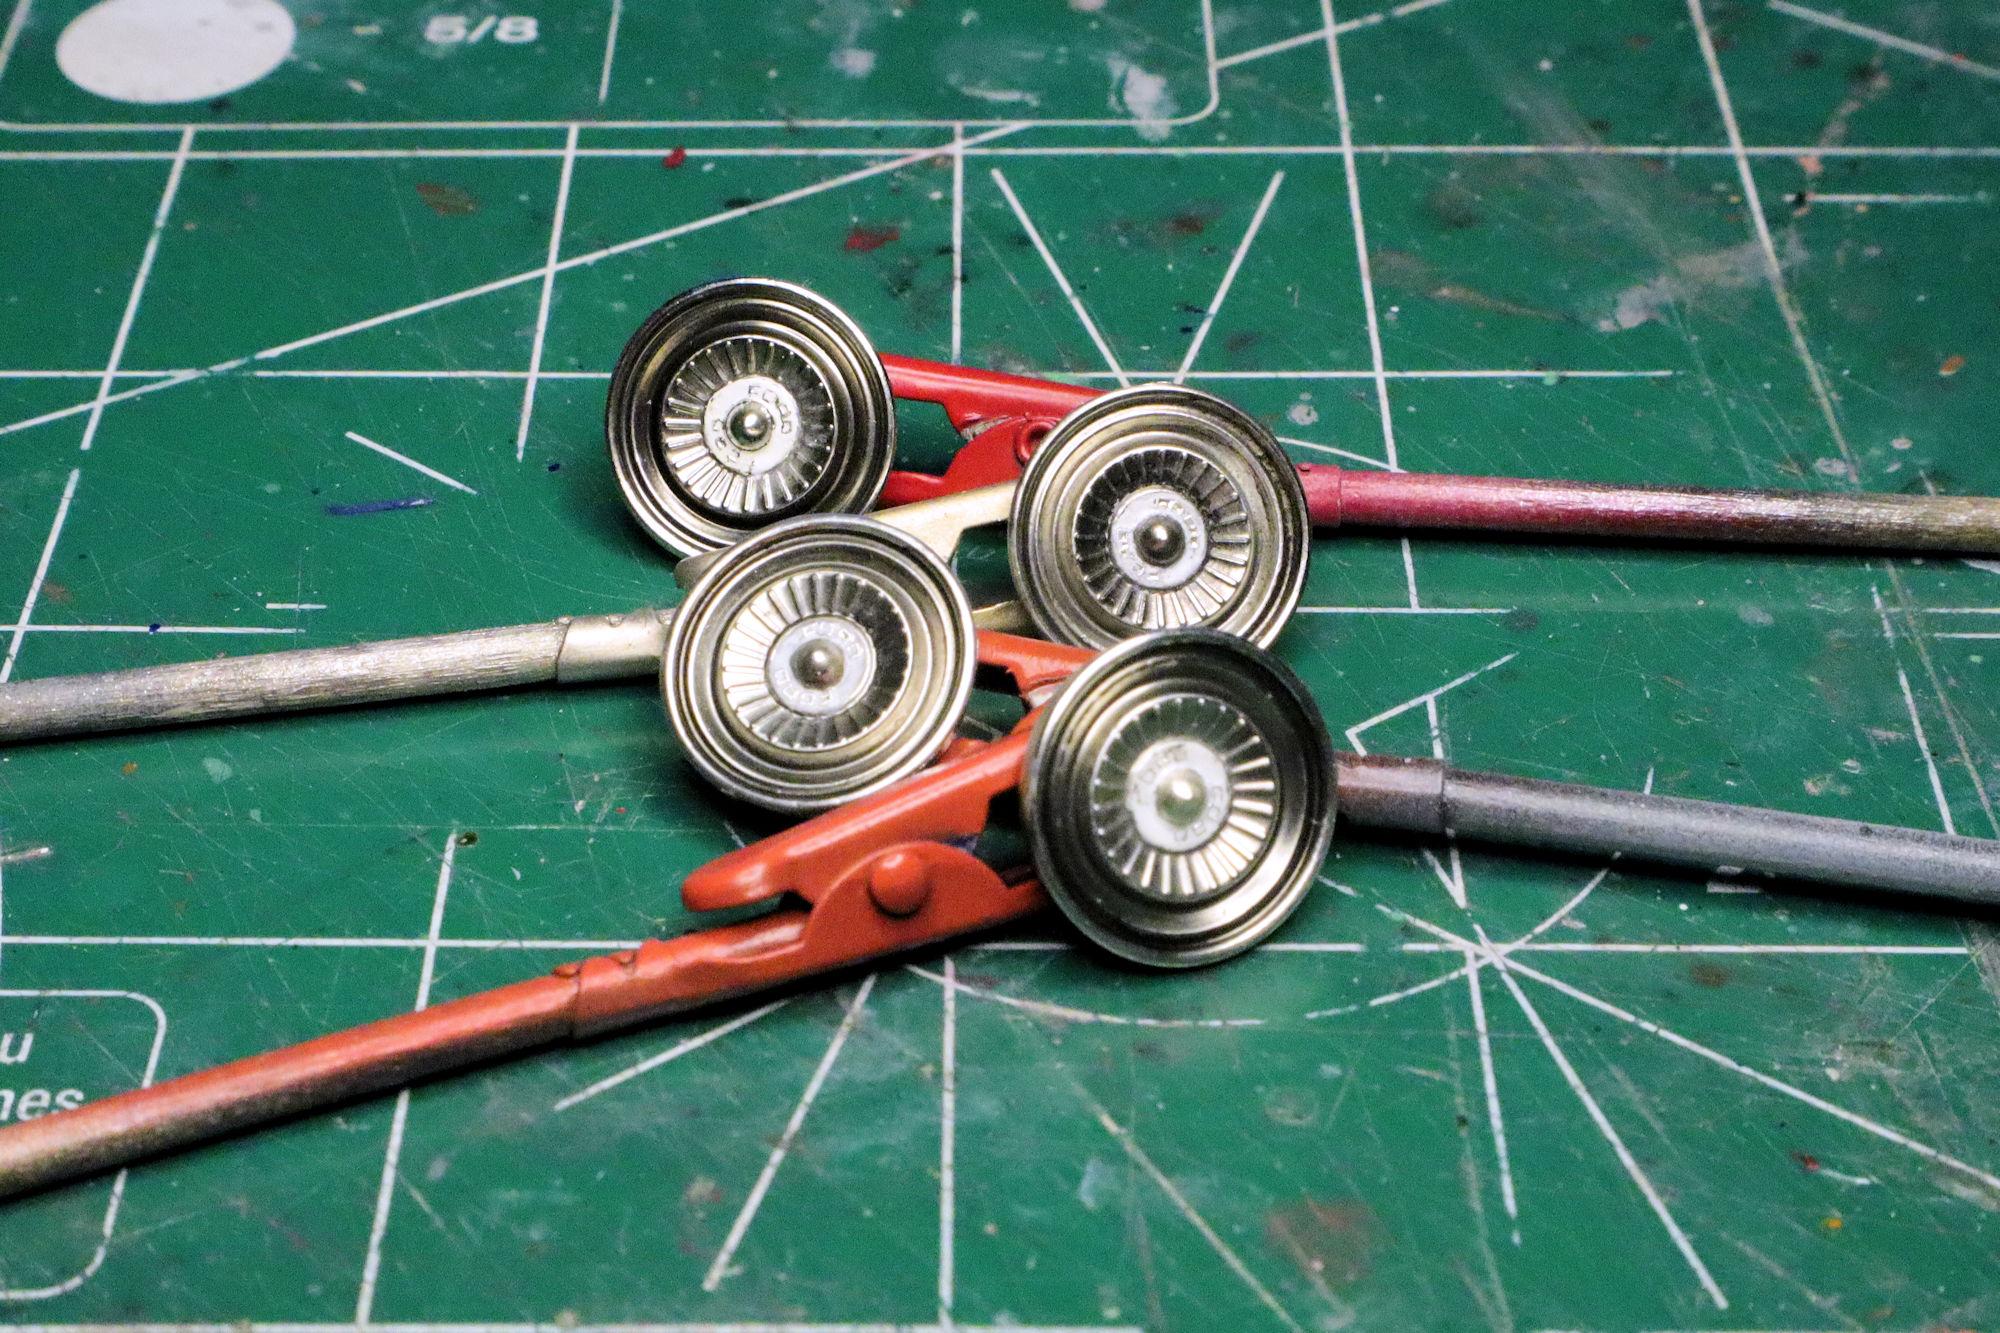
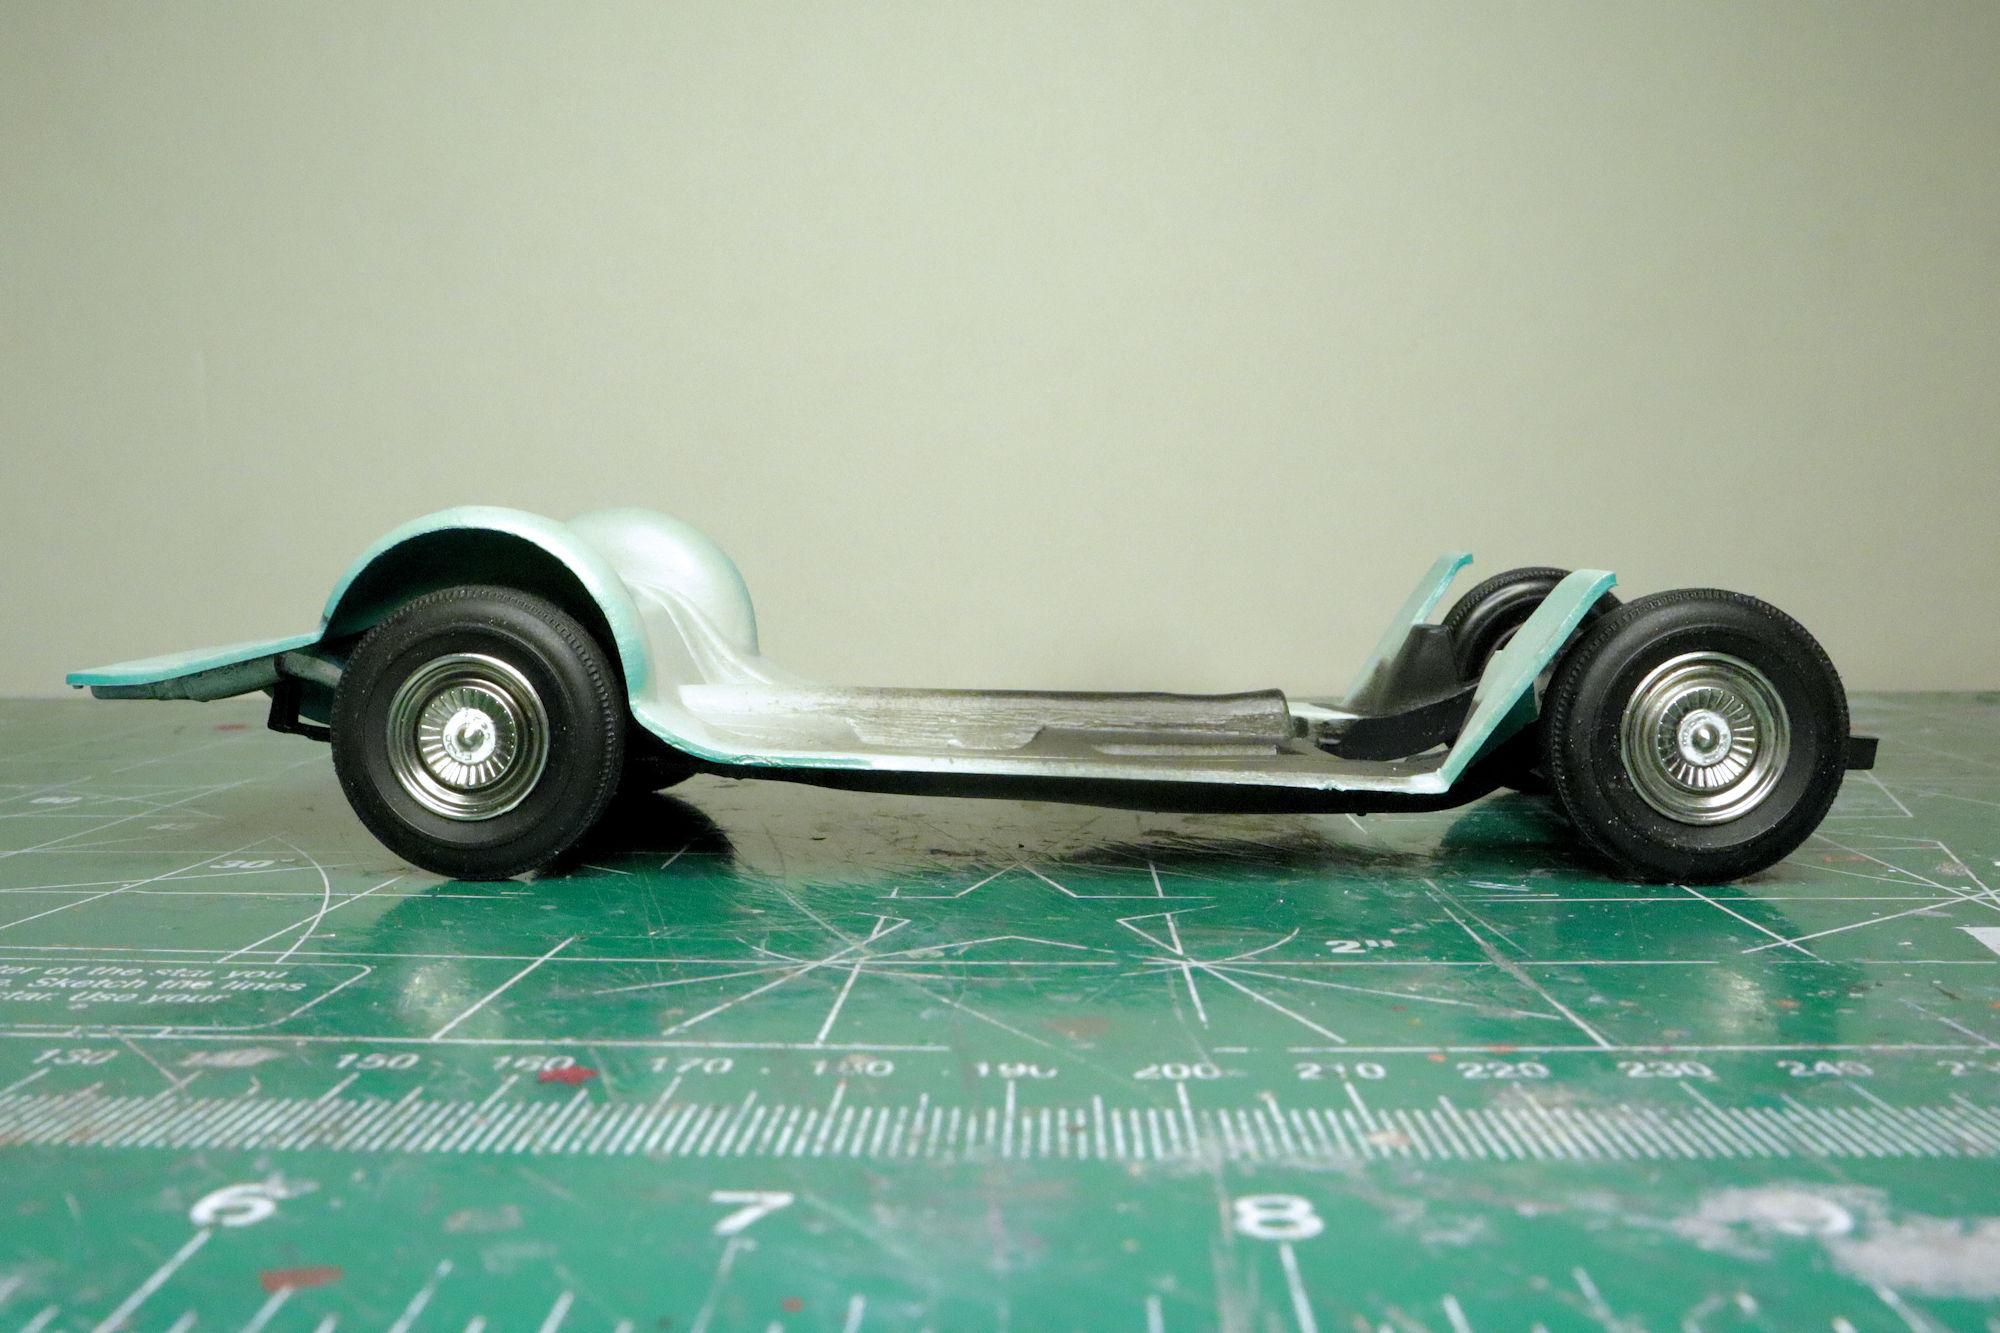
Hello Everybody! Here's the next update: I took some time and detailed the stock hubcaps. I started by spraying some Tamiya Flat Clear followed by a blackwash and some acrylic white paint. The final step was a spray of Tamiya Clear. Here are the assembled wheels mounted on the chassis. The tires from the kit went missing long before it came into my possession so I fished these out of the parts box. I also found a set with wide whitewalls and I really wanted to use those but I just couldn't get them to fit well enough on the rims. Having the wheels installed of course means that the rest of the suspension parts went on before them. I still plan to add some weathering using pastels. The front wheels are in proper alignment but the car has poseable steering which has an inherent looseness to it. Which means that the front wheels... will... never be in proper alignment. Wheels down! With that it's time to check the ride height. When I put the front suspension together, I flipped the spindles upside down to lower the front wheels just a bit. I thought about cutting the shackles on the rear springs down just a little bit too but I don't think it's necessary. The car has a little bit of a rake and I like that. As always, thanks for taking the time to look and comments, observations, hints and critiques are always welcome. David G.
-
Thank you Carl! Thanks D.W. I'm really eager to get this one finished. So hopefully I'll have more updates soon. David G.
-
Your work on the grilles is certainly an improvement over what the kit provides, Greg. David G.
-
The chrome trim strips never looked so good on this kit. David G.
-
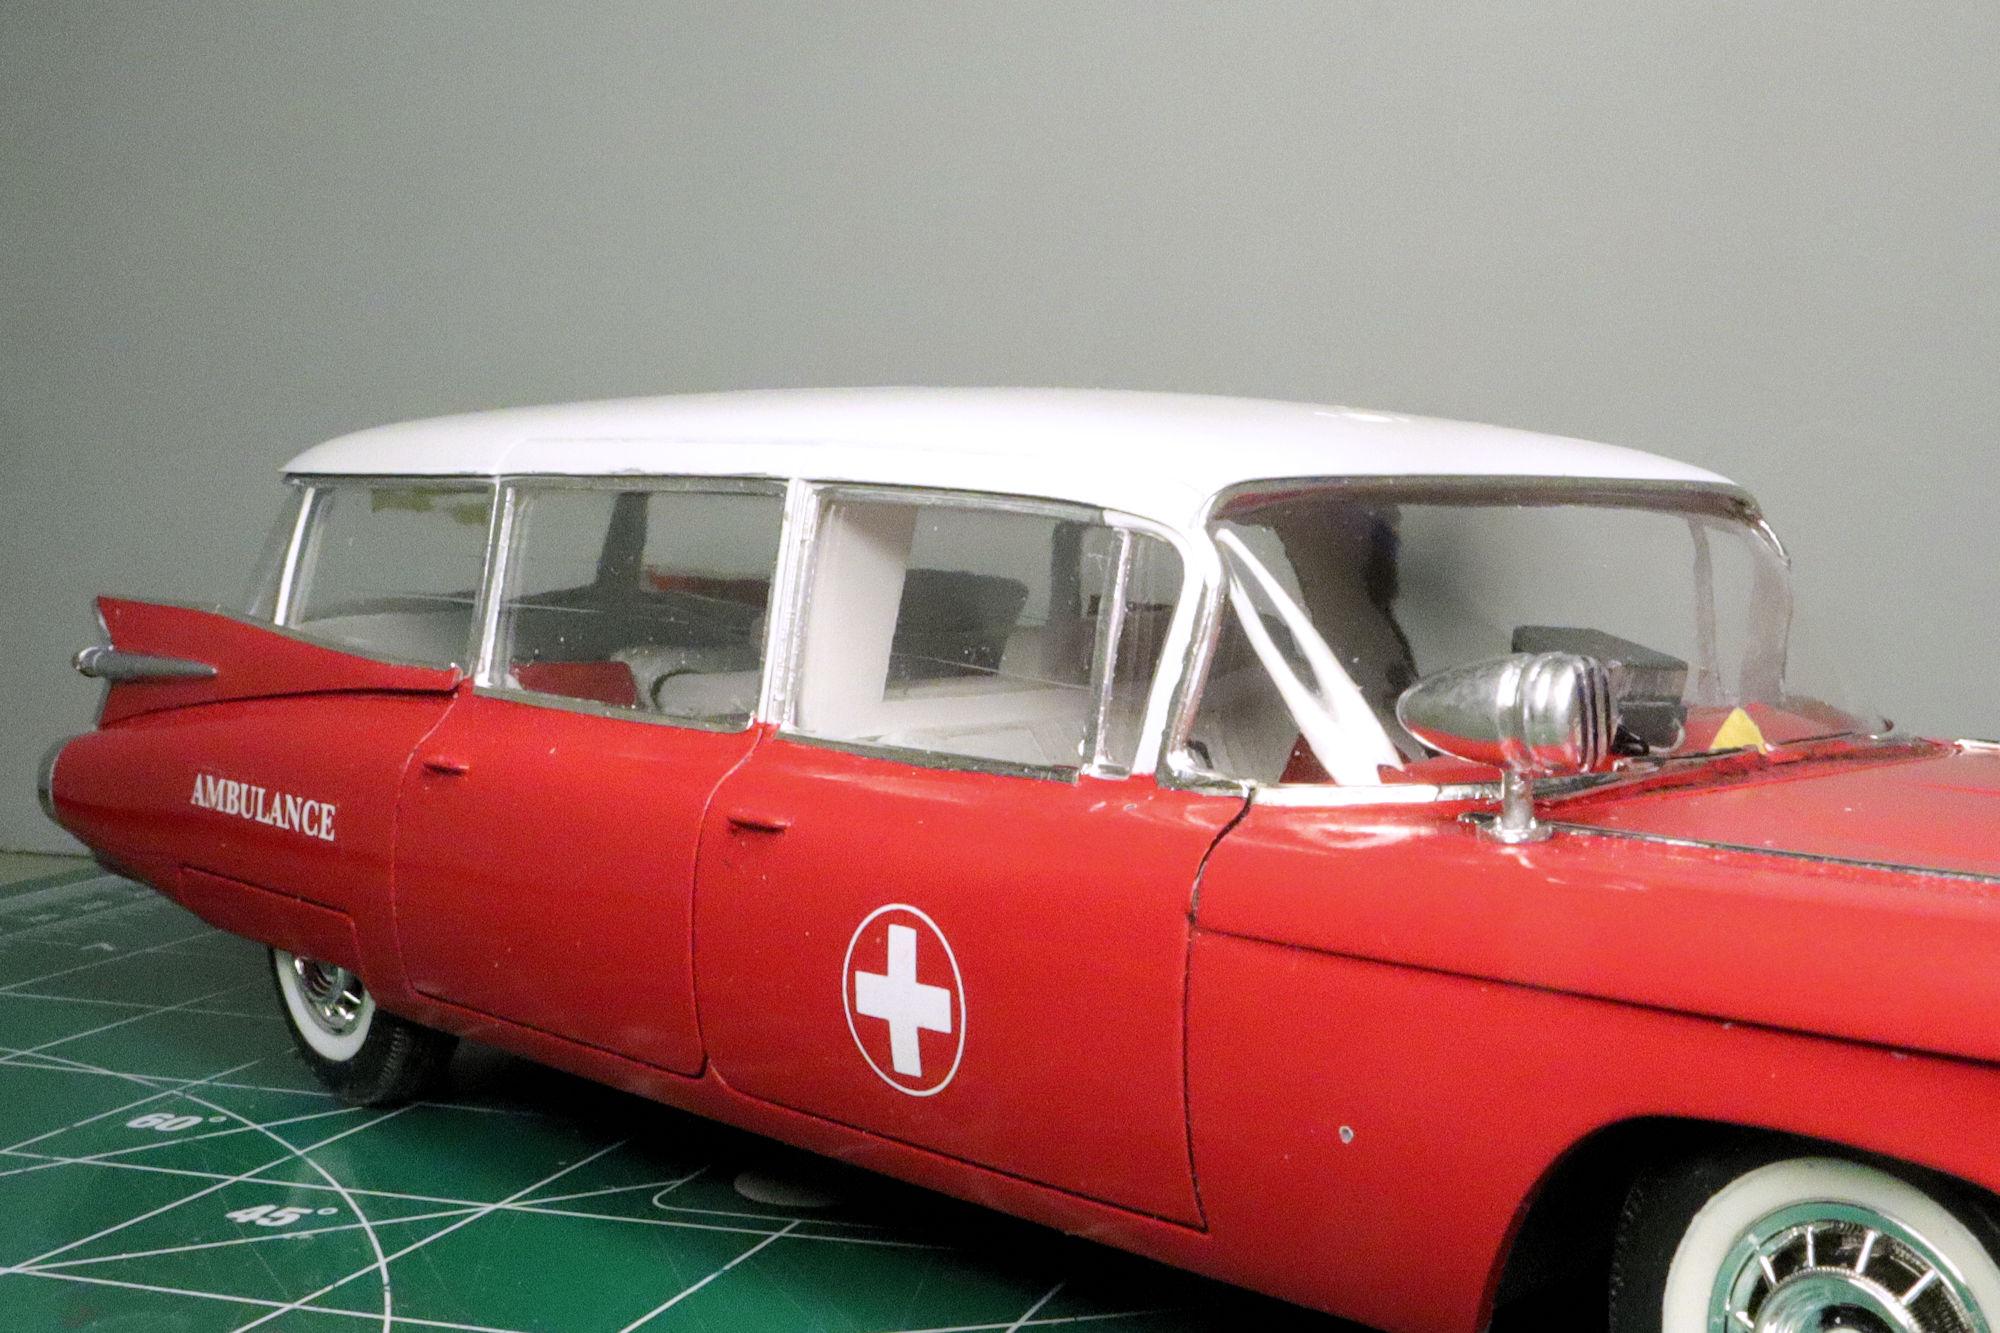
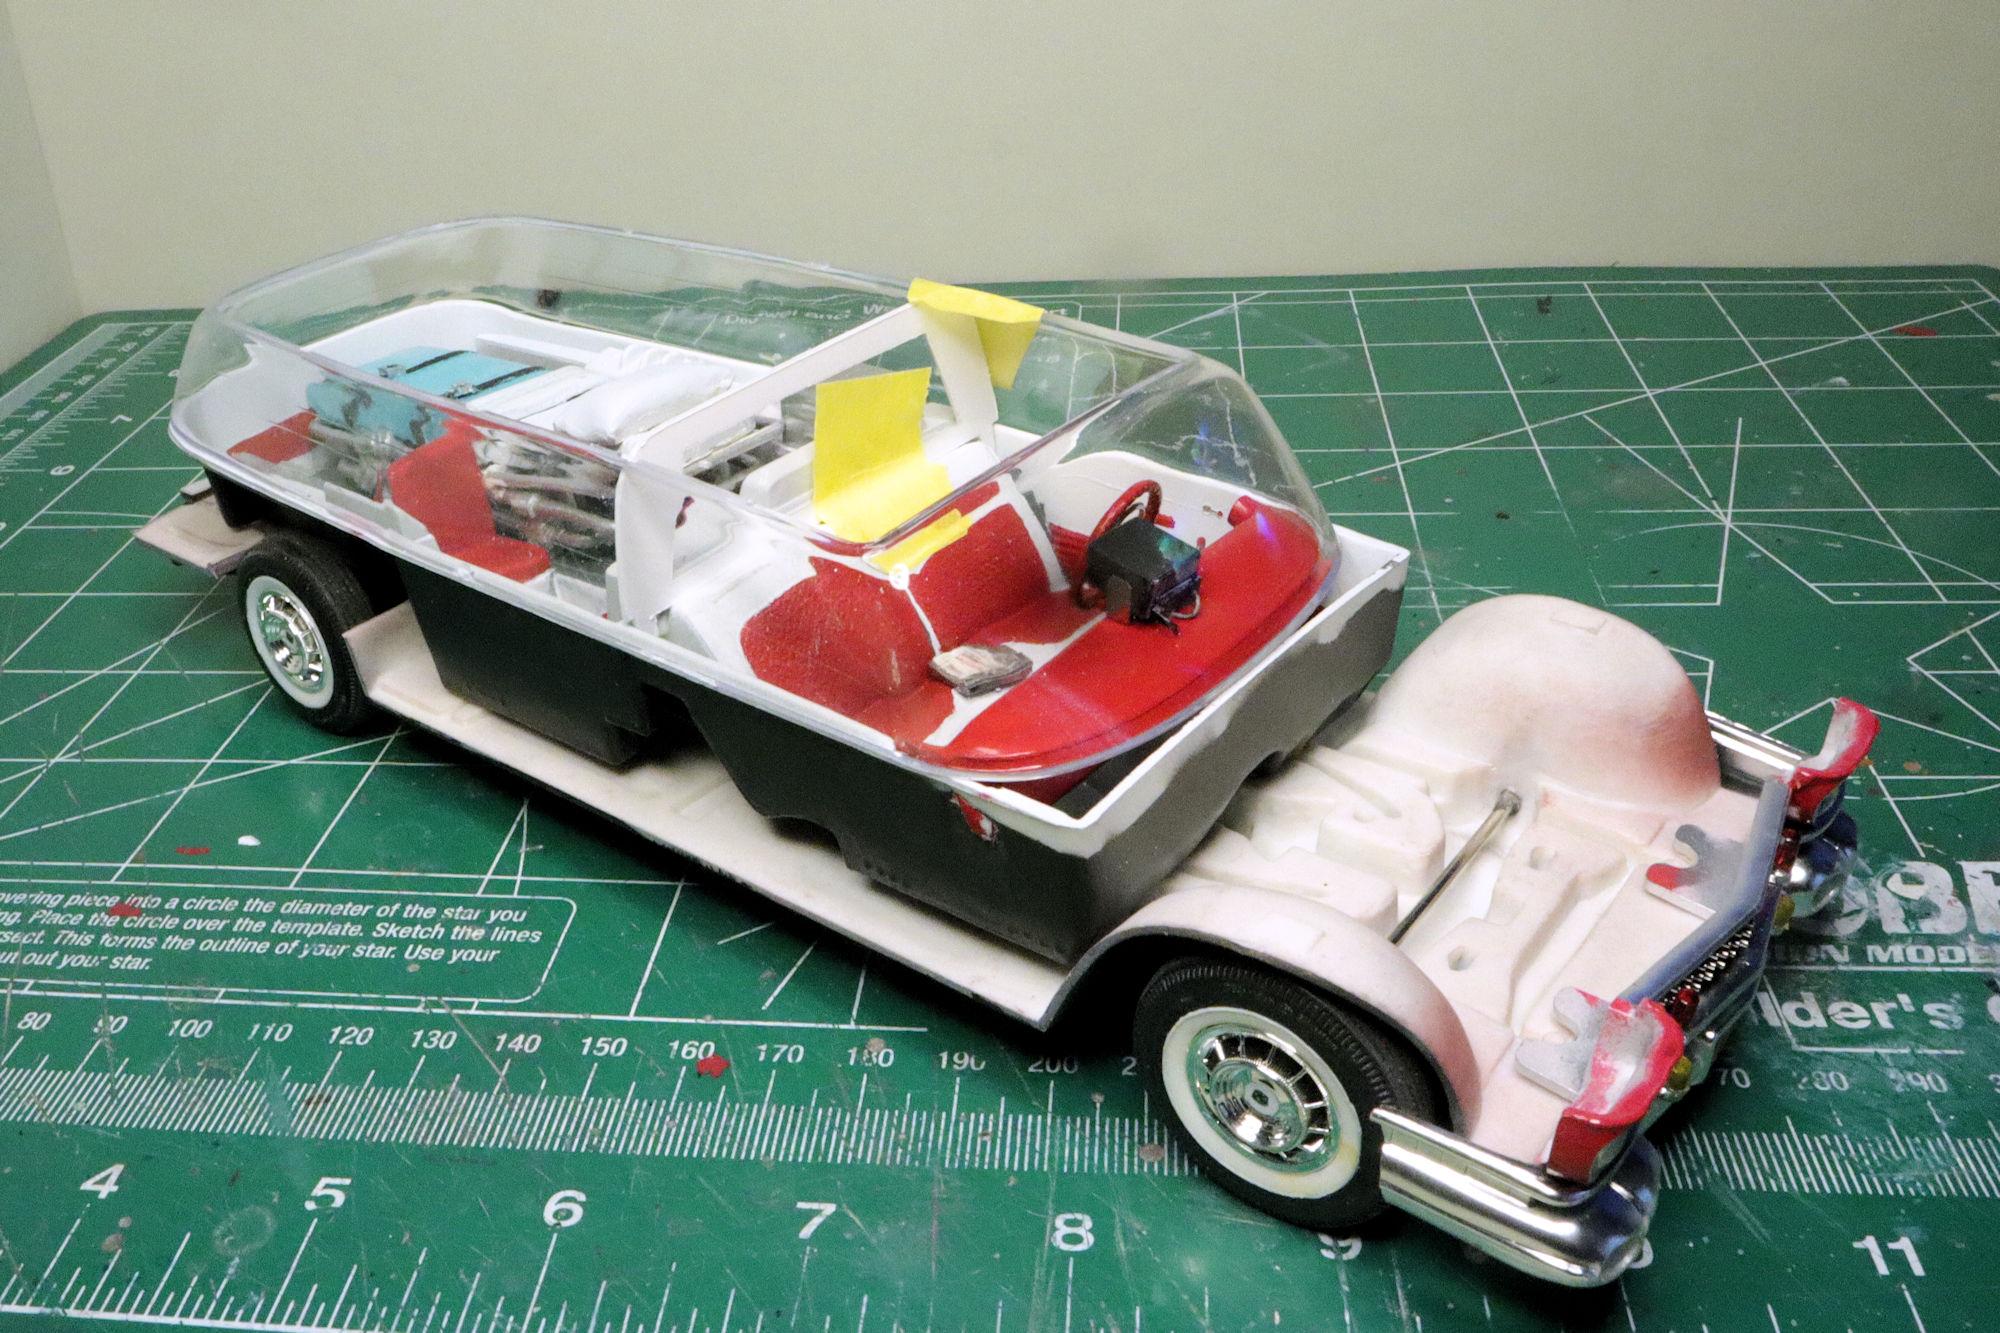
Hello Everybody! While looking at the parts in the new AMT 1959 Cadillac Ambulance kit and comparing them to what's in the Surf Shark kit, I noticed that the ambulance kit has a partition in it. The partition is intended to divide the front driver area from the rear patient care area. So of course, I had to have one for the Surf Shark ambulance. Considering the interior changes that AMT made between the two kits, I figured that the one from the ambulance wouldn't fit in the Surf Shark without modifying it. Aside from that, I wanted to keep the kit-provided one for use in the kit which provided it. So using the manufacturer's example as a rough template, I manufactured one of my own. I installed it behind the front seat using the window canopy to help hold it in place. I just thought that this was a neat picture so I included it here. I think that will work just fine. So there it is! Was it worth the effort? Yeah, I think so. I thought about adding styrene strips around the window section to simulate frames and tracks for the windows but decided against it. Seeing in place, I'm glad I kept it simple and straight forward. As always, thanks for taking the time to look and please feel free to comment. David G.
-
1937 Chevy convertible: 1/32, old Pyro model, BOX STOCK???
David G. replied to ismaelg's topic in WIP: Model Cars
Your detail painting skills are fabulous Ismael! You're really bringing this kit to life with them. David G. -
The engine looks great, excellent finish on the metal bits! David G.
-
1:16 Gunze Sangyo 1937 Rolls-Royce Phantom III Sports Saloon
David G. replied to Anglia105E's topic in WIP: Model Cars
Wow, what a stroke of luck that you were able to recover those! The paint looks good too. David G. -
Clever work on the door hardware Jim! The results are impressive. David G.